1. Velvet Red Half-Moons With Gloss Black Tips
Start with a deep velvet red (creamy opaque) for the main nail so it looks plush under light. Add glossy black only on the tip so the contrast stays sharp and birthday-ready instead of heavy all over. The half-moon near the cuticle flatters most nail beds because it visually lifts the center of the nail and makes fingers look longer. I like this on medium almond or short squoval because the separation line stays tidy and doesn't crowd the cuticle area. The styling principle is "clean geometry": one strong shape, one clean divider, and a glossy black that reflects light.
Step 1: Paint all nails with two coats of velvet red, then cure and wipe tacky residue if you're using gel. Step 2: Place striping tape to mask the top third of the nail, leaving a crisp curve at the free edge, then paint the masked area glossy black and remove tape while still slightly tacky. Step 3: For the half-moon, use a small sponge to dab a half-circle of black at the cuticle area, then clean the edge with a flat brush dipped in acetone. Finally, add a thin white line between the red and black using a striping brush or tape edge, then seal with a high-gloss top coat.
Editor's noteIf your tape pulls polish, press it onto your skin once first to reduce stickiness, then apply to the nail.
Watch outAvoid a thick separation line; it looks bulky and makes the set look store-bought.
2. Black Cherry Jelly Over White Base
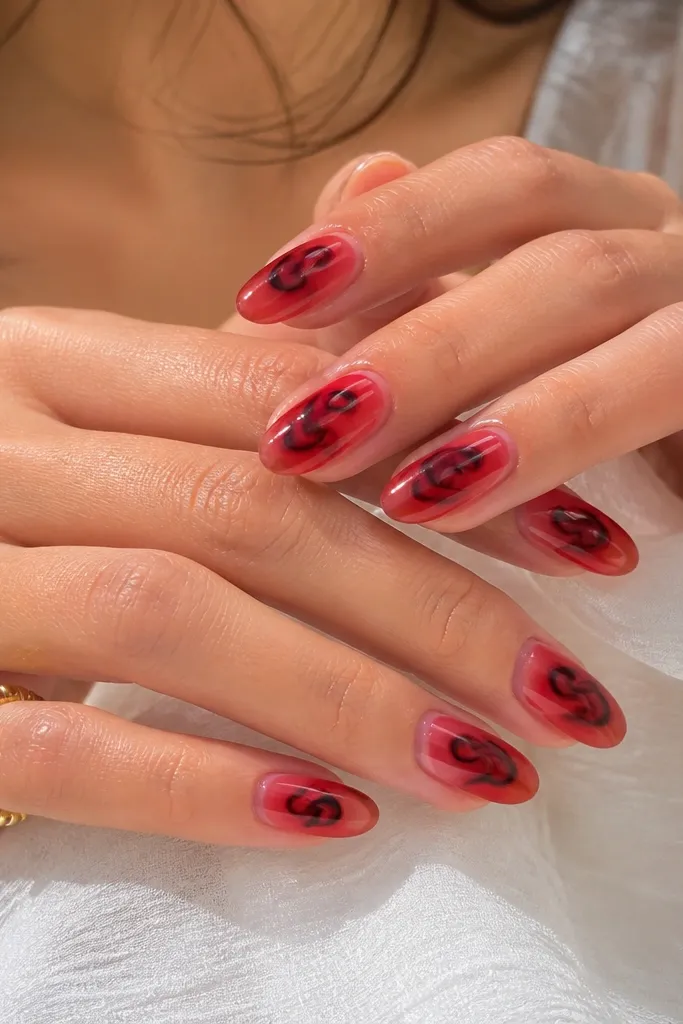
This one looks dreamy because the red is jelly - it glows instead of sitting flat. The white base makes the cherry tone pop and keeps the black swirls looking crisp rather than dull. I've worn this on cool-toned skin and warm-toned skin; it always reads like "fresh manicure" because the jelly red has light transmission. It's also forgiving on shorter nails since the center swirls create a vertical focus. The styling principle here is "light layering": white under, jelly over, then black accents.
Step 1: Start with a milky-white base (two thin coats) and cure fully. Step 2: Apply cherry jelly red in two layers, keeping it slightly sheer at the cuticle so it looks like a soft gradient rather than a solid block. Step 3: Using a dotting tool, place one small dot of glossy black in the center, then drag it outward with a thin brush to form a swirl. Finally, add a second tiny dot near the swirl tail for balance, then top coat with glossy gel top.
Editor's noteTo get clean swirls, wipe your brush on a lint-free pad between nails.
Watch outSkip a matte top coat here; it kills the jelly glow.
3. Red French Tips With Micro Black Lines
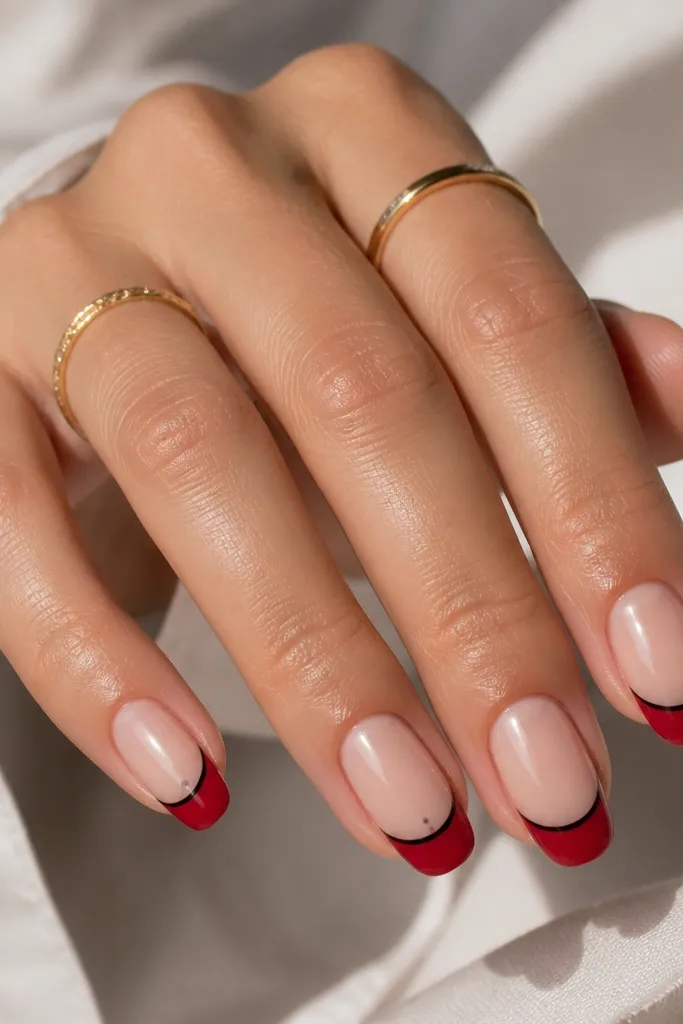
This is the birthday version of French tips: bright red tips and a micro black line that makes the edge look razor-clean. The nude base keeps it wearable and flattering, especially if your nails are short or your nail beds are wider. The black micro line gives the set structure, so it doesn't look like a random red accent. I like it most on oval or squoval because the smile line stays smooth. The principle is "contrast as detail": black is only a line, not a whole block.
Step 1: Paint a sheer nude or blush base (one to two coats) and cure. Step 2: Use French tip guides or striping tape to mask the free edge, then paint red and cure. Step 3: With a liner brush, draw a thin black line just inside the red tip edge, keeping it consistent across nails. Step 4: On the ring finger, add one tiny black dot at the center of the smile line, then seal with glossy top coat.
Editor's noteUse tape for the first line, but switch to a brush for the micro line so you can correct tiny unevenness.
Watch outDon't outline the whole tip in black; it turns into a heavy stripe instead of a classy French.
4. Matte Black Base With Gloss Red Stars
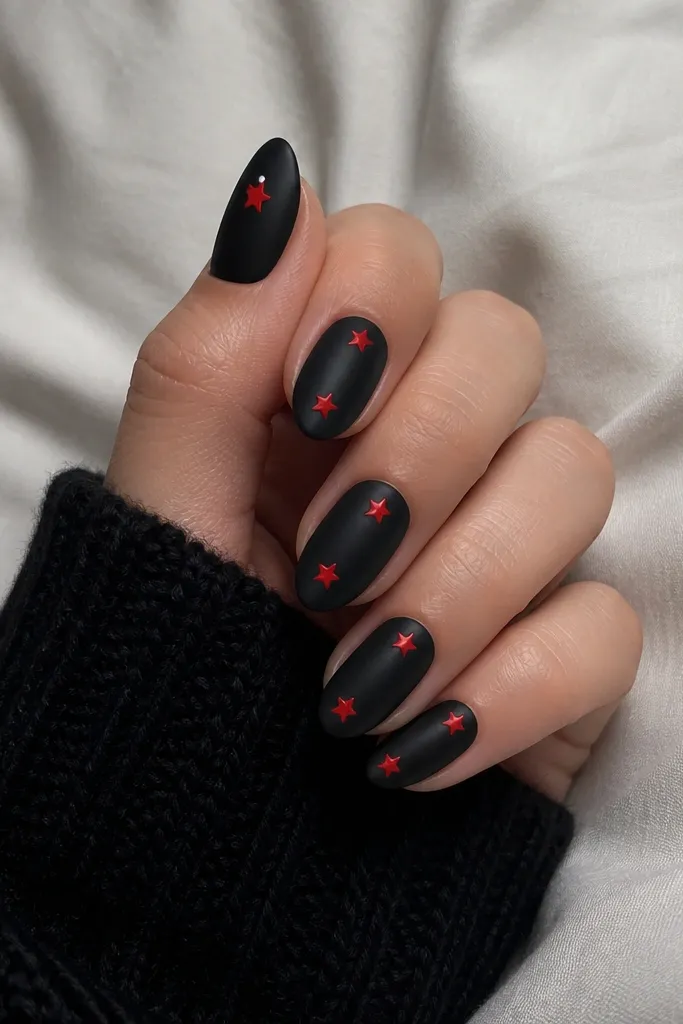
Matte black makes red look brighter and more dramatic because it kills reflections on the base. The glossy red stars then pop like little jewels. This is a great choice for an evening birthday because it reads "intentional" under indoor lighting and photos well without needing glitter. I've done this on both short and medium nails; the stars look cute without making the nails look crowded. The styling principle is "matte ground, glossy accents."
Step 1: Paint a solid matte-black base (two coats if needed) and cure. Step 2: Add glossy red stars using a small star stencil or a nail art stamp, then cure again. Step 3: For extra sparkle without glitter, dot two tiny white points around the stars with a dotting tool. Step 4: Seal everything with matte top on the base nails, but keep the stars glossy by using a glossy top only over the stars area with a small brush.
Editor's noteIf your stars blur, let the matte base fully cure and avoid thick top coat over the star edges.
Watch outAvoid matte top over the entire set; it makes the stars lose their shine.
5. Cherry Red And Ink Black Checker Accent
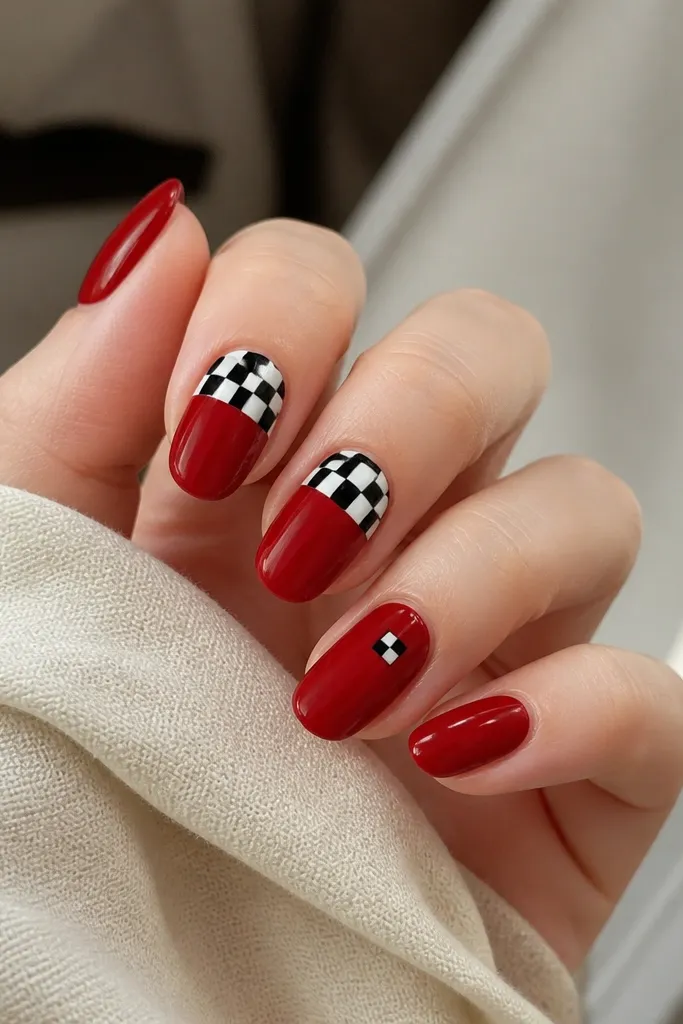
Checker patterns read playful and birthday-fun, but they can get messy fast. Keeping the checkers only on one or two nails prevents the look from turning childish or chaotic. Cherry red is the anchor color, and ink-black plus white gives the pattern a crisp, high-contrast "graphic" feel. This works beautifully on short square nails because the checker sits in a tight area and doesn't need long nail length. The principle is "one graphic element, controlled placement."
Step 1: Paint all nails cherry red and cure, then wipe tacky residue. Step 2: On the accent nails, mask the top third with tape and paint white squares first, then add black squares in a checker layout with a small brush. Step 3: For the ring nail, just paint one 3x3 square checker block centered on the nail. Step 4: Finish with glossy top coat on all nails to lock in edges.
Editor's noteUse nail striping tape as a temporary grid - it makes the squares line up.
Watch outAvoid using gray instead of true black; the checker looks washed out.
6. Red Rosebud On Black Side Panel
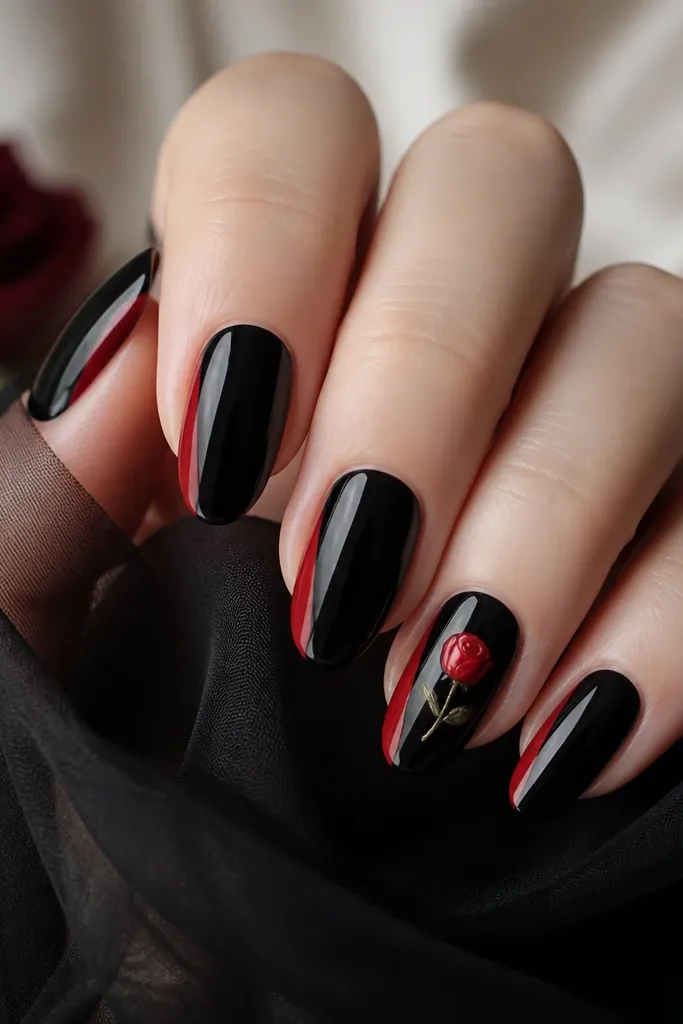
This is for the friend who wants "romantic but edgy." A black base makes the red rosebud look rich, and the thin vertical red panel gives you a clean runway for the art. I've done this with gel paint roses that take only a few petals - they still look delicate because the rosebud is small and placed near the cuticle. It flatters hands with short nail beds because the vertical panel draws the eye upward. The principle is "small art on a strong base."
Step 1: Paint all nails glossy black with two coats and cure. Step 2: Use striping tape to create a slim vertical red panel on one side of each nail, then paint red and cure; remove tape to reveal a sharp edge. Step 3: On the ring finger, dot a tiny circle of red, then use a fine brush to add five small petal arcs around it. Step 4: Add one dot of pale green or brown-green near the base of the bud (optional), then seal with glossy top coat.
Editor's noteIf your rose petals look lumpy, pull each petal line from the center outward with a light touch.
Watch outDon't put big roses on every nail; it overwhelms and looks like stickers.
7. Black And Red Diagonal Slash With Gloss Top
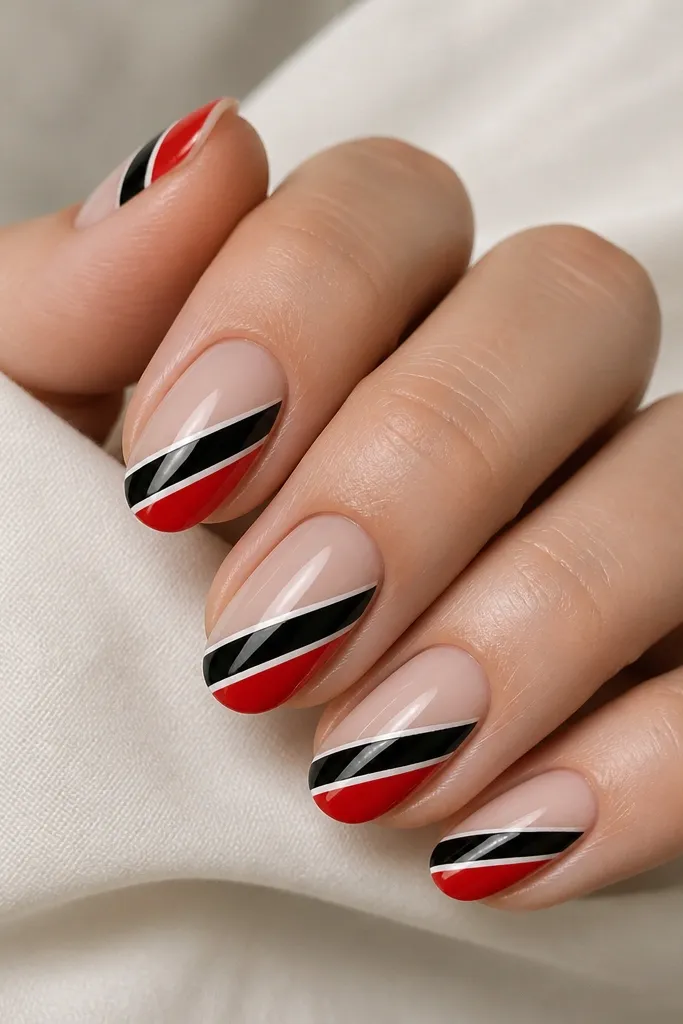
Diagonal slashes look fast and expensive because the line creates motion. With a nude base, the set stays light and birthday-appropriate, even with strong black. The thin white divider line makes the colors look intentional and keeps edges crisp. This flatters most nail shapes because the diagonal line lengthens the nail visually. The styling principle is "one diagonal graphic element."
Step 1: Apply a sheer nude base and cure. Step 2: Place a striping tape strip diagonally from lower-left near the cuticle to upper-right near the free edge; paint one side glossy black, cure, then replace tape to mask the other side and paint bright red, cure. Step 3: Use a thin liner brush to add a white line between the two colors if the tape edge isn't perfectly sharp. Step 4: Top coat with glossy gel top to smooth any micro ridges.
Editor's noteCut your tape into narrower strips for sharper diagonals on small nails.
Watch outAvoid diagonal slashes that start too close to the sidewalls; it makes the nail look narrower.
8. Red Glitter Fade Over Black Base
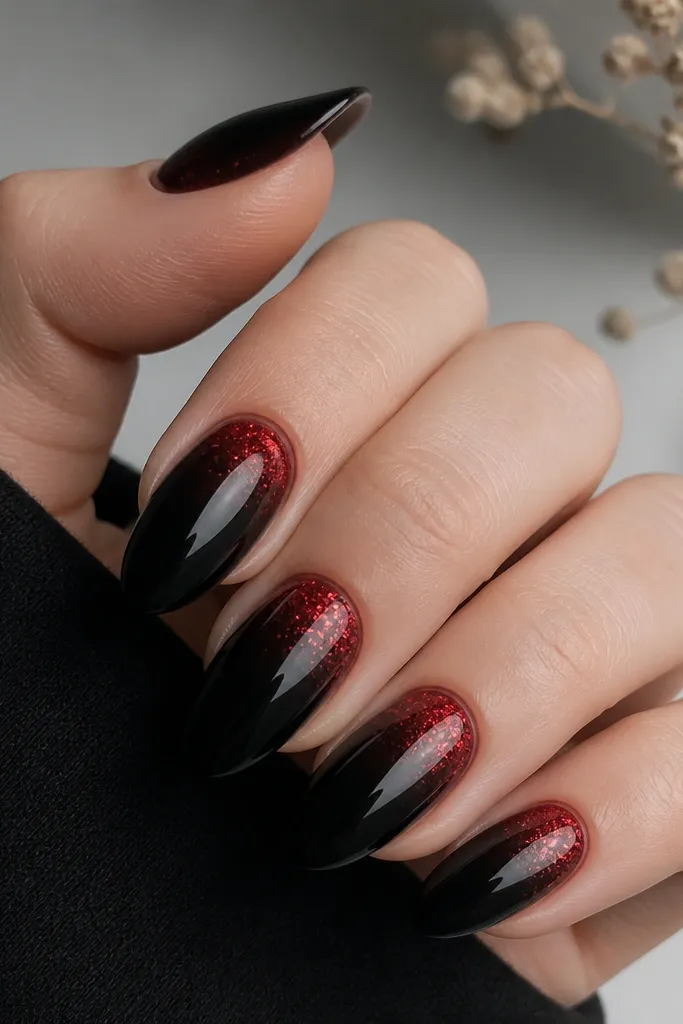
This is a budget-friendly way to get "birthday sparkle" without covering the whole nail. The black base makes the red glitter show up darker and shinier, and a fade keeps it from looking like chunky party glitter. I like this on short-to-medium nails because the fade from cuticle makes nails look longer. On deeper skin tones it still reads luxe because black is the perfect contrast; on lighter skin it keeps the set dramatic. The principle is "glitter placement matters more than glitter amount."
Step 1: Paint glossy black on all nails and cure. Step 2: At the cuticle, dab a small amount of red fine glitter gel or red glitter polish and blend it downward with a sponge lightly loaded with clear gel. Step 3: Keep the glitter density highest near the cuticle and stop around the middle so the free edge stays clean. Step 4: Seal with a thick glossy top coat to lock glitter and remove texture.
Editor's noteIf glitter feels gritty, add a thin layer of clear gel under the top coat before curing again.
Watch outAvoid putting glitter over matte black; it looks dusty and catches less light.
9. Black Lace Dotting Over Red Base
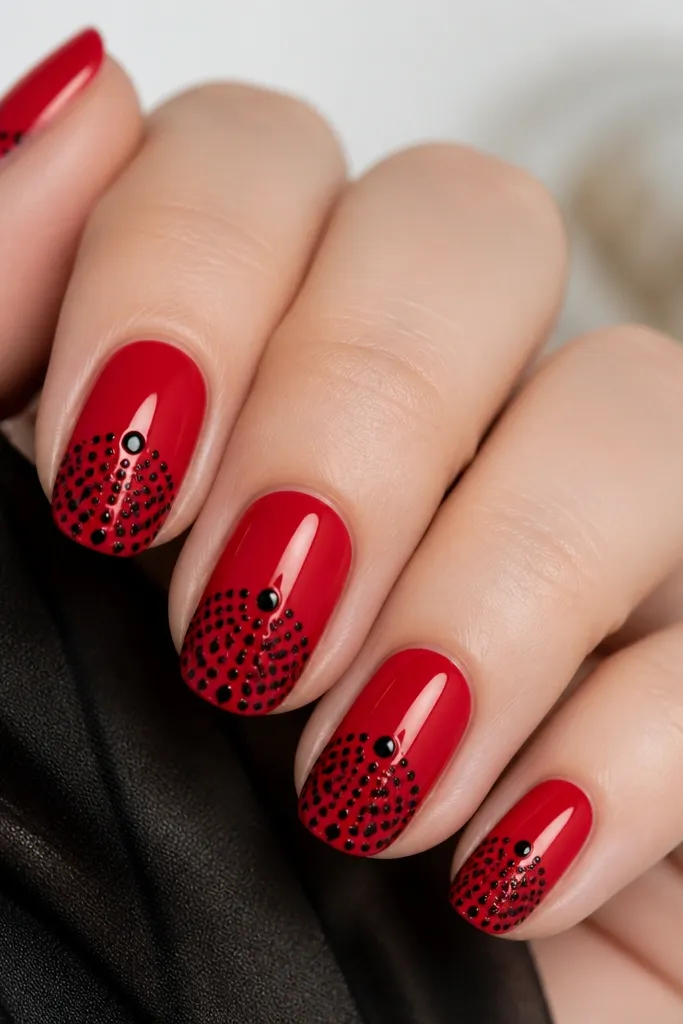
Dotting lace looks delicate but still bold because red does the heavy lifting. The black dots create a lace impression without needing lace tape or expensive stamping plates. This flatters hands because the dots follow the nail's curve, and it's forgiving if your dots are slightly uneven - lace looks better imperfect. I've worn this on almond and short oval nails; both work because the pattern sits in the middle area. The principle is "repeat a pattern, don't freehand it everywhere."
Step 1: Paint glossy red with two thin coats and cure. Step 2: Use a dotting tool to place small black dots in two vertical columns on each nail, then connect loosely by adding a few dots between the columns. Step 3: Add a slightly larger dot near the top center of the pattern, then repeat one tiny dot at the lower edge for balance. Step 4: Finish with glossy top coat, and do one extra pass around the dot edges so they don't catch on clothes.
Editor's noteDip the dotting tool lightly so you get round dots instead of blobs.
Watch outAvoid drawing lines between dots; lace should feel airy, not like a barcode.
10. Red And Black Watercolor Swirl
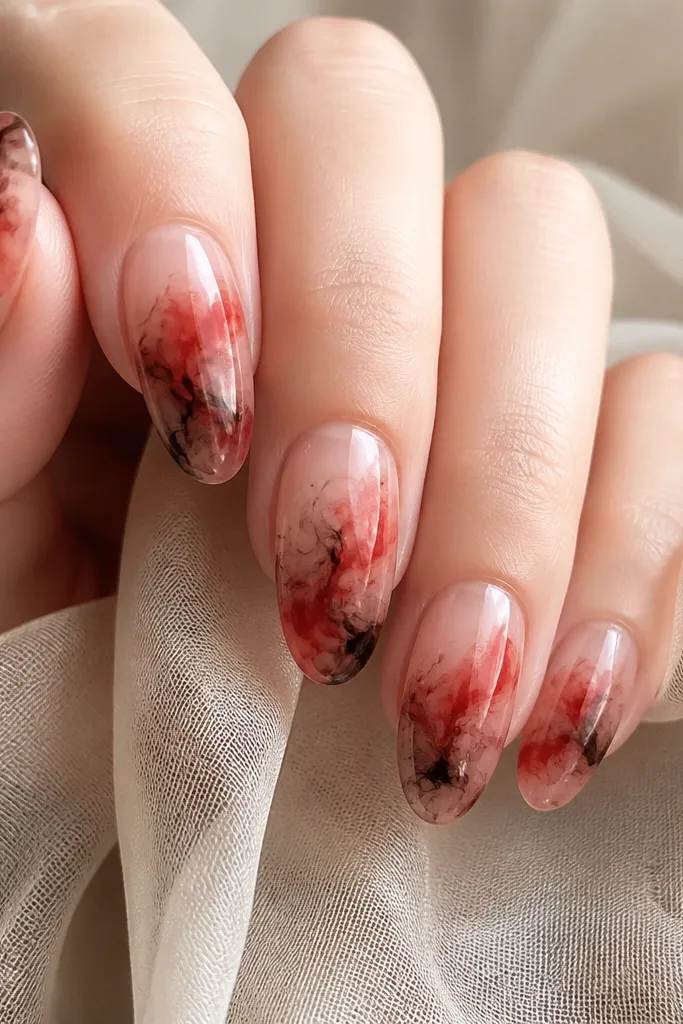
Watercolor swirls look dreamy and expensive because the edges are soft. On a budget, you can get this effect with gel polish plus a makeup sponge and a tiny bit of rubbing alcohol to help blend. The sheer nude base keeps it wearable and lets the red and black look like they're floating. I like it for birthdays where you want something artsy but not "cartoon." The principle is "controlled blur": keep the swirls loose, but anchor them in one direction.
Step 1: Apply a sheer nude base and cure. Step 2: Dab red gel into a small area near the center, then add a tiny dab of black next to it; use a makeup sponge to lightly tap and blend the edges. Step 3: Use a toothpick or fine brush to drag the blended color into a spiral, then cure. Step 4: Add one more small dab of black at the spiral tail for depth, then seal with glossy top coat.
Editor's noteDo one nail at a time so the blending stays easy before curing.
Watch outAvoid thick layers; watercolor swirls need thin gel for smooth blending.
11. Classic Black Bow On Red Accent Nail
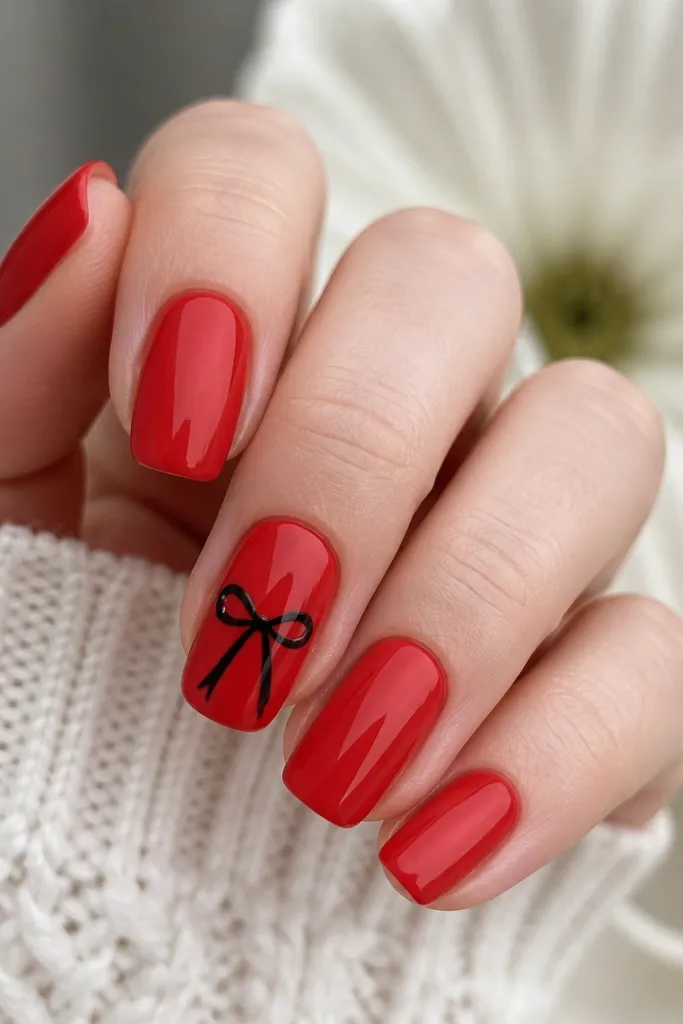
A bow gives you instant birthday energy, and keeping it on one accent nail keeps the look grown-up. The bow works because black has structure against red, and the tiny white highlight makes the bow look dimensional instead of flat. This looks great on short nails because the bow is compact and sits near the center. If your skin tone is warm, the red looks like cherry; if it's cool, it reads berry. The principle is "one focal point."
Step 1: Paint all nails glossy red and cure. Step 2: On the accent nail, draw the bow loops with a liner brush: two sideways teardrops, then a small knot in the middle. Step 3: Add a thin white line inside each loop to mimic shine, using the smallest brush you own. Step 4: Optional: add a tiny black dot below the knot for a "shadow," then seal with glossy top coat.
Editor's noteIf you're new to bows, practice on a paper nail guide with a cheap nail polish first.
Watch outAvoid oversized bows; they cover too much nail and look like a sticker.
12. Red Chrome Stripe Over Matte Black
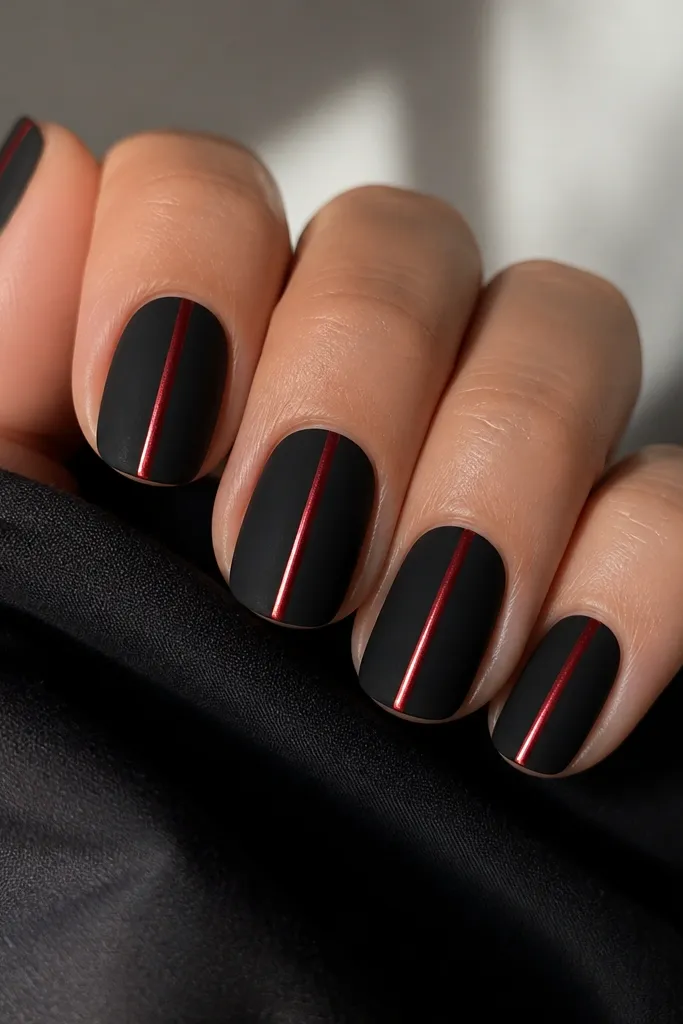
Chrome stripe on matte black looks like a salon set because the texture contrast does the work. Matte black kills glare on the base, so the red chrome line becomes the brightest element. This is flattering on medium almond and short square because the vertical stripe draws the eye up. I've used a red chrome powder over a sticky gel stripe and it holds up well for photos and night events. The principle is "texture contrast, not extra patterns."
Step 1: Apply matte black base in two coats and cure, then apply matte top if needed. Step 2: Tape a thin vertical line down the center, paint a sticky gel line, and cure. Step 3: Rub red chrome powder into the sticky line, then gently brush off excess. Step 4: Seal with a matte top on the base nails but use a glossy top over the chrome stripe only to keep it reflective.
Editor's notePress chrome powder in with your fingertip wrapped in a lint-free pad for better adhesion.
Watch outAvoid sealing chrome with matte top everywhere; it turns the stripe dull.
13. Black Smoke Gradient Behind Red Heart
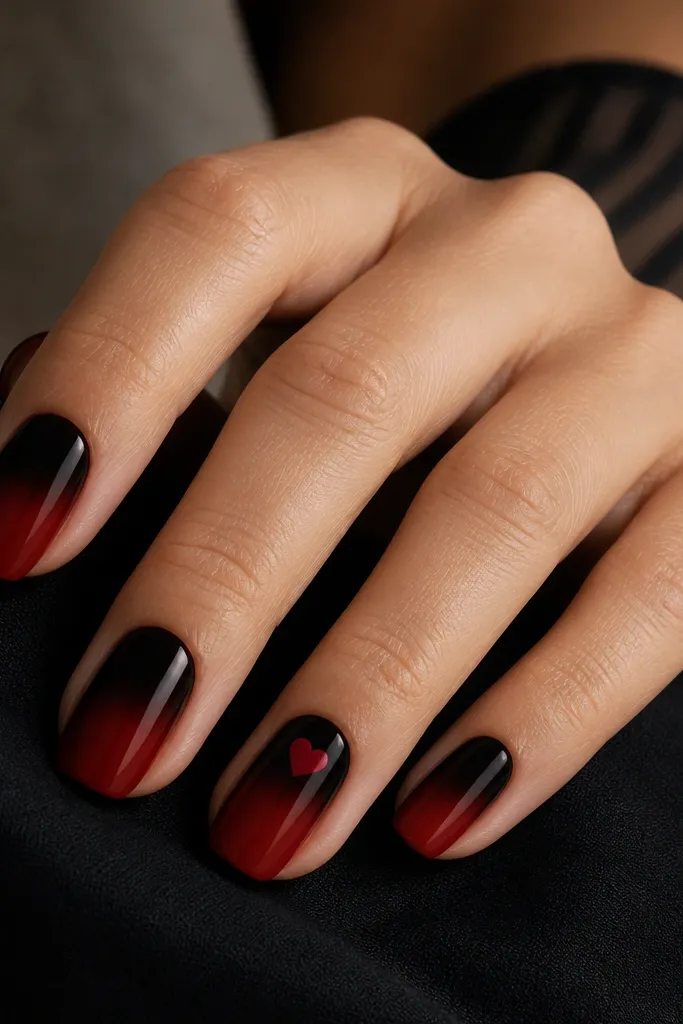
This is a moody-but-cute option that looks great in birthday photos with indoor flash. The black smoke gradient adds depth without needing glitter or heavy art, and the heart makes it sweet. I like it on medium nails because the heart sits comfortably without feeling cramped, but it works on short nails if you keep the heart tiny. The red heart pops because it sits on dark smoke, not on a flat black block. The principle is "depth behind the detail."
Step 1: Paint a red base on all nails (two coats) and cure. Step 2: For the smoky top half, sponge black gel polish lightly from the upper third downward and blend edges with a makeup sponge. Step 3: On the ring finger, draw a small red heart centered over the smoke using a dotting tool for the lobes and a liner brush for the point. Step 4: Seal with glossy top coat to smooth the gradient and brighten the heart.
Editor's noteWipe the sponge on a paper towel between nails so the smoke stays soft, not muddy.
Watch outAvoid a hard line between red and smoke; the gradient should fade.
14. Red And Black Marble Swirl Using Tape Edges
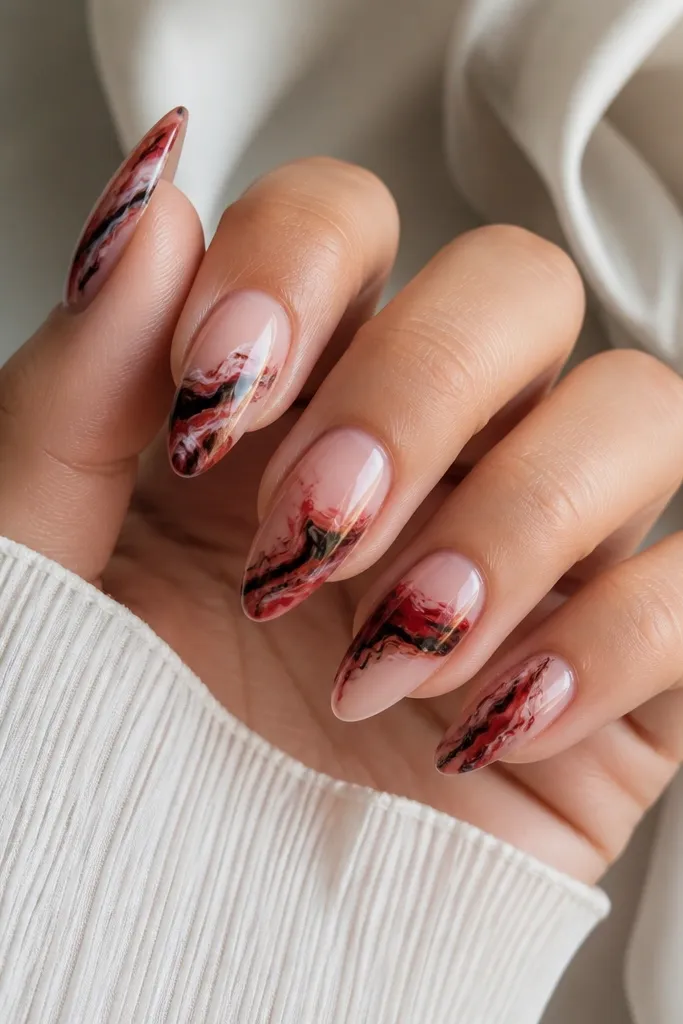
Marble looks high-end because it looks like stone, but you don't need expensive tools. Tape edges help you keep the marbling from bleeding into a blob, especially if you're using gel and you're impatient. Red and black marble looks amazing on both warm and cool skin tones because it's bold without being neon. I like it on almond or oval because the stone effect follows the nail shape. The principle is "use tape to control flow."
Step 1: Apply a clear or sheer nude base and cure. Step 2: Place two small striping tape guides across the nail to create "channels," leaving space between them for marbling. Step 3: Dab red gel and black gel in tiny patches inside the channels, then swirl with a thin brush or toothpick to drag them together. Step 4: Pull tape off while gel is still workable, then add a couple tiny white streaks by tapping a white polish onto the brush tip. Finally, cure and top coat with glossy gel.
Editor's noteUse a toothpick for marbling - it drags color without flooding the nail.
Watch outAvoid overworking the marble; too much stirring makes it muddy.
15. Blackout Nails With One Red Side Dot
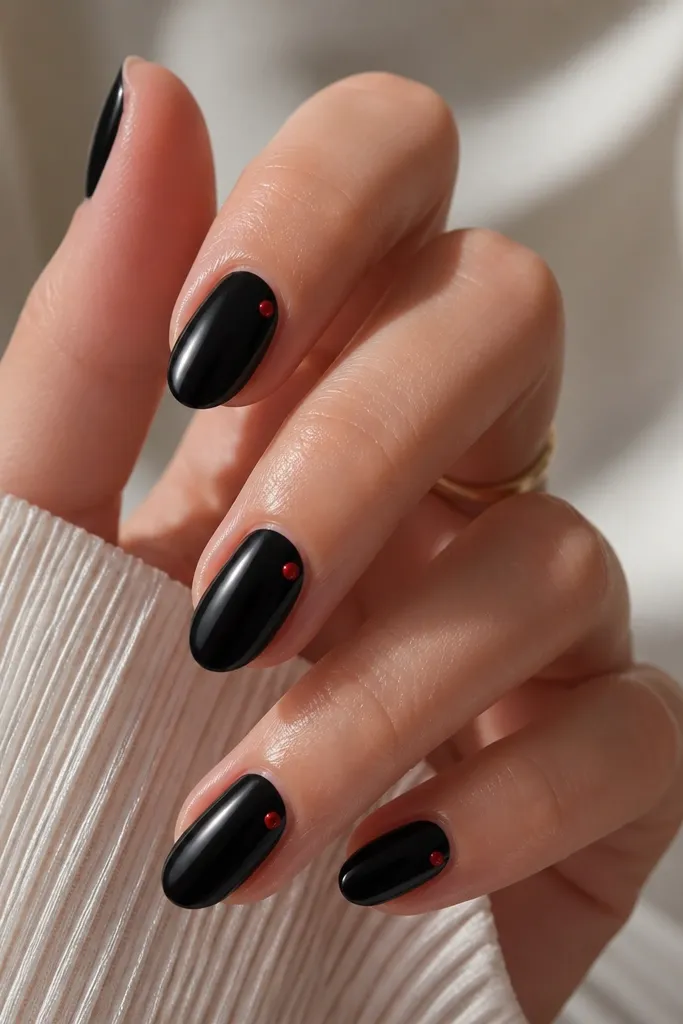
This looks sharp and grown-up because it's basically a blackout set with one controlled red detail. The single dot is enough for a birthday vibe without turning it into a full pattern. It flatters shorter nails because the dot sits off-center and draws attention to the nail's middle rather than the cuticle. I've worn this to a dinner birthday and it looked clean even after hours under warm lighting. The principle is "less design, better placement."
Step 1: Paint all nails glossy black with two coats and cure. Step 2: Use a dotting tool to place one small red dot on each nail about halfway down the nail and slightly toward the sidewall. Step 3: On the ring finger, make the dot a tiny bit larger and add a mini white dot next to it for a highlight. Step 4: Seal with glossy top coat, keeping the dot edges smooth by dragging top coat gently over them.
Editor's noteIf your dot spreads, cure the black base fully before adding the red dot.
Watch outAvoid multiple dots per nail; it stops looking intentional fast.
16. Red Glitter Tip Over Nude Base With Black Outline
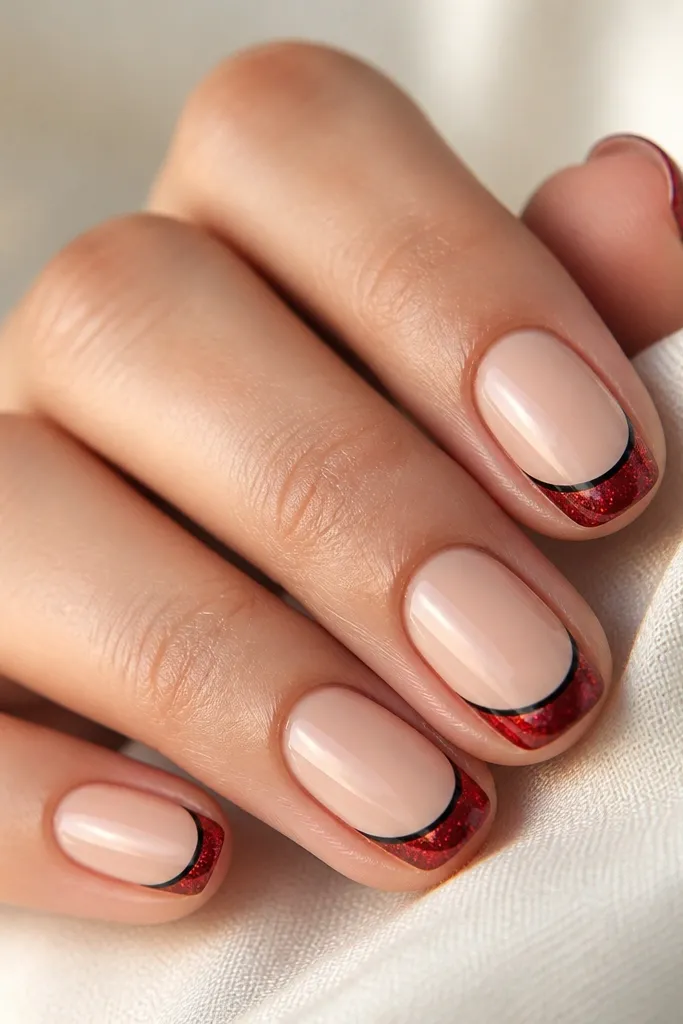
This is a budget glitter look that still feels clean. The nude base keeps it flattering and wearable, while the red glitter tip gives you the birthday "wow" when you move your hands. The thin black outline makes the glitter edge look crisp instead of fuzzy. It works on short nails because the tip area is small and the outline keeps it structured. The principle is "glitter in one zone, outline for polish."
Step 1: Apply nude base and cure. Step 2: Mask the free edge with tape and paint red glitter polish or red glitter gel; cure. Step 3: With a liner brush, draw a thin black line just along the edge of the glitter tip and remove any stray polish around the tape line. Step 4: Top coat with glossy gel, making sure the outline is fully sealed so it doesn't catch.
Editor's noteUse tape to stop the outline early so it doesn't run onto the sidewall and look messy.
Watch outAvoid chunky glitter over a thick base; it looks bumpy.
17. Black And Red Reverse French With Heart Cutout
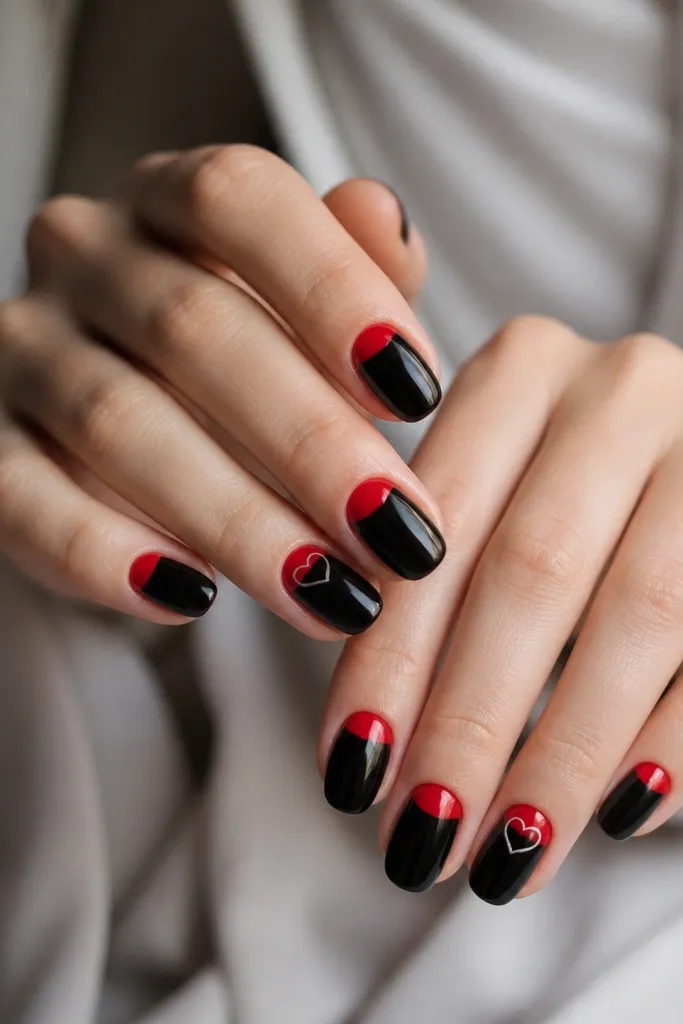
Reverse French feels special because it frames the cuticle area and looks neat in photos. Keeping the base black makes the red band look bold, and a tiny heart cutout adds romance without taking over the whole nail. This flatters hands with slightly wider nail beds because reverse French balances the width near the cuticle. I'd wear this on medium oval or short almond for a birthday dinner or date night. The principle is "frame the cuticle, then add one tiny symbol."
Step 1: Paint the full nail glossy black and cure. Step 2: Use striping tape to mask a band near the cuticle, then paint that band bright red and cure. Step 3: On two accent nails, place a small heart-shaped vinyl stencil where the red band meets the black, paint over it lightly with black or leave it clear depending on your look; remove stencil carefully after curing. Step 4: Add a thin white outline around the heart if you want extra crispness, then top coat glossy.
Editor's noteUse a heart stencil made for nails if you have one; it makes the outline look clean in seconds.
Watch outAvoid a thick red band; it hides the nail shape instead of framing it.
18. Red And Black Yin Yang Accent Nail
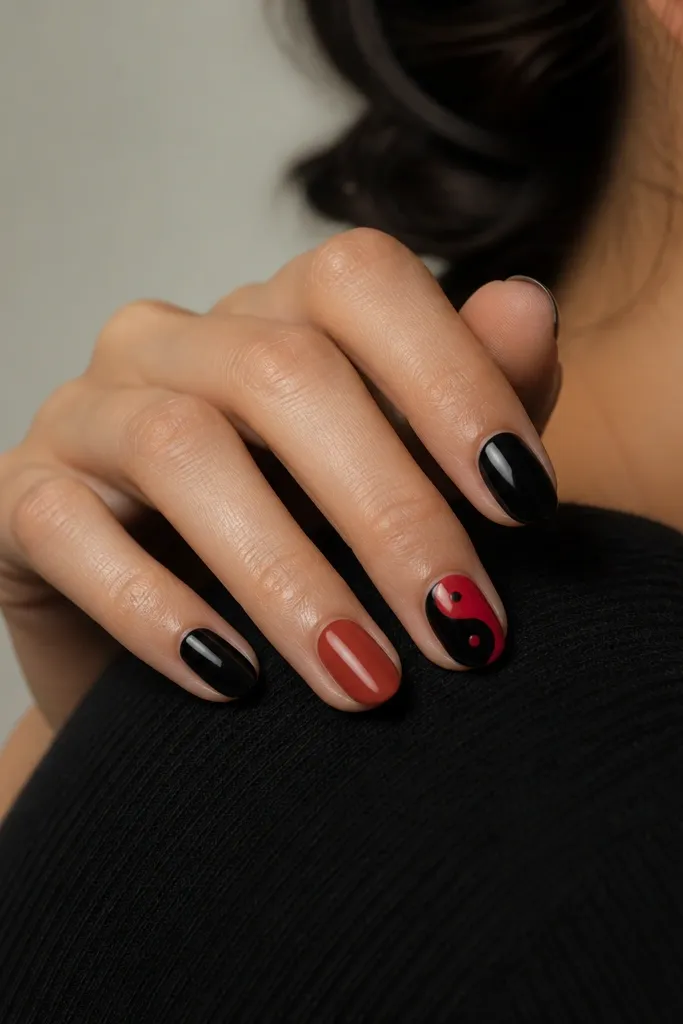
Yin yang is one of those designs that looks intentional even when it's simple. The symbol works with red and black because the colors already carry meaning and contrast. I like it as an accent nail only because the symbol takes visual space, and too many makes it look busy. It's flattering on short square nails because the symbol can be centered and small. The principle is "one icon nail, rest simple."
Step 1: Paint alternating nails solid red and solid black, then cure. Step 2: On the accent nail, paint the full nail white or sheer nude first so the red and black halves stay bright. Step 3: Draw a perfect half-circle split using a small brush and a guide dot at the center, then fill one side red and the other black and cure. Step 4: Add the two tiny dots inside each half (red dot on black side, black dot on red side), cure, then top coat glossy.
Editor's noteIf your circle wobbles, trace a bottle cap curve on paper first and use it as a practice guide.
Watch outAvoid using matte top on the yin yang; the edges need gloss for crisp separation.
19. Black Lines On Red Base Like Comic Stripes
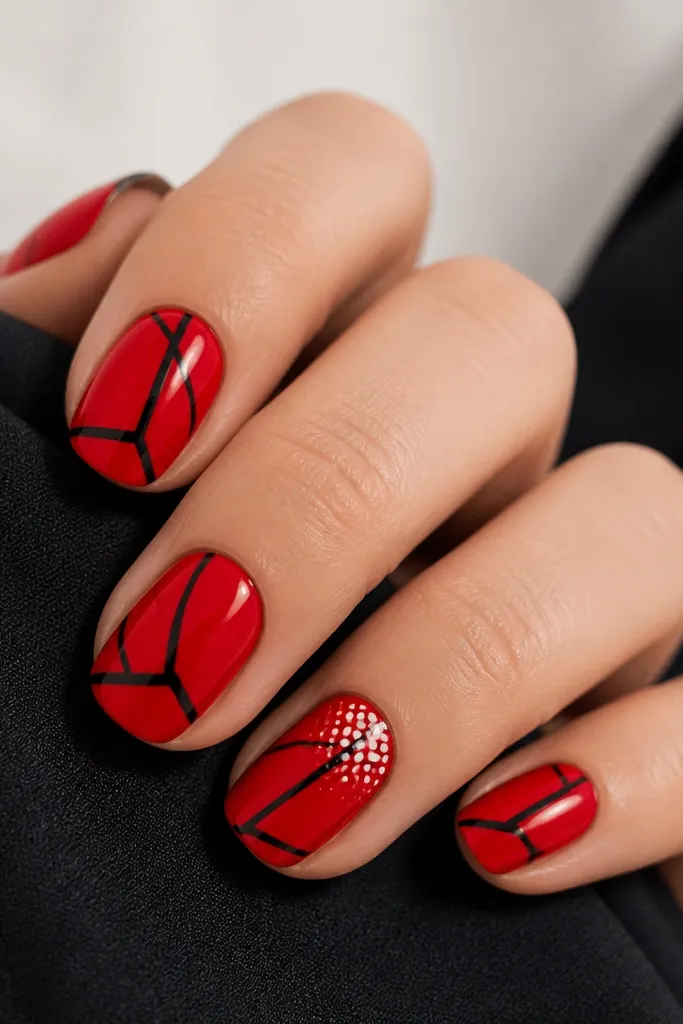
Comic stripe nail art looks fun and sharp, and it's way easier than detailed flowers. The thick black lines create movement across the red, and the white burst detail gives it a party feel. This works on medium and short nails because you're controlling the lines, not tiny shapes. I've done it on both bare nails and press-ons - it still looks crisp because the lines are bold. The principle is "bold linework beats micro details on a budget."
Step 1: Paint all nails glossy red and cure. Step 2: Use a striping brush to draw irregular black lines across the nail, varying thickness a little so it looks comic, not manufactured. Step 3: On the ring finger, add a small white burst shape near the center by placing a dot then drawing short triangles outward. Step 4: Cure and top coat glossy, making sure top coat flows over the lines without smearing them.
Editor's noteClean your brush often; black line art shows every stray hair.
Watch outAvoid using thin black marker-like lines; they disappear under top coat.
20. Red And Black Striped Tape French On Short Nails
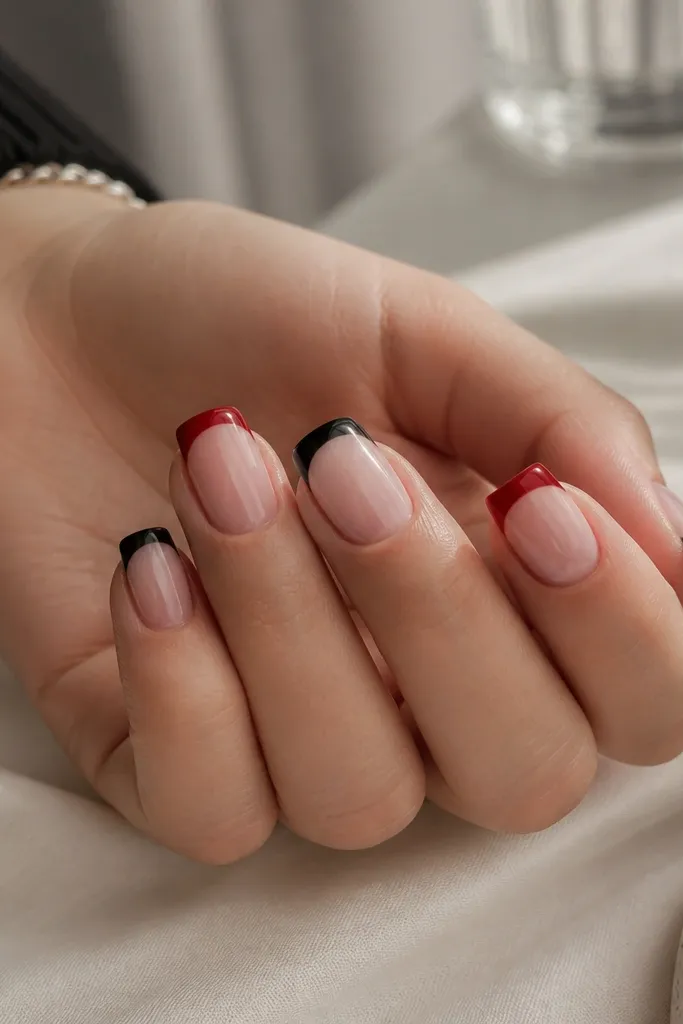
This striped tape French is one of the fastest ways to get a high-end look on short nails. The alternating red and black stripes feel birthday-fun without needing art skills, and the nude base keeps it from looking heavy. I've used this on nails that peel easily - the tape lines stay clean when you seal properly. It flatters short nail beds because the tip design adds visual length. The principle is "use tape for precision, not for decoration."
Step 1: Paint nude base and cure. Step 2: Mask the free edge with tape, then apply a second tape strip vertically to split the tip into narrow sections. Step 3: Paint alternating sections red and black, cure each color if needed, then remove all tape while gel is still workable. Step 4: Add a thin glossy top coat, then cap the tip edges with one more layer so stripes don't chip.
Editor's notePress tape down firmly only at the edges - too much pressure can lift your base polish.
Watch outAvoid wide stripes; they make short nails look chunky.
21. Red Heart Confetti Over Black Negative Space
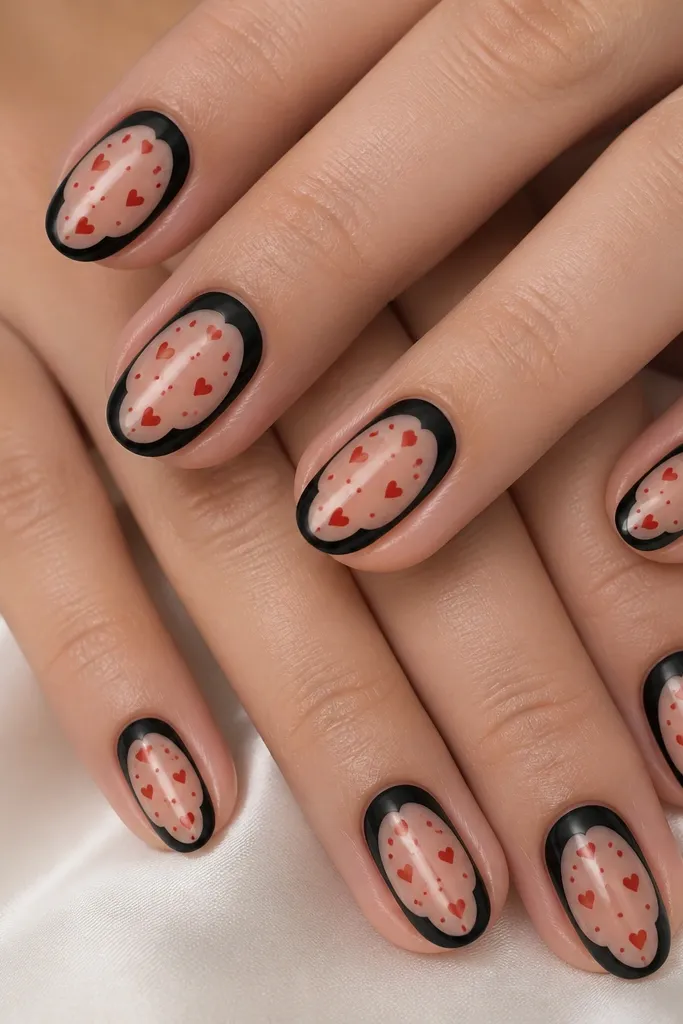
Negative space makes this set look modern, and the black shapes give you structure for the hearts. The red hearts and dots add birthday cuteness without needing glitter. I like it for anyone who wants nail art that looks good even if your nails grow out a bit, because the design isn't tied to the cuticle line alone. It also looks great on darker skin tones because the nude base stays clean and the red pops. The principle is "use black as a frame."
Step 1: Paint a sheer nude base and cure. Step 2: Use striping tape to create a simple frame shape - like a sideways rectangle or an inverted "U" - then paint black within the taped area and remove tape. Step 3: With a dotting tool, place tiny red dots, then add small hearts using a heart stamp or a quick two-dot-and-dip method with a brush. Step 4: Seal with glossy top coat, and cap around the frame edges so the negative space stays crisp.
Editor's noteFor tiny hearts, make them smaller than you think; they look cuter and cleaner.
Watch outAvoid filling the whole nail with hearts; confetti needs breathing room.
22. Black Cherry Ombre With Red Center Glow
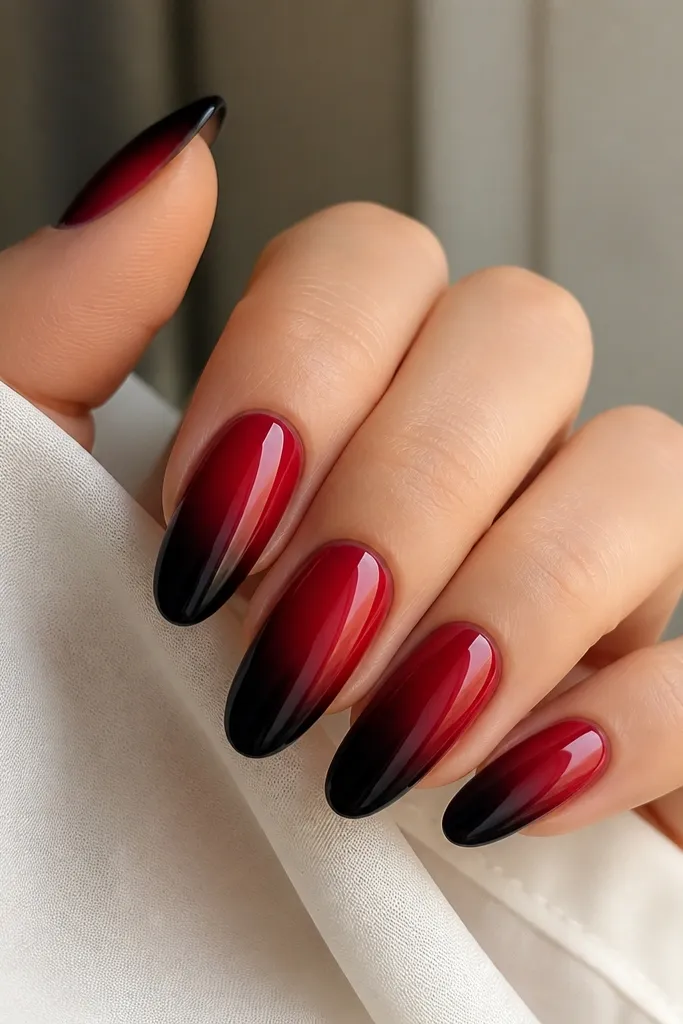
Ombre with a brighter center feels like a glow effect, and it's flattering because it draws the eye to the middle of your nail. The black at the tip keeps it moody, while the cherry center gives birthday warmth. I've worn this on both fair and deeper skin tones and it always reads "rich" instead of harsh. It also covers small nail shape flaws because the fade smooths the visual line. The principle is "bright center, darker edges."
Step 1: Paint a sheer base and cure. Step 2: Sponge black polish at the free edge and blend upward into the nail, then sponge cherry red at the center and blend slightly into the black. Step 3: Use a clean sponge corner to soften the transition so there's no harsh line. Step 4: Cure fully and apply a thick glossy top coat to smooth texture and intensify the center glow.
Editor's noteDo two thin sponge layers instead of one heavy layer - it looks smoother.
Watch outAvoid skipping top coat; ombre without a thick seal looks rough.
23. Red Velvet Stamp Flowers On One Black Nail
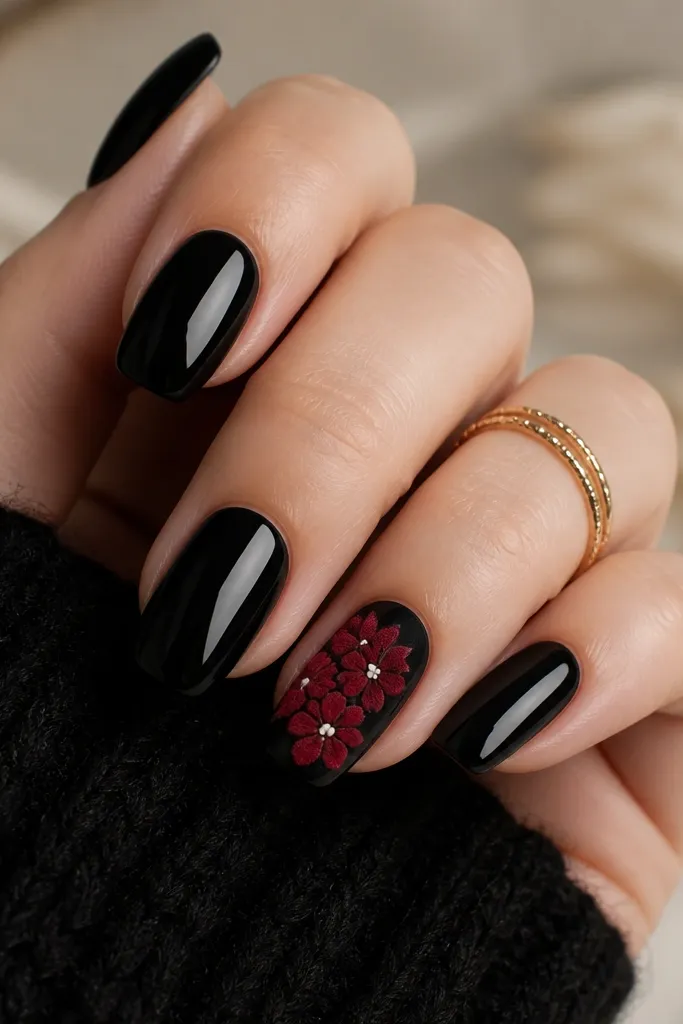
Stamping looks like you paid more because the pattern is consistent. Here, you only need one stamped nail, which keeps the budget realistic and still makes the set feel special. The red velvet effect comes from using a dense red stamping polish or a thicker red gel over the stamp, then sealing. This is flattering for medium nails because the flower cluster can sit in the center without covering the cuticle too much. The styling principle is "one perfect print, everything else solid."
Step 1: Paint all nails glossy black and cure. Step 2: On the accent nail, apply a thin layer of red stamping polish on your stamp plate and scrape off excess. Step 3: Press the stamp onto the nail firmly once, then cure if your stamp system needs it. Step 4: Add tiny white dots with a dotting tool around the flower, then top coat glossy and cap the edges.
Editor's noteWipe your stamp plate with stamping cleaner between tries; it prevents patchy transfers.
Watch outAvoid stamping on a wet top coat; it smears the flower edges.
24. Red And Black Confetti Dots With Clear Negative Middle
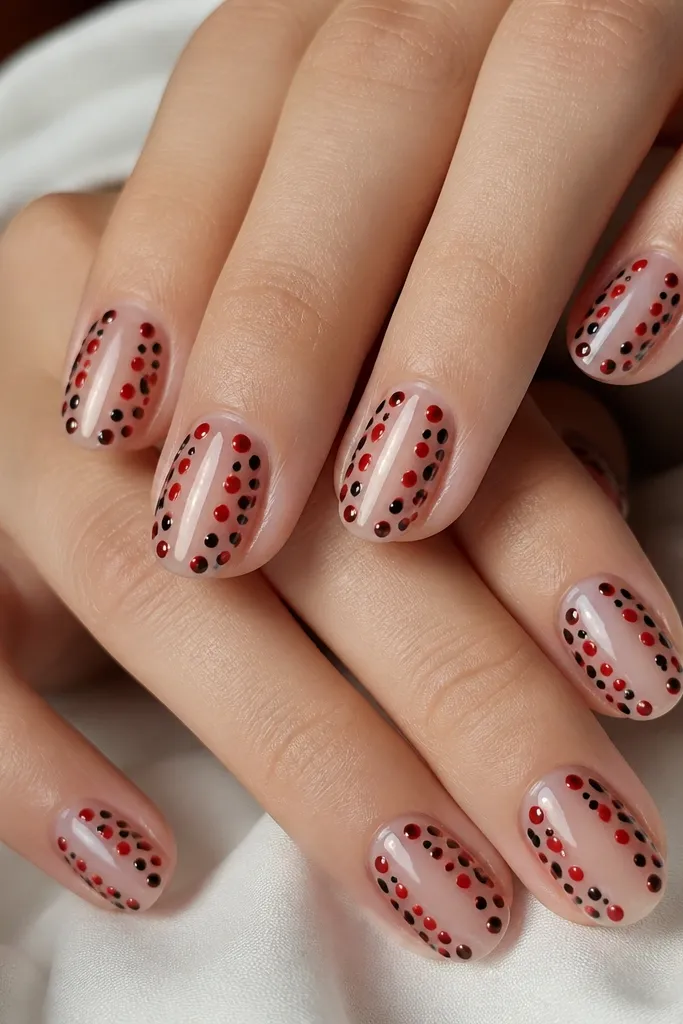
Leaving a clear strip in the middle makes the set feel light and photo-friendly, and it also hides small growth because the center stays negative space. The red and black confetti dots are easy to do with a dotting tool, and scattering them on the sides makes your fingers look longer. I like this on short nails because it avoids heavy coverage at the tip. It also works if you hate detailed art - dots are quick, but this layout looks designed. The principle is "negative space + controlled scattering."
Step 1: Apply your base color as a thin layer of sheer nude or clear, then cure. Step 2: Use striping tape to mask a vertical clear strip down the middle, then paint the left and right sides red and black in small patches. Step 3: Remove tape and immediately place red and black dots along the painted sides, keeping them uneven in size for a confetti feel. Step 4: Seal with glossy top coat, and run the brush along the middle strip edges so top coat doesn't flood underneath the masked area.
Editor's noteUse different sizes of dotting tool ends so the confetti looks natural, not uniform.
Watch outAvoid perfectly symmetrical dots; confetti should feel playful.
25. Black Gloss Base With Red Cuticle Bow Tie
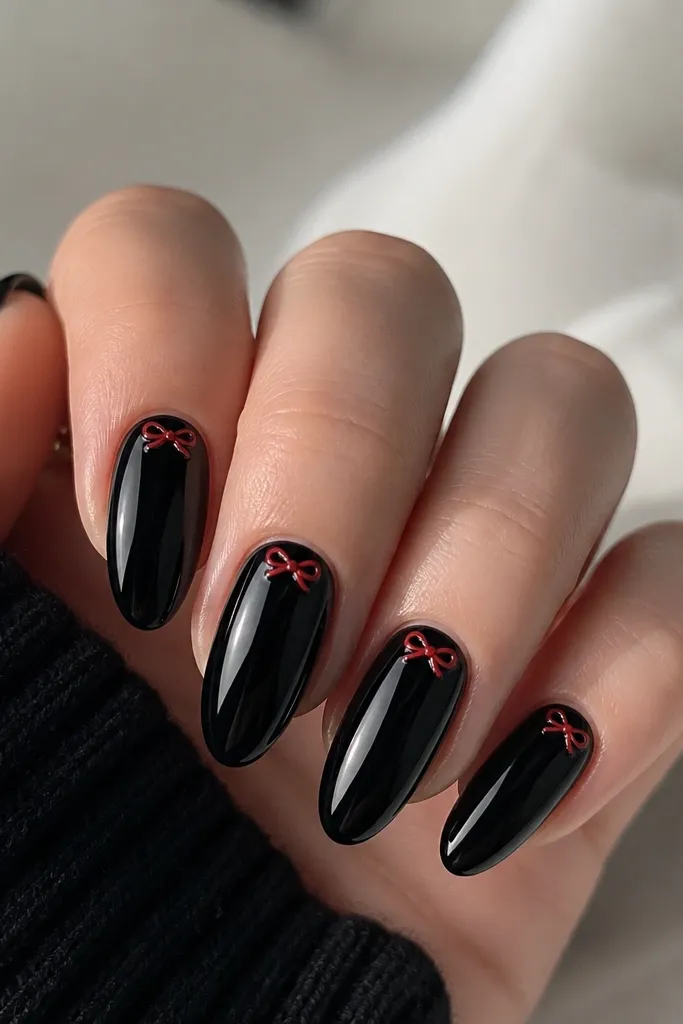
A cuticle bow tie is one of my favorite birthday looks because it's cute without covering the whole nail. The glossy black base makes the red bow pop, and the highlight lines keep it from looking flat. This flatters nails with a visible cuticle area because the bow sits right where your hand shows it most when you gesture. I recommend this for medium oval or short squoval because the bow proportions stay balanced. The principle is "small detail at the cuticle, strong base everywhere else."
Step 1: Paint all nails glossy black and cure. Step 2: On each nail, place two small red dots close together at the cuticle - these become the loops. Step 3: Using a liner brush, pull each dot into a curved loop shape and connect them with a tiny knot in the center. Step 4: Add one tiny white line on each loop for shine, then cure and seal with glossy top coat, making sure the bow edges are fully coated.
Editor's noteIf your bow looks lopsided, fix it by adding a micro dot of red at the lower loop edge before top coat.
Watch outAvoid putting the bow too low; it should sit near the cuticle line, not the middle.