
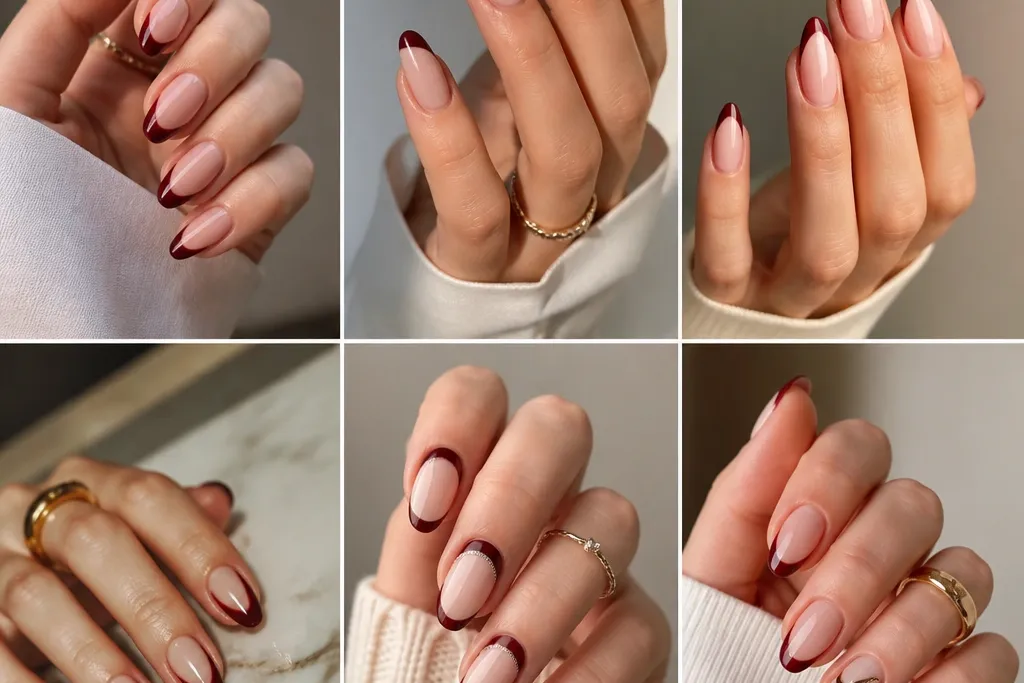
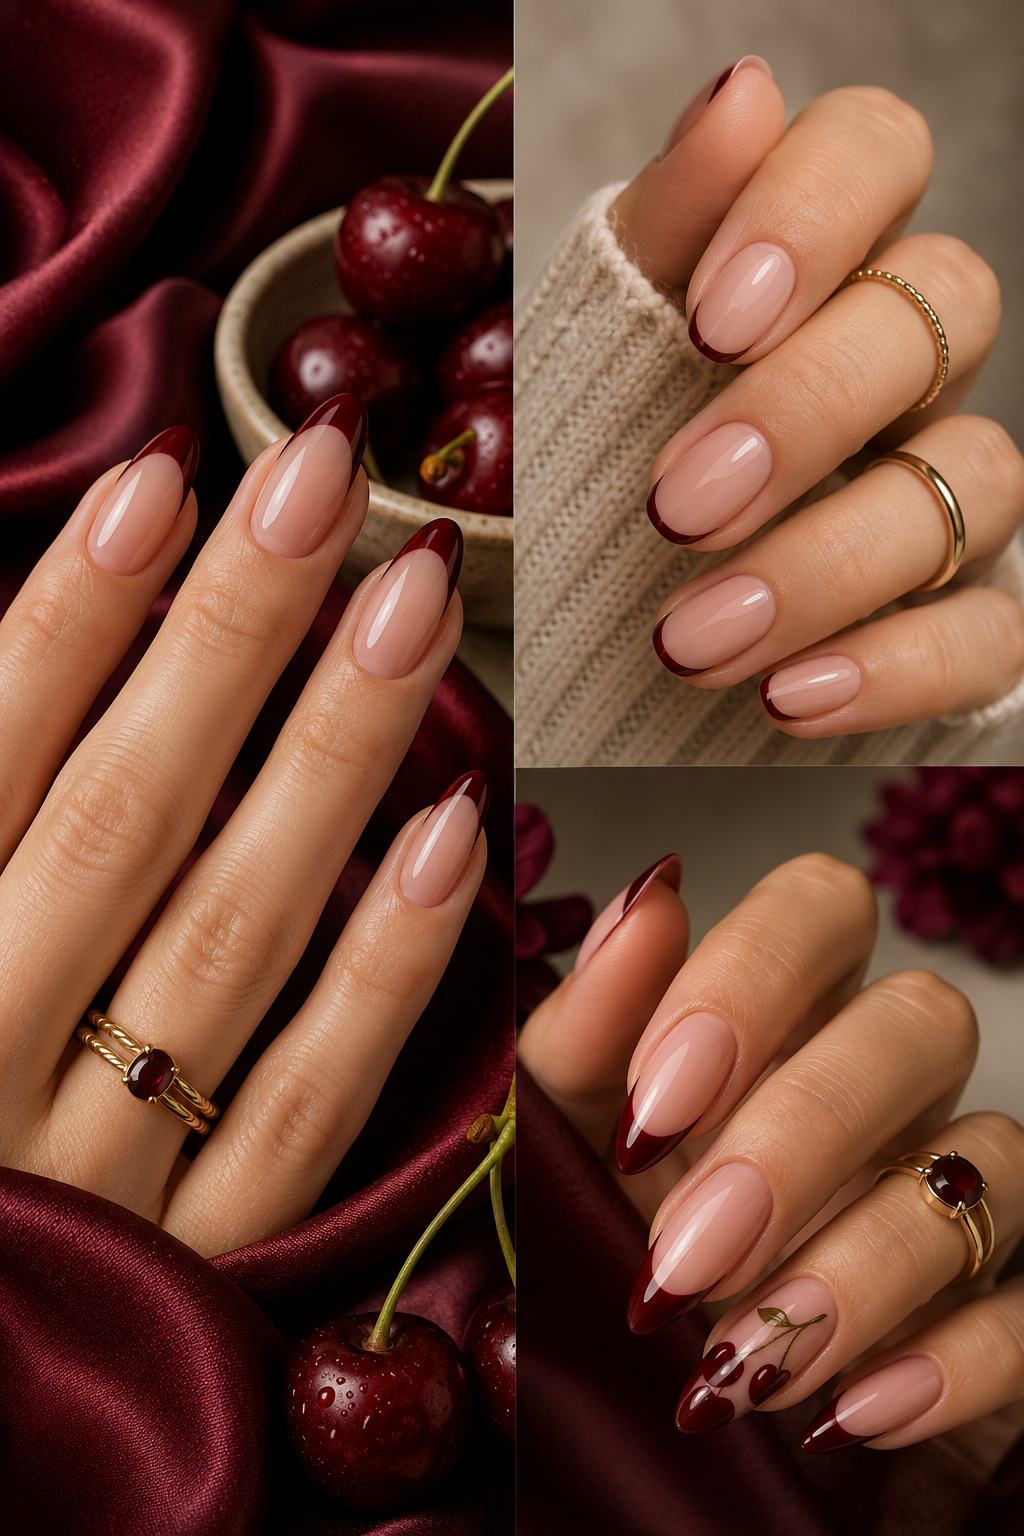
1. Classic Dark Cherry French with a Micro White Line
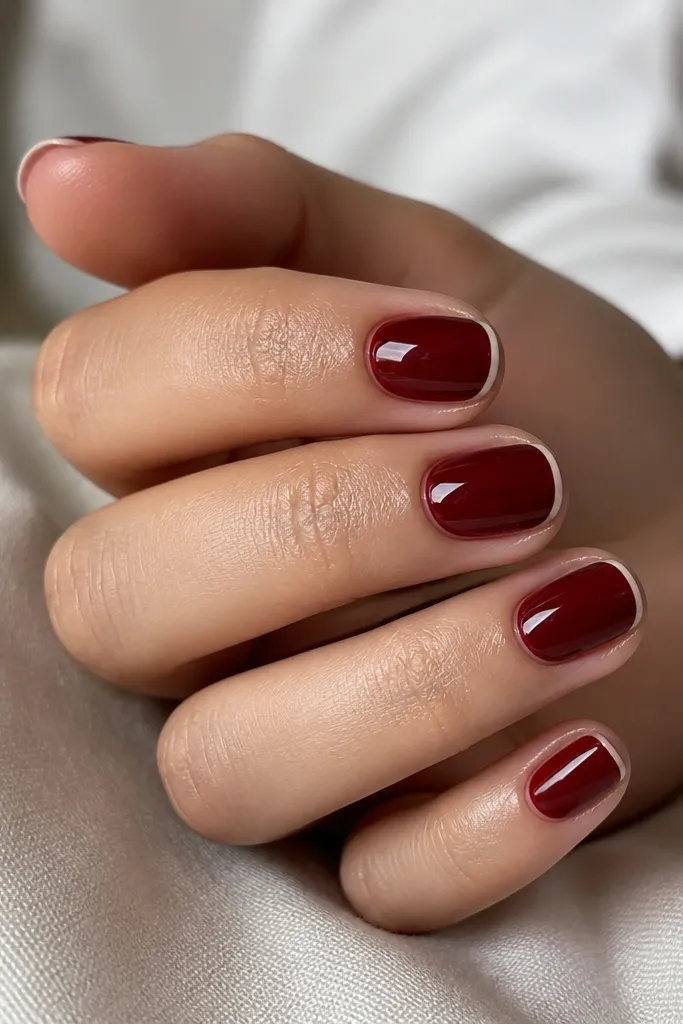
This is the cleanest way to make dark cherry red feel stylish instead of heavy. The trick is keeping the white line micro-thin and placing it slightly inward from the absolute nail edge so it doesn’t look like paint drift. I like it on medium to short nails because the negative space makes the nail look longer. For deeper skin tones, the cherry red pops without washing out, and the white stays bright even in indoor lighting. It also works for formal events because the design is basically “French, but sharper.”
Start with two thin coats of dark cherry red gel (or polish) and cure/dry fully. Dip a striping brush or nail art pen in white and draw a straight line across both sides, then connect the ends at the center. Keep the line narrow — if you can cover mistakes with top coat later, you went too thick. Finally, add a glossy top coat over the whole nail and cap the free edge so the micro line doesn’t lift.
Editor's noteIf your line looks wobbly, paint the outline first and then fill nothing — just leave it as a border. That single decision makes it look intentionally minimal.
Watch outDon’t flood the tip area with white; thick borders look like nail polish that pooled at the edge.
2. Cherry Base with Reverse French in Wine Red Gloss
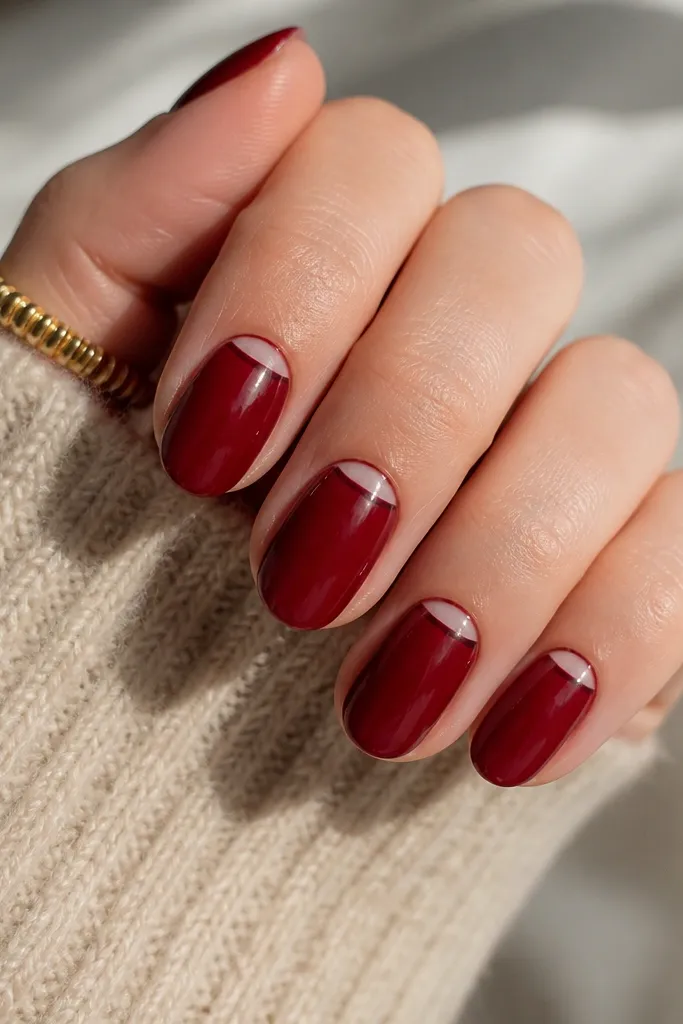
Reverse French flips the placement so the design feels modern, not traditional. A darker wine arc near the cuticle makes your nails look tidy, especially if your cuticles grow unevenly. The clear crescent gives your nail bed a bit of breathing room and makes the cherry tone look intentional. I’ve worn this on both warm and cool undertones and it always reads polished because the color family stays consistent — no harsh contrast. It’s also flattering when your nails are slightly short since the visual focus is higher up on the nail.
Paint two coats of glossy dark cherry red and let it level completely. Use a thin striping brush to paint a curved arc at the cuticle that follows your natural cuticle line, leaving a small clear gap. Fill the arc with a slightly deeper wine shade (or add a drop of black-red to your cherry) for dimension. Seal with a thick top coat and gently wipe the brush along the nail edges to prevent shrinkage.
Use a cotton swab dipped in alcohol to clean the crescent edge before curing so the arc looks razor-sharp.
Avoid covering the entire cuticle area; if you erase the crescent, it starts to look like a stripe accident.
3. Curved Smile French with Thin Black Cherry Shadow
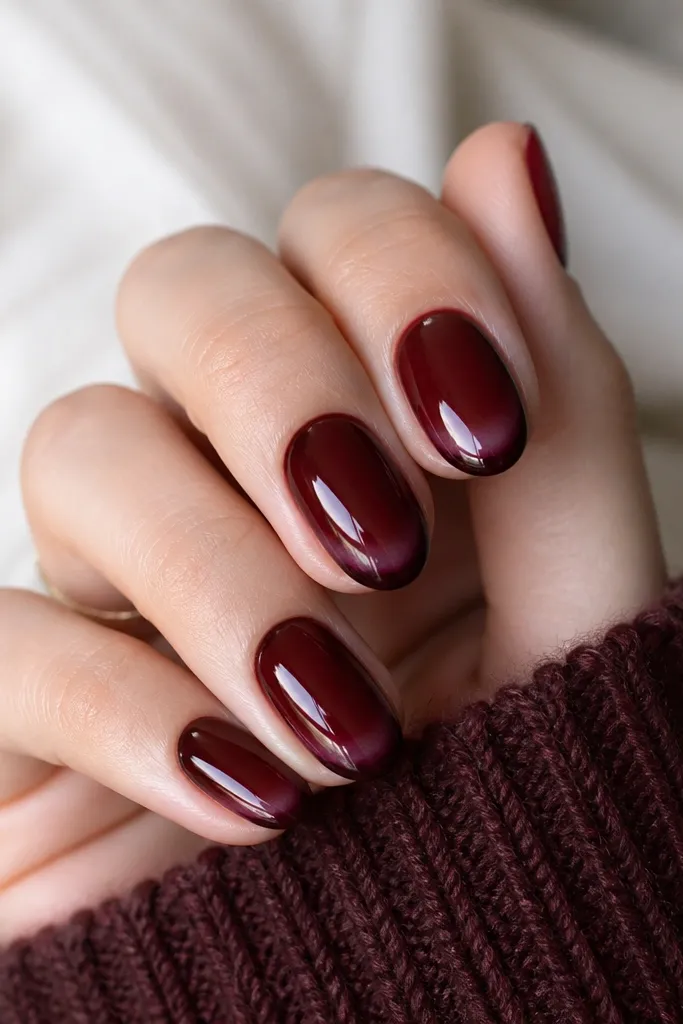
This one makes dark cherry red look like it has depth, like a wine stain that never fades. The curved smile line is the most flattering French shape on most hands because it mirrors the nail’s natural curve. Adding a black-cherry shadow instead of white keeps it moody and wearable for fall and winter. I like this on medium-length nails because the shadow band has room to show the fade. If you’re worried about white being too stark, this gives you the same framing effect with a darker, richer feel.
Start with two coats of glossy dark cherry red. Then paint the tip band using a slightly darker black-cherry shade: place the outer curve first, then softly tap toward the center so it fades. Keep the band thickness consistent — aim for about one-third of the free edge. Finish with top coat, and run the brush over the very edge so the shadow doesn’t catch on fabric.
For the fade, don’t swipe back and forth — use tiny taps with the brush tip to blend without streaks.
Don’t make the smile line too wide; a thick black band can overpower the cherry base.
4. Dark Cherry French with Negative Space Half-Moon
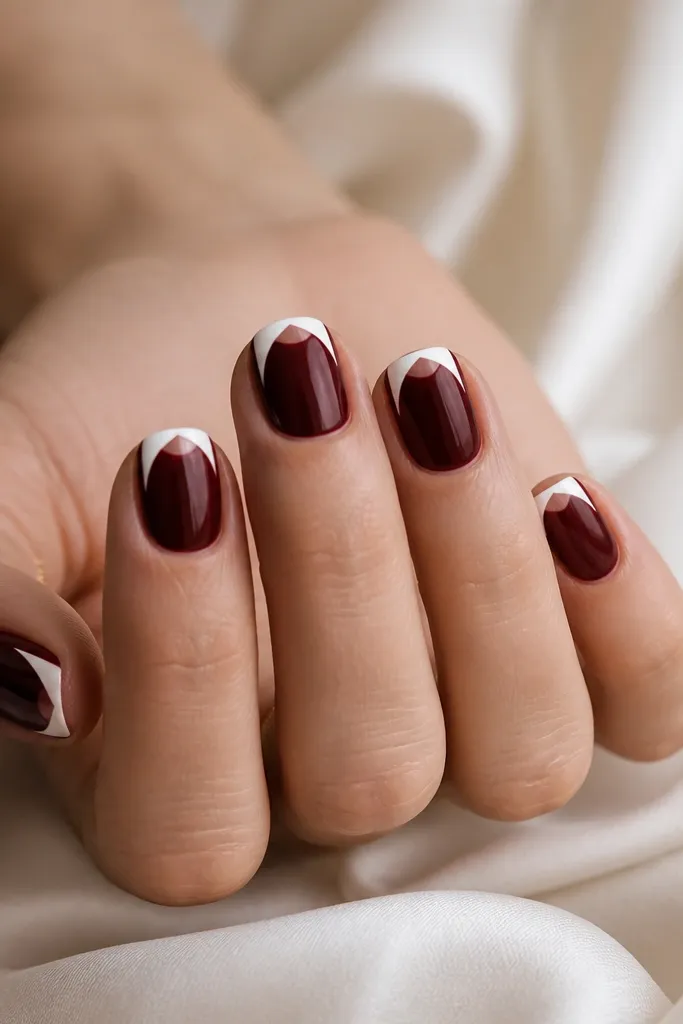
Negative space instantly makes cherry nails look graphic and expensive. The half-moon gap keeps the tip from looking like a sticker and gives a modern “fashion manicure” vibe. This design is especially flattering if your nails are short because it visually stretches the nail bed upward. The white outline adds contrast without covering the entire tip, so it doesn’t feel heavy. I wear this when I want something bold but still office-safe because it’s clean and geometric.
Apply two coats of dark cherry red and let them cure/dry fully so you don’t drag color. Use a nail art pen to draw the white outline of a French tip, then stop before the center so it stays clear. Fill nothing in the middle — leave that half-moon area bare. Seal with a glossy top coat, and cap the free edge carefully so the clear center doesn’t get dull or stained.
If your negative space looks messy, outline the edges first and only then decide if you want the center wider or narrower.
Don’t overfill the outline — if the white bleeds into the clear area, you lose the graphic half-moon effect.
5. Micro Glitter French Tip on Dark Cherry Base
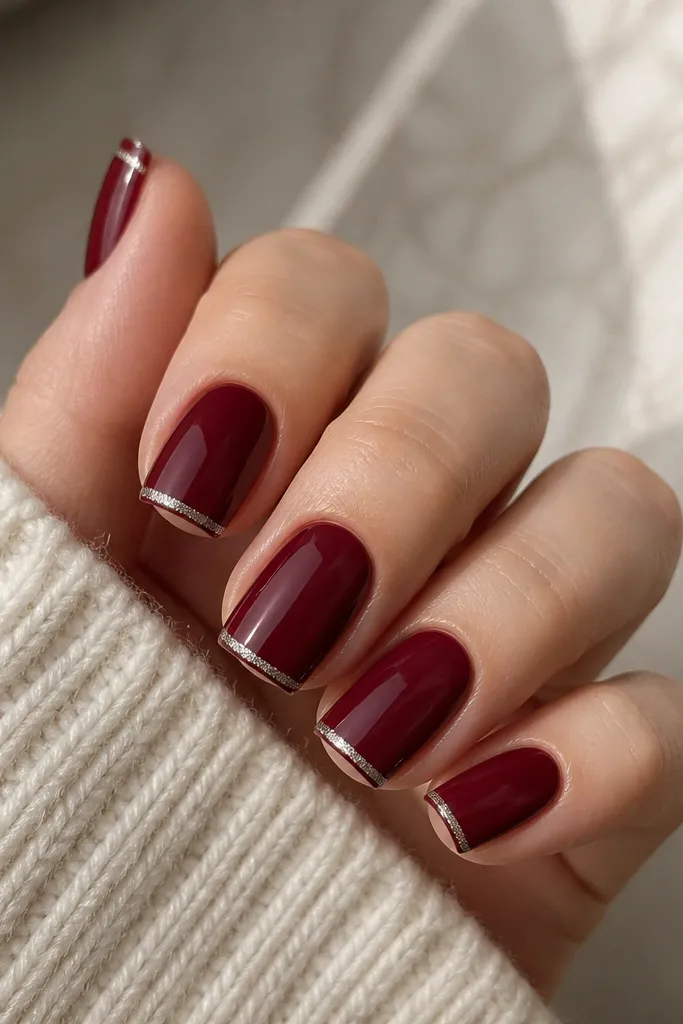
Micro glitter makes the French tip look like jewelry instead of “sparkles everywhere.” The fine silver particles catch light in motion, which is why this looks great in photos and in real life at dinner. I like it on dark cherry because the contrast feels icy against the warm wine base. This is also a good choice if you hate chunky glitter — it stays smooth and doesn’t snag. It flatters hands with shorter nails because the sparkle is concentrated at the tip, creating a longer silhouette.
Paint two coats of dark cherry red and top coat lightly (even before your final top coat) so the glitter application is smooth. Use a thin brush to apply a glitter gel or loose micro glitter mixed with clear gel only on the tip band. Keep the band narrow and centered, then clean the sides with a small brush dipped in remover. Cure/dry fully and finish with a glossy top coat that seals the glitter so it doesn’t feel gritty.
Editor's notePress a lint-free wipe lightly on the glitter while it’s tacky to even out the texture.
Watch outSkip the thick glitter layer; chunky buildup makes the tip look uneven and can lift at the edges.
6. Dark Cherry French with Gold Foil Edge Strip
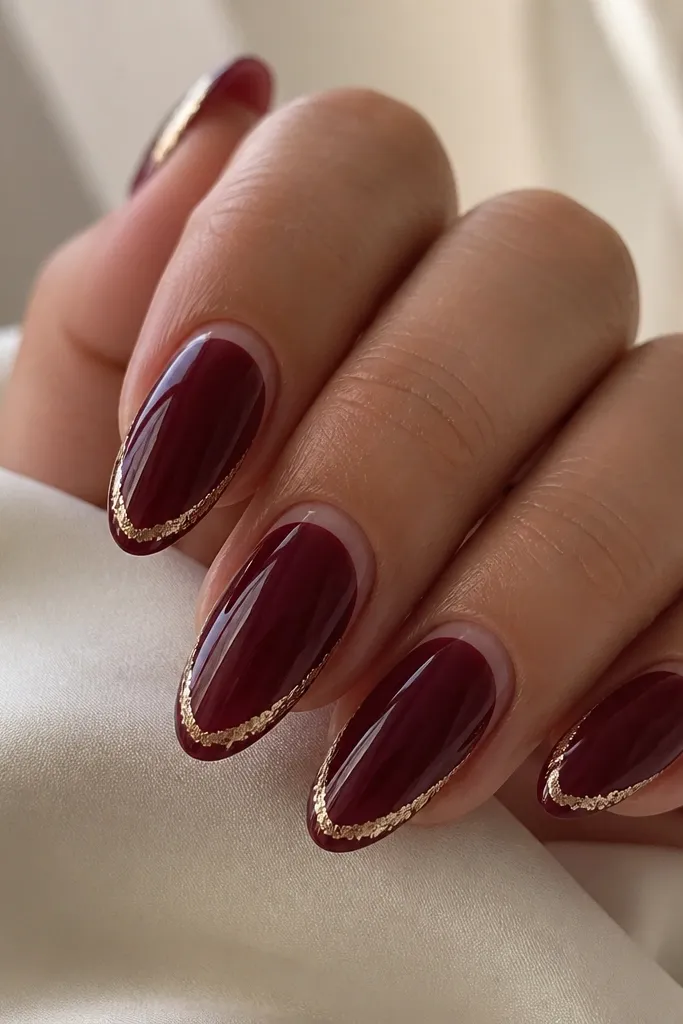
A gold foil edge gives you the “luxury manicure” look without covering the nail. The foil sits right at the tip curve, so it reads like a bracelet for your nails. It’s flattering on warm and neutral undertones because gold harmonizes with cherry red’s warm notes. I’ve worn this for weddings and holiday dinners, and it still looks classy when you’re just wearing jeans. The key is keeping the foil line thin so it stays crisp against the dark base.
Start with two coats of glossy dark cherry red, then cure/dry and let it fully cool. Apply a thin strip of gold foil adhesive gel along the outer edge of your intended French tip curve. Lay gold foil fragments on top, then press lightly and remove excess around the line so you keep only the framed edge. Seal with a thicker top coat, focusing on the foil line so it doesn’t lift.
Editor's noteIf your foil looks too scattered, place a second tiny adhesive line just on the corners where the curve starts.
Watch outDon’t cover the whole tip with foil; a full foil French looks costume-y fast.
7. White Marble French Tip Over Dark Cherry Red
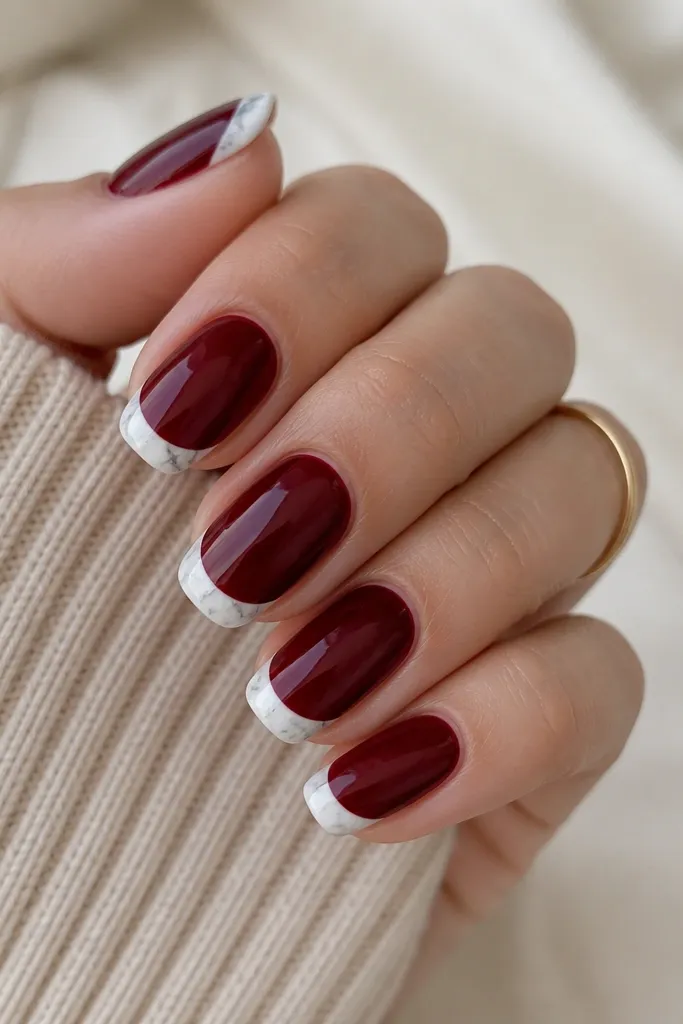
Marble French tips make dark cherry red look like a designer bag — textured but controlled. The white base of the marble brightens the nail without turning it into plain white French. Gray veining keeps it from looking like random scribbles, and the glossy top coat makes the pattern look deeper. This design is flattering on almond and oval shapes because the stone pattern has room to show movement. I’ve done it on both light and deep skin tones and it always reads upscale because the veins create depth.
Paint two coats of glossy dark cherry red and cure fully. For the French tip, outline the tip curve with a thin brush using white gel, then fill the tip area with white marble gel or white gel mixed with a tiny bit of clear. Add gray veins with a toothpick or fine liner brush, then drag them slightly so they look natural. Finish with a domed glossy top coat to make the marble look like it’s under glass.
Keep the veins thinner than you think — thick veins look like doodles on nails.
Avoid matte top coat over marble; it makes the pattern look dusty instead of stone-like.
8. Cherry French Tip with Tiny Red Heart Accent
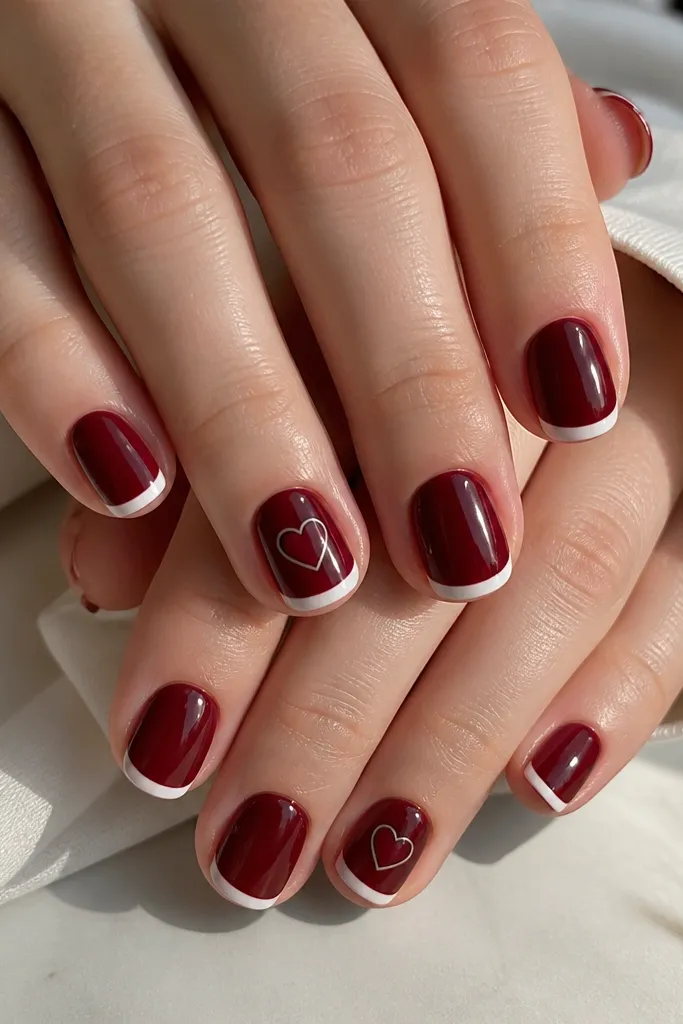
This is my favorite way to add romance without turning your manicure into a Valentine costume. The heart sits on the French tip area, so it feels intentional and not random. Using an outline helps the heart stay crisp even on smaller nail sizes. Dark cherry hearts also look richer than bright pink hearts, especially in indoor lighting. This design flatters small nail beds because the heart is centered and the rest stays clean.
Start with dark cherry red base in two thin coats. Paint the French tips with white gel using a thin brush, keeping the tips narrow on short nails. Choose two accent nails and use a nail art pen to draw a tiny heart at the center of the tip line; outline it with black-brown gel and fill with a lighter cherry shade. Seal with glossy top coat, and cap the accent area to keep the heart from catching on sleeves.
Editor's notePractice the heart on a piece of scrap nail tape first — a 20-second test saves you from redoing two nails.
Watch outDon’t put hearts on every nail; it stops looking stylish and starts looking seasonal.
9. Dark Cherry French Tip with Pearl Dot Border
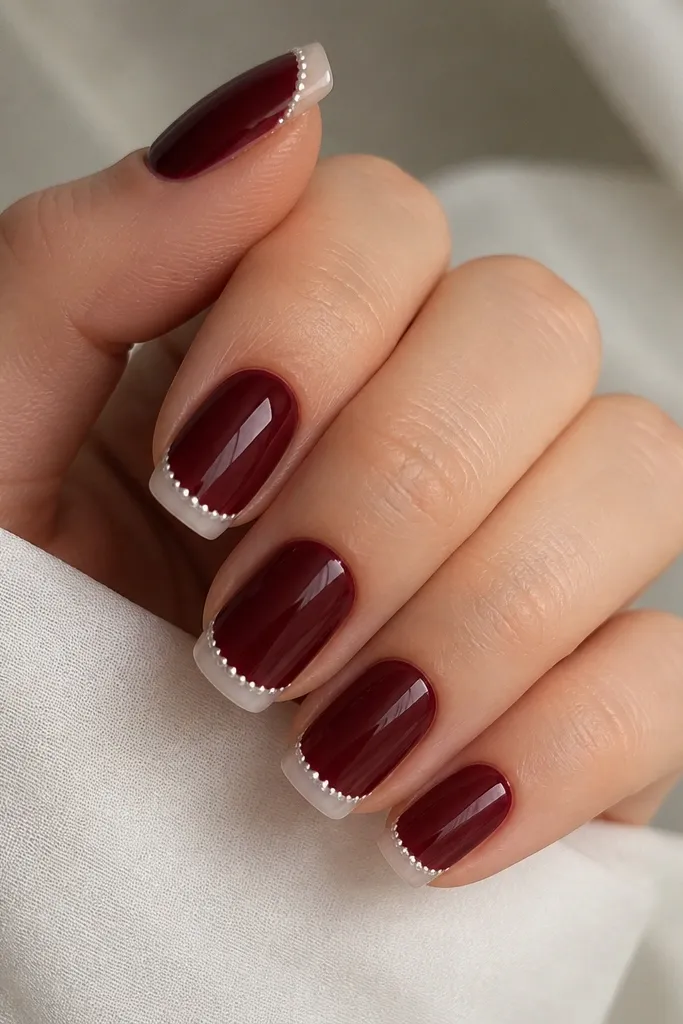
Pearl dot borders look bridal without being overly sweet. The pearls sit on the outer edge of the French tip, so your nails still read as French, just dressed up. Off-white pearls are better than pure white here because they blend with the warm cherry base and feel softer. This design flatters hands with longer fingers because the dot line creates a tidy horizontal frame. I’ve done it for engagements and it always gets compliments from people who usually don’t comment on nails.
Apply two coats of glossy dark cherry red and cure fully. Create the French tip area with either a white gel band or a very light nude-to-white gradient, keeping it thin. Place tiny pearl dots along the outer edge using nail glue or gel adhesive, leaving equal gaps between dots. Seal carefully with top coat over the dots, but use a lighter hand so the pearls don’t get flooded and smudged.
Editor's noteUse tweezers with a flat tip for pearl placement. It gives you cleaner alignment than fingers.
Watch outDon’t use huge pearls; they look heavy and make the French tip look lumpy.
10. Matte Dark Cherry with Glossy French Tip and Diagonal Accent
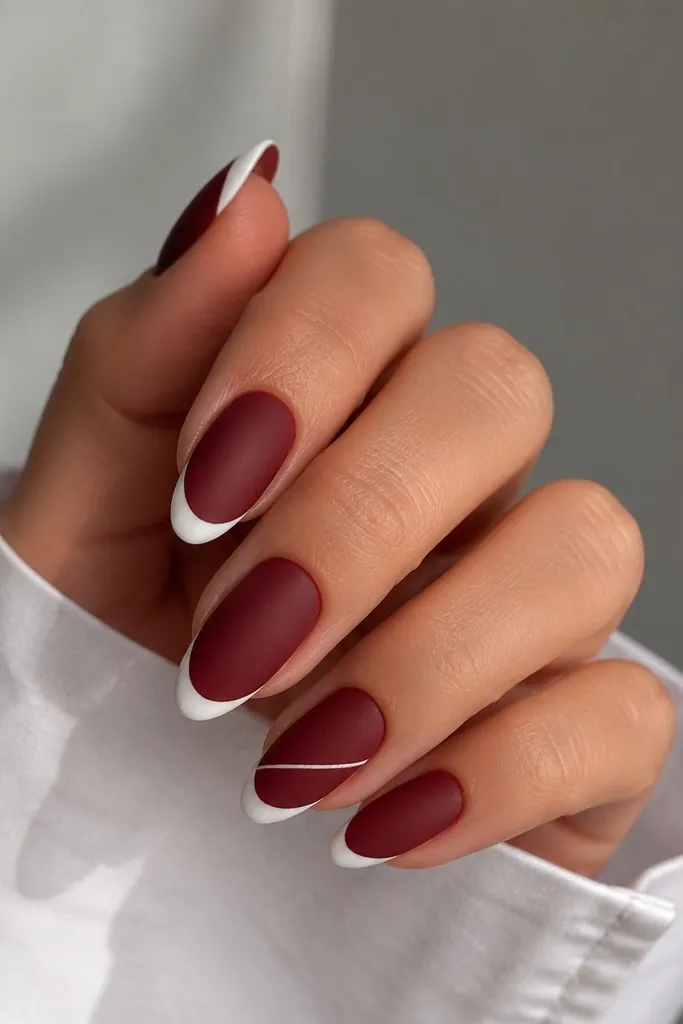
Matte cherry changes the whole vibe — it looks velvety, and the glossy tip looks like it’s been lacquered. The diagonal accent adds a little edge without needing crystals. I like this for workdays because matte hides tiny surface imperfections, and the glossy line still looks sharp. It also flatters hands with ridges because matte finish softens the look of texture. If you’re someone who thinks French tips are too plain, the gloss-matte contrast fixes that.
Paint dark cherry red and cure, then apply a matte top coat on the whole nail. For the French tip, paint glossy gel white and cure it separately from the matte layer; keep the tip curved and slightly inward. On one or two nails, add a thin diagonal stripe inside the tip area using the same white gel, then cure. Finish by applying glossy top coat only over the tip and stripe, not over the matte base.
Let the matte top coat cure fully before you paint the glossy tip, or the glossy line can smear.
Don’t put matte top coat over the tip after you paint it glossy; you’ll kill the contrast that makes this look special.
11. Dark Cherry French with Rose Gold Outline
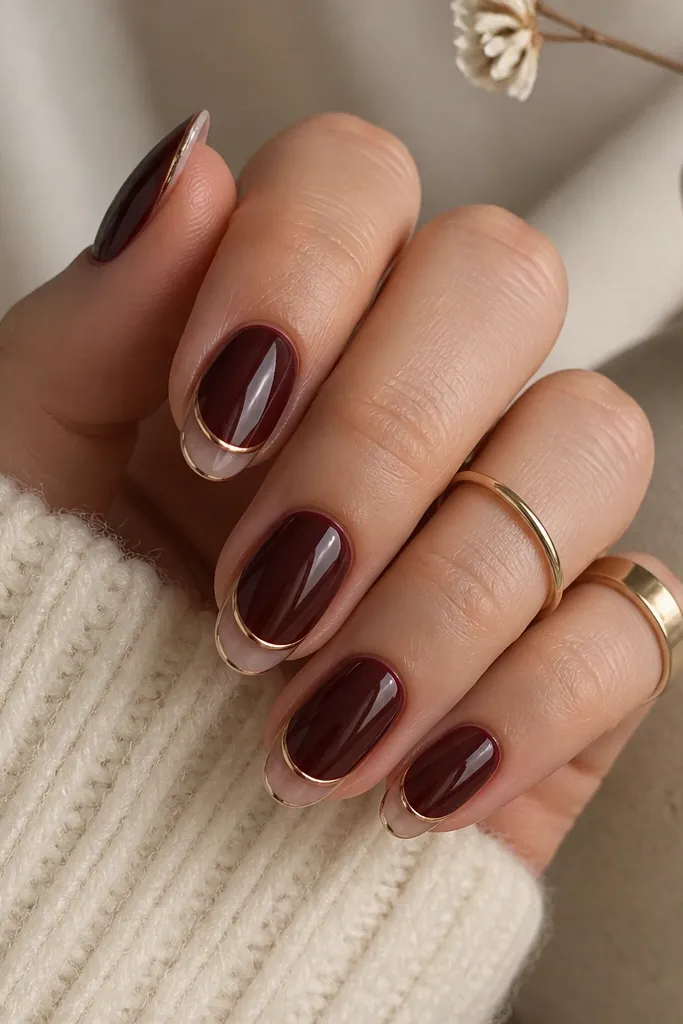
Rose gold outlines look warmer than silver and they make dark cherry feel more feminine. This is a great option when you want French tips but you don’t want to commit to solid white tips. The outline framing creates shape without adding bulk, and it looks crisp on almond and oval nails. It flatters most skin tones because rose gold has a soft glow that doesn’t clash with cherry’s warmth. I also like it because it’s easier to fix if you mess up the outline — you can wipe the line and repaint without redoing the whole tip fill.
Start with two coats of dark cherry red gloss. For the tip fill, either leave it natural or apply a sheer nude gel that matches your nail bed. Use a thin striping brush to paint a rose gold gel outline along the French tip curve, keeping the line even. Cure and then seal with glossy top coat over everything except you should be gentle around the outline so it stays sharp and not cloudy.
Editor's noteIf your rose gold looks dull, add one extra thin layer of rose gold outline gel instead of thickening the first stroke.
Watch outDon’t choose a cool-toned silver outline with cherry if you want it to look warm and flattering.
12. Dark Cherry French Tip with Tiny Studs at the Corners
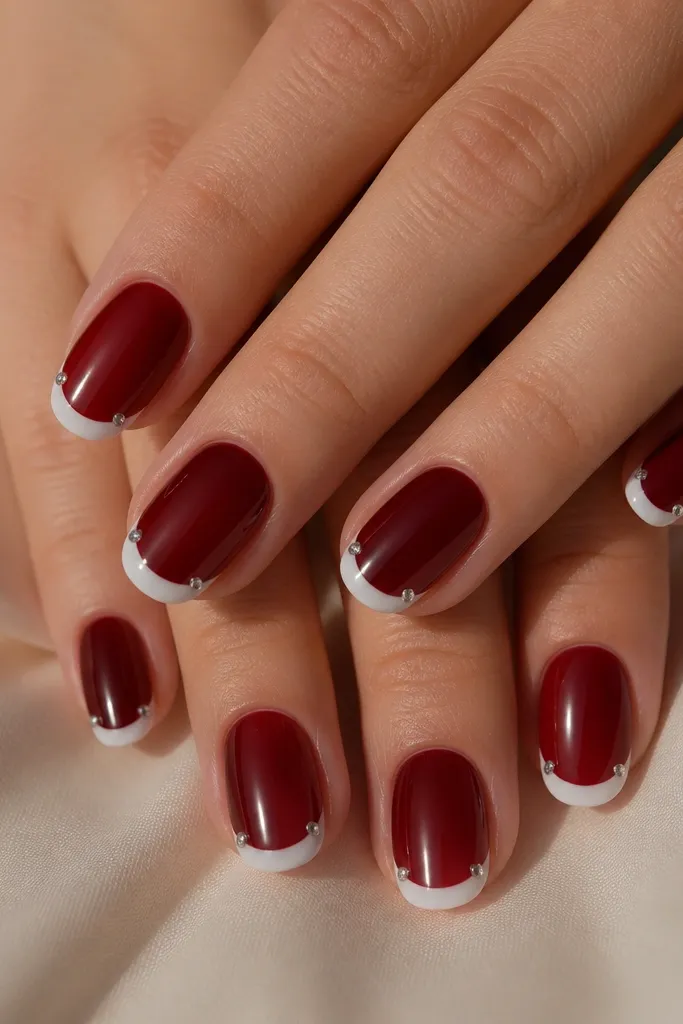
Corner studs create a structured, “clean lines” look that still feels glam. The key is keeping the stones small so they don’t look like you glued on a decoration — think micro, not chunky. This design is flattering for hands with shorter nails because the studs sit where attention naturally goes. They also photograph beautifully because the rhinestones catch light at different angles. I’ve worn this to parties and it stayed put because the studs are sealed under top coat.
Paint dark cherry red in two coats and cure/dry fully. Add a white French tip with a thin brush, keeping the tip line straight or slightly curved depending on your nail shape. Place one micro rhinestone on each corner of the French tip using nail glue, then press gently with a flat tool. Seal with top coat in two passes: first a thin coat to lock the stones, then a second full coat to smooth.
Editor's noteLet the glue set for a full minute before top coat so the stones don’t slide into a crooked angle.
Watch outDon’t skip the first thin sealing coat; stones can lift and leave a ridge.
13. Dark Cherry French with Color-Blocked Tip in Deep Plum
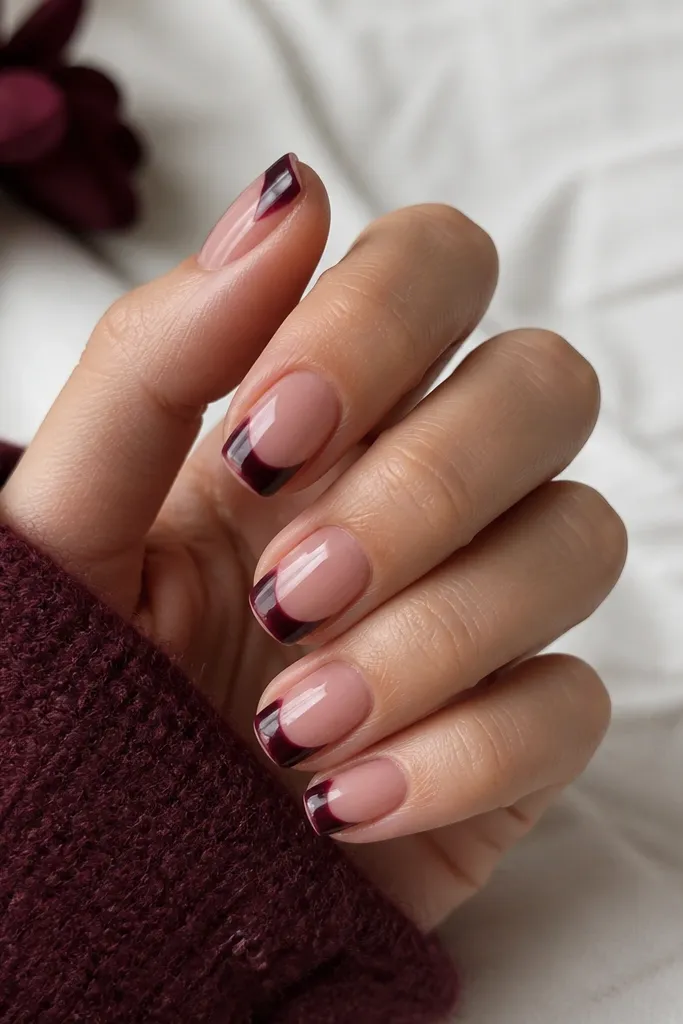
Color blocking makes dark cherry feel graphic and modern, especially when the tip is split into two tones. A deep plum next to cherry keeps everything in the same family so it looks intentional instead of random. The thin divider line adds polish and makes the split feel like design, not an accident. This is flattering on almond and oval nails because the tip area is wide enough to show the split cleanly. I like it for nights out because it looks like you planned it, even if you did it in a single sitting.
Start with two coats of glossy dark cherry red and cure fully. Paint the French tip outline first with nude or clear gel so you have boundaries, then fill the outer section with deep plum gel. Add a thin white dividing line between plum and nude using a nail art pen for control. Cure and then top coat, dragging the brush lightly over the divide so it doesn’t catch.
Use nail tape to create the divider line if you struggle with straight edges. Press it down lightly and remove while gel is tacky.
Don’t make both sections too thick; if the split takes up half the nail, it looks clunky.
14. Dark Cherry French with Shimmery Burgundy Ombre Tip
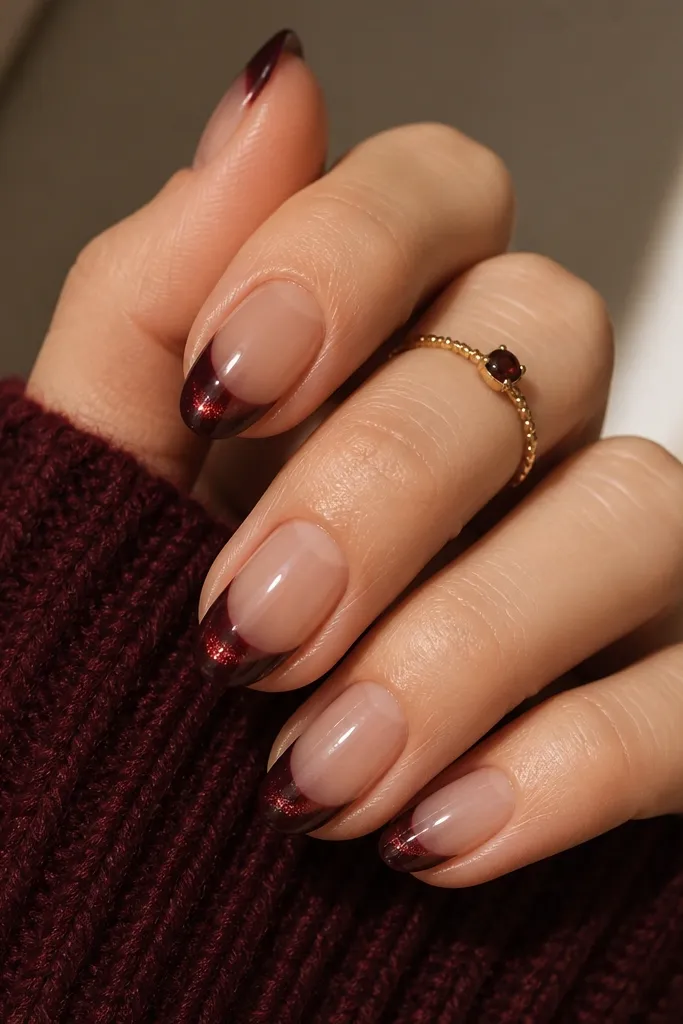
An ombre French tip makes the manicure look softer and more expensive. Instead of a hard border, the shimmer gradually lightens toward the free edge, which makes nails look longer and smoother. The shimmer is burgundy, not glittery, so it reads like satin. I love this on longer oval nails because the gradient has space to show the fade. It also looks great on hands with dryness around the cuticle because the ombre pulls attention away from texture.
Apply two coats of glossy dark cherry red and cure fully. For the tip, sponge on a shimmery burgundy gel starting at the free edge and blending inward with a makeup sponge or ombre sponge. Keep the shimmer concentrated at the outer edge and fade it with light taps — don’t swipe. Cure and then top coat with a glossy layer to smooth the transition so it doesn’t look like sponge marks.
Editor's noteWipe your sponge lightly on a paper towel before touching the nail so the ombre starts soft, not patchy.
Watch outAvoid loading too much shimmer at the tip — it can look gritty and uneven.
15. Dark Cherry French with Two-Tone Half Moon Cuticle Line
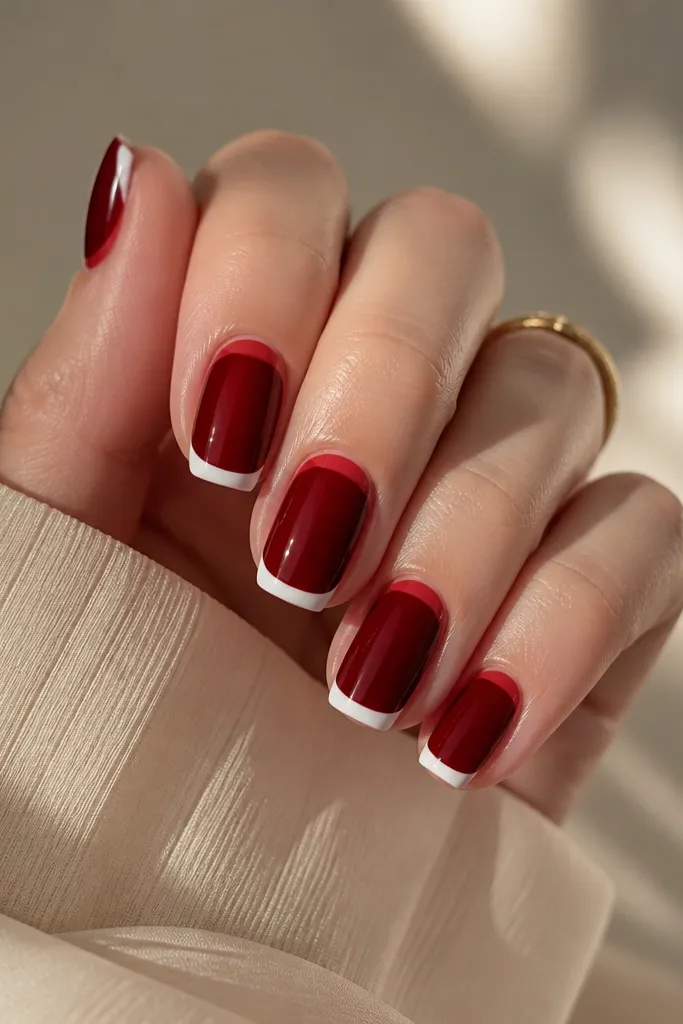
This design balances the nail by adding a tiny reverse accent near the cuticle. It makes the French tip look more intentional because your eye gets a second focal point. Using a lighter cherry half-moon keeps it cohesive — it looks like a gradient of the same color family, not random contrast. I like it when my nails are growing out because the cuticle line hides uneven regrowth better than a full plain base. It’s also flattering on shorter nails because the two focal points visually elongate the nail.
Paint two coats of glossy dark cherry red and cure/dry fully. Add a classic French tip in white, keeping it clean and slightly curved. Then use a thin brush to paint a small half-moon line under the cuticle with a lighter cherry shade, leaving a tiny gap between the line and the cuticle skin. Seal everything with glossy top coat, and cap the free edge so both the tip and cuticle line stay sharp.
Keep the cuticle half-moon line thinner than the French tip. That ratio is what keeps it stylish.
Don’t draw the half-moon too close to the skin; it can smear during washing and looks messy.



