
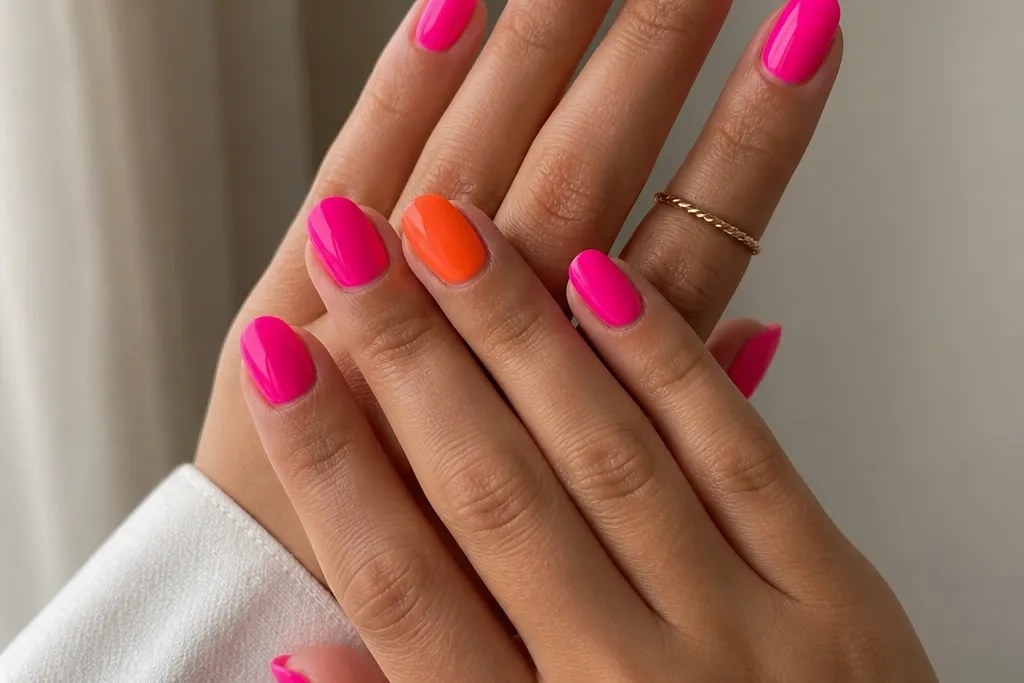
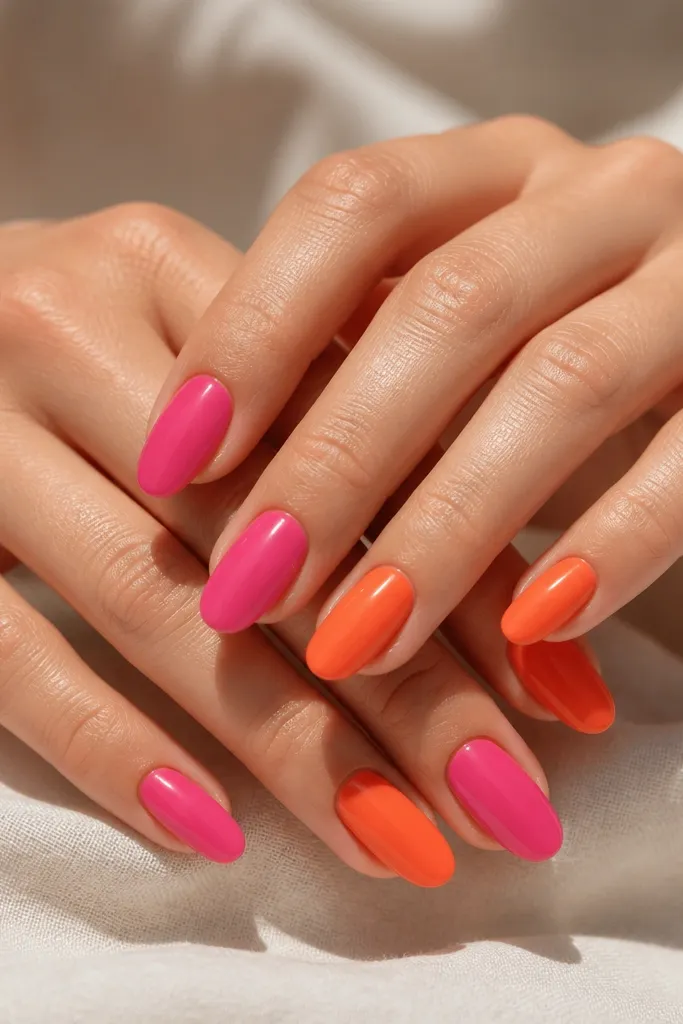
1. Hot Pink Base With Tangerine Half-Moon Tips
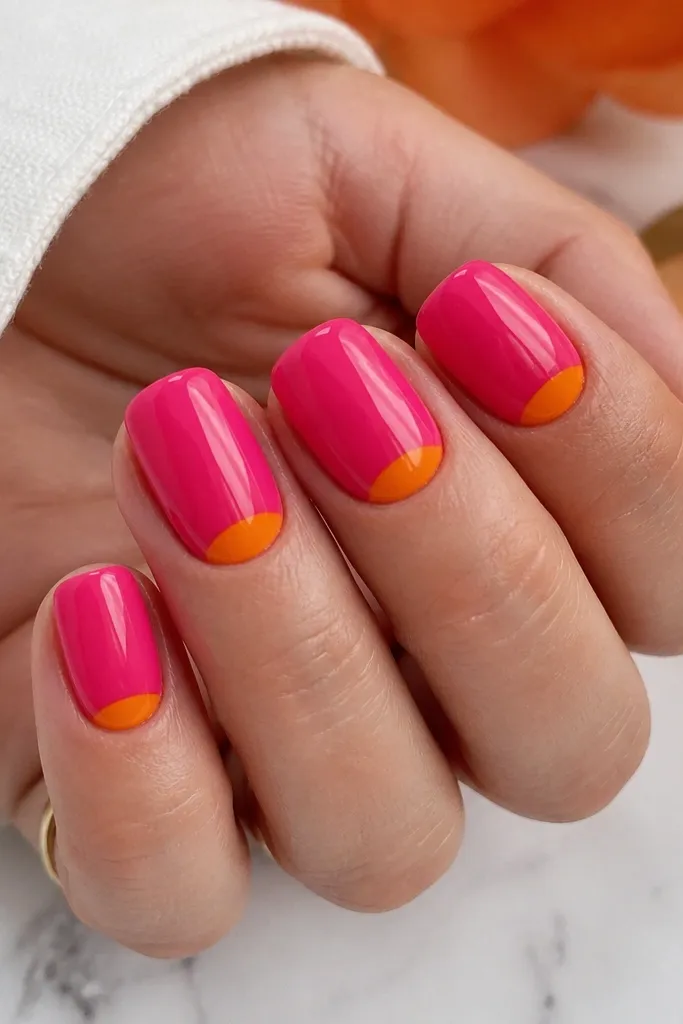
This is the everyday version of a color-block set that still feels fun. The hot pink base stays bold, while the tangerine half-moon pulls the orange into a small, flattering area near the cuticle. On light to medium skin tones, the half-moon makes your nails look cleaner and longer because the color starts high. On deeper skin tones, the tangerine pops without needing extra glitter. I love this one for workdays because it looks polished even when your hands are relaxed.
Start by applying two thin coats of hot pink gel (or polish) and cure fully. Then use a small curved brush or a half-moon nail stencil to paint a tangerine arc right under the cuticle, leaving a thin hot pink gap between arc and skin. Cap with glossy top coat, then check the edges with a gentle swipe of acetone-free wipe around the cuticle line. Finally, add a second top coat if you see any texture where the stencil edges were.
Editor's noteIf your orange looks dull, switch to a true tangerine instead of a burnt orange tone.
Watch outAvoid thick half-moon edges - they make the cuticle area look messy.
2. Creamsicle Orange Gradient Into Hot Pink Tips
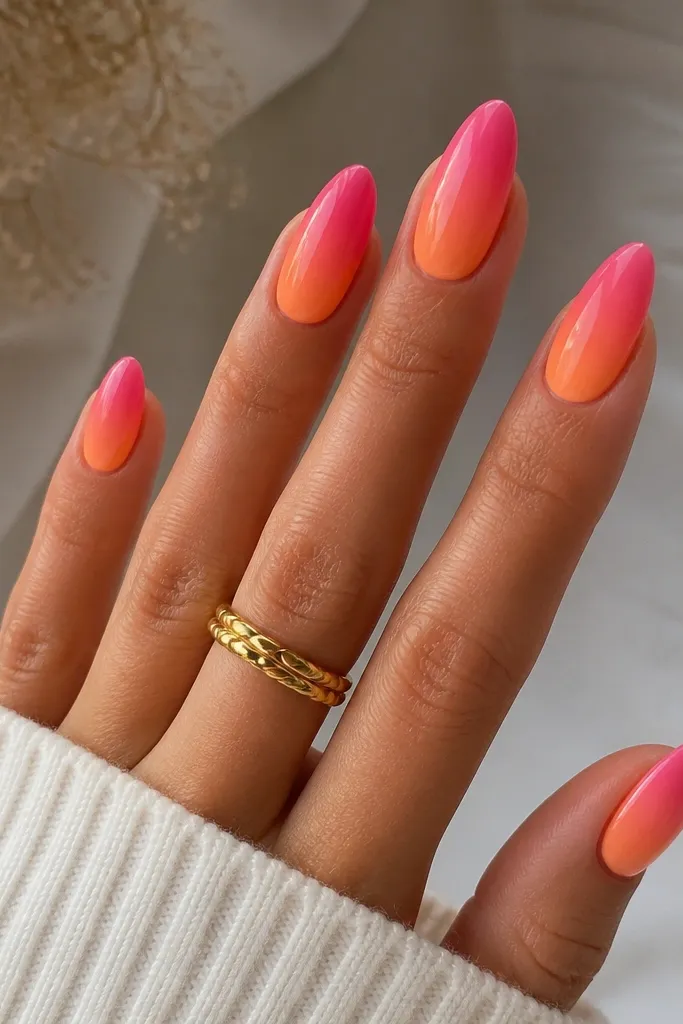
This gradient is the "I did something" manicure that still reads soft and wearable. Creamsicle orange at the base is warm and flattering, and the hot pink tips give you that bold pop when your nails catch light. Almond nails make the fade look longer because the taper gives the gradient room to breathe. If you have shorter nails, you can still do it, but keep the hot pink area to the outer third so it doesn't shorten the nail visually. I've worn this to brunch and weddings and it photographs clean in daylight.
Start by painting a thin base layer of creamsicle orange, then sponge a second layer just in the middle with a makeup sponge dab method. Wipe the sponge edge on a paper towel so you don't flood pigment at the cuticle. Next, blend hot pink from the outer half toward the center using lighter dabs - stop before you reach the center so you keep contrast. Finish with glossy top coat, then clean up sidewalls with a flat brush dipped in gel cleanser or polish remover on a lint-free wipe.
Editor's noteUse a small foam wedge, not a big sponge - it keeps the gradient smooth on the nail curve.
Watch outDon't overblend into a muddy middle; stop blending while you still see a clear transition.
3. Diagonal Split: Hot Pink Left, Orange Right
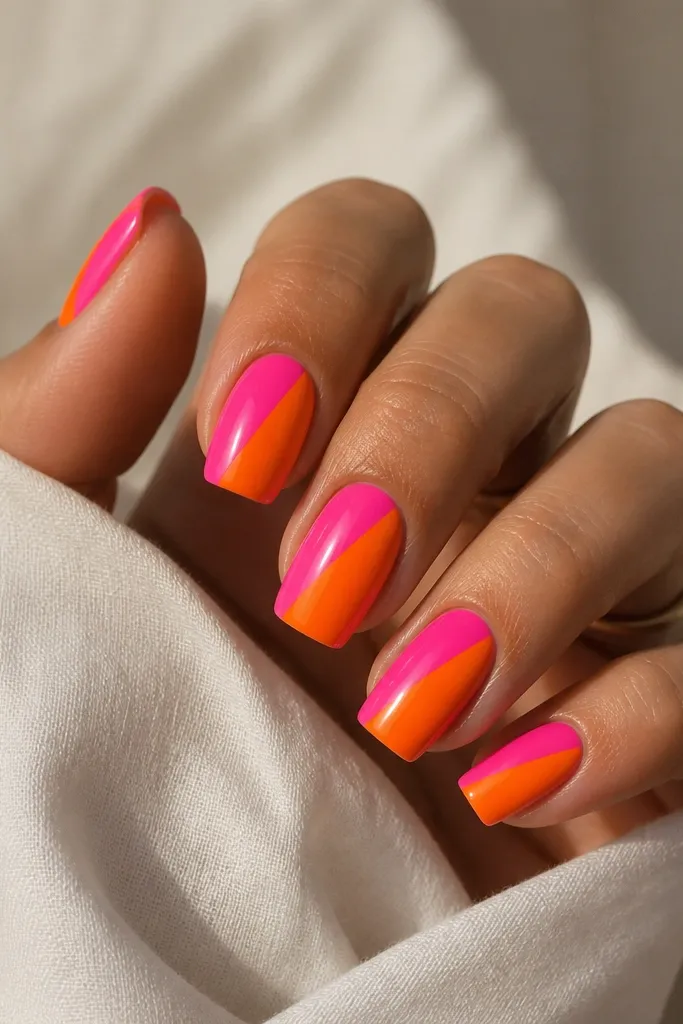
This diagonal split makes your nails look designed without needing tiny art. The hard line gives structure, and the split makes both colors feel intentional instead of competing. Squoval is perfect here because the straight edges help the diagonal stay crisp. This set looks especially good when your skin has a warm undertone, because the orange side echoes your natural warmth. I also like it for short-to-medium nails because the diagonal visually lengthens the nail bed.
Start with a clear base coat, then paint one side (left) hot pink up to the diagonal guide line. Use a striping tape laid at a 45-degree angle from corner to corner of the nail, press it flat, and then paint the other side orange. Pull the tape while the polish is slightly tacky, or if you're using gel, cure after each color so the separation stays clean. After both sides cure, remove any edge fuzz with a fine buffer, then seal with glossy top coat.
Editor's noteTo keep the diagonal straight, mark a tiny dot on each side of the nail first - it guides the tape placement.
Watch outDon't freehand the diagonal if you're rushed; wobbly lines make the whole set look cheap.
4. Hot Pink With Orange Micro-Glitter Cuticle Veil
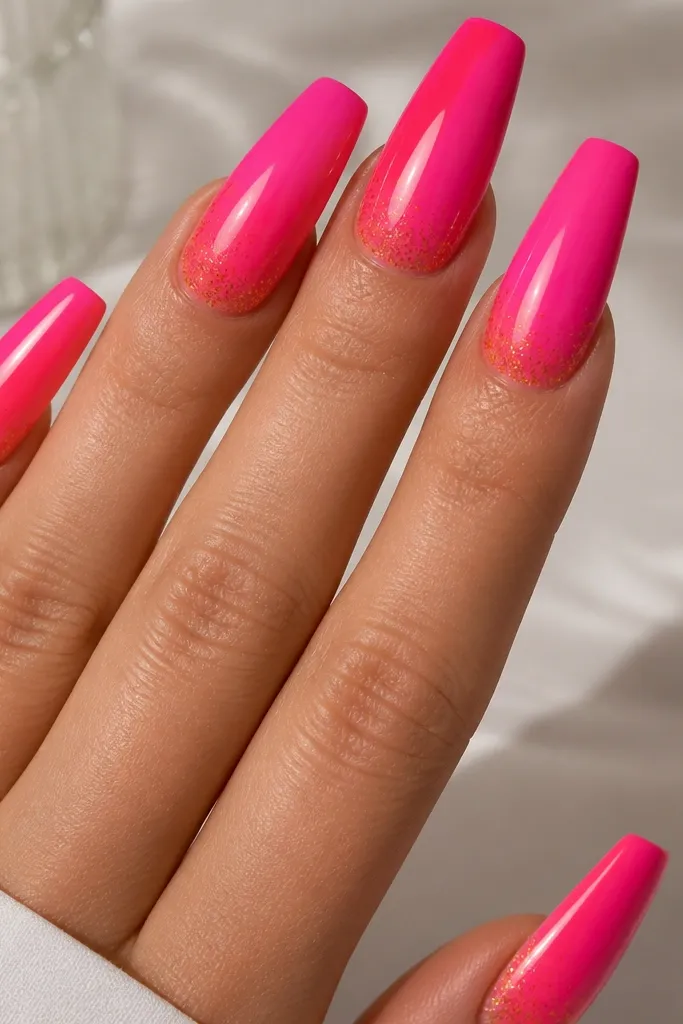
The cuticle veil is the detail that makes a simple base look expensive. Hot pink gives you the main color, and orange micro-glitter placed only at the base looks like light reflecting off a warm glow. Coffin nails make the glitter veil look intentional because the wider tip keeps the overall design balanced. This is also great if you hate full glitter because it doesn't feel gritty or heavy when you type. I've gotten compliments on this even from people who don't normally notice nails.
Start with two coats of hot pink and cure. Next, use a dotting tool or small brush to dab a thin layer of orange micro-glitter gel concentrated within 1-2 mm of the cuticle, leaving the rest clear. Add a second dab layer only if you can still see your base through the glitter. Cure, then apply glossy top coat, but keep it slightly thicker over the glitter so it doesn't catch on fabric.
Editor's noteIf glitter feels scratchy, add a builder gel layer over it before top coat.
Watch outDon't spread glitter down the whole nail - it turns into chunky sparkle fast.
5. Orange Outline Over Hot Pink Hearts
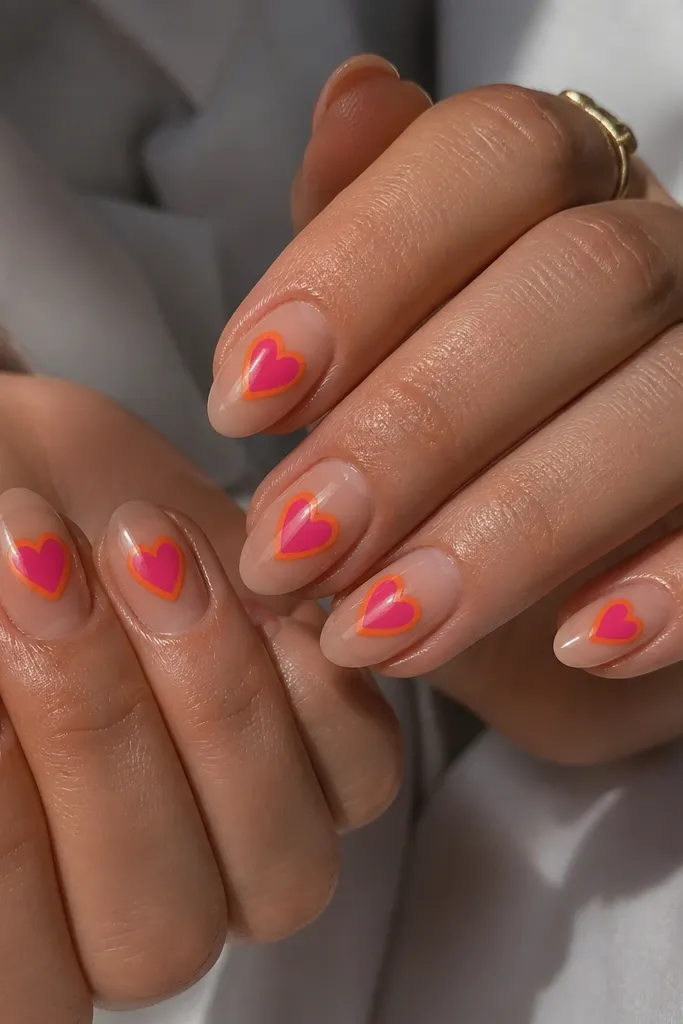
This set is cute without being childish because the nude base keeps everything grounded. The hot pink hearts are the focus, and the orange outlines make the hearts pop even on days when the lighting is flat. Short almond nails are ideal because the heart shape fits the curve and looks crisp. On fair skin, the nude base makes the colors look bright and clean; on deeper skin, the nude still reads warm and the orange outline adds extra contrast. I like this for date nights and casual weekends.
Start with a sheer nude base (pink-beige) and cure. Paint small hot pink hearts centered on each nail using a dotting tool for the heart bumps, then connect with a thin brush. While the heart is still tacky, trace the outside edges with a bright tangerine gel using a striping brush. Cure and then top coat twice for a smooth, glassy finish over the outline.
Editor's noteMake hearts slightly smaller than you think; the outline needs room to breathe.
Watch outAvoid thick orange outlines - they make the heart look like a sticker.
6. Hot Pink Jelly With Orange Sprinkles
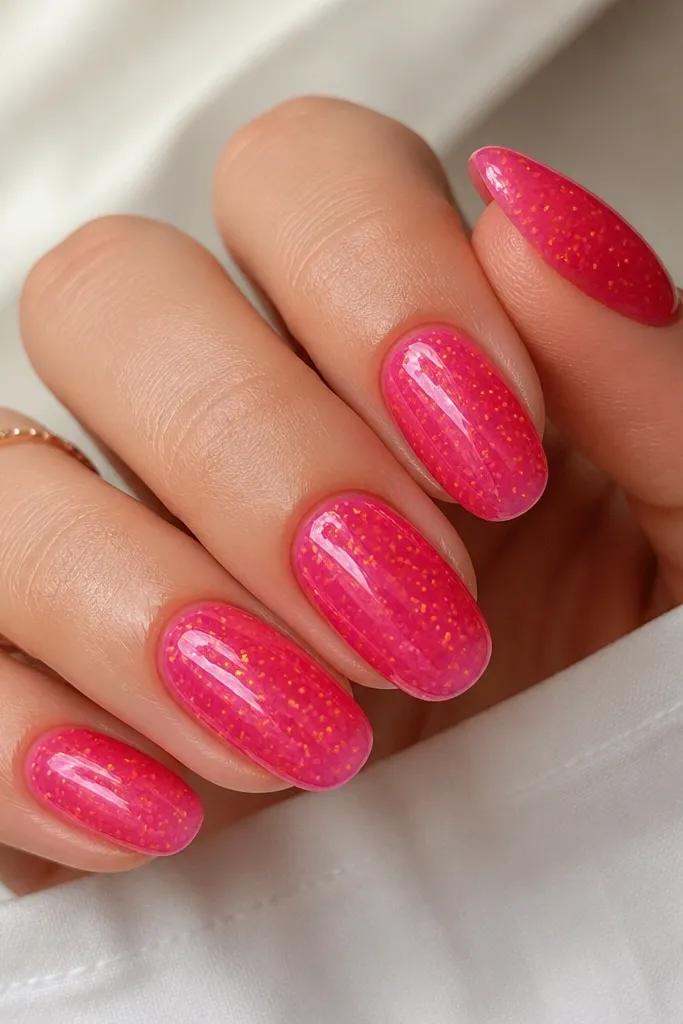
Jelly polish looks like your nails are glowing from inside, and hot pink jelly is the perfect base for orange sprinkles. The orange pieces are small enough to feel playful but they don't overpower the pink. Oval nails make the jelly effect look smooth because there are no sharp angles to grab light. This works on all skin tones because the jelly layer is semi-sheer and keeps the set airy. I've worn it on vacation and it still looked good after a day of saltwater and sunscreen.
Start with a jelly hot pink layer - keep it thin so you still see some nail plate through. Add a second jelly coat only where you want more opacity, especially near the center. Next, place orange sprinkles or tiny micro glitter dots with a pin or dotting tool, concentrating them near the upper half of the nail. Cure and seal with glossy top coat, then apply a second top coat if the sprinkles feel raised.
Editor's noteIf you're using loose sprinkles, press them down with a gel-coated brush before curing.
Watch outAvoid thick jelly layers; they look rubbery instead of glassy.
7. Orange Marble Veins Over Hot Pink
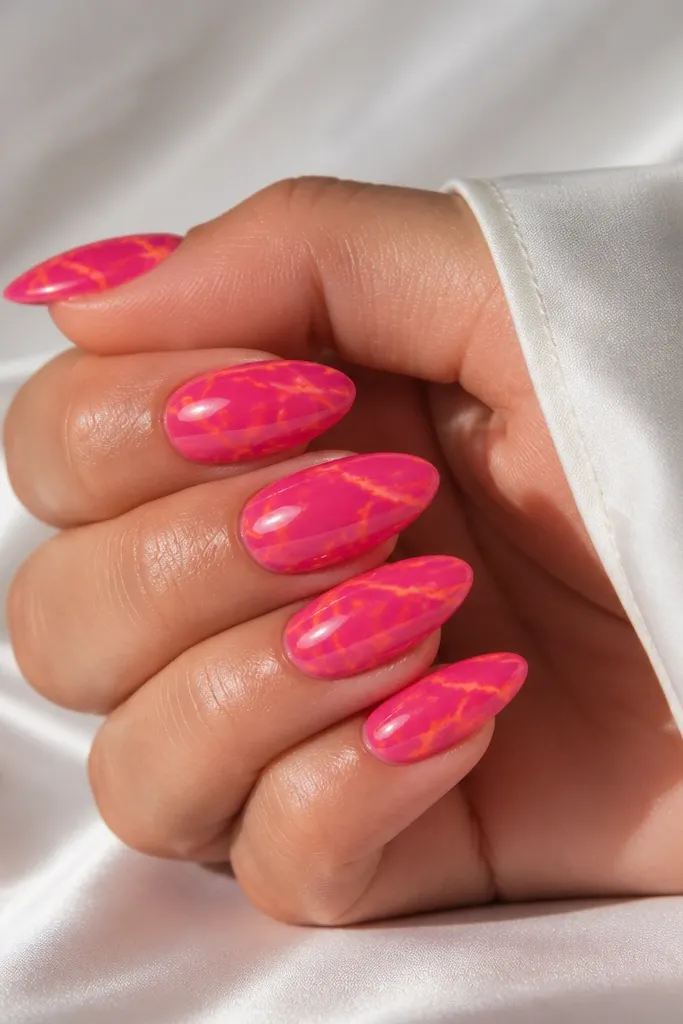
Marble nails can go heavy fast, but this version keeps it airy by using thin veins. Hot pink is your strong base color, and orange veins add movement without turning into a full pattern. Almond nails look best here because the veins follow the natural nail taper and look like stone. This set also flatters hands with shorter nail beds because the veins create vertical flow. It's a great "going out" set that still feels clean.
Start with two coats of hot pink and cure. Mix orange marble gel (or orange gel with a drop of clear) so the veins look semi-opaque, then use a fine liner brush to draw wispy lines starting near the center and fading outward. Add a couple cross-veins, but keep most lines thin and spaced. Cure, then top coat with glossy gel, pulling the top coat smoothly over every ridge so the marble sits flat.
Editor's notePractice one nail first; vein placement is easier when you set the pace with your brush.
Watch outAvoid thick swirls - they turn marble into graffiti.
8. Hot Pink French With Orange Micro Tips
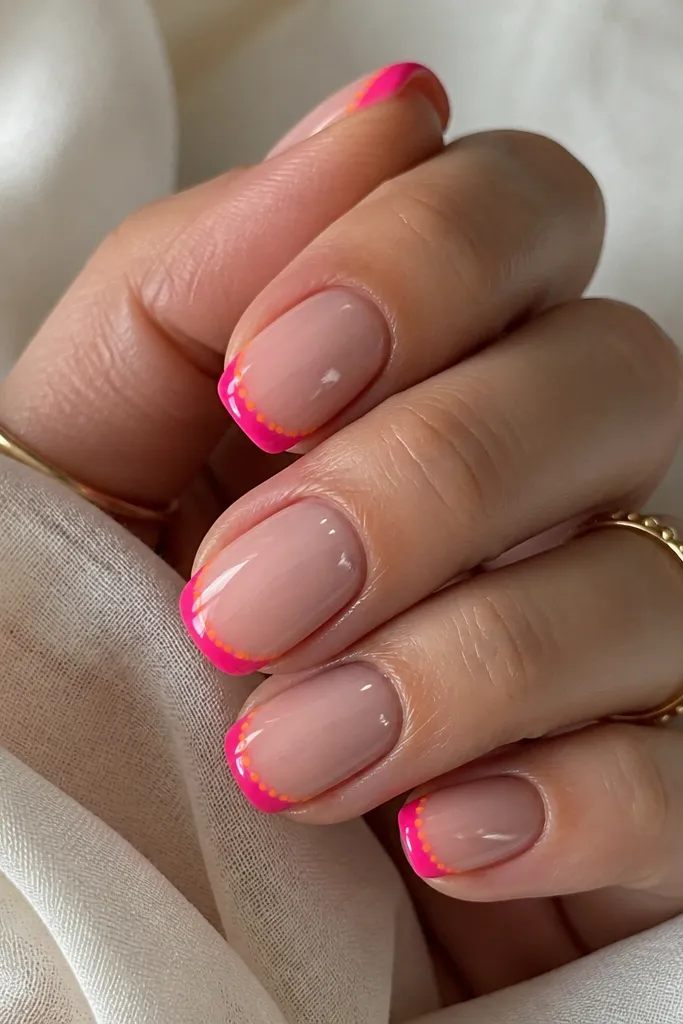
French tips usually need a clean outline, and this one gets extra interest without adding length. The hot pink French line makes the nail look crisp and dressed up, and the tiny orange dots at the edge add a playful accent. Squoval nails work because the tip width lets you place micro dots evenly. This is also flattering if you have uneven nail edges because the French line visually corrects the outline. I wear this when I want glam but don't want full nail art.
Start with a nude-pink base and cure. Use a French guide or freehand with tape to paint a thin hot pink French line across each tip, about 2-3 mm from the edge. While tacky, place one to two orange micro dots at the center of the tip line using a dotting tool, then cure. Finish with glossy top coat and cap the free edge so the tip doesn't chip.
Editor's noteKeep your French line thin - a thick line makes the nail look shorter.
Watch outDon't skip capping the tip edge; it's the first place this design lifts.
9. Orange And Hot Pink Double Stripes
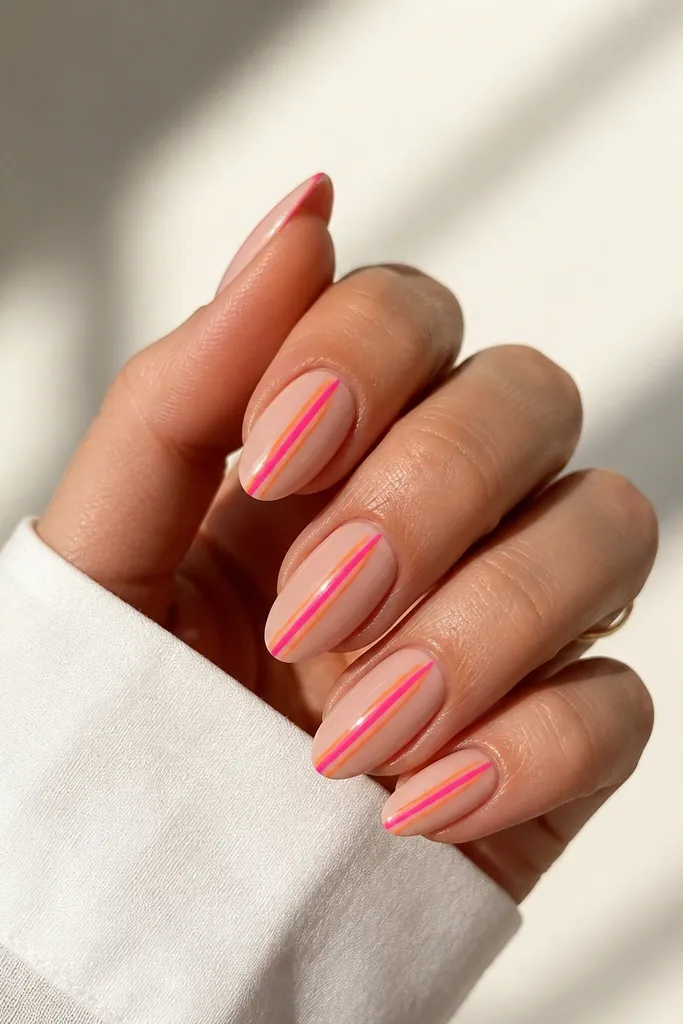
Vertical stripes are the fastest way to make nails look longer, and double stripes give the look extra personality. The nude base keeps it wearable, while orange and hot pink side-by-side create a bright, clean contrast. Almond nails are perfect because the stripes can curve slightly with the nail's natural shape. This set looks great on hands with broad nail beds because the stripes create a narrow "center" focus. I've used this pattern for clients who want color but hate busy art.
Start with a sheer nude or pale pink base and cure. Use striping tape or a steady hand to place two thin guides down the center - one for orange, one for hot pink, separated by a hairline gap. Paint orange on one guide and hot pink on the other, then remove guides while tacky. Clean the edges and seal with glossy top coat, making sure the stripes are fully covered so they don't catch on fabric.
Editor's noteAim for stripes around 1 mm each; anything wider starts to look cartoonish.
Watch outAvoid sloppy tape edges - they leave ridge lines under top coat.
10. Hot Pink Swirl Over Orange Base
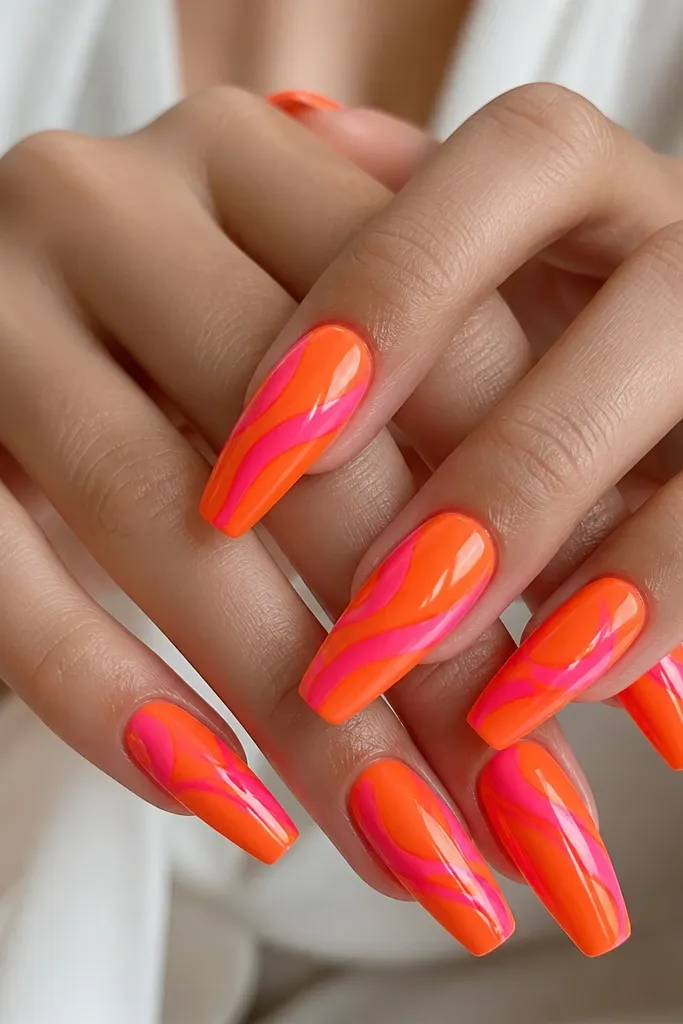
Flipping the usual order makes this combo feel fresh. The orange base sets the warmth, and the hot pink swirl moves your eye diagonally across the nail. Coffin nails give the swirl enough space to look smooth instead of cramped. This is a great pick if you want a bold look that still feels sleek, because it's one shape, not many elements. I love it for nights out when you want color that looks intentional in photos.
Start with two coats of bright orange and cure. Use a thin brush to draw one large swirl that starts near the lower third and loops toward the upper side, keeping the line weight consistent. Fill the swirl line with hot pink gel so it's opaque, then cure. Top coat with glossy gel, and cap the swirl edges so the line stays smooth when your nails hit your keyboard.
Editor's noteIf your swirl gets wobbly, wipe the brush and redo one continuous line instead of trying to patch.
Watch outAvoid multiple swirls - it turns into clutter on coffin length.
11. Orange And Hot Pink Ombre Tips
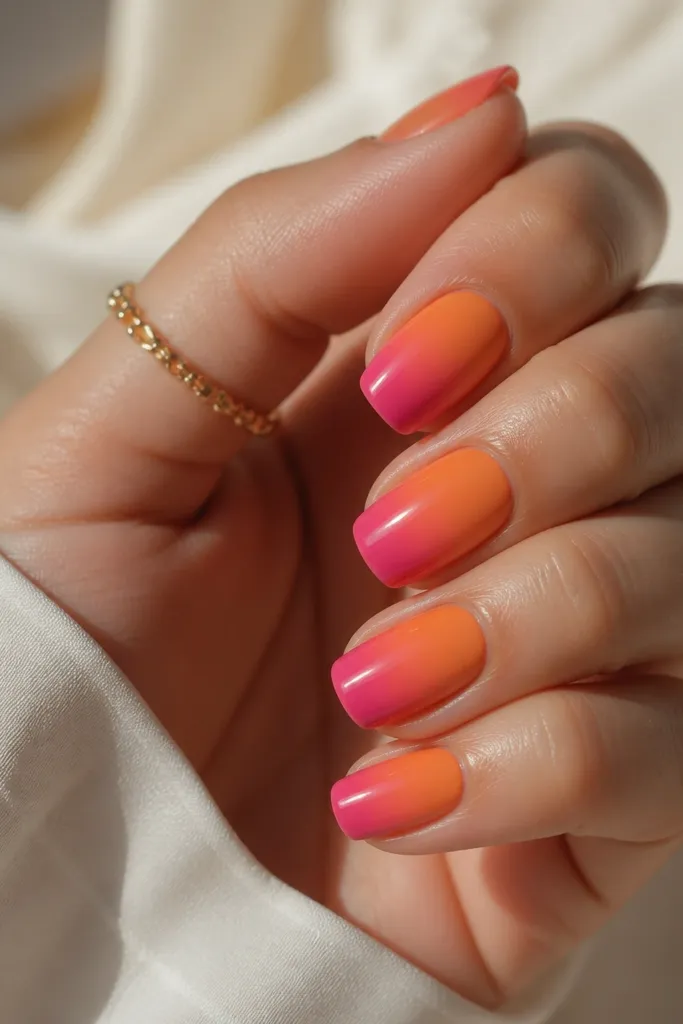
Ombre tips make nails look softer while keeping the color punch. Starting with orange near the cuticle makes your nails look warm and healthy, and fading into hot pink at the tips gives that "glam" effect when your hands move. Round and squoval shapes both work because the fade follows the nail curve. If your nails are short, keep the hot pink tip area smaller - it keeps your hands from looking top-heavy. I've seen this look work on every skin tone because it's all about smooth transitions.
Paint orange on the bottom half of each nail and cure. Then sponge hot pink starting at the tip and blend back toward the center, using light dabs so you don't create a hard band. Wipe the sponge frequently on paper towel so you keep the blend airy. Cure, then seal with glossy top coat, and add a second top coat if the gradient looks thin near the sides.
Editor's noteUse a tiny makeup sponge wedge cut in half for better control on short nails.
Watch outDon't leave a stripe of darker pigment - it looks like an unblended edge.
12. Hot Pink Cat-Eye With Orange Glow Line
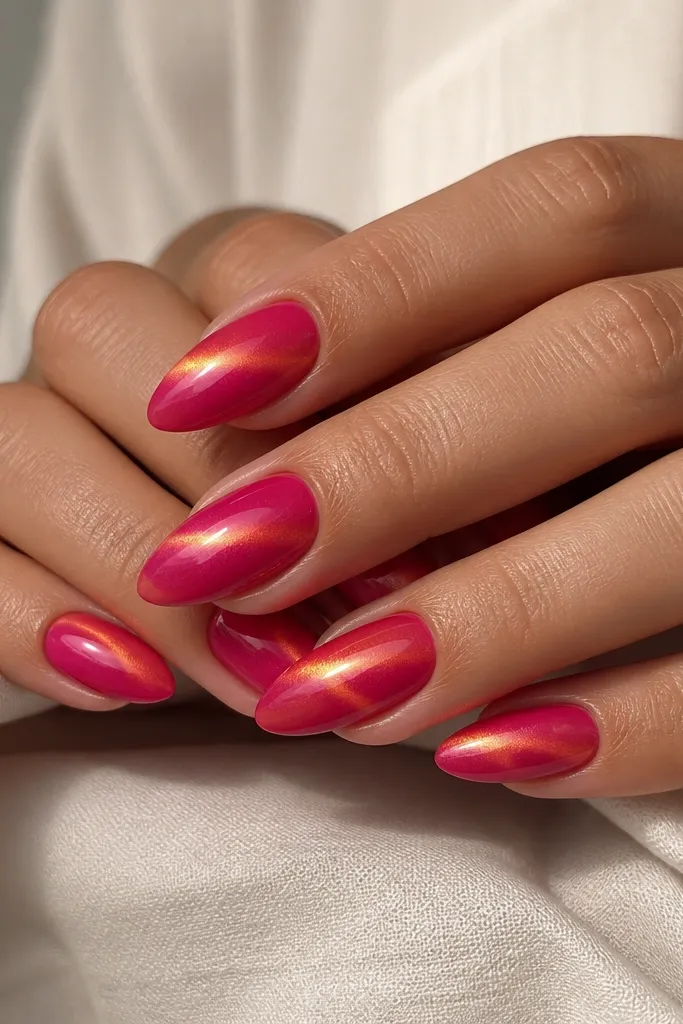
Cat-eye gel already creates a moving light effect, so adding an orange glow line makes it look like you layered lighting, not just color. The hot pink cat-eye is the main "wow," and the orange line makes it feel warmer and more wearable. Almond nails look best because the magnetic band lines up nicely with the nail's natural curve. This set is gorgeous for evenings and looks amazing under indoor lighting. I wore a similar version to a birthday dinner and it photographed like jewelry.
Apply hot pink cat-eye gel in a thin layer and cure. Before curing, use the magnet to pull the cat-eye line to where you want it - I aim it across the middle. Then, with a striping brush, paint an orange glow line over the cat-eye band, keeping it very thin so the magnetic effect stays visible beneath. Cure again and finish with glossy top coat to lock everything smooth.
Editor's noteMove the magnet slowly and hold it still - quick movement makes the band look fuzzy.
Watch outAvoid thick orange lines; they kill the cat-eye shimmer.
13. Orange And Hot Pink Checkerboard Accent
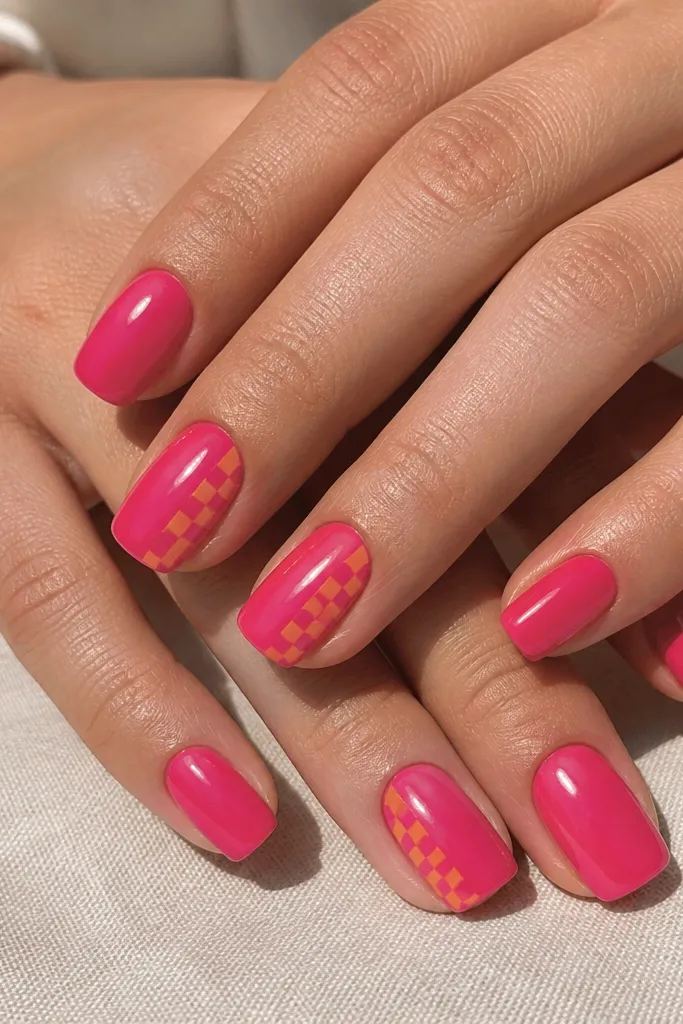
Checkerboard can look busy, but an accent-only version keeps it cute and wearable. Hot pink is your base, and orange checker squares add a graphic pop without covering the whole nail. Squoval nails help because the straight sides make the checker pattern look clean. This is a great option if you want something playful but you still need it to look neat in a work setting. I like placing the checker on one side of each nail so your eye gets a little fun moment with every hand gesture.
Start with a hot pink base and cure twice for full opacity. Pick one side area about 1/3 of the nail width and map tiny squares using a dotting tool or a fine liner. Paint alternating squares orange and hot pink, keeping each square roughly 1 mm. Cure and seal with top coat, then check the sidewall under light to remove any tiny ridges from the square edges.
Editor's noteUse a clear jelly orange for the checker so it stays bright but doesn't look too opaque and chunky.
Watch outDon't do checker on every nail - it gets loud fast.
14. Hot Pink Flower With Orange Center Dots
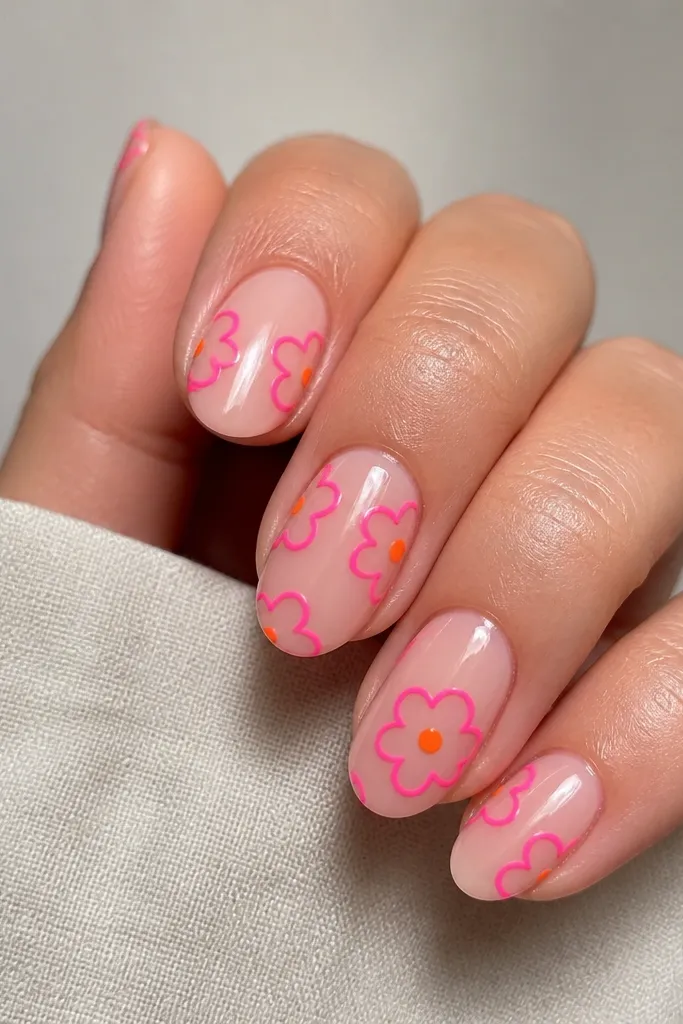
This flower set looks hand-painted but it's actually easy once you use consistent dot sizes. The hot pink petals give you the main color, and the orange centers make the flowers look dimensional. Short almond nails are perfect because the petals fit without reaching the cuticle. This works beautifully on medium to deep skin tones because the orange center adds warm contrast. I also like it for spring because it reads like fresh blooms, not heavy nail art.
Start with a sheer nude base and cure. Use a dotting tool to place five hot pink petal dots in a circle, then connect each petal with a tiny swoop of hot pink liner gel. Add one orange dot in the center per flower and cure. Finish with glossy top coat, then gently push top coat over the petal edges so the flower looks smooth instead of raised.
Editor's noteKeep petals slightly uneven; perfect circles look less natural and more sticker-like.
Watch outAvoid tiny centers - small orange dots disappear under top coat.
15. Orange And Hot Pink Negative Space Half Moons
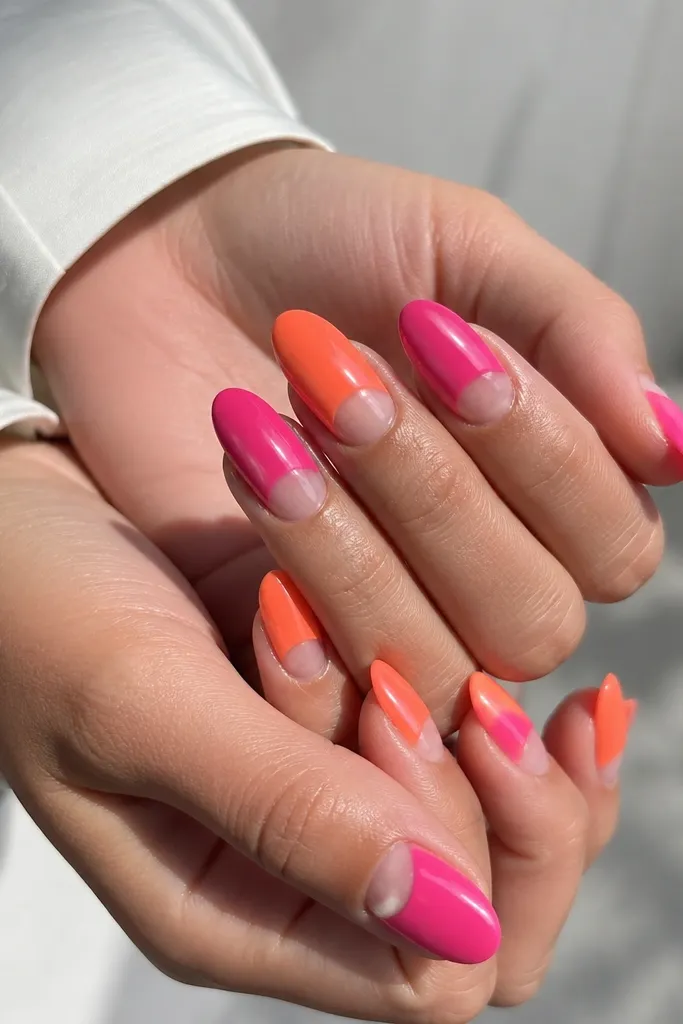
Negative space makes this combo look modern and expensive because it gives your nails breathing room. Clear half moons at the cuticle also make nails look cleaner, especially if your cuticles grow out. Alternating hot pink and orange around the half moon keeps it playful while still feeling structured. Almond nails look best because the half moon shape follows the curve and looks neat. This is my go-to when I want color but I don't want to cover my nails completely.
Start with a base that matches your skin - sheer nude or clear builder gel. Use half-moon stencils to protect the cuticle area, then paint one side of the nail hot pink and the other side orange on alternating nails. Remove stencils while tacky and cure each nail. Apply glossy top coat, then do a careful clean-up along the half-moon edge with a thin brush and cleanser so the negative space stays sharp.
Editor's noteIf your half-moon edges lift, add a thin layer of clear gel over the edge before top coat.
Watch outDon't leave the clear area too wide; it can make nails look shorter.
16. Hot Pink Chrome Tips With Orange Underlayer
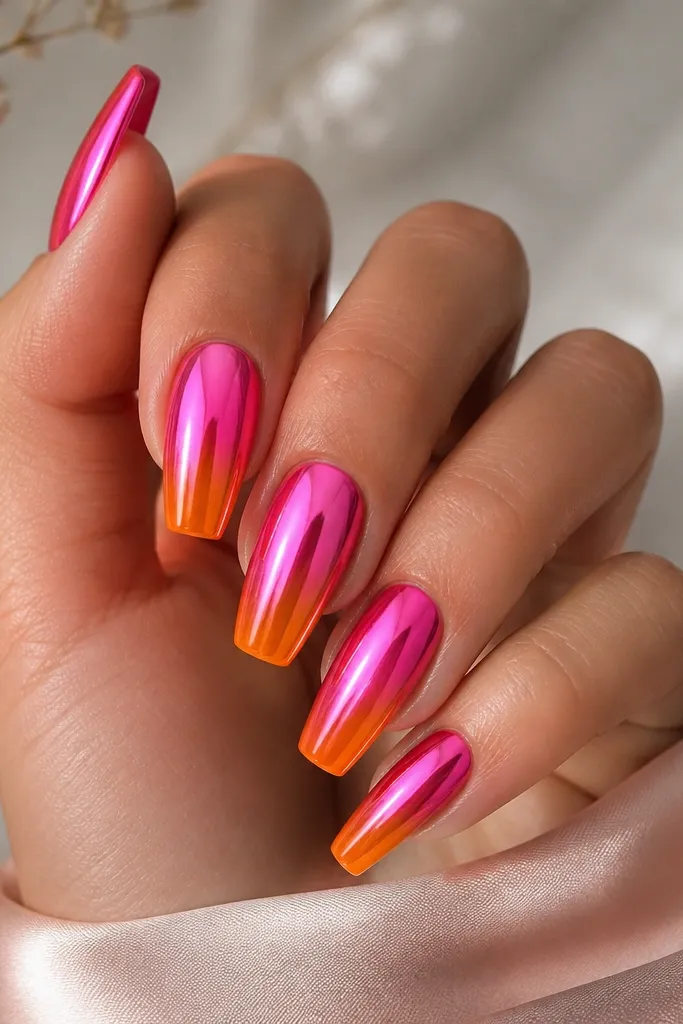
Chrome tips look like jewelry, and the orange underlayer makes the hot pink chrome appear warmer instead of flat. When the light hits, you get that mirror flash with a subtle orange glow underneath the hot pink. Coffin nails help because the tip area gives chrome room to look intentional. This set looks unreal in photos and still looks clean in real life because only the tips are chrome. I used this combo for a holiday party and it stayed eye-catching for weeks.
Apply orange gel as a base on the top third of the nail or as an underlayer near the tip, then cure. Apply a sticky chrome layer (or chrome base gel) over the area you want chrome - usually the upper half of the tip. Dust hot pink chrome powder over it and press lightly, then wipe excess. Seal with a chrome-safe top coat, and cap the free edge so the chrome doesn't peel.
Editor's noteUse chrome-safe top coat only. Regular glossy top coat can dull the mirror finish.
Watch outDon't apply chrome over wet gel; it muddles the shine.
17. Orange And Hot Pink Polka Dot Party
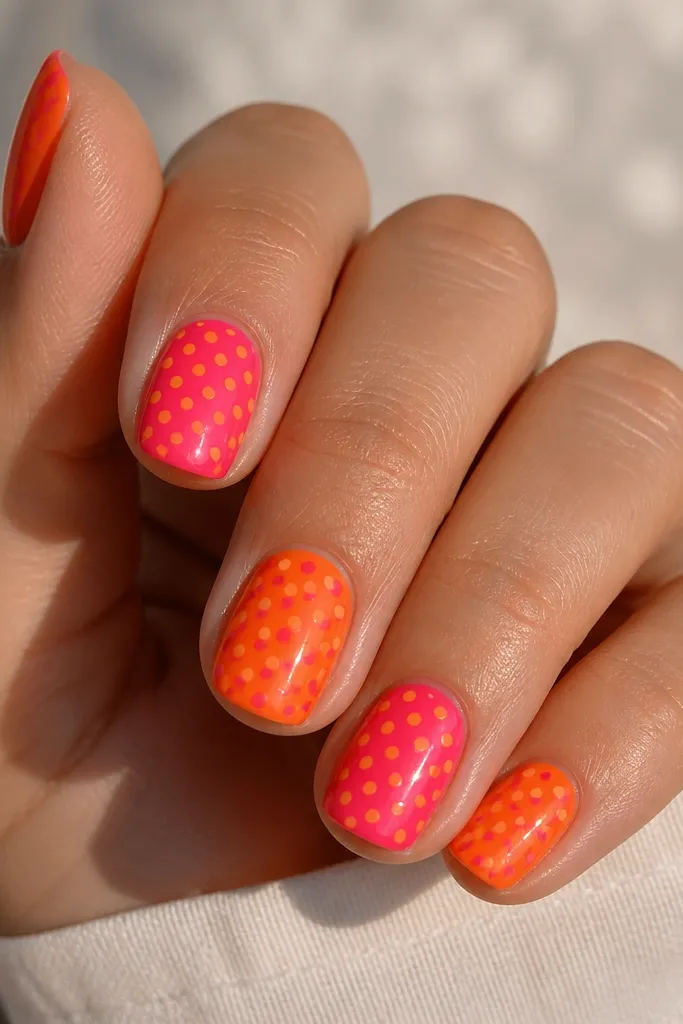
Polka dots are the easiest way to get the look "done" without needing fine art. Alternating hot pink and orange bases makes the set feel balanced, and the contrasting dots keep it from looking like two separate manicures. Short squoval nails are perfect because dots look crisp at smaller sizes. This set flatters hands when you keep dot spacing even - it makes nails look tidy instead of chaotic. I wear this in summer because it looks bright in sunlight.
Paint alternating nails hot pink and orange, two coats each and cure. Use a dotting tool to place small dots in the opposite color, keeping them roughly 1.5-2 mm apart. Start with the center dot, then add dots on the left and right to create symmetry. Cure, then top coat twice for a smooth surface over the dots.
Editor's noteUse a dotting tool with a consistent tip size; changing tools mid-set makes dots look uneven.
Watch outAvoid giant dots on short nails - they crowd the nail and look messy.
18. Hot Pink And Orange Marble Tips Only
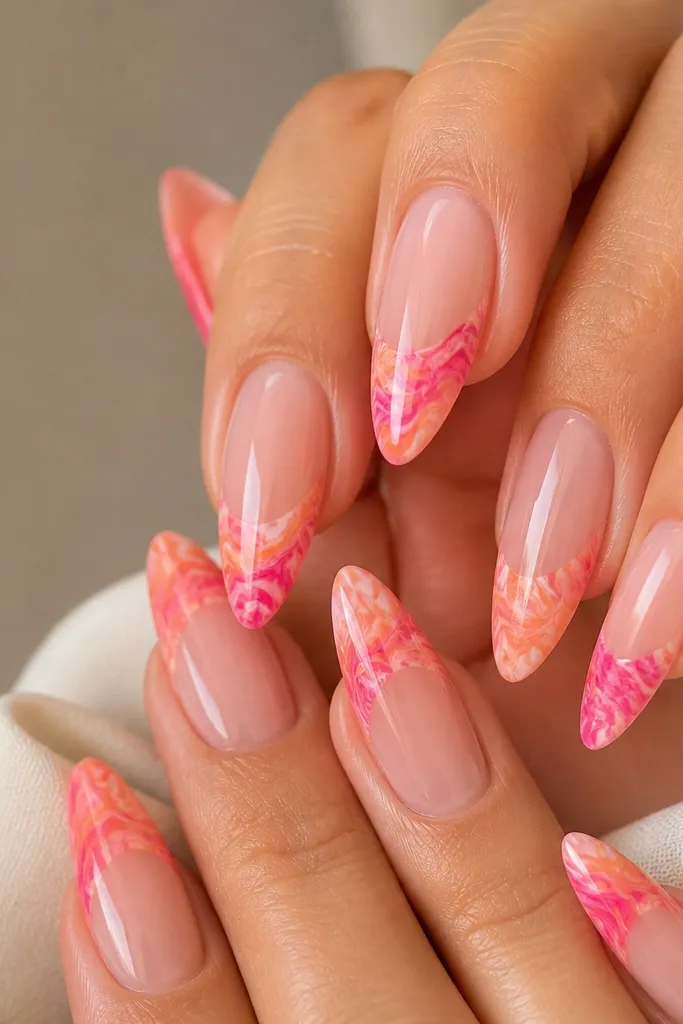
This is the "less is more" marble take. Keeping marble only on the tips keeps the set light and makes your nails look longer, because most of the nail stays nude. Hot pink and orange marble at the tips gives that bold color payoff without covering your whole nail plate. Long almond nails show the marble best because the tip area is wide enough for the swirls. If you want something dramatic for events but still want a clean base, this one wins.
Start with a nude base and cure. Paint marble swirls on the top third using a liner brush: thin hot pink lines first, then add orange lines that cross them lightly. Use clear gel to soften the edges so it looks like stone, not separate paint strokes. Cure and top coat with glossy gel, focusing on sealing the marble so it doesn't snag on rings.
Editor's noteKeep swirls smaller than you think - tips look best with tight marble patterns.
Watch outAvoid full nail marble with this color combo; it looks heavy and can stain.
19. Orange Jelly Base With Hot Pink Outline Hearts
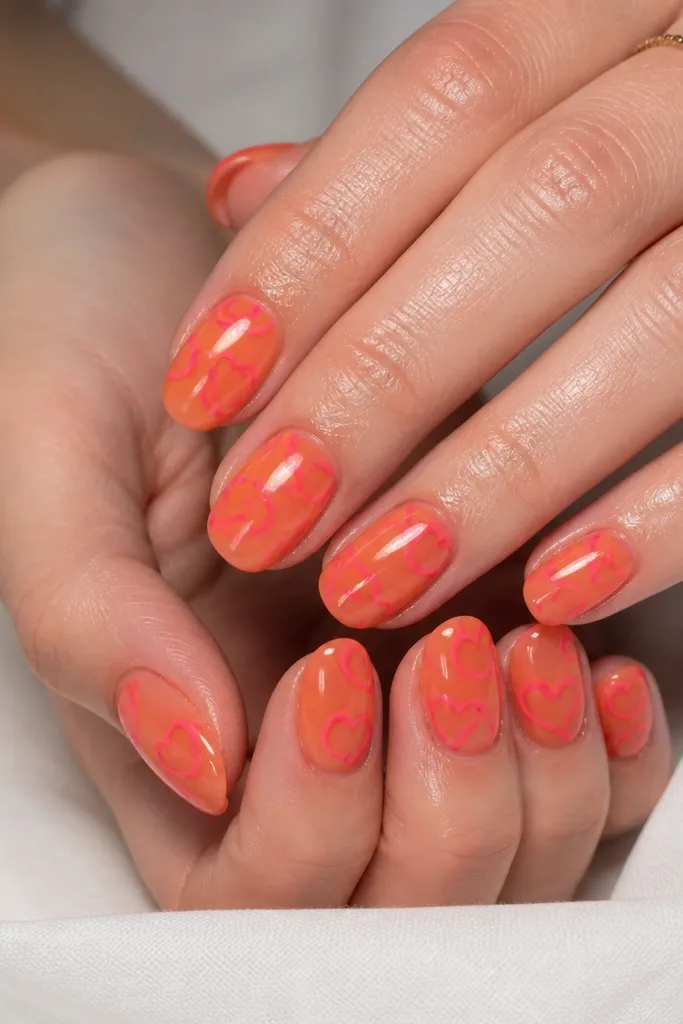
This set is sweet but grown-up because the hearts are outlined, not filled. The orange jelly base feels warm and glowing, and the hot pink outlines give crisp definition. Oval nails make the hearts look smooth and centered because the nail shape is rounded and forgiving. This works great when you want something romantic that still feels modern and bright. I've done it for birthdays and it always gets compliments because it looks like nail art, not just color.
Start with a translucent orange jelly layer and cure. Use a thin striping brush to draw tiny heart outlines in hot pink - keep the line weight consistent and avoid thick looping. Add one heart per nail, centered around the middle third. Cure and top coat with glossy gel, making sure the hearts sit flat by applying top coat slowly over the outline lines.
Editor's noteIf your outline bleeds, let the jelly base cure fully before drawing the hearts.
Watch outAvoid filled hearts on a jelly base; it gets too opaque and loses the glowing look.
20. Hot Pink Gradient Sidewall With Orange Center
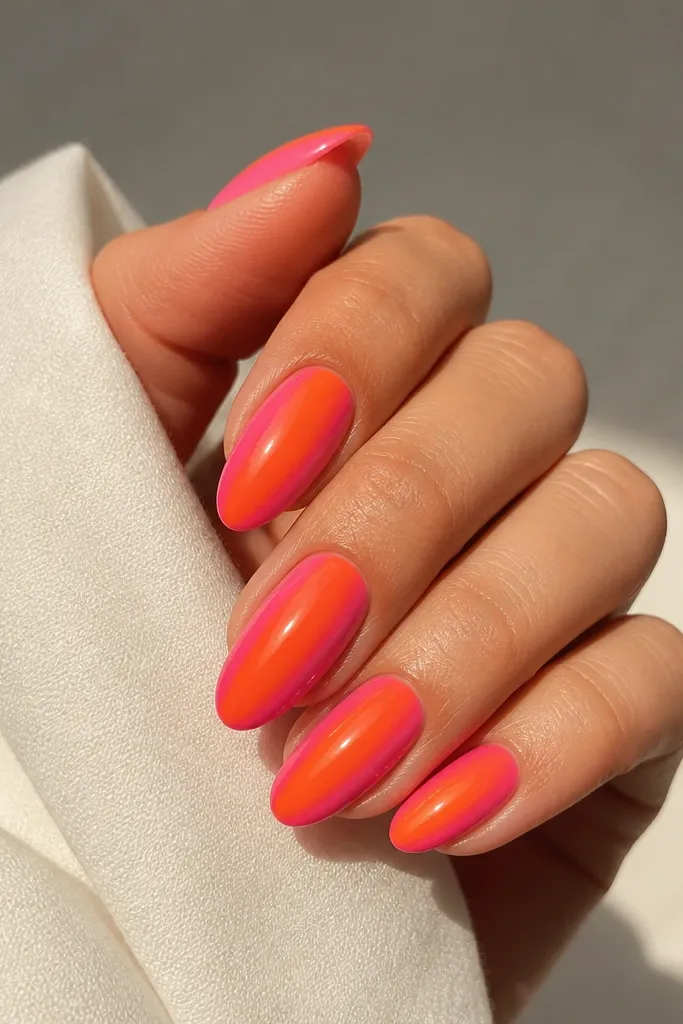
This design looks like a salon technique because it creates a "frame" around the center. The orange center stripe gives a clean focal point, while the hot pink gradient on the sidewalls adds depth. Almond nails are best because the tapered sides make the frame feel balanced. This set flatters hands with slightly wider nails because the center stripe pulls attention inward. I like it for photos because the gradients catch light along the sides.
Start with a base coat, then paint the center stripe orange from cuticle to tip, about 2-3 mm wide. Sponge hot pink along both sidewalls, blending from the center outward so the middle stays orange. Cure carefully, then apply glossy top coat, dragging top coat across the full nail to smooth the gradient edges. Clean the sidewalls with a small brush and cleanser so the gradients look sharp, not blurry.
Editor's noteUse a thin sponge brush for sidewall blending; it keeps the orange center crisp.
Watch outAvoid blending past the center stripe; once orange gets fuzzy, the look turns muddy.
21. Orange And Hot Pink Half-And-Half With Shimmer Line
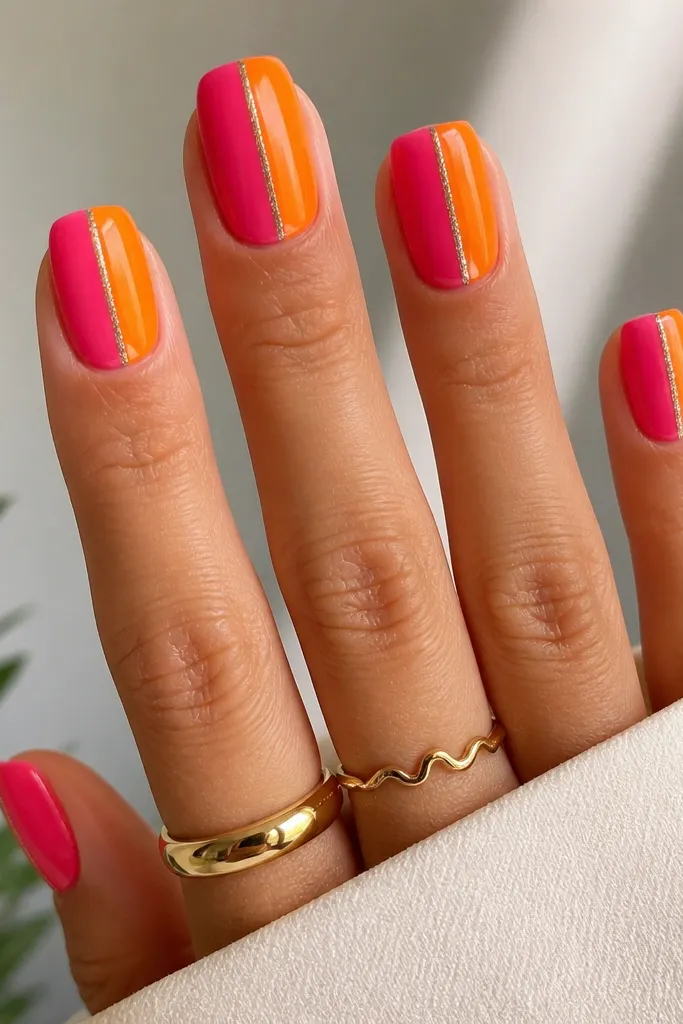
The shimmer line is the difference between "two colors" and "a set." The half-and-half split is bold and graphic, and the thin silver shimmer line adds a jewelry effect that makes it feel put-together. Squoval nails are great because the split stays clean along the straight sides. This looks extra good on nails that are slightly longer than short, because the shimmer line has room to sit centered. I wore this to a concert and it looked like my hands were holding light.
Paint the left half of the nail hot pink and the right half orange using tape guides. Cure both sides, then remove tape carefully to keep the separation crisp. Use a striping brush to draw a thin silver shimmer line across the center gap, about 0.5-1 mm wide. Cure and seal with glossy top coat, making sure the shimmer line is fully encapsulated so it doesn't lift.
Editor's noteChoose a fine silver shimmer, not chunky glitter, for a clean jewelry look.
Watch outAvoid thick center gaps; tape lifting can widen the split.
22. Hot Pink Base With Orange Foil Flakes
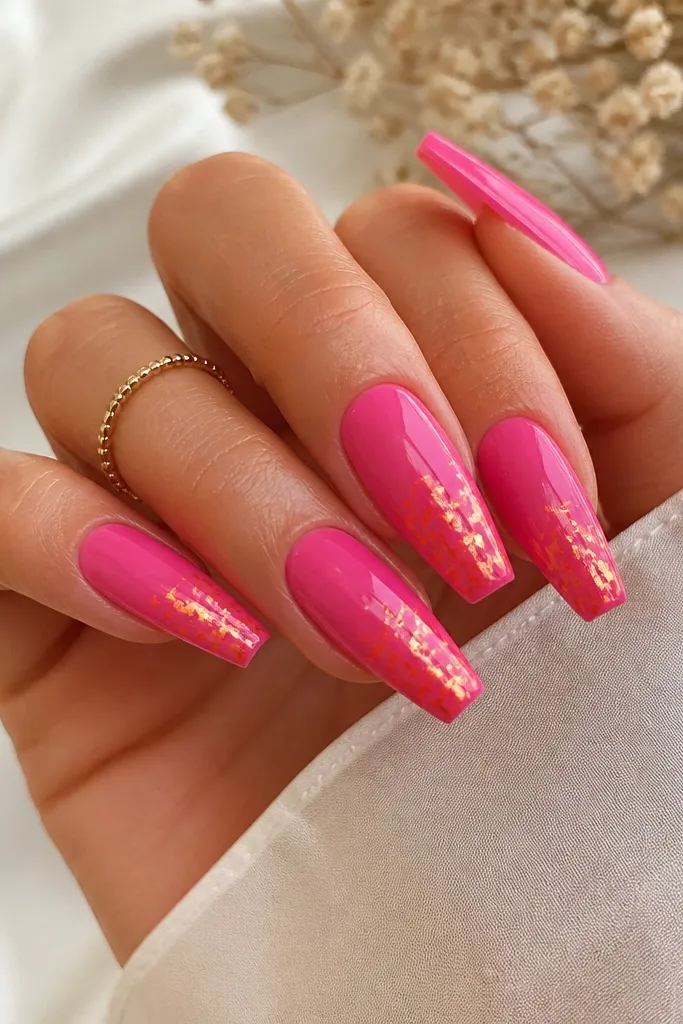
Foil flakes add texture without needing detailed art. The hot pink base is smooth and bold, and the orange foil pieces look like warm sparks when your hand moves. Coffin nails fit foil well because the shape gives you a larger canvas for the flakes to land naturally. This is flattering because the foil concentrates toward the lower half, which visually lengthens the nail. I like it for events because it reads luxe even with minimal effort.
Start with two coats of glossy hot pink and cure. Apply a thin layer of foil adhesive (or tack gel) to the lower half of the nail, about 1/3 to 1/2 of the length. Press orange foil flakes into the tack using tweezers or a foil applicator, then gently pat to set. Seal with glossy top coat, but go slowly so the foil edges stay smooth and don't lift.
Editor's notePress foil near the cuticle line last so you don't smear it while it's tacky.
Watch outAvoid heavy adhesive coverage; too much adhesive makes flakes look stuck down and dull.
23. Orange And Hot Pink Ombre Glitter Fade
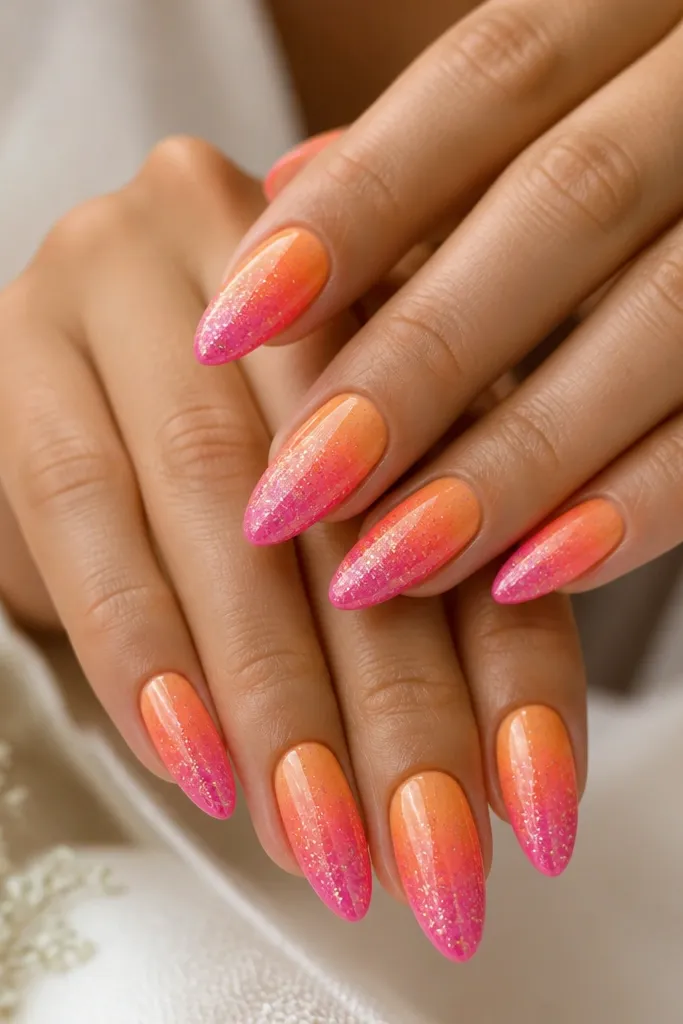
This is the "party" version of an ombre that still looks wearable. The orange-to-hot-pink fade gives you color continuity, and the glitter ramp at the tips keeps it from looking like you dropped confetti everywhere. Almond nails make the glitter fade look smooth because the taper helps you blend glitter toward the tip. This set flatters hands of all sizes because the sparkle is concentrated where your nails naturally draw attention. I use it when I want glam that doesn't feel like full glitter overload.
Paint a base gradient: orange at the lower half and hot pink at the upper half, blending with a sponge. Cure. Then apply clear gel only on the tip area and dust orange micro-glitter close to the tip, blending upward by adding less glitter as you move toward the middle. Cure and top coat with glossy gel to lock the glitter down and smooth the surface.
Editor's noteDust glitter with a small brush, then clean the surrounding skin with a cotton swab before curing.
Watch outAvoid glitter all the way to the center; it makes the nail feel heavy and textured.
24. Hot Pink Outline Tips On Orange Base
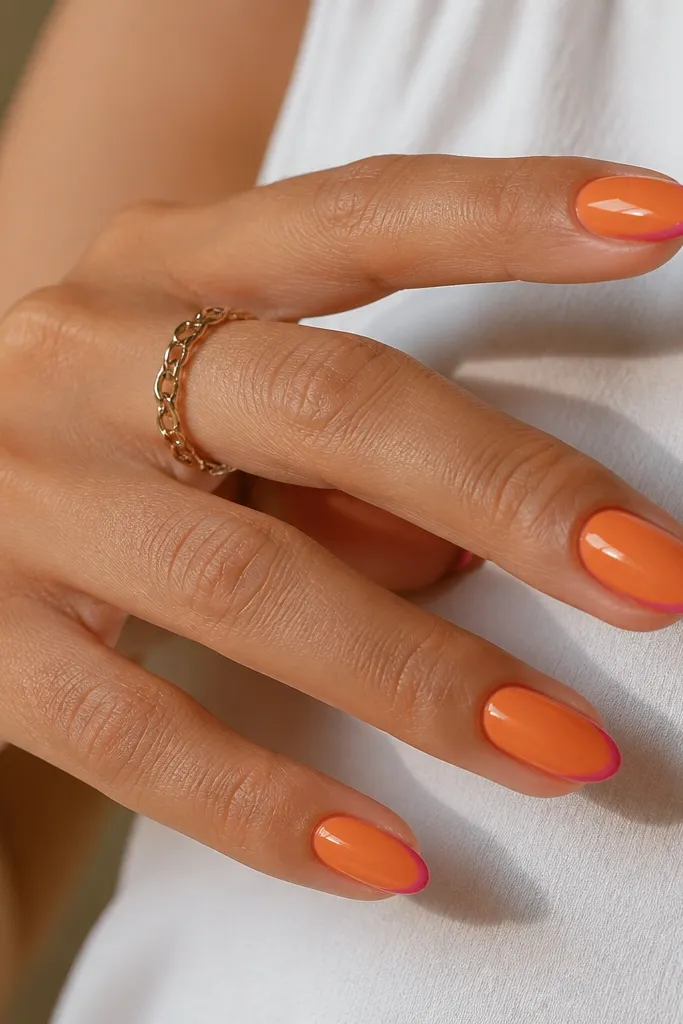
A thin outline tip is the cleanest way to make short nails look styled. Orange base warms the whole manicure, and the hot pink border around the tip makes the nail shape look sharper. Short almond works because the outline frames the curve without needing extra length. This is also great if you've got nail ridges - the smooth border can make the nail look more even. I keep this design in my rotation for quick glam that still looks neat.
Start with an orange base and cure. Use a striping brush to draw a thin hot pink line following the tip curve, staying about 1 mm from the free edge. Then add a second line inside the first line only if you want a double border effect - keep it thin. Cure and apply glossy top coat, making sure the border edges are fully sealed.
Editor's noteUse a nail guide strip or a French tip sticker to keep the outline even across nails.
Watch outAvoid thick borders; thick lines make short nails look stubby.
25. Hot Pink And Orange Checker Accent On Nude Half
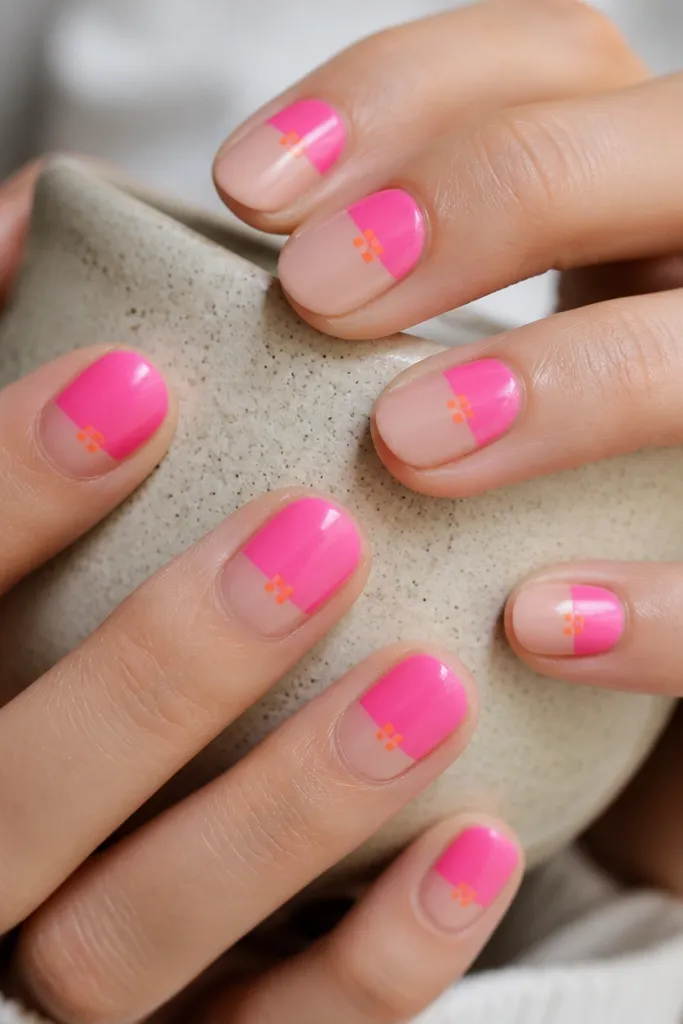
This design feels trendy because it mixes clean negative space with a small graphic element. The nude half keeps it grounded, and the hot pink top half gives you that bold color hit. The orange checker accent adds a playful twist without turning the whole nail into pattern overload. It flatters almost every nail length because the nude area creates visual balance. I like it for everyday glam because it looks intentional even with minimal jewelry.
Paint the bottom half nude and cure, leaving a crisp line at the midpoint. Tape or use a straight guide to paint the top half hot pink, then cure. For the accent, place a tiny checkerboard in the center using two colors: orange squares with hot pink squares, about 3-4 squares total. Cure and seal with glossy top coat, then clean the midpoint line with a small brush and cleanser.
Editor's noteKeep the checker small enough that it fits within the nail's center width only.
Watch outDon't let the midpoint line blur; blurred splits make it look like smudged polish.



