1. Hot Pink Base With Neon Orange Cuticle Dots
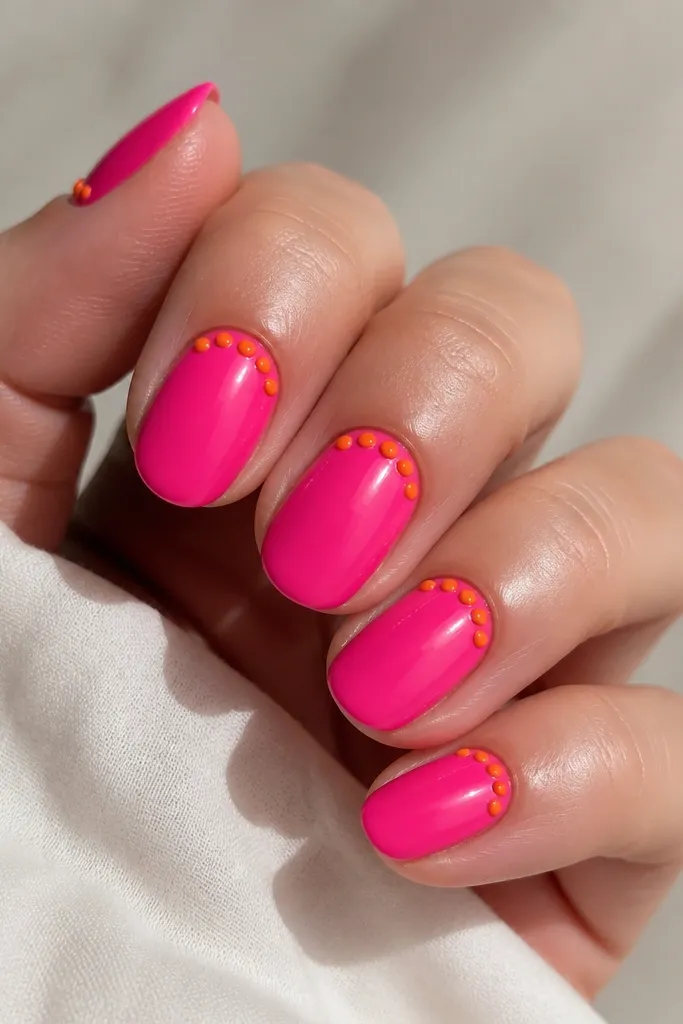
This look is bold but controlled. You paint the whole nail hot pink, then place neon orange dots only at the cuticle - like a mini sunrise. The hot pink gives you the candy color, and the orange stays focused where the eye naturally starts. I like it on medium almond and squoval because the cuticle area has enough surface to place dots without crowding. It flatters warm and neutral skin tones because the pink reads bright and clean, not dull. For everyday wear, it still feels "put together" because the art is small and repeatable.
Start by prepping the nail and applying a thin base coat. Paint two thin coats of hot pink, curing fully between coats so it doesn't look streaky. Use a dotting tool or the eraser end of a pencil with a dotting gel to place neon orange dots in a curved line at the cuticle, leaving a tiny gap so you don't flood the skin sidewalls. Finish with a thick glossy top coat, focusing on the free edge so the dots stay sealed. If you want extra crisp dots, let the pink cure slightly longer before dotting.
Editor's noteFor perfect spacing, lightly mark the dot positions with a dot of clear polish first, then fill with orange.
Watch outDon't drag neon orange across the cuticle - it smears and makes the dots look messy.
2. Neon Orange Tips Over Pink Jelly Base
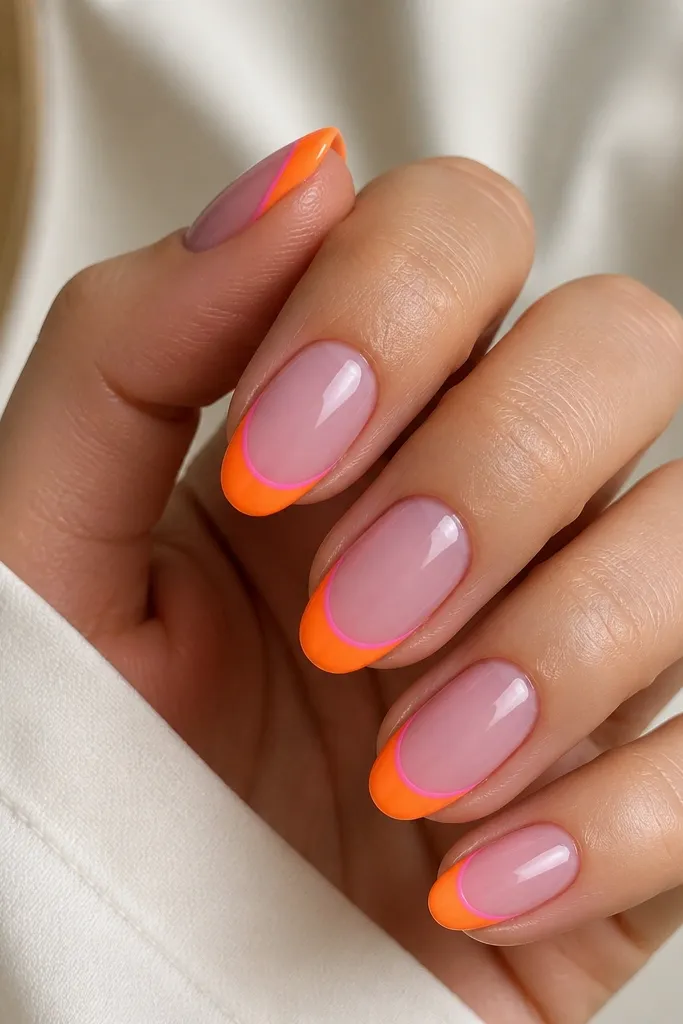
This is the "clean neon" option. A pink jelly base keeps everything wearable, while neon orange tips add that unmistakable energy. The jelly finish makes the orange look brighter because you see a hint of pink under it, not just a flat neon block. I wear this when I want the look to pop in photos but still feel office-friendly. It looks best on short squoval and medium almond because the French line can sit neatly on the smile. It also flatters both fair and deep skin tones since the pink base bridges the gap between your skin and the neon.
Start with a pink jelly polish (or mix a pink polish with a clear gel top coat) and apply two thin coats for an even see-through glow. Then tape a gentle French guide line using thin striping tape, placing it so the orange tip is about 1/8 to 1/6 of the nail length. Apply neon orange over the taped tip, cure, then remove the tape while the polish is still slightly tacky if your brand recommends it. Finally, use a glossy top coat and cap the free edge with a thin brush of top coat.
Editor's noteIf your French line is shaky, use a fine striping brush with acetone on the brush tip to clean the edge after curing.
Watch outDon't go too wide on the orange tip or it turns into a neon block that overpowers the nail.
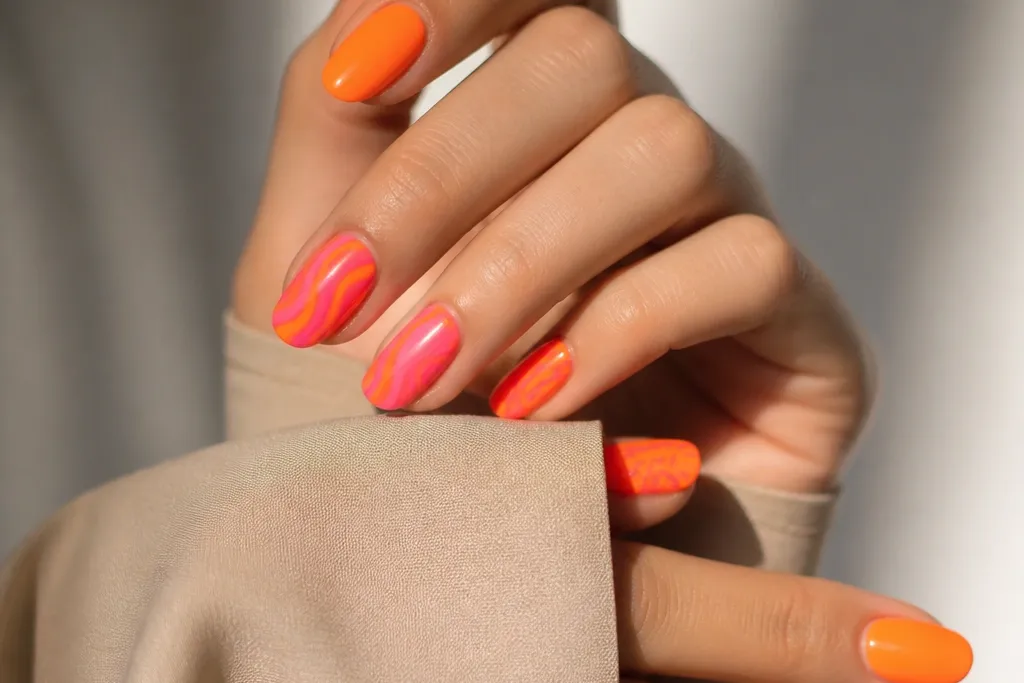
3. Pink-To-Orange Diagonal Neon Slashes
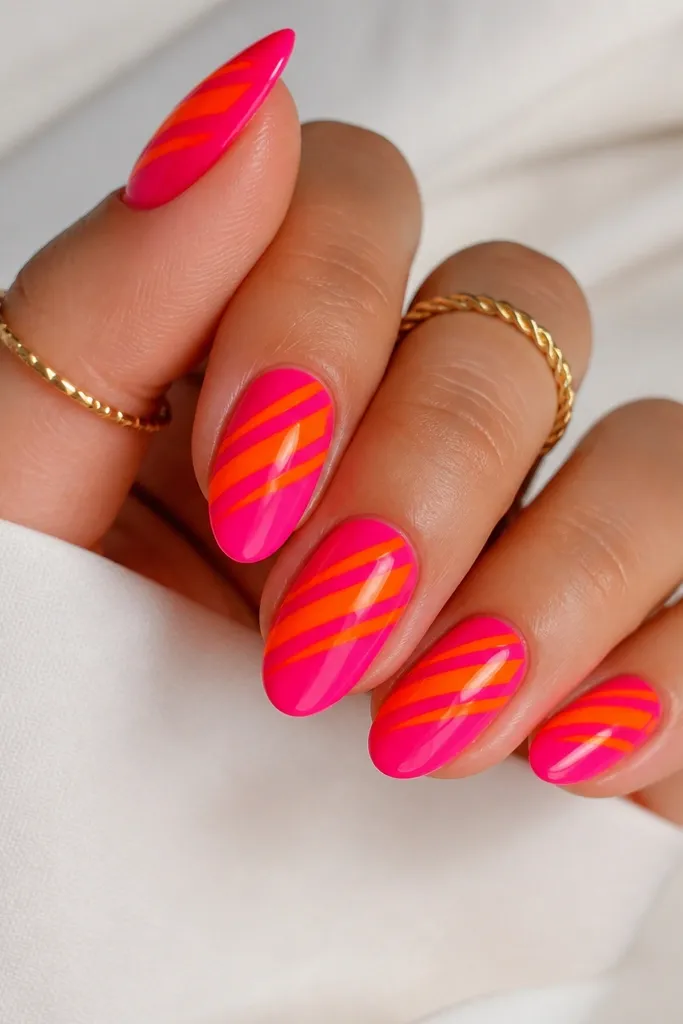
Diagonal slashes make neon feel like motion instead of wallpaper. The hot pink base looks saturated, and the neon orange slashes cut across it like graffiti lines. I love this on short rounded nails because the diagonal placement makes the nail look longer even when the length is minimal. It flatters hands that look a little flat by giving a strong center line. For skin tone, it's forgiving because both colors are warm and bright, so you don't get that washed-out contrast.
Apply two thin coats of glossy hot pink and cure thoroughly. Use thin striping tape or a nail stencil to place a diagonal guide from lower left to upper right, leaving narrow gaps for negative space. Paint neon orange over the exposed diagonal bands, cure, then remove tape carefully. Clean up the edges with a brush dipped in acetone and finish with one or two glossy top coats for smoothness.
Editor's noteMake the orange bands slightly thicker in the middle of the nail - it keeps the design looking intentional instead of flat.
Watch outDon't fill all the negative space - neon needs breathing room to look sharp.
4. Neon Orange And Pink Half-Moon Cuticles
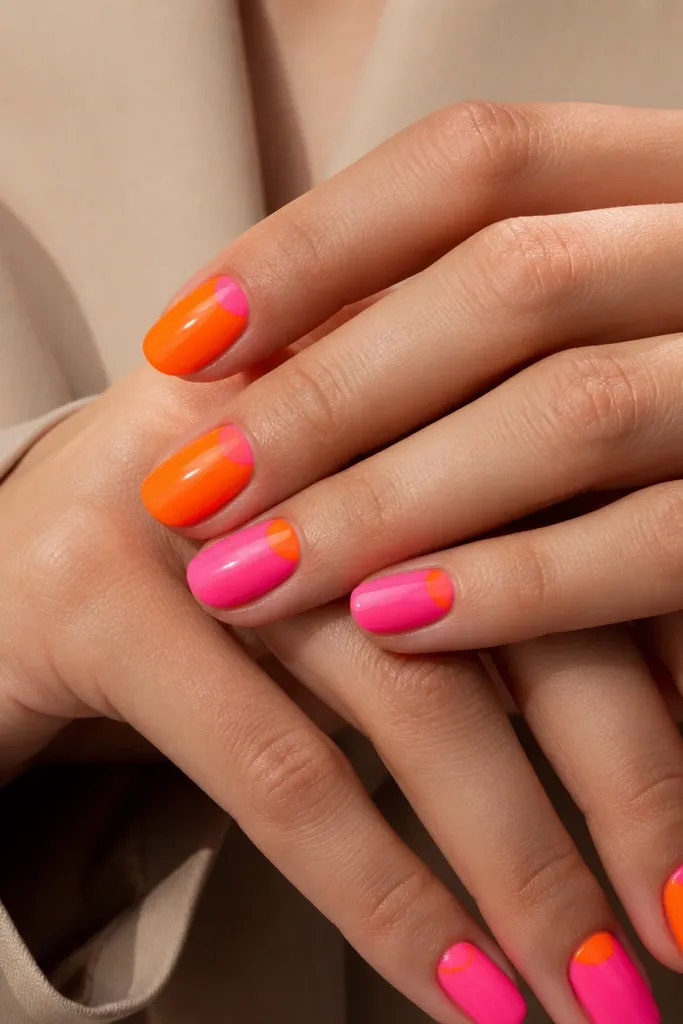
Half-moon cuticles are the easiest way to make neon feel graphic. You get two colors, but you keep the art small and symmetrical. I've done this on both short and medium nails, and it always looks polished because the half-moon shape naturally frames the nail. It flatters every nail bed because it draws attention upward from the cuticle. If you're pale, the orange reads bright and warm against your skin; if you're deeper, the pink half-moons pop without turning ashy. The glossy finish makes the curves look like enamel.
Paint a base color on each nail - for example, pink on four nails and neon orange on one or alternate per finger. Cure. Then use a small half-moon nail stencil or a curved brush to paint the opposite color at the cuticle, keeping the arc about 1/3 of the nail width. Clean the edges with a detail brush and acetone. Finish with a glossy top coat that caps the cuticle line so it doesn't lift.
Editor's noteIf you don't have stencils, use a bobby pin end to trace the curve lightly before painting the half-moon.
Watch outDon't overfill the cuticle area - if color touches the side skin, it looks bulky and grows out fast.
5. Neon Orange And Pink Checker Accent Nails
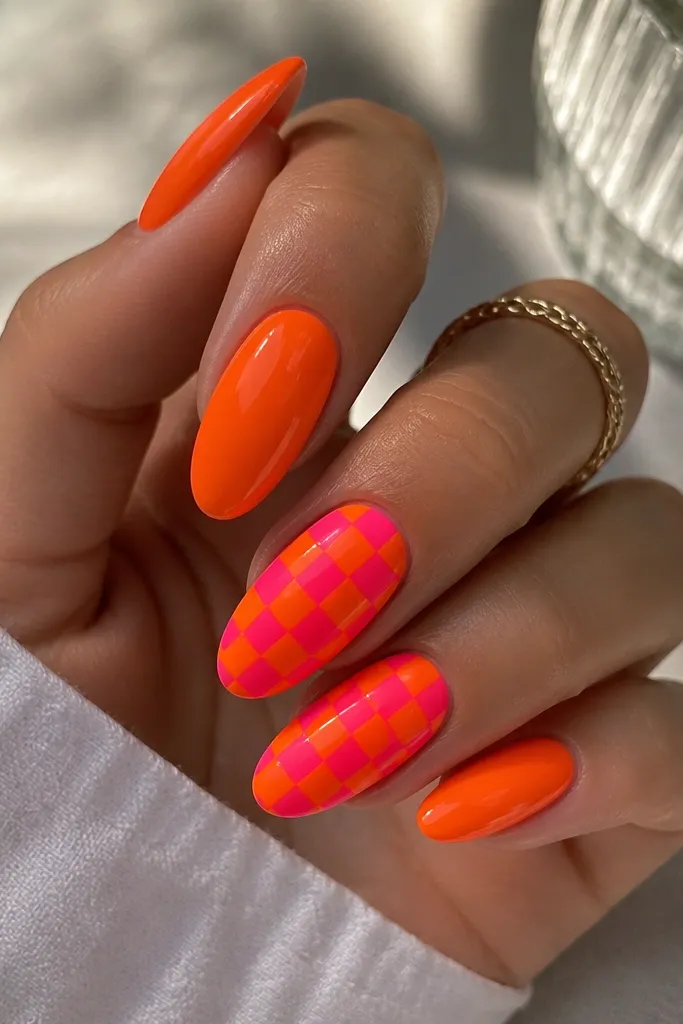
Checker patterns look playful, but the trick is restraint. I recommend making only two nails the checker and keeping the rest solid. The neon orange and pink checker reads like candy tiles, and the solid nails anchor it so it doesn't feel chaotic. This design looks best on medium length because you need enough space for square proportions to stay even. It's great for parties, festivals, and summer weddings where you want your hands to look fun in photos. It also flatters hands with longer nail beds because the squares can stack neatly without shrinking.
Start with a glossy base coat. Paint three nails neon orange and two nails hot pink, curing each. For the checker nails, mark a grid using striping tape: aim for 6-8 squares per nail depending on length. Paint alternating squares neon orange and cure, then remove tape and touch up any edges with a fine brush. Seal everything with a glossy top coat and cap each free edge.
Editor's noteKeep square size consistent by building the grid with tape before you open any polish.
Watch outDon't freehand the squares - wobbly edges make checker look cheap.
6. Pink Marble With Neon Orange Veins
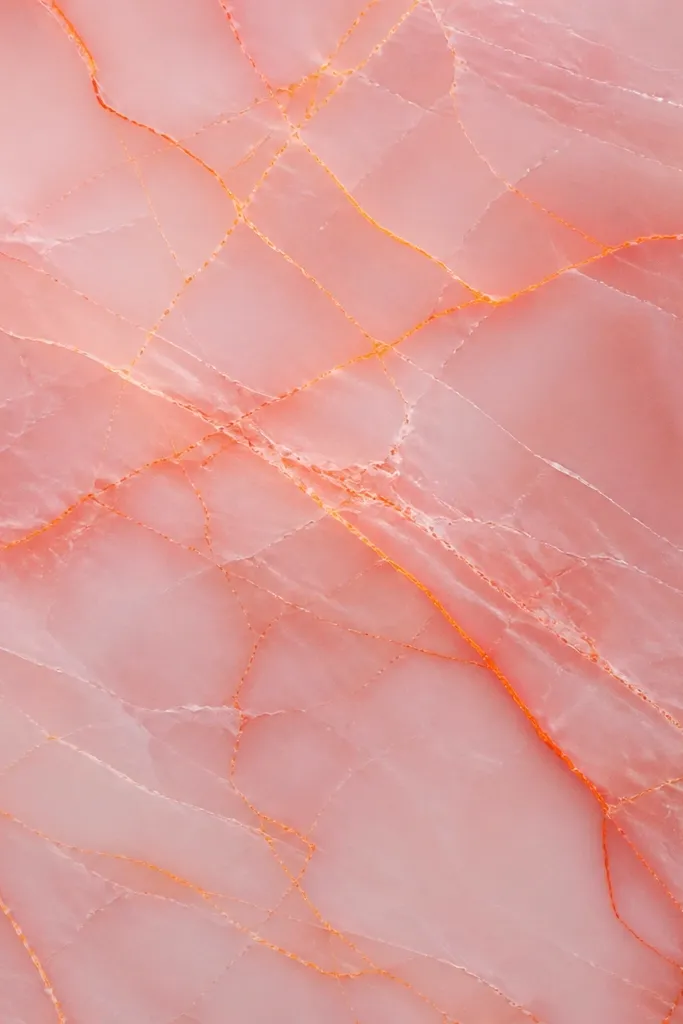
Marble is the "grown-up" way to wear neon. The pink base makes everything look soft, and the neon orange veining gives a high-energy contrast without covering the whole nail. I like it on almond and squoval because the marble lines look more organic when the nail has a natural taper. It works for fair and deep skin tones because the pink is the anchor and the orange is the highlight. This is my go-to when I want something different from French tips but still easy to wear.
Paint a pink base with two thin coats and a glossy cure. Add a small amount of neon orange gel to a palette and drag it with a thin striping brush to create vein lines - don't overdo it, keep most of the nail pink. Use a second brush with a tiny bit of clear gel to soften intersections so the veins look like stone, not sticker lines. Cure, then top coat with a glossy layer to smooth the surface. If the veins look too bold, add one more thin pink coat and cure again.
Editor's noteLess vein paint gives a more expensive marble look - you want hints, not full coverage.
Watch outDon't swirl neon orange across the whole nail or it turns into a neon blob.
7. Neon Orange Chrome Over Pink Matte
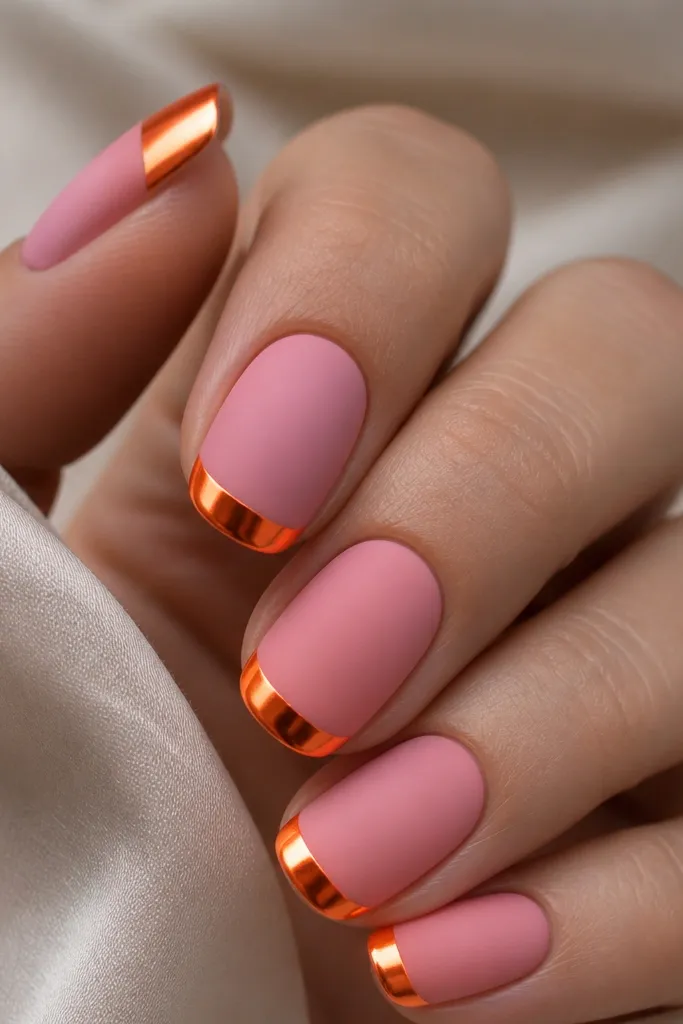
Chrome over matte is the fastest way to make neon look high-end. Matte pink kills the glare, so the neon orange chrome looks like it's lit from within. I wear this when I'm going to be in daylight or under strong indoor lights because the chrome flashes hard in motion. Almond and squoval both work, but I like squoval because the tip boundary is easy to keep straight. It flatters most skin tones because the matte pink has a soft, wearable warmth, while the orange reads as a bright accent.
Start by applying a pink matte base. If you use gel, cure the matte base fully. Tape a clean tip line about 1/6 of the nail length, then apply a thin sticky gel layer over just the taped tip area. Press neon orange chrome powder onto the sticky gel and brush off excess. Remove tape, then seal everything with a non-wipe top coat that won't dull the chrome too much.
Editor's noteUse a makeup sponge to press chrome - it gives a smoother, more even mirror finish than brushing.
Watch outDon't seal with a thick, very glossy top coat right away - it can blur the chrome edge.
8. Pink And Orange Neon Galaxy Dots
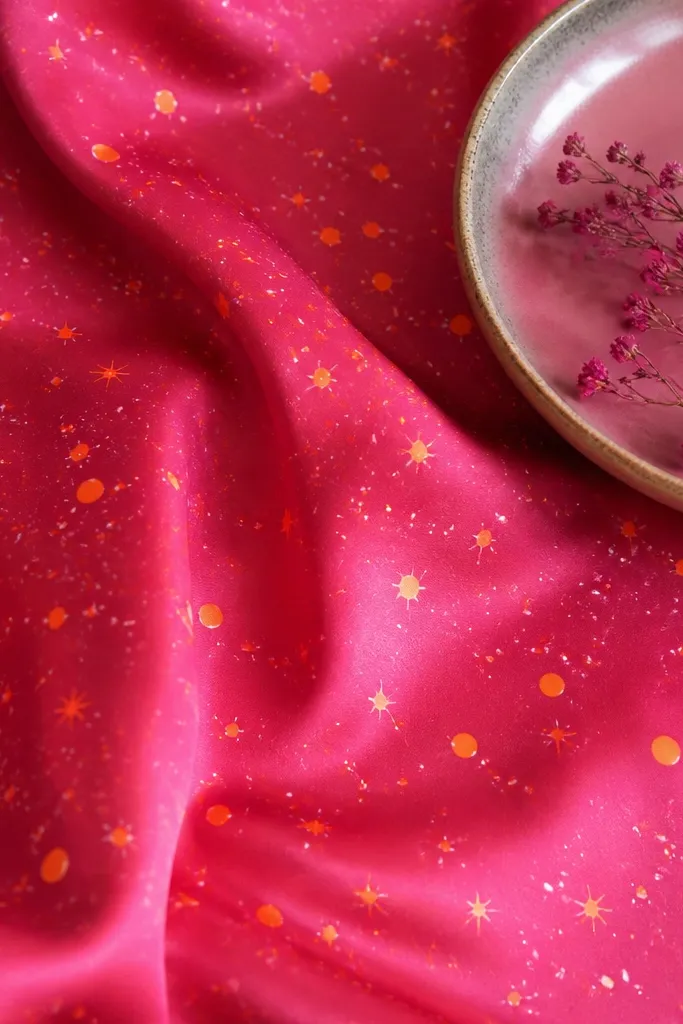
Galaxy dots make neon feel magical without needing complicated art. The pink base acts like a night sky, and the neon orange dots look like bright stars. I like this on short medium nails because you can scatter dots without worrying about long straight lines. It's flattering on hands with shorter nail beds since the dots keep attention moving across the nail surface. For skin tone, it works because pink is the main color and orange is the sparkle accent. It also looks good in both casual and party outfits.
Paint a glossy deep pink base with two thin coats. Cure. Then use a dotting tool to place neon orange dots randomly - start with larger dots near the center, then add smaller dots toward the edges. If you want extra depth, add a few tiny white dots with the tiniest tool tip. Finish with a glossy top coat and avoid flooding - thin top coat keeps the dot texture crisp.
Editor's noteLet the base cure completely before dotting so the dots don't bleed.
Watch outDon't place dots in a perfect grid - galaxy looks best when it feels accidental.
9. Neon Orange Outline On Pink Negative Space
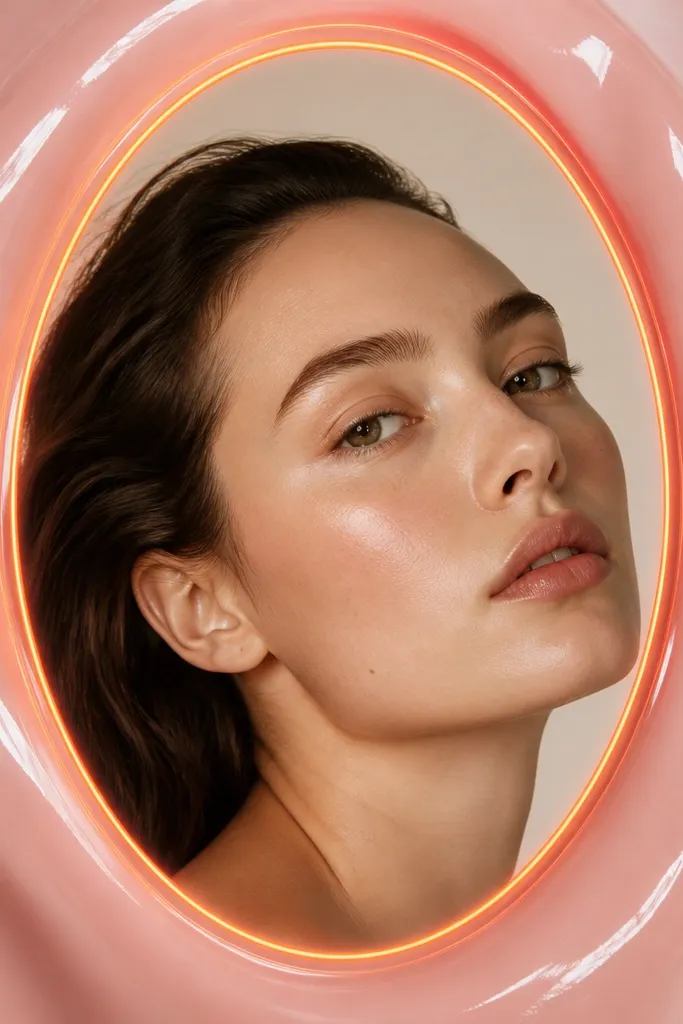
This is my favorite "professional neon" look. You keep a nude or clear base so the nail still looks clean, then you outline a central shape with neon orange and pink. The negative space makes the neon readable, and the outline style feels graphic instead of messy. I recommend it for short to medium nails because the central oval can be scaled without losing clarity. It looks great on cooler and warm skin tones since the nude base bridges everything. If you want neon but you hate full neon coverage, this one is for you.
Start with a nude or clear base and apply two thin coats of a sheer pink gel only around the area you want bordered. Use a thin striping brush to draw a central oval frame - keep it centered and about 2/3 of the nail width. Outline that oval with neon orange, making sure the orange line is slightly thicker than the pink. Cure, then add glossy top coat and cap the free edge. Clean the outline with a brush dipped in acetone before curing if you see any wobble.
Editor's noteUse a gel striping brush - the line stays crisp and doesn't blob like regular polish brushes.
Watch outDon't make the outline too thin or it disappears as your nails grow out.
10. Pink And Orange Neon Waterfall Gradient
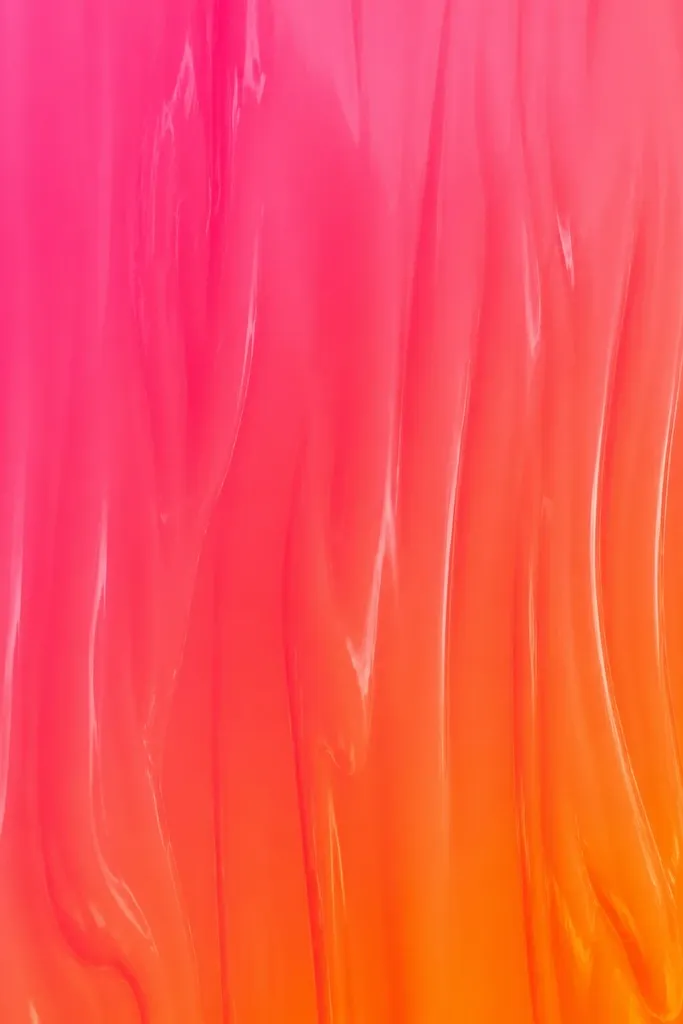
Gradients can look cheap when they're blended too much. This one works because it keeps the gradient directional - like a waterfall. Pink stays at the top and orange collects near the lower half, so the nail looks longer. I like it on almond because the shape helps the gradient travel naturally. It flatters hands with uneven nail beds since the gradient draws the eye away from small imperfections. For skin tone, it's universally flattering because both colors are warm and bright, but the directional flow matters more than the shade.
Paint a hot pink base and cure. Sponge a thin layer of neon orange onto a makeup sponge and press it starting at the lower third, then drag slightly downward using light pressure so you get streaks. Clean the edge with a brush dipped in acetone, then cure. Repeat one more thin orange sponge pass if you want a stronger neon band. Finish with glossy top coat and make sure you cap the lower edge so the gradient doesn't chip first.
Editor's noteUse a tiny amount of orange on the sponge. More product makes the gradient look muddy.
Watch outDon't fully blend with one heavy swipe - that kills the neon punch.
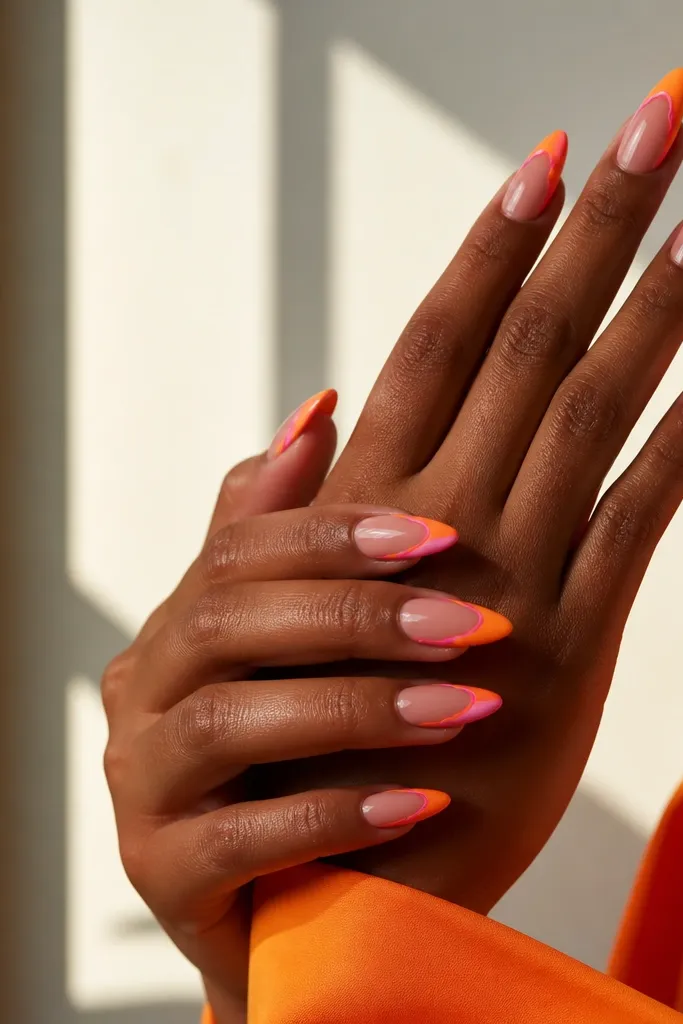
11. Neon Orange And Pink Tape Line French
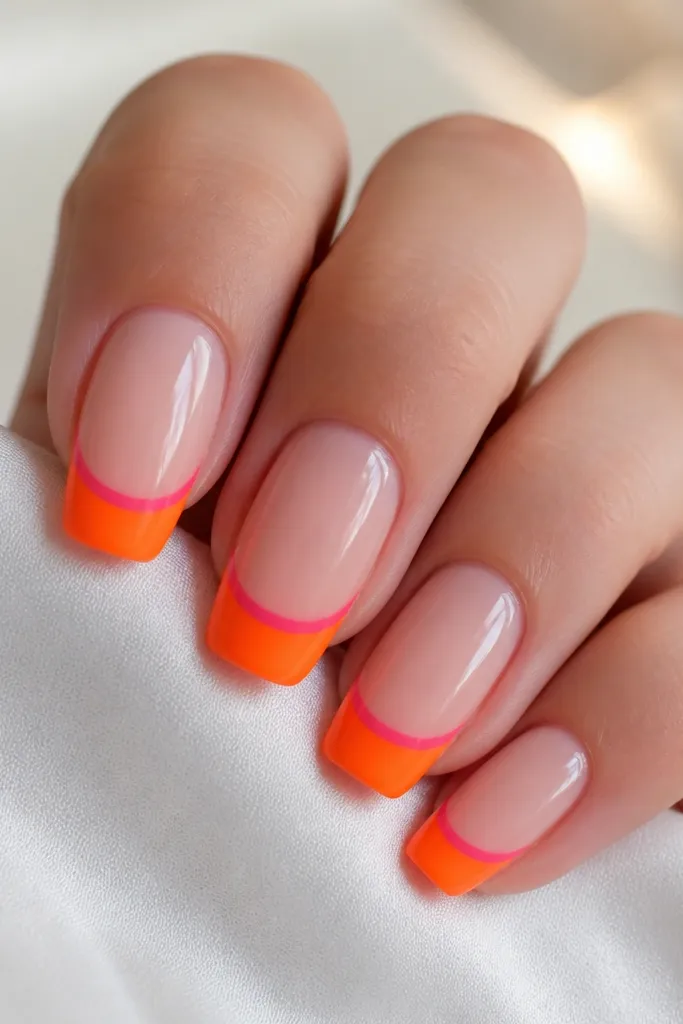
This is the "sharp edges" version of French that always looks expensive. Tape line details make neon look engineered instead of random. The neon orange tip is the main hit, and the thin hot pink stripe inside gives it that extra pop without adding clutter. I recommend it for squoval and almond because the French shape looks crisp on those forms. It flatters most nail beds, but it's especially great if you've got a slightly uneven smile line - the tape helps you stay symmetrical. It also looks amazing in photos because the lines catch light cleanly.
Apply two coats of sheer pink or nude base, cure. Place thin striping tape to mark your French smile line, then another striping tape line just inside it so you create a narrow channel for the hot pink stripe. Paint neon orange over the outer tip area, cure, then remove the outer tape. Paint a thin hot pink stripe in the inner channel, cure, then remove the inner tape. Finish with top coat and cap the tip so the neon stays sealed.
Editor's notePress tape down with a flat silicone tool so polish doesn't seep under the edge.
Watch outDon't pull tape after it fully cures hard - you risk lifting the polish edge.
12. Hot Pink And Neon Orange Swirl Tips
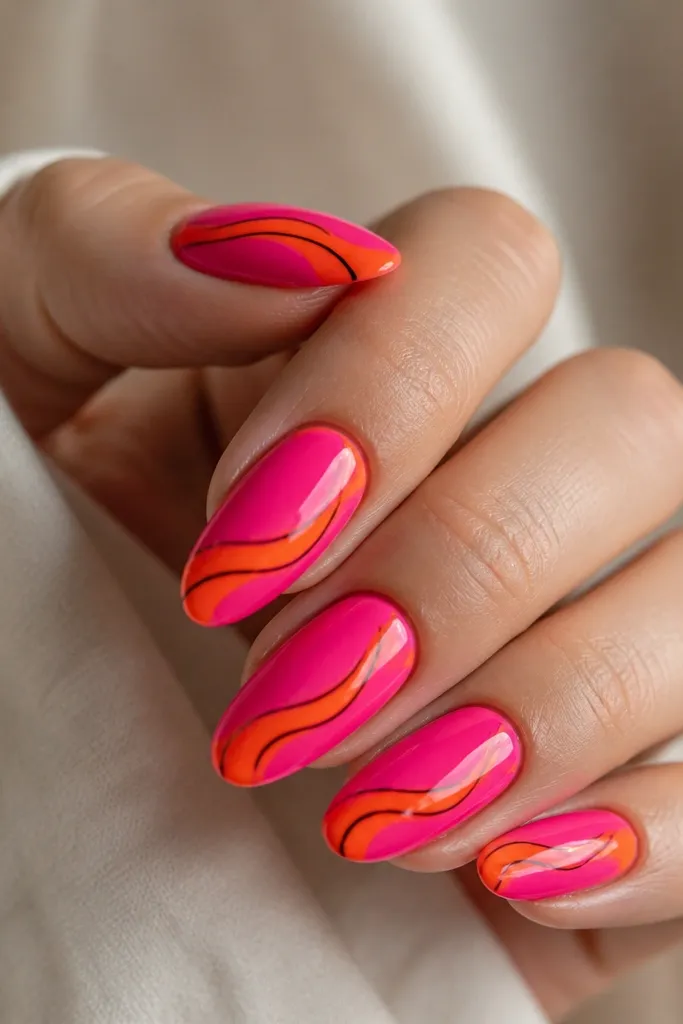
Swirl tips add personality without taking over the entire nail. The hot pink base stays smooth and candy-bright, while neon orange swirls feel like ribbon. I like adding a thin black guide line because it keeps the neon from looking like it bled. This is best on medium almond where the tip has enough space for swirls to curl cleanly. It flatters hands that look a little plain because the swirl gives a clear focal point. In terms of skin tone, the warm pink and orange combo keeps everything harmonious, and the black line adds definition.
Start with two coats of glossy hot pink and cure. Use a thin striping brush to draw a delicate black outline for the swirl shape - just the path, not thick lines. Paint neon orange inside the swirl path carefully, then cure. Add a second layer of neon orange if it looks translucent, but keep the lines crisp. Finish with a glossy top coat, and run the brush along the free edge to smooth any texture.
Editor's notePractice one swirl on a paper towel first - the curve you like will transfer better to the nail.
Watch outDon't make swirls too large - if they reach the sidewalls, the design crowds the nail.
13. Neon Orange Zigzag Over Pink Jelly
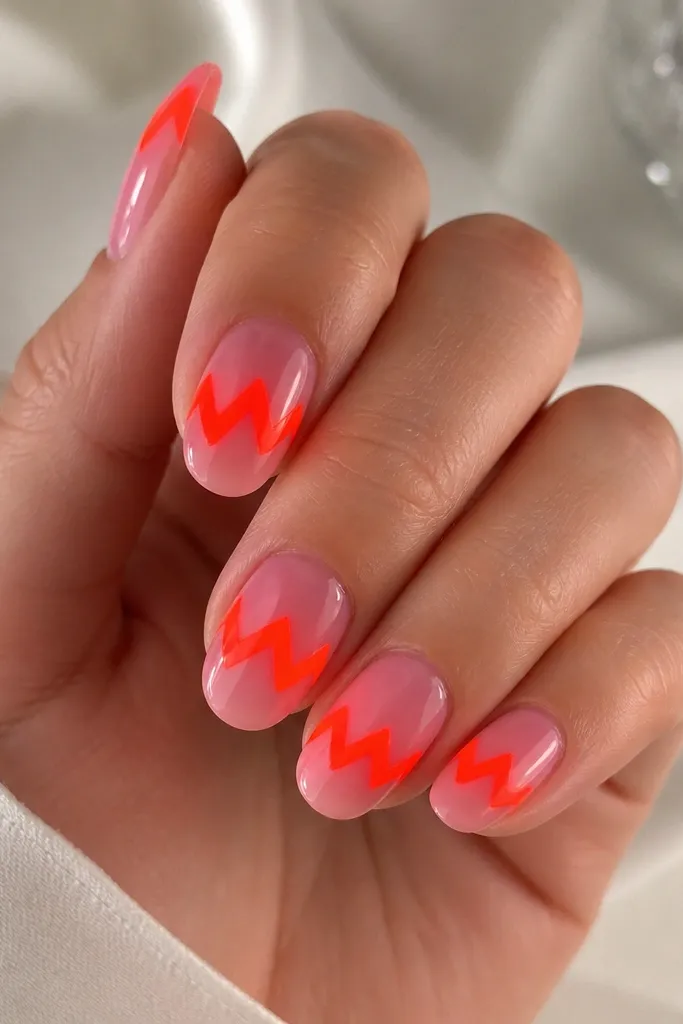
Zigzags look graphic and energetic, and they stay readable even on short nails. The pink jelly base keeps the overall look soft, while the neon orange zigzag adds a sharp hit. I use this when I want something fun that still looks "designed" rather than random. It flatters shorter nail beds because the zigzag band pulls the eye across, making the nail appear wider and longer at once. Warm and neutral skin tones both work well here because the jelly pink blends nicely. If you're wearing bright outfits, this will match without fighting.
Apply two thin coats of pink jelly polish and cure. Use striping tape to create a zigzag path across the center - aim for three peaks and two valleys depending on nail width. Paint neon orange over the taped zigzag and cure. Remove tape while polish is slightly tacky if possible, then clean any edge with a detail brush. Seal with a glossy top coat and lightly cap the zigzag corners so they don't catch on fabric.
Editor's noteKeep the zigzag centered and consistent across fingers - one nail off makes the set feel accidental.
Watch outDon't use thick polish for the zigzag band - thick edges look clumpy at the corners.
14. Pink Chrome With Neon Orange Stamping
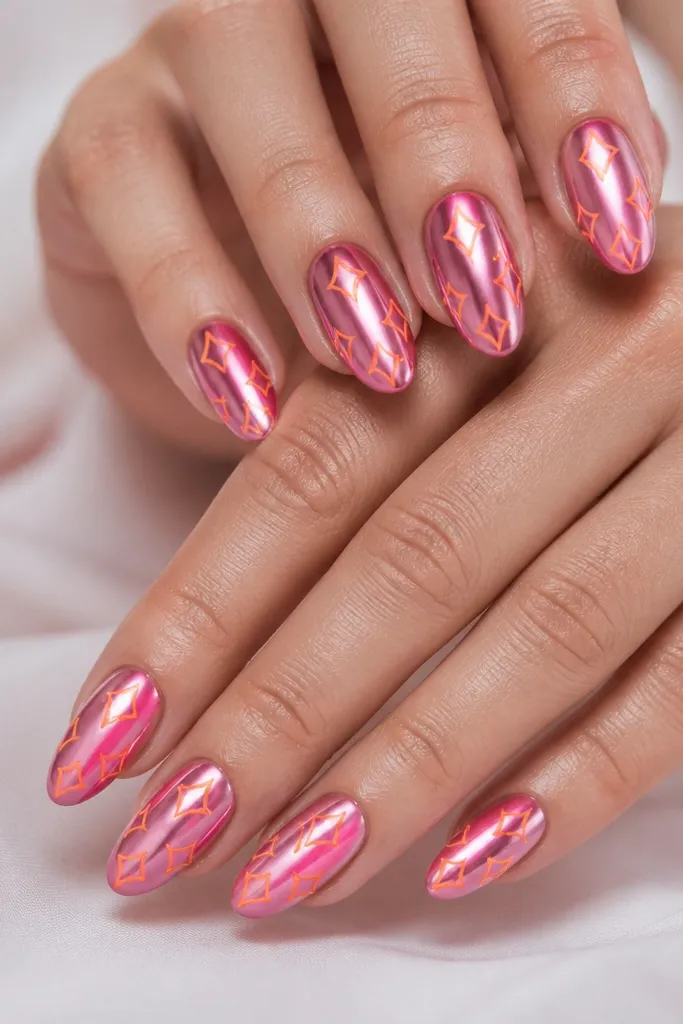
Stamping on chrome is the cheat code for looking like you went to a salon. The pink chrome gives a smooth, reflective base, and neon orange stamp designs pop like decals. I like geometric stamping because it keeps the energy controlled, not messy. This works best on medium length almond and squoval where the reflective surface looks even. It flatters a wide range of skin tones because the pink reflection bounces light and the orange prints stay bold. Great for nights out when you want your hands to look shiny even when you're not wearing a lot of jewelry.
Apply a pink chrome base following your chrome powder instructions, cure, then seal lightly if your system requires it. Choose a stamping plate with geometric or grid patterns and coat it with neon orange stamping polish. Scrape the plate clean, then press the stamp onto the nail in one firm motion. Cure or set according to your polish type. Add a glossy top coat over the stamping to lock it down, and cap the edges.
Editor's noteWarm the stamping plate with your hands for a few seconds - the stamp picks up cleaner on many brands.
Watch outDon't stamp on wet chrome - it smears and the orange pattern loses its sharp edges.
15. Neon Orange And Pink Half-Stripe Nails
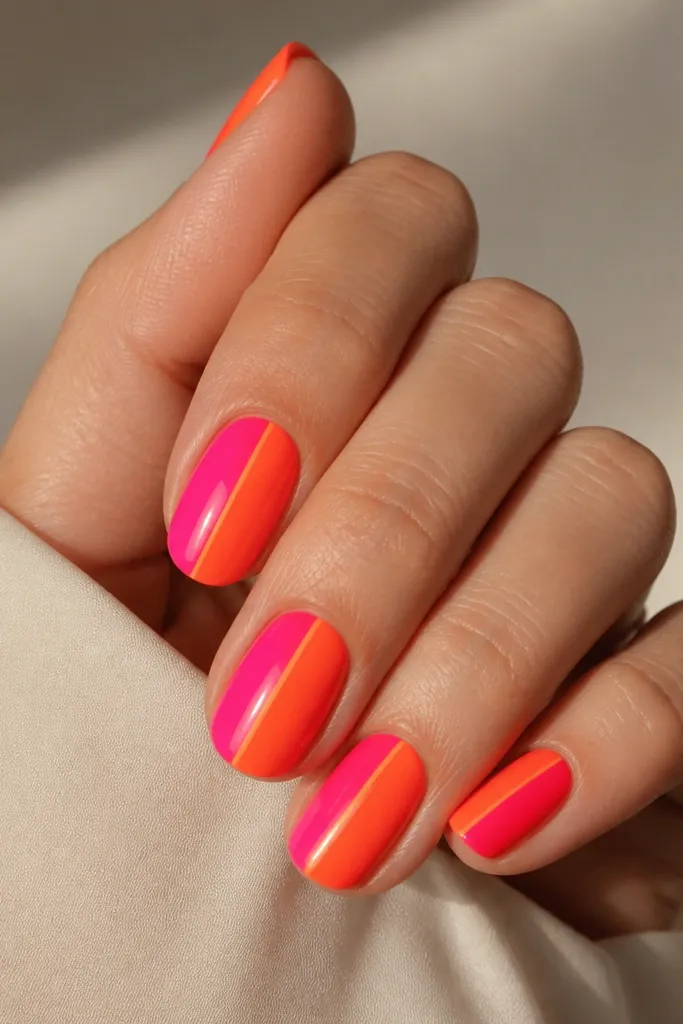
Half-stripe nails look like wearable color blocking, and they're way easier than full abstract art. You get neon orange and pink in a clean, vertical split that makes nails look longer. I like this on short squoval because vertical lines visually slim the nail and stretch the finger. It flatters people with shorter nails and wider nail beds, since the split draws attention down the center. For skin tone, it's a safe bet because both colors are bright and warm, and the separation line keeps it from looking like a smear. This is a great "weekend set" that still looks tidy.
Start with a base coat and apply a sheer pink underlayer if you want extra glow, then cure. Use striping tape to split the nail vertically slightly off-center - keep the split line about 1-2 mm from the center so it looks intentional. Paint one side hot pink and the other neon orange, cure each side if needed. Remove tape carefully and clean the separation line with a fine brush. Finish with a glossy top coat and cap the free edge.
Editor's noteIf your neon orange is streaky, do three thin coats on the orange side rather than one thick coat.
Watch outDon't let tape lift the top layer - press tape down gently so you don't peel your base.