
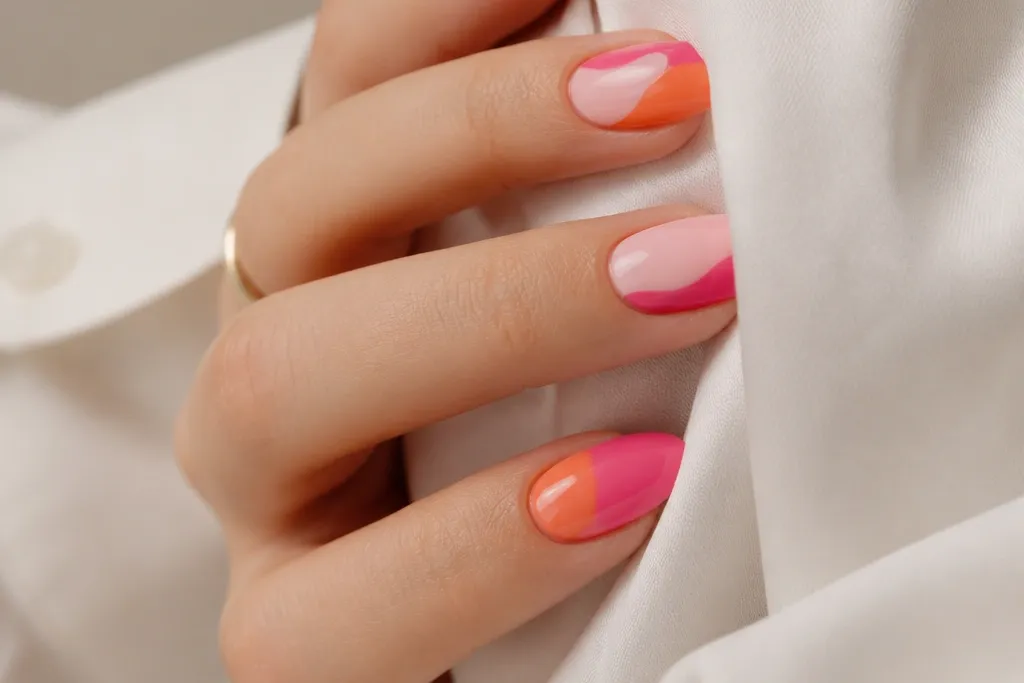
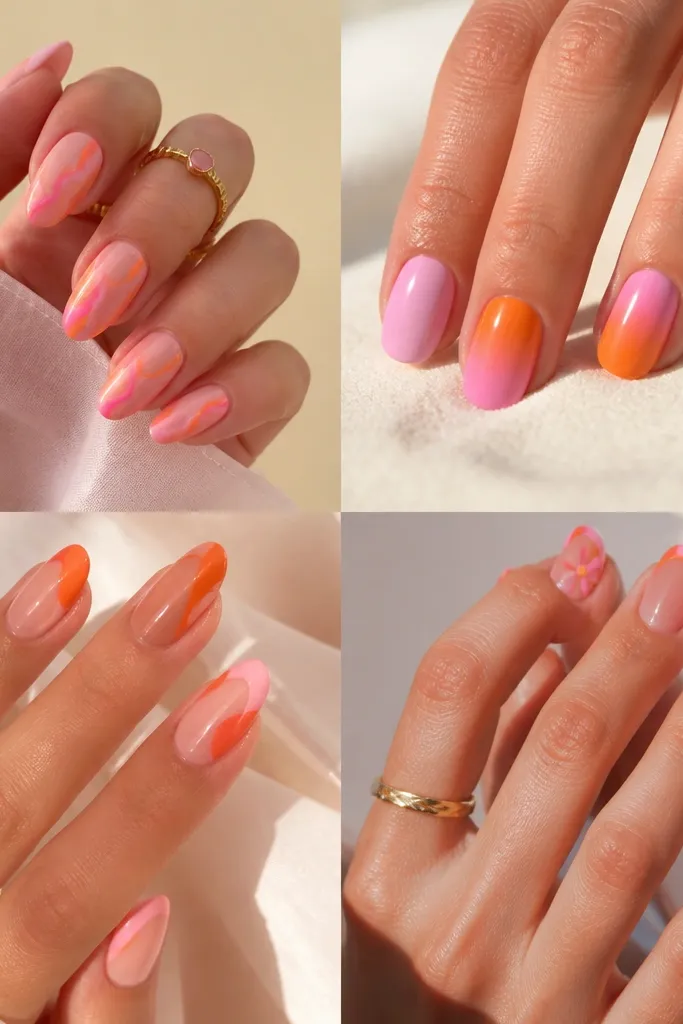
1. Creamsicle French With Thin Orange Edges
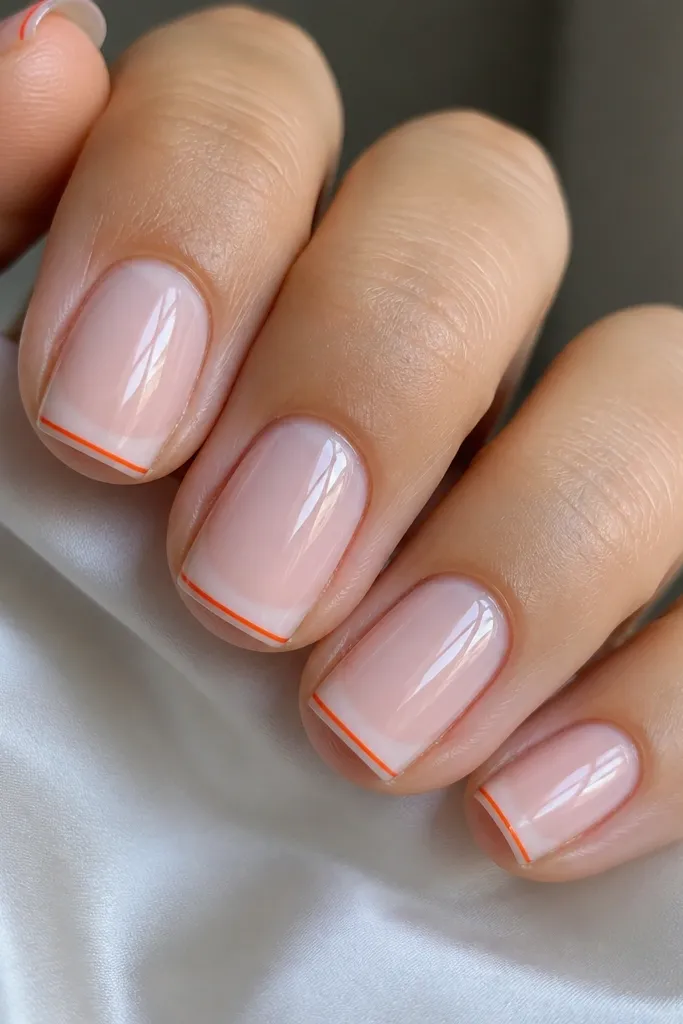
This design works because a creamsicle pink gives you softness, and the thin orange edge adds the punch without making your tips look heavy. I like it on short squoval because the orange line visually “cuts” the tip into a longer shape. If you have warm undertones, the orange reads like a flattering glow; if you’re cool-toned, the orange still looks bright because the base is milky. For everyday wear, it feels bright but controlled — the orange is there, but it doesn’t fight your outfit. The key is keeping the orange line narrow and straight, so it looks like a deliberate graphic detail.
Start by applying a milky pink gel base and cure fully. Then paint a soft French fade at the tips — not a thick cap, just enough to show the tip area. While the French is tacky, draw a thin orange line along the outer edge of the tip using a striping brush, about 0.5 mm wide. Cure again, then seal with glossy top coat for a glassy edge.
Use striping tape for one nail at a time if your lines wobble — place tape along the tip edge, paint orange, cure, then remove the tape.
Avoid a thick orange French — it makes short nails look chopped.
2. Pink Base With Tangerine Half-Moons
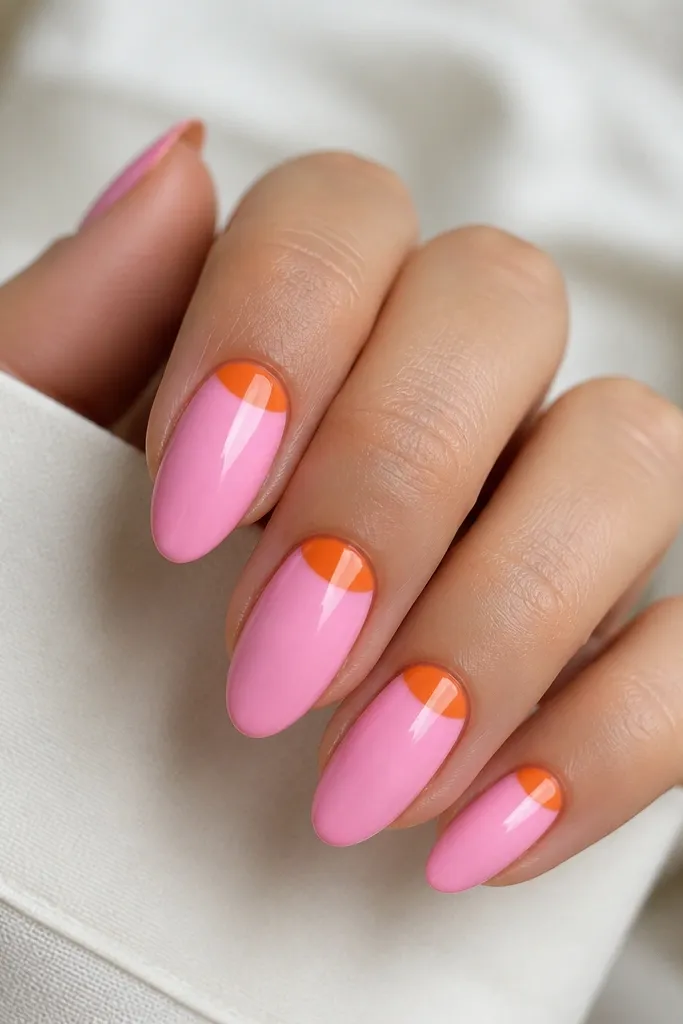
Half-moons are my go-to when you want the orange to look neat instead of chaotic. The cuticle placement makes your nails look tidy and slightly longer, especially on medium almond. Bubblegum pink is the right “background” because it’s bright enough to hold the orange shape. This set looks great on fair to medium skin because the orange glow sits right where your natural nail bed starts. It also works for formal events because the design is geometric and clean.
Begin with two thin coats of opaque bubblegum pink gel, curing each layer. Use a small nail art brush or a half-moon stencil to paint the orange half-moon directly at the cuticle line, leaving a tiny gap of pink at the edge for a sharper border. Fill the half-moon solid, cure, and check symmetry across all nails. Finish with glossy top coat, focusing extra attention on the cuticle edge so it doesn’t lift.
Editor's noteIf your half-moons get messy, paint the orange slightly smaller than you think, then widen it after you like the shape.
Watch outSkip filling the half-moon too close to the sidewalls — it shrinks the negative space and makes the nails look narrower.
3. Diagonal Pink-to-Orange Marble Swipe
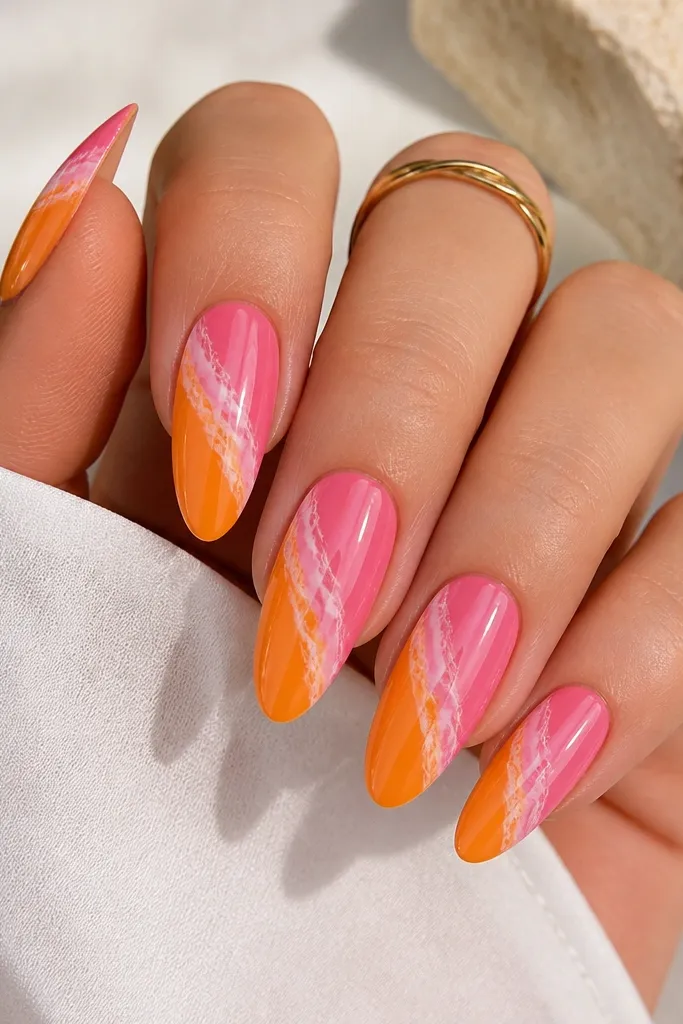
A diagonal marble swipe makes the colors look like they flow together, which is why it reads creative instead of “two solid colors.” I like this on long almond because the diagonal line has space to stretch and the veining can stay fine. The white marble lines keep the pink-and-orange contrast from looking flat. On deeper skin tones, the orange pops hard and looks warm; on lighter skin, the orange still looks bright because the pink is saturated. This is a great choice when you want movement without adding 3D gems.
Paint a pink base first and cure. Then sponge a light orange wash on the lower-left side of the nail so it’s not a perfect block. Use a thin liner brush with white gel to drag a few marble veins through the orange-to-pink overlap — keep them uneven, like natural stone. Finally, seal with glossy top coat and add a second thin top coat if you want the marble to look extra glassy.
Editor's noteFor a more realistic marble, pull your white lines through the overlap zone, not across the entire nail.
Watch outAvoid chunky white “cracks” — they look like nail stickers instead of marble.
4. Ombre Peach-Pink With Orange Crisscross
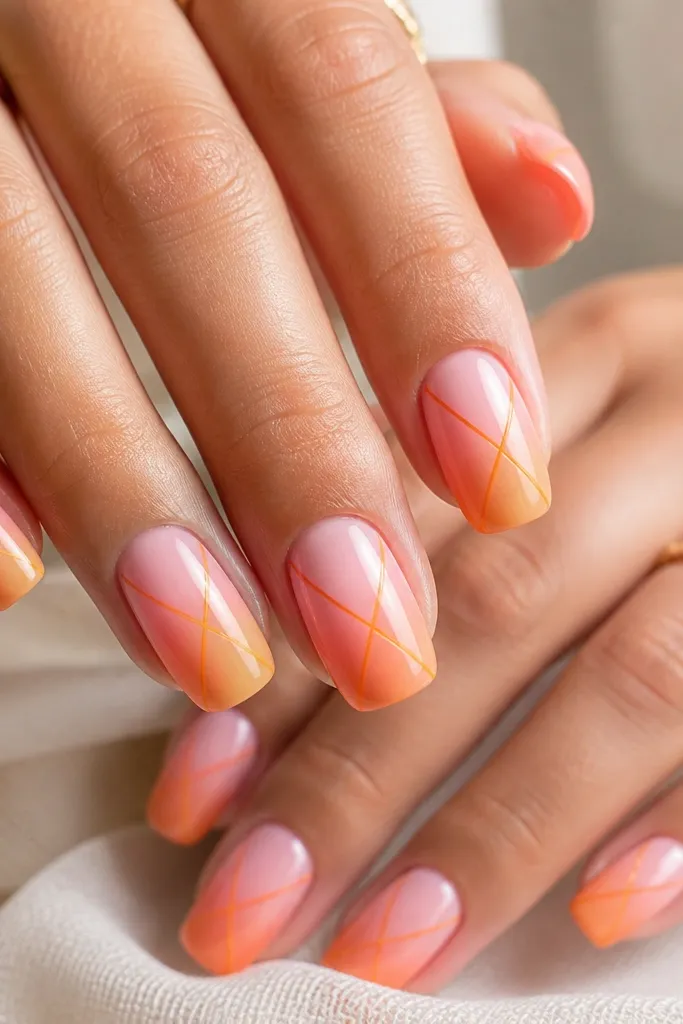
This one flatters because the ombre does the heavy lifting for length, and the crisscross adds a design element without crowding. Peachy orange at the tip elongates medium squoval nails and makes the whole hand look warmer. The soft pink near the cuticle prevents orange from taking over. The thin lines work on most skin tones because they’re transparent enough to let the ombre show through. It’s also a good option if you’re not confident with freehand art — two diagonal lines are easier than detailed flowers.
Start with an ombre sponge using peach-orange at the tip fading into milky pink toward the cuticle. Cure and wipe the tacky layer if your gel needs it. With a liner brush, draw one diagonal orange line from lower-right to upper-left, then add the second line to form an X. Keep the X centered and about 60% of the nail width so it looks balanced. Cure and finish with glossy top coat.
Let the ombre cure fully before drawing the lines, or the orange lines will bleed into the gradient.
Skip thick crisscross lines — they hide the ombre and make it look like a grid sticker.
5. Pink Skittle Nails With Orange Accent Dot
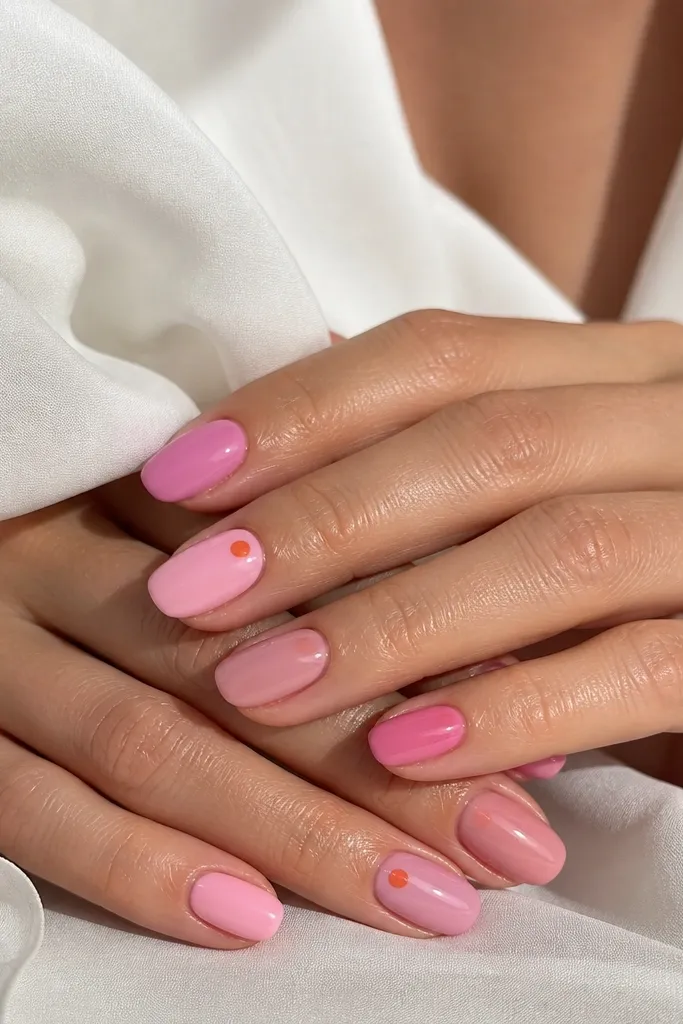
Skittle nails look creative without requiring complicated art, and the orange dot keeps the set cohesive. The trick is that the orange is consistent in size and placement, so it reads intentional. I love this for short nails because dots don’t demand extra length. It’s flattering across skin tones because pink shades do the matching work, while the orange dot adds warmth at the cuticle. This also works well if your work dress code is strict — the art is tiny, not loud.
Paint each nail a different pink — I’d pick five from milky pink, bubblegum pink, rose pink, sheer pink, and a dusty rose. Cure each nail and apply a glossy top coat. For the accent, use a dotting tool and orange gel to place one dot about 1 mm away from the cuticle center. Cure and inspect under bright light to confirm the dot size is the same on every accent nail. Seal with a final top coat.
Editor's notePractice dot size on a scrap nail tip so your dots match before you start the real ones.
Watch outAvoid random dot placement — if the dots don’t sit near the same spot, the set feels accidental.
6. Orange-Centered Galaxy With Pink Frame
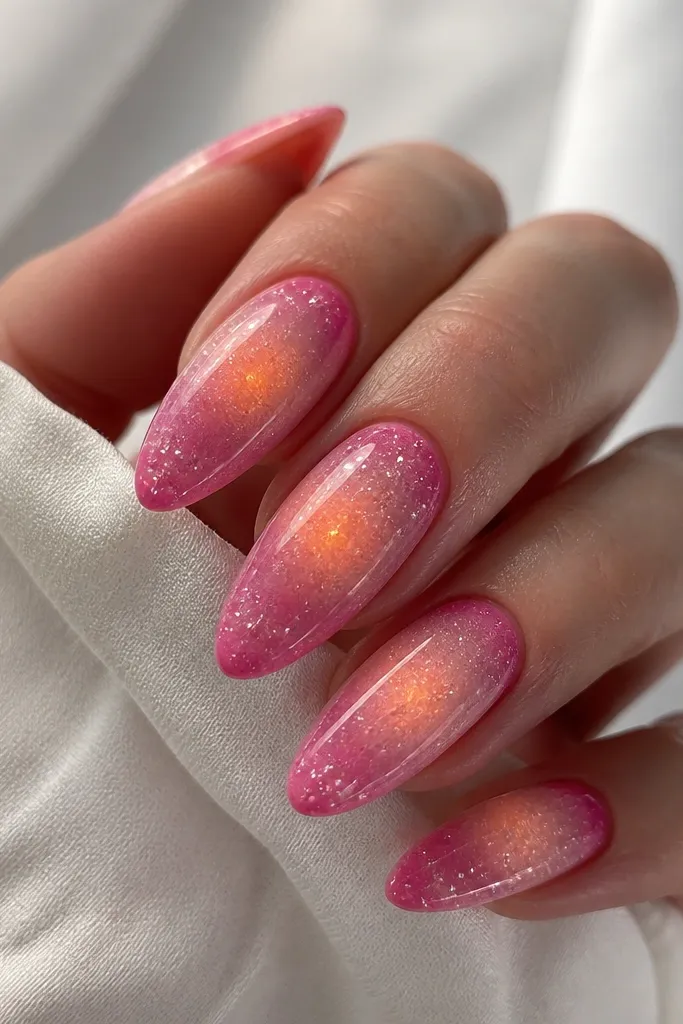
A galaxy center looks creative because it’s textured, but it still stays controlled with a frame. The orange center makes the design feel like it has a focal point, and the pink frame keeps it from looking messy. I recommend this on longer nails where the galaxy can breathe, especially if you like shimmer. On fair skin, the pink frame makes the galaxy pop; on deeper skin, the orange center reads super warm and eye-catching. It’s a good pick for nights out because the shimmer catches flash photos.
Start with a solid pink base and cure. Add a small orange dot in the center of each nail, then blend pink shimmer around it with a makeup sponge so the center stays brightest. Use a fine brush to add tiny specks of white and orange — keep them sparse so it stays classy. Paint a thin pink border near the sidewalls to frame the galaxy, then cure. Finish with glossy top coat to make the shimmer look wet.
If your galaxy looks flat, add one extra layer of glossy top coat after curing the shimmer.
Skip heavy glitter all over — it turns into chunky texture instead of galaxy haze.
7. Matte Pink With Glossy Orange Outline Flowers
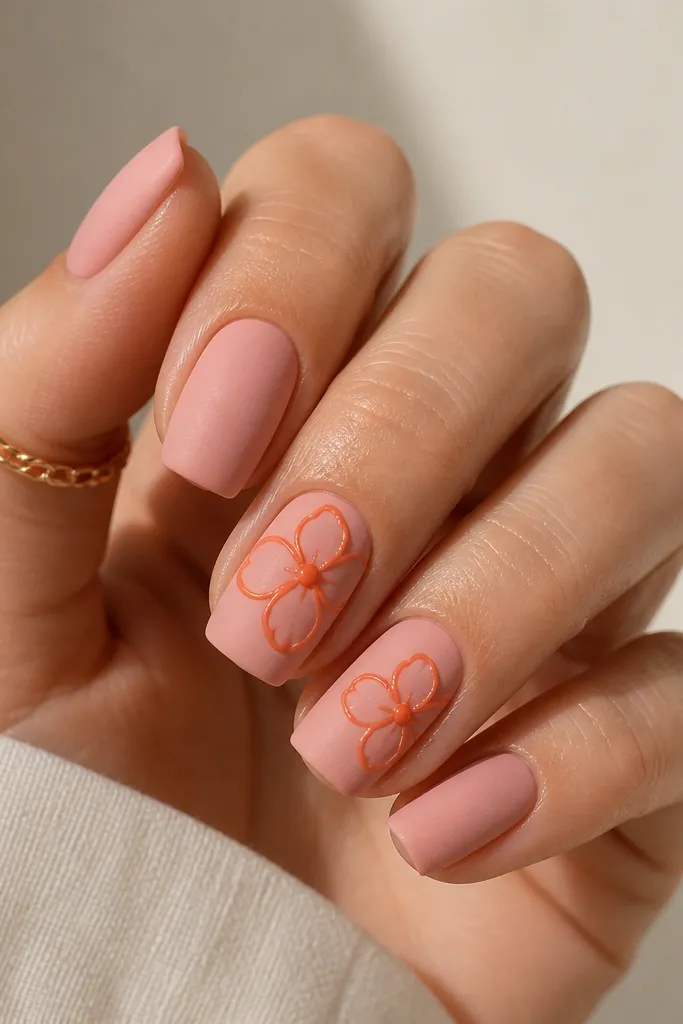
This design hits because matte pink calms everything down, and glossy orange outlines create contrast you can see from across the room. I’ve worn it to spring dinners and it still looks neat because the flowers are outlined, not filled. It flatters hands that look dry because matte hides small texture issues, and the gloss outlines draw attention to the art. The orange is the right color choice for flowers because it feels playful without turning into neon. It also works on short nails if you keep the flower small and centered.
Apply matte dusty pink gel — two thin coats, cure, and finish with a matte top coat. Pick two nails for flowers so the set stays clean. Use a liner brush with glossy orange gel to draw a simple five-petal outline flower and a tiny filled center dot. Cure, then add glossy top coat only over the flower lines so they stand out against the matte base. Cure again if your top coat requires it.
Keep the flower size to about 40% of the nail width so the outline doesn’t look cramped near the sidewalls.
Avoid fully filling the flower with orange on matte — filled shapes can look heavy and messy.
8. Orange Marble Tips Over Milky Pink
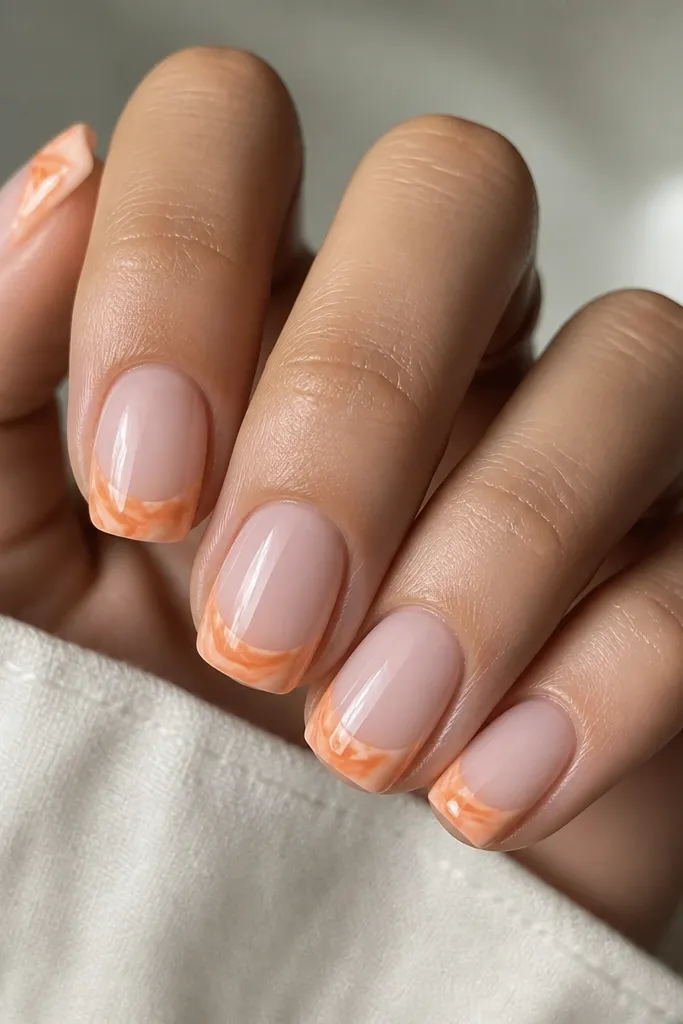
Orange marble tips are a sweet spot: they feel artistic, but they don’t cover the whole nail. The milky pink base makes your nails look fresh and bright, while the marble tips add texture and depth. This is especially flattering when your nails are short because the art stays in the tip zone, creating a “designed tip” effect. On warm undertones, the orange reads creamy and sun-kissed; on cool undertones, the white veining keeps it from looking muddy. It’s also a great choice when you don’t want full nail art on every finger.
Start with a milky pink base and cure. Sponge or brush on a thin orange layer only at the tips, then drag a little white gel through it with a fine liner brush to create marble veining. Keep the orange area about 25-35% of the nail length so it looks like a tip design, not a full cover. Cure, then seal with glossy top coat. If the marble looks too transparent, add one more thin orange layer just at the tip before the white lines.
Use a toothpick to swirl white into orange if your liner brush is too thick for delicate veins.
Avoid extending the marble past the tip curve — it makes short nails look smaller.
9. Pink and Orange Negative-Space V Tips
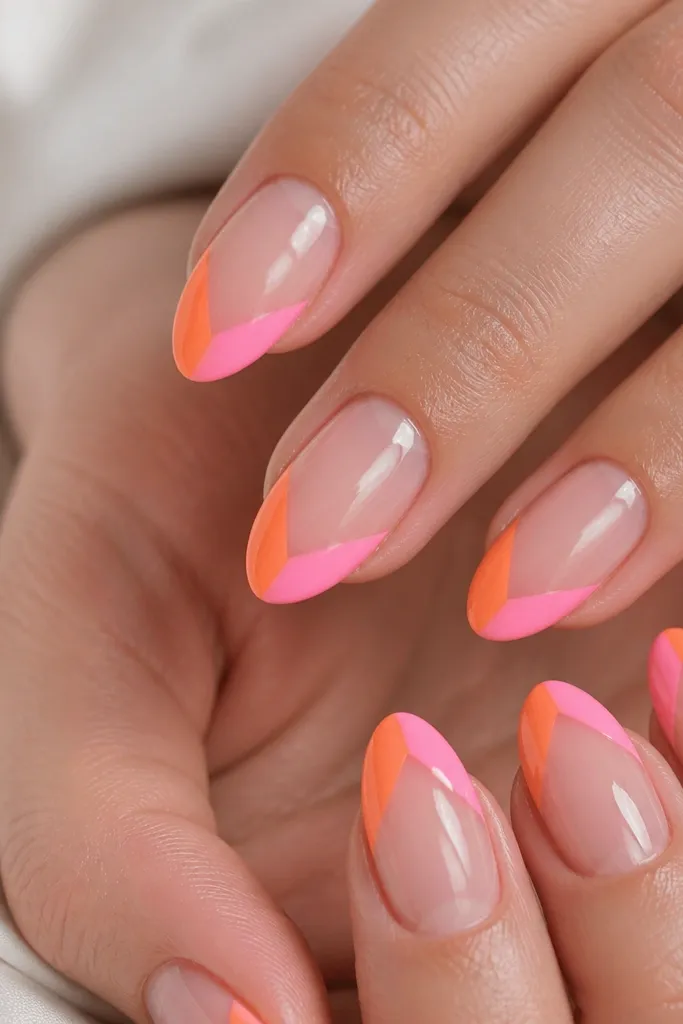
Negative space V tips look sharp because your nail color actually becomes part of the design. The V shape makes nails look longer by pulling the eye toward the center line. I love this for medium almonds and long squovals because the V has enough room to look clean. It flatters hands with shorter nail beds because the bare center adds length. Pink and orange together here feel modern and graphic instead of candy. It also hides small imperfections since the clear base and crisp V lines distract from cuticle texture.
Prep and apply a clear base or nude builder gel, then cure. Use striping tape or a steady hand to mark a V at the tip — the V edges should start near the sidewalls and meet at the center. Paint one V side orange and the other side pink, keeping the tape line crisp. Remove tape after curing the color, then add glossy top coat over everything. If you want extra definition, trace the V edges with a thin orange or pink line using a liner brush.
If your V edges look uneven, use a small brush dipped in top coat to clean the line edges before curing.
Avoid filling the negative space — leaving it clear is what makes it look expensive.
10. Orange Glitter Tip Over Pink Jelly Base
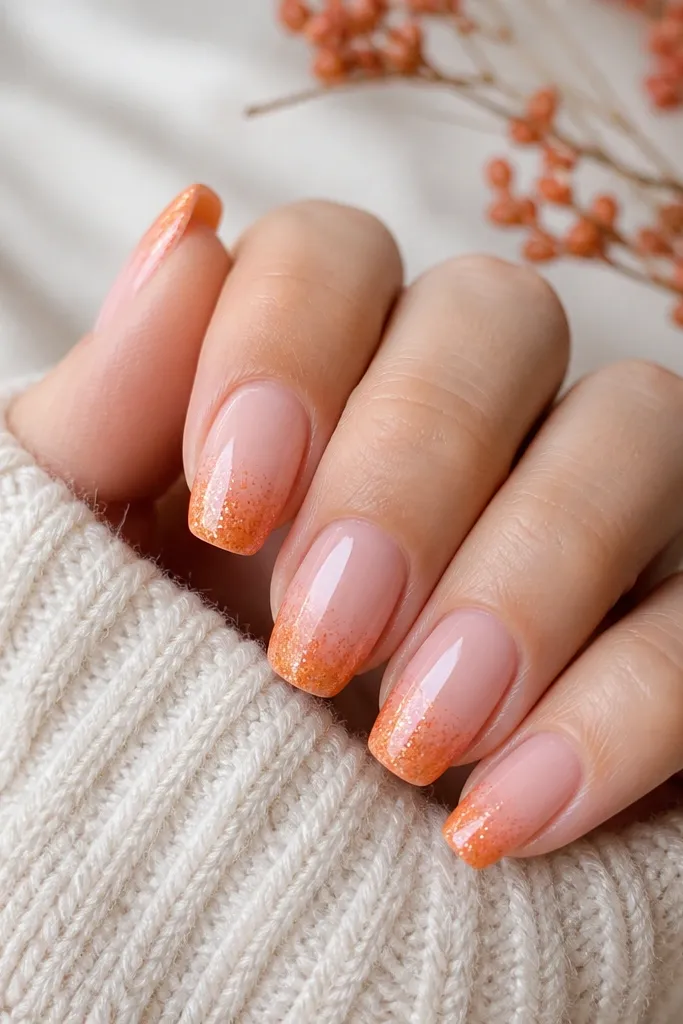
Jelly pink makes the orange glitter look brighter because it lets light pass through instead of sitting on top of opaque color. This design looks best on longer squoval where the glitter band can taper nicely. It flatters most skin tones because pink jelly reads clean and the orange sparkle adds warmth. For parties and holiday events, it photographs really well because the glitter catches flash while the jelly keeps it soft. The creative part is the taper, not the glitter itself.
Start with a pink jelly base and cure. Sponge or brush orange glitter onto the tips, keeping it densest right at the tip edge and fading upward. Use a clean brush with a tiny amount of top coat to smooth the glitter fade so it doesn’t look stepped. Cure and check coverage under direct light. Finish with glossy top coat — do one extra thin layer if you want the glitter to look sealed and not gritty.
Editor's notePress the glitter gently with a silicone tool so it bonds flat instead of sticking up.
Watch outSkip thick glitter layers with no smoothing step — they feel rough and look uneven.
11. Pink Swirl With Orange Dot Clusters
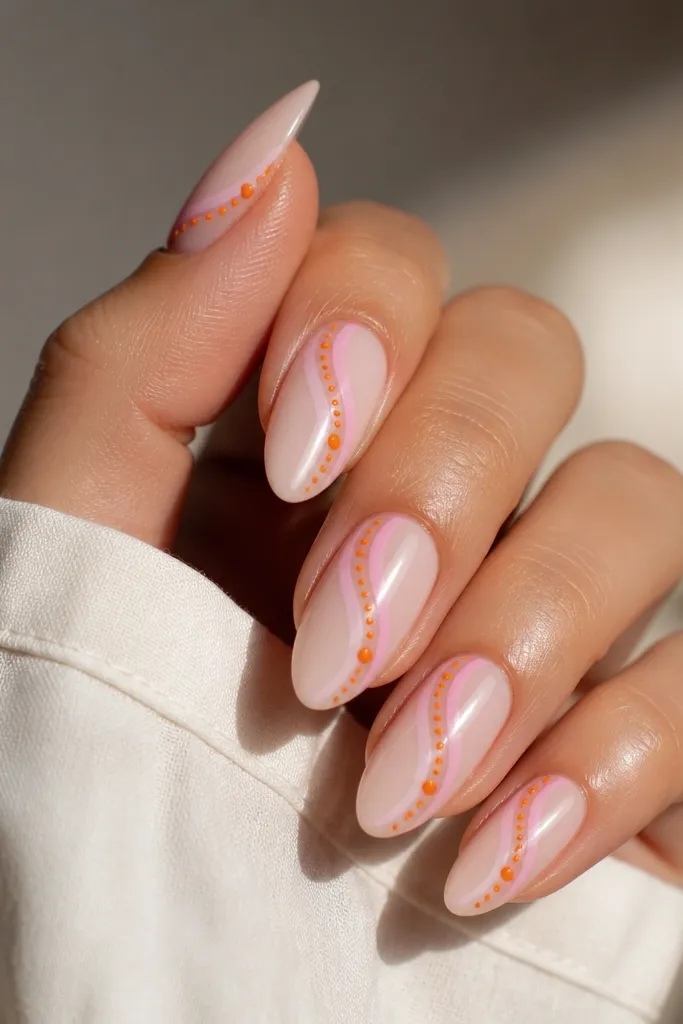
Swirls make this combo feel hand-drawn, and the orange dot clusters keep it playful. I like this on medium almonds because the swirl has room to curve without flattening. The milky nude-pink base makes the orange dots look crisp, not overpowering. If you have shorter nail beds, the swirl centered along the nail elongates visually. This is also a great way to use orange without painting big blocks — dots are easier to control and look intentional. It’s fun but still neat enough for work on most days.
Paint a milky nude-pink base and cure. With a thin brush, draw a smooth pink swirl line that runs from lower side to upper center, then thicken it slightly where it turns. Add orange dot clusters near the swirl tail using a dotting tool — keep each cluster small and spaced so they don’t merge. Cure and cover with glossy top coat. If the dots look too matte, add one extra top coat pass over just the dot clusters.
Use the same dot size across the nail set so the clusters look like a planned pattern.
Avoid random dot counts — a cluster of 9 looks like glitter rather than nail art.
12. Orange Outline French On Pink Sheer Base
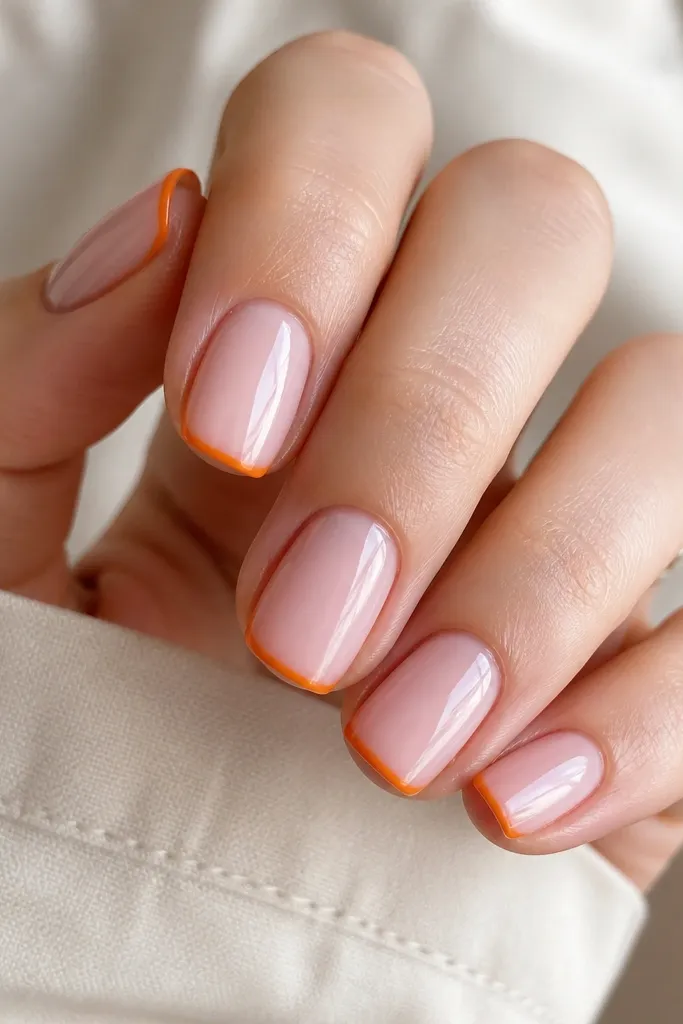
An outlined French is a clean trick when you want orange to look sophisticated instead of loud. The sheer pink base keeps everything light, and the orange outline gives that graphic definition. This is flattering on short nails because you’re not covering much surface area with solid color. It also works well if your nails have slight unevenness since the outline draws the eye to the tip curve. If you like minimal art but still want it to feel creative, this is the one I reach for.
Apply a sheer pink builder gel or sheer pink polish and cure. Use a French guide or freehand to paint an orange outline along the tip curve, leaving the inside of the tip sheer. If you need opacity, add a second thin orange outline pass, not a filled tip. Cure and seal with glossy top coat. Clean up the outline edges with a brush dipped in cleanser before curing if you see fuzz.
Use a nail art liner brush with a firm tip — soft brushes make outlined French look wobbly.
Skip a filled orange tip — outlined French is the look.
13. Pink and Orange Checkerboard Accent
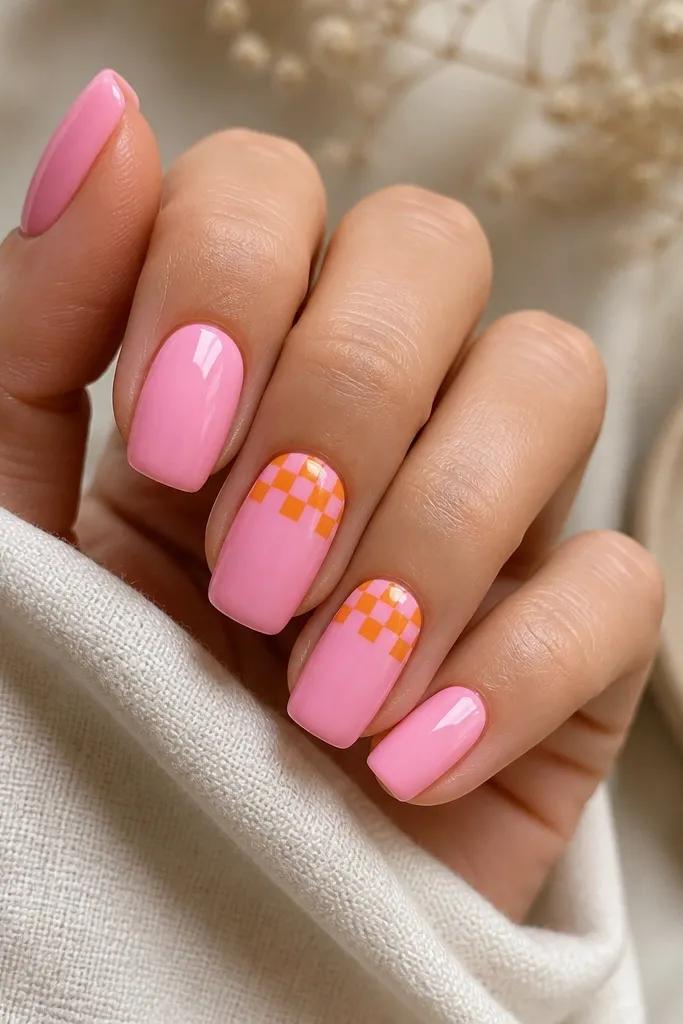
Checkerboard looks creative because it’s structured, and structured nail art reads “intentional” fast. Keeping it only on the top third keeps it from overpowering your hand. Pink as the base is your safe choice, while orange squares bring the contrast. This design flatters hands that need a little visual structure — it makes the nails look more even. I also like it for birthdays and festivals because the orange adds energy without neon vibes.
Paint all nails glossy pink and cure. Choose two nails for the checkerboard. Use nail striping tape cut into small squares or use a checkerboard stamp if you have one; otherwise, paint a grid lightly with a fine brush. Make the squares alternate between orange and a slightly lighter pink, then remove tape carefully after curing. Seal with glossy top coat to lock the pattern in place.
Editor's noteIf you’re painting by hand, draw the grid first with a clear gel line, cure, then fill squares.
Watch outAvoid large squares on short nails — they crowd the tip and make it look bulky.
14. Orange Gel 'Ribbon' Over Pink Base
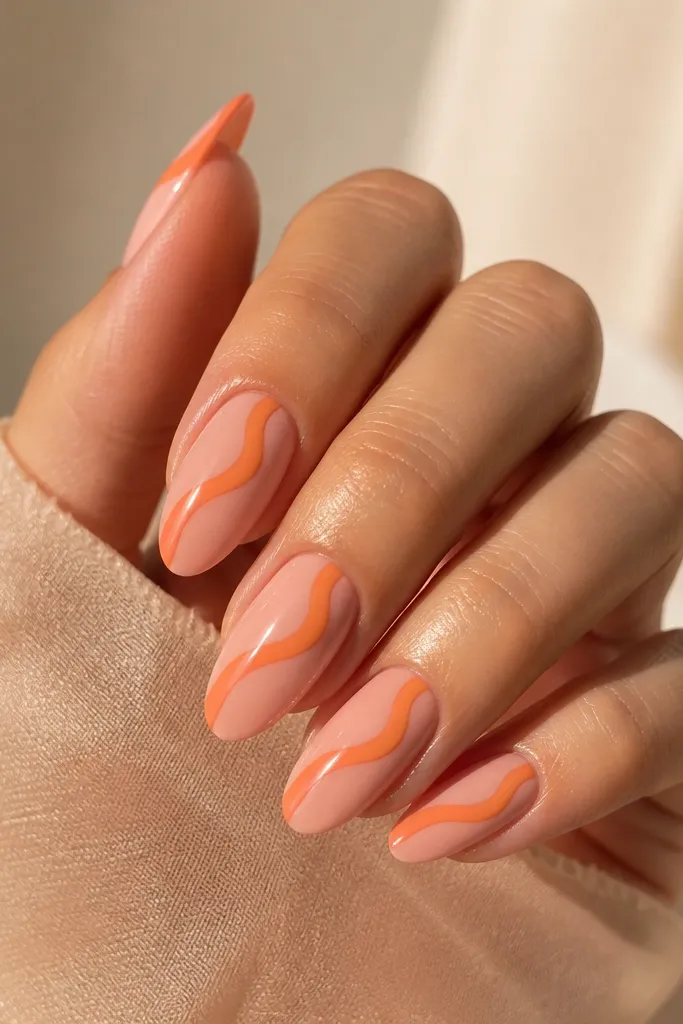
A raised ribbon stripe looks like you added something dimensional, even though it’s just gel. It’s creative because the orange is thicker and catches light, while the pink base stays smooth and simple. I recommend long almond or long squoval because the ribbon needs length to look elegant. On medium skin tones, the orange looks warm and glossy; on fair skin, it reads like a bright manicure statement. This is also one of the easiest “wow” looks if you’re comfortable drawing one line.
Start with a glossy pink base and cure. Use a brush to create an orange gel stripe that’s slightly thicker than a normal paint stroke, placing it diagonally or straight down the center. Cure in short bursts if your gel is thick, so it doesn’t flood under the skin. When the ribbon is set, cap the stripe lightly with a thin layer of orange or top coat to smooth the edges, then cure. Finish with glossy top coat over the whole nail to blend the shine.
Keep the ribbon width about 1.5-2 mm so it looks like a ribbon, not a bar.
Avoid too much gel — if it’s thick everywhere, it can lift at the edges.
15. Pink Tortie With Orange 'Cracks'
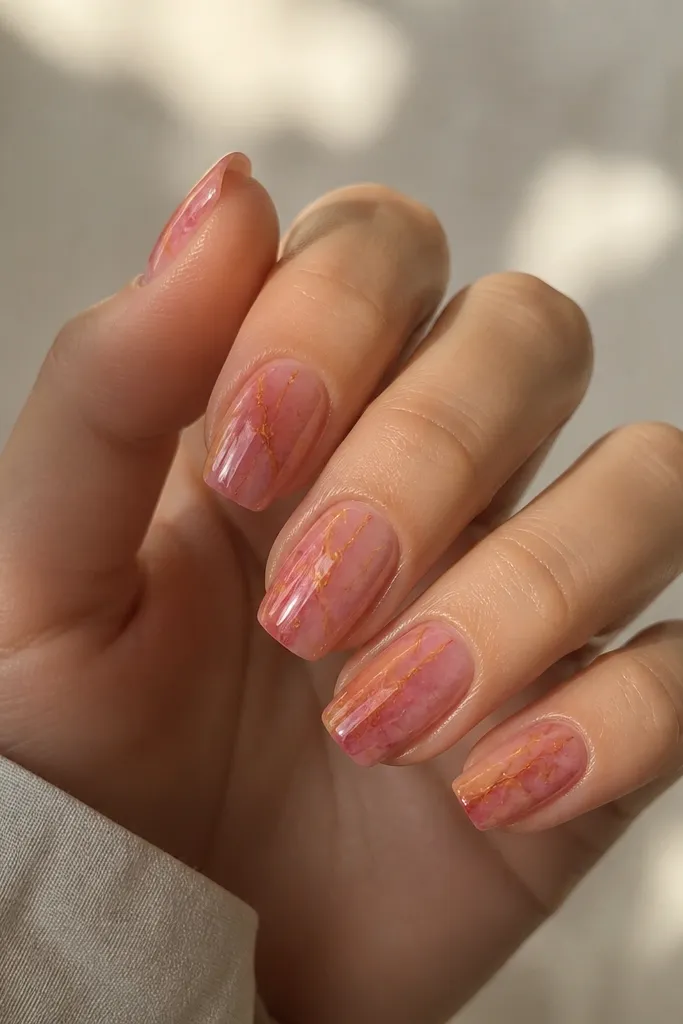
Tortie (tortoiseshell) looks creative because it has depth without requiring tiny details. The orange cracks give it that “electric” contrast while the pink tortie keeps it wearable. I like this on medium squoval because the tortie texture fills space nicely and doesn’t look sparse. It flatters almost everyone because tortie patterns soften bright colors into something wearable. This is great if you’re tired of clean lines and want something that feels handmade but not messy.
Apply a light pink base and cure. Sponge or brush on a mix of pink and a peachy nude, then use a fine brush to add irregular darker pink patches. With a thin liner brush, draw a few orange crack lines over the tortie, keeping the cracks thin and uneven. Cure and seal with glossy top coat, then add a second top coat layer if the tortie needs extra smoothness.
Editor's noteLet the tortie colors overlap — sharp edges make it look painted instead of tortie.
Watch outAvoid too many orange cracks — a few thin lines look intentional.
16. Orange and Pink Foil Leaf On One Accent Nail
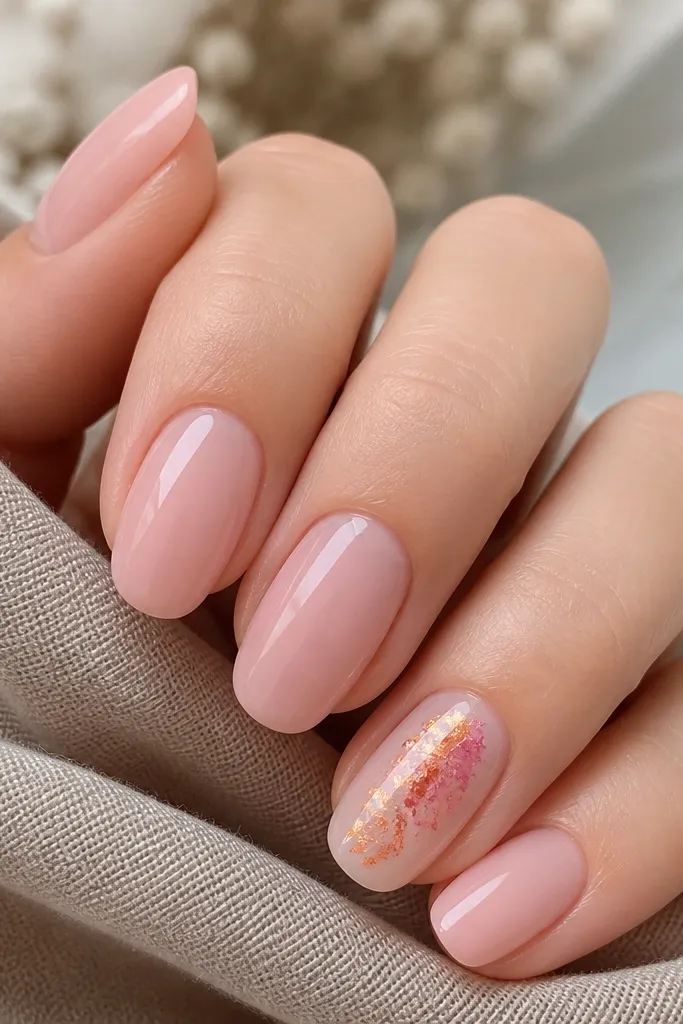
Foil leaf looks creative because it adds movement and sparkle without needing a drawing. I keep it to one accent nail per hand so the orange-and-pink palette stays refined. The foil pieces catch light and make even plain pink look special. On fair skin, the pink foil looks rosy; on deeper skin, the orange foil reads warm and bright. This design is also forgiving if your application is a little uneven because foil texture hides tiny brush marks.
Paint all nails glossy pink and cure. On one accent nail, apply a tacky foil glue layer (or tacky gel) and cure until it’s tacky per your product instructions. Press orange and pink foil leaf pieces onto the tacky area — overlap them slightly and leave some bare gel showing for balance. Seal with a thick layer of top coat, then cure. If you see any foil edges lifting, add a small amount of top coat directly on those spots and cure again.
Editor's notePress foil with a silicone tool, not your fingertip, so you don’t smear it.
Watch outSkip thin top coat over foil — it can leave foil edges snaggy.
17. Pink Gradient Cuticle Fade With Orange Tip Cap
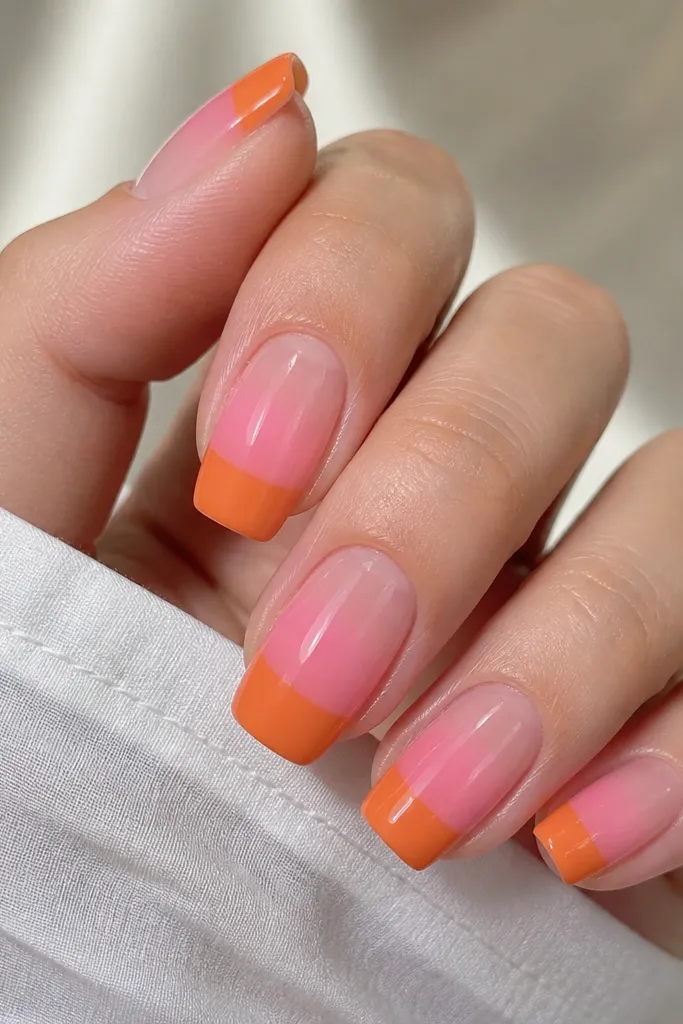
This is a strong, clean look because the gradient handles the soft transition and the orange cap gives a bold endpoint. I like it on long squoval because the nail gets a defined top and a soft middle. It flatters hands by making the nail bed look longer due to the clear-to-pink fade near the cuticle. The orange cap looks great on both warm and cool undertones because it’s balanced by the pink gradient. It’s creative without being busy — the design is basically two moves done perfectly.
Start with a clear base or sheer builder gel. Sponge a pink gradient from the cuticle down the nail, fading lighter near the cuticle and stronger near the tip, then cure. Paint a solid orange cap across the last third of the nail with a crisp horizontal edge — use a straight brush and take your time. Cure, then clean the underside of the tip edge with a small brush to prevent lifting. Seal with glossy top coat.
Editor's noteFor a sharper cap line, paint the orange, let it level for 10 seconds, then cure.
Watch outAvoid a wavy cap edge — it makes the manicure look rushed.
18. Pink Swatch Background With Orange 'Stamp' Lines
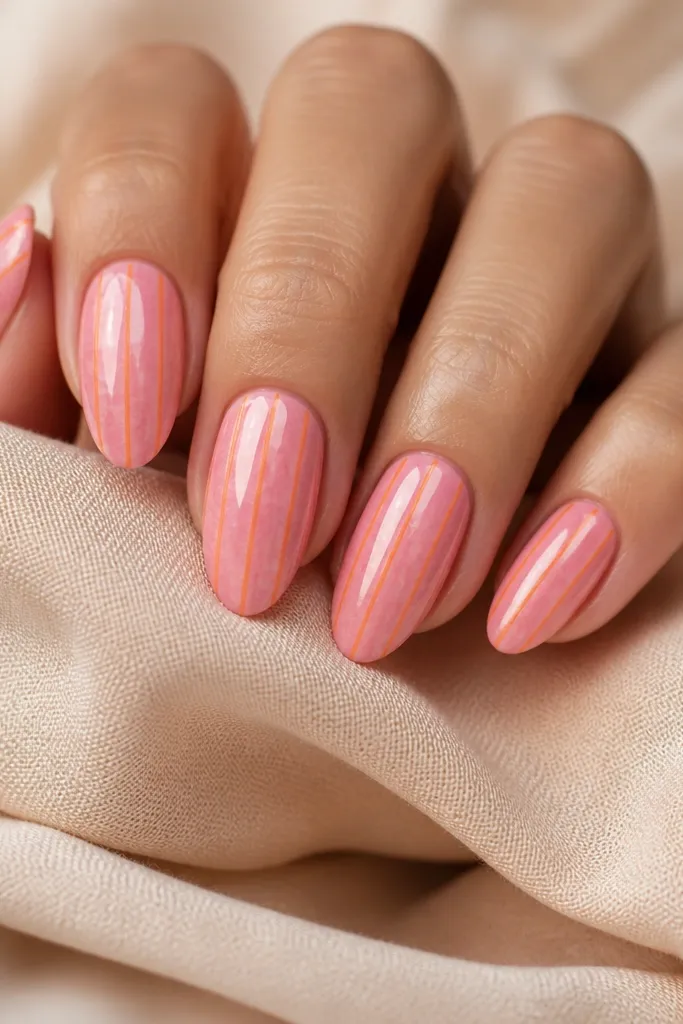
This design feels creative because it uses texture as the background and turns orange into a pattern instead of a block. The pink swatch texture makes the orange lines look crisp and graphic. I like it on medium almond because the vertical lines elongate the nail shape. It flatters hands that look good in graphic designs — if you like clean fashion details, you’ll love this. The orange stays lively while the textured pink keeps it from looking too plain. It also works well if you’re trying to stretch your manicure; the pattern hides small chips.
Paint a base pink that has slight texture — you can use a pink polish with a micro-sheen or apply pink gel and stipple lightly with a sponge, then cure. Use a stamping plate or a stencil to add orange vertical lines — stamp over the nail or paint through a stencil. Keep the lines evenly spaced and centered. Cure and seal with glossy top coat to smooth the texture slightly while keeping the pattern visible. If your background is too smooth, the stamped lines can look dull — add a second top coat layer only after the lines cure.
If you don’t have a stamp, use striping tape cut into thin strips and paint orange over it.
Skip uneven line spacing — it’s the quickest way to make the pattern look messy.
19. Orange and Pink Watercolor Fade With Clear Negative Center
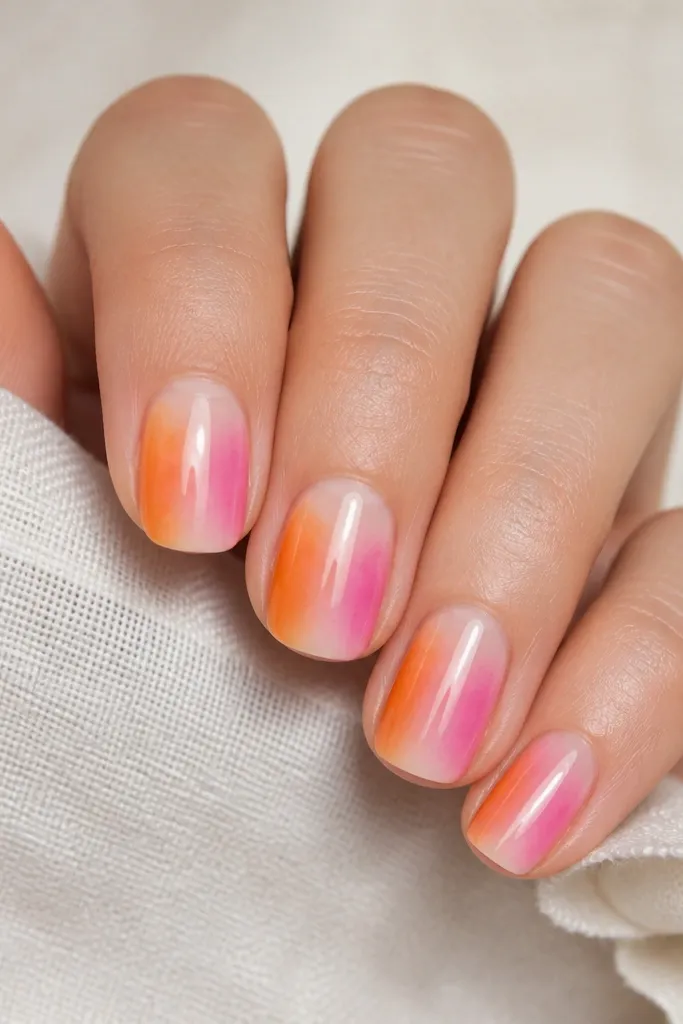
Watercolor fades look artistic, and the clear negative center keeps it from becoming a full-coverage blur. The vertical strip makes nails look longer, which is why it works on shorter lengths too. This design flatters all skin tones because the clear center matches your natural nail bed. If you want something more “art class” than “candy shop,” this is the one. The orange-to-pink blend gives warmth, while the clear strip keeps your hand looking clean.
Apply a clear base and cure. Use a thin strip of striping tape down the center to reserve the clear strip. Sponge orange onto the left side of the nail and pink onto the right side, blending where they meet near the center edges of the tape. Remove tape before curing if your tape peels cleanly, then cure. Seal with glossy top coat, and check the center strip edges — touch them up with clear gel if needed.
Blend with a damp makeup sponge (not wet) so the watercolor edge stays soft.
Avoid hard edges on the watercolor — sharp sponges make it look like tape blocked paint.
20. Pink Outline Hearts With Orange Accent on Ring Finger
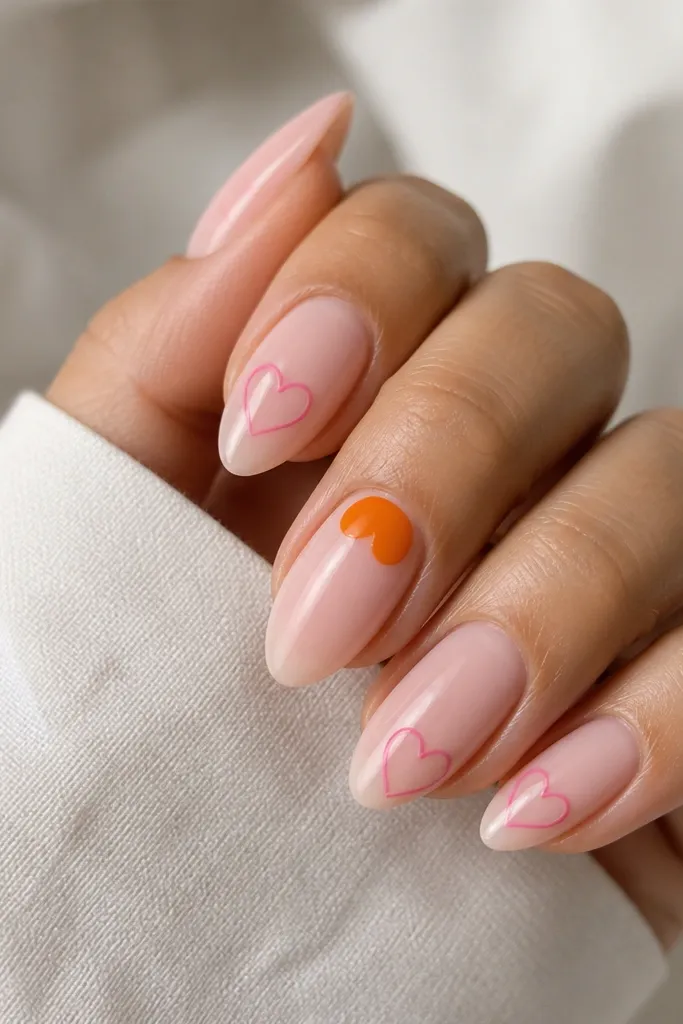
Hearts can look childish, but outline hearts in saturated pink look grown-up, especially on a sheer base. The orange accent on the ring finger makes the set feel intentional and special without turning every nail into a Valentine costume. I like this on medium almond because the hearts have a natural place near the sidewalls and don’t get cramped. It flatters fair and medium skin tones because the sheer base keeps everything light. The orange half-heart adds warmth and breaks up the pink repetition.
Start with a sheer pink base and cure. On three to eight nails (depending on your comfort), draw small outline hearts with a thin liner brush — keep them near the side, sized about 2-3 mm wide. Pick one ring finger and paint a half-heart in orange near the cuticle, leaving the top of the heart open so it looks like a cutout shape. Cure and add glossy top coat over everything. If hearts need more definition, do a second outline pass after the first cures.
Editor's noteUse a toothpick to place heart points — it’s easier than trying to drag with a brush.
Watch outAvoid filled hearts — they look heavy on sheer bases.
21. Orange-To-Pink Reverse French With Curved Smile Line
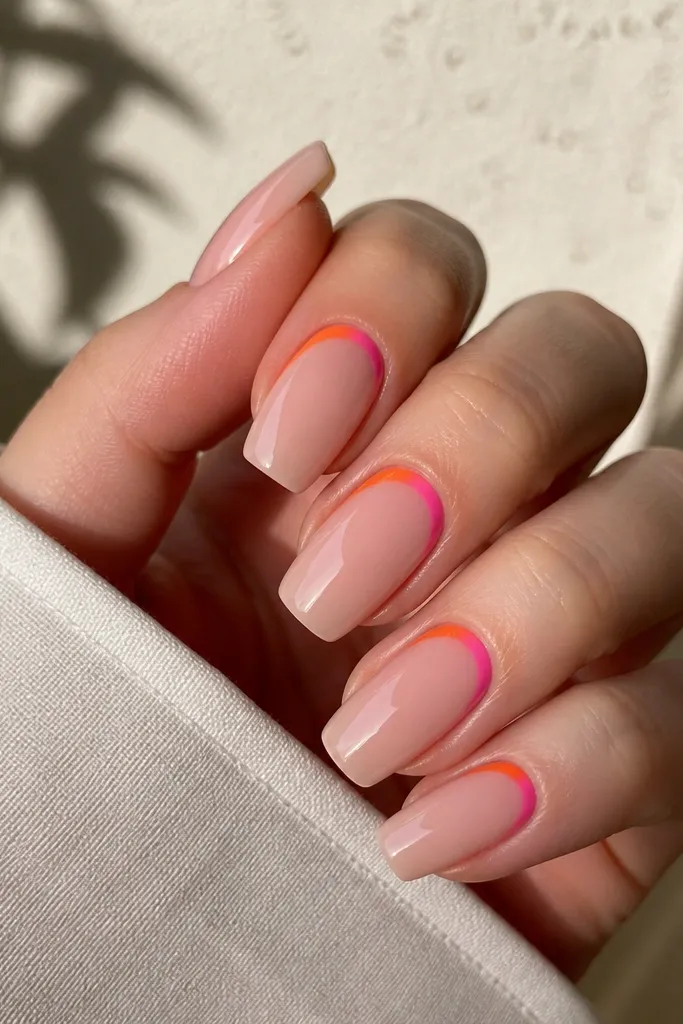
Reverse French looks “designer” because it flips the usual tip focus to the cuticle area. The curved smile line makes the nail bed look longer and gives a lifted look to the hand. I love this on long squoval because the cuticle curve has space and looks smooth. The orange-to-pink transition in the reverse band feels creative without needing extra art. It flatters most skin tones because the nude-pink base keeps it fresh and the color band is placed where eyes naturally go.
Apply a nude-pink base and cure. Place a thin curve near the cuticle following your smile line — use a French guide if you have one. Paint the left side of the curve orange, then blend into pink at the center, finishing with pink on the right side. Keep the band thickness consistent, about 1-2 mm. Cure, then top coat with glossy finish and cap the nail edge lightly so the curve doesn’t lift.
Editor's noteIf your smile line is hard to copy, trace your cuticle curve with a liner brush using clear gel first, then paint colors.
Watch outSkip thick reverse French — it can look like a sticker around the cuticle.
22. Pink Base With Orange Triangle Side Accent
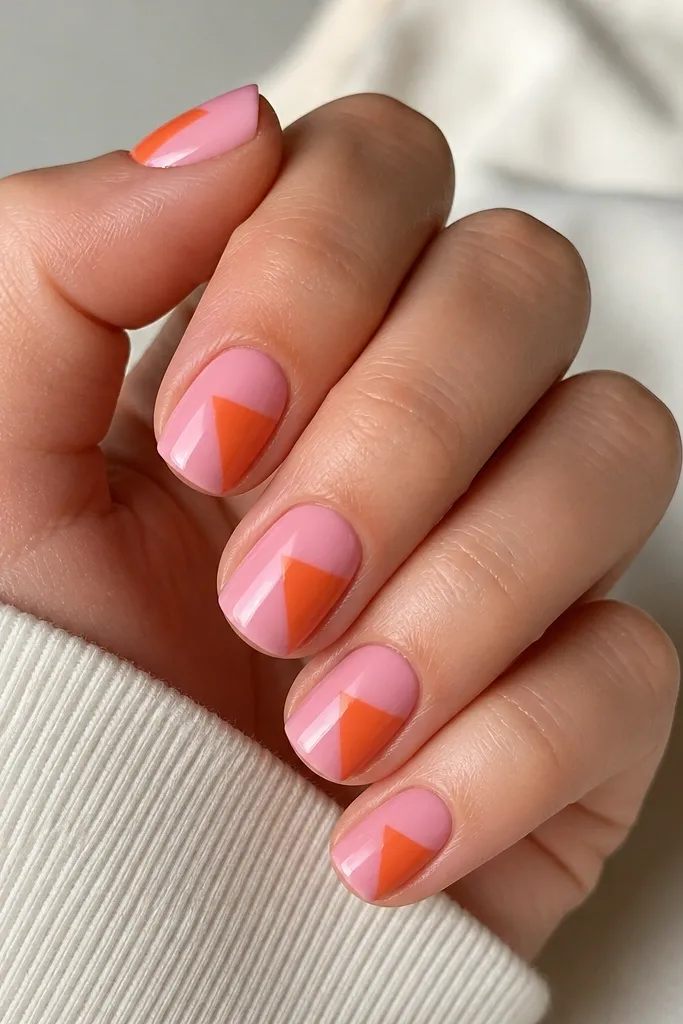
This is a geometry trick that makes pink-and-orange look modern instead of busy. A single orange triangle gives you a focal point while keeping the rest of the nail simple. I like it on short squoval because triangles create a “point” that visually stretches the nail. It flatters hands with wider nail beds because the triangle sits on one side and doesn’t cover the whole tip. If you want a manicure that looks intentional in photos, this one delivers.
Paint a glossy pink base and cure. Use a striping brush to place an orange triangle near one sidewall, with the triangle tip pointing toward the center of the nail — roughly 20-25% of the nail width. Keep the base of the triangle near the mid-nail, not at the very tip, so it looks balanced. Cure and top coat with glossy finish. Repeat the triangle placement on every nail so the set looks consistent.
Mark the triangle tip location lightly with a dot guide before painting — it keeps triangles aligned.
Avoid triangles that start too close to the cuticle — they can look like growth lines.
23. Orange and Pink Split Nail Vertical Bar
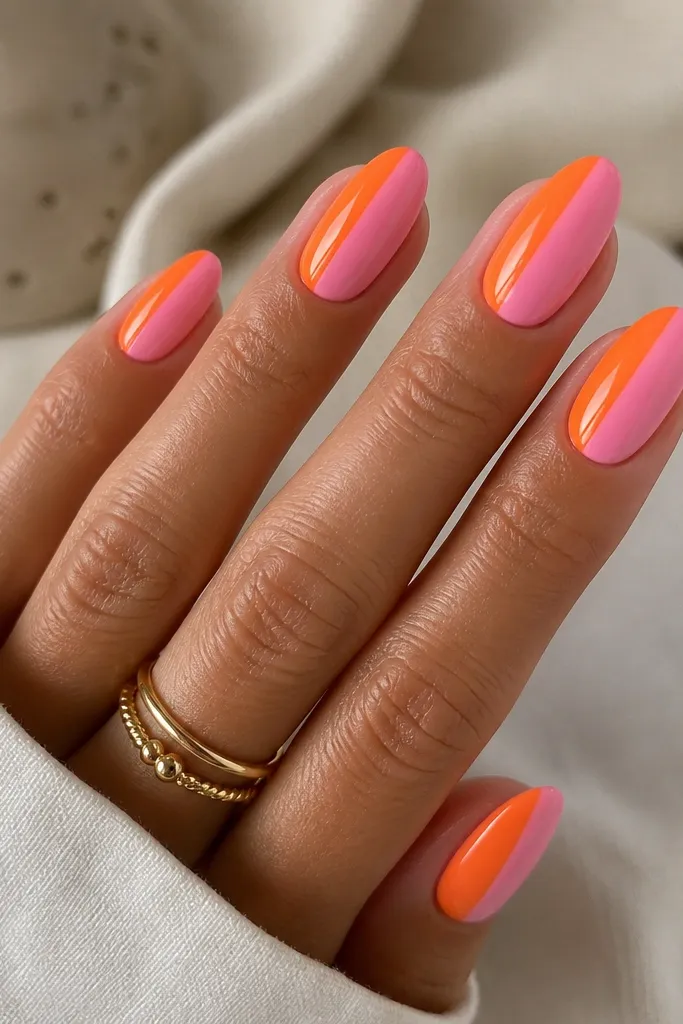
Vertical splits look bold and clean, and they make the color combo feel graphic rather than sugary. This is the design I’d pick when you want the manicure to look confident with minimal effort. It flatters long-medium nail shapes because the line runs the full length and visually narrows the nail. On fair to deep skin tones, the glossy orange and glossy pink contrast reads strong and bright. If you like symmetrical looks, you’ll love this one because every nail can match perfectly.
Start with a base coat and cure. Paint the left half of each nail orange up to the sidewall, then cure. Clean the brush, then paint the right half pink, carefully meeting the center line without flooding it. If you’re worried about bleeding, use a thin strip of striping tape down the center after the first color cures. Remove tape after both colors are cured and seal with glossy top coat.
Editor's noteWipe your liner brush often with cleanser so the center line stays crisp and not streaky.
Watch outAvoid a curved split line — it ruins the clean graphic effect.
24. Pink Marble Dots Over Orange Base
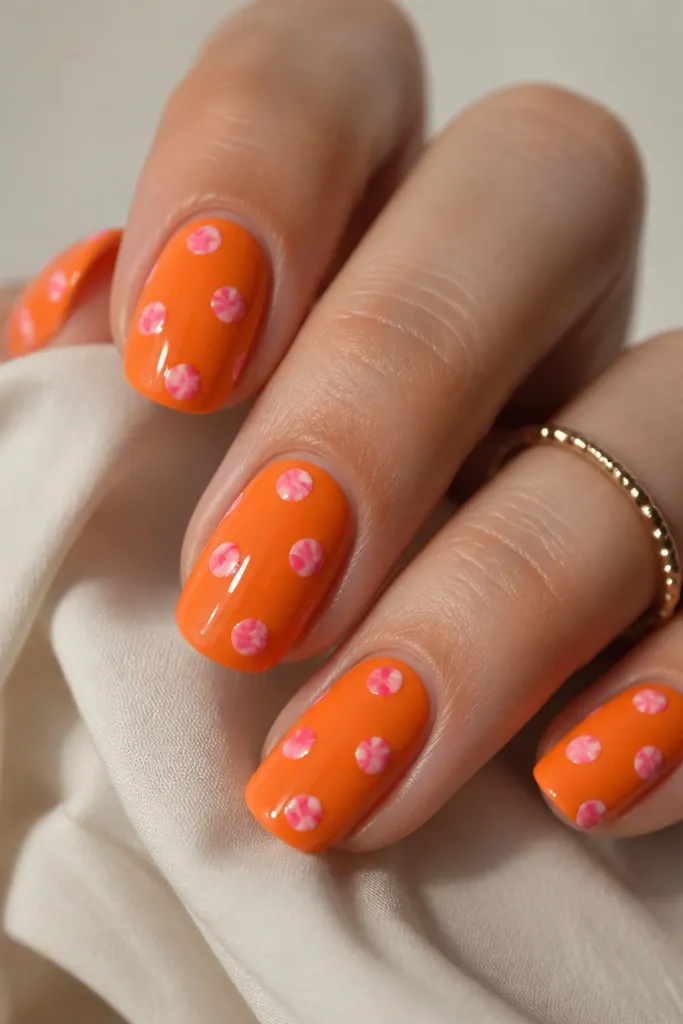
Putting pink marble dots over an orange base makes the orange feel more refined, not harsh. The orange base is the canvas, and the pink dots add softness and movement. I like this on medium squoval because the dots sit well on the nail surface and don’t require long tip space. It flatters warm undertones like a sunset, and it still works on cool undertones because the pink is saturated and clear. This design also hides minor edge wear since the dot pattern distracts from small chips.
Paint all nails a glossy orange base and cure. Using a dotting tool, place small pink dots across the nail in a loose scattered pattern. With a fine liner brush, add a tiny white swirl inside a few of the dots to create a marble-candy effect — don’t do it to every dot. Cure and seal with glossy top coat, then check under a lamp to make sure the dots don’t sink.
Editor's noteKeep the dots smaller than you think; bigger dots make orange look heavy.
Watch outAvoid lining up dots in perfect rows — it turns into a stamp instead of marble.
25. Orange Chrome Edge Over Pink Gloss
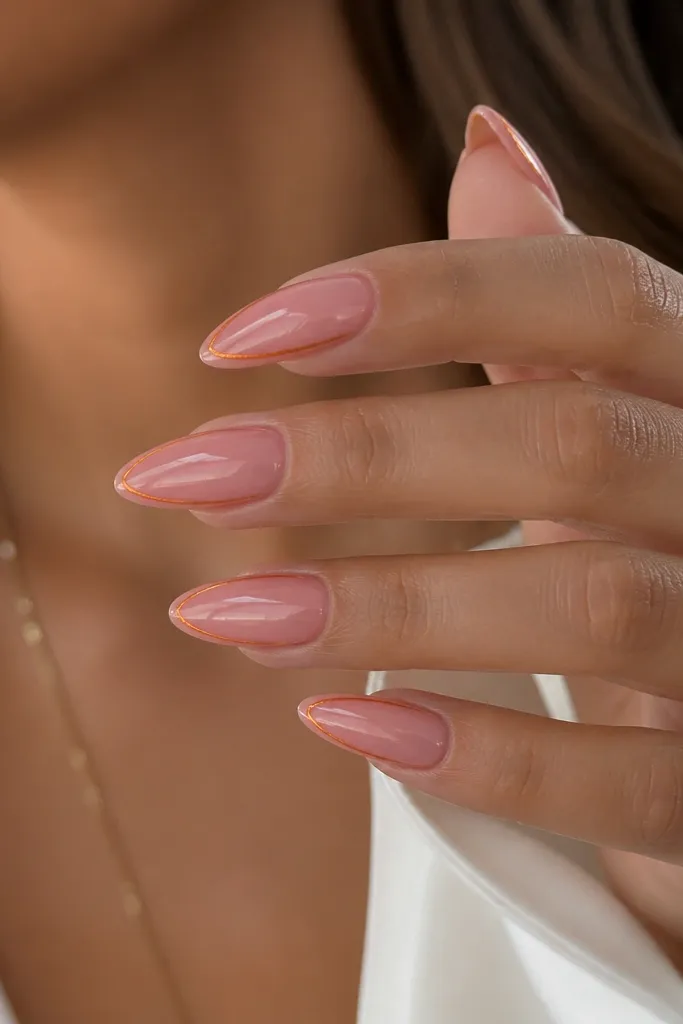
Chrome edges look expensive because they use light reflection, and orange adds warmth to pink without turning neon. I like this on long almond because the edge line follows the nail’s natural curve and looks smooth. It flatters hands because it draws attention to the shape, especially if your nails are slightly uneven — the chrome line makes the outline look intentional. On fair skin, the chrome reads like a warm copper highlight; on deeper skin, it looks like a bright sunset rim-light. This is also one of the easiest ways to make a simple pink manicure feel creative.
Apply glossy pink gel base and cure. Apply a thin strip of tacky gel along the outer edge of the nail where you want the chrome, leaving a small gap from the sidewall if you get flooding. Rub orange chrome powder onto that tacky strip, then brush off excess gently. Seal with a chrome-friendly top coat if your system needs it, or a thin gloss top coat to lock it in. Cure and repeat on every nail so the edge line matches from finger to finger.
Use a striping brush to map the edge line first, then add chrome so the shape stays consistent.
Avoid covering the whole nail with chrome — edge chrome is the look.



