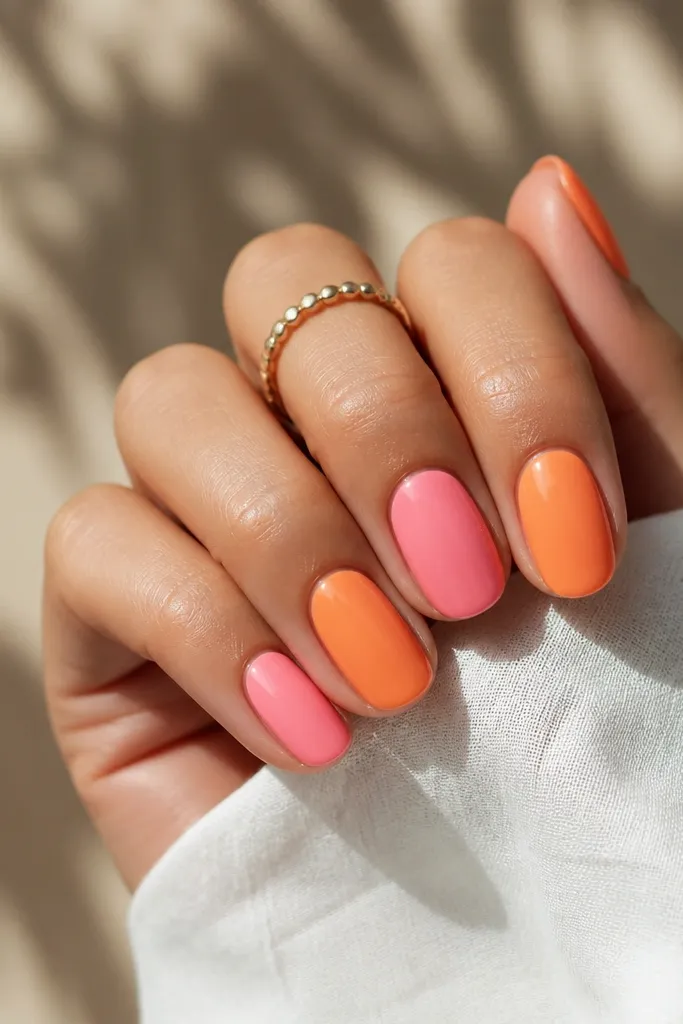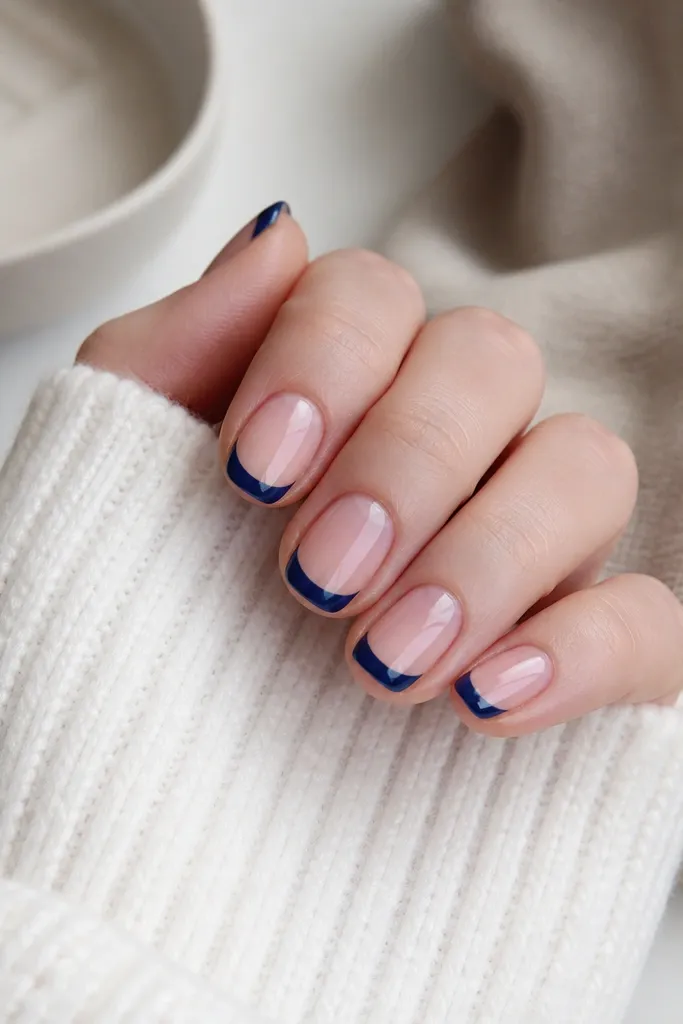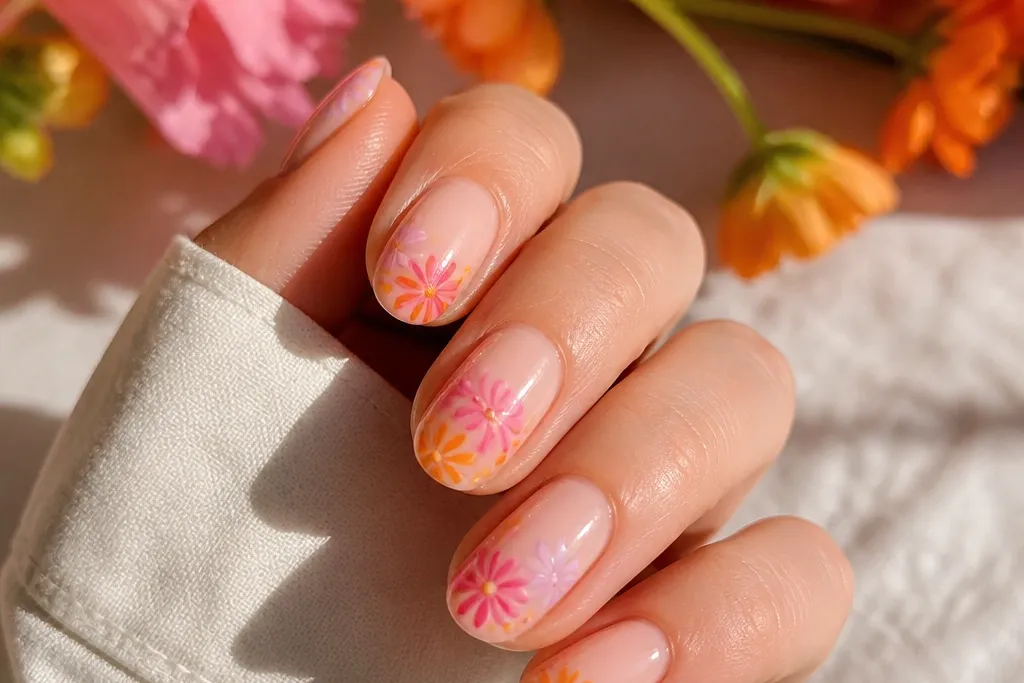
1. Milky Pink Base with Orange Halo Roses
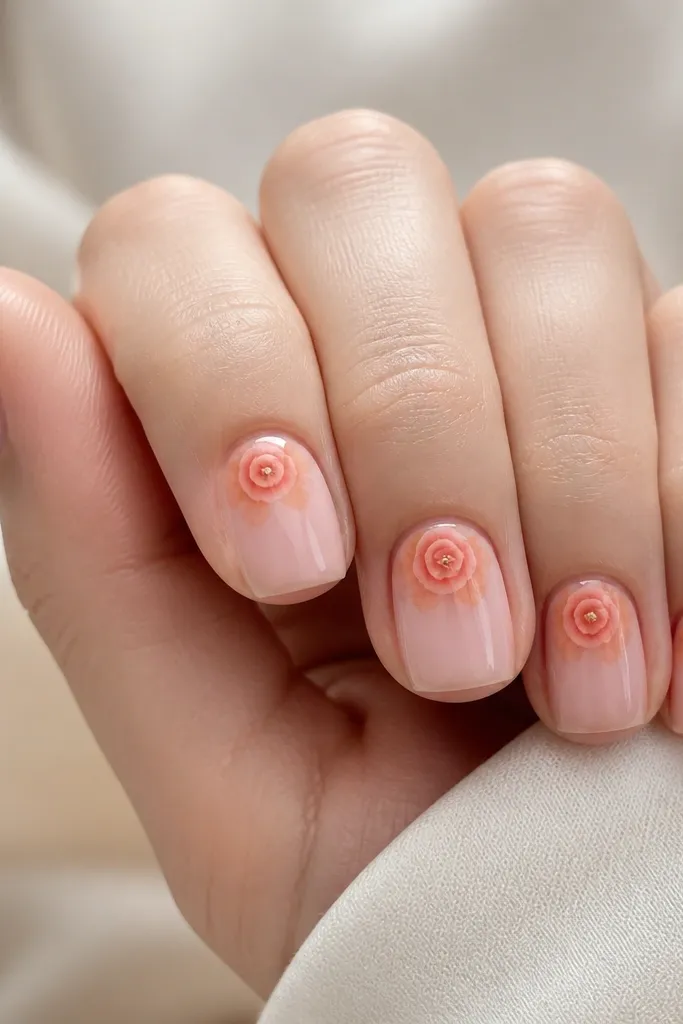
Start with a sheer milky pink base so the nail looks like skin, not paint. The orange halo goes behind the rose, not on top of it, so it reads as light shining through petals. This design flatters every skin tone because the pink stays neutral and the orange is warm but diluted. It also looks great on shorter nails because the glow makes the nail bed look longer. For dreamy vibes, keep the rose petals thin and slightly uneven - perfect symmetry makes it look like a sticker.
First, paint two thin coats of milky pink gel or builder gel, curing each coat fully. Then add orange gel in a loose crescent behind the cuticle using a small flat brush, and gently blur the edges with a clean brush dipped in gel cleaner. Next, dot the rose center with a peach micro dot, then pull 5-7 tiny petals outward with a dotting tool tip. Finally, seal with a medium-thick glossy topcoat and cure longer on the cuticle area for a smooth feel.
Editor's noteIf the orange looks too strong, swipe a second sheer milky pink coat over it lightly before sealing.
Watch outDon't draw the orange outline around the petals - a hard ring makes it look like a stamp.
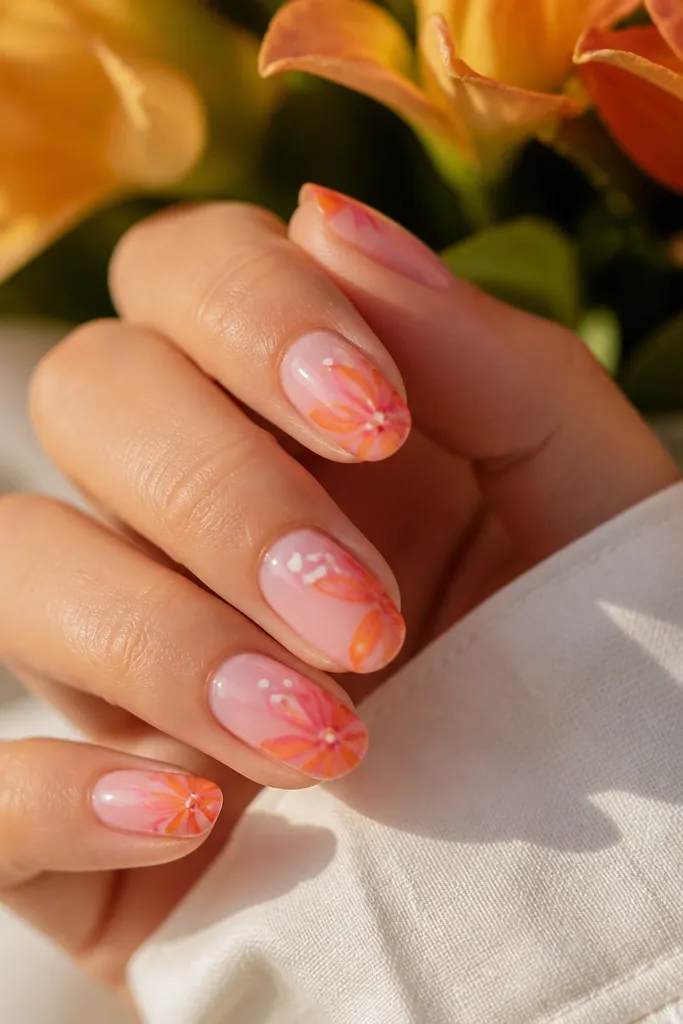
2. Peach Orange Gradient Tips with Pink Petal Sprinkles
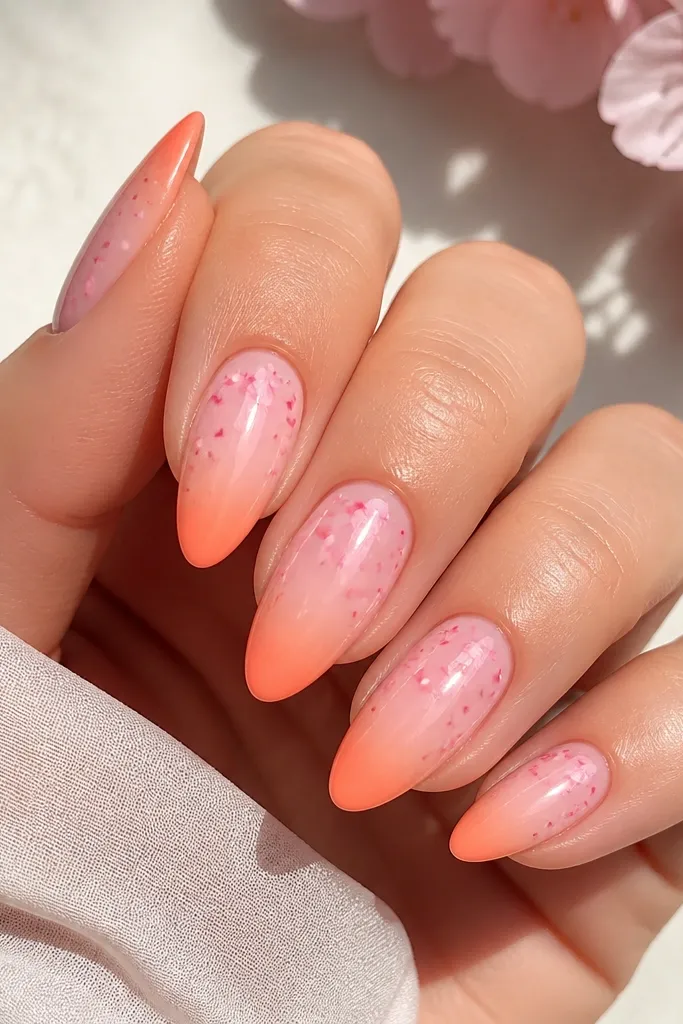
This is the "dreamy" version of ombré because the gradient is airy and the flowers are light. The pink petal sprinkles create movement without covering the gradient, so your nails still look glossy and wearable. I like it on medium almond because the fade naturally follows the nail curve. It also flatters hands with longer fingers because the brighter tip draws the eye down. For skin tone, it works especially well on fair to medium because the gradient stays warm without turning orange-brown.
Paint a thin sheer pink base first and cure. For the ombré, sponge peach-orange gel from the mid-nail toward the tip, then soften the transition with a brush so there's no stripe. Wipe the brush clean and lightly drag a tiny bit of pink back into the blend to keep it smooth. Add petals by placing 3-5 small pink half-moons with a dotting tool, then top each cluster with one tiny white-pink dot for a highlight. Seal with two coats of glossy topcoat, focusing on where the sponge texture might sit.
Editor's noteUse a makeup sponge cut small - it gives you a cleaner ombré edge than a big nail sponge.
Watch outSkip thick gel at the tip; it makes the gradient look heavy and can lift faster.
3. Two-Tone Blossom Vines on Pink-Orange Swirl
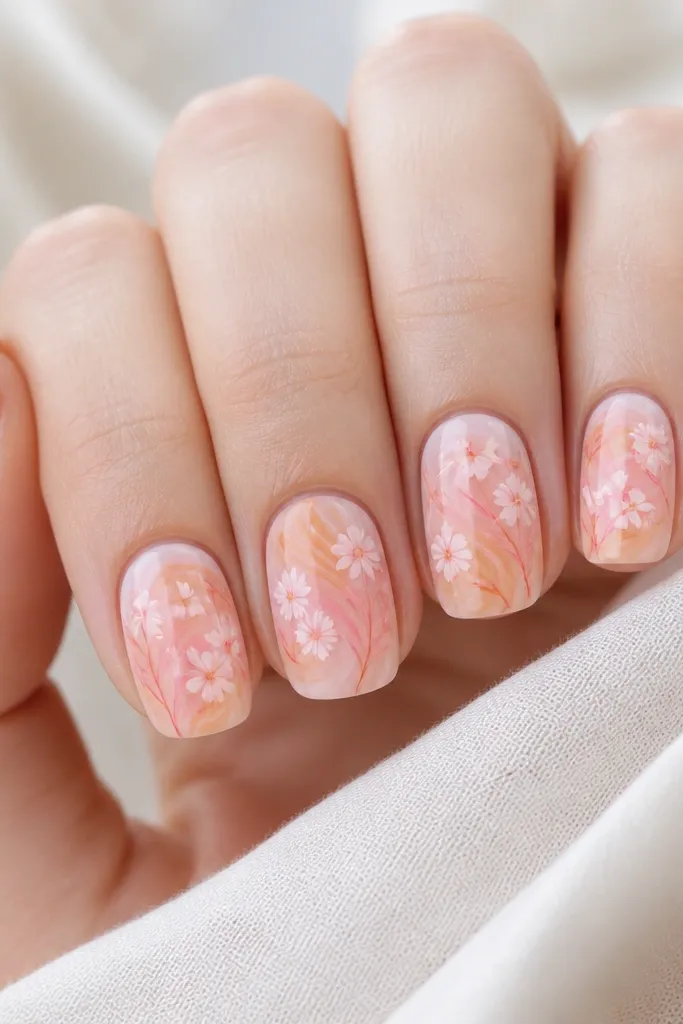
This look is dreamy because it has a background movement, not a flat color block. The swirled pink-orange gel makes the flowers feel like they're floating in light. I love it for everyday because the flowers are small and spaced, so the nails don't look busy. It also flatters hands with narrow nail beds; the swirl gives your nails a wider, softer look. Keep the stems thin and the blossoms minimal - that's what stops it from looking like a kids' sticker sheet.
Start by painting a sheer nude-pink base. Then use a thin brush to swirl orange and pink gel in a loose spiral near the center of the nail, leaving some base showing so it breathes. Cure. For the vine, draw a single thin curved line from near the sidewall toward the center using pale pink gel, then add tiny orange dots as buds. Finish by placing one small five-petal blossom at two points along the vine, with a peach dot center. Topcoat twice to smooth the swirl texture.
Editor's noteIf your swirl turns muddy, use less orange and blend with short brush strokes instead of circular mixing.
Watch outDon't outline the blossoms in dark lines - it kills the soft dreamy effect.
4. Orange-Cuticle Cameo Flower with Pink Center
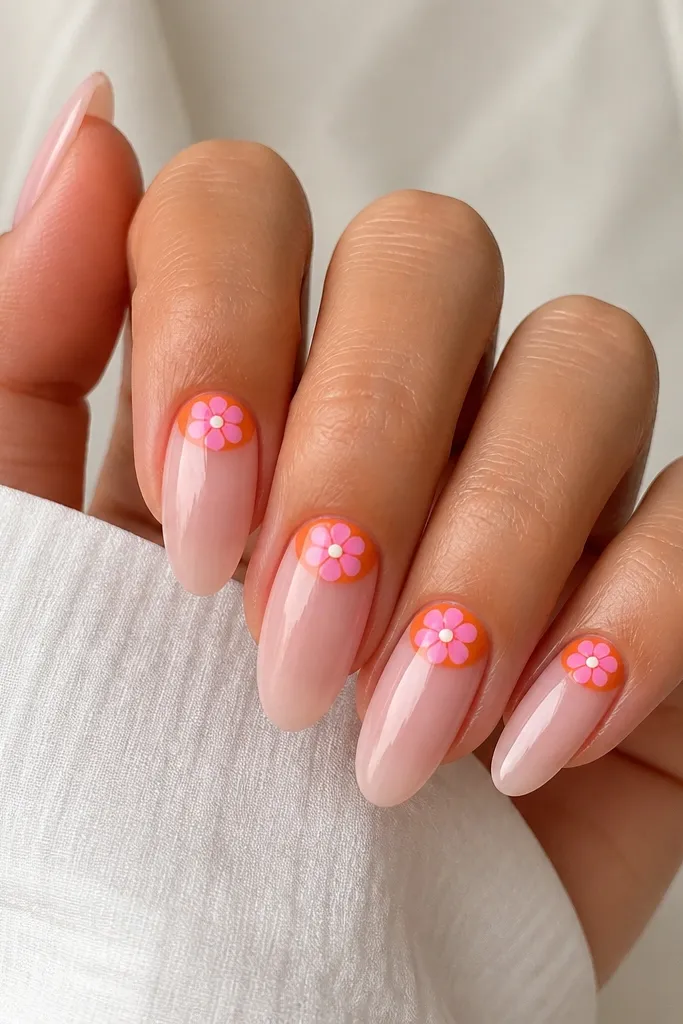
Cameo placement is the trick for keeping Pink And Orange Flower Nails dreamy without covering the whole nail. The orange crescent near the cuticle gives a bold but controlled pop, while the pink center keeps it sweet. This design is flattering on most hands because it visually lifts the nail bed upward, which looks good if your nails have a shorter natural bed. It also photographs well because the cuticle area catches light first.
Apply a sheer pink base and cure. Paint a thin orange crescent directly under the cuticle line, keeping it about 1-2mm wide so it doesn't spill down the sides. Cure and clean the edges with a small brush dipped in gel cleaner. Dot a tiny white-pink center in the middle of the crescent, then add 5 petals around it using a fine detail brush - each petal should be slightly curved and not touching. Seal with a glossy topcoat, and cap the free edge for durability.
Editor's noteUse a liner brush for the crescent; a wide brush makes it look like a stripe.
Watch outDon't make the orange crescent too thick - thick cuticle stripes look like paint, not jewelry.
5. Pink Ombre Flowers with Orange Tiny Dot Centers
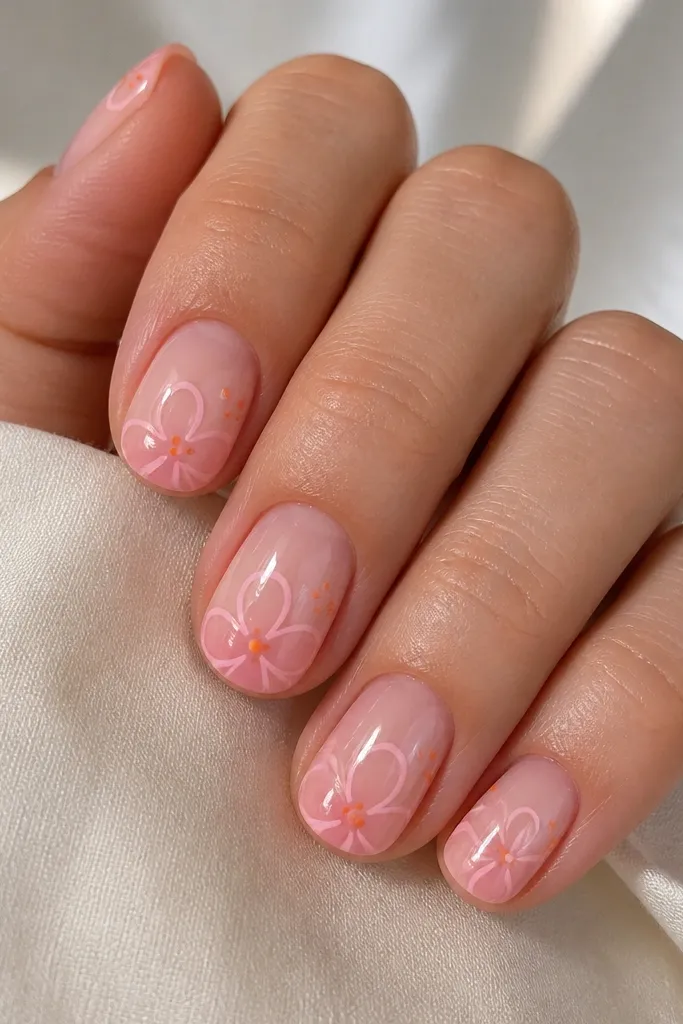
This is for when you want dreamy but subtle. The pink ombré background stays soft, and the only orange you see is in tiny centers and dots, which keeps the look airy. I've worn this on "no time" mornings because the placement is consistent and you don't have to fill the whole nail. It flatters fair skin because the pinks look fresh, and it flatters deeper skin tones too because the orange dots add contrast without getting too loud. Negative space is the secret - the empty nail area makes the flowers look lighter.
Paint a sheer base and then sponge or airbrush a gradient from cuticle to tip using two shades of pink gel. Cure. Draw one flower per nail in pale pink using an open-petal style: 5 petals that don't fully close around the center. Add a tiny orange dot in the center, and place one extra orange dot on each side of the flower about 1mm away. Finish with glossy topcoat, making sure you don't flood the petals and flatten their shape.
Editor's noteIf your petals look too solid, thin the pink gel with a drop of clear gel so it behaves like watercolor.
Watch outDon't fill the flower centers with big orange blobs - it turns dreamy into heavy.
6. Orange Spritz Background with Pink Daisy Clusters
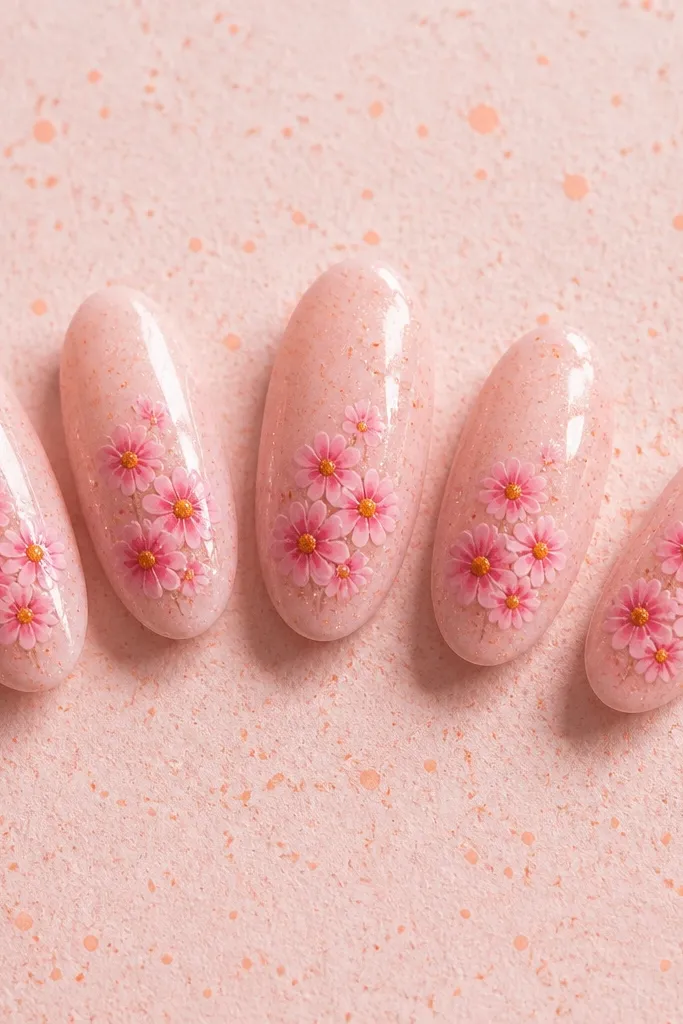
Speckled orange makes the nails feel like summer air, and pink daisies keep it cute. The orange spritz is light and scattered, so it doesn't overpower the flowers. This one looks best on medium almond because the cluster can sit in a curved arc following the nail. It's also forgiving on uneven nail beds because the background texture distracts from minor bumps. Dreamy comes from thin petal lines and a slightly translucent pink base.
Start with a milky pink sheer base. For the spritz, tap orange gel with a toothbrush or a bristle brush after loading it lightly - aim for tiny dots, not big splatters. Cure carefully. Add daisies: draw 4-6 thin pink petals around a small center dot, and repeat to form a cluster of 2-3 daisies per nail. Keep the petals slightly translucent by using a thin layer and layering if needed. Seal with two coats of glossy topcoat to lock in the spritz texture.
Editor's noteCover your cuticles with petroleum jelly before spritzing if you're doing this by hand - it saves cleanup time.
Watch outDon't use too much orange - thick splatter makes the nail look dirty.
7. Pink Glass Petal Flowers with Orange Micro Glitter Fade
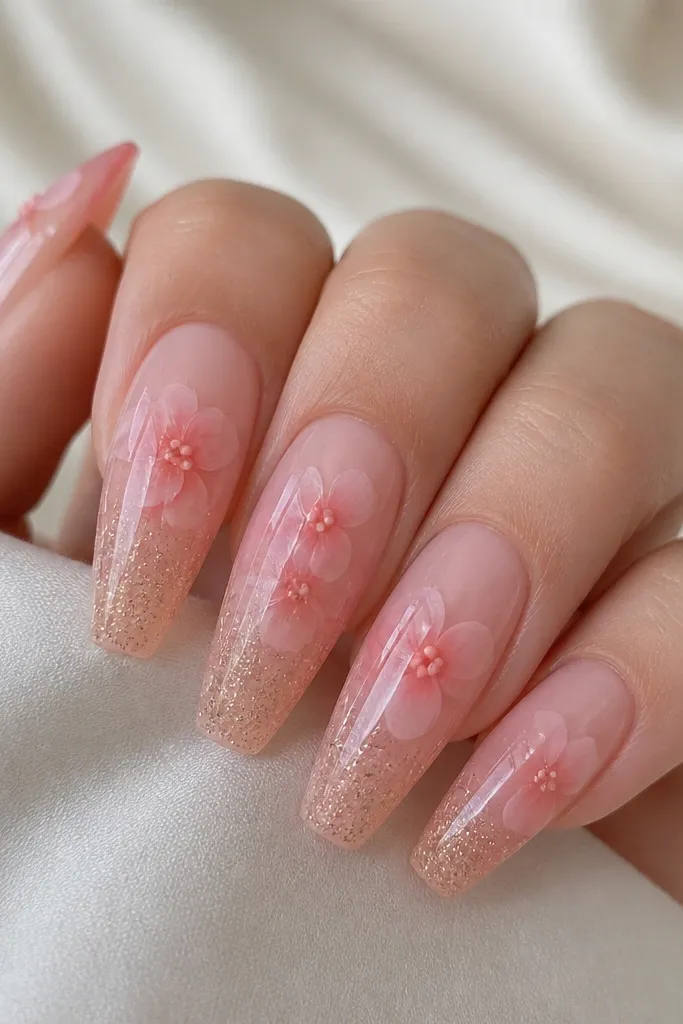
Glass petal layering is the dreamy detail. The petals look like they catch light and move, especially on longer coffin where the curve holds the shape. The orange micro glitter fade adds glow without turning into full glitter coverage. This style flatters hands with long fingers and gives a "soft jewelry" look. On shorter nails it can feel crowded, so I stick to longer lengths for this one. Keep the glitter micro - it should look like warmth, not sparkle chunks.
Apply a sheer pink base with a glossy builder gel so the surface is smooth. Layer translucent pink petals using a gel that isn't too opaque; place one flower near the center and layer 2-3 petals slightly offset for a glass effect. For the orange glitter, brush a tiny amount of orange micro glitter gel at the lower third only, then feather it upward with a clean brush. Cure each layer. Finish with a thick topcoat for full glass shine and cap the free edge.
Editor's noteUse a lint-free wipe right before topcoat to keep the glass effect clean.
Watch outDon't place glitter under the flower petals - it makes the petals look gritty.
8. Orange and Pink Split Smile Flowers (French Twist)
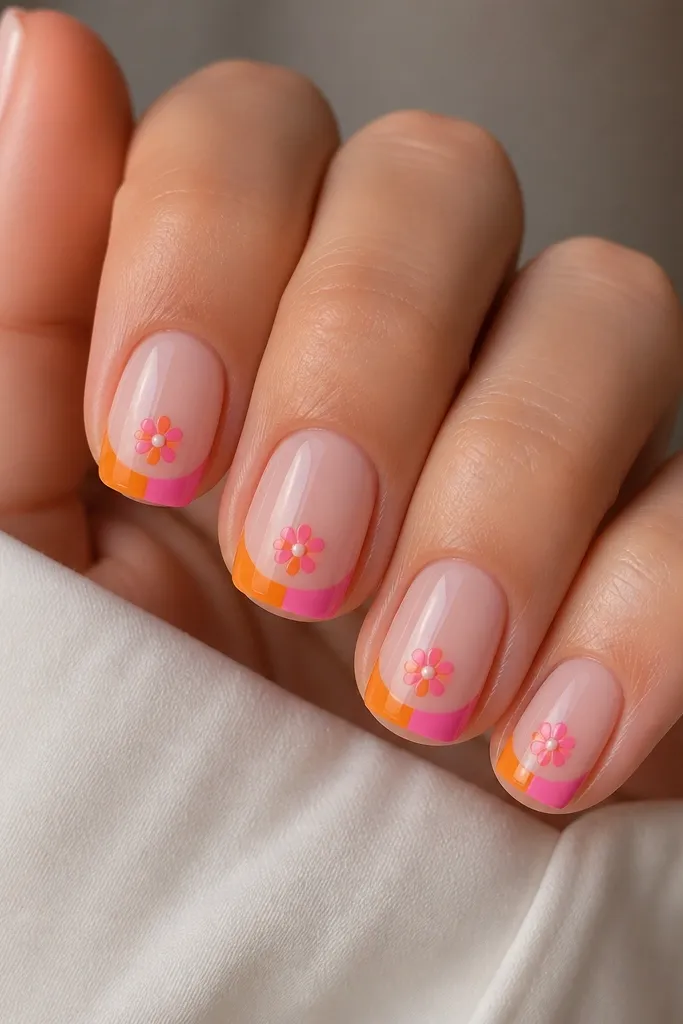
This is a French twist that stays dreamy because the smile is thin and the flowers are small. The split smile gives you that orange-pink contrast without covering the nail bed. It flatters hands for work because the design is controlled and sits at the tips, which looks neat as nails grow out. I like it for medium skin tones because the orange reads warm and clean next to the pink. Keep the flowers compact so they don't compete with the smile line.
Paint a sheer pink base and cure. Draw a thin French smile line across the tip, then split it: use orange gel on the left half of the smile and pink gel on the right half. Cure. Add a small flower just under the smile line using a dotting tool for petals, then place a peach dot center. Use a fine brush to add 2-3 tiny petal dots around the flower for softness. Topcoat twice to smooth the smile edge.
Editor's noteMake the smile line thinner than you think; a thick smile makes it look like nail polish, not gel art.
Watch outDon't smear colors at the center split - clean separation makes it look intentional.
9. Pink Rosebuds with Orange Watercolor Wash
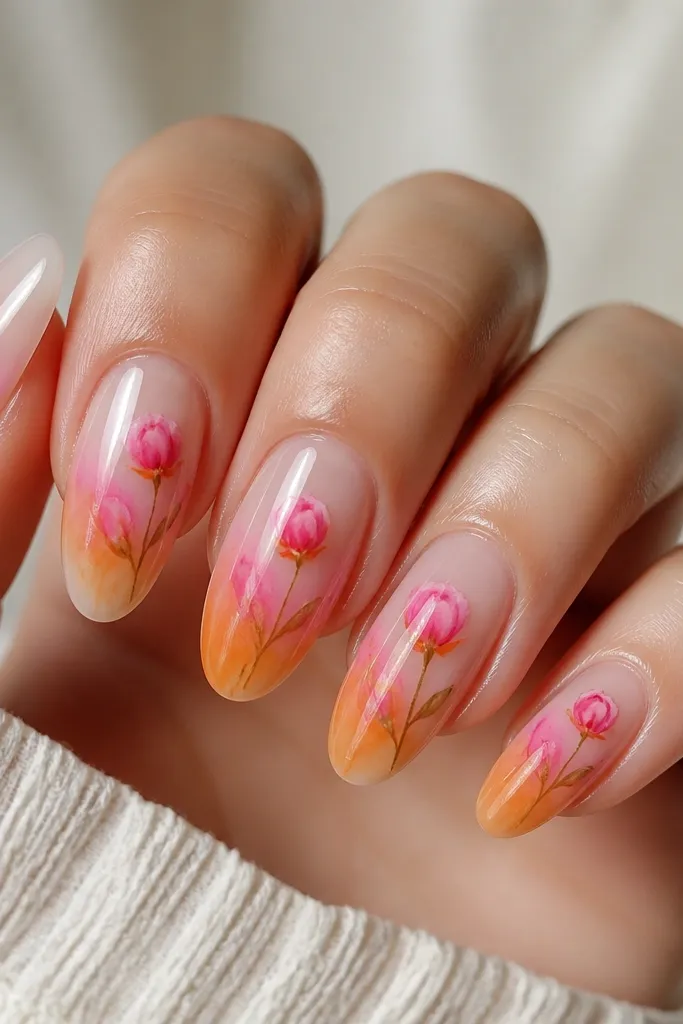
Watercolor wash is dreamy because it looks like dye in glass, not painted blocks. Rosebuds keep the design delicate and less "busy" than full roses. The orange wash fades so it adds warmth under the pink buds, which flatters olive and medium-deep skin tones because it harmonizes with warm undertones. This also works when you want something that isn't too childish - rosebuds read more grown-up. The key is translucency - you should still see your pink base through the orange.
Start with a milky pink base and cure. Add orange watercolor wash by placing a small amount of orange gel on the nail and blending outward with a brush dipped in gel cleaner, keeping the edges soft. Cure. Draw 1-2 rosebuds per nail in pink using a fine brush, starting with a tight center and adding 3-4 curved petals that don't spread too wide. Add a tiny orange line at the bud base for depth. Seal with glossy topcoat, and cure long enough to prevent dull spots over the watercolor area.
Editor's noteUse less product than you think for the wash - you can always add another thin layer.
Watch outDon't paint the wash in one thick pass; it turns cloudy.
10. Orange Lip Gloss Underlay with Pink Blossoms
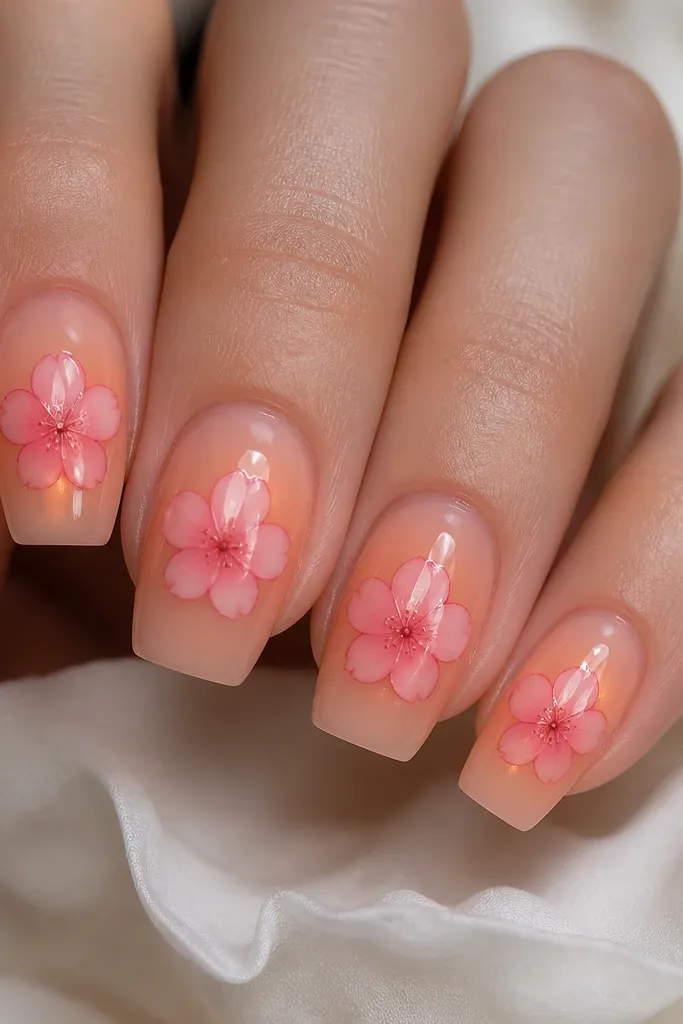
This look mimics lip gloss - warm underlay glow with soft blossoms on top. The orange underlay sits beneath the sheer pink, so you get warmth without losing the dreamy pink tone. I like it on short coffin because it makes the nail look fuller and more dimensional. It flatters hands with cooler undertones too, because the orange warmth balances the skin. Keep the blossoms small and centered so the underlay stays visible and the nail doesn't look flat.
Apply a sheer nude-pink base, then add a thin orange gel underlay only in the center area, feathering toward the sides. Cure. Place pink blossoms using a dotting tool and a fine brush for petal edges, keeping petals slightly translucent. Add a tiny dot center in peach and a couple micro dots as highlights near the petals. Topcoat with a thick, glossy gel and cap the free edge so the surface stays smooth and reflective.
Editor's noteIf your orange underlay looks patchy, thin it with clear gel and apply two super-thin layers.
Watch outDon't put orange on the entire nail - it stops reading as glow.
11. Pink and Orange Floral Nail Decal with Gel Edge Seal
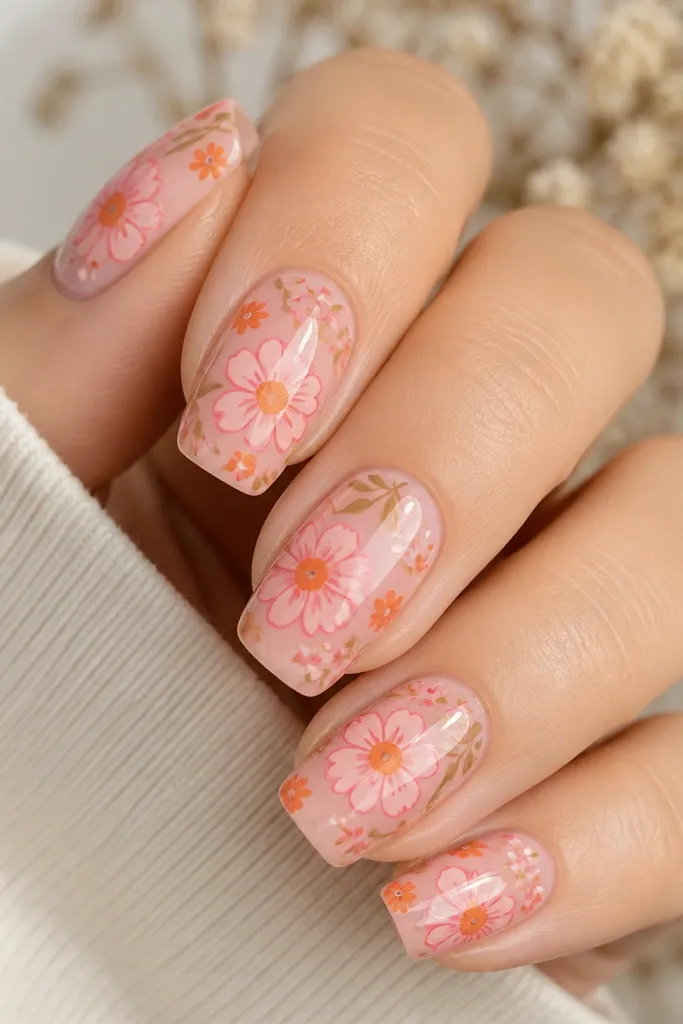
Dreamy decal nails work when the decal edges are sealed so they don't lift. The pink flowers with orange centers look cohesive when your base is sheer - your nails still look like nails, not sticker sheets. This is the easiest route if you want Pink And Orange Flower Nails dreamy for events without hand-painting. It flatters all nail lengths, but I prefer medium squoval because decals have enough space to breathe. The secret is using the right topcoat thickness at the decal boundary.
Paint two thin coats of sheer pink gel and cure. Apply the floral decal to a slightly tacky surface (or use decal glue if your set needs it), pressing from center to edge. Trim extra decal around the free edge, then use a thin layer of gel to seal the decal edges - drag gel lightly over the boundary so there's no lip. Cure and wipe. Finish with two glossy topcoat layers, curing longer on the edges.
Editor's noteIf you wash dishes a lot, add an extra topcoat layer on the index and middle nails only - they lift first.
Watch outDon't skip edge sealing; lifted edges ruin the "dreamy" look fast.
12. Single Big Bloom with Orange Side Shadows
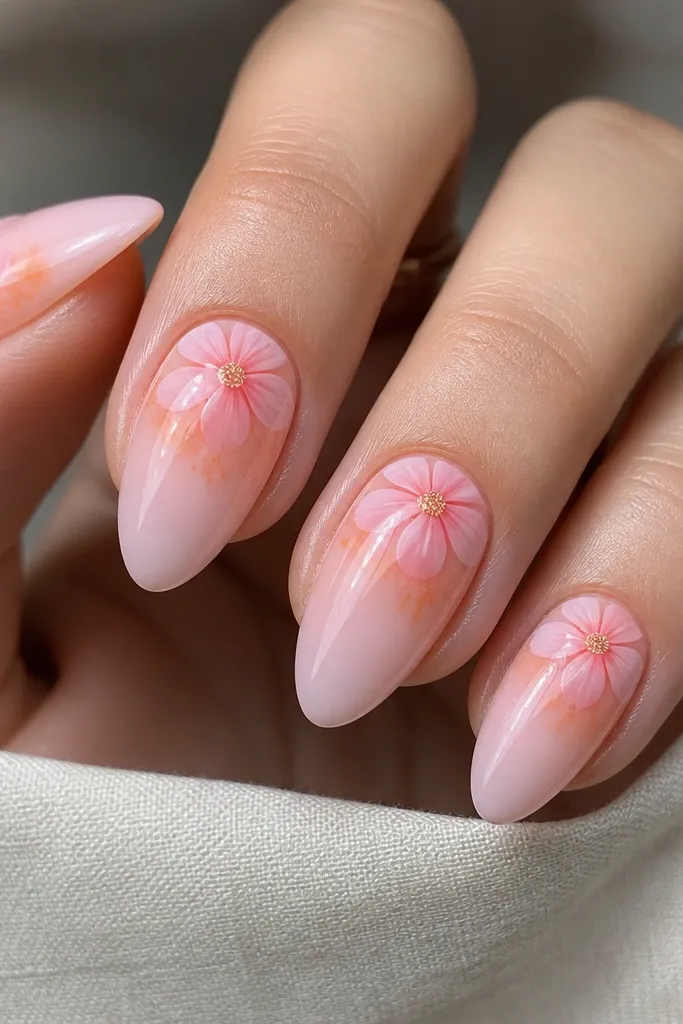
A single big bloom is dramatic, but it stays dreamy when you add side shadows instead of extra petals. Those orange shadows create depth and make the flower look painted in layers. I love this on medium almond because the nail curve supports the flower size without stretching it. It flatters hands with wider nail beds too, since the off-center placement makes the nail feel more balanced. Keep the background sheer so the flower reads as the main character.
Start with a sheer pink base and cure. Paint one large flower near the cuticle using a fine detail brush, keeping petal edges soft and slightly rounded. Add orange side shadows by placing tiny orange gel to the left and right of the flower, then blur outward with a clean brush so it fades. Cure. Add a small peach center dot and a couple of tiny petal highlights with lighter pink. Topcoat with a smooth, glossy layer and ensure the flower edges feel sealed.
Editor's noteIf the flower looks too flat, add a second thin petal layer only on the top half of petals.
Watch outDon't add extra flowers on the same nail - one bloom keeps it dreamy, not chaotic.
13. Pink Petals with Orange Micro Rings Around Centers
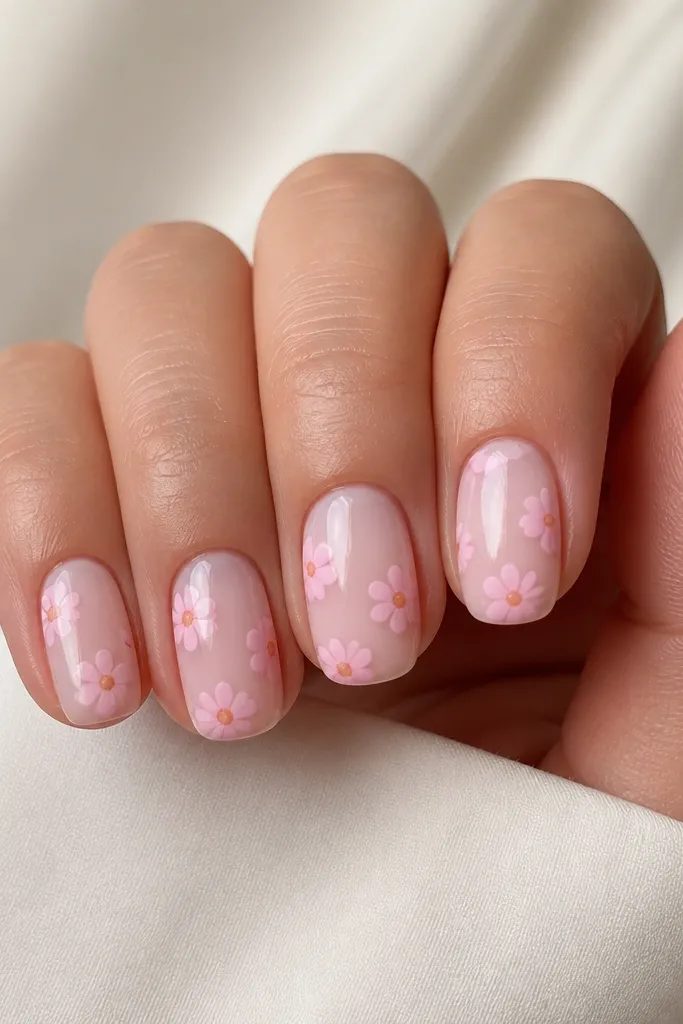
Micro rings make the centers look like tiny lanterns. The orange ring is thin, so it adds definition without turning the flowers into bold outlines. This looks dreamy because it gives a bit of sparkle effect even without glitter, especially under daylight. It's also beginner-friendly because you're repeating a small pattern - dot, ring, petals. I like this on short squoval because the flowers can stay small and evenly spaced, and the nails still look clean for daily wear.
Apply a milky pink sheer base and cure. Add flowers by placing a tiny peach-orange dot center first. Then use the dotting tool edge to draw a thin micro ring around the center - just one light touch, not a big circle. Place 5-6 pink petals around the ring using a dotting tool or a liner brush. Repeat 2-3 flowers per nail depending on nail length. Seal with glossy topcoat, and cure fully to prevent the ring from smearing.
Editor's noteUse a darker peach-orange for the dot and a slightly lighter orange for the ring so it looks dimensional.
Watch outDon't make the ring thick; thick rings look like cheap nail stickers.
14. Orange Ombre Base with Pink Flower Frames (Negative Space)
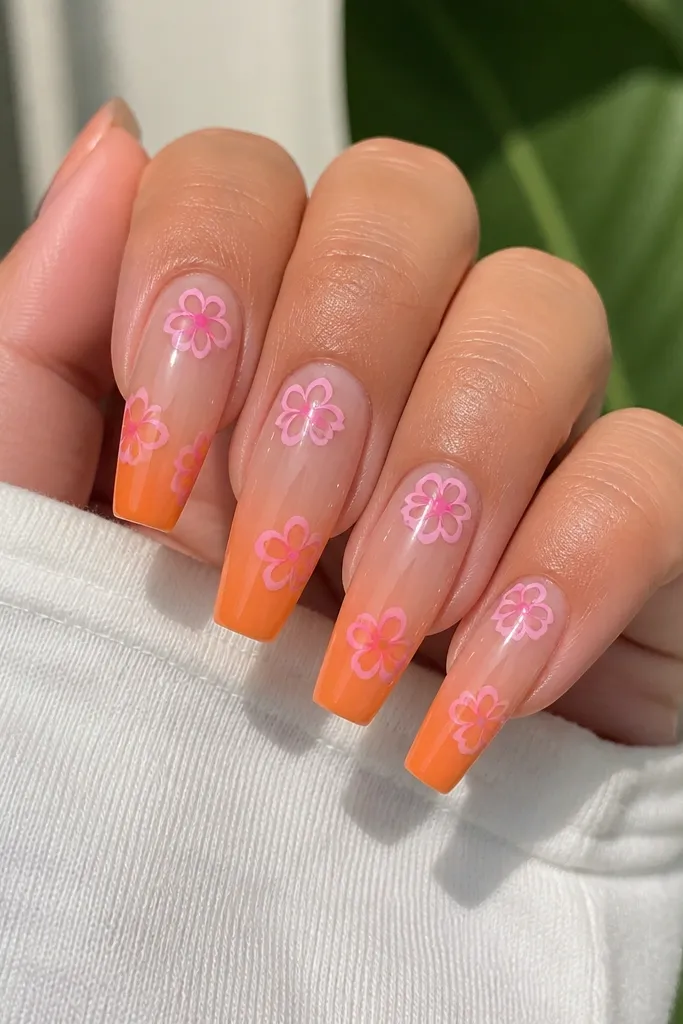
This one is dreamy because the flowers act like frames, not full coverage. The negative center keeps the look airy and makes the orange ombré feel intentional. Medium coffin gives enough length to draw the frame petals without crowding. It flatters people who want orange visible but not loud - the ombré does the work, and the pink frames keep it romantic. Keep the frame thin and let the background show through.
Start with an ombré base: sheer peach near the cuticle, then build to brighter orange at the tip using a sponge and a brush to blend. Cure. Draw a flower frame by outlining 5 petals in pink but leaving the center mostly open - don't fill it in. Place one frame near the cuticle and a smaller one mid-nail if your nail length allows. Add a tiny peach dot in the open center to tie the colors together. Finish with two glossy topcoat layers to smooth the ombré texture and sharpen the frame edges.
Editor's noteUse a thin detail brush for the frame petals; thick strokes kill the airy effect.
Watch outDon't fully fill every flower center - that removes the dreamy negative space.
15. Pink Marble Background with Orange Flower Stems
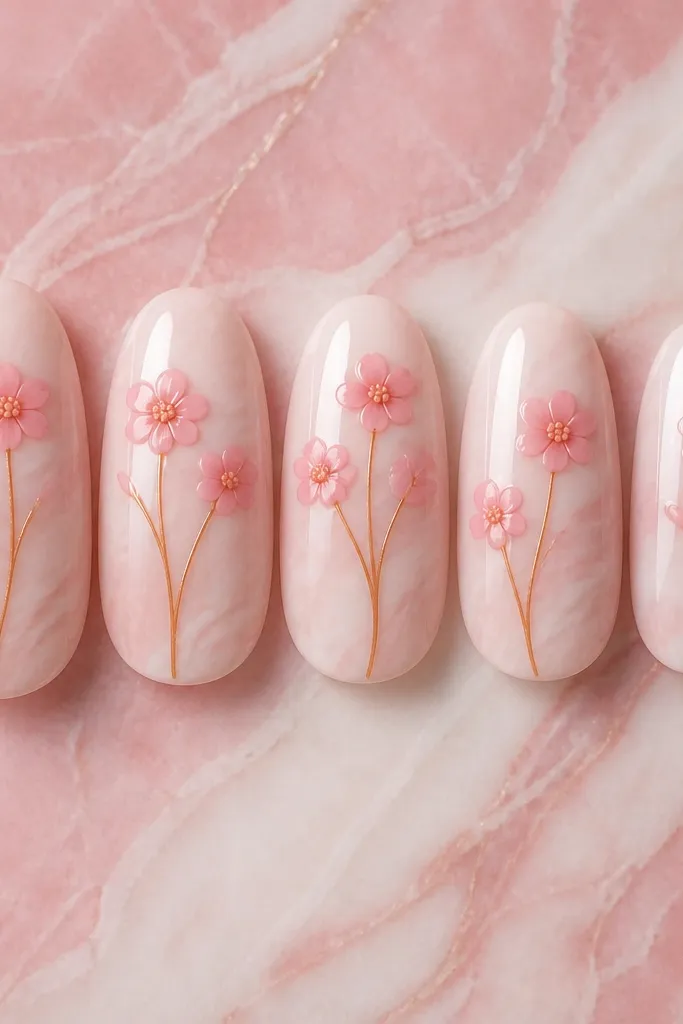
Marble backgrounds look dreamy when they stay soft, not high-contrast. The pink marble gives a cloudy, spa feel, and the orange stems add a clean line that guides your eye upward. This flatters long fingers and hands with a bit of texture on the nail bed because the swirls hide minor imperfections. The stems also make the design feel delicate and grown-up, not childish. Keep the flowers small and spaced so the marble stays visible through the design.
Apply a sheer milky pink base and cure. Create marble by adding a few streaks of white gel and a light pink gel with a thin brush, then drag them slightly with a clean brush for soft swirls. Cure. Draw one thin orange stem on each nail using liner gel, starting near the cuticle. Add a small cluster of 3-5 pink petals at the top of the stem and finish with a tiny peach center dot. Seal with a smooth glossy topcoat, and cap the free edge so the marble doesn't snag.
Editor's noteIf your marble looks too streaky, blend it with a clean brush for 2-3 short strokes only - don't overwork it.
Watch outDon't use dark brown or black for marble - it turns the whole set from dreamy to muddy.