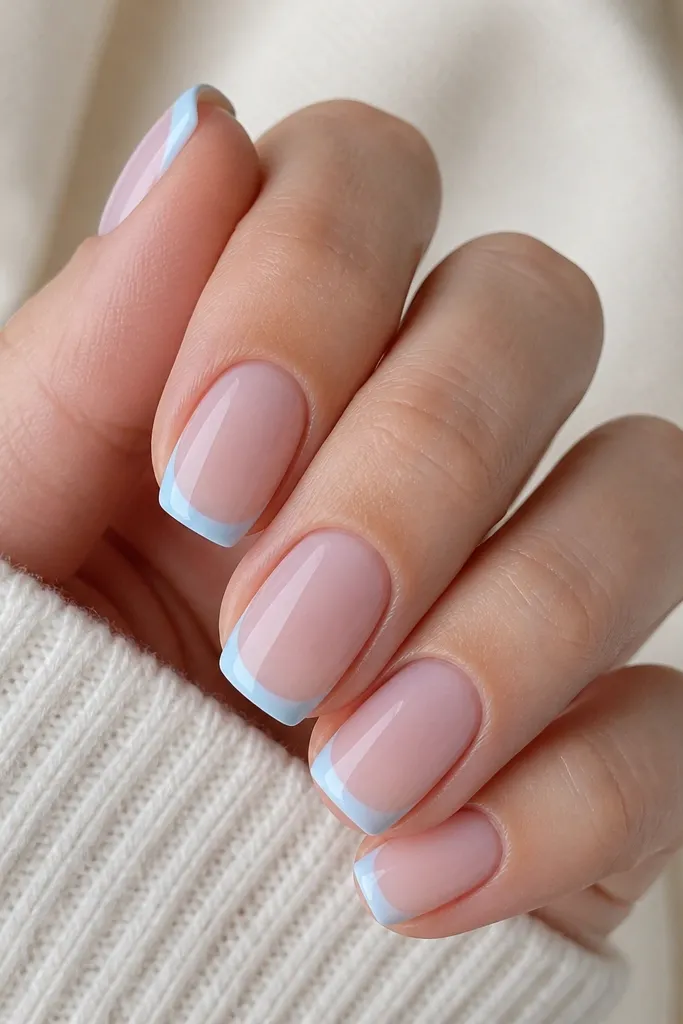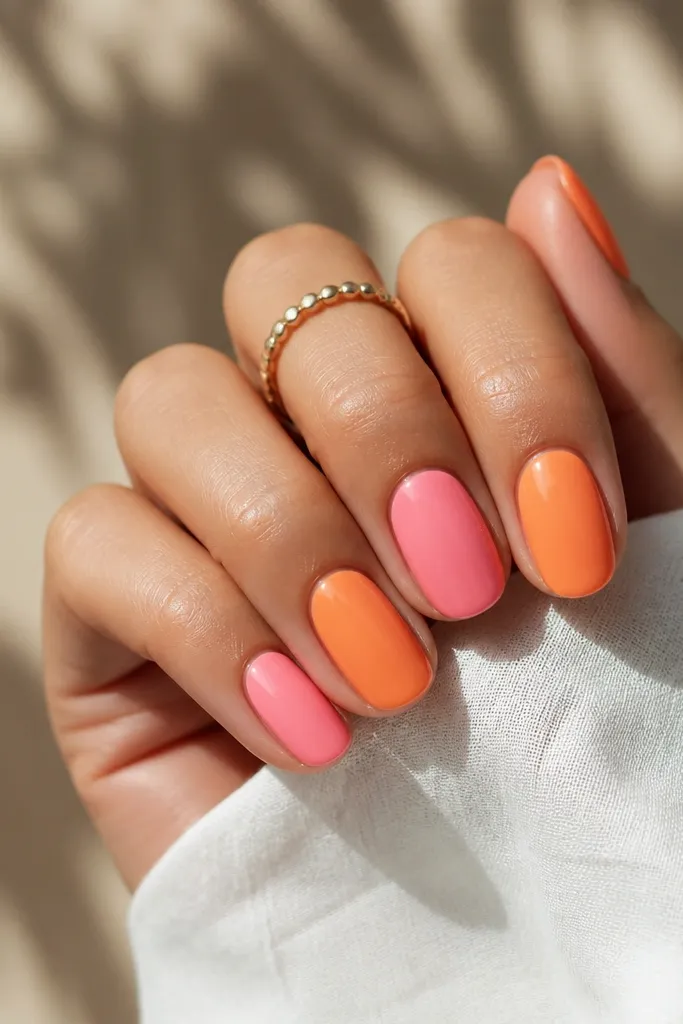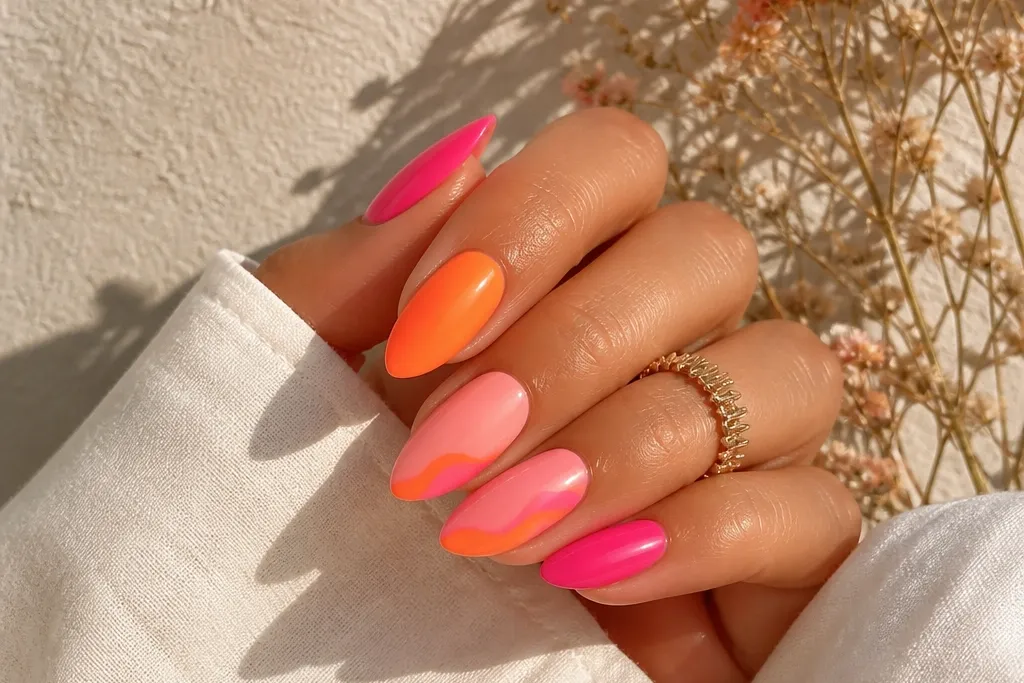
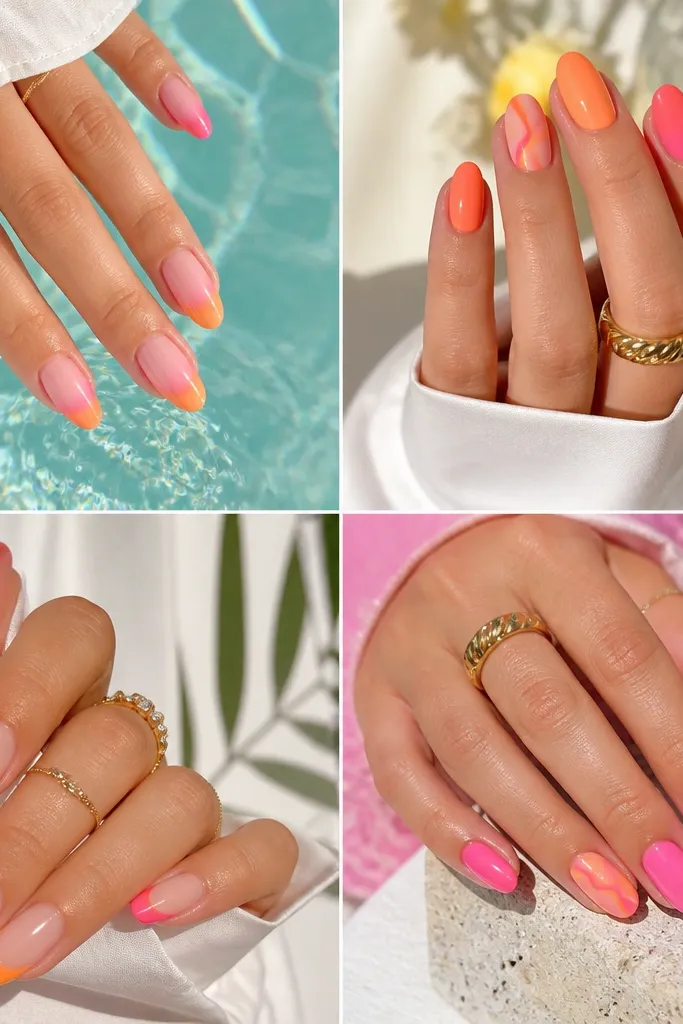
1. Milky Pink Base With Tangerine French Micro-Tip
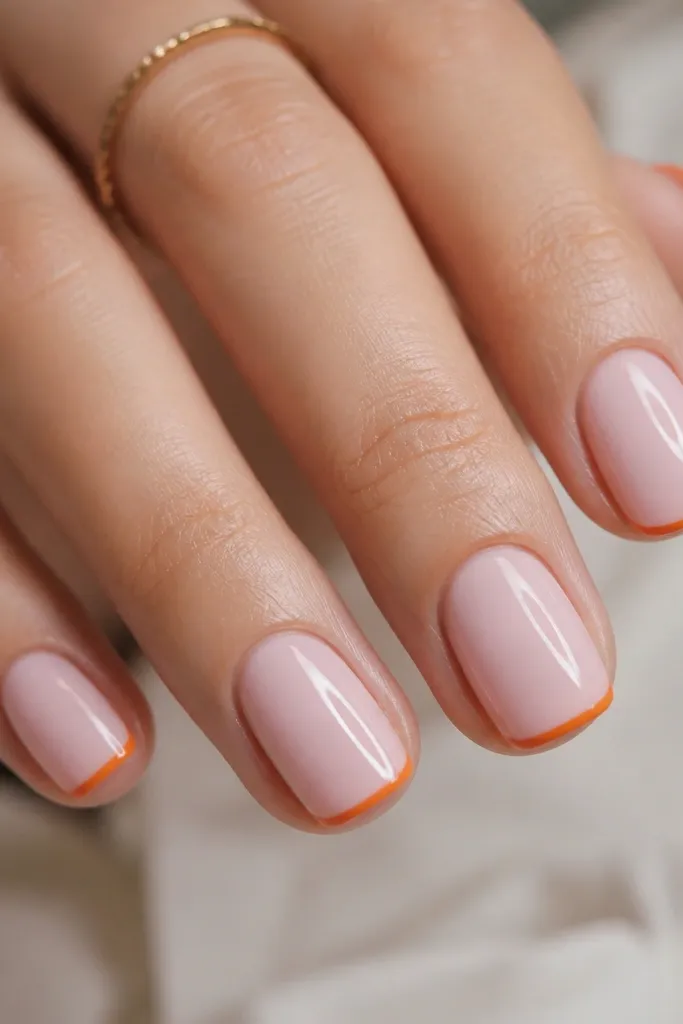
This is my go-to when I want Summer Nails Pink And Orange easy glam that looks neat even if you're rushing. The milky pink base gives you that soft summer glow, and the tangerine micro-tip keeps the orange from overwhelming shorter nails. I've worn this on light skin and medium skin tones and the contrast always looks fresh in daylight. It flatters hands that look best with clean edges because the design is basically one deliberate line. Wear it to work or a casual dinner - it reads polished without looking like full nail art.
Start with two thin coats of milky pink, letting each coat level out before curing. Next, load a striping brush with orange and wipe most of it off on the bottle rim so the line stays hair-thin. Draw the French micro-tip following your natural smile line, then connect the corners lightly so it looks even. Finish with a glossy top coat, and press the brush along the free edge to seal the tip.
Editor's noteIf your French line keeps getting fat, do two passes - first lay down a faint line, then go back for the pigment.
Watch outAvoid painting orange too close to the nail bed because it turns the set into a blocky "orange cap" fast.
2. Orange Tip Fade Over Pink Like a Sunbeam
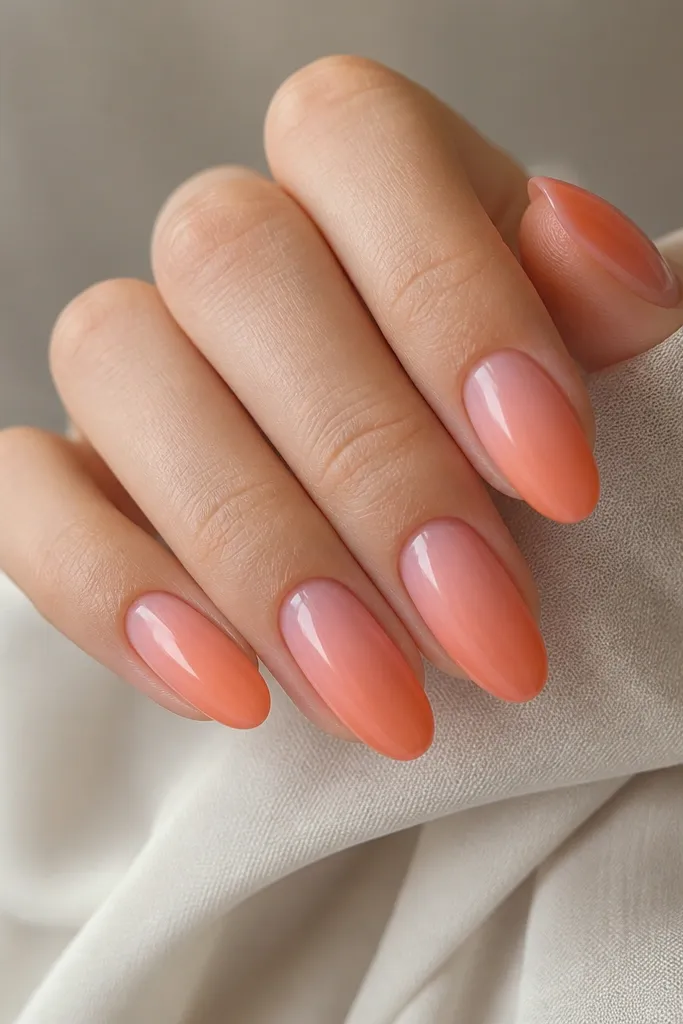
This fade looks like the sun hit your nails - that's why it always gets compliments. The pink base needs to be sheer enough to show through, and the orange should be slightly opaque so it blends without turning muddy. I like this on medium oval because the curve helps the gradient look smooth instead of striped. It flatters short fingers too, but keep the fade low so it doesn't shrink the nail visually. For summer photos, the gradient catches light and looks expensive even when the nail art time is short.
Apply one coat of sheer rose-pink, then a second coat for coverage but keep it translucent. Dab orange at the very tip using a makeup sponge or a gradient sponge, then blend upward with gentle taps. Clean the edges with a small brush dipped in acetone-free remover so the fade stays airy. Seal with a glossy top coat, then wipe the nail surface lightly to remove any pigment haze.
Editor's noteUse a sponge that's been cut into a small wedge - it makes the fade land exactly where you want.
Watch outSkip thick orange blobs; they lift the gradient and create texture you'll feel on your cuticles.
3. Pink Jelly Base With Orange Half-Moon Corner
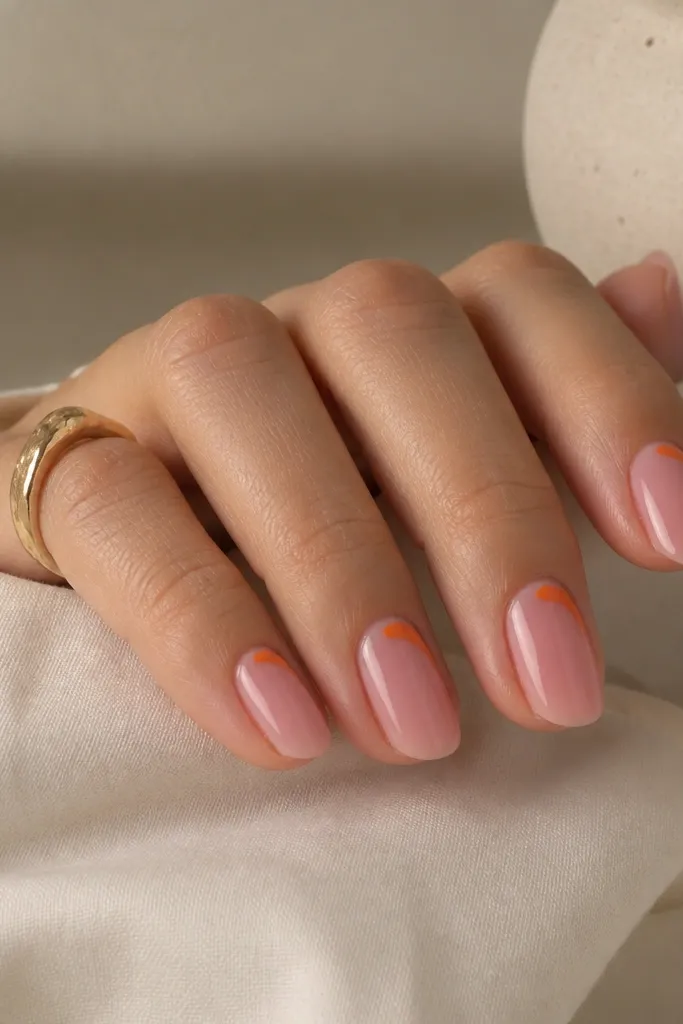
The jelly pink makes the whole set look juicy and summery, and the orange half-moon adds a punch without covering the whole nail. I love this for hands that get dry at the cuticle because the jelly finish hides tiny dryness, and the orange sits in a controlled shape. It looks great on warm and cool skin tones because orange and pink both reflect light. This is also beginner-friendly because the half-moon shape is small and forgiving. It works for everyday - grocery runs, brunch, and casual events.
Start with one coat of pink jelly, then add a second for a glossy, even look. Use a small dotting tool or the tip of a bobby pin to place orange at one side of the cuticle, shaping it into a half-moon. Leave a narrow strip of negative space between the orange and the pink so it stays crisp. Top coat everything, then cap the free edge with a thin layer to lock the jelly shine.
Editor's noteIf you're nervous about the curve, trace the half-moon with the dotting tool first, then fill inside with a steady brush.
Watch outDon't go too wide on the half-moon; if it reaches the center, it starts looking like a mistake rather than design.
4. Diagonal Orange Stripe With Soft Pink Underlayer
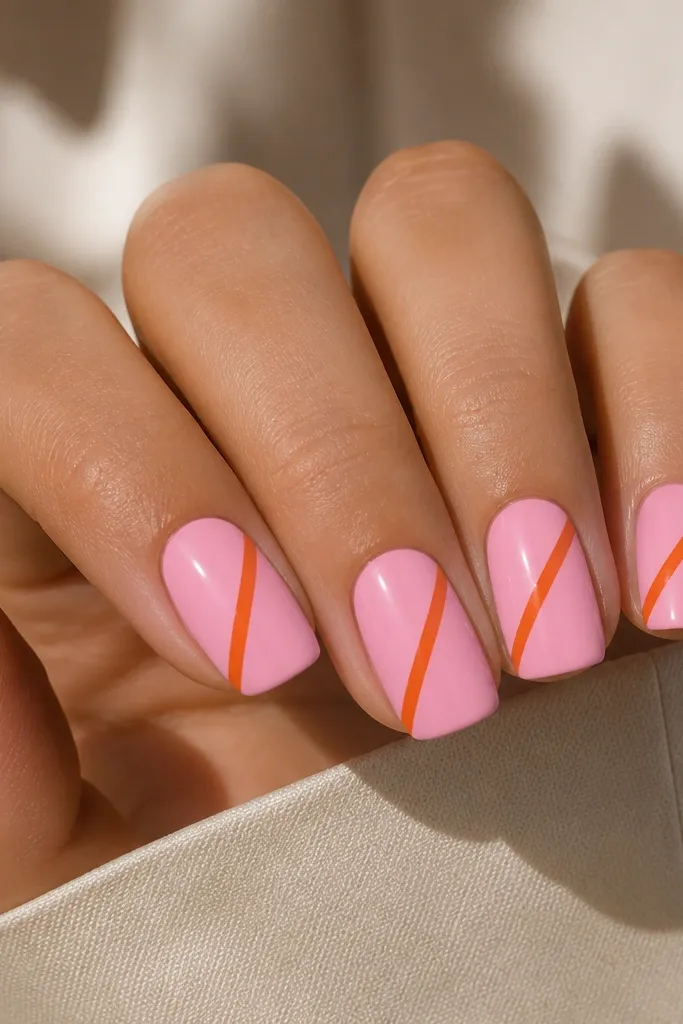
Diagonal stripes elongate the nail and make the set look intentional instantly. The soft pink underlayer keeps the orange from dominating, and the single stripe keeps it easy glam instead of full-on nail art. I've done this on short squoval and it still looks sleek because the stripe gives a vertical illusion. It flatters most hands, especially if your nails have a slightly wider nail plate - the stripe draws the eye inward. This is also a great "first attempt" design because you're only doing one line per nail.
Paint two coats of soft opaque pink and let it cure fully. With a striping brush, draw one diagonal line using orange, starting near the cuticle corner and stopping just short of the tip. For a cleaner look, pull the brush in one confident stroke instead of dragging back and forth. Add a second thin orange line only if you need more coverage, then finish with glossy top coat.
Editor's noteHold your nail under a lamp or bright window while you stripe so you can see the line thickness clearly.
Watch outAvoid using runny polish for the stripe - thick brush control is what keeps the line sharp.
5. Orange Blossom Outline On Milky Pink
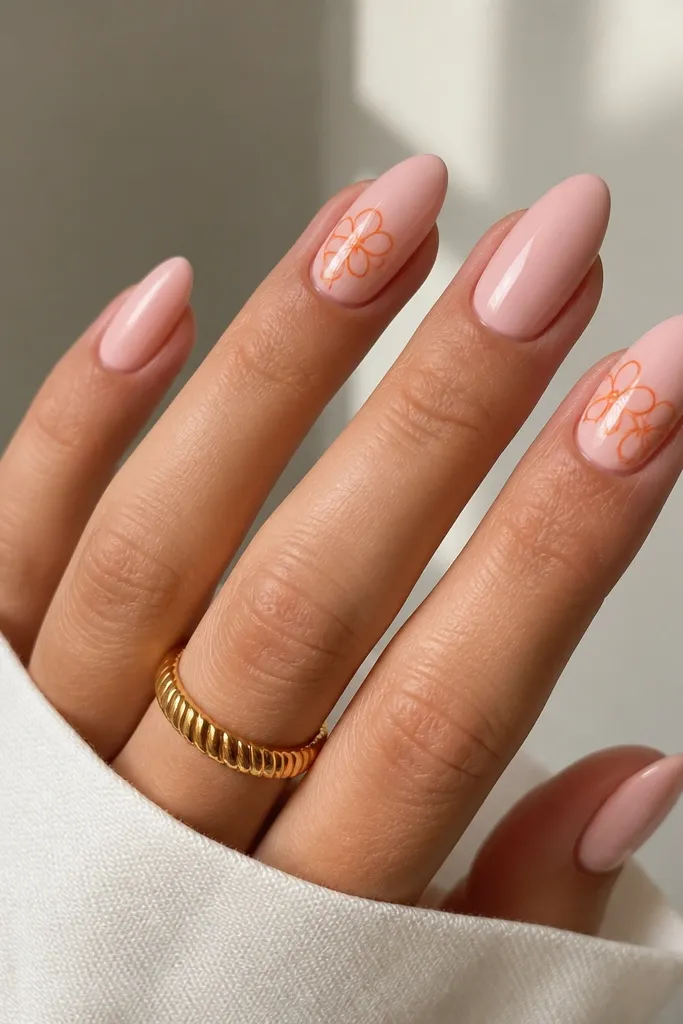
Tiny line art looks like you tried harder than you did, and this one stays airy for summer. The milky pink base makes the orange outline pop without needing heavy fill-in color. I like it on medium almond because there's enough room for a small flower without crowding the nail. It flatters fair to deep skin tones because orange outlines read warm and clear. This design is perfect if you want something romantic but still easy glam and wearable.
Start with two coats of milky pink and top coat lightly or leave it glossy enough to draw on. Use a liner brush and orange polish to draw a small flower: five tiny petal loops and a dot center. Keep the flower size about the width of your nail's center, and place it on the side of the nail for a more modern look. Seal with a glossy top coat, and cap around the flower edges so the lines don't snag.
Editor's notePractice one flower on a spare nail tip first - the petal loop size is what makes it look clean.
Watch outSkip thick orange paint for outline art; it turns into blobs instead of petals.
6. Pink And Orange Swirl Tips On Clear Base
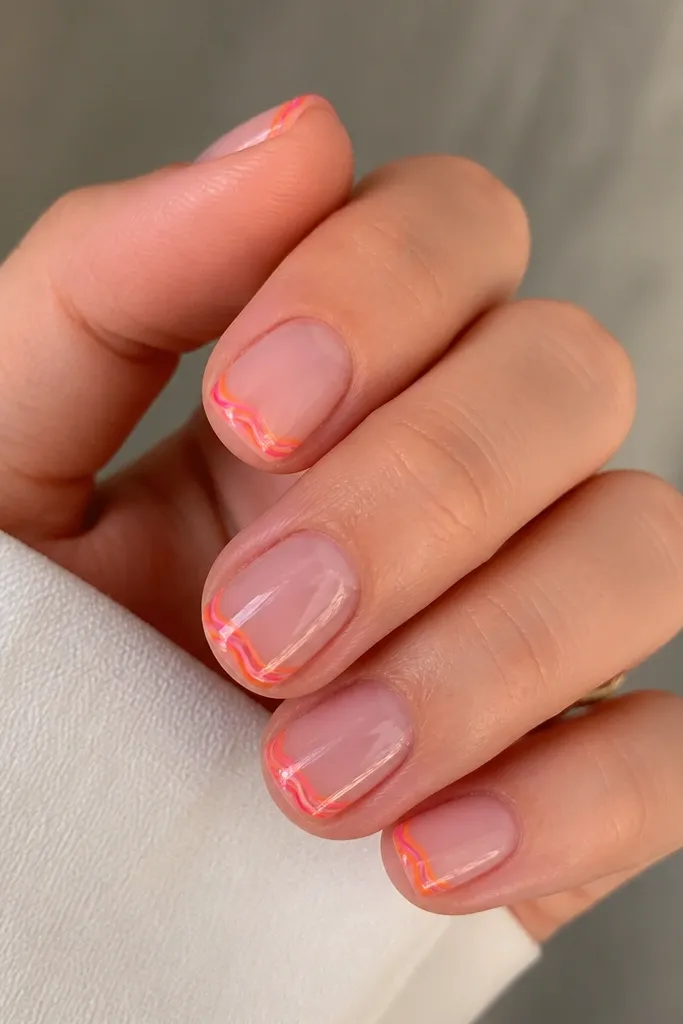
A clear-ish base makes swirls look lighter, and it's a fun way to get summer nails without heavy coverage. The pink swirls inside the orange tips keep the set cohesive, so it doesn't look like two random colors. I love this on short square because the flat tip gives you a clean canvas for the swirl lines. It looks good on all skin tones because it's mostly transparent and relies on line detail. If you want something playful but still "easy glam," this is the one.
Apply a thin clear base or sheer pink gel polish, then cure. At the tip, paint a light orange "smile curve" band, then while it's slightly tacky, add a few thin pink swirl lines that curve through the orange. Use a toothpick or dotting tool to guide the swirl direction, then add one or two orange line accents for balance. Top coat with a thick glossy layer to smooth the lines.
Editor's noteKeep the swirl lines thin - you should still be able to see the base through them.
Watch outDon't overfill the tip with solid orange or the swirls vanish under heavy color.
7. Orange Scallop Tips Over Pink Jelly
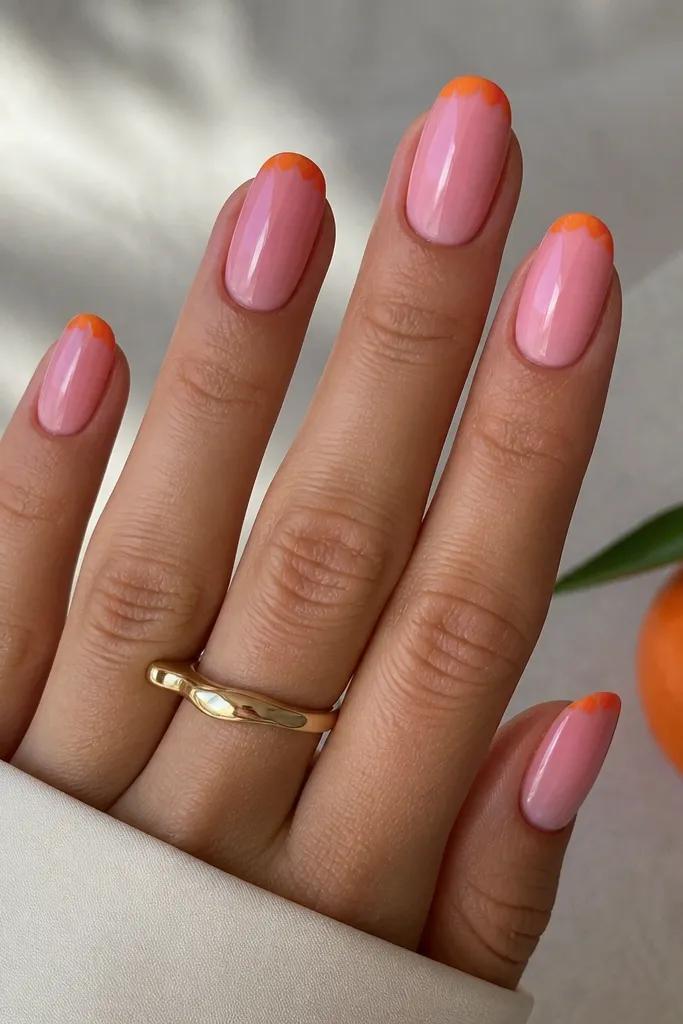
Scallops look like summer fabric patterns, and they're surprisingly easy once you use the right tool. The pink jelly base stays glossy and hides minor unevenness, which matters if you're doing this at home. Orange scallops at the tip give movement and texture you can feel from the shine. This looks especially good on medium oval because the scallop curve matches the nail shape. It flatters hands with short nail beds because the scallops sit at the edge and don't shrink the nail.
Paint two coats of pink jelly, then top coat lightly so it stays smooth. Use a small nail art sponge or a dotting tool to press tiny orange half-circles along the tip edge, placing them in a straight line from corner to corner. Work from one side to the other so spacing stays even. Add a final thin orange line only where you need to fill gaps, then seal with glossy top coat.
Editor's noteIf your scallops smear, let the base cure hard and wipe the brush tip clean before pressing each dot.
Watch outSkip uneven dot spacing; one big scallop throws the whole pattern off.
8. Pink Base With Orange Waterline Half-Strip
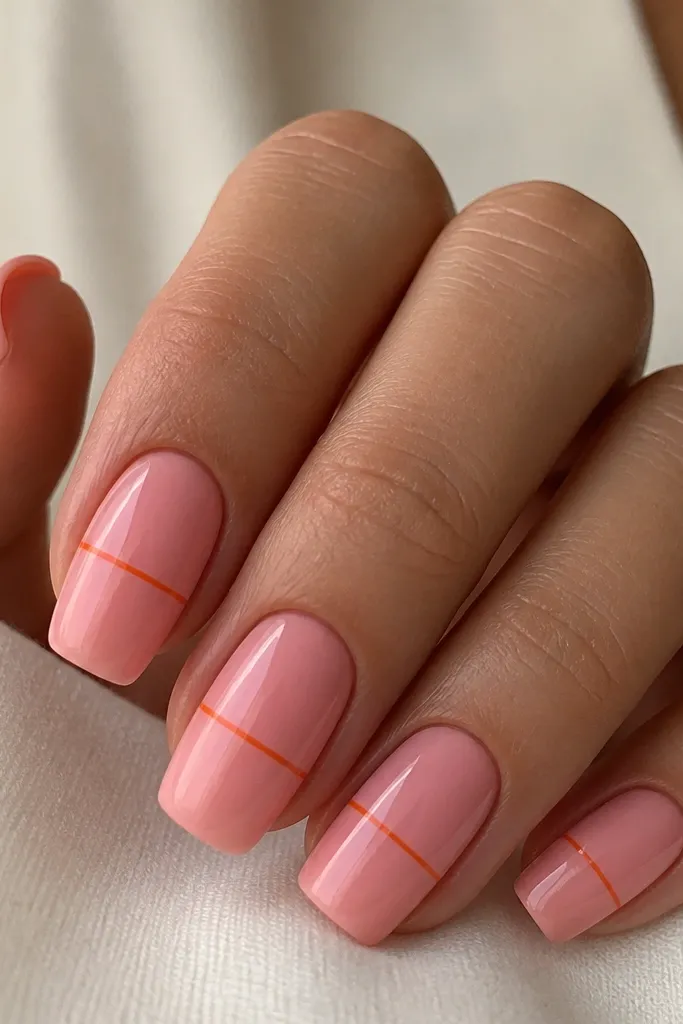
The waterline effect makes your nails look like a graphic design print - clean, modern, and still summer. The orange line is thin, so it looks glam instead of loud. I do this on longer squoval because the horizontal line needs space to look intentional. It flatters hands that already have longer fingers, and it also works on shorter nails if you keep the line closer to the tip. The look is bold but not complicated, which is why it's easy glam.
Apply two coats of glossy pink polish and let it dry completely. Use striping tape to mark where the orange line will sit, then paint orange only within that band. Remove the tape while the orange is still slightly wet or after a short dry so the edge stays crisp. Clean any edge mistakes with a thin brush and acetone on a cotton swab, then top coat the whole nail.
Editor's noteMark the line with tape first so you don't have to guess the height mid-paint.
Watch outDon't make the orange line thick - thick lines look like a chipped manicure.
9. Orange And Pink Polka Dots On Barely-There Pink
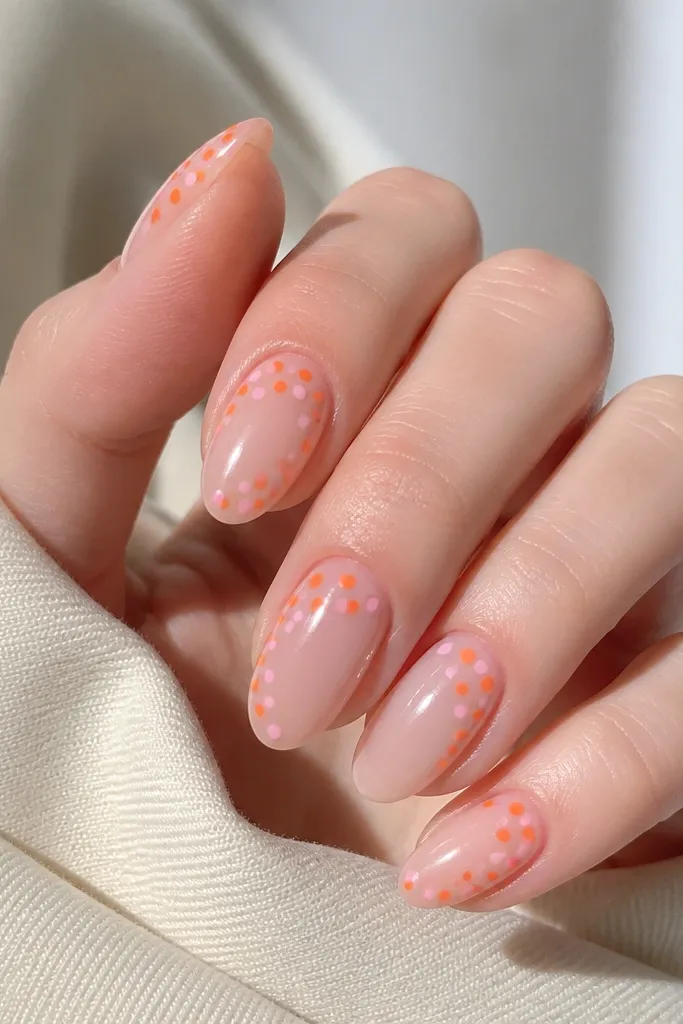
Polka dots look playful, but the trick is keeping the base sheer. The barely-there pink makes the dots look crisp and clean instead of heavy. Orange dots add the summer pop, while the second pink tone keeps everything cohesive. I like this on short almond because the dots don't have to travel far to look balanced. It flatters different skin tones because sheer bases blend naturally. This is also a good option if you want nails that still look "me" without a ton of coverage.
Paint a sheer nude-pink base in two thin coats so it stays natural. Use a dotting tool to place orange dots in a loose pattern along the cuticle area, then add a few lighter pink dots to break up the orange. Keep dot sizes varied - one larger dot every few nails looks intentional. Finish with glossy top coat, and press the brush around cuticle edges so dots don't lift.
Editor's noteWipe your dotting tool between colors so the orange doesn't tint the pink dots.
Watch outDon't pack dots too tightly; crowded dots look like a sticker instead of nail art.
10. Pink Marble Accent With Orange Vein Lines
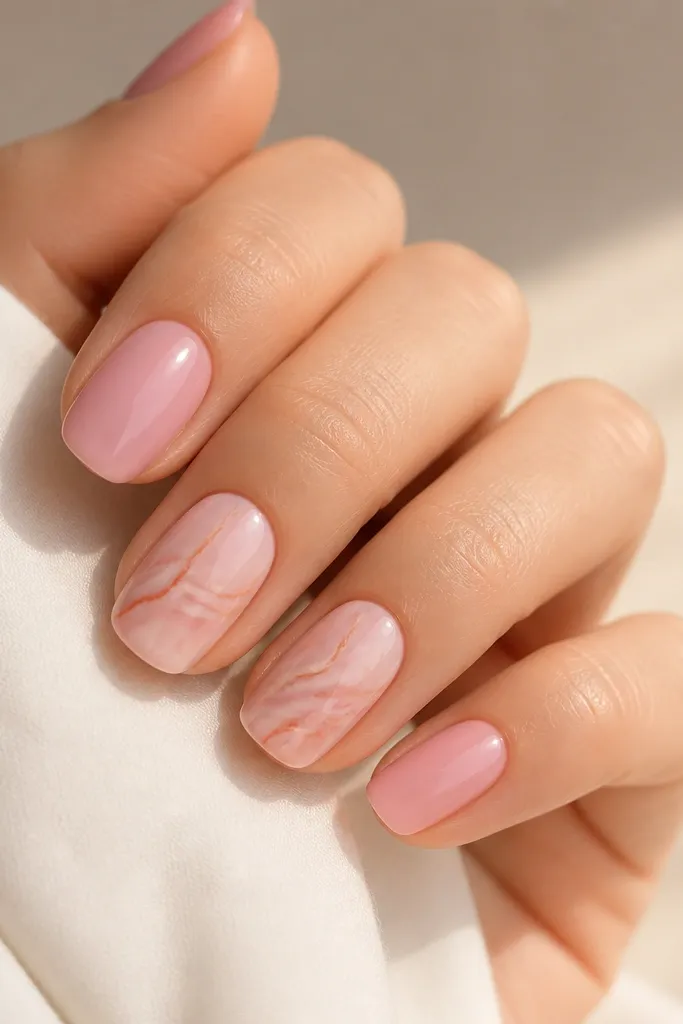
Marble looks high-end, but you don't need a full set of it. I keep marble to one or two accent nails and use simple pink on the rest, which makes the orange veins feel special. The orange lines add warmth and keep the marble from looking too cool-toned. This is flattering on hands because it draws the eye upward and adds movement without covering the whole nail. I've done this for summer events and it still looks good after a week because the accent nails don't show chips as quickly as dense art.
Start with one to two coats of glossy pink on all nails. For the marble accent, sponge or brush on thin wisps of lighter pink and white, then drag a toothpick through them to create veining. Add orange vein lines with a liner brush - one or two lines only - and keep them thin. Top coat twice for the marble accent so the surface feels smooth and doesn't snag.
Editor's noteIf the marble looks streaky, add a second thin layer of white wisps before you draw the veins.
Watch outAvoid heavy opaque marble on every nail; it turns into thick texture and looks messy when it grows out.
11. Orange Tortoiseshell Edge On Pink French
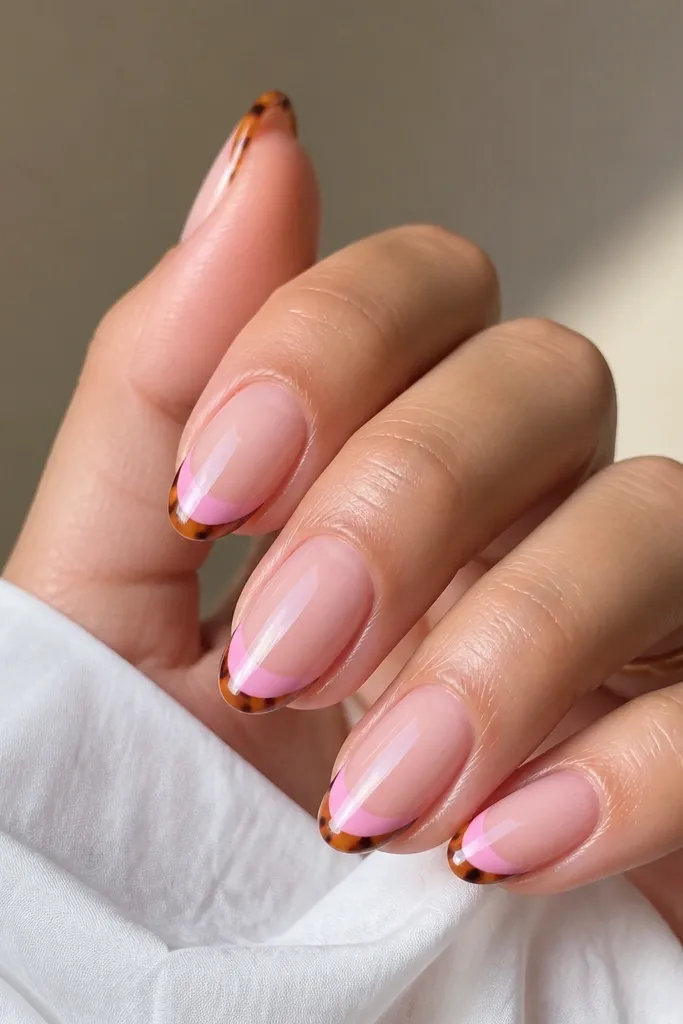
This is for when you want easy glam but with a grown-up vibe. The pink French area stays neat, and the orange tortoiseshell edge gives texture without needing big shapes. I've worn this on medium squoval and it looks especially good with gold jewelry because the orange reads warm. It flatters hands with slightly shorter nails because the tortoiseshell is only at the edge, not across the nail bed. The result feels "summer fashion" rather than "kids nail art."
Paint two coats of pink and draw a classic thin French line at the tip in a slightly deeper pink shade. Then, using a dotting tool, place tiny orange irregular dots and micro-lines right on the edge of the French, staying within a 1-2 mm strip. Blend the irregular pattern by lightly dragging a toothpick through a few dots. Seal with a glossy top coat and cap the edges so the tortoiseshell doesn't chip.
Editor's noteUse a toothpick for the micro-lines; it keeps the pattern crisp instead of smudged.
Watch outDon't flood the tortoiseshell strip; thick orange makes it look like smeared paint.
12. Hot Pink Base With Orange Outline Flowers On Sidewalls
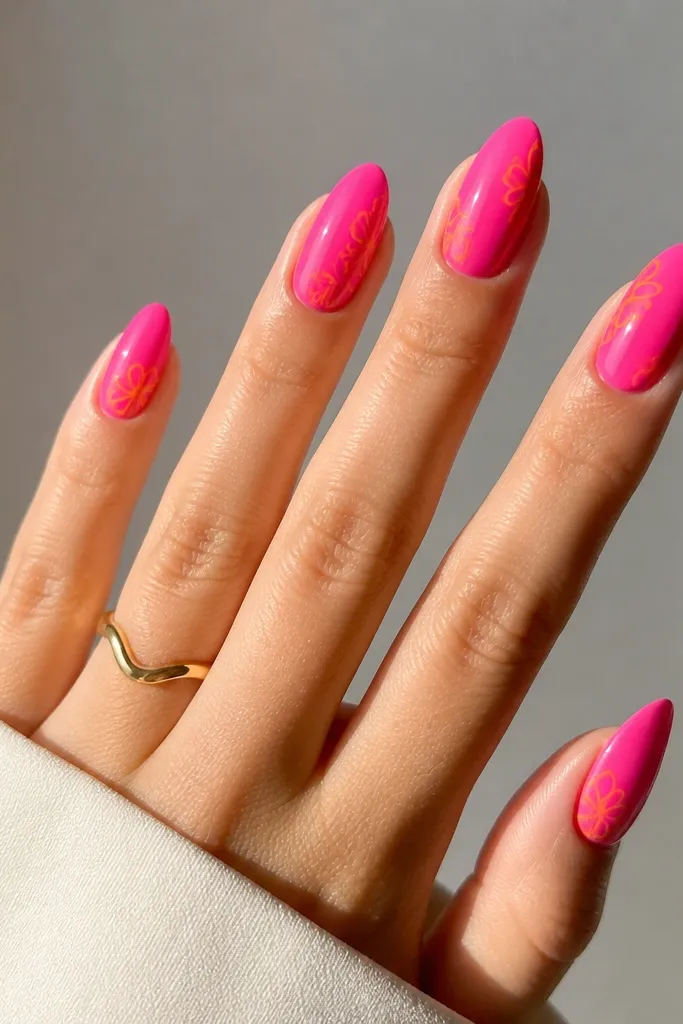
Bright hot pink makes orange look like it belongs - that's the whole reason this combo works. The orange outline flowers on the sidewalls add detail without taking over the nail. I like this on medium almond because the side placement makes your fingers look more slender, and the shape gives the flower room. It flatters deeper skin tones especially well, but it also looks striking on fair skin because it's high contrast. For parties, it reads fun and put-together.
Apply two coats of hot pink, then cure fully. Draw one small flower outline on each nail using orange: five petals and a tiny center dot. Place the flower closer to the sidewall rather than centered, leaving the other side of the nail clean. Top coat, then do a second thin top coat over the flower to prevent the outline from catching on hair.
Editor's noteIf your outline looks shaky, use steady pressure and shorter strokes; long strokes make uneven petal shapes.
Watch outAvoid filling the petals completely with orange - outline-only stays classy and easier to keep neat.
13. Orange And Pink Half-Trim Tips With Negative Space
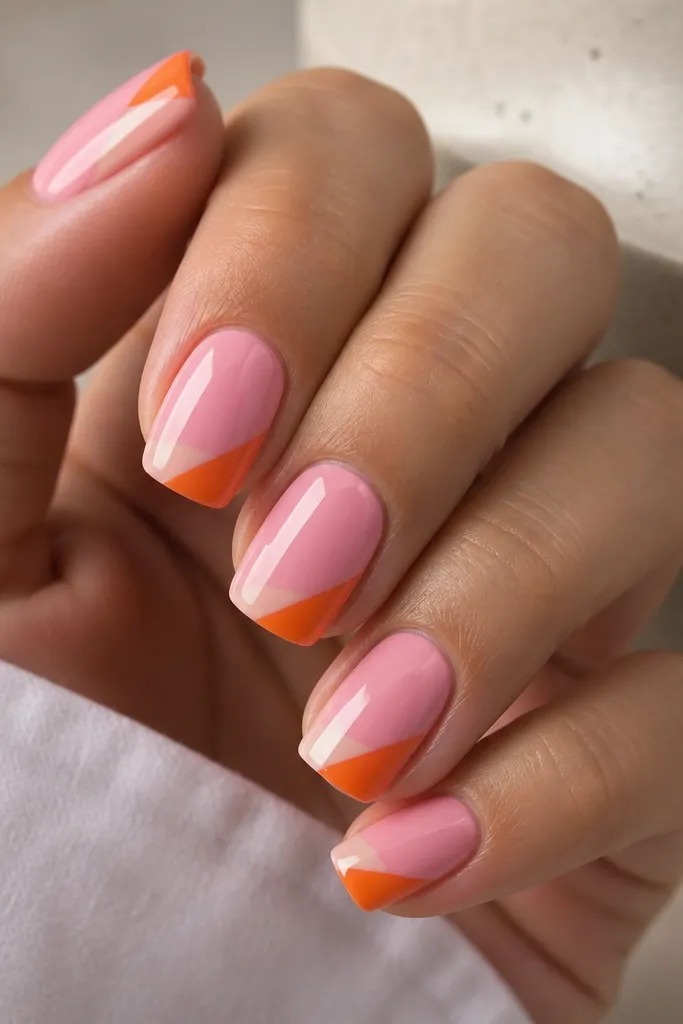
This design looks like a modern graphic poster because it uses negative space on purpose. The pink base keeps it wearable, and the orange half-trim gives that summer punch. I do this on square nails because the straight edges make the split look crisp. It flatters hands that want a bit of visual structure - it makes nails look intentional and clean. You also get that "easy glam" effect because the art is basically one split tip, not multiple details.
Paint two coats of pink on the whole nail and cure. Use striping tape to create a diagonal split on the tip so one half will be orange and the other stays bare. Paint orange only on the taped section, cure, then remove tape carefully. Clean the edges with a small brush, then seal with glossy top coat and cap the free edge.
Editor's notePress the tape down firmly at the corners so orange does not creep under it.
Watch outDon't remove tape after the polish fully hardens; it can tear the top layer and cause chips.
14. Glossy Pink Base With Orange Bubble Dots At The Tip
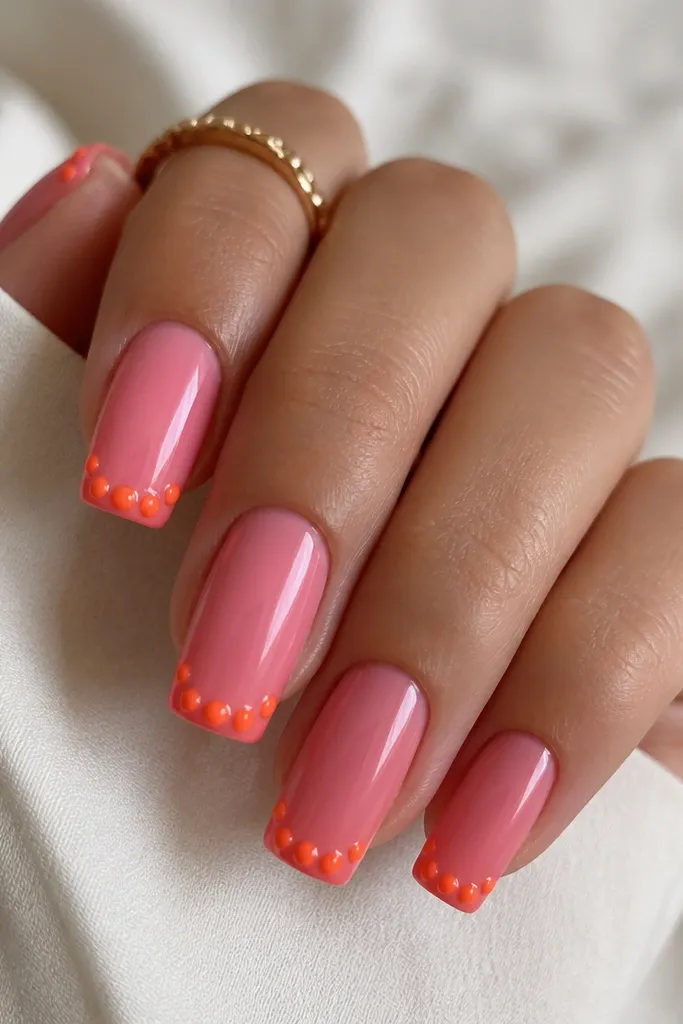
Raised bubble dots look playful, but they still read glam because they catch light. The glossy pink base makes the bubbles look intentional instead of random. I recommend this on short coffin or medium square because the tip is wide enough to place clusters neatly. It flatters most skin tones because orange beads pop against pink without needing extra colors. If you're going to a festival or a vacation dinner, this nail art feels fun without being loud.
Apply two coats of glossy pink and cure fully. Dot orange at the tip edge using a dotting tool, but keep the dots smaller than you think - you want a cluster, not a stripe. For raised bubbles, apply a second tiny layer on top of each dot and cure again, then top coat lightly around them so you don't flatten the texture. Finish by sealing the sides and free edge.
Editor's noteUse gel for the raised effect - regular polish bubbles flatten as they dry.
Watch outAvoid flooding the bubbles with too much top coat; it turns them into flat specks.
15. Pink To Orange Tip Gradient With Glitter Halo
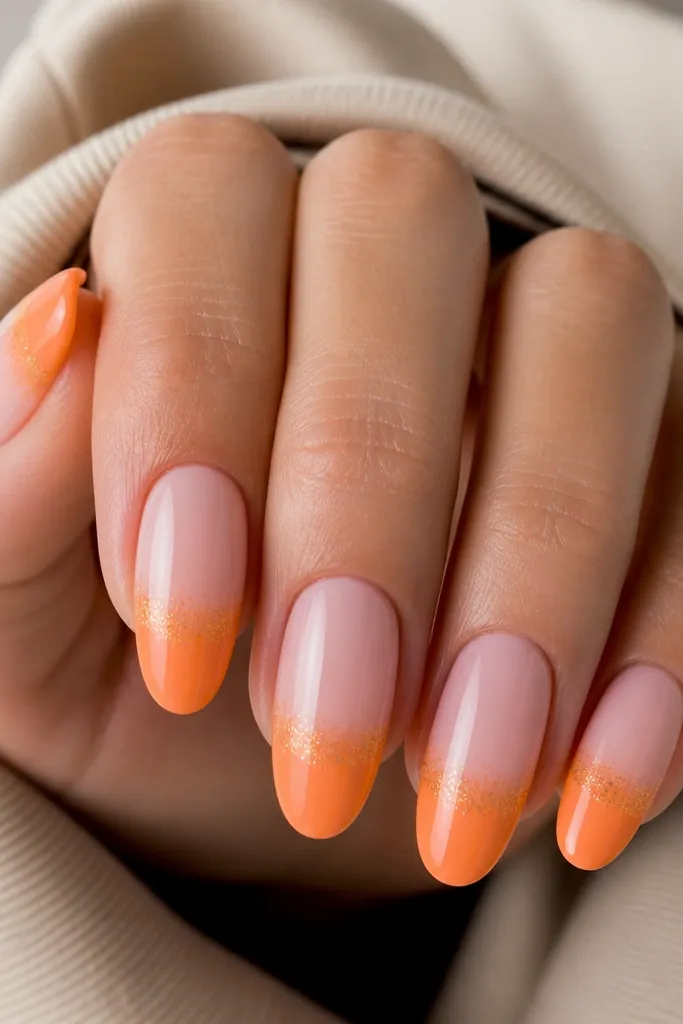
This is the one I reach for when I want easy glam that looks like a special occasion. The gradient gives the color story, and the glitter halo makes the transition look intentional instead of blended by accident. Fine glitter is key - it looks like sun sparkle, not chunky confetti. It flatters hands because the halo sits near the tip and draws attention to the nail shape. Works on fair and deep skin tones because orange glitter reflects warm light.
Paint two coats of pink, then sponge orange at the tip and blend upward. While the gradient is still slightly tacky or right after curing, dab a thin line of fine orange glitter at the blend boundary using a small brush. Keep the glitter band narrow, about 1 mm, so it looks like a halo. Seal with a glossy top coat in two thin layers, especially over the glitter line.
Editor's noteTap off extra glitter with a clean brush so the halo stays crisp and doesn't spread.
Watch outSkip chunky glitter; it catches on fabric and makes the manicure feel rough.
16. Orange Outline Cat-Eye Accent On Pink
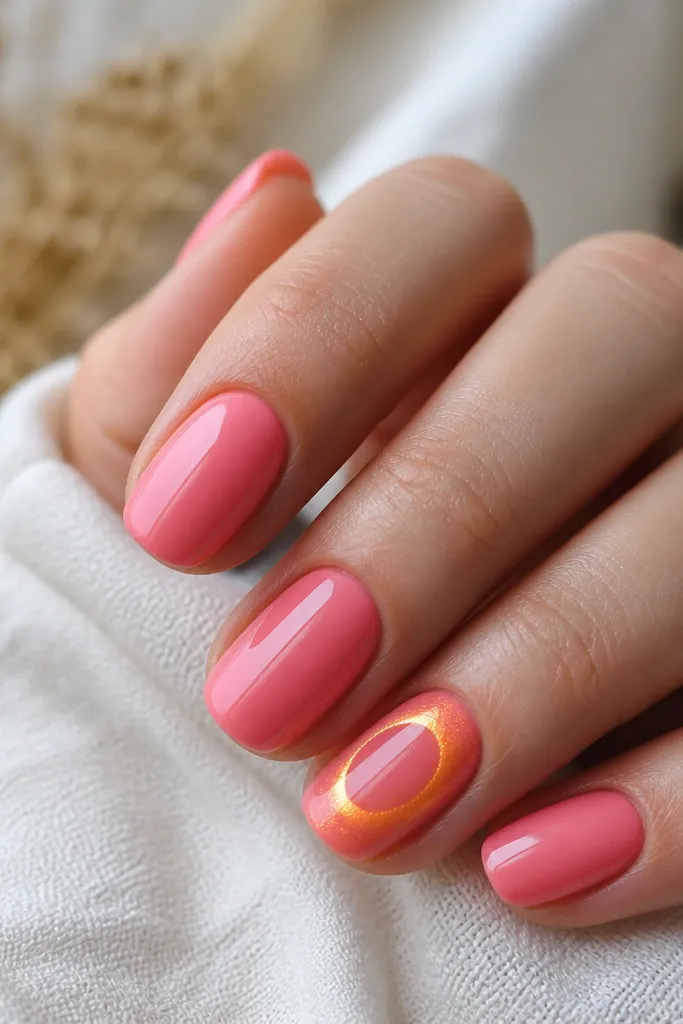
Cat-eye polish gives you motion without complicated art. I keep it to one or two nails so it stays easy glam instead of turning into a full set of heavy effects. The orange ring adds warmth and makes the pink base look brighter. This flatters hands with slightly longer nail beds because the cat-eye shine reads like a highlight. It also looks great on photos because the magnetic line shifts with your angle.
Start with two coats of glossy pink on all nails and cure hard. On the accent nail, apply a base coat then a thin layer of orange cat-eye polish and use the magnet to pull the shine into a curved ring across the center. Cure, then outline the cat-eye curve with a thin orange liner if you want extra definition. Finish with a glossy top coat to lock it in.
Editor's noteUse the magnet right after applying the cat-eye - the timing controls how sharp the line looks.
Watch outDon't magnet too long; it can blur the shine line and make the ring look cloudy.
17. Pink Base With Orange Cuticle V French
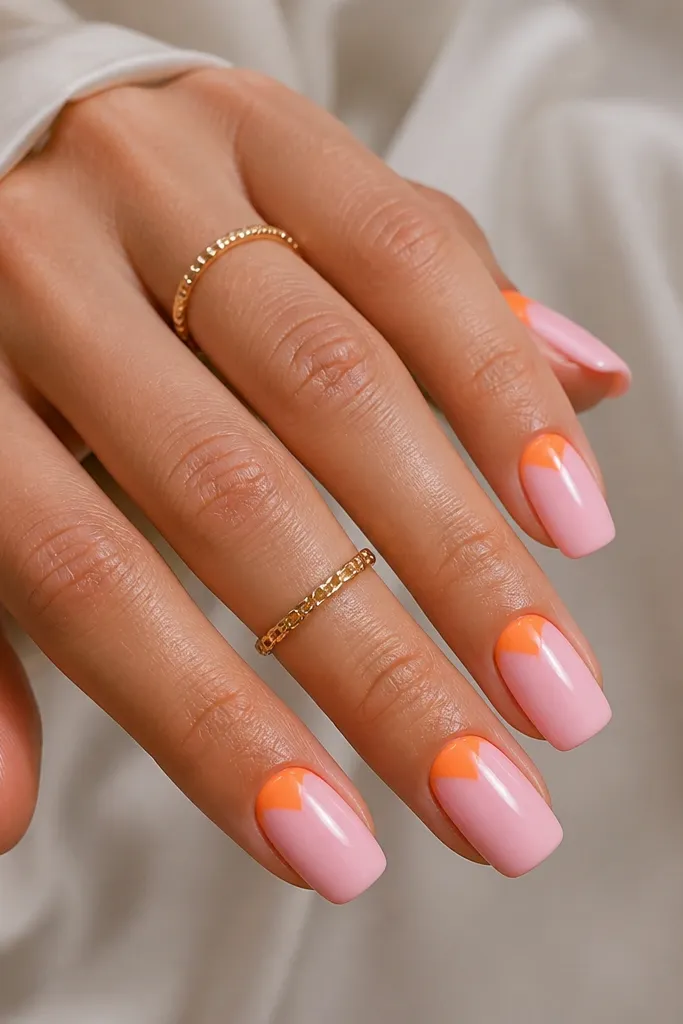
The cuticle V French makes the nail look longer because it draws a vertical shape near the base. Orange on the cuticle area stays bright, while the pink base keeps it wearable. I like this on medium squoval because the V shape matches the curve of the cuticle and looks crisp. It flatters hands that have a slightly rounded cuticle - the V shape makes it look more defined. This is also easy glam for beginners because you're working in a simple triangle, not a full French line across the tip.
Apply two coats of glossy pink and cure. Use striping tape to form a V at the cuticle or freehand with a liner brush if you're confident. Paint orange within the V shape, keeping it narrow and stopping before it reaches the sidewalls. Remove tape carefully, then clean edges with a tiny brush. Top coat twice if you want extra smoothness on the cuticle line.
Editor's noteIf you freehand the V, start with two short strokes to outline the triangle, then fill in the center.
Watch outAvoid widening the V too much; a wide cuticle triangle can make nails look squat.
18. Orange And Pink Checker Accent On One Nail Per Hand
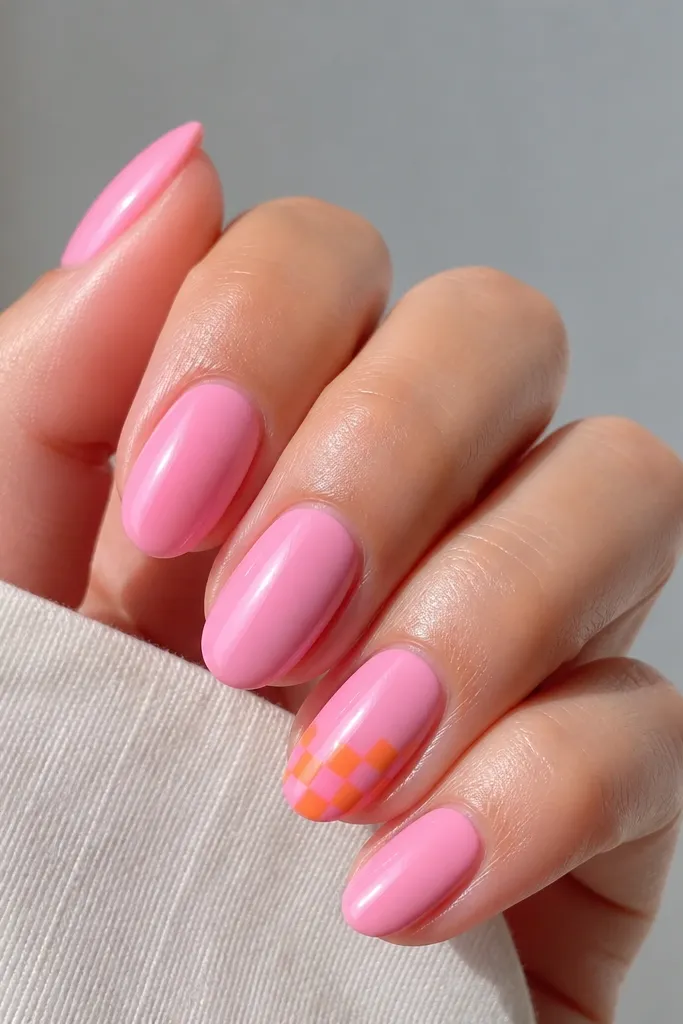
Checker accents feel playful but controlled when the pattern is small. I keep it to one nail per hand so it stays easy glam and doesn't feel like costume nails. The alternating orange and pink squares create a summer vibe that looks great with casual outfits and bright lip colors. I've worn this with both warm and cool undertones and it always looks balanced because pink and orange are related colors. It also hides small imperfections because the pattern breaks up the surface.
Paint all nails with two coats of glossy pink and cure. Choose one accent nail and mark a small grid near the tip with a light pencil outline or tiny striping tape squares. Fill alternating squares with orange, then fill the remaining squares with a slightly deeper pink if you want the checker to pop. Remove tape, clean edges, and seal with a glossy top coat, focusing on smoothing the square edges.
Editor's noteUse nail art tape cut into tiny strips - it makes the checker lines straight without extra effort.
Watch outDon't make the checker area too large; big checks look messy as the nail grows out.
19. Orange Swirl Halo On Pink Gel Base
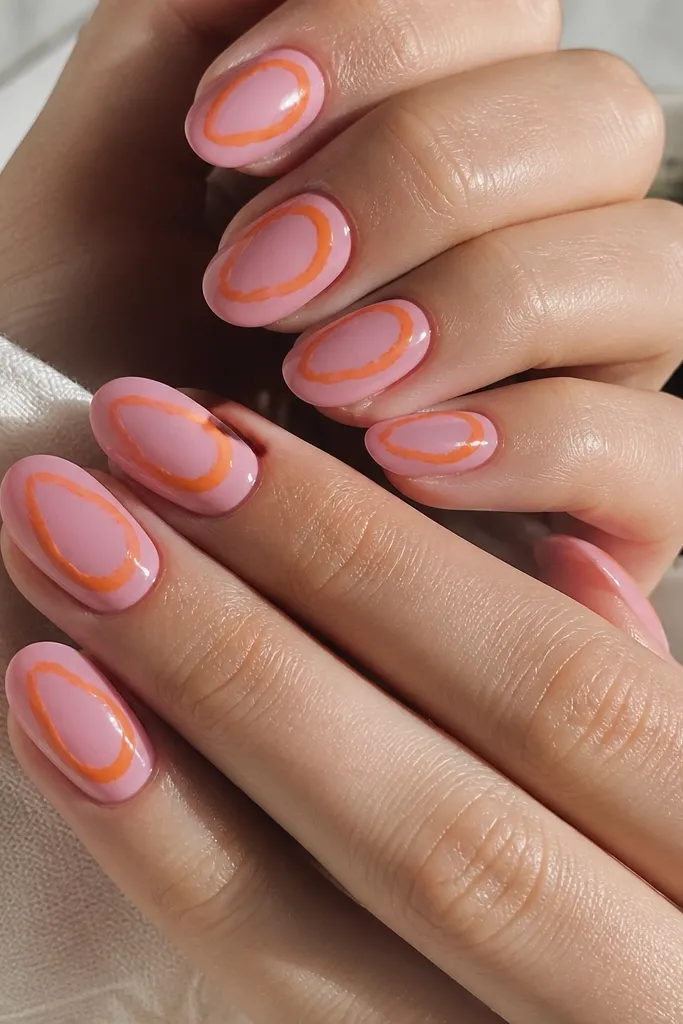
This is a fancy-looking design that stays simple because it uses one continuous swirl shape. The orange halo ring frames the nail center, which makes your nails look more polished even with minimal detail. I prefer it on oval or almond because the swirl naturally follows the nail curve. It flatters hands by adding a focal point without covering the entire nail surface. If you want Summer Nails Pink And Orange easy glam that feels artsy but still wearable, this is the winner.
Apply two glossy coats of pink gel and cure. Load a liner brush with orange and draw a loose swirl loop starting near one side of the nail center, curving around and ending near the opposite side. Keep the swirl line thin and consistent by wiping the brush lightly between nails. Cure and finish with a glossy top coat that fully covers the swirl line so it doesn't catch.
Editor's noteDraw the swirl in one slow loop instead of adding extra lines - the single-line look is what makes it clean.
Watch outAvoid thick orange lines; they cover the pink and make the halo look heavy.
20. Pink Base With Orange Starbursts At The Tips
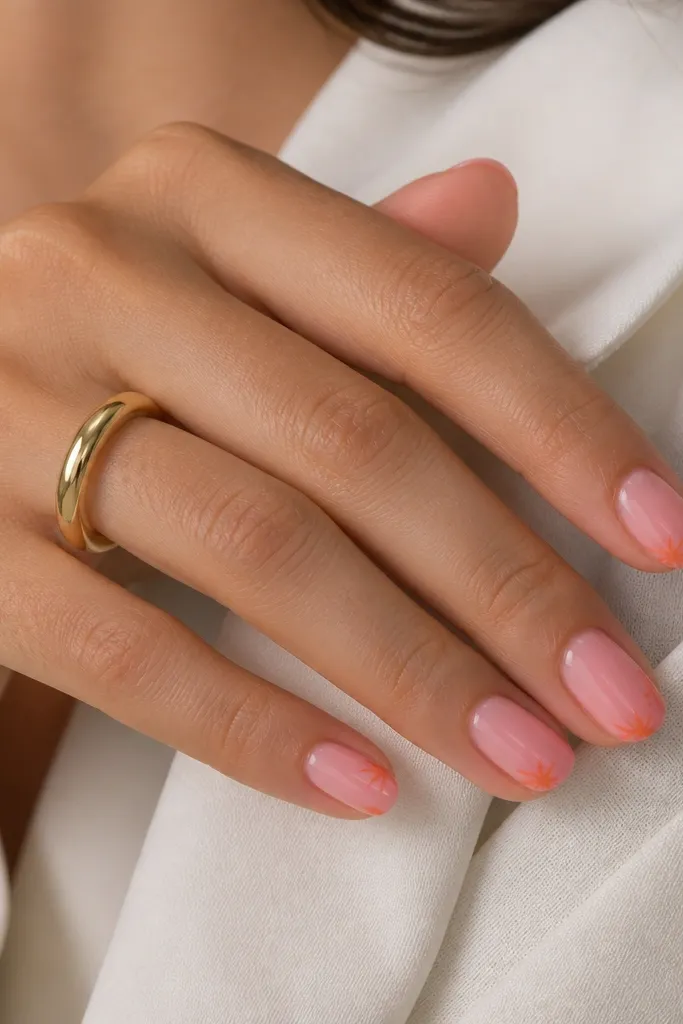
Starbursts make nails look like they're catching light, which is exactly what you want for summer. The pink base keeps everything soft, while the orange rays add that "sun flare" effect. I like starbursts on short to medium because the rays stay visible without getting crowded. It flatters all skin tones since orange is warm and bright against pink. This design feels extra for date night or vacation photos, but the art is quick once you get the ray spacing right.
Paint two coats of glossy pink and cure fully. At the tip center, place a tiny orange dot, then use a liner brush to pull thin rays outward in 6-8 lines. Keep the rays short so they don't touch the sides of the nail. Add a second dot or tiny fill only if your rays need more definition, then seal with a glossy top coat.
Editor's noteUse a light touch for rays - press too hard and the line gets thick and uneven.
Watch outSkip overfilling the starburst center; a messy center makes the rays look uneven.