1. Milky White Base with Navy Half-Moon
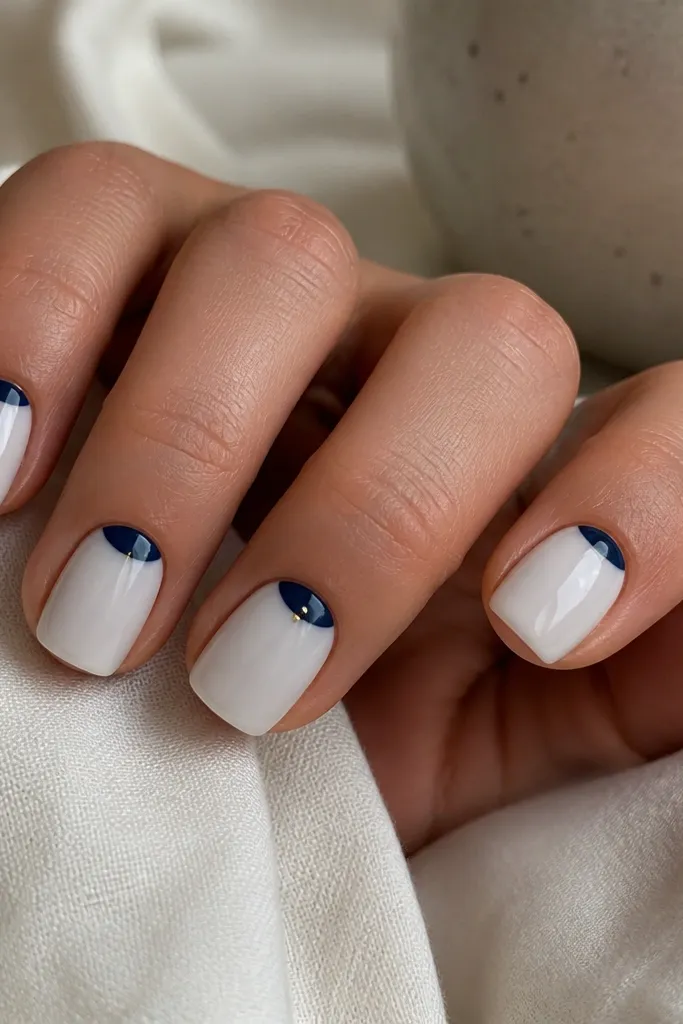
This look makes hands look instantly tidy because the milky white evens out tone and gives you that “fresh manicure” vibe. The navy half-moon at the cuticle makes fingers look a touch longer since the color starts at the base and pulls the eye upward. I like it on medium to deep skin tones because the navy reads crisp instead of muddy, and the white stays bright without washing you out. It also works if you wear a single gold ring because the tiny dot gives the set a focal point without turning it loud. The styling principle is contrast control: bold color sits in a small shape so the manicure stays wearable.
Editor's noteUse a cool-toned navy (slightly gray-blue) instead of a warm royal blue so it doesn’t clash with yellow undertones.
Start with two thin coats of milky white gel or polish, curing each coat fully. Use a half-moon stencil or a steady striping brush to paint navy gel in a curved arc at the cuticle, then cure. Add a small gold dot with a dotting tool on one accent nail, placing it just off-center of the navy arc. Finish with two coats of high-gloss top coat, and cap the free edge with the last layer so it doesn’t peel at the tips.
Watch outDon’t flood the cuticle — if navy touches the skin, it looks messy fast.
2. Classic White Micro-French with Thin Gold Edge
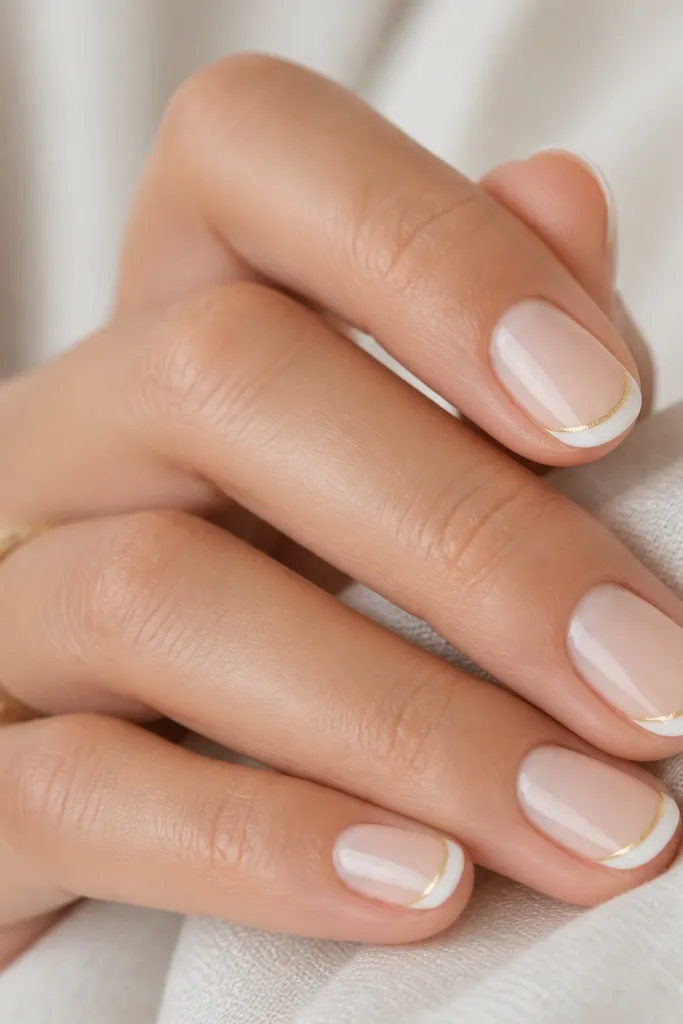
This is my go-to when I want classic white but with a little “styled” energy. The micro-French keeps the look clean for short nails and makes the nail bed look longer without covering your whole nail. The thin gold line at the tip adds a reflective edge that catches flash photography, while still staying minimal enough for work. It flatters most skin tones because the base is neutral and the white is the focus. If you wear silver rings, this still works, but it looks best when you have at least one gold piece in your rotation.
Editor's noteFor extra crisp lines, use striping tape for the gold and remove it while the gel is still slightly tacky.
Apply a sheer nude or clear base coat to smooth the nail, then cure. Paint a micro-French using classic white gel/polish, keeping the tip under 2 mm from the nail line. With a striping brush or striping tape, add a hair-thin gold line along the edge of the white tip, then cure. Seal everything with a glossy top coat and wipe the tacky layer if your gel system needs it.
Watch outSkip thick gold — a chunky line makes micro-French look heavy and cheap.
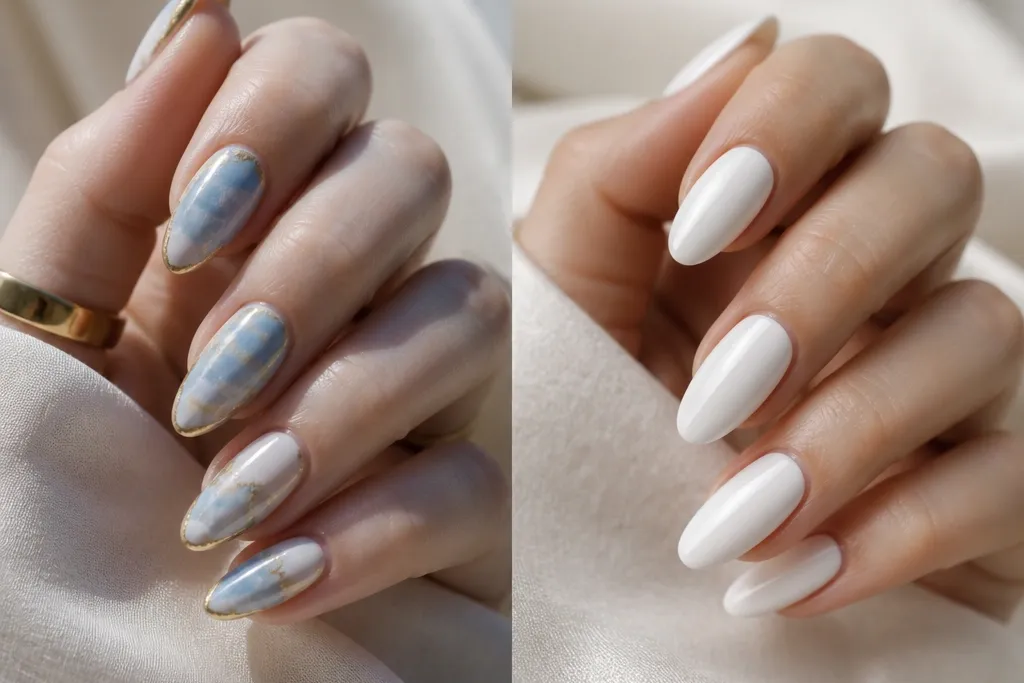
3. Blue Marble Vein Over Classic White
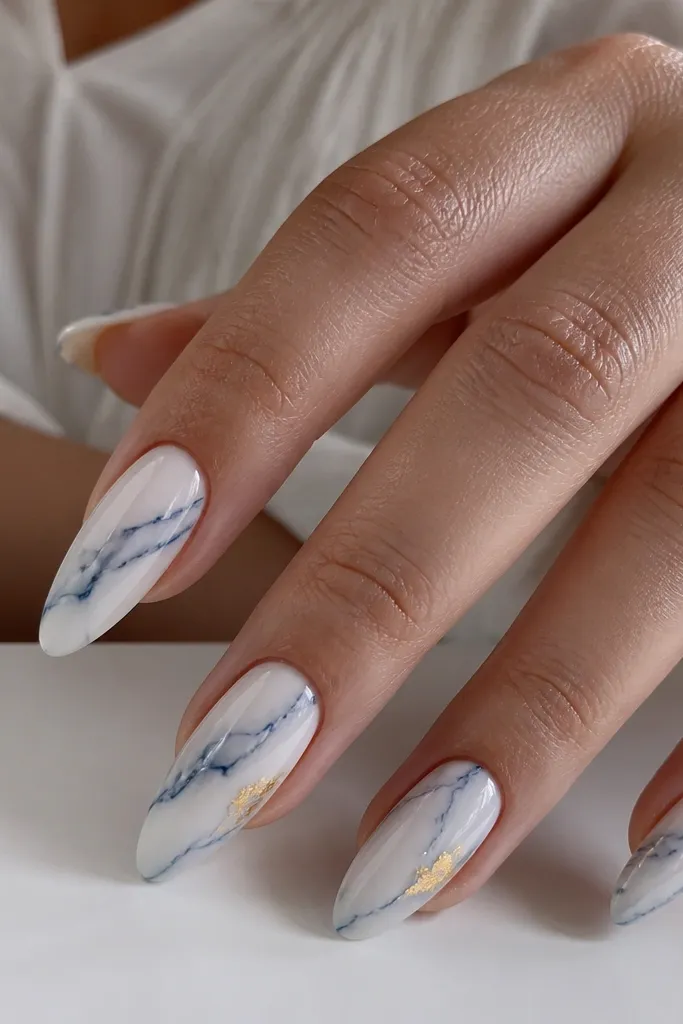
Classic white gives you the clean canvas, and the blue marble veins make it look like you spent hours even when you didn’t. I love this on almond and long square shapes because the diagonal veining naturally elongates the finger. The blue reads cooler and more expensive-looking than random blue scribbles, especially on light and olive skin tones. Gold leaf flecks add dimension without needing a full accent nail design. The principle here is controlled chaos: veins should look irregular, but the color density stays light enough to keep the white bright.
Editor's noteMix two blues — one navy and one icy blue — so the veins have depth instead of looking flat.
Paint two coats of classic white, curing between coats until fully opaque. Use a thin liner brush with watered-down blue gel or polish to draw 2-3 main vein lines per nail, then add smaller offshoots. Blend the edges lightly with a small sponge if you want softer marble, but keep the center lines crisp. Press tiny pieces of gold leaf onto two nails while the gel is tacky, then top coat with a thick, glossy layer.
Watch outDon’t cover the whole nail with blue — it stops reading as marble and starts reading as smudged.
4. Icy White Base with Navy Brushstroke Accent
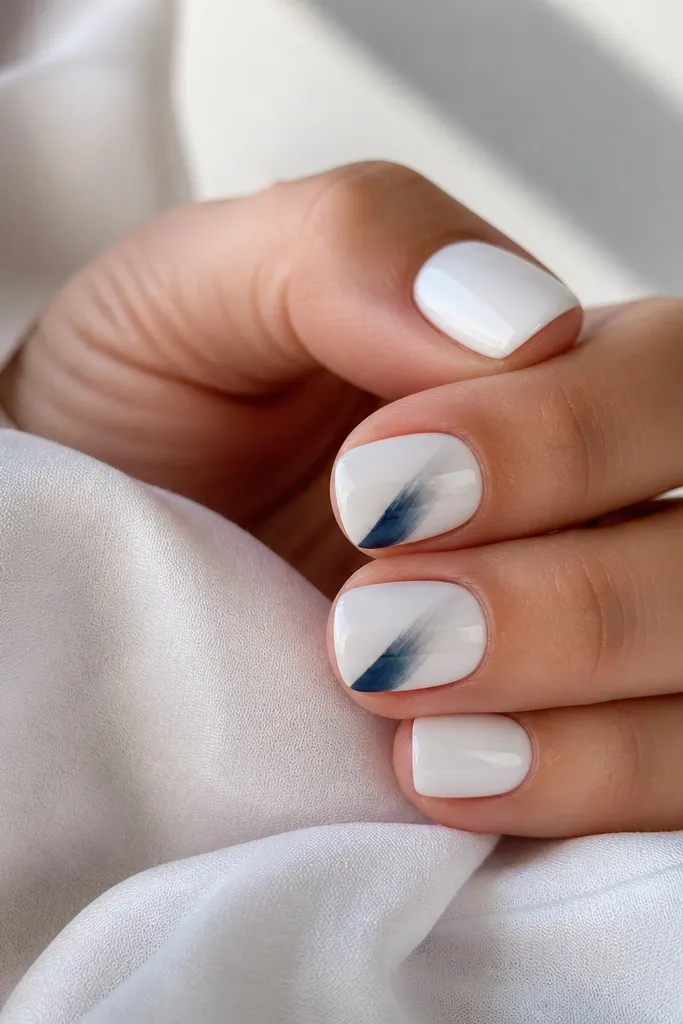
This design looks like modern art, but it’s actually easy because the brushstroke shape does the heavy lifting. The icy white base is brighter than milky white, so it looks great on medium and deep skin tones where classic white can sometimes look too bold. The navy stroke adds movement and makes fingers look slimmer because it runs diagonally. A glossy finish keeps it crisp and prevents the white from looking powdery. Styling principle: one strong stroke beats full coverage art when you want it to look intentional.
Start with two thin coats of icy white gel/polish, curing fully. On accent nails, load a striping brush with navy gel and drag a diagonal stroke from near the sidewall toward the center, then lightly flick the end for a tapered tip. Let it cure and check the opacity; add a second thin stroke only where you need it denser. Finish with one smooth coat of glossy top coat, making sure to cap the free edge.
Use a flat-ended brush for the stroke, not a round detail brush — you get cleaner edges with less effort.
Don’t make the stroke too wide — if it covers half the nail, it turns into a block of color.
5. Half-and-Half Blue Fade with Gold Corner
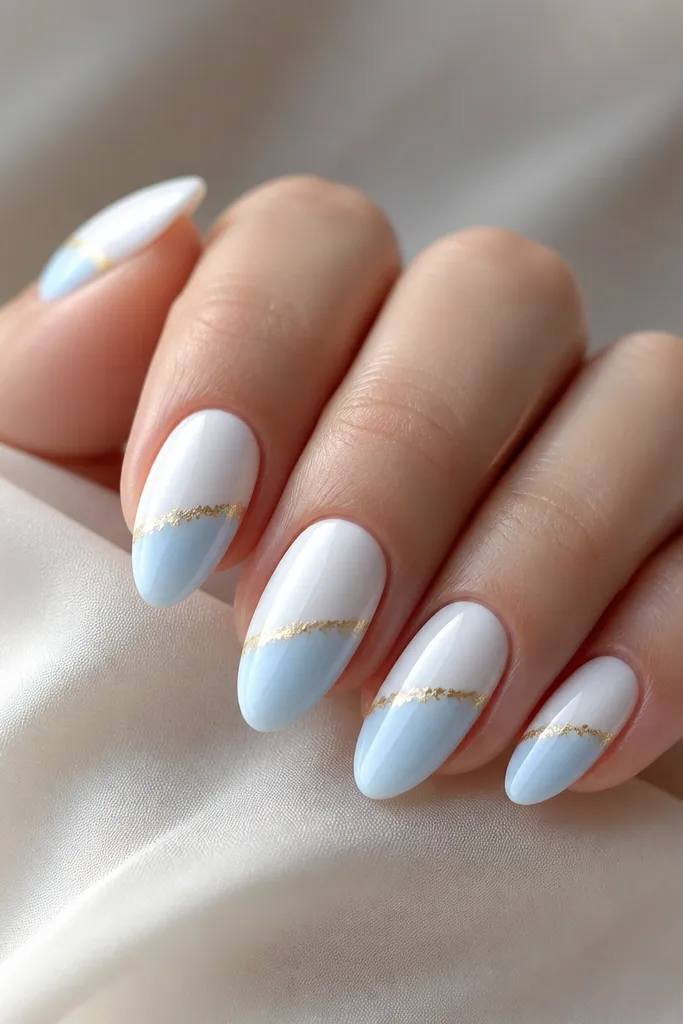
This one is a favorite for people who want blue but don’t want it to cover the whole nail. The half-and-half layout keeps classic white as the main color, so it still reads clean and wearable. The blue fade adds softness and depth, and the gold corner gives you a sharp focal point right where your hand naturally catches light. I’ve seen this look especially good with white blouses, navy sweaters, and gold hoops. Principle: place gold at a geometric junction so it looks designed, not random.
Apply two coats of classic white and cure. For the bottom half, sponge-paint a light blue gradient starting at the midline and fading downward, curing after each thin layer. Keep the split line neat by using a striping tape guide for the first layer, then remove the tape before curing the final coat. Dab small gold foil pieces into the corner at the junction, then seal with a glossy top coat.
Let the gradient layers cure between sponges so you don’t lift pigment and get muddy edges.
Don’t skip sealing — gold foil lifts if you only use one thin top coat.
6. Blue and Gold Foil Confetti Over Classic White
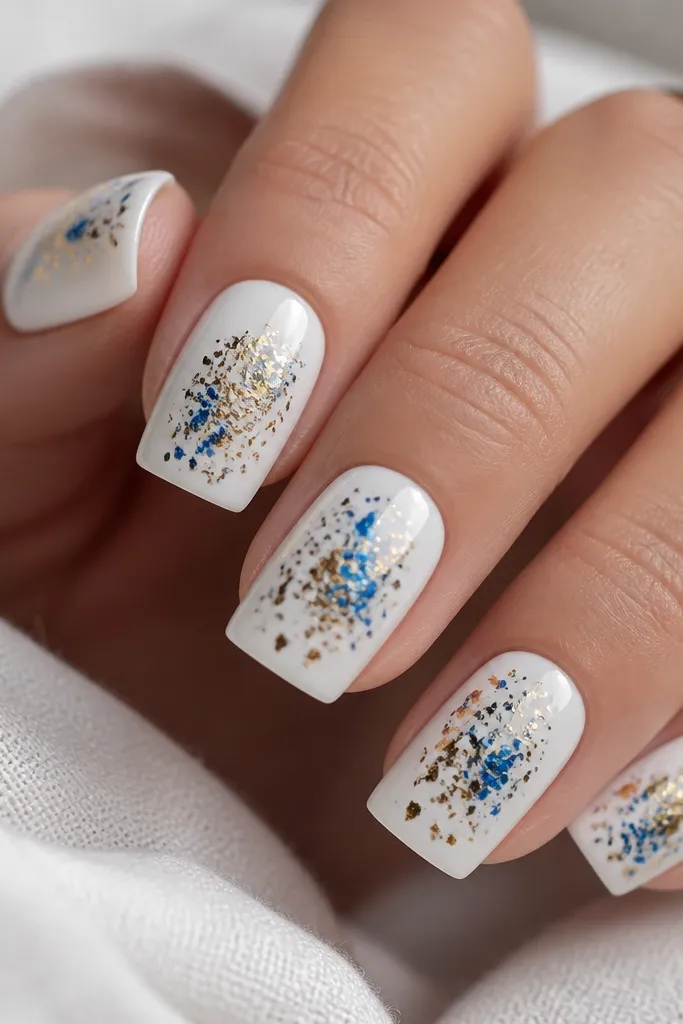
Foil confetti is the quickest way to get that “expensive manicure” look without drawing detailed lines. Classic white keeps everything bright and makes the blue foil look icy instead of dull. I like this for birthdays and holiday parties because it reads festive under flash, but it still feels clean because there’s no thick paint. It flatters shorter nails because the foil pieces add texture without needing long nail space. The principle is density — keep most of the foil in the center so the edges stay tidy.
Editor's noteUse a lint-free wipe after top coat to smooth the surface — foil can leave tiny ridges that catch on fabric.
Paint two coats of classic white and cure. Apply a thin layer of foil gel or a tacky top coat on one nail at a time, then press small blue and gold foil flakes where you want the main cluster. Use a silicone pusher to press and release so the flakes settle without big bubbles. Seal with two coats of glossy top coat, and cap the tips carefully.
Watch outDon’t use matte top coat on foil — it kills the shine that makes it look pricey.
7. Navy Outline French with Gold Dot at the Smile
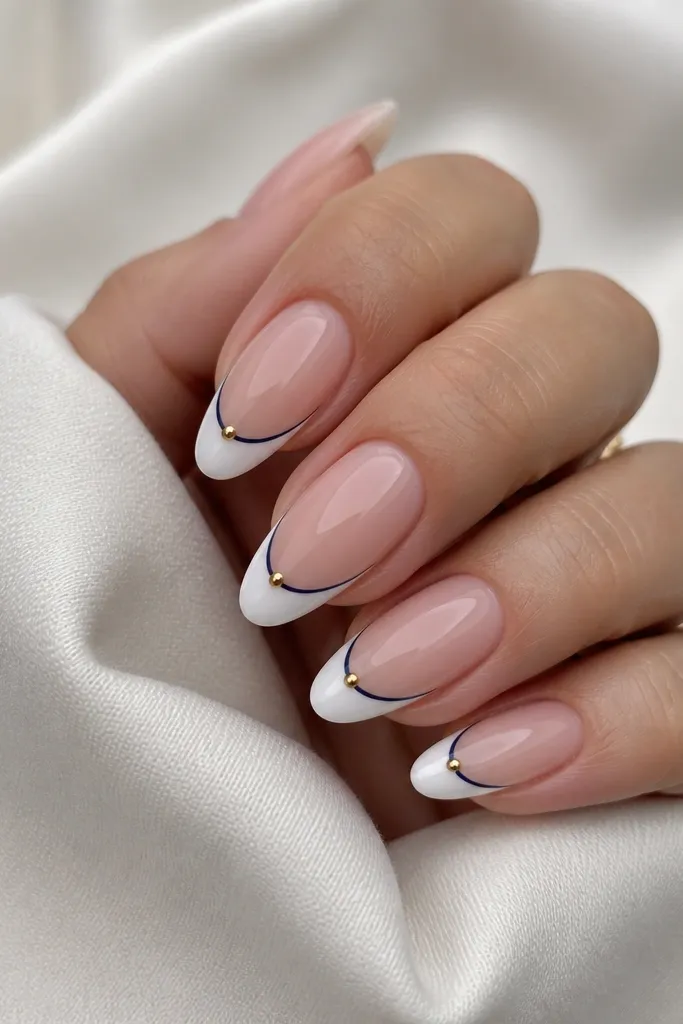
This is a refined, graphic version of white nails. The navy outline makes the white tip look sharper, and the gold dot at the center adds a tiny highlight that makes the whole manicure feel intentional. I’ve worn it with both gold and silver jewelry; it still works because the design has one clear warm accent. On olive and tan skin, the navy outline keeps everything from looking too stark. Principle: outline work beats heavy art when you want crispness.
Start with a nude or clear base and cure. Paint the tip in classic white, then cure. With a liner brush, trace a thin navy outline just along the edge of the white smile line, keeping the line under 0.5 mm. Add a gold dot in the exact center of the smile line using a dotting tool, then cure. Finish with glossy top coat, and pay attention to the free edge so it doesn’t snag.
If your outline wobbles, use a tiny flat brush dipped in cleanser to clean only the edges before curing.
Don’t make the outline too thick — it turns “French” into “sticker border.”
8. Classic White Base with Navy Horizontal Lines
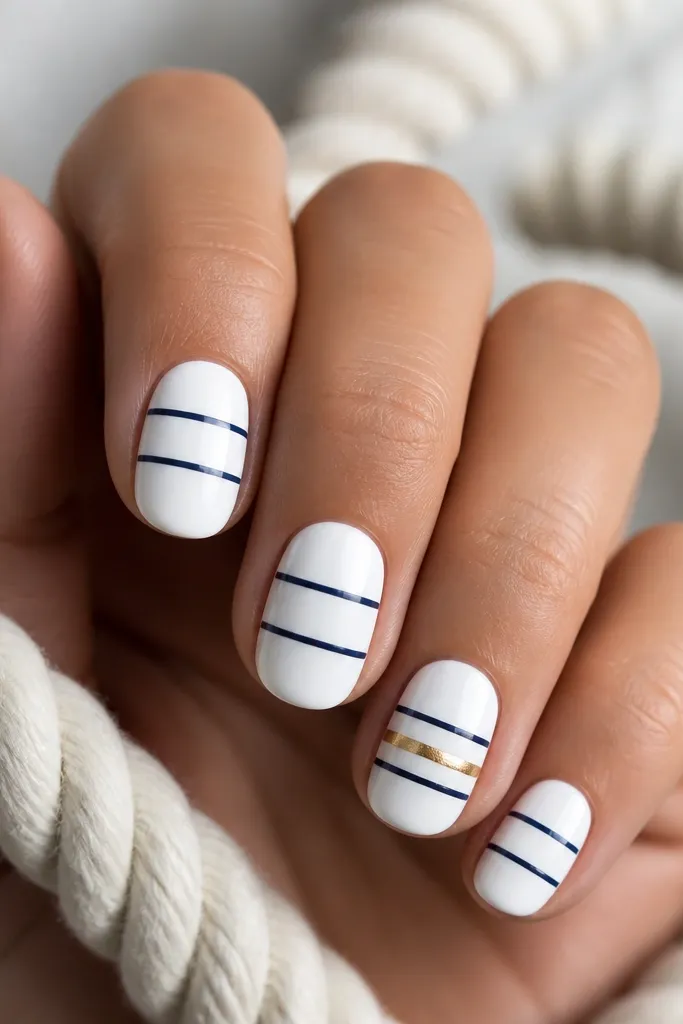
Horizontal lines can either shorten fingers or make them look longer, depending on spacing. Here, the lines are thin and placed slightly above the center so the nail still reads elongated. Classic white keeps the look bright, and the navy lines add structure that looks clean with everyday outfits. I like it on short ovals because the lines give a “done” look without long art. If you wear gold rings, the accent gold line keeps the theme consistent. Principle: keep the line count low and the spacing even.
Editor's noteUse striping tape for the first line so the second line matches the angle perfectly.
Apply two coats of classic white, cure fully. Using striping tape or a ruler-like guide, place two thin navy lines across each nail, keeping them parallel and evenly spaced. For one accent nail, replace the middle line with a gold strip or gold gel line. Cure all art and seal with glossy top coat, dragging the brush over the lines to smooth the surface.
Watch outAvoid uneven spacing — it reads messy even if the colors are right.
9. Blue Ombre Tips with Foil Gold Cuticle Halo
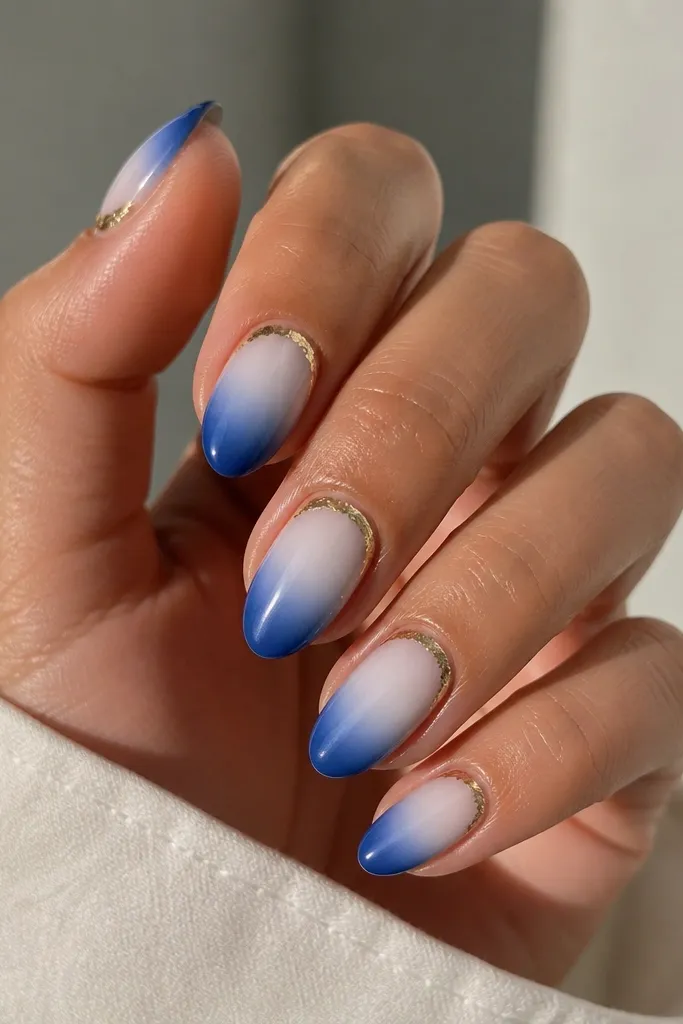
The ombre tips make your nails look dimensional, and the gold cuticle halo frames the nail bed in a way that makes hands look polished. I’ve found this design works best when you keep the ombre concentrated at the tip — it stays flattering and doesn’t overwhelm short nails. The gold halo is thin, so it reads like jewelry rather than decoration. It flatters pale skin (brightens) and deep skin (adds contrast) without turning chalky. Principle: frame the cuticle and fade the tip — you get length and sparkle in one set.
Editor's noteUse a makeup sponge and tap lightly for softer ombre edges instead of dragging pigment.
Start with a classic white base and cure. Sponge or brush on blue ombre only on the top third of the nail, fading from white at the inner edge to navy at the tip, curing after each layer. For the gold halo, apply a small amount of foil glue or tacky gel around the cuticle, then press gold foil in a thin arc. Seal with two glossy top coats so the halo doesn’t lift.
Watch outDon’t overfill the halo — if it spreads across the nail, it looks bulky.
10. White-on-White Marble Dots with Tiny Gold Flecks
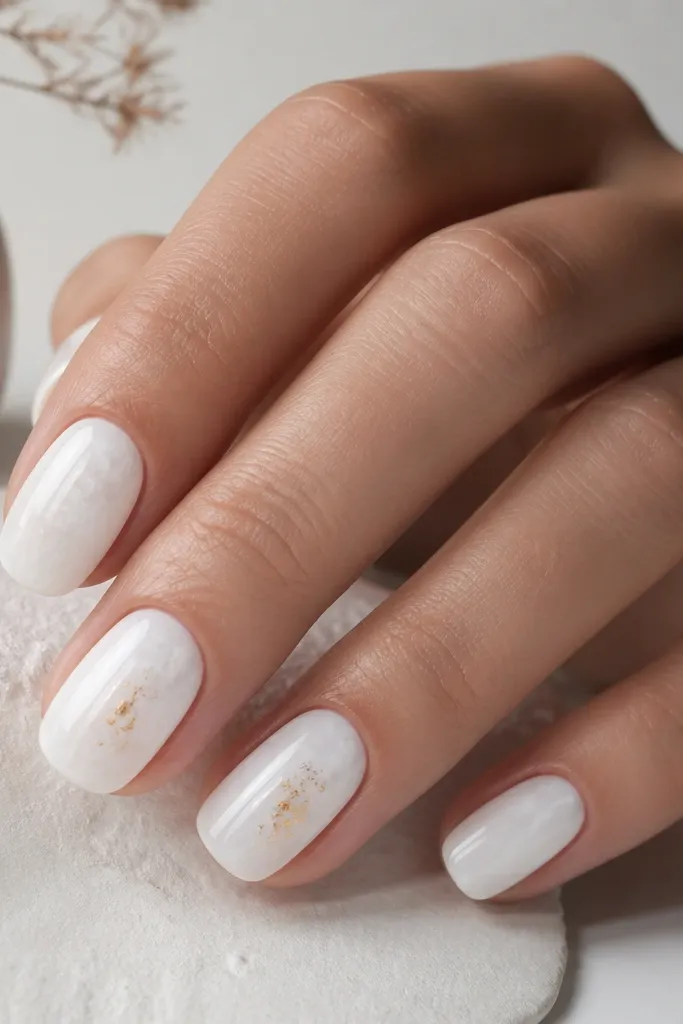
This is the “classic white but not boring” option. It uses white-on-white texture so it looks clean in person, but it still catches light when you move your hands. I like it on people who hate strong blue but still want the white-gold look to feel special. It flatters short nails because the pattern stays minimal and doesn’t add visual bulk. The tiny gold flecks give you that just-right sparkle without needing a full gold accent. Principle: texture beats color when you want a sophisticated white look.
Editor's noteKeep the lighter white only one shade up from your base — too much contrast looks like glitter glue.
Paint two coats of classic white and cure. Use a thin brush with slightly lighter white gel to add dot clusters and tiny swirls, keeping them concentrated toward the center and leaving edges mostly plain. Press micro gold flecks onto two accent nails while the gel is tacky, then cure. Finish with glossy top coat and cap the edges for wear.
Watch outDon’t add big swirls on every nail — white-on-white needs restraint.
11. Navy Stained Glass Lines on White
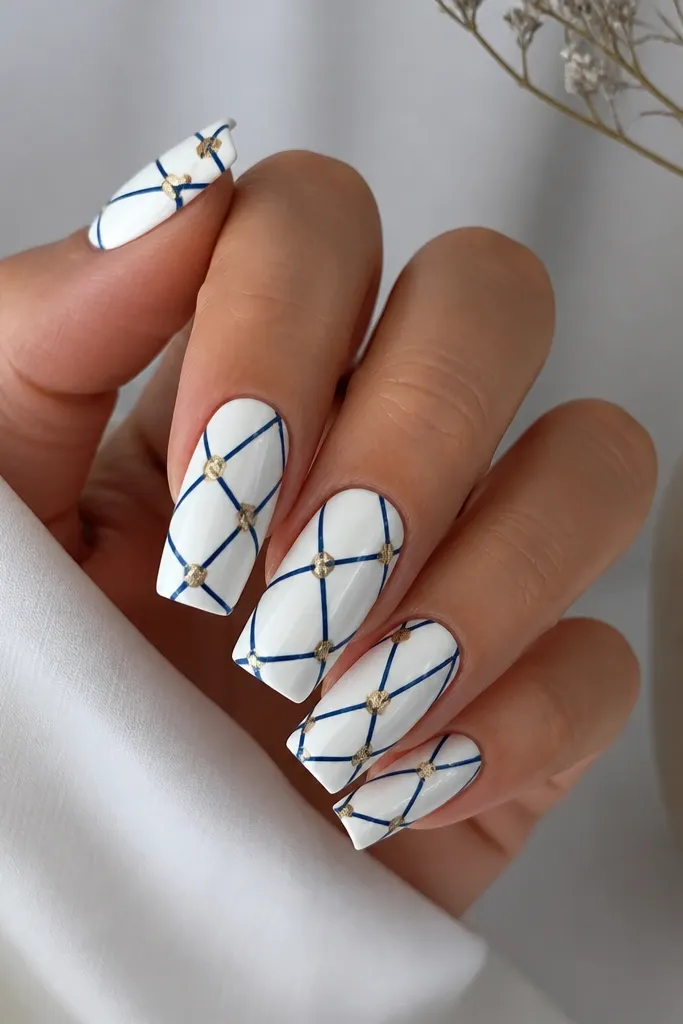
Stained glass lines look sharp because the navy acts like “lead” outlining panels. The white base keeps it bright and makes the navy lines read crisp instead of heavy. I like this on long square and squoval because you get clean panel shapes that look deliberate. It’s also great for people with warm skin tones because the navy anchors the design and the gold leaf warms it up. Principle: panel intersections get the gold, not the whole panel.
Apply two coats of classic white and cure. Using a liner brush, draw irregular navy line panels across the nail, varying the thickness slightly for realism. Add gold leaf only where two navy lines meet — press tiny pieces into the corner and cure. Seal with a glossy top coat, and use a thicker second coat to smooth over the ridges from gold leaf.
Plan your panel layout on paper first — 3-5 panels per nail looks best and avoids overcrowding.
Avoid continuous lines with no breaks — it stops looking like glass and looks like doodling.
12. Blue Floral Accent on Classic White
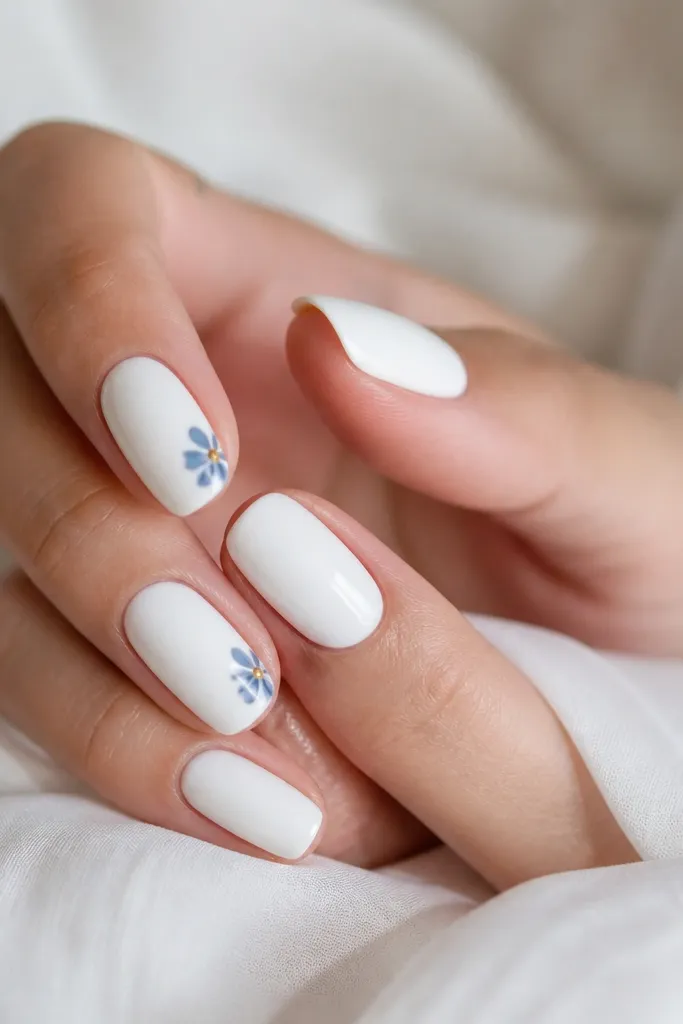
This is my favorite “blue” look for people who want it to feel pretty, not bold. Classic white keeps the background clean, and small blue petals add a soft pop that flatters fair and medium skin tones. The gold center dot makes it look like jewelry, not nail stickers. I’ve worn this for spring events and it always gets compliments because it’s detailed but not busy. Principle: place the flower near the sidewall so your nail still looks longer.
Editor's noteUse a dotting tool to place the gold center so it stays perfectly round.
Paint classic white across all nails with two thin coats and cure. On two accent nails, draw a small petal cluster using a fine detail brush and a light-to-medium blue, then add a tiny gold dot in the center of one flower. Keep the flower about one-third down from the cuticle so it doesn’t feel like it’s floating. Finish with glossy top coat on all nails and cap the free edge.
Watch outSkip giant flowers — large florals on white can look like nail decals.
13. Blue and Gold Side Stripe with Negative Space
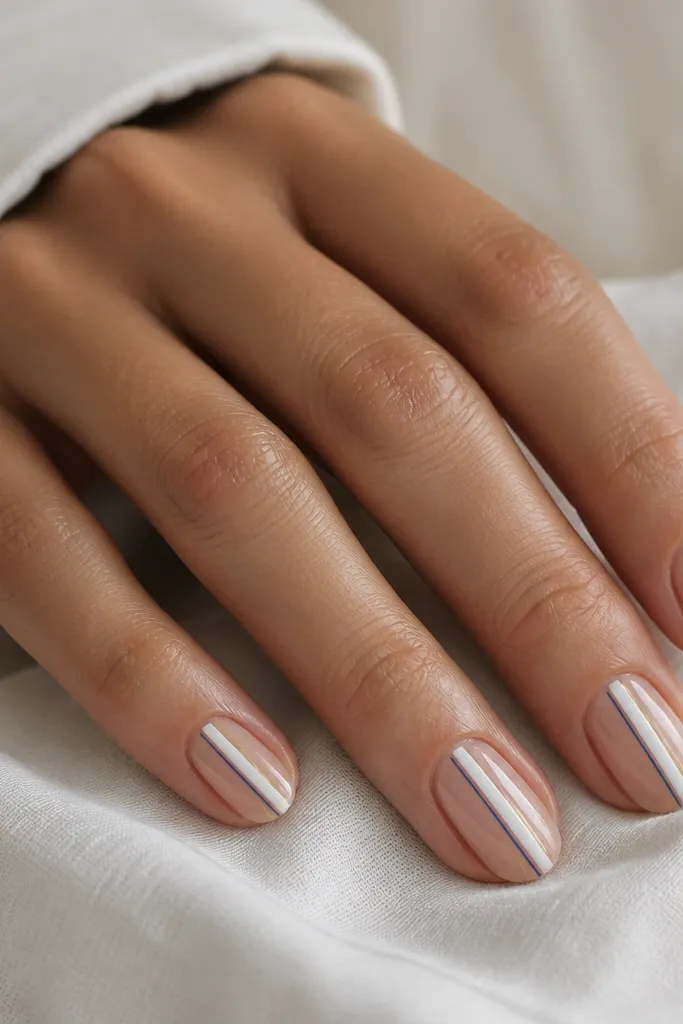
This design uses negative space on purpose, and that’s why it looks clean even when you add blue and gold. The clear/nude base keeps it light, and the center white stripe gives you that classic white vibe without full coverage. I like it on shorter nails because negative space makes them look longer and slimmer. The blue side stripe adds the “blue white and gold” theme without turning your whole manicure into a block of color. Principle: keep one main stripe, then add two hairlines only.
Start with a clear or nude base coat and cure. Use striping tape to create a straight center panel and paint it classic white, then cure and remove tape. Add a thin blue stripe along one side panel using a striping brush, and add a hairline gold stripe closer to the sidewall. Seal with glossy top coat, and do a careful second coat around the stripes so they don’t lift.
If your stripes look wobbly, do one stripe at a time and cure before starting the next.
Don’t cover the whole nail with white — negative space is the point.
14. Classic White with Blue Bow Accent and Gold Tip
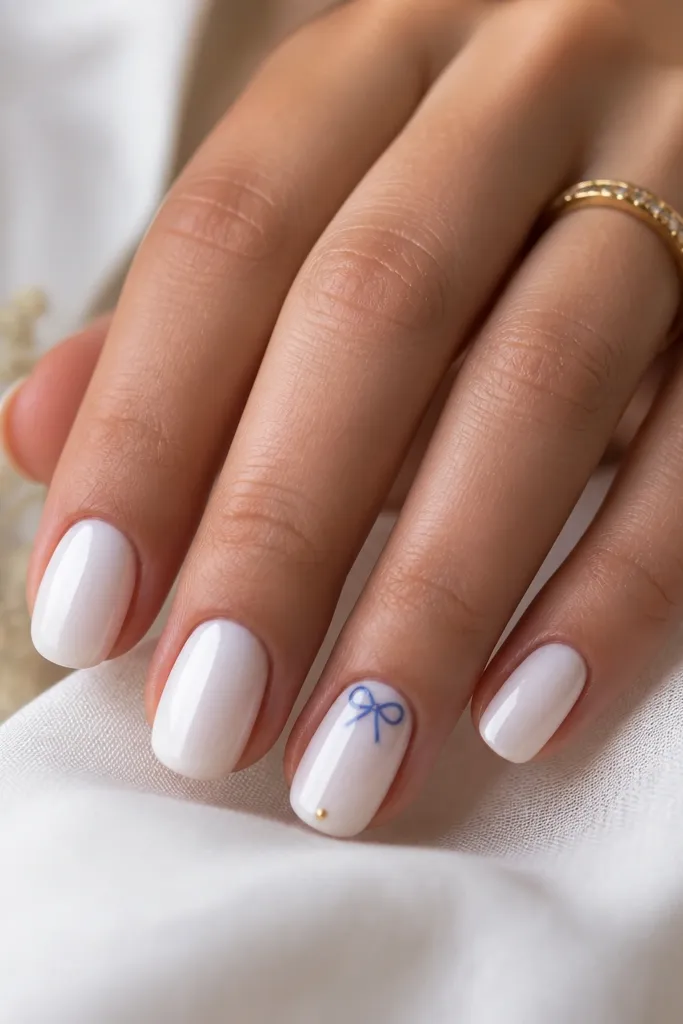
This is sweet without looking childish because the bow is small and the base is classic white. The blue bow pops against the white, and the gold dot at the tip gives a grown-up sparkle that reads like a charm. I like it for date nights, bridal showers, and anytime you want cute with control. It flatters hands with shorter nail beds because the bow placement draws attention near the cuticle. Principle: one tiny 3D-like element beats multiple decals.
Editor's noteThin your blue gel slightly so the bow edges stay crisp, not blobby.
Apply two coats of classic white and cure. On the accent nail, paint the bow loops with light blue gel using a detail brush, starting with one loop, then adding the second loop, then a small center line. Add a gold dot near the very tip, centered, and cure. Finish with glossy top coat, using extra care around the bow so it doesn’t catch on fabric.
Watch outAvoid placing the bow too low — it can make the nail look shorter.
15. Blue Shimmer Fade with Classic White Heart Outline
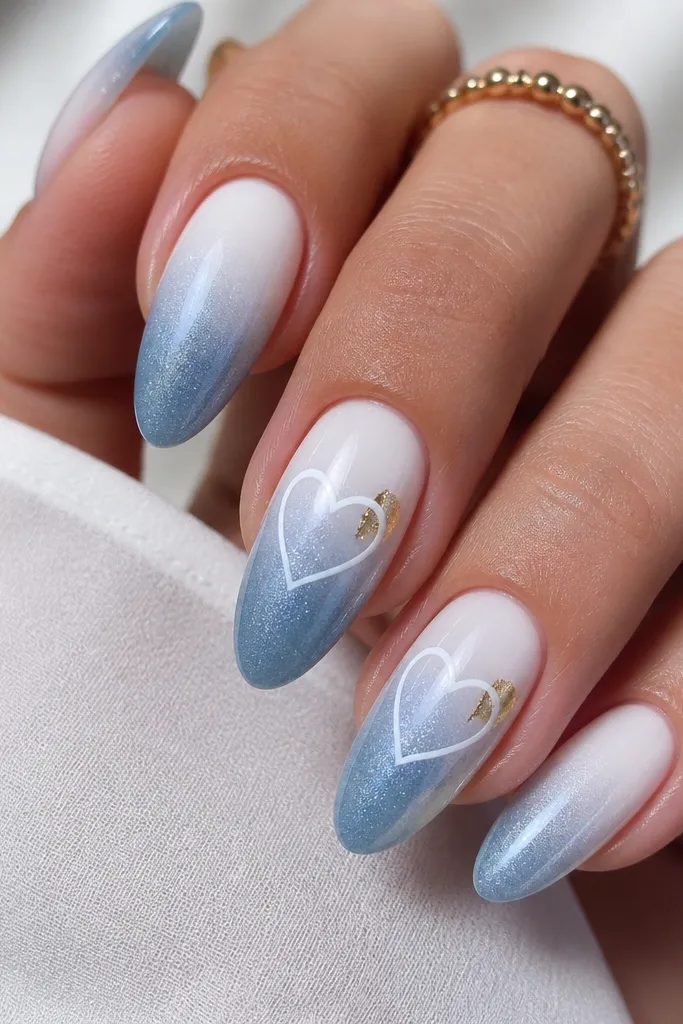
This one gives you the romance of white and the glow of blue shimmer. The shimmer fade makes your nails look like they have depth, and the heart outline stays classy because it’s not filled in — it’s just the line. I’ve worn it with both silver and gold jewelry; the gold flecks keep it from looking too monochrome. It’s flattering on medium almond and squoval shapes because the heart outline sits in the center and elongates the finger visually. Principle: use line art, not full shapes, when you want elegant contrast.
Editor's noteIf your heart line looks shaky, redraw it once on top of the cured first line with a fresh gel coat — it cleans up fast.
Paint the base with classic white and cure. Sponge on a shimmering blue only from the mid-nail down, fading upward so the white stays visible. With a fine liner brush, draw a heart outline centered on two nails, keeping the lines thin and glossy. Place tiny gold foil flecks near the top corners of the heart, cure, then seal with two coats of glossy top coat.
Watch outDon’t fill the heart — filled hearts over shimmer can look bulky.
16. Classic White Gel with Gold Foil Cracks and Blue Edge Tint
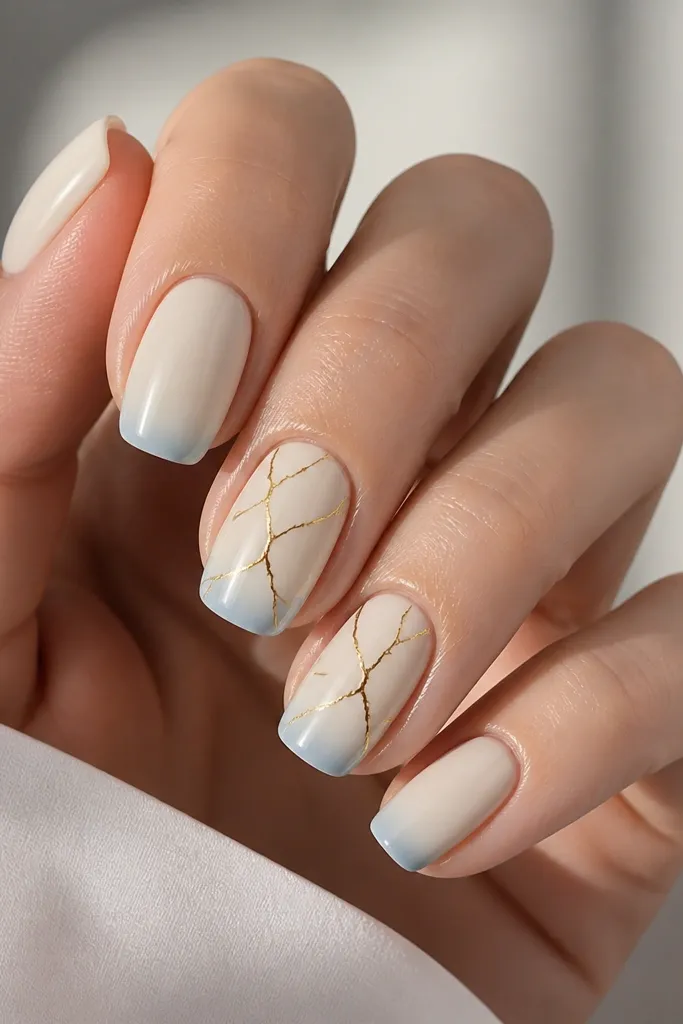
This design is for when you want a classic white manicure but you also want texture and that “caught the light” look. The gold crack lines create movement and make the nails look like they have depth, not just paint. The faint blue tint at the free edge ties it into the blue white and gold theme without turning it into a full blue set. I’ve found it works great for people who want something standout but still office-friendly. Principle: keep the blue as a shadow and let gold do the drama.
Editor's noteUse a small piece of cosmetic sponge for the blue tint so it stays faded, not solid.
Apply two coats of classic white and cure. On one or two accent nails, apply crack-style foil gel or a tacky layer, then press thin gold foil strips to form irregular crack lines, curing each nail. For the blue edge tint, lightly sponge a tiny amount of icy blue gel at the free edge only, then cure. Seal everything with two glossy top coats and cap the tips so the foil doesn’t lift.
Watch outAvoid heavy blue at the tip — it stops reading as a shadow and starts looking messy.