1. Classic White French With Ultra-Thin Gold Tips
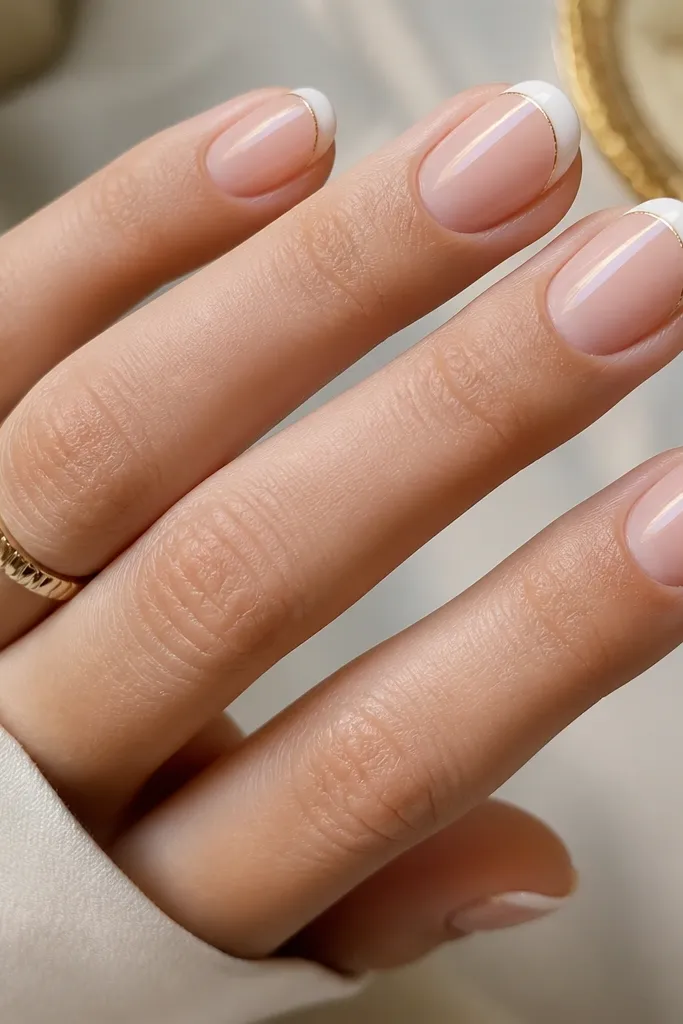
This design gives you the clean, “put together” look without adding bulk. The base is a sheer nude or clear pink, then the tip is a crisp white arc that stays opaque at the center of the nail. The gold is not a chunky stripe — it’s a hairline accent that hugs the outer edge of the French, so your nails still look neat. It flatters most skin tones because the white reads bright, and the gold adds warmth without turning the set yellow.
Editor's noteIf your French tip tends to flood the corners, cap the free edge with a tiny swipe of white before you add gold.
Start by painting a sheer base so your nail plate looks even. Then apply two thin coats of white for the French tip, using a guide or a French brush so the smile line looks smooth. After the white is fully dry, place a single gold strip along the outer edge — the strip should be no thicker than a credit card’s edge. Finish with a glossy top coat, paying extra attention to the tip so the gold line doesn’t catch on hair or fabric.
Watch outAvoid thick gold tape lines; they make the French look uneven and cheap.
2. White Half-Moon Cuticle With Gold Dot Border
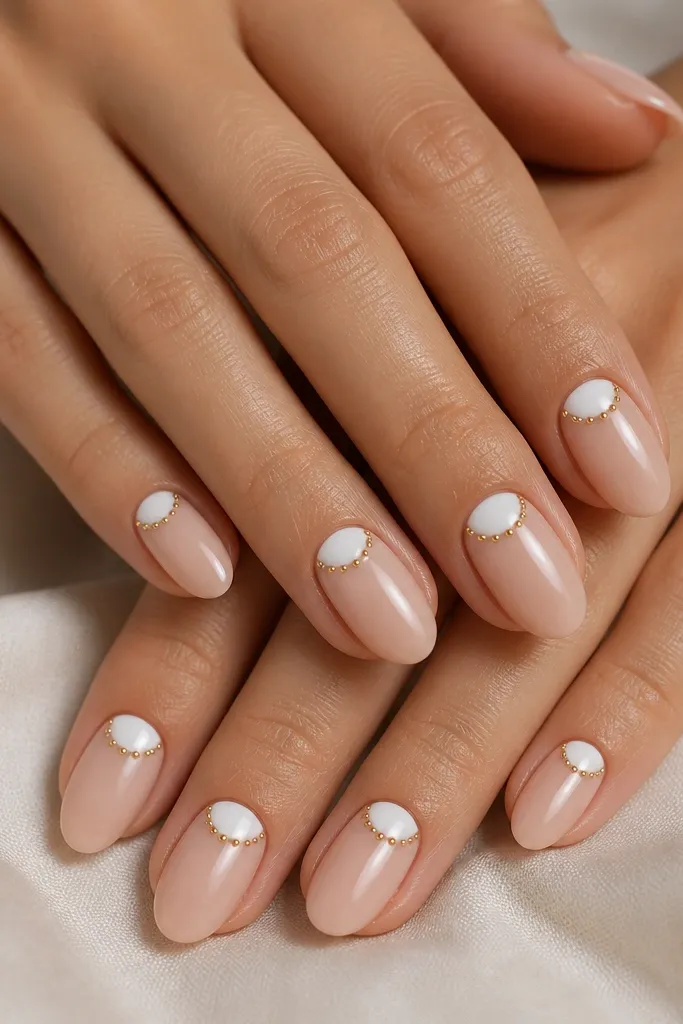
This set looks clean because it frames the cuticle area, which is where your eyes naturally start. The white half-moon is bright but controlled, so you don’t get the streakiness that happens when white spreads across the whole nail. The gold dot border adds a delicate “jewelry” effect without taking over. It works especially well for smaller nail beds because the half-moon sits in a tight, flattering band.
Begin with a sheer nude base and let it dry completely. Use a small liner brush or a half-moon stencil to paint the white half-moon, keeping it centered and symmetrical on each nail. While the white is still slightly tacky, place tiny gold dots (foil glue or gel dots) around the curve — keep the spacing consistent. Seal with one smooth glossy top coat so the dots don’t snag.
Use a dotting tool with a flat tip for more even circles instead of round bumpy dots.
Don’t extend the white half-moon onto the sidewalls; that makes the nail look wider than it is.
3. White Center Stripe With Gold Micro Lines
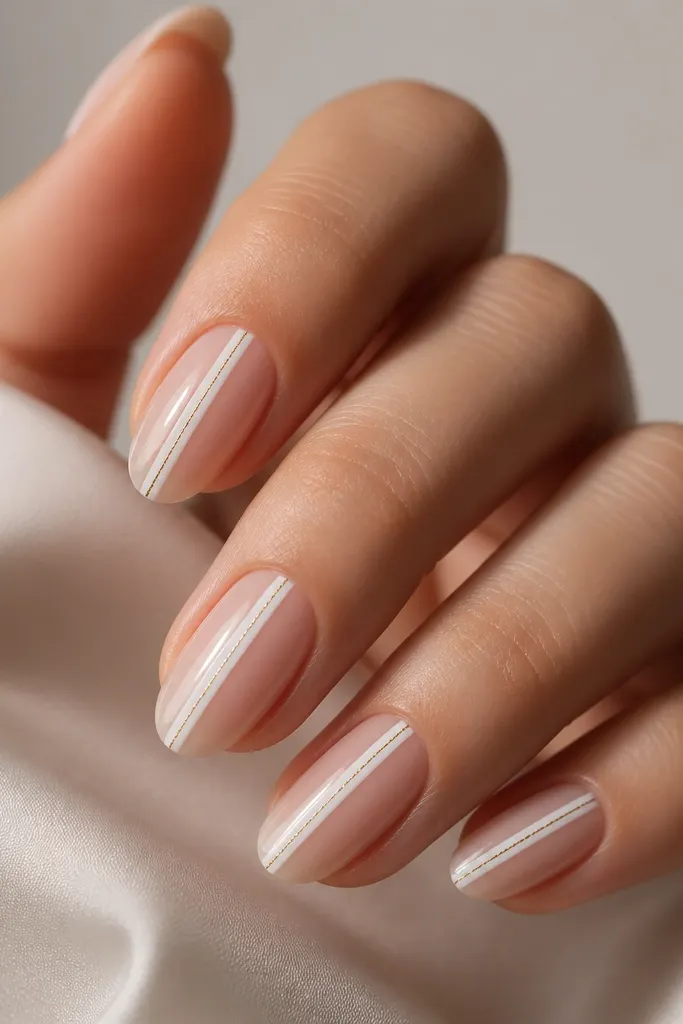
This design is my go-to when I want clean nails that still look interesting. The center stripe creates a straight visual line, which makes nails look longer and more even. Keeping the base clear makes the white and gold pop under indoor lighting. The gold micro lines act like trim, so the set reads styled rather than plain.
Start with a clear or sheer base and cure/dry it fully. Paint a narrow white stripe down the center using a liner brush, keeping it straight and consistent in width. Add one or two thin gold lines parallel to the stripe on each side, leaving tiny gaps so it doesn’t look like a solid block. Top coat with a glossy layer, and lightly drag the brush along the center stripe to smooth any raised edges.
If your stripe looks wobbly, wipe the brush edge on a paper towel before you paint; it gives you a sharper line.
Skip thick gold lines next to the white; they overpower the clean, vertical look.
4. Gold Foil Leaf Over White Glossy Base
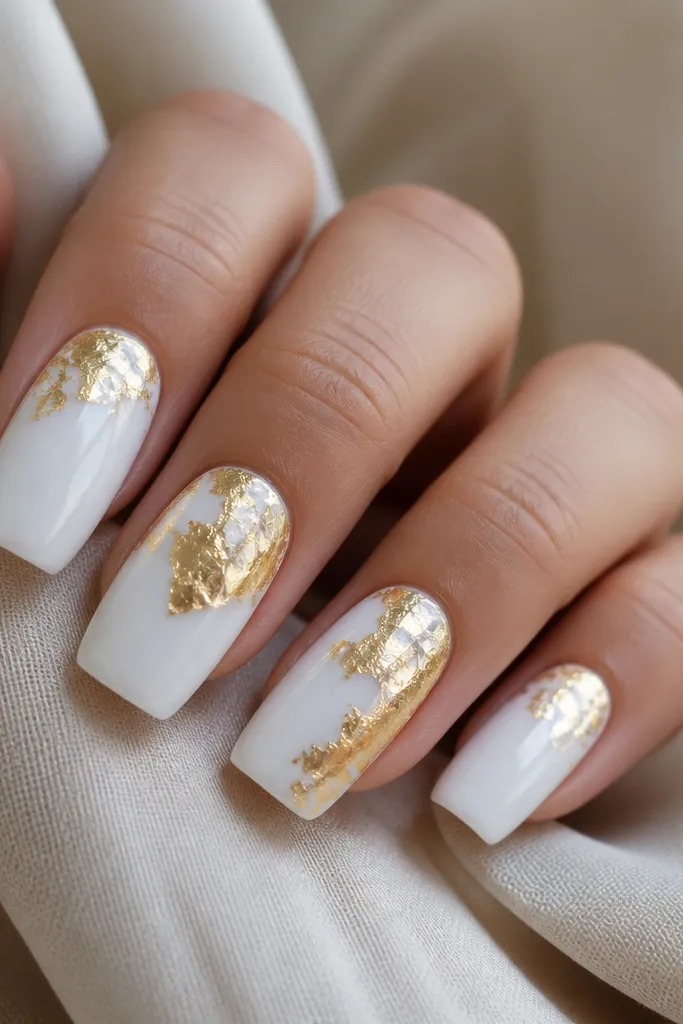
This is the “clean but expensive” option because foil catches light in a way that looks intentional, not random glitter. The key is to keep the white base smooth and opaque so foil doesn’t look muddy. Gold foil leaf over white reads warm and bright, especially on longer nails where you have space for irregular shapes. It suits fair to medium skin tones really well, and it flatters hands that need a little brightness.
Editor's noteUse foil adhesive (or a tacky gel layer) so the foil grips without needing to press hard.
Paint two thin coats of glossy white, letting each coat level out before the next. Press gold foil leaf onto the tacky surface in small sections, then lightly tap off excess so the edges look natural. Keep foil concentrated near the center and leave some clean white space so the nails still look tidy. Finish with two coats of glossy top coat to seal the foil and prevent lifting at the edges.
Watch outAvoid placing foil all over the nail; it turns into chunky texture instead of clean shimmer.
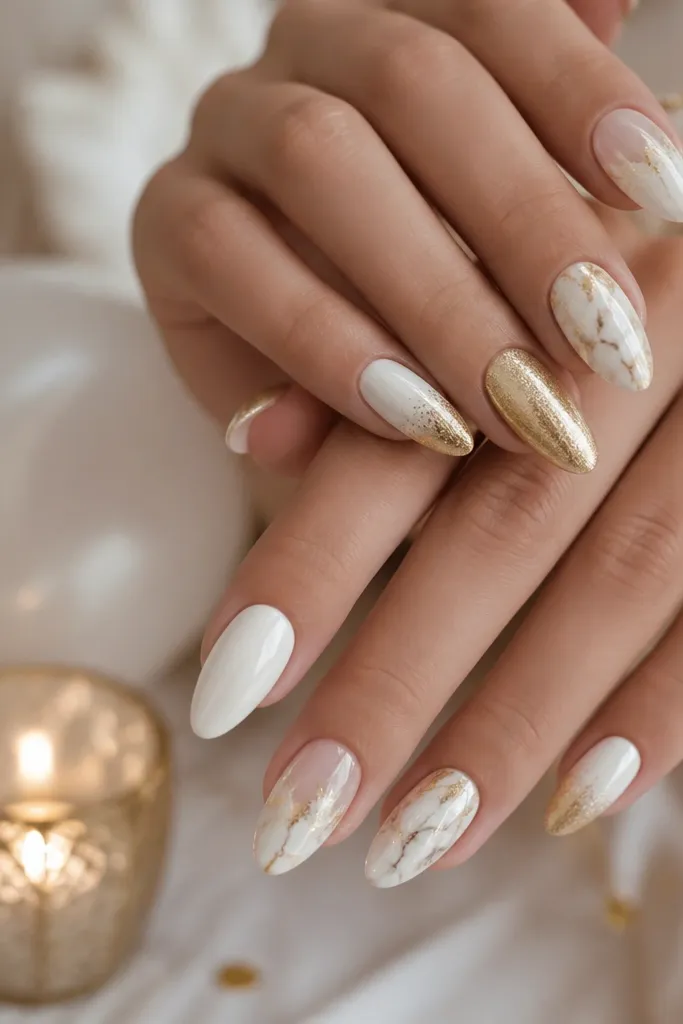
5. White Marble Swirl With Thin Gold Veins
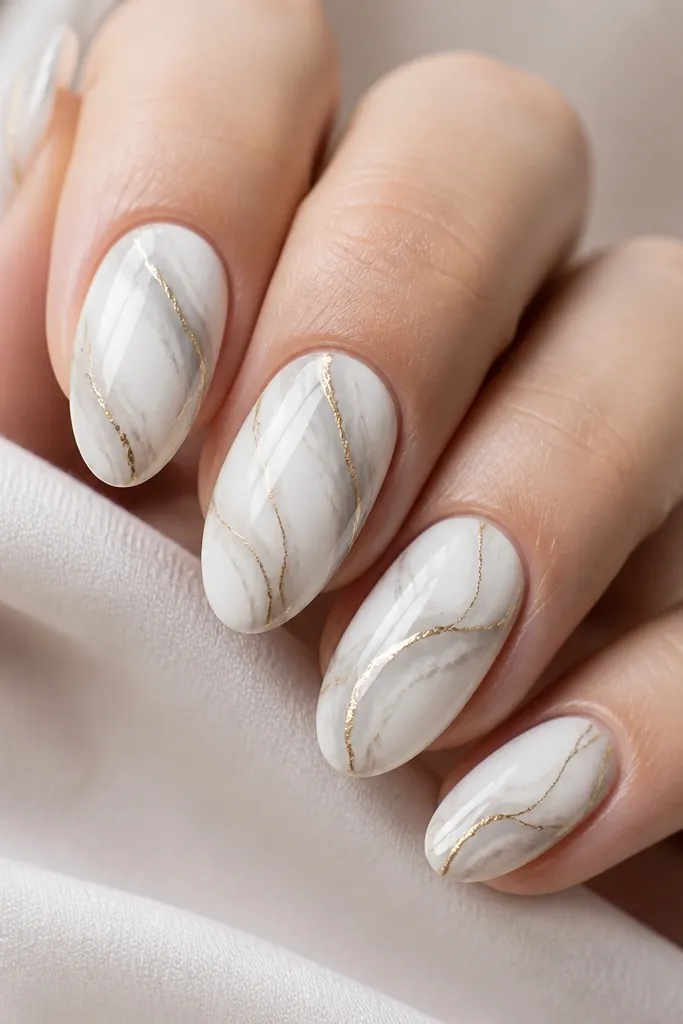
Marble can get messy fast, but this version stays clean because the swirls are subtle and the gold veins are narrow. The white base is bright, and the marble effect comes from light gray or pale taupe wisps, not heavy gray blobs. The gold veins follow those wisps like jewelry, giving you structure. It looks flattering on both short and medium nails because it has movement without huge shapes.
Editor's noteUse a gold gel pen for the veins; it gives cleaner edges than loose foil for this look.
Start with a smooth opaque white base. Add a few thin, curved wisps of very light gray or cool taupe using a sponge or liner brush, keeping the pattern sparse. Then trace select lines with a thin gold gel pen or striping gel, focusing on two or three main veins per nail. Seal with a glossy top coat and do a gentle wipe around the edges so the gold stays sharp.
Watch outDon’t over-darken the marble. If the gray is too strong, the set loses that bright white effect.
6. Gold Outline Stars On White Negative Space
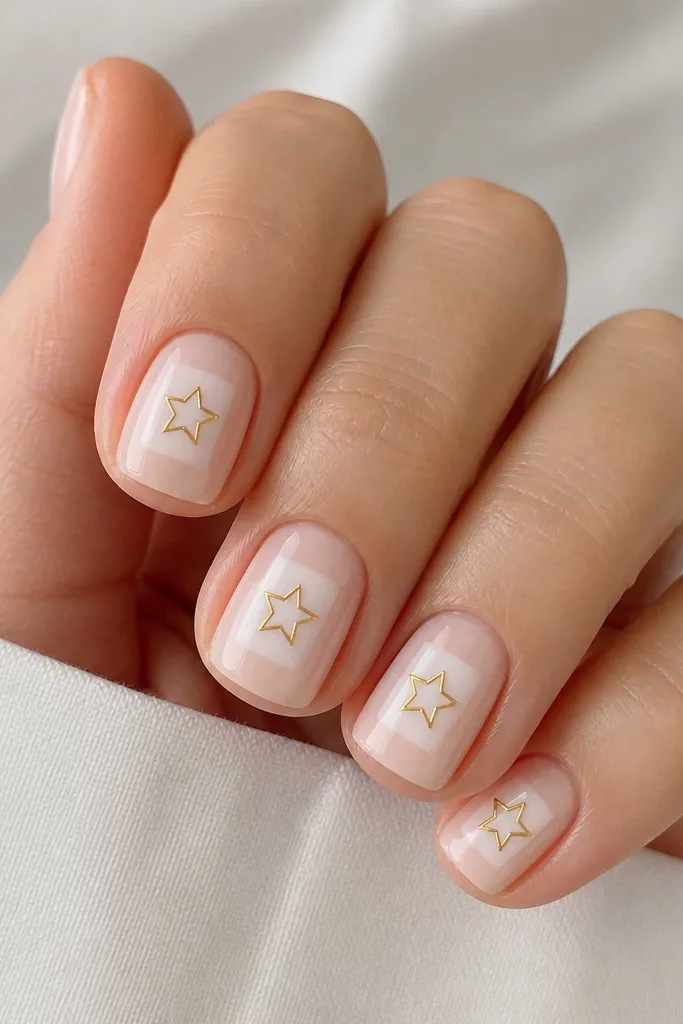
This is playful without looking chaotic. The negative space keeps the nail airy, and the white panel is crisp so it reads clean in photos. Gold stars are only outlines, so they don’t look like heavy stickers. It flatters hands that look better with simpler shapes — especially if your nails are short and you want the design to stay centered.
Editor's noteIf your stars look wobbly, draw one star in the center first on a practice nail then copy the angle.
Apply a sheer nude base and cure/dry it. Use a small strip of tape or a stencil to create a centered white panel, then paint it opaque and remove the guide carefully. Add tiny gold outline stars with a striping brush, keeping them one per nail and centered. Finish with glossy top coat, then check the sidewalls so no star edges lift.
Watch outAvoid filling the stars completely with gold; outline-only keeps the set airy.
7. White Glossy Base With Gold Cuticle Confetti
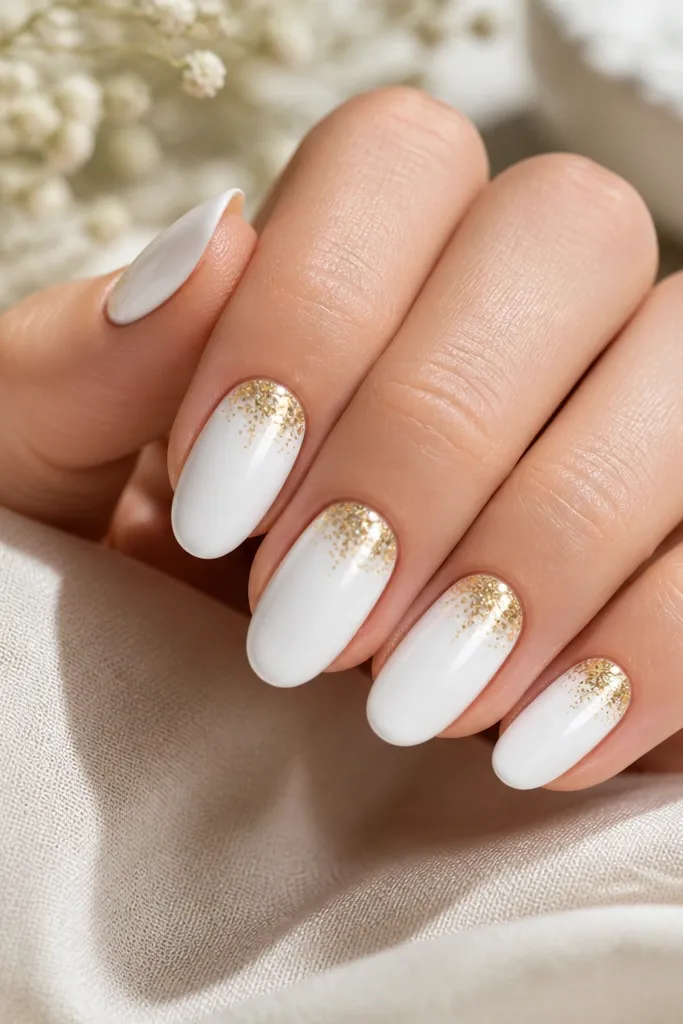
When you want white nails that don’t feel plain, this is the right kind of sparkle. The confetti is placed only at the cuticle, so the nail stays clean and bright instead of turning into full-on glitter. Gold flecks look warm against white and make skin tones look smoother by contrast. This works great for parties and also for everyday wear because the sparkle stays controlled.
Editor's noteUse a fan brush to remove loose flakes before top coat so you don’t get gritty texture.
Start with two coats of glossy white, smoothing each coat so you don’t see streaks. Add a small tacky gel layer right at the cuticle line, then tap in gold metallic micro flakes or gold glitter powder using a small brush. Keep the cluster small — about 1/4 of the nail width — and leave the rest blank. Seal with a thicker top coat so the flakes lock down and don’t scratch.
Watch outDon’t spread confetti down the whole nail; it stops looking clean and starts looking messy.
8. Gold Half-Outline French Over White Base
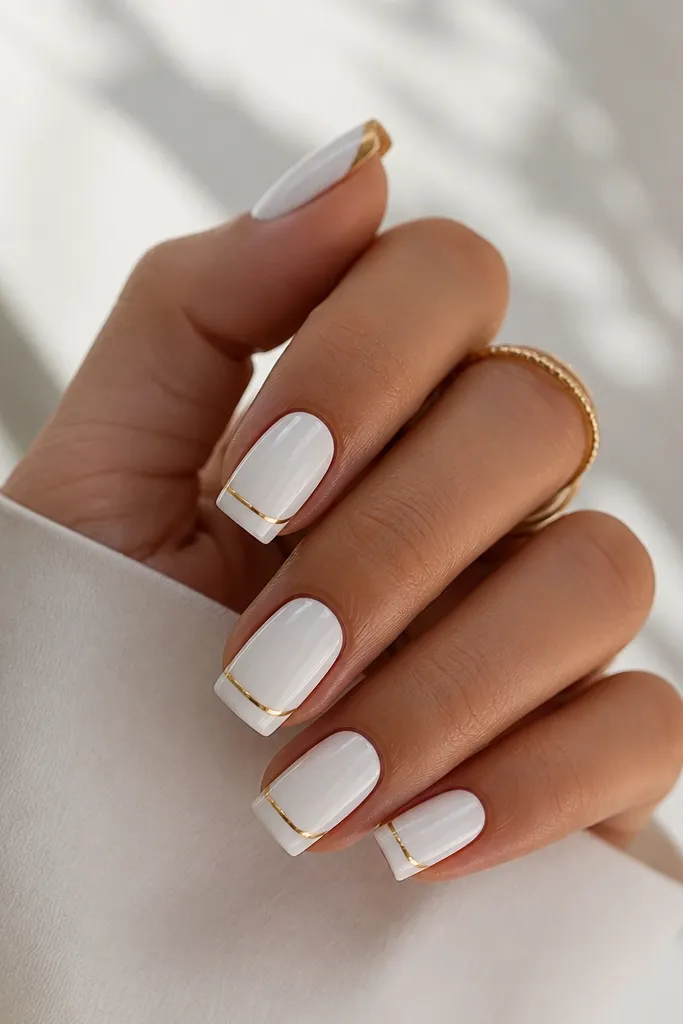
This one looks sharp because the gold only outlines part of the tip, so your eye reads the nail shape cleanly. The white base is the main event, and the gold arc acts like a frame. It’s flattering on long nails because it adds structure near the free edge without covering the whole tip. It also works on medium nails if you keep the gold arc narrow.
Editor's noteIf your gold line looks uneven, use a striping tape as a guide and peel it while the gel is still tacky.
Paint the entire nail with opaque white and let it level. With a thin liner brush or gold striping tape, draw a gold arc along the upper edge of the French curve, stopping before the sidewalls. Keep the arc thickness consistent and leave the bottom of the tip white. Top coat twice for a glassy finish so the gold line doesn’t look raised.
Watch outAvoid covering the full tip with gold; it turns into a heavy block on white.
9. White Daisy Accent With Gold Center
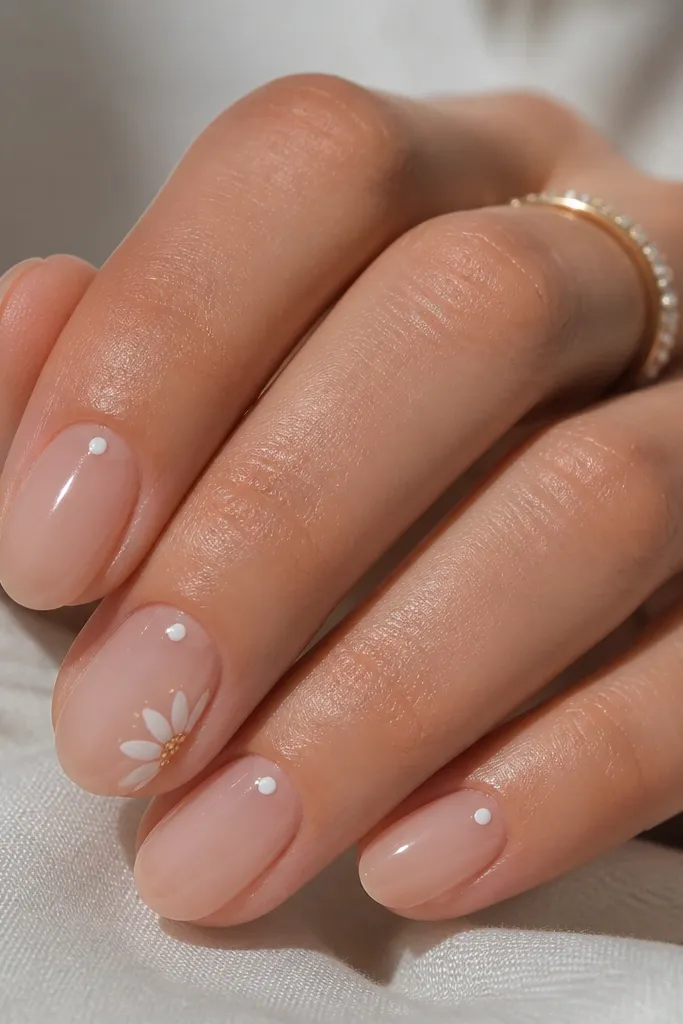
Daisies look sweet, but the clean version uses a nude base so the white petals don’t look too stark. The gold center dot makes the flower look crisp and adds warmth. I like this for spring events and also for people who want something cute that still feels tidy. It flatters medium skin tones and hands with longer finger shapes, because the flower sits vertically and doesn’t widen the nail.
Start with a sheer nude base on all nails. On one or two accent nails, paint a small white daisy using a dotting tool for petals and a liner brush for the petal edges. Add a tiny gold foil dot or gold gel dot in the center. Keep the rest of the nails minimal — either no art or a single small white dot near the cuticle — then seal with glossy top coat.
Use a matte white for petals and then only gloss the gold center for a crisp flower effect.
Skip big daisies on short nails; they crowd the nail and ruin the clean look.
10. Gold Leaf Corner On Crisp White Square
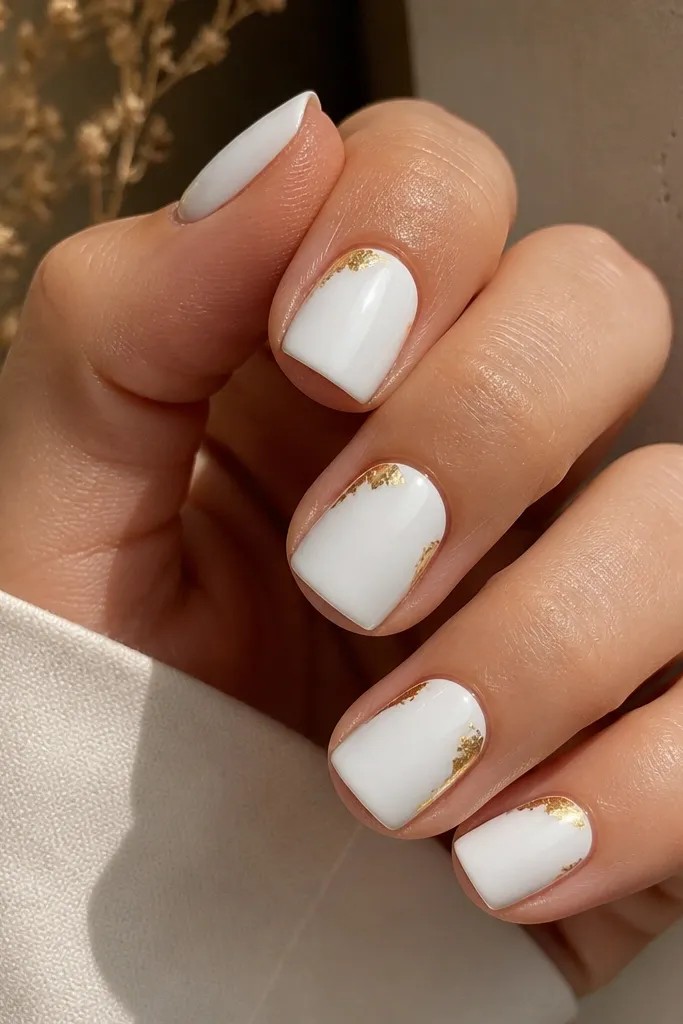
Corner placement makes this look intentional and modern. The white base stays clean and bright, while the gold leaf adds a flash of warmth without covering the whole nail. It flatters shorter nails because the gold lives in the corner and creates a diagonal line that lengthens visually. I’ve worn this on hands with shorter nail beds and it still looks neat after a week of growth.
Apply two thin coats of opaque white and let it dry fully. Pick one corner per nail and add a tiny tacky gel patch at the corner — about 2-3 mm wide. Press gold leaf onto that patch and tap off excess so only thin pieces remain. Finish with glossy top coat, and cap the diagonal edge so the leaf doesn’t lift.
Choose the same corner direction on every nail so the set looks coordinated, not random.
Avoid large gold leaf patches; they look bulky on a square shape.
11. White And Gold Diagonal Panel Nails
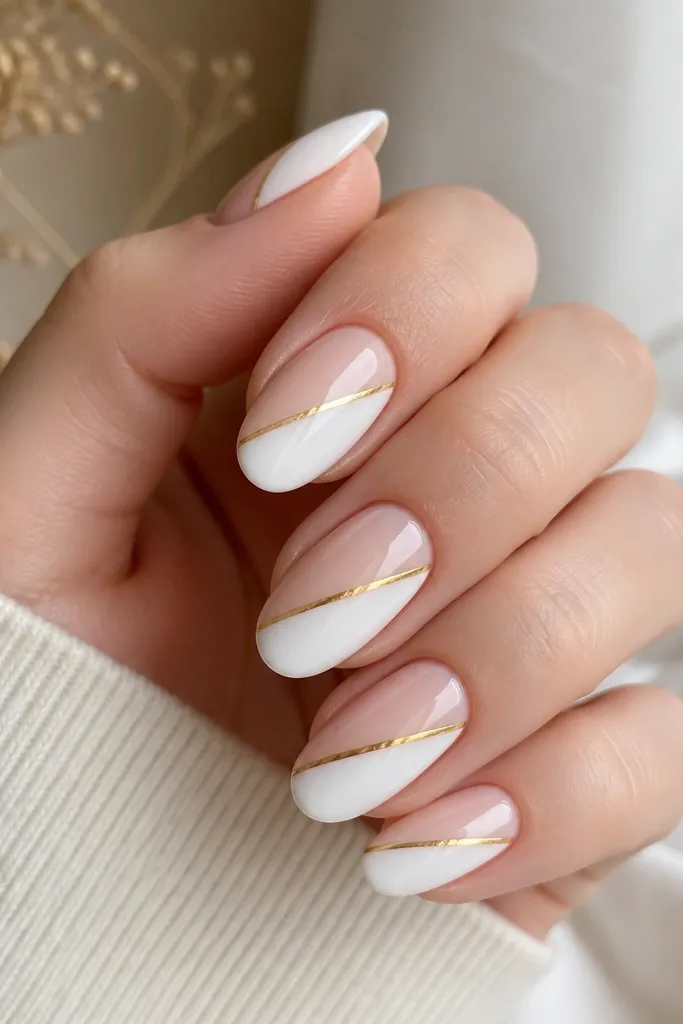
Diagonal panels make nails look longer because the line pulls upward. The gold separator is thin, so it keeps the set refined instead of decorative-heavy. This works on fair and deeper skin tones because the white panel is bright and the nude side keeps it grounded. It’s also great if you want a clean look that still feels graphic.
Editor's noteFor a cleaner diagonal edge, burnish the tape down with the back of a tweezers handle before painting.
Start with a sheer nude base and let it dry. Place a strip of tape diagonally to mask one side of the nail, then paint the other side opaque white. Remove the tape while the paint is still slightly tacky to keep the edge sharp. Add a thin gold strip along the diagonal boundary, then apply glossy top coat to lock everything down.
Watch outDon’t blur the diagonal edge with thick brush strokes; it turns into a smudge.
12. Gold Micro French On White Almond Tips
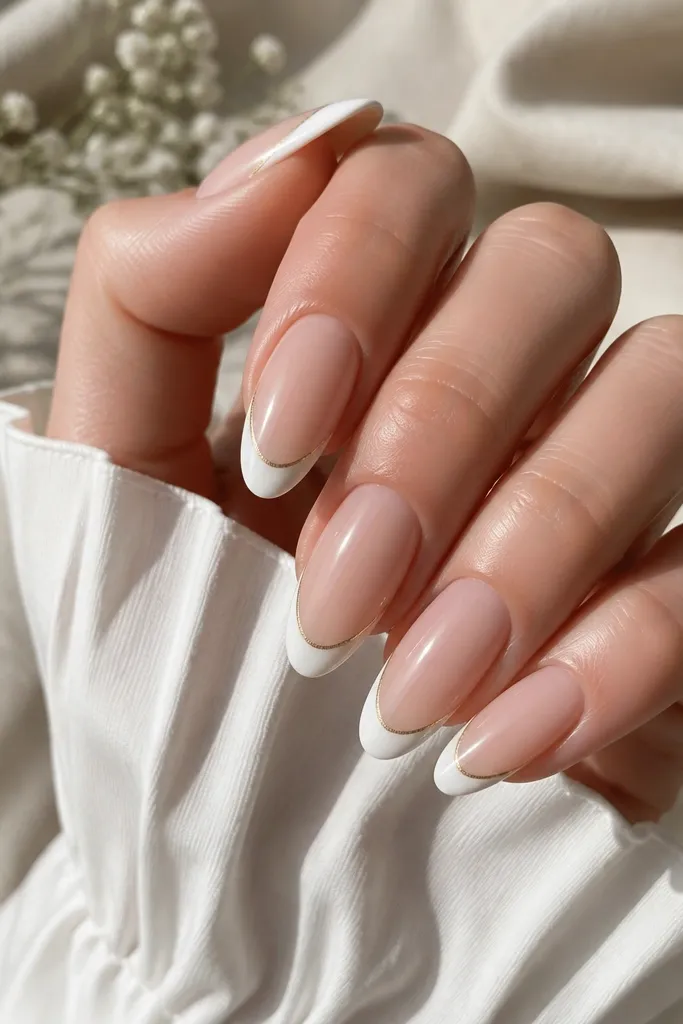
This is the double-French look, but it stays clean because the gold line sits inside the white, not on the very edge. The result is a crisp layered effect that makes nails look polished. Almond shapes look especially good because the gold line follows the curve naturally. It suits everyday wear when you keep the gold line thin and the white tip opaque.
Apply a sheer nude base and cure/dry. Paint a clean white French tip with two thin coats. Once it’s set, add a second micro gold line inside the white tip about 1-2 mm from the outer edge, using a gel striping brush. Finish with glossy top coat and cap the tip so the layered edge feels smooth.
If you’re new to micro lines, use a strip of gold vinyl or tape then seal over it with top coat.
Avoid thick gold lines inside the French; they look like stickers.
13. White Jelly Base With Gold Outline Accent
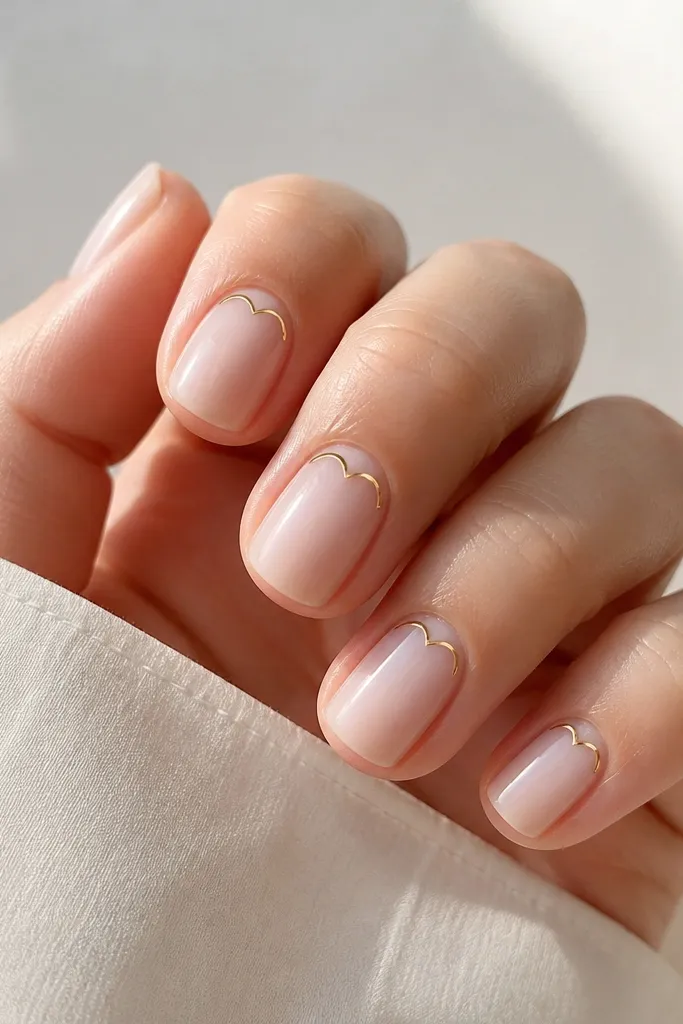
Milky jelly white looks fresh because it has a soft glow rather than a flat, chalky look. The gold outline accent is small, so the nail stays clean even when your hands move. This is a great option for people who hate heavy opacity on nails or who want something that still looks airy. It flatters most skin tones, especially when your nail beds are a bit dry or uneven because jelly polish evens the look.
Editor's noteUse jelly white on short nails — it looks less harsh than opaque white.
Start with a base coat, then apply milky white jelly polish in two thin layers so it stays glossy and not too opaque. Pick one small gold outline shape and place it near the cuticle on each nail, keeping it centered and the same size. If you use gel, cure each outline separately so the gold edges stay crisp. Seal with a glossy top coat and wipe any stray gold off the skin before it cures.
Watch outDon’t over-layer jelly white until it turns thick; thickness kills the glow.
14. White And Gold Striped Skittle Set
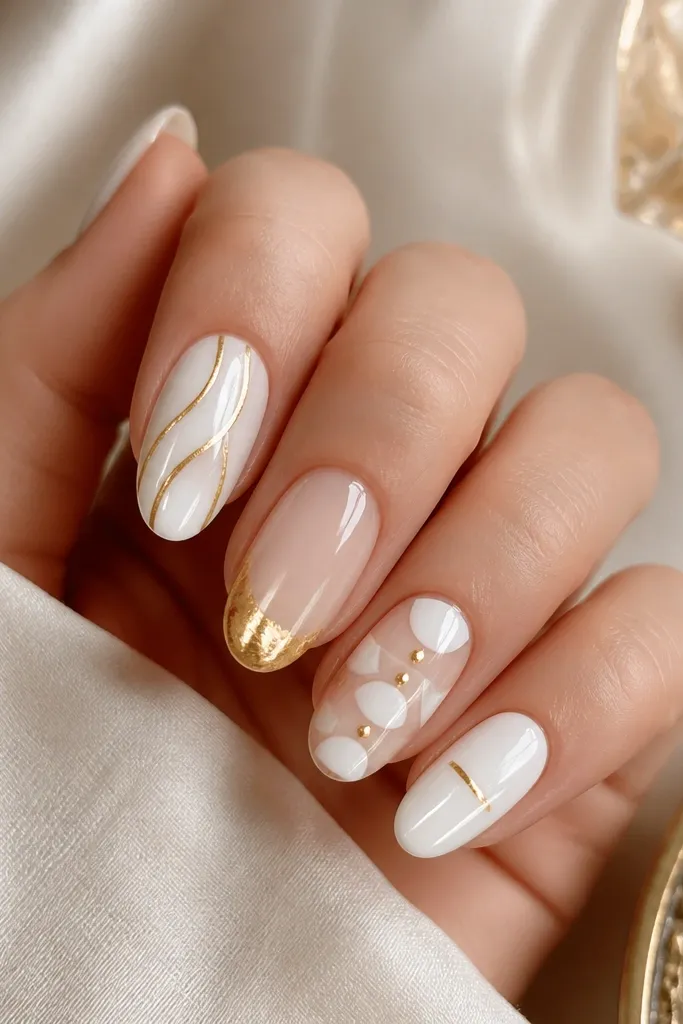
A skittle set works when every nail uses the same two tools: white opacity and thin gold line work. The clean look comes from keeping the gold details small and placing them in similar zones across nails. I like this when I’m bored with one design repeated and I want variety without losing polish. It flatters long fingers because the patterns are vertical and the set stays bright.
Pick one base for all nails, like glossy opaque white or a sheer nude with white accents. Then assign each nail a pattern: one nail gets a single gold stripe down the center, one gets a gold edge on the French, one gets a cuticle dot border, one gets a tiny diagonal line, and one stays mostly white with a micro gold corner. Keep gold details within a 1/3 width area of the nail so it doesn’t look busy. Finish with glossy top coat across all nails and check that each pattern aligns at the cuticle level.
Write down the pattern order before you start so you don’t end up with random placement.
Avoid adding glitter or extra colors; the set gets messy fast.
15. White Ombré Tips With Gold Fade Line
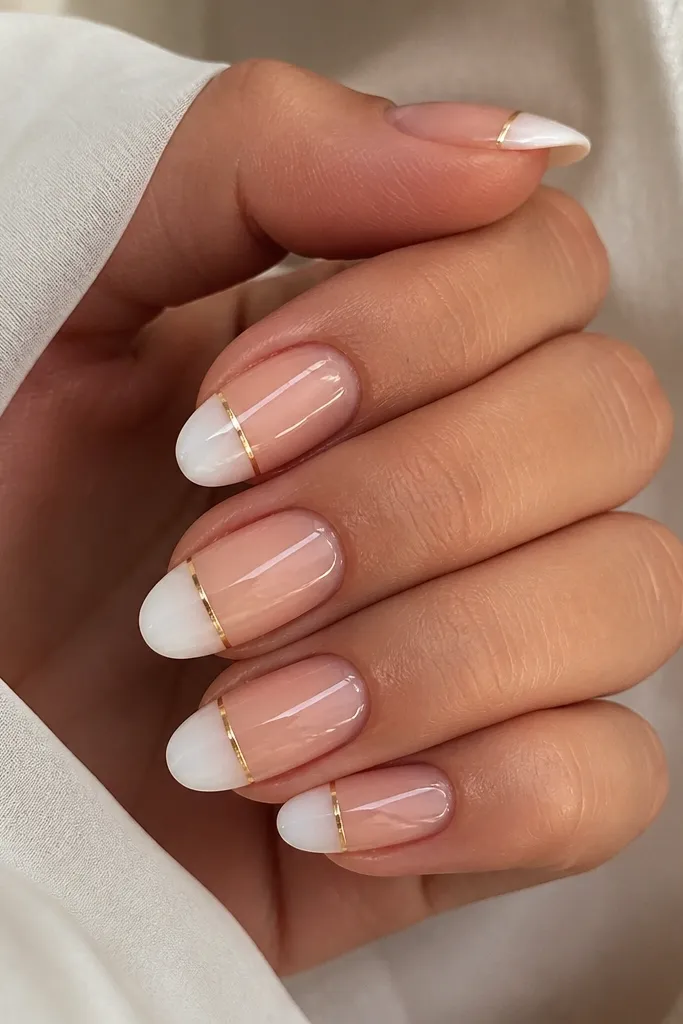
Ombré tips look clean because the transition is smooth, and the gold line gives the design an anchor. The key is keeping the ombré fade gentle; heavy white at the tip can look like a grown-out French. The gold line should be thin and straight, so it reads as a polished divider. This looks great on medium to long nails and flatters hands that want length without stark blocks.
Start with a nude base. Sponge on white at the tips using a makeup sponge, building opacity gradually from the very edge inward. Stop the fade so there’s still nude visible mid-nail — about half of the nail should be nude on medium lengths. Then add a thin gold line across the nail at the point where the fade begins, using a striping brush. Seal with glossy top coat and lightly drag the brush over the gold line to blend it into the surface.
For smoother ombré, use a damp sponge and wipe excess white off the sponge on a paper towel first.
Avoid a gold line placed too close to the tip edge; it makes the nail look shorter.
16. White Skins With Gold Foil Edge On Each Nail
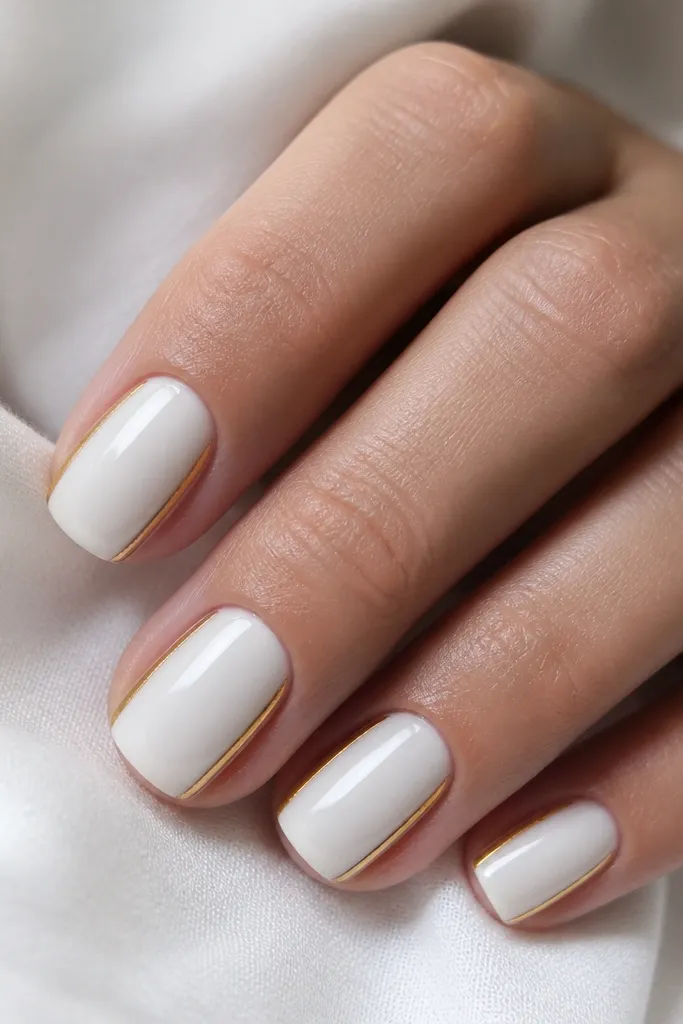
This is a clean trick for making nails look sculpted. The narrow clear side border keeps the nail from looking like a solid white block, and the gold foil edge adds a jewelry frame. It flatters shorter nails because the gold lines run along the nail’s length and make the shape look more refined. The white still does the brightening work, so your hands look fresh.
Editor's noteKeep the clear side border consistent width — it’s what makes it look intentional.
Apply a sheer base, then paint opaque white leaving a small 1 mm clear border on both sides near the free edge. Press a thin strip of gold foil or apply gold leaf gel along that side border so it looks like a frame. Use a small brush to clean the border so the gold stays crisp. Top coat with glossy gel or polish twice, making sure the side edges feel smooth to the touch.
Watch outDon’t let white spill into the side borders; that kills the frame effect.
17. Gold And White Checker Accent On One Nail
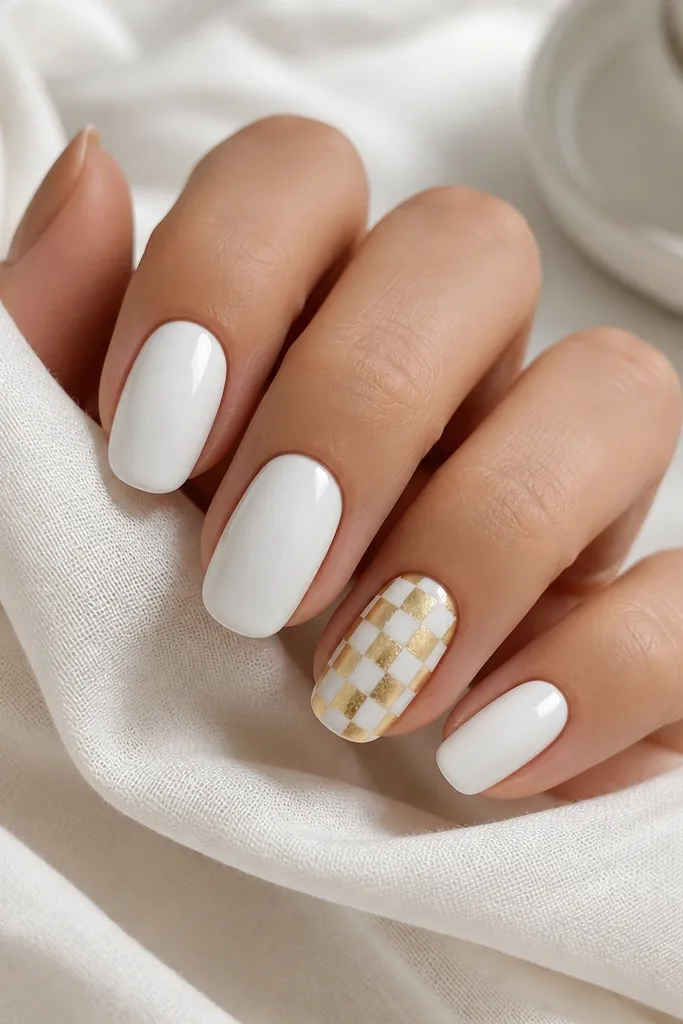
Checker detail looks crisp when it’s small and placed on only one or two nails. The rest stays solid white so your set doesn’t turn into clutter. Gold squares should look like metallic tiles, not glitter flakes, which is why I prefer gold foil or gold gel squares. This set flatters hands with shorter nails because the checkers are centered and don’t spread wide.
Editor's noteUse a nail stencil grid so your checker squares stay even.
Paint all nails a smooth opaque white base in two thin coats. On one accent nail, mark a small grid area roughly the middle third of the nail. Paint alternating tiny squares white and gold, keeping each square the same size using a striping brush or nail vinyl grid. Seal with glossy top coat and make sure the square edges feel flat.
Watch outAvoid checker patterns on every nail; it looks busy and less clean.
18. White Line Art Frame With Gold Corners
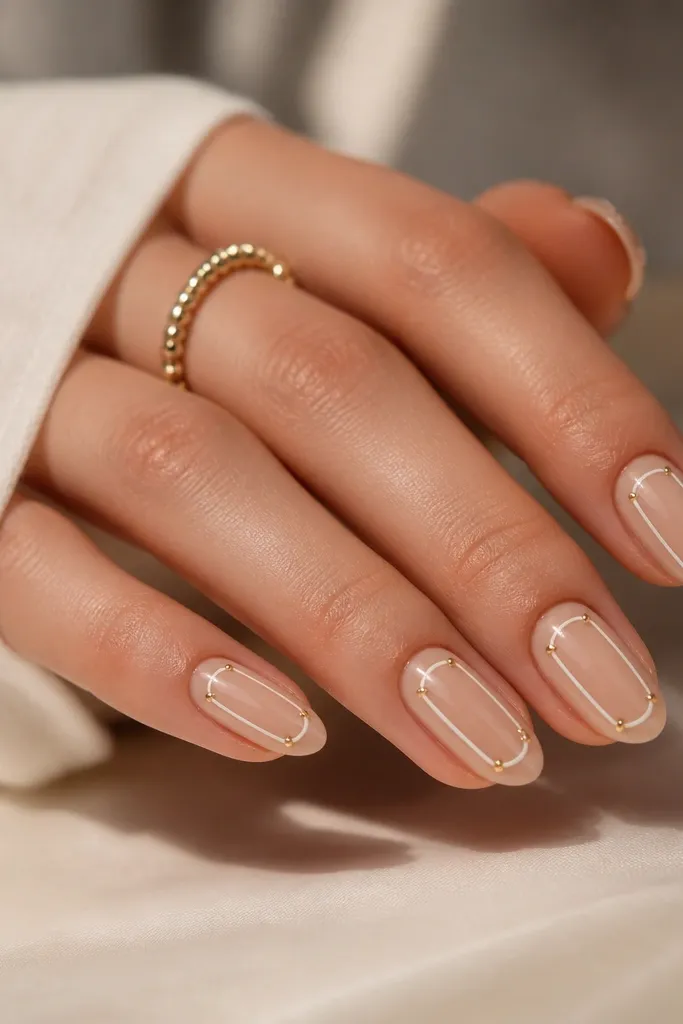
This is clean because it uses line work, not heavy fill. The white rectangle frame creates structure and makes nails look longer by drawing a controlled boundary around the nail center. Gold corners add a polished finish without covering the whole nail. It looks great on medium almond nails and makes hands look tidy even if your cuticles aren’t perfect.
Editor's noteUse a liner brush with a short bristle length; it gives you straighter lines with less wobble.
Start with a sheer nude base. Draw a thin white rectangle frame in the center using a liner brush, leaving space between the frame and the edges so it doesn’t touch the sidewalls. Add gold dots at the four corners of the rectangle, or use tiny gold gel corner shapes if you’re comfortable. Cure/dry fully, then top coat with glossy gel and cap the tips so the line stays sealed.
Watch outAvoid thick line art; thick borders make the nails look smaller.
19. Gold Bar Accent Over White Gel Polish
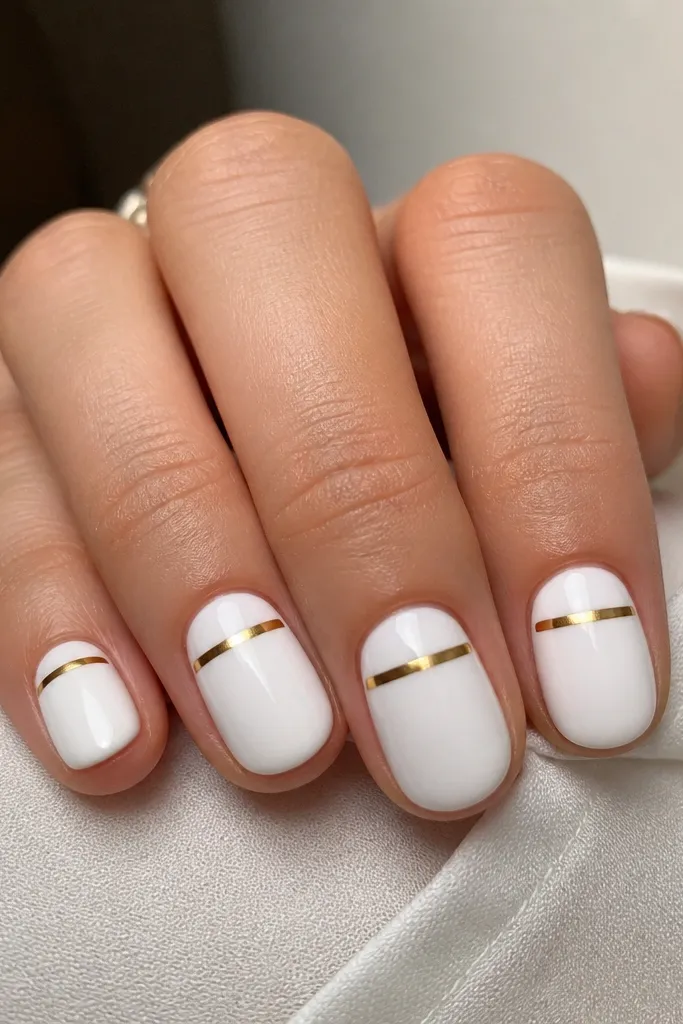
Horizontal bars can look harsh, but with a thin gold bar and glossy white base, it looks clean and modern. The slight offset toward the cuticle keeps it flattering and prevents the nail from looking cut in half. This design is great for people who want a statement that still reads minimal. It flatters medium skin tones because the white stays bright and the gold bar adds warmth without glitter.
Editor's noteIf the bar feels too bold, make it 20-30% shorter than your nail width.
Apply two thin coats of glossy white and smooth the surface. Add a thin gold strip across the middle, but place it slightly higher than center — about 1/3 down from the cuticle. If using gel, apply gold gel with a striping brush for a crisp edge. Seal with a glossy top coat and run the brush over the bar so it blends into the surface.
Watch outDon’t make the gold bar thick; thick bars look heavy on short nails.
20. White Pearl Dot Gradient With Gold Edge
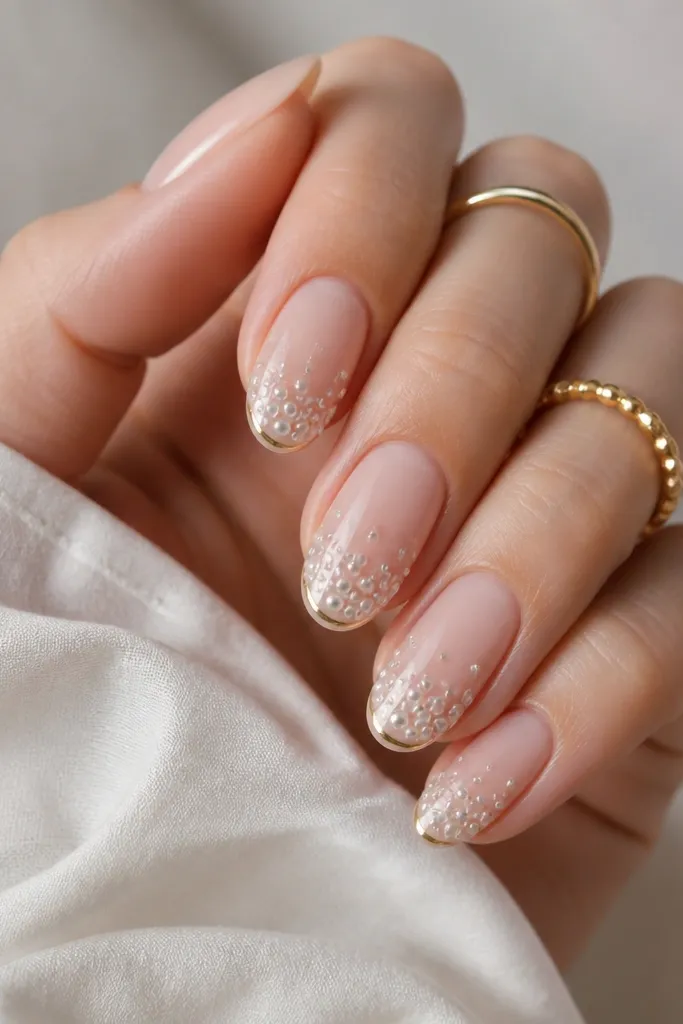
Pearl dots look clean when they follow the nail’s curve and get denser only toward the tip. The nude base keeps it light, and the gold edge makes the pearls look intentional, like a jewelry cuff. This set flatters hands that want texture but not glittery mess. It also makes nails look longer because the dot gradient guides the eye to the tip.
Editor's noteLet the pearls set fully before top coat so they don’t shift position.
Start with a sheer nude base. Place pearl dots (white 3D pearls or pearl gel beads) starting about 1-2 mm above the tip, spacing them farther apart near the middle and closer together near the edge. Add a thin gold line right at the free edge to frame the pearls. Seal carefully with glossy top coat, using a small brush to cover around each pearl without flooding them.
Watch outAvoid heavy pearl coverage near the cuticle; it makes the nail look crowded.
21. White Watercolor Wash With Gold Drip Line
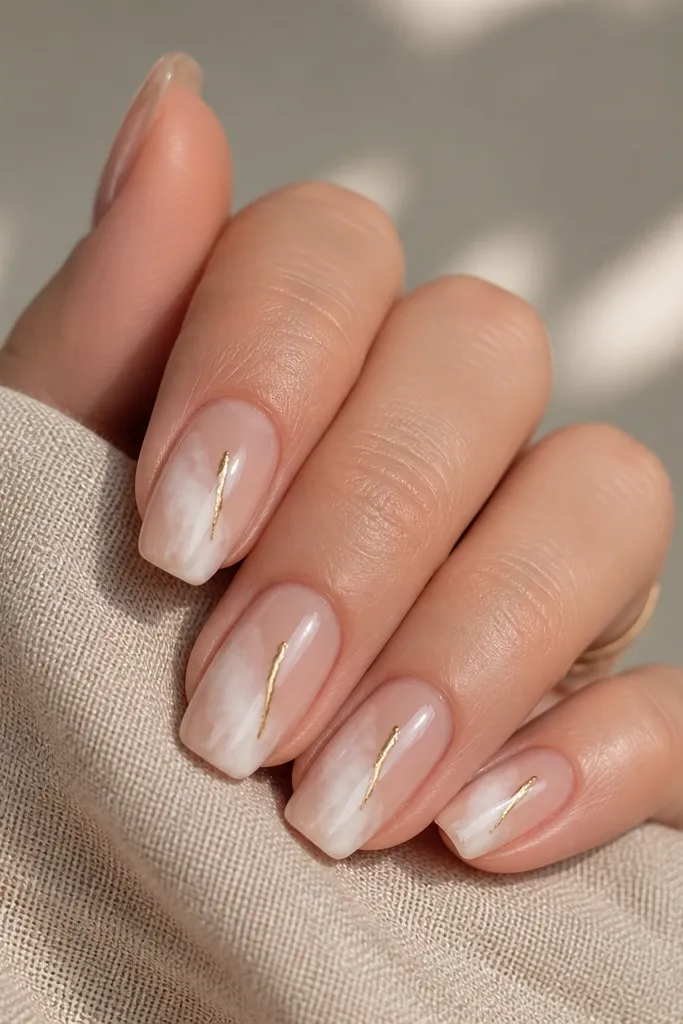
Watercolor wash looks clean when it’s airy and stays mostly transparent, so your natural nail shape shows through. The gold drip line adds motion without turning into big splatter art. I like this for date nights because it looks artsy under warm lighting but still reads neat. It flatters hands with longer nail beds because the wash spreads in a flattering oval zone.
Editor's notePractice the drip on a fake nail first; the best drip is thin and controlled, not wide.
Apply a sheer nude base. Use diluted white gel or white polish thinned with a mixing medium to create a soft wash across the center, leaving edges lighter. Then draw a thin gold gel drip line — one narrow line that starts near the upper part of the wash and ends mid-nail. Cure/dry fully, then top coat with glossy gel to smooth the watercolor texture.
Watch outAvoid opaque watercolor; if it turns chalky, it looks unfinished.
22. Gold Chain Link Accent On White Gloss
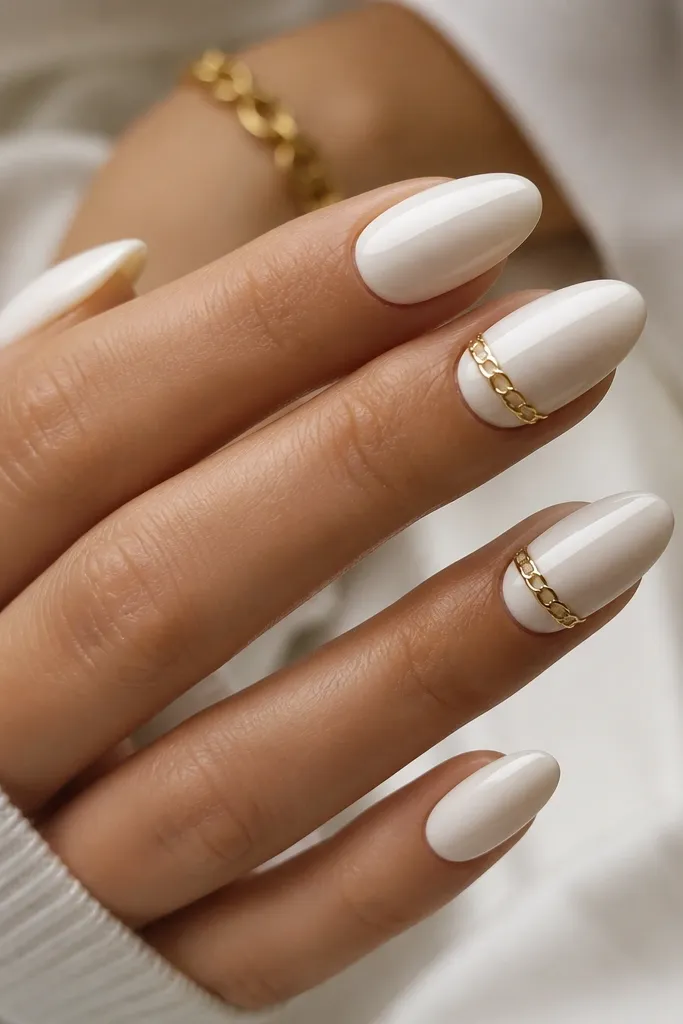
This is the “jewelry nail” look without the heavy bling. The glossy white base is smooth and bright, so the chain links look like they’re sitting on top of clean glass. Gold chain links are flattering because they’re narrow and vertical enough to keep nails looking long. It works for any skin tone because white is bright and the gold has warmth.
Editor's noteUse two accent nails, not five, so it stays clean instead of costume jewelry.
Paint all nails glossy white in two thin coats and cure/dry fully. Choose one or two accent nails and place tiny gold chain links along the center line, leaving a small gap between links so they look like separate loops. If you’re using nail chain pieces, apply with clear gel and press lightly, then cap with top coat. Seal with glossy top coat across every nail, and make sure the chain edges feel flat when you run a finger over them.
Watch outAvoid big chunky chain pieces; they catch on fabric and lift.
23. White And Gold Vertical Ombré Lines
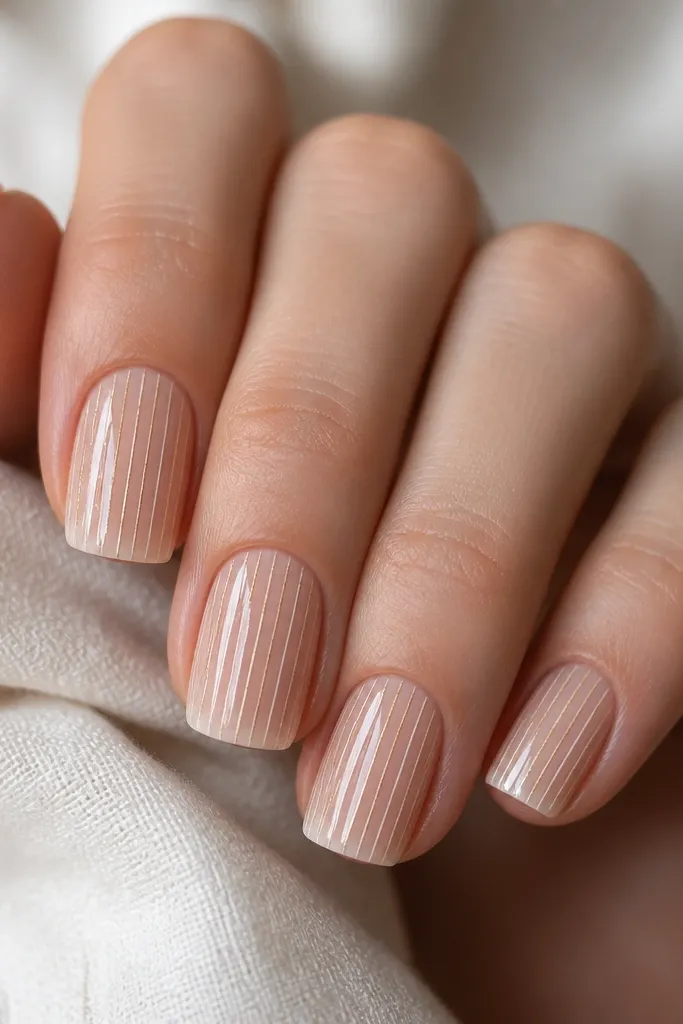
Vertical ombré lines look tidy because they guide the eye straight down. The gold-to-white fade gives a bright, clean effect without needing full coverage. I like this when I want something different from plain French, but still very wearable. It flatters short nails because the vertical line pattern creates a longer illusion, and the nude base keeps it light.
Editor's noteKeep the line count odd (3 or 5) — it looks more balanced on short nails.
Start with a sheer nude base. Place three to five thin vertical lines in the center area using a striping brush, with gold gel near the cuticle and white gel toward the tip. Blend the transition by dragging the brush lightly so the fade looks soft, not striped with hard edges. Cure/dry and then top coat glossy. Clean up around the cuticle with a small brush dipped in remover so it stays sharp.
Watch outAvoid thick lines; they turn the design into a block.
24. White Gloss Marble With Gold Speckle Cap
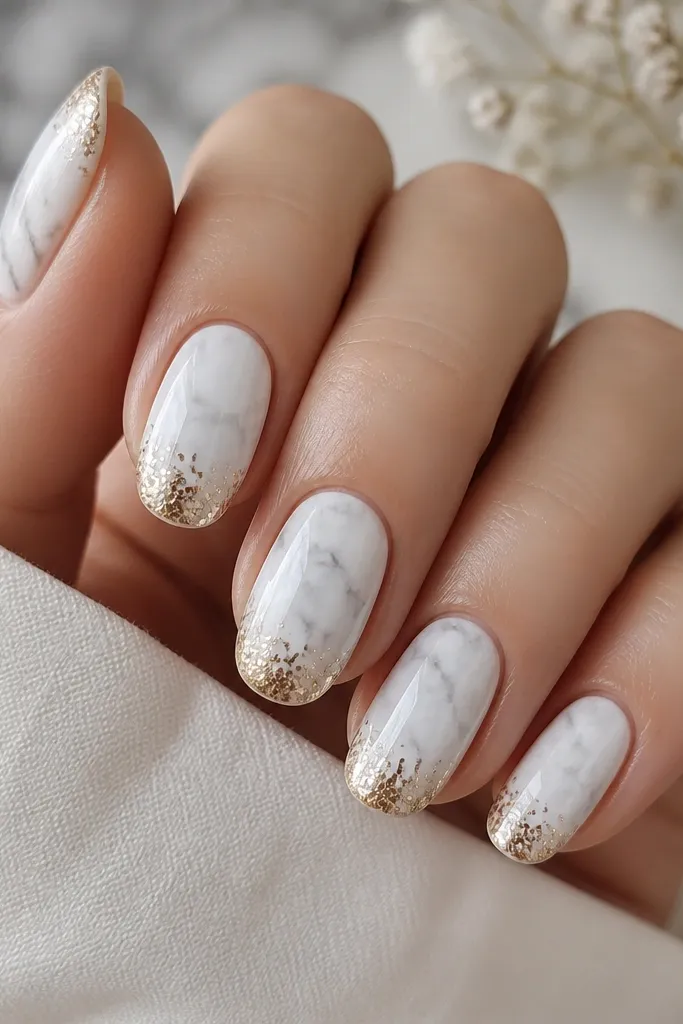
This set stays clean because the speckles are only at the tip, so they act like a metallic highlight. The marble is soft and bright, so it doesn’t turn smoky. Gold speckles look best when they’re tiny and concentrated, not chunky glitter. This flatters hands that want a little sparkle but still want the nails to read polished, not party-only.
Editor's noteUse a toothpick to place gold speckles precisely at the tip line.
Apply two thin coats of glossy white, then add soft gray marble wisps using a sponge or a very light liner brush. Keep the marble subtle — you should still see mostly white. Add gold speckles only along the free edge, building density right at the tip and fading inward. Seal with glossy top coat and cap the edges so the speckles don’t lift.
Watch outAvoid speckles across the whole nail; that’s where it stops looking clean.
25. White Micro Polka Dots With Gold Top Half-Moon
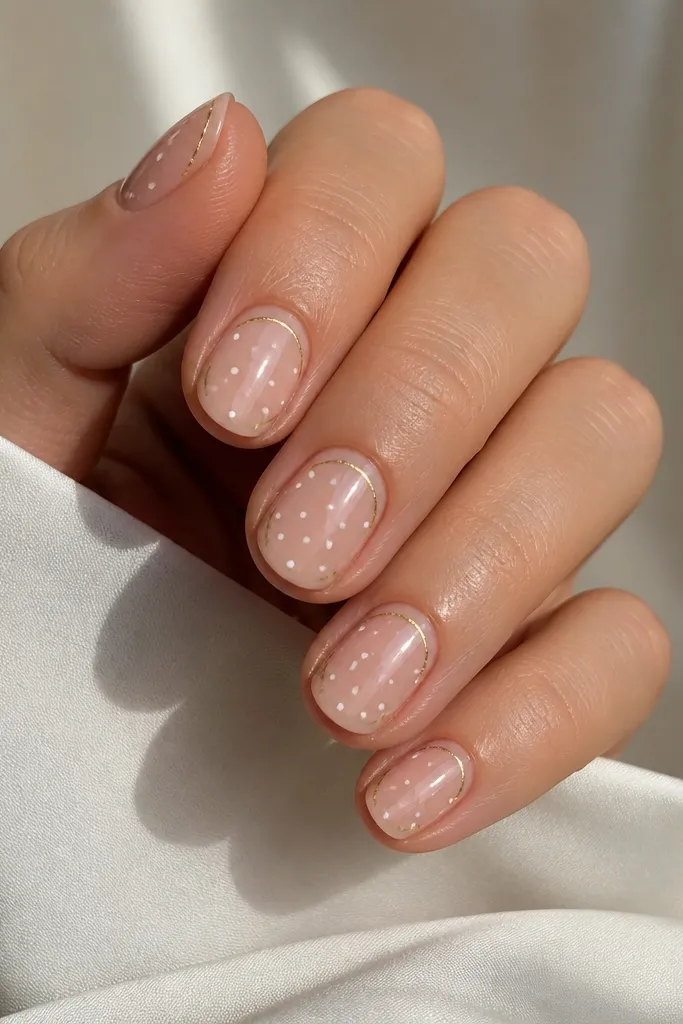
Micro dots look crisp when the dots are tiny and spaced evenly, and the gold half-moon adds structure. The nude base keeps the white dots from looking chalky. This set flatters hands that like playful details but still want a clean finish. It’s also forgiving on grow-out because the pattern repeats across the nail.
Start with a nude base coat and let it dry fully. Use a dotting tool to add tiny white dots in a light scattered pattern — keep them consistent size. Then add a thin gold half-moon near the tip area, like an inverted French line but only across the top portion. Finish with glossy top coat to lock the dots and smooth the surface.
If your dots smear, wait until the nude base is fully set before dotting.
Avoid large polka dots; big dots look childish and less clean.