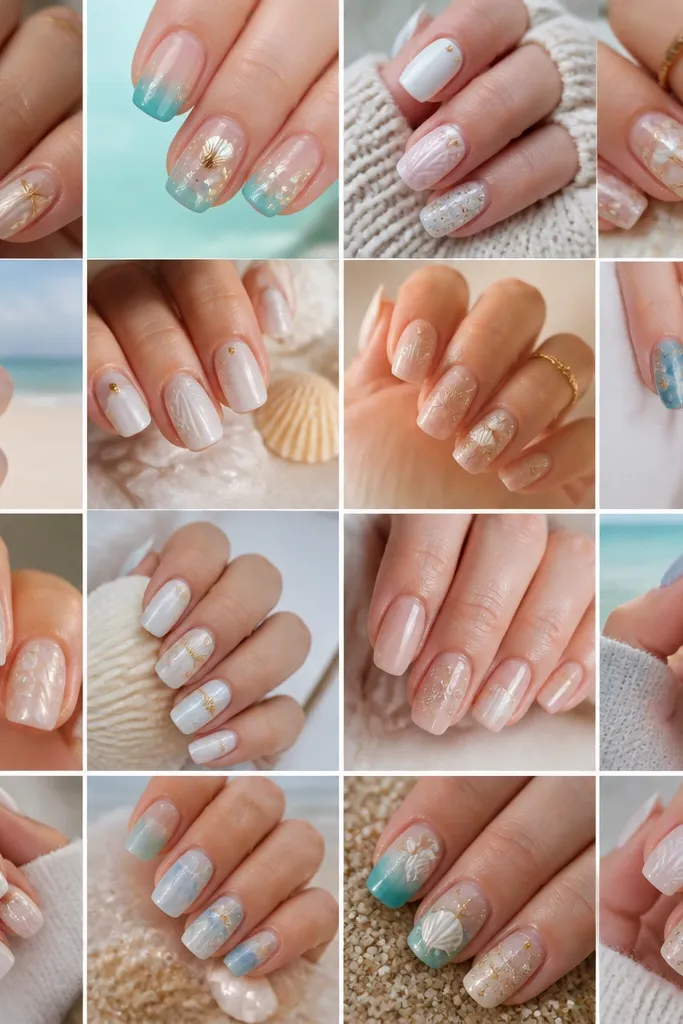

1. Milky Nude Shell Cap With Pearl Dot Crowns
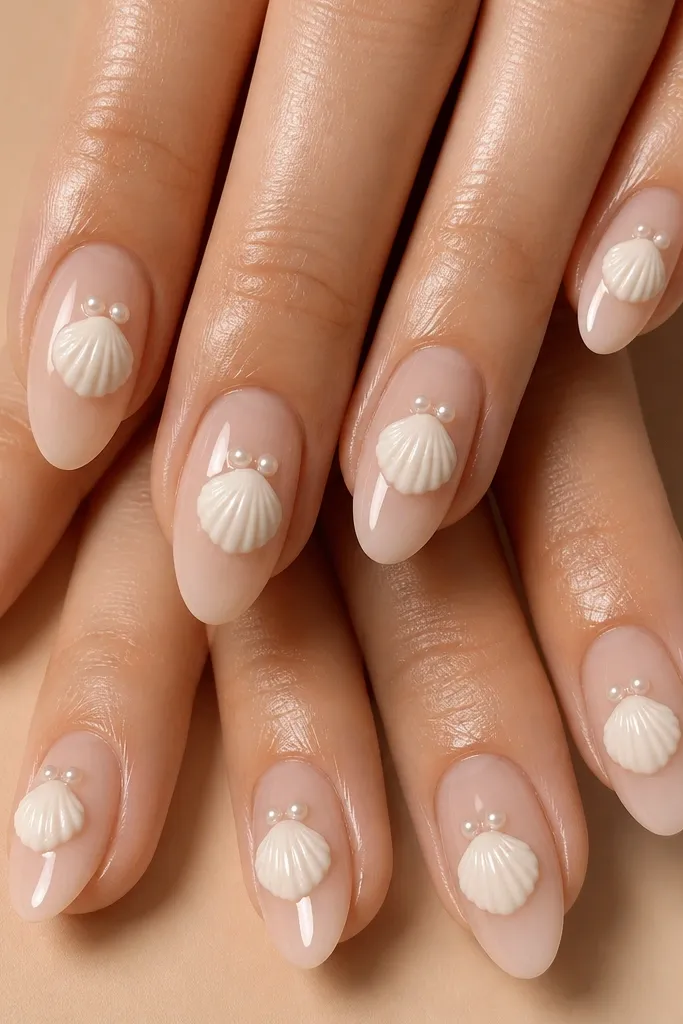
Start by filing your acrylic tips to a medium almond and buff the surface lightly so the base adheres. Apply a milky nude builder base thinly, then cure and wipe. Sculpt a small shell cap using white acrylic: make a shallow dome, then drag a fine sculpting tool across it in 4-6 curved lines to create ridges. Add two tiny pearls on top using clear acrylic or gel, then cap with clear builder gel and cure. Finish with two coats of high-gloss top coat and cure fully between coats.
I love this one because it looks expensive without needing chunky art. The milky nude base flatters most skin tones — fair, medium, and deeper — because it’s sheer enough to match your natural warmth. The shell cap is soft white with gentle ridges, so it reads like real seashell texture instead of a flat graphic. The pearl dot crowns add sparkle only where the eye already lands: the center-top of the nail. It’s a great choice for weddings, brunch, and office days where you still want the “beach detail” effect.
Watch outDon’t build the shell cap too close to the cuticle or it will look bulky and lift faster.
Editor's noteIf your pearls wobble, anchor them with a tiny bead of clear acrylic first, then place the pearl on top.
2. Seafoam Ombre With Thin White Shell Veins
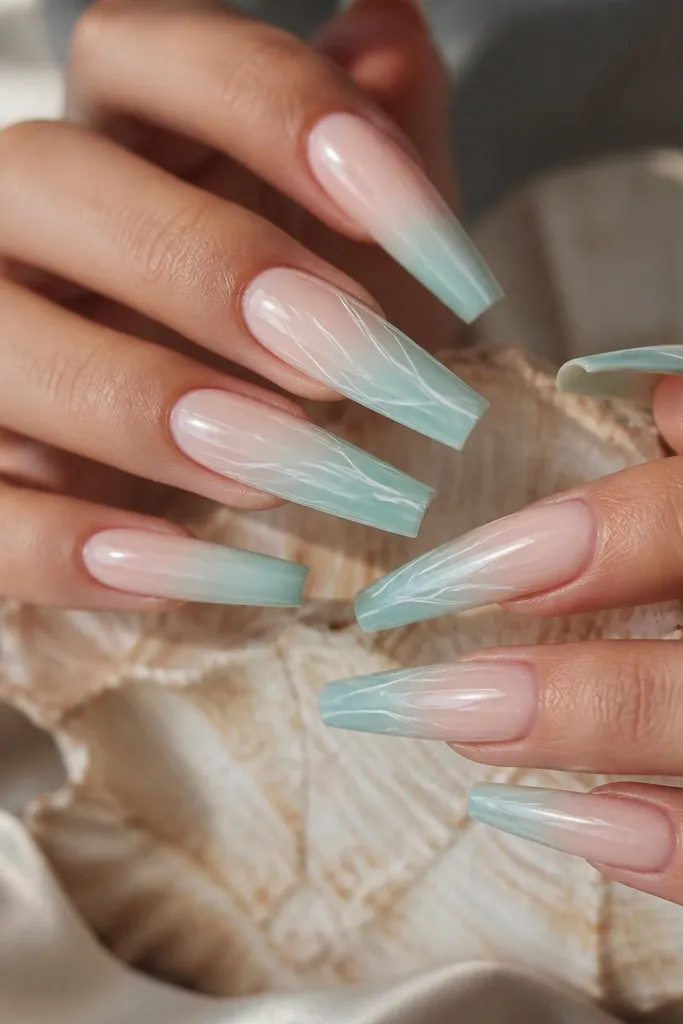
Start with a sheer nude base on all nails and cure. Sponge-paint or airbrush seafoam green from mid-nail to the tip, keeping the cuticle area sheer so the ombre looks clean. On two nails, draw 3-4 thin curved white lines using a striping gel and a fine liner brush, following the natural curve of the nail. Add 2-3 tiny cross lines near the center for vein texture. Seal with a clear glossy gel top coat in two thin layers.
This is the “I want seashell nails but I don’t want 3D” option, and it still looks stylish because the veins mimic shell structure. The seafoam ombre is flattering because it adds a cool tone that looks good against warm and cool skin — especially if you wear gold or silver jewelry. The thin white shell veins give the detail without making the nail feel heavy. I usually do this for spring weekends and vacations where you want something lighter than full 3D. It also photographs beautifully in shade because the gradient has depth.
Watch outAvoid thick white lines — they look like doodles instead of shell structure.
Editor's noteUse striping gel instead of regular polish for the veins so the lines stay crisp after curing.
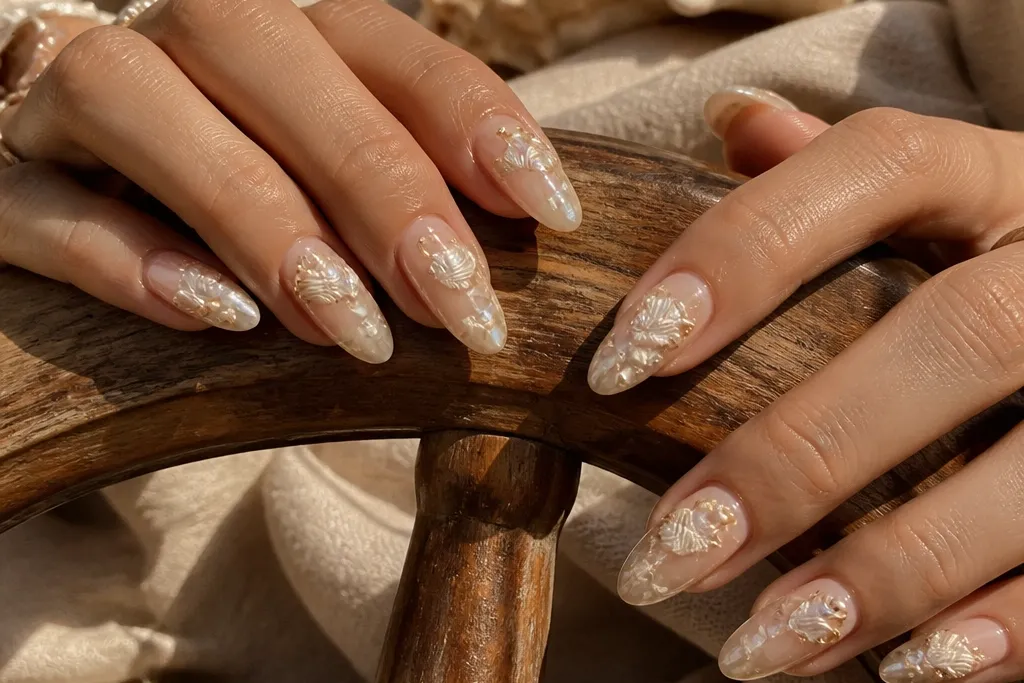
3. Iridescent Oyster Shimmer Over Clear Acrylic Shell
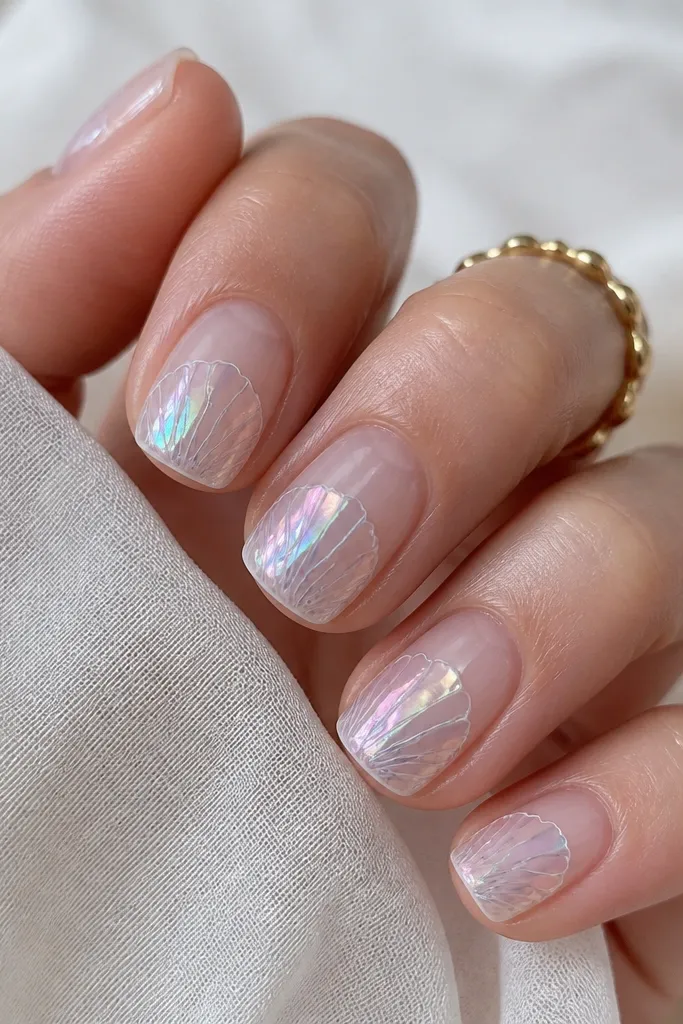
Start by applying clear acrylic or a clear builder gel base, then cap the nail so it’s smooth. Sculpt or stamp a thin shell outline in pale white acrylic — keep it narrow and centered. While the shell outline is still tacky, press fine iridescent microflakes only inside the shell area. Add a thin layer of clear gel over the top to lock the flakes in, then cure. Finish with a glossy top coat and wipe the tack layer if your top coat requires it.
This one looks like an actual oyster shell under a lamp, and it’s the most “wow” without needing big 3D pieces. Clear acrylic makes the shimmer feel deeper because light passes through it. The iridescent flakes read flattering on all skin tones; on deeper skin they pop more, and on fair skin they look like soft pearly glow. I like it for nights out because it catches spotlights. The key is keeping the shell outline light so the shimmer is the star.
Watch outDon’t cover the whole nail in flakes — it turns into glitter instead of oyster glow.
Editor's notePress the flakes with a flat silicone tool so they pack tight and don’t create texture lumps.
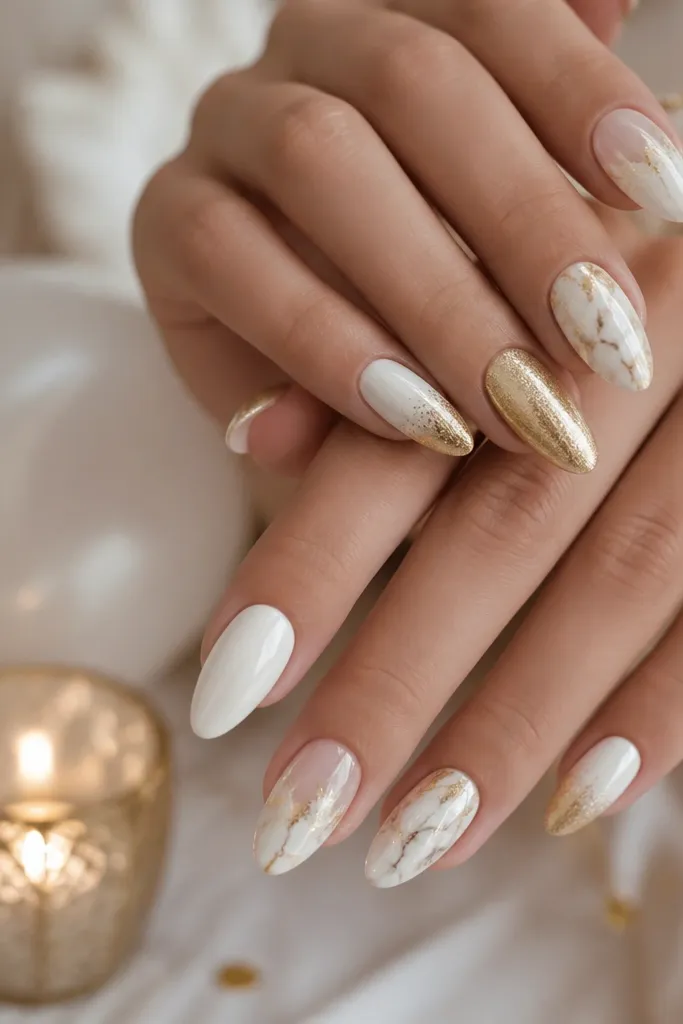
4. White Marble Sea Shell Tips With Micro Gold Sand Lines
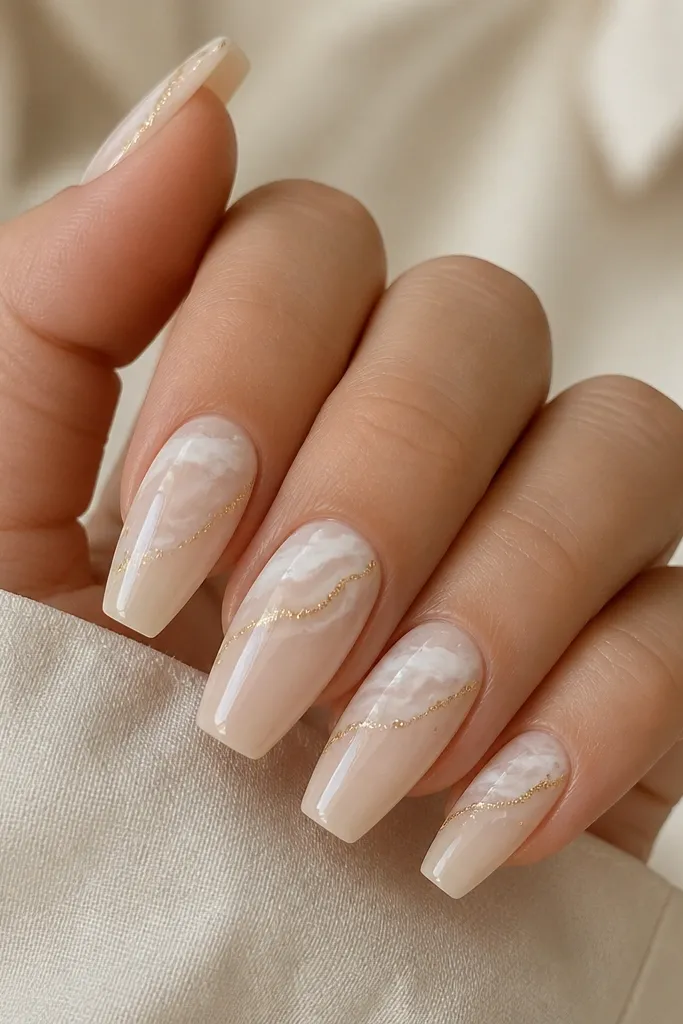
Start with a milky nude base and cure. Create marble tips by dotting white gel and swirling with a fine toothpick, then lightly blend so the pattern stays airy. Draw a thin shell curve at the tip using a white striping gel and a liner brush, keeping the curve centered. Add a micro gold line beside it with metallic gold gel and a steady hand, then place a few tiny gold specks near the line using the brush tip. Seal with two glossy top coats, keeping the second coat extra even at the tip.
This set is stylish because it mixes two textures: marble softness and clean gold “sand” lines. The milky nude base keeps it wearable, while the white marble tips make it feel high-end. Gold micro lines flatter warm undertones and look sharp with silver rings too. It’s a great look when you want seashell details but you don’t want the daily snag risk of raised 3D pieces. I’ve worn this on short-to-medium nails and it still looks crisp.
Watch outAvoid thick metallic lines; they look like paint strokes instead of sand.
Editor's noteIf your marble looks too bold, wipe your brush lightly on a lint-free wipe before blending — it softens without smearing.
5. Rose Pearl Shell Swirls On Nude Pink Acrylic
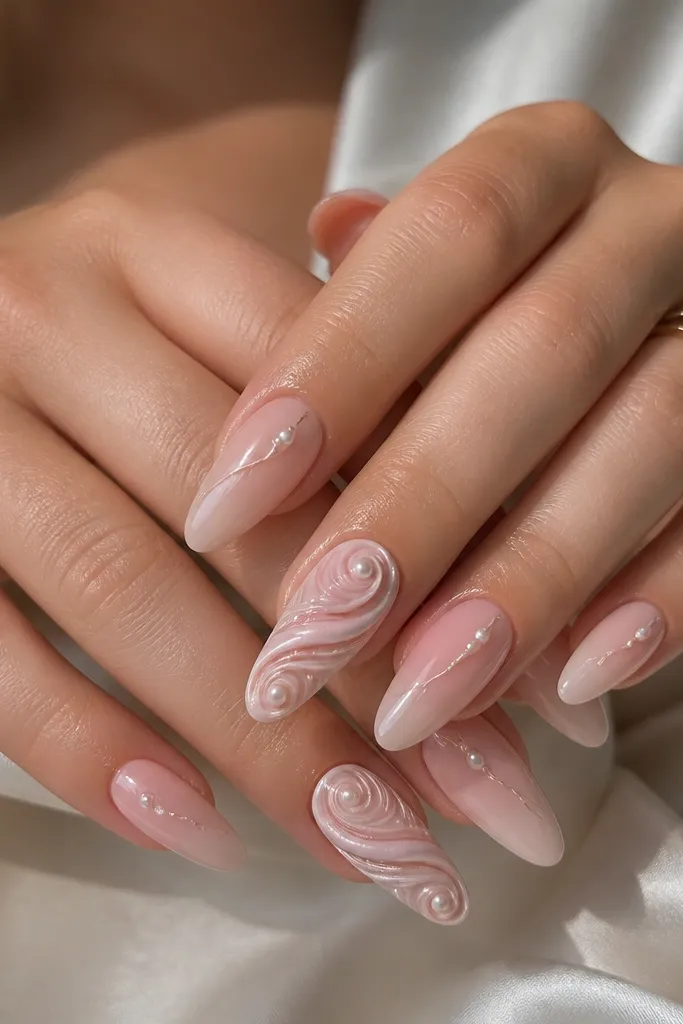
This is my go-to when someone asks for seashell nails that don’t look like pure beach white. Nude pink plus rose accents feels romantic and still reads “shell” because of the spiral pattern. It flatters hands that look better with warmer tones, and it also works on cooler undertones when you keep the base sheer. The pearl beads act like the highlight on a shell, giving the set a polished, intentional look. It’s perfect for date nights, bridal events, and spring outfits with blush tones.
Begin with a nude pink base on all nails, then cure and shape to a long almond. On the accent nails, apply a thin layer of clear gel where the swirl will go. Use a fine liner brush to paint a spiral swirl in soft rose gel, then add white gel over the inner curve for a shell-like gradient. Place one small rose-gold pearl at the outer end of the spiral, then cap lightly with clear gel. Finish with glossy top coat, paying attention to the swirl edges so they don’t lift.
Use a pearl bead size that’s smaller than a pinhead so the spiral stays the focal point.
Don’t add pearls on every part of the swirl — it will look crowded.
6. Sand Texture Acrylic With Raised Shell Outline
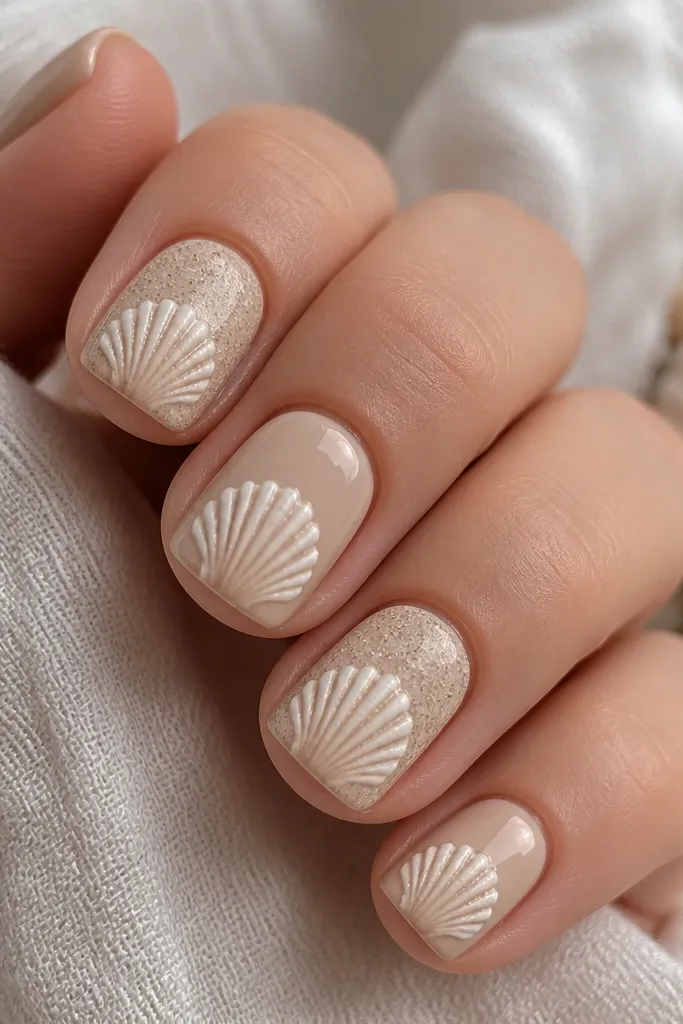
Start by applying a warm beige acrylic base and cure. For texture, mix a tiny amount of matte sand powder or fine cosmetic texture into clear gel and apply a thin layer on the center area only — don’t cover the whole nail. Sculpt a raised shell outline in white acrylic: create a curved border and add 3-5 shallow ridges using the tip of a sculpting tool. Let it set, then cap with clear gel so the ridges feel smooth. Seal with glossy top coat, then lightly buff only if your top coat creates sharp edges.
This is the most literal “seashell” look — it reads like beach sand under a shell. The warm beige base flatters many skin tones because it matches natural nail color and adds a sun-warmed tone. The raised shell outline gives the stylish detail, and the slight sand texture adds depth without needing glitter. I like it for beach weekends and photos because it has a tactile feel. Just keep the sand texture controlled so it doesn’t feel gritty.
Watch outAvoid heavy sand coverage — it looks dusty and wears off fast.
Editor's noteTest the texture on one nail first — if it feels too rough, cap it with an extra clear layer before top coat.
7. Clear Jelly Base With 3D Shell Ridges And Tiny Starfish Charm
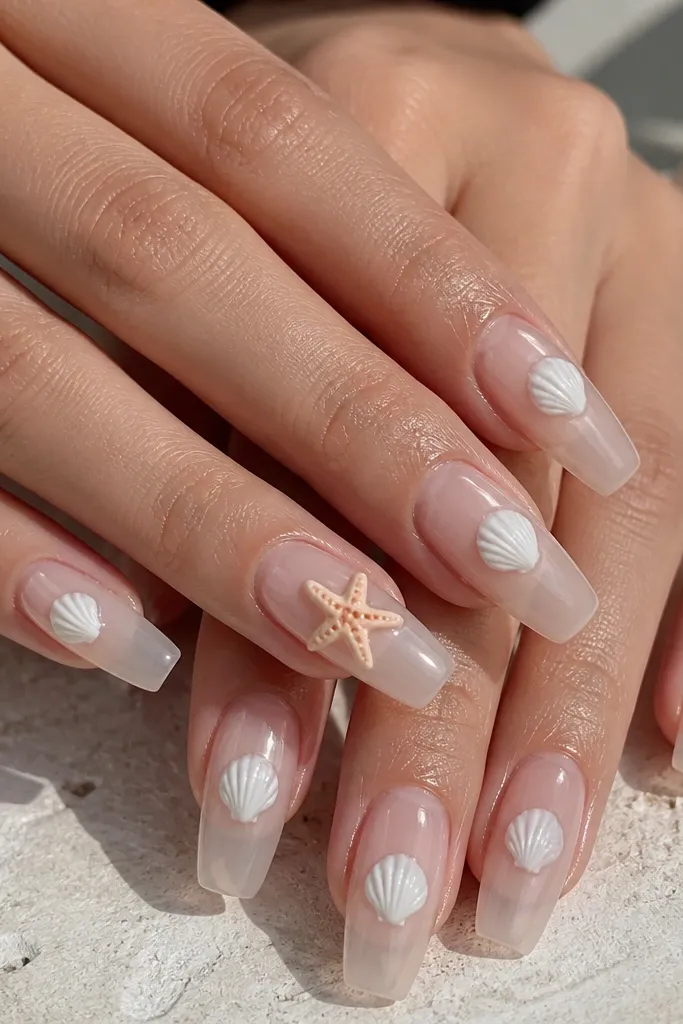
This set looks like you dipped your nails in ocean water. The clear jelly base makes the shell ridges look suspended, and it gives that glossy, wet shine that photos love. The pale peach starfish charm adds a warm touch that doesn’t overpower the shell. It flatters hands because the clear base visually lengthens and keeps the color light. I wear this when I want something fun but still clean, since the charms are tiny and placed with intention.
Apply a clear jelly builder gel base and cure. Sculpt small shell ridges in white acrylic on each nail — keep them low so they don’t snag. Use a fine brush to blend the edges into the clear base with a thin layer of clear gel, then cure. On one accent nail, place a tiny starfish charm in pale peach and white, then cover it with clear gel so the charm sits sealed under glass. Finish with two glossy top coats and cure fully.
Seal charms with a thicker clear gel layer in the center so they don’t lift at the edges.
Avoid oversized charms — big pieces make the set look costume-like.
8. Pearl French Tips With Crescent Shell Lines
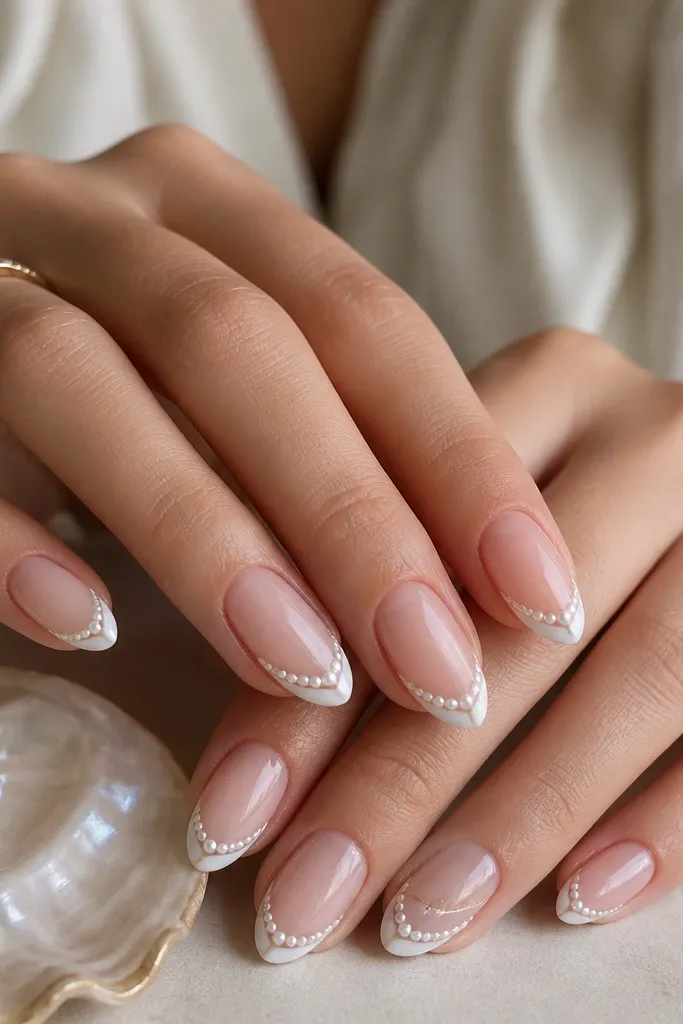
This is the most office-friendly way to wear seashell nails acrylic stylish details. The French tip keeps the shape neat, and the pearl finish makes it feel bridal and clean. The crescent shell lines give you the shell theme without needing big 3D texture. It flatters shorter nail beds because the tip design adds structure and keeps the eyes moving upward. If you want “subtle seashell” that still looks special in close-up, this is it.
Start with a sheer nude base and cure. Paint a pearly white French tip with a thin line — keep it about 2 mm wide on short nails. On one or two accent nails, draw a thin crescent shell line 1 mm above the French tip using a white striping gel. Add tiny pearl dots along the French edge, then cap with a clear gel layer. Top coat twice, and keep the second coat thicker near the tip so it stays glassy.
Use a nail guide or French stencil for the curve so the tips match perfectly.
Avoid wide French tips; they swallow the nail and make the shell details look cramped.
9. Chalky Cloud White Shells On Sheer Beige Acrylic
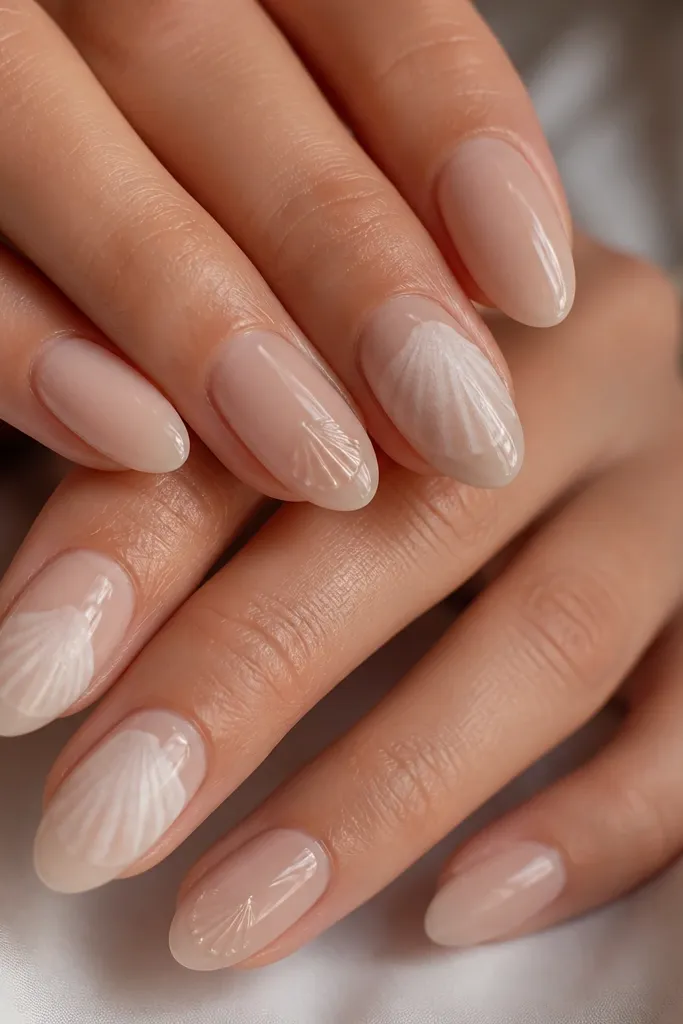
Apply a sheer beige acrylic or builder gel base and cure. For the chalky shells, use a matte white gel or a chalk powder mixed with clear gel, then paint shell shapes with a small brush. Keep the shell edges soft and slightly irregular for a natural look. On two nails, sculpt a tiny glossy shell ridge in white acrylic instead of painting, then cap and cure. Finish with top coat: use gloss on the ridge nails and a thinner top coat on the matte nails so the chalk stays soft.
Chalky cloud white shells look stylish because they feel airy instead of shiny-heavy. The sheer beige base makes the white pop without turning harsh, and it flatters deeper and fair skin because the base is close to your natural nail color. This is great if you hate glitter but still want the shell vibe. The contrast between matte shell shapes and glossy top coat on other nails makes the set look intentional. I’ve seen this look stand out in daylight because the chalk finish catches light differently.
Watch outAvoid full glossy top coat over chalky shells if you want the cloud effect.
Editor's noteIf matte gel smears while you work, wipe the brush with gel cleanser and reload — dry brushes skip and streak.
10. Coastal Blue Acrylic With 3D Shell Border On One Side
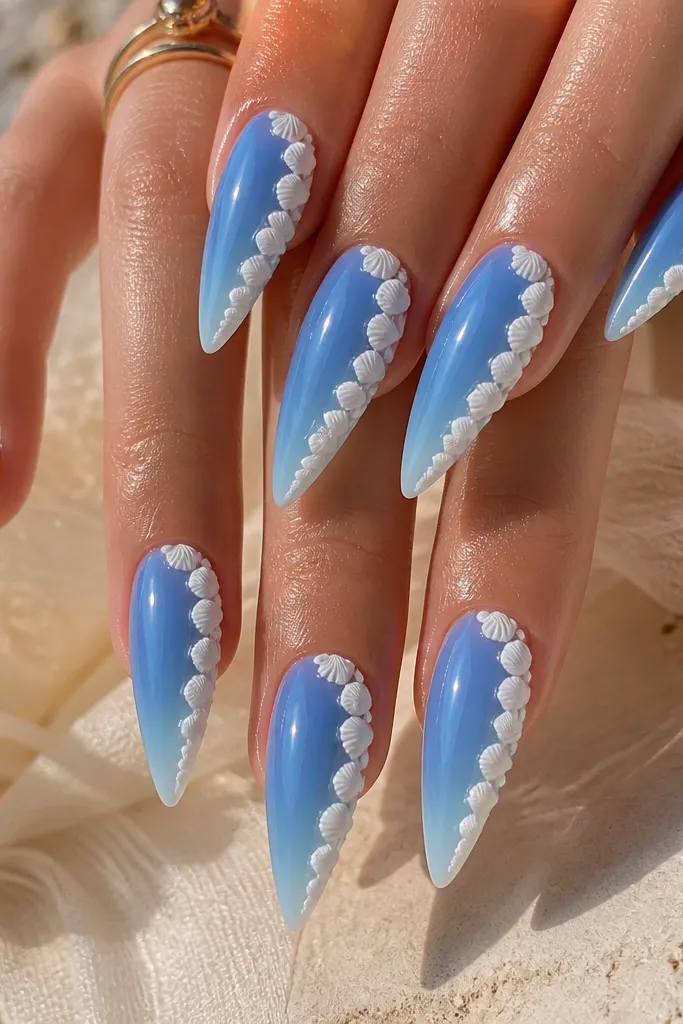
Sidewall shell borders look stylish because they create a clean “frame” instead of scattering details across the whole nail. The coastal blue base makes the white shells look crisp, and the gradient keeps it from looking flat. This design flatters hands with shorter nail beds because it adds vertical structure along one side. It’s also great for people who want 3D texture but don’t want it everywhere — less bulk, less snag. I did this for a coworker and everyone thought it was a custom nail art stencil.
Start by building a coastal blue acrylic base, leaving it slightly lighter toward the tips by mixing in a tiny amount of light blue powder or using a lighter gel at the end. Cure and file to a long stiletto. Sculpt the shell border only on one sidewall: create a row of small shell segments in white acrylic, each segment with 3-4 ridges. Blend the segments into the blue with clear gel so the border looks like it grew from the nail. Cap with clear gel and top coat to smooth the edges.
Keep the shell border width to about 1/4 of the nail so the rest stays clean and modern.
Don’t wrap the border around the tip — it makes the nail look over-decorated and bulky.
11. Pearlized Chrome Seashell Burst On Naked Pink
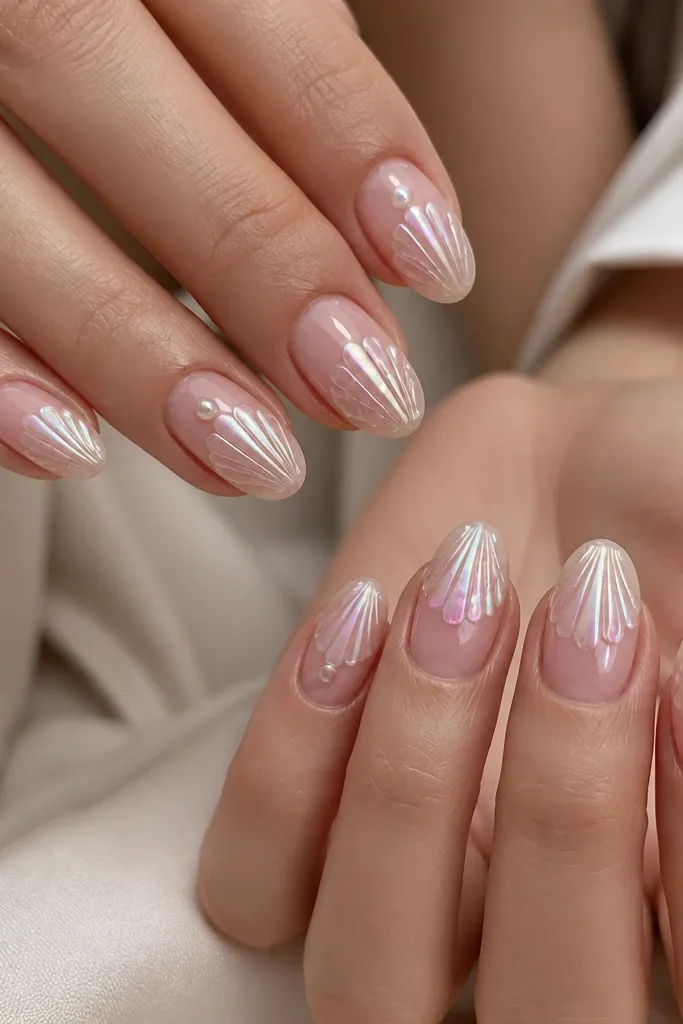
Start with a thin naked pink base and cure. Create a small shell burst in white acrylic or white gel in the center — 5-7 ridged lines that radiate outward. Seal lightly with a tacky clear gel layer. Apply pearlized chrome powder over the ridges with a sponge applicator, then buff lightly so it stays on the ridges. Add one small pearl on two accent nails, then cap with clear gel and top coat for glassy shine.
This is the “center-of-the-hand” look that reads stylish even from across a room. Naked pink keeps it wearable, and pearlized chrome gives the shell ridges a metallic highlight that looks like real shell sheen. The burst shape flatters because it pulls the eye to the middle and makes the nail look longer. It also works for events because chrome catches camera flash. I like it for people who love sparkle but want it controlled, not glittery.
Watch outAvoid heavy buffing after chrome — it can remove the sheen from the ridges.
Editor's noteKeep chrome only on the ridges; chrome on the whole nail can look dusty and flat.
12. Soft Beige With Tiny Shell 3D Corner Accent
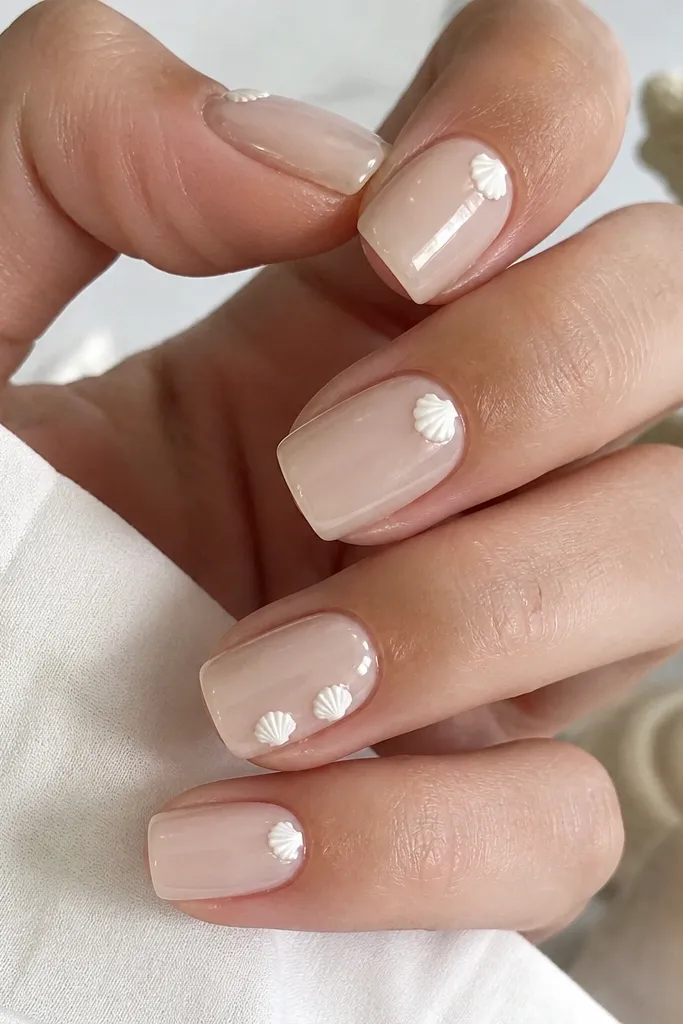
Apply soft beige acrylic or builder gel and cure. Sculpt a tiny shell accent using white acrylic: make a small half-dome and add 3-4 curved ridges. Place it in the upper corner near the sidewall, leaving about 1 mm of space from the cuticle line. Cap it with clear gel so the shell edges feel smooth. Finish with one glossy top coat layer, then check the corners by running your finger along the sidewall for snag points.
Corner accents are my favorite when someone wants seashell nails acrylic stylish details but hates big art. The soft beige base makes the shell look like a tiny detail from a jewelry box. It flatters nearly everyone because it’s neutral and doesn’t compete with skin tone. The corner placement also makes the nail look wider and more balanced, especially on shorter nails. You get the shell vibe without the weight of a full 3D centerpiece.
Watch outDon’t place the shell too low on the nail — corner accents should sit near the top for the best look.
Editor's noteIf the shell feels sharp, buff the top lightly with a 240-grit file before top coat.
13. Icy White Shell Ridges Over Clear Pink Gel
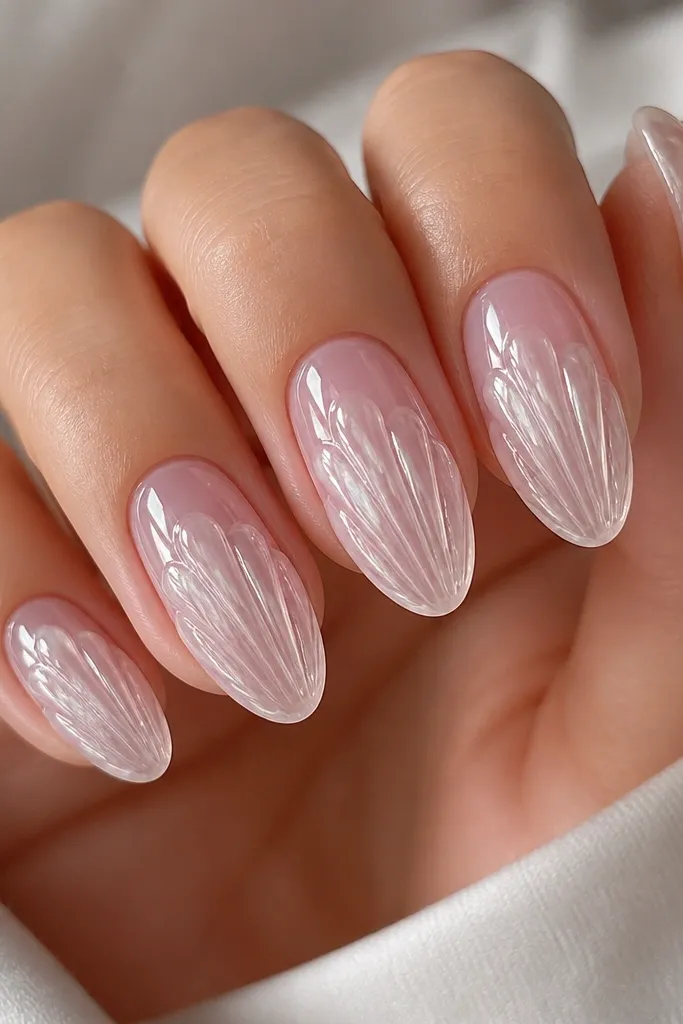
This set looks clean and futuristic because the base is clear pink and the ridges are icy white. It flatters hands by keeping the color soft and translucent, so it doesn’t overpower your skin. The shell ridges are the entire design, which makes it feel “stylish details” instead of busy nail art. I wear it when I want the sea theme but in a more wintery, cool way. It also lasts well because there are fewer tiny elements that can lift.
Start with a clear pink gel base and cure, keeping it thin for a jelly look. Sculpt shell ridges in icy white acrylic: build a narrow ridge strip in the center, then carve shallow curved lines so the ridges look like frost on shell. Keep the overall ridge height low, then cap with clear gel to smooth it. Cure thoroughly, then apply glossy top coat in two thin coats. Wipe and inspect under a lamp; if any ridge edge catches your fingertip, cap again with a thin clear gel layer.
Use a low-heat lamp schedule and cure longer if your acrylic stays soft — it affects how smooth the ridges feel.
Avoid thick ridge stacks; they make the nail look heavy and can crack at the sidewalls.
14. Ocean Wave Gel Lines With Tiny Shell Beads
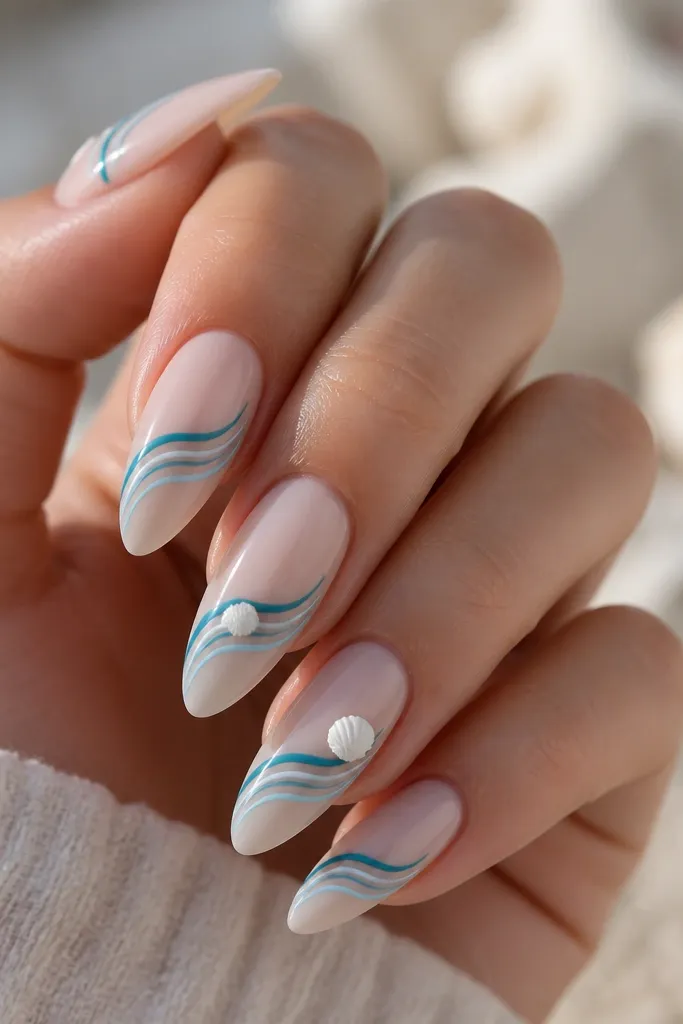
Wave gel lines keep the seashell theme modern, and the tiny shell beads add the real shell detail without making the nail too bulky. The nude base makes the teal colors pop while staying wearable, which flatters most skin tones. This set looks especially good with silver jewelry because the cool blues match. I like it for summer events where you want movement in the design — the diagonal waves make the nail feel dynamic. The beads act like highlights at the crest of each wave.
Start with a nude base and cure. Draw diagonal wave lines using teal and pale blue striping gel, keeping the lines thin and evenly spaced. On two accent nails, place tiny shell beads at the highest points of the waves using clear gel or clear acrylic, then cure. Cap with clear gel so the beads are sealed under a smooth layer. Finish with glossy top coat and check that the wave lines don’t have raised edges by lightly running your finger over them.
Use a toothpick to place beads — gel brushes spread and can smear the wave lines.
Avoid thick wave lines; they look like paint stripes instead of gel art.
15. Sea Glass Confetti Acrylic With Turquoise Drip Tips
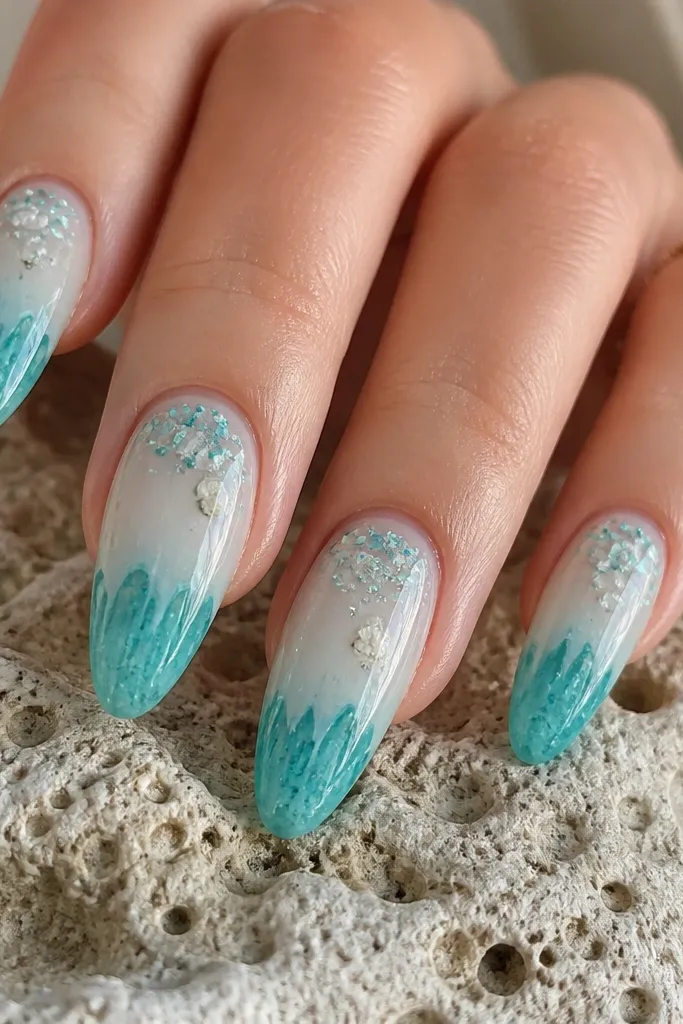
This set looks like you picked up sea glass after a storm — frosty, speckled, and a little unpredictable. The base stays clear and glossy so the confetti flakes look suspended in water instead of sitting on top. The turquoise drip tips give movement, and the irregular edge keeps it from reading like a simple ombre. I like it because it photographs well even in daylight — the flakes reflect without turning glittery-sparkly. It also grows out prettier than solid color tips since the “drip” sits near the end and the base stays clean.
Start with clear acrylic on the first layer, then add a thin milky white blend only at the lower third so the top half stays glassy. Sprinkle tiny hex and micro shard flakes in mint and aqua right above the cuticle, then cap with clear acrylic so they lock under the surface. For the tips, build a translucent turquoise acrylic at the very edge and use a small brush to pull it downward in 3-5 uneven drips per nail. Use a clean acetone brush to sharpen the drip edges while the acrylic is still workable, then keep the rest of the nail transparent. Finish with a glossy top coat and cure fully so the confetti does not dull or sink.
If your flakes keep clumping, mix them with a drop of clear acrylic monomer on a foil square first, then pick up tiny amounts with a dry acrylic brush.
Avoid using chunky glitter — it hides the sea-glass effect and makes the surface feel gritty instead of smooth.