1. Micro French Tip With Gold Edge
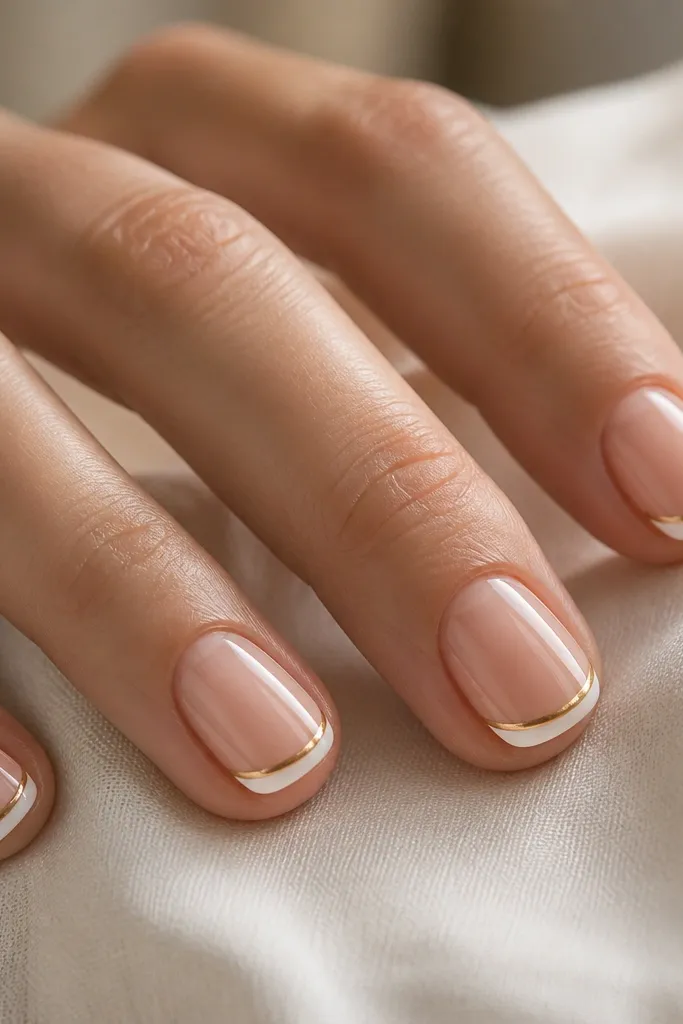
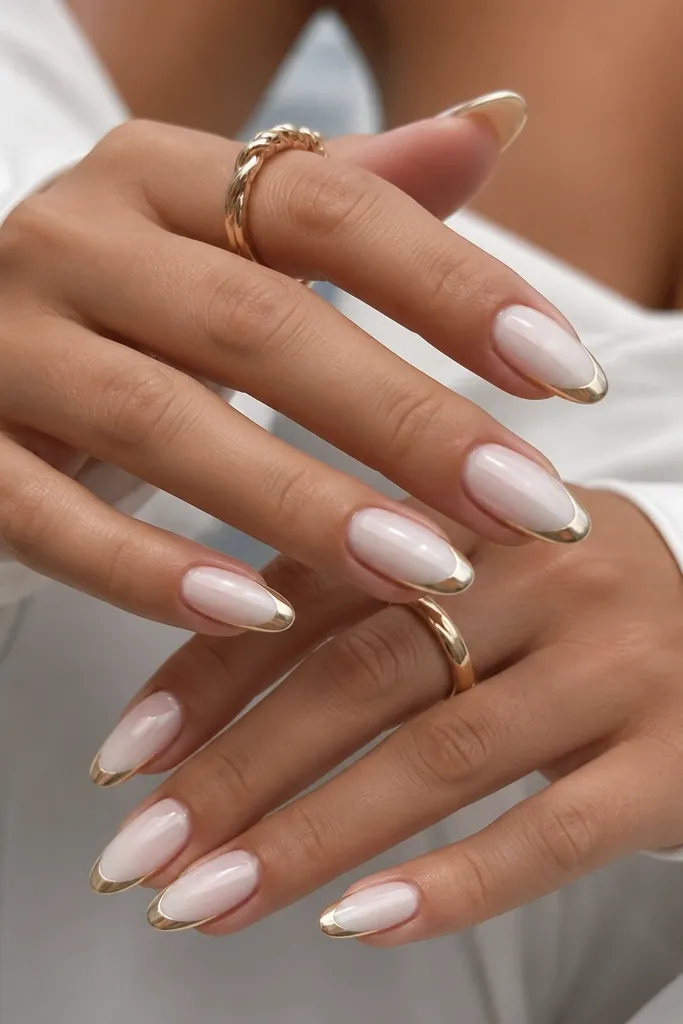
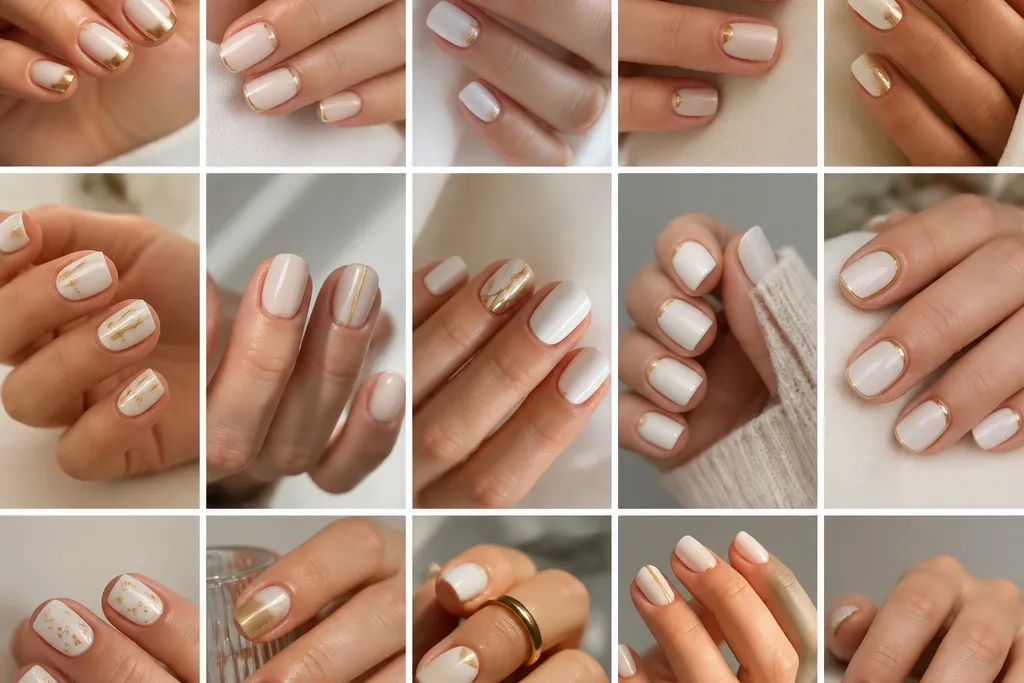
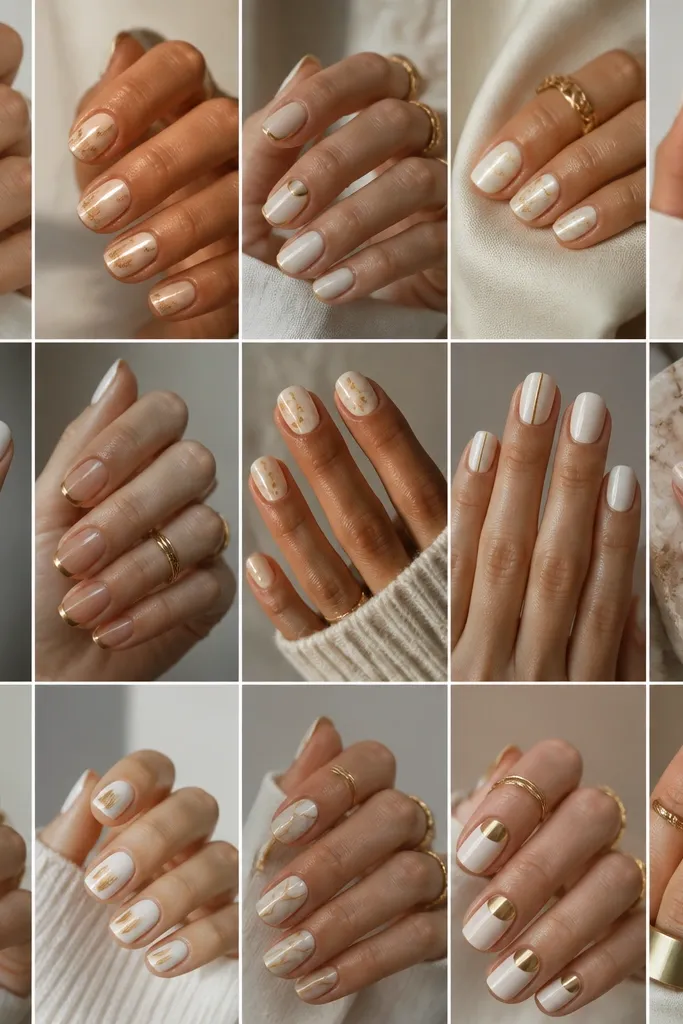
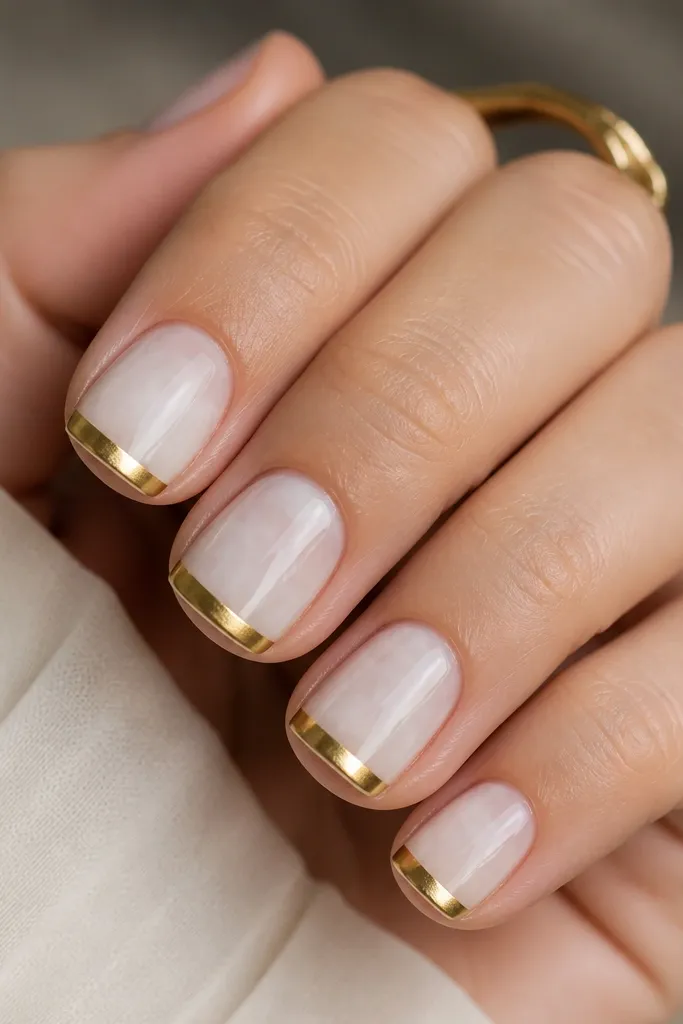
This is the white-and-gold look that always reads expensive on short nails because it barely steals space from your nail bed. Start with a crisp micro French tip in smooth milky white — the thinner the tip, the more length you get. Then add a single gold line along the outer edge of the white tip using striping tape or a fine gel liner. The gold sits only at the border, so it doesn’t make the nail look heavy or wide. It flatters most skin tones because the white is clean and the gold is warm, not brassy.
First, paint a sheer nude base or builder gel base, then cure. Next, apply milky white for the French tip, keeping the tip width around 1/8 inch from the free edge so it stays micro on short nails. Cure, then place a striping tape line along the outer edge of the white tip — press it down firmly so it follows the curve. Paint over the tape with gold gel, cure again, and peel the tape while still slightly tack-free. Finish with a thick glossy top coat for a glassy edge.
If your gold line looks wobbly, use a striping tape guide and remove it right after curing so the edges stay sharp.
Avoid thick French tips — they shrink the nail and make the gold line look like it’s covering mistakes.
2. White Base With Gold Half-Moon Cuticle
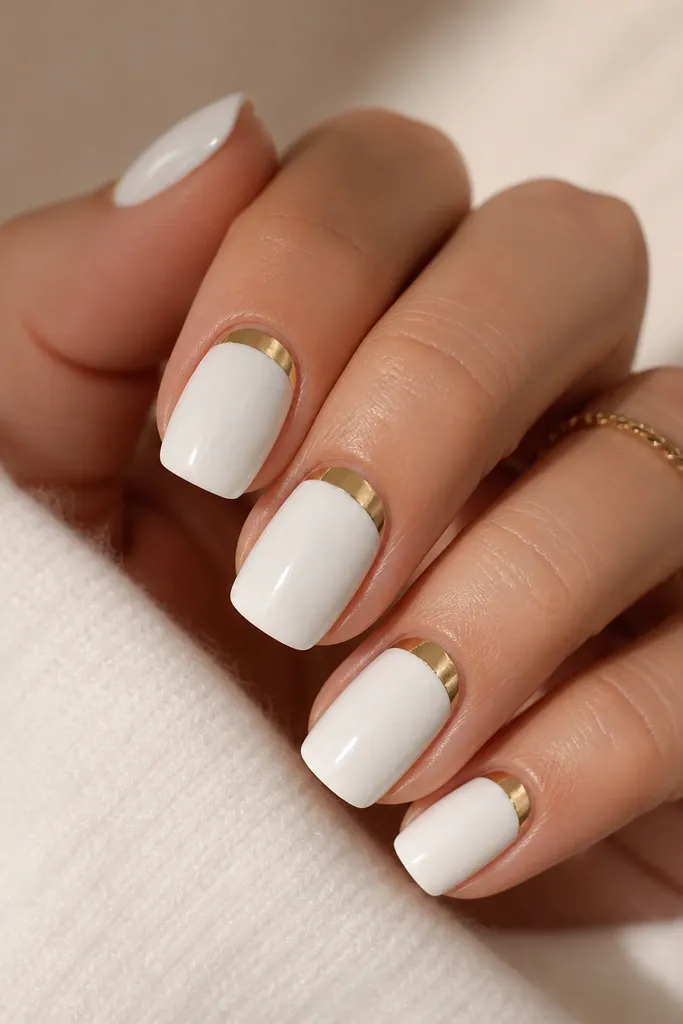
A gold half-moon at the cuticle is my go-to when I want classy without adding length. Creamy white fills the nail and makes your hands look bright, while the cuticle gold creates a focal point that visually “lifts” the nail upward. I use gold chrome or leaf for this because it looks soft and expensive even when the nail is short. This design looks especially good on medium to deeper skin tones because the warm gold pops against the cool white. If you wear rings, the half-moon also matches that jewelry glow.
Start by prepping the cuticle and pushing it back gently so the half-moon doesn’t end up messy. Apply a creamy white gel polish in two thin coats, curing each time for full opacity. For the gold, use a small half-moon stencil or freehand with a fine brush, then tap on gold chrome powder or apply gold leaf in that arc. Cure and then seal the chrome with a top coat that you brush carefully over the edges. Keep your top coat slightly thicker over the half-moon so it stays smooth.
Editor's noteUse a cuticle stencil that matches your nail curve — a stencil that’s too wide makes the arc look like a sticker.
Watch outSkip a messy cuticle line — fuzzy gold at the base reads sloppy on short nails.
3. Gold Foil Accent Over White Marble
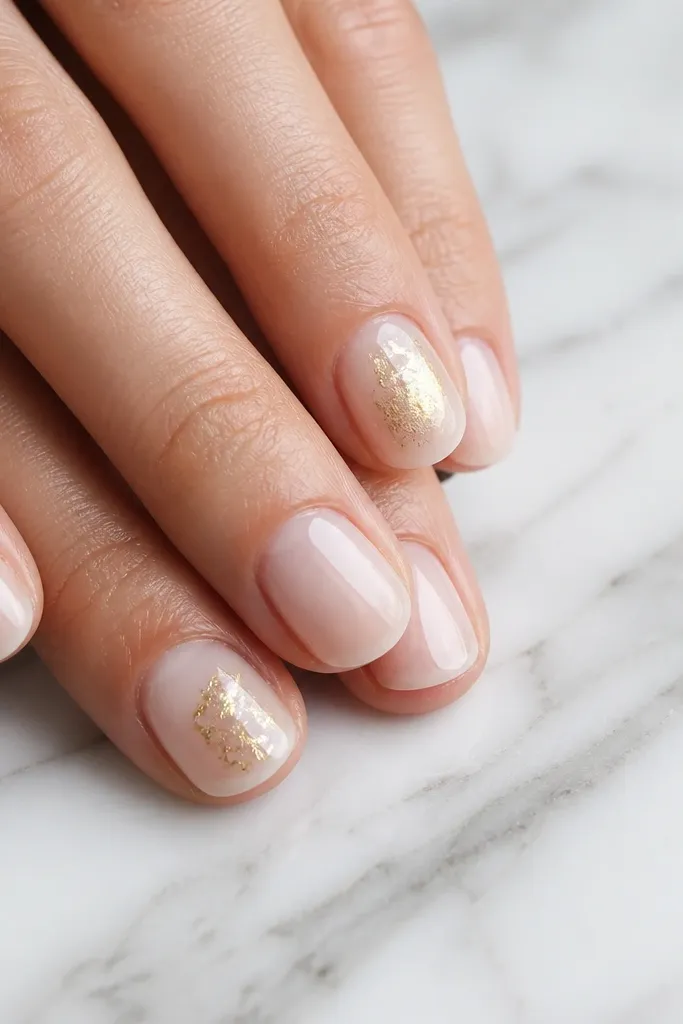
Marble looks classy on short nails when the veining is delicate and the gold is placed like a jewelry piece, not a blanket. Use a white marble technique with thin gray lines so the design has dimension without adding thickness. Then add a single irregular gold foil accent — I place it slightly off-center so it looks natural, like it landed there. The gold foil adds texture and warmth, and it doesn’t need much space to look luxe. This one flatters shorter nail beds because the marble moves the eye and the foil gives a focal point.
First, apply a milky white base and cure. Then add marble veining by dragging a thin brush loaded with light gray gel across the nail in a few controlled strokes, keeping lines 1-2 mm apart. Cure again, and wipe off tacky residue if your system needs it. Place small pieces of gold foil over the center area — press lightly, then seal with a thin layer of top coat. If you want it extra smooth, add a second top coat after curing so the foil edges don’t snag.
Use smaller foil pieces than you think — on short nails, big foil looks like a sticker.
Don’t flood the nail with veining; dense marble makes short nails look crowded.
4. White Gloss With Gold Dot Trail
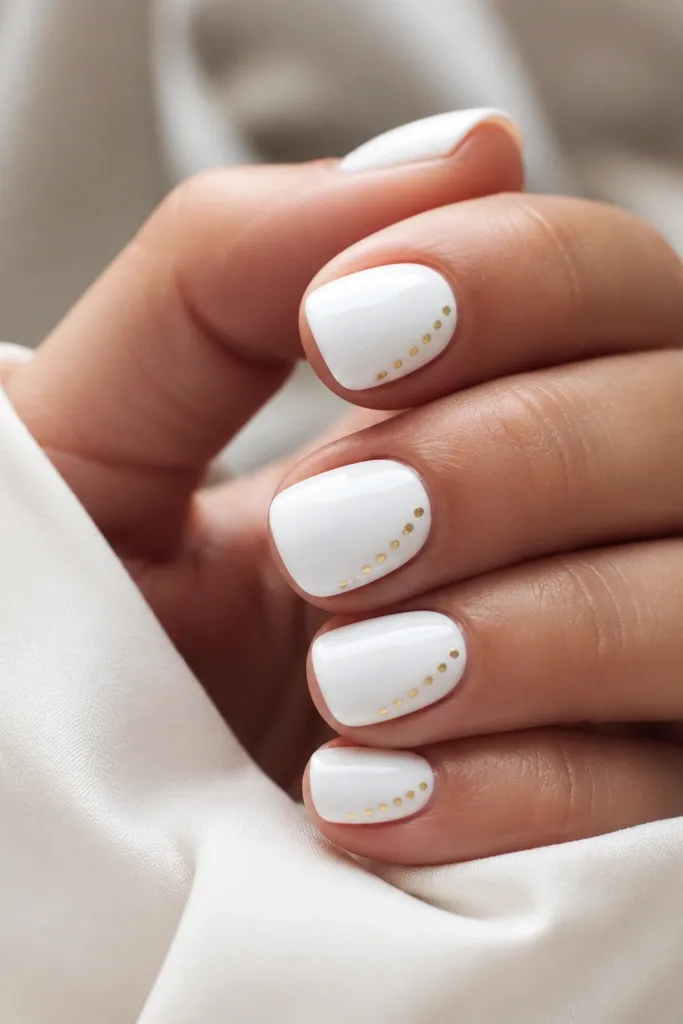
This design is playful but still clean, and it works on short nails because the dots are tiny and spaced. A shiny white base gives you that fresh “just done” look, and the gold dot trail adds movement without taking over the whole nail. I like it for everyday because it looks intentional even when you’re not wearing a full manicure theme. It flatters all skin tones because white brightens and gold adds warmth. The diagonal placement makes fingers look a bit longer by guiding the eye across the nail.
Start with a smooth white gel base, using two thin coats and curing fully between. For the dots, load a dotting tool with gold gel (or use gold paint that you can cure) and place dots in a diagonal line. Keep the first dot close to the side of the cuticle, then taper the line so dots get slightly smaller as you move toward the tip. Cure, then add a glossy top coat that covers the dots without smearing them. Wipe the nail edges clean before curing so the manicure looks crisp.
Editor's noteIf your dots merge, cure between dot rows — it prevents the gold from flowing.
Watch outAvoid large dots — they make short nails feel bulky.
5. Gold Chrome Tip Over White Smoke
Gold chrome at the tip reads sleek, and pairing it with a soft white smoke gradient keeps it from looking harsh. The base stays white, but the tip has a slightly hazy, airbrushed look — it gives depth without needing long nails. I use a thin white “smoke” layer blended with a sponge, then cap the tip with gold chrome. This is a great choice for cooler skin tones because the chrome adds warmth, while the smoke keeps everything looking smooth and not too stark. It also looks amazing with silver rings because the chrome echoes jewelry shine.
Apply a sheer nude base or clear builder gel, then cover with a milky white for an even foundation. For the smoke, dab a thin layer of white gel mixed with a tiny bit of clear over the top third of the nail, then blend with a makeup sponge — stop before it reaches the middle. Cure. Tape a straight line at the edge of the smoke area, apply gold chrome powder to the tip band, and press it in gently. Remove the tape after curing and seal with a glossy top coat.
Editor's noteUse a small piece of tape to keep the chrome band straight — freehand lines wobble on short nails.
Watch outDon’t blend the smoke too high — it makes the gold band look small.
6. White Cable Lines With Thin Gold Bar
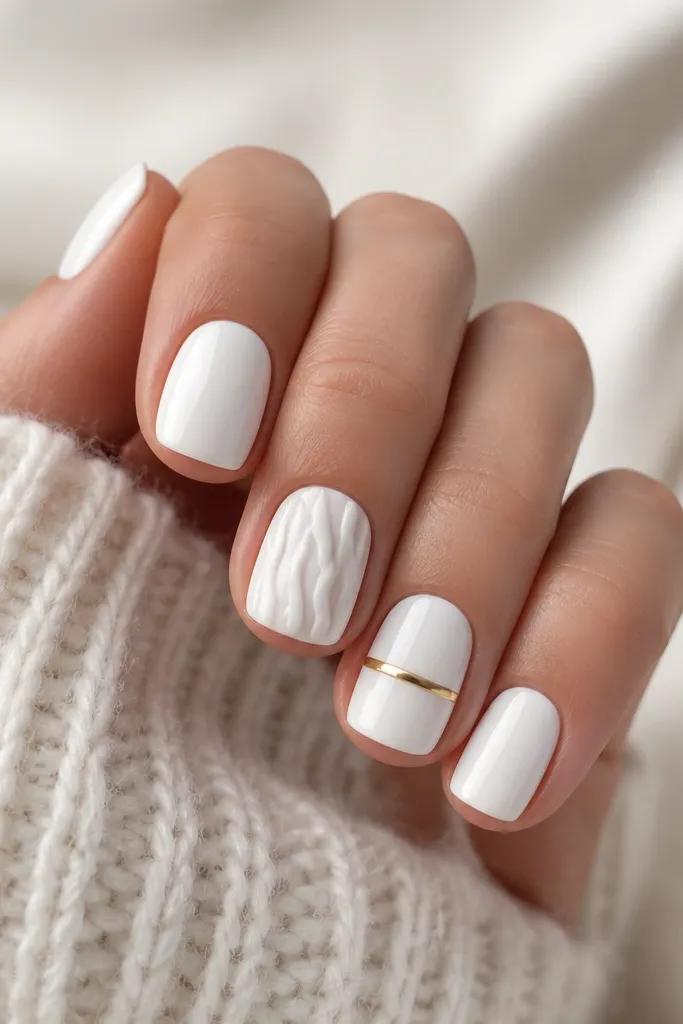
Texture can look classy on short nails if you keep it controlled. The cable-line effect gives a knit-sweater vibe, but it stays elegant because it’s monochrome white. Then you swap in a thin gold bar on an accent nail to add a clean, modern contrast. This set looks great on hands with slender fingers because the cable lines add interest without widening the nail. It works for both casual and holiday events, especially if you wear gold-toned jewelry.
Start with a glossy white base on every nail and cure. On the accent nail you want textured, use a striping gel and a small nail art brush to create cable lines — draw two parallel lines, then add diagonal cross strokes between them to form the cable pattern. Cure and top coat lightly, leaving texture intact. On another accent nail, paint a thin gold bar across the midline using striping tape as a guide. Cure and finish with top coat over the gold bar for a smooth, sealed look.
Editor's noteDo the cable lines on only one nail per hand — it keeps the texture from feeling busy.
Watch outSkip chunky raised gel on short nails; it catches on hair and fabric.
7. White Oval Base With Gold Frame Outline
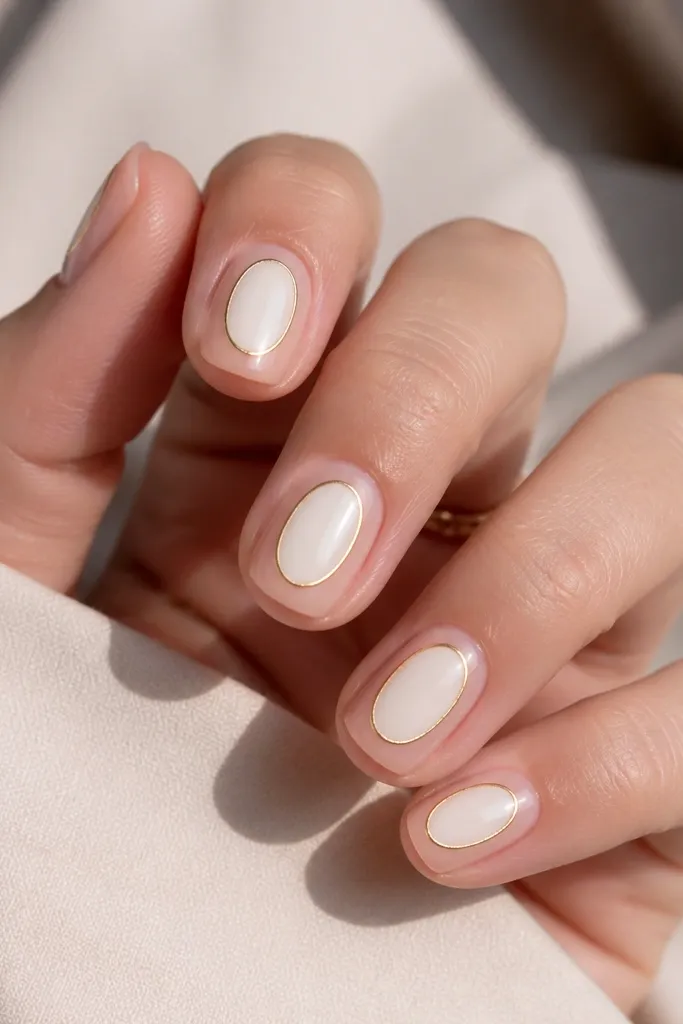
A gold frame makes short nails look designed because it creates boundaries. The white oval panel in the center brightens your nail bed, while the gold outline adds structure and keeps the design from bleeding into the nude base. I like this for people who hate full white nails because the nude base keeps it light and wearable. It flatters hands with shorter nail beds because the oval shape gives the illusion of more vertical space. It also pairs well with both warm and cool jewelry since the gold is fine and not too shiny.
Apply a sheer nude or pink base, then cure. Paint a centered white oval on each nail using a small brush, aiming for about 60% of the nail width and leaving a tiny gap at the sides. Cure. Then apply thin striping tape around the oval edges to form the outline — press gently so it follows the curve. Paint gold gel over the tape, cure, peel tape, and top coat for a smooth finish.
If your oval looks uneven, use a dotting tool to place two guide points before you paint the curve.
Avoid thick frames — they make the nail look smaller on short lengths.
8. White Half-Negative Space With Gold Corner
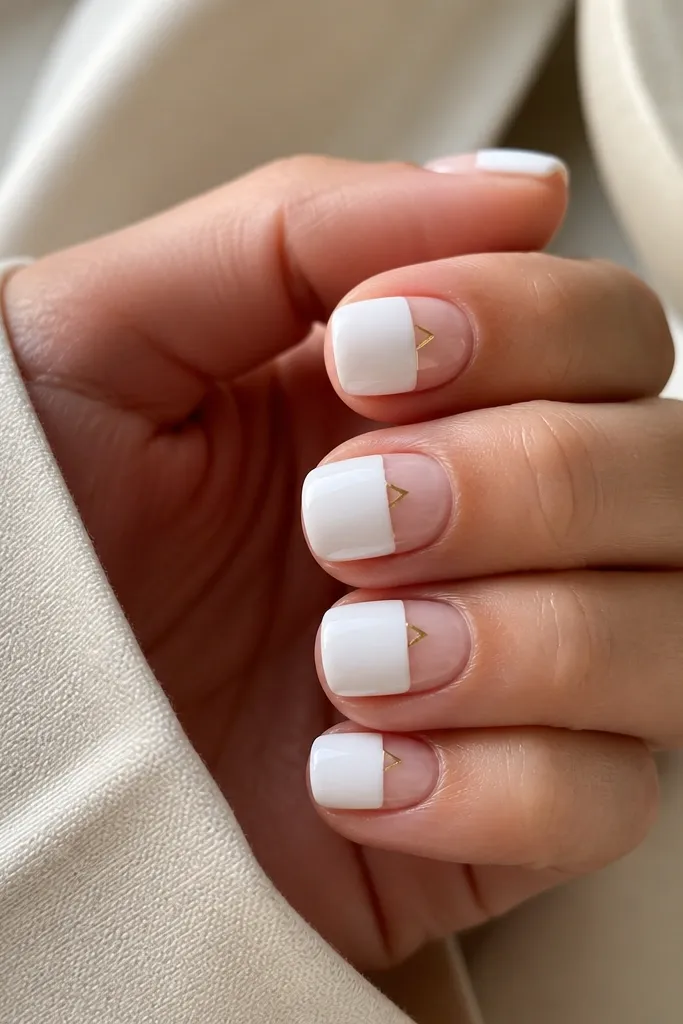
Negative space is the secret weapon for short nails. By leaving part of the nail sheer, you create a natural “break” that makes the nail look longer and slimmer. The white half coverage stays crisp, and the gold corner at the border acts like a bookmark — it’s a small detail that looks expensive. I like this for everyday because it doesn’t feel heavy, even with full white on part of the nail. It flatters most skin tones and looks great with simple rings.
Start with a sheer nude base and cure. Apply milky white starting from the free edge upward, stopping around halfway — keep the edge straight with a striping brush. Cure. Place a tiny gold accent at the meeting point of white and nude — either a small triangle of gold foil or a dot-and-line combo using a fine liner. Cure and seal with top coat, but brush carefully over the border so it stays sharp.
Editor's noteUse painter’s tape as a straight-edge guide for the white boundary; it saves you from wavy lines.
Watch outDon’t cover the negative space with white — if it turns cloudy, it loses the length effect.
9. White Roses On One Nail With Gold Leaf Frame
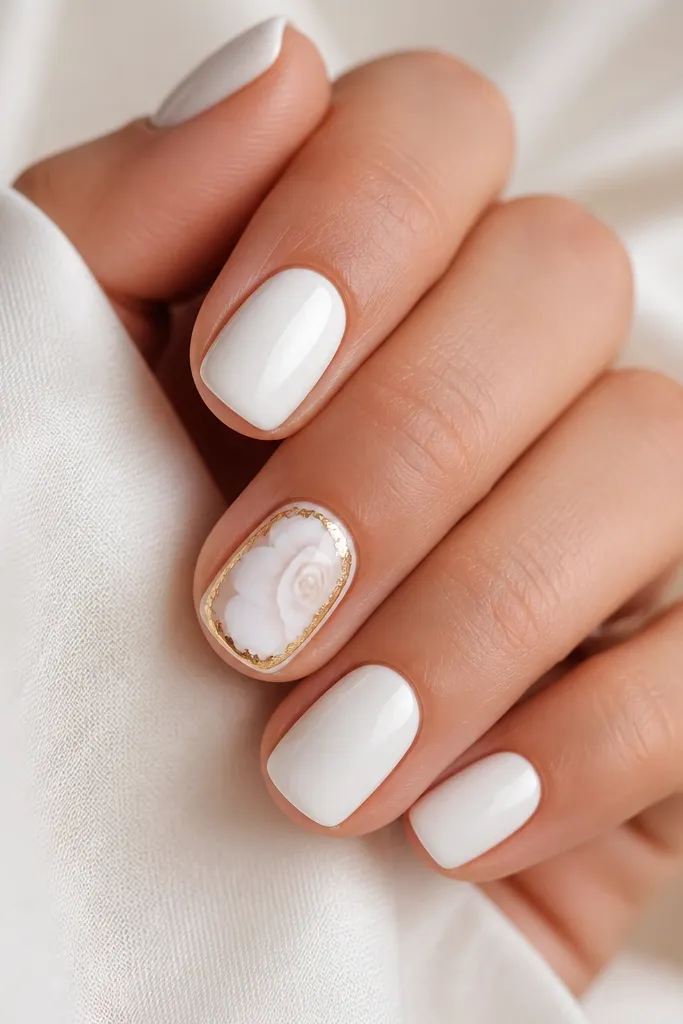
This is the romantic option that still looks classy because it’s not too busy. Keep most nails plain glossy white so your hand looks clean, then put the rose detail on one accent nail. The gold leaf frame around the rose pulls the look together and makes the nail art feel “finished,” even on short length. I’ve worn this to bridal showers and it always gets compliments because the roses are delicate and the gold is irregular in a natural way. It works on lighter and deeper skin tones because the roses are white-on-white with just enough gray shading to show shape.
Paint all nails glossy white with two thin coats and cure. On the accent nail, add a few small rose shapes using a nail art brush — start with tiny petal loops and add subtle gray at the base of each petal for depth. Let it cure. Then apply gold leaf around the edge of the accent nail — press small pieces along the perimeter and leave gaps so it looks airy. Seal with a top coat that covers the leaf without turning it cloudy.
Editor's noteKeep the roses small — one rose cluster centered near the cuticle looks better than a full bloom on a short nail.
Watch outAvoid heavy black outlines on roses; they look harsh at short lengths.
10. White Stripes Down The Side With Gold Micro Studs
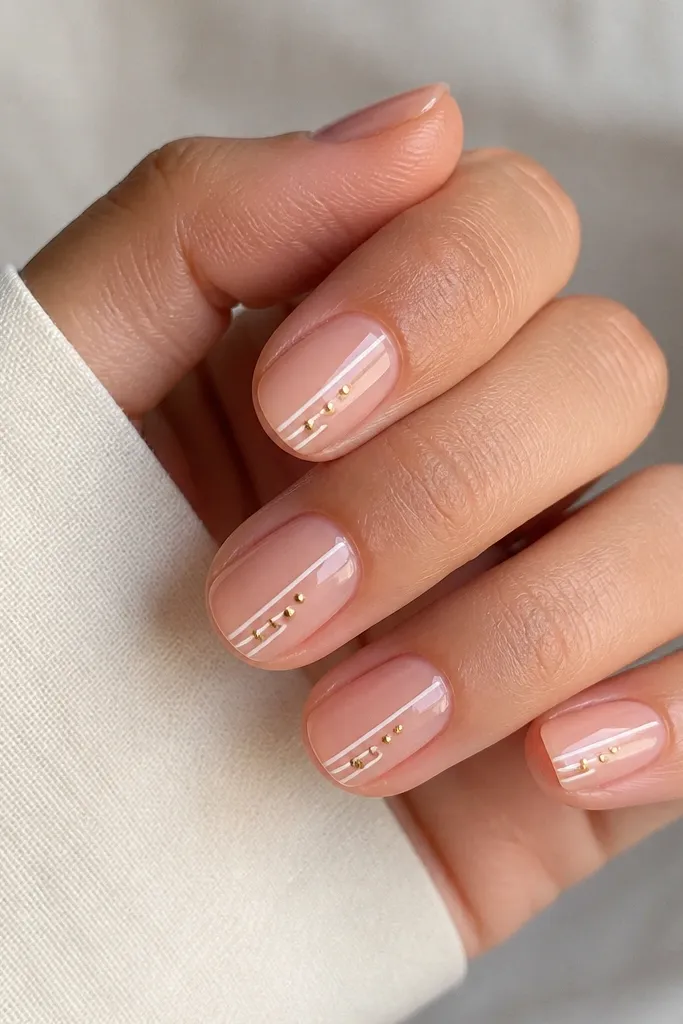
Side stripes are a length trick because they draw a vertical line. This design uses a sheer base so your nails look light, then adds thin white stripes that run from near the cuticle to the tip. The gold micro studs act like tiny punctuation marks along the stripes, giving sparkle without covering the nail. It looks especially good on nails that are slightly wider at the base because the stripes add focus down the center. The studs also look great with short nails because they’re small and don’t snag.
Apply a sheer pink or nude base and cure. Add two thin white stripes on one side of the nail — aim for stripes about 1-2 mm wide, leaving the other side clear. Cure. Place tiny gold studs along the stripe line using a dot of clear gel where you want each stud. Press lightly and cure until set, then top coat carefully around the studs so they stay sealed.
Editor's noteUse tweezers with a rubber tip pad so you don’t scratch the gel when placing studs.
Watch outSkip big gems — they can lift on short nails and make the manicure feel cheap.
11. White Gloss With Gold Foil Vein
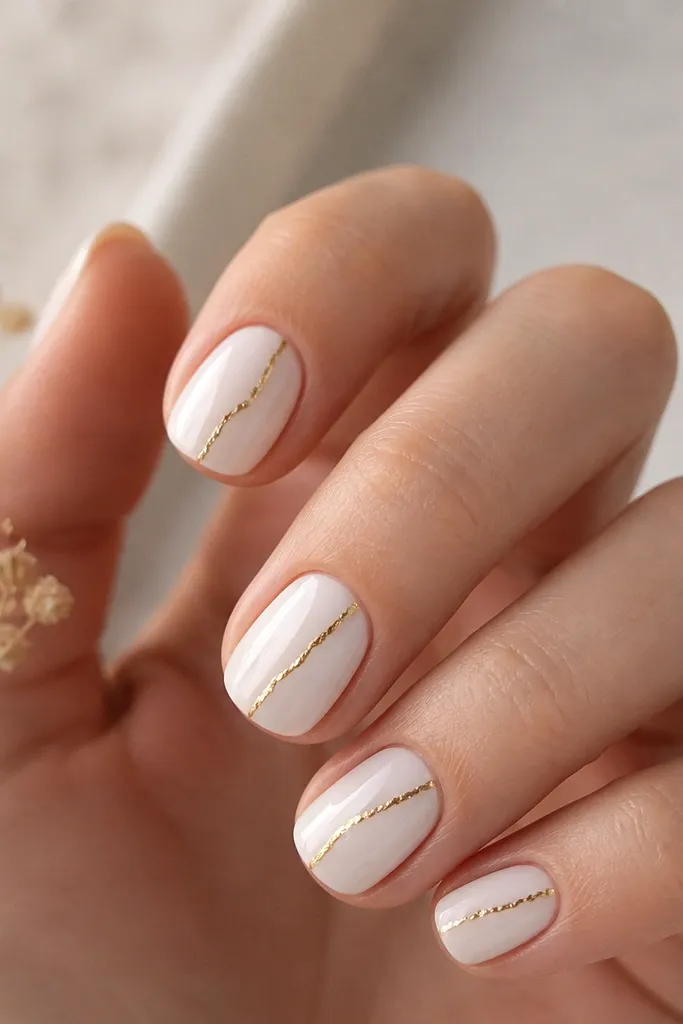
A single gold vein looks classy because it’s one focal detail with movement. The white base stays clean and reflective, and the gold foil reads like a mineral line — not like paint. I love this for short nails because the vein creates a diagonal path that makes your nails look longer and more dynamic. It flatters hands with short nail beds because you’re not adding length with a tip; you’re adding visual direction. If you wear gold rings, this ties everything together without trying too hard.
Start with a fully opaque milky white base and cure. Cut small slivers of gold foil so you can place them precisely. Use a fine brush with clear or gold gel to draw a gentle diagonal line, then press foil onto the gel line in sections. Cure and then apply top coat carefully, filling any rough foil edges so the surface stays smooth. If the foil lifts at the edges, do a second thin top coat after curing.
Editor's noteLet the foil overlap itself slightly — a tiny overlap looks more natural than a straight break.
Watch outAvoid painting the vein too thick; thick lines on short nails look like tape.
12. White Gradient To Sheer With Gold Thread Line
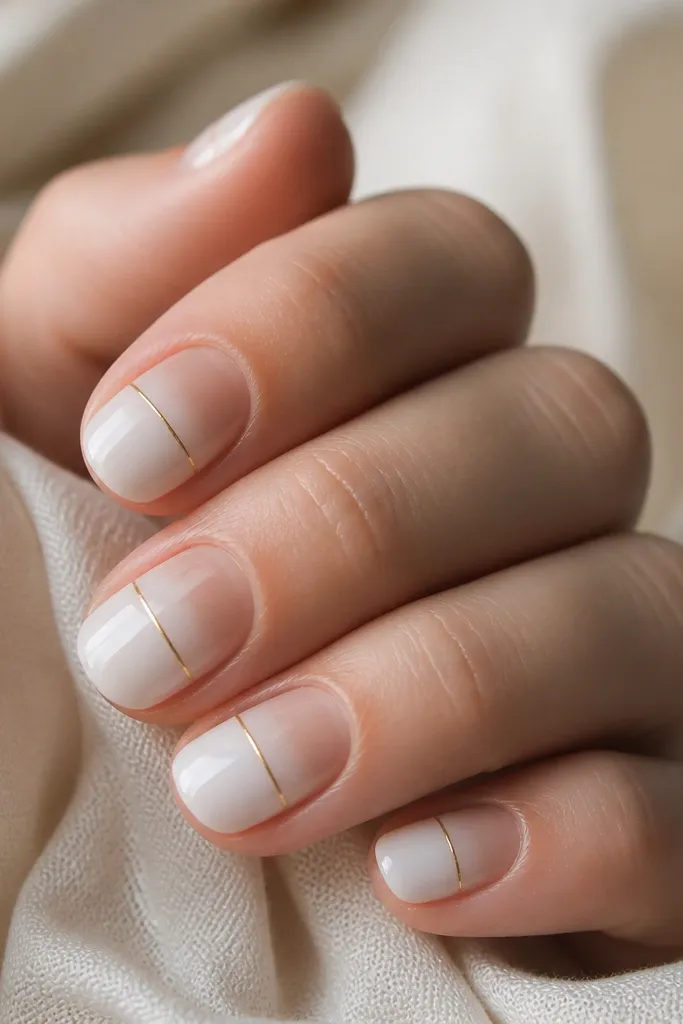
This one is for when you want white but you don’t want full coverage. The gradient from white to sheer makes your nail look softer and longer, and the gold thread line adds a modern, “clean designer” vibe. I use a thin gold liner gel and keep the line straight so it looks intentional. It flatters most skin tones because the sheer base matches your natural nail color, and the white only takes what it needs. This design also looks good in photos because it has depth without heavy texture.
Apply a sheer nude base and cure. Sponge on milky white gel starting at the tip and blending downward until it fades around the middle, curing after the first layer. Add a second light layer if you need more opacity at the tip, then cure. Draw a thin gold line across the nail near the middle with a fine liner brush — use a striping guide made from tape if you want it perfectly straight. Cure and finish with glossy top coat for a smooth gradient surface.
Use a makeup sponge that’s clean and dry between nails so the fade stays even.
Don’t leave the gradient too stark; harsh blocks of white look blunt on short nails.
13. White Marble French With Gold Corner Spark
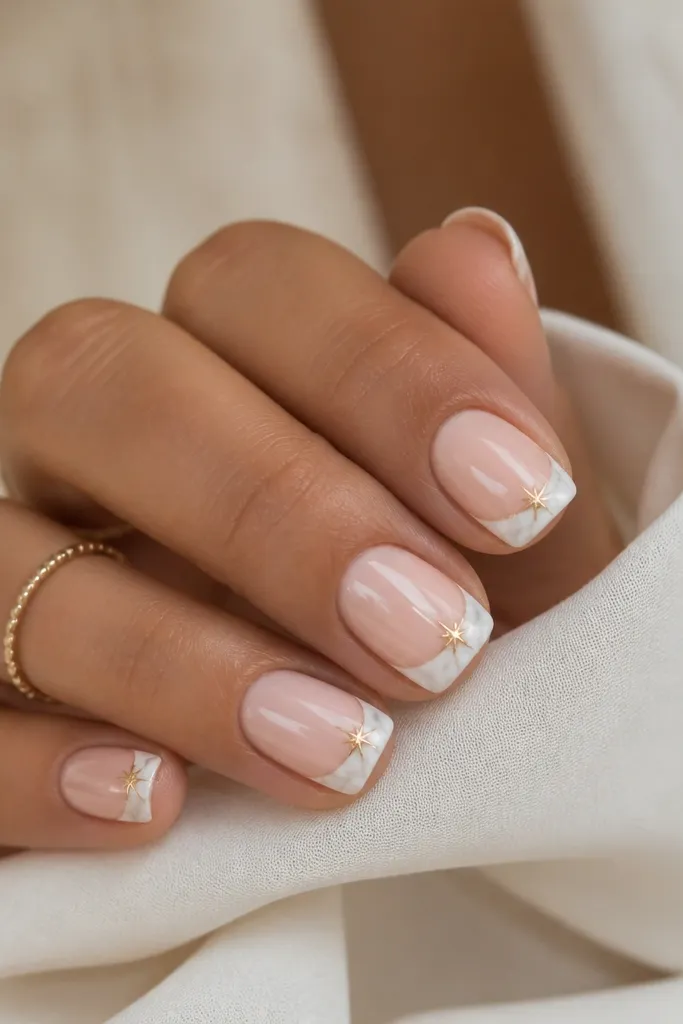
This is a French manicure but with a softer, more natural finish. The white marble tip hides brush lines because the veining breaks up the surface, and it looks great on short nails where a plain tip can sometimes look too blunt. Add a small gold corner spark at one side of the tip so you get that classy jewelry detail without going full glitter. It flatters everyone because marble reads lighter than solid white. For special events, it looks dressed up without needing long nails.
Start with a sheer nude base and cure. Paint a micro French tip shape using milky white as the base for the tip, cure it. While tacky or after curing (depending on your system), add thin gray-white veining inside the tip area only — keep it confined so the rest stays clean. Cure again. On one side of the tip corner, place a tiny gold foil piece or paint a small gold triangle, then seal with top coat.
Editor's noteKeep the gold spark to one corner, not both — symmetry can make short tips look crowded.
Watch outDon’t marble the entire nail; it turns into a busy print on short length.
14. White Gloss With Gold Grid Accent
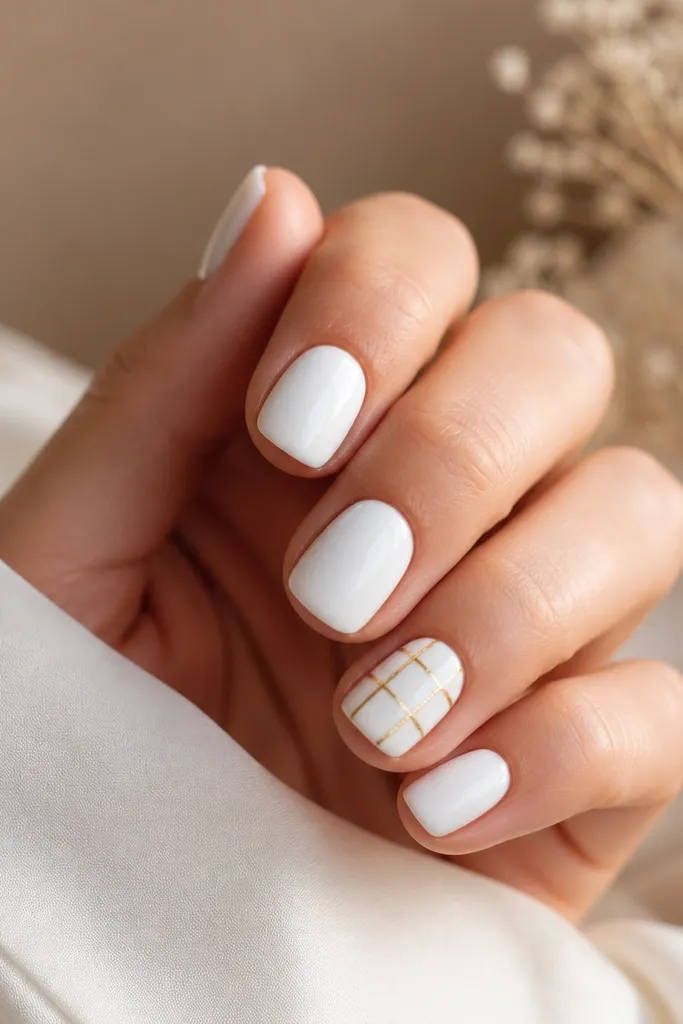
A tiny gold grid feels modern, and it works on short nails because the pattern is small and controlled. Plain glossy white keeps the look clean and bright, while the grid adds structure and a little “designer” energy. I like doing the grid on just one nail per hand so it stays classy instead of looking like a full pattern sheet. This suits people who like geometric designs but don’t want chunky art. It also looks great with neutral outfits because the gold grid gives you a focal point.
Paint all nails glossy white with two thin coats and cure. Choose one accent nail and use striping tape to map a small grid — make squares about 2-3 mm wide depending on your nail size. Apply gold gel over the taped lines, cure, then remove tape. If you don’t want tape, draw the grid with a fine gold liner gel and cure between line sets so the lines don’t merge. Finish with top coat over the whole nail, brushing gently to keep the grid lines crisp.
If the grid looks crooked, measure once with tape and don’t eyeball each line.
Skip thick gold lines — they hide the grid and look heavy on short nails.
15. White Velvet-Matte Base With Gold Outline
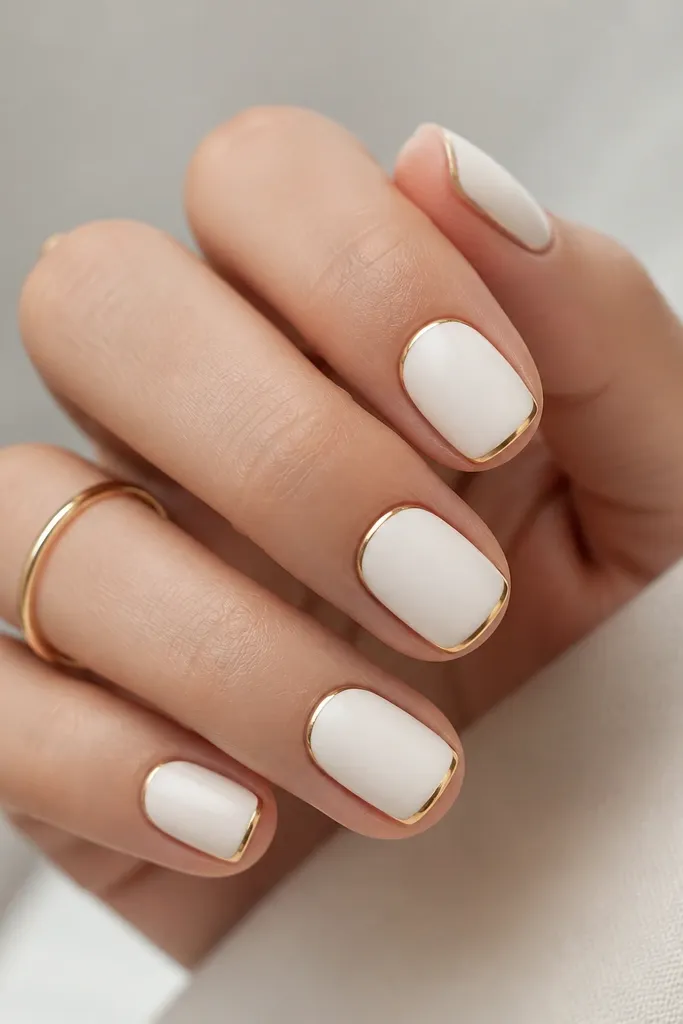
Matte white with a gold outline is one of the cleanest ways to look classy on short nails because the texture does half the work. The matte finish makes the white look soft and expensive, and the gold outline gives you a crisp border that frames your nail shape. I like this when I’m wearing gold jewelry but want my nails to feel more fashion-forward than glossy. It flatters short nail shapes by defining the edges, which makes nails look tidy even when they’re only a little longer than the fingertip. If you hate glossy smudges, matte helps hide fingerprints.
Apply a smooth white gel base and cure. Seal the white with a velvet matte top coat instead of a regular glossy top coat — cure it properly so it stays matte. Then use thin striping tape or a nail art brush to trace a gold outline along the sides and tip edge, keeping the line about 1 mm thick. Cure the gold gel. Finish with a final matte top coat only if your gold can handle it; otherwise, just top coat lightly over the gold to keep the gold from turning dull.
Editor's noteOutline slightly inside your nail edge so the gold looks intentional, not like it’s bleeding off the skin.
Watch outAvoid matte over thick gold — it can make gold look grainy and uneven.