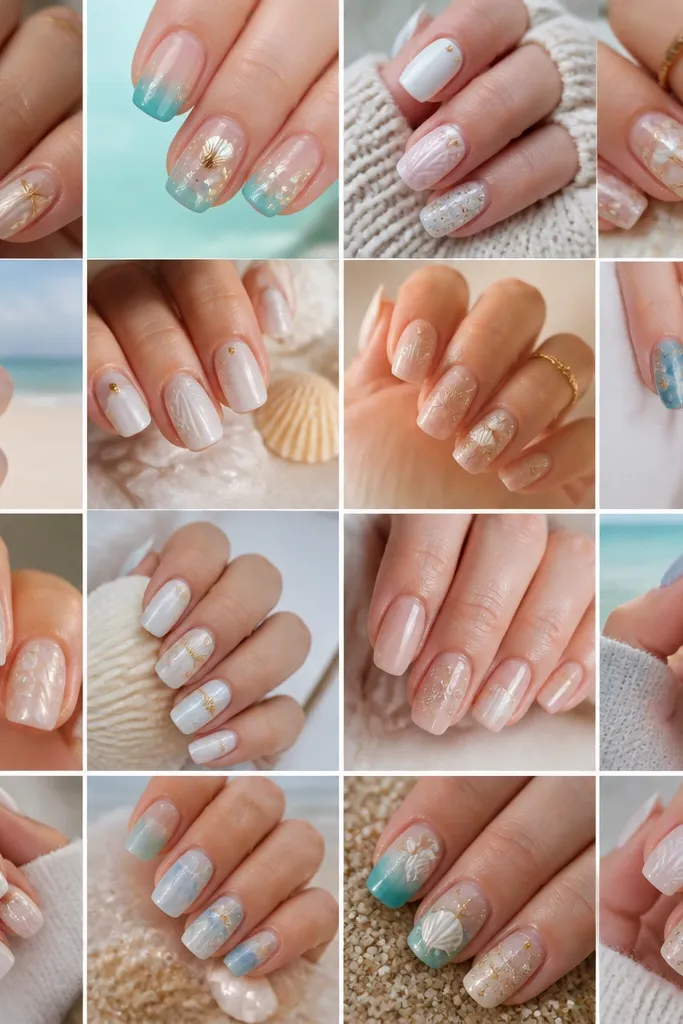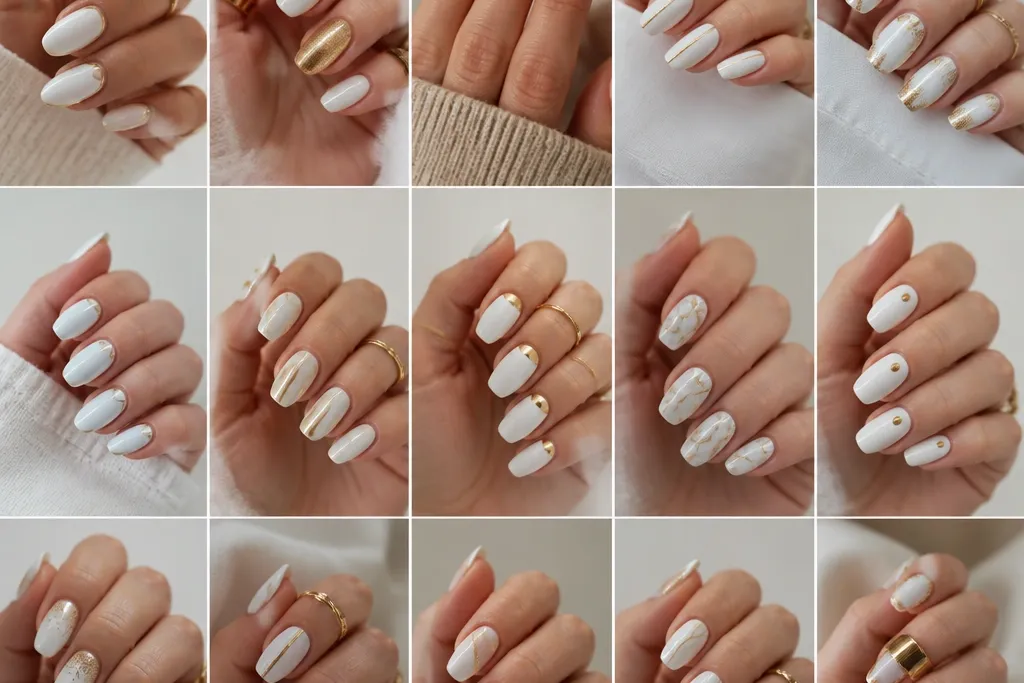
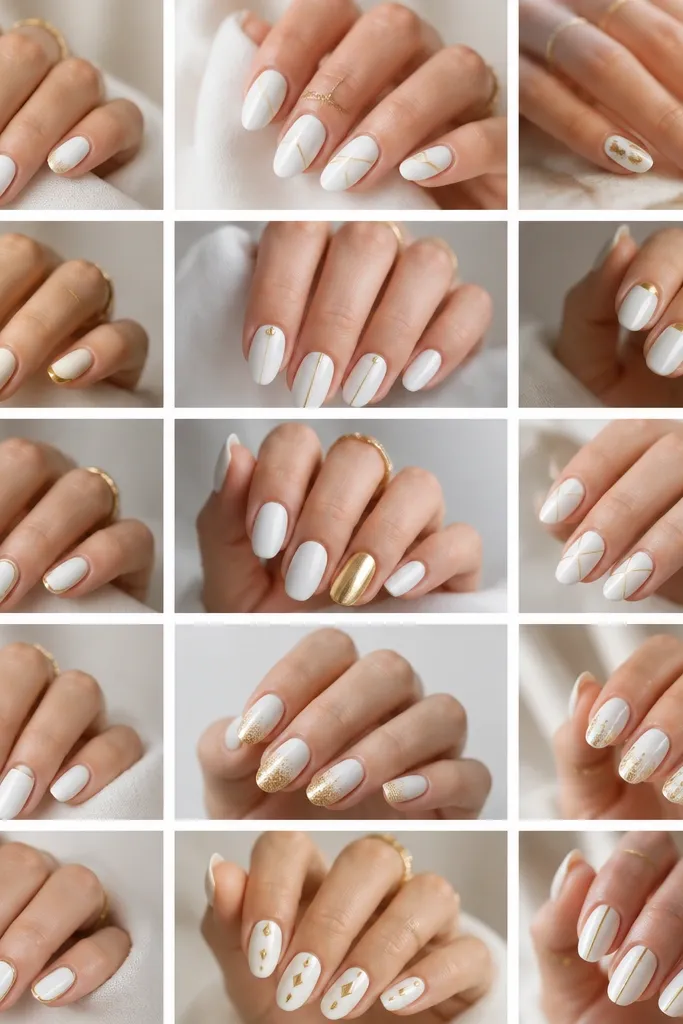
1. Milky White Base With One Gold Cuticle Line
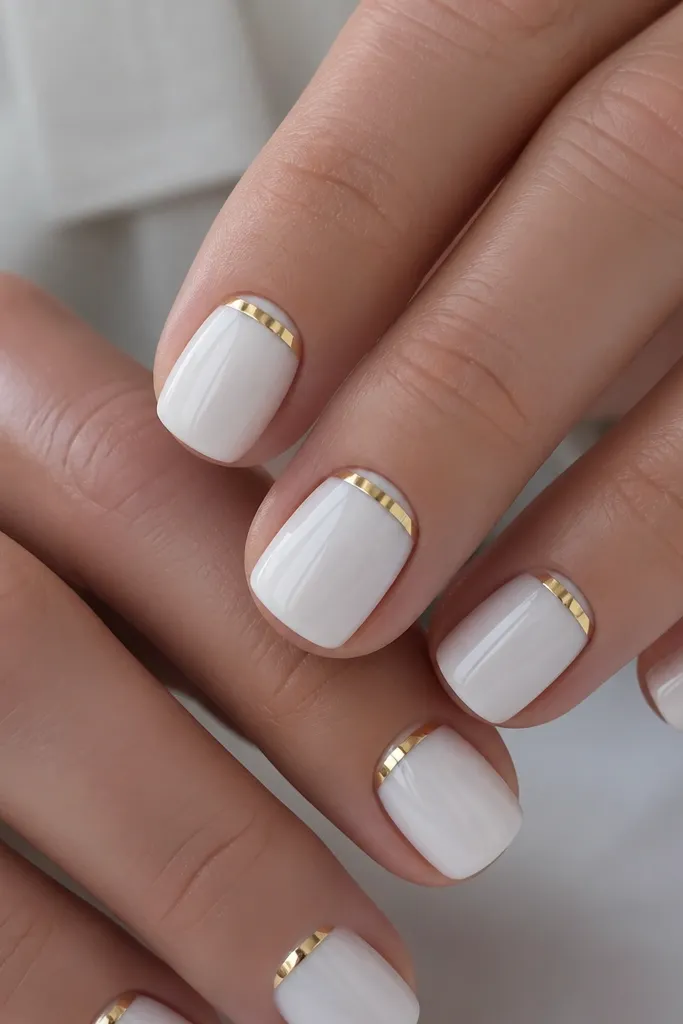
Start with a milky white base that looks like a creamy latte, not chalky. The gold line sits right at the cuticle area, so your nails look longer and more "finished" without needing full nail art. This one flatters hands with longer fingers because the line creates a gentle frame, but it also works on shorter nails because it stays high and clean. I've worn it with everyday rings and it still reads glam because the shine is concentrated where the light hits first. The key principle is restraint: one gold element, crisp placement, and lots of gloss.
Paint two thin coats of milky white, letting each coat dry fully before the next. Once the base is set, use striping tape or a steady thin liner brush to place a single gold line just under the cuticle, centered on each nail. Keep the line about 1/8 inch tall at most so it doesn't look like a stripey band. Clean up edges with a small brush dipped in acetone, then finish with two coats of glossy top coat, focusing on the cuticle edge.
Editor's noteIf your gold looks streaky, switch to gold chrome powder over a tacky layer instead of thick liquid gold polish.
Watch outAvoid dragging gold across wet white - it smears and makes the line look uneven.
2. White Half-Moon With Thin Gold Outline
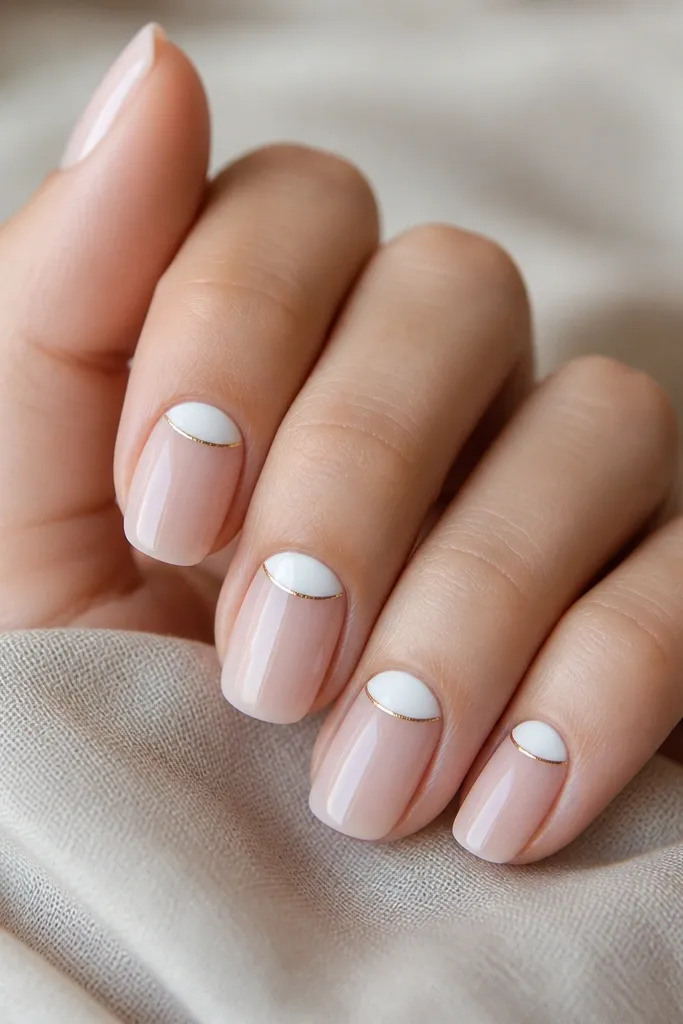
This design uses negative space to keep it airy. The half-moon in opaque white makes the base look clean, while the thin gold outline adds a jewelry-like border. It flatters medium to longer nail beds because the curve visually balances the nail shape, but it also looks good on rounded short nails when the half-moon is small. If your skin tone is warm or olive, the white and warm gold combo looks extra crisp. The styling principle is framing - you're outlining one small focal shape instead of covering the whole nail.
Apply a sheer nude base or clear builder gel so your nails look smooth and even. Use a half-moon stencil or a small makeup sponge to tap opaque white onto the bottom arc, keeping it about the width of the cuticle. While the white is slightly tacky or after it's fully dry, trace the curve with a fine gold liner or gold striping tape. Seal with a glossy top coat, and run the brush along the edge of the gold line so it doesn't lift.
Editor's noteMake the half-moon slightly higher on the index and ring fingers so your hand looks balanced in photos.
Watch outDon't make the half-moon too wide - it can shrink the nail and look bulky.
3. French Tips With White Micro Tips and Gold Side Flicks
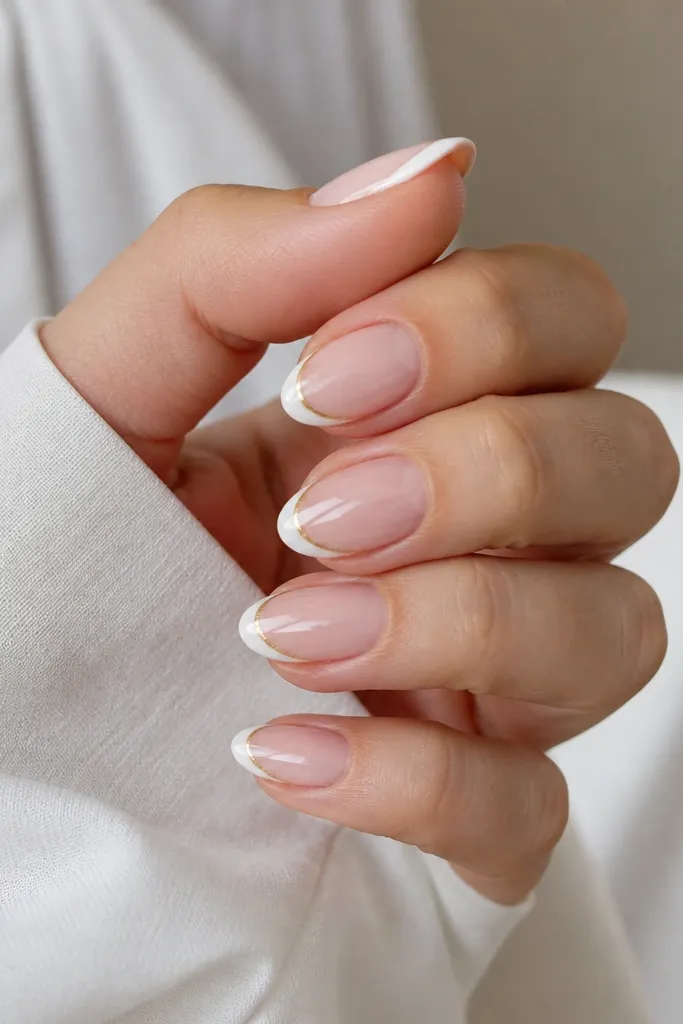
Micro French tips keep the look modern and simple. The white tip gives the classic polish vibe, and the small gold flick on the side adds a "spark" without turning the nail into a full design. This flatters most nail shapes, especially almond and short oval, because the tip stays narrow and doesn't shorten the nail. I love this when I'm dressing up but don't want big art that snags on sleeves. The principle is balance: narrow white tip plus one gold accent that follows the natural curve.
Start with a sheer nude base, then place French tip guides or use tape to mark a thin line across the tip. Paint a crisp white micro tip - I keep it about 1-2 mm tall on short nails - and clean the corners with a small brush. Add a tiny gold flick right at the outer edge of the tip using a striper brush, pointing slightly upward. Finish with a high-gloss top coat and cap the free edge.
Editor's noteUse tape to block the sides first, then remove it while the white is still slightly tacky for the sharpest edges.
Watch outAvoid thick white French tips - they look heavy and chip faster.
4. All-White Nails With Gold Foil Corners
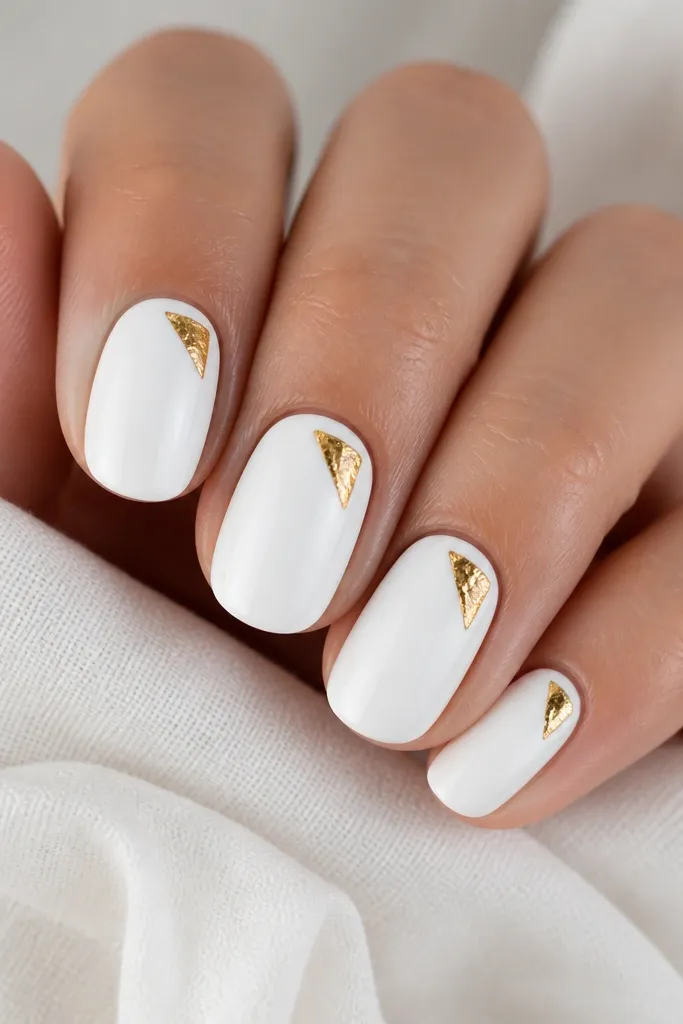
This one is for when you want full white coverage but still want glam. The gold foil corner catches light like a tiny highlight, and the irregular foil texture keeps it from looking too perfect or too "sticker." It works beautifully on square and short almond because the corner placement visually lifts the nail. If you have fair skin, the white looks bright and the gold looks warm; if you have deeper skin, the contrast is even more dramatic. The principle is controlled chaos - foil is naturally irregular, so you only place it in one small corner.
Paint two coats of opaque white, and make sure the surface is smooth before you add foil. Tear small pieces of gold foil and press them into the top corner near one sidewall - I place mine about 2 mm down from the cuticle and 2-3 mm across. Seal with a thin layer of foil glue or gel top coat, then press again lightly. Finish with a full glossy top coat to lock down the edges.
Editor's notePress the foil with a lint-free wipe or silicone tool so it molds to the nail without wrinkles.
Watch outDon't skip sealing - foil that isn't sealed catches on fabric and lifts.
5. White Marble Vein With Gold Glimmer Line
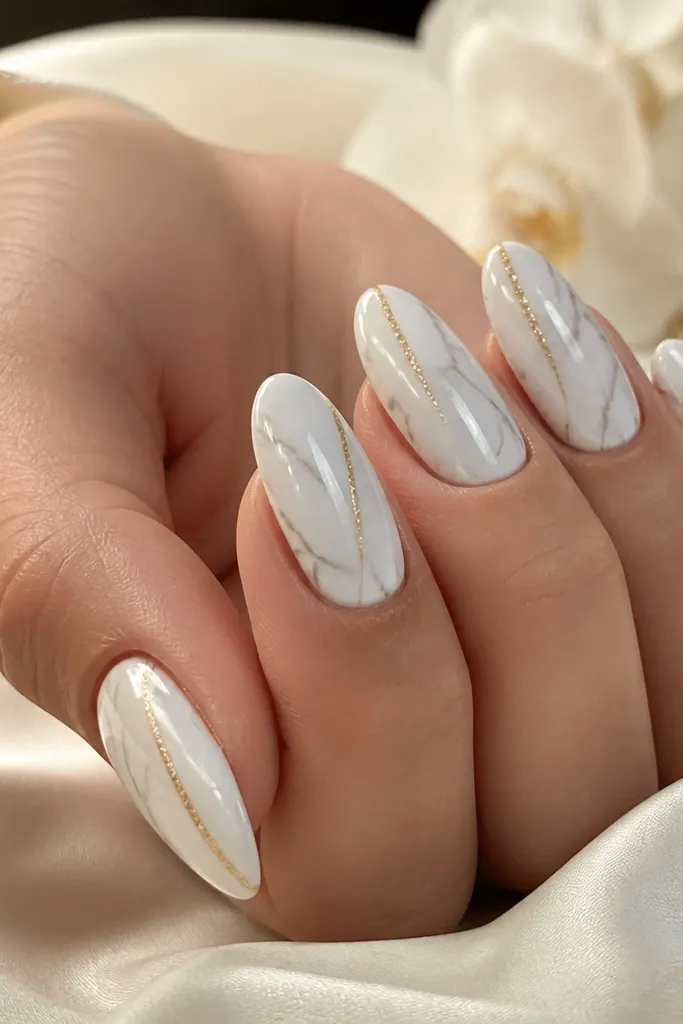
Marble looks fancy even when it's simple if you keep the veins thin. The base is a creamy white, and the veins are light grey or cool taupe so it doesn't turn yellow or muddy. Adding a single gold glimmer line diagonally makes it feel intentional and not chaotic. This flatters hands that like a longer look because the diagonal line draws the eye. I've worn marble like this with both silver and gold jewelry, and it still reads elegant because the gold is only one element. The principle is layering: marble first, then one gold accent to guide the eye.
Start with an opaque white base and let it cure fully. Create marble veins by dragging a thin brush loaded with a diluted grey polish or a marble gel through the white in a few lines - keep it sparse. When the marble is set, draw one diagonal gold line using a fine liner brush or a striping gel, starting about 2 mm from the cuticle. Add a thin layer of top coat, then finish with a second glossy coat for a glassy look.
Editor's noteIf your veins look too dark, wipe your brush on a paper towel before you touch the nail.
Watch outAvoid heavy marble blobs - they make the nail look dirty instead of marbled.
6. White Glitter Gradient With Gold Ring Finger Accent
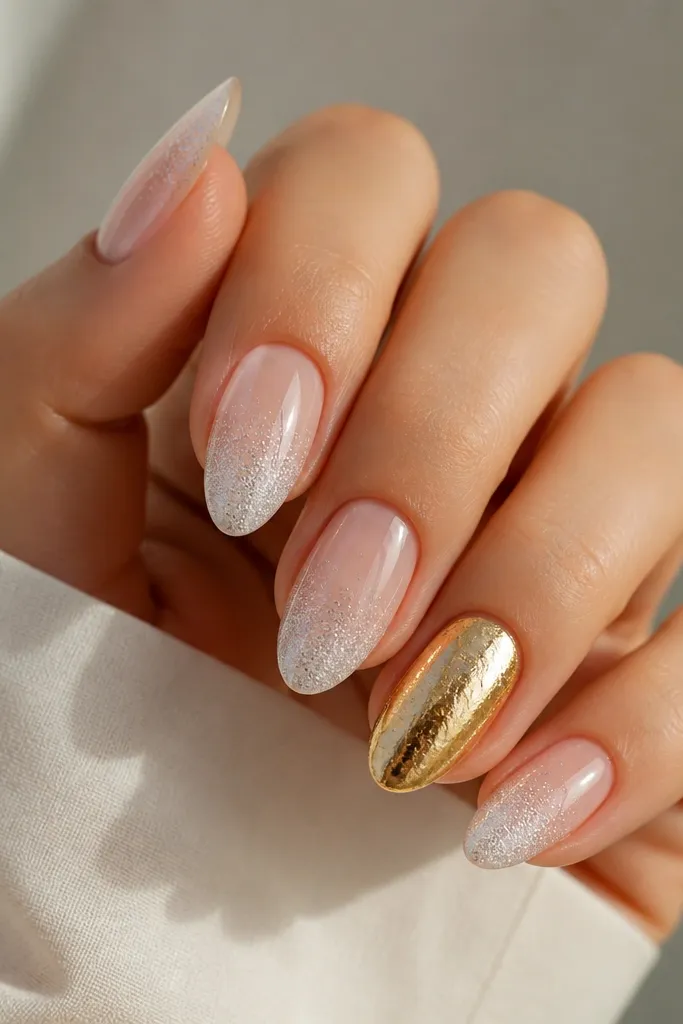
Gradient glitter is the easiest way to get "special occasion" nails without hand-drawn art on every finger. Keep the white glitter sheer at the base and densify it at the tip so it looks like light catching. Then add gold only on the ring finger - it becomes the focal point and keeps the set from feeling busy. This is great for short nails because the gradient visually stretches the tip. I've worn this to dinners and got compliments because it looks like you planned it, not like you slapped glitter on. The principle is one accent finger plus a smooth gradient base.
Paint a sheer nude or clear base, then apply a white glitter polish with a makeup sponge or a gradient brush. Start at the tip and pull the glitter down in two passes, keeping the base area mostly clear. For the ring finger, press gold foil or apply gold chrome in a central vertical patch, about 2-3 mm wide. Seal everything with two coats of glossy top coat, and cap the glitter edges to prevent snagging.
Editor's noteUse a glitter top coat that stays thick so the gradient looks smooth, not gritty.
Watch outDon't put full glitter coverage on every nail - it dulls the contrast with gold.
7. White Dot Cluster With Gold Micro Dots
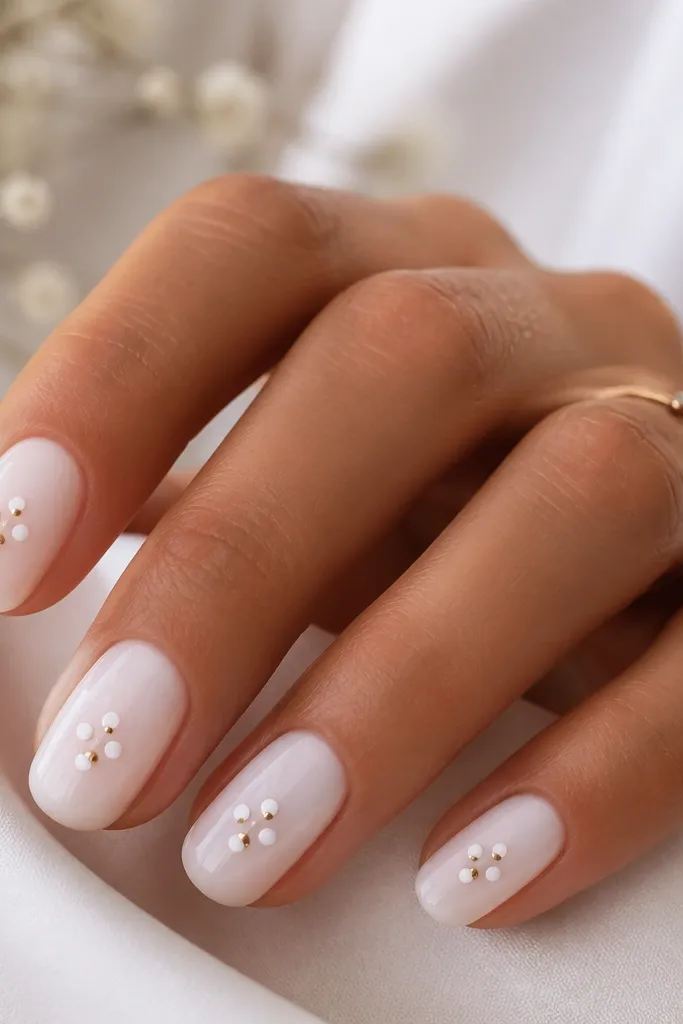
Dots are simple, but they look intentional when the sizes vary and the spacing is consistent. I like using a white base with a dot cluster so the gold micro dots feel like jewelry beads. This flatters short nails because dots create a focal point without taking up too much space. If you have warm undertones, the gold micro dots look extra flattering against bright white. The principle is size hierarchy: bigger dots for the cluster, tiny gold dots as accents.
Paint two coats of glossy white or a white base over nude, then let it dry fully. Use a dotting tool to place 3-5 white dots in a loose cluster, keeping them within a 3-4 mm circle near the center of the nail. Dip a smaller dotting tool into gold polish or gold chrome and add one to two micro dots between the white dots. Finish with a glossy top coat, and press gently over the dot area so they look smooth, not raised.
Editor's noteIf gold turns chunky, use gold chrome powder with a thin gel layer for micro-dot detail.
Watch outAvoid equal-size dots everywhere - it looks like a pattern, not art.
8. White and Gold Geometric Lines on Sheer Nude
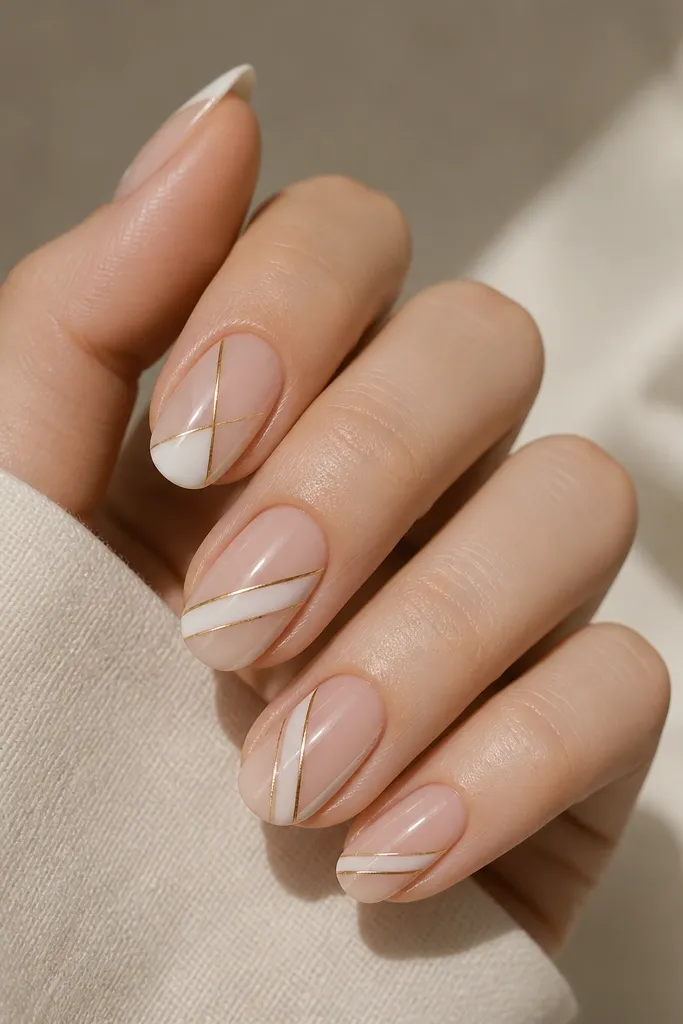
Geometric nails look hard until you use tape. The sheer nude base keeps the set light, while white diagonal lines create structure. Thin gold lines break up the white and add shine at the angles where light hits. This flatters hands with slender nail beds because the lines elongate the look. I've done this for work weeks and it still looks fresh after a few days because the design is simple and doesn't need lots of fill-in work. The principle is straight-line geometry with a clear grid - not random shapes.
Start with a sheer nude base and let it cure or dry flat. Use striping tape to mark two diagonal segments on each nail, then paint them with crisp white polish. Remove tape while the polish is slightly tacky for the sharpest edge. Add a thin gold line along one of the diagonals using striping tape again or a fine liner brush, then seal with a glossy top coat.
Editor's noteUse the same angle on every nail so your hand looks coordinated in photos.
Watch outAvoid freehand angles without a guide - they'll look uneven and cheap.
9. White Swirl on Thumb and Gold Side Accent
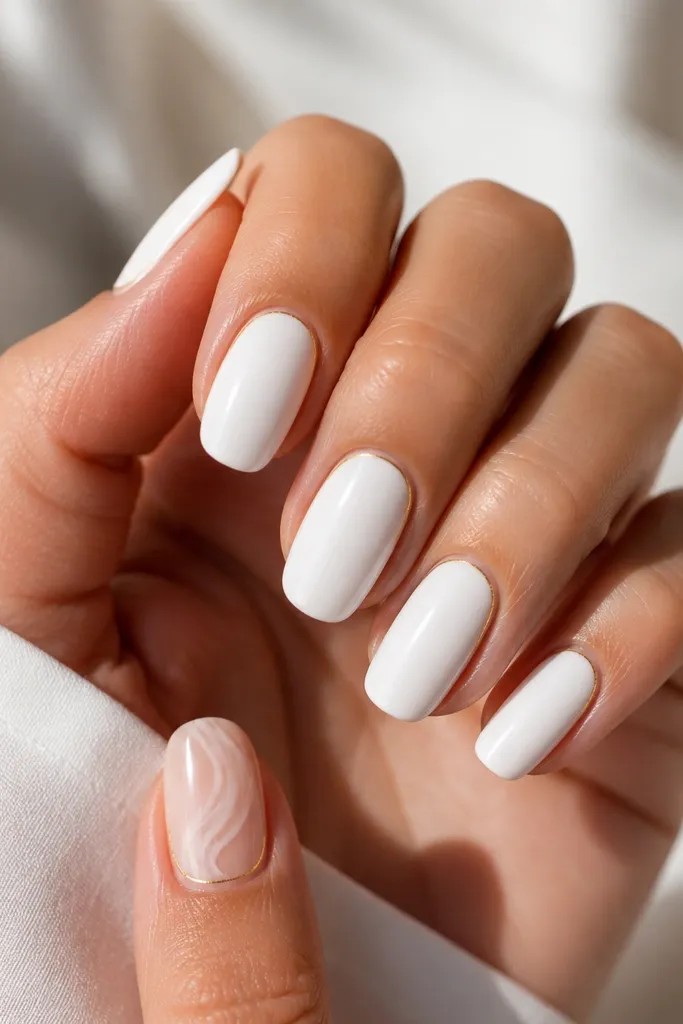
This design uses a thumb feature so you get variety without doing art on every nail. The swirl looks soft and polished when it's done in thin strokes, and the gold side accent keeps the set cohesive. It flatters medium nail beds because the swirl sits near the center and doesn't crowd the cuticle. I also like it for people who hate nail art on all fingers - it feels curated but still simple. The principle is one statement nail plus matching gold accents on the rest.
Paint all nails a glossy white base except the thumb. For the thumb, apply a sheer nude base, then paint a thin white swirl with a liner brush - start near the middle and curve outward. Add a slim gold side accent line near the cuticle on each non-thumb nail, keeping it 1-2 mm tall and aligned to the sidewall. Finish with two coats of glossy top coat, and cap the edges around the gold line so it stays smooth.
Editor's noteIf your swirl looks wobbly, make it bigger and fewer lines - a bold curve reads better than tiny shaky loops.
Watch outAvoid tiny swirls on short nails - they get lost and look like mistakes.
10. White Lattice With Gold Corner Beads
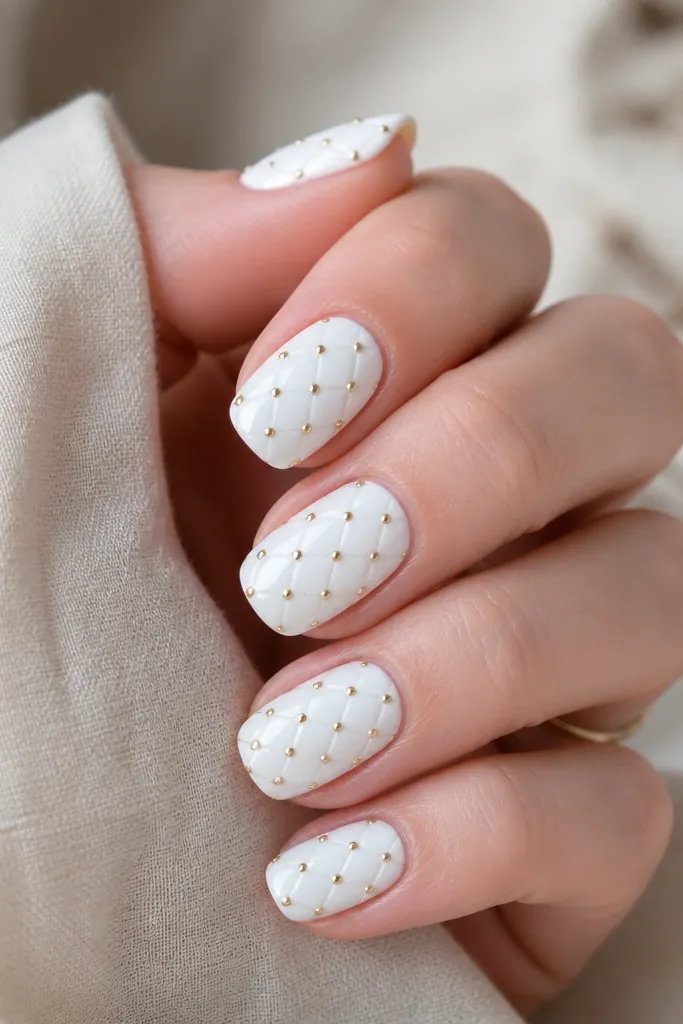
Lattice nails look like you worked harder than you did because the eye reads structure. Keep the base white and use thin diagonal lines in a slightly different white or a very light grey so the lattice shows up without looking messy. Gold beads at the corners add sparkle exactly where the lines intersect. This flatters oval and almond shapes because the lattice lines naturally follow the nail curve. I've worn it with simple outfits and it still looks "done" because the pattern has rhythm. The principle is repeating grid lines with one gold detail point.
Start with two coats of glossy white base. Use striping tape to lay two diagonals across the nail, forming a grid section, then paint over with light grey or a slightly translucent white so it doesn't blend in. Remove tape carefully and repeat for the other diagonal set to complete the lattice. Add tiny gold bead dots at the intersection points using a dotting tool, then seal with glossy top coat in two layers.
Editor's noteTape first, paint second - it keeps the lattice lines straight and makes it look expensive.
Watch outAvoid thick lattice lines - they cover the nail surface and make the pattern look heavy.
11. Gold Chrome Half-Sweep Over White Base
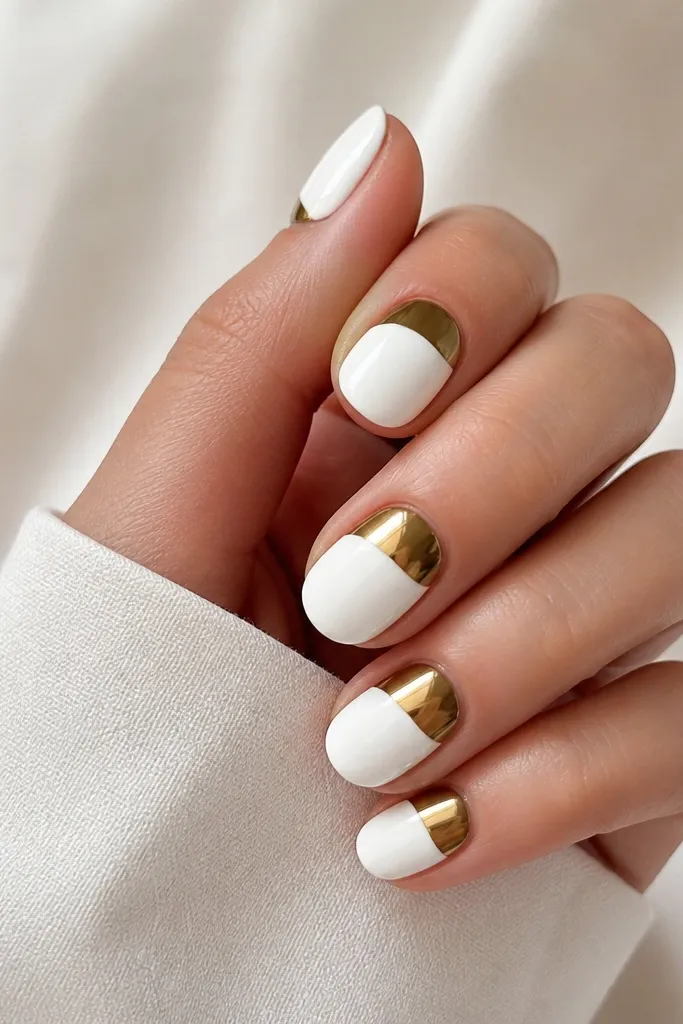
This one is bold but still simple because you only place one curved sweep. The white base makes the gold chrome look like molten metal, and the half-sweep placement keeps it from feeling like full gold coverage. It flatters fair and medium skin tones because the contrast reads clean; on deeper skin, it still pops because white stays opaque and bright. I like wearing this when I want a "going out" mani without detailed line work. The principle is mirror finish + curved placement, not complicated design.
Apply two coats of opaque white and let it fully cure. Create a curved mask with striping tape or a flexible nail art guide so you get a clean arc across the top half of the nail. Apply gold chrome powder over a tacky gel layer in the masked area, then brush off excess once cured. Peel tape while the gel is still set to keep edges sharp, then apply glossy top coat to seal and smooth the chrome.
Editor's noteUse a tacky base layer made for chrome so the powder sticks evenly without patchiness.
Watch outAvoid swiping chrome over uncured white - you'll get dull patches and smudged edges.
12. White Base With Gold Vertical Line Down the Center
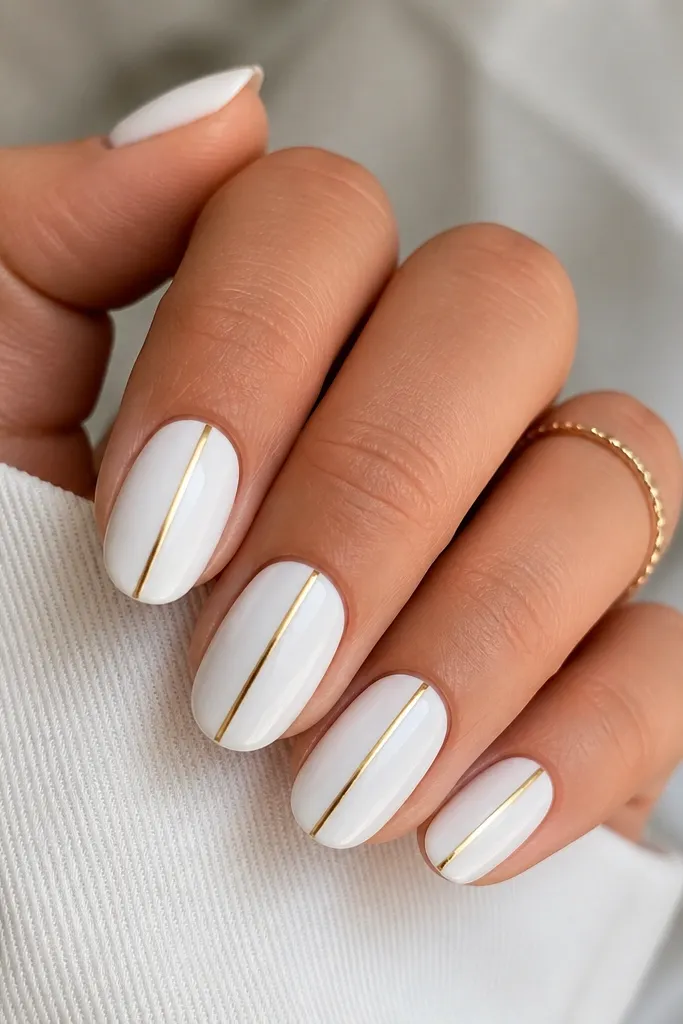
A center line makes nails look longer and more narrow, which is why I reach for it when my hands feel "short." The white base keeps everything crisp, and the gold line acts like a highlighter. It flatters hands with wider nail beds because the line visually narrows the center. For everyday glam, it's hard to beat because it stays subtle up close but sparkly in motion. The principle is vertical emphasis - one straight element that changes the whole shape perception.
Paint two coats of glossy white, then let it dry until it feels smooth and not tacky. Use striping tape to mark a 1-2 mm strip in the center, or use a fine liner brush and steady hand. Apply gold polish or gold gel along the center line and cap the ends so it reaches close to the cuticle and tip without flooding the edges. Remove tape while the gold is still workable, then seal with two coats of glossy top coat.
Editor's noteIf your gold line spreads, use a thinner brush and reload often instead of dragging once.
Watch outDon't center the line too low - it shrinks the nail visually.
13. White Polished Tips With Gold Thin Outline Around the Tip
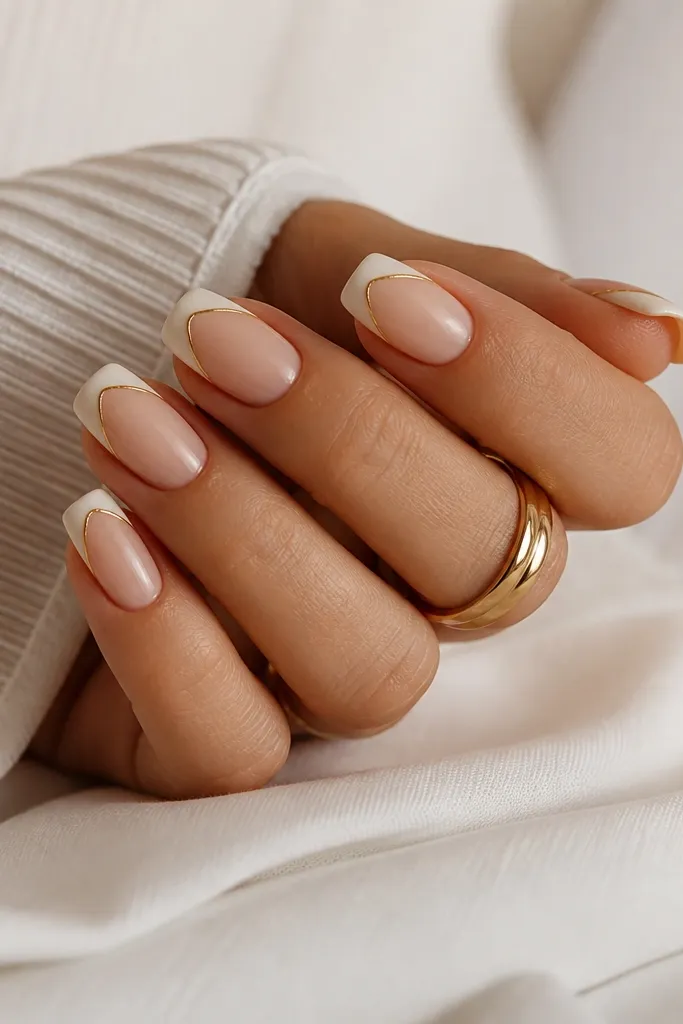
This is French tips, but the gold outline turns it into jewelry. The gold is placed only along the boundary between white tip and nude base, so the design stays light while still looking glam. It flatters short nails because it creates a clear tip boundary without making the tip too thick. I've had this last through busy weeks because there's no fragile art near the cuticle - it's mostly at the tip. The principle is edge definition: define the tip, then add a slim gold border.
Start with a nude base and let it dry fully. Paint crisp white French tips using guides, keeping the tip height around 2-3 mm for short nails. Once the white is set, trace just the edge of the tip with a fine gold liner brush, staying inside the border by about 0.5 mm. Clean up any smudges with acetone on a small brush, then apply glossy top coat twice.
Editor's noteUse a gold liner gel that levels - it makes the border look smooth instead of raised.
Watch outAvoid thick gold borders - they catch and chip at the tip.
14. White and Gold Diagonal Checker Accent on Two Nails
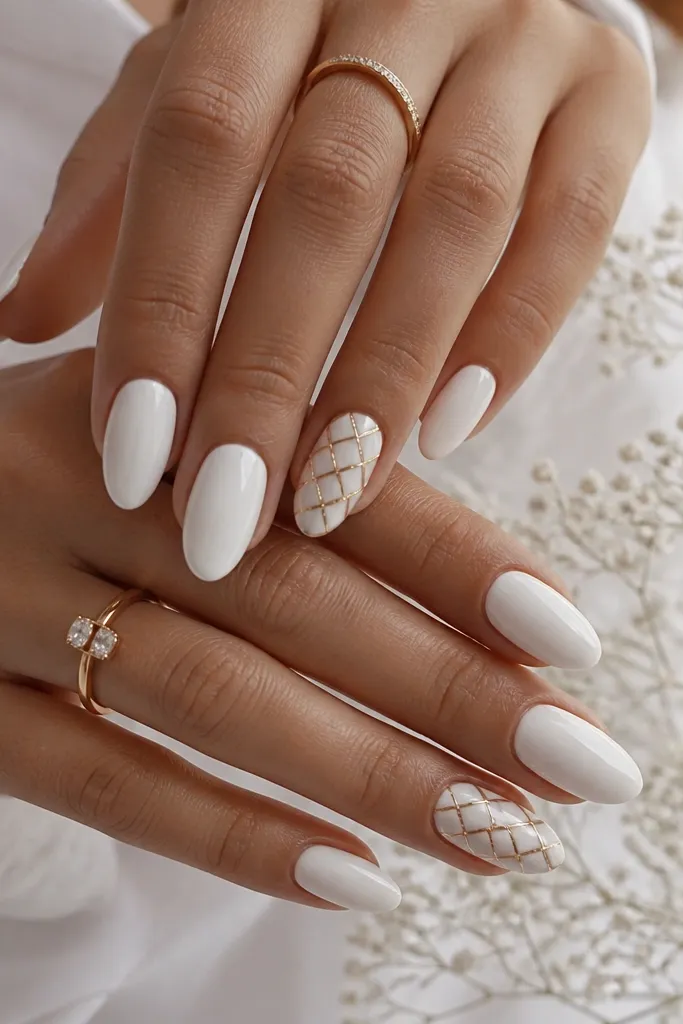
Checker patterns can look retro or busy, so I keep it to two accent nails. The white squares stay crisp, and the gold lines act like the grout, making it feel modern. This flatters medium nail beds because the checker sits in a controlled diagonal zone. I like this for parties because it's fun without covering every nail with detail. The principle is focus - let most nails be plain so the accent pattern looks intentional.
Paint all nails glossy white except two accent nails. On the accents, lightly map a diagonal band across the nail with a pencil-marking guide if needed, then use striping tape to create small square sections. Fill the squares with white polish, then remove tape and draw thin gold lines between squares using a liner brush. Seal with two coats of top coat, and cap the edges at the diagonal corners.
Editor's noteMake the squares slightly bigger than you think - tiny checker can blur when it's on a curved nail.
Watch outAvoid checker on every nail - it turns into clutter fast.
15. Gold Foil Confetti Over White Negative Space
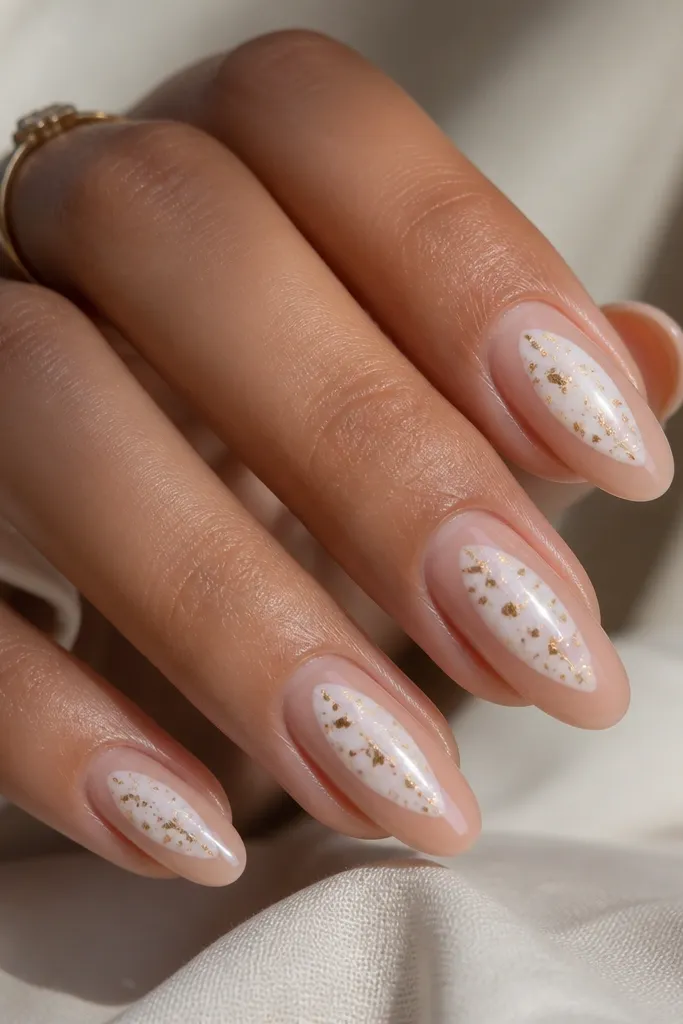
Negative space plus confetti foil looks playful, but it still reads classy because the white area is clean and the foil pieces are small. This works great if your nails are on the shorter side because the center shape draws the eye without needing length. It flatters both warm and cool skin tones because the white stays bright and the gold foil warms everything up. I've worn this when I didn't want full white coverage but still wanted that "white and gold" look. The principle is contrast with breathing room - you leave parts of the nail clear and let foil sparkle only where it counts.
Apply a nude sheer base. Use a stencil or freehand with tape to create a centered white negative-space shape, then fill it with opaque white in two thin coats. While the white is tacky, press tiny pieces of gold foil confetti onto the white area only, keeping pieces scattered but not packed. Seal with a gel top coat, then finish with full glossy top coat over the entire nail.
Editor's notePress foil with a silicone tool so it lays flat instead of sticking up in corners.
Watch outAvoid large foil chunks on negative space - they overpower the clean shape.