1. Matte Black French With Gold Micro Tips
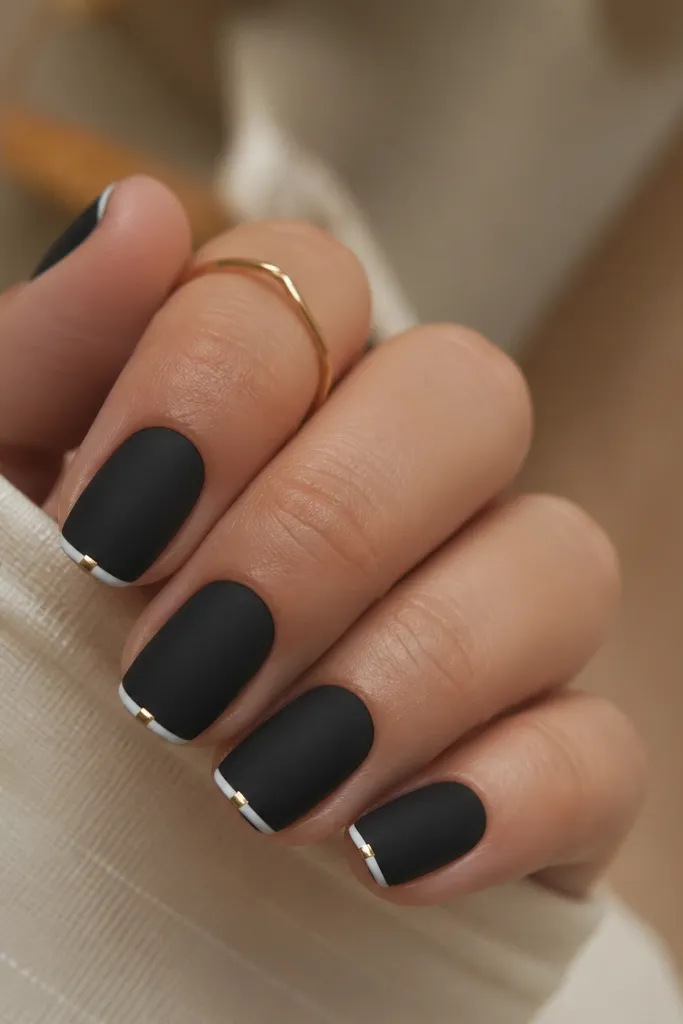
This look works because it keeps the contrast crisp and lets gold act like jewelry. Start with a matte black base so the surface looks soft and hides tiny streaks. Add a narrow white French line (not a wide band) so the nail still looks clean and modern. Place gold micro-foil only at the tip center so it catches light when you move your hands. This flatters most skin tones because the black frames your nail bed and the white adds brightness without needing extra color.
First, prep and push back cuticles, then apply a matte black gel or polish base and cure fully. Next, use striping tape to mark a thin French guide, paint the tip white, and cure. Remove tape carefully, then dab a small strip of gold foil or apply gold chrome gel on the very center of the white tip. Finally, seal with a matte top coat over the black sections and a glossy top coat only over the gold so it reflects.
Editor's noteUse a striping tape guide even if you think you're good at freehand. The thin French line is what makes this look intentional.
Watch outAvoid a thick French band - it makes the design feel heavy on short nails.
2. Black Base With White Diagonal Slash And Gold Studs
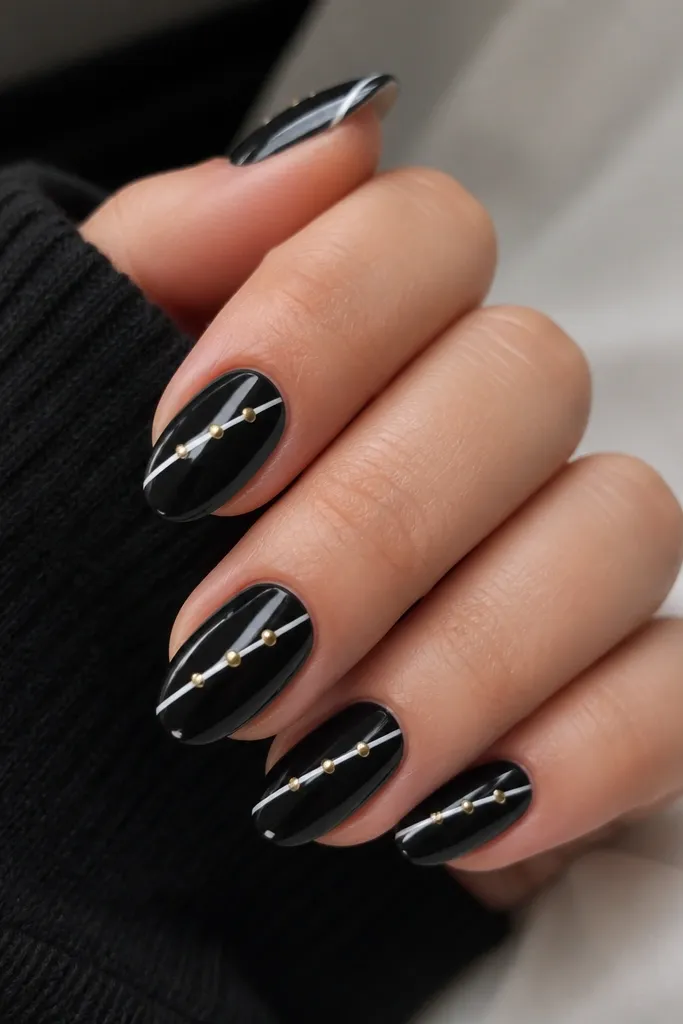
Diagonal lines make your nails look longer because they pull the eye across the nail in one direction. The white slash gives you that clean, graphic contrast against the deep black. Gold studs are best when you keep the count small - two studs per nail is enough to read "styled." I like this on almond because the diagonal follows the natural nail curve. It looks great on fair to deep skin tones because black is the frame and white is the high-contrast highlight.
Start with two coats of glossy black, letting the second coat level out before curing. Then place a small piece of nail art tape at an angle and fill the diagonal area with opaque white gel or polish, curing after the first thin layer. Remove tape and sharpen edges with a second micro layer of white if needed. Add gold studs using a dotting tool and cure, then finish with a glossy top coat over everything.
Editor's noteKeep the diagonal angle consistent across nails so your hands look coordinated, not random.
Watch outDon't use sheer white. Opaque white makes the slash look crisp instead of cloudy.
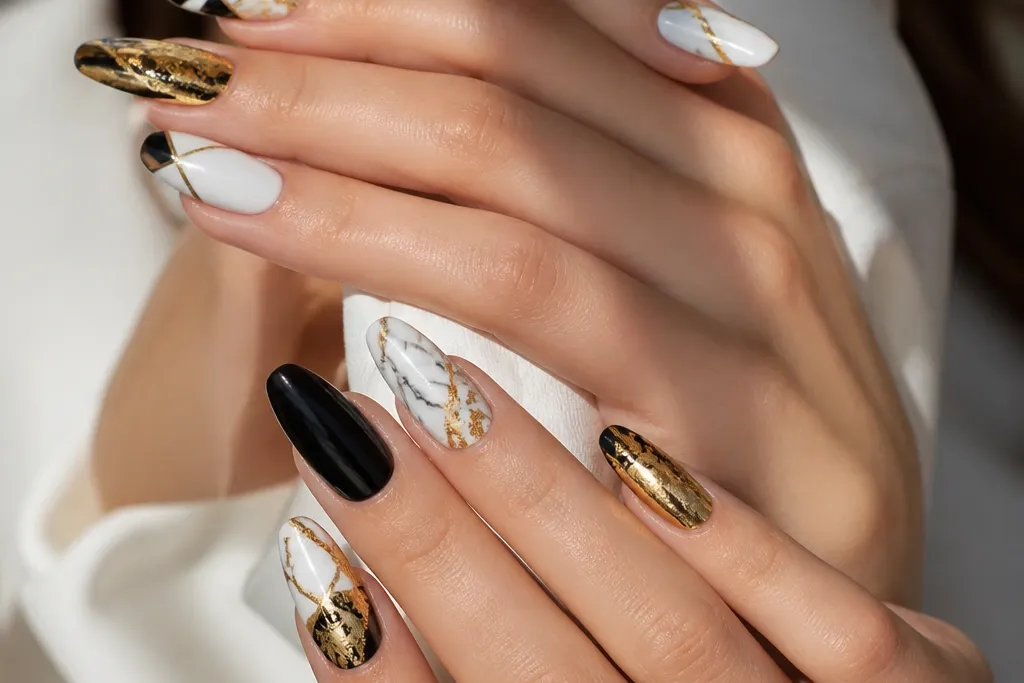
3. White Marble Over Black With Gold Leaf Flecks
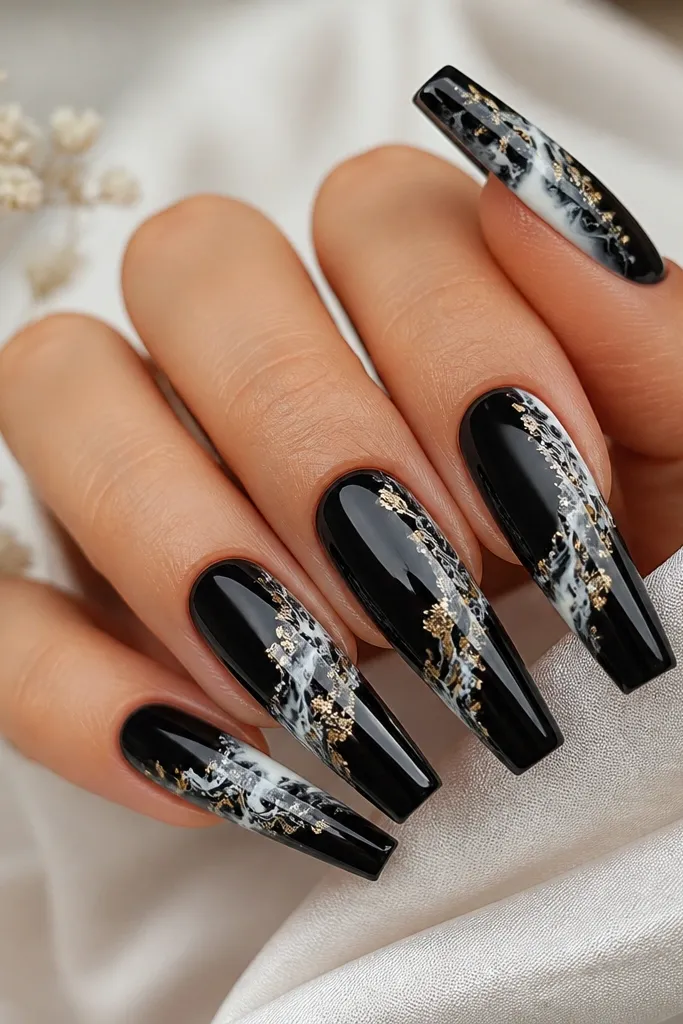
Marble looks high-end because it has movement, and black makes the white swirls look bold instead of washed out. Gold leaf flecks add depth because they sit unevenly, like real stone highlights. This design looks best on longer shapes where the marble can stretch across the nail without hitting the corners. It's flattering because the black background thins the visual weight, and the white movement gives brightness. It also photographs well under flash - the gold catches the light in tiny bursts.
First, apply a glossy black base and cure. Then dab white gel onto a makeup sponge and lightly tap over the nail to create cloudy marble patches, curing in short bursts. Use a thin liner brush with a diluted white/gray mix to draw vein lines through the patches, then cure. Add small bits of gold leaf with tweezers and press lightly, avoiding big chunks. Seal with a glossy top coat in two thin layers so the leaf doesn't lift.
Editor's noteIf your marble looks too busy, remove some white by painting over lightly with black around the edges before top coat.
Watch outAvoid thick layers of top coat on gold leaf - it can flatten the texture and dull the sparkle.
4. Black Negative Space Half-Moon With White Outline And Gold Foil Arc
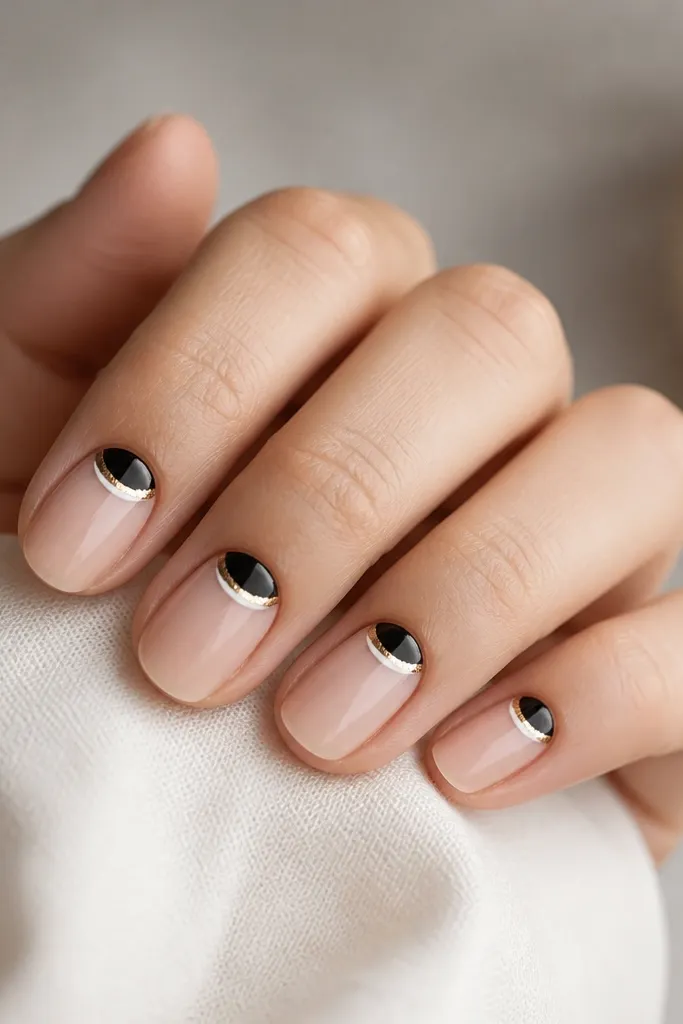
Negative space looks modern because it breaks up the heavy contrast and keeps the manicure airy. The half-moon placement flatters everyone because it follows the natural nail curve at the cuticle. A thin white outline makes the black shape look intentional instead of like a missed patch. The gold foil arc adds a delicate jewelry effect without covering the whole nail. This works especially well if you want something stylish but not loud for work.
Start with a sheer nude or clear base and cure. Use a half-moon stencil or cut a small arc from striping tape to mask the cuticle area, then paint the inside of the half-moon black and cure. Outline the half-moon with a thin white gel line using a liner brush, curing again. Add gold foil to the top edge of the half-moon by pressing tiny pieces along the outline. Finish with a glossy top coat, keeping the foil sealed but not flooded.
Editor's noteIf your half-moon edges look wobbly, redo the black shape before doing the white outline. The outline is only as clean as the base.
Watch outAvoid placing the half-moon too low. It can shorten the nail visually.
5. White Glossy Base With Black French And Gold Side Accent
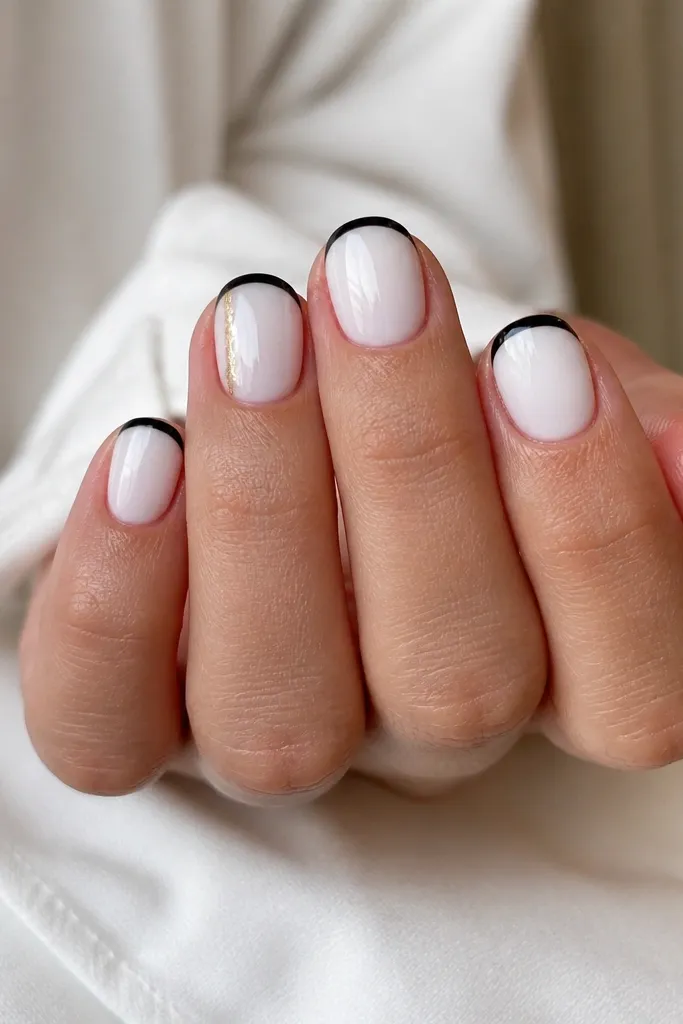
Flipping the base to white makes the whole set brighter and more wearable, especially if you don't want too much black. The black French tip gives structure so it doesn't look like plain white. Gold side accents add interest without taking over, which is why this works even on short nails. On round nails, the black tip keeps the shape neat and the gold vertical strip elongates the nail bed. It's flattering on all skin tones because the white base reflects light.
Apply two coats of glossy white base and cure, making sure it's opaque at the edges. Mask a French tip with tape and paint the tips black, curing after each coat if needed. On one or two accent nails, press a narrow gold foil strip along the side wall about a third of the nail width from the center line. Seal with glossy top coat, then lightly buff the side area so the foil doesn't catch on fabric.
Editor's noteKeep your black French tip slightly thinner than you think. Thick tips make short nails look stubby.
Watch outAvoid gold foil on every nail with a white base. It turns into a busy pattern fast.
6. Black Ombre To White Tips With Gold Chrome Gradient
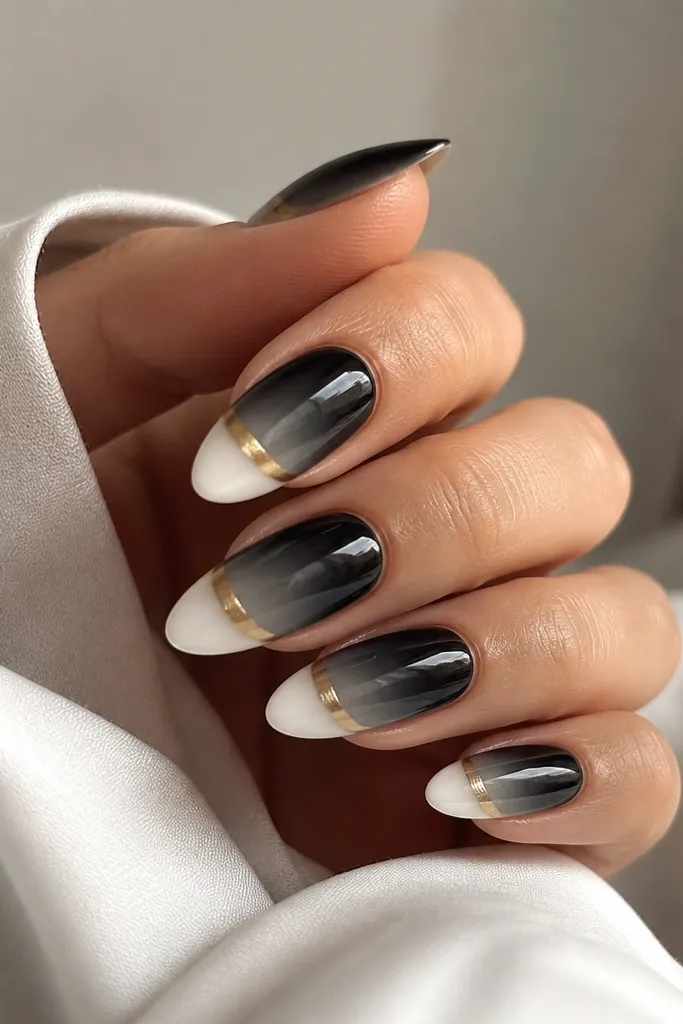
This one looks like a salon ombre because the color transition is soft, not streaky. Black at the base anchors the nail, then it fades into crisp white tips for that clean contrast. The gold chrome band sits right where the ombre changes, so it looks like a light reflection. I love this for date nights because it looks expensive without needing tiny art details. It flatters hands with longer fingers and also works on shorter nails if you keep the white tip narrow.
Start with a black gel base and cure. Sponge on a gray transition by tapping a makeup sponge lightly with diluted black/white mix, then blend until it looks smooth from cuticle to mid-nail. Add bright white at the tips using a sponge or brush, curing each layer lightly. Buff the surface gently so it's even, then apply gold chrome gel or chrome powder along the center transition line. Finish with a glossy top coat to lock the chrome in.
Editor's noteUse a makeup sponge that's clean and not shedding - those fibers cause ombre streaks.
Watch outAvoid a hard line between gray and white. Blend it with a lighter hand on the sponge.
7. Gold Chrome Half-Nail Over Black With White Corner
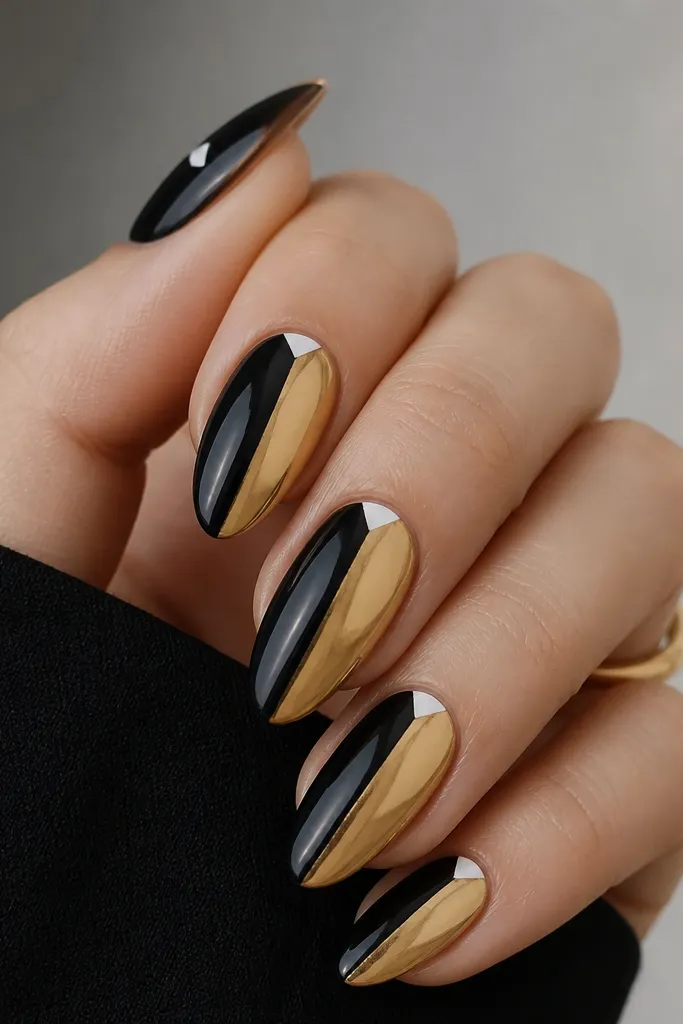
This is a graphic, fashion-forward set that still feels clean because the split is straight and the white accent is tiny. Gold chrome gives the "expensive metal" look that foil sometimes lacks under indoor light. The black half keeps it grounded, and the small white triangle adds a sharp contrast point. I like it on almond because the vertical split looks elongated. It works for fair, medium, and deep skin tones because gold and black balance each other and the white triangle adds brightness.
Paint the entire nail glossy black and cure. Use tape to mask a vertical line down the center, then apply gold chrome gel/powder on the exposed half, curing and buffing lightly if needed. Remove tape slowly to keep edges crisp. With a fine liner brush, paint a small white triangle at the top cuticle corner where the two halves meet. Seal with glossy top coat, keeping the chrome smooth and not flooded.
Editor's noteDo the white triangle last. It's easier to place when you can see the gold edge.
Watch outAvoid thick chrome layers. They can look dull and peel at the sidewalls.
8. Black And White Checkerboard With Gold Outline Lines
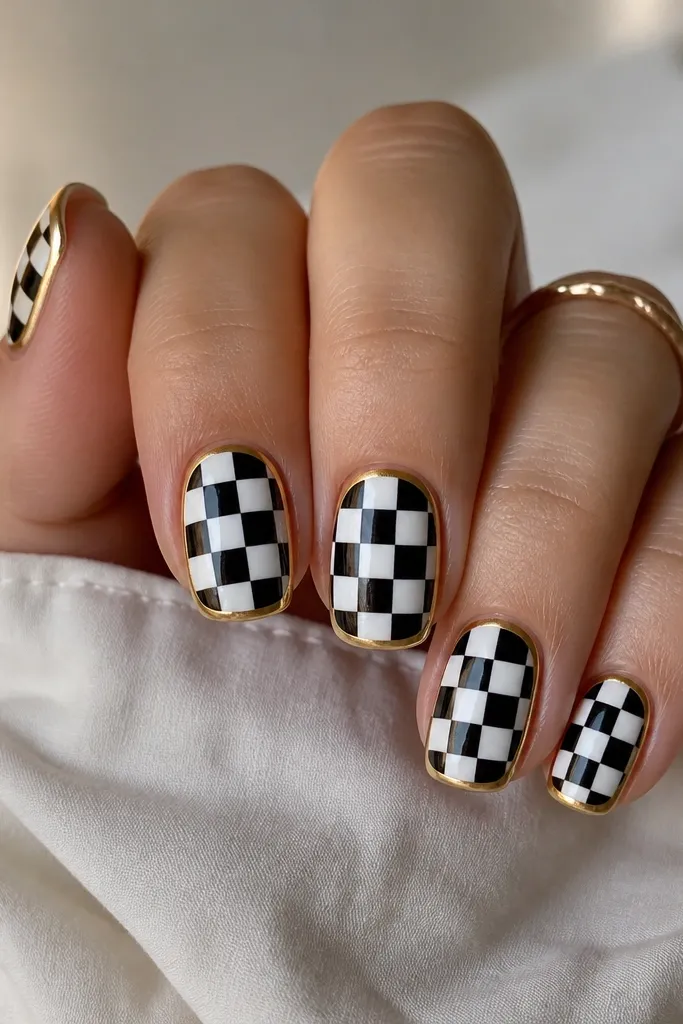
Checkerboard looks playful, but black-white-gold keeps it from feeling childish. The gold outline makes the pattern look framed and intentional, especially when the squares are small. Use this on short squoval or square nails so the grid reads clean. It looks great for parties and also looks sharp with a simple outfit because the design is the statement. On deeper skin tones, the gold outline helps the white squares pop without turning gray.
Start with a base coat, then paint a solid black layer and cure. Mark a grid using striping tape cut into thin strips - aim for 6-8 small squares across the nail depending on size. Fill alternate squares with opaque white gel, curing each side if your white needs build-up. Once the checkerboard is complete, use a fine liner brush to paint a thin gold line around the perimeter of the nail. Top coat with gloss to keep the grid edges smooth.
Editor's noteMake your squares slightly wider than you think. Tiny squares get messy at the sidewalls.
Watch outAvoid uneven grid spacing. If the squares aren't consistent, the whole set looks rushed.
9. White Tip With Black Base Dot Fade And Gold Center Dot
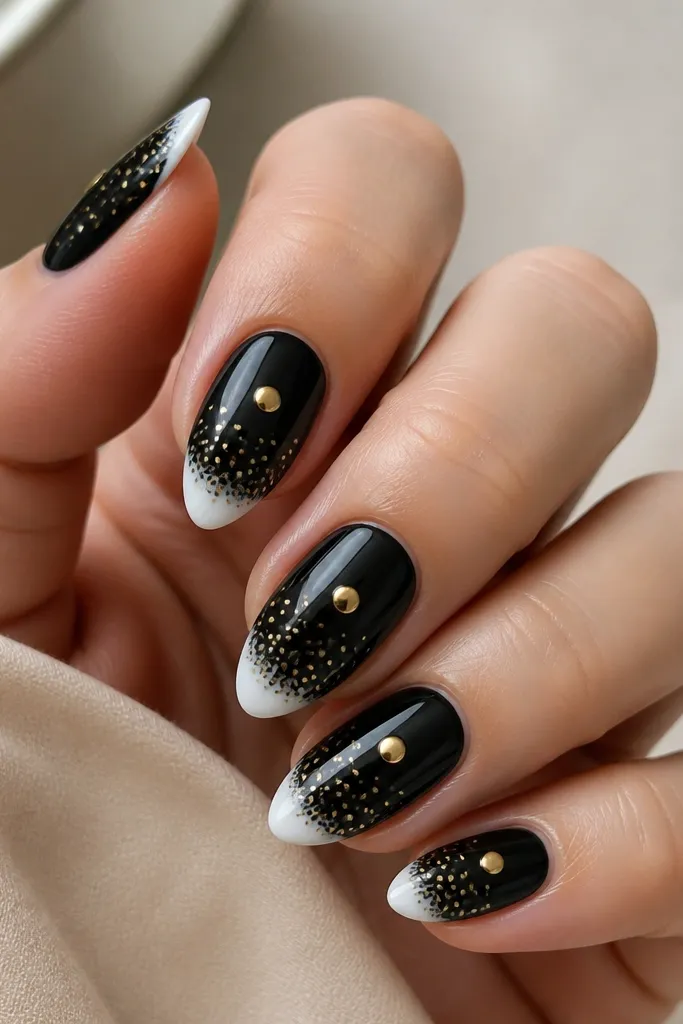
Dots are easy to make look intentional when you use a fade - they give movement without needing hand-drawn lines. A white tip keeps the contrast fresh and makes the black section feel less heavy. The gold center dot works like a focal point on a photo, drawing your eye to the middle. I like this for everyday because it looks styled but not too busy. It flatters short nails because the white tip visually lifts the nail line.
Paint the nail black and cure. Create a French-like white tip by masking the tip with tape and applying opaque white, curing. With a dotting tool, place small dots in the black area near the base, then do fewer dots as you move toward the tip. Clean the dot edges with a small brush dipped in top coat. Place one larger gold dot in the center using gold gel and cure. Finish with a glossy top coat.
Editor's noteUse two dot sizes so the fade looks like it was designed, not random.
10. Black Gloss With White Aurum Swirl And Gold Leaf Corners
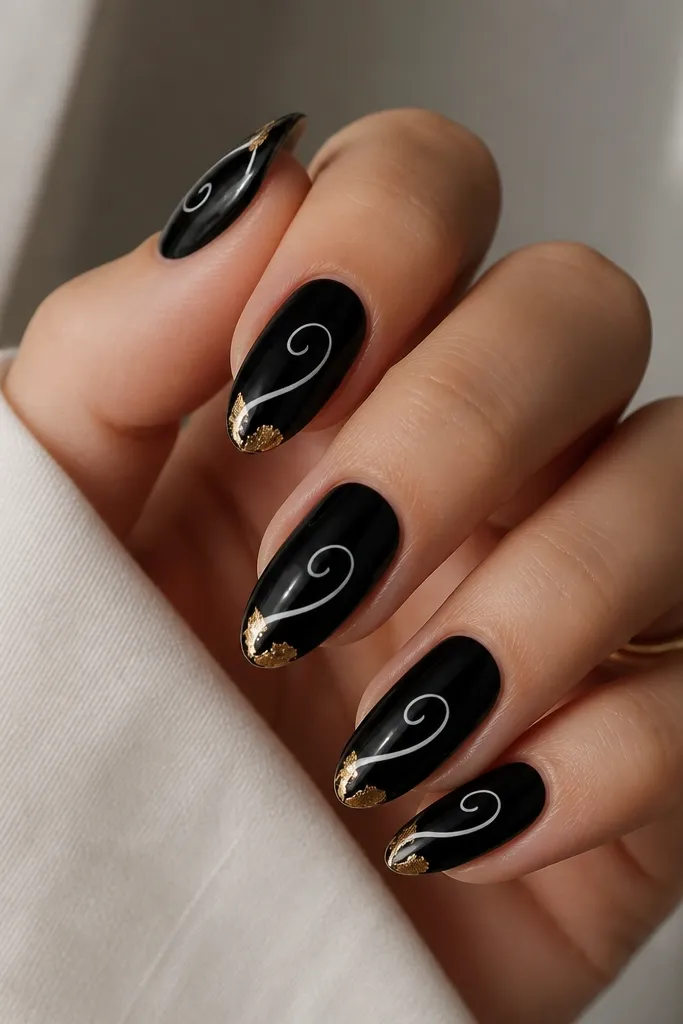
A single swirl looks classy because it's one clear line, not a whole scene. The white swirl on glossy black gives a clean, almost calligraphy feel. Gold leaf corners add a "spark" effect that doesn't cover the whole nail. This is flattering for medium to long nails because the swirl has space to breathe. It's also great if you want something different from marble but still want that art-nail energy.
Start with glossy black and cure. Using a thin liner brush, draw a smooth white swirl - start near mid-nail and curve toward the tip, keeping the line consistent in thickness. Add a second thin line beside it if you want a double-swirl look, then cure. Place small gold leaf pieces at the upper left and upper right corners near the tip, pressing lightly. Seal with glossy top coat in two thin layers so the leaf stays dimensional.
Editor's noteIf the swirl looks shaky, wipe your brush and redraw one clean line instead of trying to fix it mid-stroke.
Watch outAvoid adding multiple swirls on every nail. One swirl per nail looks expensive.
11. Gold Foil Frame Over White Base With Black Inset
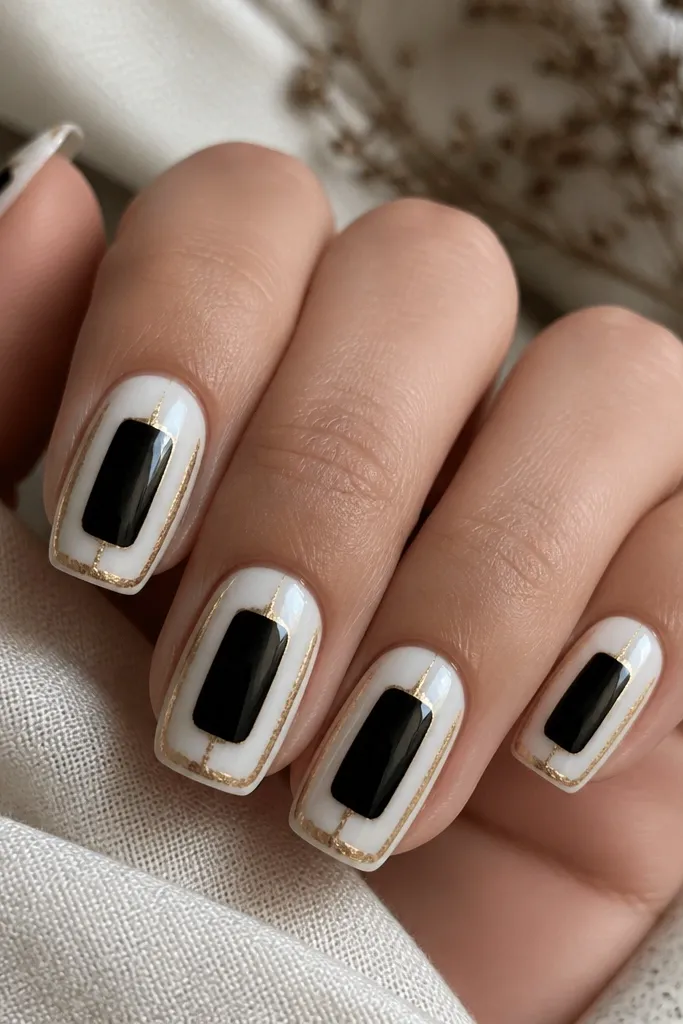
This design looks like nail art you'd wear to a gallery opening because it has structure. The white base keeps it bright, while the gold frame adds a jewelry-like border. The black inset gives you contrast without covering the whole nail, so the manicure stays light and modern. It's flattering for hands with shorter nail beds because the frame guides the eye to the nail shape. Under daylight, the gold frame reads crisp; under indoor light, it flashes in small places.
Apply glossy white as your base and cure. Use striping tape to create a rectangle frame, leaving a margin around the edges, then apply gold foil over the taped border area and press down. Remove tape to reveal sharp edges. Paint the center inset black, keeping it smaller than the frame opening. Cure and then seal with a glossy top coat carefully around the gold edges so the foil doesn't lift.
Editor's noteIf foil refuses to stick at the corners, press it with a silicone tool for 10 seconds before sealing.
Watch outAvoid thick black inset shapes that touch the frame. Leave a small gap for that framed look.
12. Black Grid Lines On White With Gold Corner Accents
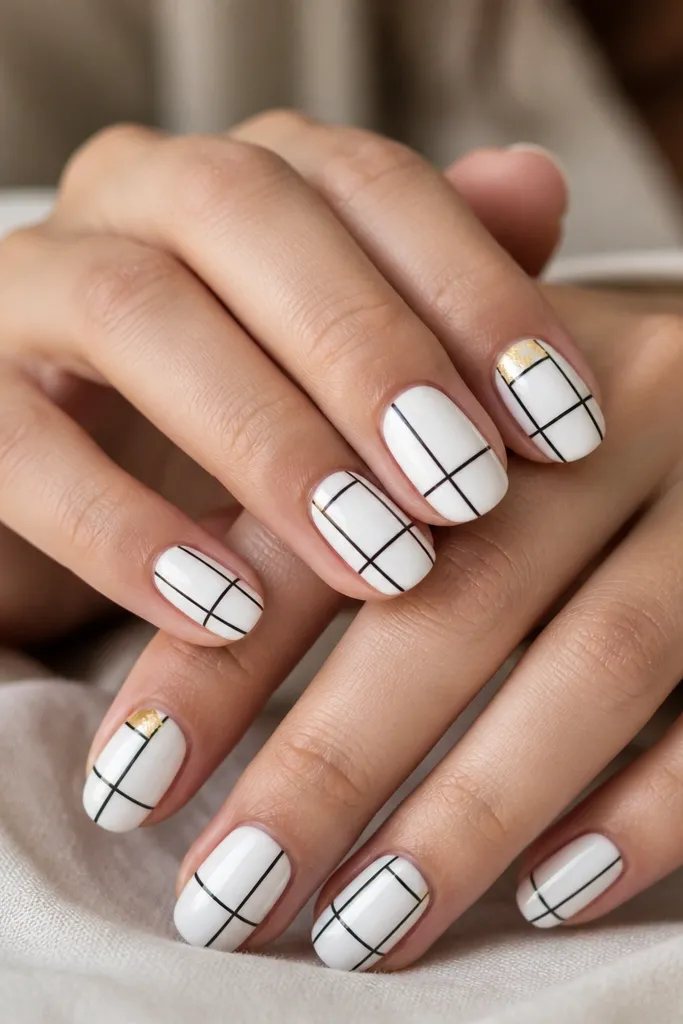
Grid lines look sharp because they're geometric and predictable, which makes them easier to keep neat than freehand art. The white base makes the black lines pop, and gold corner accents add a little luxe without clutter. I like this for medium squoval and almond because the grid can curve slightly with the nail shape. It looks good on every skin tone because white is reflective and black is high-contrast. It also works for office settings if you keep gold to one or two nails.
Start with a glossy white base and cure twice if needed for full opacity. With a fine striping brush or liner, draw vertical black lines first, then horizontal lines to form small rectangles. Keep line thickness thin so it looks like design, not scribbles. Add gold foil accents only at the top corners near the cuticle on one or two nails - keep them tiny. Seal with glossy top coat, using a slow brush stroke so you don't flood the grid.
Editor's noteUse a straightedge under your hand when drawing lines. Your wrist angle changes line thickness fast.
Watch outAvoid thick marker-like lines. They make the grid look messy.
13. Black Marble Tips With White Base And Gold Thread Lines
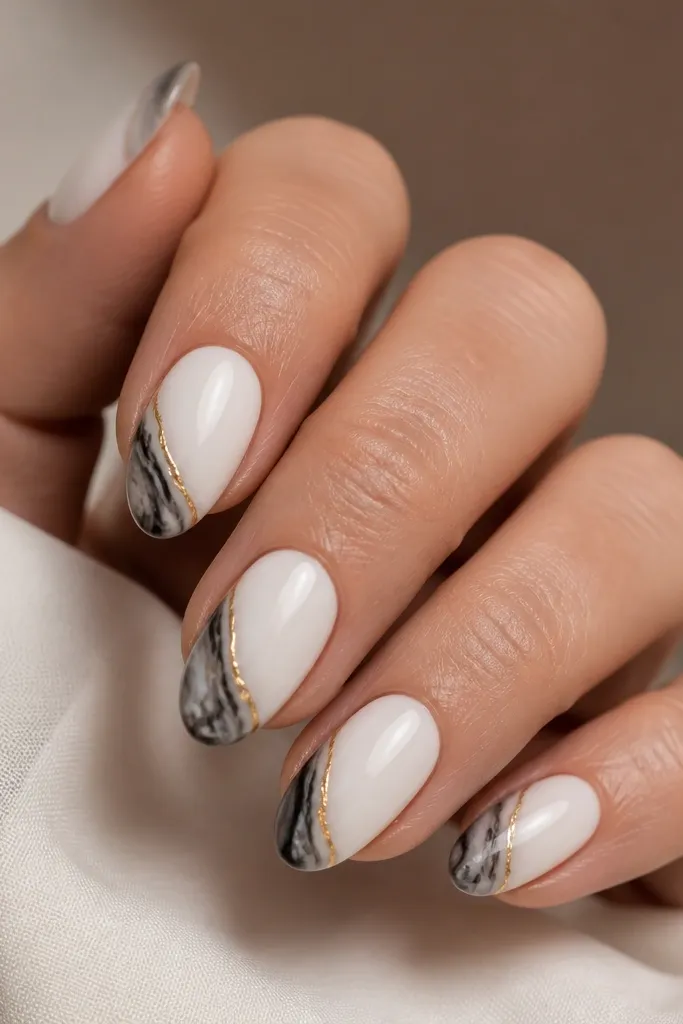
This one flips the marble placement so it feels lighter. A white base makes the nail look clean, while black marble at the tip adds drama without covering the whole nail. The gold thread lines act like highlights - they make the marble look intentional and dimensional. I like it on short almond because the marble fits the tip area and doesn't crowd the nail bed. It's flattering because the white base makes your hands look brighter, especially if you wear warm or neutral makeup.
Paint a glossy white base and cure. Mask the top third of the nail with tape, then create black marble on the exposed tip using a sponge tap with gray-black and a liner brush for vein lines. Remove tape to keep the marble edge clean. Draw one thin gold line along the edge of the marble using gold gel and a striping brush, then cure. Finish with glossy top coat.
Editor's noteKeep the gold line single and thin. One thread beats three lines every time.
Watch outAvoid dragging gold gel through wet marble. Wait until marble is fully cured.
14. Black And White Vertical Half-Moons With Gold Center Cap
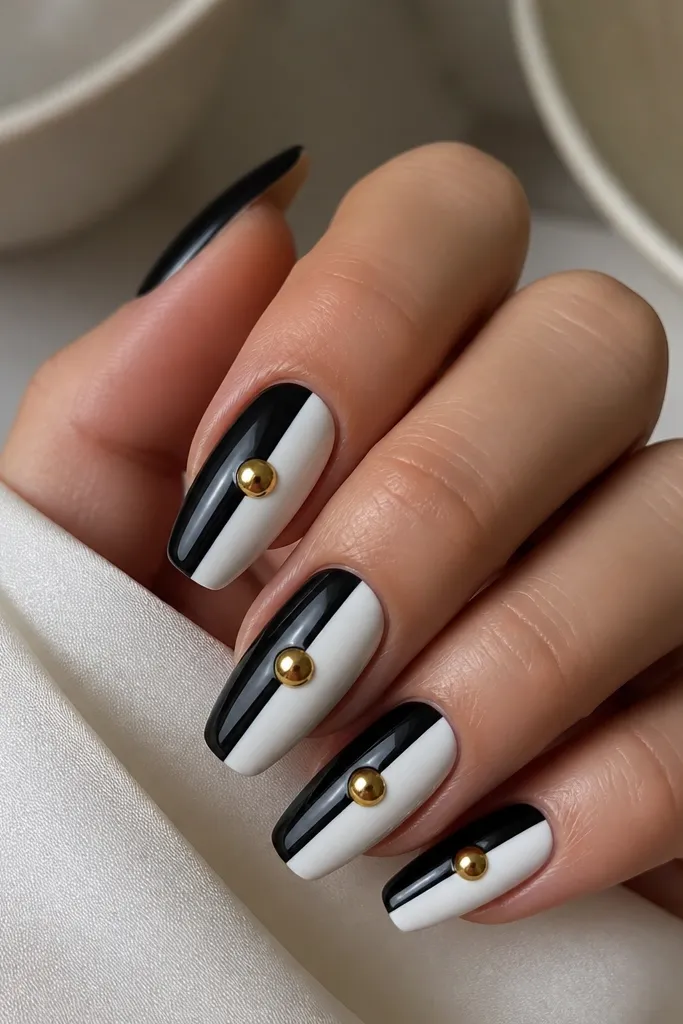
Vertical half-moons make nails look like they have a design element, not just color blocking. The black and white halves create a clean, fashion look, while the half-moon cut adds depth and keeps the design from feeling flat. The gold center cap gives you that focal point and ties the set together. This works best on medium coffin or almond because the center shape has room. It's flattering because the vertical split visually lengthens the nail.
Paint the left half of the nail black and the right half white using tape guides, curing each side if your gel needs it. Then add a half-moon cutout effect: with a small piece of tape or a half-moon stencil, mask a curved area near the center and repaint the opposite color so it looks like two moons facing each other. Remove masks and clean edges with a liner brush. Place a small gold cap in the exact center using gold gel and cure. Seal with glossy top coat.
Editor's noteUse thin tape. Thick tape makes the center curve look chunky.
Watch outAvoid mis-centering the gold cap. If it's off, the whole set looks unplanned.
15. Black Micro-French With White Beaded Line And Gold Dot Ladder
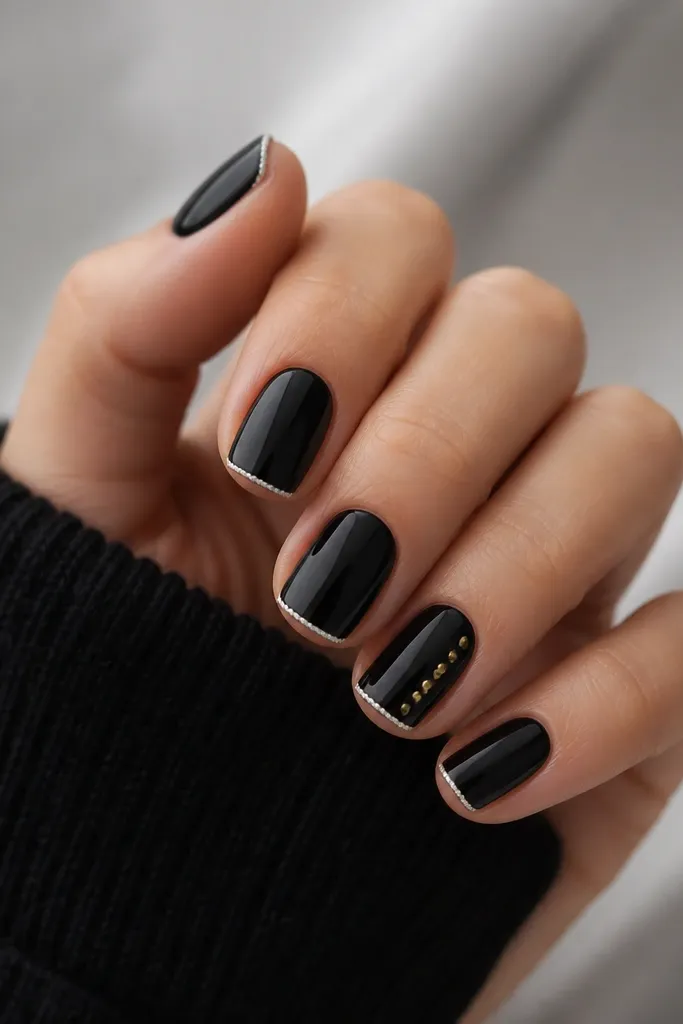
Micro-French is sleek because it barely takes up space, and that's what makes it look chic with black and white. The beaded line adds texture, and texture reads luxe when it's neat. The gold dot ladder gives movement without turning into a full pattern. This is great for shorter nails because the design keeps the tip crisp and doesn't overwhelm your nail bed. It flatters most hands since it keeps the nail looking clean and structured.
Apply glossy black base and cure. Mask a micro-French tip with tape and paint a thin white line, curing. For the beaded effect, use a dotting tool to place tiny dabs of white gel directly on top of the micro-French line, curing after you finish each nail so beads don't slump. On one accent nail, place gold dots in a vertical line that gets slightly higher each dot like a ladder, then cure. Finish with a glossy top coat on the black and carefully over the beads so they stay rounded.
Editor's noteIf beads look flat, you over-sealed. Let beads cure fully and use a thin top coat layer.
16. White And Black Split With Gold Diagonal Tape Lines
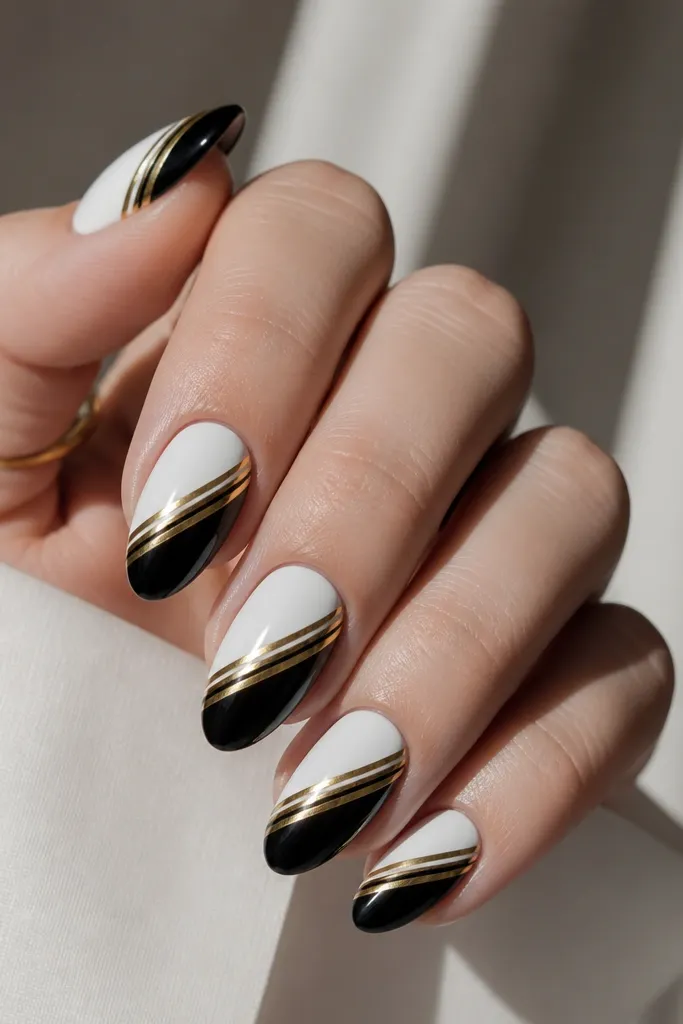
Diagonal tape lines look clean because they're straight, and straight lines are what make this combo feel modern. The split gives you instant contrast, and the gold lines add a tailored, designer feel. This works best when your black and white are both fully opaque and glossy. I like it on almond because it makes the nail look longer and more sleek. It's flattering on all skin tones because the contrast is the focus, not undertone matching.
Paint the whole nail either black or white as your base and cure for full opacity. Use striping tape to create a diagonal split - press down firmly along the line. Paint the exposed side with the opposite color, cure, then remove tape slowly. Apply two thin gold lines across the diagonal split using gold gel and a striping brush, keeping them parallel. Cure and top coat with gloss.
Editor's notePress tape hard at the sidewalls. That's where leaks happen and the split gets blurry.
Watch outAvoid using streaky white. It turns the diagonal into gray smudges.
17. Black Ombre With White Stars And Gold Half-Moon Crown
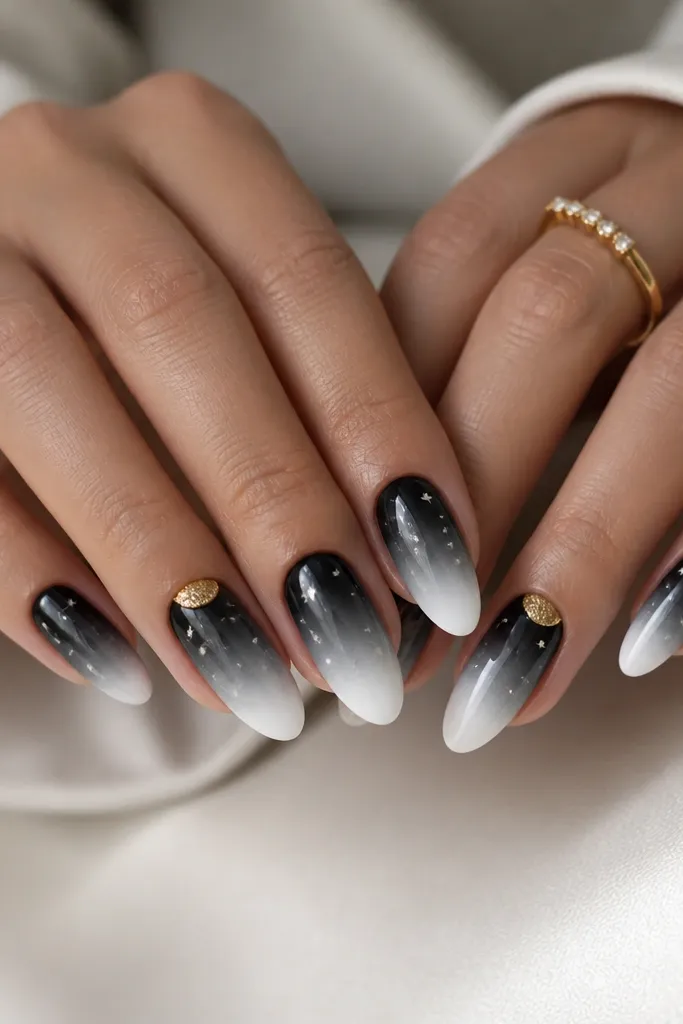
Stars give personality, but black-to-white ombre keeps it from looking childish. The white stars pop against the dark area and look like they're floating. The gold half-moon crown near the cuticle adds a luxe "halo" effect that frames your nail bed. This is flattering on medium almond and squoval because the ombre naturally lengthens. It works across skin tones because the contrast is strong and the white elements are bright.
Apply a black-to-gray ombre by sponging diluted black downward, then sponge white only at the tips, curing between light layers. Seal with a glossy top coat so the star placement is smooth. Place white star decals or paint stars with a tiny brush near the mid-nail, curing if using gel. Add a gold half-moon crown on one or two accent nails using a half-moon stencil and gold foil or gold gel, curing and sealing. Finish with glossy top coat over stars and foil.
Editor's noteUse fewer stars than you think. Three to five per nail looks intentional; more looks cluttered.
Watch outAvoid matte top coat over stars and foil. Matte kills the sparkle.
18. White Base With Black Side V-Shaped Tips And Gold Center Line
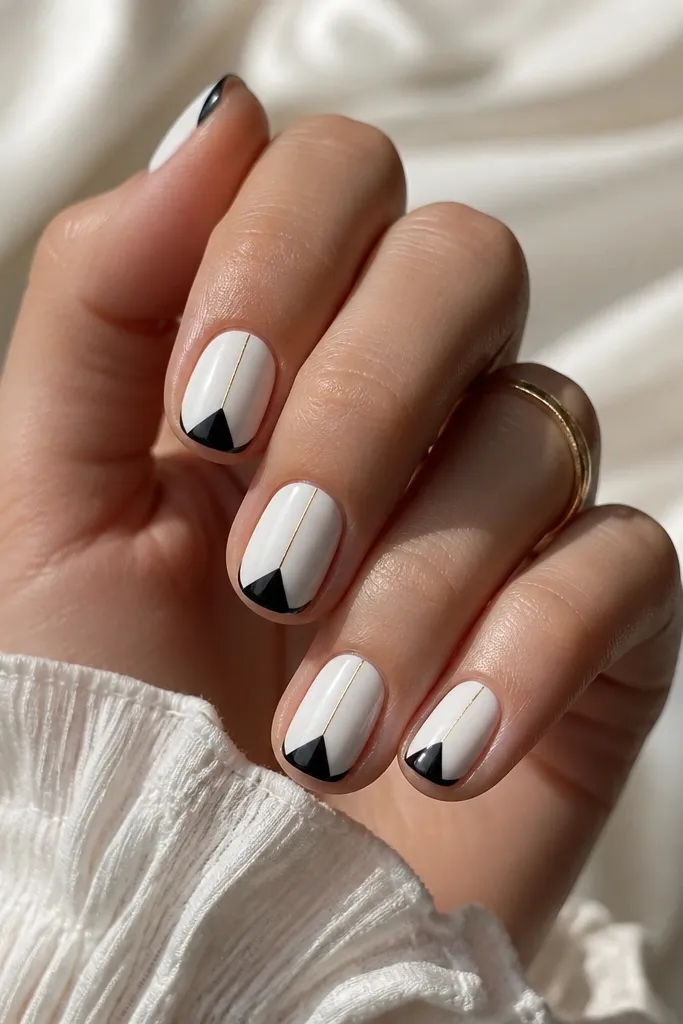
V-shaped tips make nails look sharper and longer because the black angles pull the eye inward. A white base keeps it bright and clean, so the design reads modern instead of heavy. The thin gold center line adds structure and gives a "catwalk" feeling without needing extra art. This works especially well for short squoval because V tips visually narrow the nail and add length. It flatters every skin tone since white is the background and gold is the bright accent.
Paint the nails glossy white and cure. Use tape to create a V guide on each nail: place two strips from each side edge toward the center tip point. Paint inside the V area black, cure, and remove tape. With a fine liner brush, draw a thin vertical gold line from near the cuticle down the center, then cure. Seal with glossy top coat, making sure the gold line is fully covered but not flooded.
Editor's noteChoose a center point that's slightly above the true tip. That lift makes the nail look longer.
Watch outAvoid thick gold lines. Thin gold looks like a detail, thick gold looks like a stripe.
19. Black Base With White Half-Moon Cuticle And Gold Foil Edge
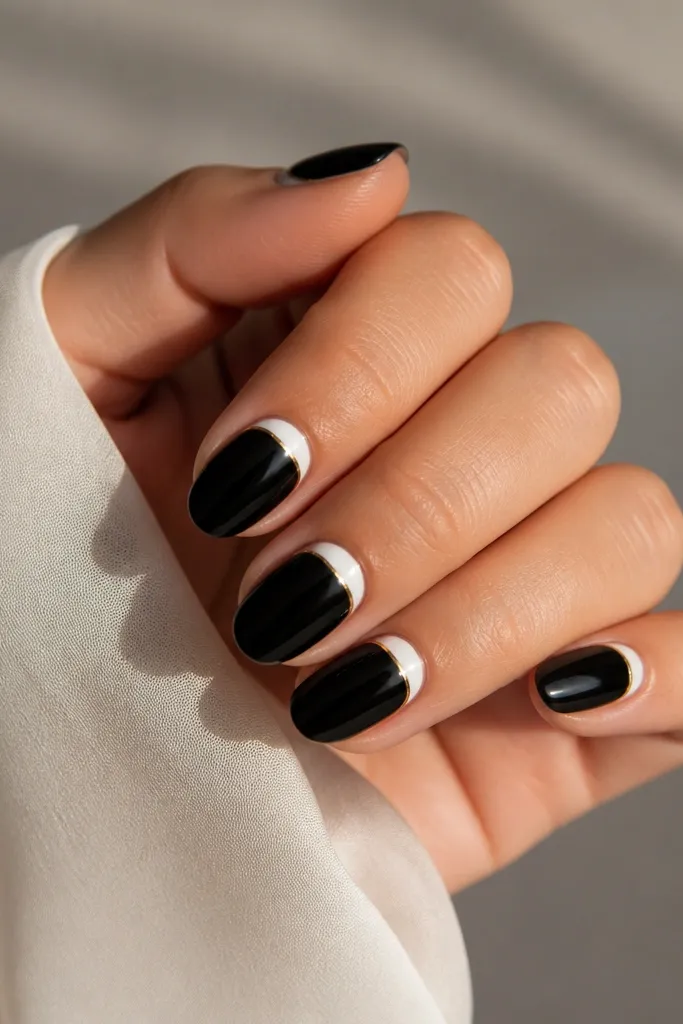
This is the cleanest "classy contrast" version of black-white-gold because everything is placed at the cuticle where the nail naturally has a curve. The white half-moon brightens your nail bed and makes your cuticles look neat. A thin gold foil outline makes it look like you added jewelry to your cuticle line. It's flattering for short and medium nail lengths because the design sits near the base and visually widens the nail bed. It also looks great on hands with visible cuticle texture because the white shape draws attention upward.
Start with glossy black base and cure. Use a half-moon stencil or cut a small arc from tape to mask the cuticle area. Paint the inside of the half-moon with opaque white gel, cure, then remove the mask. Press a thin strip of gold foil along the top edge of the white half-moon and seal immediately with glossy top coat. If foil is uneven, add gold chrome gel over the foil edge for a smoother line.
Editor's noteTake a second to clean the half-moon edges with a small brush dipped in remover before top coat. It makes the line look salon-perfect.
Watch outAvoid dragging gold foil into the white. Keep the foil on the edge line only.
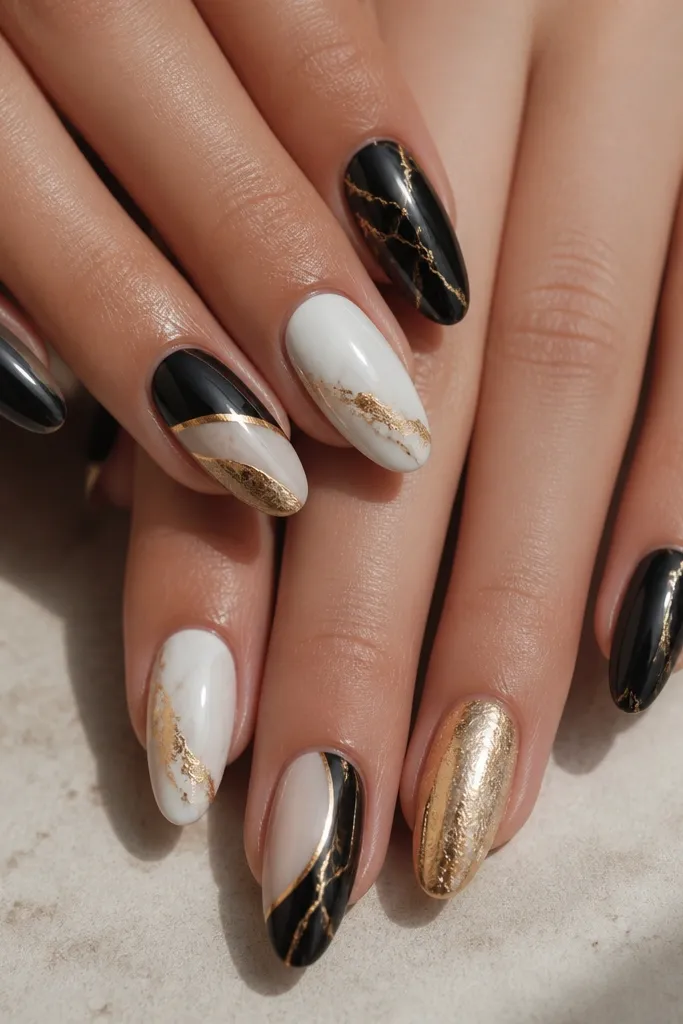
20. White Marble Accent Nails With Black Outline And Gold Specks
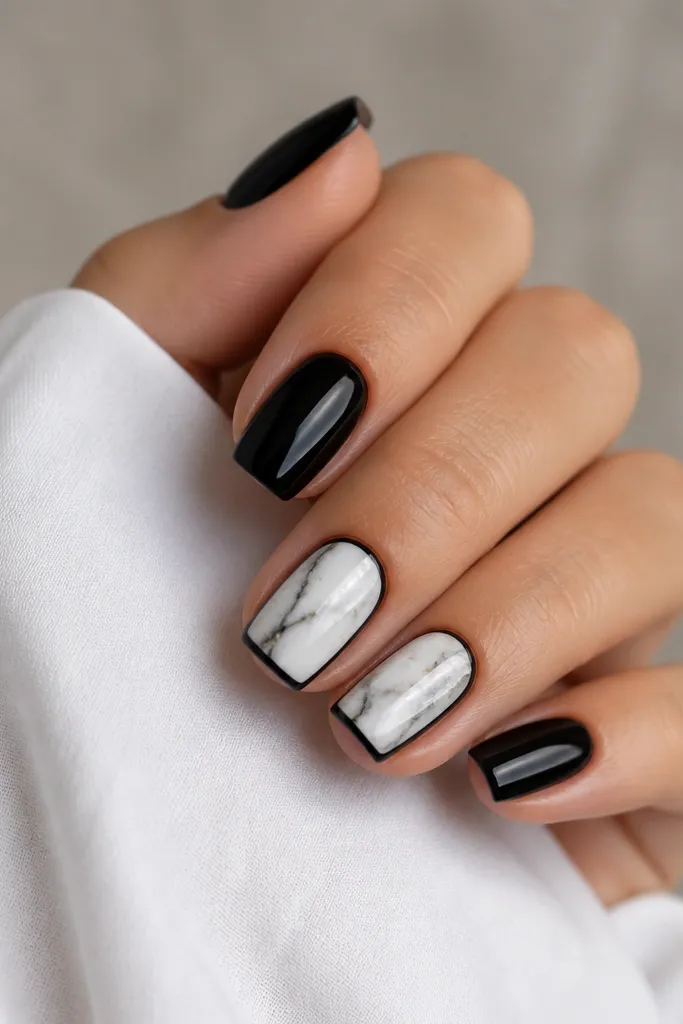
This is a balanced set because it uses black as the majority and marble as the accent. The black outline around the marble area makes the marble look crisp and intentional instead of like random swirls. Gold specks in the marble veins add depth and a "stone with flecks" look. I like this if you want something that feels special but still wearable. It flatters all skin tones because the black background makes the white accents pop.
Paint four nails glossy black and cure. For the two accent nails, do a white base first, then add black/gray marble veins using a sponge for cloudy patches and a liner brush for vein lines. Draw a thin black outline around the marble area with a fine brush, keeping the outline slightly inset from the edges. Add tiny gold specks with gold gel using a toothpick or dotting tool, cure. Finish with glossy top coat on all nails, and use a second coat on the marble to smooth the surface.
Editor's noteIf your marble looks too gray, add a small extra white layer before drawing veins.
Watch outAvoid outlining the entire nail. Outline only the marble zone for the clean contrast.