1. Porcelain White Almond With Mirror Gold Half-Moons
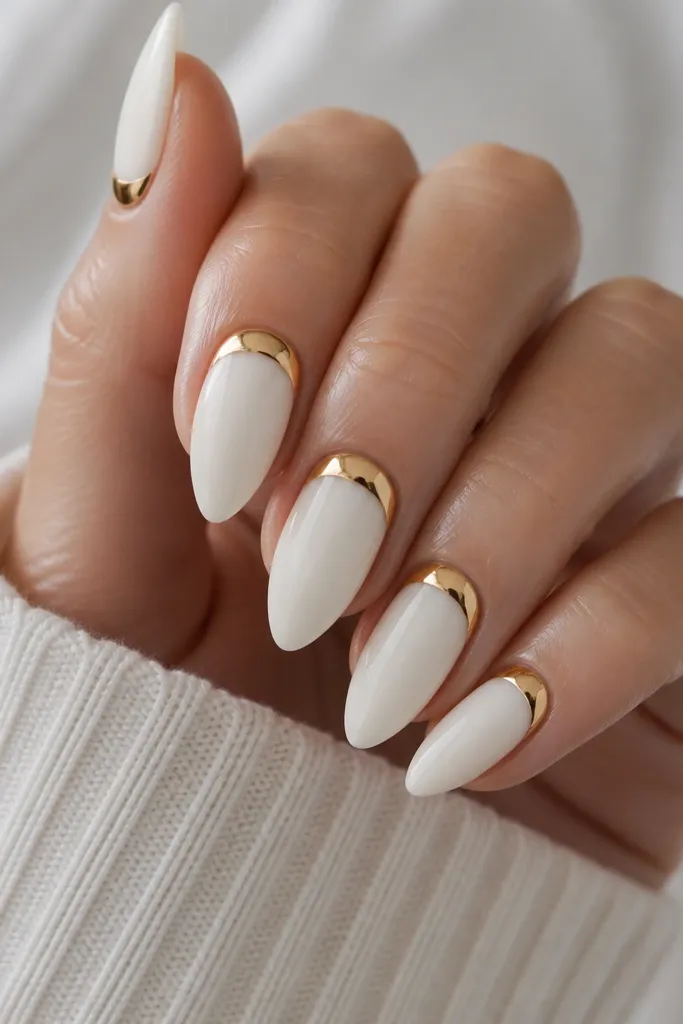
Start by sculpting or filing almond nails and apply a milky opaque white acrylic base. Cure fully, then use a thin liner brush to paint a curved mirror gold half-moon at the cuticle area, leaving a tiny gap of white so it doesn’t look overfilled. Add a second mirror-gold pass if you want it extra bright, then seal with a thick glossy top coat. Finally, check the edges under a bright lamp and clean up any gold that creeps onto the sidewalls.
This one looks expensive because the white is fully opaque and the gold is shaped like a neat half-moon, not a blob. I like it on warm light skin and cool fair skin because the porcelain white brightens your hand and the mirror gold reflects light back at you. On longer almond nails, the half-moon sits perfectly in the natural curve and makes your fingers look longer. It works for office days because it’s graphic but still soft — no busy patterns, just strong contrast.
Watch outAvoid placing the half-moon too low — it should hug the cuticle curve, not stretch toward the middle.
Editor's noteIf your gold looks dull, switch to mirror chrome gel or chrome powder mixed for foil-level shine.
2. Soft Square French Tip With Gold Foil Skips
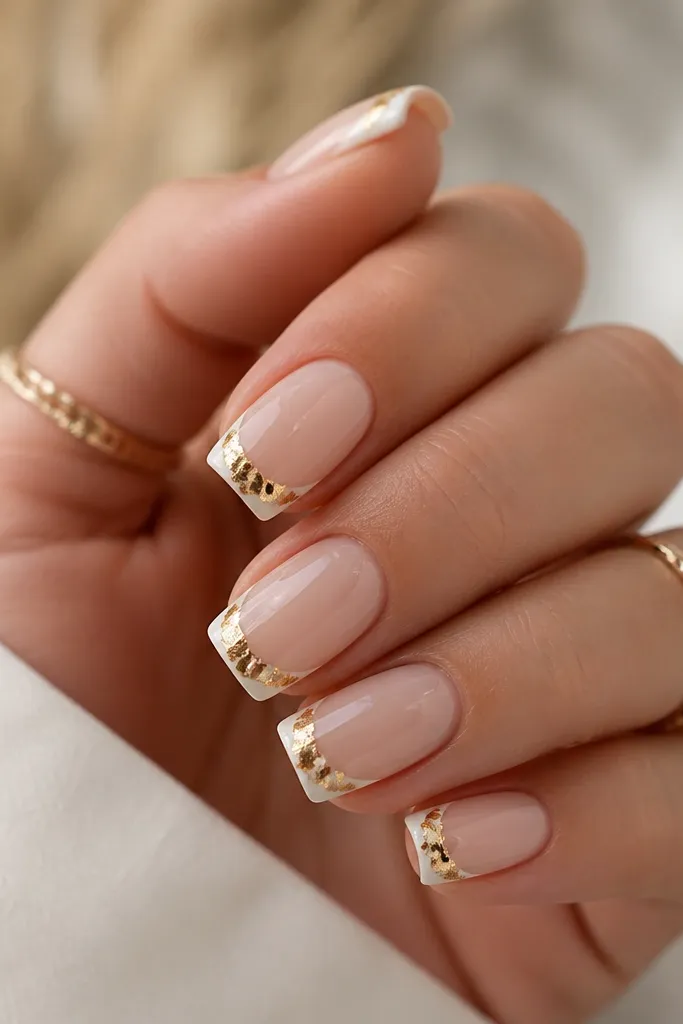
Apply a sheer nude or clear builder base, then paint a solid white French tip that covers about 1/5 of the nail length. While the white is still slightly tacky, press tiny pieces of gold foil into random spots along the tip edge, keeping the foil mostly in the corners. Seal with a thin layer of gel, then add a final glossy top coat. Clean the underside and file the free edge so foil doesn’t catch on fabric.
This is my go-to when you want French tips but not the same old thin line. The white tip stays crisp, and the gold foil skips add movement without turning it into full glitter. It flatters hands with wider nail beds because the soft square shape keeps the white tip balanced. Wear it to events where you want “clean” from across the room and “details” up close.
Watch outAvoid using chunky glitter foil — it can look heavy and rough under glossy top coat.
Editor's notePress foil with a dry lint-free wipe first so it grabs the surface instead of sliding.
3. White Marble Base With Thin Gold Vein Lines
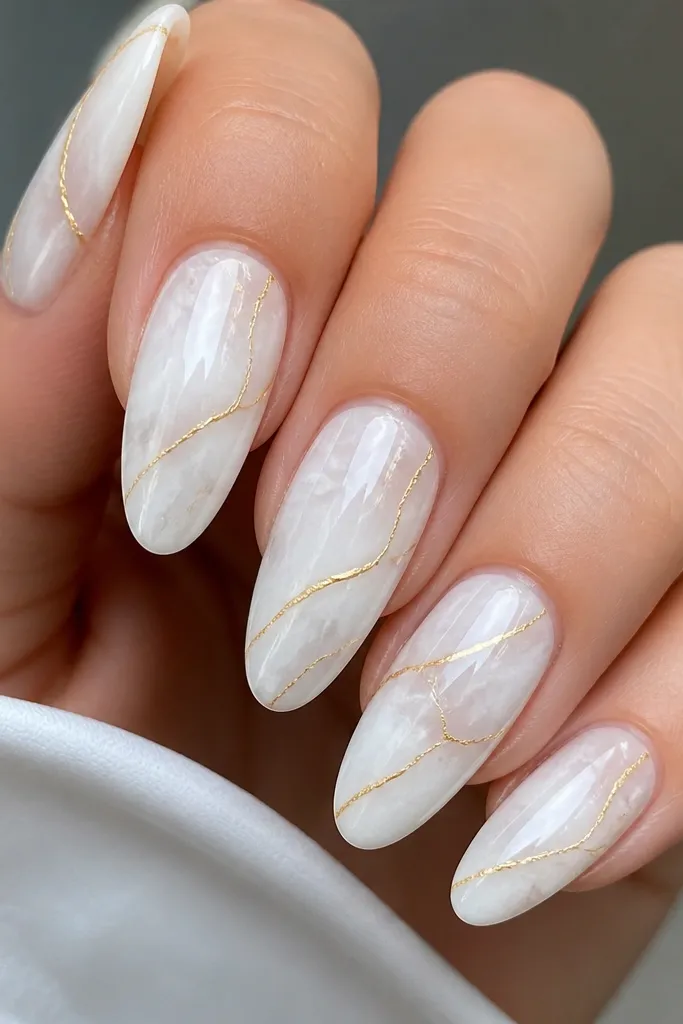
Marble looks creative because it has natural variation, and gold veins make it feel intentional. I love this for medium to deep skin tones because the gold reads warm against the cool white marble and makes your hands look lit. Almond or long oval nails make the veining look like it’s moving, not stuck. This design also hides small growth issues better than fully geometric art.
Build the nail with a milky white base, then add subtle marble swirls using a watered-down white and faint gray gel. Use a detail brush to draw one or two thin gold lines that follow the marble cracks, keeping them under 1mm wide. Add a few tiny gold dots at vein intersections for realism. Seal with glossy top coat and wipe the tacky layer so the gold stays smooth.
Use a striping brush with a metal ferrule — it gives you hairline gold without wobble.
Avoid thick gold veins; they turn marble into cartoon instead of stone.
4. Gold Leaf Half-Sleeve on White Milky Almonds
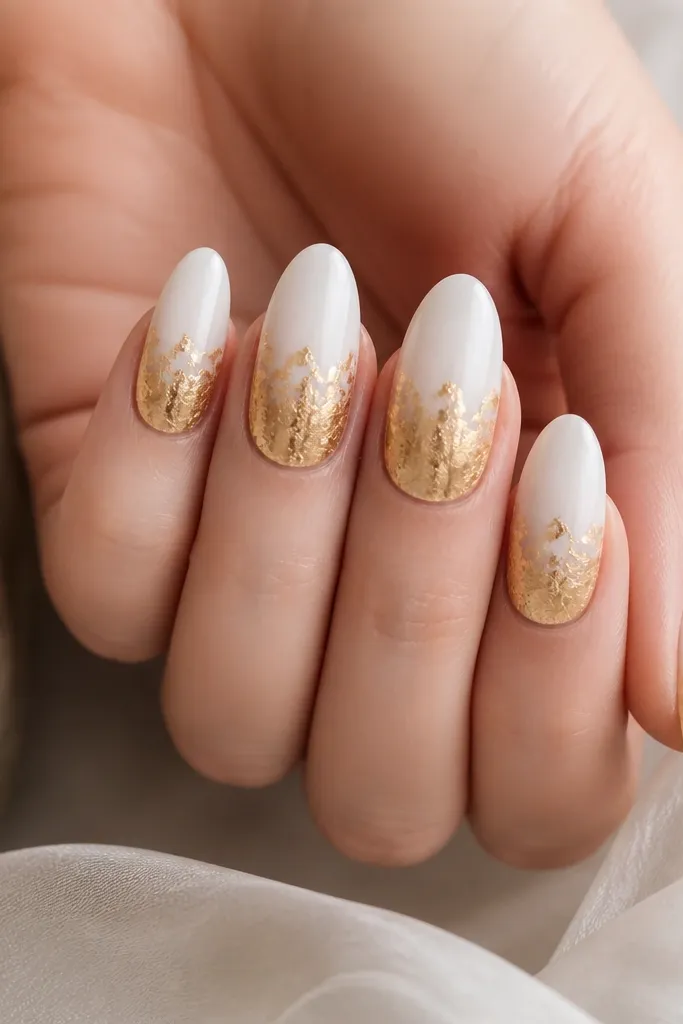
Gold leaf gives texture that chrome can’t, and it looks amazing against a smooth milky white. I wear this when I want my nails to look artsy but still wearable because the top half stays clean and minimal. It flatters short to medium nail lengths if you keep the leaf to the lower half, not the full nail. The result reads “designer” because the leaf has irregular edges that mimic real metal.
Start with milky opaque white acrylic across the full nail and cure it smooth. Apply gold leaf adhesive or tack gel to the lower half, then press gold leaf pieces in overlapping patches, leaving some white gaps for contrast. Press lightly with a foil applicator so leaf adheres without wrinkles. Seal with a glossy top coat in two thin layers so the leaf doesn’t lift at the edges.
After sealing, run a soft buffer along the surface lightly so the leaf doesn’t feel gritty.
Avoid covering the entire nail with leaf — it becomes heavy and can snag on sleeves.
5. White Cuticle Frame With Micro Gold Studs
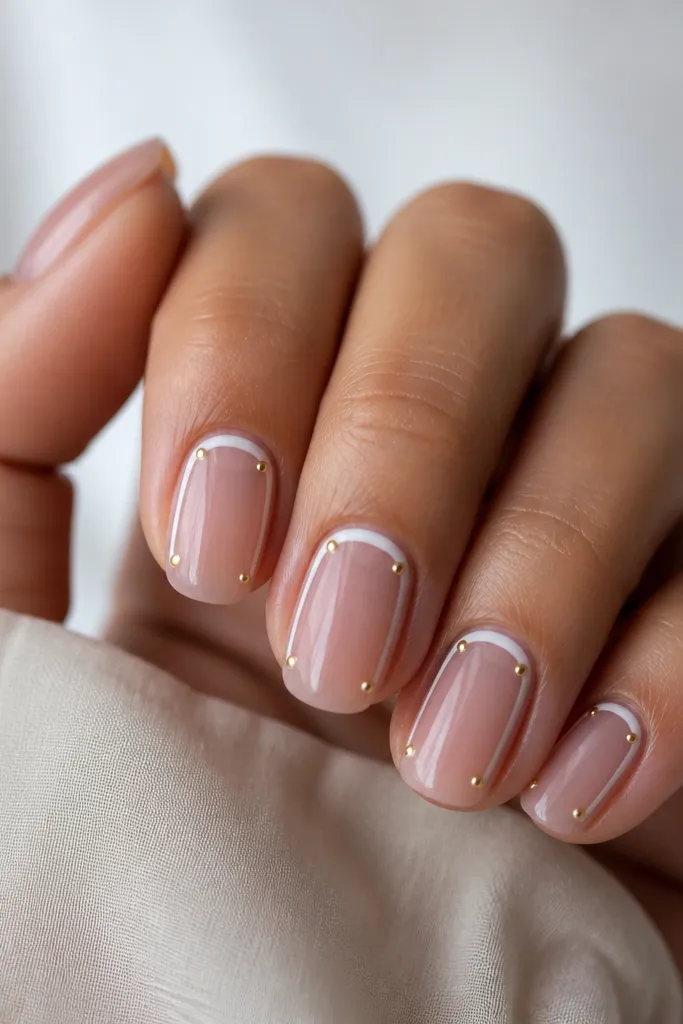
Start with a clear or sheer builder base so your natural nail color shows through. Use a thin brush to draw a white cuticle frame outline, forming a curved rectangle that hugs the cuticle and sidewalls. Place one tiny gold stud at each corner of the frame (or two on the ring finger for emphasis). Seal with a glossy top coat that covers studs fully so you don’t feel bumps.
This design makes your cuticle area look tidy and intentional. The white frame creates a crisp border, and the micro gold studs add sparkle without taking up space. I like it on medium almond and short oval because the frame sits right where your nail naturally narrows. It’s also great if you hate big art because it stays neat and repeats on every nail consistently.
Watch outAvoid placing studs too close to the free edge; they chip faster there.
Editor's notePick micro studs that are the same size across the set so the frame looks uniform.
6. Gold Chrome Tip Over White Cloud Gradient
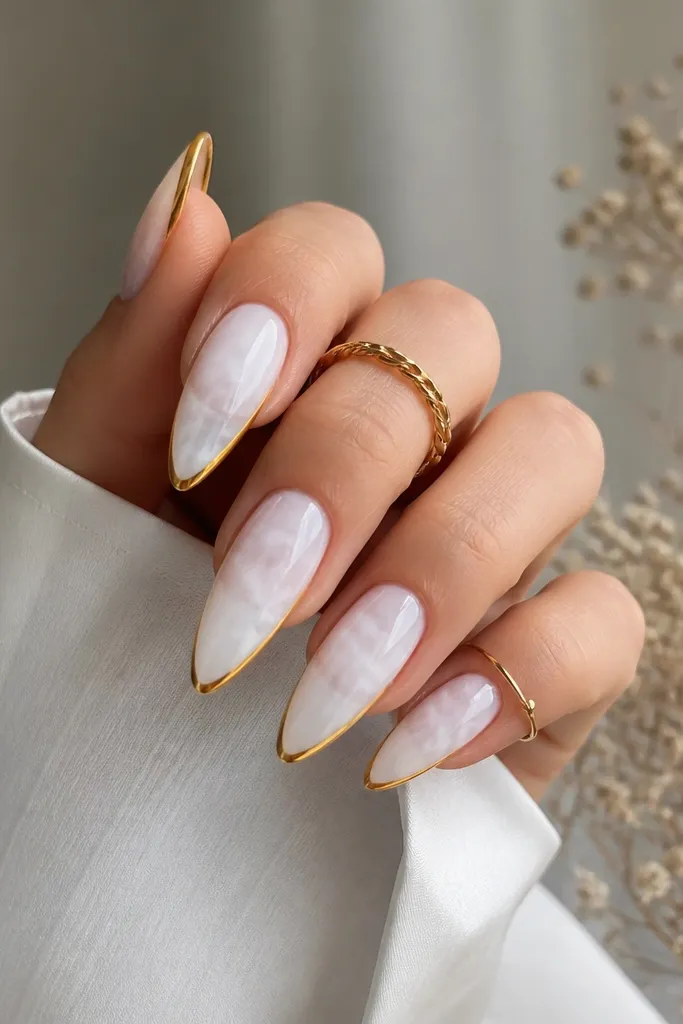
A cloud gradient keeps white from looking flat, and the gold chrome tip gives it a clean designer edge. This looks best on almond and long square because the gradient has room to blend. For fair skin, it brightens and looks fresh; for deeper skin tones, the gold tip adds warmth that doesn’t clash with cool white. It’s also a strong choice for holiday parties because chrome reads bright under indoor lighting.
Apply a sheer base, then sponge on a white gel gradient so it fades softly from the cuticle toward the tip. Build the white more opaque at the upper third of the nail. Add a straight gold chrome tip line that covers about 1/4 of the nail length — keep it crisp with tape if you need it. Cure, then top coat glossy to lock in the chrome look.
Use a makeup sponge with minimal product so your gradient looks airy, not streaky.
Avoid overdoing the gradient — if it turns streaky, it looks messy in daylight.
7. White Lattice Pattern With Gold Corner Blocks
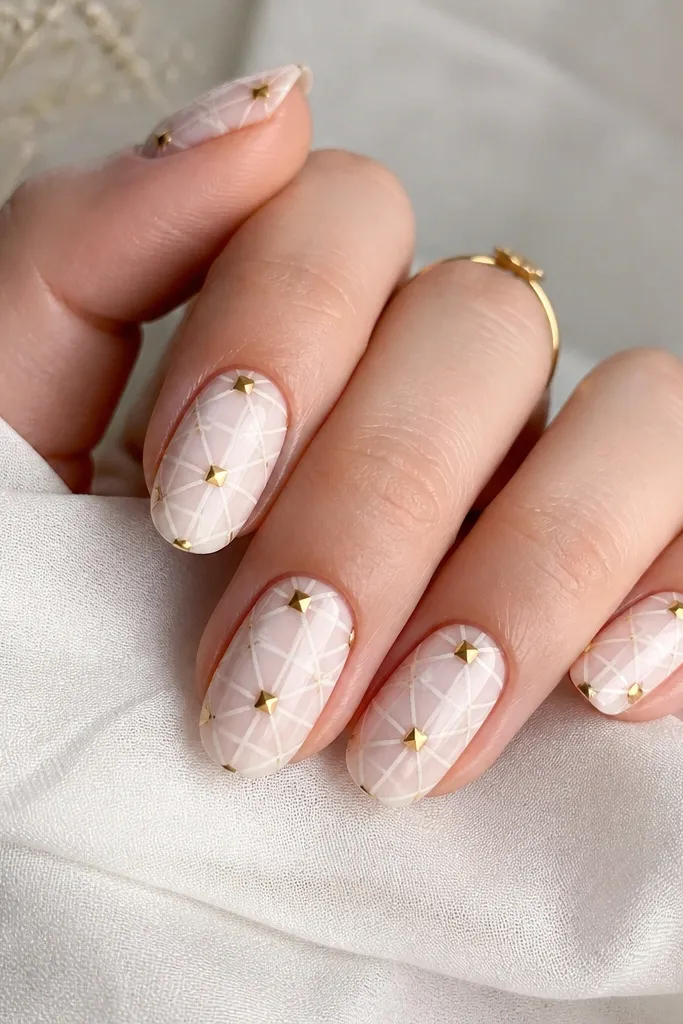
Start with milky white acrylic and smooth the surface. Use striping tape or a fine liner brush to draw a vertical and horizontal lattice grid, keeping line thickness consistent. Place small gold corner blocks at the outer corners of the lattice — one block near the cuticle and one near the tip. Seal with glossy top coat and check under a flashlight so the lines stay crisp.
Lattice gives a structured, creative feel while still reading clean because the lines are thin. Gold corner blocks make it look like a design system, not random nail art. I like this on short square because the grid fills the flat surface nicely. It’s also great for people who want nail art that looks “intentional” even when you’re not into heavy 3D details.
Watch outAvoid thick lattice lines; thick grid lines look like sticker residue.
Editor's noteIf your lines get shaky, use pre-measured striping tape strips and remove them before curing.
8. White Heart Negative Space With Gold Outline
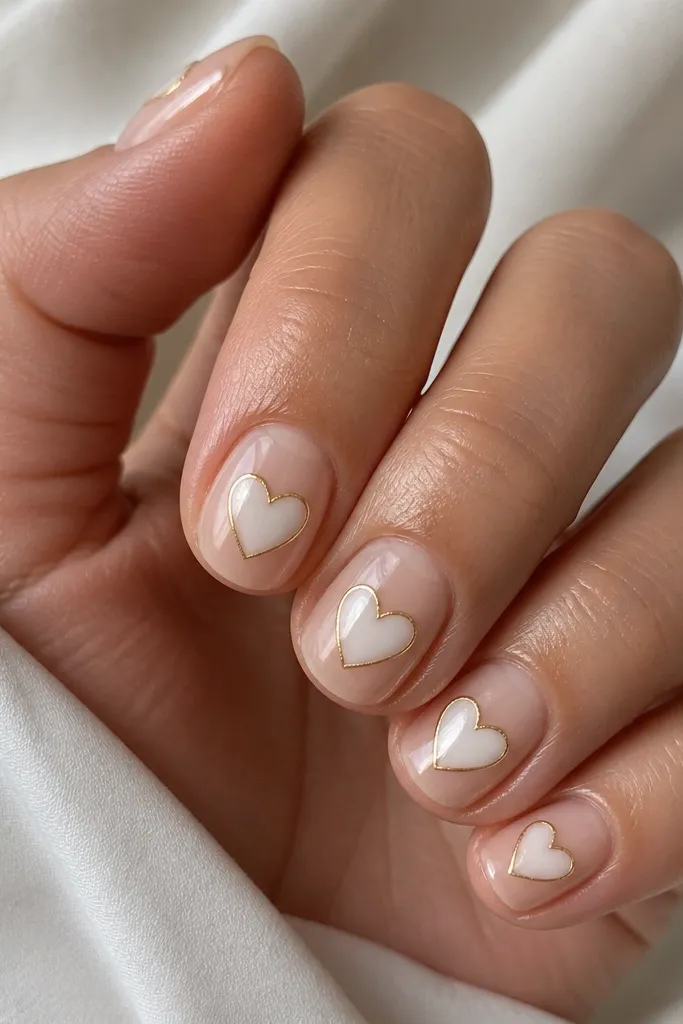
Keep a clear or sheer base so the negative space is visible. Paint a centered white heart using a heart stencil or by marking two points and joining them. Outline the heart with a thin gold gel line, then add a micro gold dot at the heart base if you want extra sparkle. Cure and finish with glossy top coat, making sure the outline is smooth.
Negative space makes hearts look modern, not childish. The white heart is crisp and clean, and the gold outline gives you that “jewelry” effect on a simple shape. This flatters shorter nails because the heart sits in the middle and visually balances the nail width. I’ve worn this for birthdays and dates — it’s cute without being overly sweet.
Watch outAvoid filling the entire heart with gold — outline only keeps it classy.
Editor's noteUse a small dotting tool to place the heart tip points before you connect the lines.
9. White Ombre With Gold Glitter Cuticle Halo
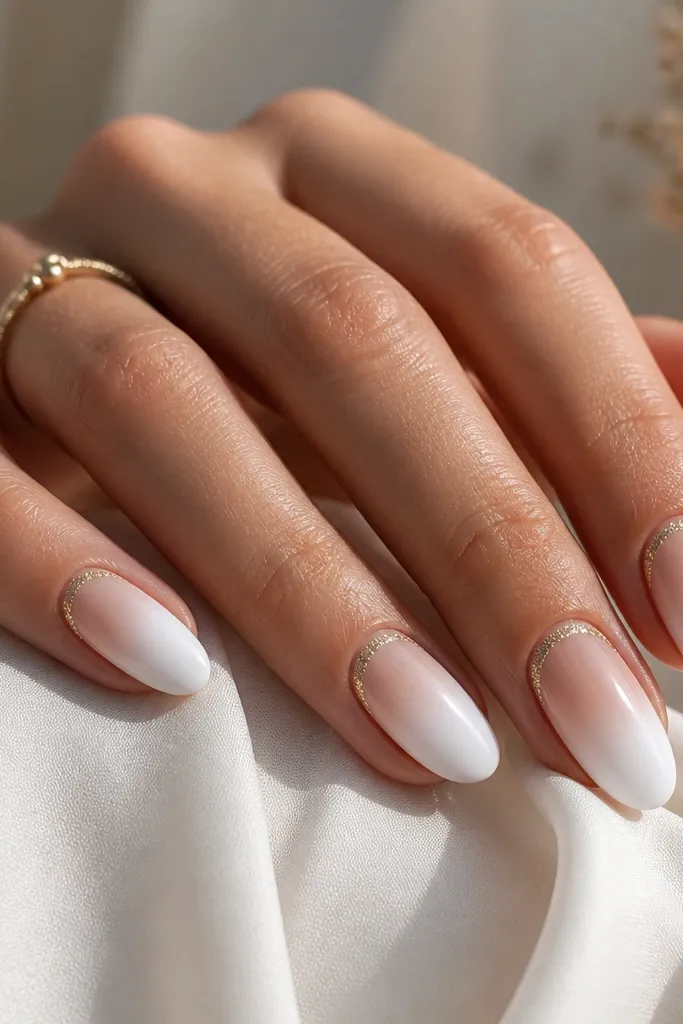
Apply a sheer base, then sponge or airbrush a white ombre so it gets more opaque near the tip. Add gold glitter gel around the cuticle in a thin ring, leaving a clean white gap between the glitter and the nail surface for crisp separation. Use a small brush to clean up the ring edges. Seal with glossy top coat in two layers to lock glitter down.
This is the “soft glam” version of gold and white. The ombre makes the white feel airy, and the gold glitter halo adds sparkle exactly where light catches when you move your hands. It looks flattering on hands with longer fingers because the ombre stretches the nail upward. For everyday wear, it stays subtle since the glitter is a ring, not a full nail.
Watch outAvoid a thick glitter ring; thick glitter near the cuticle lifts sooner.
Editor's noteTap glitter gel on with a brush instead of dragging — dragging makes it look patchy.
10. White Checkerboard With Gold Stripe Borders
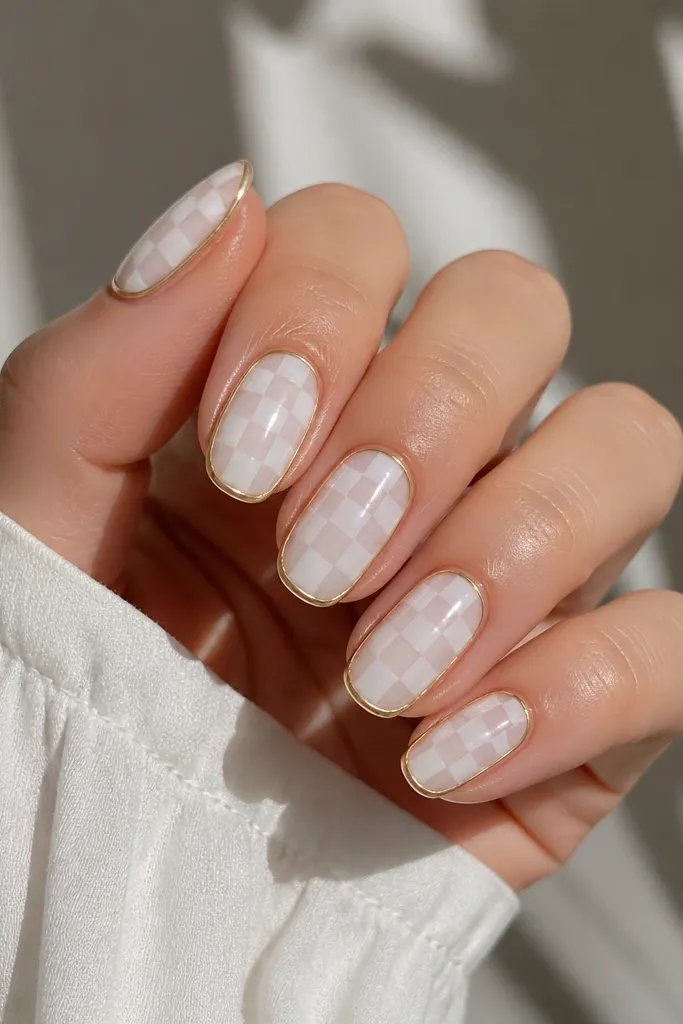
Checkerboard is bold but it stays wearable when you keep it in small squares and add gold borders to frame it. The gold stripe border makes every nail look like it has a clean outline, so the pattern doesn’t look chaotic. I like this on medium square because the flat sides let squares look even. It’s a fun choice for concerts and weekend nights when you want your nails to read from across the room.
Start with milky white acrylic and cure smooth. Draw a thin gold border around the nail perimeter using a liner brush. Within the border, use nail striping tape to create a checkerboard grid, then fill alternating squares with white gel and (optional) a second white tone if you want depth. Finish by removing tape carefully and sealing with glossy top coat.
Use striping tape for the grid so your squares stay straight across the nail.
Avoid uneven square sizes; one big square makes the whole set look rushed.
11. Gold Drip Accents on Matte White Base
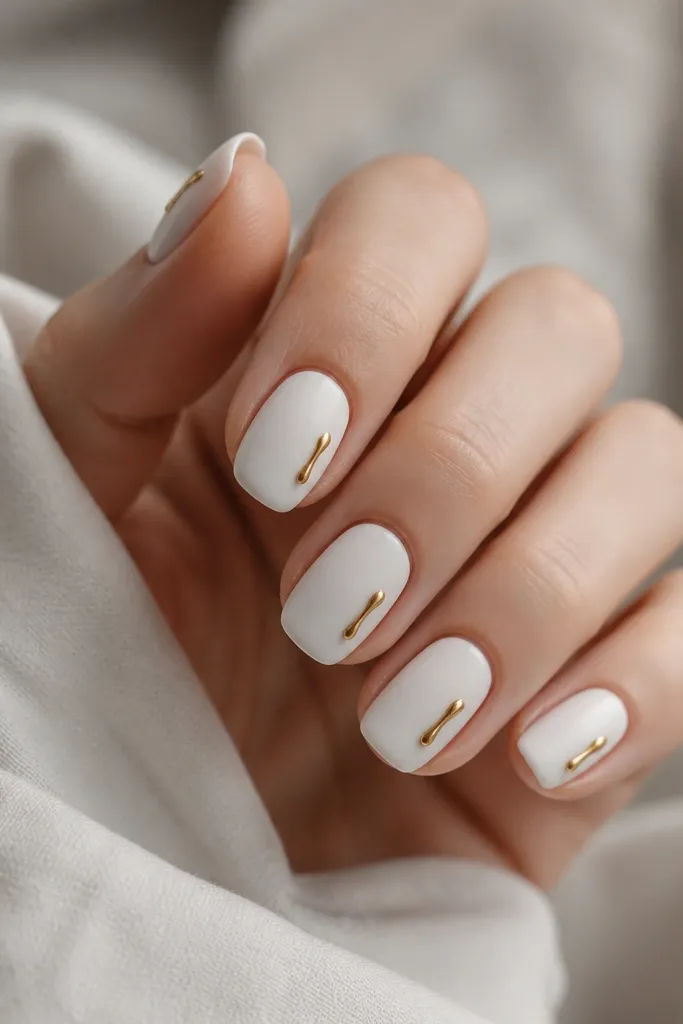
Build with milky white acrylic and top it with a matte top coat so the nail surface is not shiny. Use a gel brush to place 2-3 small gold drip lines on one side of each nail — keep them short so they don’t hit the free edge. Cure, then add a glossy top coat only over the gold drips, not the whole nail. This keeps the contrast crisp.
Matte white makes gold drip look like wearable art, not glitter. The contrast is strong: matte background, glossy gold drips that catch light when you tilt your hand. This looks great on almond and long oval because the drip has a natural direction. It flatters most skin tones because the matte white is neutral and the gold adds warmth without overpowering.
Watch outAvoid matte top coat over chrome gold; it kills the reflective shine.
Editor's noteKeep drips on one side per nail so it looks intentional, not random.
12. White Pearl Background With Gold Chain Links
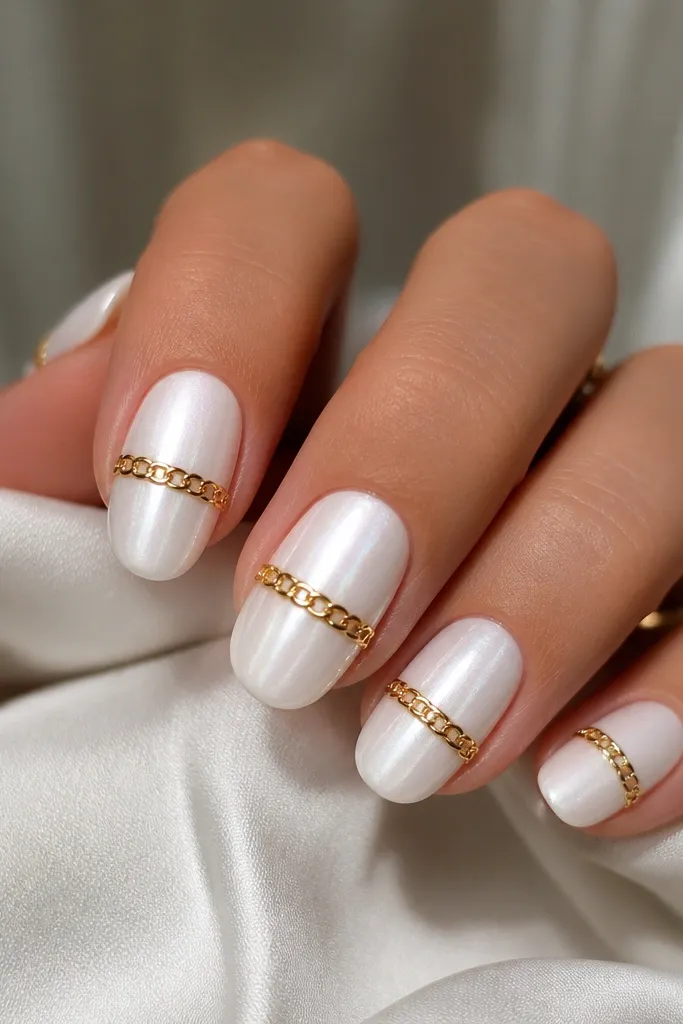
Pearlized white has that soft glow, and gold chain links make it feel like jewelry you can wear. I like this on medium almond because the chain line looks like it wraps around the nail curve. It flatters hands that look a little dry because the pearl finish hides texture. For events, it reads elegant without needing gems.
Apply pearl white acrylic or pearl gel in a milky base and cure smooth. Draw a thin gold line where the chain will sit, then add tiny chain links using a striping brush or nail art pen. Place links along one horizontal band near the mid-nail, leaving white space above and below. Seal with glossy top coat so the chain stays raised enough to catch light but smooth under your fingers.
If you use a nail art pen, do one practice line on a paper strip first so you know how thick it lays.
Avoid putting the chain too close to the cuticle; it can look cramped.
13. Gold Confetti Specks on White Negative Space Tips
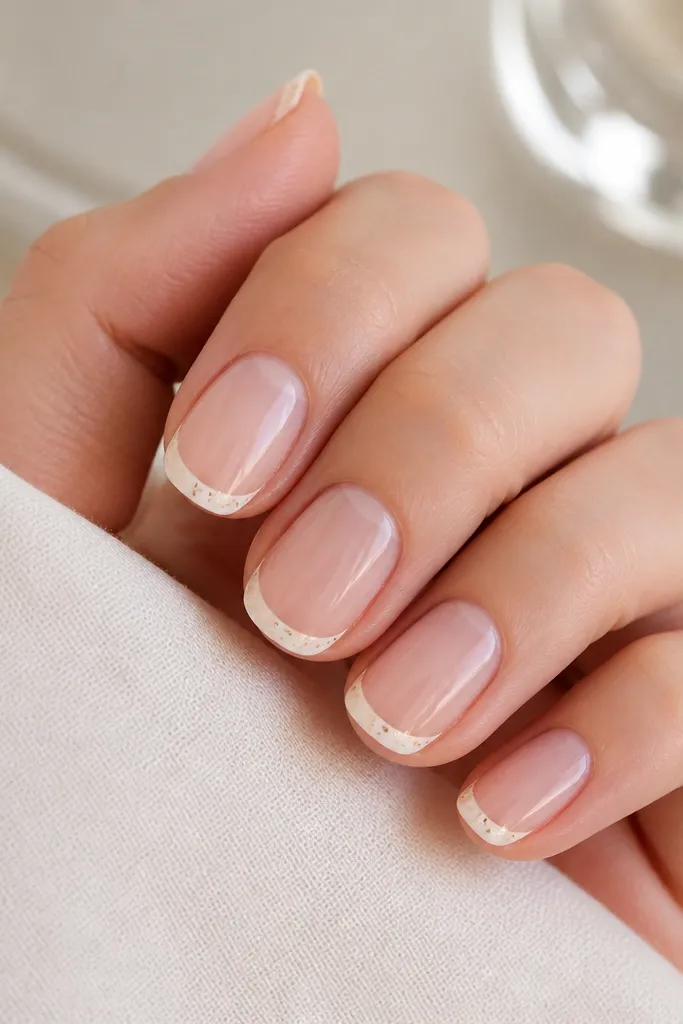
Start with a clear base or a sheer nude. Paint a narrow white tip, about 1-8 to 1-6 of the nail length. Add tiny gold confetti specks using a dotting tool or a fine brush, keeping them mostly in the center of the white tip. Seal with glossy top coat and cure fully so specks don’t smear.
This design keeps things airy because the base is clear and the white tip is narrow. The gold confetti specks add sparkle without making the tip look heavy. It flatters short nails because the negative space makes fingers look longer. It’s also great for people who want gold and white but don’t want full coverage art on every nail.
Watch outAvoid overloading specks; too many makes the tip look like cheap glitter.
Editor's noteUse a toothpick to place specks — it gives you precise dots instead of blobs.
14. White Botanical Line Art With Gold Stem Dots
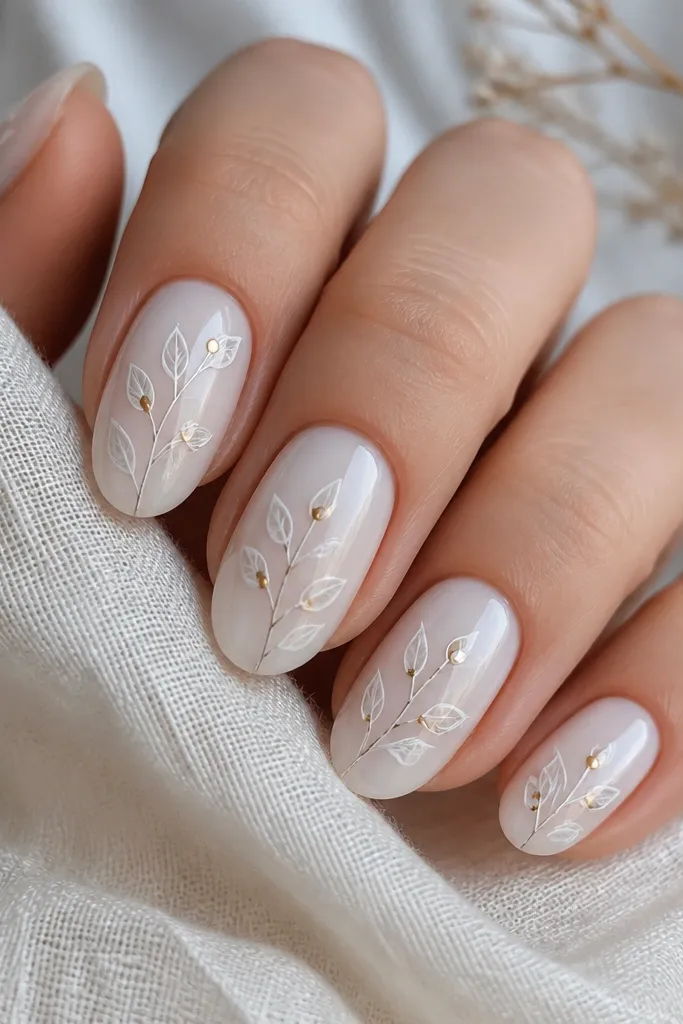
Start with a milky white acrylic base. Use a detail brush to draw simple leaf stems and small curved lines with a slightly darker white or very faint gray for contrast. Add gold dots at two or three node points along the stem using a dotting tool. Seal with glossy top coat; keep the line art thin so it doesn’t feel raised.
Botanical line art looks creative because the lines have movement, and white-on-white gives a soft, high-end look. The gold dots act like tiny beads and make the design pop without adding bulk. I like it on almond and long square because there’s enough surface to draw stems that feel balanced. This is a great “spring but still classy” set for brunch, dinners, and bridal events.
Watch outAvoid thick botanical lines; thick lines make it look like a coloring book.
Editor's noteDo the line art on two nails first so you get your hand motion steady before finishing the rest.
15. Gold Foil French With White Underlay Reverse Tips
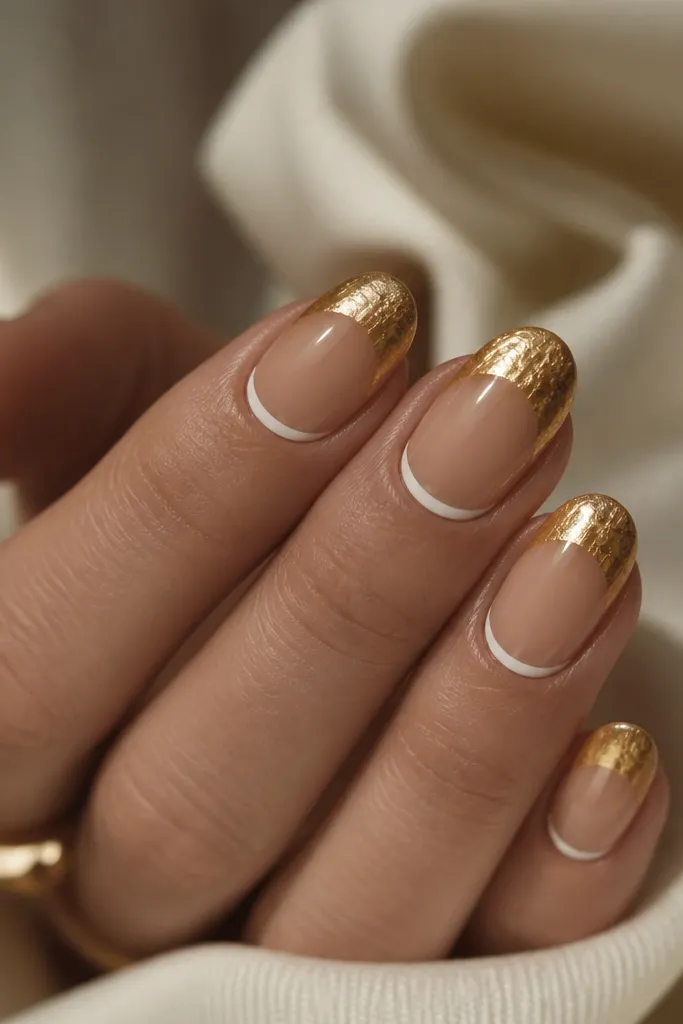
Apply a sheer nude base, then paint a thin white reverse French line right under the cuticle, about 1mm thick. Add gold foil to the tip area, pressing irregular foil pieces so it looks like broken metal. Seal with gel and top coat in two layers so foil edges don’t lift. File the free edge lightly so the foil doesn’t catch on hair.
Reverse French is the trick when you want gold and white but with a twist. The underlay white near the cuticle keeps it bright, and the gold foil at the tip brings drama. This looks flattering on medium almond because it visually lifts the nail and gives a clean boundary at the cuticle area. It’s also a strong choice if you want a set that photographs well under flash.
Watch outAvoid straight, full gold coverage to the sidewalls; it can look like a grown-out polish job.
Editor's noteWhen you press foil, press and release — don’t rub. Rubbing smears and dulls the shine.
16. White Halo Marble With Gold Arc Accents
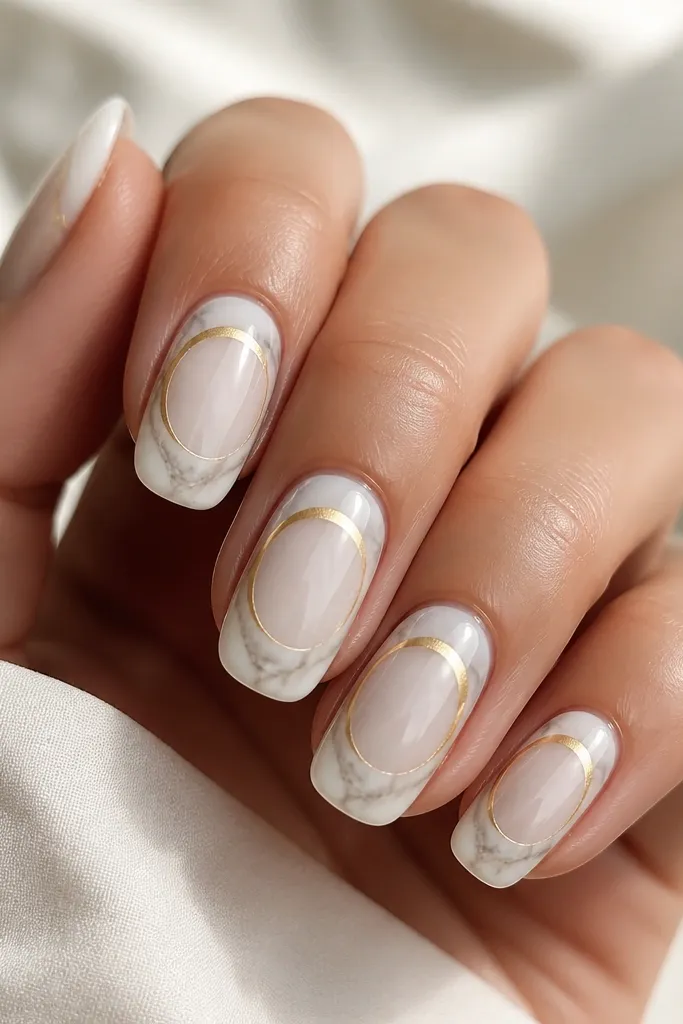
Build a milky white marble base with faint gray swirls. Draw a soft circular halo around the center using a white gel that’s slightly thicker than your marble. Add gold arc accents near the outer sides of the halo — keep them curved and thin so they don’t block the halo. Seal with glossy top coat and wipe clean so the arcs stay sharp.
Halo marble looks creative because it’s structured but still organic. The gold arcs mimic jewelry settings, and they help your eyes rest on a focal point. I like this for hands with shorter nail beds because the halo centers the design and makes the nail feel longer. It also works for bridal events since it’s white-forward with controlled gold.
Watch outAvoid adding too many gold elements; one halo plus two arcs is enough.
Editor's noteUse a small round stencil or a cut piece of tape to map the halo circle before you paint it.
17. White Side-Swoop With Gold Foil Edge
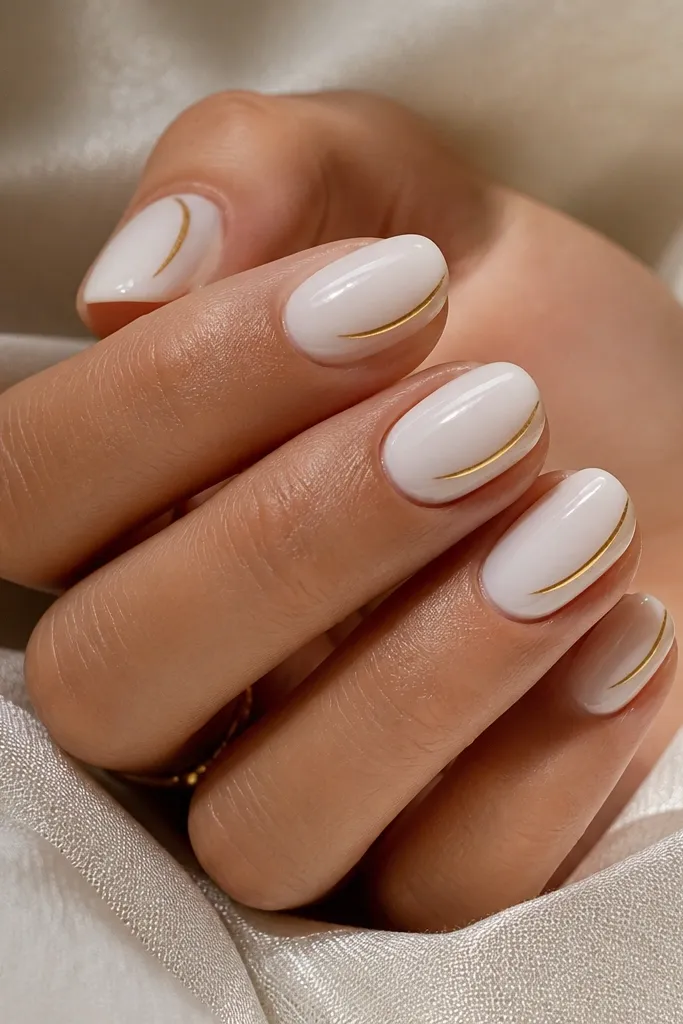
Side-swoop art makes nails look longer because the curve pulls the eye from cuticle to tip. The gold foil edge adds sparkle only along the line, so it stays elegant. This flatters most nail shapes, but it’s especially good on short oval and almond because the swoop can follow the natural contour. I wear it when I want something artsy without clutter.
Start with milky white acrylic. On each nail, draw a single curved swoop along one side using a white gel that sits slightly raised. Apply gold foil adhesive or tack gel right along the edge of the swoop and press foil so it sticks only to the line. Seal with glossy top coat and lightly file the surface so the swoop doesn’t feel sharp.
Keep the swoop width consistent; if it widens, it starts to look like a smudge.
Avoid wrapping gold foil all around the nail; keep it to the swoop edge.
18. Gold Studded White Tip Ombré
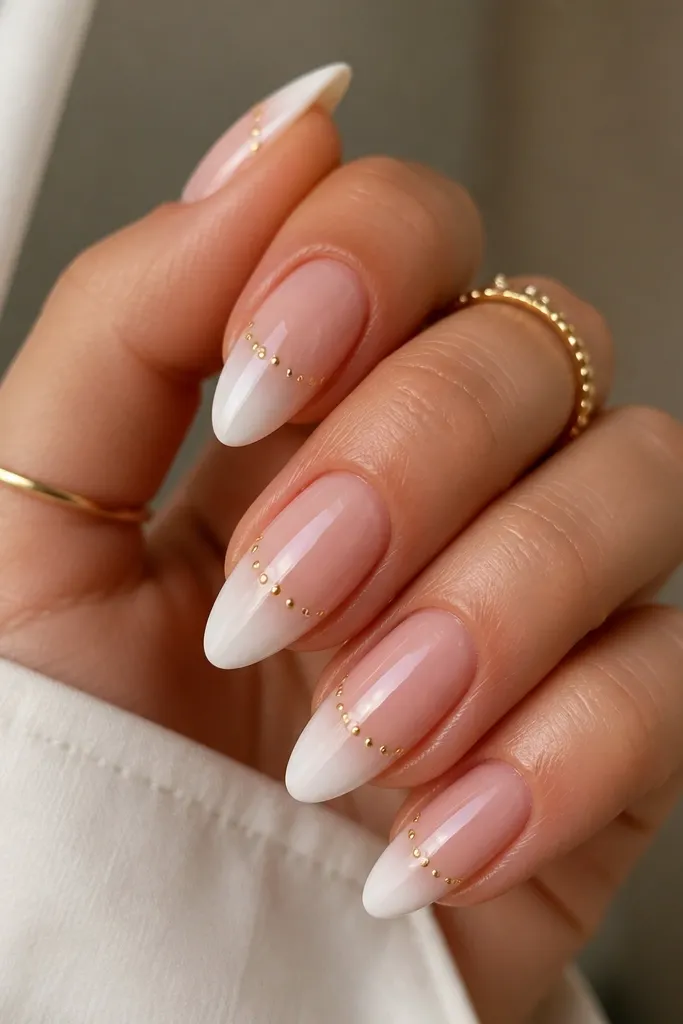
This is playful but controlled: the ombré makes it soft, and the studs create a little “constellation” effect. It flatters hands that look good with sparkle but you don’t want big rhinestones. I like it on almond because the tip area has enough space to place studs in a line. For warm skin tones, the gold looks golden and not brassy when paired with pure white.
Create a sheer base, then sponge a white ombré that becomes opaque in the last third of the nail. While the tip white is tacky, place small gold studs in a single diagonal or straight line across the tip — about 3-5 studs depending on nail length. Press each stud down and cure. Finish with glossy top coat, making sure the studs are fully sealed so they don’t catch.
Use tweezers with a flat tip so studs don’t roll off the nail.
Avoid placing studs too close to the free edge; they chip when they hit your nails on things.
19. White Negative Space Crescent With Gold Rim
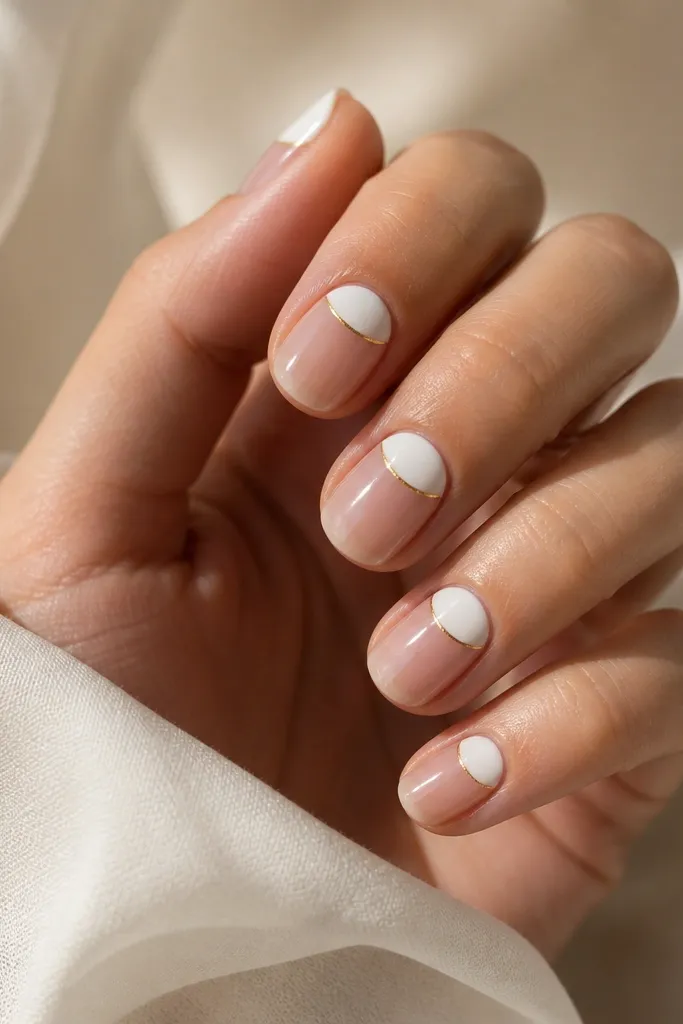
Keep a clear base and cure it smooth. Paint a white crescent across the upper half of the nail, leaving clear space on both sides. Add a thin gold line around the crescent edges as a rim, then cure. Seal with glossy top coat and clean up the sidewalls with a small brush dipped in alcohol.
This one gives you that clean, modern look with minimal art. The crescent shape uses negative space so it doesn’t feel busy, and the gold rim makes it look like a framed gemstone. I like it on short to medium nails because the crescent sits high and visually balances the nail. It’s also a good choice if you have to keep your nails work-appropriate but still want them to look styled.
Watch outAvoid thick gold rims; thin lines make it look like jewelry, thick lines look costume.
Editor's noteIf your crescent looks uneven, use a curved strip of tape to map the curve before painting white.
20. Pearl White With Gold Line Staircase
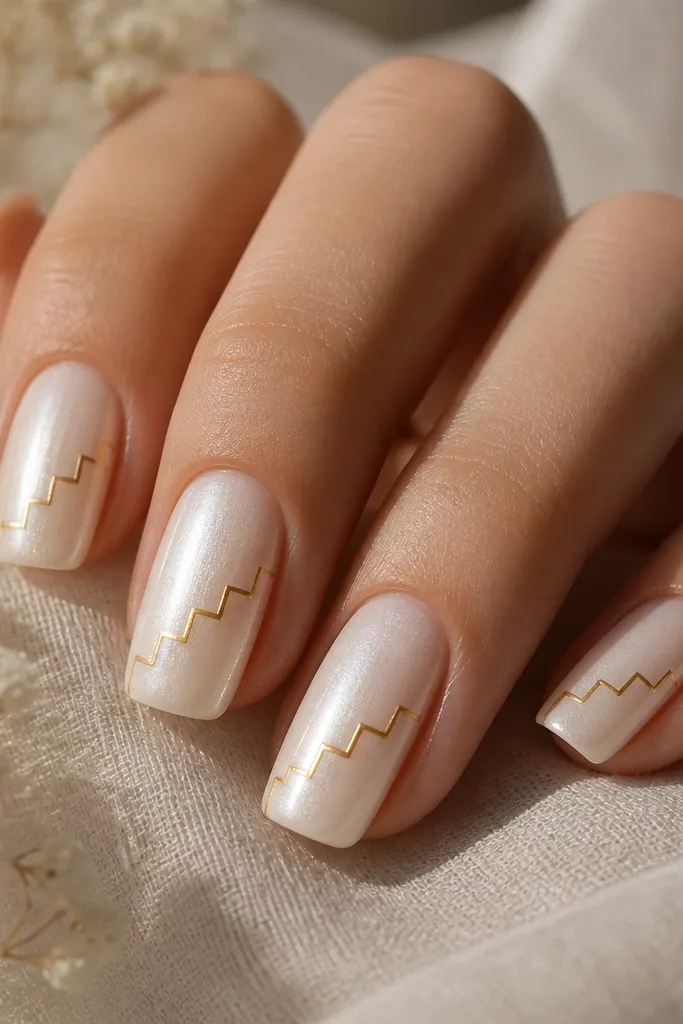
The pearl base adds glow, and the gold staircase gives you a graphic, architectural look. Because the gold is line-thin, it stays elegant even though the pattern is bold. This is great for oval and almond shapes where the diagonal line can follow the nail’s natural angle. I like it for nights out because it looks subtle in daylight and sharper under flash.
Apply pearl white acrylic or pearl gel and cure smooth. Draw a diagonal “staircase” line using a thin gold striping brush: one short horizontal step, then a small vertical step, repeated across the diagonal. Keep the steps consistent in size so it looks clean. Seal with glossy top coat to lock in the pearl glow and prevent gold from dulling.
Use a ruler edge under your hand to keep the diagonal angle consistent across nails.
Avoid random step sizes — it turns into scribble instead of design.
21. White Ombré to Glossy Gold Leaf Tips
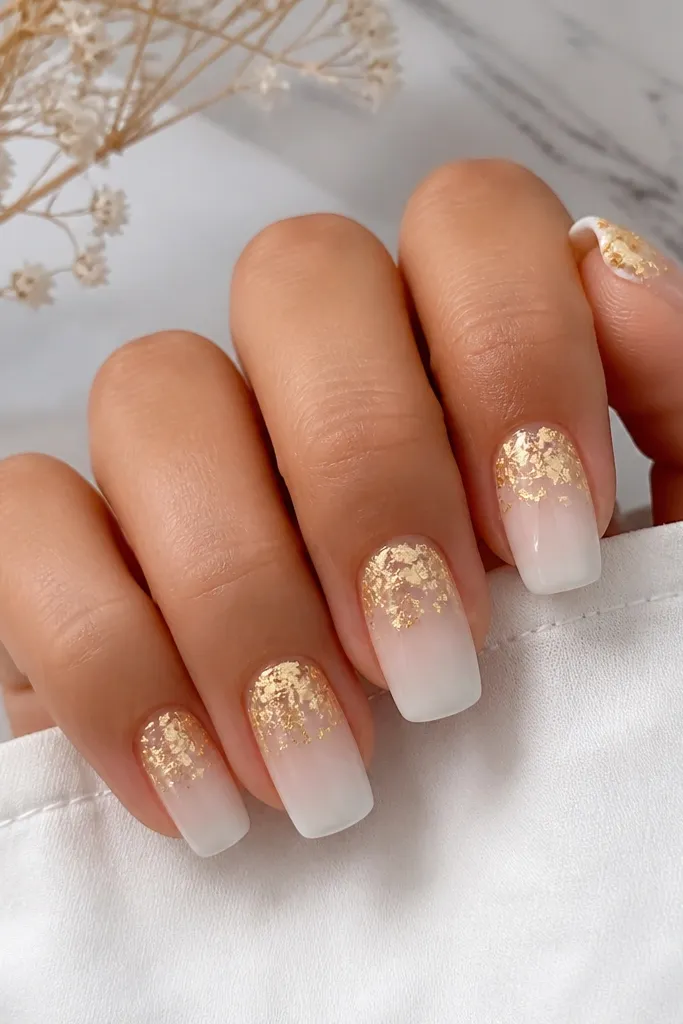
This set looks like a gradient sunset but in nail form: soft white fades into gold leaf at the tips. The leaf keeps it textured so it doesn’t look like a simple paint job. It flatters long almond and long oval nails because the fade has room to blend. For most skin tones, the contrast reads clean, and the gold leaf gives a warm glow that photographs well.
Start with a sheer base, then sponge a white ombré so it’s most opaque from mid-nail to the top third. Apply tack gel to the tip area only, then press gold leaf pieces so they start around the top third of the tip and fade downward. Seal with a glossy top coat in two layers, letting the first layer settle into leaf edges. File the free edge so it’s smooth.
Blend the point where white meets leaf by brushing a tiny amount of white gel right at the boundary before sealing.
Avoid skipping the first sealing layer; leaf edges can lift if you go straight to thick top coat.
22. Gold Chrome Dot Fade on Milky White
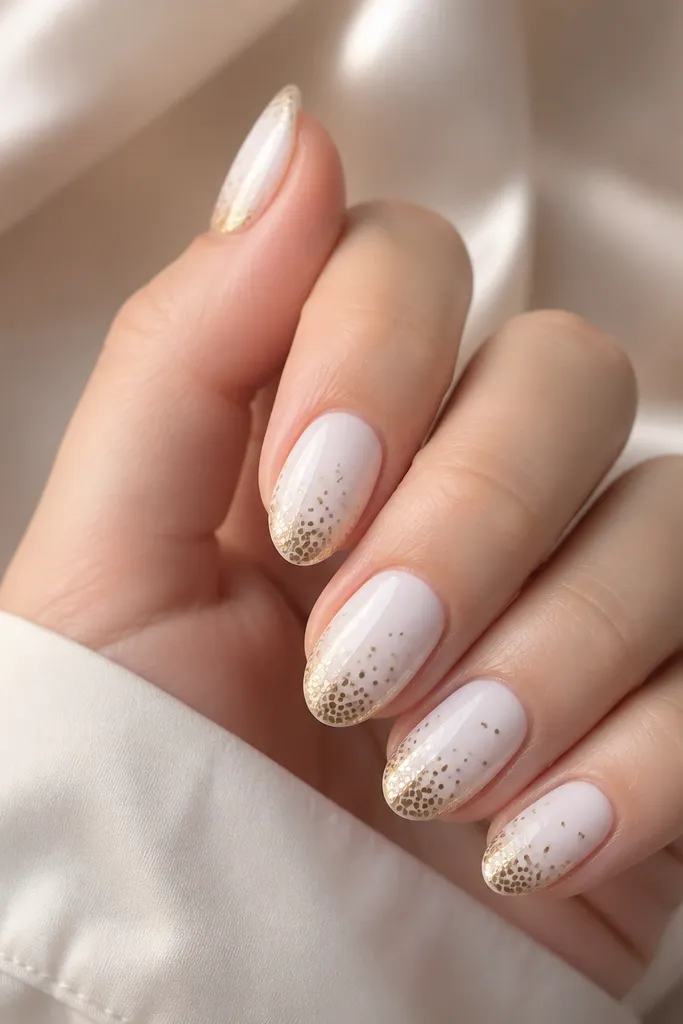
Dot fades look trendy without being loud, and gold chrome dots add that high-shine “confetti” effect. The milky white base keeps the dots visible and crisp. I like this on short square because the dot spacing can be tight and still look neat. It’s also a great option when you want something cute but you don’t want to draw lines.
Apply milky white acrylic and cure smooth. Use a dotting tool to place gold chrome dots in a gradient: more dots near the tip, fewer as you move toward the cuticle. Keep dot sizes consistent, around the same diameter each time, and leave a small white gap between clusters. Seal with glossy top coat, and cure fully so dots don’t smear.
If you don’t have chrome gel, use a gold metallic gel and top coat it with chrome powder before sealing.
Avoid placing dots in a perfect grid; the fade should feel natural, not patterned.
23. White Polka Dots With Gold Confetti Accent Nail
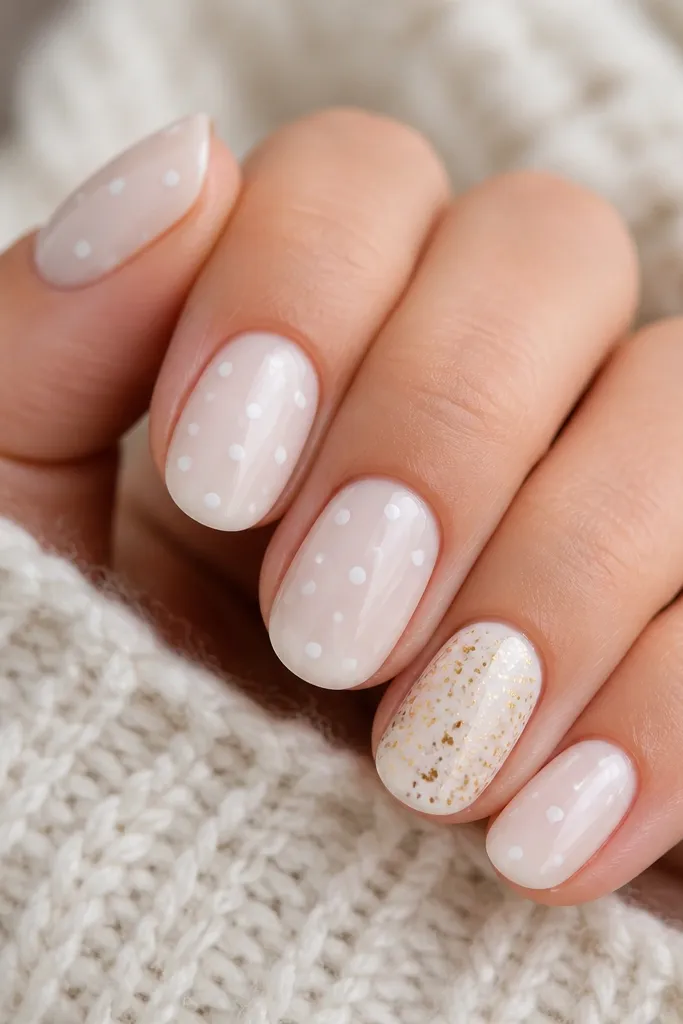
Build a milky white base on all nails. Add tiny polka dots using a slightly different white gel (one more opaque or one with a hint of pearl) so dots show as texture. Choose one or two accent nails and cover them with scattered gold confetti specks, keeping the pattern lighter near the cuticle. Seal everything with glossy top coat and cure fully.
Polka dots are classic, but the gold confetti accent nail makes it feel current. The white polka dots on white sound boring, but when you use two levels of opacity, it creates texture instead of flat color. This looks great for casual weekends and birthdays because it has movement. I like it on short oval and medium square since the dots stay readable and don’t blur.
Watch outAvoid adding polka dots of the same exact opacity as the base — they disappear.
Editor's noteUse a dotting tool size that matches your nail width so dots don’t look too tiny on larger nails.
24. White And Gold Marble Swirl Tips
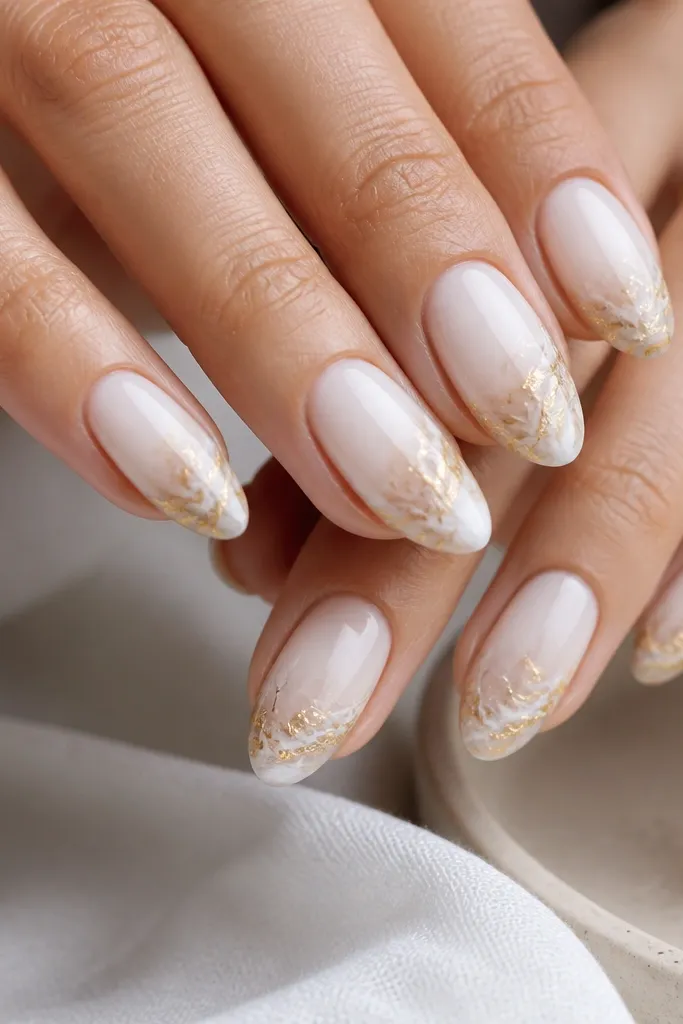
Start with milky white acrylic and keep the base smooth. At the tip area, paint a few marble swirls with faint gray-white gel, then drag thin gold metallic gel through the swirls. Keep gold streaks narrow and let them taper — thick streaks look like paint. Seal with glossy top coat and wipe the surface so the marble looks smooth, not grainy.
This design concentrates the action at the tip, which keeps the middle of your nail clean and wearable. Gold swirl streaks inside the marble look like real stone veining, especially when the marble is subtle. I like it on almond nails because the tip curve makes swirls look like they flow. It’s a solid pick for weddings and photos because the gold catches light without needing full coverage.
Watch outAvoid putting gold swirls across the entire nail; it gets busy and loses the stone look.
Editor's notePractice your swirl pressure on one nail first; consistent pressure makes the gold taper evenly.
25. White Cuticle Bow With Gold Knot
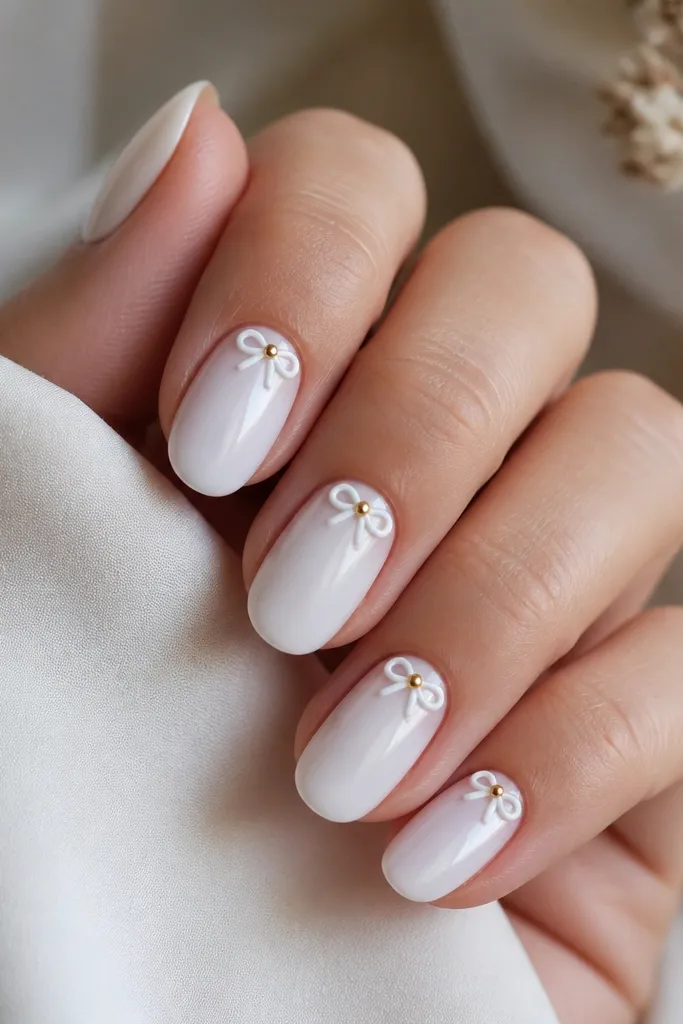
Apply milky white acrylic and cure smooth. Use a detail brush to sculpt a small bow near the cuticle: two curved loops on the sides, leaving a gap in the center. Place a tiny gold bead or gold gel dot as the knot, then cure. Seal with glossy top coat, and cap the bow edges so they don’t snag.
A cuticle bow feels playful but stays sophisticated when the bow is small and placed close to the cuticle. The gold knot in the center makes it look like a charm. This flatters hands because it adds detail at the top of the nail where your eye naturally goes. I wear this for anniversaries and holiday parties because it looks cute in close-up without being bulky.
Watch outAvoid big 3D bows; they catch on hair and lift fast.
Editor's noteKeep the bow width under the width of your cuticle so it looks neat, not oversized.