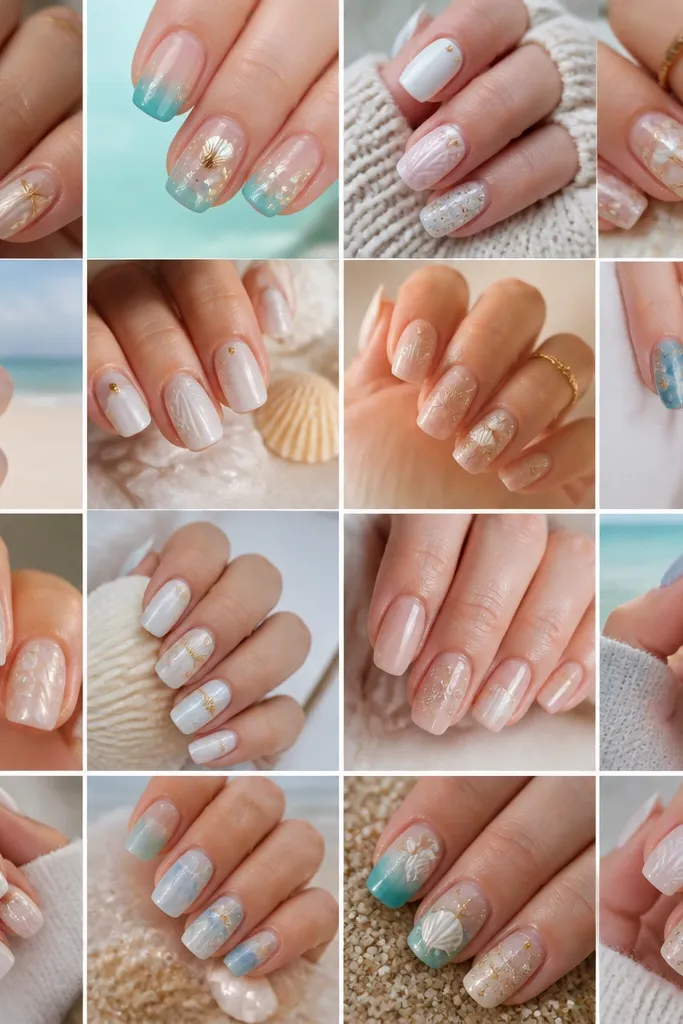
1. Classic Seafoam French with Conch Ridges
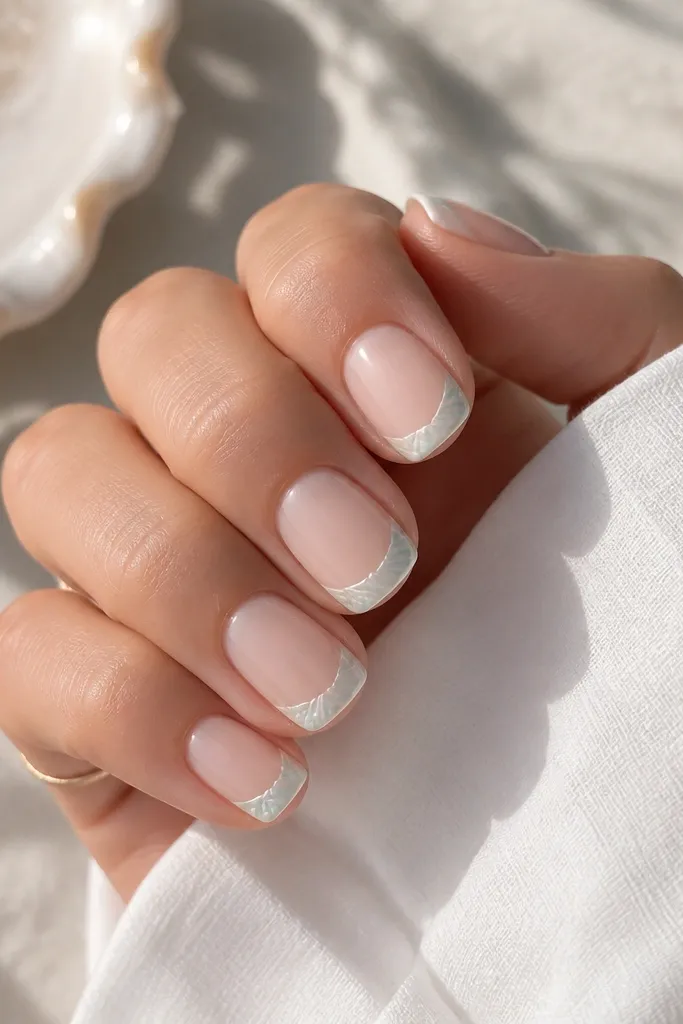
Start with a sheer milky pink base so your skin tone doesn’t get swallowed by opaque color. The French tip stays thin and crisp, then the shell texture goes over it with a pale seafoam tint so it looks like shell color under light. This version flatters cool undertones and fair to medium skin because the seafoam reads fresh instead of yellow. It also looks great for everyday wear because the shell lines are subtle and you’re not relying on heavy glitter. The styling principle is layered contrast: white for the tip boundary, lighter seafoam for the shell ridges.
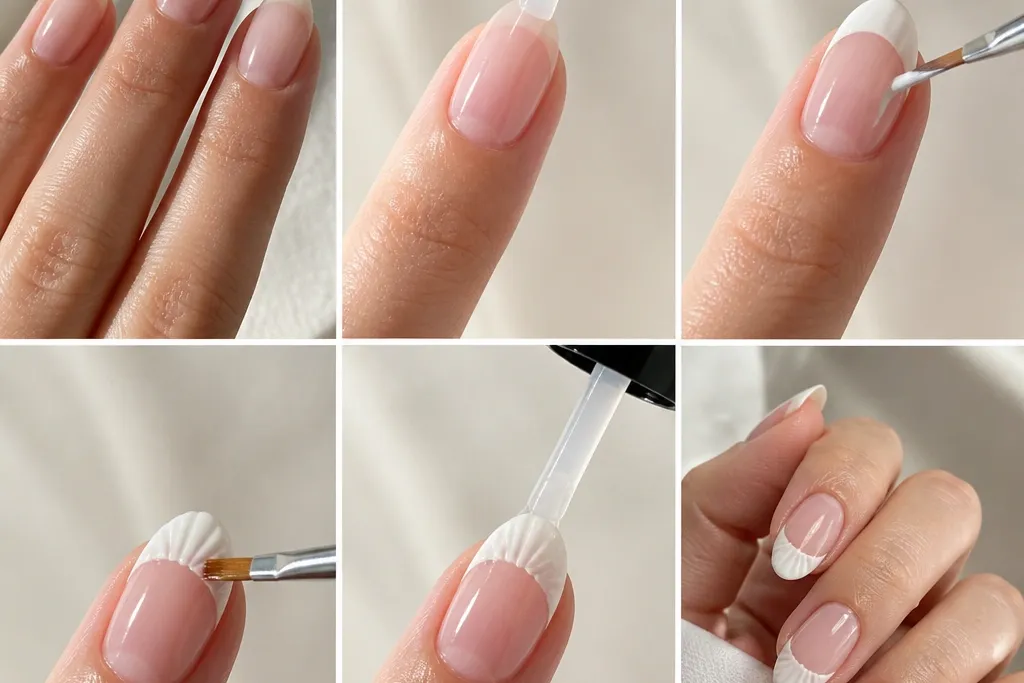
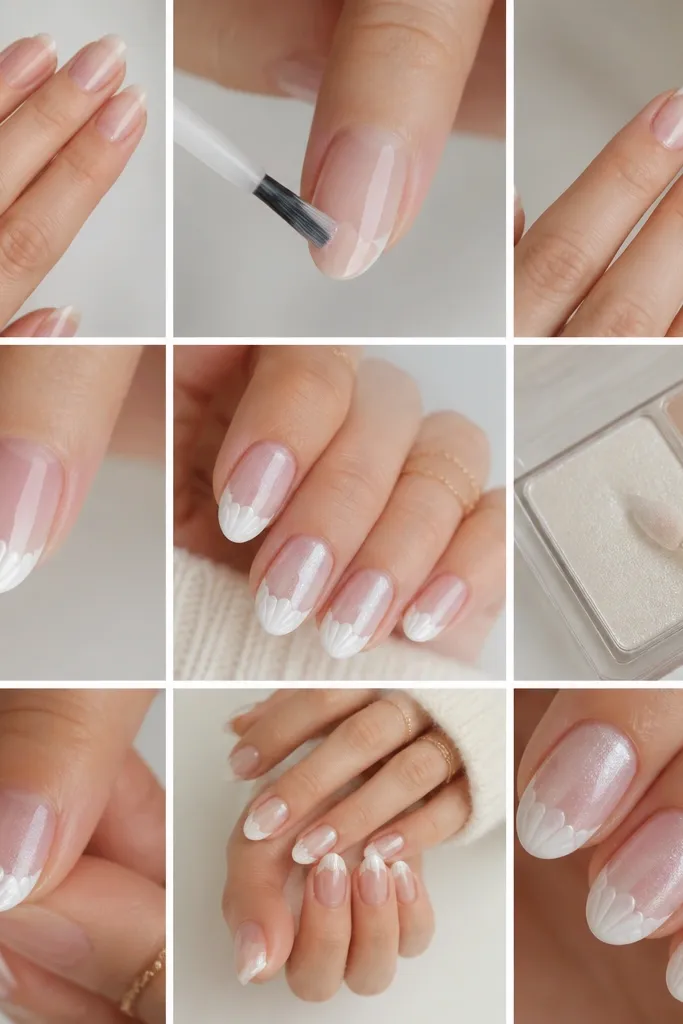
First, apply two thin coats of a milky nude base and cure/dry fully. Next, paint the French tip using a guide or freehand: keep the smile line about 1/3 of the nail width and let the edges taper slightly. Then, with a liner brush, pull 3-6 short, curved ridge strokes from the outer tip edge toward the center, using seafoam-tinted white or a white gel mixed with a drop of green shimmer. Finally, add one tiny pearl dot near the ridge center and seal with a glossy top coat.
Editor's noteIf your ridges look too bold, wipe your brush on a paper towel before you touch the nail — the seafoam will fade into a realistic shell sheen.
Watch outDon’t cover the whole tip in dense lines; it turns into a scribble instead of a conch texture.
2. Pearl Dot Seashell French on Milky Nude
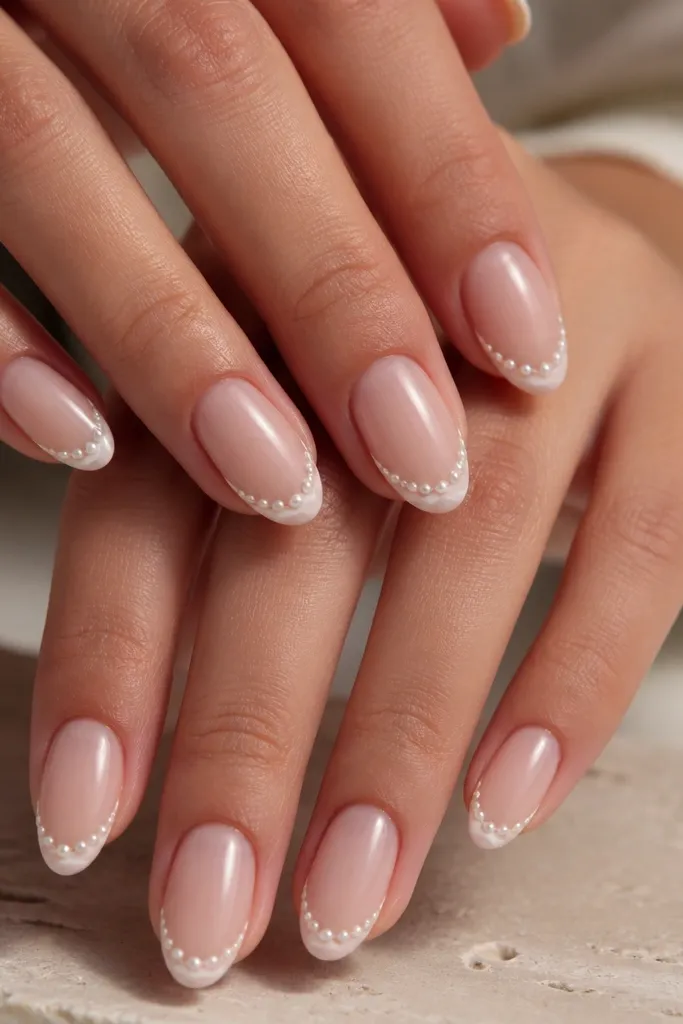
This is the seashell French tip design I use when I want it to look expensive without doing heavy sculpting. The milky nude base keeps the nail looking smooth, while the dot pattern creates a shell sparkle that reads “pearl oyster.” It flatters warm undertones because the ivory dots warm up the white tip. This set also works on short nails because the dot spacing gives detail without needing long ridges. The principle here is texture through micro-dots: small marks create depth even when your white line is simple.
Apply a milky nude base in two thin coats, then cure/dry. Use a fine strip of French-tip guide tape or a steady freehand to paint a thin white smile at the tip. While the tip is still tacky (if gel) or just set (if polish), place pearl dots with a 1.0-1.5 mm dotting tool: start with three dots near the center and add the rest toward the edges. Add one faint curved line through the dot cluster using off-white gel to mimic shell waves. Finish with a thick, even glossy top coat.
Editor's noteFor perfect dot size, press the dotting tool straight down once — don’t drag, or the dots turn into smears.
Watch outDon’t use bright glitter dots; they look like confetti instead of oyster pearl.
3. Soft Pink Shell French with White Wave Tips
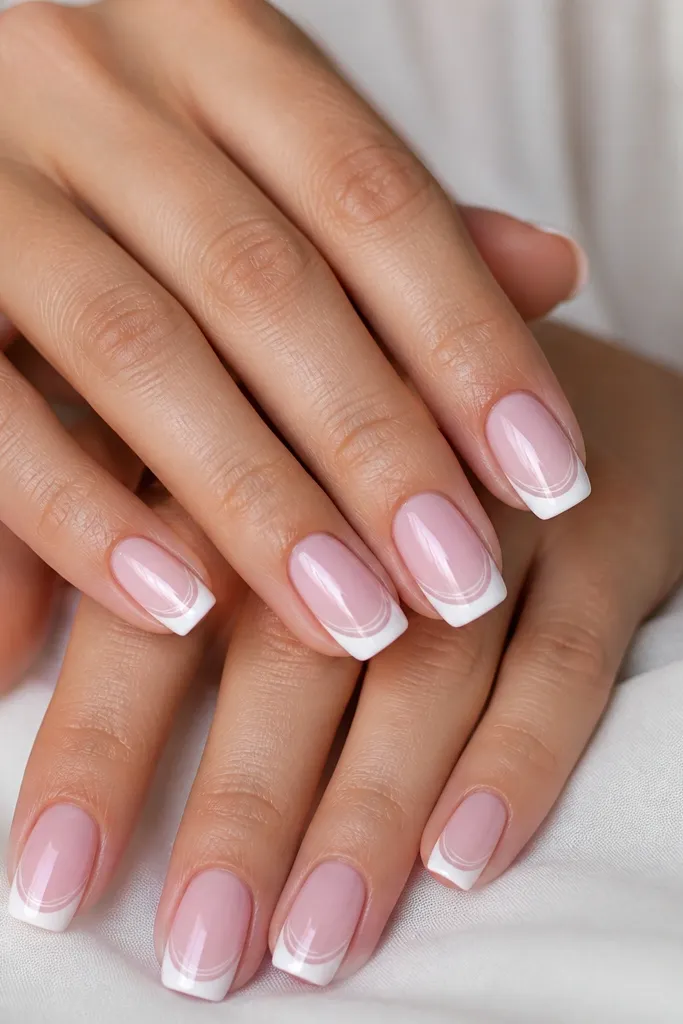
If you want seashell French tips that look romantic instead of beachy, this is the one. The soft blush base makes the white tip look creamy, and the wave arcs add movement without needing detailed ridges. I like it on medium skin tones because the blush balances the contrast so the tips don’t look too stark. For fair skin, it still works because the waves are pale and keep the design airy. The key principle is tone-on-tone: use pale pink and white waves that sit inside the French area.
Start with a blush sheer base, two coats for an even glow. Paint a French tip that is slightly wider at the sidewalls and thinner in the middle, keeping the overall tip width around 1/3 to 2/5 of the nail. Add wave arcs inside the white area using a liner brush and a mix of milky white plus a tiny dab of blush gel. Make 3-4 arcs per nail, spacing them so they don’t touch the side edges. Seal with glossy top coat and clean up the side lines with a thin brush dipped in remover.
Editor's noteKeep your wave arcs short — long waves look like abstract art, not shell ripples.
Watch outDon’t paint the waves all the way to the cuticle; the design looks crowded.
4. Sea Glass French with Iridescent Topcoat Shell Glow
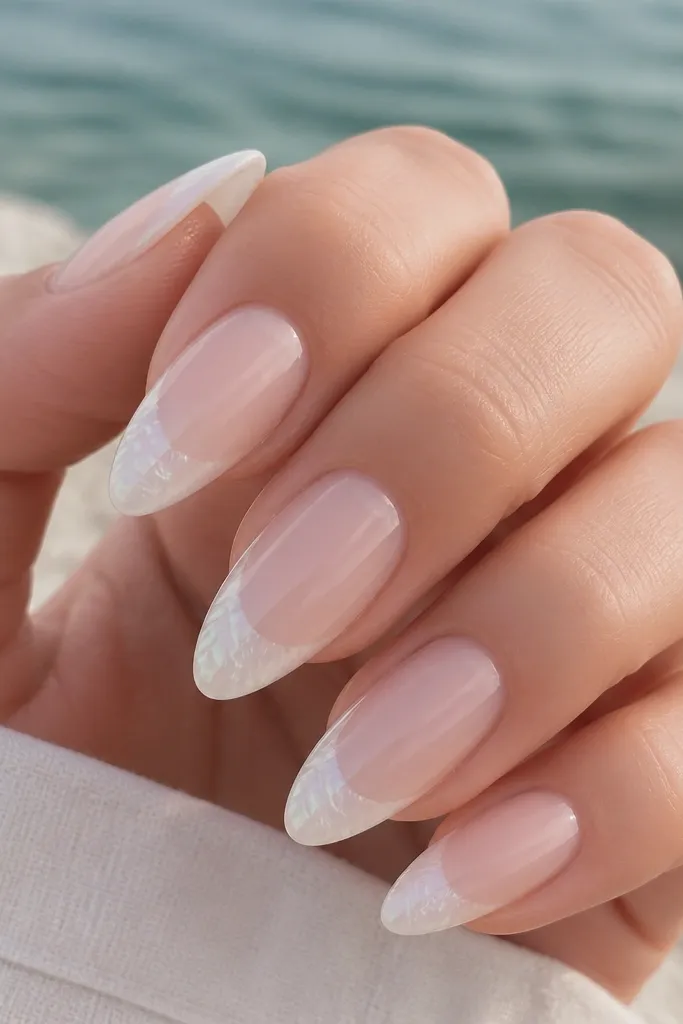
This design is for the days you want seashell nails that look glassy and modern. The French tips are milky-translucent instead of opaque white, so the iridescent topcoat does the heavy lifting. It flatters olive and neutral undertones because the cool nude and shimmer make skin look smoother. It’s also flattering for longer almond nails because the glass effect looks like depth. The principle is using finish, not heavy art: your shimmer and translucency create the shell look.
Apply a cool-toned sheer nude base in two thin coats. Paint a milky French tip with a translucent white gel or thin white polish so the line looks like frosted glass. Cure/dry that layer, then add a very light layer of iridescent topcoat only on the French area — use less product so it doesn’t dull the base. If you want extra shell cues, add two or three faint curved lines in white at the tip center using a liner brush. Finish with a full-coverage glossy top coat to lock everything in.
Editor's noteUse a makeup sponge to dab shimmer only on the tip area if your brush makes streaks.
Watch outDon’t go too opaque with the tip; sea-glass nails lose the effect when the white is solid.
5. Mini Starfish French with Shell Edge Outline
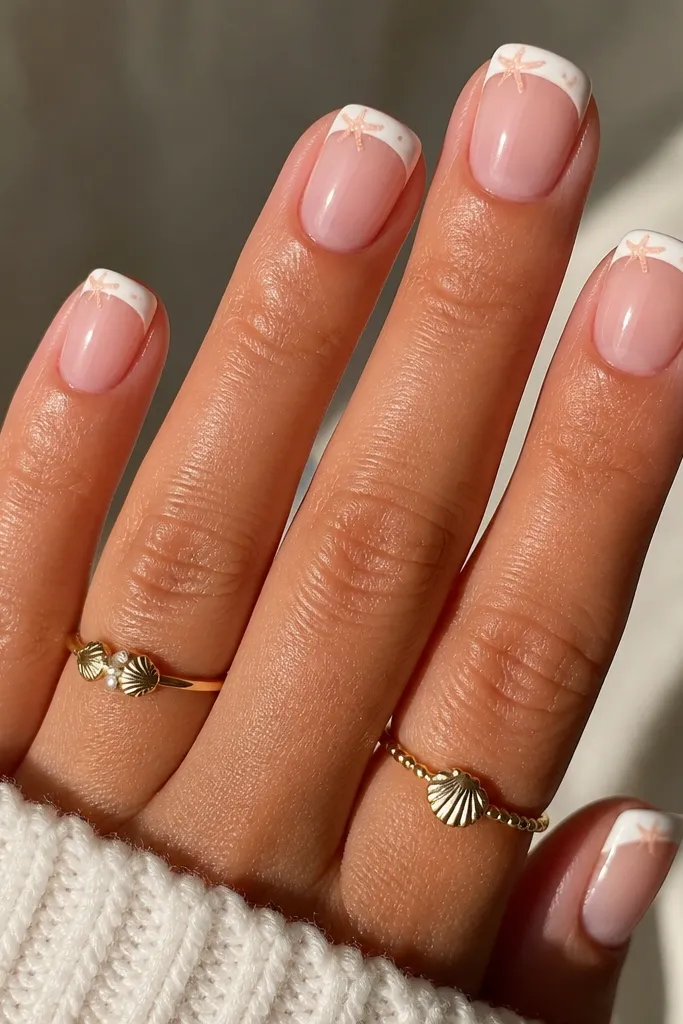
This one is playful but still classy because the starfish stays tiny. The sheer nude base keeps your fingers looking clean, and the off-white outline gives the tip a shell-like boundary. I like this on medium-short nails because the icons fit without crowding. For warm undertones, pale peach starfish looks natural and not neon. The principle is adding one focal point inside a simple French tip so your design reads instantly.
First, apply a sheer nude base and cure/dry. Paint a thin French tip in white, then add a second outline line along the inside edge of the tip using off-white gel — keep it narrow. Dot a tiny starfish shape in pale peach: place a small center dot, then add four short tapered lines around it with the liner brush. Add one micro highlight dot near one “arm” of the starfish using pearl white. Seal with glossy top coat and wipe any outline that touches the skin with a clean-up brush.
Editor's noteIf freehand starfish is hard, use a dotting tool to place the arm tips, then connect them with the smallest brush.
Watch outDon’t make the starfish bigger than the shell texture area; oversized icons look costume-y.
6. White French with Opal Shell Ridges
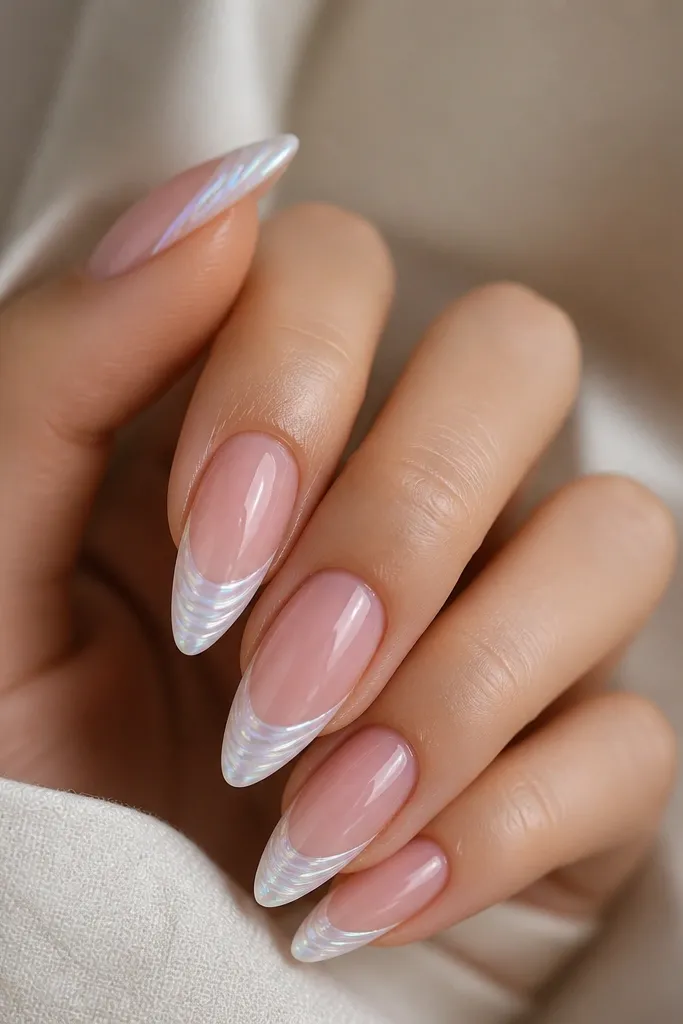
This is the high-contrast version that still feels wearable. The bright white tip gives you that clean French look, and the opal ridges add color shifting without turning the whole nail into glitter. It flatters cool undertones and looks especially good on hands with visible veins because the opal shimmer makes them look softer. For special events, it reads “pretty” fast because the shimmer catches every time you move your hand. The styling principle is sharp base + delicate color shift in the texture layer.
Apply a sheer pink base in two coats. Paint a crisp French tip in bright white, keeping the curve even across all nails. With a liner brush, add opal ridges using a white gel mixed with a tiny amount of lavender shimmer, then drag 3-5 short lines inward from the outer tip edge. Add a second set of 1-2 ridges in aqua shimmer on top so you get color variation. Cure/dry each ridge layer if your gel requires it, then finish with a glossy top coat.
Work one nail at a time so the ridge layer stays tacky for smooth lines.
Don’t mix too much shimmer into the white; it turns sandy and dull instead of opal.
7. Nude Marble Shell French Tips
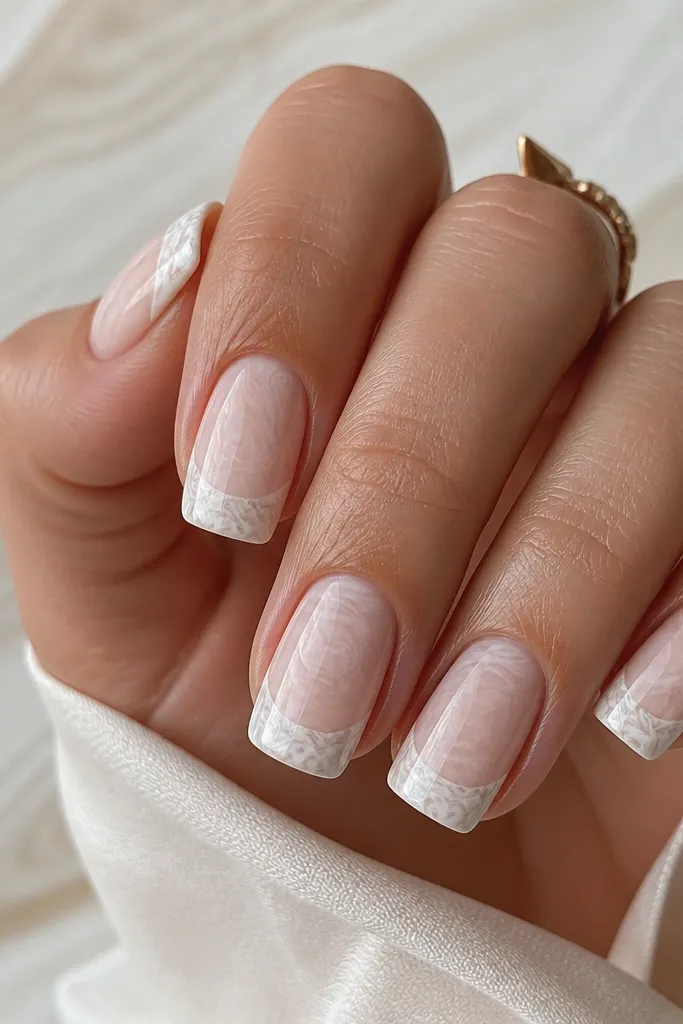
When you want seashell nails that feel designer instead of beachy, marble is your move. The nude marble base makes the nails look dimensional, and the marble swirls inside the French tip mimic shell veining. I like this on deeper skin tones because the milky white swirls pop cleanly without needing thick glitter. It also looks good year-round since the palette is mostly neutral. The principle is veining: you’re drawing shell structure with thin swirls, not filling the tip with patterns.
Start with a nude base that has a slight jelly finish. Add a very light marble effect by dragging a thin brush with pale gray gel in one or two streaks per nail, then cure/dry. Paint a white French tip, keeping it medium-thin so you have room for swirls. Use a liner brush to add 2-3 thin marble swirls inside the tip in milky white and pale gray, following the nail’s curve. Finish with a glossy top coat and clean the tip edge so the French line stays crisp.
Editor's noteIf your marble looks muddy, use a smaller brush and pull fewer lines — less looks more expensive.
Watch outDon’t add black-gray; it makes the shell look like bruising.
8. Pastel Shell French with Lavender Pearls
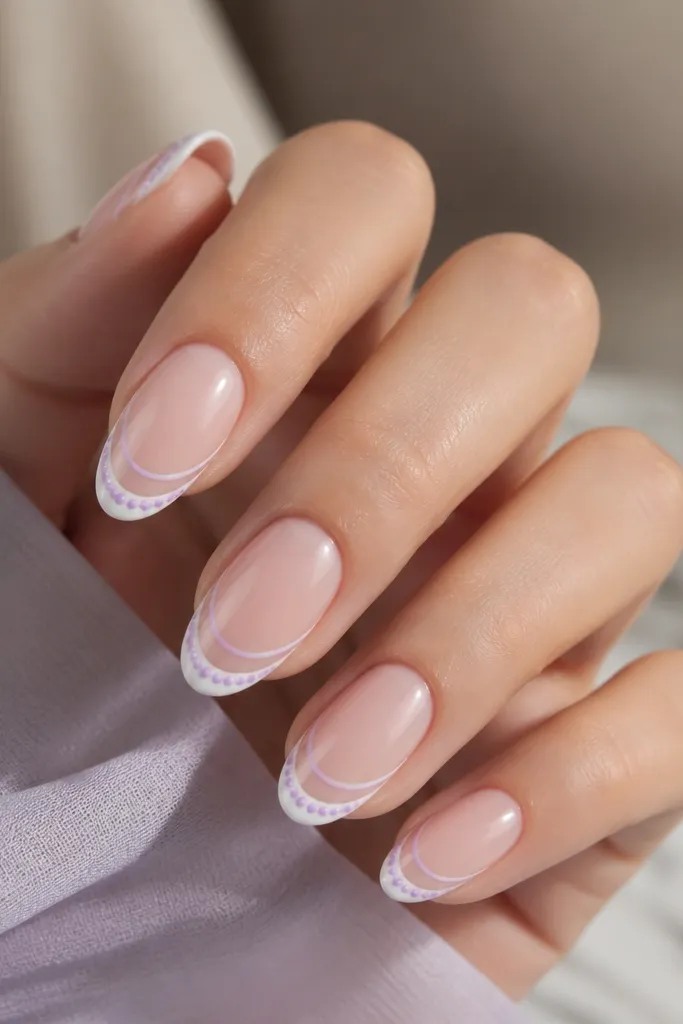
This is the “soft spa nails” version. The milky white tip keeps the design clean, and lavender pearls add a calm pop that still reads seashell. It flatters fair to medium skin because lavender brightens without looking harsh. On warm undertones, it can look a little rosy, so keep the base pale pink rather than peach. The styling principle is pastel contrast: use gentle color and repeat the same dot spacing on every nail for harmony.
Apply a sheer pale pink base and let it level fully. Paint the French tips in milky white with a thin, even line — don’t overbuild thickness. With a dotting tool, place 4-6 lavender dots inside the tip, mostly clustered near the center and slightly toward one side. Add one faint lavender ridge line with a liner brush, about the length of two dots. Seal with a glossy top coat; you want the pearls to look like they sit under glass.
Editor's noteIf dots sink into the polish, wait an extra minute and then place them — surface texture matters.
Watch outDon’t use neon purple; it kills the shell softness.
9. Champagne Shell French with Gold Flecks
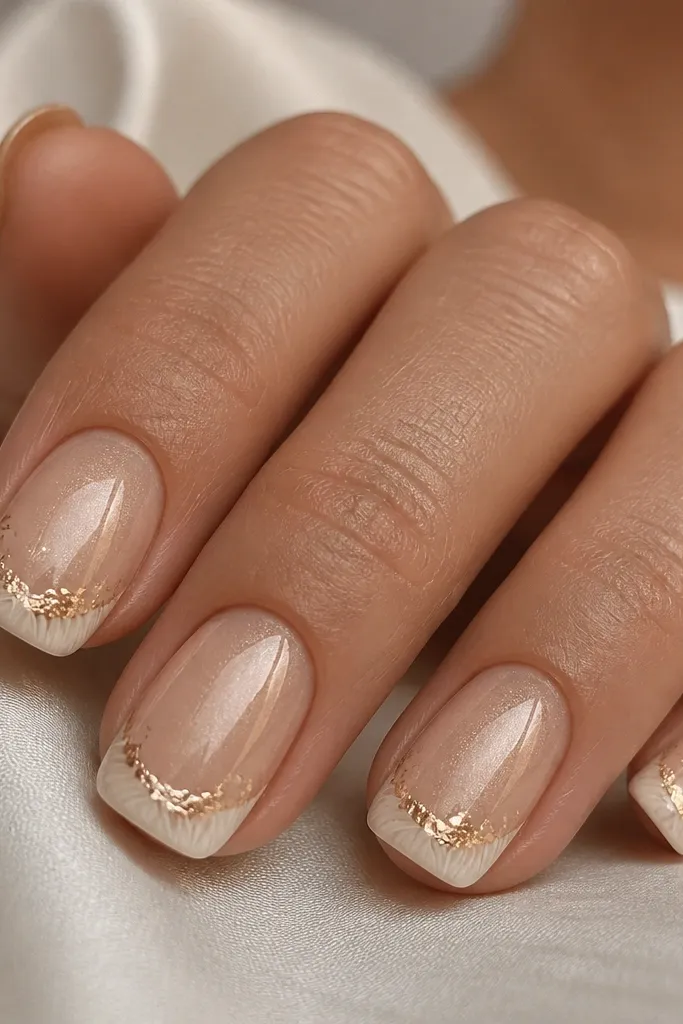
This design turns seashell French tips into something you can wear to dinner. The champagne nude base flatters medium to deep skin tones because it warms the overall look without needing heavy color. The gold flecks give the shell a “sun on the ocean” vibe, and the carved curved line keeps it from looking like random glitter. I like it on nails that are short to medium because the foil flecks need space to catch light. The principle is controlled sparkle: tiny flecks only on the French area, plus one etched element.
Start with a sheer champagne base, two thin coats. Paint French tips in creamy white, keeping the smile line even. Press tiny gold foil flecks onto the wet top of the French area, using tweezers or a dot of gel as glue. Then draw one single curved shell line with a liner brush using off-white gel and a gold-tinted topcoat mix. Finish with a glossy top coat, and cap the foil by brushing a clear layer over it so it doesn’t snag.
Editor's noteUse a matte top coat on one nail as a contrast accent, then keep the rest glossy for a high-end look.
Watch outDon’t scatter gold over the base; it looks like cheap dust.
10. Sea Shell Outline French with Negative Space
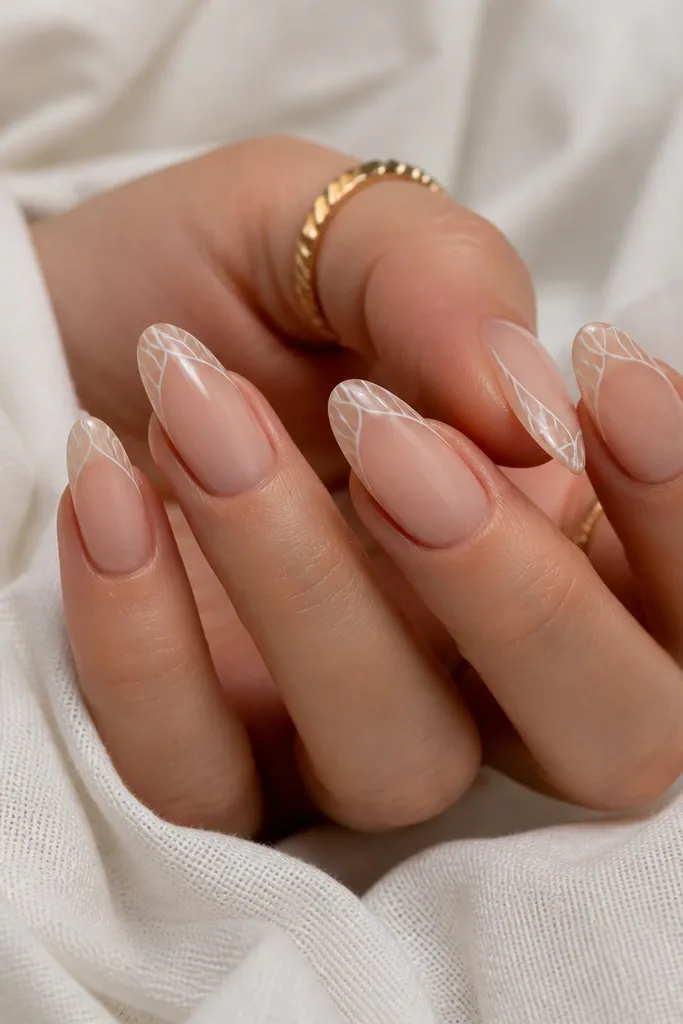
Negative space makes this look clean and modern, and it’s also easier when you’re learning. Instead of filling the entire tip, you outline it, then add a few shell wave marks inside. This flatters hands with shorter nail beds because you’re not covering as much area with white. It also looks good on any undertone since the base stays nude and the white is only an outline. The principle is using line work: less paint, more shape.
Apply a nude base in two thin coats and cure/dry fully. Place French-tip guide tape at the smile curve, then paint a thin white outline along the guide edge — you should still see nude beneath. Cure/dry. Inside the outlined tip, use a liner brush to paint 2-4 short wave marks, slightly irregular like shell ripples. Finish with a glossy top coat, and pull a cleanup brush around the outline so the line stays sharp.
Editor's noteOutline first, then add waves — if you do waves first, they can get smeared when you outline.
Watch outDon’t thicken the outline into a solid block; it defeats the negative-space look.
11. Icy White French with Blue-Tinted Shell Texture
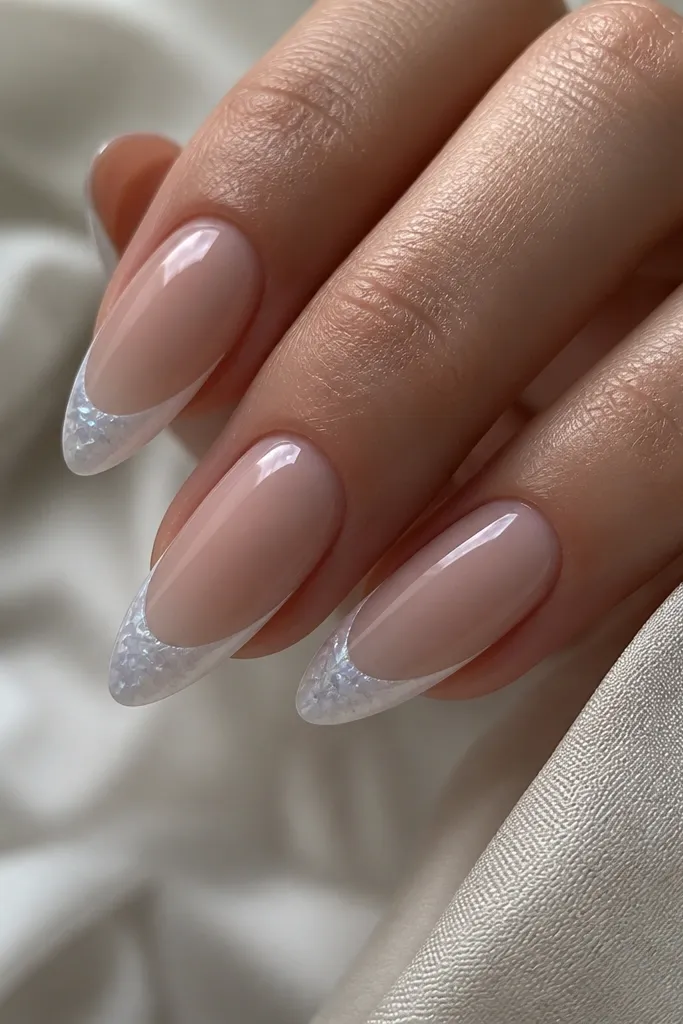
This is the cold-weather seashell French tip. The icy white tip is slightly translucent, and the blue tint in the texture makes it look like winter shell glass. It flatters cooler undertones and looks especially good on nails that are long enough to hold detail. If you tend to get bored with pink and want something fresh, this will do it. The principle is frost effect: keep the base sheer and let the tip look like it has depth.
Apply a sheer nude base and cure/dry. Paint an icy white French tip using a translucent white gel or thin white polish so the line still looks milky, not opaque. Add texture with a liner brush: make 3-5 short ridge strokes using a white gel with a tiny drop of blue shimmer. Add 2-3 micro dots near the ridge ends with a dotting tool. Seal with glossy top coat, then lightly buff the top if you see ridge texture sitting too high.
Editor's noteUse a tiny amount of blue pigment; too much makes it look like sky-blue nail polish, not shell frost.
Watch outDon’t skip the sheer base — icy tips on an opaque base look heavy.
12. Rose Nude French with Shell Petal Tips
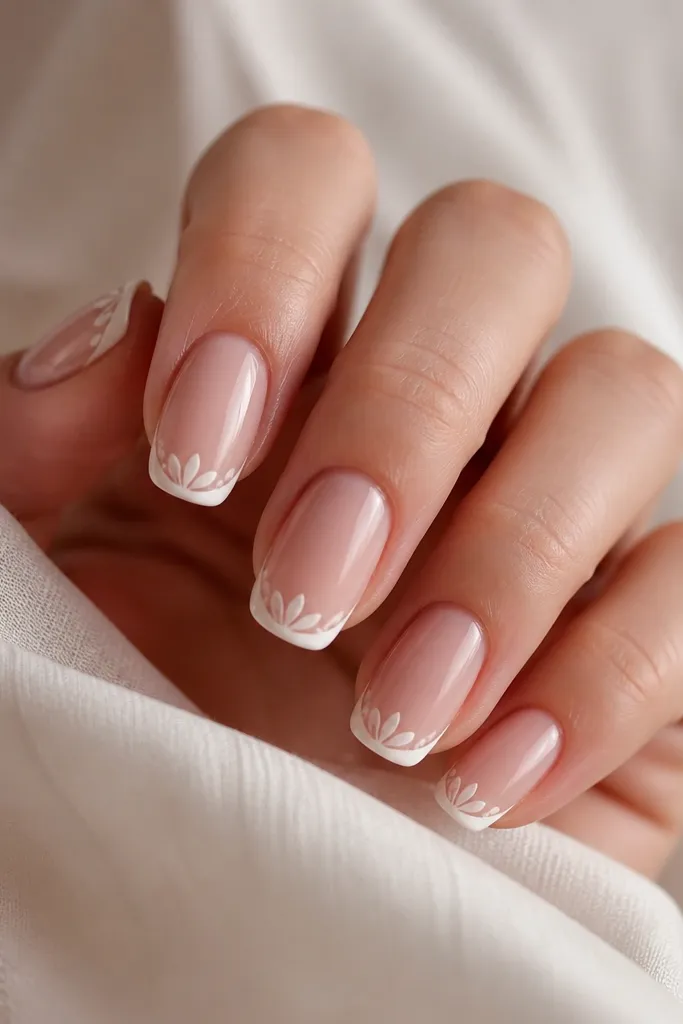
This version looks like a shell flower. The rose nude base makes it flattering and feminine, and the petal strokes give you texture that looks like shell layers. It’s great for hands with shorter nail beds because the petal fan stays centered and doesn’t need a lot of width. On warm skin tones, the rose base makes the manicure look naturally harmonious. The principle is petal layering: small teardrop marks build the shell look without needing perfect ridges.
Start with a rose nude jelly base in two thin coats. Paint a rounded French tip in white, keeping it slightly thicker in the center for a soft dome look. With a liner brush, place 6-8 tiny teardrop strokes inside the tip: start with one near the center, then place teardrops around it like a fan. Use off-white for the outer teardrops and a touch of pale pink for 1-2 inner ones. Seal with a glossy top coat and cap the edges so the petal texture doesn’t catch on fabric.
Editor's noteIf your teardrops look like blobs, lift your brush right as you reach the tip — quick up and out gives a point.
Watch outDon’t overcrowd every teardrop — leave small gaps so the shell layers show.
13. Beige Seashell French with Micro Rim Pearls
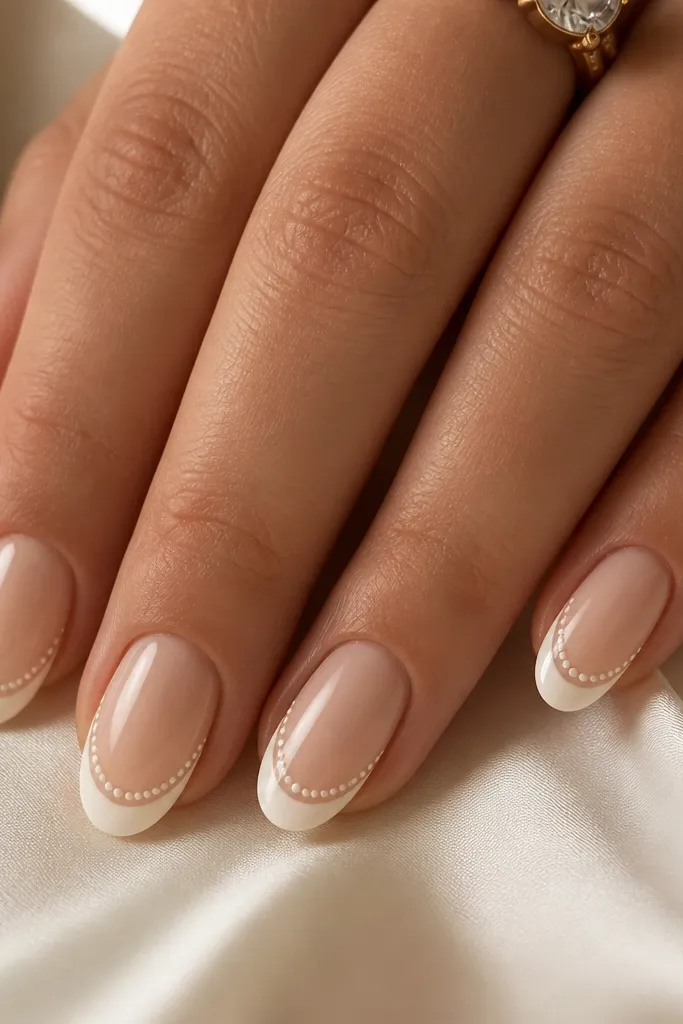
This is the “jewelry French tip” look. The beige nude base makes it neutral and wearable, and the micro rim pearls create a seashell edge effect without painting lots of detail. I like it for everyday because it’s subtle until the light hits the beads. It flatters medium to deep skin tones because the beige base looks cohesive and the pearls pop cleanly. The principle is framing: you’re outlining the tip, then adding one small internal curve for balance.
Apply a beige nude base and cure/dry fully. Paint a very thin creamy white French tip, keeping the curve neat. With a dotting tool, place tiny pearl dots along the inside edge of the tip — only 1 row, spacing them about a dot width apart. Add one internal curved dot line in the center using off-white gel, with 3-5 dots. Finish with a glossy top coat and make sure you cap over the pearl dots so they feel smooth.
Use a clear gel as “glue” for pearls if your dots keep popping off while you cure.
Don’t make the pearl border thicker than the French line; it looks like a sticker border.
14. Milk White French with Shell Scribble Waves
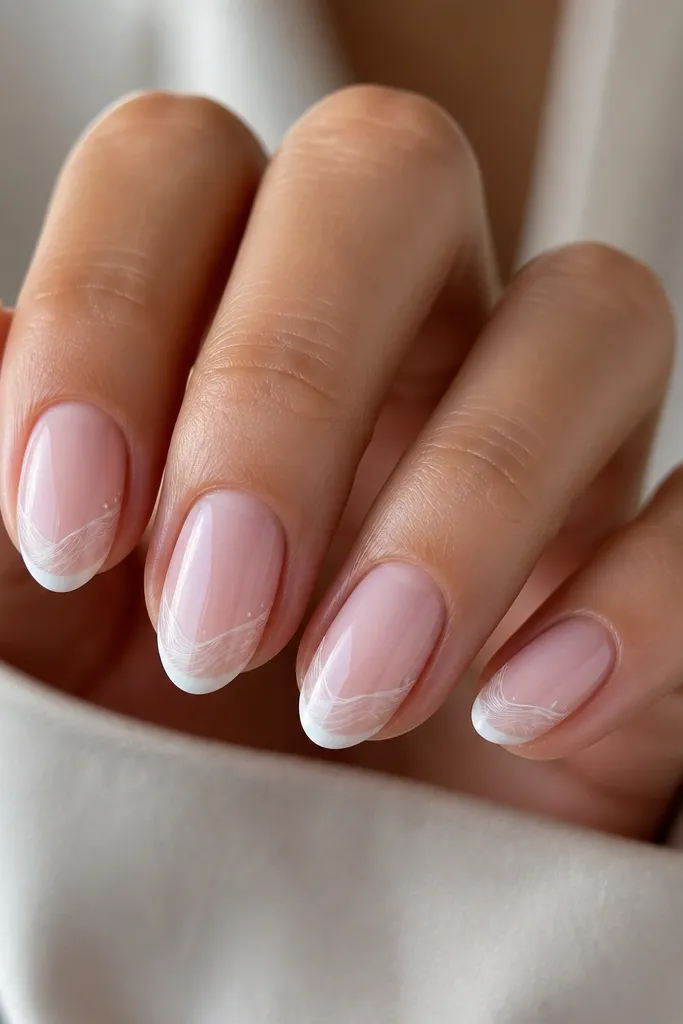
This is the easiest seashell French tip to repeat because it’s forgiving. The milk white tip gives you the French structure, then the scribble waves add shell movement without needing perfect symmetry. It flatters all skin tones because the palette is mostly white and milky pink. It also works on very short nails where ridges might not fit. The principle is controlled chaos: thin lines that look slightly imperfect read more natural as shell waves.
Start with a sheer milky pink base in two thin coats. Paint the milk white French tips, keeping them narrow so the nail still looks clean. With a liner brush, draw 2-3 thin wave scribbles inside each tip, keeping the lines light and not fully filling the area. Add a few tiny dot accents near one end of the waves to mimic shell speckle. Seal with a glossy top coat and clean the edges so the white tip stays sharp.
Editor's noteIf you mess up a scribble, wipe only that line and re-draw it — don’t repaint the entire tip.
Watch outDon’t press hard with the brush; thick lines look heavy and blocky.
15. Pastel Mermaid Shell French with Teal Edge Fade
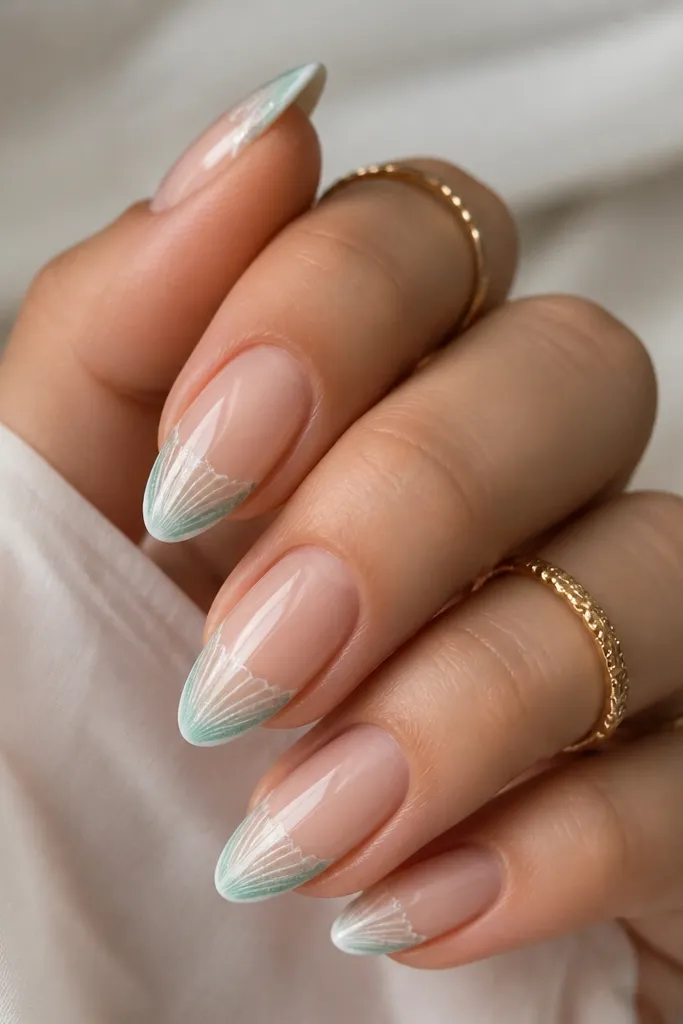
This one looks like mermaid shell edges without going full loud. The white center keeps the French tip classic, and the teal fade at the corners adds that ocean depth. It flatters neutral to cool undertones because teal looks crisp against nude. If you want something fun for summer photos, this nails that vibe while still reading as a French manicure. The principle is gradient placement: color goes at the edges so your shell texture still looks airy.
Apply a sheer nude base in two coats. Paint the French tip in white, keeping the center opaque enough to look clean. Mix teal shimmer gel with a little clear gel, then use a sponge or the side of a makeup sponge to dab teal only on the outer corners of the French tip — blend inward slightly. Add 3-6 short ridge strokes using off-white gel over the white center, then add one or two teal-tinged strokes near where the gradient starts. Cure/dry and finish with glossy top coat.
Editor's noteBlend the teal with tiny dabs, not swipes — swipes leave bands.
Watch outDon’t fade teal across the whole tip; it becomes a teal French, not a shell edge.