1. Milky White Stiletto With Gold Foil Crescent
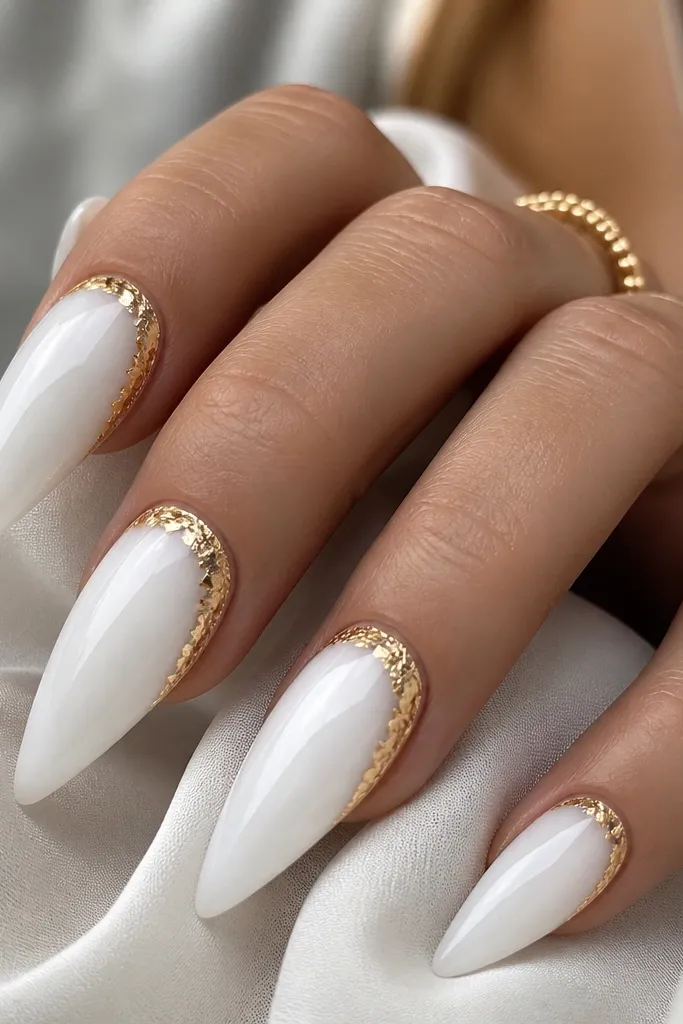
This set is the one I reach for when I want "soft glam" without heavy clutter. The base is milky opaque white gel - not pearl, not sheer - so it reflects light evenly. The gold foil crescent hugs the natural curve of the nail, so it frames your hand instead of covering it. It flatters medium to deep skin tones because the white reads bright and the gold warms everything. For events, it also looks great with thin gold rings since the foil follows the same arc.
Start by applying a milky opaque white gel in two thin coats, curing between each layer, until you get full coverage at the sidewalls. Place a small strip of gold foil at the cuticle area, then press it lightly with a silicone tool so it forms a crescent that points inward toward the center. Seal the foil with a thin layer of clear builder gel or top coat, then cap the stiletto tip. Finish with a high-gloss top coat so the foil stays smooth and reflective instead of textured.
Editor's notePress foil with a dry foil tool, not wet gel, or it smears and looks dull.
Watch outDon't cover the whole nail in foil - it kills the clean contrast that makes the set look expensive.
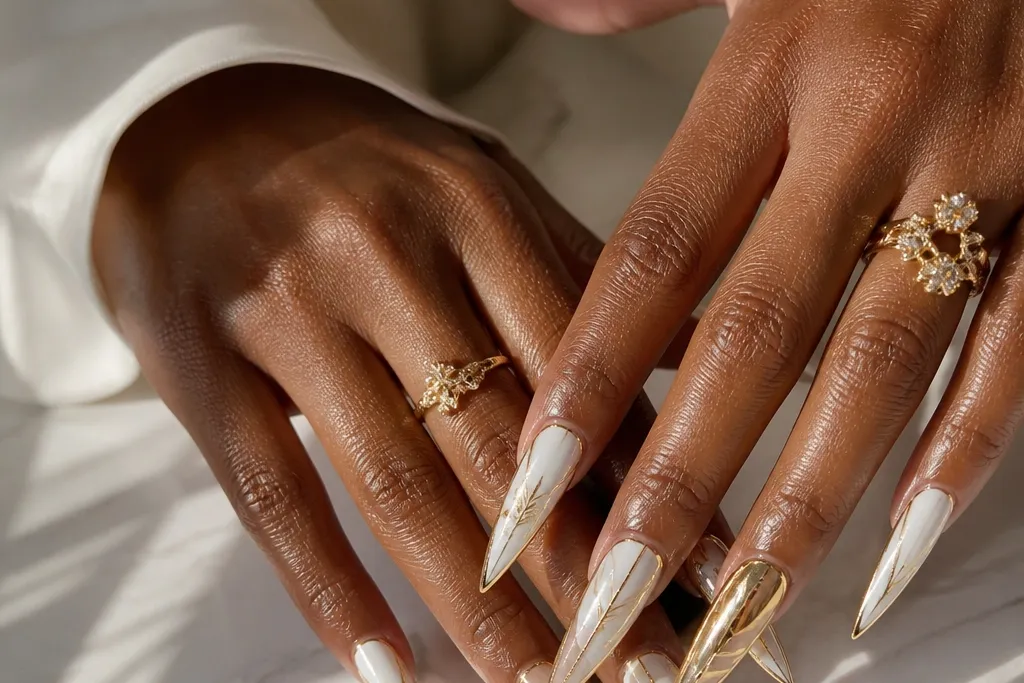
2. Glossy White Chrome Stiletto With One-Line Gold Strip
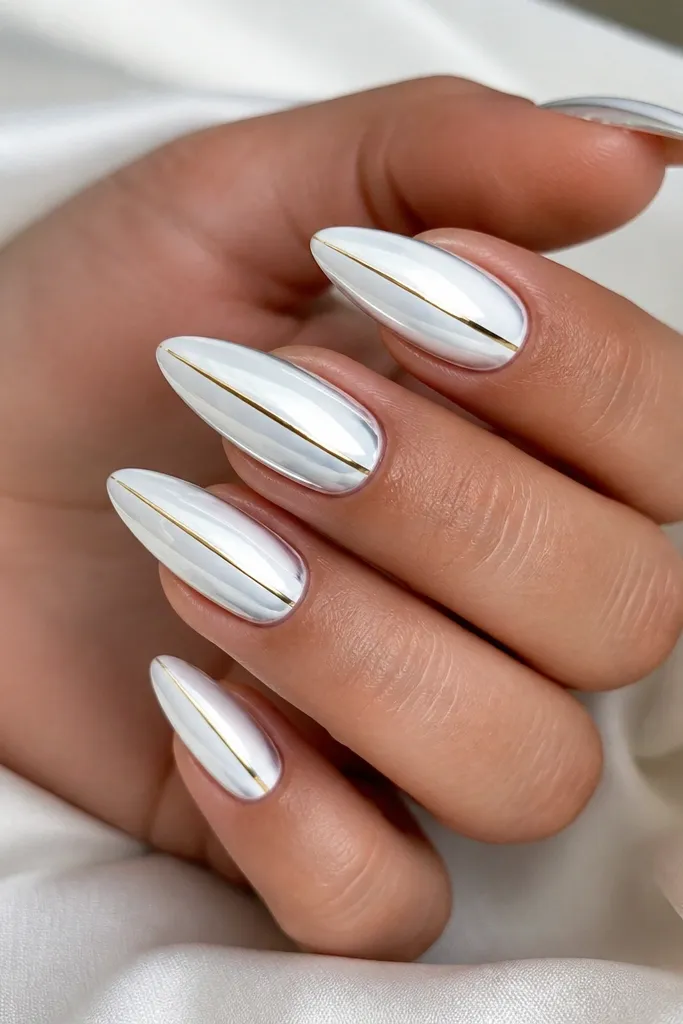
If you want that "expensive salon" look with minimal effort, this is it. The white is chrome, so it bounces light like a tiny spotlight. The gold strip is thin and straight, which makes your fingers look longer and slimmer. This works on all skin tones, but it's especially flattering if you like a clean look with silver jewelry too - the white reads cool while gold adds warmth. It also fits short-to-medium stiletto lengths because the line gives a vertical illusion without extra bulk.
Buff the white chrome base to a smooth, even shine using a fine buffer, then wipe with lint-free pads and a proper cleanser. Apply a thin vertical striping tape line down the center, aligning it so it's centered from cuticle to tip. Seal over the tape with clear gel, then remove any tape edges before curing if your tape is removable. Finish with glossy top coat for that glassy mirror effect.
Editor's noteUse striping tape with a sharp edge and press it for 10 seconds on each side so it doesn't lift at the corners.
Watch outAvoid thick gold lines - they look heavy and can make the stiletto tip look blunt.
3. White Marble Stiletto With Gold Vein Overlay
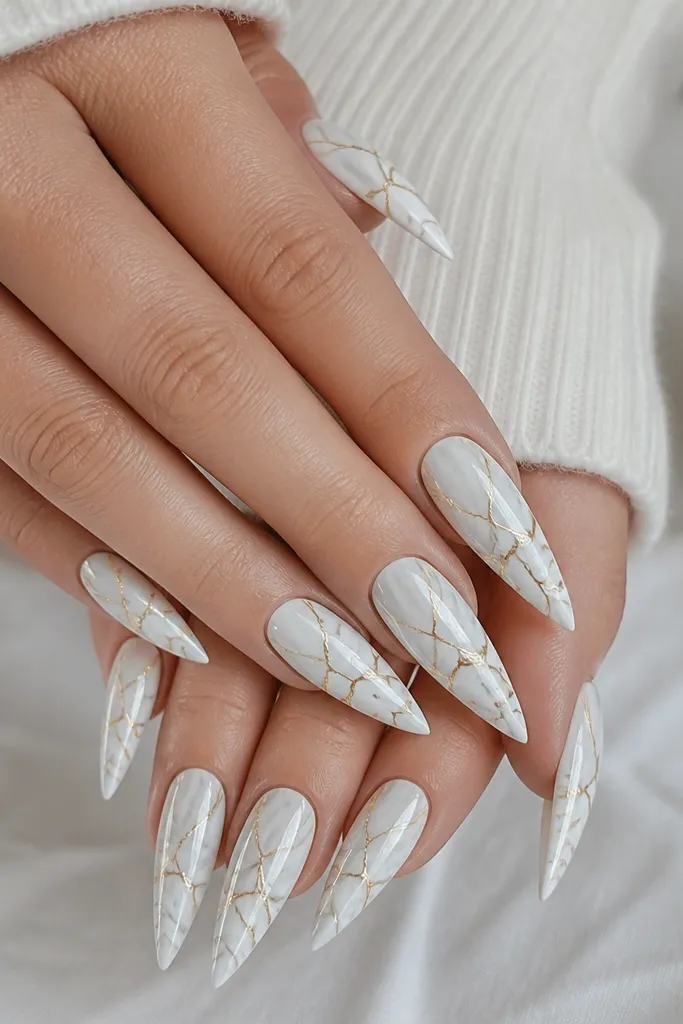
Marble nails look hard to do, but the trick is controlling contrast. The base is glossy white with faint gray veining, so it looks like real stone instead of random scribbles. Gold veining is applied as thin lines over select marble cracks, not everywhere, so it looks intentional. This set flatters hands with longer fingers because the veining follows the nail's length. It also looks amazing for winter events since the white reads crisp and the gold gives warmth.
Start with an opaque white base, then add soft gray marble using a tiny liner brush and a couple of wispy strokes - keep it light near the cuticle. Drag a few marble lines downward, then clean up edges with a brush dipped in cleanser. Add gold foil or gold gel lines only along the most defined marble cracks, keeping one or two per nail. Seal with a glossy top coat and cap the free edge to prevent the marble lines from catching.
Editor's noteUse a damp brush to soften gray veining so it looks cloudy, not harsh.
Watch outDon't make the marble too dark - dark gray turns it into "mud," and the gold looks dirty.
4. Half-Moon White Base With Gold Outline Stiletto
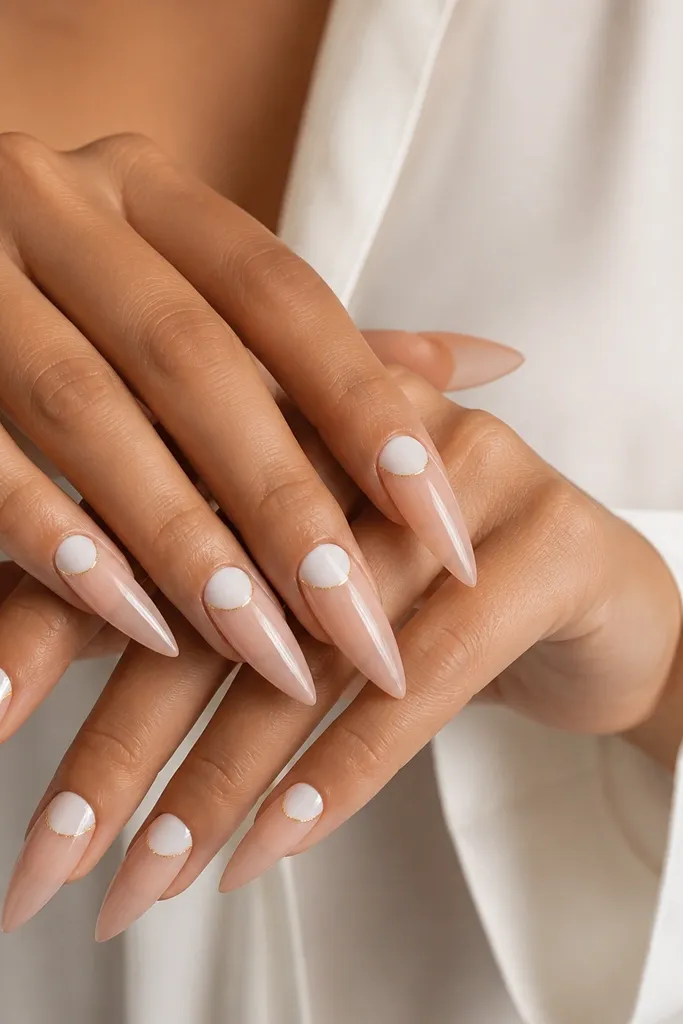
This design is clean, wearable, and it makes your cuticles look neat even when your nail grows out. The half-moon is milky white, which gives a bright focal point at the base. The gold outline is a thin ring that defines the shape without turning the set into a full glitter mess. It flatters everyone because the nude portion makes fingers look longer and more natural. If you're doing this for work dinners or events where you want "polished," this is the one I'd pick.
Apply a sheer nude base where your nail naturally looks pink, then cure. Add milky white gel only in a half-moon shape at the cuticle, using a small nail art brush or half-moon stencil. Outline that white half-moon with thin gold striping tape or gold gel, keeping the line even and centered. Finish with two coats of glossy top coat and pay attention to the cuticle edges so the gold outline doesn't lift.
Editor's noteIf your half-moon looks jagged, clean the shape with a thin brush dipped in cleanser before curing.
Watch outAvoid thick gold rings - they make the cuticle area look bulky.
5. White And Gold Glitter Fade Stiletto
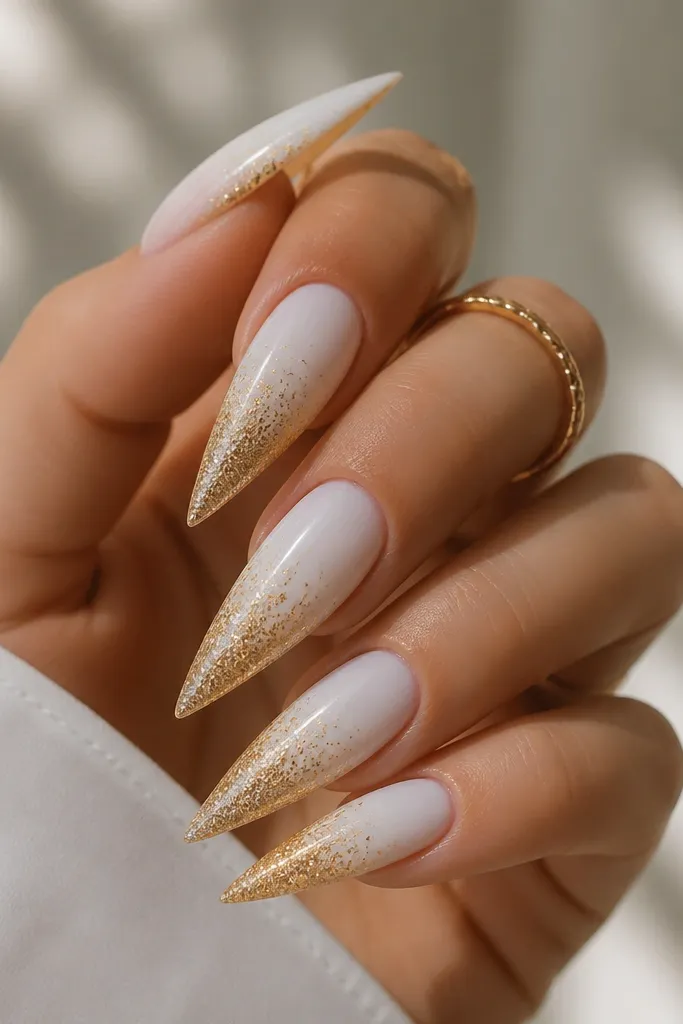
This is the "night out" set. The white base is glossy and smooth, and the gold glitter fades up the nail like a gradient light beam. The fade placement matters: densest at the tip, softer toward the middle, so it looks luxe instead of messy. This flatters shorter fingers because it creates a gentle ombré that draws the eye down. It also plays well with chunky rings and bracelets because the glitter is concentrated where your fingers point.
Start with an opaque white gel base and cure fully. Apply a gold glitter gel with a flat brush, starting at the tip and pressing glitter into the last third of the nail. Use a clean brush to feather the glitter upward so the density drops gradually. Seal with a thick top coat to smooth the texture and cap the tip so it doesn't shed.
Editor's noteUse a glitter gel that self-levels so you don't get gritty ridges at the fade line.
Watch outDon't pack glitter all the way to the cuticle - it looks like over-sprayed craft glitter.
6. White Gloss Base With Gold Studded Side Accent
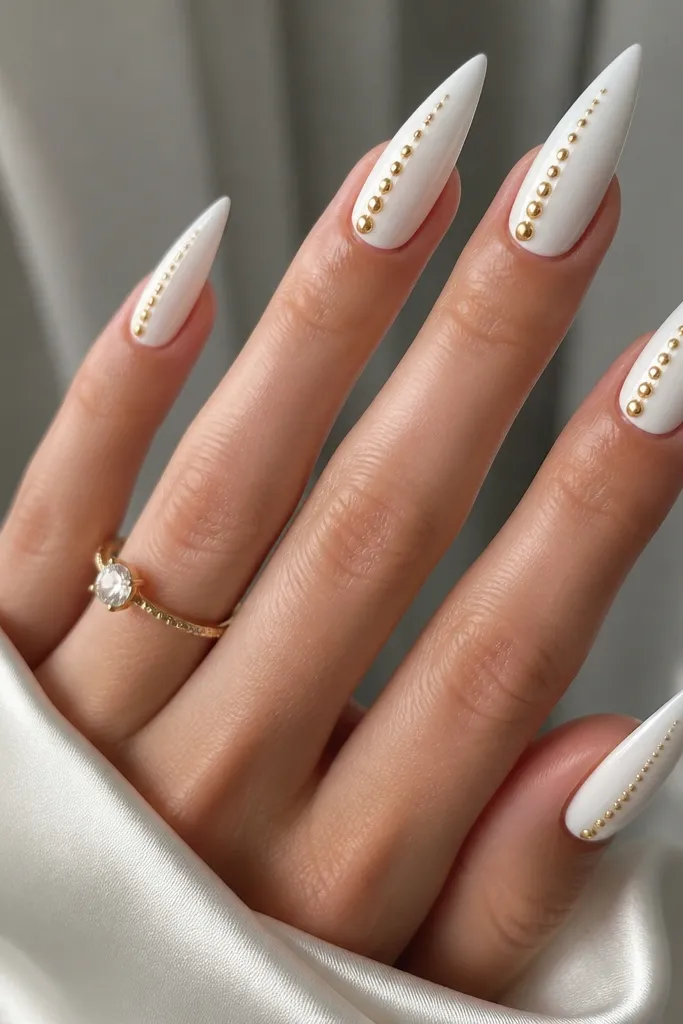
I like this one when I want drama that still feels "clean." The nail is full glossy white, so it looks crisp against your skin. The gold studs sit on one side, not across the whole surface, which keeps the look sleek and elongates your hand. This flatters hands with broader nail beds because the studs are offset, giving a slimmer visual line. It's also great if you hate glitter because the texture stays controlled and the studs catch light when you move.
Apply glossy opaque white gel in two coats, curing each layer. Place a small dot of clear gel or adhesive gel along one sidewall where you want the studs, then pick up tiny gold studs with tweezers. Set studs in a straight line with even spacing, leaving the cuticle area plain and tapering the last two toward the tip. Cure, then seal over with clear gel and top coat, making sure the studs are fully covered so they don't snag.
Editor's notePress each stud for a few seconds so it bonds flat instead of popping up.
Watch outAvoid placing studs too close to the cuticle - they catch on sleeves during growth.
7. White Negative Space Stiletto With Gold Frame
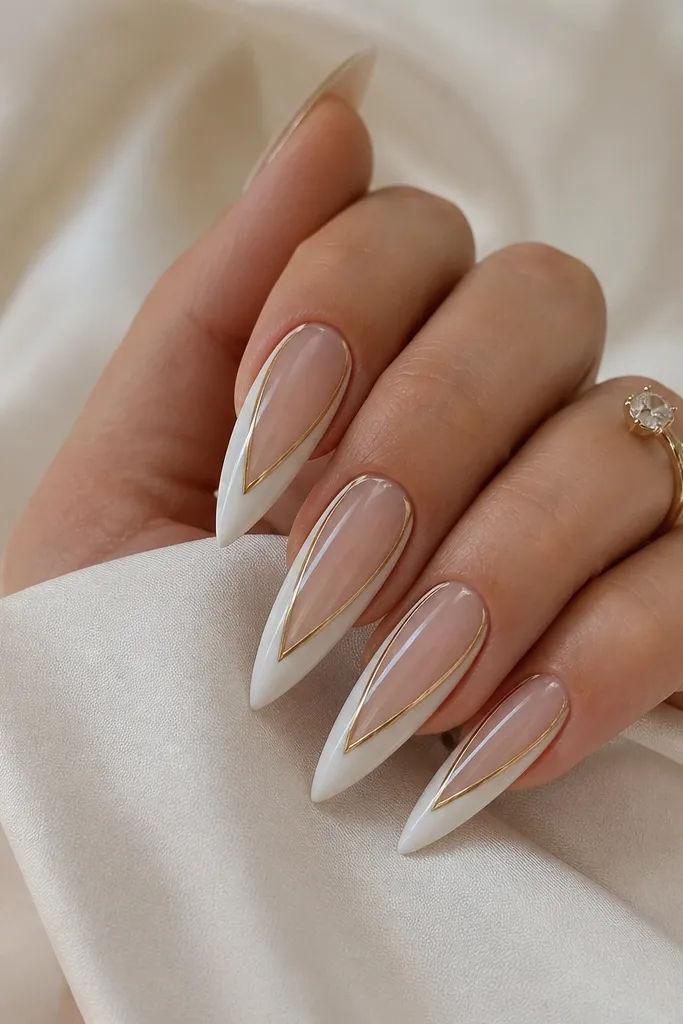
Negative space always looks intentional when the frame is clean. Here, the white acts like a border, not a full coat, so your hand looks lighter and longer. Gold frames the negative panel with thin lines, adding a sharp, architectural feel. This set flatters all skin tones, especially if you wear gold jewelry because the frame lines mirror jewelry proportions. It's also a good choice if you're growing out nails because the negative space hides regrowth lines better than full coverage designs.
Start with a sheer nude base and cure. Use striping tape to map two vertical lines on either side of the center panel, then apply white gel inside the bordered area. Remove tape carefully after curing if your tape is removable, or seal edges if not. Add gold striping gel or thin tape lines along the white borders, then cap with clear gel and glossy top coat.
Editor's noteUse tape to set the symmetry first, then paint inside the lines. Freehand framing usually looks off-center.
Watch outDon't make the negative panel too wide - it shortens the nail visually.
8. Pearl White Stiletto With Gold Flake Splash
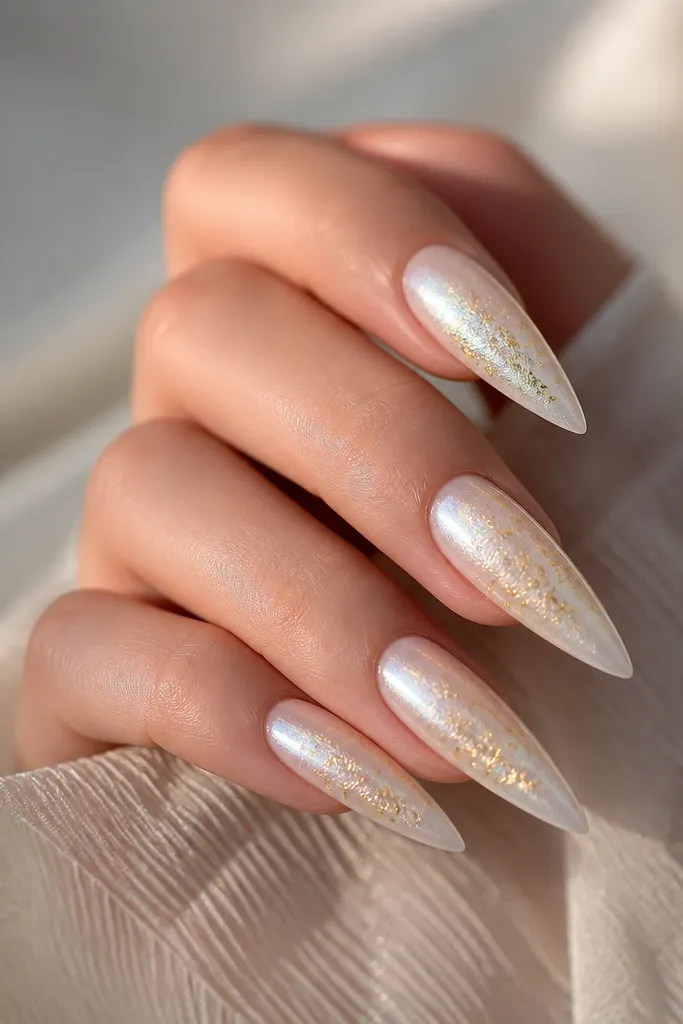
Pearl white is different from milky white - it has that soft glow that looks flattering on camera without being mirror-shiny. Gold flakes add motion, like a light spray rather than a solid block. I like this for birthdays and engagement photos because the flakes sparkle as you turn your hand. It flatters fair skin by warming up the look and it flatters deeper skin tones by giving a bright highlight effect. The key is keeping the splash concentrated so it looks designed, not accidental.
Apply a pearl white gel base in one even coat, then add a second coat only where coverage looks thin, curing each time. Add gold flakes by pressing them lightly with a sponge or picking them with tweezers and placing them in a loose cluster. Leave breathing room around the cuticle so the pearl glow still shows. Seal with a thick top coat to lock flakes down and smooth the surface.
Editor's noteUse a matte or satin top coat if you want the gold flakes to look more subtle in daylight.
Watch outAvoid heavy flake layering - thick texture chips faster on stiletto tips.
9. White Ombre Stiletto With Gold Tip Cap
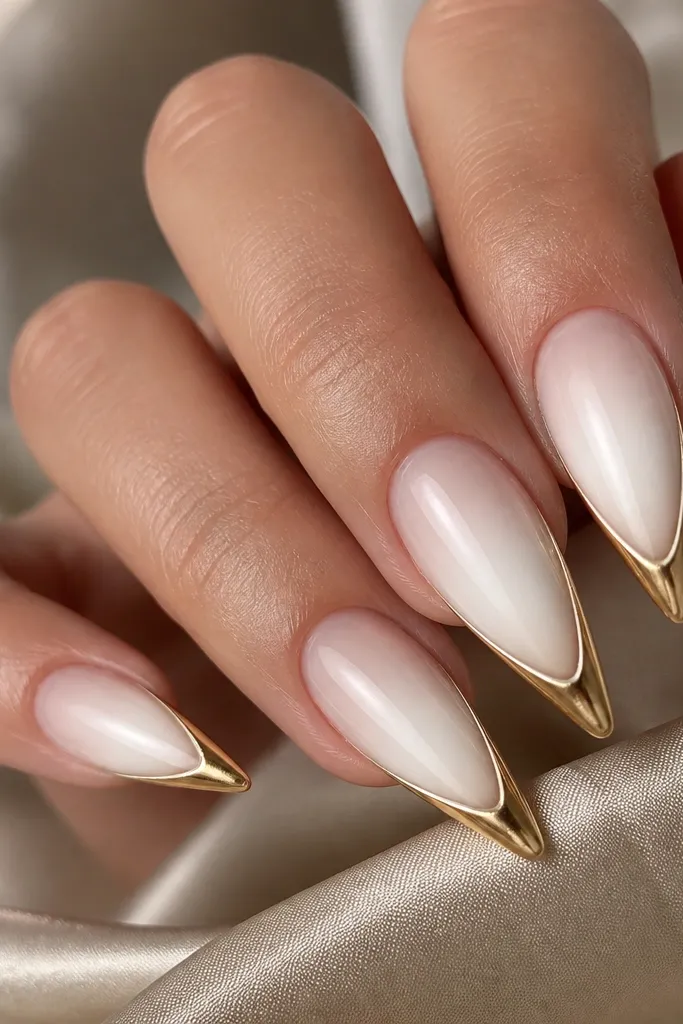
This design looks clean and expensive because the gradient does the work. The base starts more sheer near the cuticle and turns milky white toward the middle, then the tip gets a gold cap. That curved gold cap makes the stiletto look extra sharp. It flatters short fingers because ombre creates length, and it flatters long fingers because the gold tip frames the end. Wear it with a gold watch or stacked rings and it looks like a set from a high-end salon.
Create a sheer-to-white ombre by blending a white gel from the middle down toward the tip while keeping the cuticle area more translucent. Cure each blending stage so you don't get muddy lines. Add gold gel at the tip only - about 2 to 3 millimeters wide - and shape it into a curved cap. Cap the gold with top coat and wipe any overflow so the curve stays crisp.
Editor's noteUse a small makeup sponge for blending - it gives a smoother ombre than a brush when you're new.
Watch outDon't paint gold up too high - if it covers half the nail, it stops looking sleek.
10. White French Stiletto With Gold Wire Accent
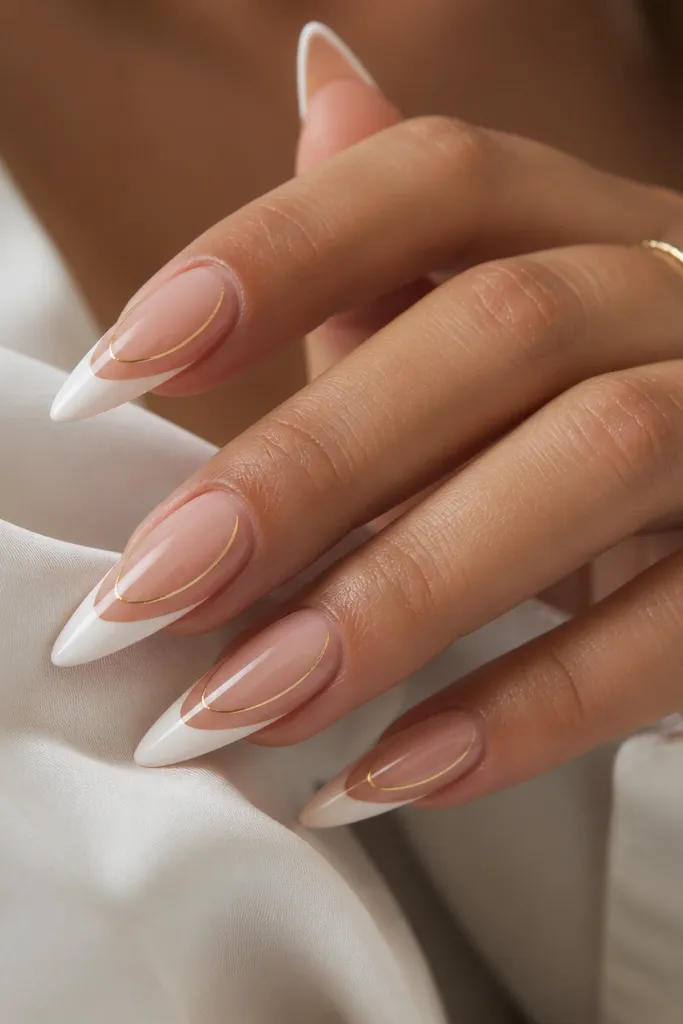
Classic French is always flattering, and adding gold wire makes it feel current. The white tip is crisp and opaque, and it keeps the set looking clean even with stiletto length. The gold wire accent is placed on just one side of the French tip, so the design has movement without becoming busy. It suits fair and medium skin tones especially well because the contrast is bright. If you wear nude outfits often, this gives your hands a focal point without needing heavy color.
Apply a nude base and cure, then use French tip guides to paint a milky white tip in one clean arc. Cure until the white is fully opaque and smooth. Add a thin line of gold gel where you want the wire, then drag it slightly to create a raised wire effect. Place the wire so it starts at one corner of the French tip and ends near the center. Finish with glossy top coat, making sure the wire is sealed so it doesn't snag.
Editor's noteIf your gold wire looks flat, add a second thin gold layer and cure longer on that layer.
Watch outAvoid thick French tips - wide white ends make stiletto tips look shorter.
11. White Lattice Stiletto With Gold Points
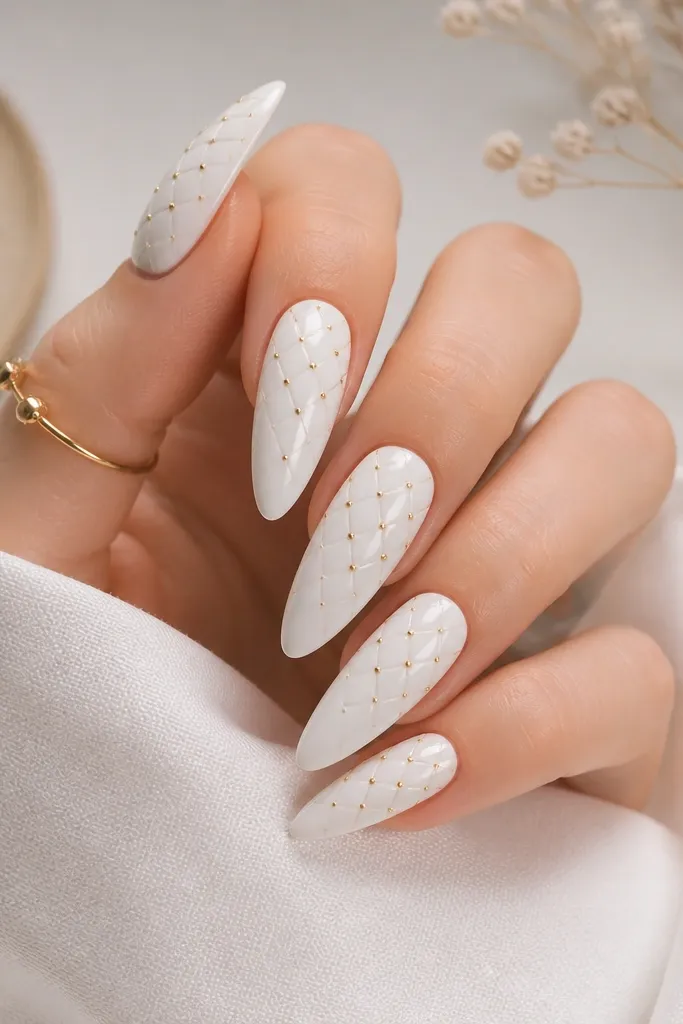
This is for the "structured glam" mood. The white base is glossy and solid, then thin lines form a lattice pattern, which makes your nails look like they have dimension even without 3D gems. Gold dots at intersections give sparkle exactly where the eye lands. It flatters hands with slimmer nail beds because the grid adds structure. It also looks great with geometric rings and simple outfits because the nail pattern does the talking.
Start with a full opaque glossy white base in two coats. Use a nail striping brush to paint thin white lines in one direction first, cure, then paint the cross lines. Add small gold dots using a dotting tool or a tiny bead of gold gel, placing them only at a few intersections per nail. Seal with clear gel and glossy top coat, and cap the free edge so the pattern stays smooth.
Editor's noteKeep your lattice lines thin. Thick lines make the nail look like a sticker sheet.
Watch outDon't cover the whole nail with dots - you want sparkle, not a textured patch.
12. White And Gold Swirl Curl Stiletto
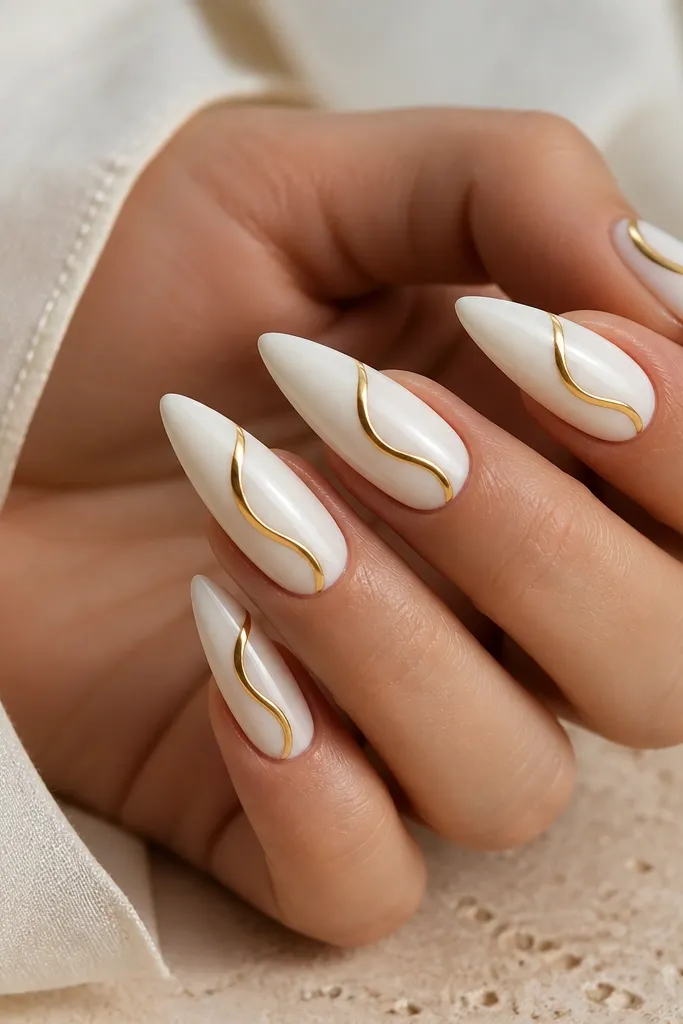
Swirls look fancy because they guide your eye along the nail's length. The base is glossy white so the gold reads bright and metallic. The swirl curl is placed on one side, starting near the cuticle and tapering as it reaches the tip, so your fingers look elegant rather than heavy. This flatters most skin tones and it's especially flattering if you like oval or almond rings, since the swirl echoes that shape. It's also a good pick if you want drama but you hate glitter.
Apply glossy white base gel and cure thoroughly. With a fine liner brush and gold gel, pull a single continuous swirl line - start near the cuticle on one side, curve inward, then taper downward. Add a second thin gold line only if you want extra thickness, but keep the swirl centered in your nail's middle third. Cure and seal with clear gel, then use glossy top coat for a smooth finish.
Editor's notePractice the swirl on a paper nail tip or scrap nail first. Your hand learns the curve fast.
Watch outAvoid multiple swirls on the same nail - it looks cluttered on stiletto length.
13. White Gloss Base With Gold Half-Tip Confetti
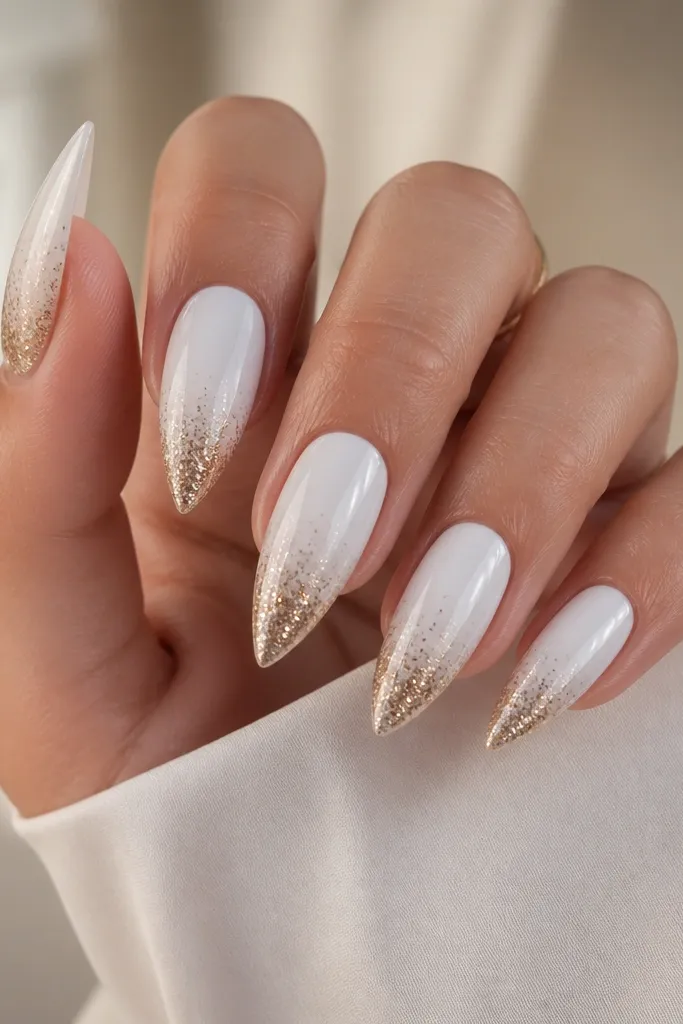
This design gives you a fun party look without covering the whole nail in glitter. The solid white top keeps it clean, while the gold confetti in the lower half creates sparkle exactly where your fingers point. It flatters all skin tones, and it looks extra good with silver too because the white is neutral and glossy. For photos, the confetti catches light as you move, so the nails look "alive." I also like it for people who wear makeup with gold highlights - it matches without looking matchy.
Start with a glossy opaque white base and cure. Apply gold confetti glitter gel only on the lower half of the nail, pressing glitter at the tip and feathering upward with a clean brush. Leave the cuticle area fully white and smooth so it doesn't look dusty. Seal with top coat in two thin layers, curing between, so the confetti doesn't create bumps.
Editor's noteUse a small fan brush to blow off extra glitter after placing it, so it stays sparse and intentional.
Watch outAvoid thick glitter gel. Thick layers crack at the free edge.
14. Matte Off-White Stiletto With Gold Leaf Edge
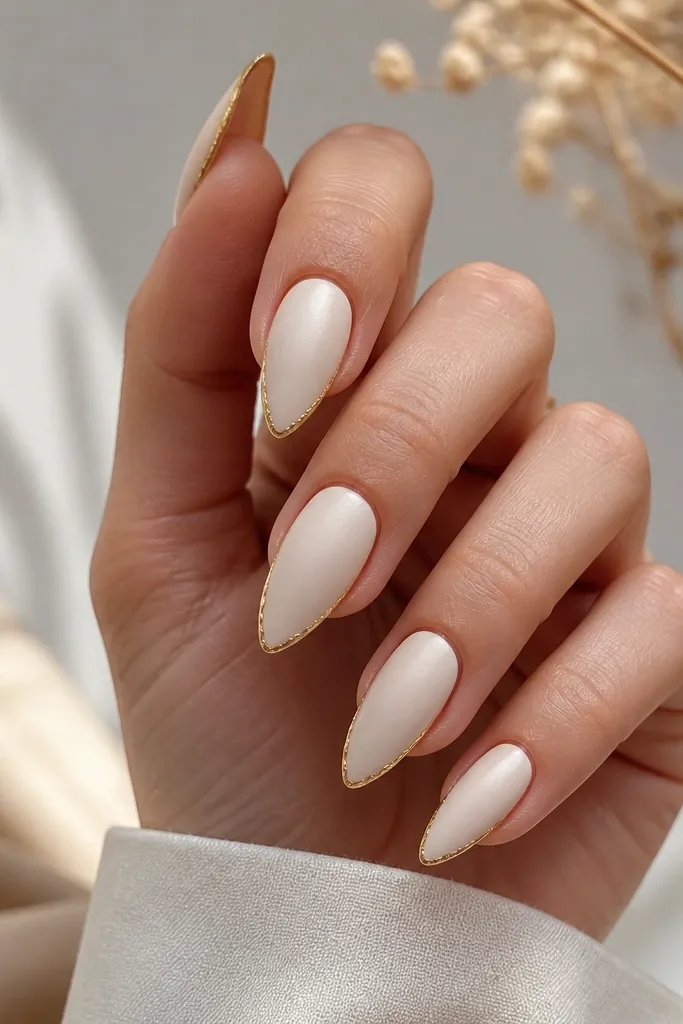
Matte off-white looks expensive because it softens the contrast with gold. The gold leaf edge is thin, so it glows against the matte surface without turning into full-on shine. This set flatters hands with dry cuticles because matte hides tiny texture at the surface (not on the cuticle, but on the nail). It also looks great if you wear lots of neutrals since the nails match the outfit tone. The gold leaf placement along the outer edge makes your fingers look slimmer.
Apply an off-white gel base in two thin layers and cure. Apply a matte top coat as your final step for the velvety finish. Add gold leaf by tearing small pieces, pressing them lightly along the outer edge with a tacky layer or adhesive gel, and keeping the leaf thin and uneven for realism. Seal the gold leaf lightly with a satin or gel top coat only over the leaf area so it doesn't disappear into the matte.
Editor's noteIf gold leaf looks dull, add a tiny glossy top coat only over the leaf spots.
Watch outAvoid using full glossy top coat on a matte set - it kills the off-white softness.
15. White And Gold Butterfly Accent Stiletto
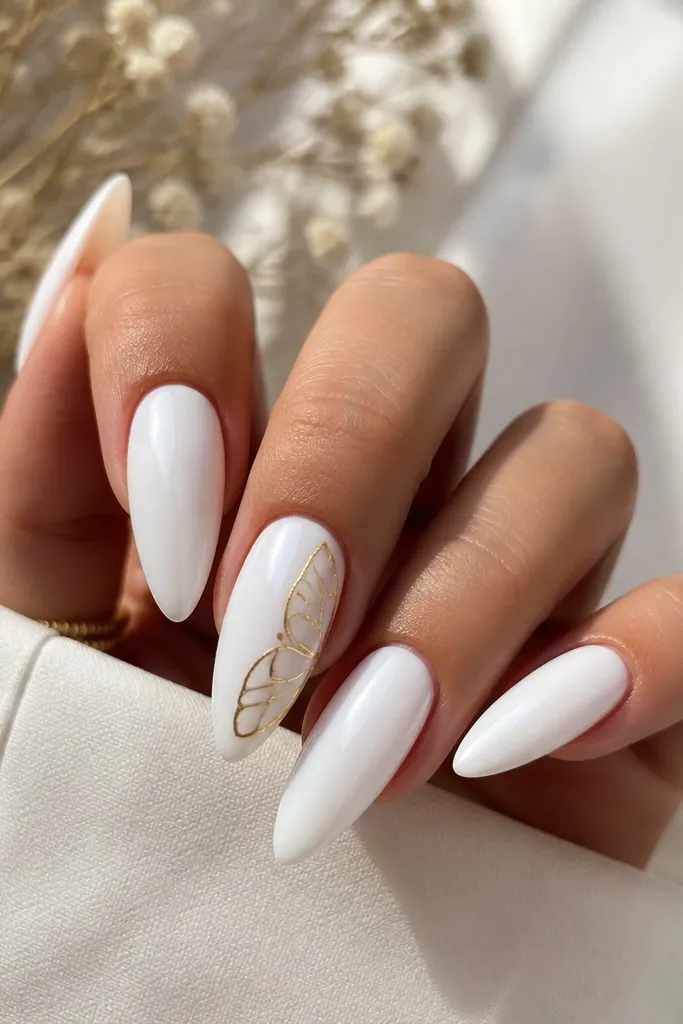
Butterfly accents are cute without going childish when you keep them small and placed right. The base is glossy white so the gold butterfly pops cleanly. The butterfly sits on the side of the nail around the middle third, which makes the nail look longer and gives a focal point when you gesture. This flatters fair, medium, and deep skin tones because the white is bright and the gold is warm. It's also a fun choice for bridal events or spring birthdays where you want something feminine but still polished.
Apply opaque glossy white gel in two coats and cure. Place a small gold butterfly decal or paint wings with gold gel and a fine liner brush, keeping the wings narrow and not too wide. Add a second tiny line of gold to define the wing edges, then seal with clear gel. Finish with glossy top coat and cap the tip so the decal edge doesn't lift.
Editor's noteKeep the butterfly under the top third of the nail. If it sits too low, it looks like it's sliding off.
Watch outAvoid placing butterfly art on every nail - it should feel like a detail, not a cover.
16. White Jelly Gel Stiletto With Gold Drip Tip
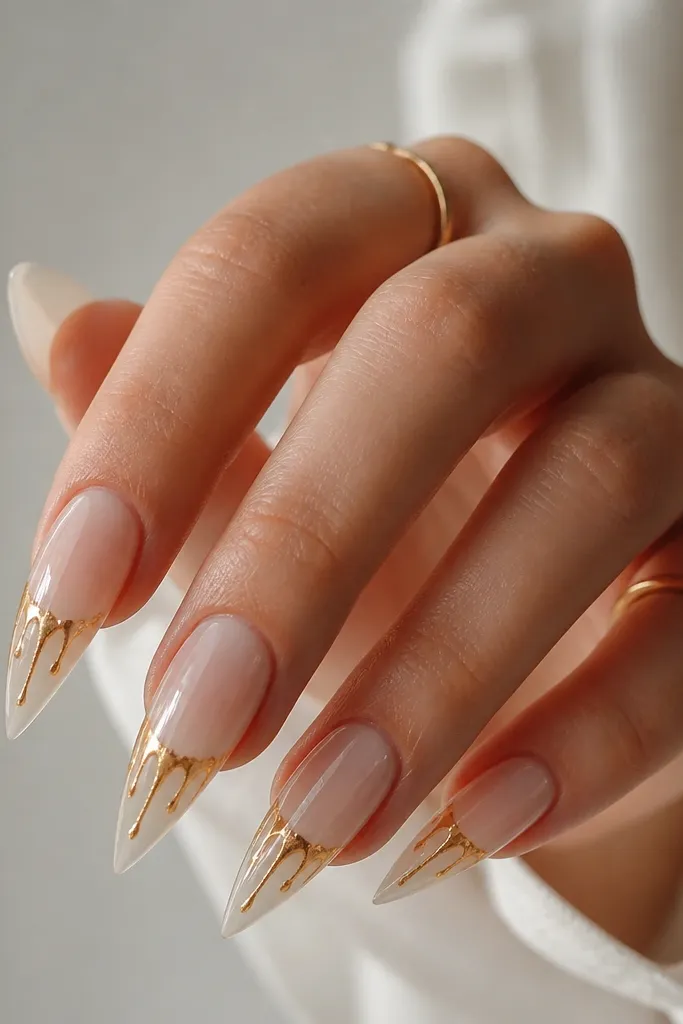
Jelly white looks glossy and juicy, and it makes gold drips look even more metallic. The translucency gives depth so the nail doesn't look flat, especially on stiletto shapes where light hits from the sides. Gold drips are placed only near the tip, so they look like a controlled spill rather than random mess. This flatters hands that look better with softer contrast because jelly white is less stark than opaque white. It also looks great for parties because the drips catch light as you move.
Start with a jelly white gel base applied in two thin layers, curing each time so it stays translucent and doesn't turn chalky. Add gold drip lines using a striping brush and gold gel, pulling a few thin strands from the tip area downward. Keep the drips uneven in length so they look natural, then cure. Seal with clear gel and glossy top coat, making sure the drips are fully embedded so they don't snag on fabric.
Editor's noteUse a gel that drags slowly. If it runs too fast, the drips look messy on stiletto tips.
Watch outAvoid thick gold drips. They create ridges and chip at the free edge first.
17. White And Gold Confetti Foil Mix Stiletto
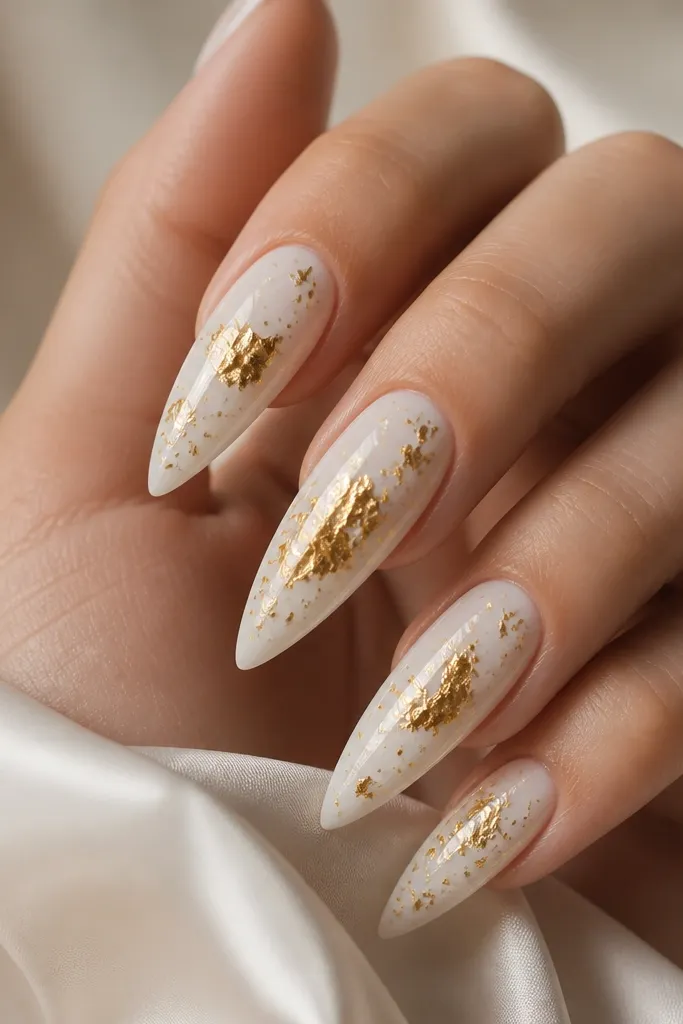
This set is the "more than plain white, less than full glitter" sweet spot. You get foil sparkle from the larger pieces and fine confetti shimmer from the smaller bits. The base stays white and clean, so the gold reads crisp instead of muddy. It flatters all skin tones, and I like it most when you want nails that look good in both indoor warm lighting and outdoor daylight. It also hides minor placement differences because confetti and foil create their own texture pattern.
Apply glossy opaque white base in two thin coats and cure. Add gold confetti pieces first by pressing them into a tacky layer on the lower half of the nail. Then add a few larger foil fragments near the center, pressing lightly so edges lift just enough to catch light. Seal with clear gel and top coat in two layers, curing between, and cap the tip thoroughly.
Editor's notePress foil last. It prevents the confetti from getting buried under larger pieces.
Watch outAvoid piling gold flakes on top of each other. Too much build lifts and chips.
18. White Lace Veil Stiletto With Gold Outline
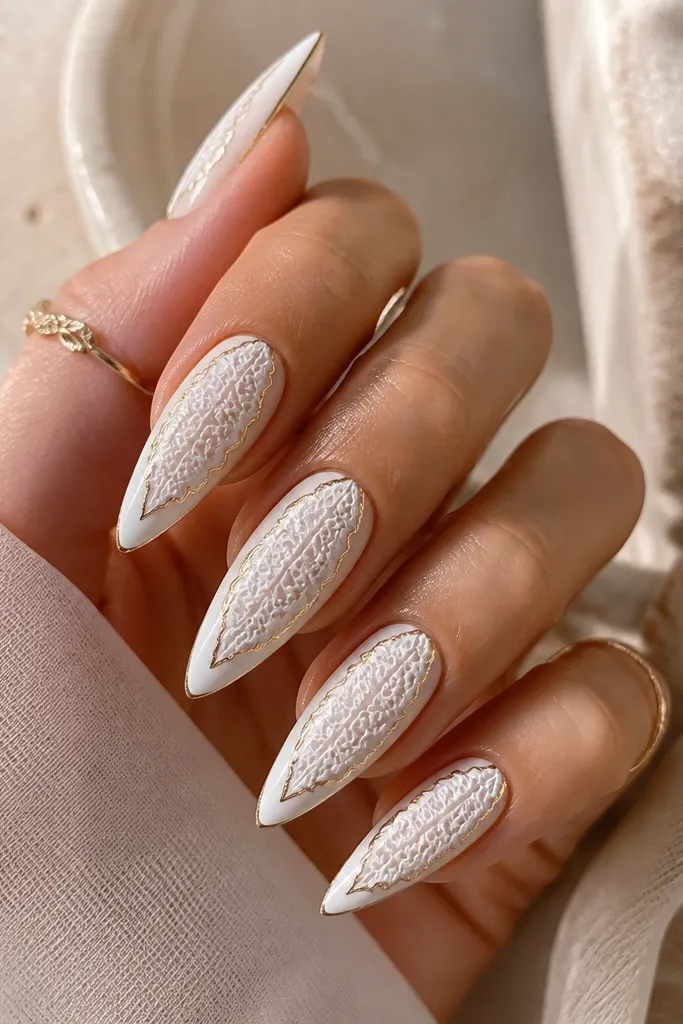
Raised lace patterns look high-end when the base is smooth and the lines are controlled. This set uses a glossy white base, then a lace veil pattern is built with slightly raised white gel so it feels dimensional. A thin gold outline frames the lace area, which makes the pattern look intentional instead of busy. It flatters hands that look better with texture because the lace sits in the middle and draws the eye away from wider nails. It also looks stunning for bridal showers and engagement parties.
Start with a glossy opaque white base and cure. Use a lace nail stamp or hand-painted lace lines with a liner brush, placing the pattern around the middle third and leaving the cuticle area plain. Outline the lace with thin gold gel or striping tape, keeping the frame narrow so it doesn't hide the lace. Seal over with clear gel, then apply glossy top coat to smooth the surface while still keeping the lace slightly dimensional.
Editor's noteIf your raised lace feels too thick, thin the gel before you cure. Raised patterns should look delicate, not chunky.
Watch outAvoid gold outlines that touch the cuticle. They snag and look grown-out fast.
19. White Stiletto With Gold Bar Crackle + Clear Glass Top
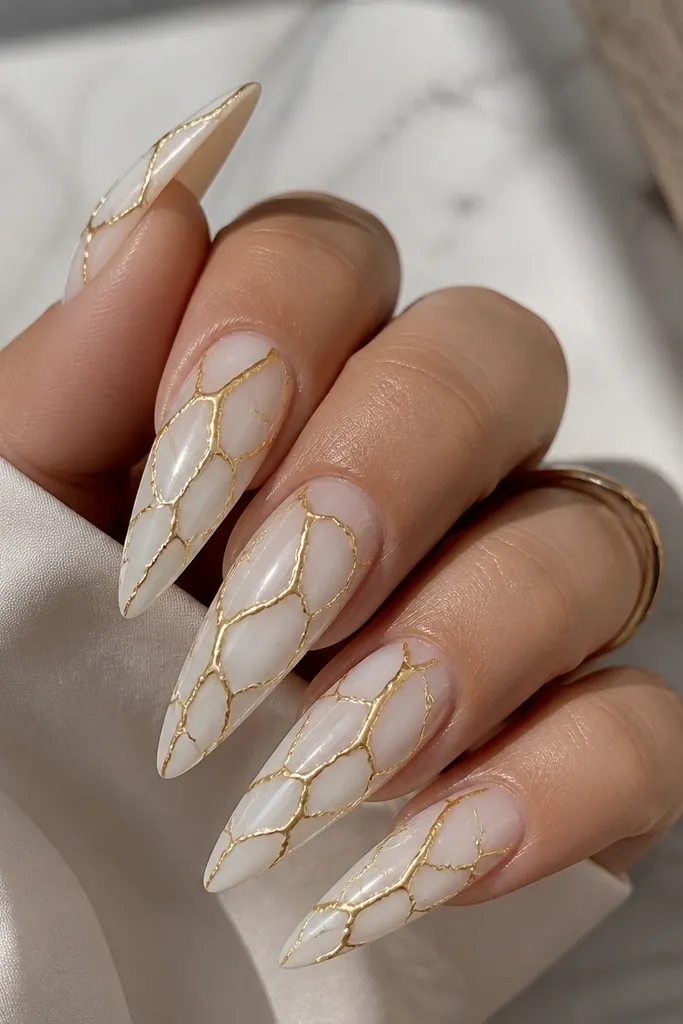
This set looks like broken jewelry - the gold bars have that jagged, crackle energy, but the milky white base keeps it clean and wearable. I've done this with both gel and press-ons and the effect is the same: the gold lines look sharper as the clear top levels everything out. The key is using a gold crackle medium that breaks into thin segments instead of chunky flakes, then sealing with a thick, high-gloss clear layer. It reads luxe in photos because the "glass" top makes the gold lines feel suspended inside the nail.
File your stiletto shape first and buff the surface lightly so the milky white gel grips. Apply two thin coats of milky white gel, curing fully between coats, then place thin gold bar pieces or gold crackle medium in a broken grid pattern - I aim for 2-3 larger fractures per nail plus smaller spider lines. Cure, then add a clear builder gel layer thick enough to smooth the texture and create that glassy dome. Finish with a high-gloss top coat and cure again, then wipe inhibition residue with alcohol so the gold bars look crisp instead of cloudy.
Editor's noteFor extra drama, use a fine detail brush to pull one gold bar line right to the sidewall - it makes the crackle look intentional instead of random.
Watch outSkip thick gold placement. If the gold bars sit too high before the clear builder gel, you'll get bumps that catch on hair and clothing.
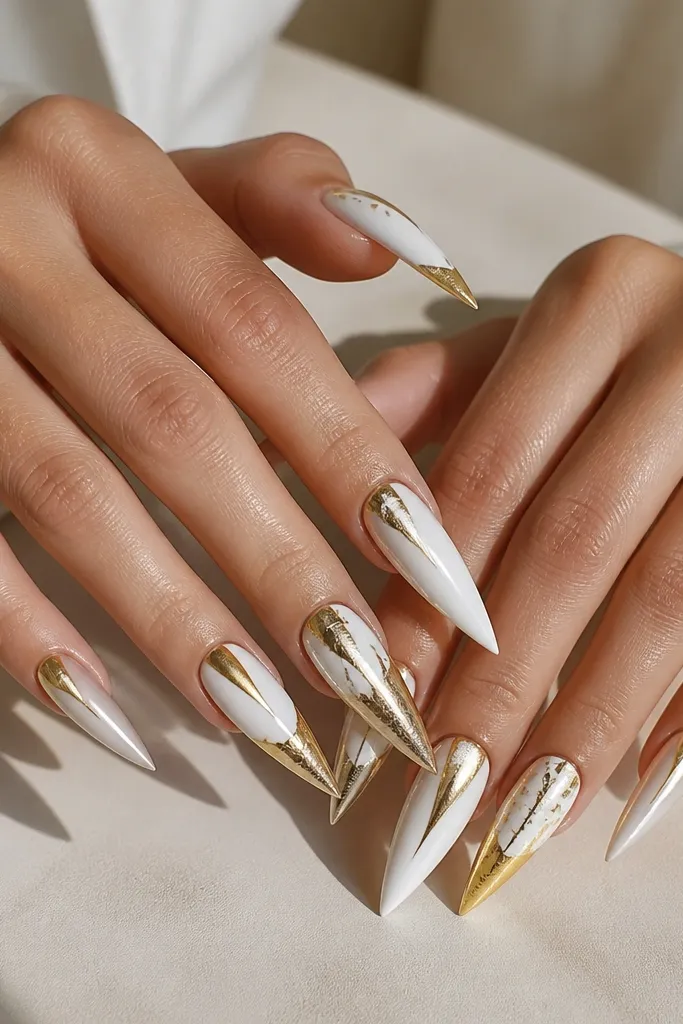
20. Pearl Milky White Stiletto With Gold Rimmed Negative Space Triangles
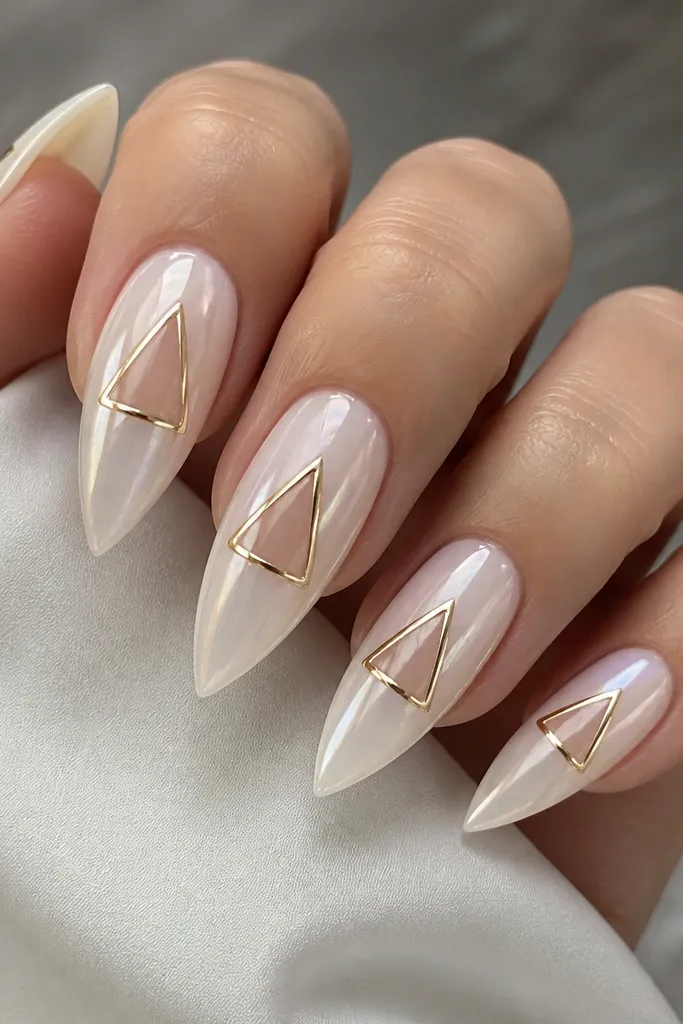
This design is dramatic without feeling busy because it uses clean negative space. The pearl milky white base gives a soft glow, and the gold foil triangle rims turn the empty windows into something graphic and expensive-looking. I like this set for events because it looks sharp in daylight and still pops under indoor lighting. The triangles also make the nail look longer - the eye follows the gold outline up the stiletto point.
Start with a sheer base so the nail surface looks even, then apply pearl milky white gel in two coats, curing each layer. Use thin striping tape or a nail stencil to block off triangle areas - place one triangle closer to the cuticle and another closer to the side, leaving them open. Brush gold foil strips along the edges of the blocked shapes, then remove the tape carefully while the gold is still workable enough to stay stuck to the gel. Seal over everything with two thin coats of glossy top coat so the edges feel smooth, not sharp.
Editor's notePress the gold foil strips down with a silicone tool for 5-8 seconds per nail. It helps the foil grab the gel and prevents lifting at the rim.
Watch outSkip painting gold over the negative space. It turns the triangles into filled blocks instead of crisp frames.