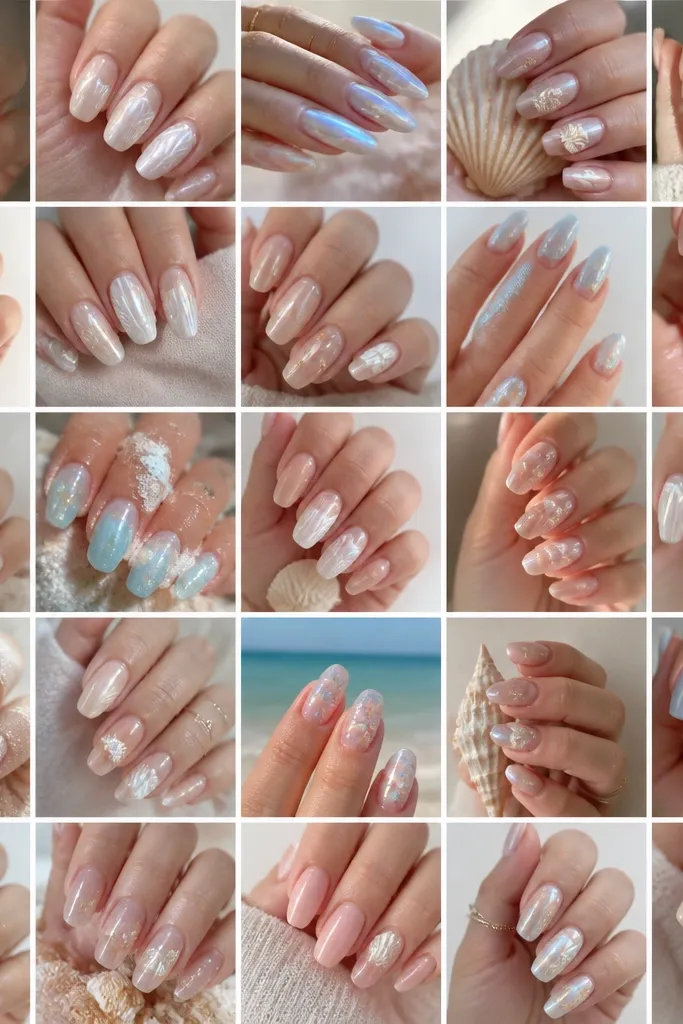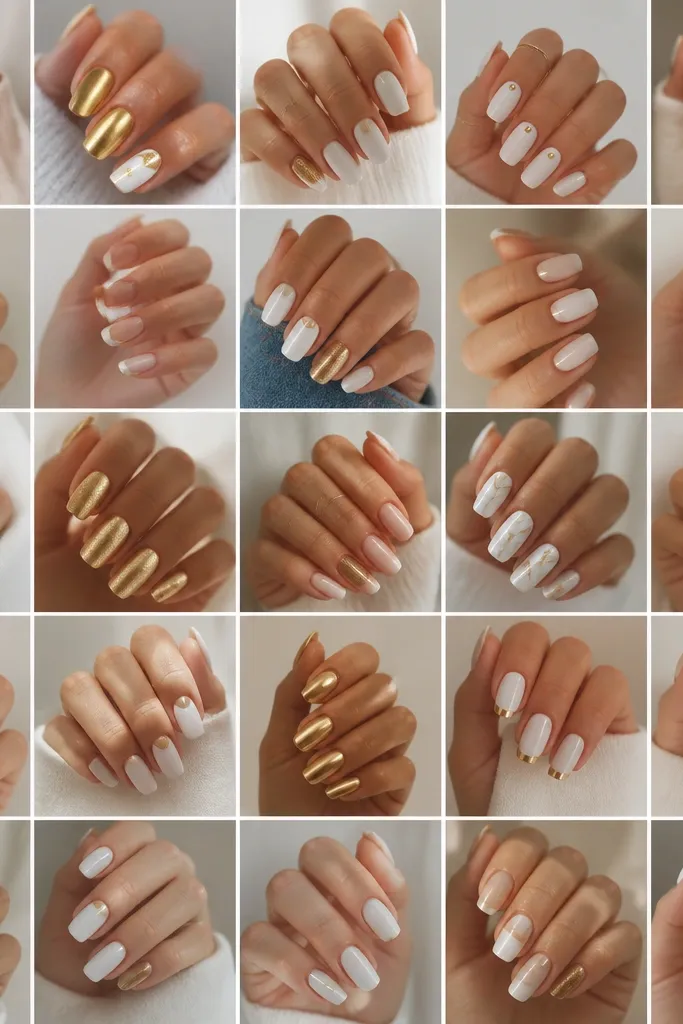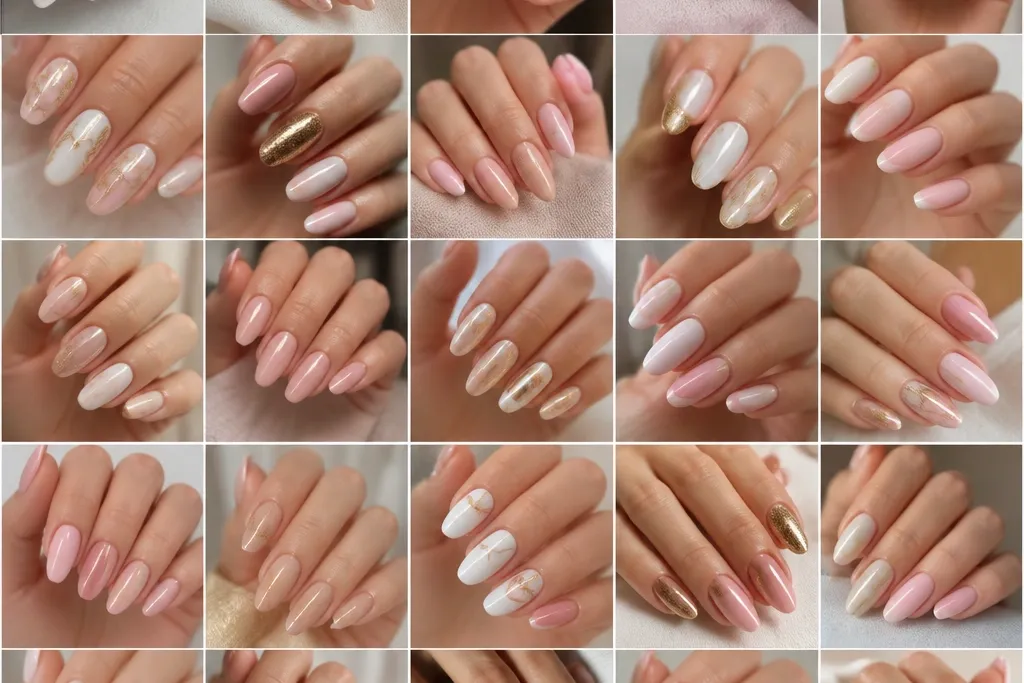
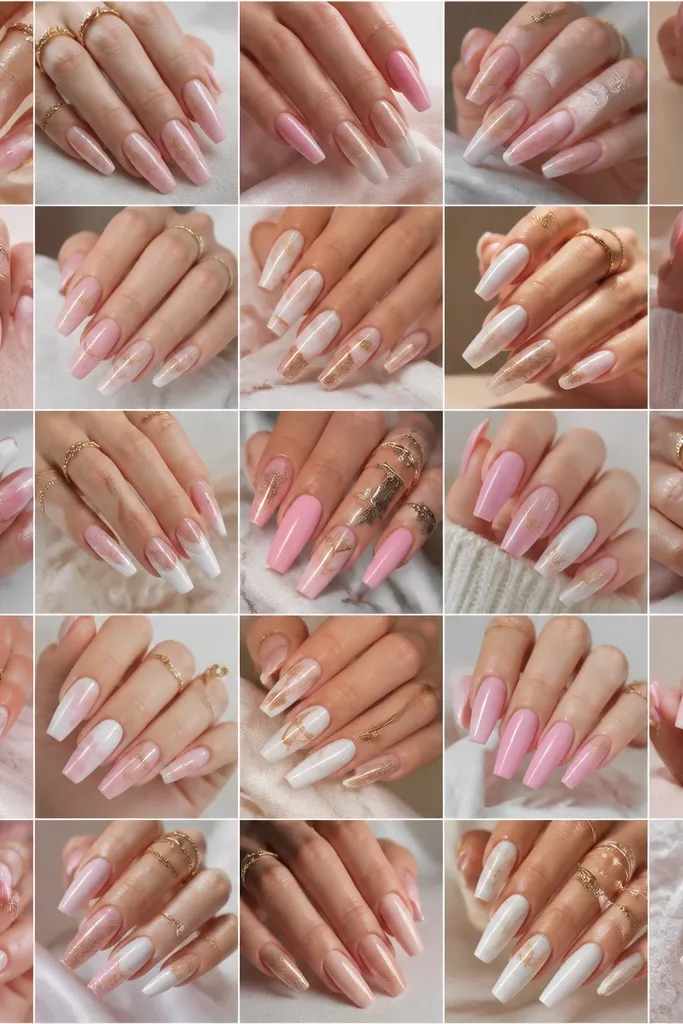
1. Milky Pink Base With Micro Gold Half-Moons
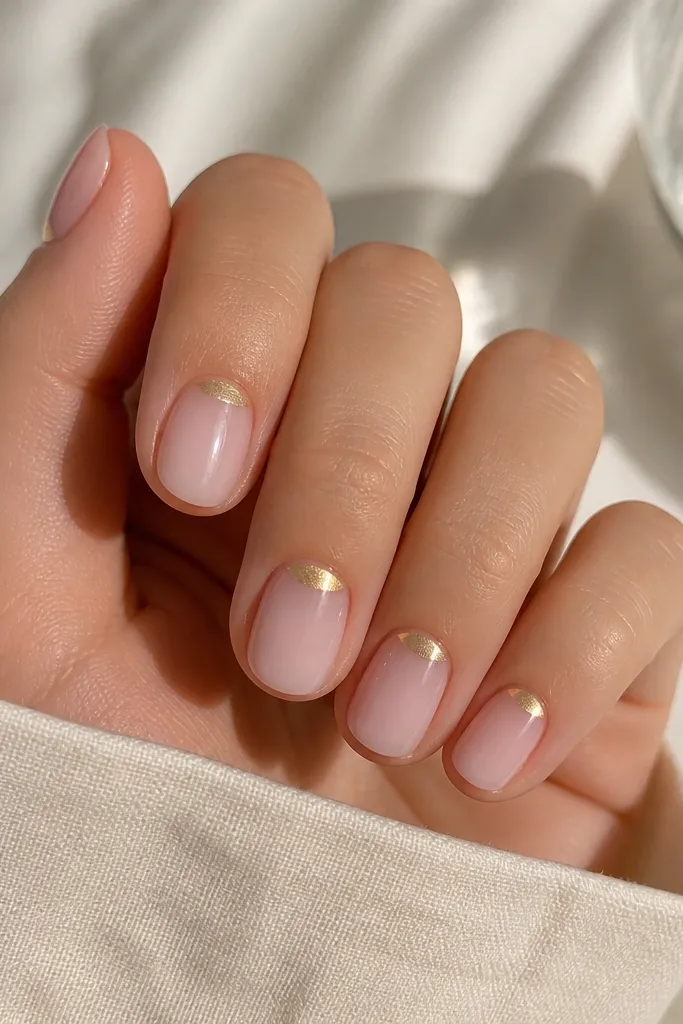
This set is my go-to when I want soft glam without spending an hour painting. The milky pink gives a smooth, skin-like glow that looks flattering on warm and cool skin tones, and it makes your nail edges look tidy even if your cuticles need a little cleanup. The micro gold half-moons sit right where your eyes already look - at the cuticle - so the gold reads delicate instead of loud. It works especially well on short rounded square or short almond because the gold stays small and neat.
Start by filing your nails to a short rounded shape and pushing back cuticles lightly. Apply two thin coats of milky pink gel polish, curing fully between coats. Use a dotting tool to place a tiny gold chrome crescent at the cuticle on each nail, staying about 1mm away from the side walls. Finally, seal with a high-gloss gel top coat, and cure thoroughly to lock in the chrome.
Editor's noteIf your gold looks dull, rub a clean makeup sponge lightly over the chrome to remove excess pigment before top coat.
Watch outAvoid thick gold at the cuticle - it turns the look from soft to heavy fast.
2. French Tip With White Cloud Edges And Gold Smile Line
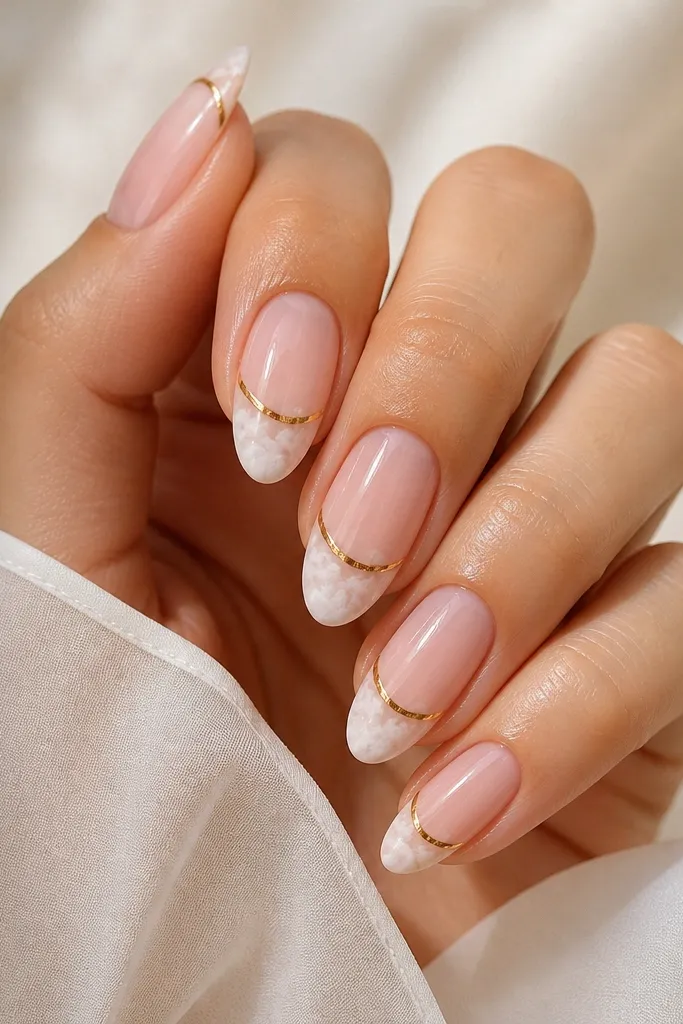
Cloud-edged white French tips create a softer border than a sharp straight line. The sheer pink keeps everything airy, and the gold smile line adds a warm highlight that balances the cool white. This is flattering on medium almond because the taper gives the French tip room to look blended rather than blunt. I've worn this to bridal showers and it always reads polished in daylight and flash.
Start with a sheer pink base in two coats and cure. With a fine brush, paint a white French tip but stop short of the corners, then use a fluffy brush to blur the edge downward for a cloud effect. Next, draw a thin gold line just below the smile area using striping gel or chrome paint, keeping it centered. Finish with glossy top coat on top of everything, curing fully.
Editor's noteUse striping gel for the gold line - it stays controlled and doesn't flood under the brush tip.
Watch outDon't make the white tip too wide; wide cloud tips can swallow the pink and look messy.
3. Pink Marble With White Veins And Gold Leaf Flecks
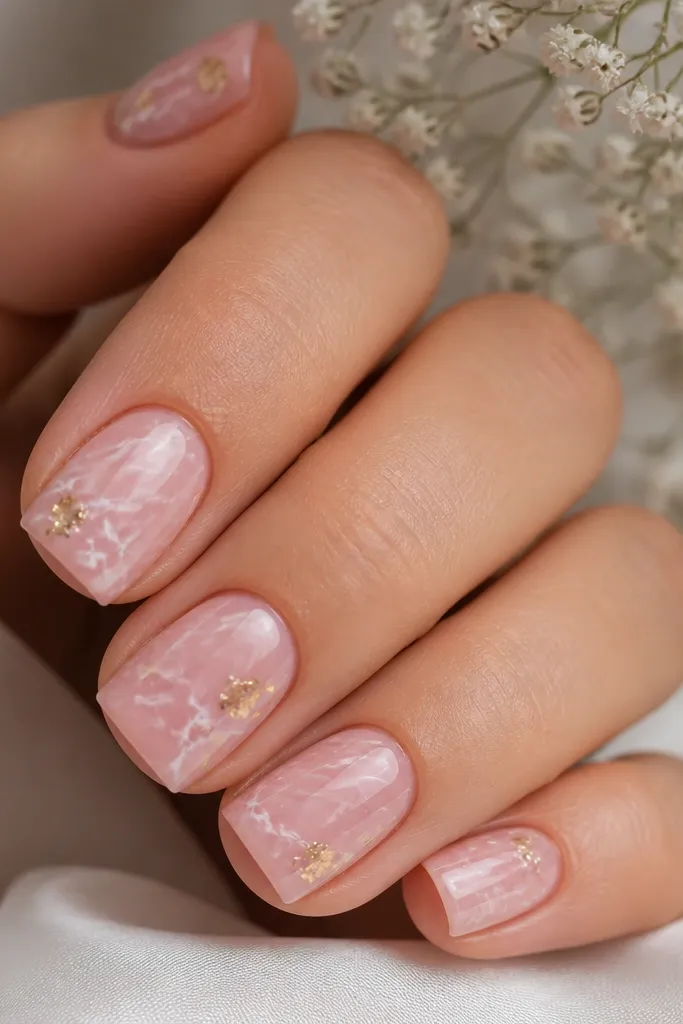
Marble looks fancy because it has movement, and soft pink marble keeps it wearable. The white veins create brightness without turning the set into high-contrast stark white tips. Gold leaf flecks add texture that looks real, not like sticker glitter. This style flatters all skin tones because the pink is close to your natural nail color, and the white veins brighten the look.
Start with a sheer pink base gel and cure. Sponge or brush a slightly translucent pink layer to create cloudy background patches. Paint thin white veins with a detail brush, then lightly smear the edges so they look organic, not outlined. Press tiny bits of gold leaf onto wet top gel in two or three spots per nail, then seal with glossy top coat.
Editor's noteGold leaf grabs better if you press it onto slightly tacky gel, not fully cured polish.
Watch outSkip heavy gold leaf coverage - too many flecks makes it look like craft foil, not soft glam.
4. Half-White Nails With Blush Pink Base And Gold Corner
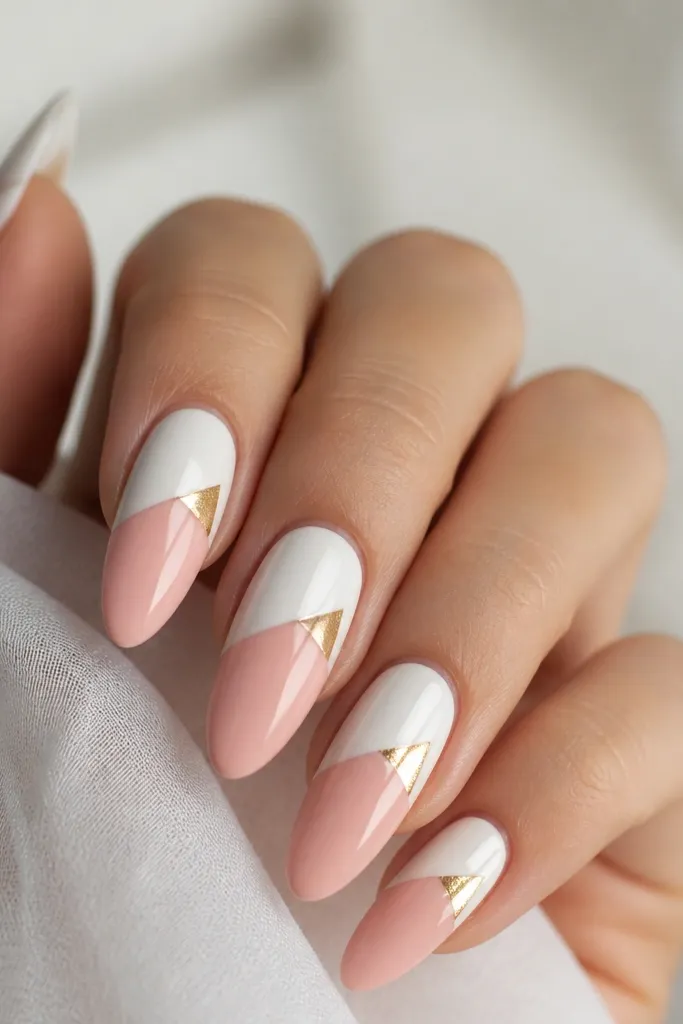
This is a graphic soft glam set that still feels gentle because the colors are pastel and the gold is tiny. The half-and-half layout elongates fingers on long almond, and the gold corner acts like a jewelry clasp. It looks great if you wear dresses or tops with white accents because your nails echo the outfit. I've found the most flattering version is keeping the line slightly diagonal rather than perfectly straight.
Apply blush pink base in two thin layers and cure. Use a striping tape guide to get a clean diagonal split, then paint opaque white on the top section in one or two coats until it's solid. Remove tape carefully while gel is still tacky or after fully curing, depending on your system. Place a small gold foil triangle at the junction corner using gel glue, then cap with glossy top coat.
Editor's noteIf your white streaks, do a thin first coat and cure, then add a second opaque coat - don't try to fix streaks in one thick layer.
Watch outAvoid a straight, harsh border - it makes the set look like a manicure sticker instead of soft glam.
5. Sheer Pink Nude With White Dot Cluster And Gold Outline
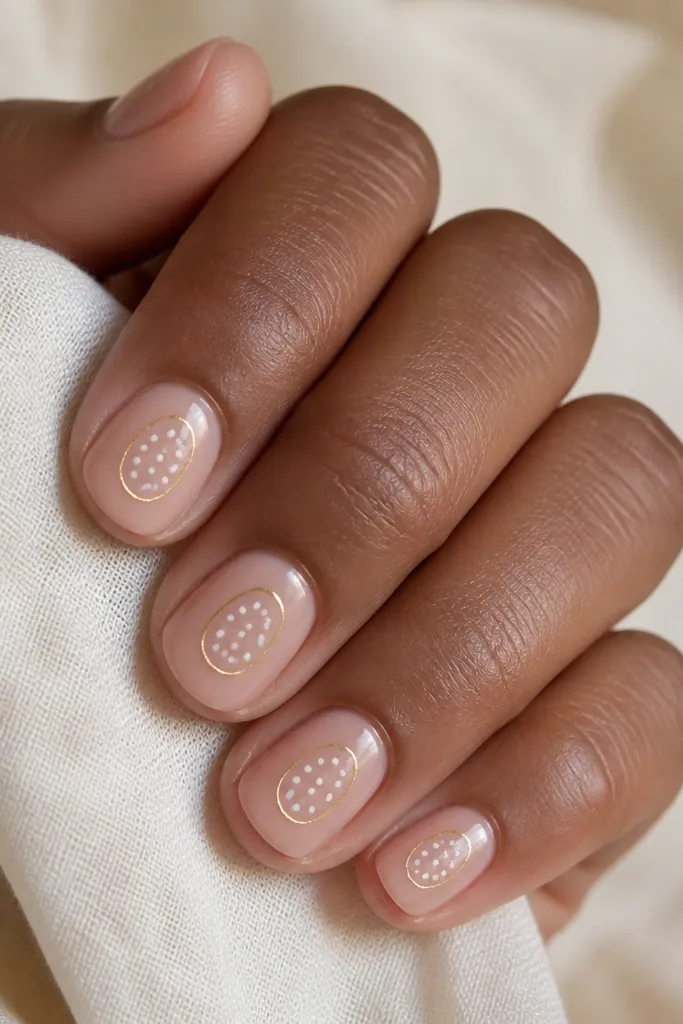
Dot clusters feel playful but still elegant when you keep them tight and small. The sheer nude pink base makes the white pop without looking like harsh nail polish art. Gold outlining gives structure, so the dots don't look random. This one flatters smaller nail beds because the dot cluster stays centered and doesn't spread to the sides.
Start with a sheer nude pink base and cure. Use a dotting tool to place 4-7 tiny white dots in a cluster, leaving a little space between dots so they look crisp. Draw a thin gold outline around the outer edge of the dot cluster using a fine liner brush. Finish with a glossy top coat, and be careful not to flood the dots so they stay defined.
Editor's noteUse a white gel with a dense pigment - it keeps dot edges sharp under top coat.
Watch outDon't make dots too big; oversized dots turn the design into cartoon dots.
6. Pink Ombré To White Tips With Gold Glitter Cuticle Band
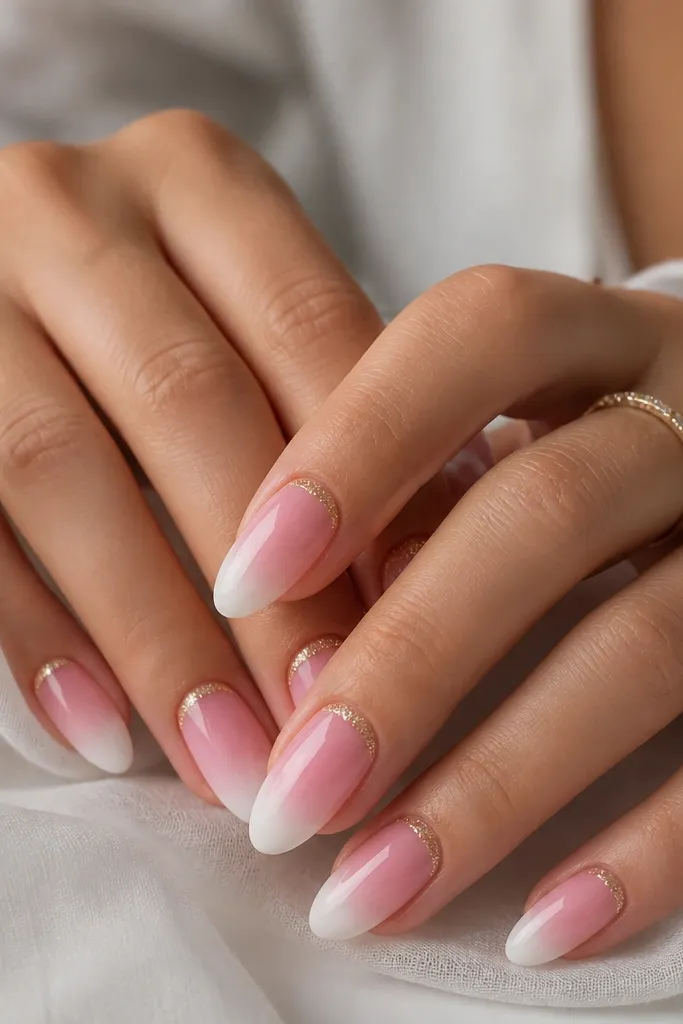
A pink-to-white ombré feels soft because the transition is gradual instead of a hard line. The gold glitter band at the cuticle adds sparkle where it looks like jewelry, not like a party confetti mess. This set works well for medium to long almond because the gradient has room to blend. I like it for date nights because the gold catches movement.
Apply a sheer pink base and cure. Sponge-blend pink into a lighter pink near the tip, then add white at the very tip using a makeup sponge with minimal product for a soft fade. Clean edges with a brush dipped in gel cleanser. Place a thin band of gold glitter gel at the cuticle, keeping it under 1mm tall, then cure. Seal with glossy top coat.
Editor's noteFor cleaner blending, wipe excess gel off your sponge before you touch the nail.
Watch outAvoid dragging white too far down; it can turn ombré into a solid white block.
7. White Halo Accent Nail With Pink Base And Gold Drip
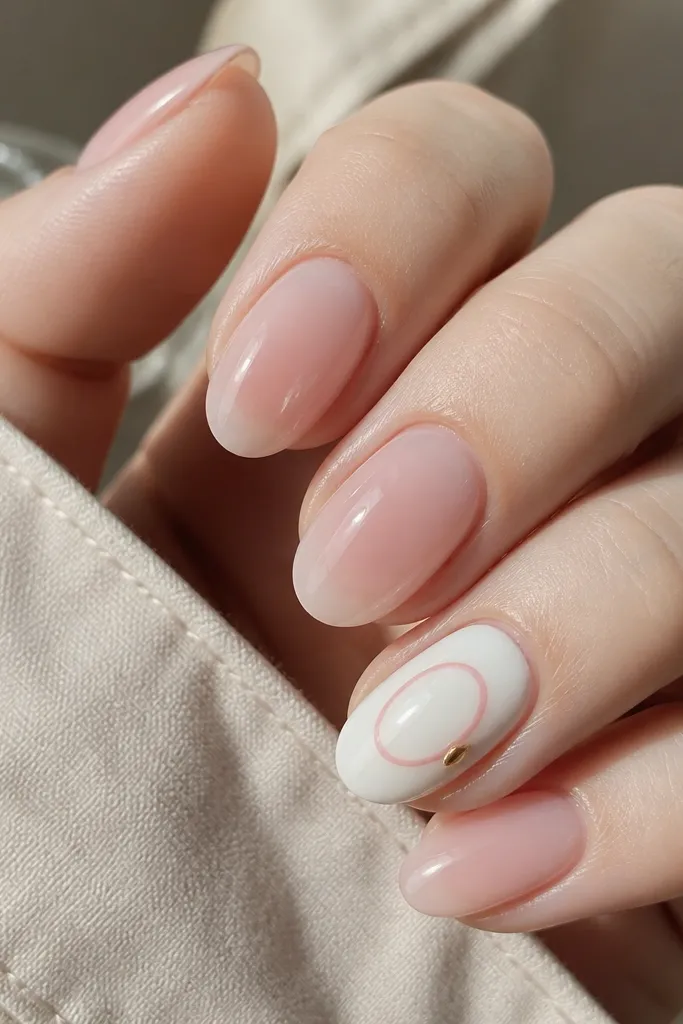
Accent nails make soft glam feel intentional without covering every nail in art. The opaque white accent reads crisp and clean, while the pale pink halo keeps the look gentle. A tiny gold drip adds a playful, fashion-forward touch that still stays classy because it's small. This flatters hands that need a focal point - your eye goes to the accent nail and the rest looks simple and neat.
Start all nails with a sheer pink base in two coats and cure. Pick one accent nail and paint it opaque white in two thin coats for full coverage. Add a thin halo ring using pale pink gel around the center, then cure. With a detail brush, pull a small gold drip from the halo edge, then cap and seal with glossy top coat.
Editor's noteUse gel gold paint instead of loose glitter for the drip so it looks smooth, not gritty.
Watch outAvoid making the drip long - it turns into a nail spill instead of an accent.
8. Pink Base With Diagonal White Stripe And Gold Corner Bow
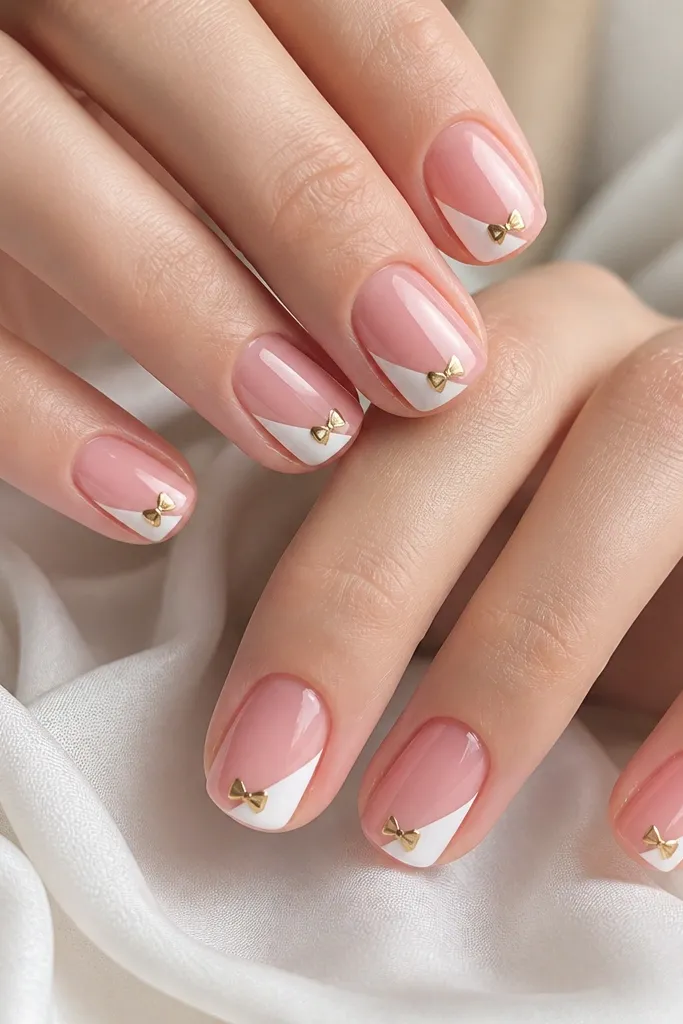
Diagonal stripes slim the look and add movement, so this set looks good even if your nails are on the shorter side. The white stripe keeps contrast, but the pink base keeps it soft. The gold corner bow reads like a tiny gift detail - cute without being childish. I've worn this with off-shoulder tops and it matches the feminine vibe without going full bling.
Apply glossy pink gel base in two coats and cure. Use striping tape to place a diagonal guide, then paint opaque white on the taped section and remove tape while gel is still tacky or after cure. Form a tiny gold bow at the lower end of the stripe using gold foil gel glue or shaped foil, then cure. Finish with glossy top coat, making sure the tape edges are fully sealed.
Editor's notePress the bow pieces gently so they sit flat before top coat caps them.
Watch outDon't use thin, transparent white for the stripe - it will look like streaky nail polish.
9. Milky Pink With White Flower Center And Gold Petal Outline
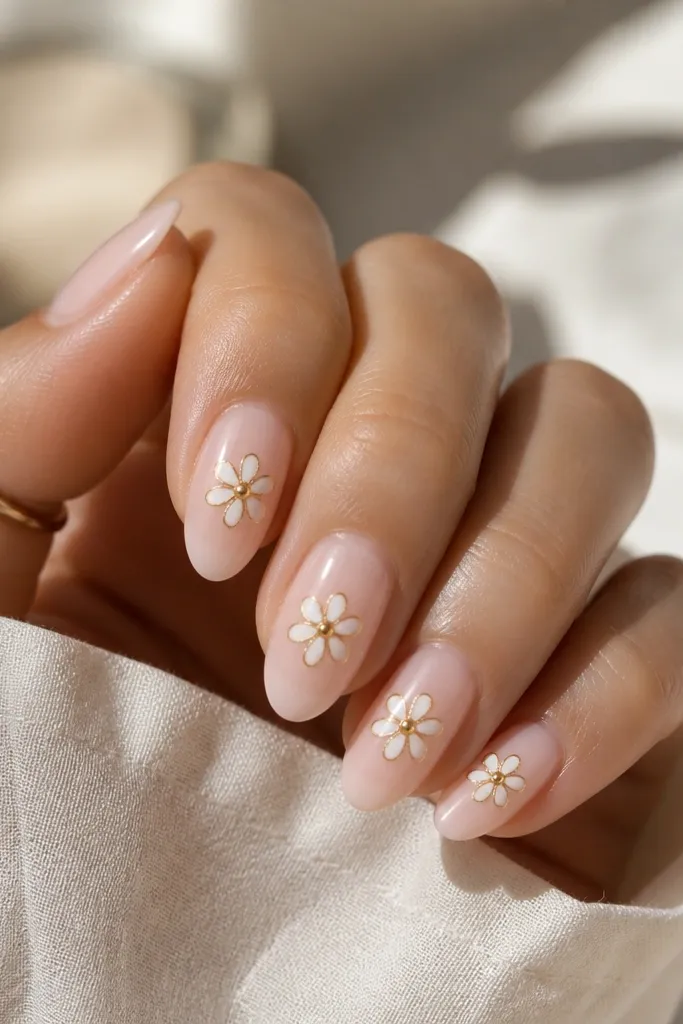
Tiny florals can look busy, but in this layout they stay soft because the flower is small and centered. Milky pink smooths everything out, and white petals give a clean, pretty focal point. A thin gold outline makes the flower look framed, like nail jewelry. This style is flattering on medium almond because the nail shape gives the flower enough space without stretching it.
Start with milky pink base in two coats and cure. Use a dotting tool to place a center dot of white, then add five small petal dots around it, lightly blending the edges with a clean brush. Trace around the outer petal edges with gold liner gel for a delicate frame. Cure and seal with glossy top coat, applying a careful second coat over the flower so it doesn't catch on fabric.
Editor's noteIf your petal edges look uneven, clean the brush with gel cleanser and nudge only the outer rim - don't repaint the whole flower.
Watch outAvoid large flowers; bigger florals overpower the gold and lose the soft glam feel.
10. Pink French With White Tip Overlay And Gold Speckle
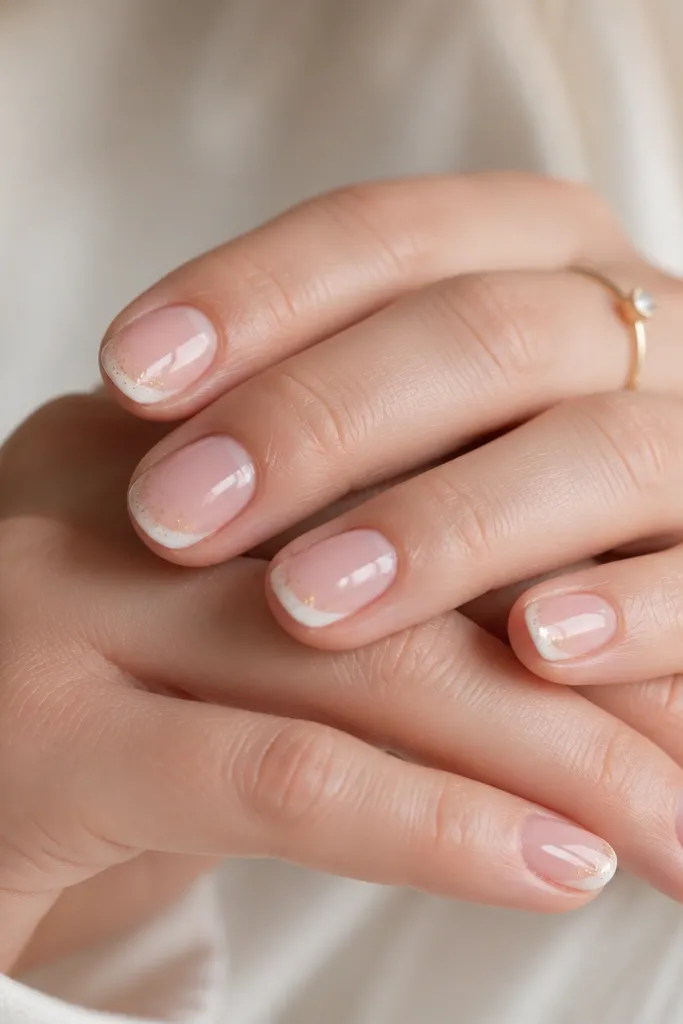
This version keeps the French tip gentle by using a white overlay rather than a thick, opaque block. The gold speckles sit near the tip and look like light dusting, which is perfect for soft glam. It flatters short nails because the white is controlled and doesn't expand past the curve. I like this for everyday wear because it looks cute without needing a full manicure redo every few days.
Apply sheer pink base and cure. Paint a thin white French tip line along the smile, then add a slightly translucent white overlay on top so it looks soft at the edges. Use a fine brush or toothpick to add 3-6 tiny gold speckles near the tip, concentrating in the outer half. Finish with glossy top coat, and cap the free edge with extra top coat to prevent chipping.
Editor's noteGold speckles look best when you vary sizes - two bigger dots and the rest tiny.
Watch outDon't place speckles all over the nail - keep them near the tip only.
11. Pink Base With White V-Cut Tips And Gold V Line
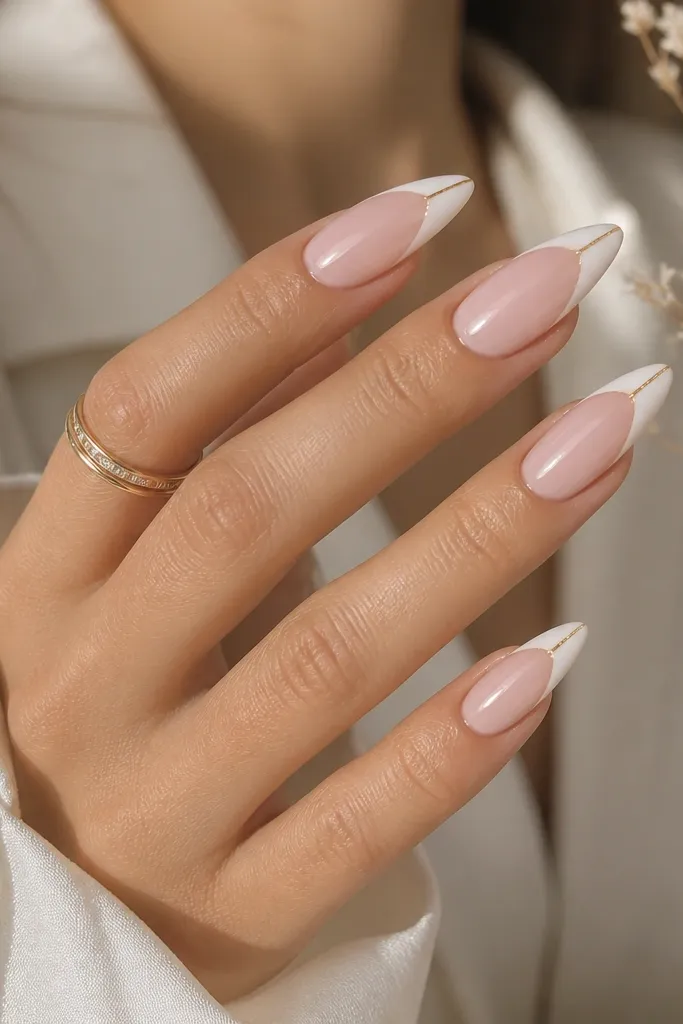
V-cut tips make your nails look sharper without turning them into a hard-edged look. The white V adds a clean shape, and the gold center line makes it feel like a designer manicure. This works best on long almond because the V needs length to look intentional. It's also great for hands with longer nail beds - the gold line draws the eye upward.
Start with a sheer pink base in two coats and cure. Use a striping tape or nail guide to create a V shape at the tips, then paint opaque white inside the V, leaving the center slightly clear or a thin pink gap depending on your look preference. Remove tape and clean edges with a small brush. Draw a thin gold line along the center of the V using liner gel, then cap with glossy top coat.
Editor's noteIf your tape leaves ridges, file lightly at the tip before top coat so the V edge feels smooth.
Watch outAvoid thick gold in the V line - it should look like a line, not a stripe.
12. Blush Pink Swirl Highlights With White And Gold Foil Corners
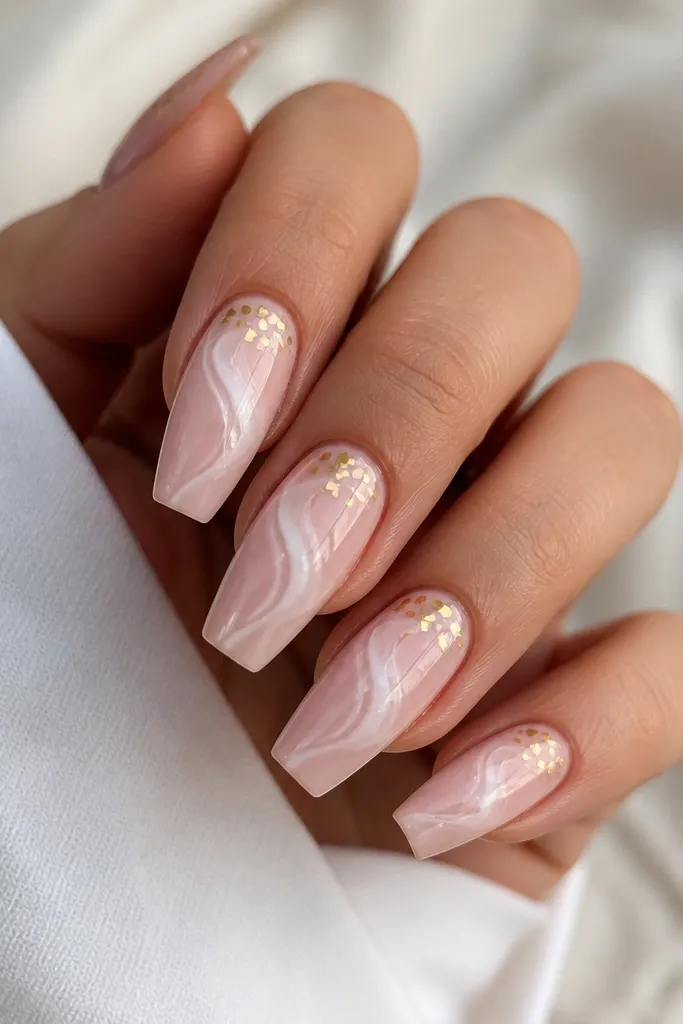
Swirl highlights add motion and keep the set from feeling flat. Using white as the swirl gives brightness, while the gold foil corner keeps it from looking too plain. The gold placement near the sidewall makes fingers look narrower because the foil acts like a vertical accent. This one flatters medium coffin and almond shapes because there's enough surface area for the swirl to breathe.
Apply blush pink base in two coats and cure. Draw a loose swirl with opaque white gel across the center, starting near one sidewall and curving toward the opposite side. Keep the swirl width about 2-3mm so it doesn't dominate. Place tiny gold foil squares at the top corner where the swirl area feels lightest, then seal. Finish with glossy top coat, and wipe any foil edges with a lint-free wipe so they don't snag.
Editor's noteUse thin gold foil pieces - small scraps glue better and look more expensive under top coat.
Watch outAvoid thick swirls that touch the sidewalls - they can make the nail look wider than it is.
13. White Marble French Tips With Pink Base And Gold Frame
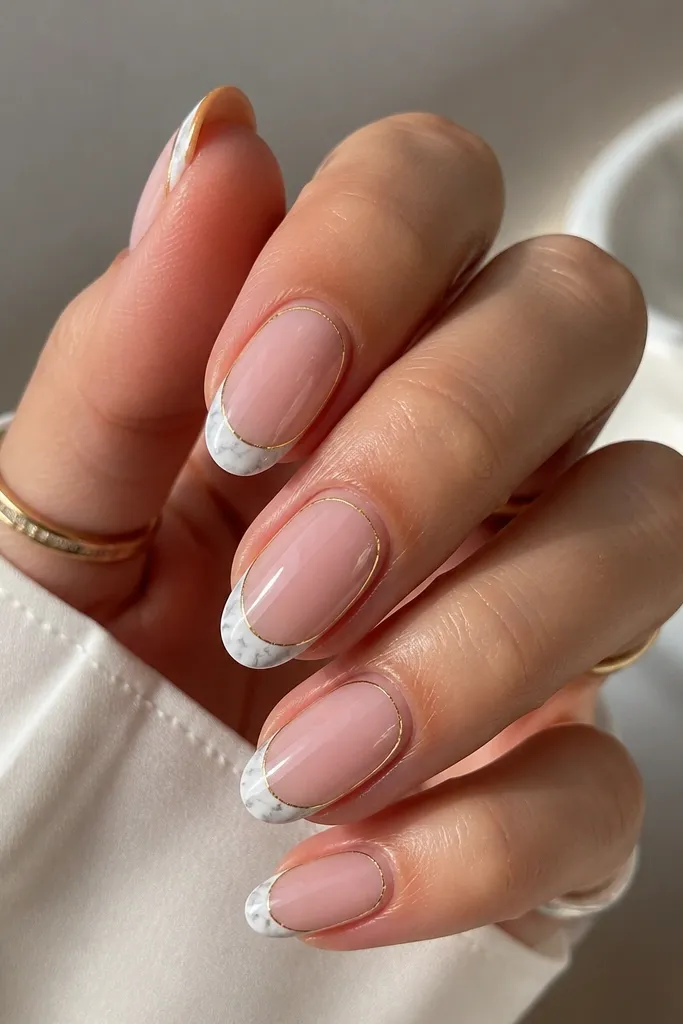
A marble French tip feels festive but still soft when the base is sheer and the marble stays light. The gold frame gives structure like a picture border, so the design looks intentional even if your marble lines vary. This style flatters short almond because the frame visually lengthens the nail. It also looks great on hands with cooler undertones because the white marble brightens the overall palette.
Start with a sheer pink base and cure. Paint French tips with opaque white, then add a few thin marble lines in very light gray or diluted white using a detail brush. Clean the tip edge with a small brush and gel cleanser so it stays crisp. Draw a thin gold outline around the nail perimeter - leaving the center open - then cure. Seal with glossy top coat, and cap the free edge.
Editor's noteIf your marble looks too dark, dilute white with a drop of clear gel and repaint the veins lightly.
Watch outAvoid full gold borders from cuticle to tip - thin frame only, or it will look heavy.
14. Pink Nude With White Bow Tie Accent And Gold Studs
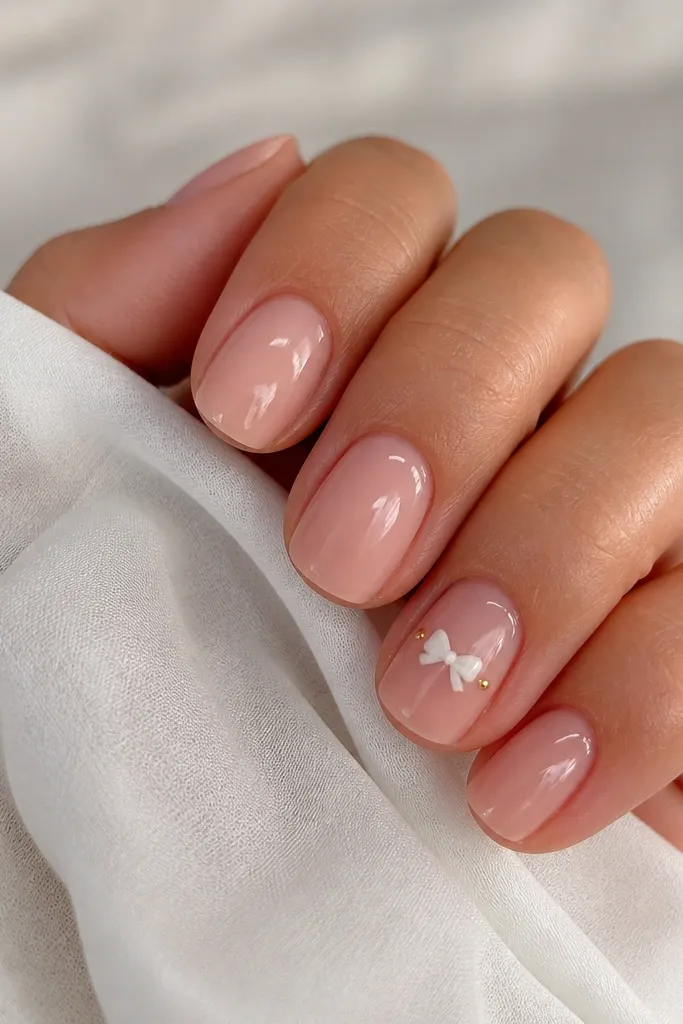
Bow tie accents look sweet and grown-up at the same time when you keep them centered and small. The pink nude base keeps it wearable, and the white bow reads crisp. Gold studs add a tiny bit of shine like earrings without turning the whole set into rhinestone overload. This works best with short rounded or short square because the bow stays in scale with your nail.
Paint all nails with pink nude gel in two coats and cure. Choose one accent nail and create the bow with white gel: two small loops and a tiny center knot. Add two gold studs using gel glue, placing them symmetrically on each side of the bow. Cure and seal with glossy top coat, then do a second top coat over the accent nail to smooth any raised edges.
Editor's noteUse a gel glue that dries clear so the studs don't look cloudy under top coat.
Watch outSkip big rhinestones for the studs - tiny metal studs keep it soft glam.
15. Soft Pink Gradient With White Half-Moon Tips And Gold Chrome Lining
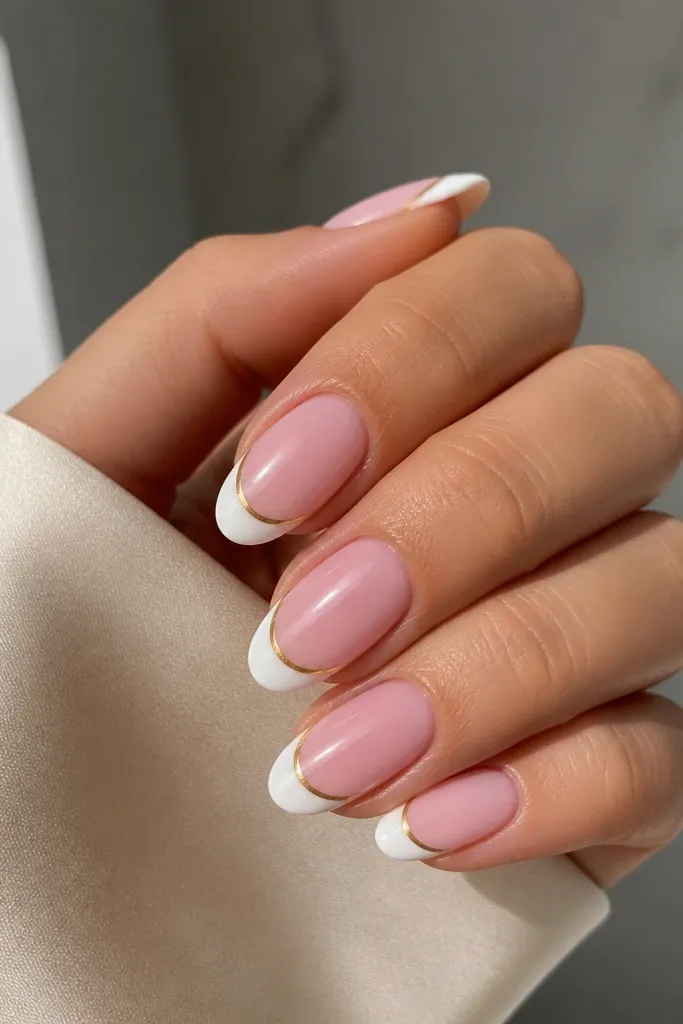
Half-moon tips feel modern and gentle because they avoid a full white tip that can look bold. The soft pink gradient makes the transition look like natural nail color, and the gold chrome lining gives that jewelry glow. This is flattering on medium almond because the rounded half-moon follows the nail curve. I've gotten compliments on this set in both daylight and indoor lighting because the gold line stays sharp.
Start with a sheer pink base, then add a second layer that fades slightly lighter toward the tip using a sponge. Paint white half-moon caps at the tips, centered and rounded, leaving some pink visible at the sides. Use gold chrome paint on a fine liner brush to outline the outer edge of each half-moon. Cure and seal with glossy top coat, making sure the gold line is fully capped.
Editor's noteIf the gold line smears, let your white cure fully first, then do gold on top of cured polish.
Watch outAvoid thick gold around the half-moon edge - it should look like a thin rim.
16. Blush Pink Base With White Negative Space Heart And Gold Edge
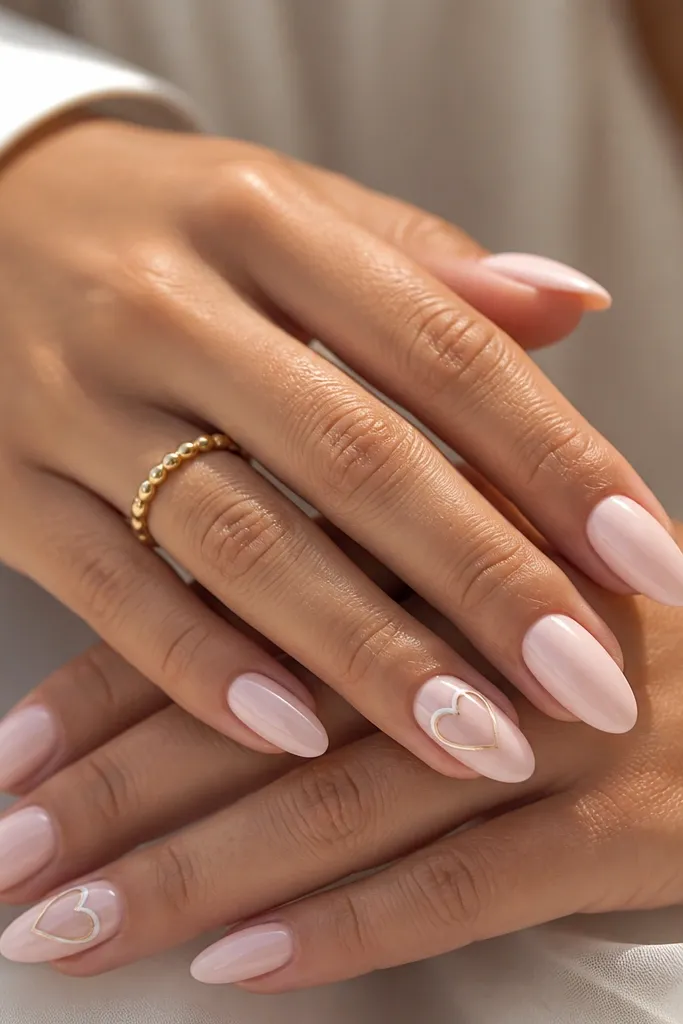
Negative space hearts look expensive because they rely on shape, not heavy coverage. The blush pink base keeps the heart soft, and the white border adds a clean, sweet edge. Gold tracing turns the heart into a jewelry charm without needing rhinestones. This set is flattering for hands with longer nail beds because the heart outline has room to look balanced.
Apply blush pink base in two coats and cure. Choose one or two accent nails and outline a heart using opaque white gel, leaving the center as negative space by not filling it in. Then trace around the heart's outer top curve and sides with a thin gold liner gel. Cure and seal with glossy top coat, and cap the edges carefully so the heart line doesn't lift.
Editor's noteKeep the heart slightly higher on the nail so it doesn't feel like a sticker stuck mid-nail.
Watch outDon't fill the heart center with white - negative space is the point.
17. Pink Sheer Base With White Stamped Lines And Gold Foil Tape
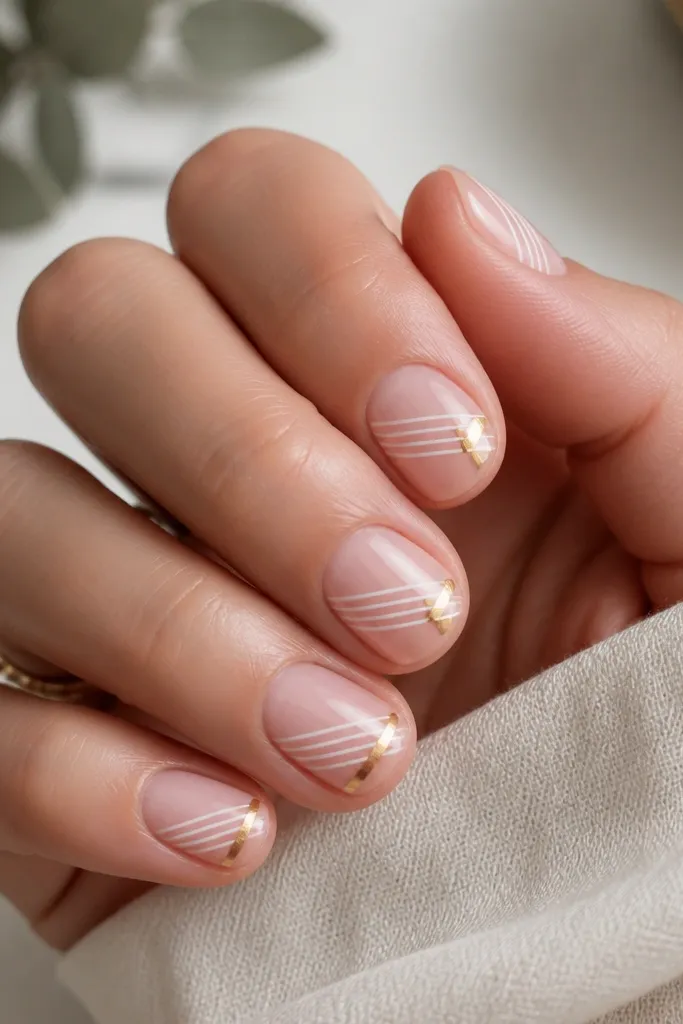
Stamped lines give you crisp detail you can't get with a freehand brush. The sheer pink base keeps it soft, and the white stamping looks like delicate lace when you keep the pattern thin. Gold foil tape acts like a clean accent strip, so the set feels designed rather than random. This works best for short square because the diagonal stripe stays visible and doesn't crowd the tip.
Start with a sheer pink base and cure. Use a nail stamping plate that has thin line patterns; stamp with opaque white polish and scrape clean. Apply the stamp to each nail diagonally, keeping the pattern placement consistent. Cut small strips of gold foil tape and place them at the end of the stamped area, then seal with glossy top coat.
Editor's noteStamp on slightly tacky base so the pattern transfers cleaner and you get sharper edges.
Watch outAvoid thick stamping polish - it blurs the lines under top coat.
18. White French Tips With Pink Underlayer And Gold Stud Strip
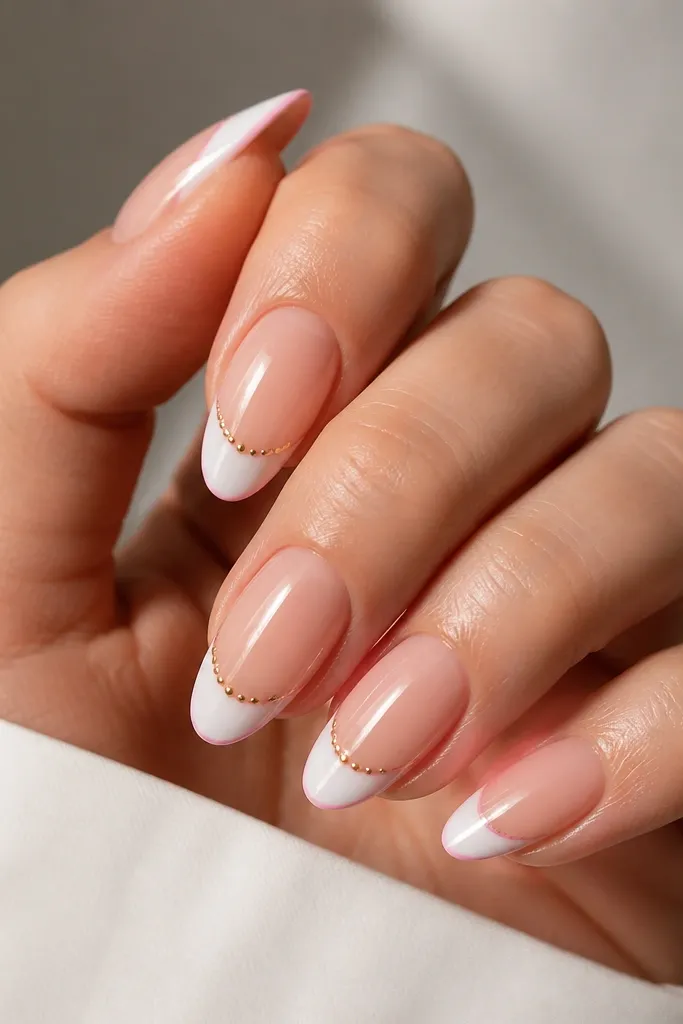
The pink underlayer trick makes white French tips look softer and more dimensional. Instead of a flat white block, you get a thin blush line that reads like a highlight. Tiny gold studs along the smile area add just enough texture to feel glam while staying controlled. This set looks great for weddings and photos because the white stays crisp and the studs catch light.
Apply a sheer pink base in two coats and cure. Paint French tips in opaque white, but leave a 0.5-1mm blush line at the very edge by keeping the white slightly off the tip boundary. Add tiny gold studs in a short strip along the smile on one or two nails only, using gel glue. Cure and finish with glossy top coat, making sure studs are fully capped so they don't snag.
Editor's noteCap around studs with a thicker top coat, then wipe the nail edge to avoid lumps.
Watch outDon't stud every nail - the set stops feeling soft and starts feeling heavy.
19. Pink Ombre With White "Reverse French" And Gold Cuticle Charm
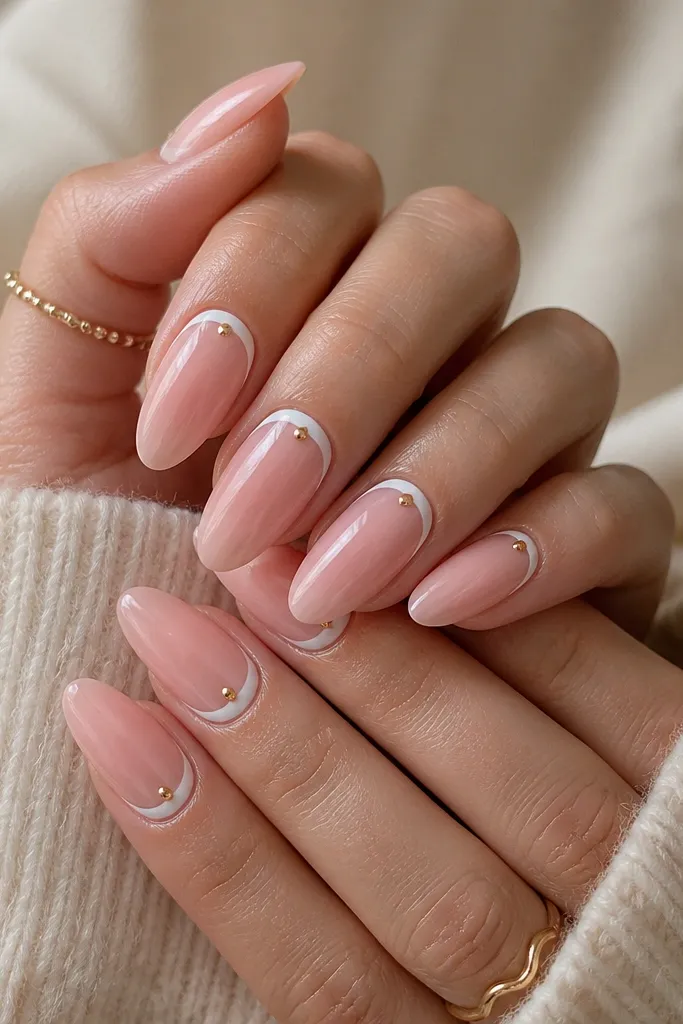
Reverse French is the cheat code for a clean look that still feels special. The white arc near the cuticle brightens your nail bed, and the pink ombré keeps it gentle instead of stark. A single gold dot in the center acts like a charm, so the gold stays classy. This flatters hands because it draws attention up toward the cuticle and makes fingers look longer.
Start with a sheer pink base. Sponge-blend a slightly deeper pink into the mid-nail for a soft ombré, then cure. Paint a thin reverse French arc in opaque white around the cuticle, keeping it centered and leaving a tiny gap from side walls. Place a small gold dot (chrome paint or a tiny foil bead) at the center of the arc, then cap with glossy top coat.
Editor's noteUse a fine angled brush for the reverse arc so the curve stays smooth.
Watch outDon't thicken the reverse French - thin looks soft glam; thick looks messy.
20. Sheer Pink Base With White Pearl Dots And Gold Micro Chrome
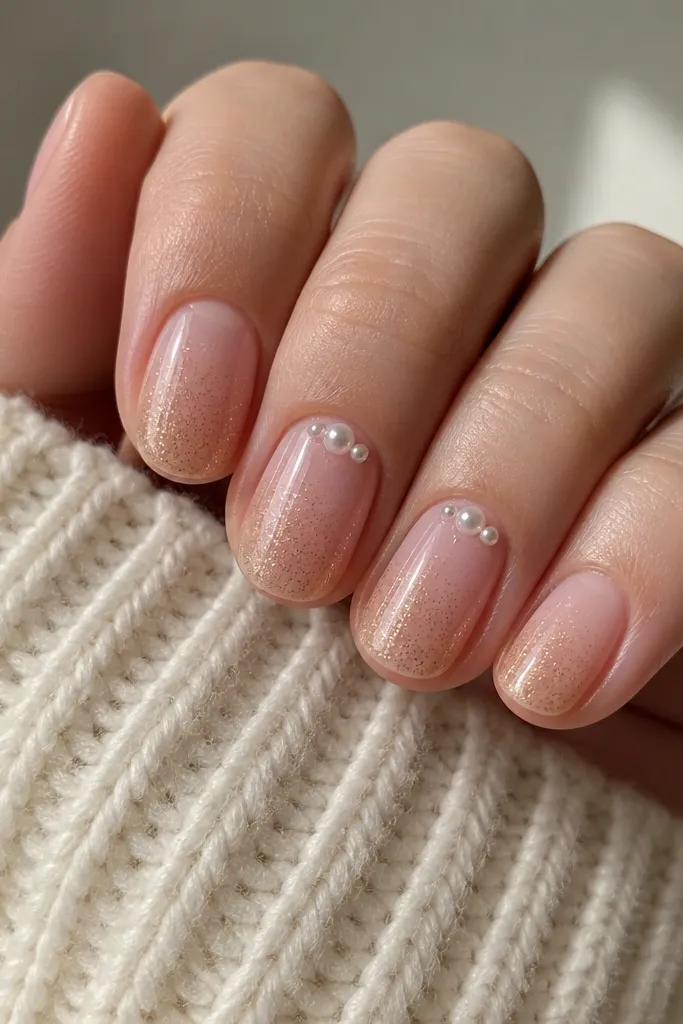
Pearls read soft, and the key is using tiny dots instead of big stones. The sheer pink base keeps everything light, and the white pearls add a delicate texture that looks good even without a lot of line work. The gold micro chrome shimmer on the lower half gives movement when you walk and keeps the set from looking flat. This is perfect if you like sparkle but hate chunky glitter.
Apply sheer pink base gel in two coats and cure. On two nails, place 3-5 tiny white pearls near the cuticle using gel glue, spacing them evenly. On every nail, lightly dust gold micro chrome shimmer starting at mid-nail and stopping before the tip. Cure and seal with glossy top coat, pressing top coat gently over pearls so they don't pop up.
Editor's noteGold micro chrome looks best when you apply less than you think - it should look like a glow, not a coating.
Watch outAvoid large pearls - they make the set feel bridal heavy instead of soft glam.
21. White Lacquer Tips With Pink Cuticle Glow And Gold Side Lines
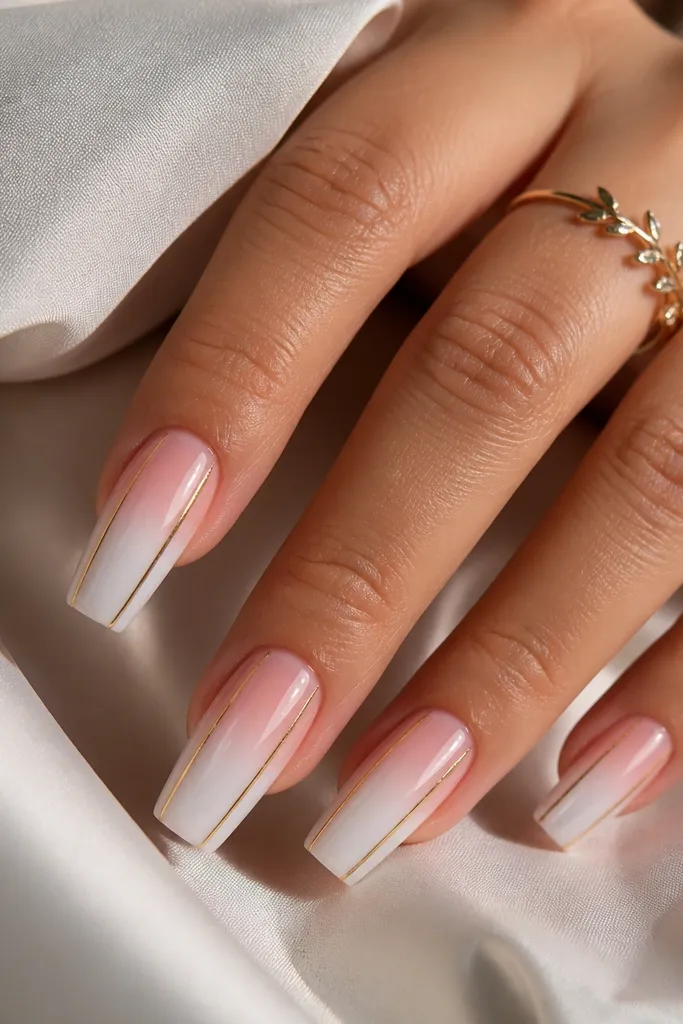
This set is sharp but still soft because the pink glow at the cuticle offsets the white tips. Side lines make the nail look longer and more narrow, and gold keeps it feeling like jewelry instead of graphic art. I like this on medium coffin because the shape gives room for clean side lines. If you wear black, navy, or white outfits, this combo looks extra intentional.
Start with a sheer pink base and cure. Create a pink glow at the cuticle by using a slightly deeper pink and blending upward with a sponge, then cure. Paint the tips opaque white in two thin coats for a lacquer look. Draw two thin gold lines down each nail's sides, keeping them symmetrical and about 1-2mm away from the edges. Seal with glossy top coat, focusing on the tip edges.
Editor's noteIf your side lines look wobbly, use striping tape as a guide, then remove it right after the line is placed.
Watch outAvoid uneven line thickness - it reads amateur fast.
22. Pink Base With White Dot French And Gold Tip Cap
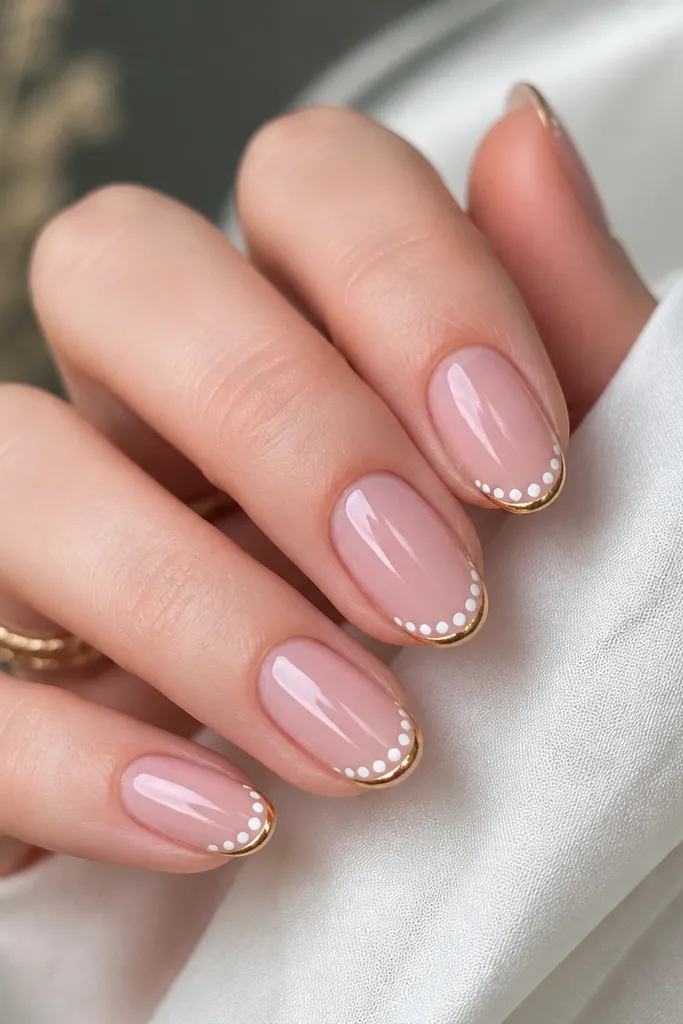
Dot French feels youthful, but it looks grown-up when the dots are evenly spaced and the base is glossy. The gold tip cap adds that final "done" look without covering the whole nail. This is flattering on short almond because the dots create a clean curve and gold at the tip makes the nail look longer. I've used this on my own nails when I wanted something cute for a weekend and still photo-ready.
Apply glossy pink base in two coats and cure. Paint a thin guide line where the French curve should sit, then dot white gel along the line using a dotting tool, spacing them evenly. Cure and clean any stray dots with a small brush. Add a thin gold chrome cap along the very tip edge, just a narrow rim, then cure. Finish with a glossy top coat that fully smooths the rim.
Editor's noteLet the white dots cure fully before you add gold so the gold doesn't drag the dots.
Watch outAvoid random dot sizes - keep them consistent for a soft glam look.
23. Pink Milky Base With White Aura Ring And Gold Sparkle Center
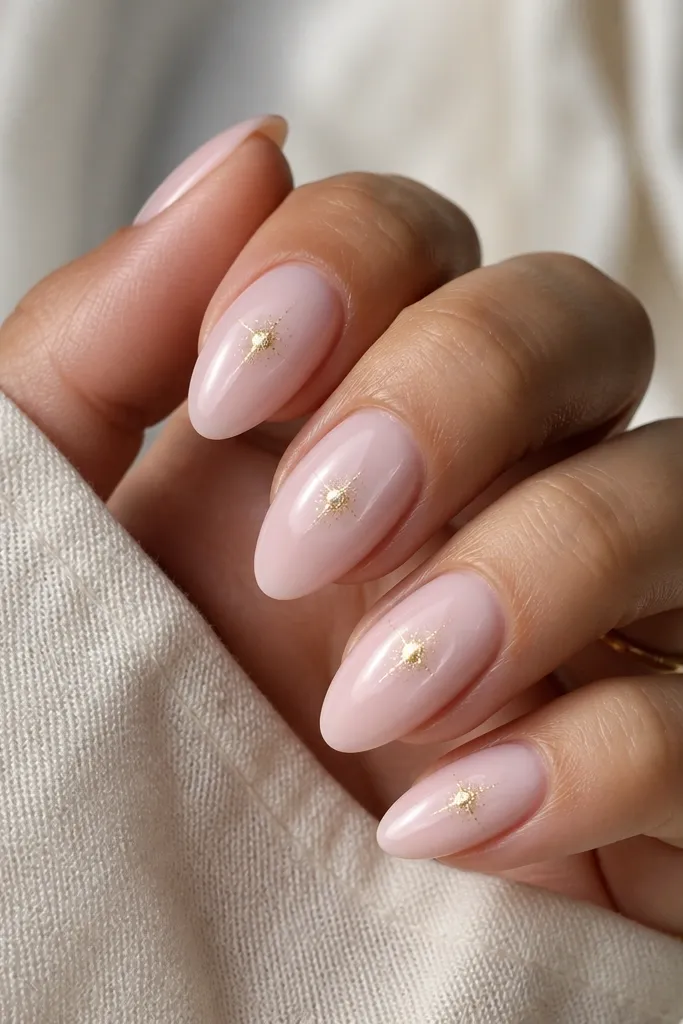
Aura rings are trendy, but they can look messy if the ring is thick. Here, the white aura ring is thin and blended, which keeps it soft. The gold sparkle center adds a focal point that feels like a small pendant. This style flatters medium to long almond because the aura ring has enough space to look centered and intentional. It also looks great on hands with shorter fingers because the vertical nail shape stays in control.
Start with milky pink base in two coats and cure. Use a sponge to blend a very soft translucent white around the center, creating a ring effect rather than a filled circle. Clean the edges with a brush so the ring stays thin. Add a tiny gold sparkle cluster in the exact center using gold glitter gel or micro glitter, then cure. Seal with glossy top coat, and avoid brushing over the sparkle too much while it's tacky.
Editor's noteBlend the white aura with less product than you think - thin aura rings look expensive.
Watch outAvoid a filled white circle - that turns it into a blob instead of an aura.
24. White And Gold Confetti On One Pink Nail With Clean Base
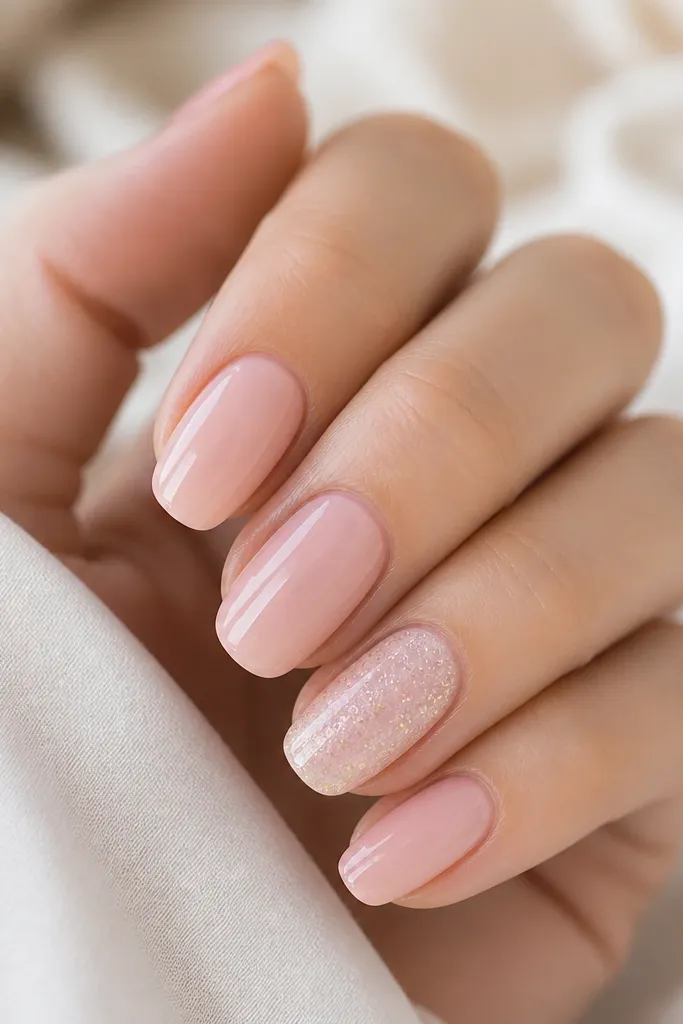
A single confetti accent keeps the set light and wearable. Sheer pink on the other nails makes the confetti nail feel like a highlight, not a full glitter bomb. White micro dots keep it airy, while gold glimmer adds warmth. This style flatters any nail shape because the base is simple and the accent carries the look. I like it when I want "party" energy but still want my hands to look elegant in everyday photos.
Paint all nails with sheer pink gel in two coats and cure. Choose one accent nail and apply a thin layer of clear gel as your base for confetti. Add white micro dots and fine gold glimmer in a scattered pattern, focusing on the top half and leaving a little negative space near the cuticle. Cure and then cap with glossy top coat in two layers so the confetti doesn't feel rough.
Editor's noteUse micro glitter, not chunky - it stays soft under top coat.
Watch outAvoid full coverage confetti on every nail; it looks busy and cheap quickly.
25. Pink Base With White Lace Stamping And Gold Corner Accent
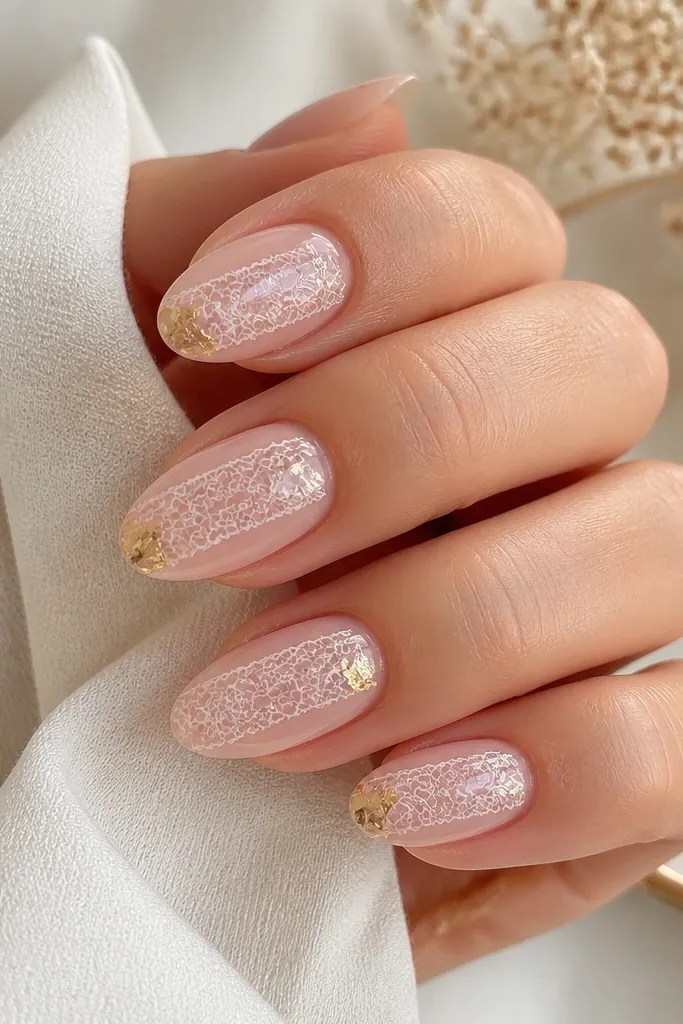
Lace stamping looks soft glam when the base is sheer and the stamp is white, not gray. The lace pattern creates delicate detail without freehand work, and the gold corners act like jewelry clasps. This set is flattering for hands that like texture but want it clean - the stamp is controlled, so it doesn't look messy. I've worn this for bridal events and it reads romantic without being overly bridal.
Apply sheer pink base in two coats and cure. Use a lace stamping plate and stamp with opaque white polish across the middle area of each nail you want stamped. Clean the stamp edges with a small brush and gel cleanser. Add tiny gold foil accents in just two corners of the stamped area per stamped nail. Seal everything with glossy top coat, then do a second coat over the stamped sections to smooth the texture.
Editor's noteIf the stamp looks patchy, stamp again after wiping the plate - don't try to fix it with thicker polish.
Watch outAvoid stamping over thick gel layers - it smears and looks uneven.