1. Crisp Micro French With Warm Gold Tips
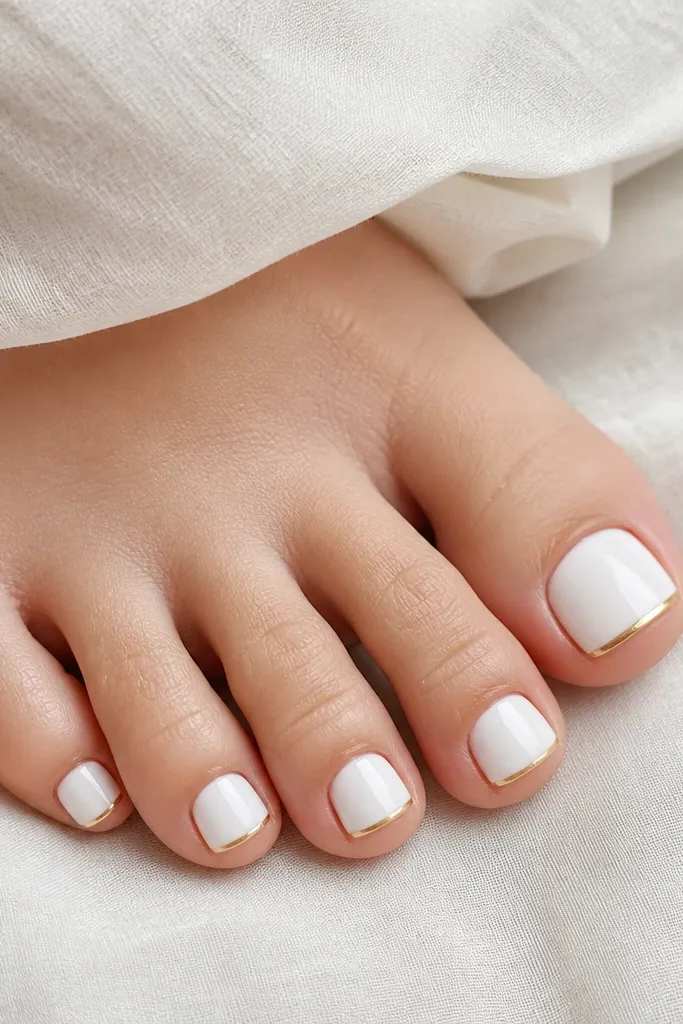
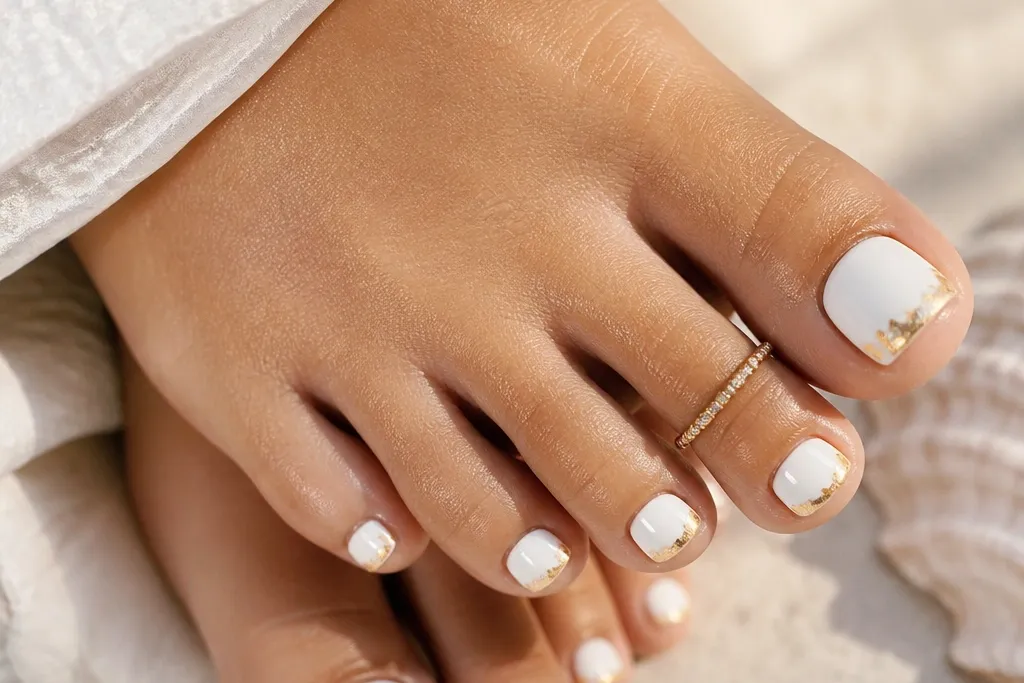
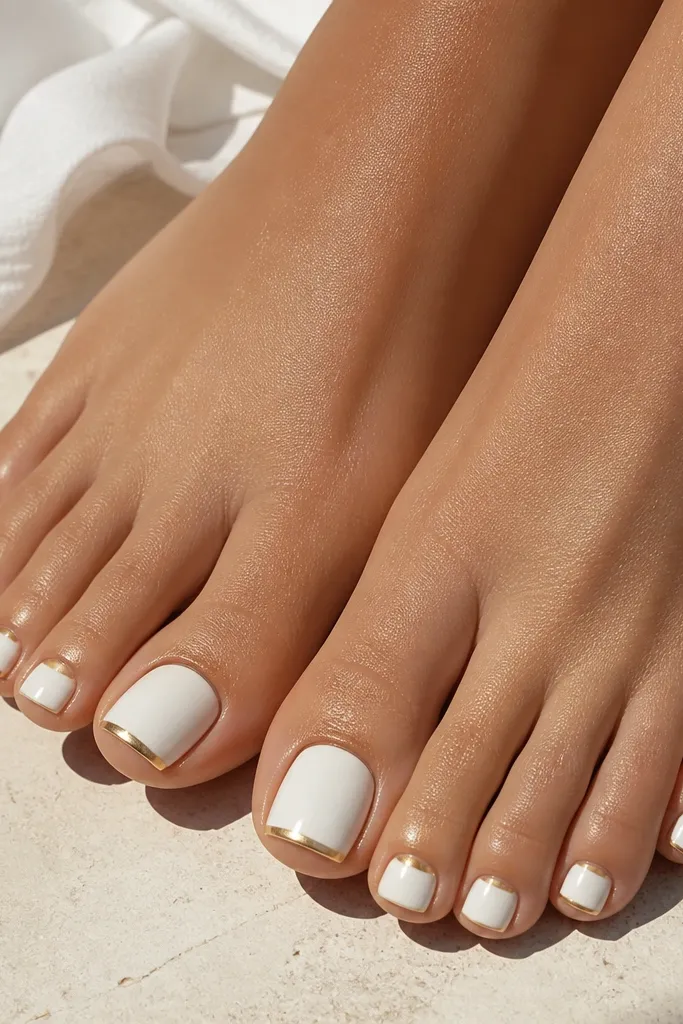
This one is my go-to when you want white and gold to look sharp on short toes. The white base is bright and opaque, then each nail gets a micro French line so the nail bed still looks neat. The gold is only on the tip edge, using a warm yellow-gold tone so it doesn't clash with summer tans. It flatters almost everyone because the design creates a long, tidy look without adding bulk. It also works for everyday sandals because there's nothing raised that can catch.
Start by painting a thick, opaque white base in two coats, letting each coat dry or cure fully. Then use striping tape or a fine liner brush to place a micro French arc about 1-2 mm from the free edge, painting it white first if needed for symmetry. Next, run a thin warm gold line along the very tip - keep it narrower than the white French line. Finally, seal with a high-gloss top coat, and brush extra top coat along the sidewalls where chips start.
Editor's noteIf your gold looks dull, switch from glitter polish to gold foil gel or chrome powder for that smooth, bright finish.
Watch outAvoid thick gold at the tip - it makes toe nails look bulky and peels faster at the edge.
2. White Half-Moon Base With Gold Foil Dot
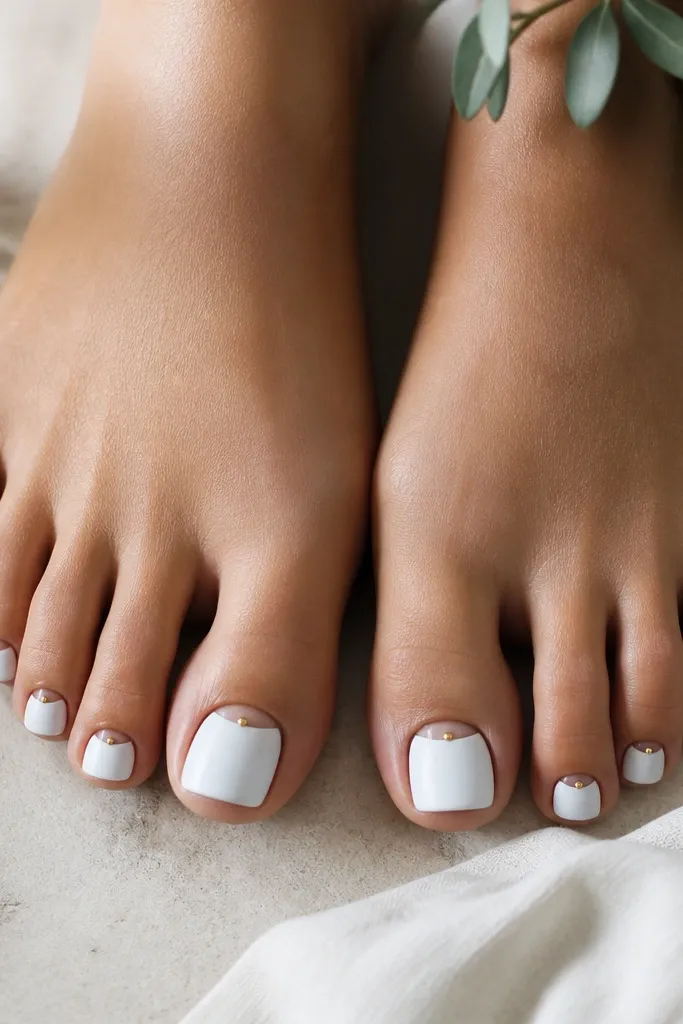
This design looks clean and modern because the gold is small and placed where your nail naturally draws attention. The half-moon near the cuticle gives structure, while the gold foil dot adds sparkle without turning the whole toe into a glitter bomb. I like a slightly matte white base because it makes the gold look brighter by contrast. It flatters hands and toes with any skin tone, especially if your feet have a warm undertone because warm gold sits nicely against it. It's also great for people who hate busy nail art.
Start with two coats of white, then decide on finish - I use matte top coat after the base if I want that soft look. With a small dotting tool or the tip of a toothpick, place a tiny gold foil piece (or gold foil gel) in the center of the half-moon area. Use a half-moon stencil or freehand a curved shape at the cuticle that covers about 20-25% of the nail width. Cure or dry fully, then seal with a matte top coat for the white and a glossy top coat only over the foil dot if you want extra shine.
Editor's noteKeep the gold dot smaller than a sesame seed - bigger dots look heavy on toes.
Watch outDon't place the gold dot too far down the nail - it steals attention from the clean half-moon shape.
3. Gold Line Art Over White Marble Swirls
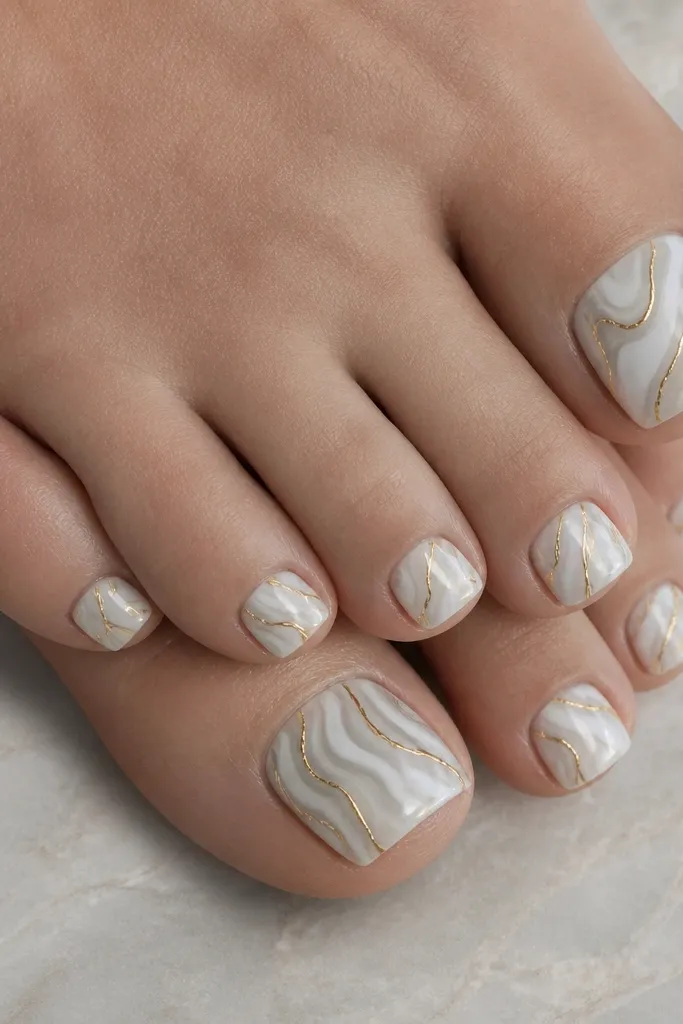
Marble is the fastest way to make white and gold feel "designed" without looking busy. The trick is to keep the marble movement subtle so the gold line art looks intentional. I use a white base and then add thin, watery grey-white streaks so the pattern looks like stone, not like messy splatter. The gold line art should trace the biggest curves only. This flatters most foot shapes because it visually lengthens - the movement follows the nail's natural curve. It also photographs well because the gold lines catch light even when you're not in direct sun.
Start with an opaque white base in two coats. Then add marble streaks with a thin brush dipped in a diluted grey-white polish, dragging lines from one side toward the center - keep them light and airy. Let it set, then trace 2-4 key swirls per nail using gold striping polish or a fine gold gel liner. Finally, top coat fully, making sure the brush goes over the gold lines so they feel smooth under sandals.
Editor's noteIf you're using regular polish for marble, wait 10 minutes before gold so the gold doesn't smudge.
Watch outSkip chunky gold stickers on marble - they look raised and can catch on shoe straps.
4. White Gloss With Gold Leaf Accent on Big Toe
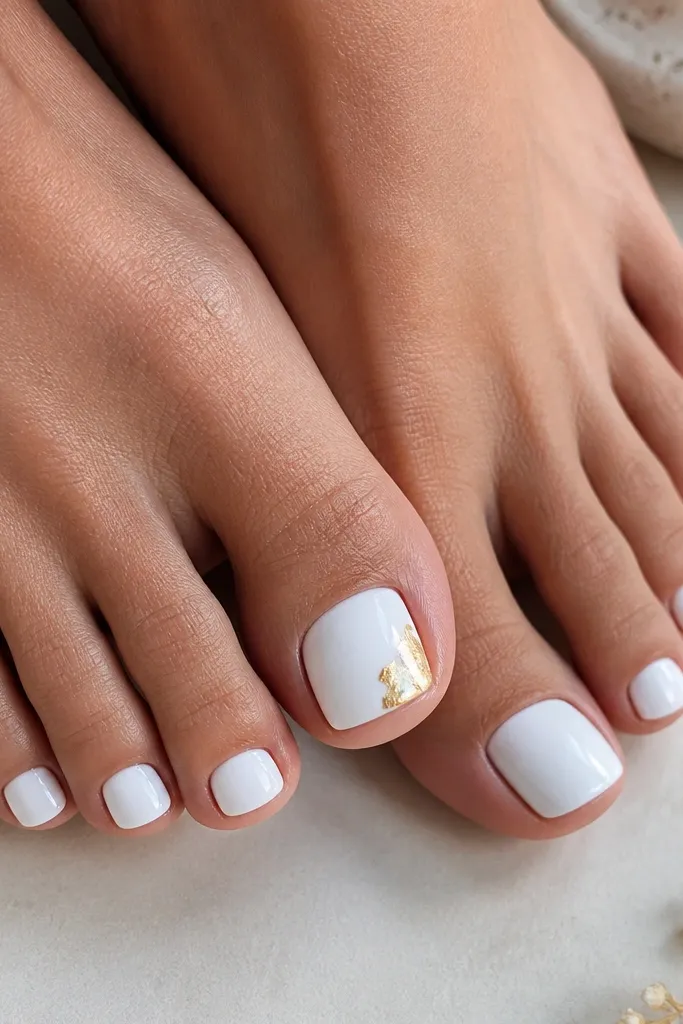
This is summer glam that stays wearable. White gloss on every toe looks fresh and even, and the gold leaf accent on the big toe gives you that "done" look without dragging the design across all five nails. I love gold leaf because it looks like real foil - it has little texture and irregular edges that feel boutique. It flatters fair, medium, and deep skin tones because the white is consistent and the gold is warm. For people with wider toes, this works because it doesn't add stripes that can visually widen the nail.
Start by painting all toenails with two coats of glossy white, curing or drying fully between coats. For the big toe, press a tiny piece of gold leaf (or gold leaf gel) onto the outer half of the nail - about 1/3 of the nail area. Use a silicone tool or tweezers to place it, then gently tap so it adheres. Seal with two thin layers of top coat, paying attention to the edges of the leaf so it doesn't lift.
Editor's noteGold leaf looks best when it's slightly off-center, not perfectly centered on the nail.
Watch outAvoid covering the entire nail in leaf - it can look dull and cluttered once you add top coat.
5. Reverse French With Gold Half-Moon at Cuticle
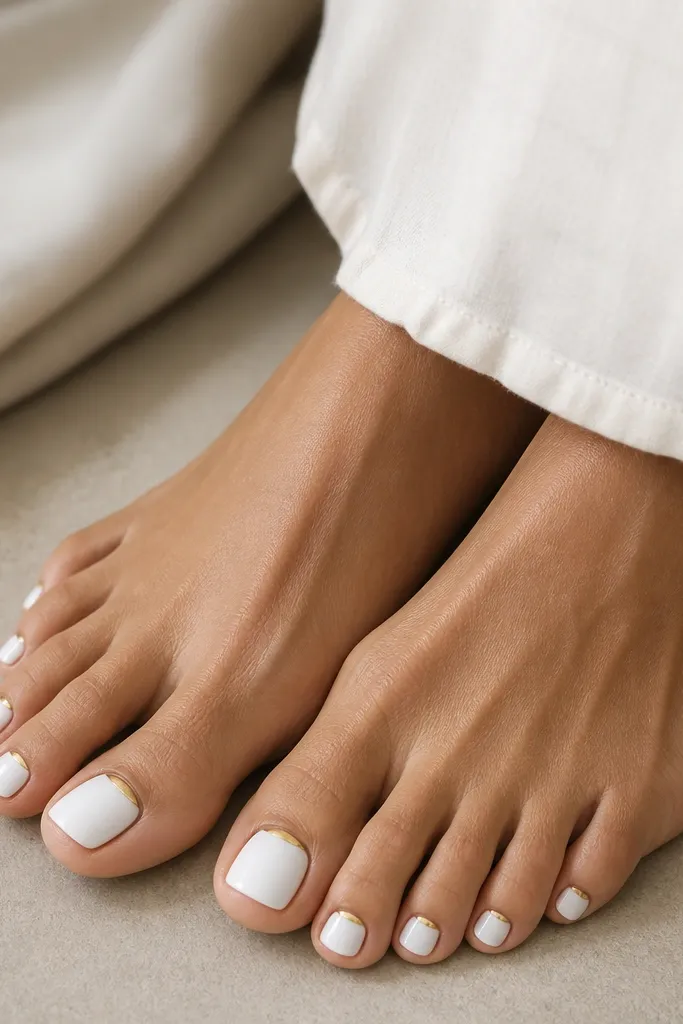
Reverse French is flattering because it frames the nail instead of just the tip. The gold half-moon at the cuticle creates a clean focal point and makes your toes look groomed in photos. I prefer warm gold for this one because it looks smooth and flattering against skin. White stays as the main color, so the design works for both short and medium toe nails. It also holds up well because the gold area is near the cuticle where your shoes don't grind it as much.
Start with two coats of opaque white. Then use a half-moon stencil or freehand a curve at the cuticle - stop about 1 mm away from the side edges so it doesn't smear. Fill the curve with gold gel or gold striping polish, aiming for a smooth arc about 1-2 mm tall. Cure/dry, then apply top coat, keeping the brush around the gold edge to lock it in.
Editor's noteIf your cuticle area is dry, gently buff and push it back first - it helps the gold line stay crisp.
Watch outDon't let the gold touch the skin - it looks messy and lifts faster on toes.
6. White Polka Dots With Tiny Gold Caps
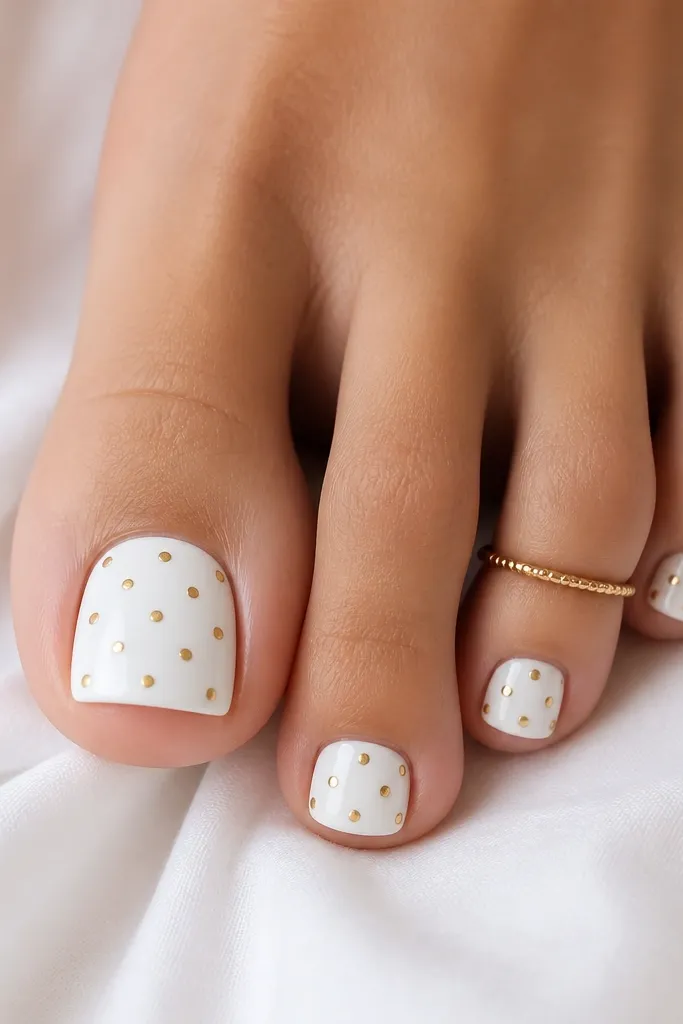
This design is playful but still clean, because the gold caps are tiny and spaced. I do a white base and add small dots using a dotting tool, then place a micro gold cap on top of the dot center. The effect is like little studs, but it stays flat enough for sandals. It flatters most skin tones because the gold touches are warm and the base stays bright. It's a good choice if you want something cute for beach weekends without full-on rhinestones.
Start with a glossy white base in two coats. Use a dotting tool to place small dots - keep them about 1.5-2 mm wide and spaced evenly across each nail. Add a tiny amount of gold gel or gold polish to each dot center, then cure or let it dry fully. Finish with a thick top coat layer so the dots and gold caps feel smooth, not bumpy.
Editor's noteUse a paper towel to wipe your dotting tool between nails so the dot size stays consistent.
Watch outDon't use big rhinestones here - they snag on straps and look heavy on toes.
7. White Crisscross Lattice With Gold Corners
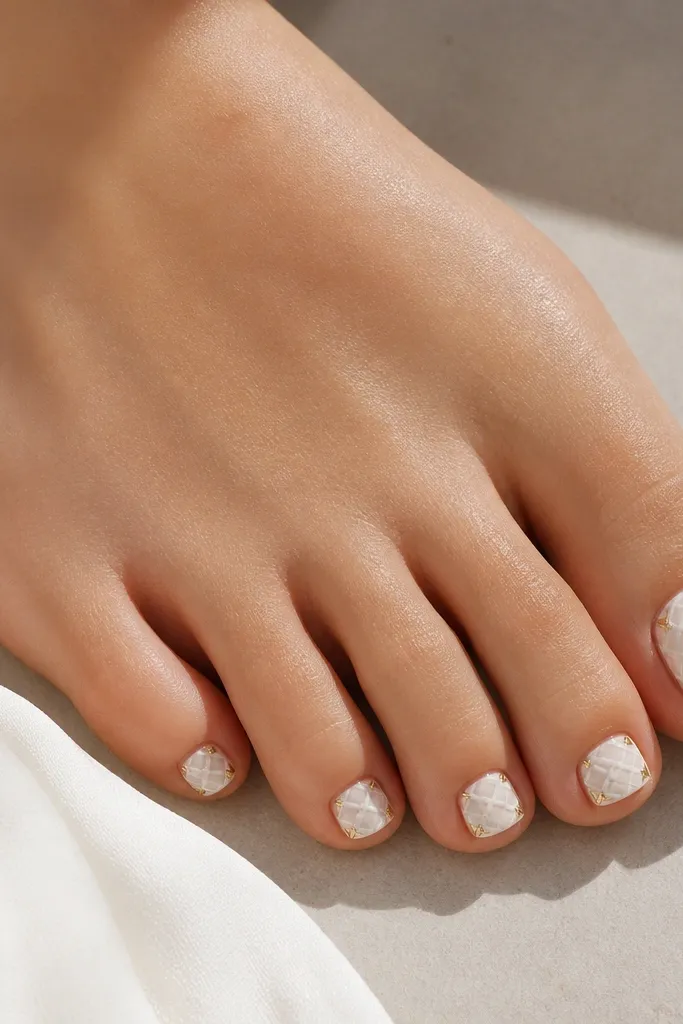
Lattice designs look detailed, but you can keep them summer-friendly by limiting gold to the corners. The white lattice gives a geometric structure without needing extra colors. Gold at the corners catches light when you walk, so the design reads glam even with minimal sparkle. I like this on medium-length toes because the pattern needs a little space to breathe. It flatters feet with narrower toes because the geometry adds a tidy frame.
Apply two coats of glossy white as the base. With a thin liner brush, draw diagonal lines from corner to corner, then add the opposite diagonals to make a grid - keep line thickness under 0.5 mm. Place small gold dots or gold squares at each corner near the side edges. Seal with top coat, using extra care around the corners so the lines don't lift.
Editor's noteIf your lines get shaky, tape a thin guide strip along the nail's long axis before painting diagonals.
Watch outAvoid thick lattice lines - they look like marker and chip faster on toes.
8. Gold Chrome Ombre From Tip to Center
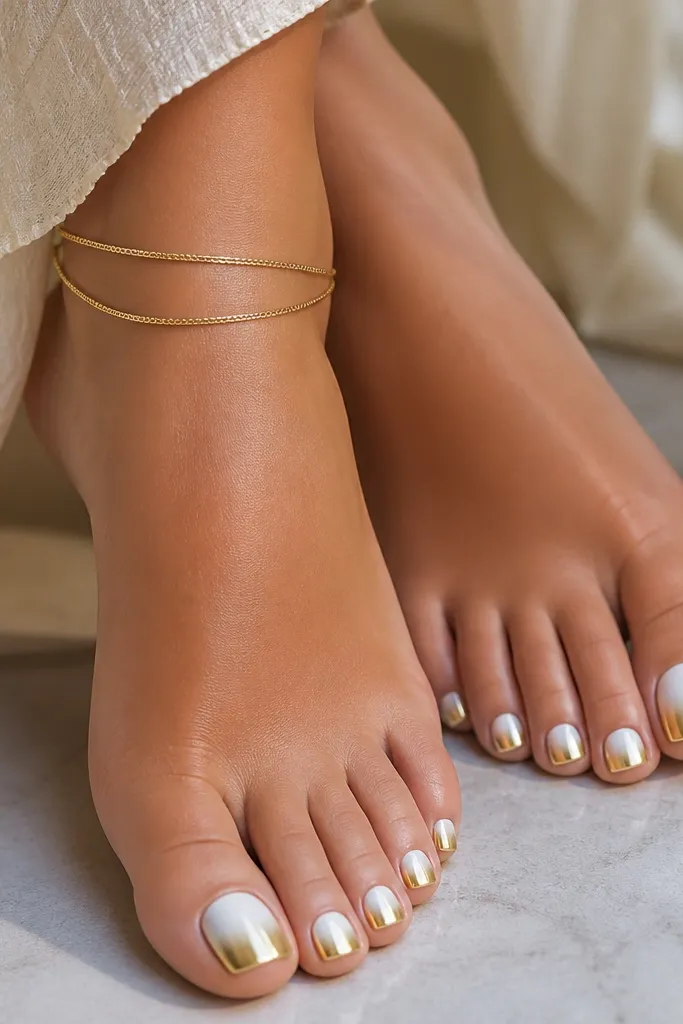
This is the toe design that looks like you paid for a salon gel set. White at the base keeps it clean, and gold chrome toward the tip creates that "sunlit" effect as you move. Chrome also hides tiny imperfections because it reflects light. I've worn this with sandals a lot and get compliments because the gold looks bright even when it's not fully covered. It flatters all skin tones because the gradient keeps contrast controlled. The ombre also works on shorter nails since the main impact is at the tip.
Start with a glossy white gel base or white polish base that's fully cured/dry. Buff lightly if you're using gel so the chrome adheres. Apply gold chrome powder with a sponge or applicator starting at the tip and blending upward about 1/2 to 2/3 of the nail length, leaving the cuticle area white. Seal with a chrome-friendly top coat to avoid dulling the finish.
Editor's notePractice the fade on one nail first - the sweet spot is a soft blend over 2-3 mm, not a sudden line.
Watch outDon't skip a proper top coat for chrome - it can rub off on toes faster than you expect.
9. White Cloud Tips With Gold Micro Glitter Trace
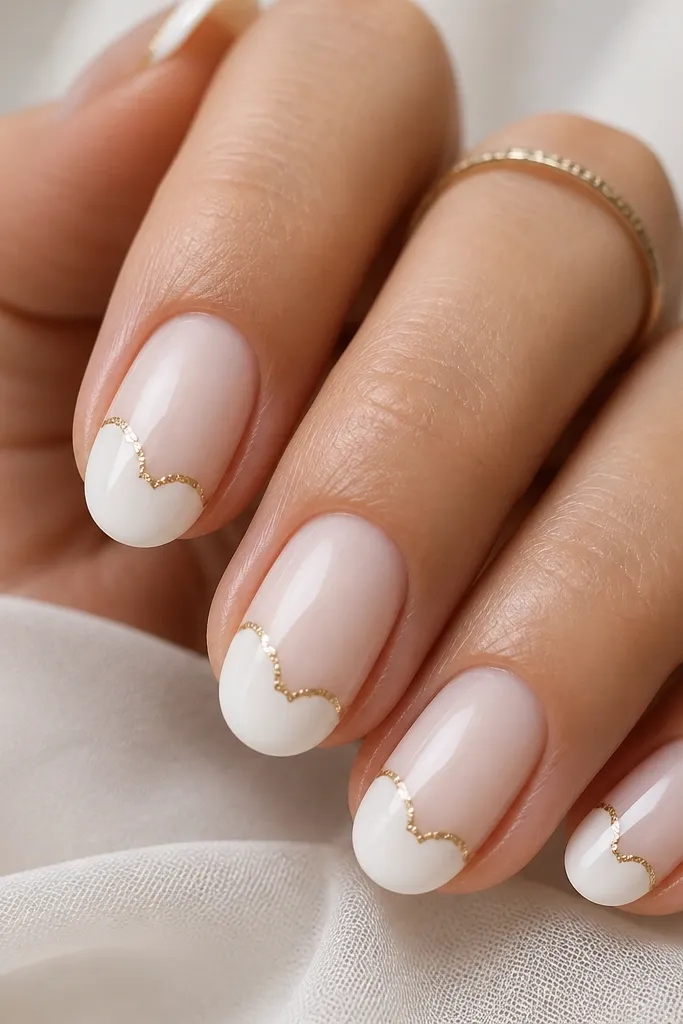
Cloud tips feel soft and summery, and the gold trace keeps it glam without going overboard. The cloud shape adds a little movement to toes that can look plain in plain French tips. I use micro glitter that stays fine - it reads as a line of light instead of chunky sparkle. This flatters toes because the curve is rounded, which also reduces snagging. It looks great with light-colored sandals and white sneakers because everything matches.
Paint two coats of glossy white as the base. For the cloud tip, use a small sponge or a stamping sponge to create rounded bumps along the free edge, then outline the cloud curve with a thin gold polish or gold gel liner. Keep the gold trace to the outer curve so it doesn't thicken the design. Top coat with two layers for smoothness, especially over the cloud bumps.
Editor's noteUse a small liner brush and wipe it on the bottle edge - it keeps the gold line thin.
Watch outAvoid thick glitter - it catches on fabric and looks rough after a few wears.
10. White Beaded Look With Gold Outline
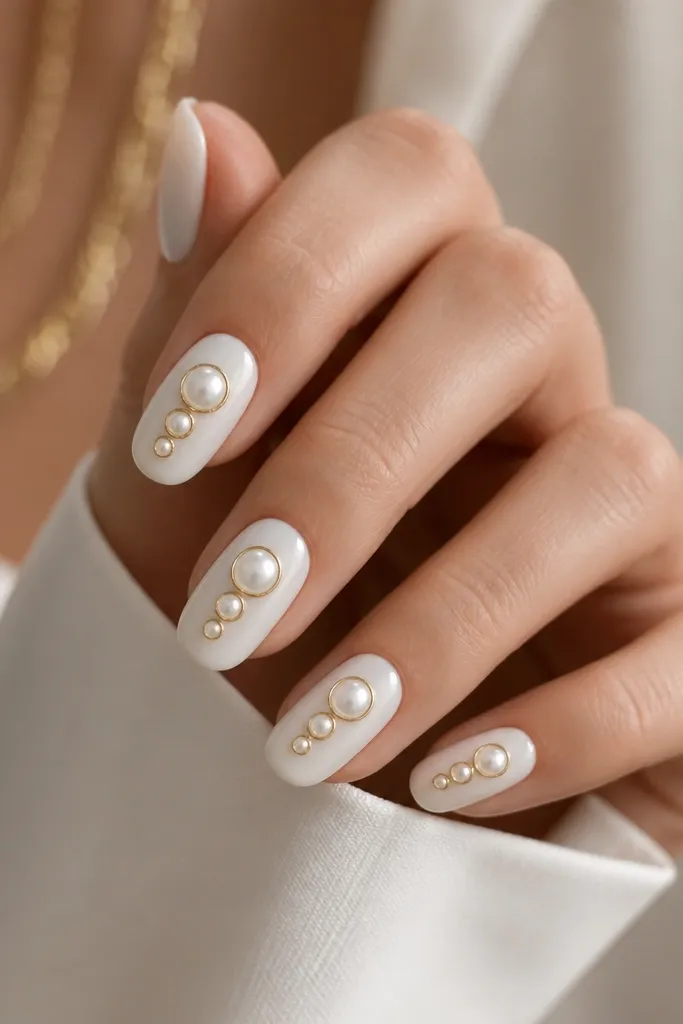
This design mimics tiny beads, but it's still wearable because the beads are small and the gold outline keeps everything crisp. The white "bead" effect is created with gel dots that are slightly domed, and the gold outline makes them look intentional instead of accidental. I like it for people who want glam but don't want rhinestones that pop off. It flatters medium to deep skin tones because the white domes stand out clearly. It's also cute with dressy sandals because it reads like jewelry.
Start with a glossy white base in two coats. Place 2-3 small domed dots along the center line of each nail using white gel - keep each dot about the size of a small pinhead. Cure, then outline each dot with thin gold gel using a liner brush. Finish with a glossy top coat, carefully covering the edges so the domes don't snag.
Editor's noteIf your beads look flat, add a second tiny gel layer to each bead before curing.
Watch outDon't place beads too close to the sides - they catch on shoe edges first.
11. Half-and-Half White With Gold Side Stripe
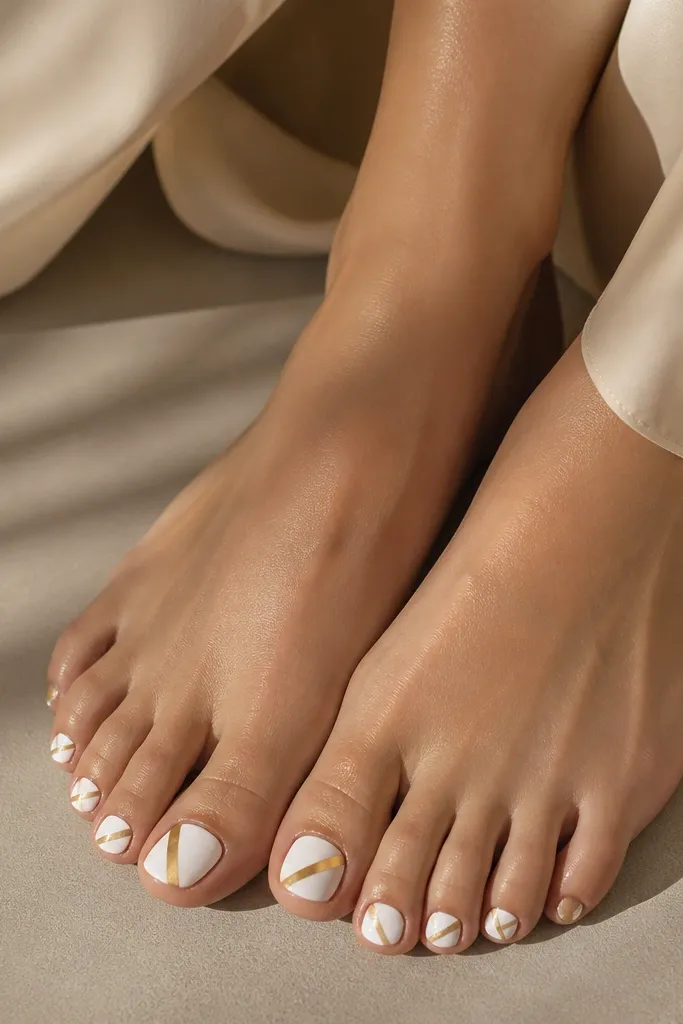
Half-and-half designs look bold without needing multiple colors. Here, the base stays white, and the gold side stripe gives you that diagonal slimming effect. Diagonal lines flatter because they visually lengthen and keep the toe nail looking neat from the top view. Warm gold is the right choice because it looks like jewelry against white. This is a great option when you want something different from micro French but still simple enough for DIY.
Paint two coats of glossy white. Use striping tape to create a diagonal split - place tape so it runs from about 1 mm from the cuticle to the tip center line. Peel the tape and fill the diagonal area with white if needed, then apply a thin strip of gold tape or paint a gold stripe with liner gel. Remove tape while the stripe is still slightly tacky (for gel) or once the polish is set enough not to smear, then seal with top coat.
Editor's notePress the tape down firmly at the edges so gold lines don't bleed under.
Watch outAvoid thick diagonal stripes - they make the toe look wider and less refined.
12. White Floral Stamp With Gold Center Petal
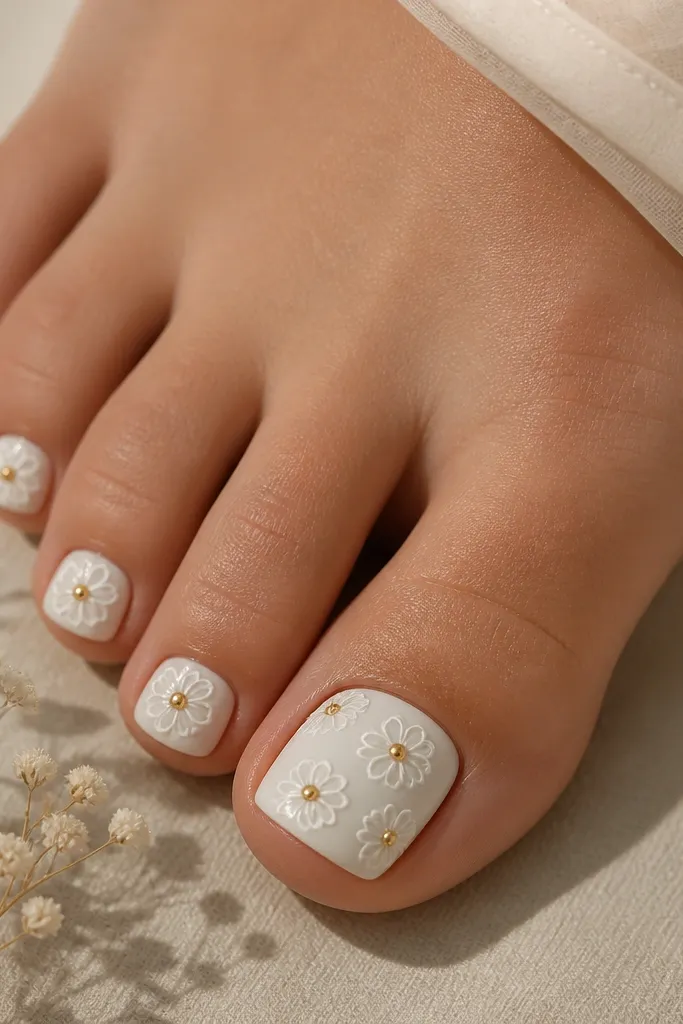
Floral stamping looks like nail jewelry, but it's repeatable and fast when you use nail stamping plates. Keeping the floral lines white keeps the design cohesive with the rest of your set, and gold centers add that "one detail" glam. I like this on the big toe and second toe, then keep the other toes plain white if you want a calmer look. It flatters fair and medium skin tones because the contrast is clear and gentle. It also looks great with sandals because the flower sits flat and doesn't snag.
Start with two coats of glossy white base. Use a clear stamper and scrape a stamping plate with white polish first, then stamp flowers onto each nail where you want them - usually near the outer half. For the center, use a tiny brush to paint a warm gold dot inside the flower center. Cure/dry and finish with a glossy top coat that smooths over the stamped texture.
Editor's noteWipe the stamper between nails so the pattern stays crisp, not smeared.
Watch outAvoid stamping over wet polish - it blurs and the gold centers look uneven.
13. White Dot Grid With Gold Nail-Glint Lines
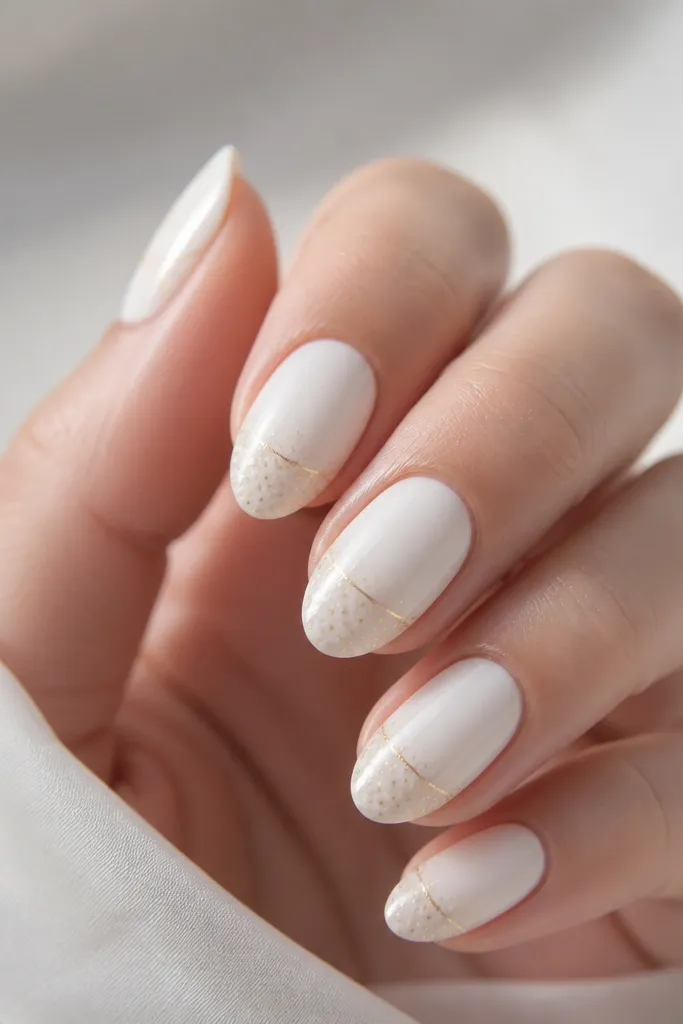
This is a clever way to make white and gold feel structured. The dot grid gives texture without adding color, and the gold glint lines add sparkle that looks like light reflecting off jewelry. I like placing the grid near the tip because it shows when you wear open-toe shoes, and it stays hidden when your toes are covered. It flatters all skin tones because the pattern stays monochrome until the gold line. If you're bored of plain white toes, this gives you a design that still feels clean.
Paint two coats of glossy white. With a dotting tool, place dots in a grid pattern starting about 1/3 down from the tip toward the outer edge, leaving the bottom portion plain. Then add one thin gold line across the grid at a slight angle - keep it narrow and centered so it looks like a highlight. Seal with top coat, and use a second top coat layer if your dots feel raised.
Editor's noteKeep dot spacing consistent; a simple 1 mm dot size looks best on toes.
Watch outDon't cover the entire nail in dots - it turns from chic to busy fast.
14. Gold Foil Reverse Tip Over White
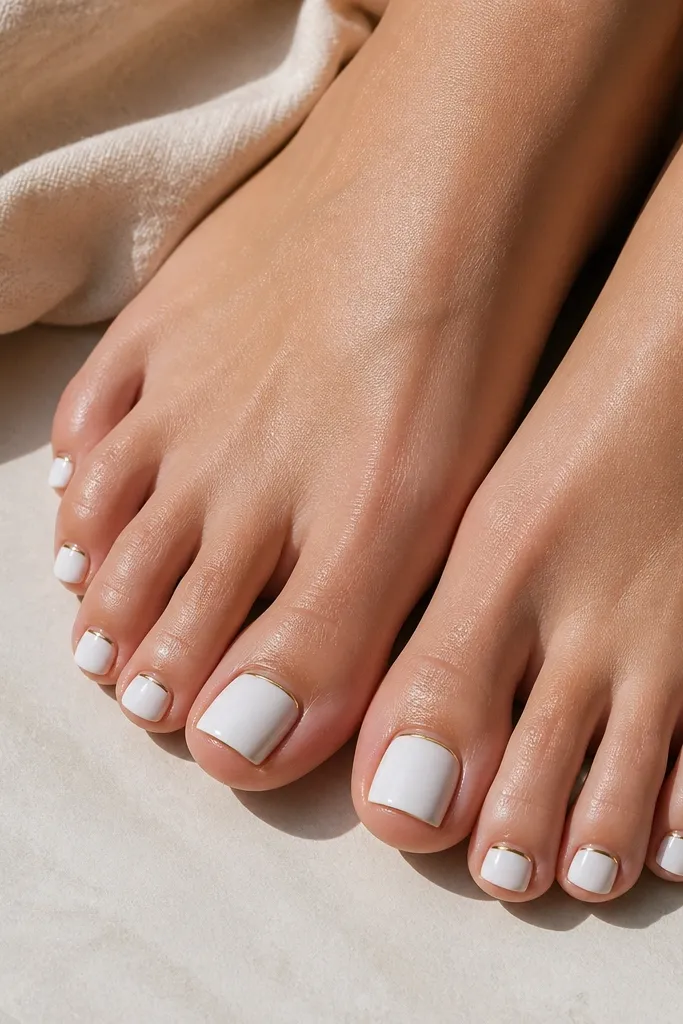
This design looks like you put jewelry under the nail edge. The white stays bright and clean, and the gold foil arc only shows at the tip line, which makes it feel airy for summer. I use gold foil gel because it lays down with less mess than loose foil. It flatters short toes because the arc follows the shape of your nail and visually extends it. It also hides small edge imperfections because the foil catches light.
Start with two coats of glossy white and cure/dry fully. For the reverse tip arc, place a striping guide or use a curved stencil so you get a thin crescent at the very edge. Apply gold foil gel along that crescent, press gold foil lightly, and cure. Finish with top coat, making sure the foil is sealed so it doesn't snag.
Editor's noteUse a thin crescent - about 1 mm tall - so it reads like a highlight, not a full tip.
Watch outAvoid thick foil arcs - they lift and look bulky under sandals.
15. White Glassy Top Coat With Gold Rhinestone Trio
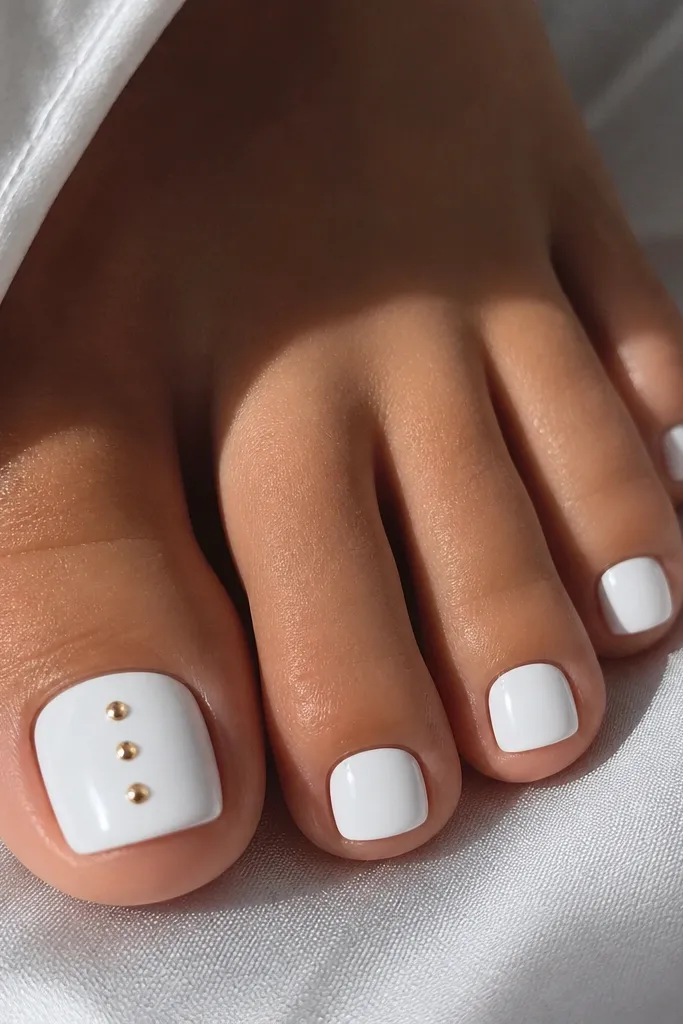
Tiny rhinestones can look expensive when you keep the number low and the placement consistent. This set uses one rhinestone trio on the big toe and keeps the rest white, so the sparkle has a clear focal point. I choose warm gold rhinestones because the color harmonizes with yellow-gold jewelry and doesn't look icy. The glassy top coat makes the stones look like they're under glass. It flatters anyone who wants glam for weddings, beach dinners, or vacation photos. It also stays comfortable because the stones are small.
Paint all toes with two coats of glossy white and cure/dry fully. On the big toe, place three tiny warm gold rhinestones in a vertical line: one near the center of the nail, one slightly above, one slightly below. Use nail glue or gel adhesive, then cure if you're using gel. Seal around the stones with top coat using a gentle brush - don't flood so it doesn't spread.
Editor's notePick stones around the size of a pinhead; larger ones feel rough against shoes.
Watch outAvoid putting stones on every toe - the set looks chaotic and catches on straps.
16. White Swirl Cutouts With Gold Thread Effect
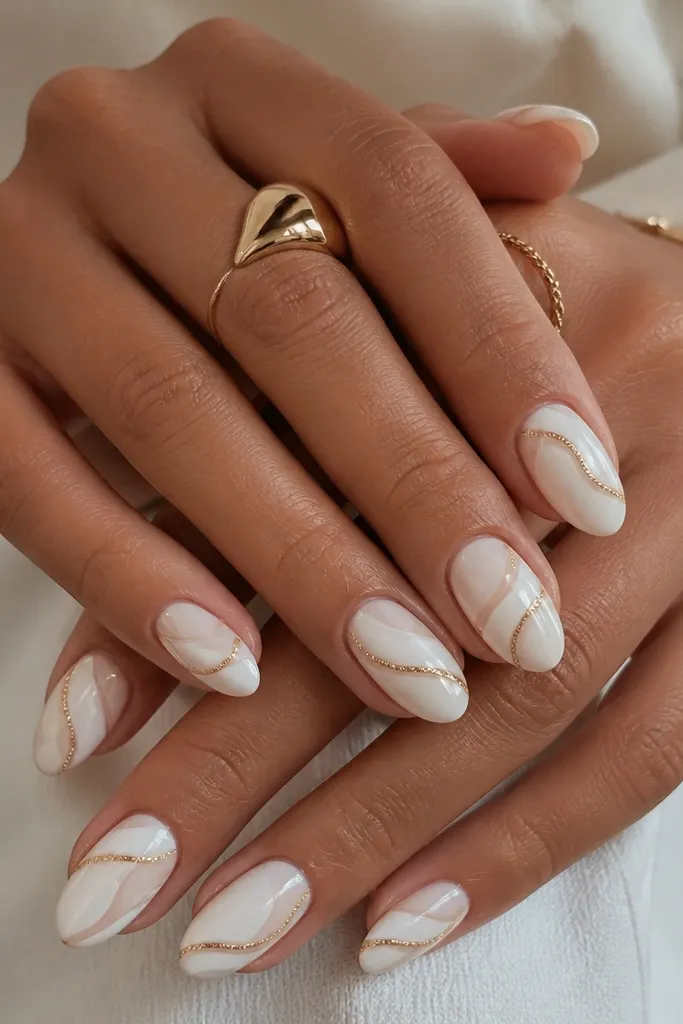
Negative space swirls make your toes look like nail art, not just color. The gold thread effect adds shine along the most visible swirl paths, so the design reads layered even though it's mostly white. I like this for people who have bitten nails or uneven nail texture because the negative lines distract the eye from tiny flaws. It flatters medium and deep skin tones because the contrast between skin and white looks crisp. It also looks great with minimalist sandals since the lines are neat and not bulky.
Start with a sheer nude base or your natural nail as the negative space foundation. Paint white swirls with a thin liner brush, leaving gaps where you want the negative space to show. Then trace portions of the swirl with gold striping gel to create the thread effect - keep it to one or two passes per swirl. Cure/dry, then apply top coat carefully so it doesn't blur the negative space edges.
Editor's noteUse a gel liner for the gold thread if you want ultra-clean lines that don't bleed.
Watch outDon't overfill the swirls with white - thick swirls can look gummy on toes.
17. White Cuticle Frame With Gold Micro Studs
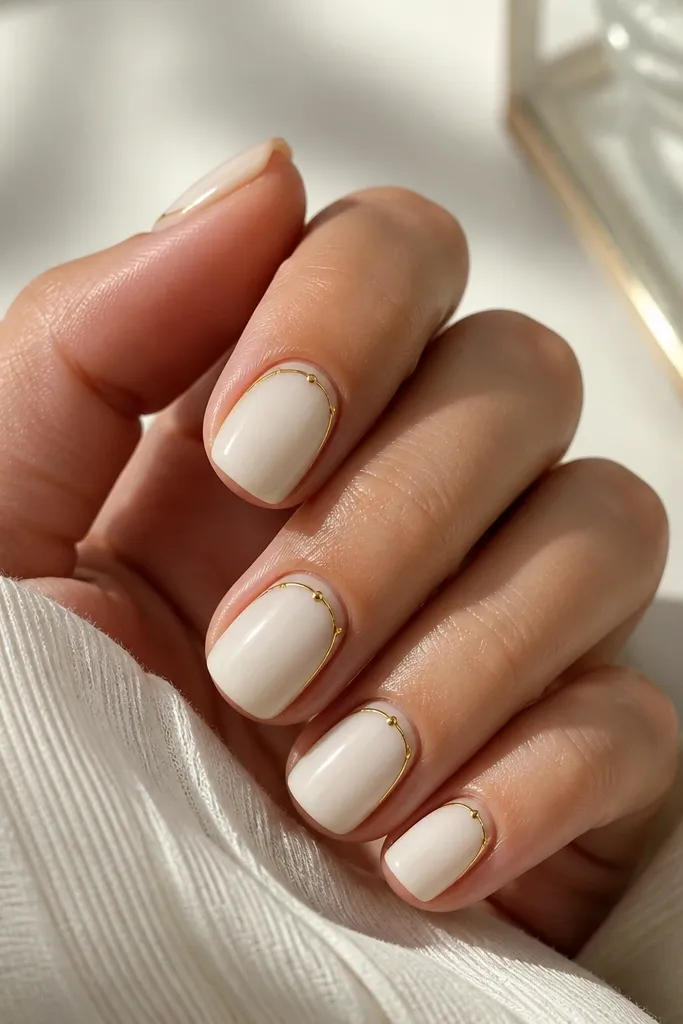
This is a clean, jewelry-style design that makes toes look polished even when the nail grows out a bit. The cuticle frame gives a structured look, and micro studs at the corners create a subtle sparkle without feeling loud. I've worn this on vacation and it still looked good after a week because the design sits near the cuticle where chips show later. It flatters everyone because the frame shape suits the nail's natural curve. Warm gold keeps the whole set cohesive with bronzy summer makeup.
Apply two coats of glossy white. Use a liner brush to draw a thin gold arc around the cuticle - keep it about 1 mm away from the side edges. Place one micro stud at each corner of the arc (two total per nail) using gel adhesive or nail glue. Cure/dry and seal with top coat, making sure the studs are fully covered so they feel smooth.
Editor's noteIf your studs catch on socks, apply top coat only around the studs, not over the whole nail thickly.
Watch outAvoid heavy gold frames - they look like you traced with marker and peel faster.
18. White Ombré Tip With Gold Edge Halo
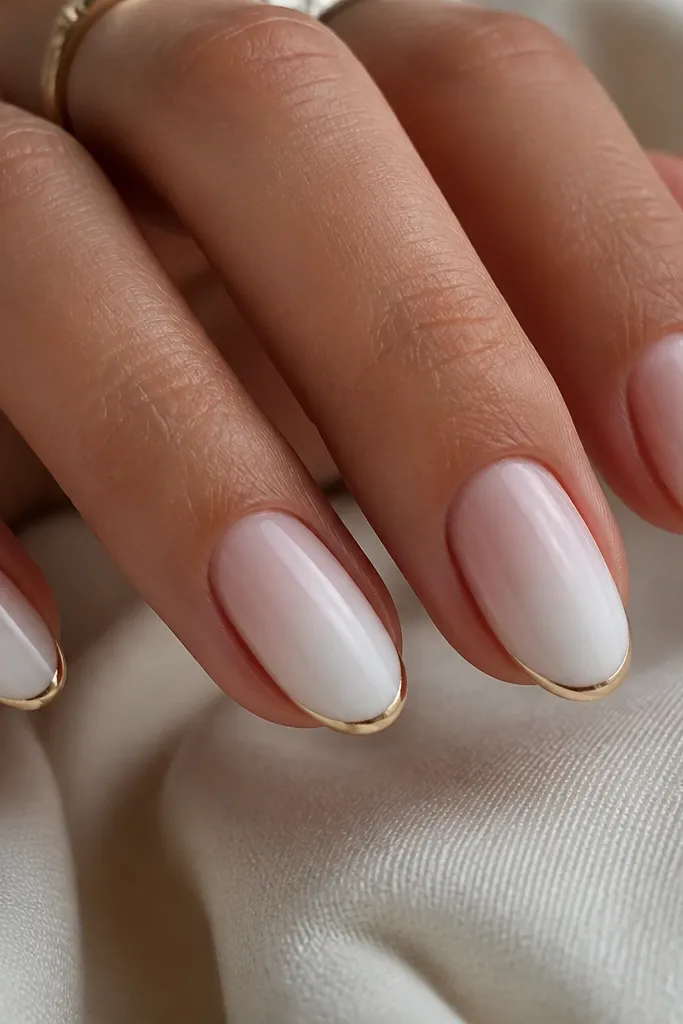
This design looks soft and expensive because the white fades instead of staying flat. The gold halo line at the very edge ties it together and makes the tip look crisp. I do this when I want a manicure that feels feminine and not too graphic. It flatters short toes because the ombré creates a longer nail look. Warm gold halo also looks great with tan skin because it catches sunlight at the tips.
Start with a sheer nude or clear base, then sponge on white ombré from the tip upward - stop before you reach the cuticle so the fade stays gentle. Build the white at the tip with one more sponge layer until it's opaque. Then paint a thin warm gold line along the tip edge like a halo - keep it even across all nails. Top coat with a glossy finish, brushing the edges where the fade meets the nail.
Editor's noteUse a makeup sponge with minimal product for the fade so you don't get patchy dots.
Watch outSkip thick white at the cuticle - it breaks the ombré effect and looks harsh.
19. White Floral French With Gold Outline
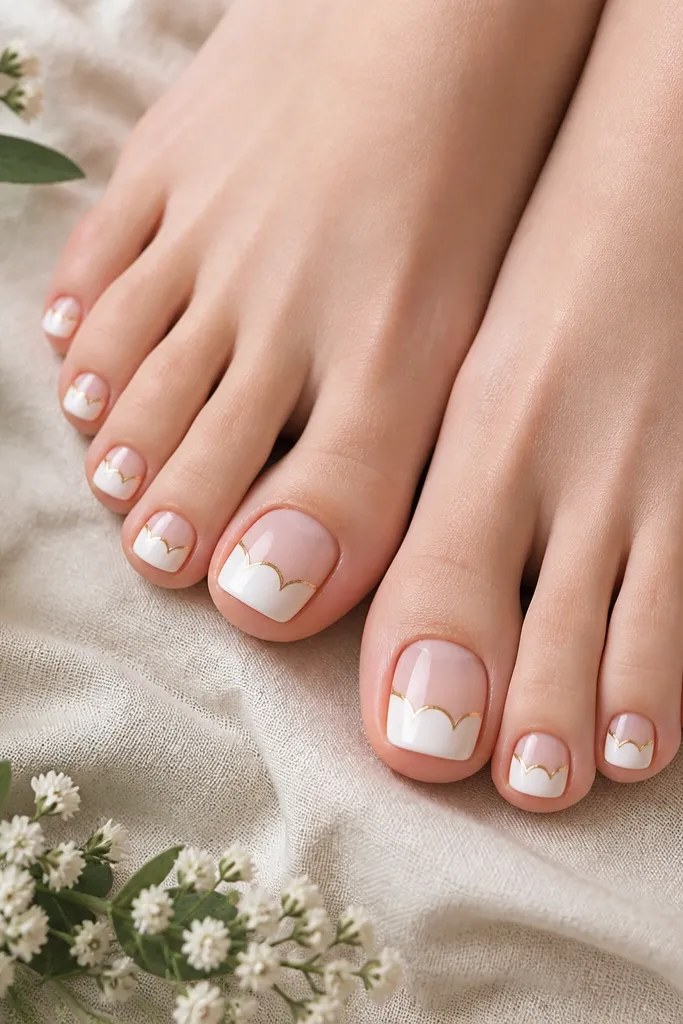
Petal French tips look adorable on toes because they mimic tiny flowers without going full floral everywhere. The gold outline makes the petal edges pop, so the design stays visible in photos and looks clean from across the room. I like it for summer because it feels light and romantic, not heavy. This flatters medium and fair skin tones especially when your sandals show the top of your toes. It also works well if you want something more detailed than micro French but still comfortable.
Paint a glossy white base in two coats. Create petal French tips using a stencil or by stamping petal shapes near the free edge, then connect them with a smooth white arc. Use a thin gold liner to outline the outer edge of each petal tip, keeping the line narrow so it doesn't thicken the petals. Finish with top coat in two layers, focusing on the petal edges for smoothness.
Editor's noteIf your petal edges look uneven, use a cotton swab dipped in acetone to clean up before top coat sets.
Watch outAvoid gold that fills the petal interior - outline only keeps it airy.
20. White Negative Space V With Gold Chevron Accent
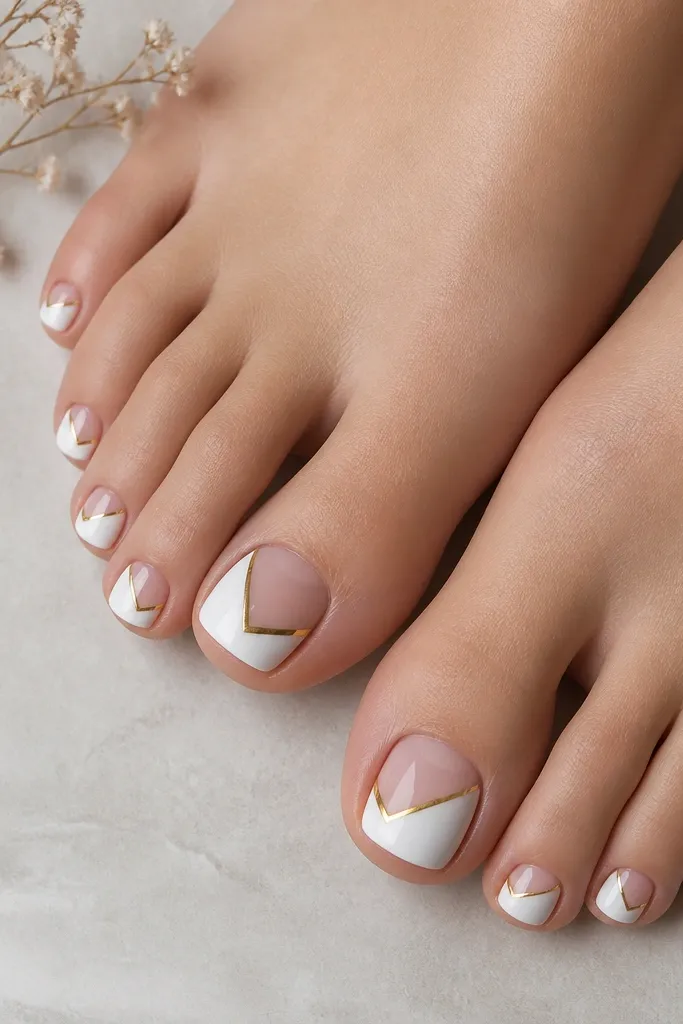
The V shape is flattering because it points toward the tip and visually lengthens the nail. The design keeps most of the toe clean and lets the gold chevron act like a single accent. I like this when I want white and gold but not a full gold situation that can look too heavy on toes. It flatters all skin tones, and it's especially nice if you wear strappy sandals because the V shape reads clearly from above. It also grows out better because the negative space is part of the design.
Start with a sheer nude base. Paint a glossy white V that starts around mid-nail and tapers toward the tip, leaving a clean negative space line in the center or side depending on your preference. Add a small warm gold chevron near the tip on the white side, about 1-2 mm wide. Seal with top coat, making sure the chevron edge is fully coated so it doesn't lift.
Editor's noteUse striping tape to form the V - it keeps the point crisp and prevents a wobbly look.
Watch outDon't make the V too wide - wide V shapes look blunt on toes.
21. All-White With Gold Side Leaf on Each Toe
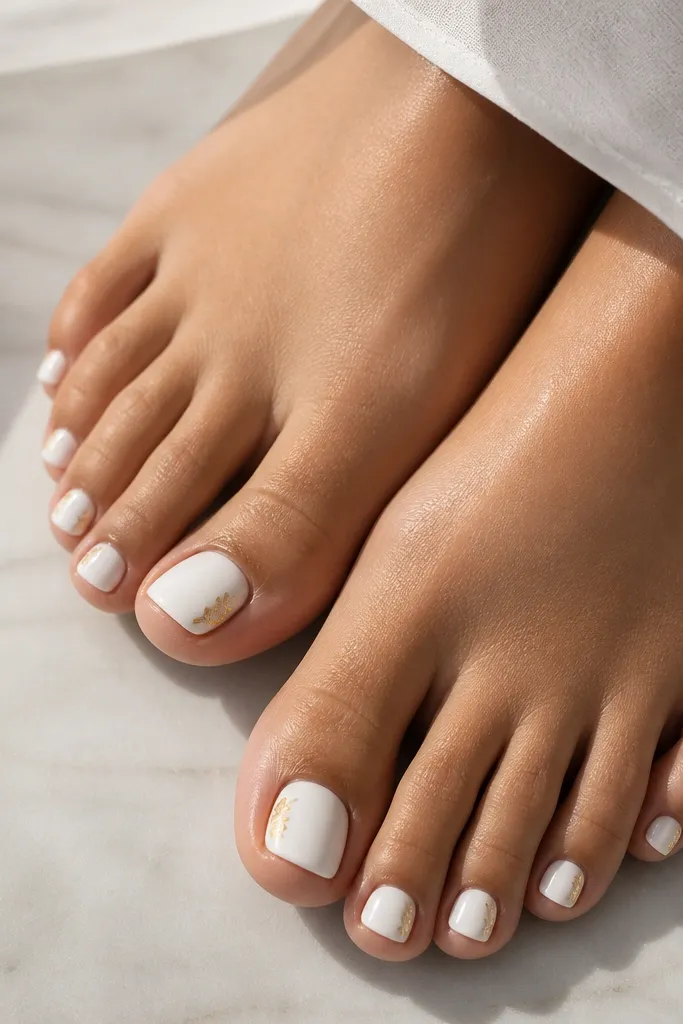
This is the "vacation glam" version of white and gold. Keeping the base all white makes it feel fresh, while leaf accents on the outer side of each nail look like jewelry catching light as you walk. I've done this for beach trips and it stays cute even when nails grow out because the leaf placement is at the side, not the tip. It flatters fair to deep skin tones because the contrast is clean and the gold stays warm. The side placement also feels more comfortable because it doesn't create a raised tip.
Paint all toes with two coats of glossy white, then cure/dry fully. Place a small piece of gold leaf (or gold leaf gel) on the outer half of each nail - about 1/4 of the nail width. Keep the leaf height consistent, usually 2-4 mm from the side near the middle of the nail. Top coat twice to seal and smooth, especially over the leaf edges so sandals don't snag.
Editor's noteHold the gold leaf piece with tweezers and press for 3-5 seconds - longer pressing can smear the edges.
Watch outAvoid leaf accents too close to the tip - they lift first.
22. White Micro Gems Look With Gold Outline Corners
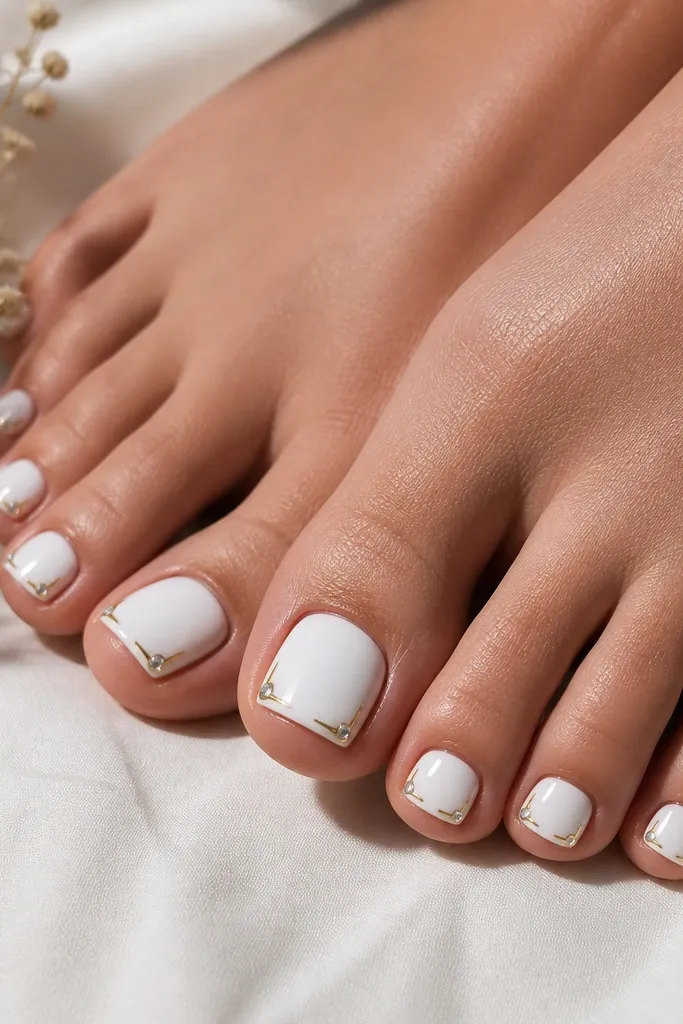
This design gives you that high-end nail salon look while staying minimal. The white base is clean, and the gold outlined corners create a frame that makes the toe nails look like they have built-in jewelry. Tiny micro gems add sparkle at the corners only, so it doesn't look crowded. I like it for special dinners, weddings, and any time you want something more than plain white. It flatters short nails because corners make the nail look longer without adding length. Warm gold edging keeps it from looking icy or cheap.
Start with two coats of glossy white. Use a fine liner brush to draw small gold corner frames near the side edges of each nail - think of two corner triangles, not a full frame. Place one micro gem in each corner using gel adhesive, then cure. Seal with a glossy top coat, making sure the brush covers the gem edges so they're secure and smooth.
Editor's noteChoose micro gems with flat backs so they don't feel sharp against your shoes.
Watch outAvoid large gems - they twist and pop off on toes faster.
23. White Butter Gloss With Gold Foil Strip Across Tip
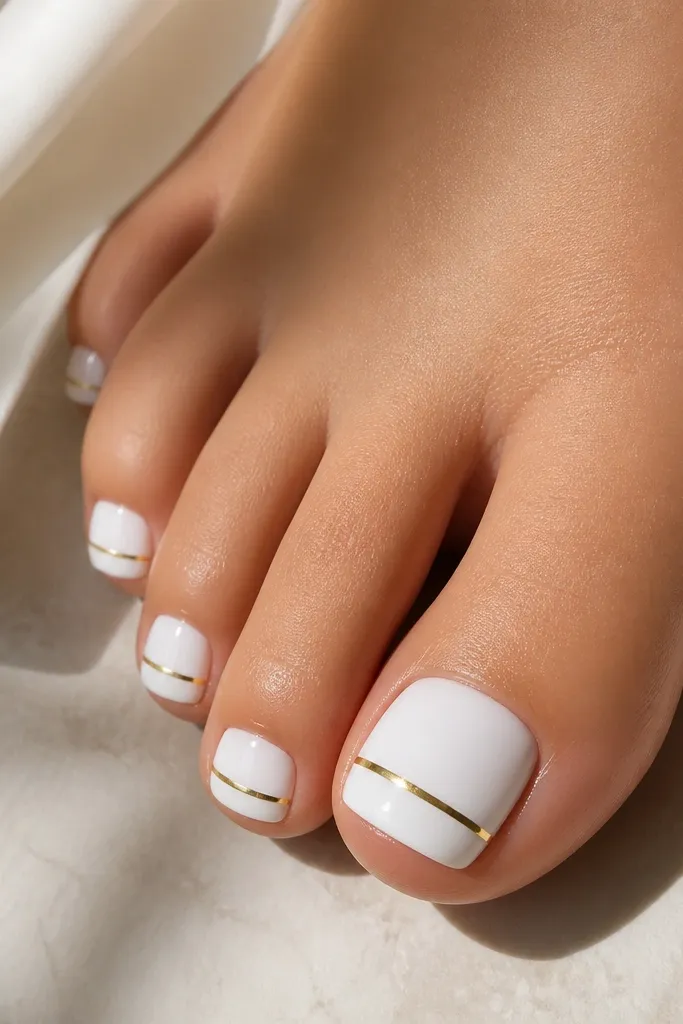
This one looks bold but still easy to wear because the gold is one clean strip. The white butter-gloss finish makes the whole set look smooth and healthy, like you just left the salon. The foil strip catches light with movement, so it looks glam even without extra art. I like it on medium-length toe nails because the strip needs a little width to look balanced. It flatters most skin tones and works especially well with gold jewelry and warm-toned outfits.
Apply two coats of glossy white and cure/dry fully. Measure the tip line - the strip should sit about 1-2 mm below the very edge so it doesn't get worn down instantly. Apply gold foil gel along a horizontal line, then press gold foil gently and cure. Top coat twice to seal, and run the brush along the strip edges so it doesn't lift.
Editor's noteUse a striping tape guide for the line - even a 1 mm error shows on toes.
Watch outAvoid placing the strip at the absolute tip edge - it wears off fastest there.
24. White Watercolor Fade With Gold Speckle
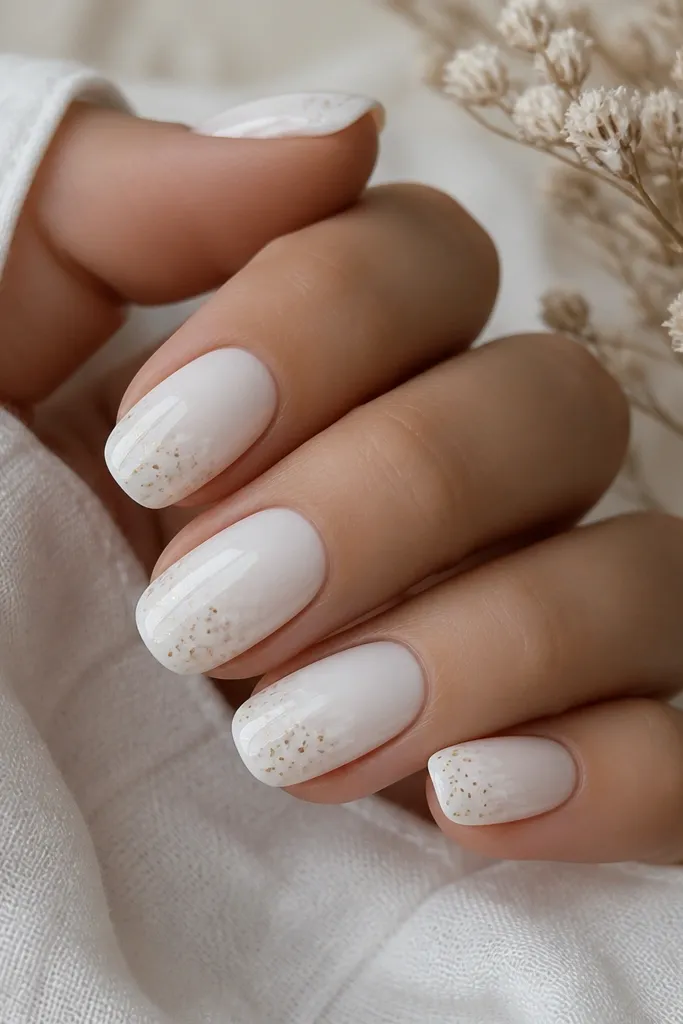
Watercolor fade makes white look like it has depth instead of being one flat color. The gold speckle adds sparkle without the heavy look of glitter polish. I use warm gold speckles because they look like sun flare rather than harsh glitter. This design flatters toes because the fade is soft and the speckles are light - it doesn't make the nail look chunky. It's perfect for beach days and casual summer outfits where you want something fun but still classy.
Start with an opaque white base in two coats. Create the watercolor fade by lightly dragging a diluted white polish or gel from the tip upward with a sponge - keep it soft and translucent, not streaky. Then add tiny warm gold speckles using a dotting tool loaded with gold polish - tap lightly so the dots are small. Cure/dry and top coat with a glossy finish to smooth everything out.
Editor's noteTap the speckle tool once off to the side first - it prevents big blobs on your nail.
Watch outDon't over-sprinkle - if you can see the gold dots in a cluster, it reads messy.
25. White Glazed Donut With Gold Ring Accent
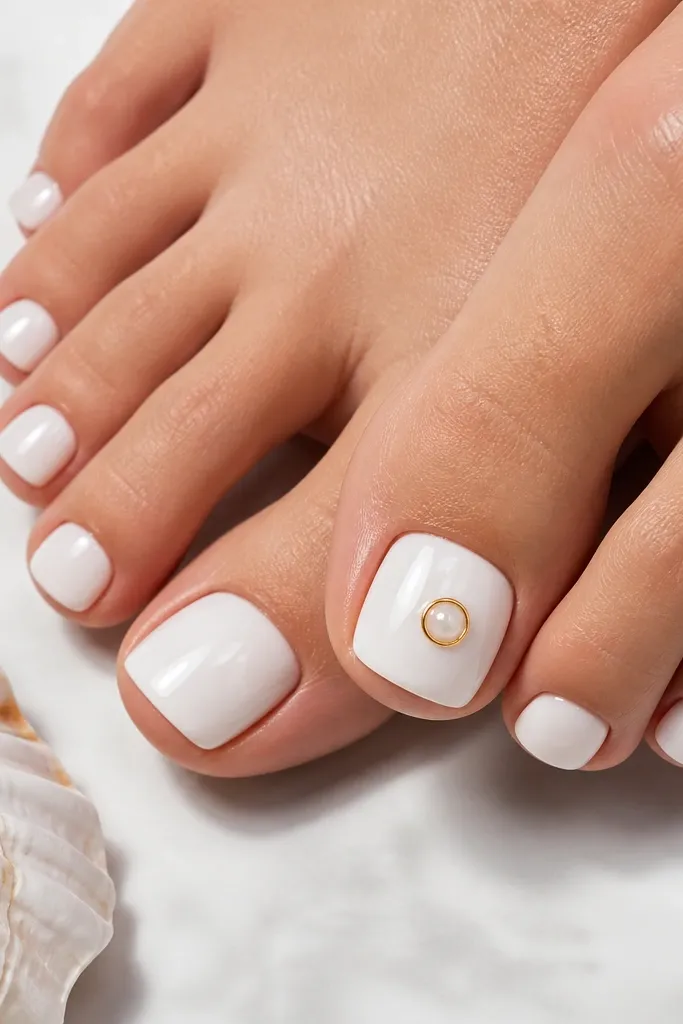
This is a playful design that still looks clean because the gold is shaped like a ring, not a random scatter. The glazed white finish gives a "thick shine" look that makes toes appear healthier and smoother. I like putting the ring accent on the big toe and keeping the others plain so it feels intentional. Warm gold ring details look great with summer outfits and gold accessories. It flatters fair and medium skin tones because the white shine reflects light, and it looks chic without being loud.
Paint all toes with two coats of glossy white. For the big toe, place a tiny dot of gold gel in the center, then draw a thin gold ring around it using a gold liner brush or a ring-stamp guide. Keep the ring diameter small - around 2-3 mm - so it doesn't overpower the nail. Cure/dry and apply top coat twice for that glassy glazed effect.
Editor's noteIf you're using polish, use a faster-dry top coat so the ring edge stays crisp.
Watch outAvoid thick gold rings - they look like stickers on toes.