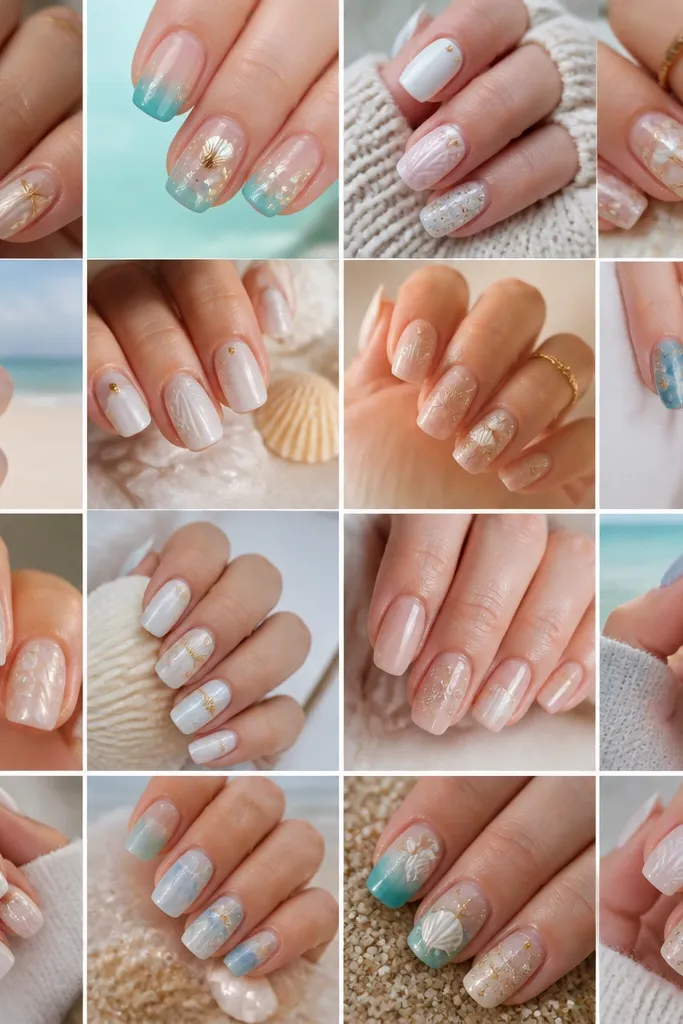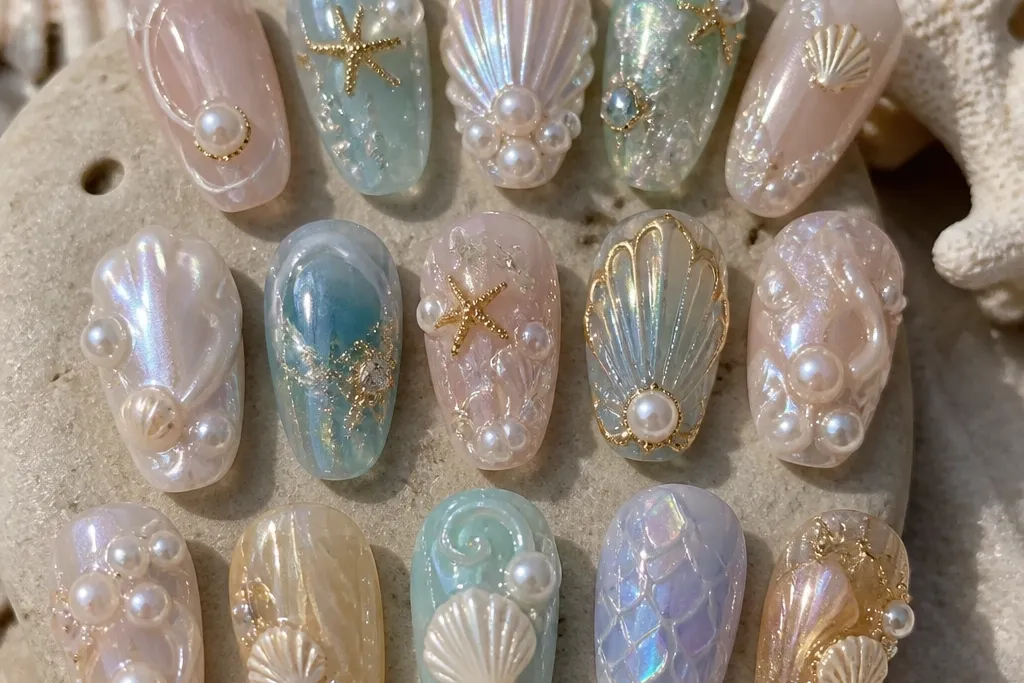
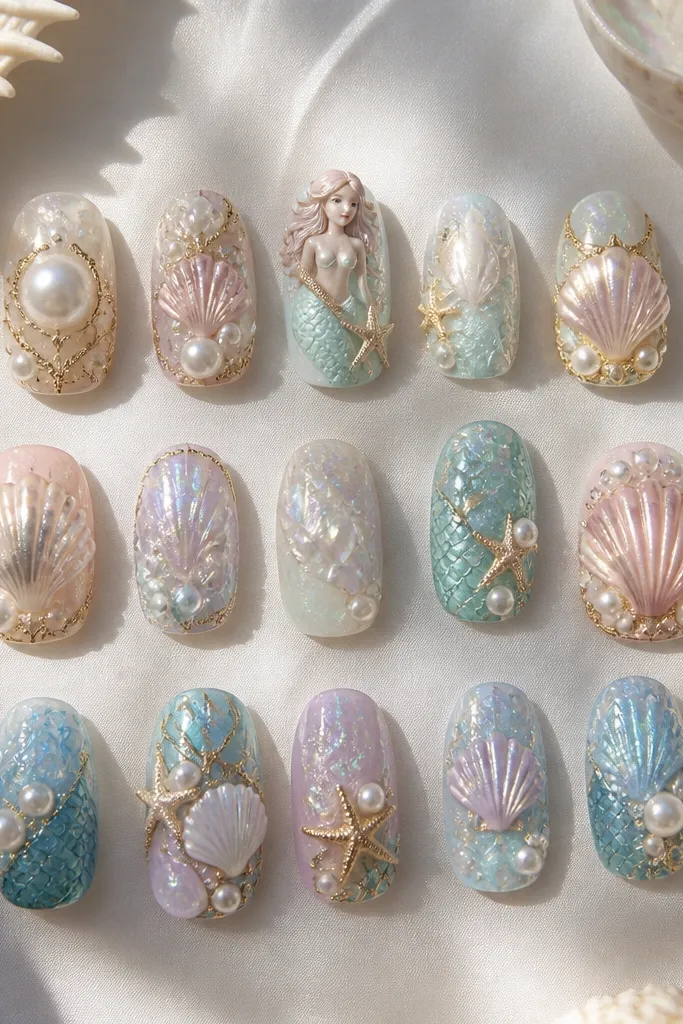
1. Icy Seafoam Shells With Pearl Edges
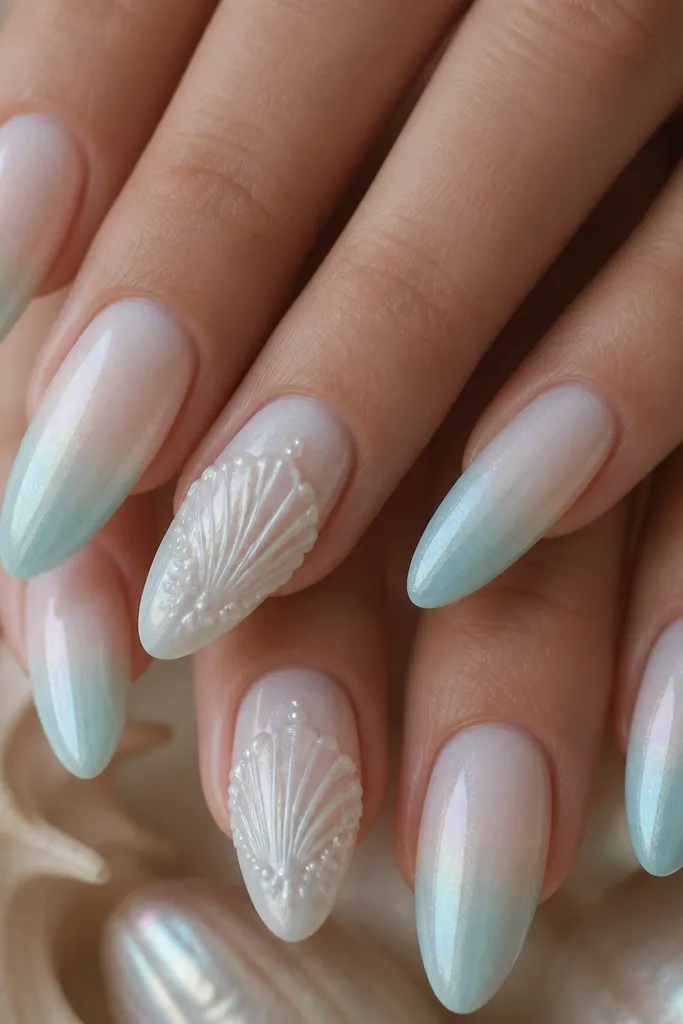
This set is the one I reach for when I want “mermaid but classy.” The milky pearl base keeps everything bright, and the seafoam fade at the tip makes the shells look like they’re under water. Use icy white shells with a few pearl beads placed only on the highest ridges, not all over, or the texture looks messy. It flatters cool undertones and fair skin because the pearl and seafoam reflect light without turning yellow. For occasions, it works for bridal nails, baby showers, and any event where you still want your hands to look clean and polished.
Start by painting a thin milky pearl base on all nails, then sponge a seafoam gradient only from mid-nail to the tip. Place pre-made icy shell pieces on two accent nails using a small dot of builder gel under each shell edge. Before curing, add a micro line of gel over the shell edge like a bridge, then cure. Finally, cap every nail with a thick glossy top coat so the shell edges disappear into the glass finish.
Editor's noteIf your shells look dull, add one extra layer of glossy top coat just on the shell area and cure it separately.
Watch outDon’t cover the whole shell with pearls — it looks like costume jewelry.
2. Coral Rose Shells Over Pink Mermaid Scales
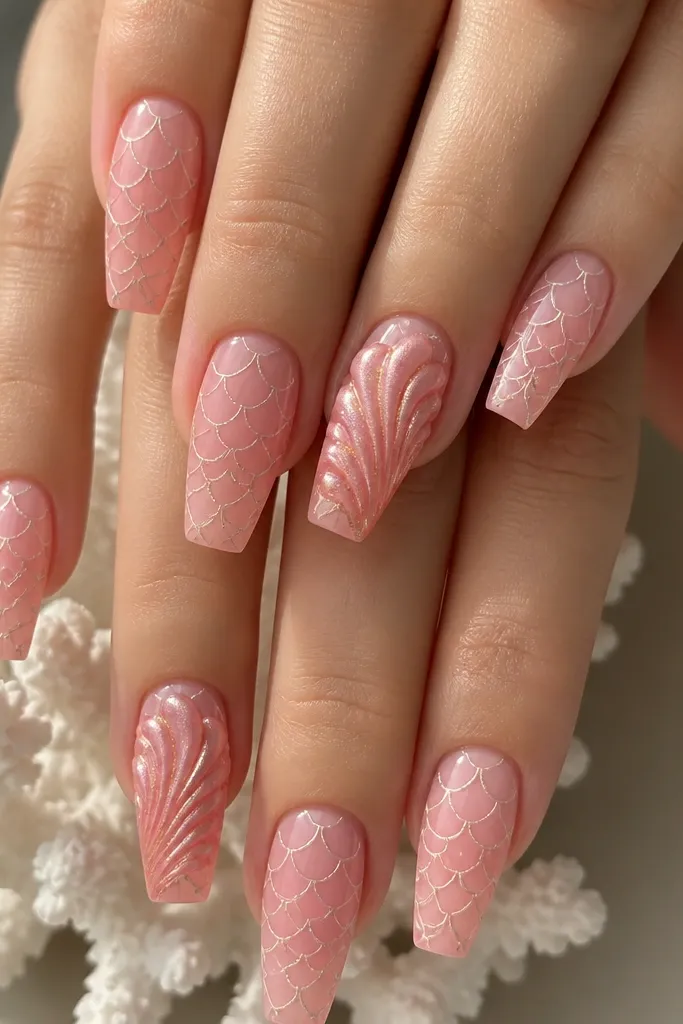
This one is warm, flirty, and perfect for summer dinners. The pink mermaid scales give you that “underwater texture” without needing a ton of 3D pieces. Coral rose shells add depth, and the warm gold specks make the shell interior look like it has sand and sunlight inside. It flatters warm undertones and medium skin tones because the coral doesn’t wash out. Wear it with gold rings and a soft pink lip and you’ll look like you planned the whole outfit.
Paint a pink ombre base: start with baby pink near the cuticle and blend to a slightly deeper rose at the tip. Create mermaid scales using a thin striping brush — paint short curved lines, then add a second pass so each scale has a glossy center. Place coral rose shell charms on the two longest nails, slightly angled toward the sidewall. Cure, then do a tight gel cap around the shell perimeter and finish with a high-shine top coat.
Use a striping brush with the bristles trimmed short so your scale lines stay tight and crisp.
Don’t let the scales dry matte — if the lines lose shine, the set looks flat.
3. Teal Waterline Shells With Micro Starfish
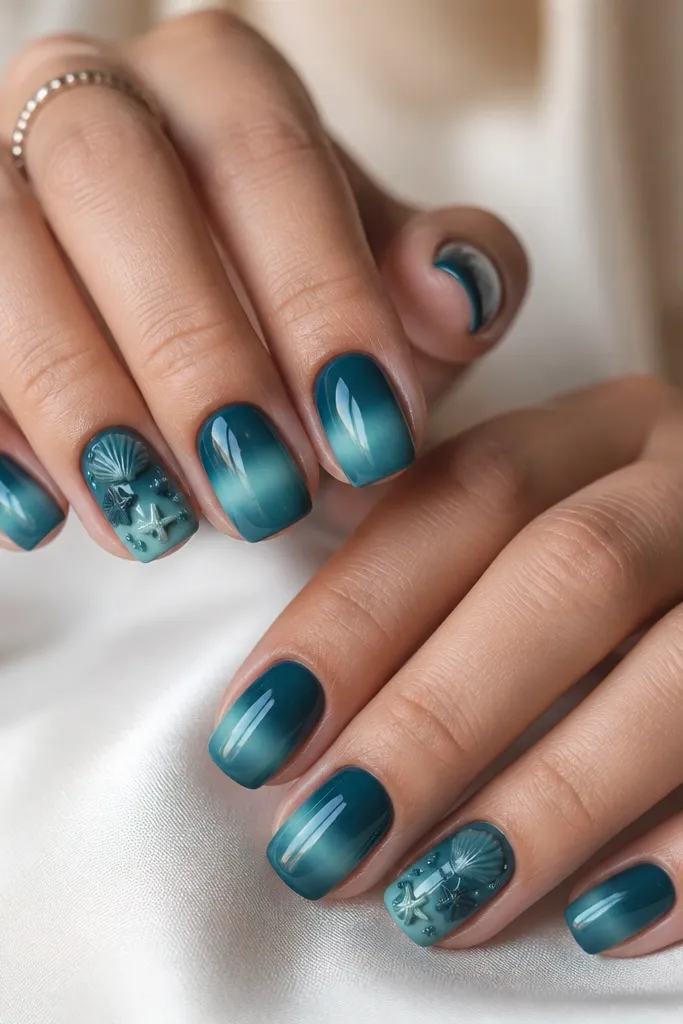
This set looks like you dipped your nails into a tidepool. The deep teal base anchors the look, and the waterline fade gives movement even when your nails are short. Add micro starfish charms alongside small shell pieces so the mermaid theme reads instantly, not as generic sea decor. It flatters most skin tones because teal has enough contrast to stand out without going harsh. I like it for vacations and casual weekends because it still looks fun when you’re not dressed up.
Apply a deep teal polish or gel base to all nails, then sponge a lighter seafoam waterline across the middle, leaving the cuticle darker. On accent nails, place a small shell near the center and a tiny starfish charm closer to the sidewall. Use builder gel under each charm so it sits flush, then cure. Add a thin gel bridge around the charms, cure again, and cap with glossy top coat so the waterline fade looks smooth.
Editor's noteKeep starfish smaller than the shell by at least half — they should support the composition, not steal it.
Watch outDon’t put charms on every nail if they’re all the same size — the set turns bulky.
4. Lilac Pearl Shells With Holographic Sea Dust
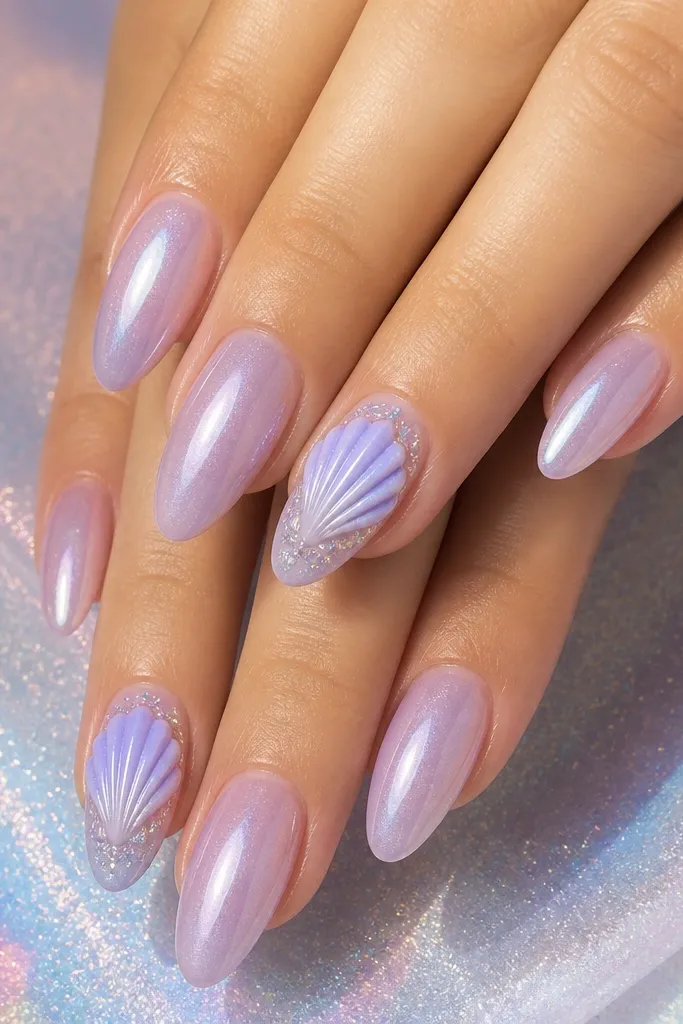
This is my go-to when I want a dreamy mermaid effect without bright colors. Translucent lilac looks like tinted water, and the pearl glaze keeps it luminous. The holographic sea dust makes the set look like it’s catching sunlight, which is exactly what 3D details need to look expensive. It flatters fair to medium skin because lilac doesn’t overpower the hand. Wear it for concerts, date nights, and anything where you want your nails to glow in photos.
Start with a translucent lilac jelly layer, then add a pearl glaze only on the top half of each nail so the cuticle stays light. On accent nails, place lilac-white shells with a few holographic flakes pressed into the gel around the shell edge. Cure, then cap with a medium-thick top coat. Finally, add one more thin holographic shimmer layer on the background around the shell so the sparkle looks integrated, not sprinkled.
Press flakes with a silicone tool — don’t brush them. Brushing lifts them off the cured surface.
Don’t use chunky holographic glitter — it shows texture underneath the top coat.
5. White Shells Over Mermaid Blue Jelly Gradient
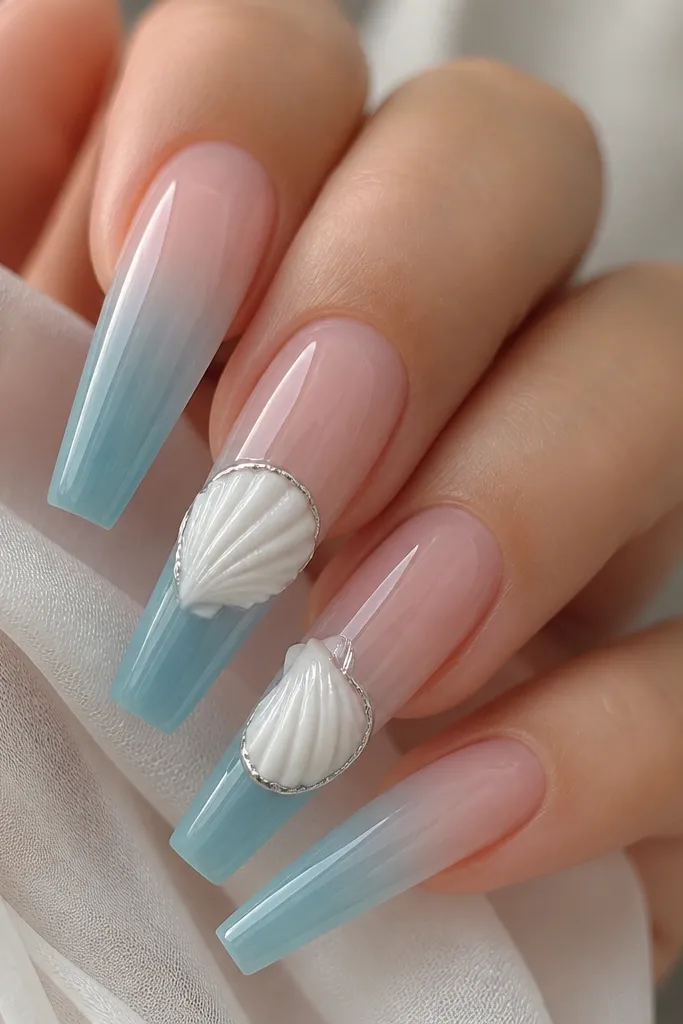
This set is clean and high-end-looking because it uses a jelly gradient instead of opaque paint. The clear-to-blue fade makes the shells stand out without needing heavy color in the background. White shells with a thin silver chrome line along the lip creates that “sea glass shine” effect I love. It flatters hands with longer nail beds and looks especially good on medium skin tones. It’s also easy to match with silver jewelry.
Apply a clear jelly base near the cuticle, then blend into mermaid blue using a sponge so the transition looks watery. Cure fully. Place the white shells on two accent nails using gel under the base, then add a thin chrome strip using foil gel at the shell lip and cure. Cap with glossy top coat, making sure the chrome line is fully sealed so it doesn’t snag on fabric.
If your gradient looks streaky, sponge more layers with thinner gel and cure between each.
Don’t paint the gradient opaque — the jelly look is what makes it feel mermaid.
6. Sand Dollar Shells With Gold Seaside Lines
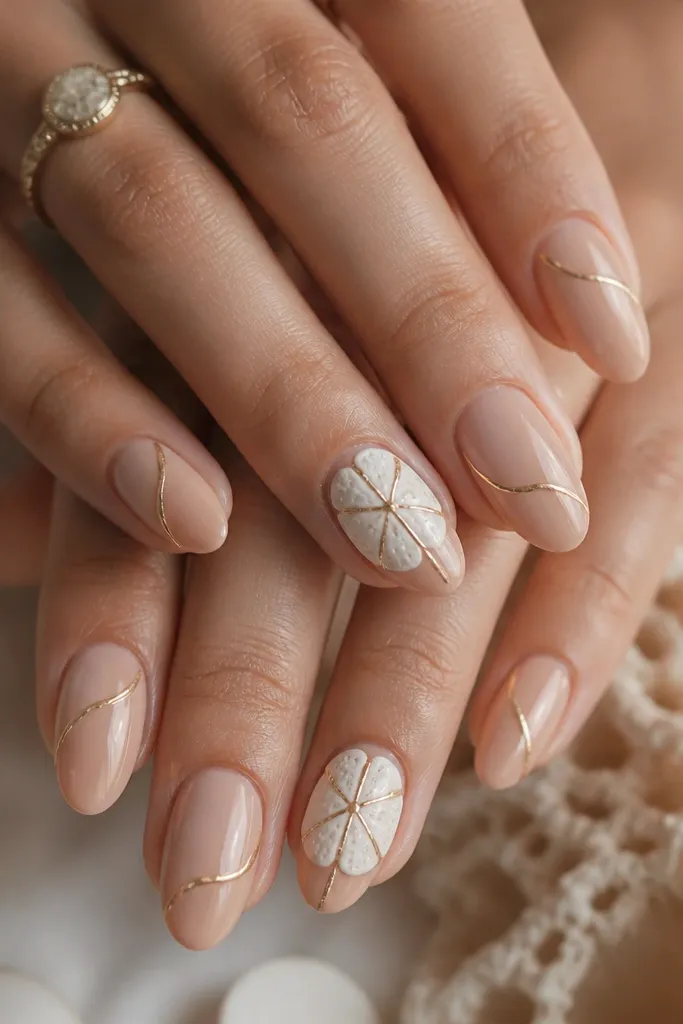
Sand dollar shells look delicate, and that’s why this set feels expensive. The warm nude base keeps everything neutral, so the gold lines look like jewelry instead of decoration. I like off-white shells with gold line art because it mimics how sand dollars look in sunlight. This flatters warm undertones and works on short nails because the nude base elongates your hand. It’s a great choice for weddings, engagement parties, and any day you want “beach theme” without loud color.
Start with a warm nude base, then add a glossy top layer to smooth the surface before you draw lines. Use a fine striping brush and metallic gold gel to paint thin wave lines on the non-accent nails. On accent nails, place sand dollar shells centered, then draw radiating gold lines from the shell center with a dotting tool for tiny points. Cure, bridge any shell edges with gel, and cap with a thick glossy top coat.
Seal gold line art with a slightly thicker top coat just over the lines so they don’t wear off first.
Don’t skip a smooth nude base — gold lines look uneven on bumpy gel.
7. Seafoam Shell Swirls With Iridescent Pearl Chrome
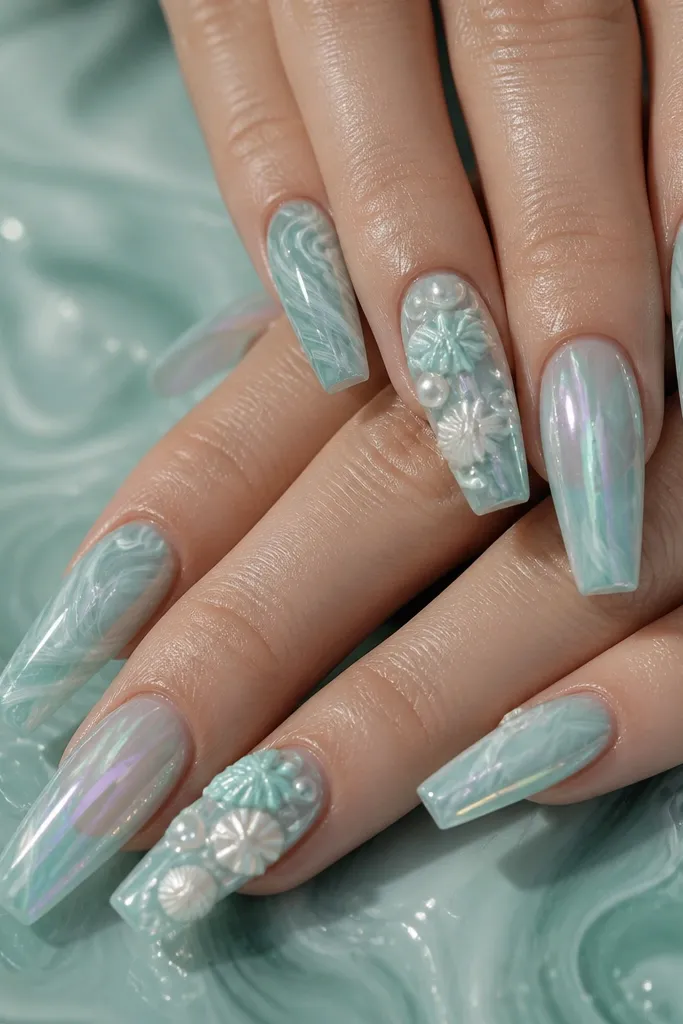
This set uses motion instead of a busy background. Seafoam swirls make the nail look like it has currents, and iridescent pearl chrome gives you that mermaid sparkle without glitter chunks. The shells are pale white and seafoam so they match the swirl color, which keeps the whole set cohesive. It looks best on medium to long nails because the swirls need space to breathe. If you wear statement earrings, this manicure won’t fight them.
Paint a seafoam base, then swirl slightly darker seafoam with a thin brush from side to side, leaving thin clear gaps so it looks airy. On accent nails, place pale shells near the tip and add iridescent pearl chrome streaks using chrome powder and foil gel on the background around the shell. Cure, then bridge the shell edge with a thin gel layer. Finish with a glossy top coat that covers the entire swirl area so the chrome looks embedded.
Use rubbing alcohol on a clean brush to lightly lift and smooth swirl edges before curing.
Don’t place chrome directly on top of uncapped texture — it dulls and lifts.
8. Black Ink Mermaid Water With White Shell Accents
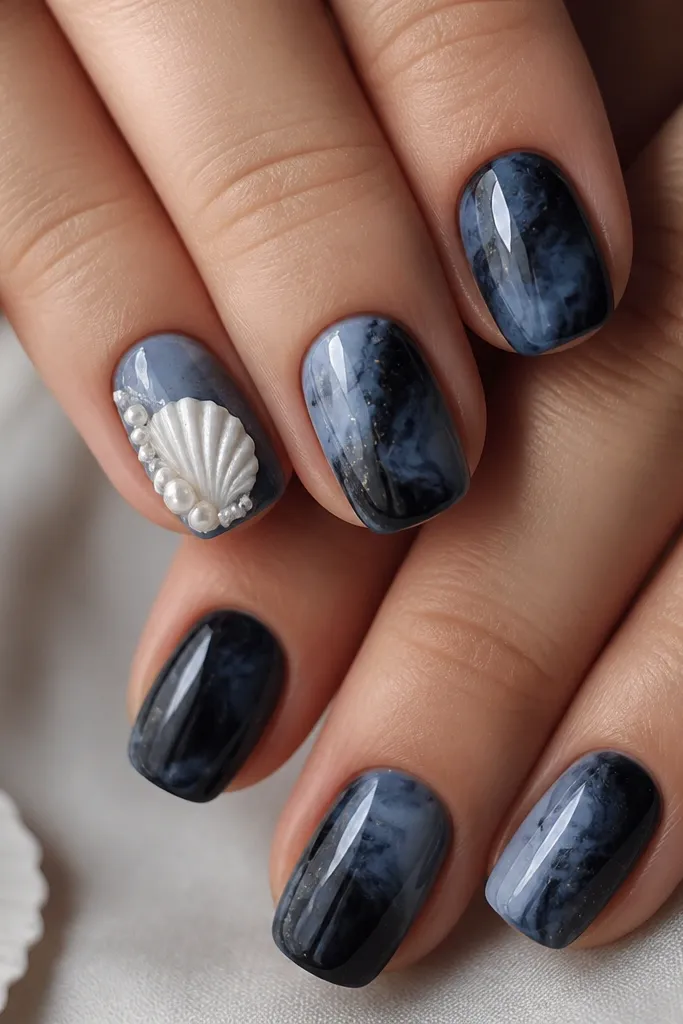
This is the moody mermaid set that still reads “shoreline.” A black ink wash looks like deep water, and white shells give you high contrast that photographs hard. Add a few pearl beads on the shell rim for highlights that mimic bubbles. It flatters darker skin tones and also looks striking on fair skin because the contrast is clean. I love this for fall events and night parties because the black base makes the shell look brighter.
Apply a navy base, then use black gel ink with a sponge and small brush to create a smoky wash across each nail. Cure, then place white shells only on two nails — keep the rest smooth. Add pearl beads with gel only on the highest shell ridges, then cure. Cap with glossy top coat, making sure the ink wash is fully sealed so it doesn’t stain under top coat.
Editor's noteUse gel ink instead of regular black polish so the wash stays controllable under the top coat.
Watch outDon’t overdo pearls — five beads total across the shell is plenty.
9. Blue Ombre Shells With Shimmering Cuticle Melt
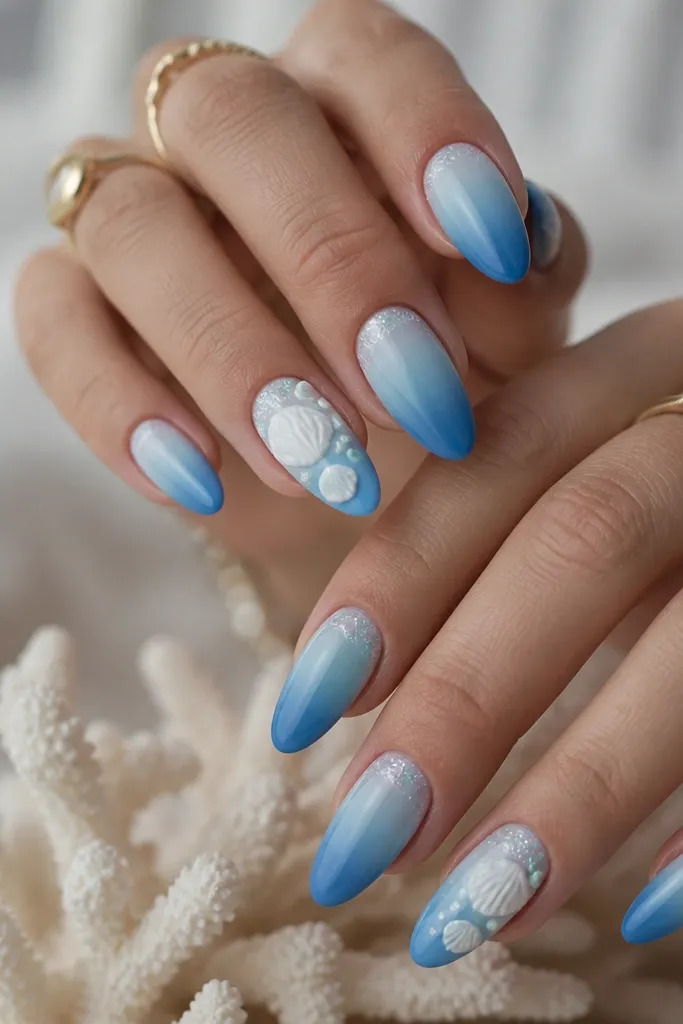
This set has that “just did my nails” glow because the shimmer is concentrated where your hands move most. A sky-to-ocean ombre looks soft, and the shimmering cuticle melt adds depth without needing extra 3D on every nail. White shells with seafoam dots keep the mermaid detail tight and readable. It flatters hands with shorter nail beds too because the blue gradient pulls the eye down. Wear it with casual outfits if you want your nails to look styled even when your clothes are simple.
Blend a sky blue at the cuticle into deeper ocean blue at the tip using a sponge and cure between two thin layers. Create a shimmer cuticle melt by tapping fine holographic shimmer gel near the cuticle and fading it upward slightly. Place white shells on two accent nails, then add tiny seafoam dots around the shell base with a dotting tool. Cure, bridge edges, and cap with a glossy top coat.
Editor's noteKeep the shimmer only in the top third of the nail so it doesn’t look like glitter bombing.
Watch outDon’t put shells too close to the cuticle — the edge lifts when you grow out.
10. Green Teal Shells With Jelly Bubble Beads
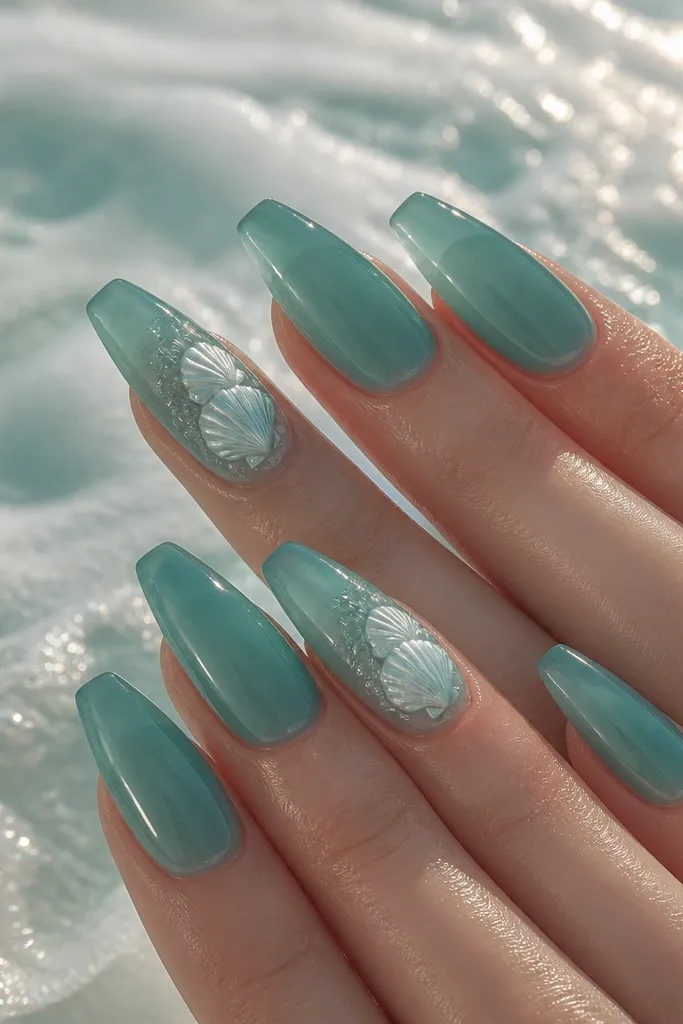
Bubble beads make these nails look like a mermaid toy set, but the jelly base keeps it from looking childish. The translucent green-teal background makes the shells feel underwater, and the bubble beads add playful dimension when the light hits. This set flatters olive and medium skin tones because green-teal brings out warmth in your skin. I’d wear it for birthdays, beach trips, and any time you want your nails to look fun without being messy.
Paint a translucent green-teal jelly layer and build it to an even opacity with two thin coats, curing each. Add a soft shimmer wash at the top third using fine shimmer gel so it looks like foam. Place pale white shells on two accent nails, then add jelly bubble beads around the shell base — fewer beads on the sidewall, more on the center. Cure, bridge any gaps with gel, and cap with a glossy top coat that smooths over the bubbles.
Editor's noteIf bubble beads snag on your clothes, cap them with a thicker top coat and cure longer on that nail.
Watch outDon’t place bubble beads on all nails — it turns into a texture overload.
11. Silver Chrome Seashells With Frosted Waterline
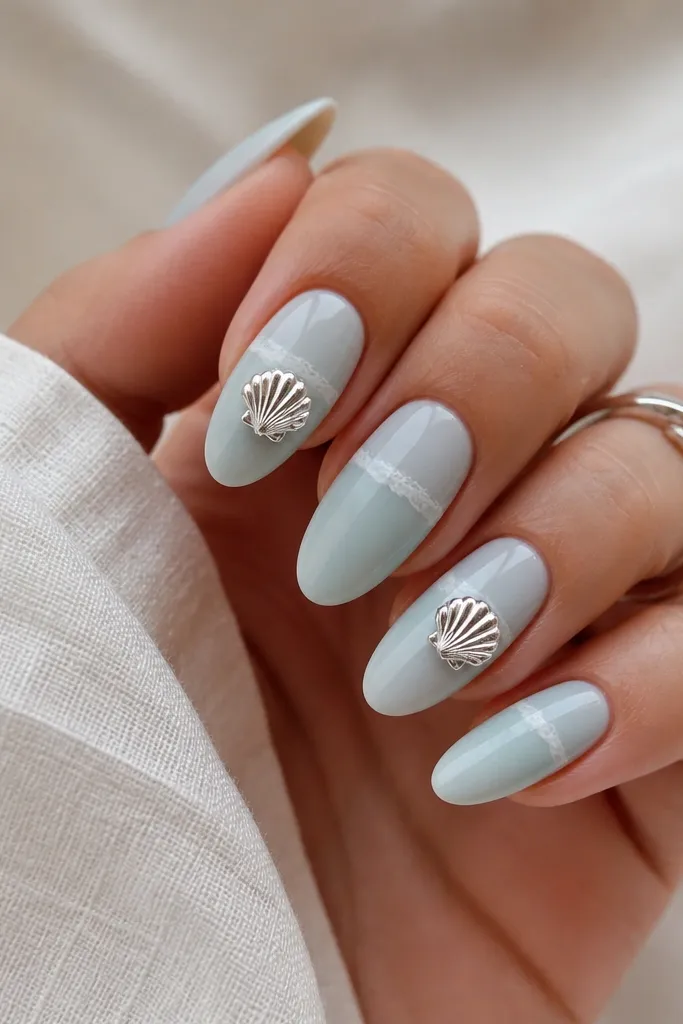
Mirror chrome shells over a frosted base look like jewelry you can wear on your hands. The frosted icy blue background gives you that winter mermaid vibe, and the thin waterline keeps it from looking like plain chrome. Silver chrome works well with cool undertones and also makes warm skin look cleaner because it adds contrast. It’s a strong choice for events where you’ll be around bright lighting, like parties and indoor venues. Keep the rest of the nails simple so the chrome shells stay the focal point.
Apply a frosted icy blue base on all nails, then sponge a slightly lighter frosted waterline across the midsection. Cure fully. Place silver chrome seashell charms on two accent nails, then add a tiny amount of gel at the edge to prevent lifting. If you’re using chrome powder, press it onto foil gel on the shell ridges and cure. Cap with glossy top coat, using a thicker layer over the chrome so the mirror finish stays smooth.
Editor's noteWipe chrome residue carefully with a lint-free wipe so you don’t get cloudy patches under top coat.
Watch outDon’t skip capping over chrome ridges — rough edges look cheap fast.
12. Champagne Pearl Seashells With Soft Pink Tide
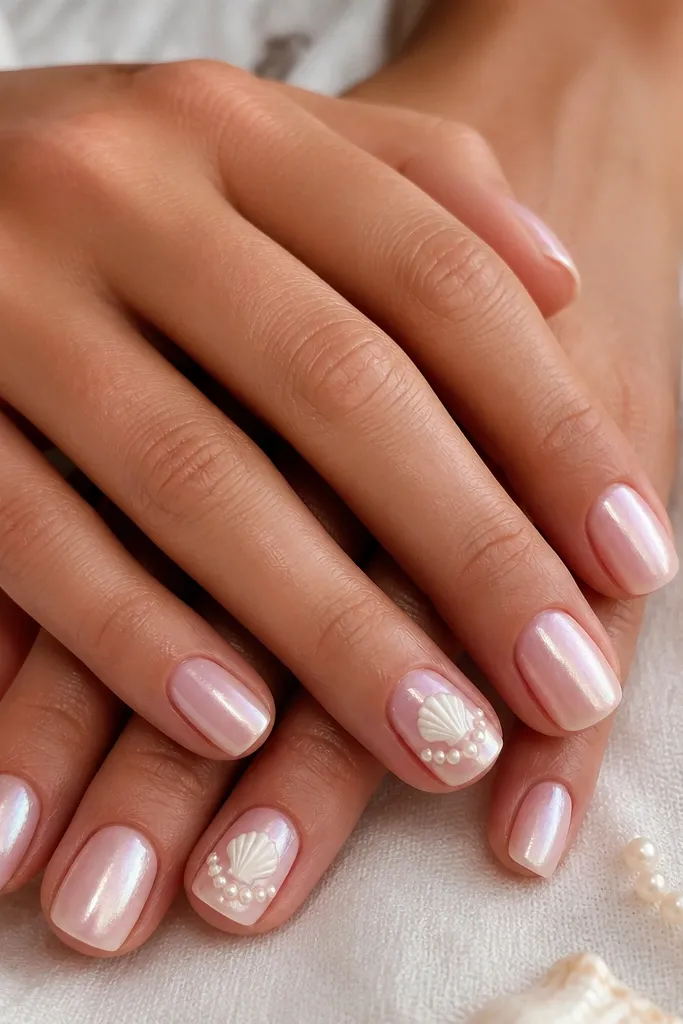
This manicure is subtle, but it still has that mermaid detail because the pearl sheen changes with movement. The soft pink tide keeps it romantic, and champagne pearl shells add warmth that flatters most skin tones. I like the smaller seashells here because they look refined on shorter nails. It’s also a great pick if you hate heavy texture but still want 3D. Wear it to work with a blazer, or to brunch when you want something pretty but not loud.
Paint a soft pink base, then overlay a champagne pearl shimmer gel so it looks like a satin glow. Cure and smooth. On accent nails, place small champagne pearl seashells near the tip so they don’t crowd the cuticle. Add a dotted pearl line near the tip using a dotting tool and gel, then cure. Finish with a glossy top coat that fully seals the pearls and shells.
Editor's noteFor a cleaner look, keep the seashell size consistent across both accent nails.
Watch outDon’t use bright white pearls against soft pink — it looks mismatched.
13. Turquoise Shells With Pink Coral Rim
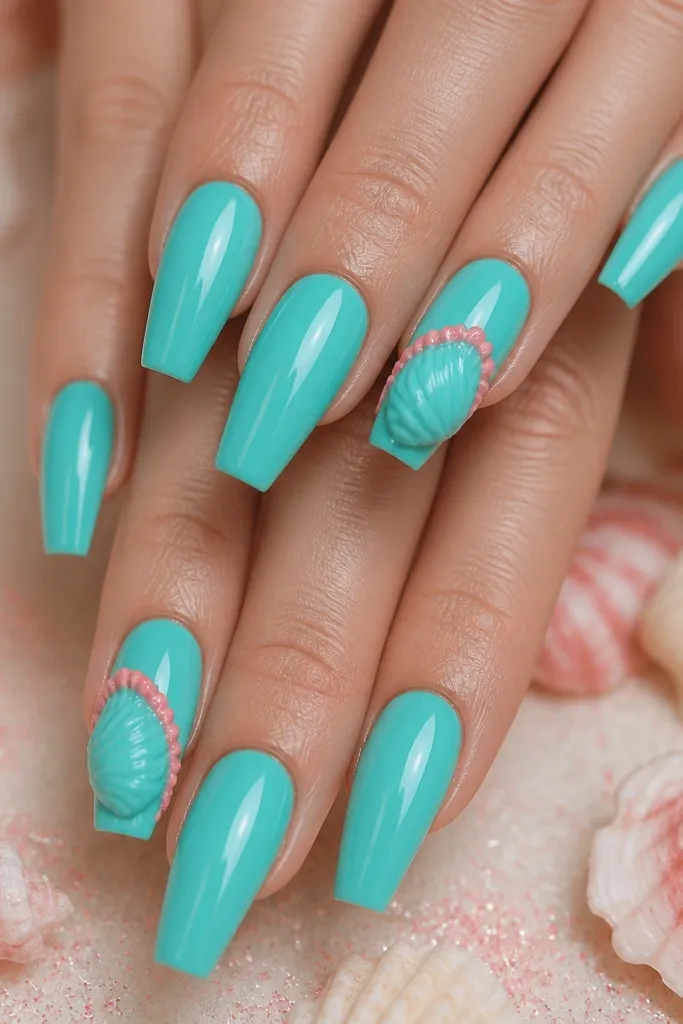
Hot pink coral rims make turquoise shells look like they came from a coral reef, not a craft store. The turquoise base is bold enough to carry the mermaid theme, while the pink rim adds a crisp outline that makes the 3D details pop. This set flatters medium to deep skin tones because the colors have strong contrast. It also looks great if you wear pink nail polish without wanting the whole nail to be pink. Use it for summer parties, pool days, and anything where your outfit has a pop color.
Paint all nails a glossy turquoise, then add a thin layer of coral micro glitter only around the mid-to-tip area on the accent nails. Place turquoise shell pieces on two nails, centered and slightly angled. Use a fine brush to paint a hot pink coral rim around the shell opening with gel paint, then cure. Bridge the shell edge with gel and cap with a thick glossy top coat so the rim stays smooth.
Use gel paint for the rim, not regular acrylic paint — it stays flexible and less likely to chip.
Don’t blend the rim into the shell — keep it as a crisp outline.
14. Pastel Rainbow Mermaid Shell Mix (5-Nail Set)
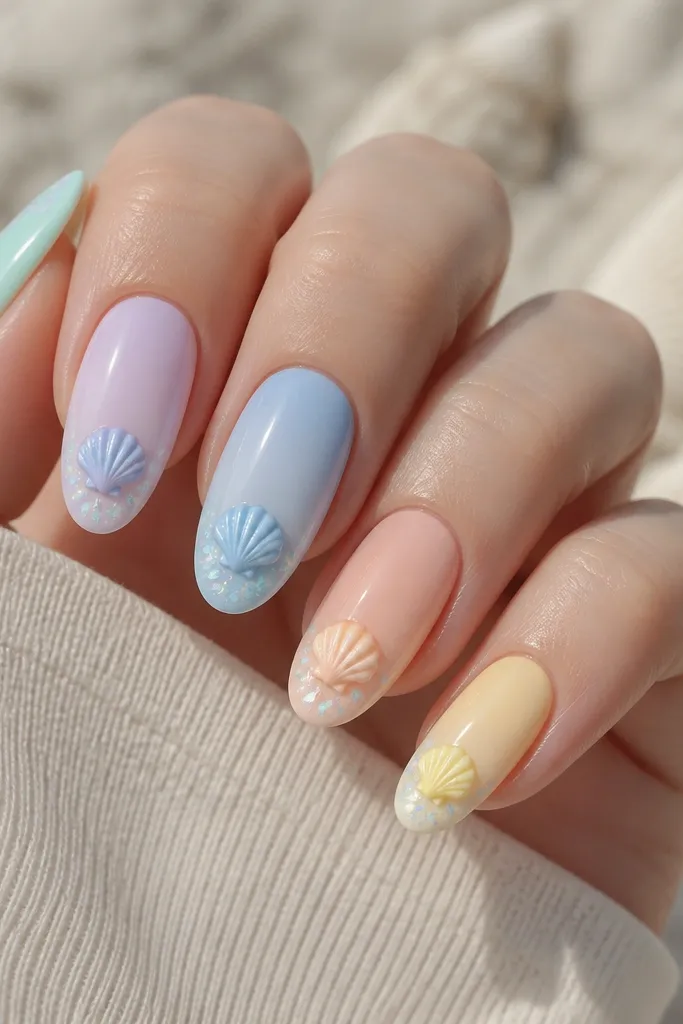
This is the “everyone asks where you got your nails” set because each nail looks like its own mini tidepool. The pastel gradients keep it soft and wearable, while the consistent white shells unify the theme. Matching the shell accent to each nail color makes the 3D detail feel intentional, not random. It flatters all skin tones because pastels brighten the hand without harsh contrast. I like it for vacations and photo days because it looks cheerful in every lighting.
Pick five pastel gradients and apply each one smoothly: mint, lavender, baby blue, peach, pale yellow. Cure each nail. Use small white shells on all five nails, placing them near the tip with the shortest side facing outward. Add iridescent flakes around each shell edge in the same color family as the nail gradient, then cure. Cap with glossy top coat, making sure the surface stays level where the shell sits.
Keep shells the same size across all five nails so the set looks balanced.
Don’t add too many flakes — a light dust around the shell edge looks more realistic.
15. Sea Glass Ombre With Mini Shell Stack
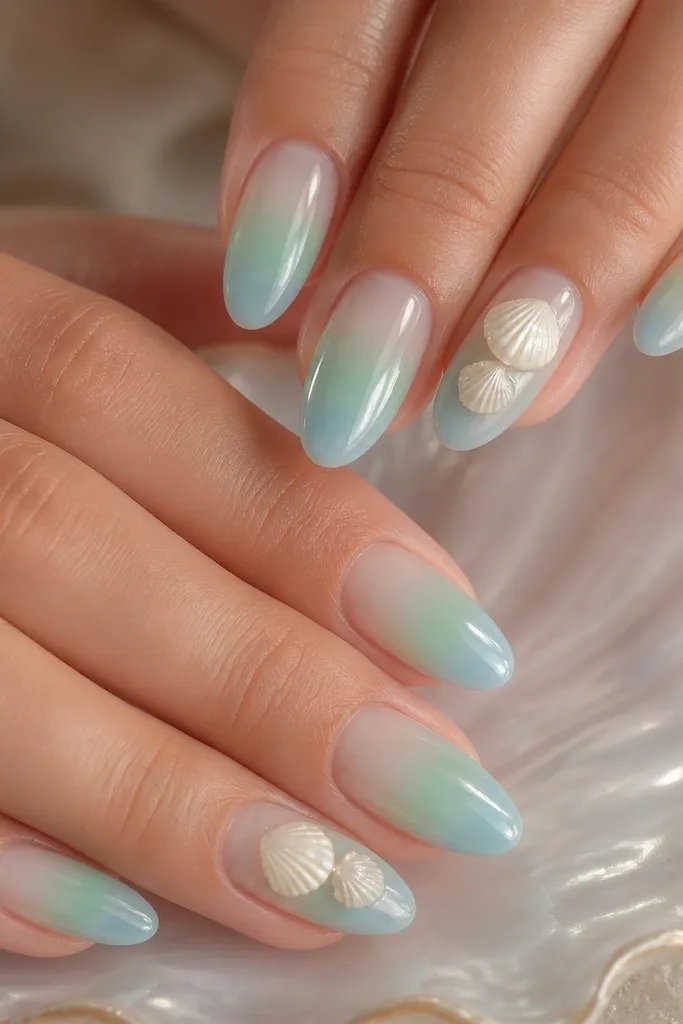
This set makes 3D look like a sculpture without going heavy. Sea glass ombre creates a translucent, watery background, and the mini shell stack gives height where you want it. Layering two small shells instead of one big shell keeps the shape elegant and reduces the bulky feel. It flatters short and medium nails because the stack is at the tip, where it visually lengthens the nail. It’s a great choice for someone who wants the mermaid vibe but hates loud glitter.
Create a sea glass ombre by sponge-painting clear mint at the cuticle, then layering seafoam and pale blue near the tips. Cure and add a soft pearly shimmer gel so it looks like glass. On accent nails, place the first mini shell flat near the tip, cure, then add a second mini shell on top at a slight angle using a tiny amount of gel. Bridge the edges with gel and cap with glossy top coat to smooth the stacked transition.
Editor's noteIf the stack lifts after curing, add a thin gel “halo” around the base shell and cure longer on that nail.
Watch outDon’t stack shells without curing between layers — the top piece slides.