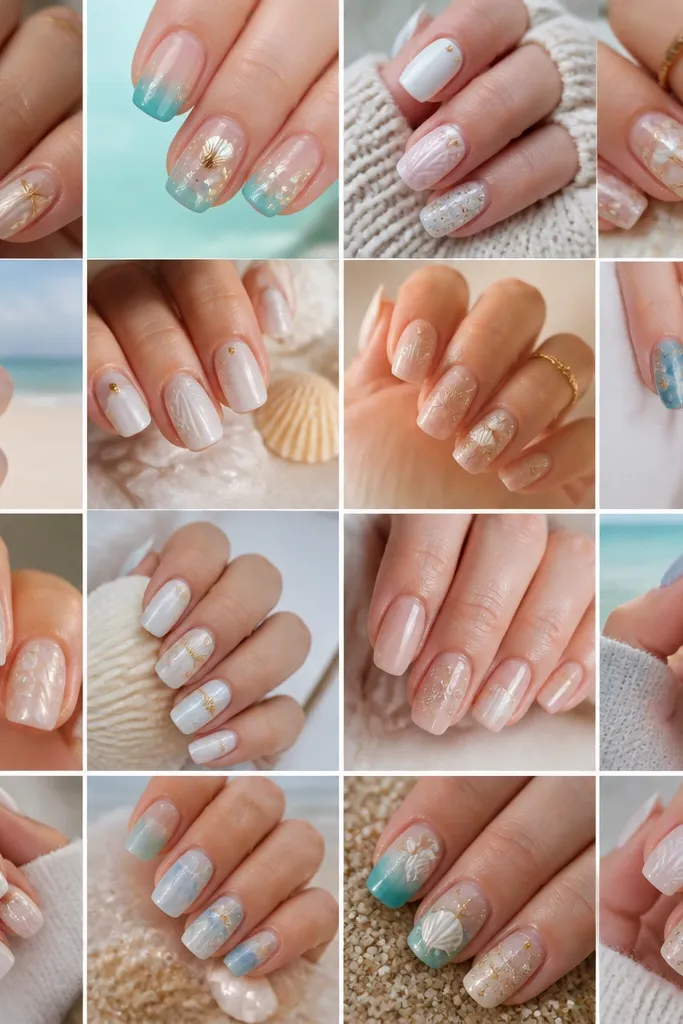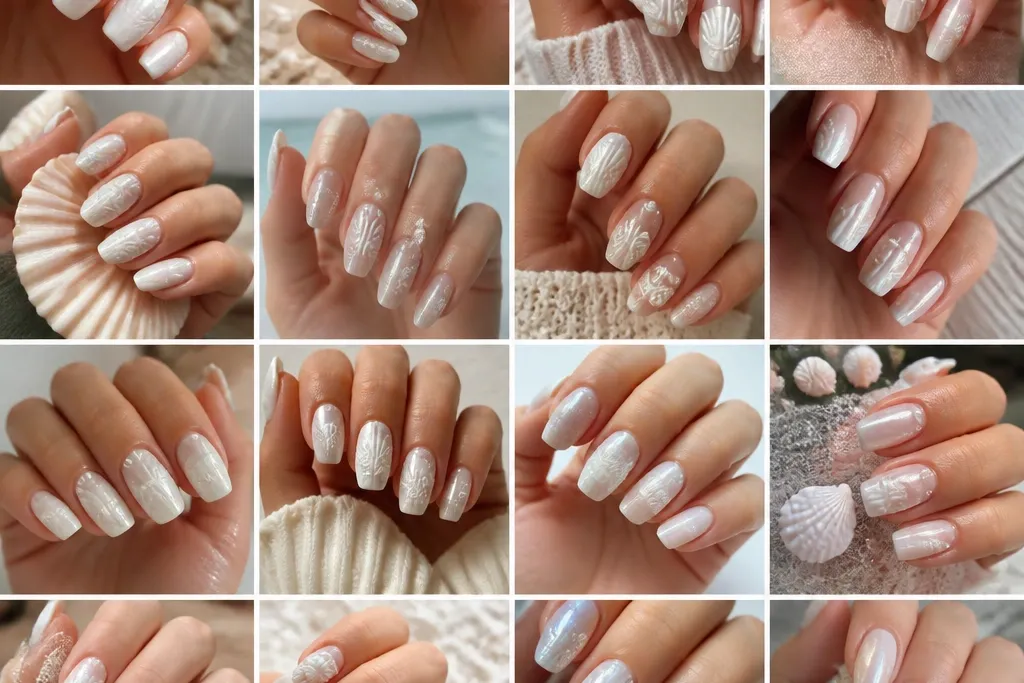
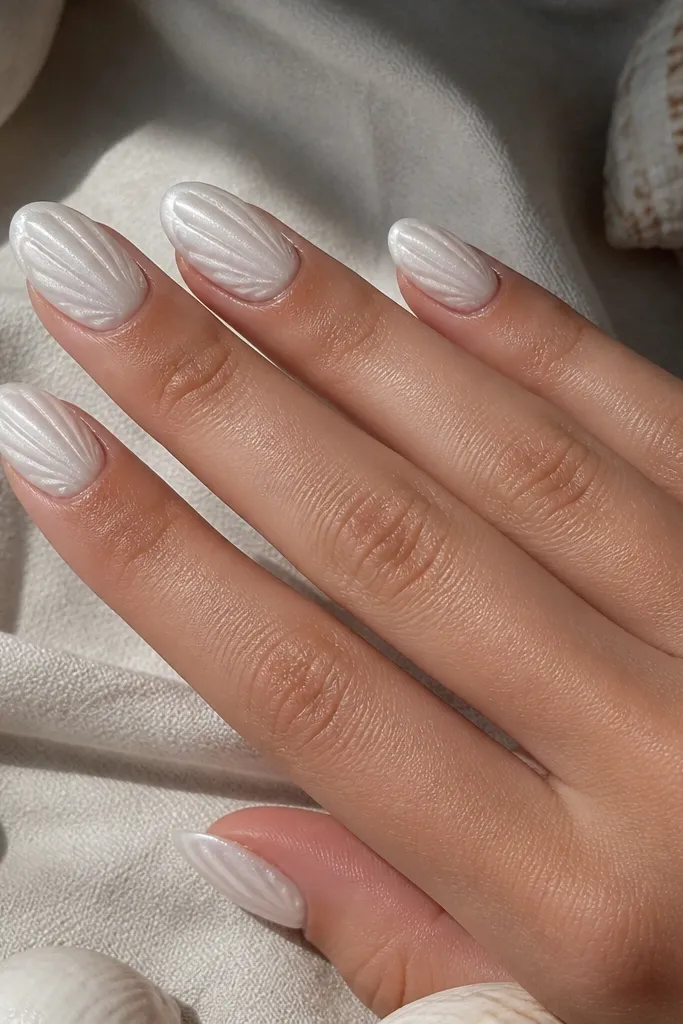
1. Milky White Shells with Icy Blue Center Highlight
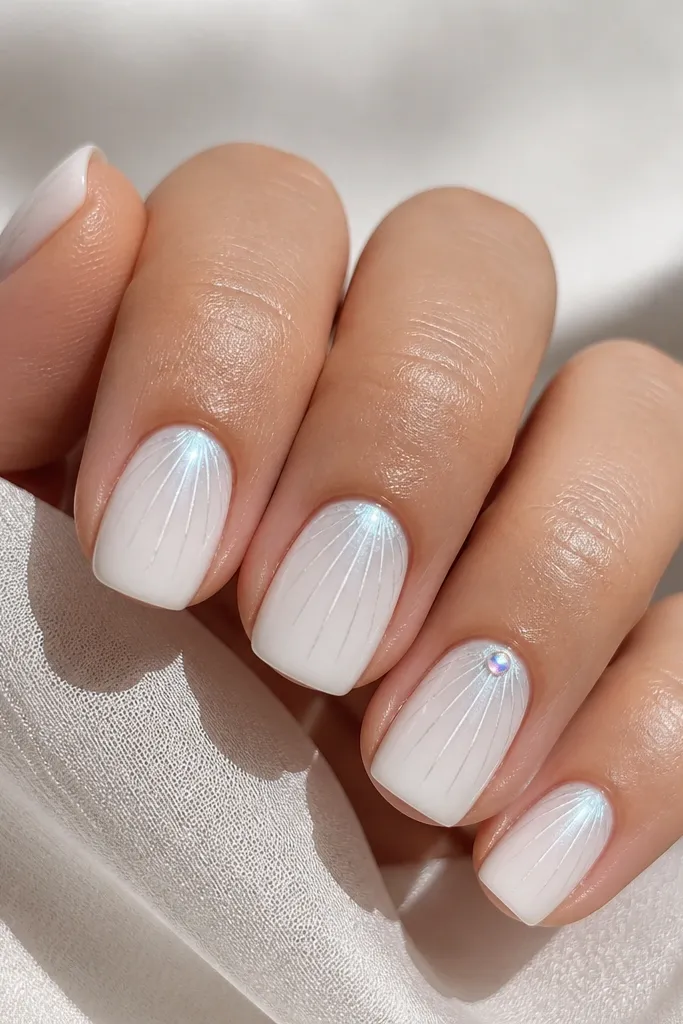
This set is my go-to when someone wants “ocean glam” but hates anything that looks like a beach postcard. The base is a milky white gel that looks soft, not chalky, and the shell ridges are painted with a liner brush in the same white family but slightly darker for contrast. The icy blue highlight sits in the middle of the shell shape so the nail looks dimensional. It flatters fair to medium skin tones because the white stays bright and the blue reads icy instead of muddy. I’ve worn it with silver jewelry and it looks clean in daylight and flash.
Start by applying a milky white gel base in 2 thin coats, curing fully between coats. With a liner brush, paint 3-4 curved shell ridges that arc from near the cuticle toward the sidewalls, leaving the center slightly open. Add a tiny icy blue pearlescent dot or short streak in the center of the ridges, then cure. Finish with a thin layer of builder gel or gel top coat over the ridges, cure, then apply full glossy top coat and cure again. Clean up around the cuticle with a small brush dipped in gel cleanser so the shell lines stay sharp.
Use a liner brush that’s small enough to draw a 1-2 mm ridge line. If the ridge is thicker than that, it stops looking like a shell.
Avoid pure opaque white with no pearly finish — it turns flat and makes the ridges look like scribbles.
2. Seafoam Wave Tips on Milky White Shell Base
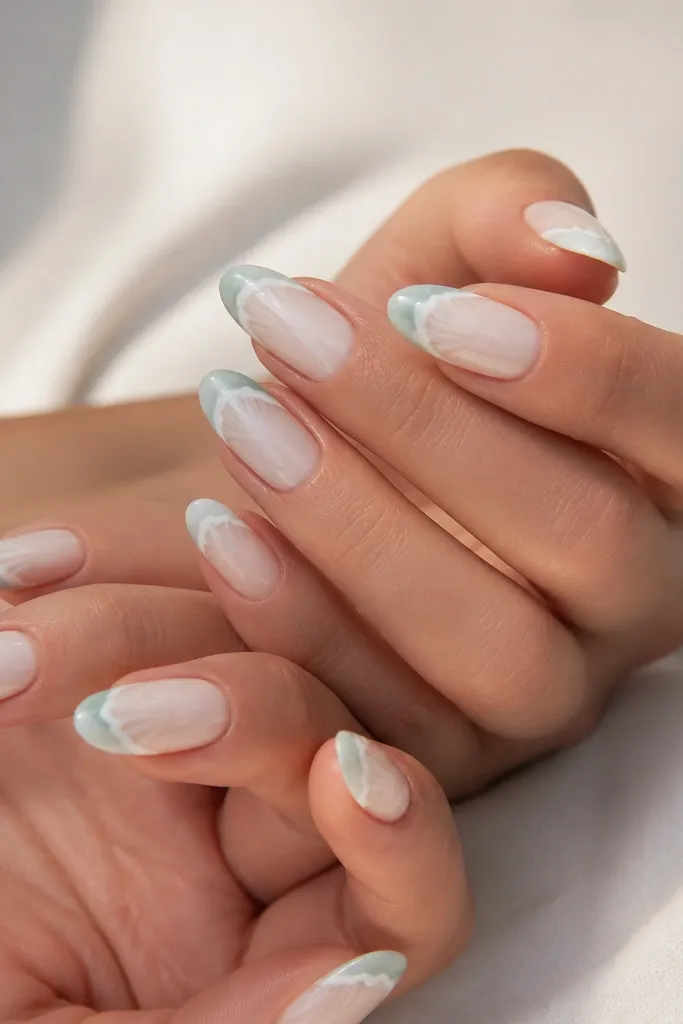
This is the “simple but still cute” version of seashell nails. The milky white base gives you that clean shell background, and the seafoam waves at the tips create the ocean feeling without covering the whole nail. I like this for medium skin tones because seafoam looks fresh rather than harsh. The ridges stay faint near the cuticle, so the set doesn’t look heavy. It’s also flattering on almond shapes because the wave line follows the curve of the nail and looks longer.
Paint the entire nail with milky white gel in two thin coats and cure. Use a striping brush to place 1 wave line per nail in seafoam — start from one sidewall about 2-3 mm below the tip, curve across, and end on the other sidewall. Add 2-3 tiny short “crest” strokes on top of the wave line to mimic foam, then cure. For the shell effect, add 2-3 faint ridge lines near the cuticle only, keeping them close together. Seal with a gel top coat, cure, and then wipe the inhibition layer if your top coat requires it.
Keep the wave line thickness consistent. A slightly thinner line looks more like foam and less like a sticker outline.
Skip chunky glitter on the tips — it makes the wave look like craft foam instead of ocean foam.
3. Pearl Chrome Cuticle Shells with Soft White Ridges
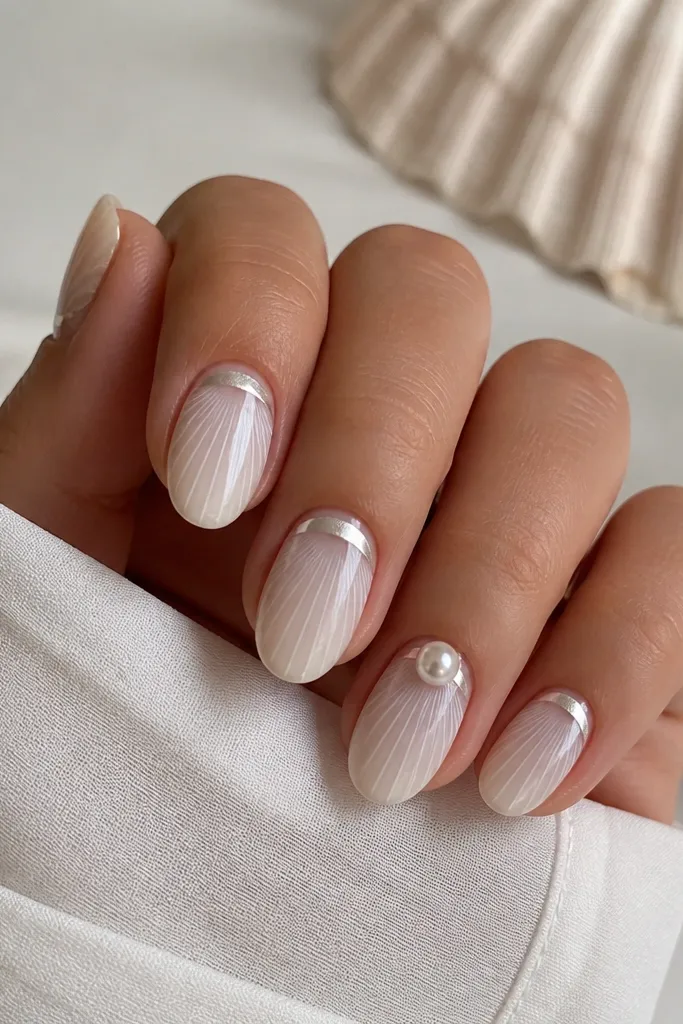
This look reads expensive because the pearl chrome catches light immediately, even with simple shell ridges. The base is sheer milky white so your nail bed still shows through a little, which makes the ridges look delicate. The chrome is only at the cuticle — I keep it in a narrow crescent so it doesn’t overpower the shell design. It flatters all skin tones, but especially looks stunning on deeper skin because the chrome arc pops without looking neon. This is the one I reach for when you want ocean glam for a dinner or a wedding guest look.
Start with a sheer milky white base gel and cure. Apply a thin crescent of pearl chrome powder gel at the cuticle area only, leaving a clean gap where the nail curves out. With a liner brush, draw 3-5 shell ridges starting from the edge of the chrome crescent and curving toward the center, keeping the lines thin. If you add a pearl bead, place it on the chrome at the center point and seal it with a small amount of gel. Finish with gel top coat in two layers for a super glassy surface.
Buff the first gel layer lightly with a 180-grit file before chrome if you see any texture. Chrome sticks better on smooth gel.
Avoid chrome all over the nail — it kills the shell ridges by making everything equally reflective.
4. White Shells with Micro Holographic Sand Glitter
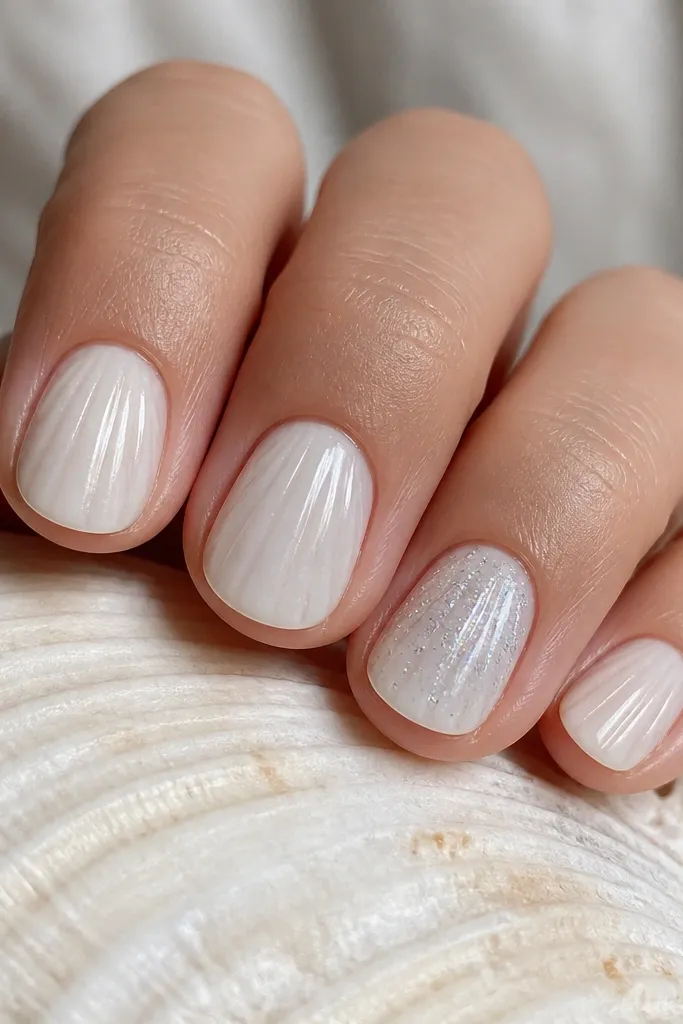
This one is for people who love shimmer but hate big glitter texture. The shell ridges do the work, and the micro holographic dust gives you that “sun on sand” effect. I keep the glitter only on one or two nails so the set stays simple ocean glam. It looks great on short nails because micro glitter doesn’t bulk up the surface. For most skin tones, the holographic flecks read clean when paired with milky white.
Editor's noteUse glitter that looks like fine sugar, not flakes. Flakes catch light in chunks and ruin the “sand” effect.
Apply milky white gel to all nails in two thin coats and cure. Paint shell ridges with a liner brush using an off-white gel that’s just a touch darker than your base. For the accent nail, dab micro holographic glitter gel in the center area and blend it outward with a silicone tool so it fades. Cure, then seal with a gel top coat — I do 2 coats here because glitter needs a smooth finish to avoid catching fabric. Clean edges with a small gel brush and cleanser.
Watch outDon’t place glitter right at the free edge — it chips faster and looks messy after a few days.
5. Shell Ridges with Tiny Sea Glass Dot Accent
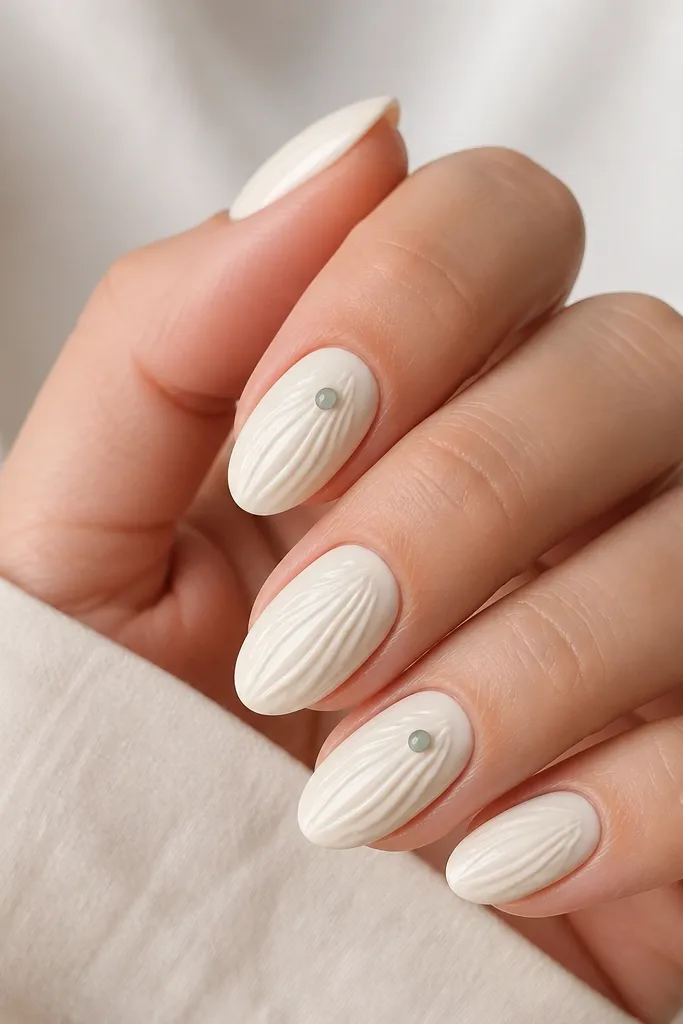
This is the “minimal ocean” set that still gets compliments. The shell ridges are the main design, and the sea glass dot is the only color pop. I like sea-glass green because it’s soft, not neon, and it looks believable against milky white. This flatters hands that look a bit longer already, because the center dot draws the eye upward. It’s also perfect for work since the accent is small and glossy.
Editor's noteDot placement matters: keep it 1/3 of the way down from the tip, not right at the cuticle.
Start with a creamy white gel base (not super opaque) and cure. Paint 4 curved shell ridges that fan slightly, following the nail curve. Leave the center area mostly clean so the dot stands out. Add one tiny sea-glass green dot on the center of 2 nails, then cure. Seal with a top coat and cap the free edge so the dot stays locked under the glassy finish.
Watch outAvoid multiple dots — two is enough. More turns into confetti instead of sea glass.
6. White Seashell French Tips with Thin Blue Outline
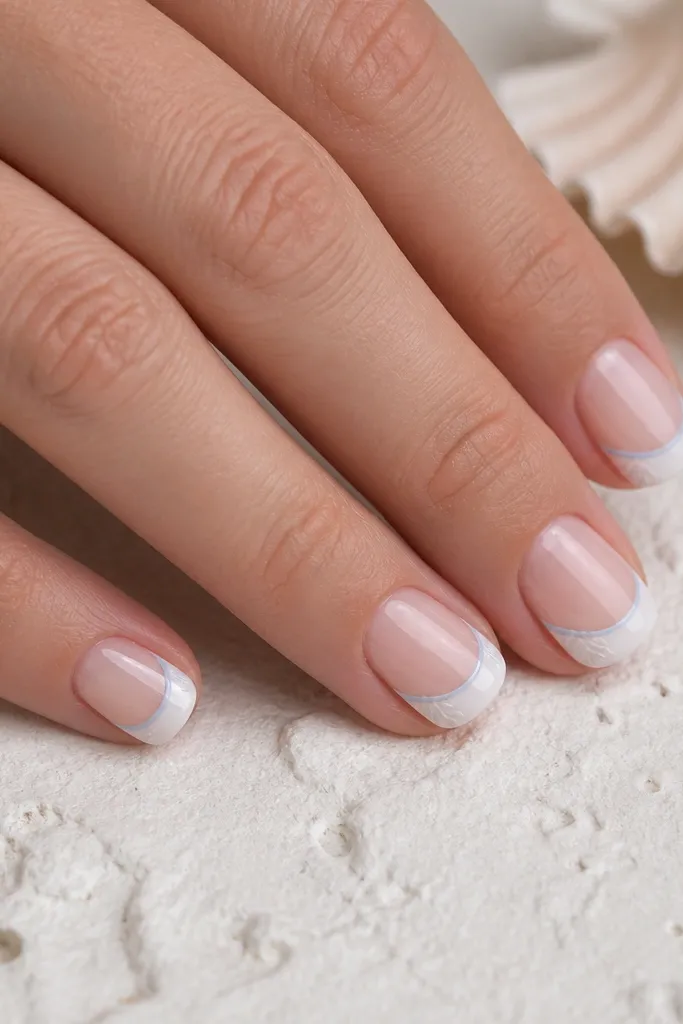
French tips are already neat, so you just need to add shell cues without changing the whole manicure. The white French tip looks like a shell edge, and the ultra-thin blue outline adds ocean glam without turning into full ombre. This looks great on short nails because the design is crisp and doesn’t require lots of space. It flatters warmer undertones too because the blue outline stays cool and clean against white. I’ve worn this with casual outfits and it still looks like a “put together” manicure.
Editor's noteUse tape or a guide strip for the first French pass, then remove it while the gel is still workable if your brand allows it.
Paint the nail base in sheer milky pink or nude that matches your skin, then cure. Create the French tip using milky white gel, keeping the smile line tight and even. With a liner brush, draw a single thin icy blue line just inside the white tip edge, then cure. Add 2-3 tiny shell ridges near the sidewalls under the French line so it looks like a shell pattern. Finish with glossy top coat and cap the tip edge.
Watch outDon’t make the blue outline thick — thick lines look like cheap nail tape.
7. Glazed Shells with Milky White + Silver Holo Vein
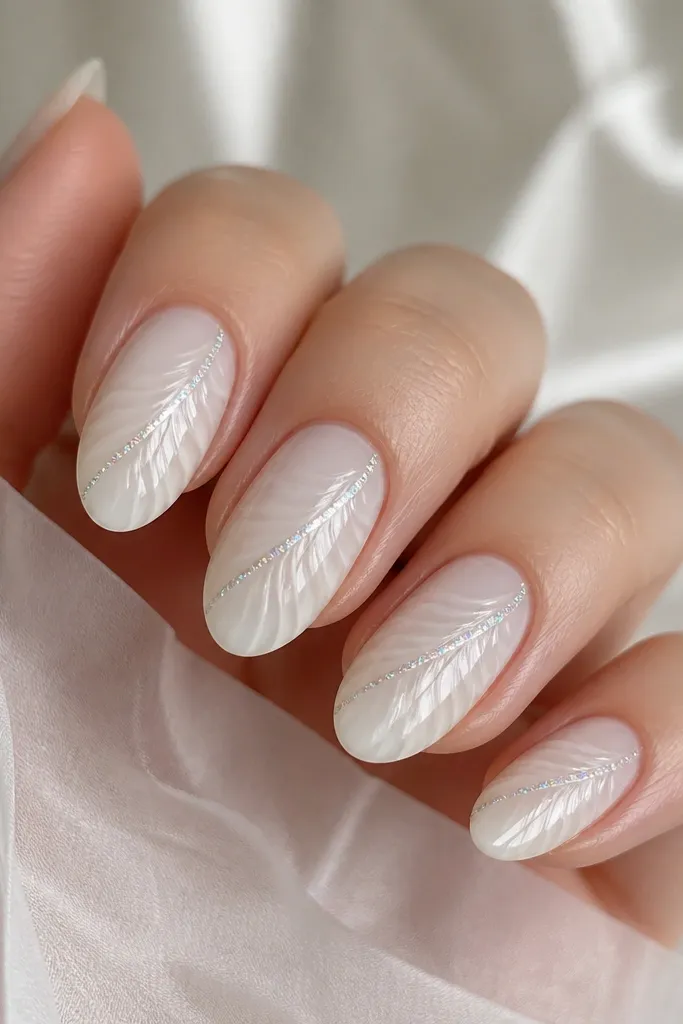
This one looks like shell jewelry. The milky white keeps it clean, and the silver holo vein adds movement because it catches light at different angles. I like diagonal placement because it makes the nail look longer and draws attention away from cuticle texture. This is flattering on medium to long nails, especially almond shapes, and it works well for cooler undertones. If you wear silver rings, this will match instantly.
Apply milky white base gel in two thin coats and cure. Paint shell ridges in thin curved lines, leaving space for the diagonal accent. Add a thin silver holo gel line diagonally from about mid-sidewall toward the center, then cure. For extra dimension, you can lightly drag the holo line over one ridge line so it looks integrated, not pasted on. Seal with a thick glossy top coat and cure fully for the “glazed” shine.
If your holo line looks streaky, do two thin passes instead of one thick pass.
Skip chunky silver chrome dust — it makes the vein look heavy and hides the shell ridges.
8. White Shells with Blue-Green Waterline Skim
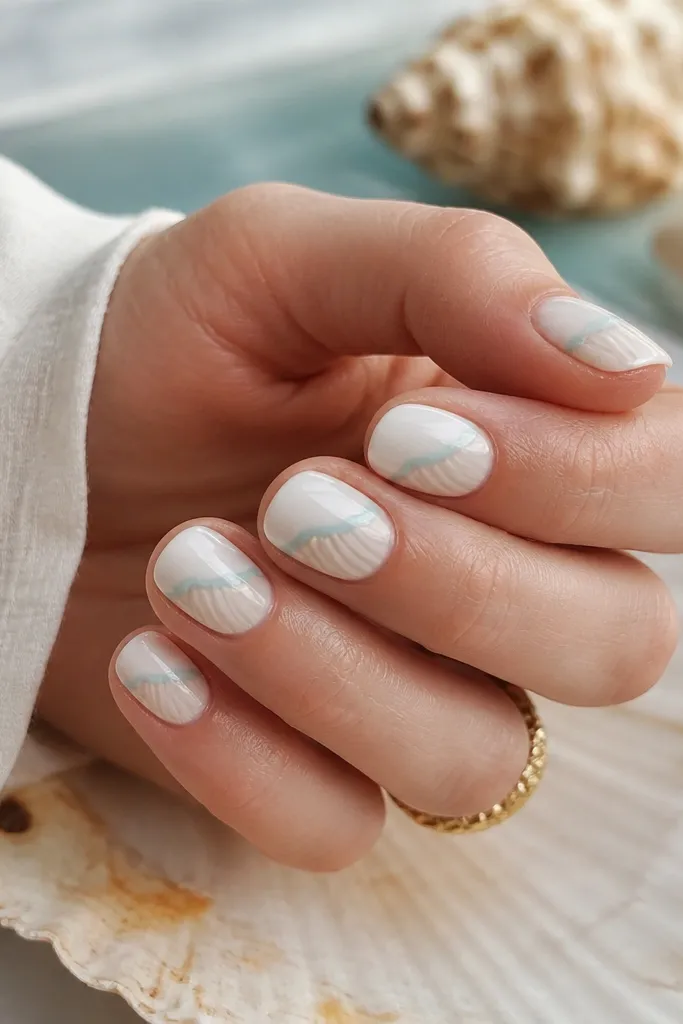
This design mimics the way ocean waves sit on the surface — a thin band, not full coverage. The waterline band in blue-green gives instant ocean glam, while the shell ridges keep it seashell themed. I like it on oval nails because the waterline looks smooth and the ridges curve naturally with the shape. It’s flattering for most skin tones and looks especially good on hands with shorter nail beds because the waterline gives structure. It also photographs well because the band is a clear focal point.
Paint milky white base gel and cure. Draw shell ridges in the lower half of the nail — 3-4 lines that start near the cuticle and arc toward the waterline. Create the waterline band by painting a thin horizontal strip in blue-green gel about 2-3 mm from the tip, keeping the strip straight. Add a second thinner strip just above it if you want more depth, then cure. Finish with a glossy top coat, making sure the band is sealed without flooding the cuticle.
Keep the waterline band thinner than you think. A thin band looks like water; a thick band looks like paint.
Don’t blend the waterline into the white with a sponge — it turns into muddy ombre.
9. Shell Ridges with Milky Pink Pearl Ombre Edge
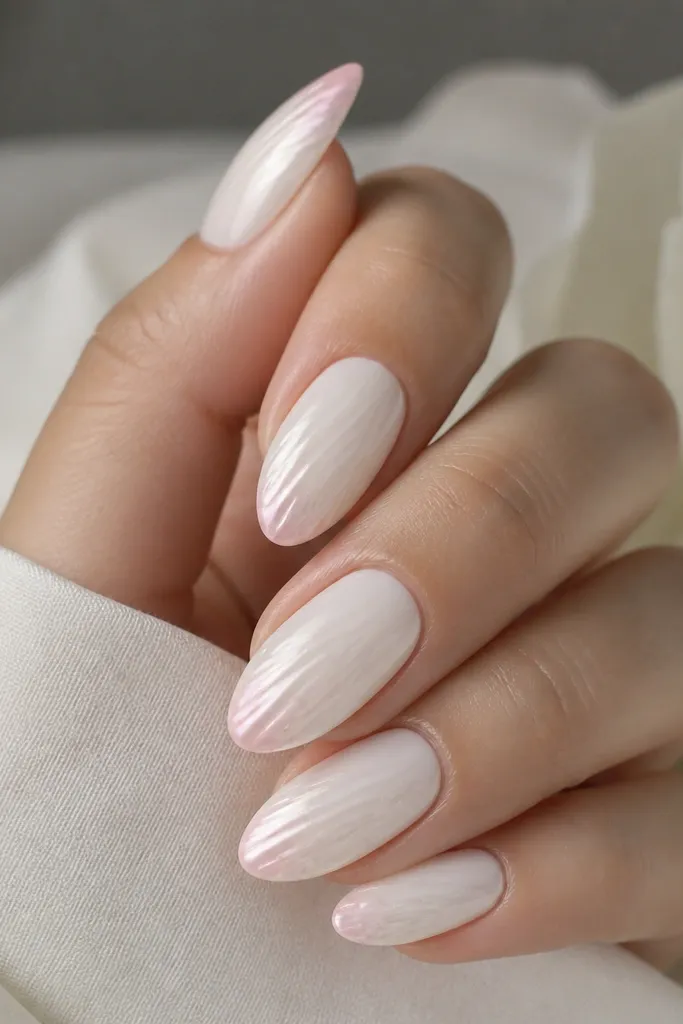
If you want ocean glam that feels romantic instead of icy, this is it. The shell ridges stay white and clean, while the milky pink pearl ombre at the tips adds warmth and a “pretty seashell” vibe. I’ve worn this with both gold and rose-gold jewelry and it looks right either way. It flatters warm undertones because the pink doesn’t fight your skin. On medium almond nails, it also makes the tips look extra neat and elongated.
Editor's noteFeather with a light touch. Overworking the ombre makes it streaky.
Start with a milky white base gel and cure in two thin coats. Paint shell ridges in thin lines across the center, curving with the nail shape, then cure. For the ombre edge, use a milky pink pearl gel and apply it only to the top third, then feather downward with a makeup sponge or an ombre brush. Blend until the pink fades smoothly into white, then cure. Seal with a glossy top coat, and do a careful cap on the free edge so the ombre doesn’t peel.
Watch outAvoid bright bubblegum pink — it makes the manicure look like candy instead of seashell blush.
10. White Seashell Nails with Tiny Starfish Charm Accent
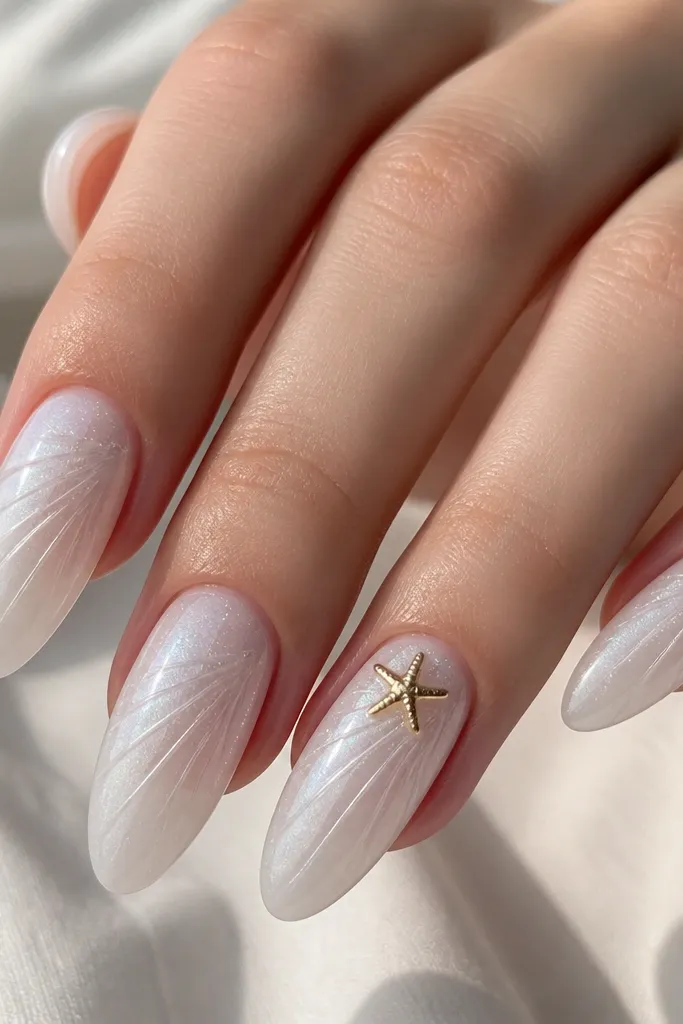
This is for when you want the ocean theme to be obvious without painting a bunch of cartoon shapes. The milky white base keeps everything soft, and the shell ridges add the real seashell texture. A small gold starfish charm gives you a focal point that reads “ocean glam” immediately in photos. It flatters long nail shapes because the charm sits high and makes the nail look elegant rather than cluttered. If you like jewelry and want your nails to match, this one nails it.
Apply sheer milky white base gel and cure. Paint shell ridges in thin curved lines across each nail, concentrating the ridges toward the center. Place a tiny gold starfish charm on one ring finger near the cuticle, then cover it with a thin clear gel layer to lock it in and cure. Add a micro dusting of holographic shimmer to the sidewalls on the other nails if you want extra light. Finish with glossy top coat, then cap the free edge so the charm doesn’t snag.
If your charm is raised, add one extra thin top coat layer so it feels smooth under your nails.
Avoid oversized charms — big pieces make the manicure feel heavy and cheap fast.
11. Icy White Shells with Blue Pearl Cluster at Cuticle
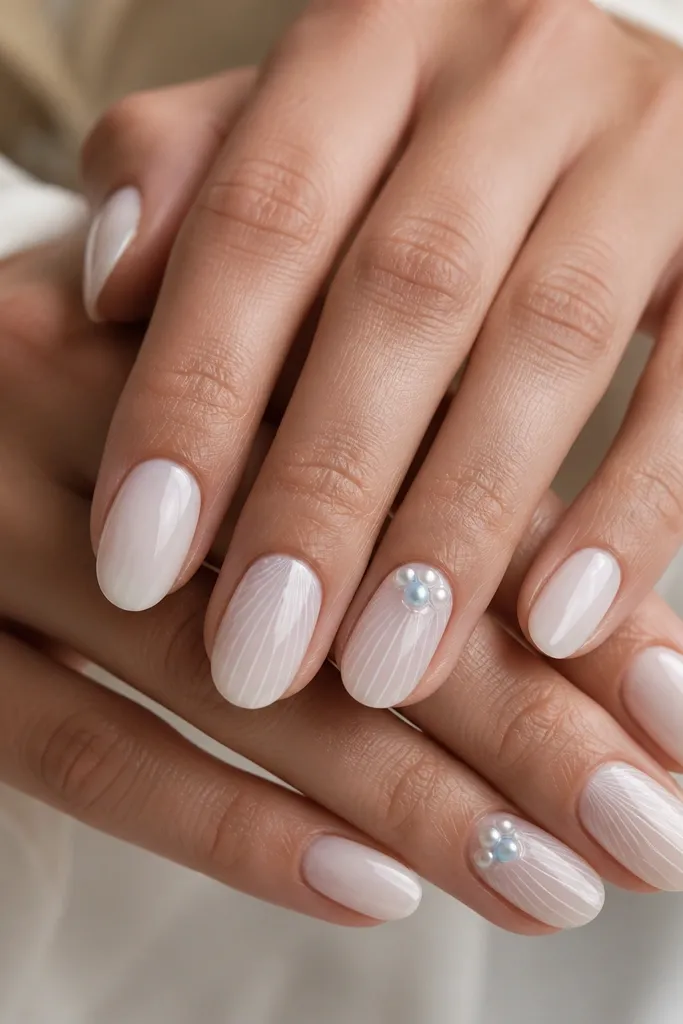
Pearls at the cuticle look like jewelry and they make the shell theme feel intentional. The base is icy white, which keeps the design crisp, and the ridges are thin so you still see the shell texture. The blue pearl cluster gives a pop of ocean color without turning into a full nail pattern. This looks especially good on medium skin tones because the icy white brightens your hand. It also works for formal events where you want something photogenic but not loud.
Editor's noteUse pearl sizes that are smaller than your ridge lines. If pearls are too big, they hide the shell design.
Start with icy white gel base in two thin coats and cure. Paint shell ridges using a liner brush, keeping the lines narrow and slightly curved. On the ring finger, place 3-5 tiny blue pearls in a small grouping near the cuticle — keep them tight, not spread out. Cover the pearls with a clear gel dome, cure, then file lightly if needed for smoothness. Seal everything with glossy top coat in one or two layers depending on how thick the dome looks.
Watch outDon’t place pearls on every nail — it overwhelms the seashell look.
12. White Shells with Watercolor Seafoam Fade Side
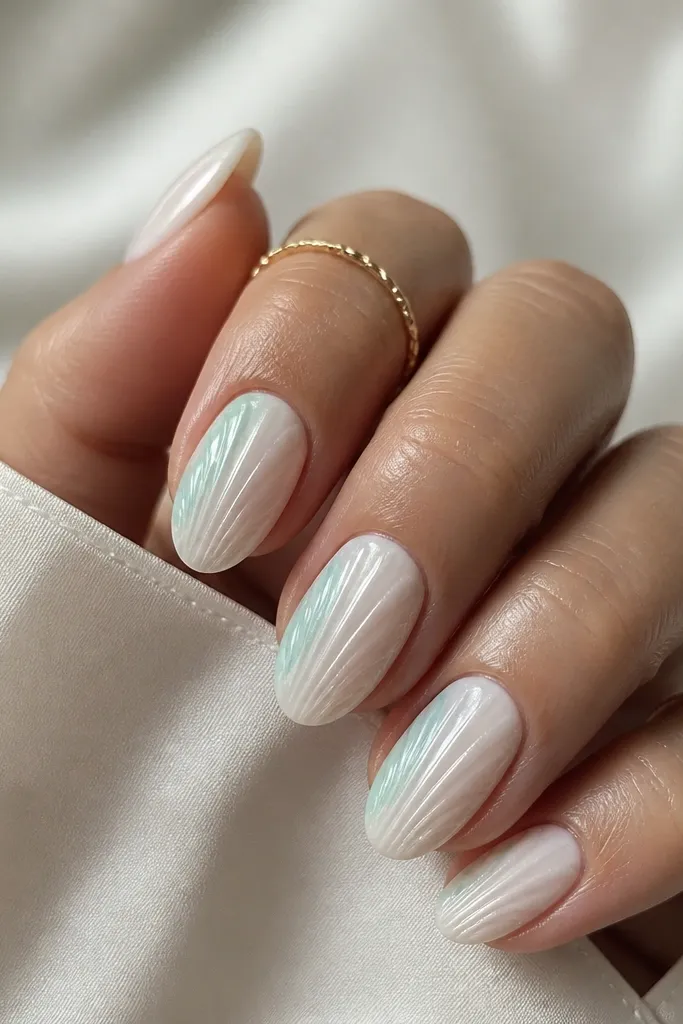
This is the “artful” ocean glam version that still stays wearable. The seafoam watercolor fade is placed on one side, which makes the nail look slimmer and more flattering. The shell ridges stay crisp in the center so the manicure still reads as seashells, not just paint. I like this for hands that have a wider nail bed because the side fade balances the shape. It also looks gorgeous in outdoor light because the seafoam looks like it’s floating under glass.
Editor's noteUse less product than you think. Watercolor-style fades look best when they’re translucent.
Apply milky white base gel and cure. Draw shell ridges in the center area with a liner brush, curving from near the cuticle toward the middle. For the side watercolor, load seafoam gel on a small brush, then feather it on one sidewall only, stopping about 2-3 mm before the tip. Blend the edge with a clean brush dipped in cleanser so it stays soft. Cure, then seal with glossy top coat and cap the sides so the watercolor edge doesn’t lift.
Watch outAvoid hard edges on the seafoam — harsh lines make it look like nail art tape.
13. Shell Ridges with White-Gold Foil Shimmer Stripe
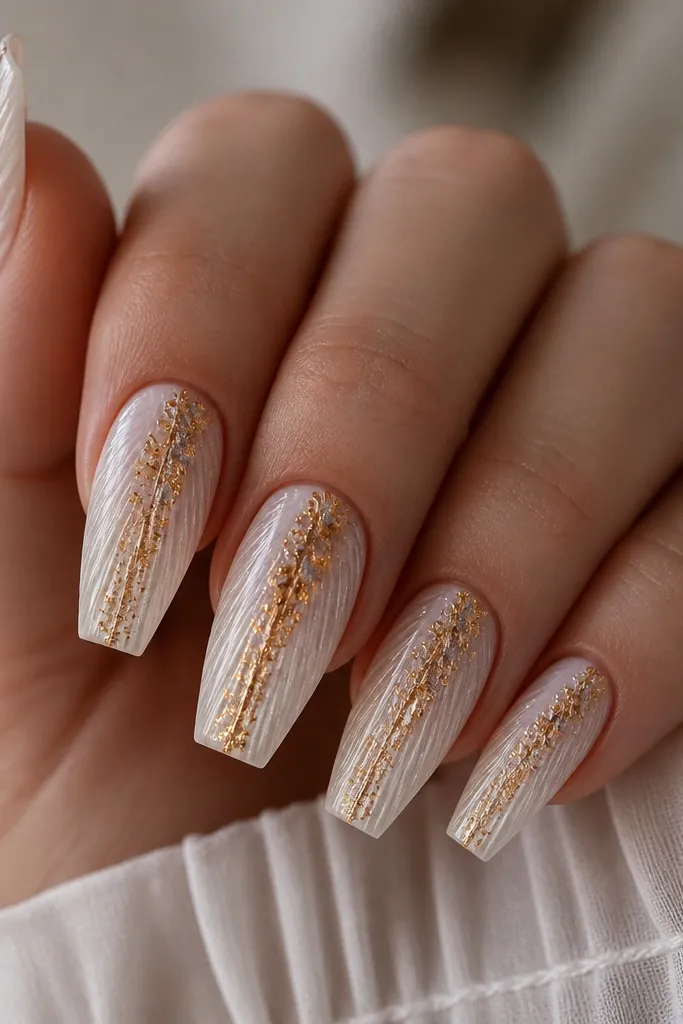
Gold foil makes seashell nails feel like evening jewelry. The milky white keeps it soft, and the vertical foil stripe creates a clean, lengthening look. I like this on coffin and long almond shapes because the stripe guides the eye down the nail. It flatters warm undertones and also looks amazing on cool undertones when you pair it with silver rings — the mix feels intentional. This is a great choice for holiday parties or a date night where you want something that looks “done.”
Editor's notePress foil with a small foam applicator, not your finger. It gives you a smoother, more controlled stripe.
Start with milky white base gel in two thin coats and cure. Paint shell ridges across the nail, leaving the center slightly lighter so the foil stands out. Apply a thin strip of gold foil adhesive (or clear gel where foil will go) along the center line, then press gold foil pieces gently until you get a narrow stripe. Cure, then brush a thin layer of clear gel over the foil to smooth it out before top coat. Finish with glossy top coat and cap the free edge so foil doesn’t snag.
Watch outSkip thick foil sheets — they lift and make the nail feel rough.
14. White Seashell Nails with Tiny Blue Crystallized Specks
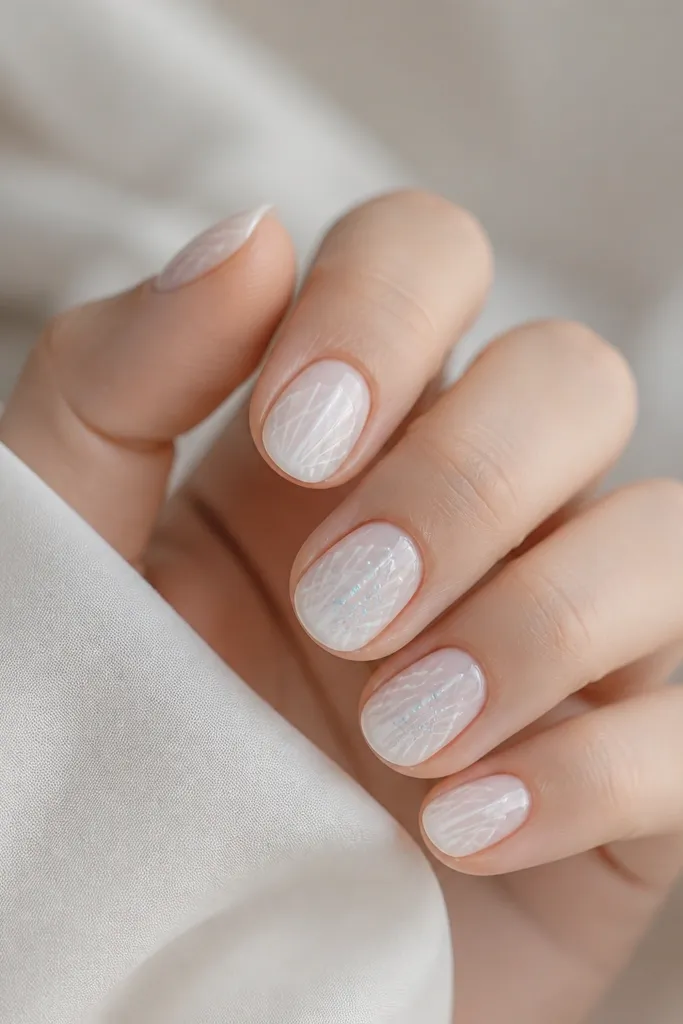
This look gives you ocean glam in the form of “sparkle frost.” The milky base and shell ridges keep the manicure grounded, while the tiny blue specks mimic the way light hits water. I like this for everyday because the specks are small enough that they don’t look like heavy glitter. It flatters fair to medium skin tones since the blue reads bright against white. For camera flash, the specks pop without turning the nail into a glitter bomb.
Editor's noteUse a small dotting tool to place specks instead of shaking glitter from height. Height makes clumps.
Apply sheer milky white gel base and cure. Paint shell ridges with a liner brush, keeping lines thin and slightly curved. On accent nails, dab a small amount of clear gel in the center area only. Sprinkle tiny blue crystal glitter or fine micro “crystal” particles, then press lightly so they stick. Cure and seal with a glossy top coat in two thin layers to prevent texture from catching.
Watch outAvoid big chunk crystals — they look rough and chip sooner.
15. Shell Ridges with Half-Moon Seafoam at the Cuticle
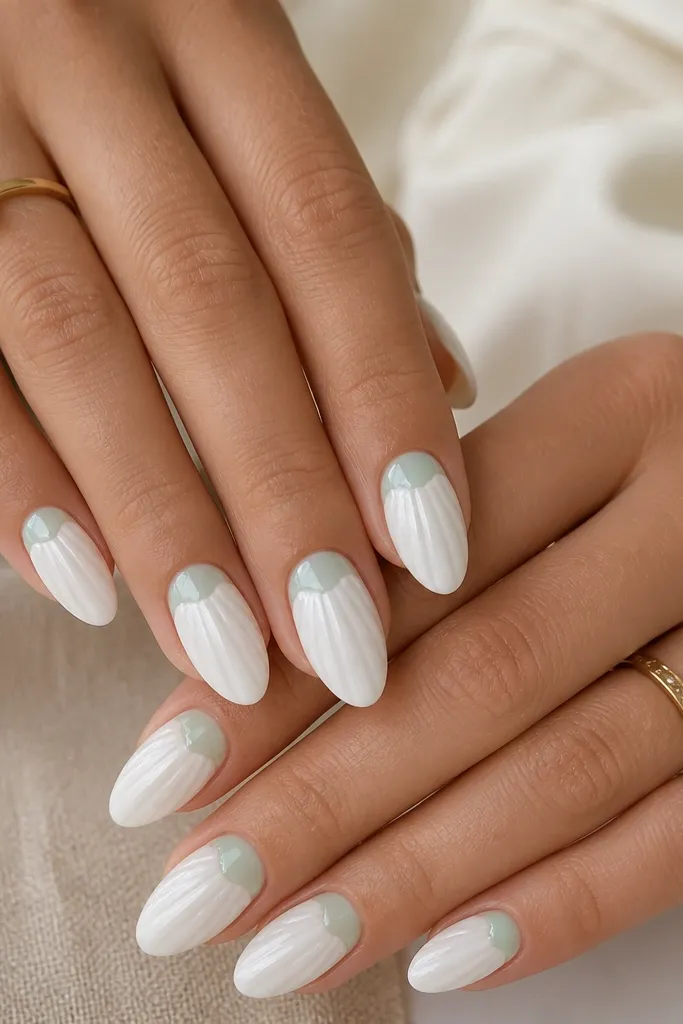
Half-moons are clean and graphic, so this works when you want ocean glam that still looks simple. The seafoam half-moon at the cuticle adds color without taking over the nail, and the shell ridges bring the seashell theme back in. I like this set on almond and short oval because the half-moon hugs the nail curve. It flatters all skin tones because the seafoam sits in a soft range — not too bright. If you’re trying to grow your nails out, this design also helps hide small imperfections at the cuticle area.
Start with milky white base gel and cure. Paint a seafoam half-moon at the cuticle — keep it about 1/3 of the nail width and stop before it reaches the sidewalls. Cure. With a liner brush, draw shell ridges starting from the outer edge of the half-moon and curving toward the center. Keep ridges to 3-4 lines so it stays simple. Apply glossy top coat and cap the cuticle edges carefully.
Make the half-moon slightly thinner than the cuticle line you want. It looks better when it’s subtle.
Avoid sloppy seafoam spreading onto the base — it makes the cuticle look stained.
16. White Shells with Vertical Tiny Stripes like Shell Fibers
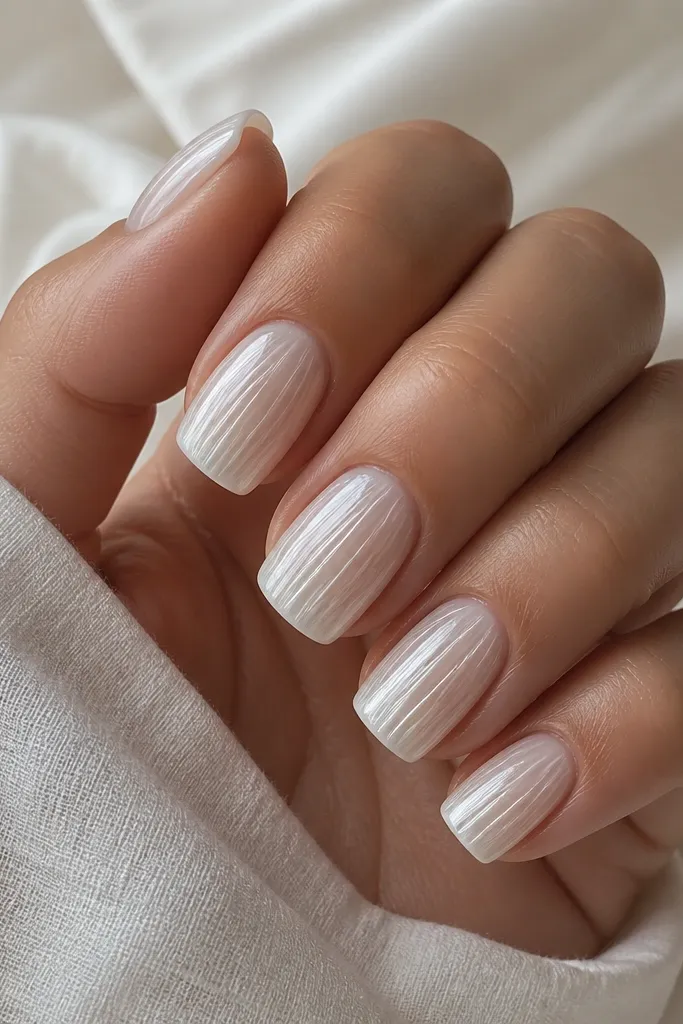
This one is almost like a shell cross-section, and it looks super clean in person. Instead of big curved ridges, you use vertical micro stripes that taper — it reads as shell fibers. The milky white base keeps it airy and modern, and the pearly finish makes the stripes catch light. This is flattering on shorter nails because the vertical lines add length without using blue. For any skin tone, this stays soft and doesn’t fight your jewelry.
Apply milky white gel base in two thin coats and cure. Use a liner brush to draw 6-8 vertical micro stripes across the nail — start near the cuticle and stop slightly above the tip, tapering as you go. Leave tiny gaps between stripes so the nail still looks breathable. Cure, then add a thin layer of clear gel over the design to smooth it out. Finish with full glossy top coat and cap the free edge.
If your stripes look too dark, thin your white gel with a drop of clear gel before painting.
Don’t draw stripes too close together — they turn into a solid panel and lose the shell effect.
17. Shell Ridges with Blue-Tinted Milky Ombré Bottom
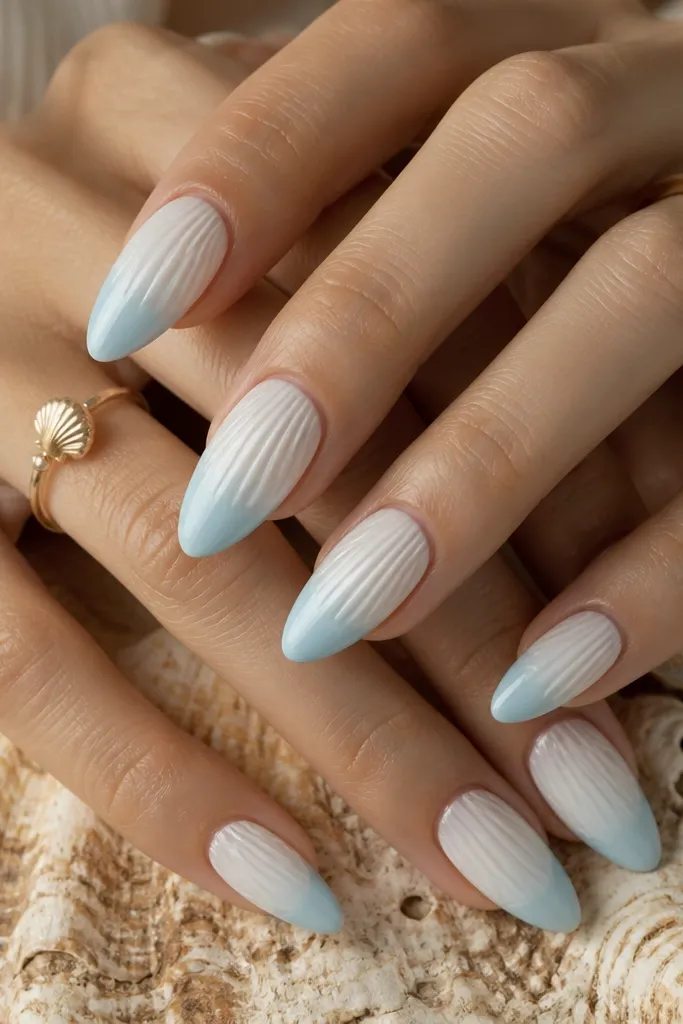
This is a simple ocean glam look with a gradient that still feels like seashells. The milky white top keeps the shell ridges crisp, and the blue-tinted ombré bottom creates depth like water. I love it on long almond because the gradient naturally follows the nail shape and makes the nail look longer. It flatters cool and neutral undertones, especially when paired with silver or white gold jewelry. The key is keeping the blue fade soft — no harsh line.
Editor's noteBlend the ombré with a sponge that’s barely damp with cleanser. Too wet makes it streak.
Paint milky white base gel and cure. Paint shell ridges on the top half only, using thin curved lines. For the ombré bottom, apply a light blue-tinted milky gel starting at the midline and feather downward with a clean ombré sponge. Blend until the transition is smooth, then cure. Add a thin clear gel layer over the ridges and ombré to unify the finish, then apply glossy top coat.
Watch outAvoid a sharp boundary between white and blue — that line makes it look like two separate polishes.
18. White Seashell Nails Simple Ocean Glam with Single Wave on Accent Nail
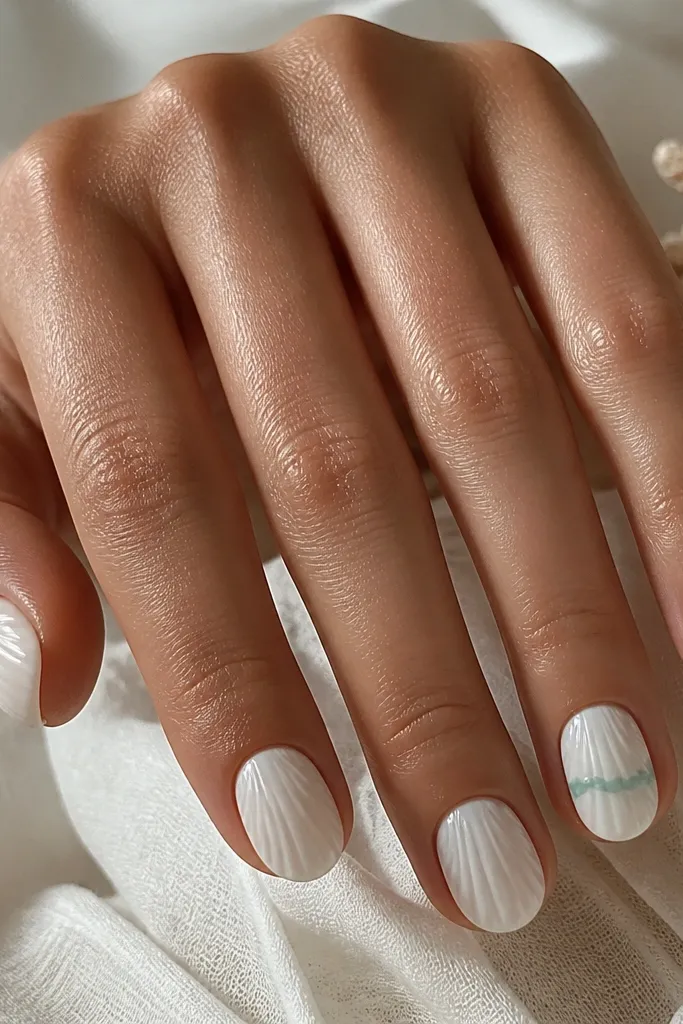
This is the most straightforward way to get “ocean glam” without turning the whole set into a pattern. Shell ridges give you the seashell identity, and the single wave line adds the ocean cue. I like this for people who want compliments but don’t want to see a different design on every nail. It’s flattering on short oval and round shapes because the wave line sits in the center and doesn’t crowd the tips. On camera, it reads clean and intentional.
Editor's noteKeep the wave line to one — even a second line makes it look like a kids' drawing.
Do milky white base on all nails, cure twice if needed for even coverage. Paint 3-5 shell ridges per nail using a liner brush, keeping them thin and evenly spaced. Choose one accent nail and draw a single seafoam wave line across the center — one smooth curve with small foam bumps at the top of the wave. Cure, then seal everything with glossy top coat. If the wave line feels slightly raised, add a thin clear gel layer over it before the final top coat.
Watch outAvoid adding extra icons like shells or anchors — the single wave is enough.
19. Smooth White Shells with Clear Jelly Ocean Topcoat and Tiny Bubble Spots
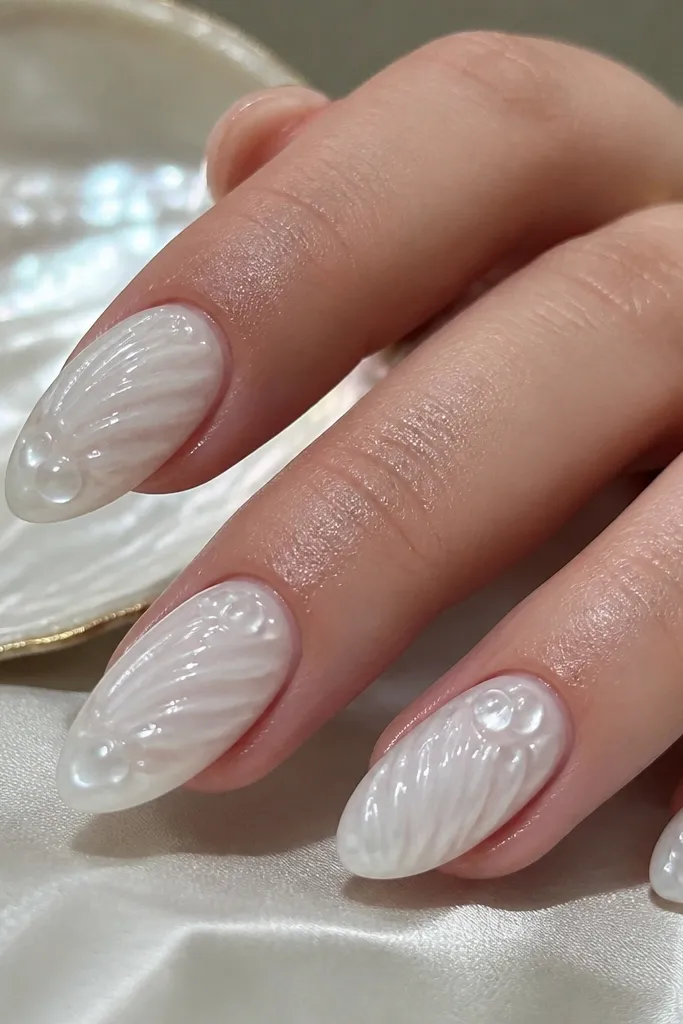
This look is white seashell nails with a jelly-water effect, so it reads ocean glam even before the shell details. The milky base gives you that clean beach-glass vibe, and the clear jelly layer makes the nails look wet and dimensional. Tiny bubble spots under the jelly coat create the “floating in water” illusion without needing heavy 3D charms. I like it because it stays bright and wearable — the bubbles are small enough that it still feels fresh, not costume-y.
Start with two thin coats of milky white polish, then cure fully between coats. Use a fine striping brush to paint one smooth curved shell ridge per nail — think one arc that follows the nail’s natural curve, not a full fan pattern. On a sponge or dotting tool, place micro bubble dots using clear builder gel mixed with a tiny touch of white polish so they look like cloudy bubbles, not plain dots. Seal everything with a medium-thick clear jelly topcoat, then cure and cap the free edge so the bubbles look suspended under glass.
Keep your bubble dots near the lower half of the nail so they read like depth, not clutter. If bubbles look flat, add one extra thin jelly layer only over the bubble area.
Don’t place bubble dots right at the cuticle — they make the nail look overfilled and messy when the nail grows out.
20. White Seashell Nails with Matte Shell Powder Center and Glossy Fringe Edges
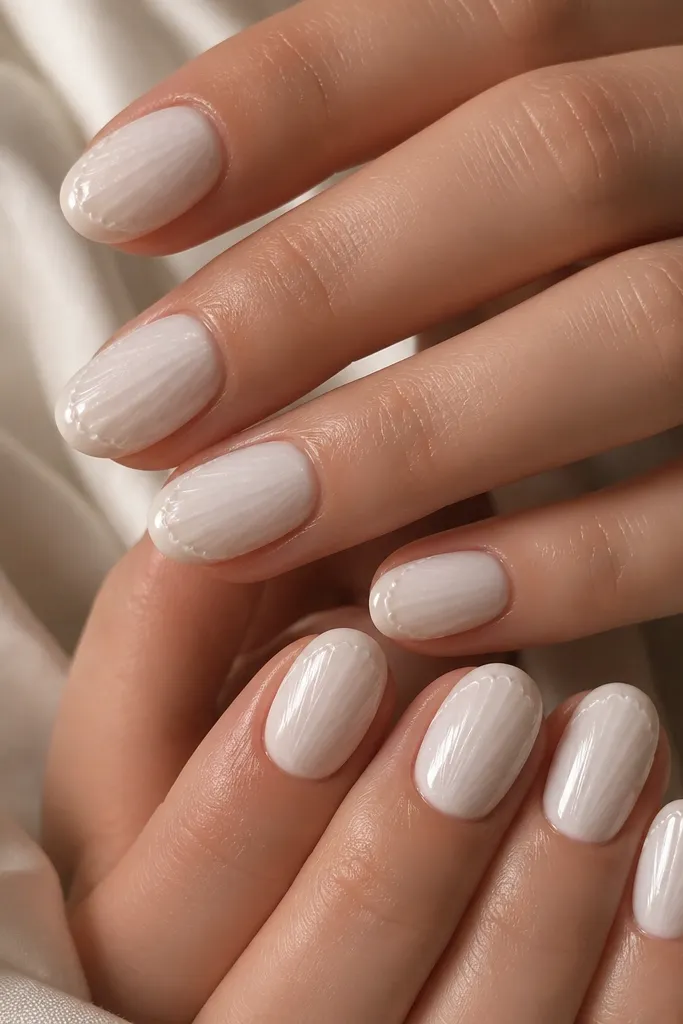
This is a more modern take on white seashell nails because it mixes matte and gloss in the same nail. The matte shell powder center looks like dry sand and makes the white look richer, while the glossy fringe edges catch light like the rim of a real shell. It works especially well if you keep your shell pattern minimal — one fan shape per nail looks intentional instead of busy. I’ve worn this to events where I wanted ocean glam that didn’t scream “theme party,” and it photographed beautifully.
Apply a smooth opaque white base in two coats, curing hard each time so the surface stays even. Paint a thin fan-shaped shell area in a semi-thick clear gel in the center of the nail, then dust matte shell powder over it and tap off the excess. Cure, then wipe with isopropyl alcohol to remove loose powder and reveal a soft matte center. Finally, use a striping brush to paint a glossy scalloped border along the sides and near the free edge, cure, and cap with a glossy topcoat only on the rim so the center stays matte.
Use matte shell powder sparingly — press it on with the applicator or a makeup sponge so you get texture without turning the whole nail chalky.
Don’t use glossy topcoat over the matte center — it flattens the texture and kills the sand-like effect.