1. Milky Nude Almond with Opal Shell Half-Moons
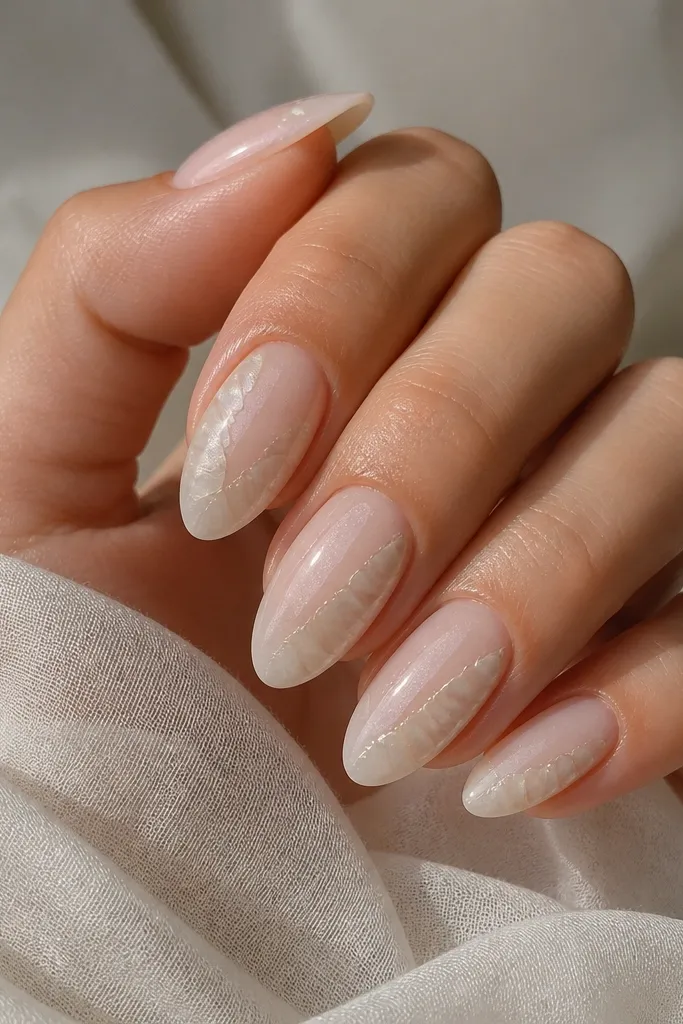
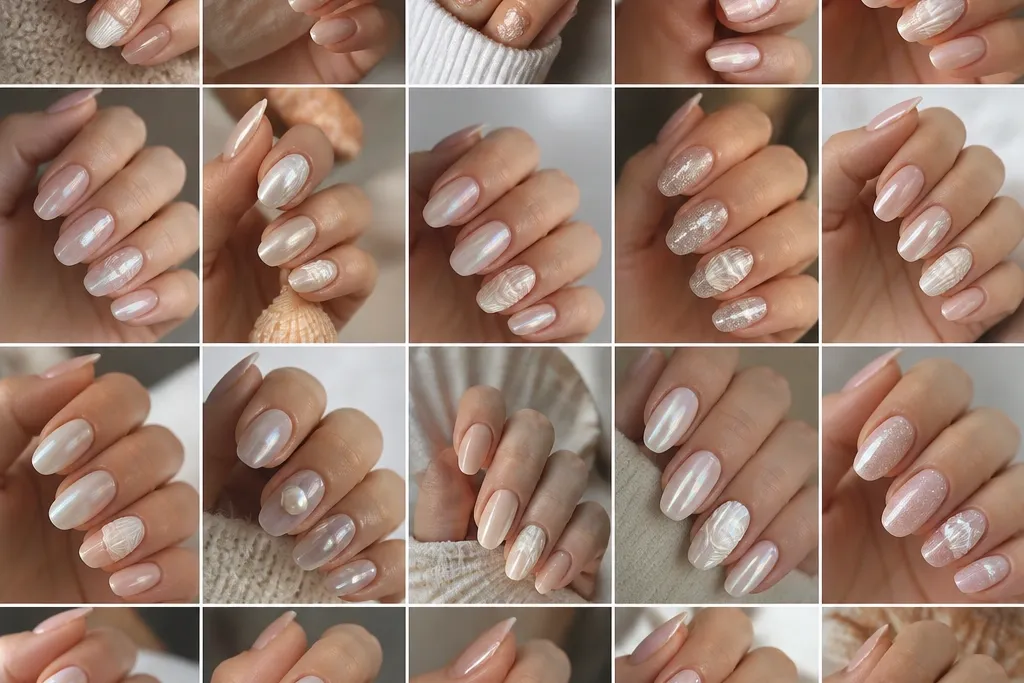
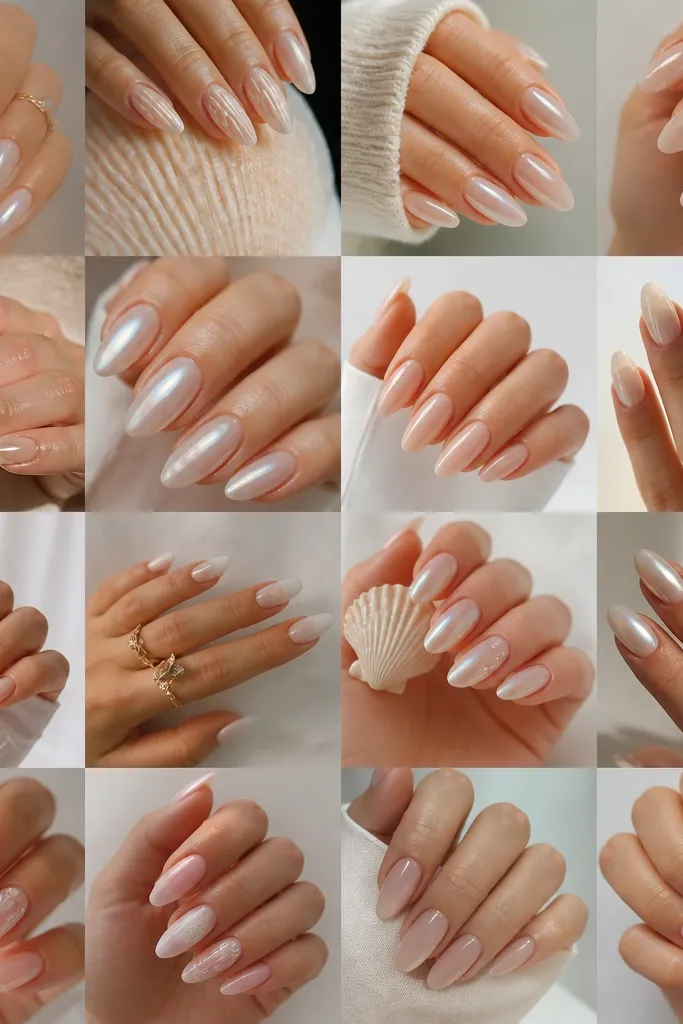
This is the "always pretty" Almond Seashell Nails that look beautiful because it keeps the pattern airy. I use a milky nude gel that looks like your nail after a good hand cream - soft and slightly cloudy. Then I paint tiny shell arcs only on the outer half, curving them to follow the almond shape. The opal shimmer sits behind the arcs, so when the light hits, the shell looks dimensional instead of flat. It flatters most skin tones because the base is neutral and the shell reads white-pearl rather than stark white.
Start by filing your almond shape to a medium taper and pushing back cuticles cleanly. Apply two thin coats of milky nude gel, curing each coat until it's smooth but not thick. With a fine liner brush, paint 6-8 tiny curved arcs along the outer edge, leaving the center untouched. Add a micro highlight line (near-white) along the top edge of each arc, then cap with a glossy top coat, sealing the free edge.
Editor's noteIf your arcs look too bold, reduce brush pressure and drag the tip of the liner lightly - thin lines cure cleaner.
Watch outAvoid using opaque white paint for the arcs; it looks chalky and kills the shell illusion.
2. Champagne Nude Almond with Pearly Sea-Foam Tips
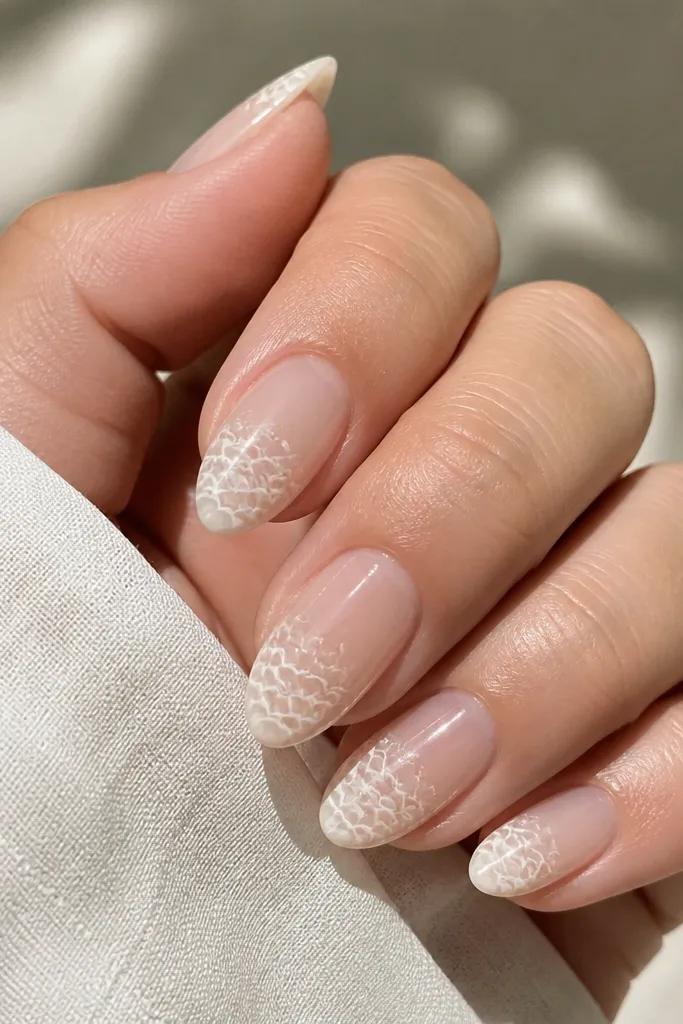
This one looks like sunlight hitting wet sand. The champagne nude base warms up your hands and makes the pearly seashell tips look softer than a classic French. I place the sea-foam detail mostly at the tip and let it fade down about one-third of the nail. The scallops are small and uneven on purpose - real foam isn't perfect - so the set looks organic. It's flattering if you like a neutral manicure but still want something that looks "done" in photos.
Apply two coats of champagne nude gel, curing fully so the base is even. At the tip, use a dotting tool or skinny brush to create tiny scallops in pearly white, then connect them with 3-5 short curved lines. Blend the pattern downward using a light swipe of the milky base so the fade looks natural. Finish with a glossy top coat and wipe the tacky layer so the pearly shimmer stays smooth.
Editor's noteUse a pearly polish with a fine shimmer, not chunky glitter, so the foam reads delicate.
Watch outDon't cover the whole nail with sea-foam; it turns into busy confetti fast.
3. Icy Pink Almond with Aurora Shell Lines
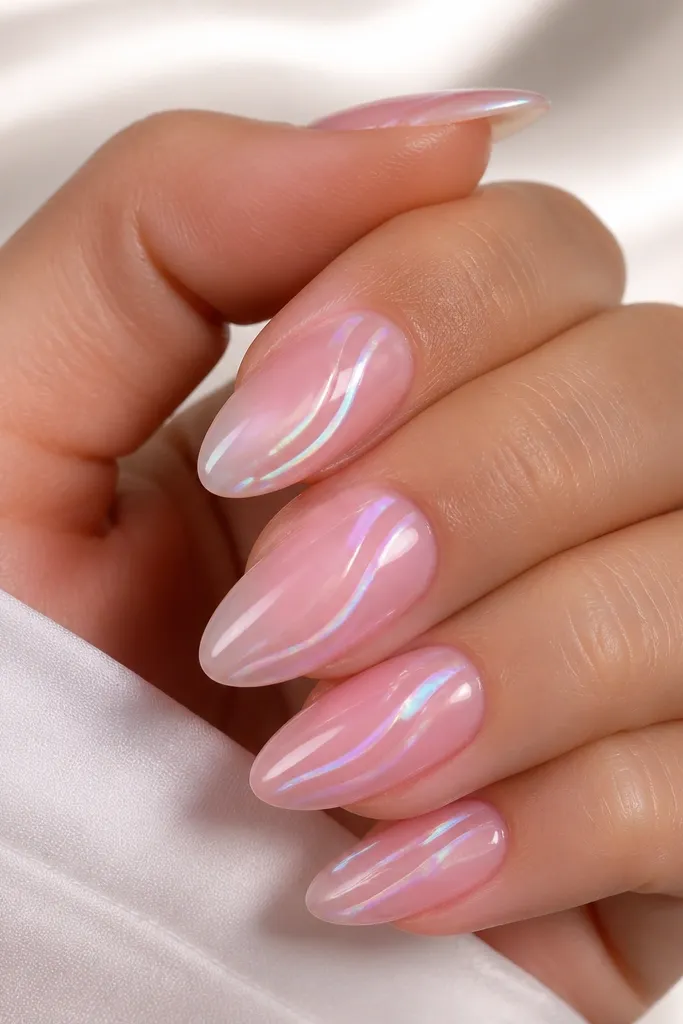
If you wear cool-toned makeup or silver jewelry, this set is a magnet. The base is an icy pink that's sheer enough to let your natural nail tone show through, but cloudy enough to make the shell lines pop. I paint the shell using thin layered lines - start with white, then add a whisper of pale lilac and a tiny aqua highlight on the outer edge. The effect looks like shell reflecting the sky. It's especially flattering on shorter almond lengths because the vertical line placement makes fingers look longer.
Start with an icy pink jelly gel, applying two thin coats for a glassy, translucent look. With a fine liner brush, paint 4-6 thin shell arcs along the outer third, keeping them narrow and evenly spaced. Add a second pass using a pale lilac shimmer gel on every other arc, then touch one tiny spot of aqua shimmer at the top corner of the arcs. Seal with glossy top coat, paying extra attention to the sidewalls so the lines don't snag.
Editor's noteLet each color layer cure fully before adding the next - mixing too soon blurs the aurora effect.
Watch outAvoid thick lines; on icy bases they look like marker instead of shell.
4. Soft Peach Almond with Tiny Rose-Gold Shell Specks
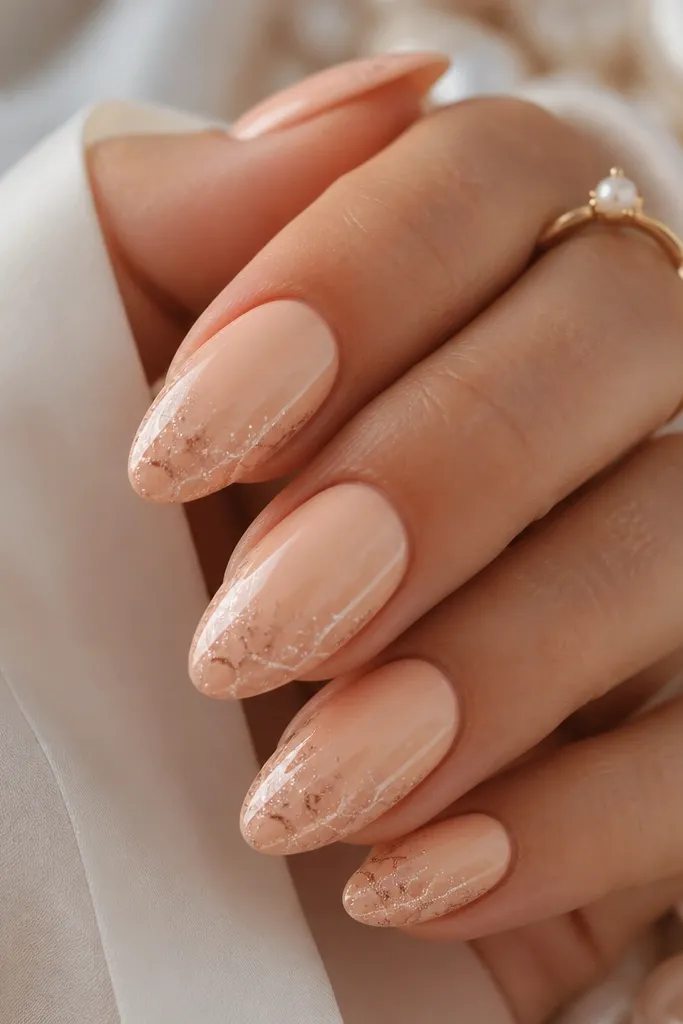
This is my go-to when someone wants seashell nails that still feel warm and wearable. The peach base gives the shell arcs a "sunlit" feel, and the rose-gold specks imitate shell dusting you'd see on beach rocks. I keep the shell pattern light: arcs plus a few micro dots, not heavy swirls. The rose-gold shimmer catches light without looking like full-on glitter. It looks great with tan skin, warm undertones, and gold rings because everything stays in the same temperature.
Paint two coats of soft peach nude gel, curing each coat until smooth. Use a fine brush to add tiny curved arcs along the outer edge - keep them short, about half the nail length. Add rose-gold shimmer specks with a toothpick or small dotting tool, placing them between arcs so the pattern looks airy. Finish with glossy top coat; cap the top of each arc lightly so it feels smooth.
Editor's noteIf specks look too dense, pull your dotting tool away after each dot - fewer dots look more expensive.
Watch outDon't do large glitter chunks; rose-gold specks should look like shimmer dust.
5. White Almond with Milky Shell Ombré Outer Edge
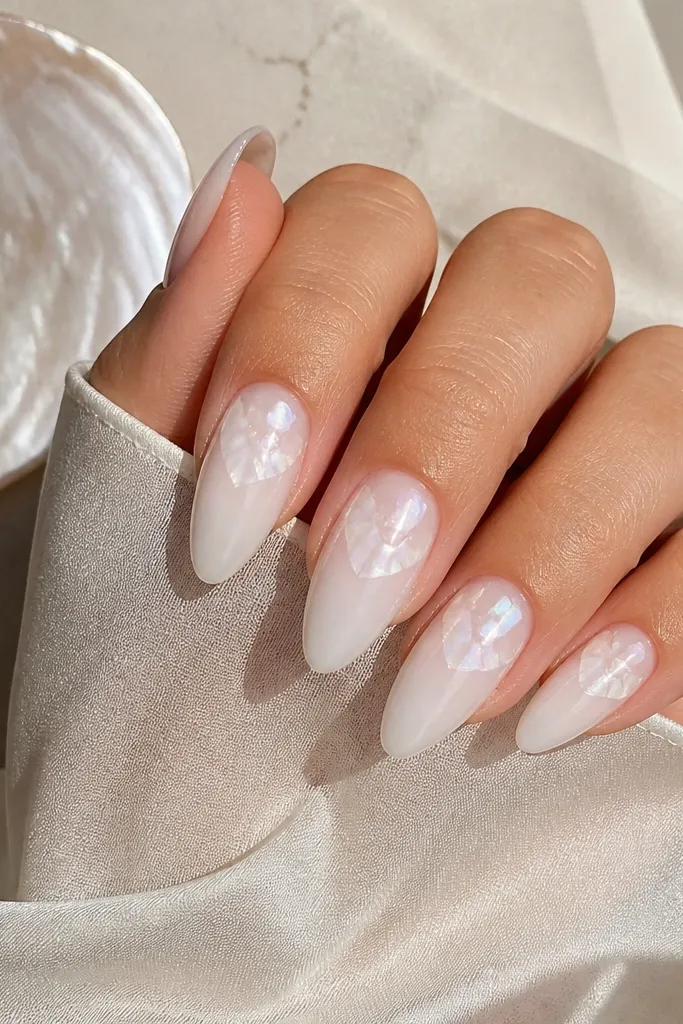
This set is clean, graphic, and still reads as seashell. The base is bright white gel, but the shell arcs are semi-translucent so you don't get that flat sticker look. I do an ombré effect only on the outer half - then the shell arcs sit inside that gradient like they're under glass. The center stays brighter and calmer, which makes the design feel intentional. It looks great on fair skin and also works on deeper skin tones if you keep the white opaque and the pearl translucent.
Start with two coats of bright white gel, curing fully so you have solid coverage. Create the outer-half ombré by blending a milky pearl gel from the outer edge toward the center using a flat brush - stop about 1/3 in. While it's cured, paint thin shell arcs in the milky pearl, following the ombré boundary. Add one highlight stroke to each arc, then seal with a glossy top coat and clean under the free edge.
Editor's noteUse a slightly damp brush to blend the ombré - dry blending leaves chalky edges.
Watch outAvoid placing shell arcs over the center; it makes the design too dense and less luxe.
6. Neutral Nude Almond with Sea Shell Negative Space
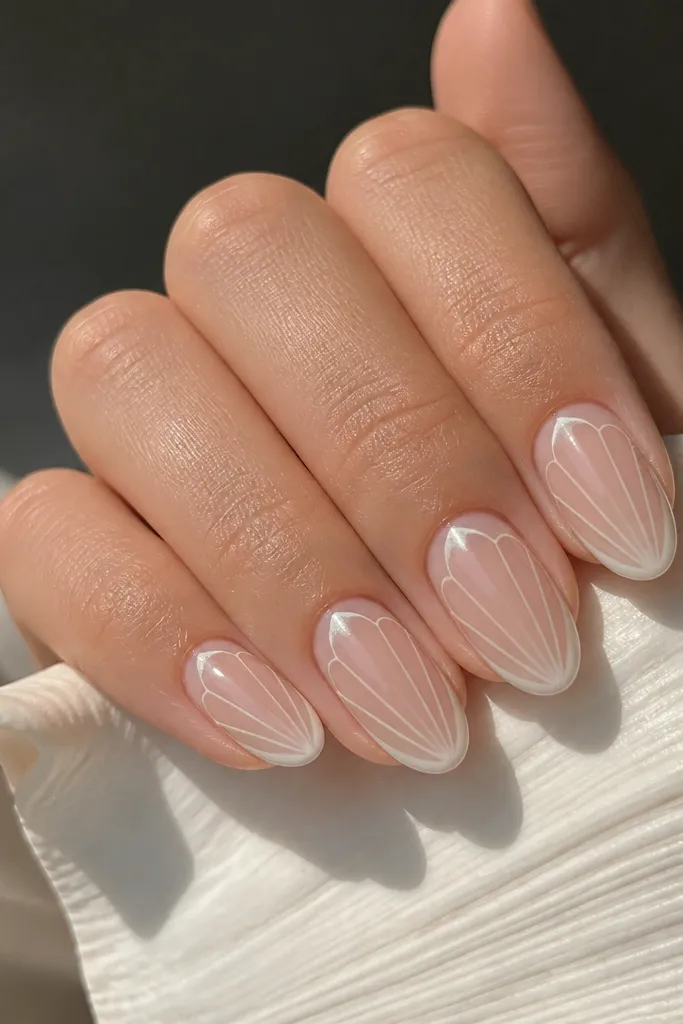
Negative space makes these Almond Seashell Nails that look beautiful because they look crisp and airy. The base is a neutral nude gel that matches your natural nail tone closely. Then I outline shell arcs and let the center breathe by keeping thin clear lines or leaving parts of the base unpainted. The pearl outline makes the shell feel delicate instead of heavy. This set flatters hands that have a little dryness because the neutral base looks like a smooth manicure even when your cuticles need a small touch-up.
Apply two coats of neutral nude gel and cure until glossy. With a fine liner, draw thin shell arc outlines on the outer half, leaving narrow gaps so the design has negative space. Add a tiny pearl highlight only on the top edge of the arcs, not the entire arc. Finish with one to two glossy top coats, then cure extra time if you use gel - negative space designs show texture.
Editor's noteKeep outline lines under 1 mm thick so the negative space stays clean in photos.
Watch outAvoid filling every gap; full coverage negative-space designs look messy.
7. Milky Lavender Almond with Scallop Shell Border
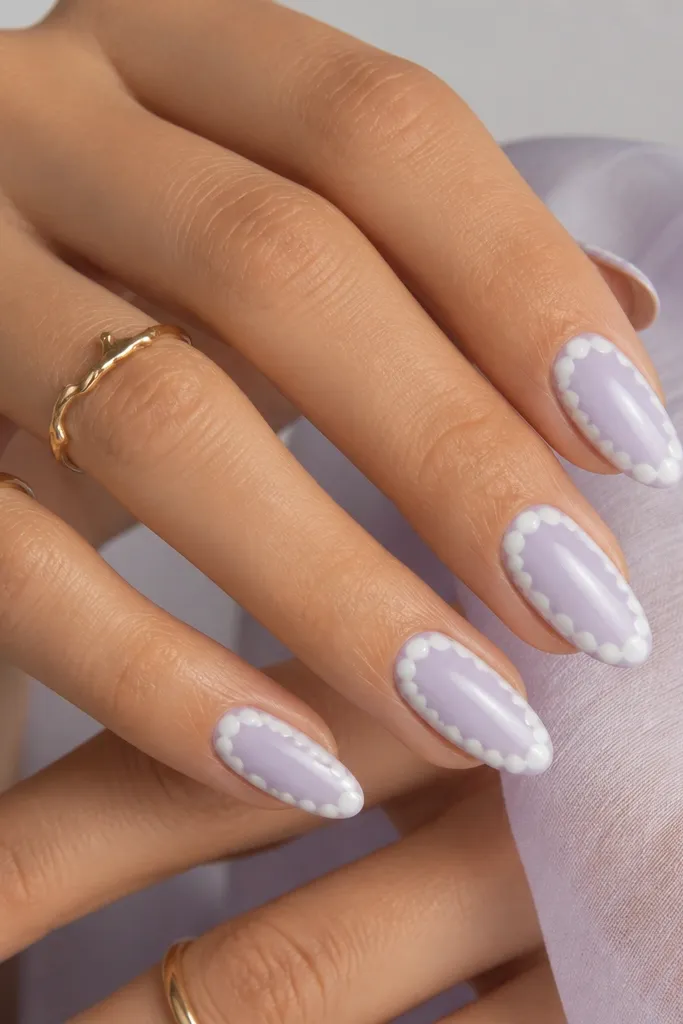
This is the "soft and pretty" version that still looks like seashells. The lavender base is milky, not neon - more like blueberry milk than purple paint. The scallop border hugs the sidewall line, so your nails look slimmer and longer. I keep the scallops small and consistent, like tiny shell ridges, then I add a pearl highlight on the top of each semicircle. It's flattering on medium and long almonds because the border creates a frame.
Start with two coats of milky lavender gel, curing each layer to a smooth finish. Use a dotting tool to place tiny pearly white semicircles along the outer edge, spacing them tightly but not touching. Add a thin highlight line down the top of each semicircle using near-white gel. Keep the center plain and glossy, then top coat and seal the tips.
Editor's noteIf scallops look uneven, rotate your hand and place dots from the sidewall inward - it keeps the curve even.
Watch outAvoid big scallops; they read like nail stickers instead of shell ridges.
8. Clear Glass Almond with Shell Arc Stickers Under Gel
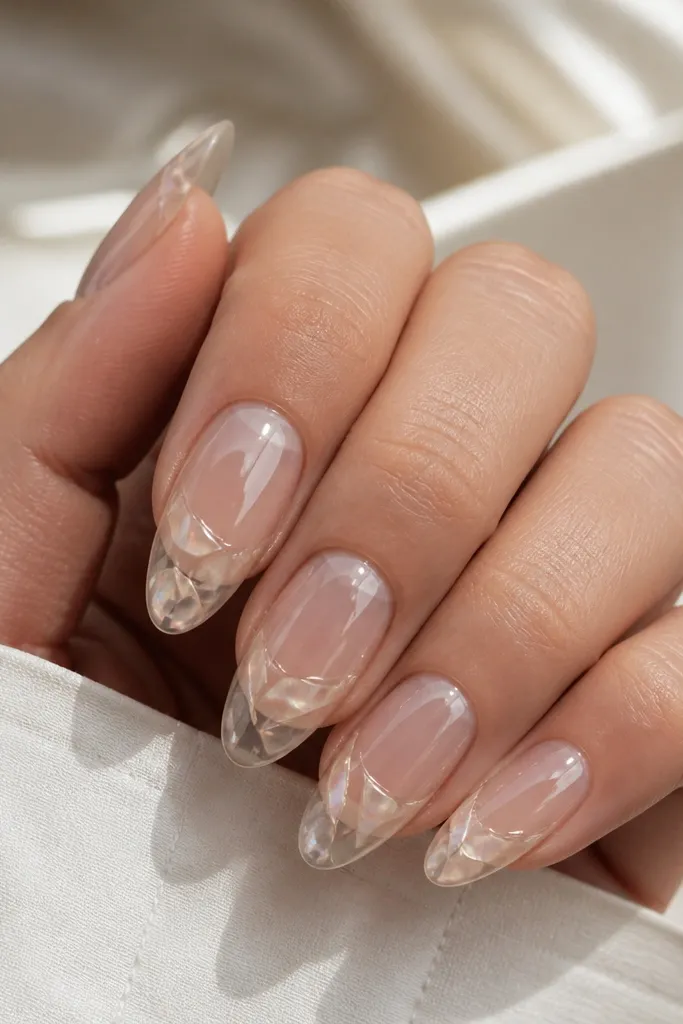
This one looks like real shell trapped under a glassy dome. I like it when you want Almond Seashell Nails that look beautiful but you don't want to hand-paint arcs every time. You apply the decal carefully, then you bury it under clear gel so you don't see decal edges. The result is smooth and glossy, and it catches light like a wet shell. It flatters hands because the clear base makes everything look clean and lengthened, especially on shorter nails.
Start with a clear builder gel base or a clear overlay on your natural nail, curing to create a smooth surface. Place thin shell arc decals on the outer half, trimming fit so there's no overhang at the sidewalls. Apply a layer of clear gel over the decals, then cure. Finally, add another thin clear layer to fully bury edges, wipe tacky layer if needed, and finish with glossy top coat.
Editor's noteUse a soft buffer after the first clear layer cures to level any decal texture before the final top dome.
Watch outAvoid placing decals too close to the cuticle; they wrinkle and lift sooner there.
9. Pearl White Almond with 3D Shell Tips (Micro Beads)
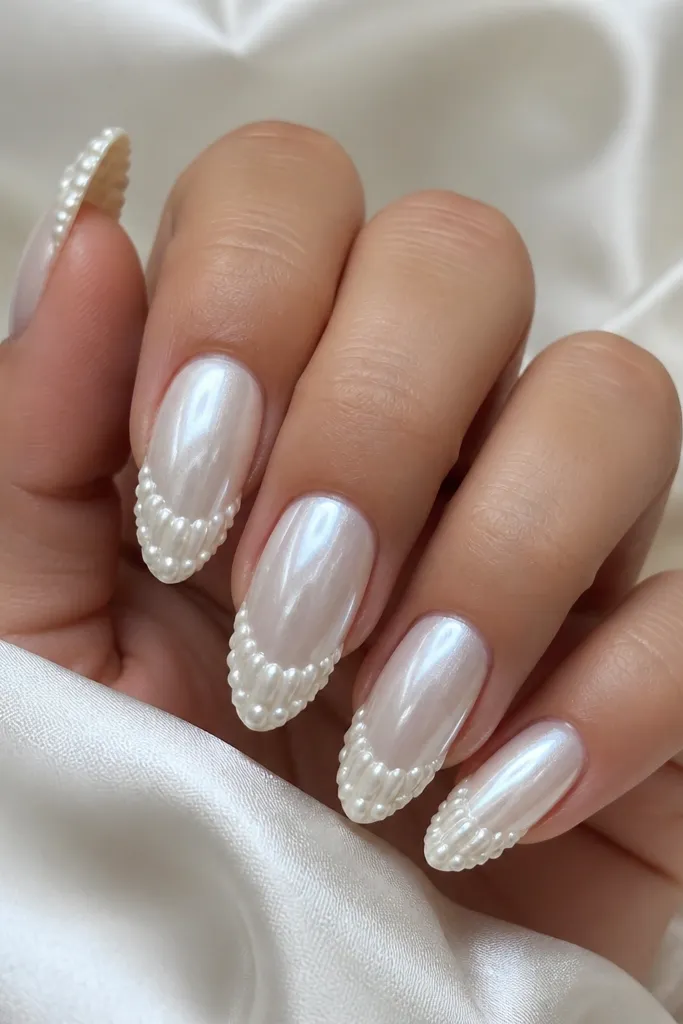
This set is for people who want the "wow" look in person, not just in photos. The base is pearl white so it already looks luminous, then the micro beads create shell ridges at the tip. I keep the 3D detail only on the outer half of the tip so the nail doesn't feel bulky. The texture looks like a seashell's folded ridges when light hits from the side. It's especially flattering on medium-length almonds because there's enough room for the ridges to look intentional.
Apply two coats of pearl white gel, curing fully. At the tip outer edge, dab a tiny amount of clear gel and place micro pearl beads in a scalloped line, pressing lightly with a dotting tool. Build a second scallop line just slightly above the first so it looks layered, then cure. Seal with a thick-ish glossy top coat, dragging it gently over the beads to smooth the surface so it doesn't snag.
Editor's noteUse micro beads sized like coarse sugar, not bigger - bigger beads look like decoration, not shell.
Watch outAvoid placing 3D beads across the whole nail; it feels heavy and chips faster.
10. Caramel Nude Almond with Rose Quartz Shell Veins
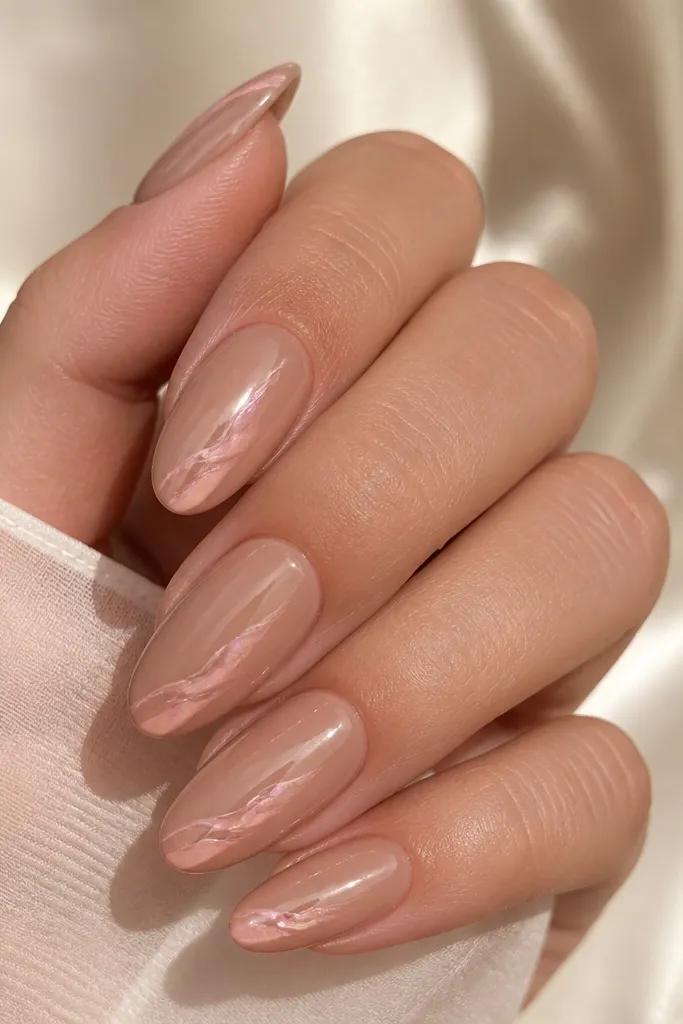
This looks like a rose quartz shell, warm and soft. The caramel nude base adds depth without darkening the hands, so the blush veins look delicate. I paint shell arcs and then add a second line slightly offset, like a vein - that gives the shell a layered, mineral look. It's gorgeous on medium to deep skin tones because the blush shows up without needing stark white. If you love "neutral with a twist," this is it.
Start with two coats of caramel nude gel, curing until glossy and even. Use a fine brush to paint 5-7 thin shell arcs in blush pink along the outer third. Add a second, fainter arc line offset from the first using pale rose quartz shimmer gel. Clean up the edges with a brush dipped in gel cleanser, then apply glossy top coat and cure.
Editor's noteWhen drawing veins, keep the second line shorter than the first so it looks layered, not doubled.
Watch outAvoid using hot pink; it makes the shell look like candy, not mineral.
11. Sea Glass Green Almond with Icy Shell Speckle
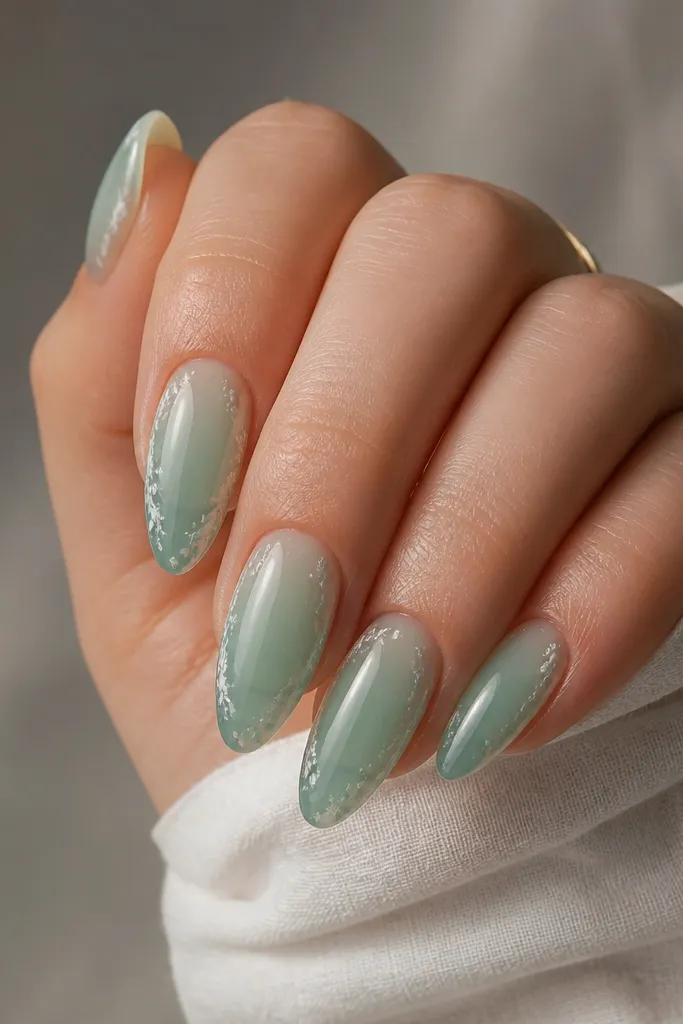
Sea glass green is the most flattering "color shell" base when you want something different but still beachy. The base is translucent so it looks like colored water, not opaque paint. Then I add short shell speckles and tiny arc fragments along the outer edge - think little shell bits rather than full patterns. The white-ice pearl specks make it feel cold and glossy, like sea glass. This is great for people with olive undertones because the green warms up and the pearl keeps it bright.
Apply two coats of sea glass green jelly gel, curing until you have a watery translucence. With a fine liner or stamping dot tool, add tiny white-ice pearl speckles along the outer edge in a loose curve. Add 3-4 short arc strokes between speckles, keeping them thin and not too long. Top coat with a glossy layer and press the brush lightly over the outer edge to smooth any texture.
Editor's noteIf speckles look too uniform, vary dot size with a second pass using less product.
Watch outAvoid large shell drawings on green; they look like cartoon shells.
12. Soft Nude Almond with Galaxy Shell Ombre (Pearl + Lilac)
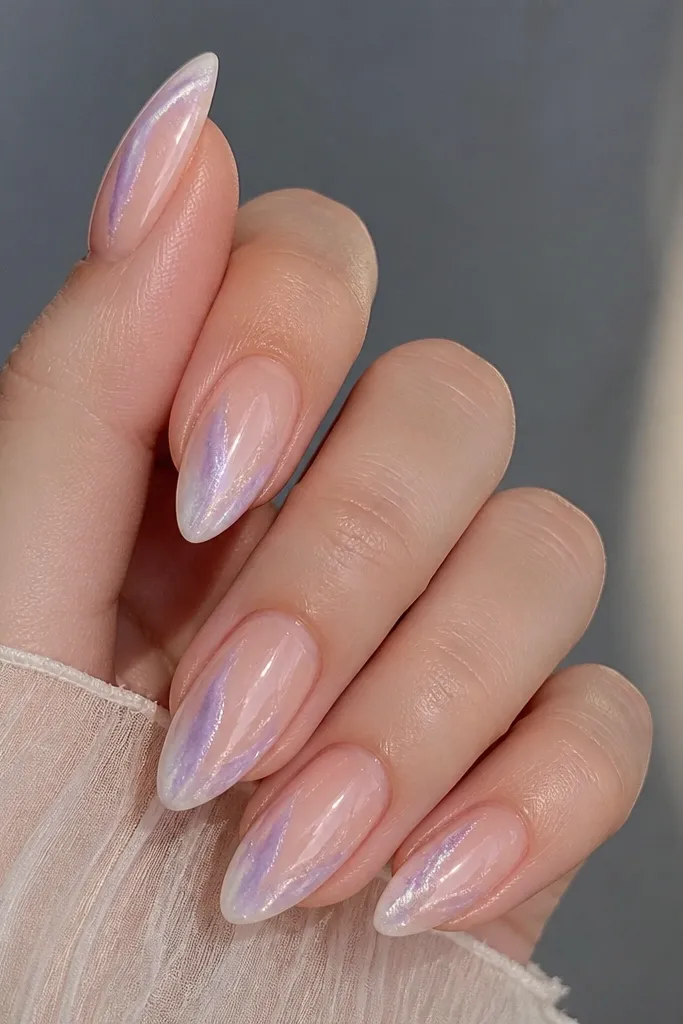
This is seashell nails with a night-sky twist. The base is soft nude so it stays wearable, then the ombré glow adds depth like a shell reflecting moonlight. I use pearl-white and pale lilac shimmer - the lilac only appears near the outer edge. Then I add a few faint shell arcs that look almost like ridges under glass. It's flattering on hands that look better with cool highlights, and it makes nails look longer because the glow points inward.
Start with a soft nude gel base, two coats, cured glossy. Blend pearl-white shimmer gel from the outer edge toward the center in a soft ombré, keeping it to about one-third of the nail width. Add pale lilac shimmer only at the outermost edge, then cure. Paint 3-5 thin shell arcs on top of the glow, then seal with glossy top coat.
Editor's noteUse a sponge for the ombré, but press lightly and wipe the sponge edge on a paper towel first.
Watch outAvoid mixing lilac through the whole nail; it turns into a solid lavender set.
13. French Tip Almond with Pearly Shell Border
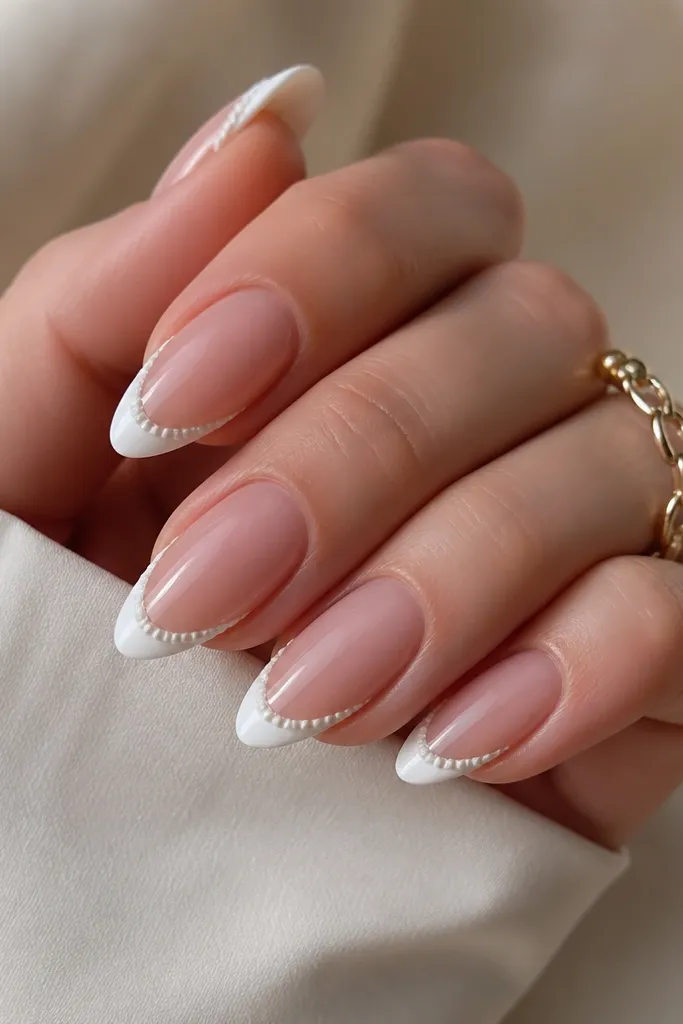
French tips are already flattering, and the shell border makes them feel fresh. The base is a sheer nude, and the tip is a crisp white gel - clean enough to look like you just left the salon. Then I add a narrow shell border along the outer edge of the French tip using pearly white and a faint shimmer line. That border keeps the design from becoming "basic French," but it still looks neat for everyday. It's especially good for work settings because it looks polished, not artsy.
Apply sheer nude base in two thin coats, curing smooth. Create your French tip with a guide or freehand, keeping the smile line slightly curved and the tip thickness even. On the outer edge of the French, paint tiny shell ridges - small curved arcs stacked like fish scale but in a thin strip. Add one pearly highlight line, then top coat and cap the tip edge so it doesn't lift.
Editor's noteKeep shell ridges to a 1-2 mm strip so the French tip stays the star.
Watch outDon't add shell ridges across the whole tip; it looks like busy nail art.
14. Milky Taupe Almond with Shell Linework and Micro Gems
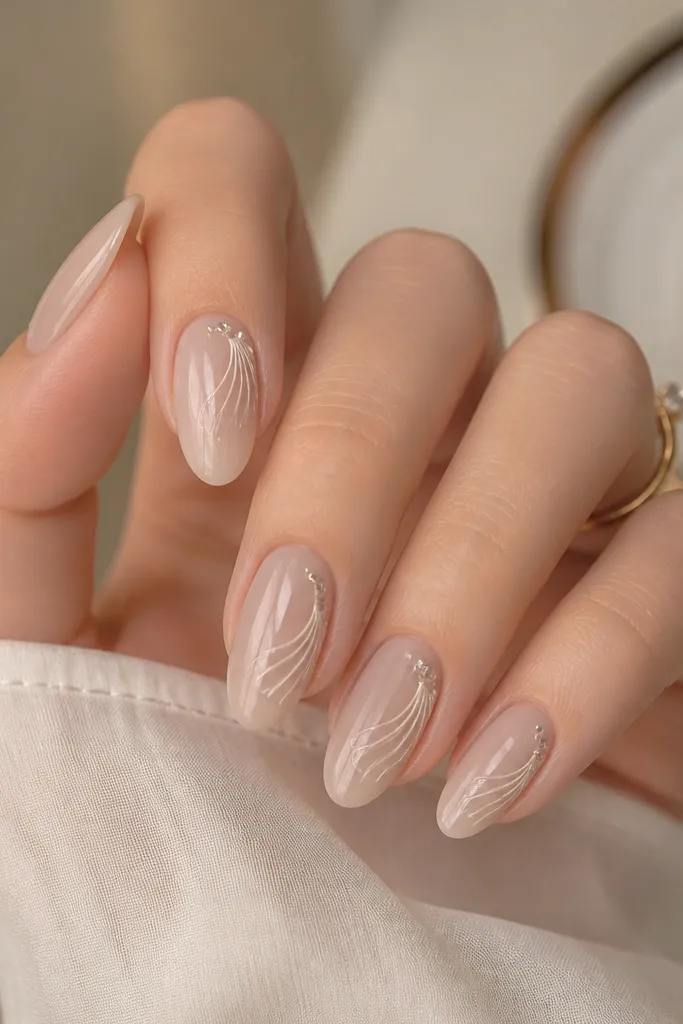
This set is for nights out when you want seashell nails that still look refined. Milky taupe is a neutral that works with both gold and silver, and it makes pearl details look soft rather than stark. I do thin shell linework - arcs and a couple short ridges - then add one or two micro gems to mimic tiny shell sparkle. The gems are placed sparingly so the nail still looks elegant, not rhinestone heavy. It flatters hands with a cooler undertone because taupe keeps everything balanced.
Start with milky taupe gel, two coats, cured glossy. Use a fine liner brush to draw shell arcs along the outer half, keeping the lines thin and slightly irregular. Cure, then place one micro gem near the top third of the densest arc area using a tiny dab of builder gel. Cure again, then apply glossy top coat carefully around the gems without flooding them.
Editor's notePick micro gems with a flat back so they sit flush and don't catch on hair or fabric.
Watch outAvoid more than two gems per nail; extra stones make shell look like random bling.
15. Sea Salt White Almond with Water-Drop Shell Texture
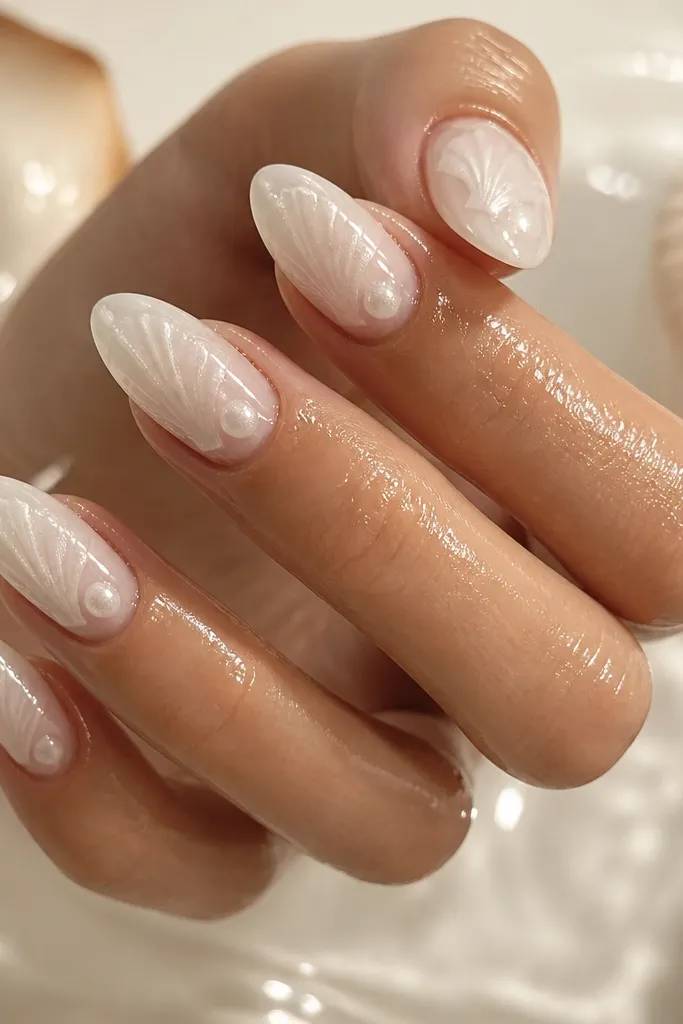
This is the "fresh out of the ocean" vibe. The base is sea salt white - not pure bright white, but slightly creamy so it blends with the water highlights. Instead of thick shell arcs, I make shell ridges and then add tiny domed water-drop dots at the top of each ridge. That combo makes the shell look wet and dimensional. It flatters everyone because the palette stays light and clean, and the texture draws attention to the nail shape.
Apply two coats of sea salt white gel and cure until smooth. Paint thin shell ridges along the outer edge using a fine brush, spacing them evenly. Add a small bead of clear gel on the top of every other ridge, then cure so it domes like water. Finish with glossy top coat and cure fully, then check sidewalls so the domes don't snag.
Editor's noteUse a clear gel with good self-leveling so the water dots look rounded, not squished.
Watch outDon't skip the doming; flat highlights look like smudges.
16. Rose Beige Almond with Stamped Shell Pattern + Gloss Dome
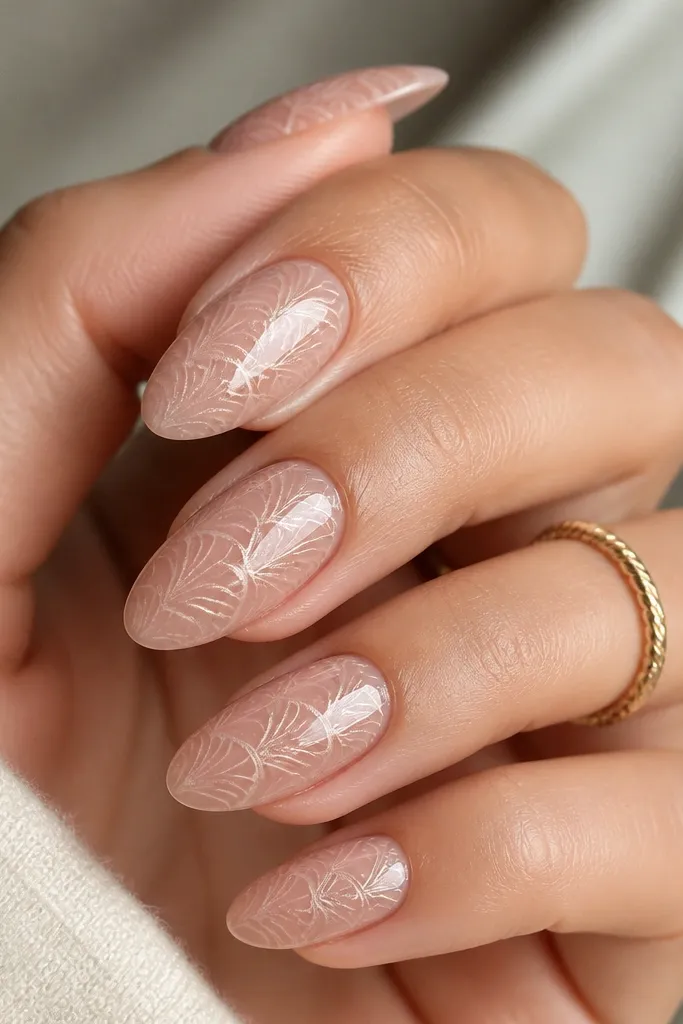
Stamping is how you get crisp shell arcs without hand shaking. The rose beige base is the key - it makes the stamped shell look like it's printed on soft shell paper. I use a shell stamp plate with small curved ridges, then I apply a translucent pearl stamping polish so the pattern looks milky instead of metallic. After stamping, I build a glossy dome top coat so the design looks suspended. It's great if you want Almond Seashell Nails that look beautiful but you hate messy freehand lines.
Start with rose beige gel, two coats, cured smooth. Apply stamping polish to a shell pattern plate and scrape firmly so the design transfers clean. Press the stamp onto the outer half of each nail, then cure and check alignment. Build a glossy dome with clear gel in thin layers, curing each layer so the top is smooth and the pattern is buried.
Editor's noteWipe the stamper between nails so the shell lines stay sharp, not smeared.
Watch outAvoid metallic stamping polish; it makes the shell look like foil instead of shell.
17. Pearl Grey Almond with Cracked Shell Vein Effect
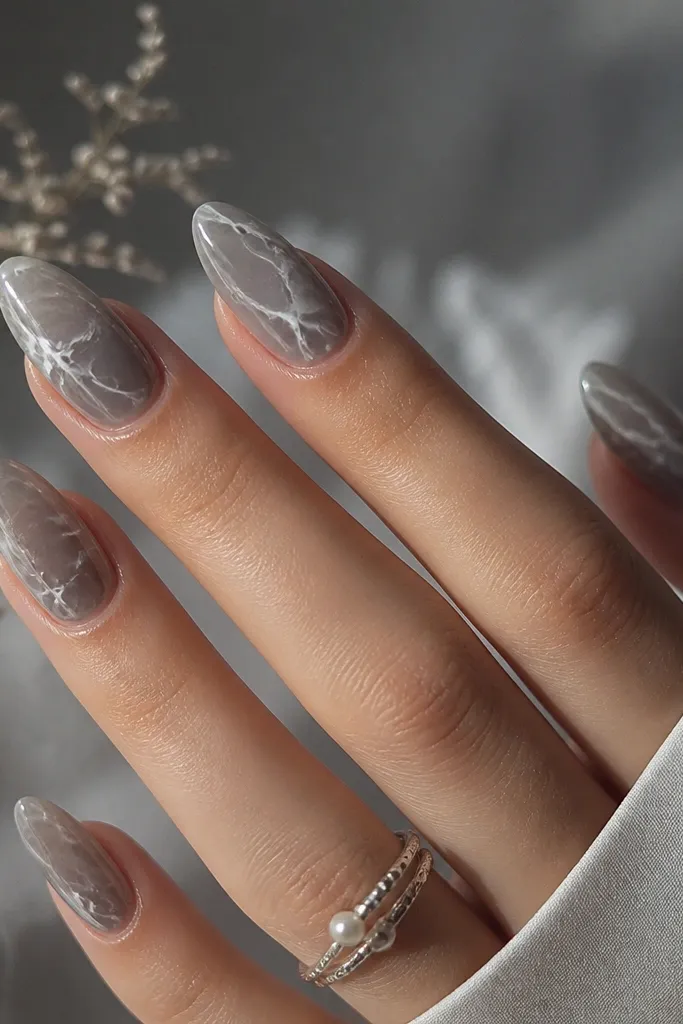
This one looks like cracked ice shells in the best way. The pearl grey base gives a cool tone that makes the white-pearl highlights pop. The trick is to paint "cracks" that are actually shell veins - thin, curved, and branching slightly, but not wide or jagged. I highlight only the top edge of each vein line so it catches light like shell ridges. It's flattering on fair to medium skin tones and looks amazing with silver rings and grey sweaters.
Apply two coats of pearl grey gel, curing until it looks satin-smooth. With a fine liner, draw 4-6 curved vein lines on the outer half, keeping them thin and tapering at both ends. Add a second near-white highlight line along the top edge of each vein, then cure. Finish with glossy top coat to smooth everything and seal the edges so the lines don't lift.
Editor's noteKeep vein lines spaced apart; clustered cracks make the nails look dry and damaged.
Watch outAvoid thick crack lines; they turn into acrylic "crackle" instead of shell texture.
18. Classic Nude Almond with Pastel Shell Confetti Arcs
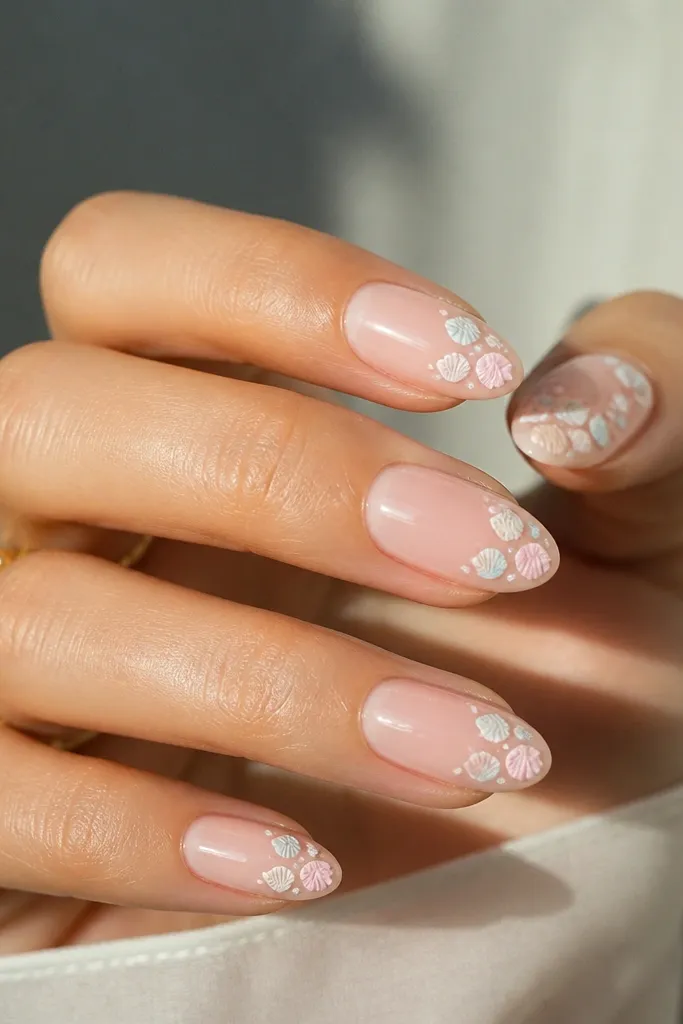
This set is playful without looking chaotic. The base is classic nude - clean, neutral, and slightly glossy. Then I add pastel shell arcs in three shades: milky white, pale blue, and light pink. The arcs are small and "confetti-like," but I keep them all on the outer half so the nail looks cohesive. The pastel colors make the shell feel beachy and cute, and the nude base keeps it wearable. It flatters almost everyone because the pastel shades are light and the nude grounding is steady.
Start with two coats of classic nude gel, cured smooth and glossy. Add a few shell arcs in milky white first along the outer edge, about 5-7 arcs per nail. Then place 2-3 arcs in pale blue and 2 arcs in light pink between the white arcs, keeping spacing consistent. Add a tiny highlight stroke on the top edge of each arc and seal with glossy top coat.
Editor's noteUse a smaller liner brush than you think - tiny arcs read more like shell ridges.
Watch outAvoid large pastel swirls; they look like generic abstract nails, not seashells.
19. Ocean Blue Almond with Pearl Shell Mosaic Outline
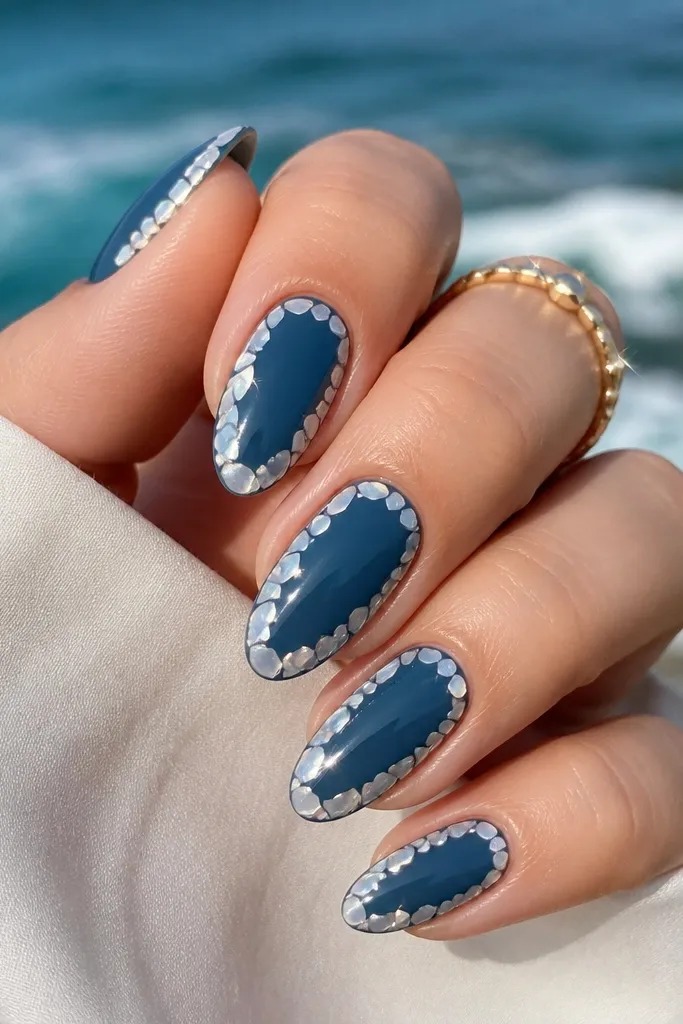
If you want seashell nails that look beautiful but still bold, this ocean blue base is it. The blue is deep and glossy, and the shell detail is pearl white made from small "tiles" - tiny curved segments that form a shell ridge pattern. I don't fill the whole nail; I outline the shell mosaic along the outer half so it feels like a shell pattern on water. The pearl tile edges look dimensional and clean. This flatters darker skin tones especially well because the contrast is crisp without being neon.
Apply two coats of glossy ocean blue gel, curing until fully even. On the outer half, stamp or paint small curved "tile" segments in pearl white, forming a mosaic ridge line from tip toward mid-nail. Leave small gaps between tiles so the blue shows through like water between shell fragments. Add a thin pearl highlight along the outer edge of the mosaic, then seal with glossy top coat and cap the tip.
Editor's noteIf painting tiles, use a dotting tool to start each segment - it keeps each piece rounded like shell fragments.
Watch outAvoid thick pearl blobs; tiles must stay small to keep the mosaic look.
20. Tidepool Almonds with Iridescent Shell Confetti Dip
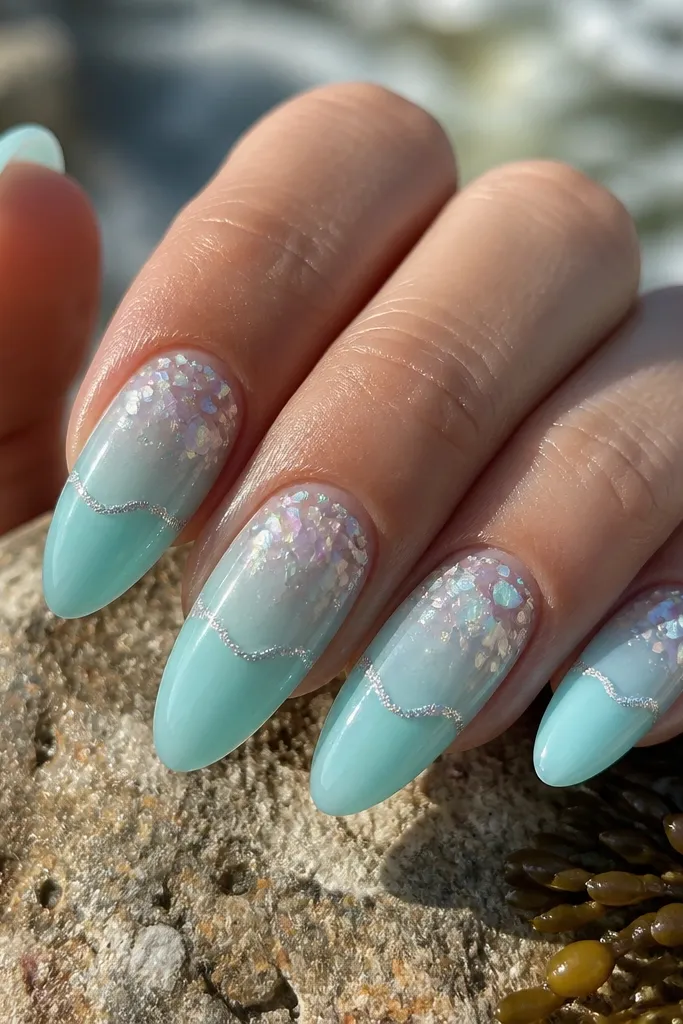
These nails look like you scooped glitter off a wet shoreline and pressed it onto sheer aqua gel. The mix of tiny iridescent shell confetti and a faint wavy shoreline gives the "seashell" vibe without using big 3D decorations. I like this set because it reads soft and pretty from across the room, but up close you see the color shift - pink flashes next to green. It also grows out better than heavy tips since most of the sparkle sits near the cuticle and fades down.
Start by filing your almond shape so the tip is narrow but not sharp - aim for a 1.5-2 mm point after filing. Apply a sheer aqua builder gel or milky aqua gel (two thin coats) over the full nail, then cure each coat fully. Dab iridescent shell confetti near the cuticle using a dotting tool and a tiny amount of tacky gel, then lightly sweep it downward so it fades by the time it reaches the mid-nail. For the shoreline, use a fine striping brush to paint a thin wavy line with pearl shimmer gel at about the lower third, then pull a little of the shimmer into the confetti for a blended edge. Seal everything with a glossy top coat in two thin layers, curing each layer so the confetti stays locked under the glassy finish.
Editor's noteWhen you place confetti, press it once - don't drag. Dragging lifts pieces and you end up with rough edges under the top coat.
Watch outSkip thick glitter placement in one spot - it causes bumps that show through even under a shiny top coat.