1. Sea-Glass Base With White Spiral Shell
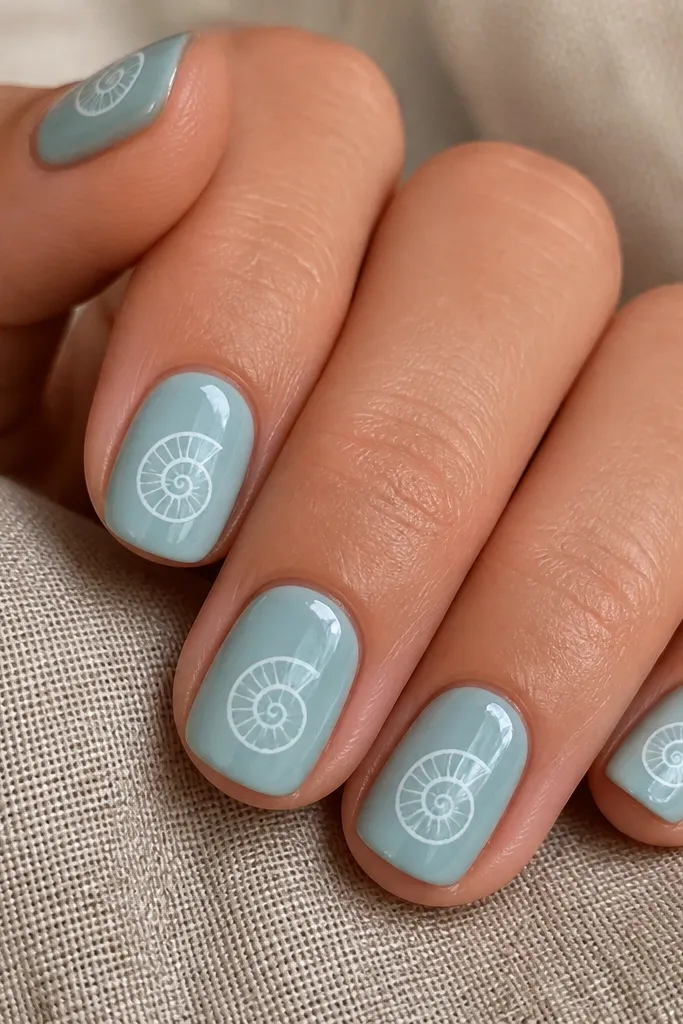
This set is the one I reach for when someone wants a beach mani that looks soft, clean, and photo-friendly. The base is a milky sea-glass blue, almost like diluted turquoise, so it stays light against skin tones from fair to deep. The shell is drawn in white gel liner with a thin inner line, which makes the spiral read as real shell ridges. I like it on short squoval because the spiral fits neatly and doesn’t look crowded.
Start by painting two thin coats of milky sea-glass blue, letting each coat fully dry or cure. Then use a striping brush to draw a small spiral shell in the center of each nail, about half the nail width, with 5 to 7 curved ridges. Add one tiny curved highlight line near the cuticle edge of the shell, keeping it narrow so it looks like light catching the shell. Finish by sealing with a glossy top coat, making sure you cap the free edge.
If your white looks chalky, mix white gel liner with a drop of clear gel so the lines stay smooth and glassy.
Avoid drawing the shell too large — if it hits the sidewalls, it looks like a sticker instead of hand-painted ridges.
2. Ocean Blue Shell With Pearl Top Edge
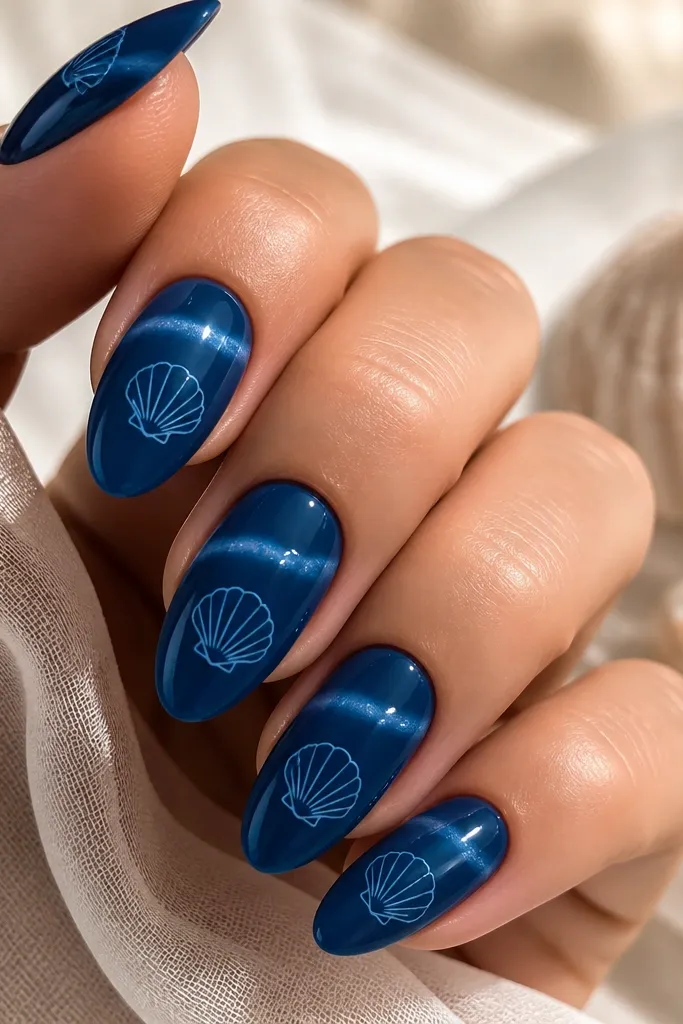
Paint two coats of deep ocean blue and cure fully. With a sponge or small flat brush, dab a pearl shimmer product lightly across the upper third, leaving a little of the solid blue visible under it so it doesn’t turn opaque. Use a fine liner brush to draw a simple shell outline in light blue centered on the nail, then add a short curved shadow line beneath the outline. Seal with a high-gloss top coat and cure longer than usual for extra shine.
This design looks expensive because the shimmer sits where light naturally hits — near the top. The deep ocean blue base gives contrast, while the pearl band makes the whole set look like wet sand under sun. The shell outline is light blue, so it stays delicate instead of harsh. I’ve worn this on medium almond when I wanted something beachy but still classy for dinner.
Watch outSkip heavy glitter here — too much sparkle turns the shell details hard to see.
Editor's noteUse a damp sponge (not wet) for the pearl band so it spreads in a soft gradient.
3. White Foam French Tips With Blue Shell Half-Moon
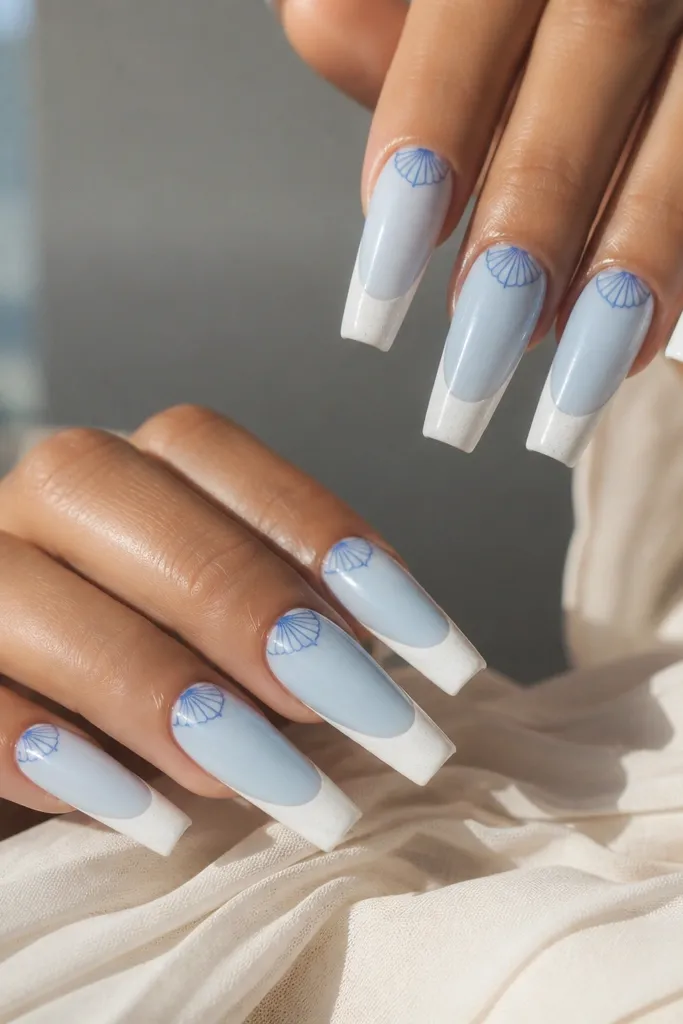
Start with a pale blue base, two thin coats, and cure. Create the foam French tips by painting a sheer white band at the free edge, then stipple a tiny amount of white micro-glitter with a small makeup sponge so it looks like bubbles. For the half-moon shell, draw a curved shell shape near the cuticle, leaving a thin negative-space crescent between shell and cuticle. Add 4 to 6 thin ridges in darker blue inside the half-moon, then finish with glossy top coat.
French tips make this style instantly vacation-ready, and the foam effect reads like sea spray. The pale blue base keeps it airy, while the half-moon shell near the cuticle gives you shell detail without filling the whole nail. The darker blue lines inside the shell add depth so it doesn’t look like a flat stamp. This is best for long coffin or stiletto because the French tip has room to sit cleanly.
Watch outDon’t paint the shell under the cuticle skin — it will lift and look messy fast.
Editor's noteKeep the foam edge uneven on purpose — perfectly straight foam looks fake.
4. Milky Blue Base With 3D Shell Outline Gel
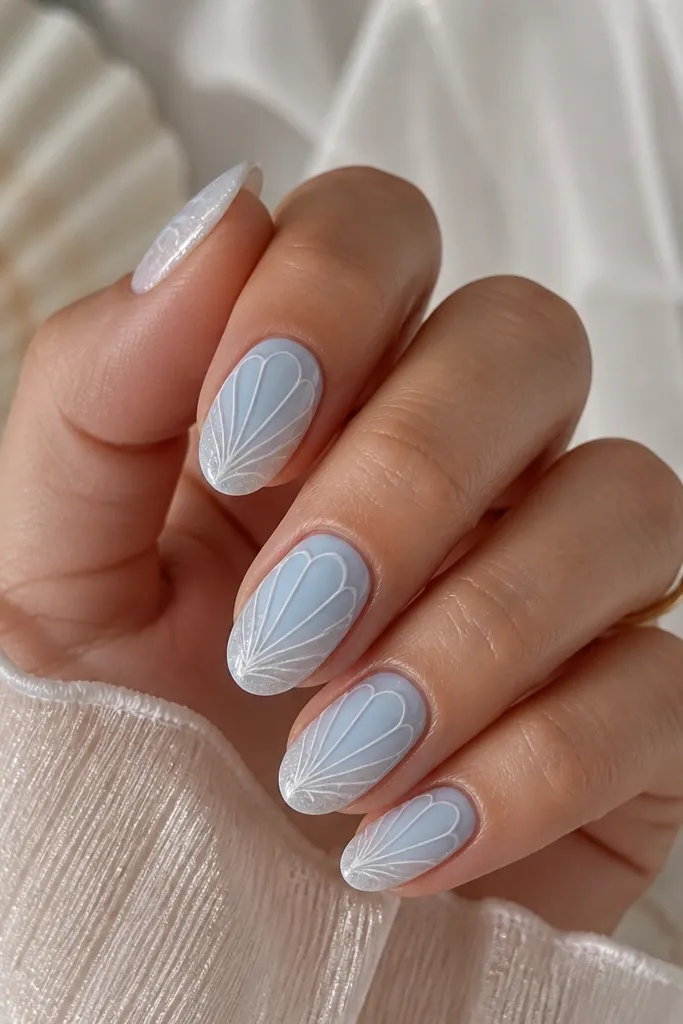
3D outlines give you that “shell you can feel” look, and it’s the set that gets the most compliments when people touch your nails. The milky pastel base keeps everything soft and beachy, while the raised white ridges catch light like real texture. I like this for everyday because the design stays focused and doesn’t require heavy glitter. It flatters hands that look better with a little height from the nail shape — almond is a sweet spot.
Apply two coats of milky pastel blue, cure fully, and wipe the tacky layer if your gel system needs it. Use a small bead of thick white gel or 3D gel to outline a shell shape centered on each nail, then drag the ridges with a fine dotting tool so they form curved lines. Build ridges one at a time so the raised lines stay crisp. Add a whisper of shimmer at the free edge only, then cap everything with a thick top coat to smooth the surface.
Use a matte nail prep brush to keep the 3D gel lines sharp; don’t overload the bead size.
Avoid rushing the cure — under-cured 3D gel squishes and ruins the shell texture.
5. Blue Marble Waves With Shell Center Panel
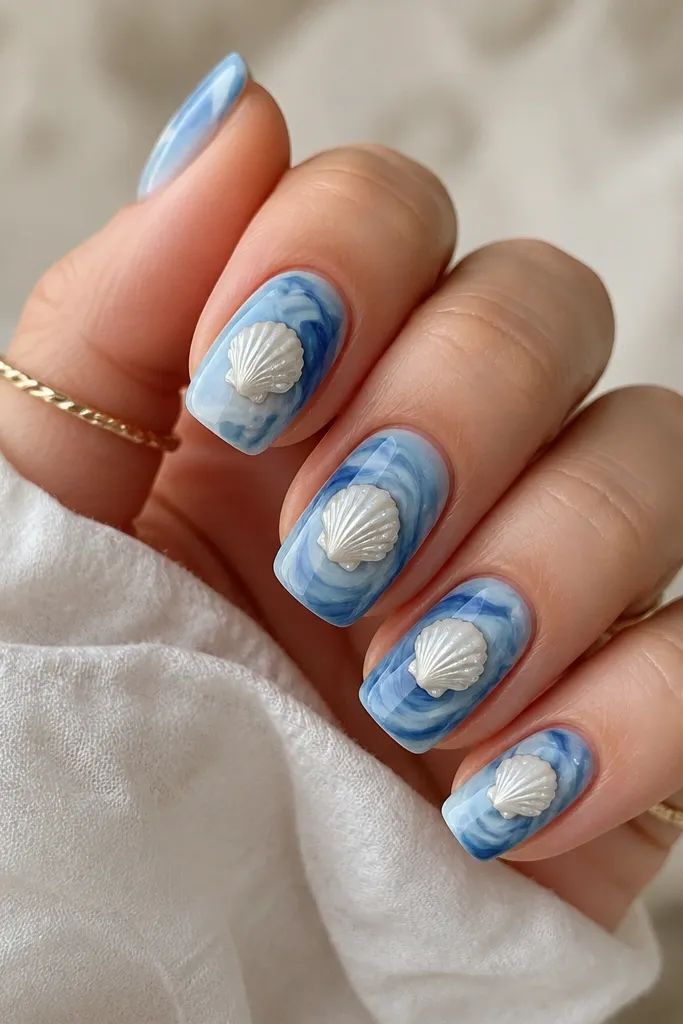
Marble waves look like currents, and the shell center panel makes it read as a true seashell mani instead of generic abstract art. The mix of light and dark blues gives depth, especially on medium squoval where the nail surface has enough width to show swirls. Keeping the shell in the center makes the design balanced, so it doesn’t overwhelm the hand. This one looks great on warm or neutral skin tones because the whites stay bright.
Paint a light base first (milky blue), cure. For marble, use two blues — one darker and one medium — and swirl them with a marbling tool or a thin brush, working fast before the gel levels. Leave the center panel slightly cleaner by wiping or skipping swirls there. Then paint a small white shell panel in the center and add 5 ridges, each ridge slightly curved. Finish with a glossy top coat to blend the marble and sharpen the shell edges.
Do the marble before the shell so you don’t accidentally cover your shell area with swirls.
Avoid over-thick marble — it can look bumpy and makes the shell panel look pasted on.
6. Nude Base With Baby Blue Shell and Gold Sand Dots
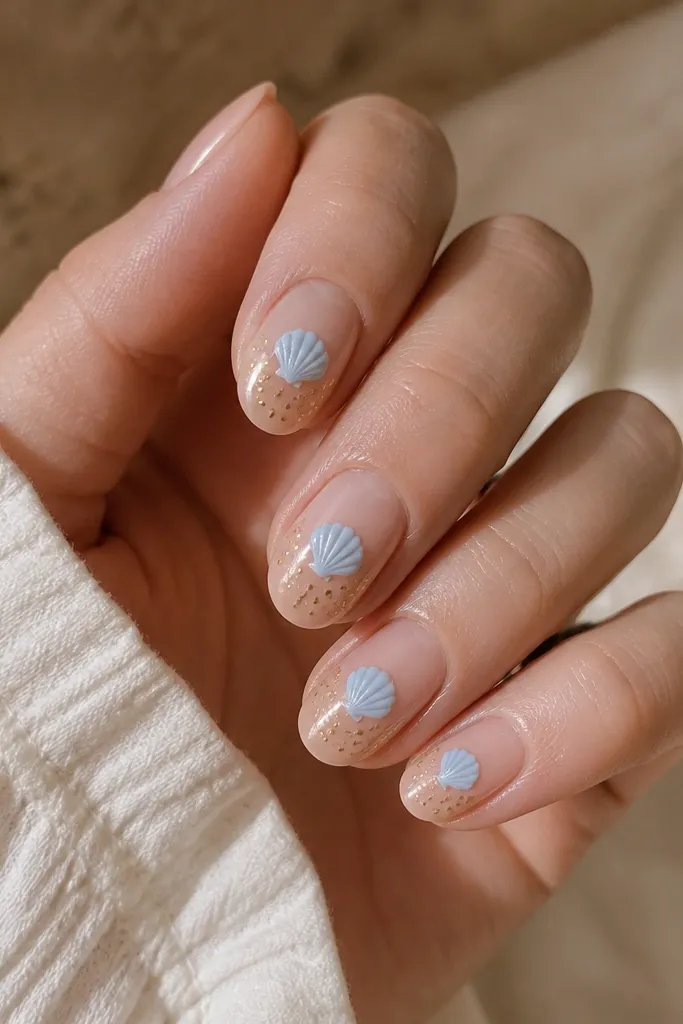
Start with a nude pink gel polish, two thin coats, and cure. Draw a baby blue shell centered on each nail using a fine liner brush, keeping the ridges thin so they look delicate. Add 3 to 5 tiny gold dots near the lower third of the nail, clustered but not touching the shell. Seal with glossy top coat, and if your gold dots feel raised, do one extra top coat layer to smooth.
This set looks like a beach photo filter on your nails. The nude base flatters almost every skin tone because it matches your natural nail bed color, and it makes the blue shell look extra fresh. Gold sand dots add warmth, so the blue doesn’t look cold. I’ve worn this for vacations where I wanted the mani to match neutral outfits and still feel seasonal.
Watch outDon’t put gold dots all the way up the nail — it turns into glitter overload.
Editor's noteUse a dotting tool with a slightly larger tip for the first dot, then a smaller tip for the rest so the dots look natural.
7. Dark Navy Shell With Ice Blue Highlights
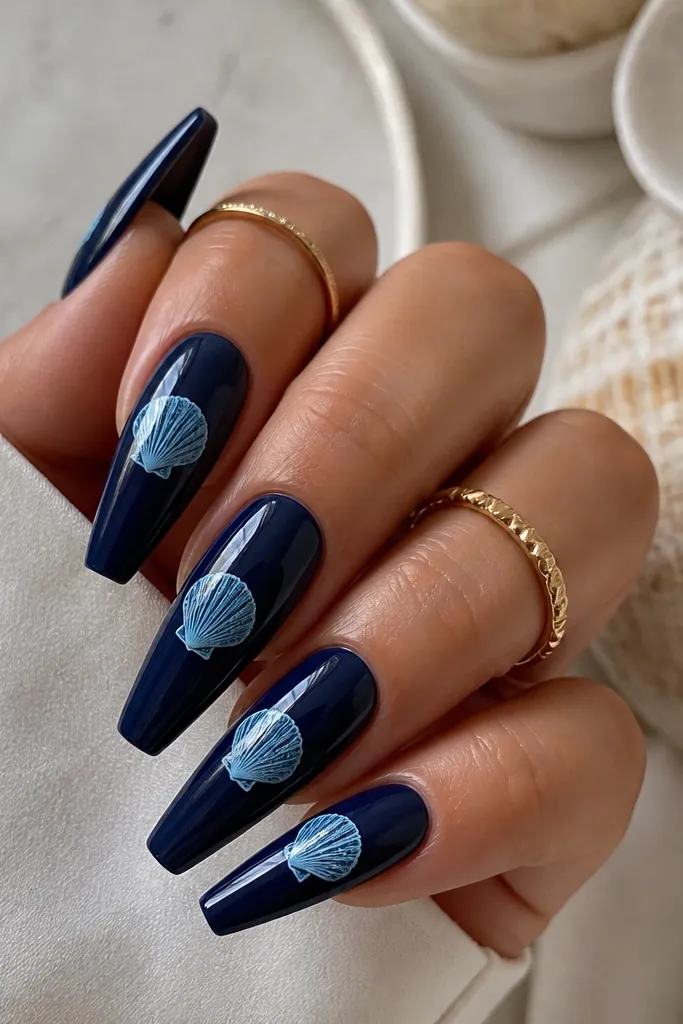
This is a dramatic beach mani that still reads “shell” instead of “winter nails.” The deep navy makes the ice blue ridges pop, and the thin white highlight line keeps the shell looking sunlit. I like it for evening beach dinners because the contrast looks sharp under warm lighting. It also works well if your skin runs cooler — the ice blue balances it.
Apply two coats of deep navy and cure fully. Use ice blue gel liner to draw a shell shape centered on the nail, then add 6 to 8 curved ridges inside. Take a very thin brush and pull a single highlight line along one side of the shell, leaving the rest clean. Finish with glossy top coat and cap the free edge so the shell edges stay crisp.
If your ice blue bleeds, wipe your brush on a lint-free wipe before you touch the nail.
Avoid thick ridges in dark sets — they hide detail and make the shell look like a blob.
8. Soft Aqua Shell With Glittery Sea Foam Skirt
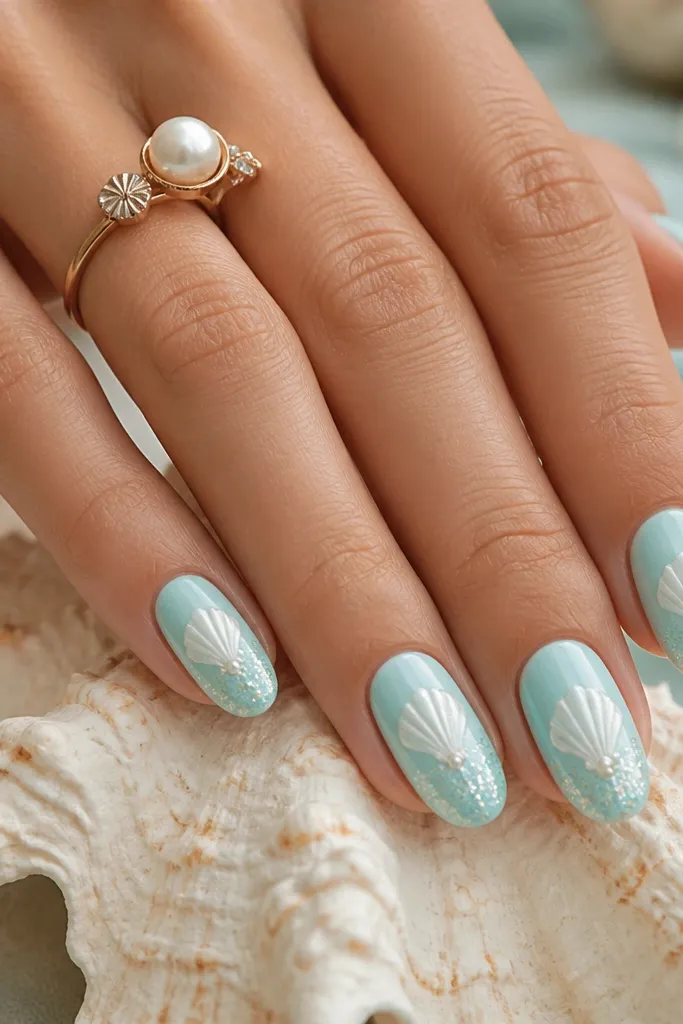
This one looks like the moment the waves hit the sand. The soft aqua base stays light, and the glittery sea foam skirt adds sparkle only where it belongs — at the tip. The shell is pale white with a light aqua shadow line, so it blends naturally with the base. I recommend this when you want something fun for beach photos but still wearable for a week.
Paint soft aqua, two thin coats, cure. Create the sea foam skirt by painting a sheer white band at the free edge, then tap micro-glitter over it with a sponge so it fades upward. Draw a centered shell in pale white, then add a thin shadow line in light aqua under the ridges. Seal with glossy top coat, making sure glitter edges don’t snag by fully capping.
Use micro-glitter with fine particles — coarse glitter looks chunky on the tip.
Avoid glitter all the way to the cuticle — it makes the mani look busy.
9. Shell Accent Only on Ring Finger With Blue Ombre
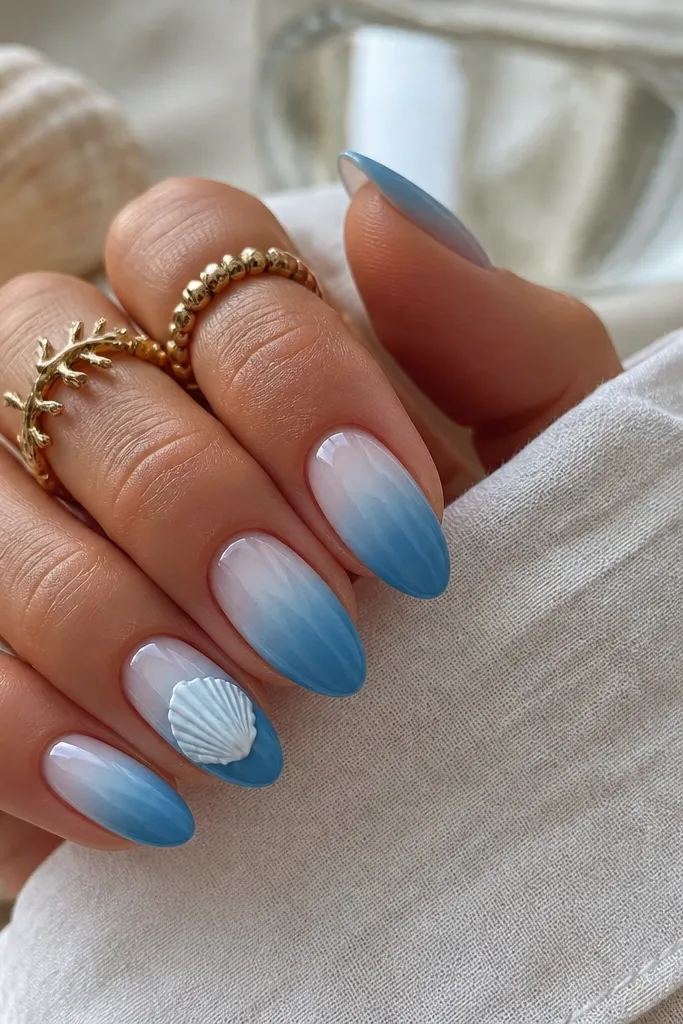
Start with a pale blue base at the cuticle area, then sponge a medium blue down the nail, and finish with a darker blue at the tip. Blend edges with a clean sponge so the ombre doesn’t streak. On the ring finger only, paint a centered white shell with 6 ridges and a tiny highlight line. Leave the other nails ombre-only, then apply glossy top coat to lock in the blend.
If you hate busy nails but still want a beach mani, this is the one I keep going back to. The blue ombre gives you movement across every finger, and the shell accent on the ring finger gives you that seashell moment without crowding your hand. It flatters any nail length because the ombre shapes the nail visually, and the shell detail is clean and readable. This style also works great if you need a mani that looks good in work photos.
Watch outDon’t skip blending — ombre lines that look like stripes ruin the beach-soft vibe.
Editor's noteDo the ombre with three colors maximum — two gives smoothness, three gives richer depth.
10. Turquoise Shell With White Dot Pearl Ripples
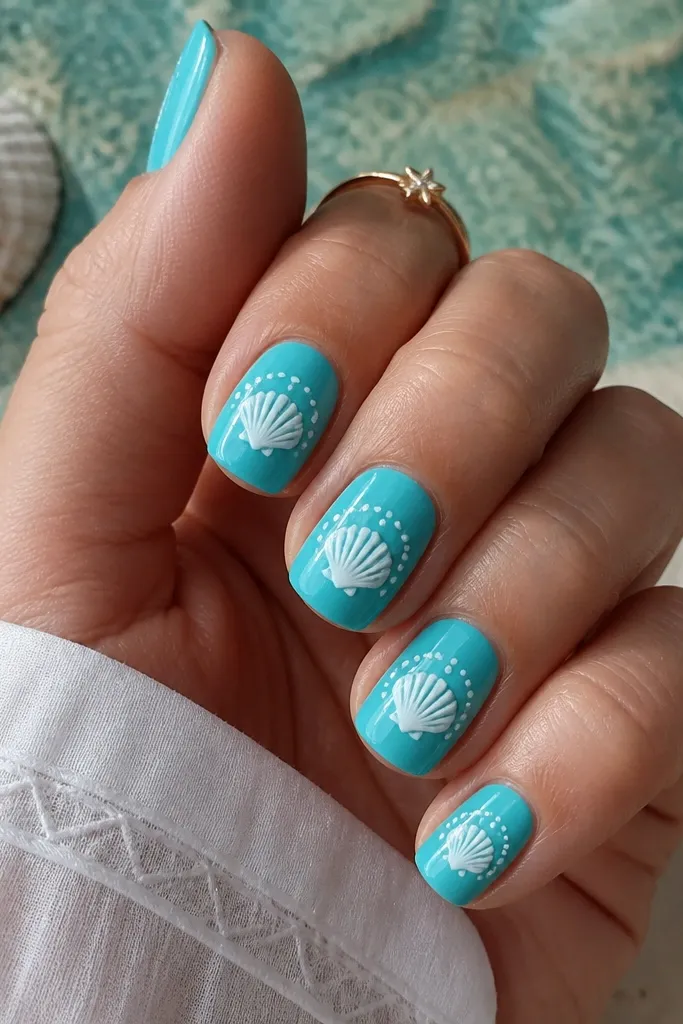
This design looks like shells sitting in shallow water. The turquoise base is bright but still beachy, and the white dot ripples make the shell feel surrounded by water movement. It’s especially flattering on short squoval because the shell stays compact and the dots add interest without taking over. I’ve done this for summer weddings and it always looks fresh, not costume-y.
Apply two coats of turquoise gel polish and cure. Draw a centered white shell using a fine liner brush, then add tiny white dots around the shell edges — think 2 rows of dots, not a full circle. Keep dots spaced so the turquoise still shows through. Add one small pearl-like highlight dot just off the shell ridges, then seal with glossy top coat.
Use dot placement like punctuation: leave bigger gaps at the sides so the dots don’t turn into a blob.
Avoid making every dot the same size — variation makes it look like water ripples.
11. Blue Seashell French With Tiny Starfish Charms
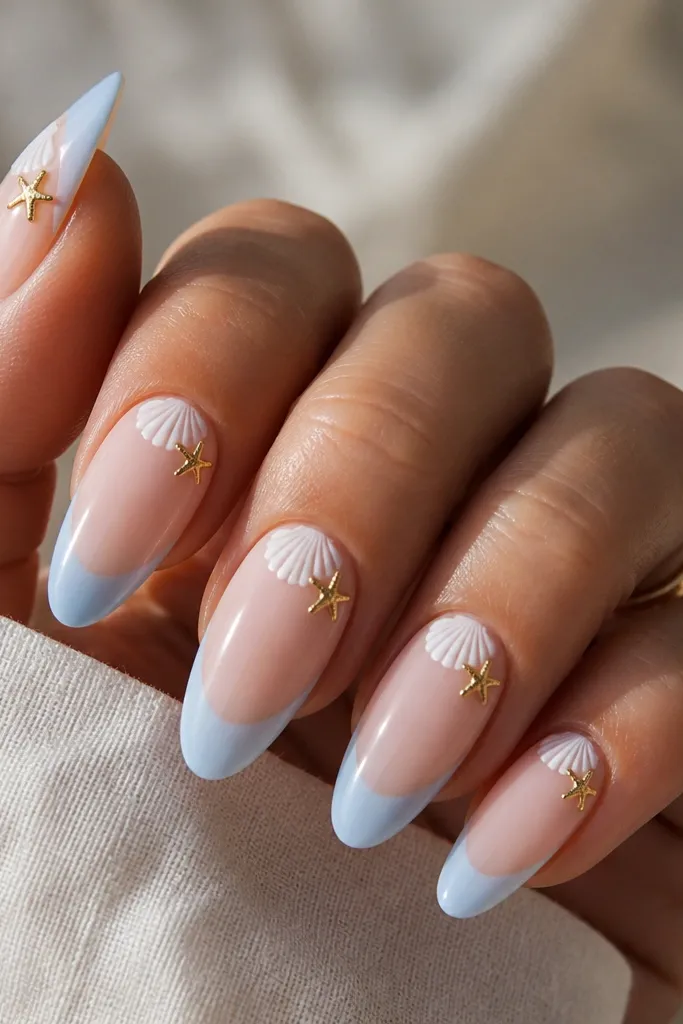
Charms turn a mani into a vacation accessory, and the starfish here keeps the theme clear. The sheer nude base makes the blue French tip look clean instead of heavy, and the small shell near the cuticle feels like a jewelry piece. This set is great for parties on vacation because the charms catch light and show up in photos. It also works on hands with shorter nail beds because the nude base gives a lengthening effect.
Paint a sheer nude base, cure. Create a soft blue French tip by painting a thin band at the free edge and blending it slightly toward the nail bed. Paint a small white shell near the cuticle, centered, with 5 ridges. Place a tiny gold starfish charm at the outer side of each nail and press it into tacky gel or nail glue. Top coat carefully in thin layers around the charm so it stays secure and doesn’t flood the edges.
Use top coat in two thin passes around charms instead of one thick layer — it prevents bubbles.
Avoid oversized charms — they make the nail surface uneven and can lift sooner.
12. Chrome Blue Shell With Pearl Inner Glow
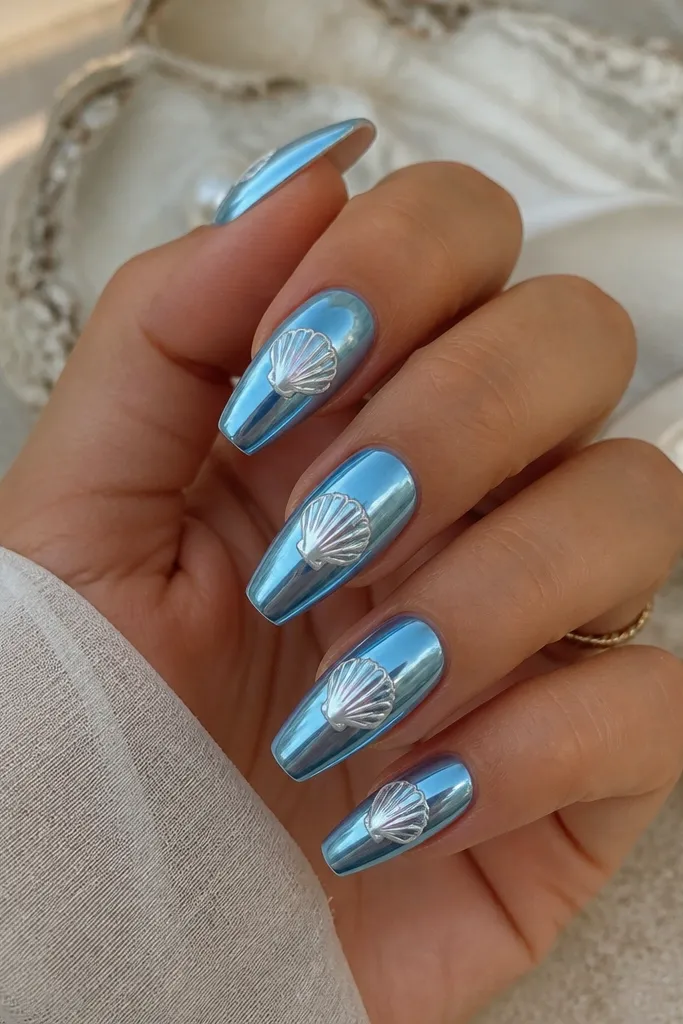
Chrome makes seashell designs look like they’re lit from within. The blue chrome base is reflective, so even simple shell ridges look detailed. The pearl inner glow inside the shell keeps it from looking like a decal on shiny metal. I like this on medium coffin because the curved shape reflects light smoothly and the shell stays readable.
Apply blue chrome to all nails and cure according to your system, then wipe if needed. Draw a shell in white liner over the chrome, centered on each nail. While the liner is still tacky, add pearl powder or pearl gel into the ridges using a tiny brush so the inside looks softly luminous. Seal with a glossy top coat made for chrome (so it doesn’t mute the reflection), and cure fully.
If your chrome dulls after top coat, use a chrome-safe top coat or a thin clear overlay only.
Don’t paint the shell too thick on chrome — heavy lines look like masking tape.
13. Sand Beige Base With Blue Shell and Micro-Glitter Coast
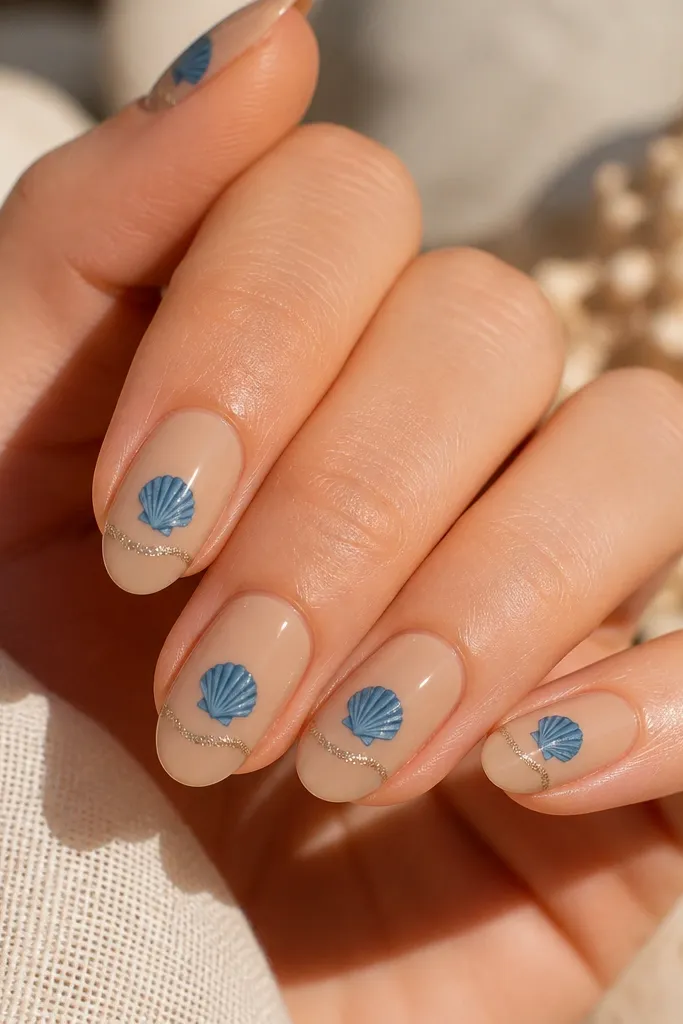
Apply sand beige as your base, two coats and cure. Paint a centered blue shell with thin ridges and a slightly darker blue shadow line under the ridges. Add a thin micro-glitter line across the lower third of the nail, keeping it straight and narrow so it reads like a shoreline. Finish with a glossy top coat and cap the edges so glitter doesn’t catch.
Warm sand beige makes the blues look sun-kissed instead of stark. The shell in baby blue stays delicate, and the micro-glitter coast line gives you that beach shoreline sparkle without covering the whole nail. This set flatters most skin tones because beige bases match the natural warmth of hands. I like it for early summer when you want beach energy but your outfit colors are still neutral.
Watch outAvoid thick glitter bands — they look like random sparkle instead of a coast.
Editor's noteUse a striping brush for the coast line — it keeps glitter from wandering.
14. Seafoam Green Blue With White Shell and Tiny Seashell Outline
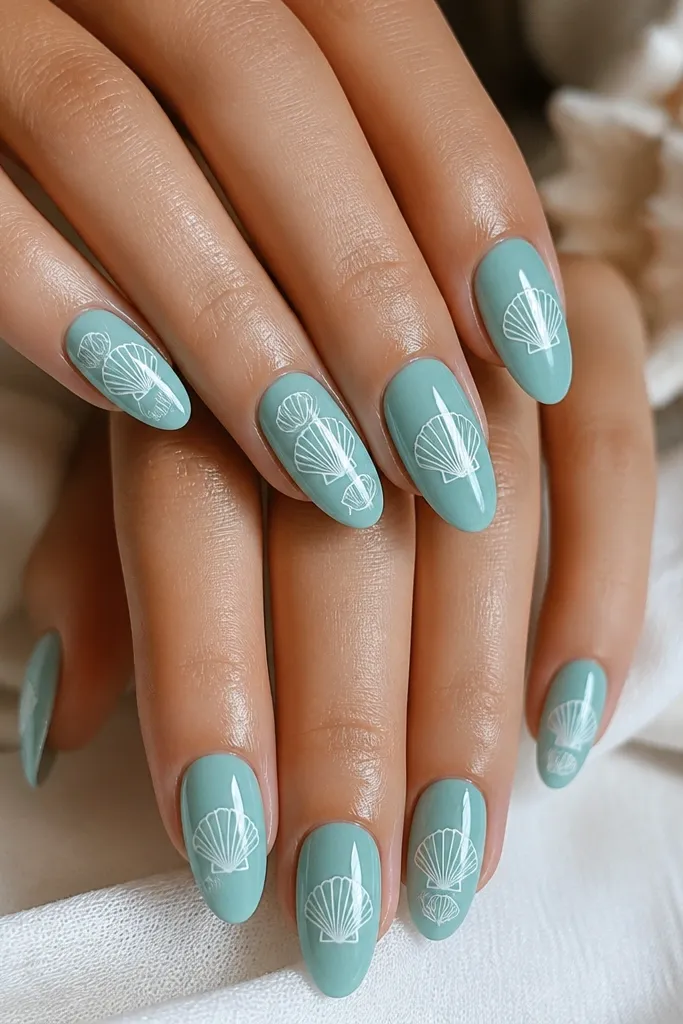
This set feels playful but still clean because the main shell is centered and the side outline is tiny. The seafoam green-blue base is flattering on olive and neutral skin tones because it brings out warmth and makes the white look crisp. The double-shell idea gives you depth without adding bulk. It’s also a good option if you want something “beach” but not full-on glitter.
Paint a seafoam green-blue base, two thin coats and cure. Draw a white main shell centered with 6 ridges. Add one tiny secondary shell outline near the sidewall of the nail, angled slightly toward the tip. Keep the secondary outline smaller than a grain of rice and only 2 to 3 ridges so it stays subtle. Seal with glossy top coat, and do a careful cap around the side outline.
Practice the tiny outline on a paper nail tip first — the side detail is the hardest part.
Avoid placing the tiny shell too close to the cuticle — it can look crowded and messy.
15. Blue Marble With Negative Space Shell Outline
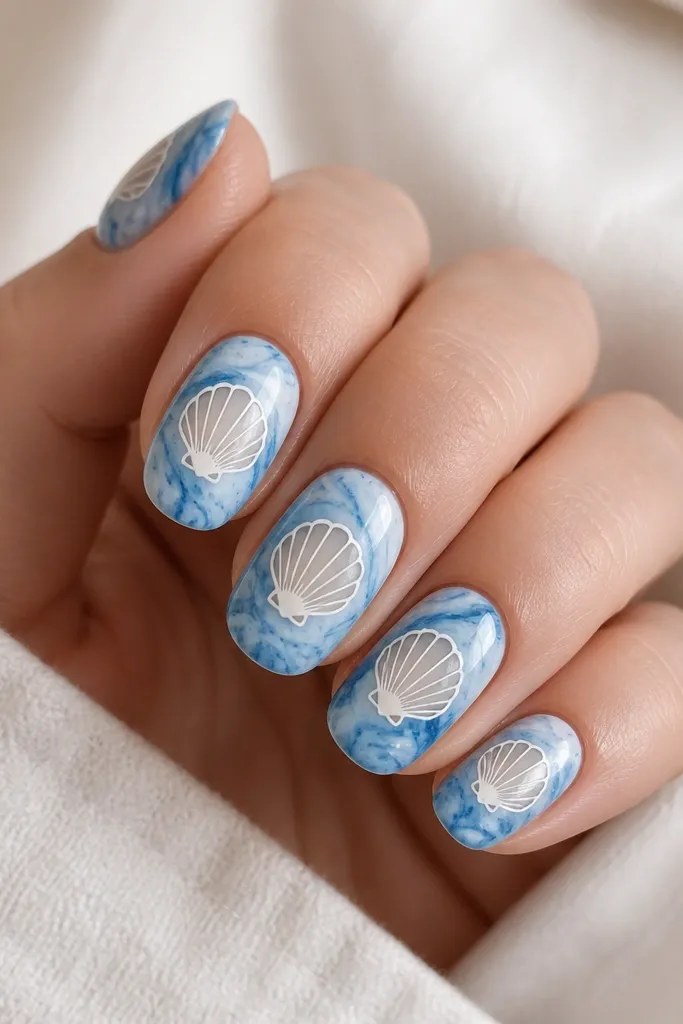
Base coat with a light blue, cure. Marble with a darker blue and a medium blue, leaving the center area of each nail slightly cleaner. Use a thin liner brush to outline a shell shape in the negative space — meaning you’re defining the ridges by the edges of the unpainted area, then adding tiny white accents only at the ends. If you need a pop, add a single thin white dot at the shell highlight spot. Finish with glossy top coat to smooth the marble and sharpen the shell outline.
Negative space makes shell designs look modern and crisp. The marble background gives movement, but the unpainted shell outline keeps the eye focused and prevents the set from looking busy. This looks great when your marble has enough contrast — light swirls and dark swirls — so the shell outline is clearly defined. It flatters hands with longer nails because the negative space elongates the visual line.
Watch outAvoid high-contrast marble with no cleanup — it makes the shell outline disappear.
Editor's noteUse fewer marble swirls around the shell center so your negative space stays visible.
16. Powder Blue Shell With Clear Gel Water Drop
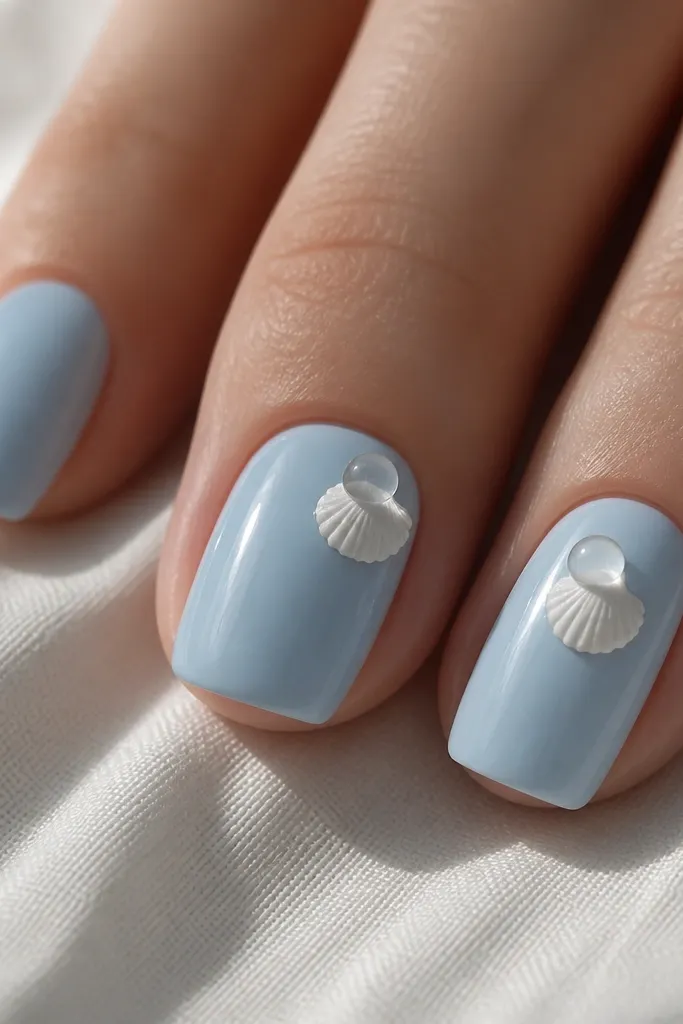
Paint powder blue, two coats, cure. Draw a small white shell centered with 5 to 6 ridges. Use clear gel to place one drop shape slightly above the shell ridges, then gently spread it so it domes and catches light. Cure fully, then apply glossy top coat around the drop to blend edges without smearing it. Cap the free edge so the water drop doesn’t lift.
This is the “wet shell” look that photographs insanely well. The powder blue base is light and airy, and the white shell stays crisp. The clear gel water drop adds a 3D highlight that mimics sunlight reflecting off water. I like it on short almond because the droplet gives height and the design stays balanced without taking over the whole nail.
Watch outAvoid thick top coat over the droplet — it can flatten the dome and lose the 3D shine.
Editor's noteMake the droplet slightly off-center — perfectly centered droplets look too sticker-like.
17. Blue Seashell Checker With Tiny Wave Lines
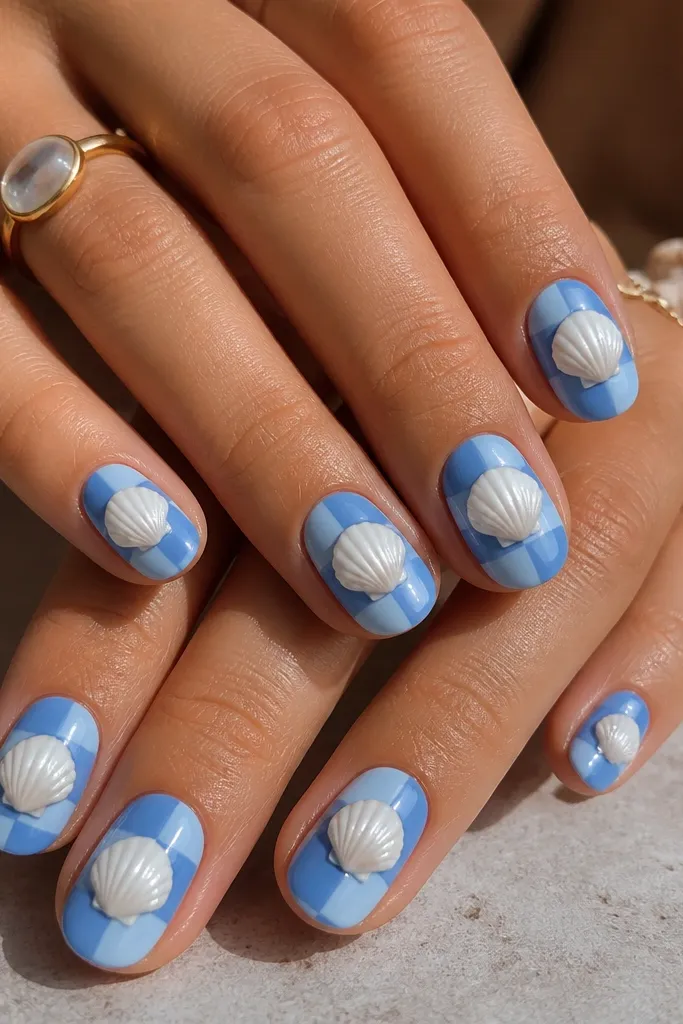
Paint alternating blocks of light blue and medium blue using a striping tape guide or a steady hand, cure each color. On each nail, paint a small white shell centered, but instead of classic straight ridges, draw ridges as gentle wave lines. Keep the shell smaller than you think — the checker background already has visual weight. Add a tiny curved highlight line at the top of the shell and seal with glossy top coat.
Checker patterns are rare in seashell manis, but they look great because they add structure. The light and medium blue panels give you a beach-boardwalk vibe, and the shell keeps it from becoming abstract. The wave-line ridges inside the shell match the theme of ocean movement. I like this for vacations when you want something fun that still stays themed and readable.
Watch outAvoid letting the white shell run into the blue blocks — keep a clean border around it.
Editor's noteUse striping tape for the checker — it keeps edges sharp and stops the design from looking messy.
18. Turquoise Drip Shell With White Lace-Like Veins
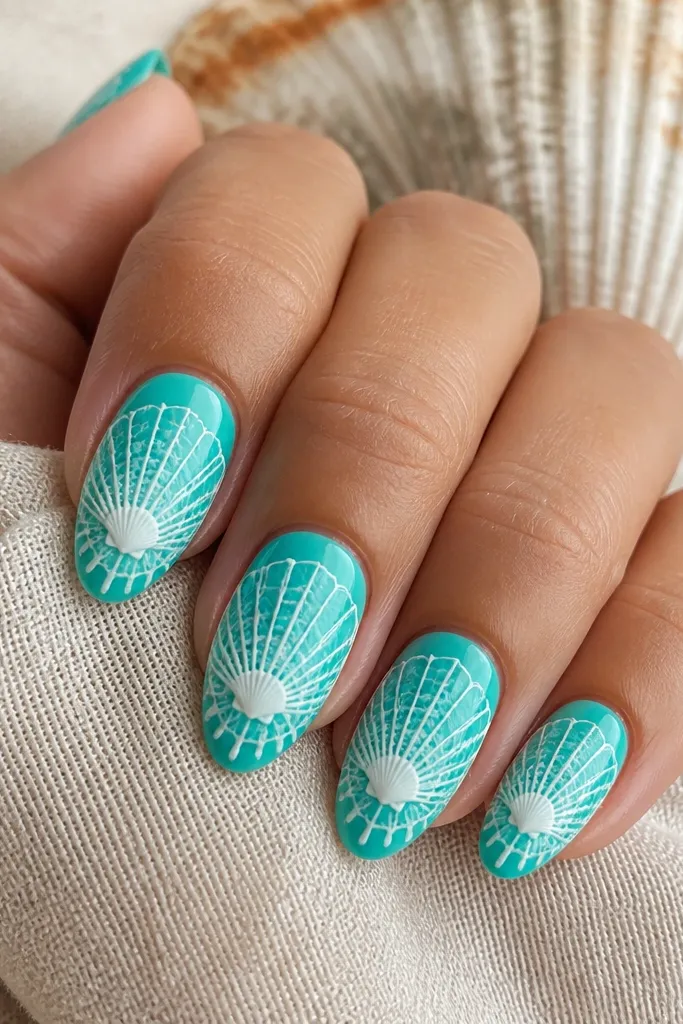
This design looks like lace laid over a shell, and it’s one of my favorites for beach nights. The turquoise base gives you that ocean color, while the white lace-like veins add delicate detail without heavy glitter. The tiny drip near the free edge makes it feel like seawater, not nail art on a flat surface. It flatters longer almond nails because the drip has room to taper cleanly.
Apply turquoise base, two coats and cure. Draw a white shell centered, then add lace-like vein lines that branch from the shell ridges outward in thin curves. Keep the lines airy — don’t pack them too tight. Near the free edge, add one tiny drip of clear gel or sheer white gel, pulling it down slightly and curing it so it holds shape. Finish with glossy top coat and cure fully.
Thin your white liner with clear gel if it’s too opaque — lace lines should look fine, not chunky.
Avoid thick branching lines — they turn into messy scribbles quickly.
19. Blue Shell Fade Tips With Pearl Confetti
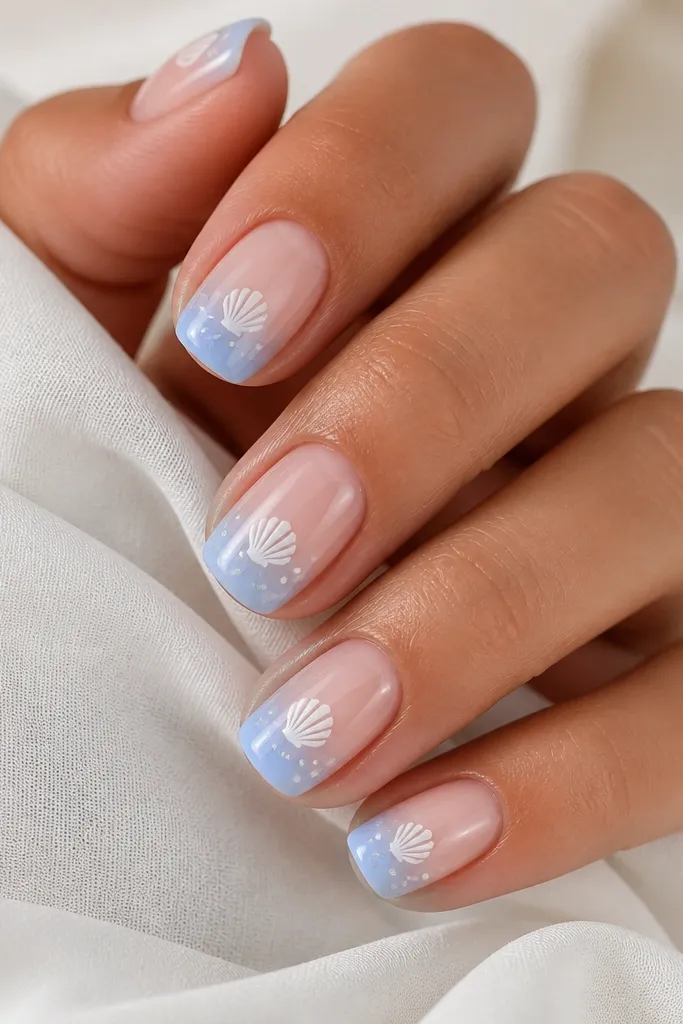
Fade tips keep the nails looking clean, and the shell gives you the theme. The pearl confetti near the tip looks like tiny beads of sunlight, and it doesn’t cover the nail surface like glitter. This set flatters hands that need a softer look because the nude base is forgiving and the fade makes fingers look longer. It also works for short nails because the shell stays centered and the pearls sit near the free edge.
Start with a nude base, two coats and cure. Create the fade by sponging a light blue at the free edge and blending upward until it’s sheer near mid-nail. Draw a small white shell centered with 5 ridges. Add pearl confetti by tapping tiny pearl dots or using a pearl powder mix near the tip area only, keeping it to 4 to 8 pieces per nail. Seal with glossy top coat and cap the tip to lock pearls in place.
Tap pearls onto tacky top coat instead of trying to paint around them.
Avoid placing pearls across the whole nail — it makes the fade disappear.
20. Deep Blue Base With White Shell and Silver Wave Line
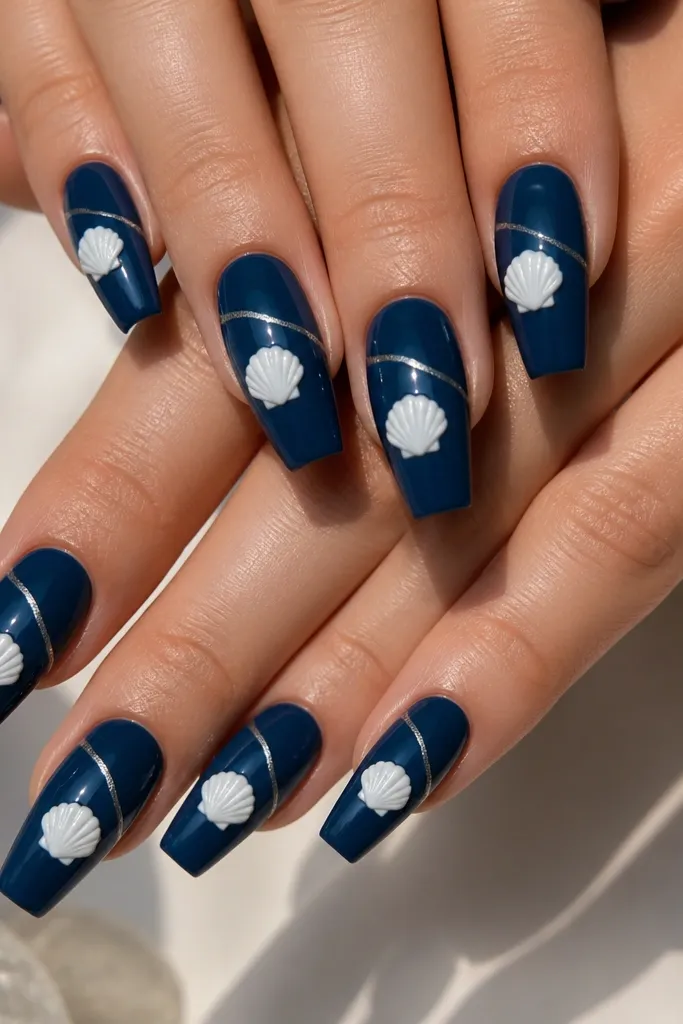
Paint deep blue, two coats and cure. Draw a centered white shell with 6 to 7 ridges. With a thin striping brush, paint a silver wave line diagonally across the nail, stopping before it hits the sidewalls so it stays clean. Add a tiny silver dot at the wave’s lowest point near the shell highlight for cohesion. Finish with glossy top coat, ensuring the silver line is sealed so it doesn’t scratch.
Silver wave lines make the shell look like it sits on top of moving water. The deep blue base adds drama, and the white shell stays the main focus. The diagonal wave line keeps your eye moving across the nail, which makes the mani feel more dynamic than a straight design. I’d wear this for seaside dinners or when you want your nails to match silver jewelry.
Watch outAvoid thick diagonal lines — they overpower the shell and make the set feel heavy.
Editor's noteUse liquid chrome or a gel striping silver that dries smooth — tape chrome can look gritty on top of shells.
21. Powder Blue With Shell Outline in Soft Gray
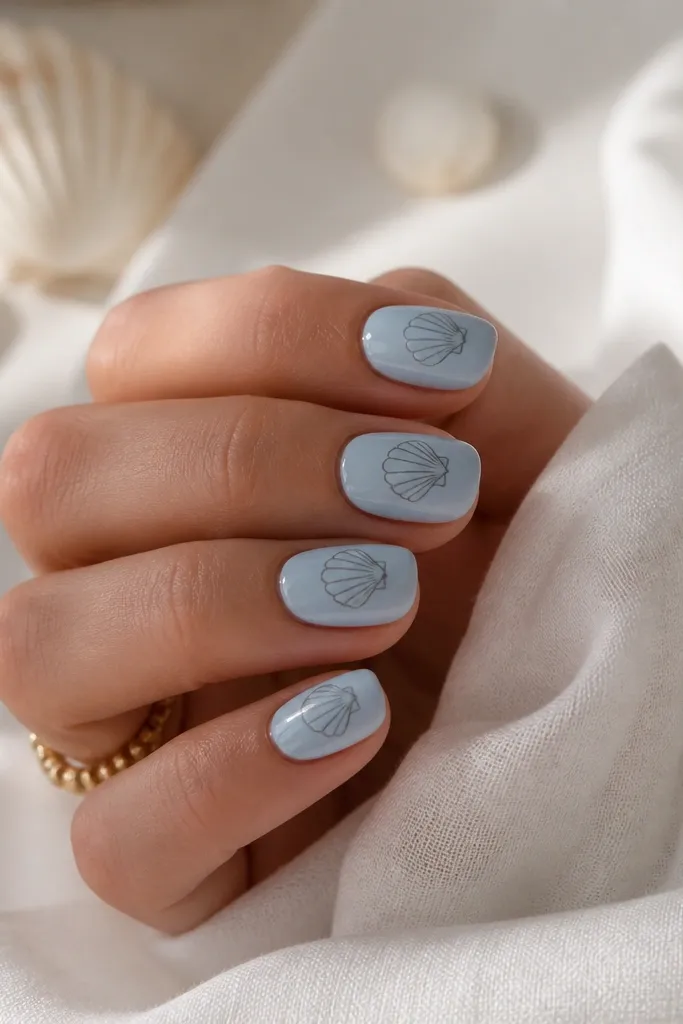
Apply powder blue, two thin coats and cure. Use a fine liner brush to draw a shell outline centered on each nail in soft gray. Add 5 to 6 gray ridges inside the outline, leaving a thin gap between ridges so they look delicate. Add one tiny white highlight line near the top of the shell. Seal with glossy top coat, then do a second thin top coat if your gray looks slightly matte.
Gray outlines look clean and modern, especially when you want a beach mani that isn’t super bright. The powder blue base stays airy, and the gray ridges add definition without the sharpness of black or dark navy. The tiny white highlight keeps it from looking flat. I like this for people who want seashell nails but prefer a calm, wearable look for everyday.
Watch outAvoid using pure black — it reads harsh and kills the beach softness.
Editor's noteIf gray looks too dark, mix white gel with a tiny amount of black gel until it turns soft and chalky-light.
22. Blue Shell With Peach Corail Accent
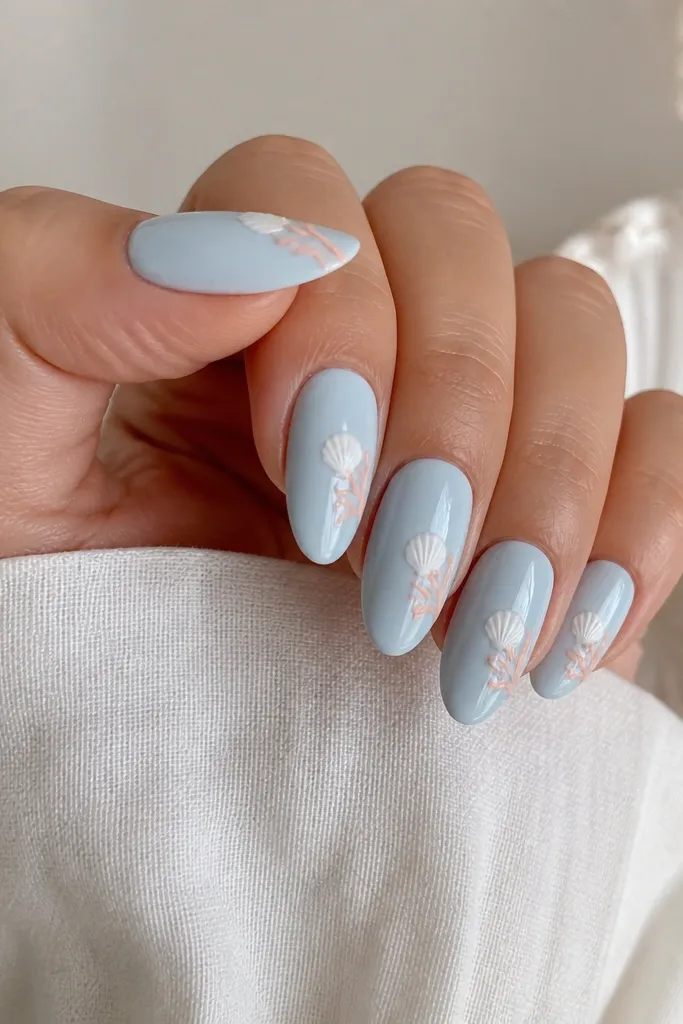
Paint pale blue base, two coats and cure. Draw a white shell centered with 6 ridges. On one side of the shell, add tiny peach curved lines that branch like coral — keep them short and only on one side so it stays intentional. Add a small peach dot at the end of the branches. Finish with glossy top coat and cure fully.
Peach next to blue feels like coral beside a shell, and it adds warmth without going neon. The pale blue base makes the peach accent look sunlit, and the white shell keeps the design crisp. I like this for summer weekends because it looks cheerful and still neat. It also flatters medium to deep skin tones because the peach pops against cool blue.
Watch outAvoid spreading peach accents across the whole shell — it turns into a color block.
Editor's noteUse a dotting tool to place the peach ends first, then connect with a thin brush so the lines look organic.
23. Seafoam Blue With Shell Stamp and Hand-Drawn Highlights
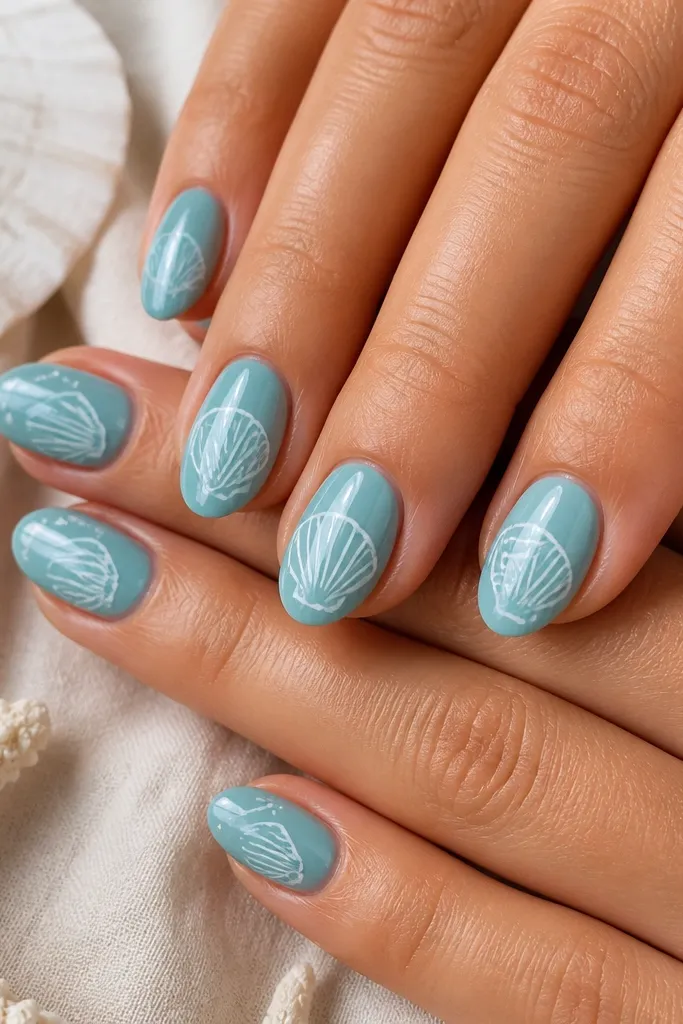
Paint seafoam blue base, two coats and cure. Apply a shell stamp in white using a stamping plate and scraper, then transfer onto nails and cure or seal as your system requires. With a thin liner brush, add 2 to 3 pale blue highlight strokes inside the stamped ridges, focusing on the top half of the shell. Add one tiny dot of white where the highlight would hit and finish with glossy top coat.
Stamping gets you the shell shape fast, and then hand-drawn highlights make it look custom. I’ve done this when I’m rushing but still want the mani to look clean up close. The seafoam blue base makes the stamped white shell look bright without being too stark. The pale blue highlights inside the ridges add dimension, especially in sunlight.
Watch outAvoid skipping the hand highlights — stamped shells alone often look flat and repetitive.
Editor's noteWipe the stamping plate quickly between nails so your shell doesn’t look patchy.
24. Blue Seashell Nails With Tiny Starburst Sun Rays
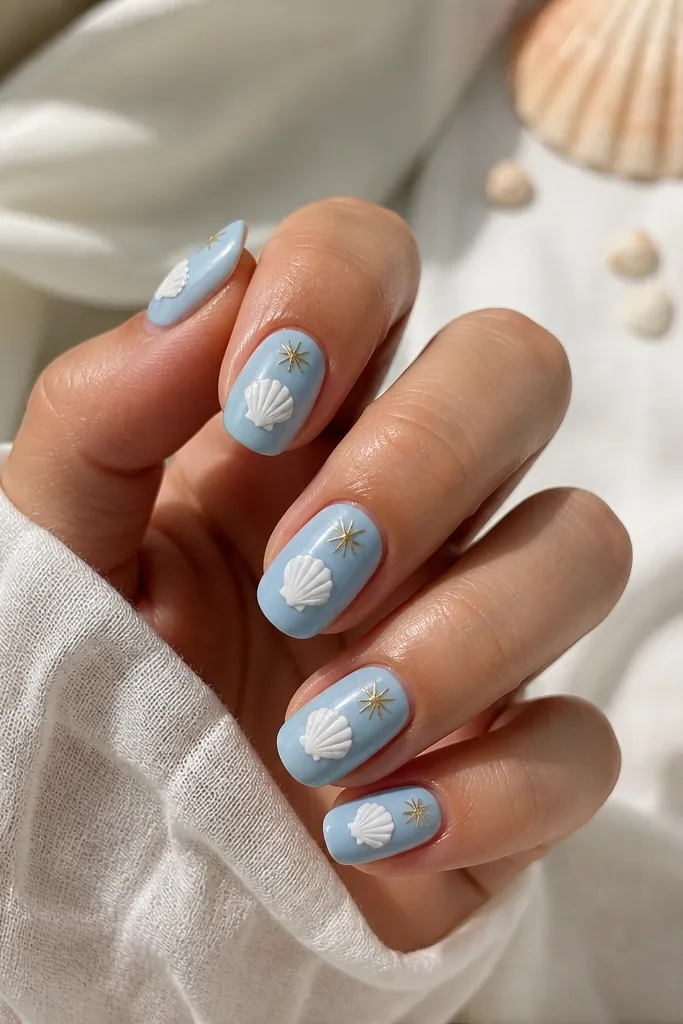
Sun rays make seashell nails feel like beach weather, not just ocean color. The light blue base keeps everything soft, while the white shell stays crisp and the gold starbursts add warmth. I like this when you want beach nails that match gold jewelry and look bright in photos. It’s also a good design for short to medium nails because the starbursts are small and don’t clutter.
Apply a light blue base, two coats and cure. Draw a centered white shell with 5 to 6 ridges. Place a tiny gold starburst near the upper right or upper left of the shell (pick one side for a consistent look), using a dotting tool or a gel starburst stamp. Add 1 thin gold line extending outward to mimic a sun ray. Seal with glossy top coat and cure fully to lock the gold in place.
Keep the starburst to 5 points maximum so it stays cute, not busy.
Avoid placing starbursts in the exact center of the nail — it can look like a logo.
25. Blue Shell With Glittery Wave Underside
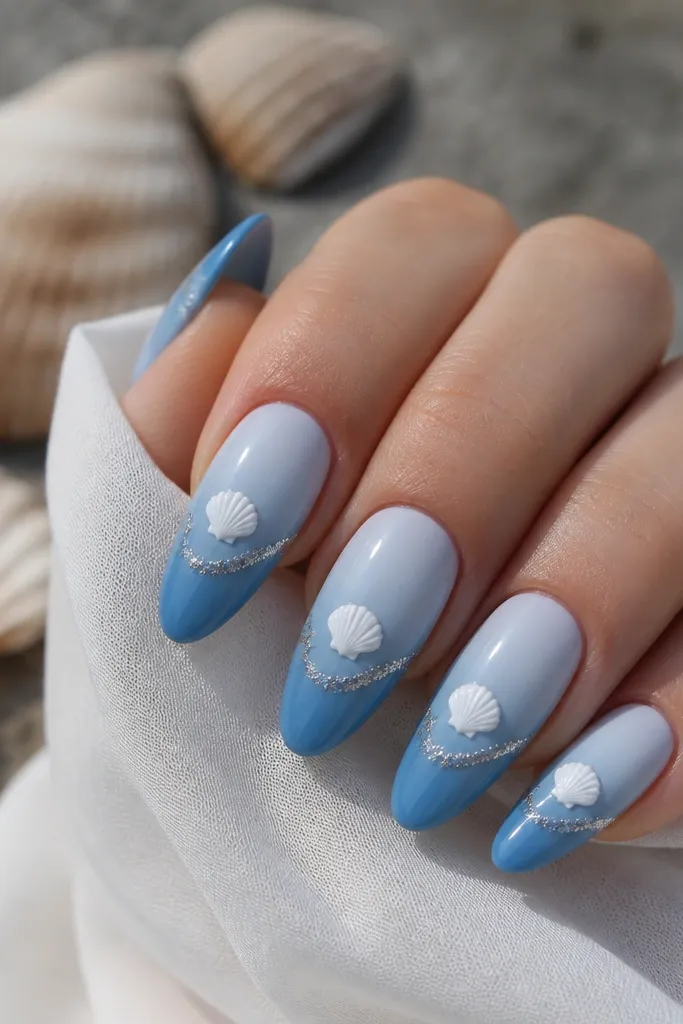
Start with a gradient: pale blue at the cuticle, medium blue in the middle, deep blue at the tip, then cure. Draw a white shell centered with 6 ridges and a tiny highlight line at the top. Paint a thin wave line underneath the shell in clear or sheer white, then tap micro-glitter onto that wave line only. Keep the glitter line narrow, about 1 to 2 mm tall. Finish with glossy top coat to smooth and seal.
This design looks like the shell is hovering over foamy water. The gradient base gives you a natural wave effect, and the white shell stays clean and readable. The glittery wave line under the shell adds movement without covering the ridges, so the shell still looks detailed. I’d wear this for a beach weekend when you want nails that stay interesting even when you’re not posing for a close-up.
Watch outAvoid glitter on top of the shell ridges — it blurs the detail.
Editor's noteUse a striping brush for the wave line first, then glitter — the wave shape stays sharp.