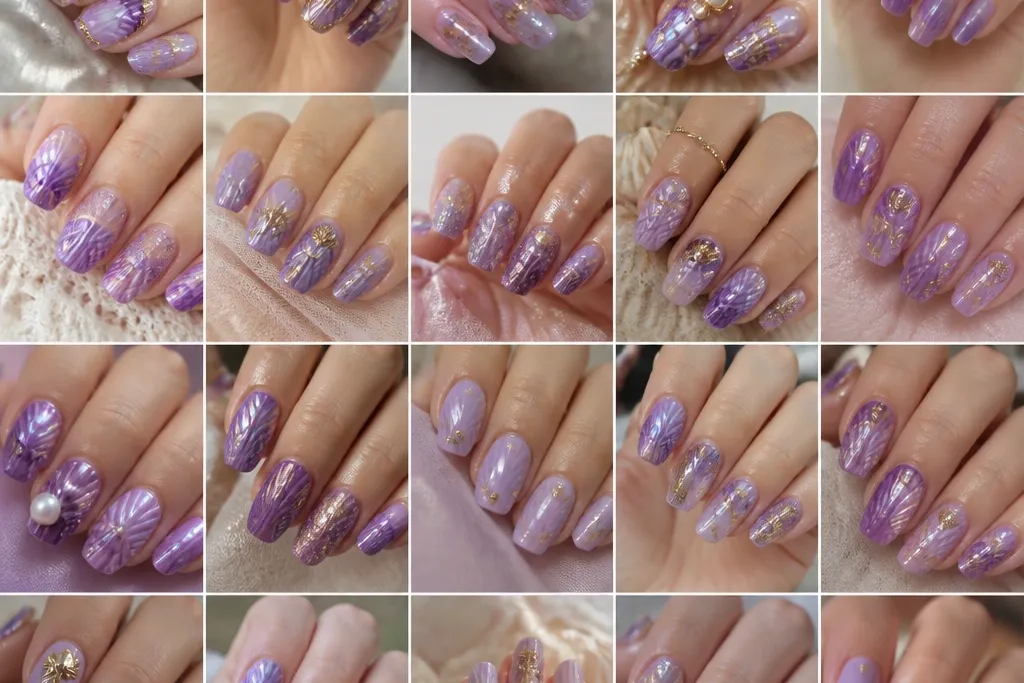
1. Milky Grape Half-Shell with White Foam Edge
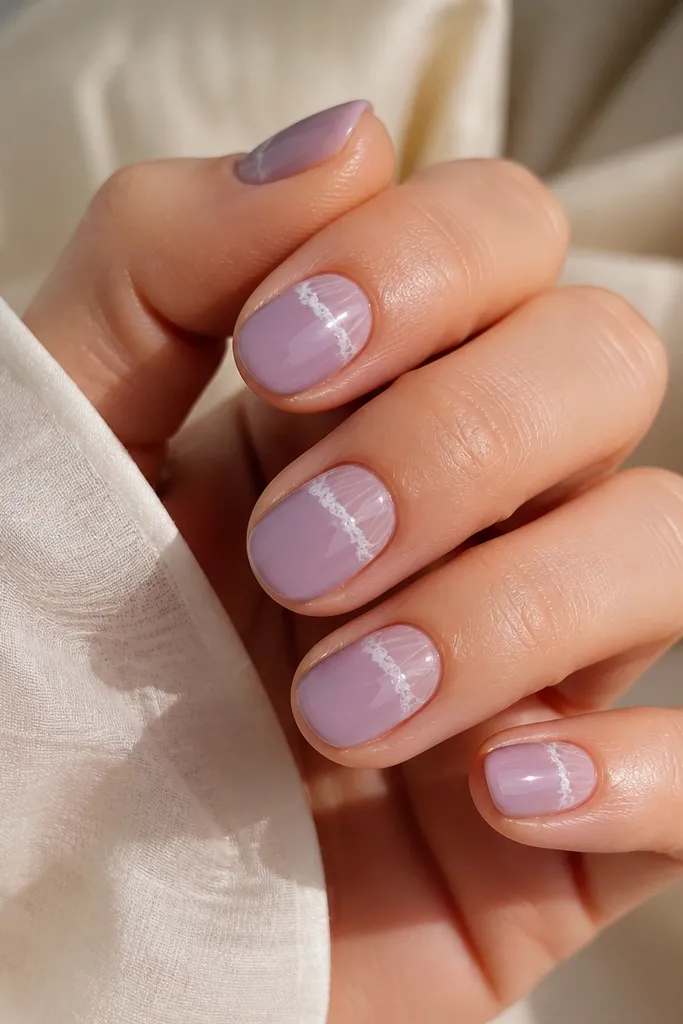
This look is the most "real shell" version I've tried because the foam edge is placed like a wave crest. Start with a milky grape base - it's not dark enough to swallow the ridges, and it photographs softly. The ridges are a mid-lavender band that you pull into short curved strokes, then you add a thin milky white line along the outer ridge edge. It flatters light to medium skin tones because the milky base brightens the hand. For medium-to-long almond nails, the shell arc reads clean; for short nails, keep the ridges centered so it doesn't look crowded.
Step 1: Paint a milky grape gel base on all nails and cure. Step 2: With a dotting tool, tap a lighter lavender gel into a curved band near the cuticle, then use a thin striping brush to drag 6-8 short curved ridges downward toward the center. Step 3: Add a super-thin milky white foam line just outside the ridges, following the nail's curve, then cure. Step 4: Cap with two thin layers of glossy topcoat, curing between each layer.
Editor's noteIf your foam line looks too thick, wipe your brush on a lint-free pad before you touch the nail.
Watch outAvoid skipping the milky white foam - without it, the ridges look like simple stripes.
2. Lavender Oyster with Deep Grape Rim
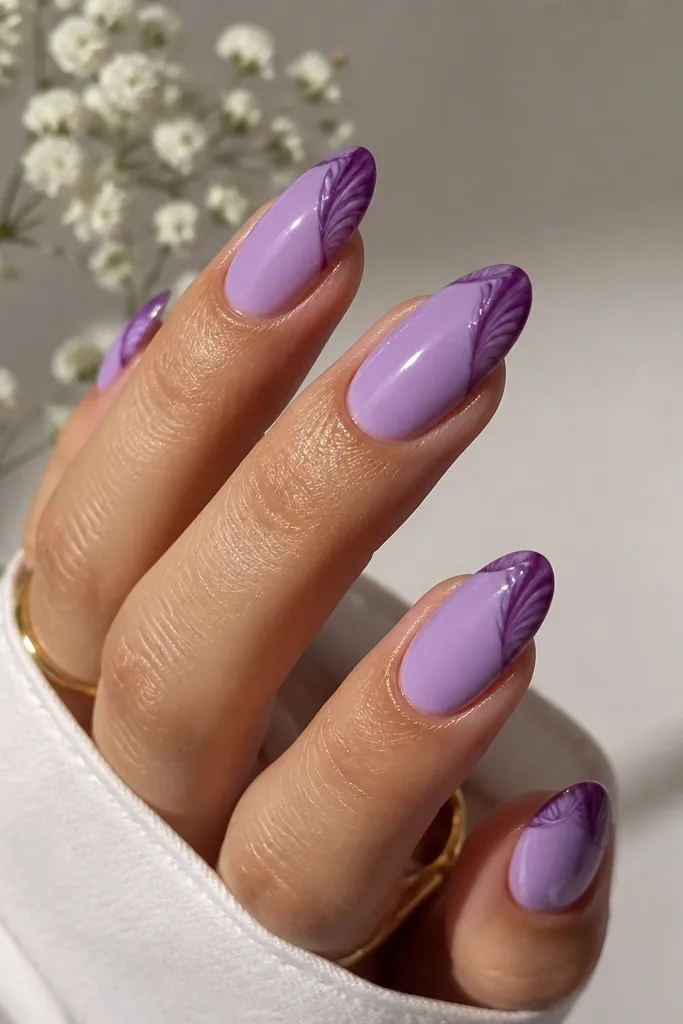
This one reads like an oyster shell because the contrast is controlled. The lavender base is cool and airy, while the deep grape rim gives the "shadow" that makes the ridges pop. I like it on medium almond nails because the curved rim has room to sweep without hitting the sidewalls too hard. It looks great on warm or neutral skin tones because the purple stays balanced, not pink. For daytime wear, this design feels classy instead of loud.
Step 1: Apply lavender gel as your base and cure fully. Step 2: Mix or choose a deep grape polish and paint a thin curved rim around the outer half of the nail, leaving the center slightly lighter. Step 3: Use a fine liner brush to add 5-7 short ridges from the rim inward, keeping them parallel and spaced evenly. Step 4: Seal with glossy topcoat in two thin coats, curing after each.
Editor's noteUse the nail's sidewall as a guide - stop the rim about 1 mm before the edge so it stays crisp.
Watch outDon't flood the rim - thick borders look heavy and hide the shell detail.
3. Purple Sea Glass Shell with Micro-Holo Specks
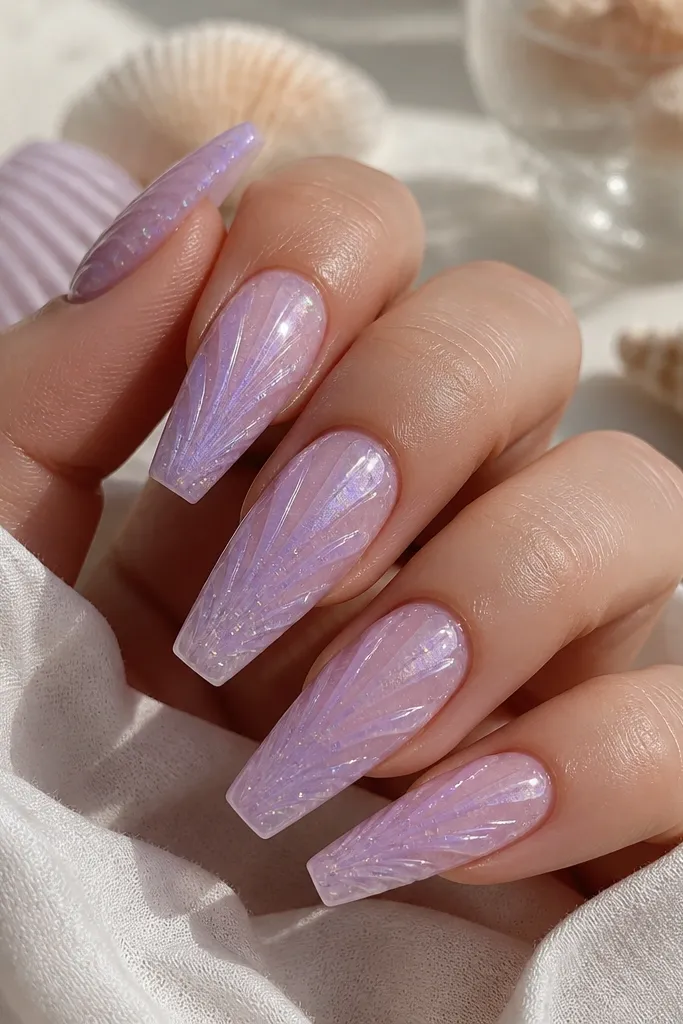
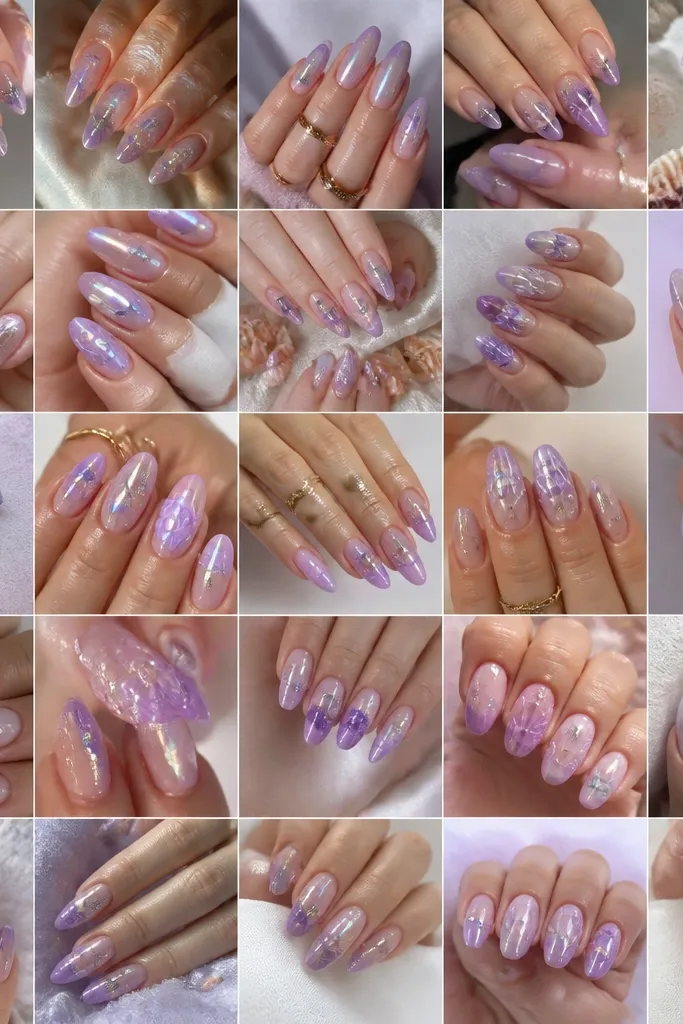
Sea glass nails are my favorite when I want seashell vibes without full opacity. The sheer purple base lets light pass through, which makes the shell ridges look like they're under water. Micro-holo specks add sparkle that stays refined, not chunky. I've worn this on medium skin tones and it looks extra pretty because the purple doesn't fight your undertone. Coffin nails work well because you get a long center area for the ridges and a clean sparkle spread.
Step 1: Paint a sheer purple gel base in 2 thin layers, curing each. Step 2: Add semi-transparent lavender ridges by pulling gel into short curved strokes on the center third only. Step 3: With a tiny brush, tap a few micro-holo specks around the ridges, focusing near the top third. Step 4: Topcoat with a thick clear layer, then cure, then add a second thin topcoat to smooth.
Editor's noteIf specks clump, press them lightly with a silicone tool so they spread before curing.
Watch outSkip chunky glitter - it kills the sea glass effect.
4. Grape Marble Shell with White "Wave Veins"
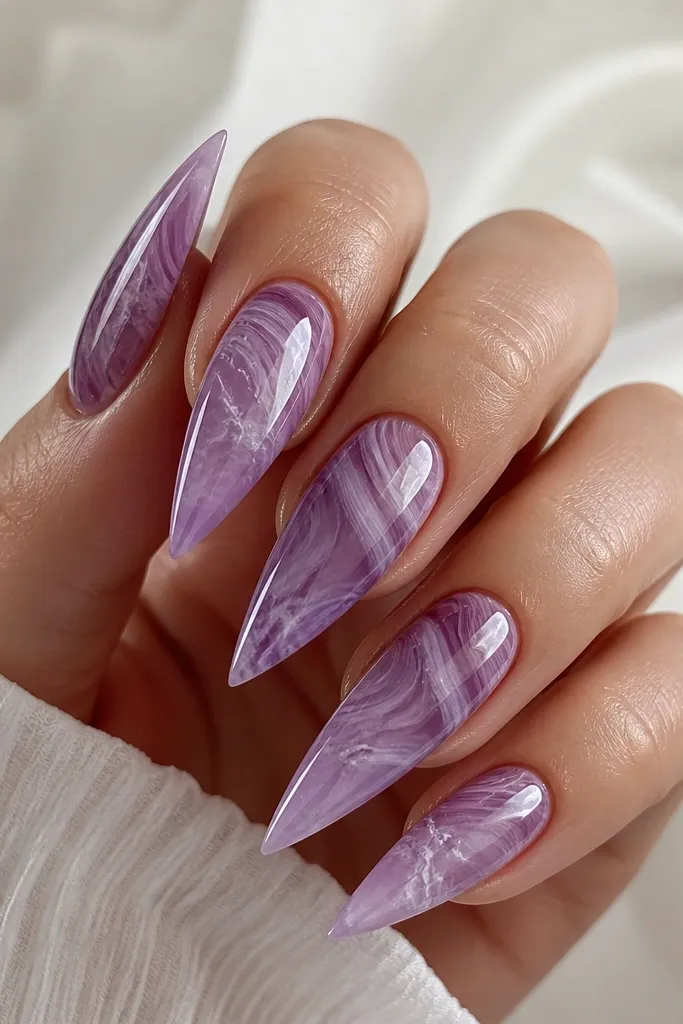
This is for when you want seashell nails that look like they came from a beach stone. The marble base makes the design feel organic, and the white wave veins create that foam movement. I use a thinner marble technique so the ridges still show; if the marble is too opaque, the shell loses its form. It looks flattering on deeper skin tones because the grape tones have enough contrast to read clearly. Stiletto nails handle the swirl well because the shape gives the eye a long path.
Step 1: Create a grape marble base using two shades - deep grape and mid purple - with a small brush to swirl thin streaks, then cure. Step 2: Draw shell ridges on the center third using a semi-transparent lavender polish in 6-9 short curved lines. Step 3: Add white wave veins by dragging a milky white gel through 2-3 ridge lines, keeping it airy. Step 4: Cap with glossy topcoat, using extra care around the white areas so they don't smear.
Editor's noteWork in small sections and cure each nail separately if you're prone to smudging.
Watch outDon't make the marble too thick - heavy swirls flatten the shell ridges.
5. Lilac Shell Tips with Negative Space Center
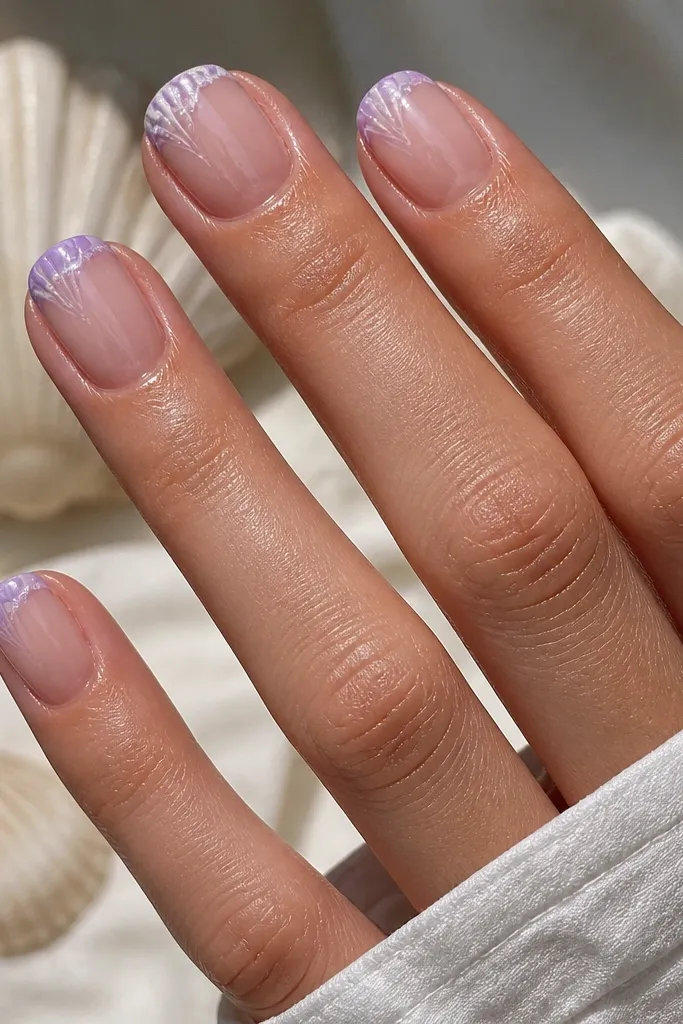
Negative space makes purple seashell nails look modern and clean, especially if you hate bulky art. Keeping the center nude makes your nails look longer and keeps the shell detail concentrated at the tips. I've done this on short square and it makes hands look sharper because the ridges sit right where your eye expects a tip design. The lilac-to-deep lilac fade looks soft, not harsh, and the white foam line at the very edge gives the seashell illusion. Great for office days or anytime you want something "pretty" without heavy glitter.
Step 1: Prep and apply a sheer nude base (or leave the center bare if you're comfortable) and cure. Step 2: Paint a deep lilac band at the tip line, then blend upward with a lighter lilac using a sponge or the side of a brush. Step 3: Add shell ridges inside the tip zone - 5-7 short curved lines that start near the deep lilac border. Step 4: Place a thin milky white foam highlight along the very tip edge, then cure and topcoat.
Editor's noteUse a nail art striping tape to keep the tip line straight before you add ridges.
Watch outAvoid letting the ridges creep into the nude center - it makes the design feel messy.
6. Royal Purple Shell with Gold Pearl Dots
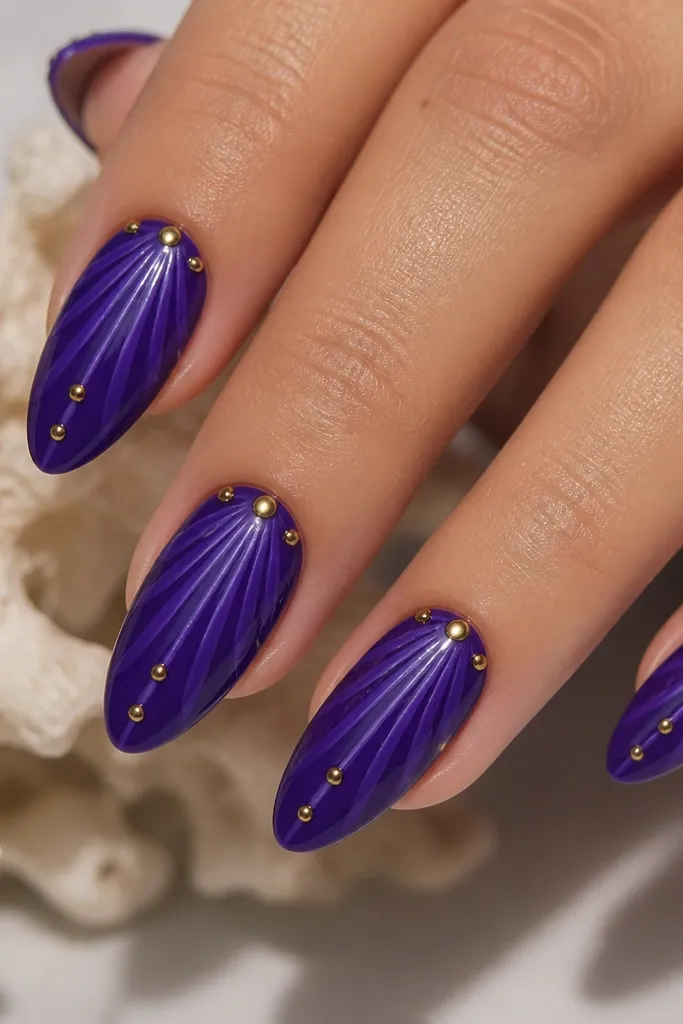
This version is for nights out because the pearls catch the light like tiny shell beads. Royal purple is bold, and the lighter ridges keep it from becoming a flat purple block. I place only a few pearl dots - too many and it turns into generic bling. On fair to medium skin tones, the gold looks warm against purple and makes your hands look instantly more "done." Almond nails are perfect because the ridge curves look intentional around the shape.
Step 1: Apply royal purple base and cure. Step 2: Add lighter royal ridges using a thin liner brush - 6-8 curved lines, each about 2-3 mm long. Step 3: Place gold pearl dots on 2-3 of the ridges near the cuticle area, pressing them lightly so they sit flat. Step 4: Cure, then topcoat with two layers of glossy clear gel, focusing on sealing around each pearl.
Editor's noteIf pearls catch on fabric, add a final ultra-thin topcoat layer and cure longer for a smoother cap.
Watch outSkip oversized pearls - they make seashell ridges look secondary.
7. Soft Lavender Ombre Shell with Milky White Crest
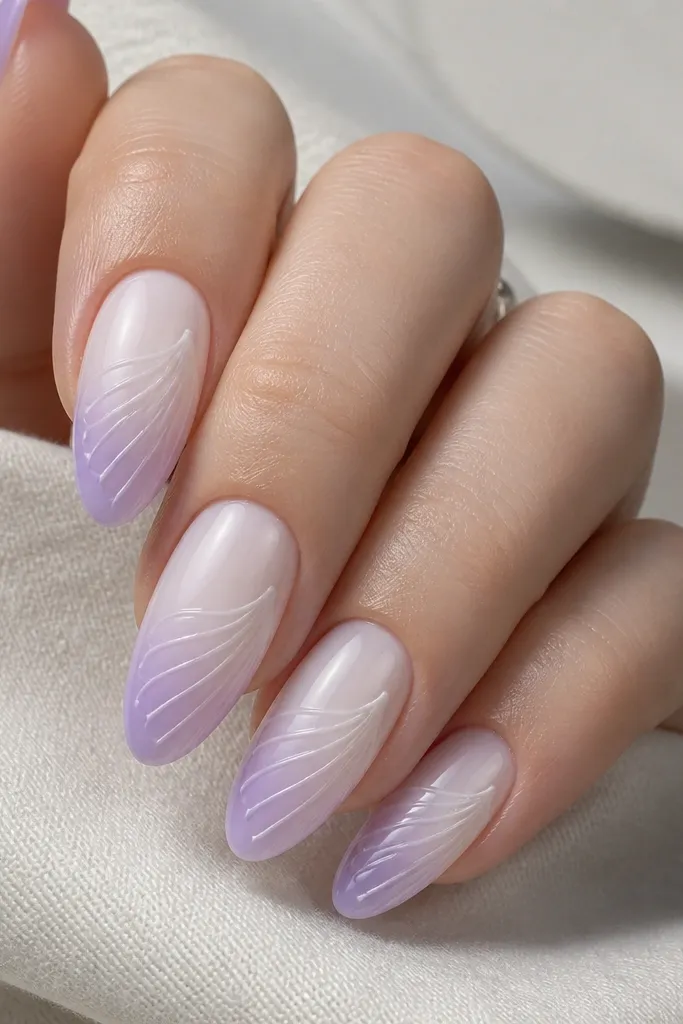
Ombre makes the seashell look float, like it's lit from behind. Starting milky near the cuticle softens the transition and makes the ridges look dimensional instead of painted on top. I like this on long oval nails because the fade has room to blend, and the ridges can run diagonally slightly to follow the nail's curve. It flatters hands because the light area near the cuticle makes fingers look longer. This is also forgiving if your ridges aren't perfectly even.
Step 1: Sponge on milky white at the cuticle area and blend into soft lavender toward the tip in 2 thin layers, curing each. Step 2: With a liner brush, draw shell ridges in a slightly darker lavender across the center third, using short curved strokes. Step 3: Add a milky white crest line along the outer edge of the ridges, keeping it thin. Step 4: Seal with two thin glossy topcoat layers.
Editor's noteWipe the brush edge on a paper towel before you draw ridges so the line stays hair-thin.
Watch outDon't over-opaque the ombre - if it turns chalky, the shell depth disappears.
8. Plum Shell Ridges with Clear Jelly Topcoat
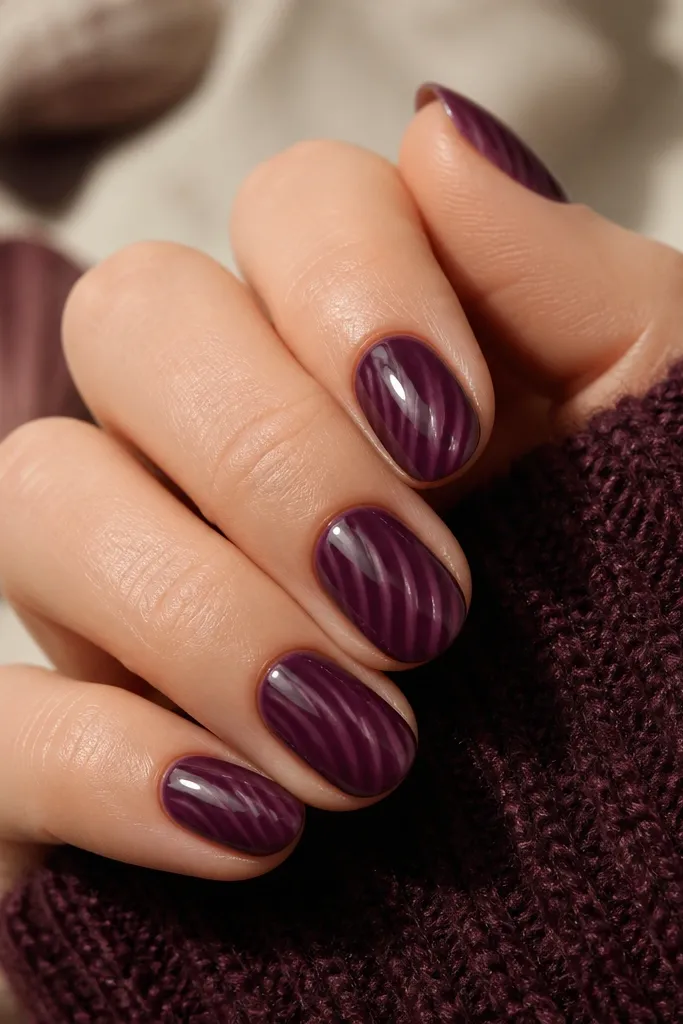
A jelly topcoat changes the whole mood. Instead of a flat glossy shine, you get that suspended, watery look that makes ridges feel like they're under a thin layer of ocean. Plum is richer than grape, and it reads expensive on most skin tones because it has both red and purple undertones. I keep the ridges thin and semi-opaque so you can see them through the jelly layer. This one looks especially good on short almond because the smooth curve pairs with the "under-glass" effect.
Step 1: Paint deep plum base and cure. Step 2: Add lighter plum ridges with a fine liner brush on the center third only, 6-10 short curved lines. Step 3: Apply a clear jelly topcoat layer and cure, then do a second thin jelly layer to build the suspended look. Step 4: Finish with a glossy topcoat if your jelly topcoat is not fully glossy on its own.
Editor's noteIf your jelly topcoat floods the ridges, cure for a full extra 10-20 seconds per nail to prevent leveling blur.
Watch outDon't make the ridges thick before jelly - thick gel under jelly looks bumpy.
9. Purple Seashell French with White Rim
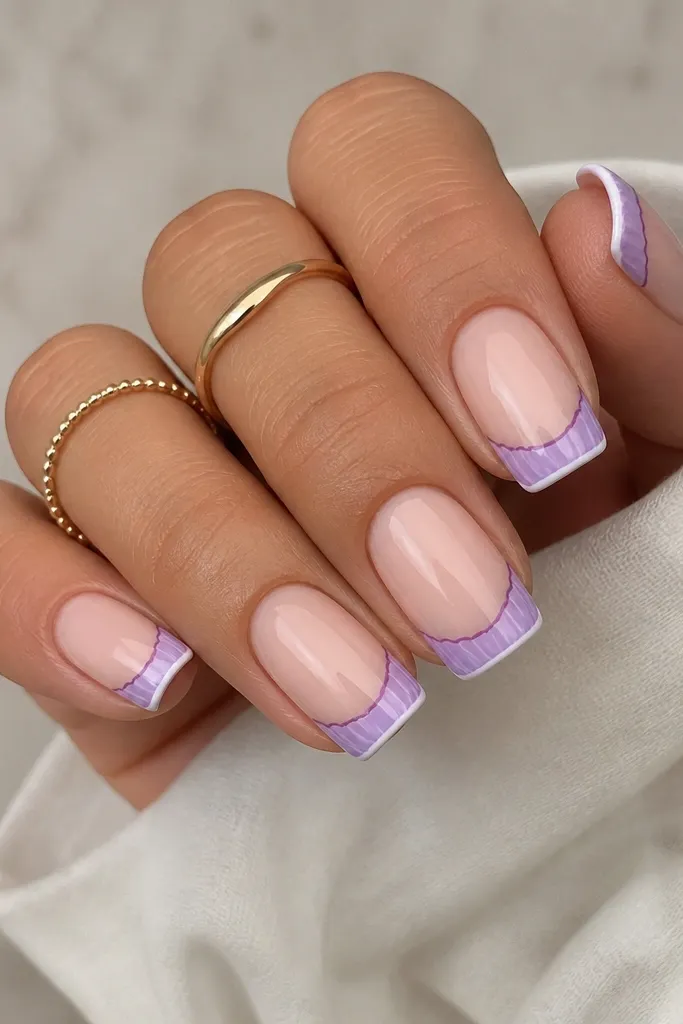
French tips with seashell ridges look clean because the design is already placed by shape. The trick is to put the shell detail inside the French tip, not across the whole nail. Use a nude base so the purple tip feels crisp. The white rim at the outer edge is the key - it mimics foam and makes the tip look like it's floating on water. This flatters short squares because the French line creates length without needing a long nail.
Step 1: Apply a nude base and cure. Step 2: Paint lavender French tips with a slightly deeper purple outline right at the smile line, then cure. Step 3: Add shell ridges inside the French area with a lighter lavender - keep them short and centered. Step 4: Add a thin milky white rim along the outer edge of the French tip, cure, then topcoat.
Editor's noteUse a French guide sticker if your smile line drifts - seashell ridges look sharper when the tip edge is straight.
Watch outAvoid thick French gel - it makes the ridges sink and look muddy.
10. Indigo Night Seashell with Silver Shimmer
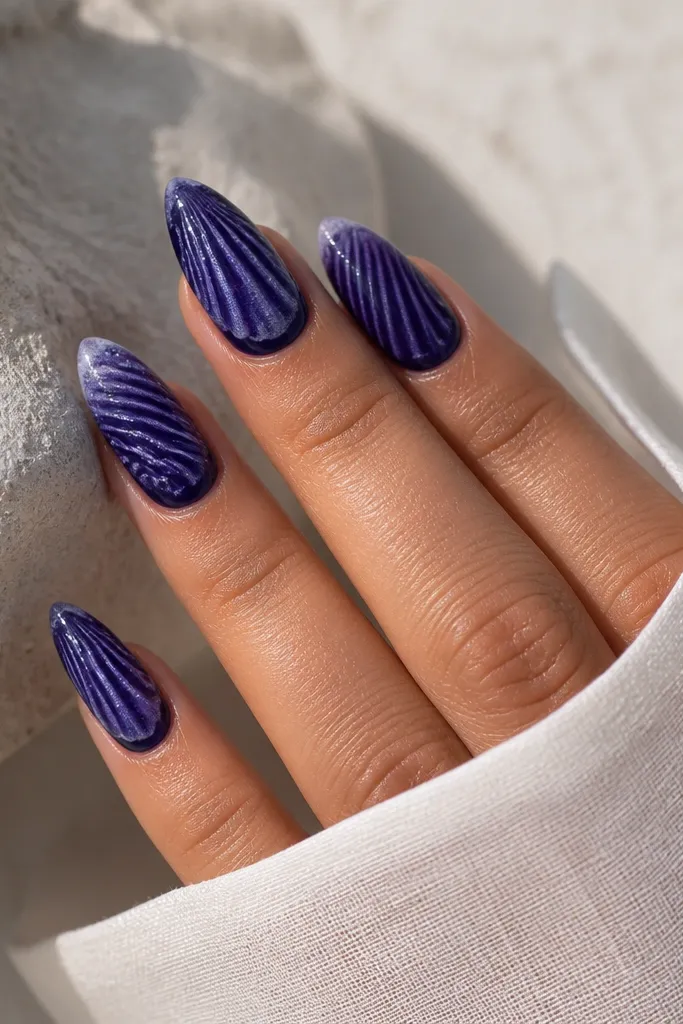
This is the moody version that still reads as seashell. Indigo is darker than grape, so it needs a highlight - that's where the milky foam edge and the silver shimmer come in. The silver is fine, not chunky, so it looks like light reflecting off wet shell. I've worn this to winter dinners and it looks great because the deep color matches coats and looks intentional. On medium-long almond nails, the ridges look sculpted instead of flat.
Step 1: Paint a deep indigo base and cure. Step 2: Draw shell ridges using a mix of indigo and a slightly lighter purple, keeping strokes short and curved. Step 3: Tap a tiny amount of fine silver shimmer powder over the ridges, then cure. Step 4: Add a thin milky white foam edge along the outer ridge line and finish with two glossy topcoat layers.
Editor's noteUse a small makeup brush to dust shimmer; tap off excess so you don't get glitter fallout.
Watch outSkip heavy glitter - it turns the shell into a sparkle manicure.
11. Lilac Pearl Swirl Shell Ridges
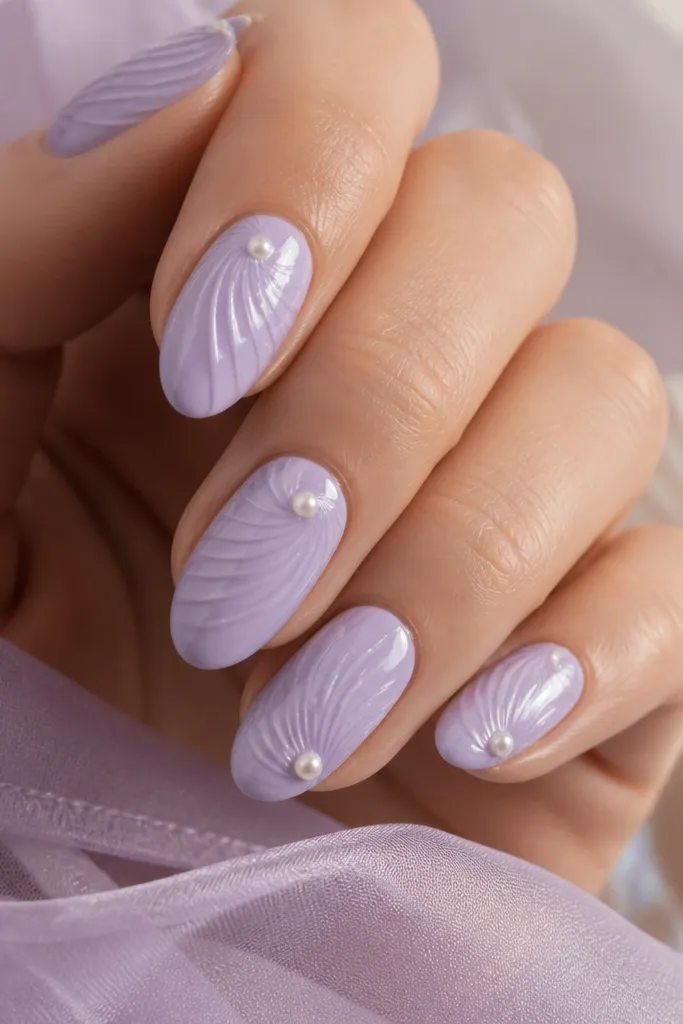
This one is seashell without the classic foam border, and it still looks believable because the ridges swirl like growth lines. Pale lilac gives you a soft base, and the darker lilac ridges create motion. Pearl dots at the swirl turns mimic little shell bumps. I like it on medium oval nails because the shape helps the swirl flow; on very short nails it can feel cramped. Works beautifully for fair skin and for anyone who likes pastel manicures that still feel special.
Step 1: Apply pale lilac base and cure. Step 2: Draw ridges in a swirl pattern across the center third - 7-12 short curved lines that follow one main curve. Step 3: Place pearl dots at two or three ridge turn points, pressing gently to flatten. Step 4: Cure and seal with glossy topcoat in two layers to lock in the pearl edges.
Editor's noteIf pearls look too round, lightly drag a dotting tool through the gel around them before curing so they blend.
Watch outDon't add pearls everywhere - three placement points is enough.
12. Purple Shell Chrome with Soft Mirror Fade
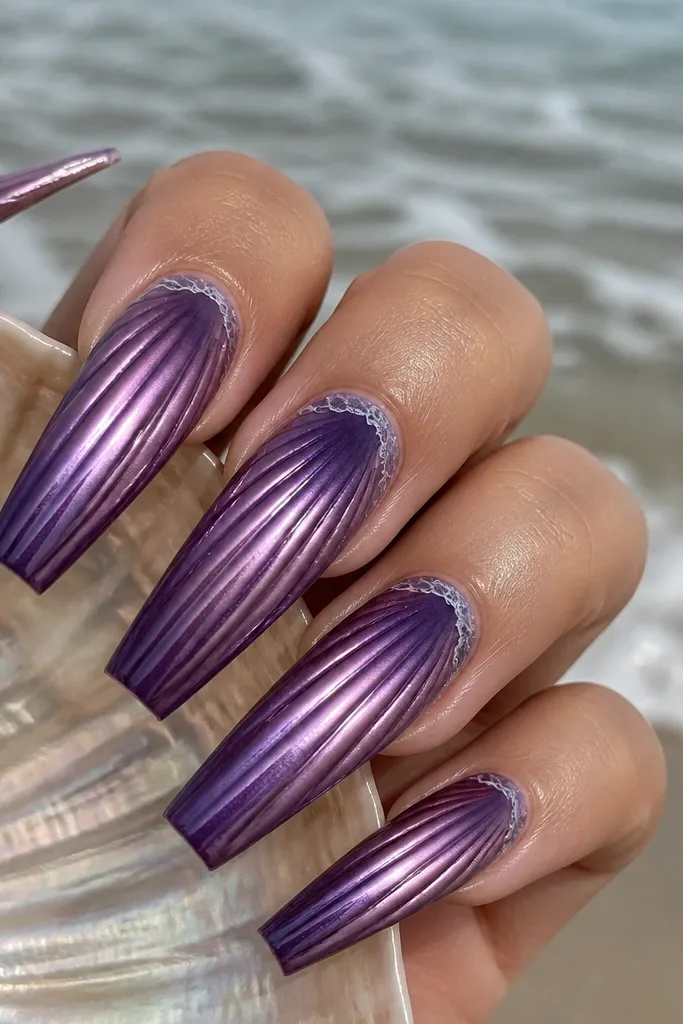
Chrome makes seashell nails feel like polished seashell jewelry. The key is that you chrome the ridges, not the whole nail - that way you still see the shell structure. Deep purple base gives you depth, and the chrome fade creates the illusion of light catching at different angles. I've found this looks best on longer coffin or almond shapes because chrome shows every ridge line clearly. It's also great for evening events because the mirror finish reads instantly.
Step 1: Apply deep purple base and cure. Step 2: Paint shell ridges in a sticky clear gel layer - only where the ridges are - then cure. Step 3: Apply purple chrome powder over the ridges and brush off the excess so only the ridge areas stay mirror-bright. Step 4: Add a thin milky foam line at the outer ridge edge, cure, then topcoat carefully with a thin non-smudge topcoat if your chrome needs it.
Editor's noteTest your topcoat - some topcoats dull chrome, so use one labeled safe for chrome finishes.
Watch outAvoid chroming the entire nail - it turns into a purple chrome manicure, not seashell.
13. Periwinkle-to-Grape Ombré Shell Ridges
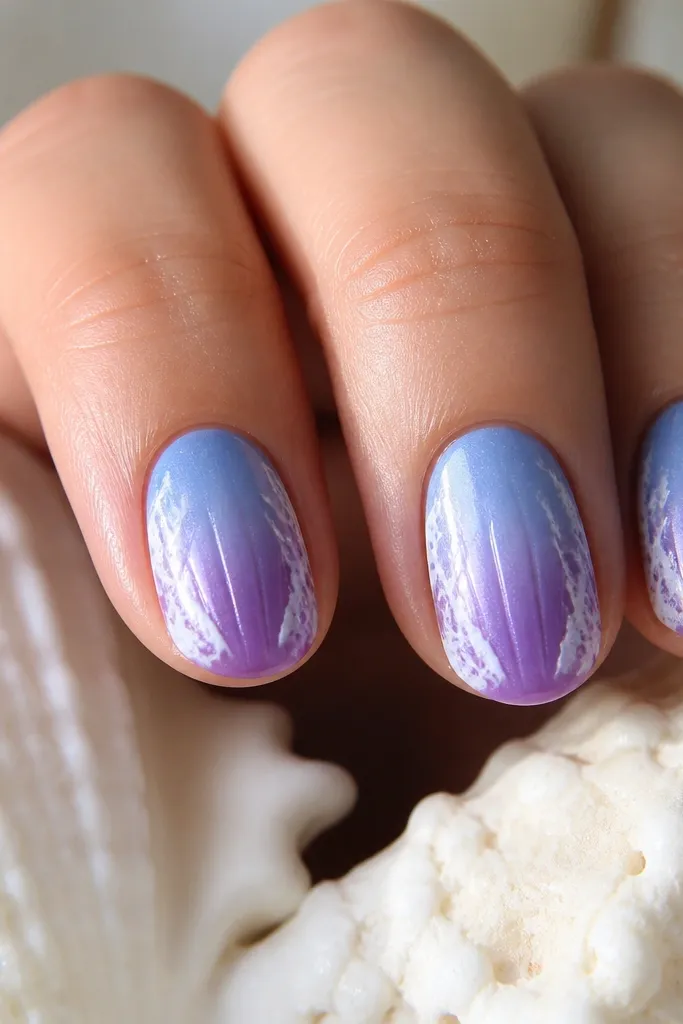
This look mixes actual ocean colors with purple shell detail. Periwinkle at the cuticle makes your hands look fresh, and the grape tip anchors it so it still feels like purple. Shell ridges are drawn in a mid-lavender so they contrast without looking harsh. I like it on short ovals because the fade does the length work. It also flatters cooler undertones because periwinkle and purple sit naturally together.
Step 1: Sponge periwinkle at the cuticle and blend into grape purple toward the tip in 2 thin layers, curing each. Step 2: Add shell ridges with a mid-lavender polish down the center third, 6-9 short curved lines. Step 3: Flick a tiny milky white foam highlight at the outer ridge edge on 2-3 nails so it doesn't look repetitive. Step 4: Topcoat with glossy gel in two thin layers.
Editor's noteKeep the outer edges clean - wipe the sidewalls with a brush dipped in cleanser before curing.
Watch outDon't blend too far down - if the fade reaches the tip too softly, ridges lose contrast.
14. Purple Shell Water Decal with Hand-Finished Foam
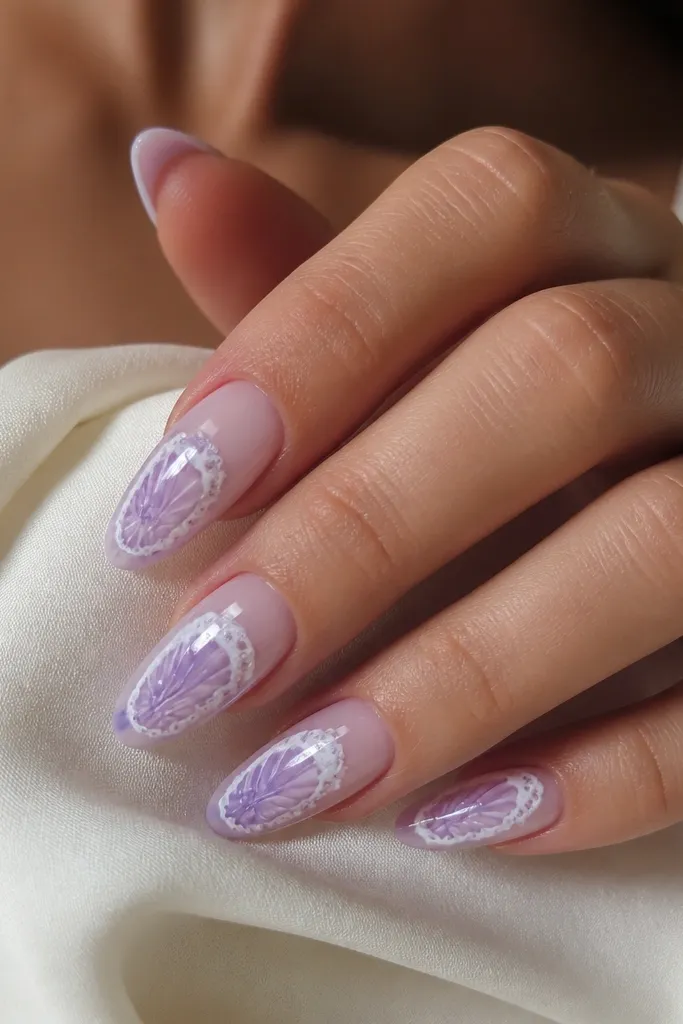
Decals get you close fast, but the foam edge is what makes it look custom. A sheer nude base keeps the decal from feeling heavy, and the milky white foam you paint by hand gives that wave-crest illusion. I like this for events when you want the look to last and you don't want to spend an hour drawing ridges. It flatters almost everyone because the nude base blends with your skin. Long almond shows the decal details best, but you can scale it down for shorter nails by trimming carefully.
Step 1: Apply a sheer nude gel base and cure. Step 2: Apply the water decal according to the packet timing, then trim to the sidewalls and file the top so it's flat. Step 3: Paint a thin milky white foam line by hand along the decal's outer edge using a striping brush, cure. Step 4: Seal with two layers of glossy topcoat, pressing the brush around the decal edges to prevent lifting.
Editor's noteAfter topcoat, check the free edge with a flashlight - if it catches, file one more pass.
Watch outDon't skip edge sealing - decal corners lift first.
15. Grape Shell Ridges with Clear Gem Cutters
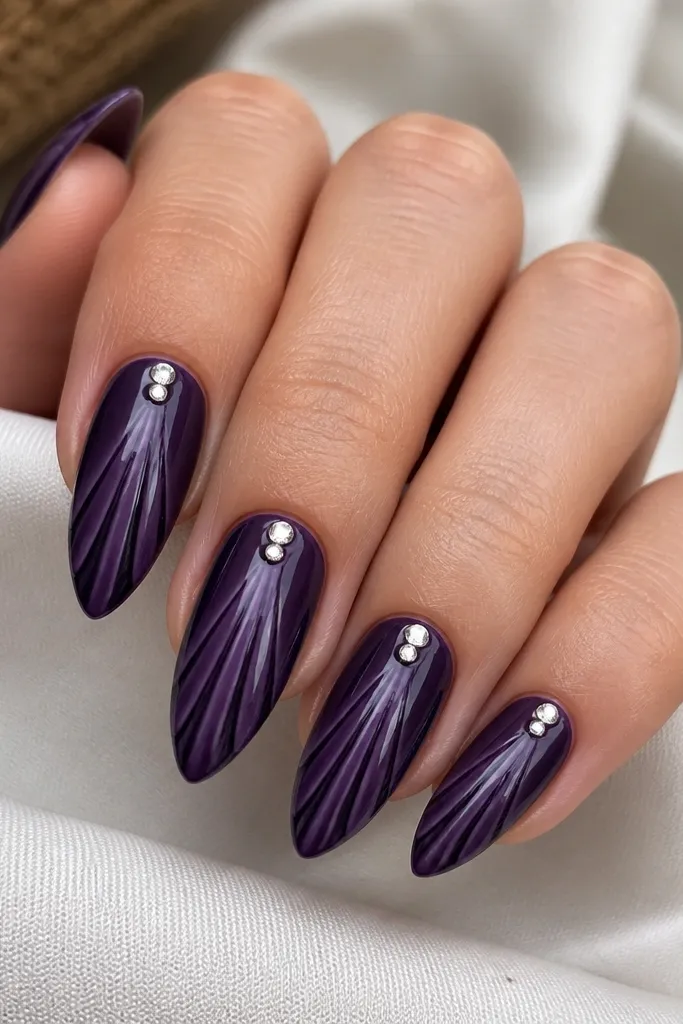
Faceted gems make the shell look like it has water droplets on it. Deep grape gives a strong base, and lighter ridges keep the structure visible. The gems are placed near the cuticle because that's where light naturally hits when your hand moves. This look is flattering on medium to deep skin tones because the grape reads bold without turning dull. On stiletto nails, the gems also balance the sharp shape so the manicure doesn't feel too sweet.
Step 1: Paint deep grape base and cure. Step 2: Draw shell ridges in lighter purple on the center third with short curved strokes, 6-8 lines. Step 3: Place two tiny clear faceted gems near the cuticle on each nail using gel as adhesive, then cure. Step 4: Cap with glossy topcoat and make sure the gel covers the base of each gem so it doesn't snag.
Editor's noteChoose gems with flat backs so they don't lift the topcoat.
Watch outAvoid placing gems at the tip - they look like random rhinestones instead of shell highlights.
16. Soft Purple Seashell with Peachy Nude Base
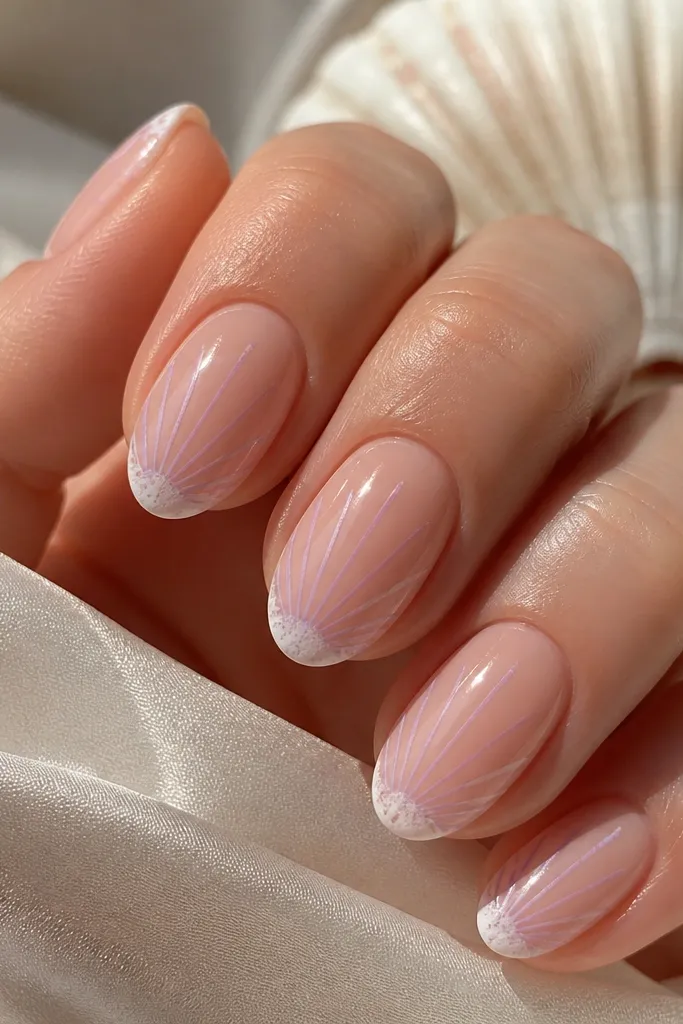
Peachy nude under purple is a secret trick that makes the whole seashell look warmer and more wearable. The peach tone balances cool lavender so your nails look healthy instead of washed out. I keep the ridges thin and spaced, because short almond nails don't have room for thick texture. The milky white foam line is faint but present - it gives the wave effect without overdoing it. This is a great pick if you have cool undertones and want purple that still feels flattering.
Step 1: Apply peachy nude gel base and cure. Step 2: Add thin shell ridges in soft lavender using a liner brush - keep them on the center third, 6-10 lines. Step 3: Paint a faint milky white foam line along the outer edge of the ridges, using a dotting tool to keep it crisp. Step 4: Topcoat with two glossy layers, curing between coats.
Editor's noteIf your white foam looks too bright, mix milky white with a tiny dot of nude gel to soften it.
Watch outDon't use pure white on a peachy nude base - it can look harsh.
17. Violet Shell Ridges with Pearlized Lavender Shimmer
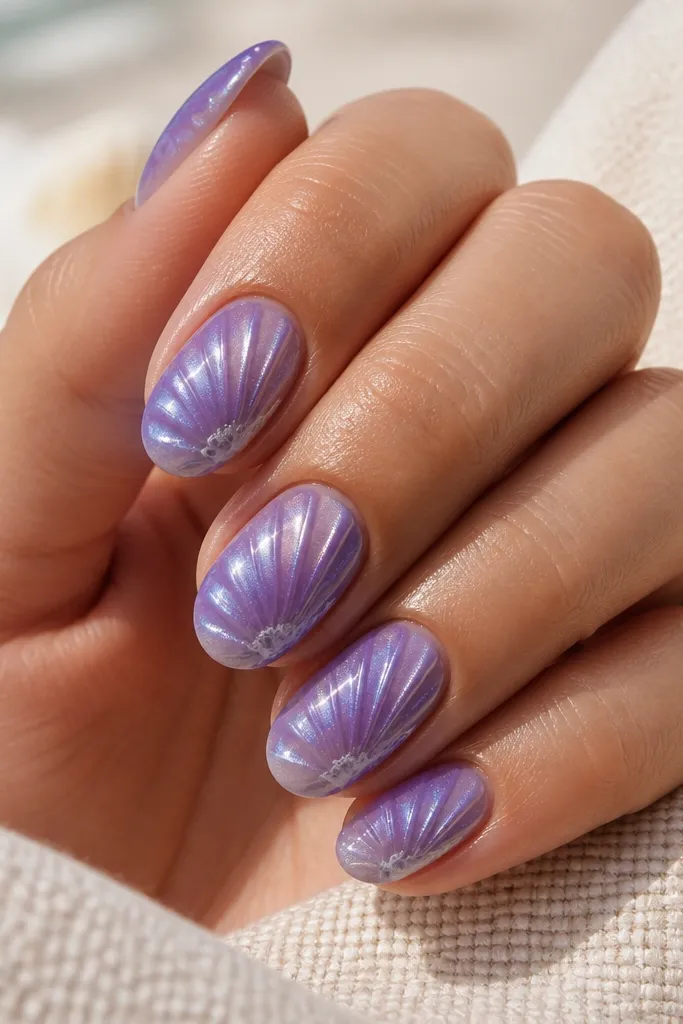
Pearlized shimmer is different from glitter - it looks like a soft sheen that moves when your hand turns. Violet base gives the richness, and pearlized lavender ridges add that shell glow. The milky foam line keeps it from looking like plain shimmer stripes. I like this on medium oval because the shape shows the shimmer shift without making it look too sparkly. It flatters most skin tones because the shimmer is controlled and the foam line gives a clean focal point.
Step 1: Apply violet purple base and cure. Step 2: Paint lighter lavender shell ridges across the center third, then lightly brush a pearlized lavender shimmer powder over the ridges before curing. Step 3: Add a thin milky white foam line along the outer ridge edge. Step 4: Seal with two glossy topcoat layers, curing fully so the shimmer doesn't dull.
Editor's noteUse a soft eyeshadow brush to apply shimmer - the bristles keep it airy.
Watch outAvoid heavy shimmer coverage - it hides the ridge lines.
18. Purple Shell Ridges with Opal Flake Only at the Tip
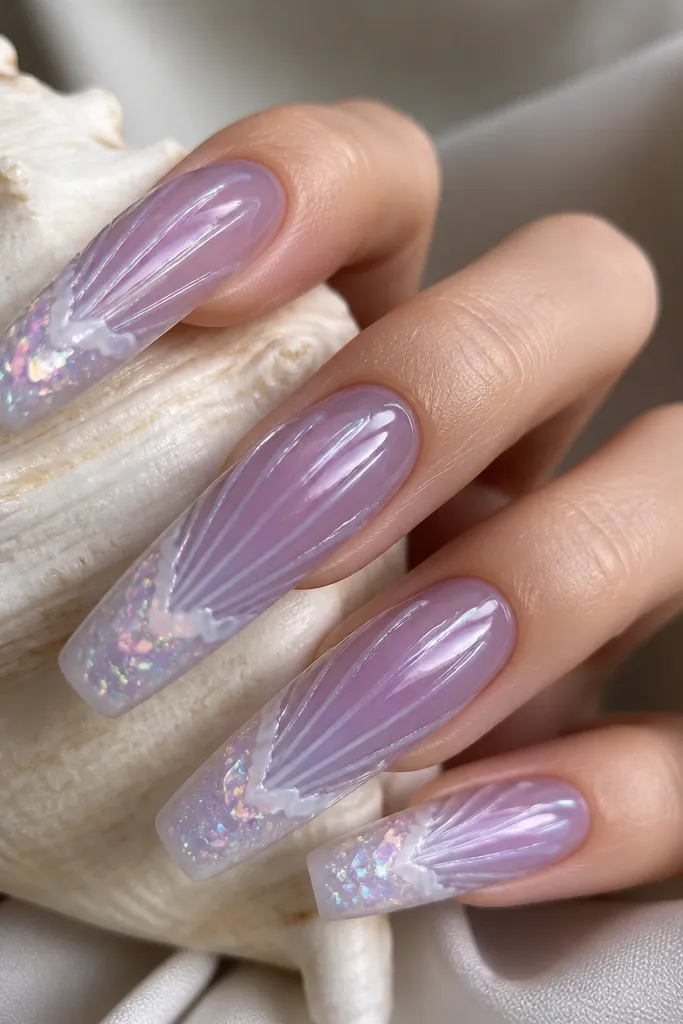
Putting opal flake only at the tip gives a "sunlit wave" effect without turning the whole nail into glitter. The sheer purple base keeps it airy, and the semi-transparent ridges look like you're seeing through a thin shell layer. Opal flake changes color slightly - it reads as ocean light rather than a single-color sparkle. This looks amazing on long coffin because the tip zone is wide enough for a controlled flake placement. It's also flattering because the center stays lighter and the tip detail creates shape.
Step 1: Apply sheer purple base in 2 thin layers and cure. Step 2: Draw semi-transparent lavender shell ridges on the center third, 7-11 short curved lines. Step 3: Add milky white foam line at the edge where ridges meet the tip area. Step 4: Press tiny opal flakes onto the tip only, then cure and cap with a glossy topcoat in two layers.
Editor's notePress flakes with a silicone tool - dragging can pull the ridges out of alignment.
Watch outDon't put flake near the cuticle - it makes the design look top-heavy.
19. Dark Grape Shell with White Micro-Ridges and No Glitter
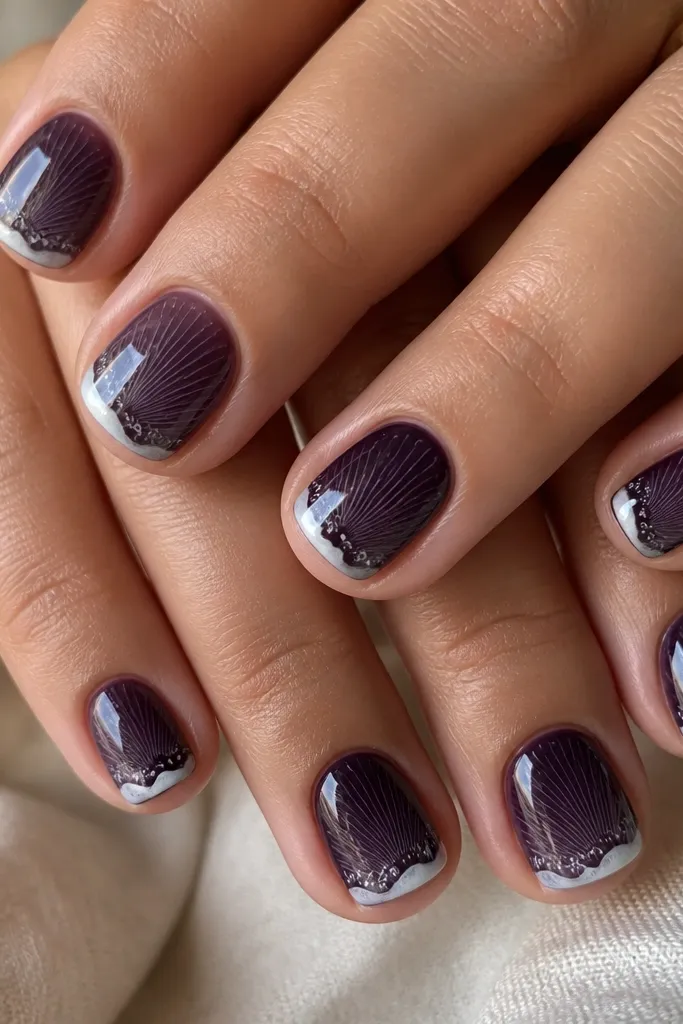
This is the cleanest "shell texture" look because the ridges are micro-drawn, not filled. Dark grape is the base, and the shell ridges are created with tiny white lines that feel like the shell's natural grooves. The foam edge is a single milky highlight so it still reads as seashell, not nail lace. I've found this works on short square because micro-ridges don't crowd the corners like thick gel ridges do. It looks sharp and intentional for everyday wear.
Step 1: Paint dark grape base and cure. Step 2: Use a fine liner brush to draw white micro-ridges within the center third - aim for 10-15 tiny curved lines per nail, each short. Step 3: Add a thin milky white foam edge along the outer side of the micro-ridges. Step 4: Topcoat with two glossy layers, making sure the surface feels smooth when you run a fingertip over it.
Editor's noteIf your lines look shaky, rest your pinky on your desk for steadier control.
Watch outAvoid drawing thick white ridges - they look painted on, not grooved.
20. Purple Seashell Accent Nail Set (4 Shell + 1 Foam Gradient)
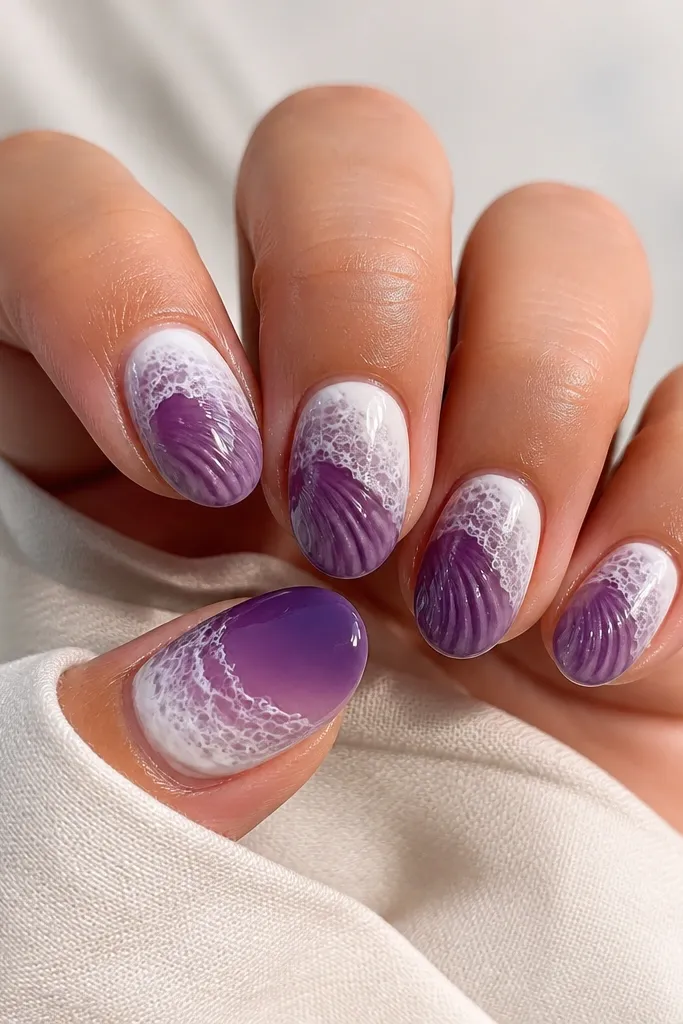
Accent sets look expensive because your eye gets a break and the shell detail feels intentional. I like doing four "true shell" nails and one statement foam gradient because it keeps the manicure cohesive. The shell nails use three purples and a thin foam edge; the accent nail uses a smooth fade to mimic a wave. This style flatters hands with uneven nail lengths because the gradient nail distracts from minor differences. It also works for both casual and dressy outfits because it isn't all-over heavy.
Step 1: Paint all nails with deep grape base and cure. Step 2: On four nails, add lavender shell ridges in the center third and finish with a thin milky white foam edge. Step 3: On the accent nail, sponge or brush a lavender gradient from deep grape at the base to lighter lavender near the tip, then drag milky white in a soft wave across the gradient. Step 4: Cure and topcoat all nails with two glossy layers.
Editor's noteChoose which nail is the accent based on your dominant hand - I pick the thumb because it gets the most compliments.
Watch outAvoid making every nail equally complex - the design loses its "set" effect.