1. Milky Nude Base With One Tiny Shell Dot
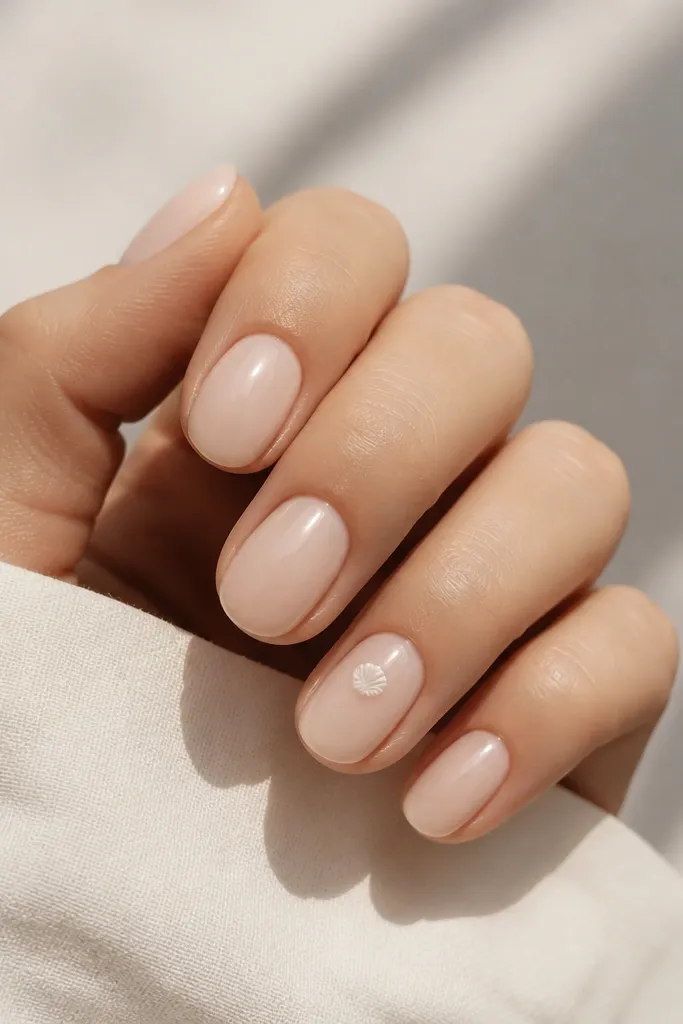
This one is my go-to when I want seashell nails simple budget-friendly but still polished. Start with a sheer milky nude so your nail looks even and smooth — it hides small texture differences. The shell is kept tiny: one dot plus a couple of thin arcs in white, so it reads as shell without taking over the nail. It looks best on short to medium lengths because the design sits cleanly near the cuticle. I’ve worn it on fair and medium skin tones and it always looks like a soft “natural beach” manicure, not a loud theme.
Paint all nails with a sheer milky nude, two thin coats. Let each coat dry fully — thin coats matter more than brand here. On your accent nail (I do index on both hands), place a micro dot of white near the upper third of the nail, then pull two short curved lines outward with a dotting tool or toothpick. Seal with a thick glossy top coat, and drag the top coat slightly over the free edge so it doesn’t chip as fast.
Editor's noteUse a toothpick dipped lightly in white polish — too much product makes the lines blob.
Watch outAvoid placing the shell dot in the middle of the nail on short lengths; it looks cramped and cheap.
2. Pearl Pink Shell Arcs on Two Accent Nails
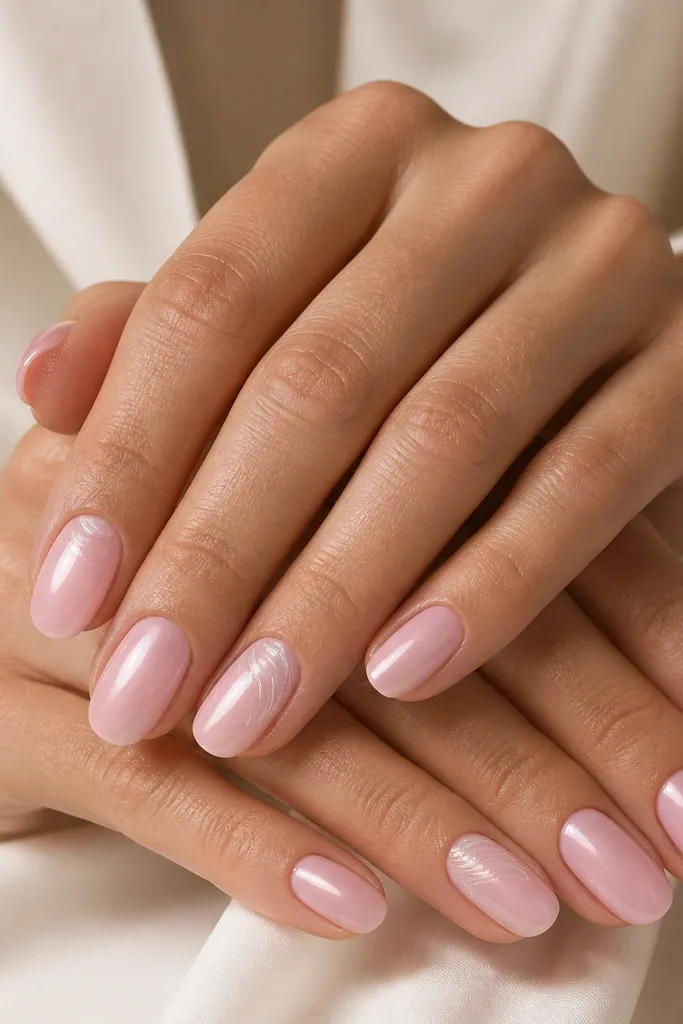
Pearl pink is the color that makes seashell details look expensive even when your tools are basic. The milky white arcs sit on top like shell ribs, and the pearl finish gives the “oyster” vibe. This works especially well on medium skin tones and warm undertones because the pink doesn’t clash — it looks like skin plus glow. I like it for spring and beach weekends because it looks fresh, not holiday-ish. Keep the arcs thin and spaced so you can still see the pink underneath.
Apply pearl pink to all nails with two coats for an even glow. Choose two accent nails per hand (usually ring and middle). On each accent nail, draw 4-5 thin curved lines in milky white starting just above the cuticle, each line fanning slightly to one side. Add one tiny pearl dot near the center of the arc cluster, then finish with a high-shine top coat.
Editor's noteIf your white polish is streaky, mix a drop of clear polish into it on a palette so it glides.
Watch outSkip thick opaque white; chunky lines make the shell look like paint blobs instead of ribs.
3. Half-Moon Shell With Sheer Nude French Tips
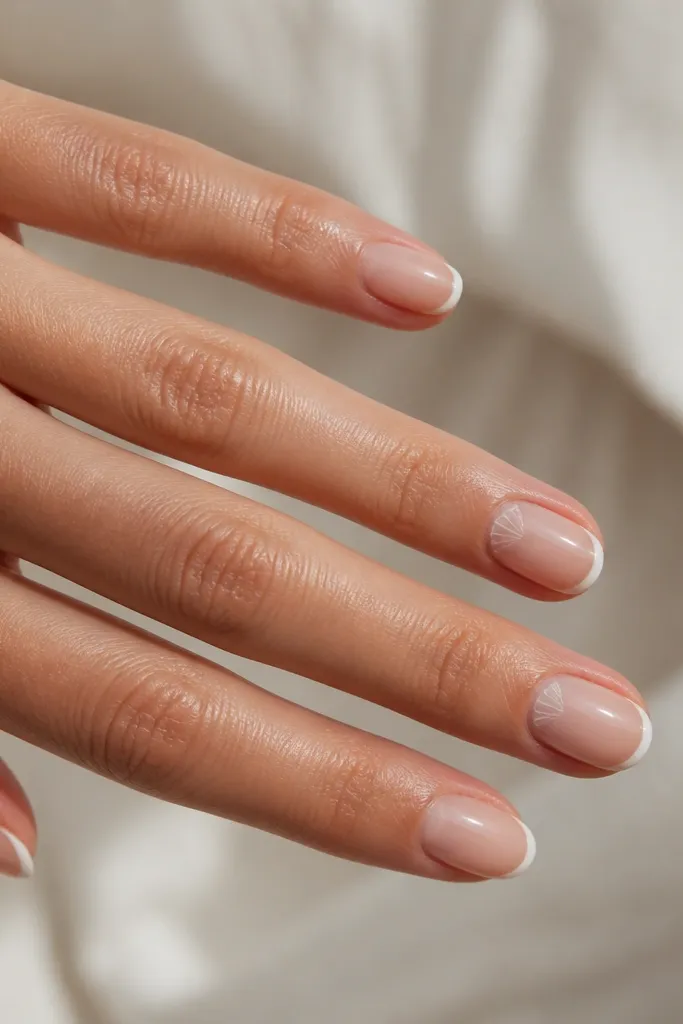
This design looks clean because it uses the French tip as your structure, then adds shell detail only at the cuticle. The half-moon shell is a small set of arcs that mimic the shell’s spiral, and it makes the manicure feel intentional from every angle. It’s flattering on almost every nail shape, especially almond and short square, because the tips lengthen visually. I’ve done this for events where you want “pretty nails” but nothing too busy — it reads classy in photos. The shell detail stays light enough that it doesn’t overwhelm your natural nail.
Start with a sheer nude base, then paint thin French tips in white using a striping brush. On the ring finger accent, add a half-moon shell at the cuticle: draw a curved outline with white, then add 3-4 inner arcs that fan inward. Keep the shell smaller than the cuticle width so it looks delicate. Top coat everything, and cap the tip edges well.
Editor's noteUse nail tape for the French line if you’re shaky; remove it while the polish is still slightly tacky.
Watch outDon’t make the French tips too thick; thick tips make the shell detail look off-balance.
4. Seafoam Base With White Shell Side Sweep
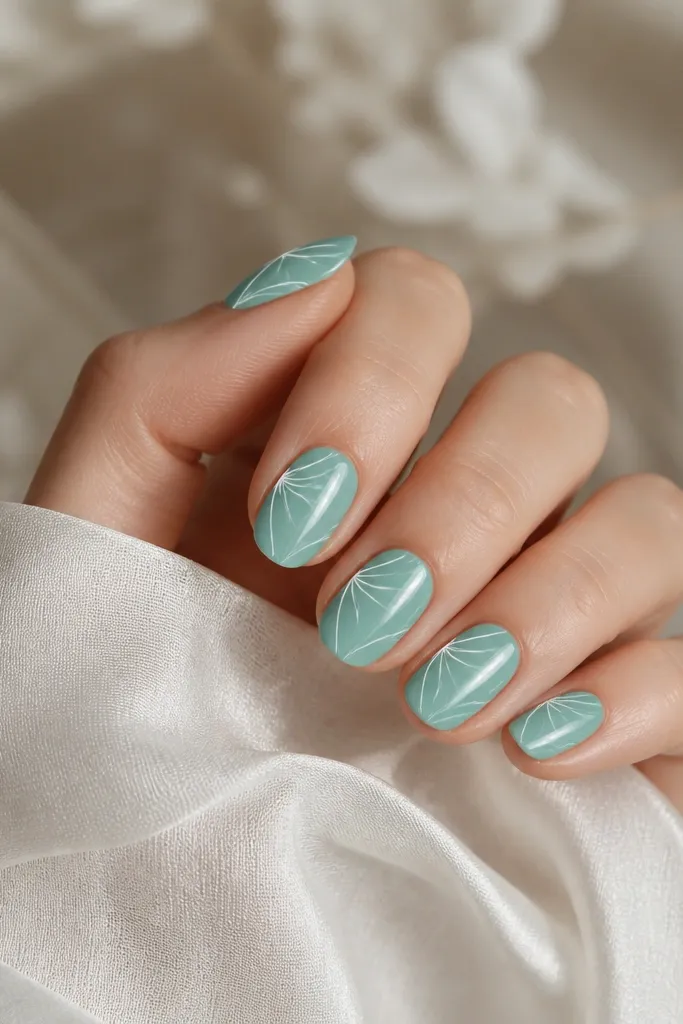
Seafoam is one of the easiest colors to make seashell nails feel fresh instead of childish. The white side sweep gives you a shell-rib look without needing to draw a full shell. This is great for long almond and medium coffin because the side sweep follows the natural curve of the nail. If you have cool undertones, seafoam makes your skin look brighter; if you have warm undertones, it still works because the white ribs keep it balanced. It also looks good with minimal jewelry — simple studs and a gold bracelet.
Paint a glossy seafoam base in two thin coats. With a striping brush, pull one main curved white line along the side of the nail from the upper third toward the center. Then add 3-4 thinner curved lines branching outward from that main line, like shell ribs. Keep the cluster tight — about the width of a pencil eraser at the mid-nail. Seal with a smooth, thick top coat to prevent the seafoam from staining.
Editor's noteIf seafoam stains, use a base coat with pigment-blocking ingredients under it.
Watch outAvoid spreading the ribs across the whole nail; a wide shell sweep looks messy and cheap.
5. Sand Beige Base With Starfish Micro Accent
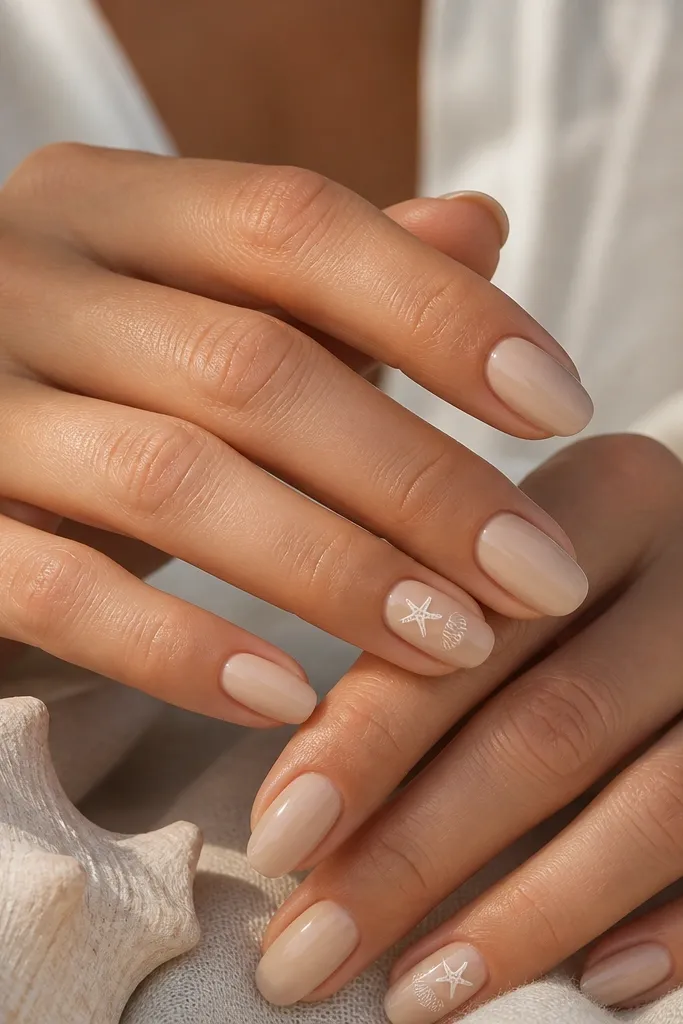
This one reads beachy without relying on heavy shell art. The sand beige base is flattering on every skin tone because it’s neutral and warm, and it makes white accents pop. The starfish micro accent adds the “seashell vibe” even if you keep the shell lines minimal. I’ve used this for vacation photos and it still looks cute in indoor lighting. It’s also beginner-friendly because the starfish can be a simple five-point shape rather than a detailed illustration.
Apply sand beige in two coats for full opacity. Pick one accent nail per hand, usually ring finger. Place a tiny white starfish shape near the cuticle using a dotting tool for the points, then add two short curved arcs next to it to suggest shell texture. Finish with a glossy top coat and cap the edges.
Use a fine liner brush if you want cleaner starfish legs, but a dotting tool works for quick results.
Don’t center the starfish in the middle of the nail; keep it near the cuticle for a neat look.
6. White Marble Shell Texture Using Sponge Stippling
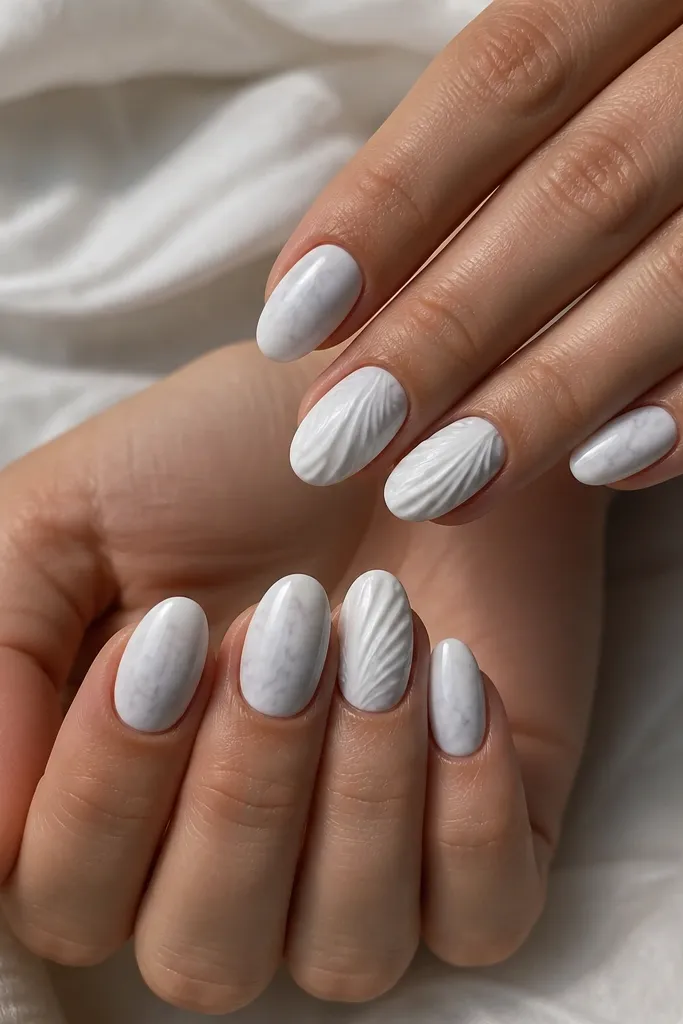
Marble plus shell is one of those combinations that looks complex but is actually easy on a budget. The sponge stippling gives you that cloudy, stone-like texture without buying expensive stamping plates. The shell ribs are the only “drawn” part, and they’re in a slightly darker white so they show up against the marble. This style looks amazing on medium coffin and almond because the texture catches light. I’ve worn it on my own hands when I needed something different from basic florals, and it always gets compliments.
Base coat with milky white. For the marble effect, dab a tiny amount of light gray polish with a makeup sponge in irregular patches, then blend edges by lightly tapping over them. On two accent nails, draw 4-6 thin shell ribs in slightly off-white from the cuticle down to the mid-nail. Add one small highlight dot near the center of the ribs. Seal with a glossy top coat to smooth the sponge texture.
Tap, don’t swipe — swiping turns marble into streaks.
Avoid heavy gray; too much contrast makes it look like cheap nail art, not marble.
7. Clear Jelly Top With Frozen Shell Lines
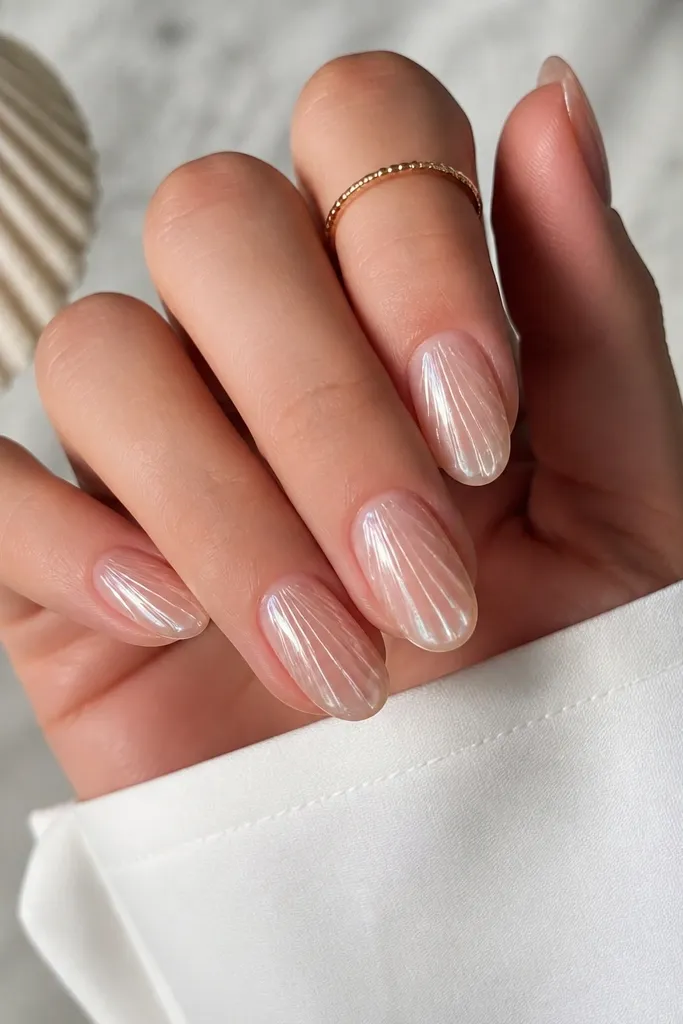
If you like a more modern, icy beach look, this one is for you. The clear jelly top makes the shell lines look like they’re suspended in water, which is the part that makes it feel higher-end. Use pale blue with the white so it reads like sea air. This works best on medium length because the diagonal ribs have room to look intentional. On deeper skin tones, the pale lines pop beautifully without looking harsh. It’s also great for people who hate glitter because the shine comes from the jelly finish.
Paint a sheer nude base in two thin coats. Apply a clear jelly polish (or a clear top coat thickened with a drop of clear polish) over everything. While the jelly is tacky, draw thin diagonal curved lines in white across each nail, then add 1-2 pale blue ribs beside them. Keep the lines spaced so the jelly still looks see-through. Finish with another layer of jelly or a glossy top coat.
Editor's noteLet the base dry longer than you think — jelly layers shift if the undercoat is too wet.
Watch outSkip thick lines; frozen shell looks best when the polish stays fine and airy.
8. Pastel Ombre With Milky Shell Tips
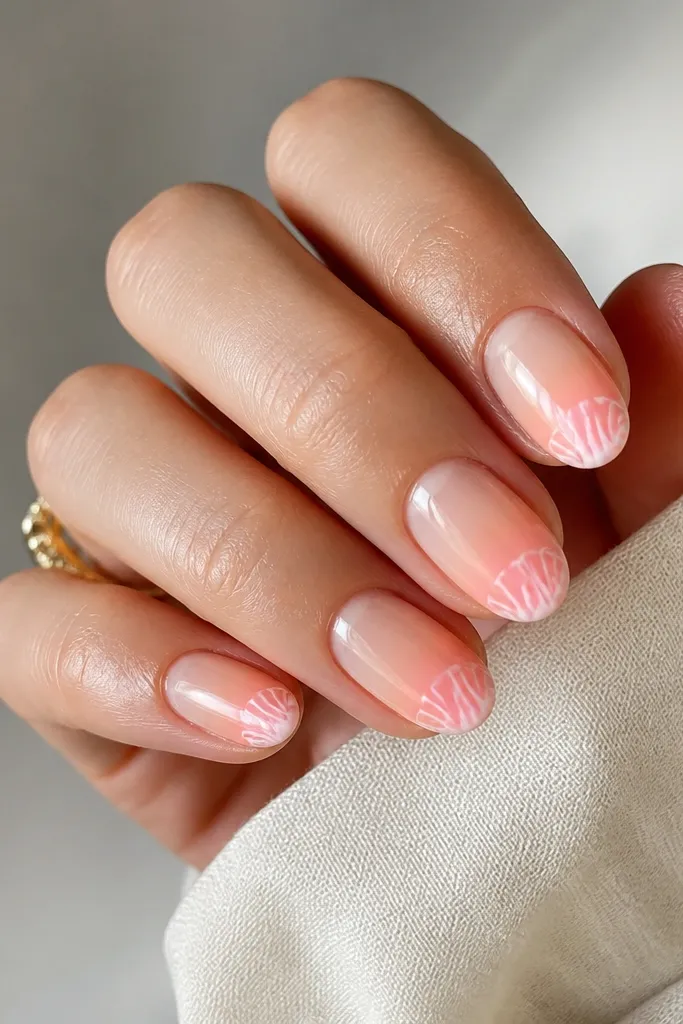
Ombre makes seashell nails look like a full design even when the shell part is small. The trick is using pastel ombre that fades smoothly, then adding shell arcs only at the tip so the design stays neat. I like peach-to-pink ombre because it flatters warm and neutral skin tones and looks great with gold rings. On short nails, the ombre creates length, and the tip shell detail gives the beach vibe. It also looks good if your hands get dry because the sheer fade hides small dryness patches.
Start with a sheer nude base. Sponge on pastel ombre: blend pale peach near the tip, then soften into pale pink toward the center using a makeup sponge. Let it dry, then on each nail draw 3-4 thin shell arcs at the tip edge using milky white. Keep arcs small and centered so they don’t cover the whole tip. Top coat thickly to unify the sponge texture and boost shine.
Use a sponge that’s already used for makeup blending; new sponges can leave too much texture.
Don’t use high-contrast dark-to-light ombre; it makes the shell look like an afterthought.
9. Shell Sticker + White Edge Trace (No Tools Needed)
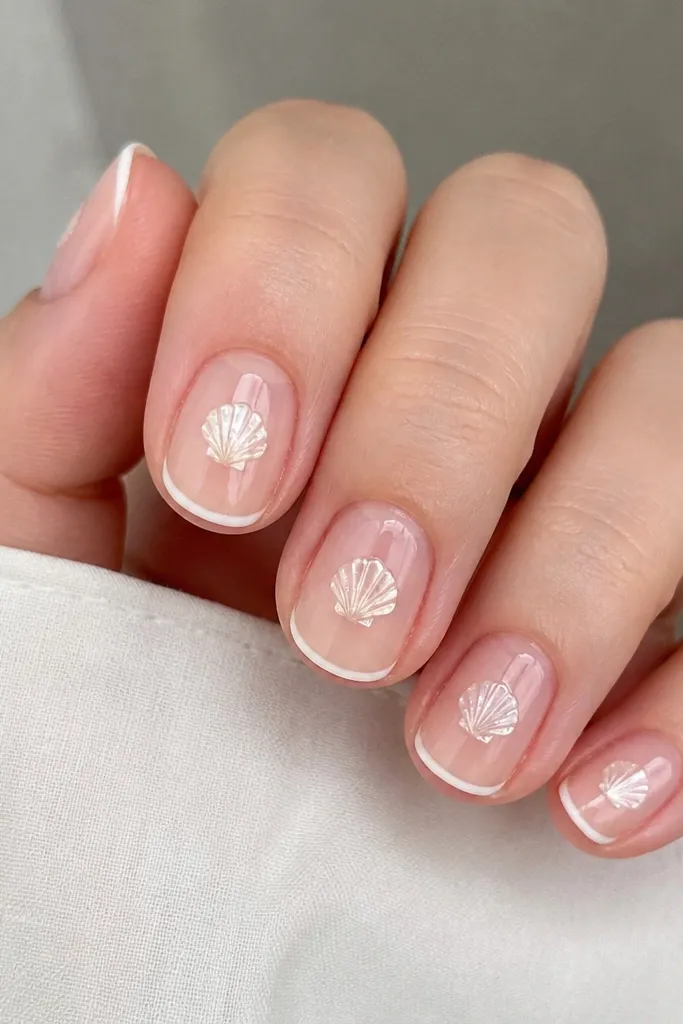
Stickers are the fastest way to get seashell nails simple budget-friendly, and the edge trace is what makes it look custom. The sticker gives you the shell shape, and the white outline makes it look like painted lines instead of a flat decal. This style is forgiving on uneven nails because the sticker sits smoothly under top coat. It’s also flattering across nail shapes because the sticker size stays controlled. If you’ve ever had stickers lift at the edges, this method reduces that by sealing the outline.
Paint a sheer nude base and top coat lightly once it’s dry. Place shell stickers on two accent nails per hand, pressing down firmly for 20-30 seconds. Using a thin liner brush, trace the sticker edges with milky white polish, then let it dry. Apply a thicker top coat, making sure it covers the traced outline and the sticker edges. Cure or fully dry before washing hands.
Trim sticker edges with small nail scissors if they hang over the sides.
Don’t skip top coat thickness; thin top coat makes stickers look like they’re sitting on top.
10. Gold Foil Seashell Spiral on Nude
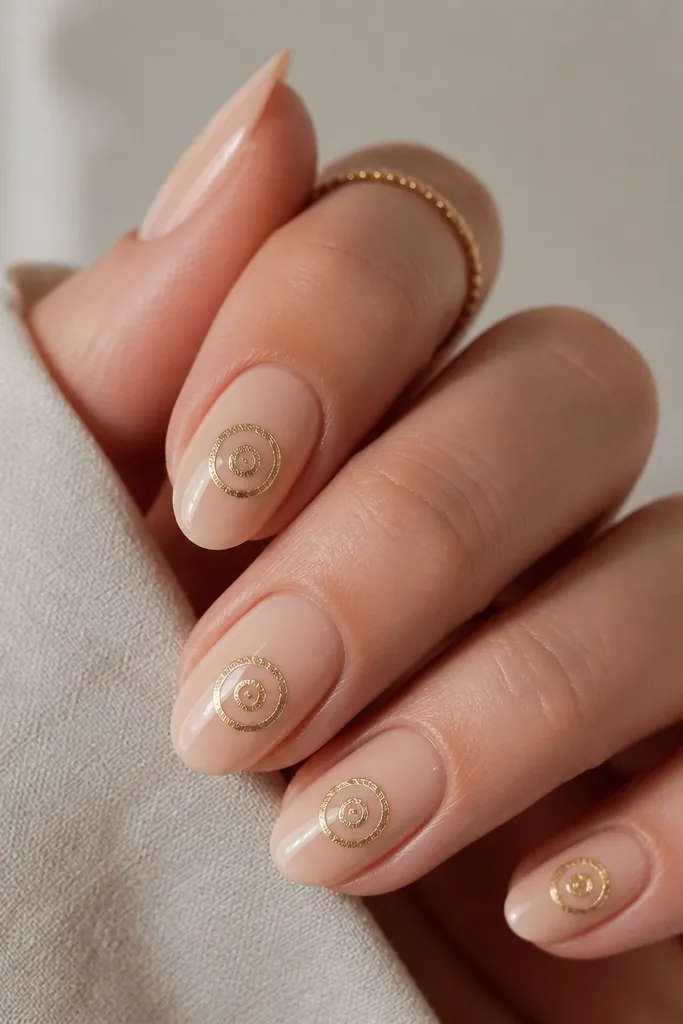
Gold foil spiral gives you that shell spiral look without needing steady hand painting. The nude base keeps it wearable, and the foil catches light like tiny highlights. This is stunning on medium to deep skin tones because the gold shows up clearly, but it’s still classy on fair skin. I like it for dinner dates and summer nights because it looks intentional without being glittery all over. It also grows out better than full art because the spiral stays compact.
Apply a glossy nude base in two coats. Use nail foil adhesive or a clear gel tack layer where you want the spiral. Press gold foil pieces in a spiral pattern, starting near the center of the nail and moving outward in a gentle curve. If you don’t have adhesive, use a sticky top coat and work fast. Seal with a top coat that won’t eat the foil edges — press gently while it sets.
Editor's noteCut foil into small strips so you can build the spiral tighter.
Watch outAvoid covering the whole nail in foil; it turns into a gold sticker look instead of a shell spiral.
11. White Shell Ribs on Clear Nude With Tiny Teal Dot
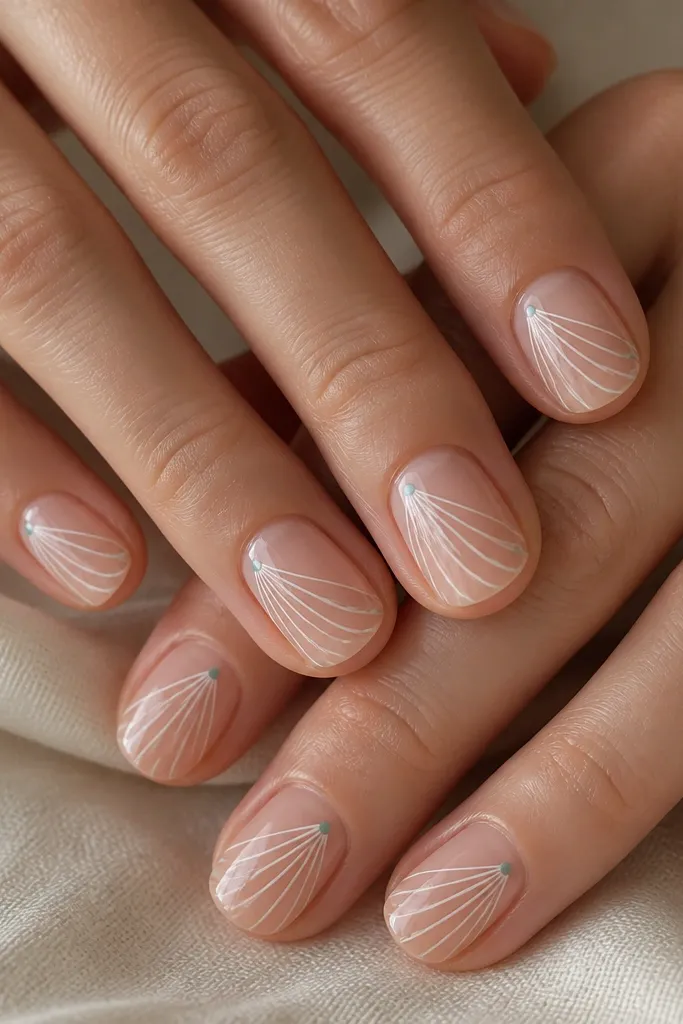
This is the “beach souvenir” look I keep coming back to because it’s simple but not boring. Clear nude is the base that makes everything feel clean, and the white ribs give the shell shape instantly. A tiny teal dot adds a pop that looks like sea glass — just one accent point, not a full color block. It’s flattering for hands that need a neat, polished vibe without heavy color. I’ve used teal because it sits between blue and green, so it matches both silver and gold jewelry.
Paint clear nude (or sheer pink nude) and let it fully dry. With a fine liner brush or dotting tool, place a tiny teal dot near the upper third of the nail. From that dot, draw 4-6 thin white curved ribs fanning outward in one direction, leaving space between each line. Keep the ribs shorter on short nails and longer on medium nails. Top coat twice if your lines feel slightly rough.
If your ribs look too dark, thin your white polish with clear top coat so it becomes milky.
Avoid drawing ribs all the way to the tip; stop at mid-nail so the look stays airy.
12. Blue-Gray Base With Milk White Shell Outline
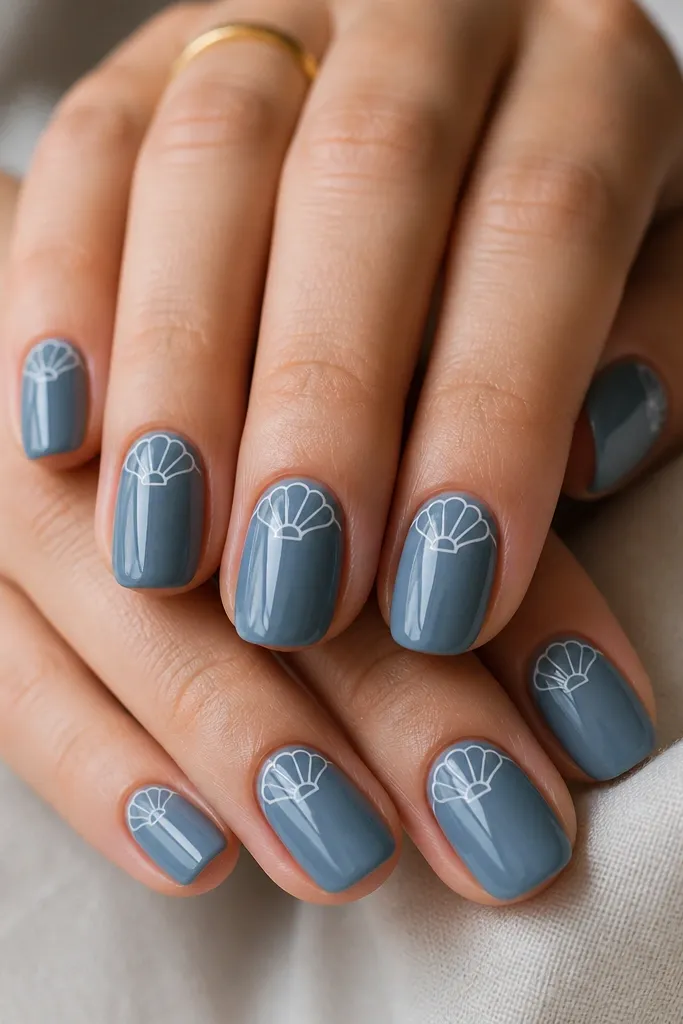
Blue-gray is a cool twist that still reads beachy when you keep the shell lines light. A milk-white outline works better than filled-in shells because it looks like negative space design rather than chunky art. This looks especially good on olive skin tones because the cool blue-gray makes your skin look smoother and brighter. It also looks great on short nails because the outline stays compact and doesn’t crowd the tip. If you want seashell nails simple budget-friendly but you hate colorful bases, this one is your compromise.
Apply blue-gray polish in two coats for full opacity. On each nail, draw a thin curved outline of a shell near the cuticle, like a crescent that sits horizontally. Then add one inner arc line that follows the curve, staying about one-third the size of the outer outline. Clean up edges with a brush dipped in remover. Seal with a glossy top coat.
Use the corner of a flat brush to outline the curve — it gives you a smoother line than a dotting tool.
Avoid thick white outlines; they look like stickers or marker lines.
13. Shell French Fade With Milky White Micro Lines
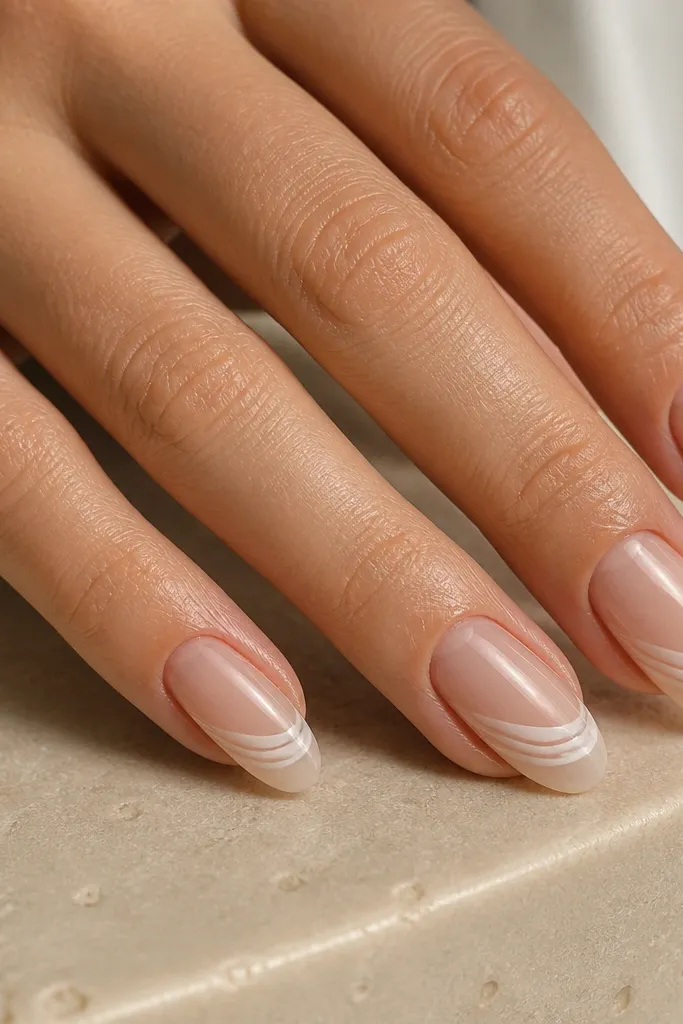
A French fade makes your nails look longer and cleaner than a hard French tip, and the micro lines add the seashell identity. I like this because it hides small nail shape differences — the fade blends everything. The micro shell lines are very small, just 2-3 curves in milky white, so you don’t need perfect steady-hand skills. This design looks great on square and short almond because the fade frames the nail edge. It also wears well for work since the shell art is subtle.
Paint a sheer nude base. For the French fade, sponge milky white at the tips and blend upward slightly, then add a second light layer if you need more opacity. On each nail, draw 2-3 tiny curved micro lines inside the fade area, starting near the top of the white section. Keep the lines thin and spaced like ribs. Finish with a glossy top coat and cap the tips.
Editor's noteLet the sponge layers dry between coats; layering too fast makes the fade muddy.
Watch outAvoid drawing big shell ribs on top of the fade; it gets busy fast.
14. Iridescent Shell Flakes Over Nude (Budget Version)
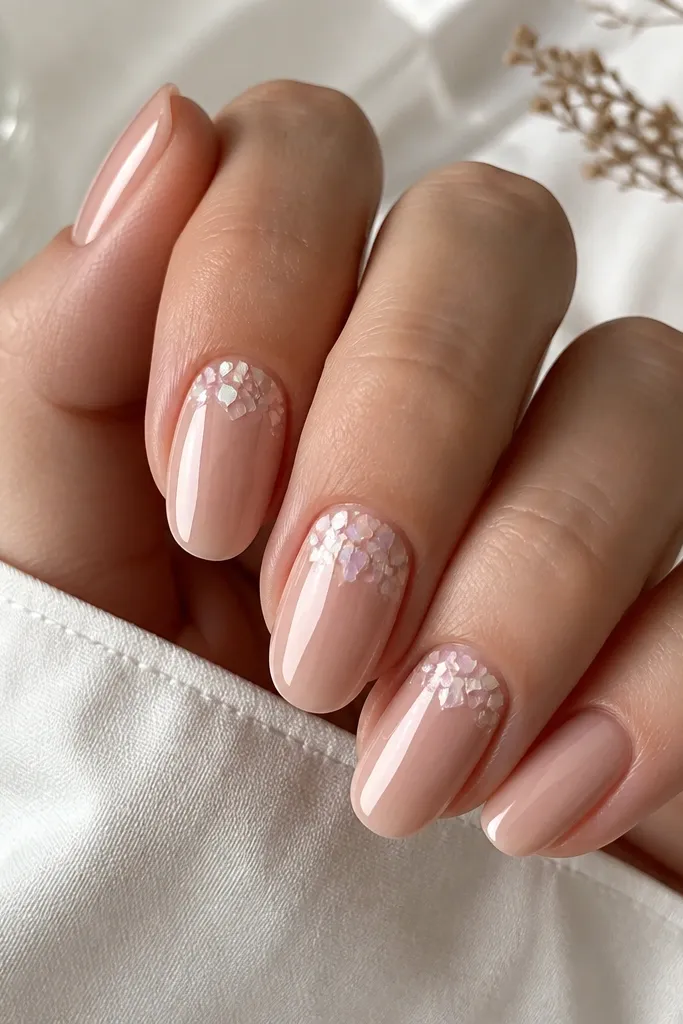
Iridescent flakes give you that “shell shimmer” without doing a full nail of glitter. Concentrating the flakes near the cuticle looks intentional and keeps the design from looking like random sparkle. This works on all nail lengths, but it’s especially flattering on short nails because it adds glow without crowding. It also looks good on both cool and warm skin tones because the flakes shift between pink and blue. I use this when I want a seashell look that still feels simple and easy to maintain.
Apply a glossy nude base to all nails. On two accent nails per hand, dab a small amount of nail glue or clear gel tack near the cuticle. Sprinkle iridescent flakes onto the tack, then gently press and tap off the excess. If the flakes are uneven, add a thin layer of clear gel or top coat to smooth. Seal the whole nail with top coat so the flakes don’t catch on fabric.
Editor's noteUse less flakes than you think — a small amount looks more like shell than full-on glitter.
Watch outAvoid putting flakes on every nail if you want budget-friendly; it usually looks messy instead of intentional.
15. Shell Ridges Using White Stripe Tape
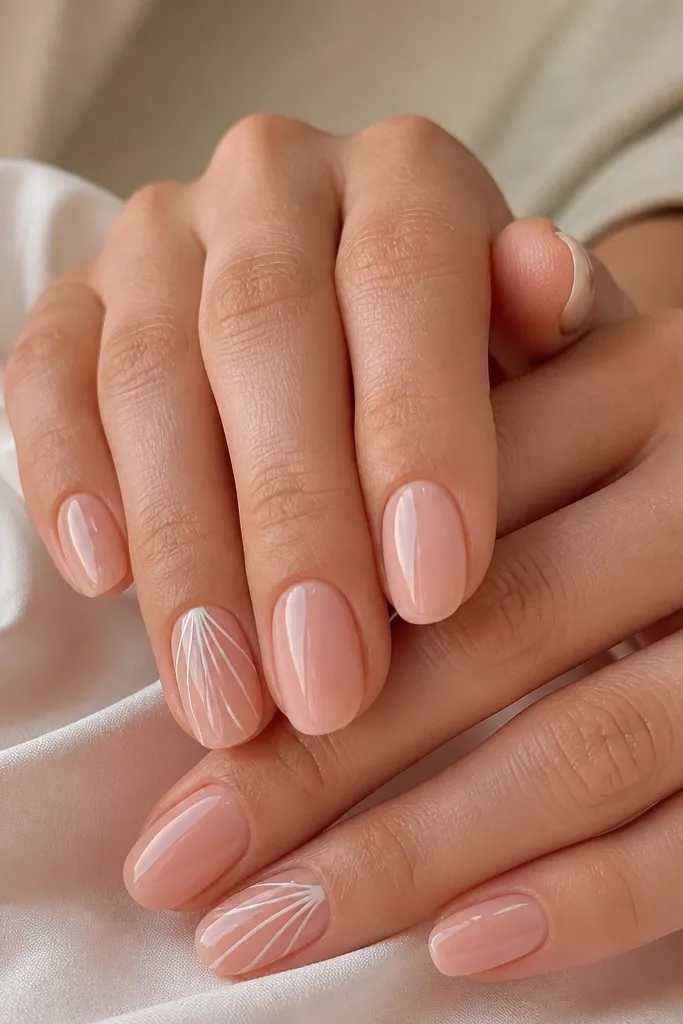
Striping tape is one of the best shortcuts for shell ridges because it gives you straight-to-curved consistency. The ridges are the whole point of the shell look, and tape makes them clean even if you’re not steady with a brush. Keep the tape lines thin and slightly curved so they mimic shell ribs. This style looks crisp on almond and coffin shapes, and it also works on short nails if you keep the ridges near the cuticle. It’s a great option when you want seashell nails simple budget-friendly and you don’t want to clean up paint edges.
Paint all nails with a sheer nude base and let it dry. On accent nails, place 4-5 thin strips of white striping tape starting near the cuticle and fanning toward one side, leaving small gaps between strips. Press the tape down firmly along the nail curve. Apply a layer of top coat over the tape, then add a second top coat to fully seal edges. Remove tape only if your top coat instructions say it’s safe; otherwise keep it sealed.
Trim tape to about half the nail length so it doesn’t look like long stripes.
Don’t use thick tape; it makes the ridges look like decals.
16. Sea Glass Negative Space Shell (No Full Painting)
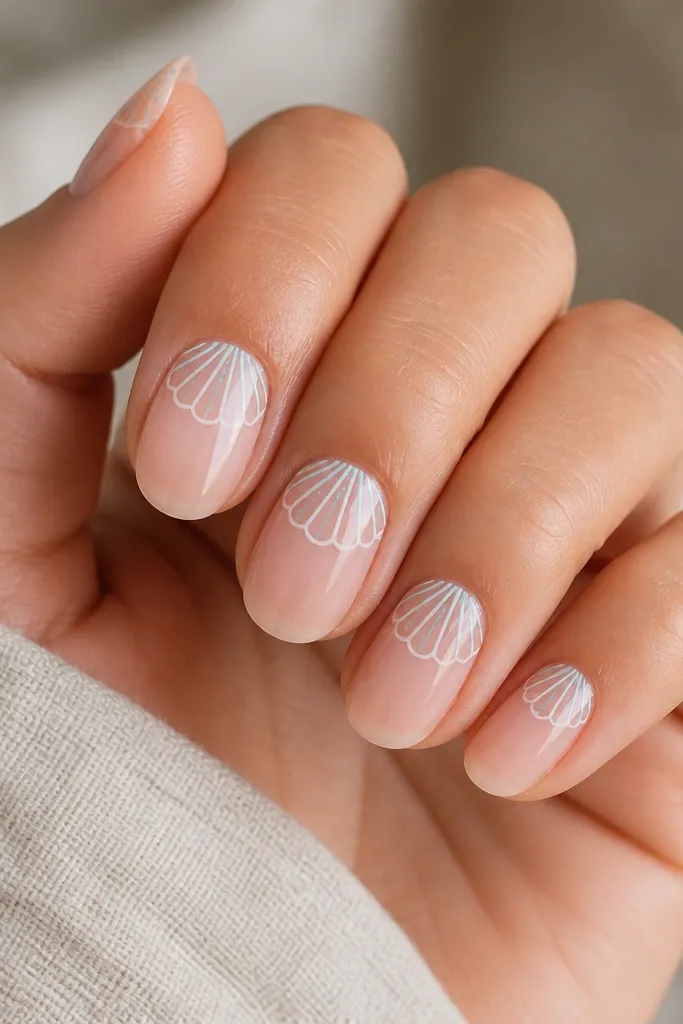
Negative space is the cheat code for looking neat while staying simple. You keep most of the nail clean and glossy, then add only a shell outline in pale teal and white. The sea glass color makes it feel beachy without needing a bright seafoam base. This looks best on short almond and oval because the outline fits the curve. I’ve worn it on days when I didn’t have time to paint full details and it still looked intentional. It also photographs well because the lines stay crisp against the sheer base.
Apply a sheer base in one or two thin coats. On each nail, use a fine liner brush to draw a curved shell outline near the cuticle, leaving the center area open (negative space). Add a pale teal inner line following the curve, then a small white highlight arc near the top of the shell. Clean up around the lines with a cotton swab lightly dipped in remover. Seal with a glossy top coat.
Editor's noteUse pale teal instead of darker teal so the design stays soft and shell-like.
Watch outAvoid filling the shell shape; filled shells usually look like sticker art.
17. White Shell Accent With Nude Skittle Nails
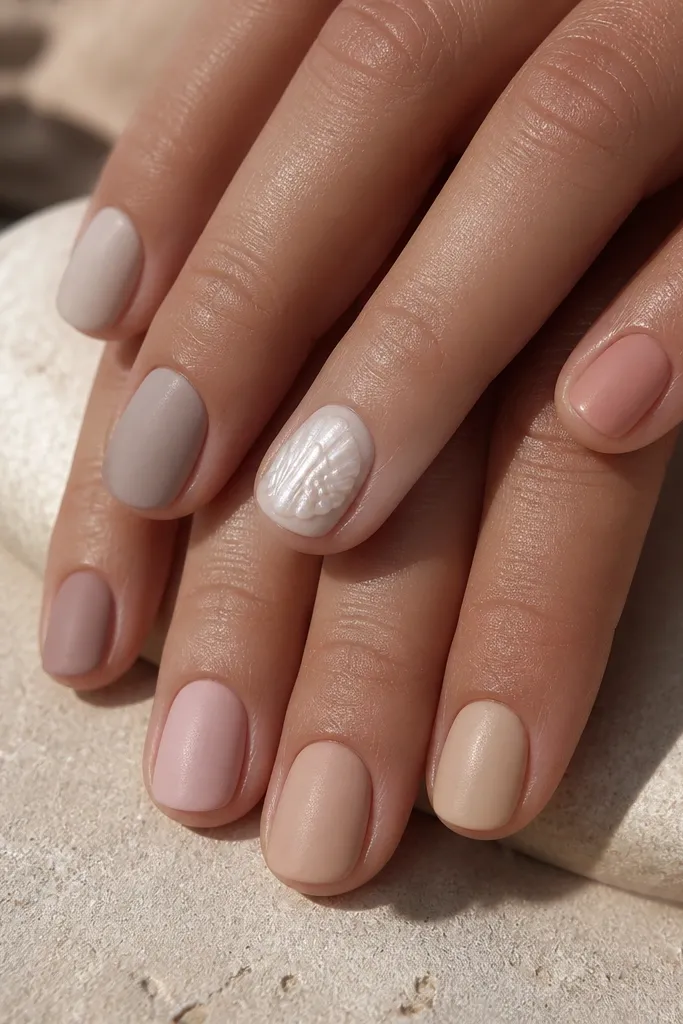
Skittle nails let you keep the manicure interesting without turning it into an all-over art project. By using different nude shades, you get dimension, and the one shell accent becomes the focal point. It looks good on every skin tone because nude shades are forgiving and blend with your hand. I’ve done this when my nails are short and uneven — the nude variety distracts from small growth differences. The shell ribs are thin and minimal, so the overall look stays budget-friendly and clean.
Choose 4 nude polishes in the same family: sheer nude, warm beige nude, pink nude, and milky nude. Paint each nail a different nude shade, one coat per nail then a second coat for opacity. On the ring finger (and only that nail), draw 4-5 thin white shell ribs starting near the cuticle and fanning outward slightly. Add one tiny white dot at the base of the ribs for the shell center. Top coat all nails to unify the shine.
Pick nude shades that are within one shade family — too many undertones clash.
Avoid using one bright neon nude; it pulls focus away from the shell.
18. Shell Crest on French Tip With Blush Base
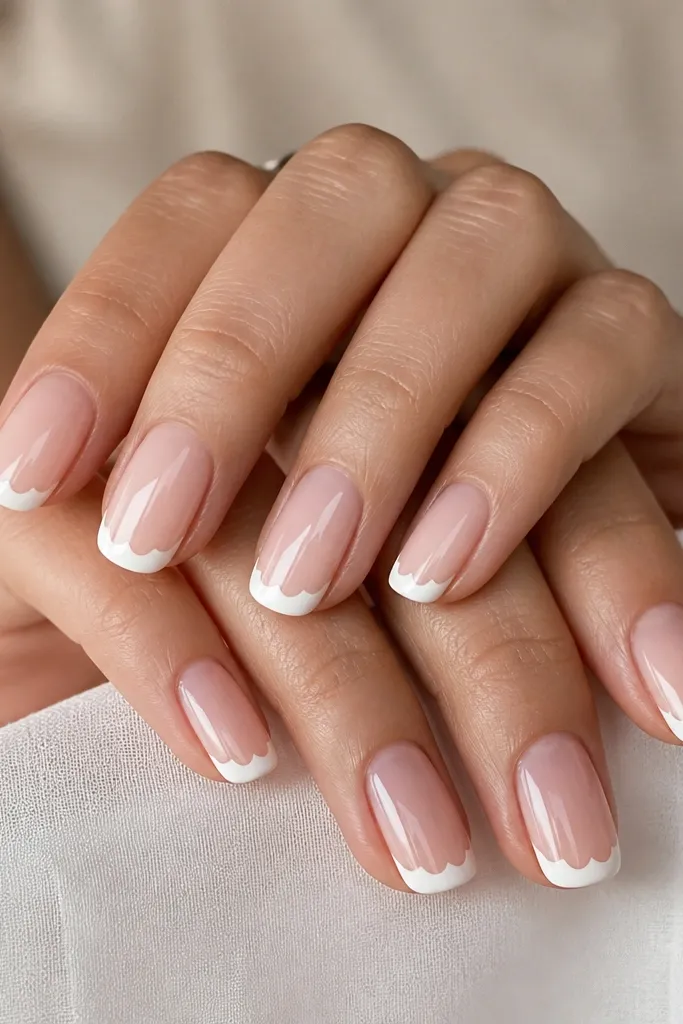
This is a clean, “summer manicure” version of a crest, and it looks more detailed than it is. The blush base keeps everything soft, and the French tip gives you a defined space to add shell arcs. The shell crest sits right on the tip edge, so it reads as a seashell detail without covering the nail. It’s flattering on almond, short coffin, and even squoval because French tips lengthen. If you want something that looks put-together for brunch or a wedding, this one hits that sweet spot.
Paint a blush pink base in two coats. Add thin white French tips, keeping the curve smooth. On each tip, draw a tiny shell crest: 3-4 scalloped curved arcs that sit across the tip edge like a crown. Keep the crest narrow so it doesn’t widen the nail visually. Finish with a glossy top coat and cap the tip edges.
Use a nail art striping brush and lightly drag the arcs — don’t press hard or they’ll get thick.
Skip a wide scallop crest; wide crests look like cheap stencil work.
19. Oyster Pearl Center With Blush Half-Ribs
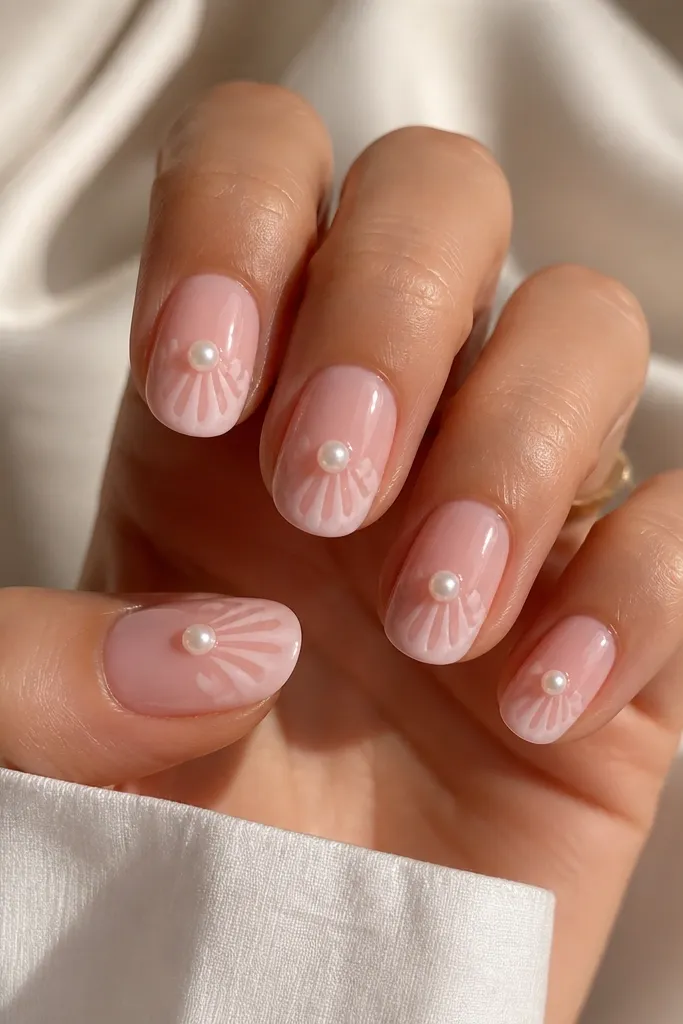
This is the most “oyster” looking simple design I’ve done on a budget. The pearl center gives you a focal point that reads luxurious, while the half-ribs keep it from turning into full nail art. Blush pink is the right base because it blends with the pearl highlight and keeps the ribs soft. It’s flattering for almost everyone because it’s not too pale or too saturated. I wear this when I want my nails to look fancy but I don’t want to spend an hour drawing. The half-ribs are also forgiving if your line control isn’t perfect.
Apply blush pink in two thin coats and let it dry. On each nail, place one tiny pearl dot or a small dot of iridescent polish near the center of the nail. Draw 2-3 milky white curved half-ribs on one side of the pearl, then repeat on the other side, leaving the middle open. Keep the ribs short so the design looks like a clamshell detail, not a full pattern. Seal with a glossy top coat, and avoid flooding the pearl dot so it doesn’t smear.
If you don’t have pearl polish, use a dot of white plus a touch of clear glitter top coat.
Avoid placing the pearl dot too close to the cuticle; it can look like a smudge when it grows out.
20. White Seashell Outline With Clear Top Coat Only
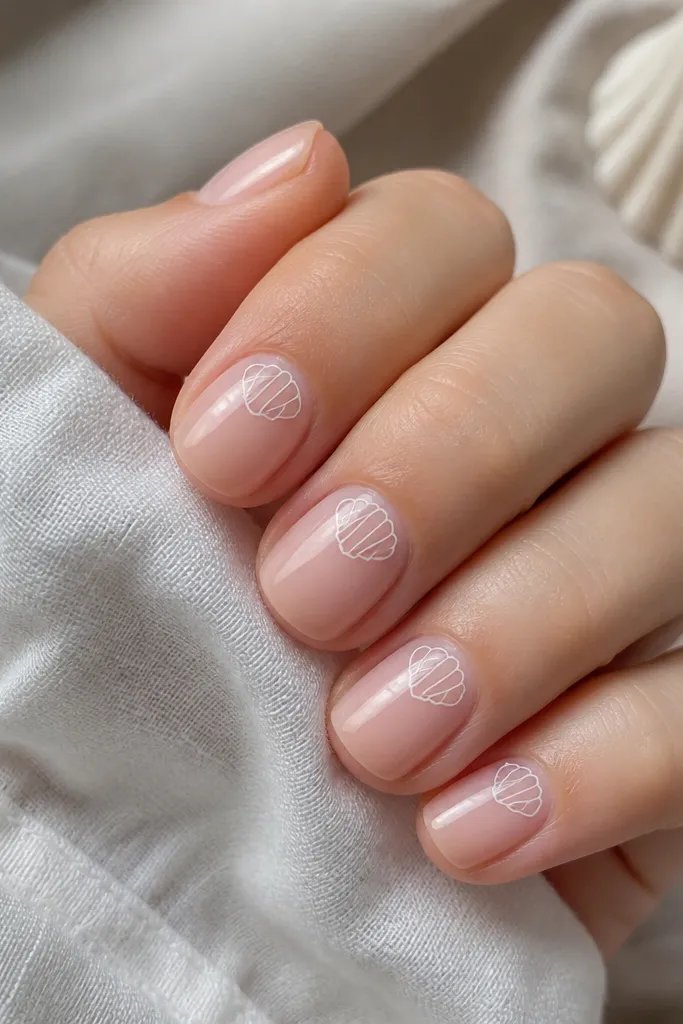
This is the “barely there but still seashell” manicure that looks clean and costs almost nothing. Because you only draw the outline, you avoid the time-consuming filling and you keep the look airy. The clear coat makes the nail look healthy and smooth, and the thin white outline reads like a sketch. This style looks amazing on nails that are naturally pretty or have a good shape, because you’re letting the nail show through. It also works for people who hate color on their hands. I’ve done this for quick weekends where I still wanted the theme.
Start with clean, shaped nails and buff lightly so the surface is smooth. Apply a clear base coat and let it dry, then add a glossy clear top coat. Using a fine liner brush, draw a thin white seashell outline near the cuticle on each nail, keeping the outline small and consistent. Do not fill the inside — only the outline. Add a final top coat to seal the lines and smooth any brush texture.
If your outline wobbles, add one extra thin line to correct the curve instead of erasing everything.
Avoid thick marker-like lines; thin outlines look custom and budget-friendly.