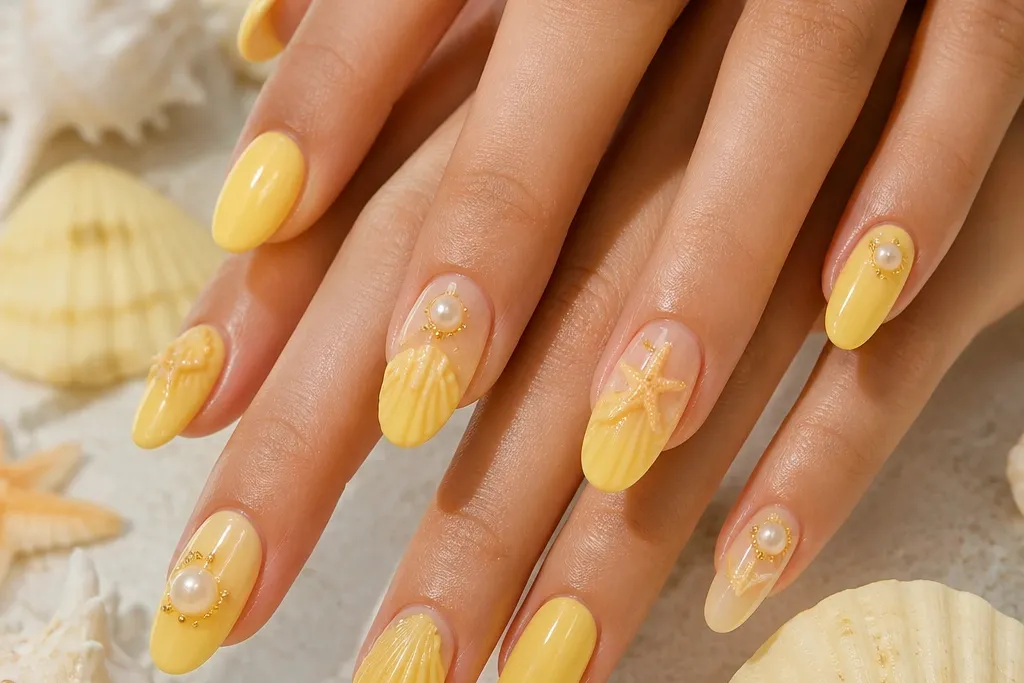
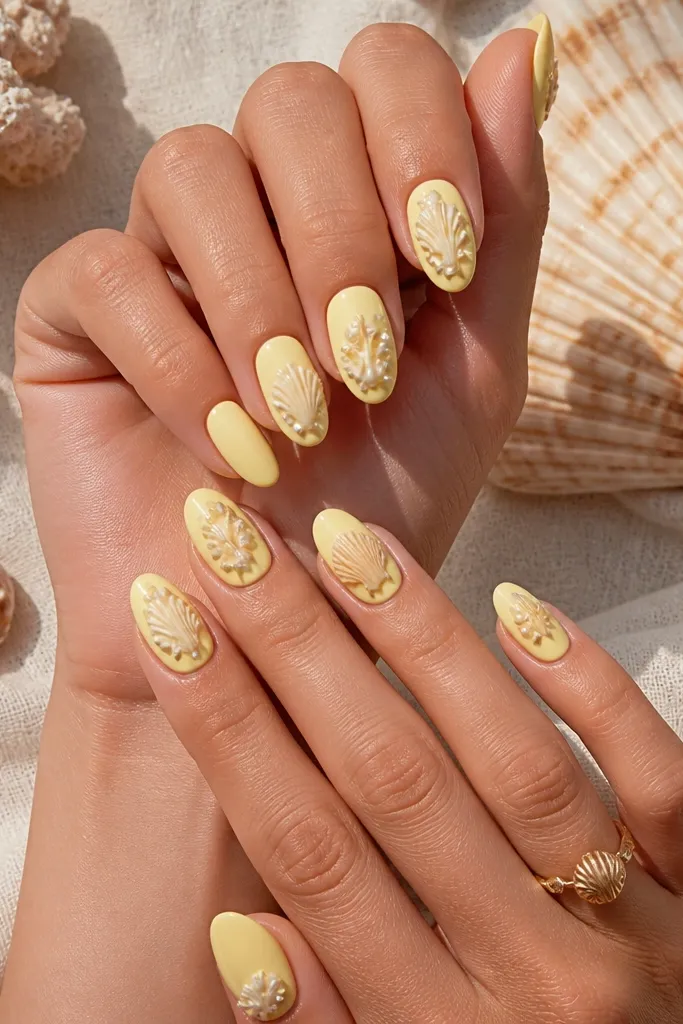
1. Butter Yellow Tip With Sea-Foam Shell Ribs
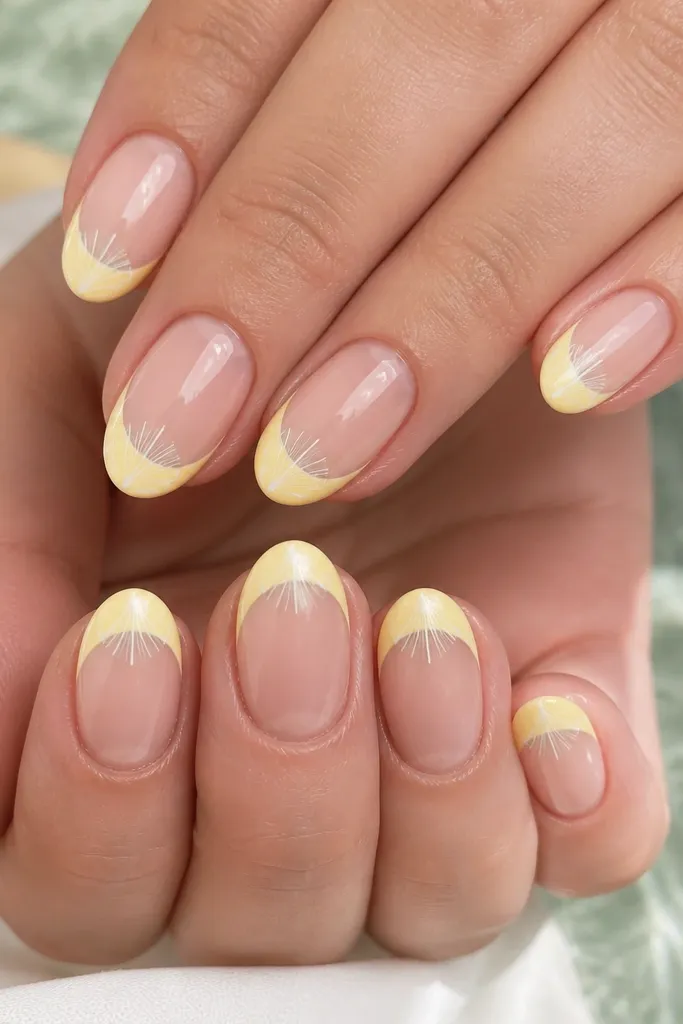
This one is my go-to when I want "beach cute" without the manicure feeling busy. The butter-yellow tips look warm against most skin tones, especially light to medium complexions, and the sea-foam highlight keeps the yellow from turning neon. The shell ribs are drawn thin so they look like shell ridges, not stripes. On short almond nails, the ribs stay crisp because the tip shape gives you a natural boundary. For fair skin, pair it with sheer pink base; for deeper skin tones, use a nude base that matches your undertone so the yellow pops cleanly.
Start by prepping and pushing back cuticles, then buff the shine off the nail surface. Paint a sheer nude or sheer pink base coat, cure, then apply a butter-yellow tip using a striping brush to keep the edge sharp. With a fine-liner gel or acrylic paint, draw shell ribs starting near the center of the tip and fanning outward - keep each line about the width of a hair. Add a tiny sea-foam dot at the rib start, cure, then finish with a thick glossy top coat that covers the tip edge.
Editor's noteDo the shell ribs in two passes: one light sketch layer, then a second darker line layer once you see the spacing.
Watch outAvoid thick white lines - they dry raised and make the shell look like stickers.
2. Milky White Base With Transparent Yellow Shell Half-Moons
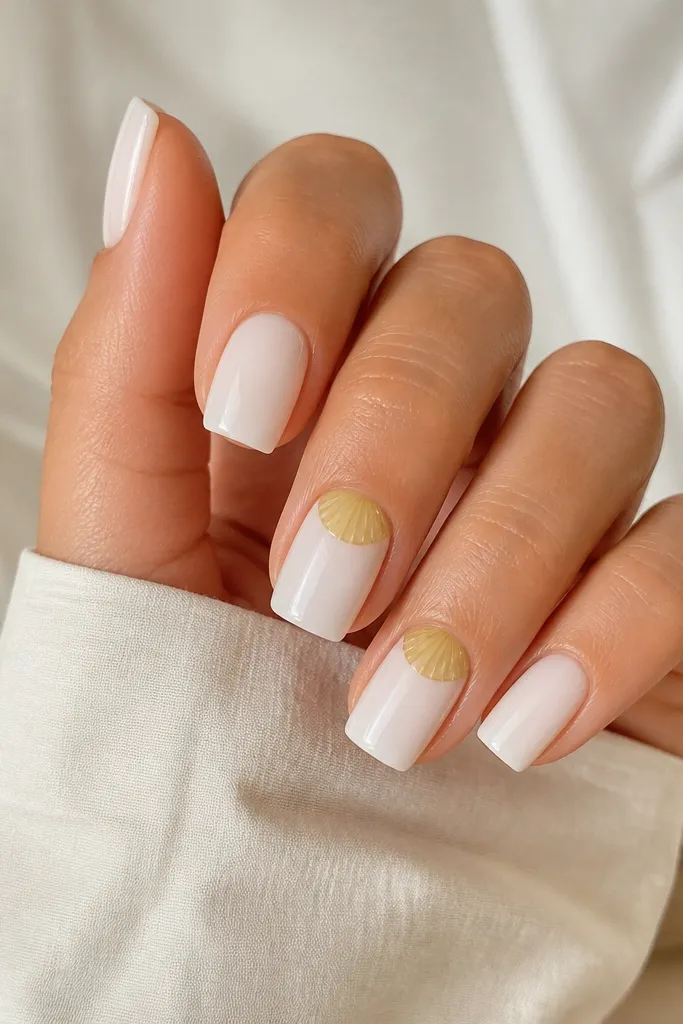
This design is airy and expensive-looking because the yellow is semi-sheer. The milky white base makes the shell ribs visible, while the transparent yellow half-moon keeps it soft - it won't overpower your hands. I wear this when I'm going for "clean summer" for brunch or office days because it doesn't scream vacation. It flatters most skin tones since milky white brightens the nail bed area. If your hands run dry, the milky base makes the cuticle area look smoother because it visually evens out the tone.
Start with a milky white gel polish base, cure fully, and wipe the inhibition layer if your brand requires it. On the accent nails, paint a semi-sheer transparent yellow half-moon centered at the cuticle - use a small flat brush and keep the curve tight. Add shell ribs in thin pale white or very light cream within the yellow area, drawing 6-8 lines that radiate outward. Cure, then top coat the whole nail with a leveling layer so the half-moon edge disappears.
Editor's noteIf your yellow looks too opaque, thin it with a clear gel to keep that see-through shell effect.
Watch outAvoid painting the half-moon too wide toward the middle of the nail or it turns into a blocky yellow patch.
3. One-Line Shell Swirl on Sheer Nude
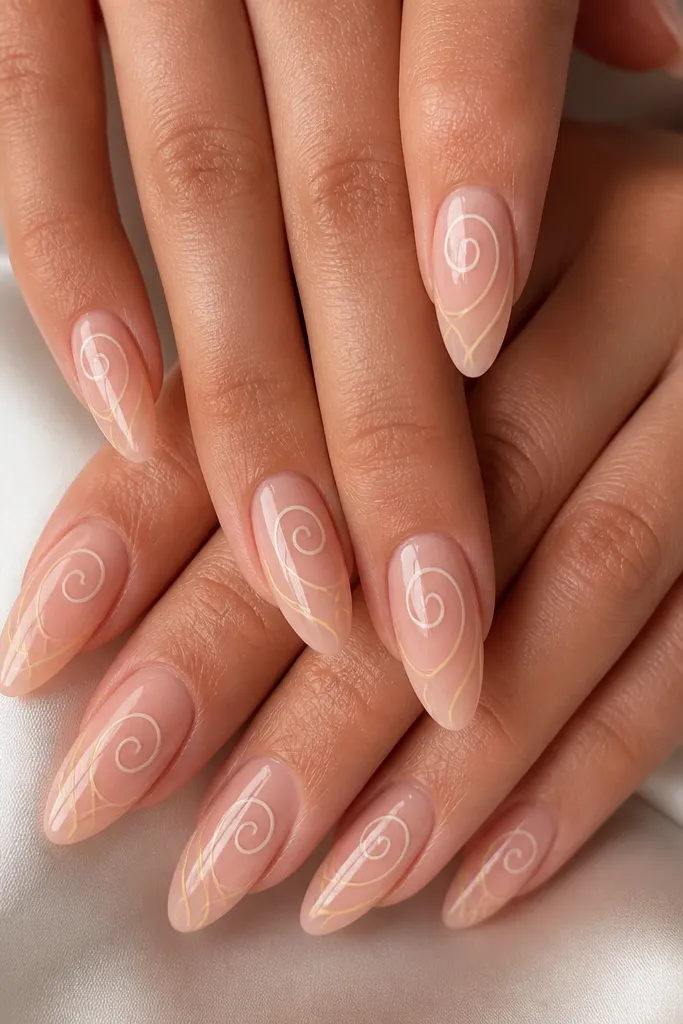
This is the minimalist version that still looks like seashells, not "random nail art." The sheer nude base makes your nails look longer, and the one-line swirl gives the illusion of shell spirals without needing a full rib pattern. I like it on medium-long almond or squoval because the swirl has room to curve naturally. It's flattering on hands with shorter nail beds because the nude base blends in and the thin lines keep everything light. For warm undertones, use a pale honey yellow line; for cooler undertones, use a slightly pink-leaning white highlight.
Prep, then apply a sheer nude base and cure. Using a striping brush and thin gel paint, draw a single shell spiral starting near the lower third of the nail and curving toward the center - keep the line thickness consistent. Add one small pale yellow "glow" stroke next to the main line, then cure again. Finish with a glossy top coat that covers the line edges so it looks smooth under light.
Editor's notePractice the spiral on a plastic nail form first so your curve lands in the same place on every nail.
Watch outAvoid multiple thick lines - two or three heavy passes make it look like a scribble.
4. Shell Confetti Tips With Micro Glitter Dust
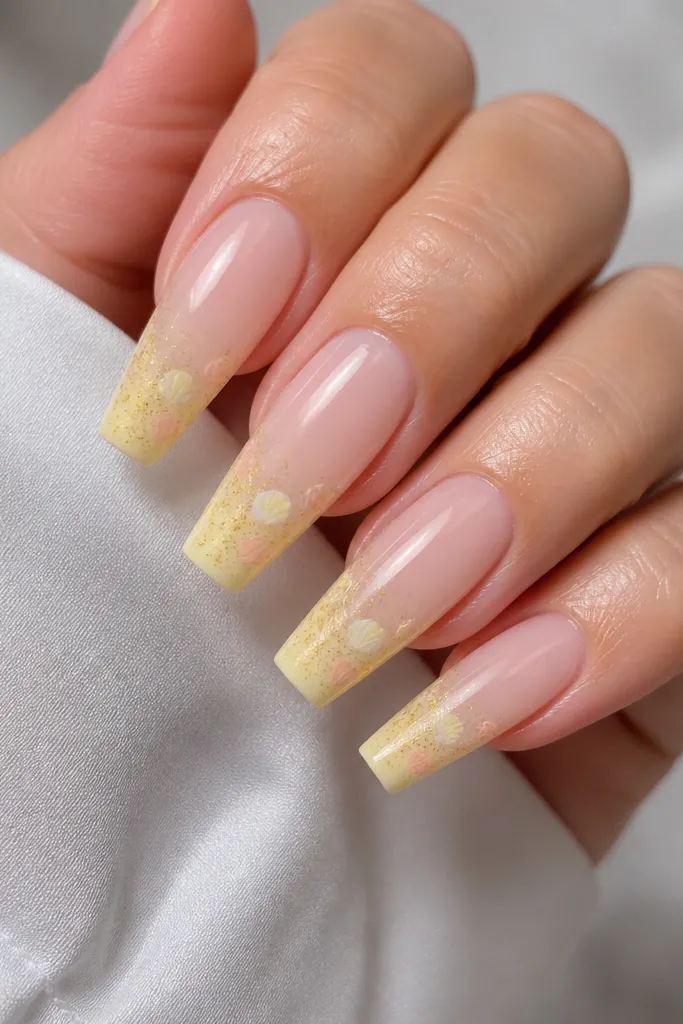
If you want yellow seashell nails creative summer charm with movement, this is the one. The confetti shell marks break up the yellow so it doesn't look like a plain French tip. I add micro glitter dust only near the tip so it catches sun without turning the whole nail sparkly. This works best on long coffin or long almond because the tip area is wide enough for multiple tiny details. It flatters hands that look better with strong contrast, and it also hides minor cuticle dryness because the base stays sheer.
Start with a sheer pink or sheer nude base, cure, then apply butter yellow tips using a French guide if you need clean edges. While the tip is still tacky (or after a thin top coat layer if your system needs it), add tiny shell dots using a dotting tool and pale cream gel. Add short rib strokes in white or very light yellow between the dots for the confetti look. Finally, dust micro fine pale gold glitter at the outer tip edges, cure, then seal with a thick glossy top coat.
Editor's noteUse a glitter that is fine enough to feel smooth - if it feels gritty, it will snag and dull fast.
Watch outAvoid piling glitter in the center - it makes the tip look crusty instead of sunlit.
5. Sea-Glass Ombre With Yellow Shell Accent
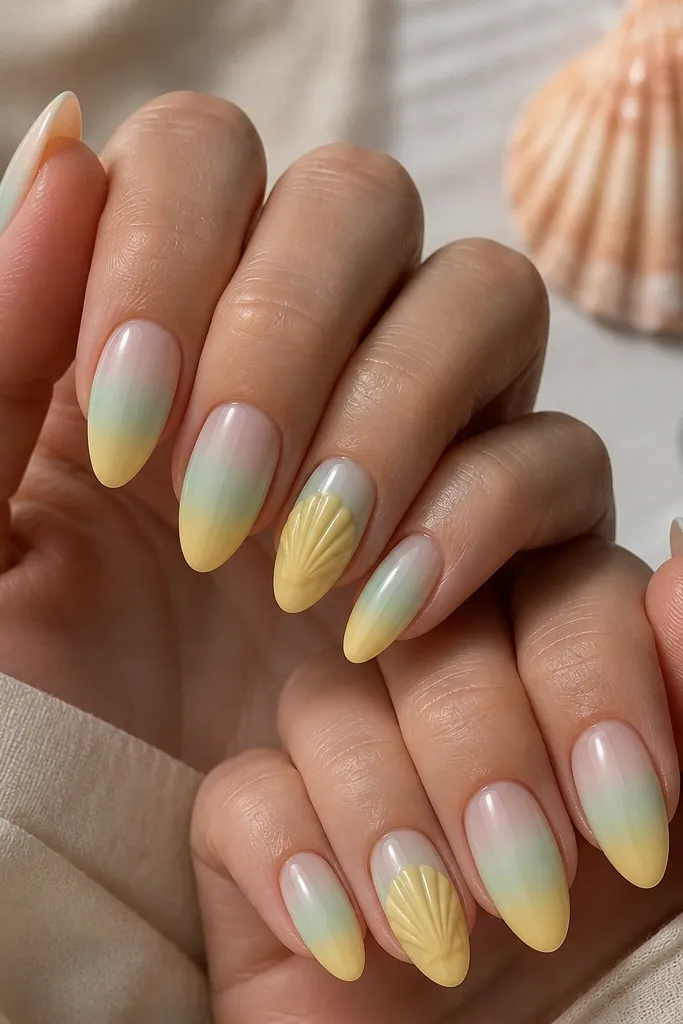
This design looks like you dipped your nails in ocean light. The sea-glass ombre keeps the yellow from being the only color, so it feels more "summer charm" and less like a standard yellow manicure. I love it on medium almond because the gradient has a natural runway from cuticle to tip. It flatters fair and medium skin tones by adding cool tones near the cuticle and warm tones near the tip. If your skin is deeper, the sheer nude base helps the gradient stay clean instead of muddy.
Apply a sheer nude base and cure. For the ombre, sponge on pale mint gel at the cuticle side, then blend into soft yellow toward the tip using a makeup sponge with light pressure. Wipe and clean the sides, then cure. On one or two nails, add a stronger yellow patch in the center and draw shell ribs across it with thin white and pale sea-foam lines. Top coat with a leveling glossy layer to smooth the sponge texture.
Editor's noteBlend in small sections and cure after you're happy - repainting over sponge texture makes it cloudy.
Watch outAvoid hard lines in the ombre - they make the look look like a stripe, not a gradient.
6. Pearl Center Shell With Micro Rhinestone Star
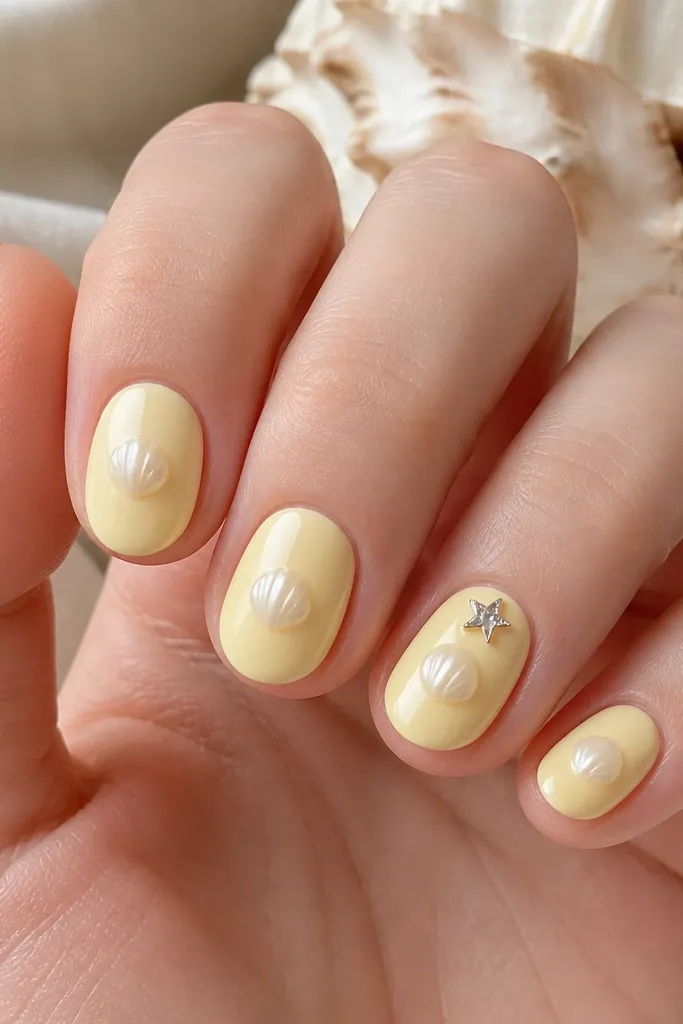
This one reads playful and special without going full 3D on every nail. The pearl center mimics the shell's raised "nucleus," which gives depth even if you keep the rest flat. I use a tiny rhinestone star because it looks like a sun sparkle on vacation photos. This style looks best on short oval or squoval because the raised center stays proportional and doesn't snag. It flatters hands with smaller nail beds since the center detail draws the eye upward. For everyday wear, stick to one rhinestone nail so it doesn't look costume-y.
Start with a creamy butter yellow base, cure, and keep it even. On each nail, apply a small bead of pearl gel or builder gel in the center - about the size of a small sesame seed - and shape it into a dome. Cure under the lamp until it's set, then add thin shell rib lines around the dome using a fine brush in pale cream. On one accent nail, place a micro rhinestone star near the cuticle using nail glue, then seal everything with top coat.
Editor's notePress the rhinestone gently with a silicone tool so it sits flat before you cure or glue sets.
Watch outAvoid big stones - they lift edges and catch on hair.
7. Yellow Seashell Negative Space With Cuticle Web
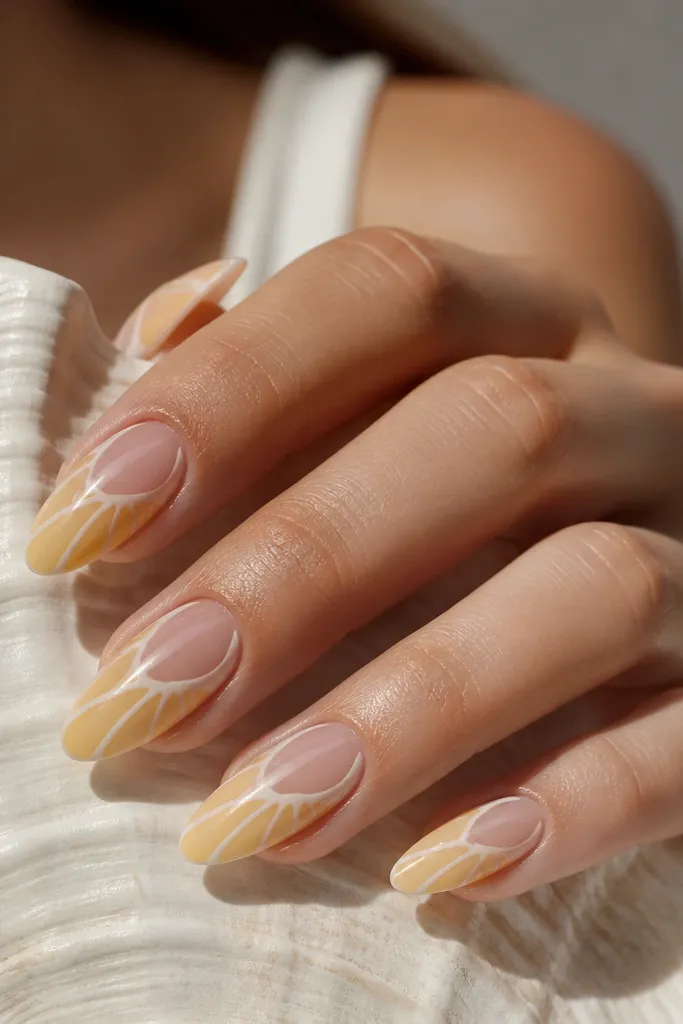
Negative space is the fastest way to make yellow look clean instead of heavy. This design uses a nude base and leaves the center clear, then frames it with yellow shell rib arcs near the cuticle. The "web" look draws attention to your nail shape and makes fingers look longer. I like it most on almond because the curved arcs follow the nail's natural shape. It flatters almost everyone because the nude center keeps things light, especially on deeper skin tones where full yellow can look too bold.
Prep and apply a nude base, cure, then skip fully covering the nail. For the shell arcs, use a butter-yellow gel and draw 4-6 curved ribs starting near the cuticle and arcing toward the sides, stopping before they reach the free edge. Outline the arcs with a thin pale cream line so the ribs look like layered shell. Add one extra yellow arc slightly thicker for variation, cure, then top coat with a smooth glossy layer.
Editor's noteUse tape or a nail guide to protect the clear center so your ribs stay crisp.
Watch outAvoid letting the ribs touch the cuticle skin - it will peel and look messy.
8. Sunburst Shell Tips With Thin Orange-Lemon Blend
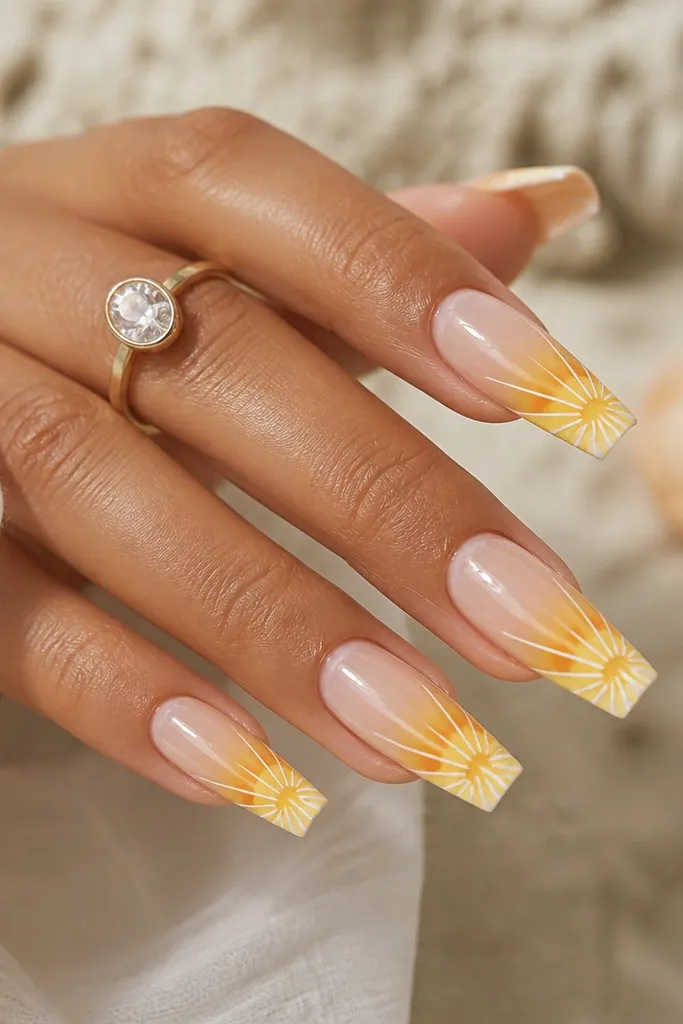
This is summer charm with a little heat. The sunburst rays make the yellow feel like sunshine, and the shell ribs tie it back to the seashell theme. I use a thin orange-lemon blend because straight orange can look harsh; the lemon keeps it soft. This is best on coffin or long almond where rays have space to spread without stacking on top of each other. It flatters medium to deep skin tones because the warm tones brighten the hand. For fair skin, keep the orange rays thinner and place them only on two accent nails.
Apply a sheer nude base and cure. Paint butter yellow tips, then add thin rays using a nail art brush: start with lemon yellow at the outer edge, then drag a tiny amount of orange toward the center. Add white shell ribs over the center area like a subtle overlay - 5-7 lines, not a full cover. Cure, then seal with glossy top coat, making sure the tip edge is fully leveled.
Editor's noteKeep rays at a consistent angle so the sunburst looks intentional, not random.
Watch outAvoid heavy orange - it turns the look from sunny to carnival.
9. Three-Tier Shell Gradient on Almond
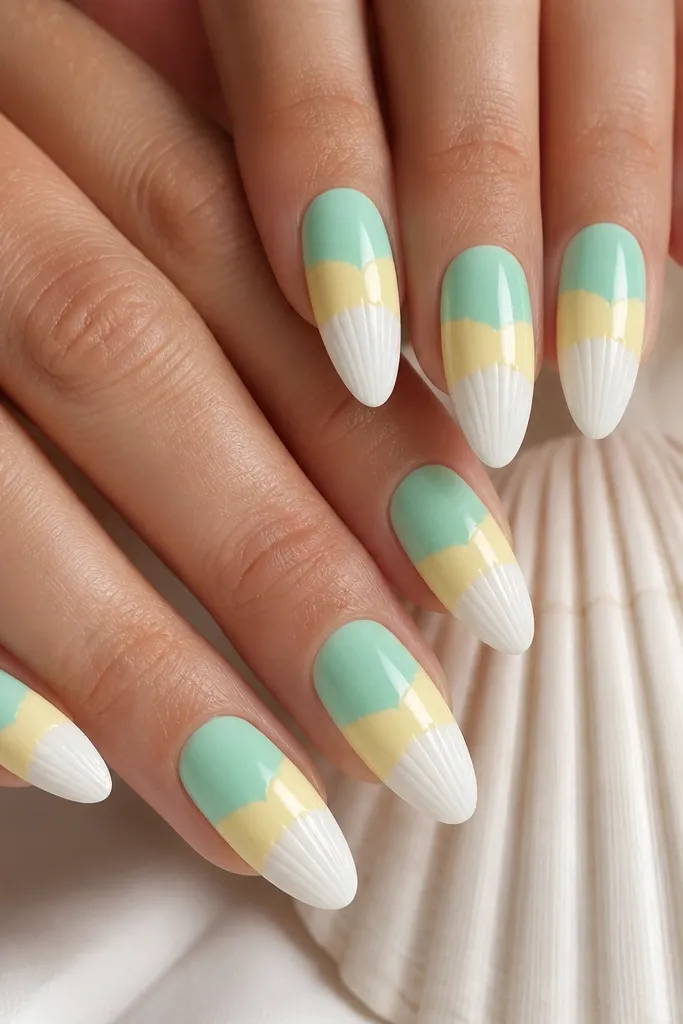
This design looks like layered shell plates, and it's surprisingly easy once you think in tiers. The three colors create depth without needing 3D charms, and the shell rib lines on the bottom tier make it read as seashell texture. I wear this when I want something more graphic than delicate swirls. Almond shape is perfect because the tiers look like waves moving down the nail. It flatters hands with longer fingers by emphasizing vertical flow. For shorter nail beds, keep the tiers smaller and stop the tiers earlier so they don't shrink the visible nail length.
Start with a sheer nude base and cure. Sponge or paint the top tier pale sea-foam across the middle-upper nail, cure, then add the butter-yellow tier below it, leaving clean separation lines. Finish with a milky white tier at the tip and draw shell ribs only inside that white area. Cure fully, then apply a glossy top coat in two layers if you feel any texture from the ribs.
Editor's noteUse a thin striping brush to define the tier boundaries - the clean lines make it look salon-finished.
Watch outAvoid blending the tiers too much - if they melt together, the design loses the shell-plate effect.
10. Pearlescent Yellow Jelly With Cracked Shell Overlay
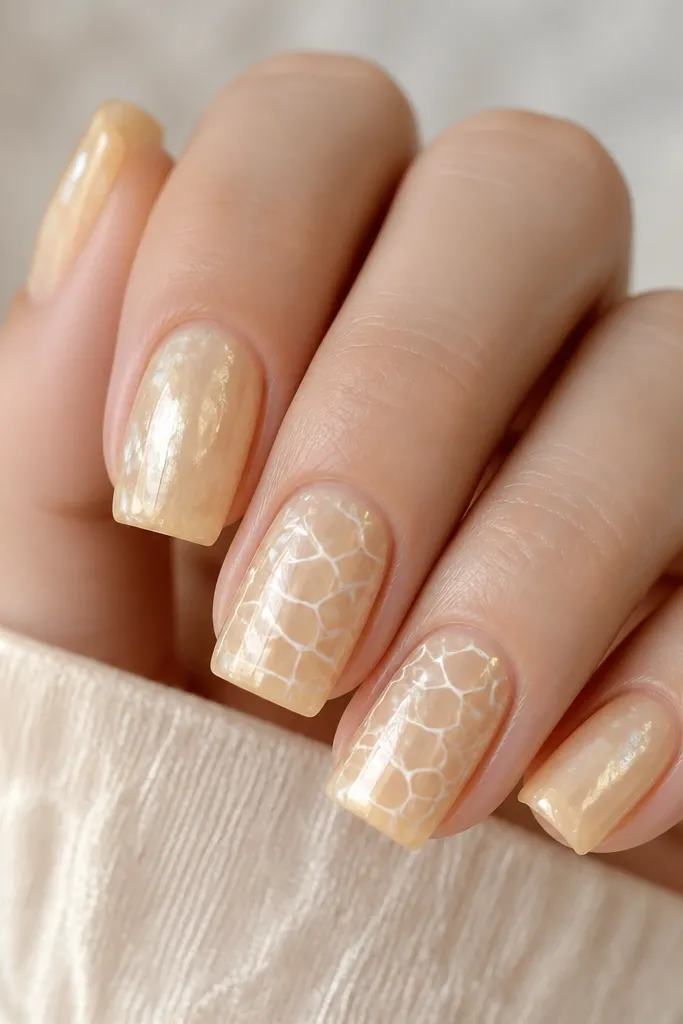
Jelly polish is where the "inside glow" comes from. This version uses pearlescent yellow jelly so your nails look like they're lit from beneath, and then the cracked shell overlay adds texture without bulky 3D. I like it for summer parties because it looks juicy in photos and still classy in person. Square nails work great because the jelly shows clean edges and the cracked lines look crisp. It flatters most skin tones since the translucency makes it feel light, not heavy. If you hate thick nail art, this is a good middle ground.
Prep and apply a base coat, then cure. Paint pearlescent yellow jelly in two thin layers, curing each time so it stays glossy and glassy. On the accent nails, draw a cracked shell pattern using a thin brush and milky white gel - keep the cracks short and curved, not straight lines. Add a couple tiny shell rib arcs where the cracks meet to keep the theme. Cure and finish with a thick top coat to lock in the design and smooth the surface.
Editor's noteThin layers matter with jelly - thick jelly looks cloudy and takes longer to cure evenly.
Watch outAvoid using matte top coat - it kills the jelly-glow effect.
11. White Shell Outline Over Butter Yellow French
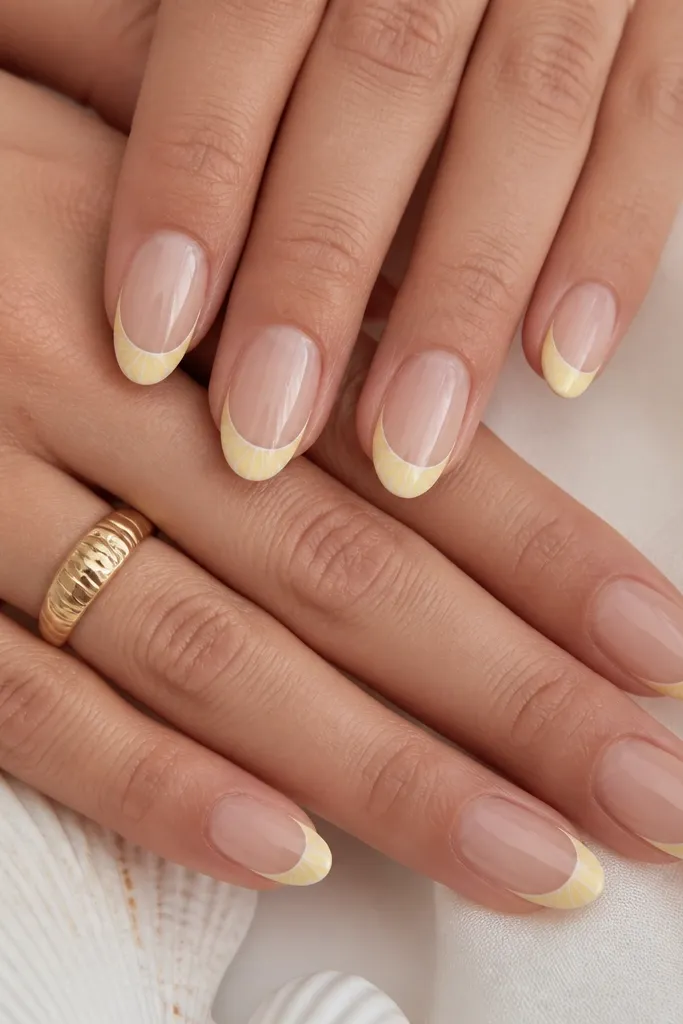
This is a clean, graphic take on seashell nails. The butter yellow French gives you that classic summer color, and the white shell outline makes it feel like shell edges rather than a plain tip. I like this for people who want nail art but don't want tiny details on every nail. It flatters short to medium nails because the design hugs the tip and keeps the nail bed looking longer. On fair skin, the white outline brightens everything; on deeper skin, it adds contrast without needing glitter. It also looks good with simple jewelry because the lines are crisp.
Start with a sheer nude or sheer blush base and cure. Paint butter yellow French tips and cure. Using a fine liner brush, draw a thin white outline following the smile line shape, then add 2-4 short shell rib marks near each corner of the tip. Cure again, then top coat with a glossy layer that covers the outline so it looks like part of the polish, not a raised line.
Editor's noteUse painter's tape to get a perfect smile line if you're still learning French tips.
Watch outAvoid thick white outline - if it looks paint-balled, it will chip sooner.
12. Sea-Foam Marble With Yellow Shell Dotting
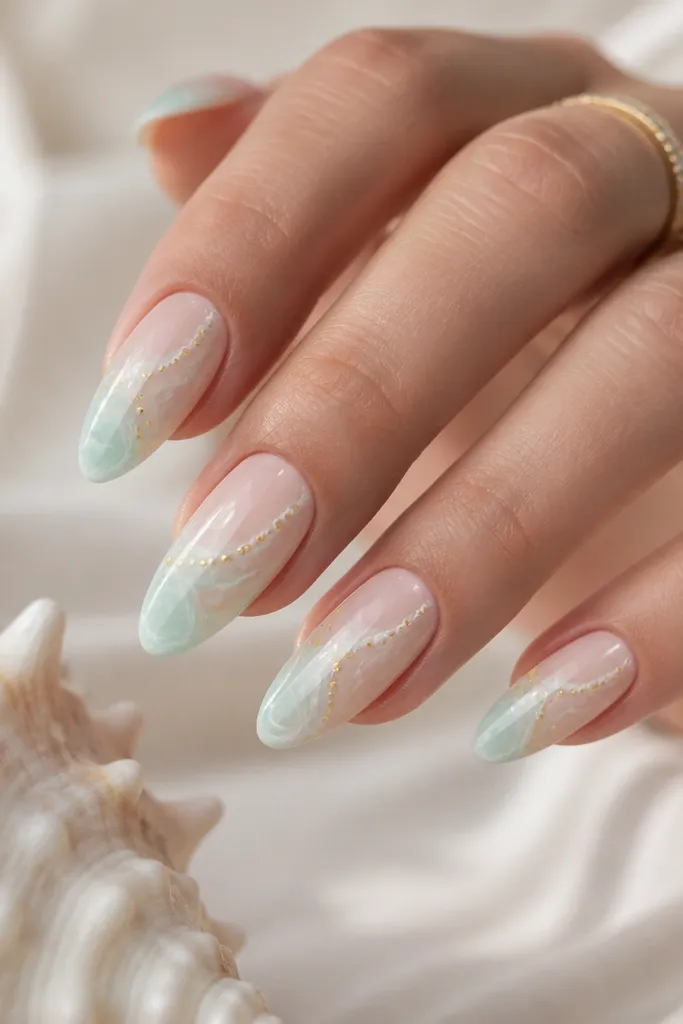
Marble makes the seashell theme look more natural, like waves and foam. This design uses sea-foam marble as the background, then adds yellow dot clusters to suggest shell texture without drawing full ribs. I like it for beach vacations when you want something that looks different each time the light hits it. Almond nails are perfect here because the marble flows along the nail curve. It flatters hands with slightly longer nail beds, and the dot clusters keep the design from feeling washed out. For warm skin tones, use a butter yellow dot color; for cool undertones, go with a lighter lemon yellow so it doesn't fight the mint.
Apply a sheer nude base and cure. Sponge or marble-paint pale mint and milky white with a thin brush, then drag slightly with a clean tool to create soft swirls. Cure, then dot yellow using a dotting tool: place 4-6 small dots close together near the center, then add a few more toward one side to mimic shell ridges. Cure and top coat with a glossy finish to deepen the marble and make the dots look embedded.
Editor's noteKeep the dot cluster tight - wide spacing turns it into random polka dots.
Watch outAvoid overmixing the marble - if you blend too much, it looks muddy.
13. Yellow Seashell 3D Charm Placement on Ring Finger
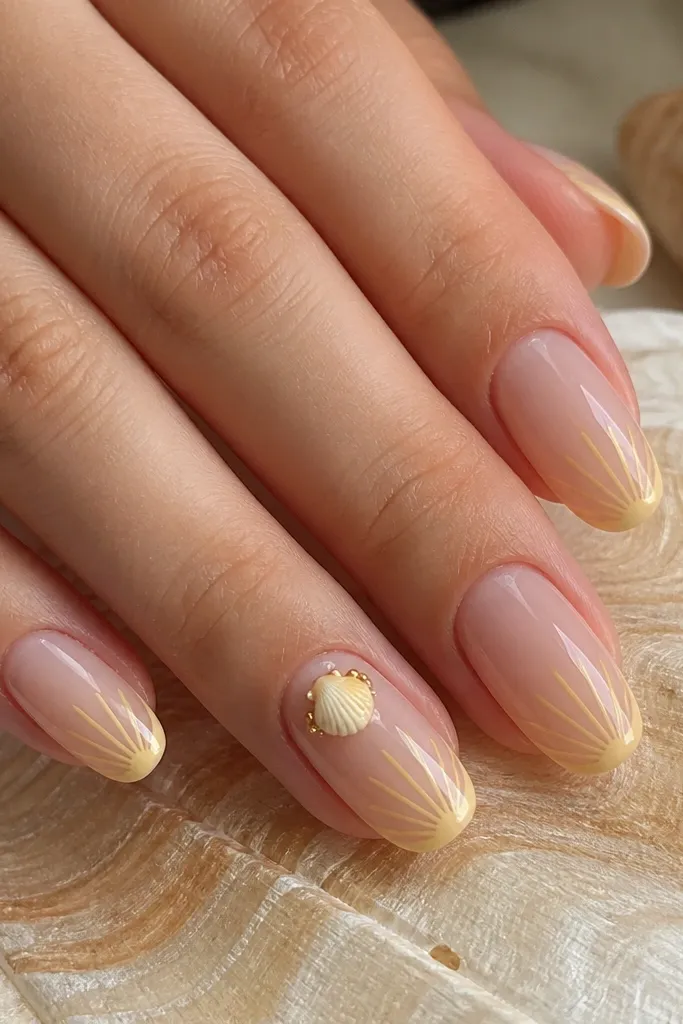
3D charms look best when you treat them like jewelry, not like wallpaper. I place a single small seashell charm on the ring finger - usually a tiny white or pale yellow shell with ridges - and keep the other nails mostly smooth. The contrast between glossy polish and the charm's raised texture makes the whole set look intentional. This flatters hands with long fingers and clean nail beds because the charm becomes the focal point. If your nails are short, go for a smaller charm and position it closer to the middle to avoid bulk near the cuticle. For everyday wear, this is the safest way to do 3D without snagging on everything.
Start with a sheer pink base and cure, then add a soft butter-yellow accent line or half-moon on each nail. On the ring finger, place the 3D seashell charm using nail glue or a small dab of builder gel - keep it centered and press lightly so it doesn't tilt. Cure, then draw thin shell ribs around the charm with pale cream gel to blend the charm into the design. Finish by applying top coat carefully around the edges, then do a second top coat layer to fully seal the charm and smooth the surface.
Editor's noteSeal the underside edges too - run the brush along the nail's sidewalls so the charm can't lift.
Watch outAvoid stacking multiple charms on one nail; the set becomes bulky and catches easily.
14. Yellow Shell Waterline With Tiny Seashell Outline
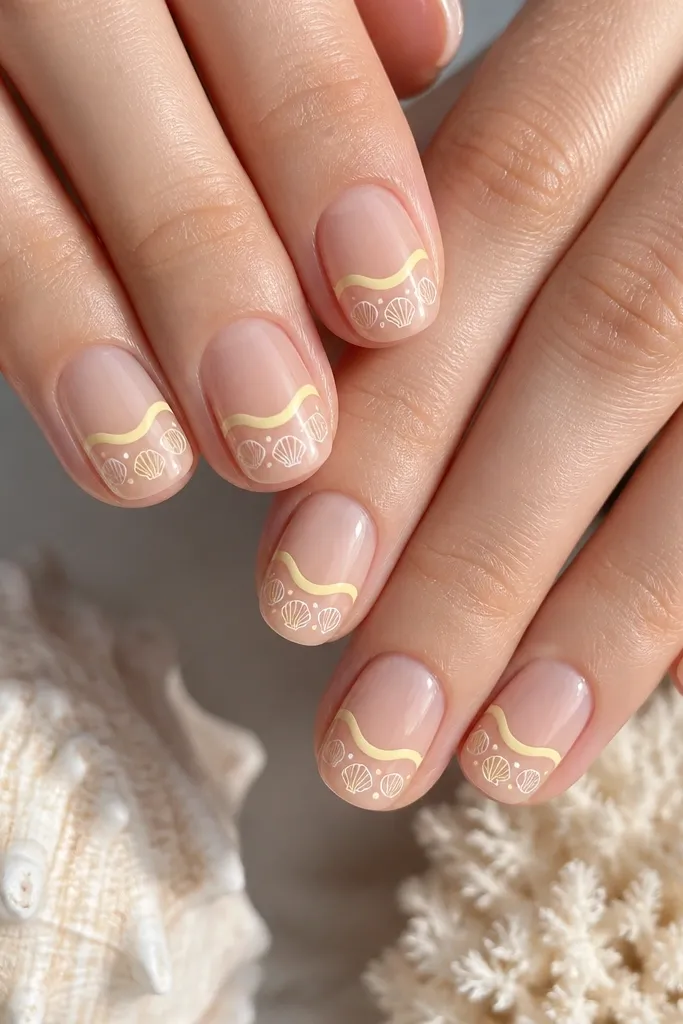
This design mimics the look of a wave line crossing the nail. The butter-yellow waterline gives structure, and the tiny seashell outlines keep the theme subtle so it works for day-to-day. I like it on short oval because the doodles don't overwhelm small spaces. It flatters hands with a more natural nail curve since the horizontal line follows that shape. For fair skin, the white outlines pop; for deeper skin, use a slightly warmer cream outline so it doesn't look stark. It also looks good with simple summer outfits because the art stays neat.
Prep and apply a sheer nude base, cure. Paint a butter-yellow waterline across the mid-nail, slightly arcing to match your nail curve, then cure. On the free edge area, draw one tiny outlined seashell on each nail using a fine liner brush in white or pale cream, keeping them small and evenly spaced. Add one pale yellow fill spot inside each outline if you want a hint of color. Cure and finish with a glossy top coat that covers the whole nail and smooths the outline edges.
Editor's noteDraw the waterline first - use it as your guide for where to place the little shells so everything stays balanced.
Watch outAvoid putting big seashell outlines on short nails; they crowd and look heavy.
15. Lemon Cream Base With Shell Ridges and Gold Edge Flick
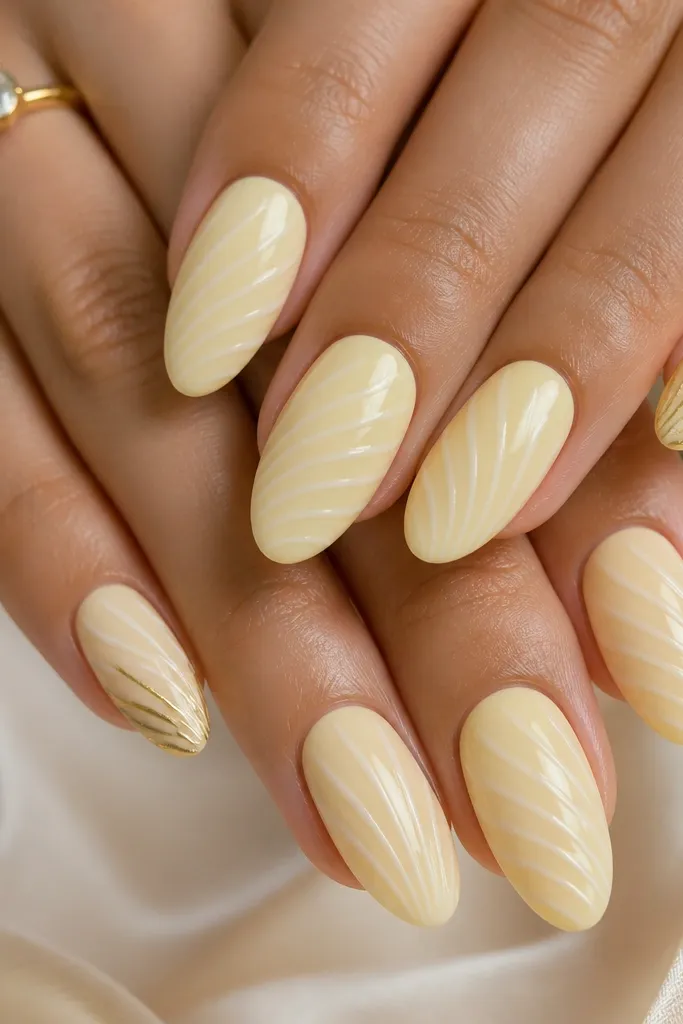
This one feels like late-afternoon sun on the sand. The lemon cream base is smooth and bright, and the shell ridges create that real texture look without needing charms. The thin gold edge flick adds "summer charm" without covering the whole nail with glitter. Almond nails are ideal because the ridges can run diagonally and still look tidy. It flatters medium to deep skin tones especially well because lemon cream warms the hand. For fair skin, keep gold to one or two nails so it stays classy.
Start with a lemon cream gel base and cure until it's fully opaque. Draw shell ridges across the center with pale white gel - 7-10 thin lines that curve slightly so they mimic shell growth. Add a tiny cream highlight line next to a few ridges so the texture looks dimensional, then cure. On two accent nails, draw a thin gold line along the outer tip edge and flick it outward 2-3 millimeters like a sun ray. Seal with a glossy top coat in one thick layer, then add a second layer only if the ridges feel textured.
Editor's noteUse gold foil gel or a fine gold liner - thicker metallic paint looks grainy on ridges.
Watch outAvoid gold on every nail; it turns the set from summery to costume fast.