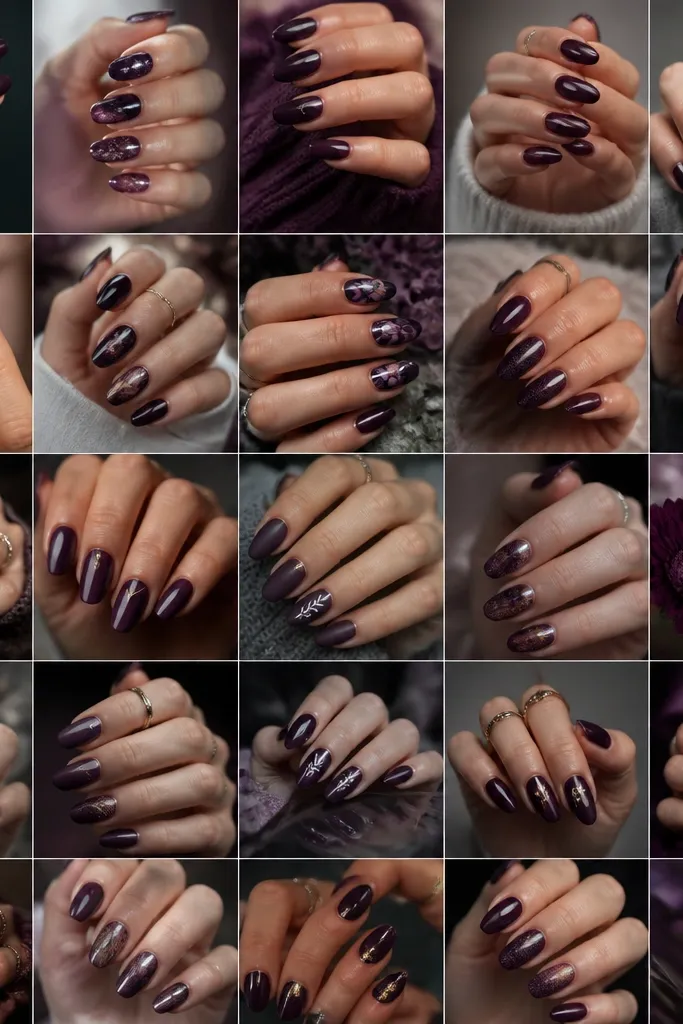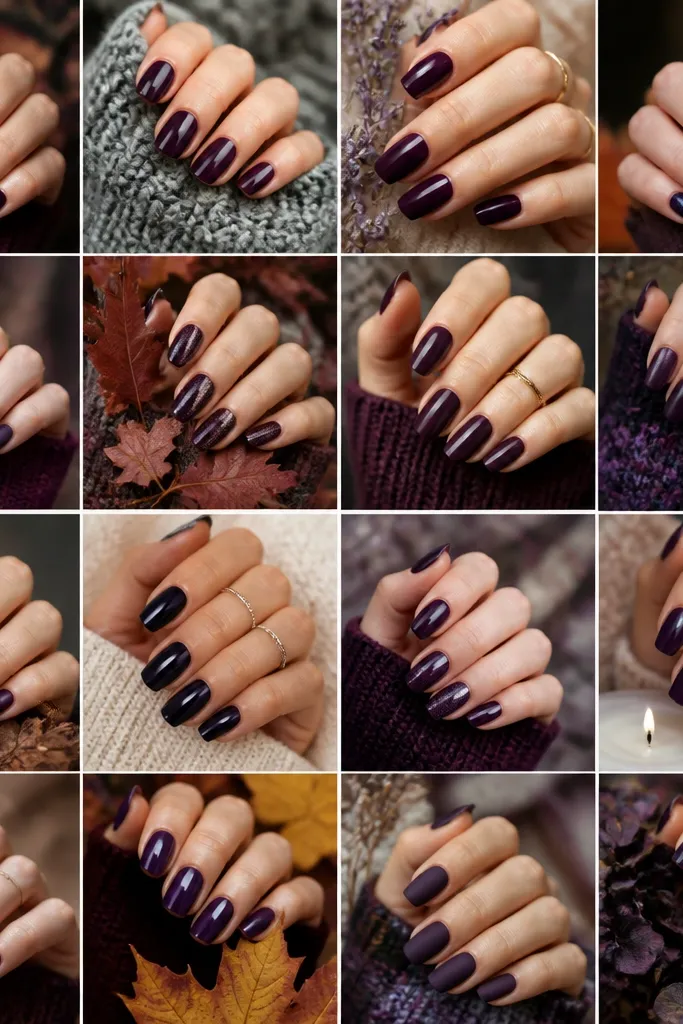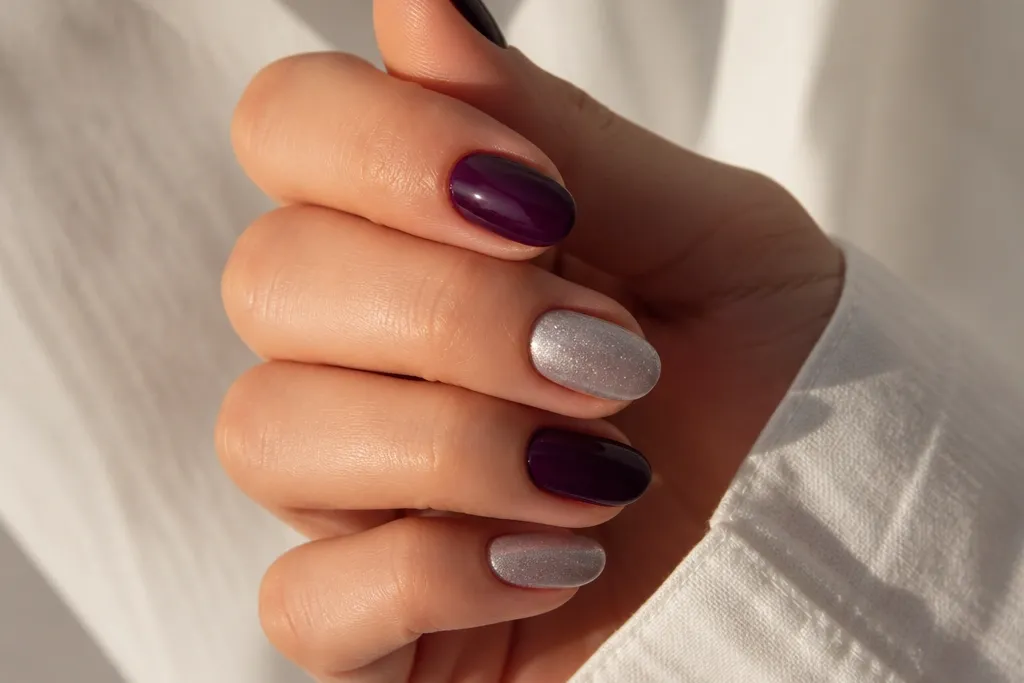
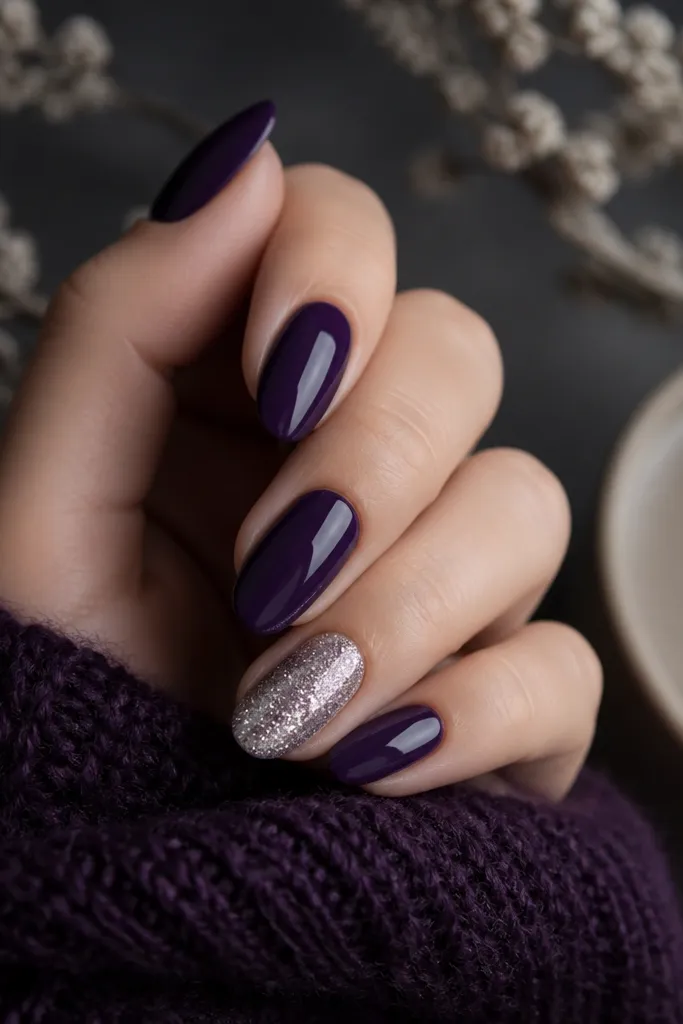
1. Velvet Plum Base with Micro-Silver Tips
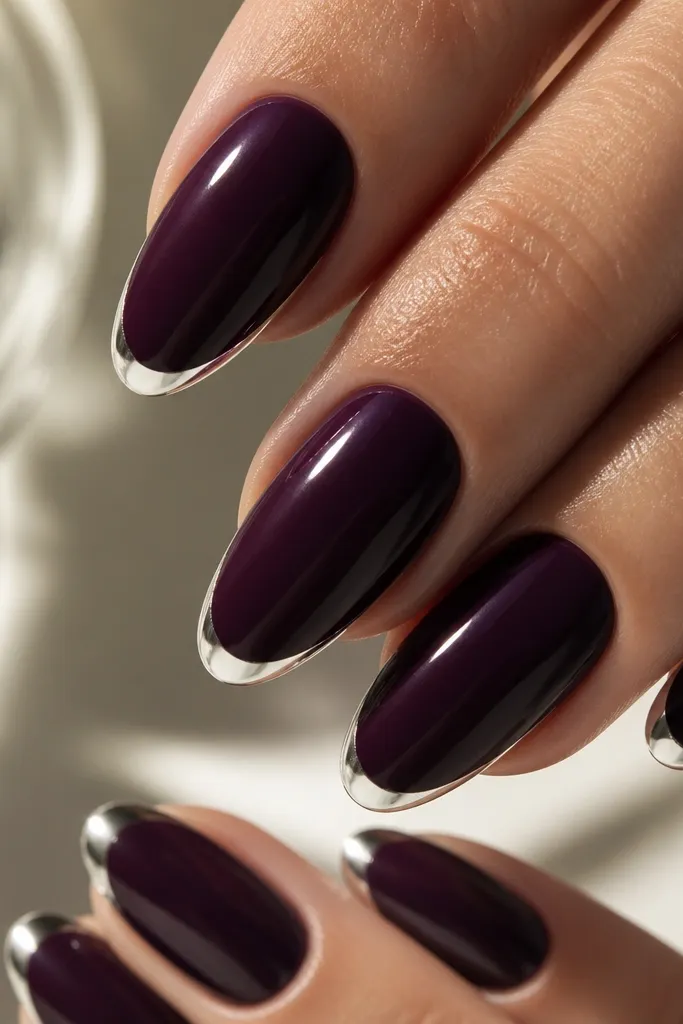
This one is my go-to when I want dark purple to look rich without the silver overpowering the nail. The velvet plum is a creme gel in a near-black purple, so it stays opaque in one nail pass. The silver goes on as micro tips — think a hairline arc that follows your smile line. That thin placement makes your nails look longer, especially on shorter hands, and it reads classy in photos because the silver catches light only at the edge. It also flatters warm and cool skin tones because the purple stays neutral and the silver is bright but controlled.
Editor's noteIf your silver looks grainy, press the chrome powder on with a firm foam applicator for 5-7 seconds before sealing.
Start by cleansing the nail and gently pushing back cuticles, then buff just the shine off. Apply 3 thin coats of velvet plum gel, curing each coat fully, until the surface looks smooth and even. Use striping tape or a thin liner brush to place a 1-2 mm silver arc at the tip, then fill it with chrome powder pressed lightly or silver foil applied in small sections. Clean up the edges with a flat brush dipped in alcohol before curing. Finish with a glossy top coat in one smooth layer, then cure and wipe for a crisp mirror finish.
Watch outAvoid painting silver too wide — it makes the set look heavy and can drag attention to uneven nail shape.
2. Grape Jelly Gradient with Silver Half-Moons
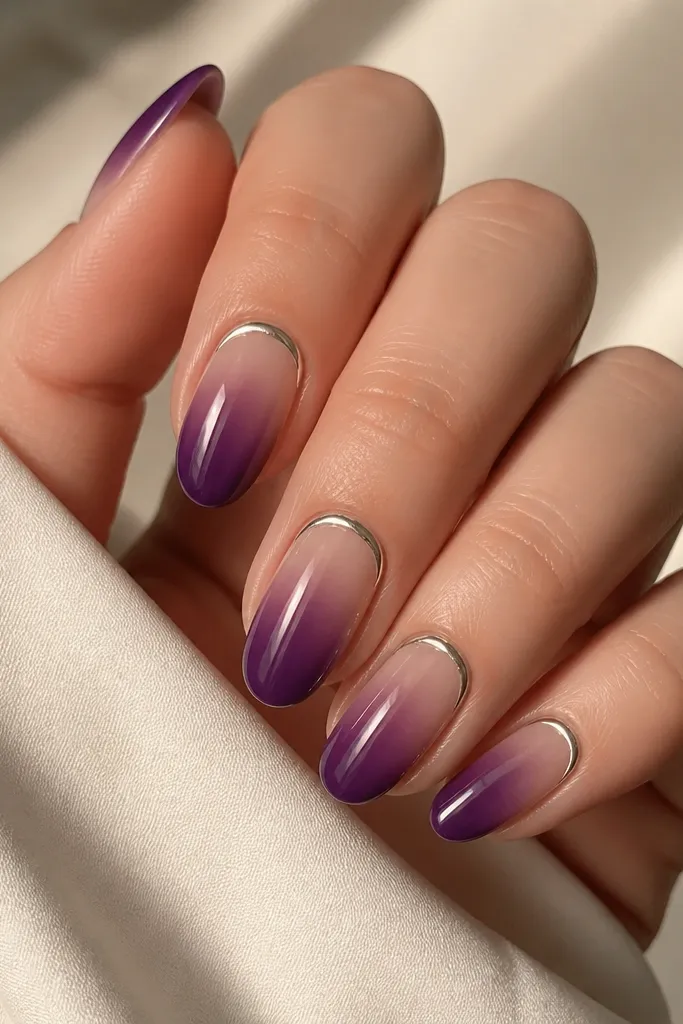
This gradient is prettier in real life than it looks in pictures because the jelly finish lets light pass through the purple. I use grape jelly as a base and build the depth gradually so the nail doesn’t look chalky. The silver half-moons at the cuticle are thin and centered, so they frame the nail bed instead of covering it. This style is flattering on hands with shorter nail beds because it creates a defined “window” that draws the eye upward. It also works for neutral, olive, and deeper skin tones because the grape stays bright and the silver stays clean.
Start with a base coat, then apply 2 jelly coats of grape, keeping the first coat sheer at the cuticle and the second slightly darker. For the gradient, sponge a darker plum jelly from mid-nail to the tip, then blend with a clean sponge before curing. Place silver half-moons using a small stamping plate or by dotting silver foil glue along the cuticle curve and pressing foil into it. Keep the half-moon width to about 1/3 of the nail width so it doesn’t flood the sides. Seal with 2 coats of glossy top coat, curing thoroughly and wiping after the final cure.
Use a makeup sponge cut into a small triangle for cleaner jelly blending.
Avoid thick silver at the cuticle — it lifts faster and makes the nail bed look crowded.
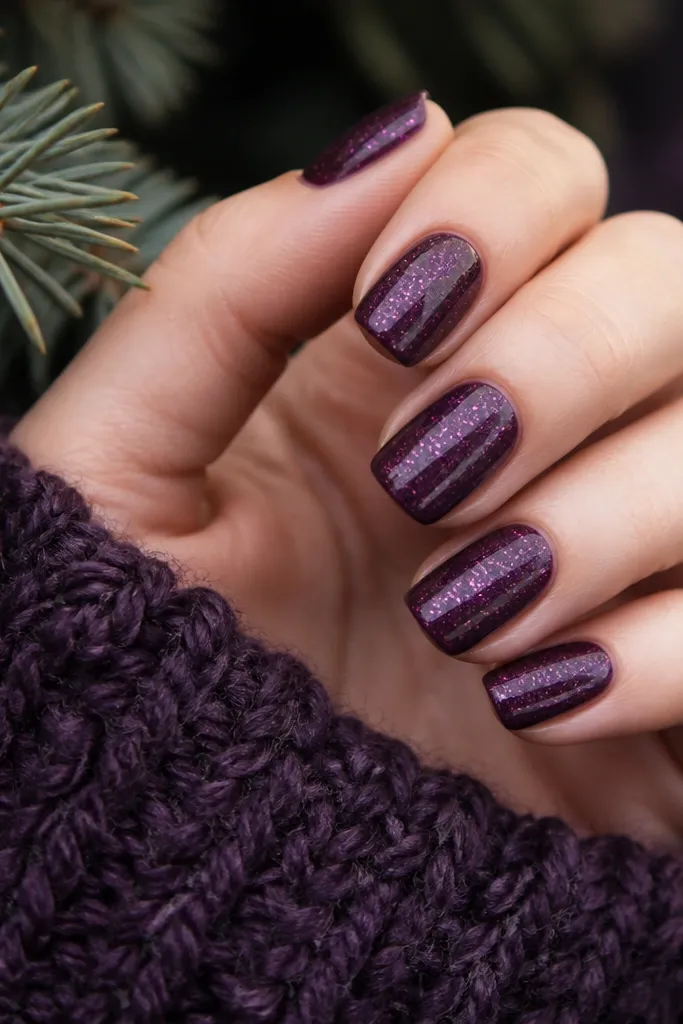
3. Deep Plum Chrome with Silver Crackle Lines
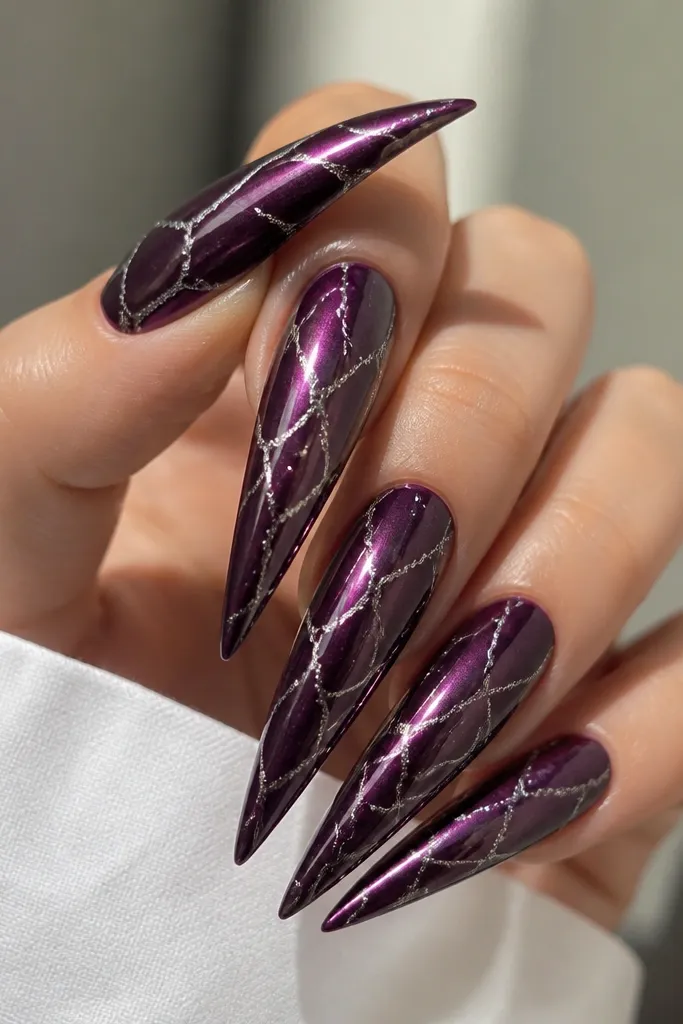
This is the “party in a bottle” set I did when I wanted dark purple to look like liquid metal. The base is a deep plum chrome powder or chrome gel, so the whole nail already has shine and dimension. Then I add silver crackle lines — not full overlays, just thin fractures that look like light caught in glass. The contrast is striking but still wearable because the crackle is controlled. It flatters long nails and hands with slim fingers, and on medium nails it still looks sharp if you keep the lines narrow. Cool undertones look extra good here because the plum reads icy under chrome.
Editor's noteAfter drawing crackle lines, tap the brush once on scrap paper so you don’t flood the chrome base.
Prep and buff the nail lightly, then wipe with alcohol so chrome grips. Apply 2 coats of deep plum chrome gel, curing each coat to the tacky state your brand recommends. Dust chrome powder or press chrome gel for a mirror finish, then seal lightly with a thin top coat. Use a liner brush to draw 3-5 diagonal crackle lines per nail, starting near mid-nail and stopping before the tip. Apply silver chrome gel or silver foil flakes over the lines, press with a small tool, then cure and finish with a high-gloss top coat.
Watch outAvoid skipping the light buff — chrome won’t grab evenly and you’ll get dull patches.
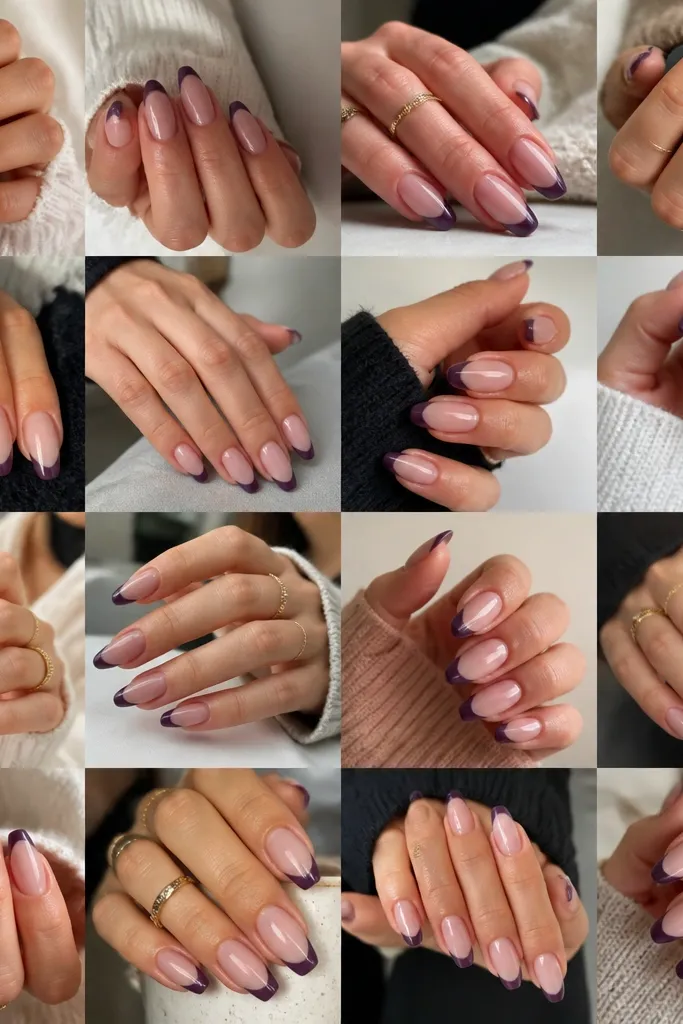
4. Dark Purple French with Silver Side Beads
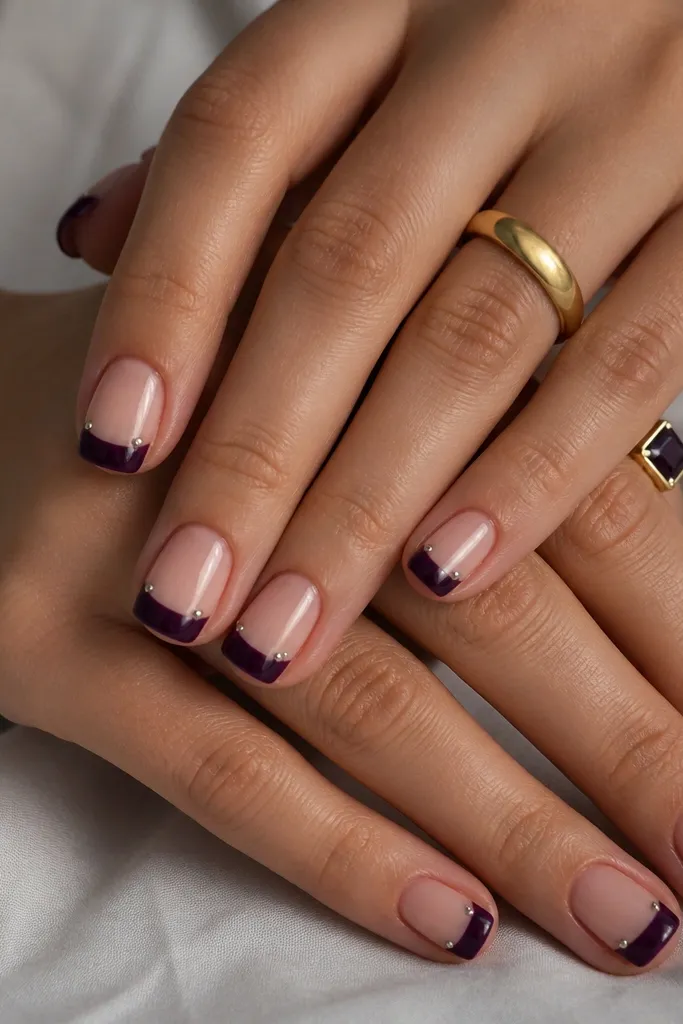
This twist makes a French manicure look modern without turning into a glitter mess. The dark purple French is opaque and slightly wider than classic, so it gives that bold edge. The silver bead accents are tiny — I use micro rhinestones or bead studs — placed on the side where the tip line ends. This placement makes your nails look intentional and “finished” even if your base coat is simple. It flatters short nails because the French width creates structure, and the beads are small enough not to shorten the nail visually. Warm skin tones love this combo because purple looks deep and silver stays bright against it.
Start with a sheer nude base coat or clear gel to smooth the nail, then cure. Paint 2-3 thin coats of dark purple for full opacity, leaving the tip area ready for the French. Use French tape to set a wide tip line, then fill with dark purple gel and cure. Remove tape while gel is still slightly tacky so edges stay sharp. Add two micro silver beads per nail using rhinestone gel, placing them about 1-2 mm away from the side edges and just under the tip line. Cure, then seal with a glossy top coat that doesn’t flood the bead edges.
If your beads snag on clothes, cap each bead with a tiny brush of top coat before the final full cure.
Avoid placing beads too close to the cuticle — it makes the nail look bottom-heavy.
5. Plum Creme with Silver Foil Cuticle Halo
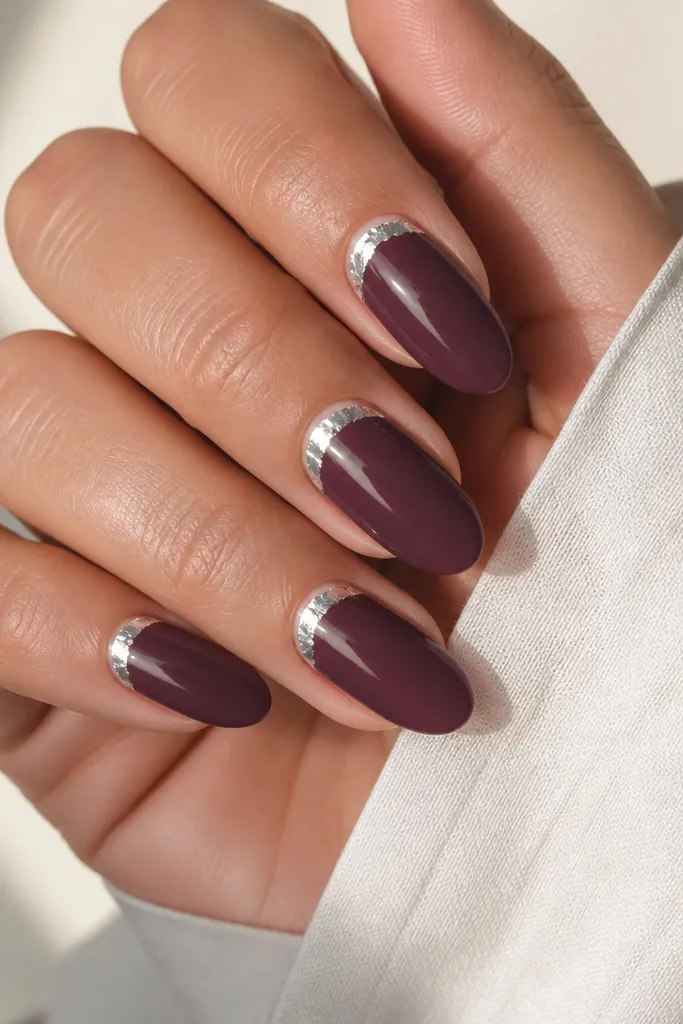
This is the set I reach for when I want “glam” without full foil coverage. The plum creme is solid and smooth, so it looks polished even when you move your hands. The silver foil halo is thin and sits right at the cuticle — it gives that halo effect that makes nails look more lifted. The foil’s slight irregular edge keeps it from looking like a sticker, and the negative space around it keeps it airy. It flatters all nail lengths, but it’s especially good for shorter nails because the effect starts at the cuticle and visually lengthens. Medium and deep skin tones look especially good because silver pops against plum.
Editor's noteWork with small foil pieces — large sheets fold and you get ugly creases.
Apply 3 thin coats of plum creme gel, curing each coat for a glassy finish. Use a cuticle glue or foil transfer gel in a thin ring around the cuticle curve — leave a tiny gap at the side walls. Press silver foil onto the halo area in small pieces, then peel back slowly to reveal a clean crescent. Use a fine brush with alcohol to tidy any stray foil at the side edges before curing. Seal with 2 coats of glossy top coat, paying extra attention to the cuticle line so foil stays sealed.
Watch outAvoid thick foil at the cuticle — it chips first and makes the halo look messy.
6. Dark Purple Marble with Silver Vein Sweep
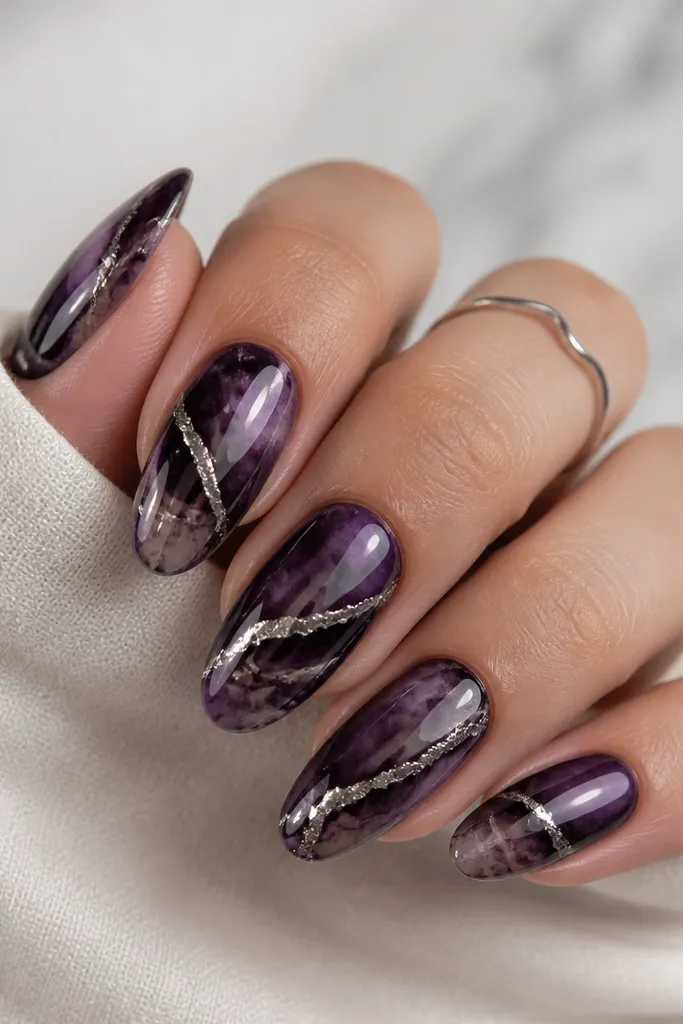
Marble looks best when it’s controlled, not busy. I use dark purple marble as a base with a few broad swirls, then I add one silver vein per nail so the set stays elegant. The silver vein gives the eye a clear focal point, making the marble feel intentional instead of random. This style flatters medium oval nails and hands with fuller fingers because the diagonal vein adds visual length. It also looks great on fair skin because the dark purple has contrast, and on deeper skin tones because silver brightens the whole nail. If you like statement nails but hate chunky 3D stuff, this is your lane.
Editor's noteKeep marble swirls larger than you think — tiny swirls turn muddy under dark polish.
Start with a dark purple creme base in 2-3 thin coats, curing until perfectly smooth. For marble, drop a tiny amount of lighter plum gel and swirl with a thin brush or silicone tool, then lightly drag to create 2-3 swirls per nail. Use silver striping tape as a guide line for the vein — place it diagonally from near the cuticle to just past mid-nail. Remove the tape and fill the vein with silver gel or chrome gel, then cure. Add a thin layer of top coat over the marble area first, cure, then cap with a final glossy top coat.
Watch outAvoid covering the whole nail in silver — it kills the marble contrast and looks flat.
7. Plum Ombré with Silver Glitter Fade Cap
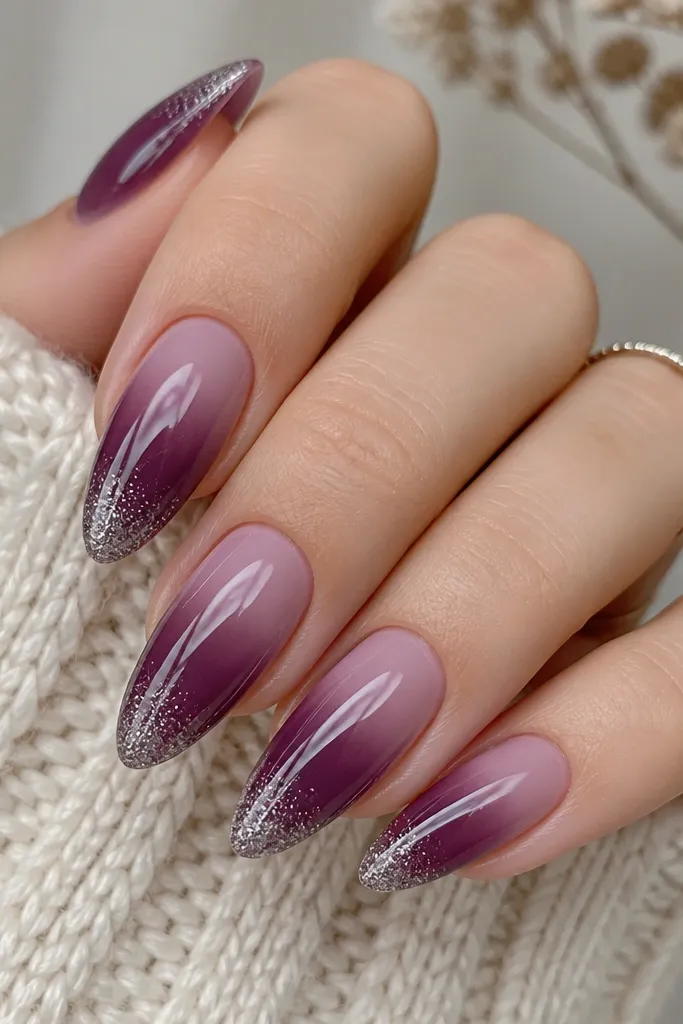
This is the easiest “dark purple but still sparkly” look. The ombré gives you depth — the lighter plum at the cuticle keeps the nail from looking like a single block of color. Then the silver glitter fade cap sits only at the tip, so sparkle stays concentrated where light hits. I like this on medium almond nails because the ombré follows your natural nail curve. It flatters most skin tones, but it’s especially flattering when your hands look a little dry, because the gradient looks smoother than a matte solid. It also survives photos better than full glitter because the base is clean and glossy.
Editor's noteIf the glitter feels gritty after cure, add a thin “glitter sink” layer of clear gel and cure again.
Paint 1 thin coat of base coat, cure, then apply a lighter plum shade at the cuticle area and blend down with a sponge. Build to a deep plum at the tip with 2-3 thin ombré passes, curing each pass so the gradient stays smooth. For the silver glitter cap, load a dense silver glitter polish or fine glitter gel onto a sponge, then tap only the last 2-3 mm of the nail. Blend the top edge of the glitter cap with a clean sponge so it fades, not a straight line. Cure and seal with a glossy top coat, adding a second top coat if the glitter feels textured.
Watch outAvoid putting glitter all the way down the sides — it makes the nail look wider and messy.
8. Dark Purple Lace Look with Silver Dot Borders
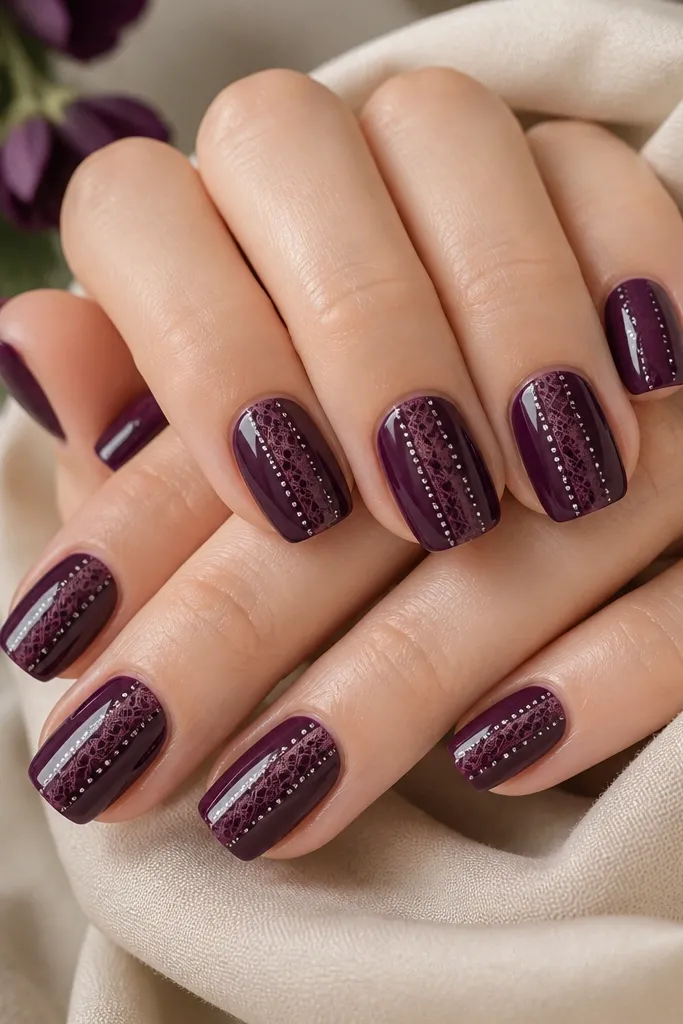
Lace nails can look childish if the pattern is too delicate or too small. This version keeps it bold by using a darker-to-lighter plum “lace” stencil in the center, then adding silver dots along the border to sharpen the shape. The dots are what make it feel modern, not costume-y. It flatters short nails because the lace sits in the middle and the silver border gives a clean frame. I’ve worn this with both casual outfits and dressy events, and it reads intentional either way. Silver dots also look great on hands with shorter nail beds because the center placement draws attention upward.
Editor's noteWipe your dotting tool with alcohol between nails so dot sizes match.
Apply 2-3 thin coats of dark purple creme gel, curing until smooth. Create the lace center by using a lace stamp plate or a thin stencil with a slightly lighter plum gel; press lightly and cure. Use a dotting tool to place silver dots along the outer edge of the lace area, keeping the spacing consistent (about 1 dot every 1-2 mm). Add one extra dot at each corner of the lace shape for a balanced frame. Cure fully, then cap with a glossy top coat in one direction to avoid dragging the dot gel.
Watch outAvoid tiny lace details — they blur into a smear on dark purple.
9. Silver Foil Half Wrap on Deep Plum
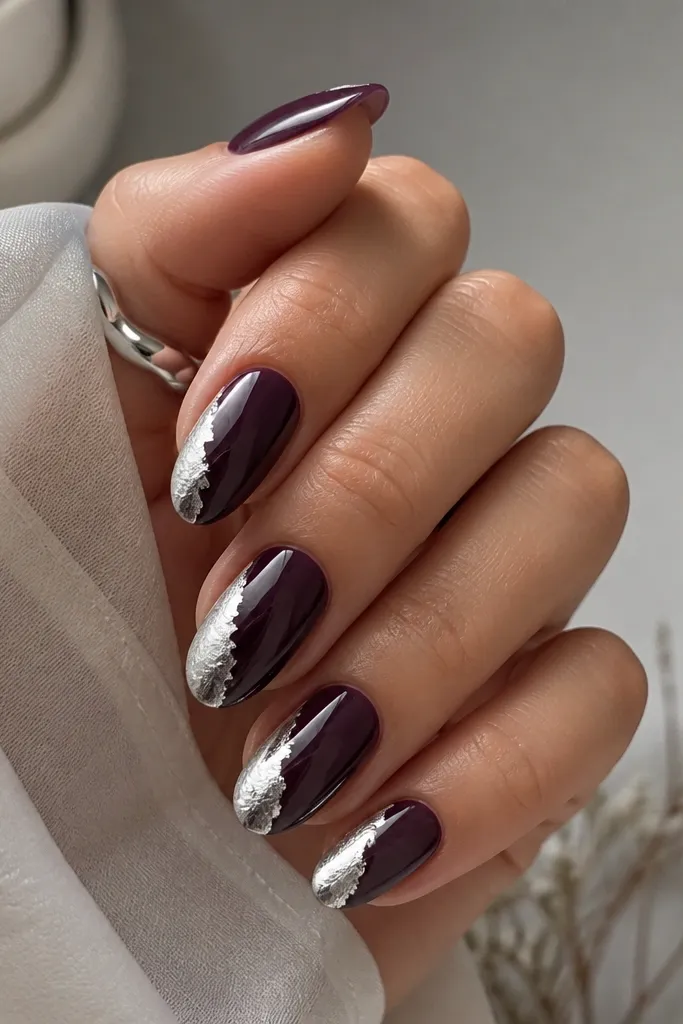
This half-wrap is a clean way to wear silver foil without the hassle of full foil coverage. The diagonal band makes the nail look longer and slimmer, and the rest of the plum keeps it grounded. I like it on medium almond nails because the curve helps the foil catch light smoothly. It flatters hands with wider nail beds because the silver band sits off-center and visually narrows the center. The plum base also hides minor imperfections better than lighter colors. If you want something that looks expensive but doesn’t require ultra-fine hand drawing, this is the one.
Editor's notePress foil with a silicone tool, not your fingers — fingers leave oils and smears.
Start with 3 coats of deep plum creme gel, cured to a glossy surface. Apply foil transfer gel along a diagonal path starting near one sidewall about 2-3 mm from the cuticle and ending near mid-nail on the opposite side. Press silver foil onto that gel path in one steady press, then peel slowly. Use a fine brush to clean any foil that touches the cuticle line, then cure. Finish with a glossy top coat, and cap the band edges so the foil doesn’t lift.
Watch outAvoid wrapping foil too close to the tip corners — it chips first there.
10. Dark Purple Chrome with Silver Foil Confetti Specks
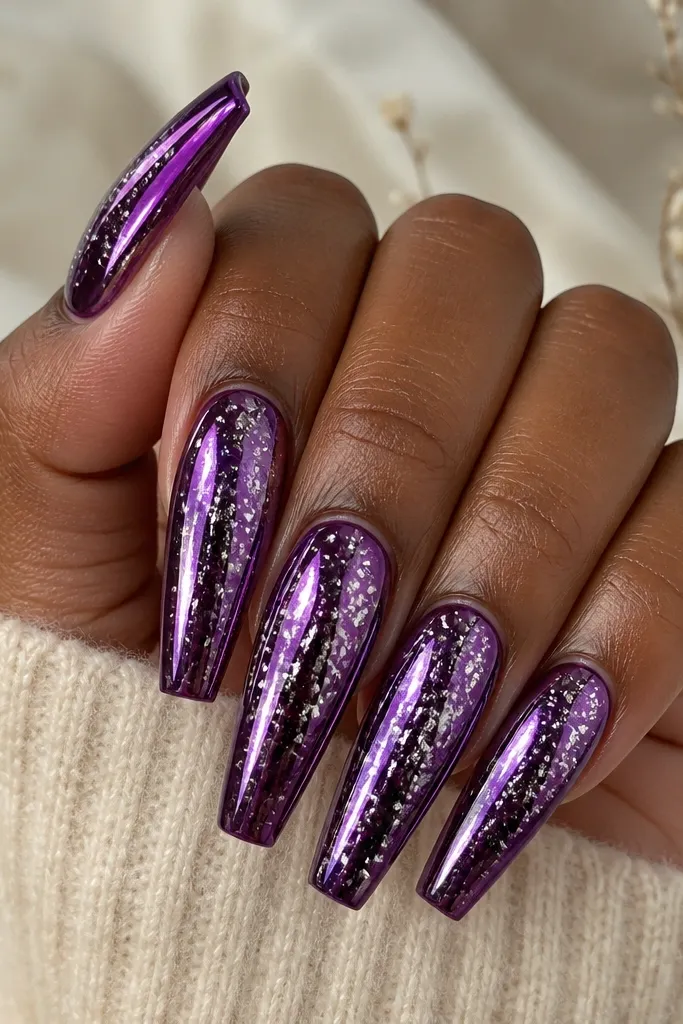
Confetti specks look playful but still sleek when the base is chrome. The deep purple chrome makes the color look like it has depth, and the tiny silver bits catch light in small flashes. I keep the specks irregular — not a perfect pattern — because that’s what makes it feel hand-done. This style flatters long nails and looks amazing in low light because the chrome reflects everything. It also works on hands with thicker nail plates because the mirror finish smooths the look. If you love silver but hate large foil sheets, this is the compromise.
Editor's noteConcentrate specks on the upper half of the nail — it makes the set look intentional instead of random.
Prep and buff lightly, then wipe with alcohol. Apply deep purple chrome gel and cure as directed, then apply chrome powder for a full mirror surface. Use foil transfer gel in small dots or short strokes across the center area of each nail. Press tiny silver foil pieces onto those spots, then gently press again so the specks lay flat. Cure, then seal with a high-gloss top coat in two thin layers, curing between coats for full coverage.
Watch outAvoid using chunky glitter as confetti — it looks textured under chrome and catches on fabric.
11. Plum Creme with Silver Linework Grid
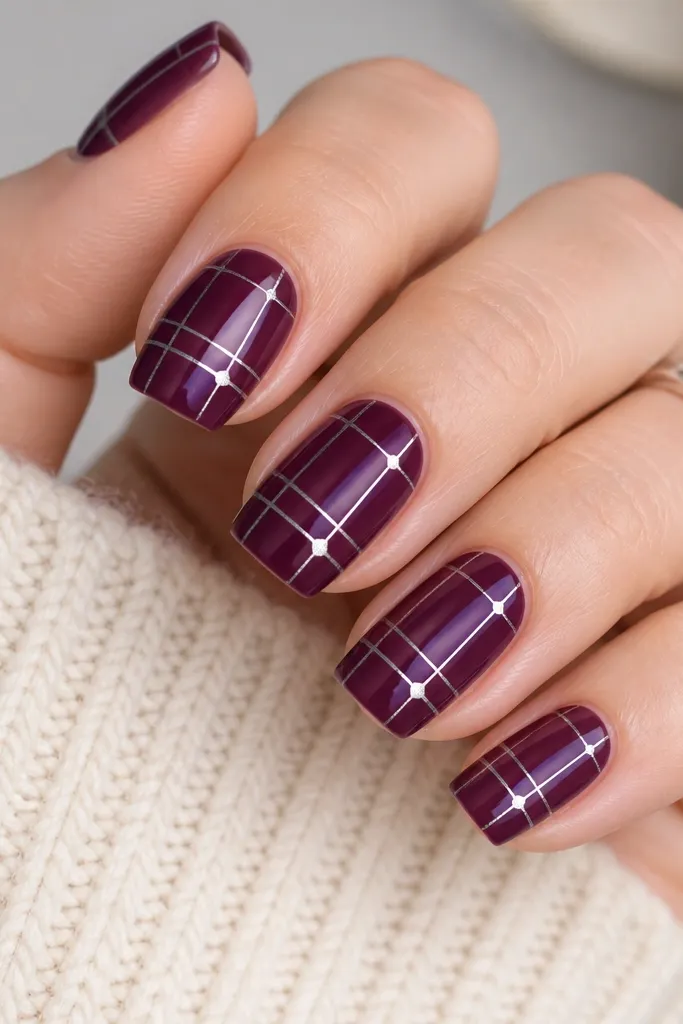
A grid sounds simple, but on dark purple it looks sharp and modern instead of nerdy. I do thin silver linework because thick lines make it look like nail tape stickers. The plum creme base needs to be smooth and opaque so the lines look crisp. This set flatters short square nails because the grid creates structure across the nail surface. It also looks good on fair and medium skin tones because the silver linework provides contrast at a glance. If your hand gets photographed a lot, this one reads clean and intentional.
Editor's noteUse a ruler-like striping tape guide for your first line so your grid doesn’t drift.
Apply 3 thin coats of plum creme gel, curing each coat for an even surface. Use a striping brush or fine liner to draw a vertical line down the center of the nail, then add two angled lines on each side so you get a light grid. Keep line spacing consistent — around 2-3 mm between major lines on medium nails. Add silver gel to the lines and cure, or use silver striping tape for the first pass then seal with top coat. Finish with a glossy top coat, and brush along the edges to keep lines from lifting.
Watch outAvoid skipping a smooth base coat — silver linework looks messy on bumpy purple.
12. Dark Purple Watercolor with Silver Drip Accent
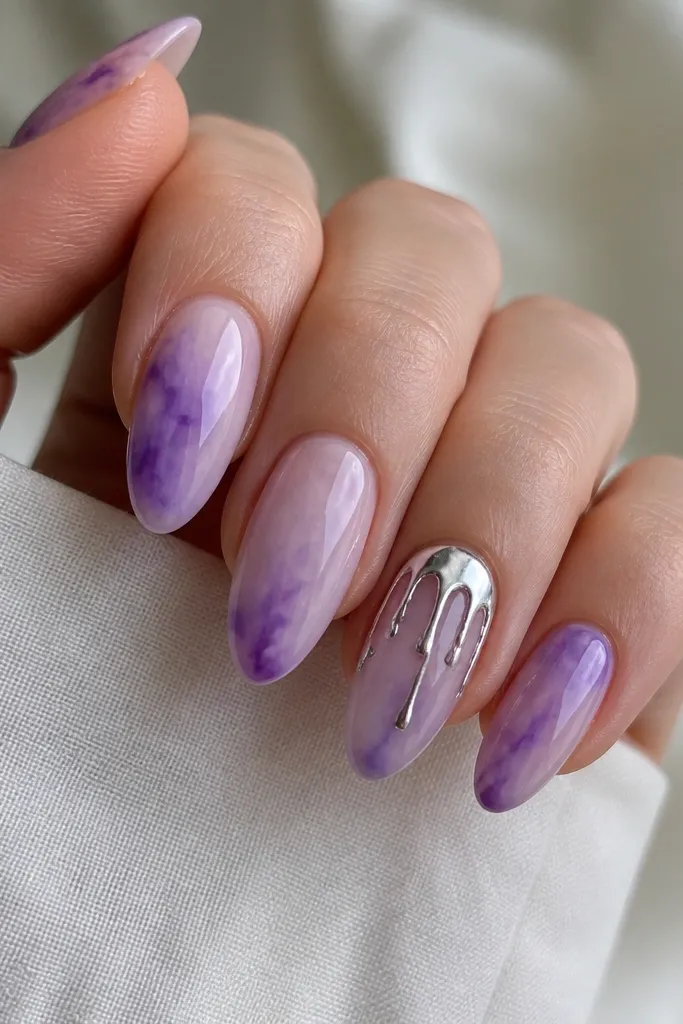
Watercolor nails are tricky because they can turn into mud fast on dark colors. The trick is using a slightly smoky purple blend and keeping it airy — you should still see variation, not heavy blotches. The silver drip accent is placed on only one or two nails so it feels like art instead of chaos. This style looks great for fall events and nights out because it feels soft but still dark. It flatters all skin tones, especially if you want your nails to look “different” without being too heavy. I like it most on almond or oval nails because the drip follows the nail’s natural taper.
Editor's notePractice the drip once on a paper towel first — the angle is what makes it look like real paint.
Start with a dark purple sheer-to-medium base, then sponge a lighter smoky purple around the center and blend out with a clean brush. Build the opacity with one more thin layer so the watercolor stays translucent but not see-through. Pick one accent nail and draw a silver drip using a thin liner brush with silver gel, starting at the upper third and pulling down to about 1/3 of the nail length. Use a dotting tool to create a tiny teardrop at the drip end so it looks deliberate. Cure and seal with glossy top coat; apply a second top coat if the drip feels raised.
Watch outAvoid adding silver to every nail — the watercolor needs breathing room.
13. Plum Galaxy with Silver Star Foil Dots
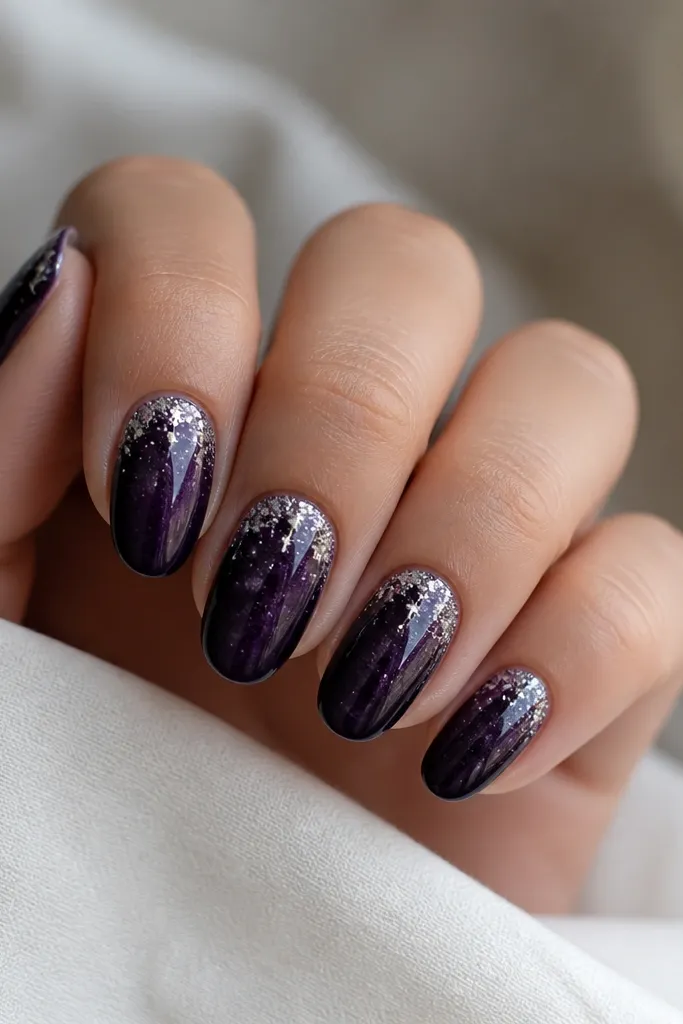
Galaxy nails look best when the base stays dark and the “stars” are small. I use a dark plum as the base, then add fine lighter-purple specks for depth so the nail looks like it has atmosphere. For silver, I use tiny star foil dots — small enough to read as twinkles, not blobs. This is flattering on medium and short nails because the star cluster near the cuticle makes the nail look taller. It also looks gorgeous against darker outfits because the silver flashes. If you want something that feels like night sky but still matches the dark purple trend, this nails it.
Editor's noteUse less product than you think — galaxy nails look best when the stars are sparse.
Apply 2-3 thin coats of dark plum creme gel, curing until glossy. For the galaxy effect, flick a lighter plum gel onto the nail with a stiff brush and a tiny amount of product so the specks stay fine. Add a few larger specks near the center using a dotting tool. For silver stars, dab foil transfer gel in tiny dots near the cuticle, then press small silver foil pieces or use a silver chrome dot. Cure and seal with glossy top coat, then add a second top coat if the specks feel textured.
Watch outAvoid big glitter chunks — they look like craft glitter instead of stars.
14. Dark Purple Ombré with Silver Halo Ring on One Nail
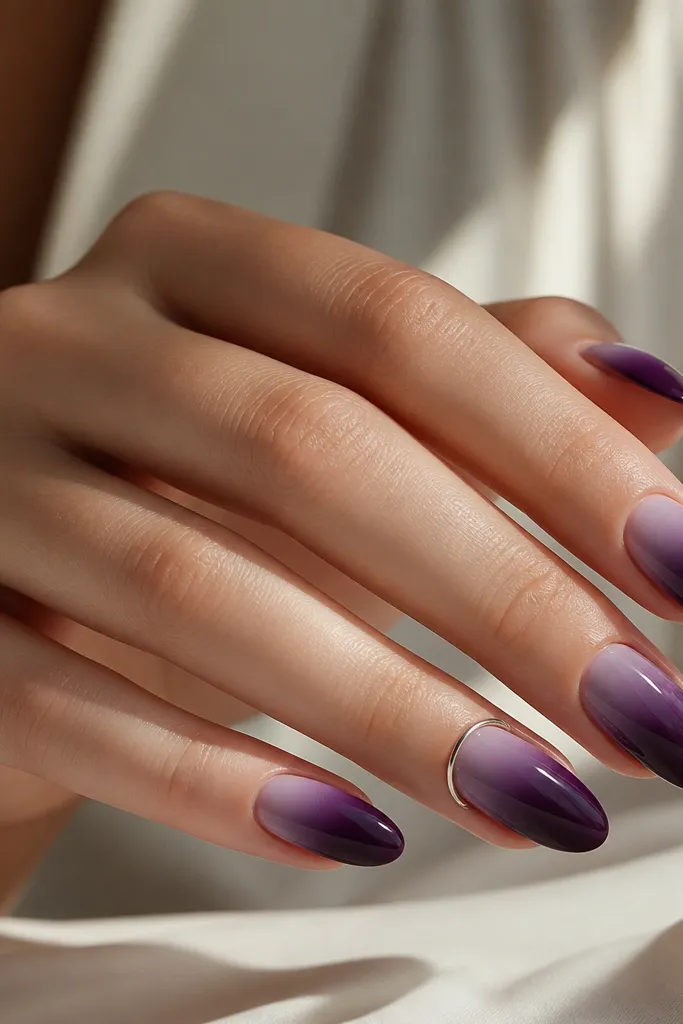
This is a “wear it every day” way to include silver without turning your whole manicure into a disco ball. The ombré base gives you softness and dimension, and the silver halo ring on one nail creates a focal point. I like doing it on the ring finger because it looks intentional and balanced with the rest of the set. The halo ring is thin so it doesn’t shorten the nail visually. This set flatters hands with bitten or uneven cuticles because the halo frames the area and pulls attention up. Silver also pairs well with both cool and warm skin tones when the purple stays deep.
Editor's noteIf your halo looks uneven, use a small silicone tool to press the foil edge back into place before curing.
Start with an ombré using a light-to-deep plum jelly or creme, sponge from cuticle to tip in 2-3 thin passes and cure each pass. Keep the gradient subtle so the base looks smooth. On the ring finger only, apply foil transfer gel in a thin crescent around the cuticle, leaving small gaps at the sidewalls. Press silver foil into the ring and peel carefully. Seal all nails with glossy top coat, and add a second top coat on the ring finger to smooth the foil edge.
Watch outAvoid placing the halo too low — it can make the nail bed look shorter.
15. Plum Creme with Silver Striped Accent French
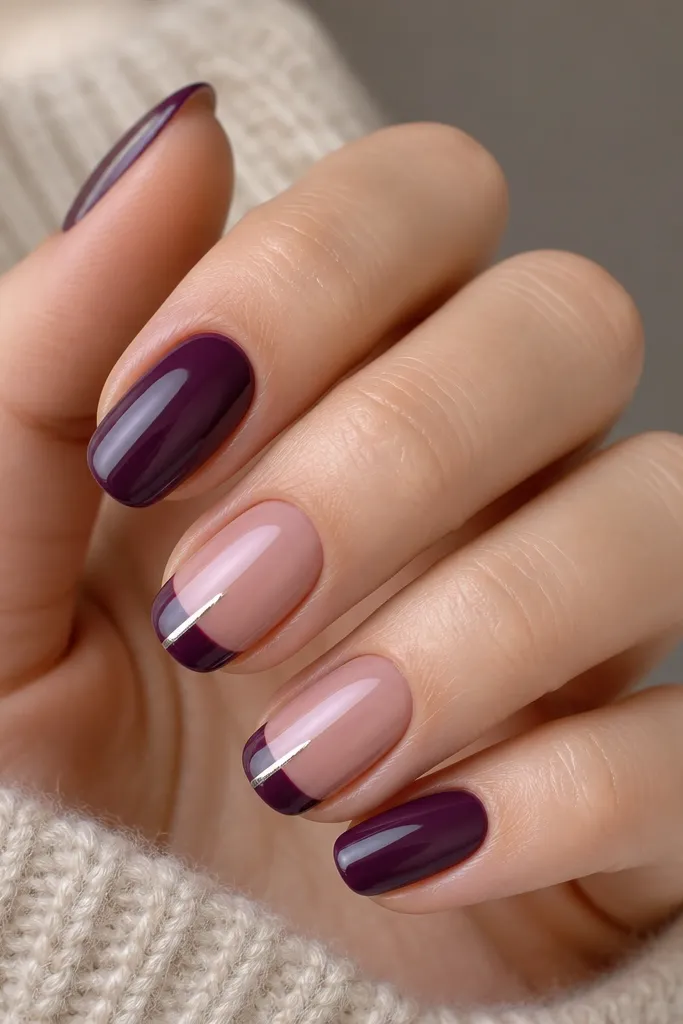
This one is for when you want the look of nail art but you’re not trying to fight with foil on every finger. The solid plum creme makes the set look tidy, and the striped French accent adds a sharp, graphic line. I usually do it on two nails so the silver stripe feels like a detail, not the whole manicure. The silver stripe running through the French line makes the tip look crisp and gives a polished “salon” finish. It flatters short to medium nails because the stripe is a narrow vertical element. It also looks great with both silver jewelry and gold jewelry because the purple keeps the palette balanced.
Editor's noteUse tape for the stripe position, not just for the French edge — it keeps the silver perfectly straight.
Apply 3 coats of plum creme gel to all nails, curing until smooth. Choose two accent nails and mask the tip with French tape to create a clean French line. Paint the tip area with deep purple gel, cure, then remove tape while tacky. Add a thin silver stripe either by lining the French edge with a silver liner gel or by placing a strip of silver striping tape across the French line. Cure and wipe, then finish with glossy top coat on every nail.
Watch outAvoid using thick silver polish for the stripe — it spreads and ruins the crisp line.
16. Dark Purple Matte Base with Silver Glossy Top Patch
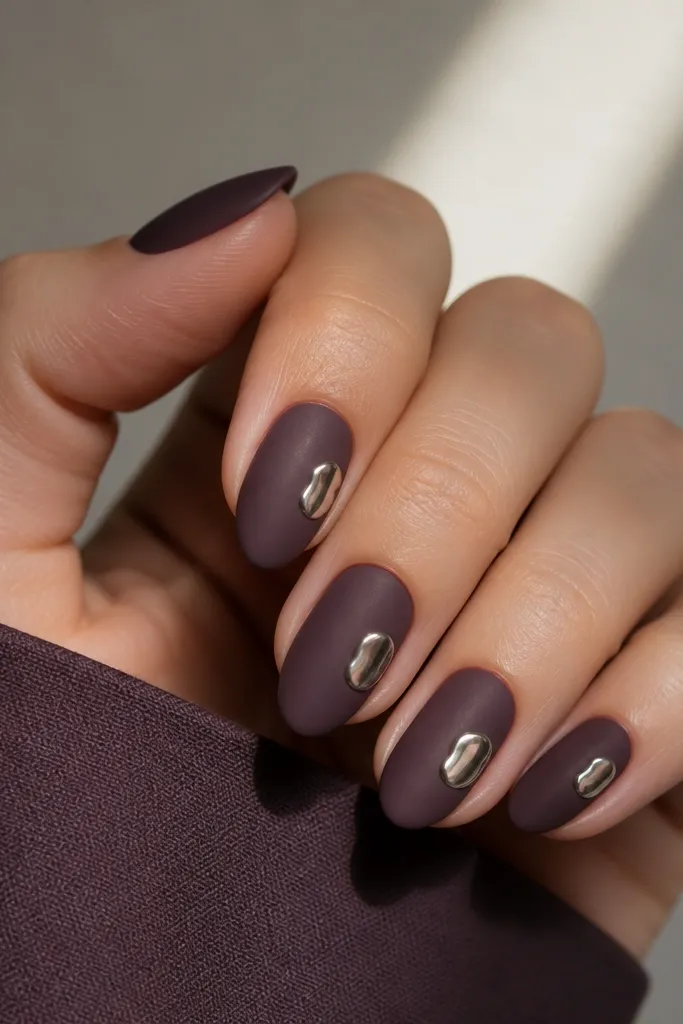
Matte and silver together looks expensive when you keep the silver patch small and glossy. The matte dark purple kills shine, so the silver patch becomes the only reflective point. I use a small crescent or oval patch so the design still looks balanced and not random. This style is flattering on hands with dry cuticles because matte hides minor texture better than glossy. It’s also great for everyday wear because matte doesn’t show every tiny smudge like high-gloss does. Silver stays bright, and the contrast looks clean in sunlight and indoor lamps.
Editor's noteIf the silver patch looks dull, add one extra glossy top coat layer over just that area.
Apply 3 coats of dark purple gel and cure until fully set. Seal with a matte top coat on all nails and cure, then wipe if your brand requires it. For the silver patch, apply a thin layer of clear gel where you want it, then place silver foil or silver chrome gel on top. Press foil lightly and cure. Finish with a glossy top coat only over the silver patch, not the whole nail, so the rest stays matte.
Watch outAvoid matte top coat over silver — it kills the mirror look and makes the patch look gray.
17. Plum Skittle Set with Silver Accent Lines
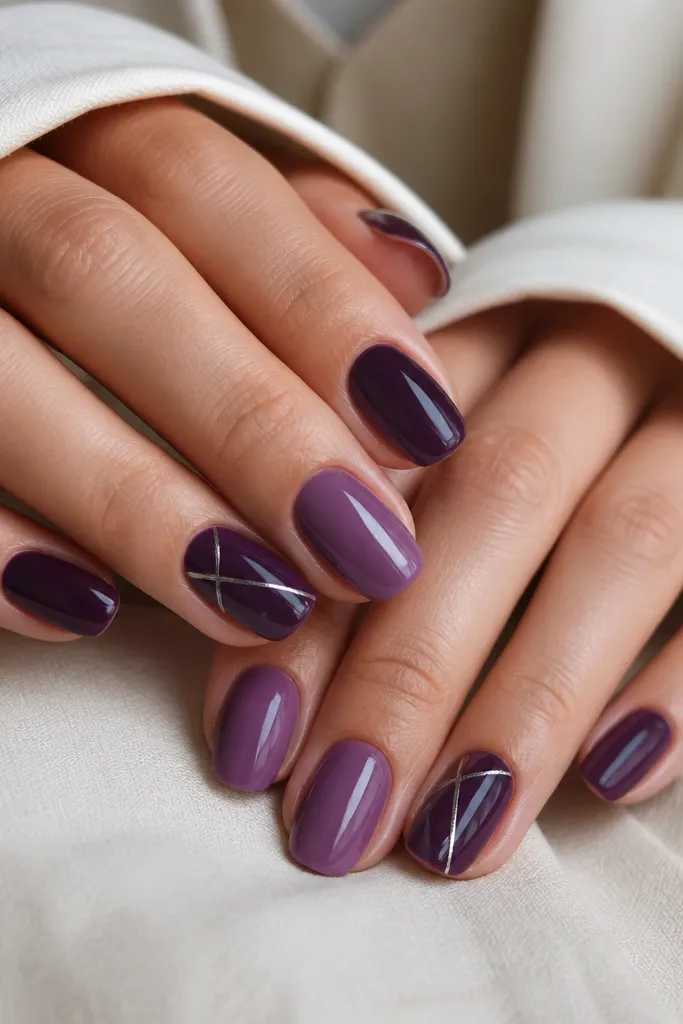
Skittle sets work when you keep the palette tight. Here, every nail is still purple, just shifted in tone: deep plum, grape plum, and one jelly option. Then you add silver accent lines only on the darker nails so the set feels cohesive. The straight lines make the manicure look structured, and the tone changes keep it from being boring. This flatters hands with uneven nail lengths because you can use the lighter purple on shorter nails to brighten them. It also looks good on medium skin tones where a single shade can sometimes look flat.
Paint nails 1-3 with deep plum creme in 3 thin coats, curing each coat. Paint nails 4-5 with lighter grape plum creme in 2-3 coats so it stays opaque but not heavy. Choose one or two nails to add silver accent lines: draw a thin vertical line from mid-nail to near the tip using striping gel. Add one angled line on the same nail so the lines form a simple “V” shape, keeping the silver width to about 0.5-1 mm. Cure and seal with glossy top coat on all nails for matching shine.
Keep all silver lines the same thickness across the set — that’s what makes it look designed, not accidental.
Avoid mixing silver finishes on the same nail — foil and chrome together can look mismatched.
18. Dark Purple Holo Gel with Silver Edge Frame
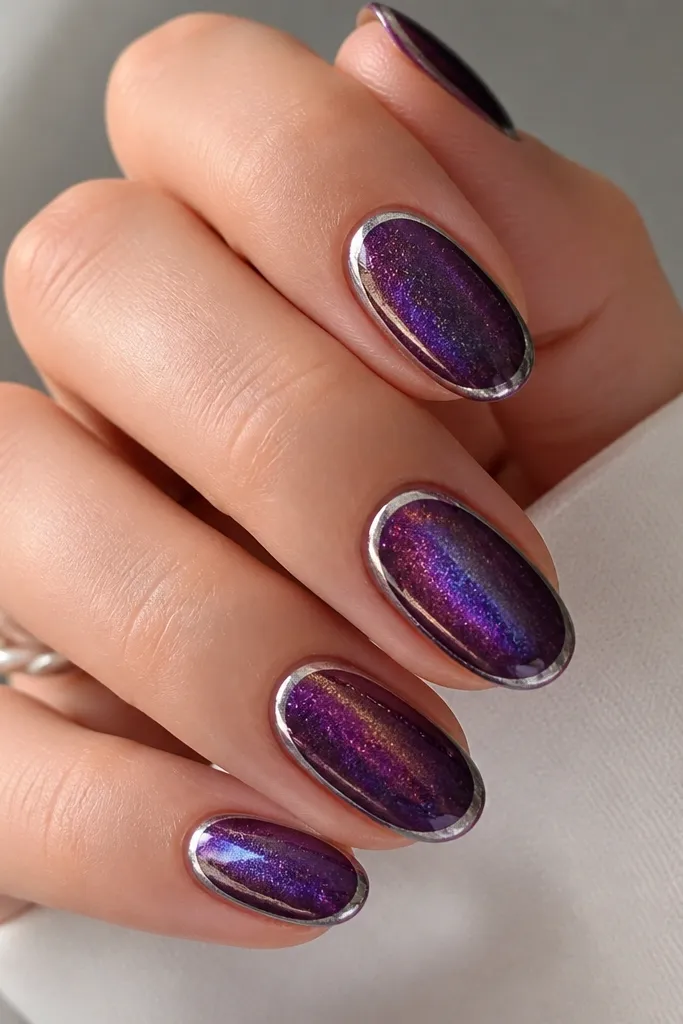
This is the set that looks different every time you move your hand. The deep purple holo gel gives you that shifting sheen without needing extra glitter, and it stays classy because the base is still dark. The silver edge frame is thin and follows the nail perimeter so your nail shape looks crisp. I like this for special nights because the holo catches spotlights, but it still reads wearable because the silver is just a border. It flatters medium oval nails and hands with a clean nail shape. On fair skin, it looks dramatic; on deeper skin, the holo still pops because the purple is strong.
Apply 2-3 coats of deep purple holographic gel, curing each coat so the holo looks even and not patchy. Use thin striping tape to mask a border at the sides and near the tip edge, leaving the center exposed. Apply silver striping gel along the taped border area, then remove tape while tacky to keep the outline sharp. If you prefer foil, use foil transfer gel only inside the border and press silver foil in thin sections. Seal with glossy top coat in one smooth layer, curing fully.
Press striping tape down with a silicone tool so the edge doesn’t bleed under the gel.
Avoid framing too wide — a thick border makes nails look shorter and boxy.
19. Plum Swirl French with Silver Center Knot
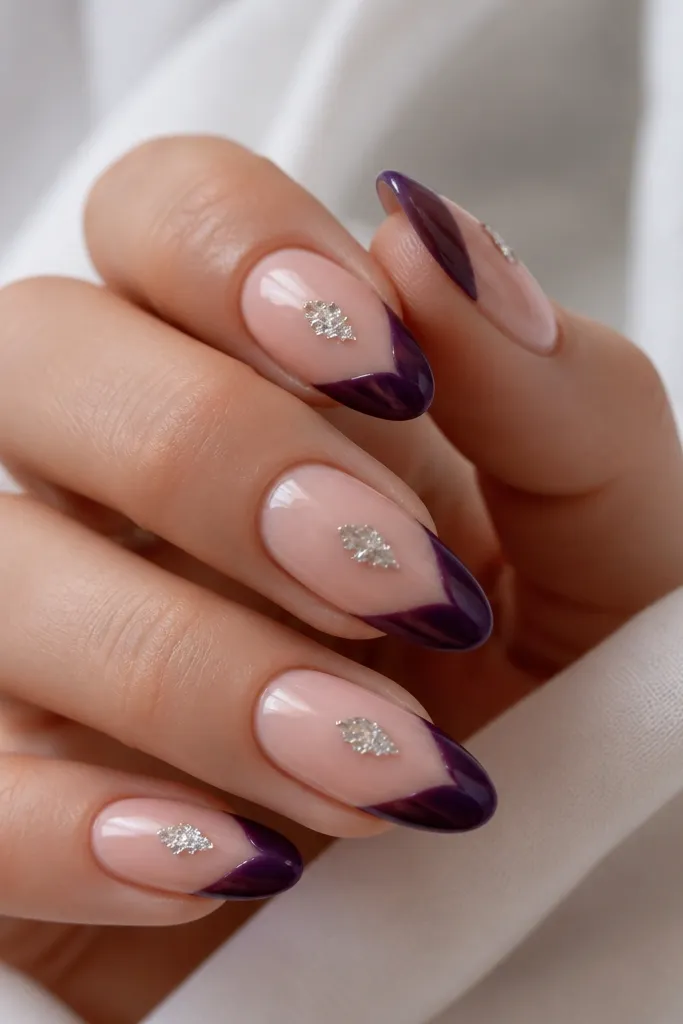
This design looks like you tried a nail artist technique, but it’s surprisingly doable with a liner brush and small foil pieces. The swirl French gives motion, and the silver center knot acts like a focal charm. I keep the knot small so it doesn’t turn into a bulky 3D blob. This set flatters oval and almond nails because the swirl follows the nail’s natural curve. It also looks good on hands with shorter nails if you keep the swirl near the tip and don’t pull it too far down. The purple stays dark and rich, while the silver knot adds that bright “wow” in photos.
Editor's noteUse a small piece of foil and overlap it like shingles — that’s how you get a knot shape without bulk.
Start with a smooth nude-to-clear base, then apply 2-3 coats of dark purple gel for full opacity. For the swirl French, use a French guide tape to place the tip area, then freehand a curved line within it using a thin liner brush so it looks like a swirl. Cure and remove tape carefully. For the silver knot, apply a small amount of foil transfer gel in the center of the nail and place tiny silver foil pieces in a tight cluster, pressing gently. Cure, then cap with two glossy top coat layers to lock the foil cluster down.
Watch outAvoid large foil clusters — they snag and lift at the edges.
20. Dark Purple Glass Nails with Silver Confetti Cut Lines
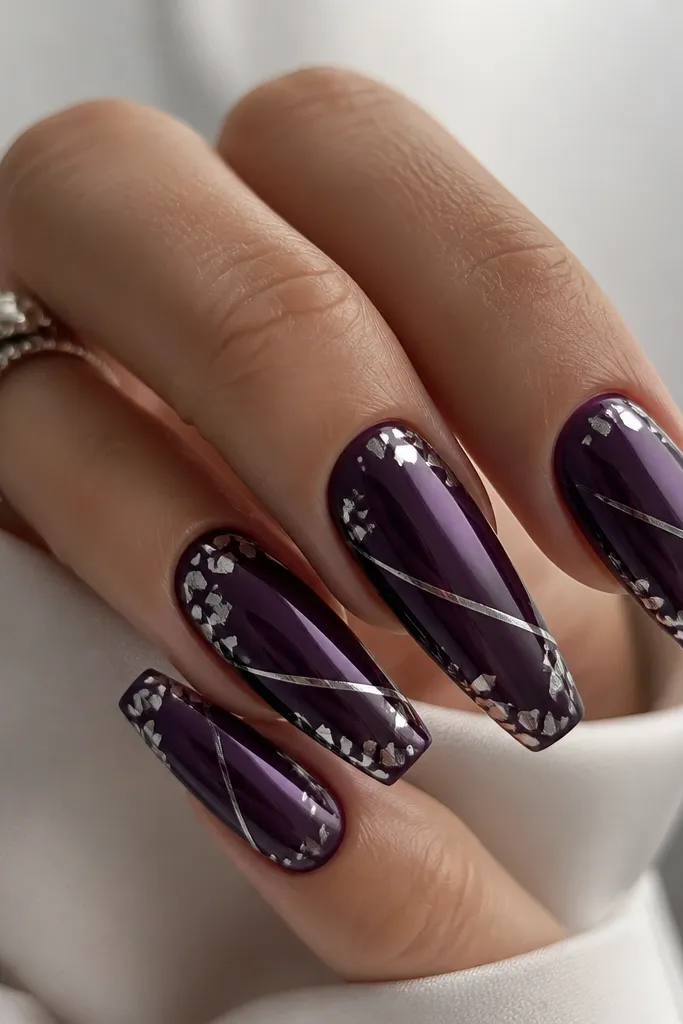
Glass nails are all about smooth, layered shine, and dark purple makes the effect look deeper. I add silver cut lines diagonally so the nail looks like it has sharp facets, then sprinkle tiny confetti pieces near the perimeter for extra sparkle. The confetti is small and sparse — it’s there for flashes, not full coverage. This design flatters longer coffin nails because the diagonal lines follow the shape and make the nail look even sharper. It also looks great on hands with cooler undertones because the silver reads crisp against the plum. If you want a “sleek glam” set, this is my favorite combination of clean and edgy.
Editor's noteIf the cut lines look fuzzy, remove tape earlier in the cure cycle so the gel doesn’t level out.
Prep and buff lightly, then apply 3 thin coats of dark purple gel, curing each coat so the surface stays glass-smooth. For glass effect, add a thin layer of clear gel and cure, then lightly file only the surface if needed. Draw two diagonal silver cut lines using striping tape as a guide, then fill with silver chrome gel or silver foil transfer gel. Press silver foil over the cut lines in thin sections for sharp edges. Add 3-6 tiny silver confetti flecks near the side edges using a dot of clear gel, then cure. Finish with a glossy top coat in two layers so the surface stays smooth over the silver.
Watch outAvoid heavy foil on top of glass layers — it can create bumps that catch light in a bad way.