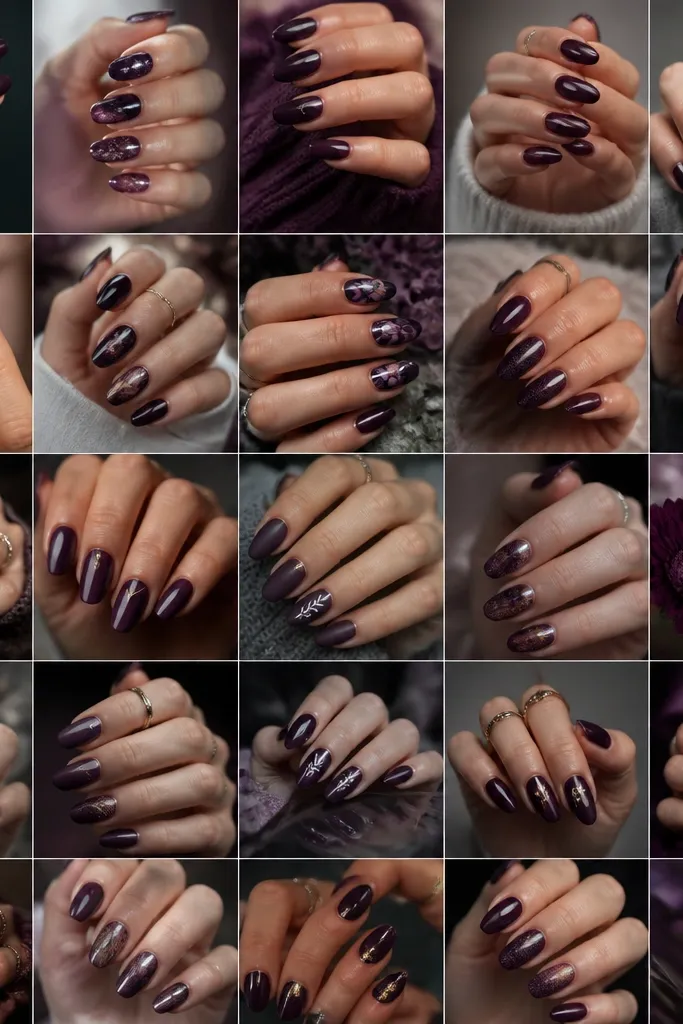
1. Eggplant Gloss With Silver Foil Cuticle Moon
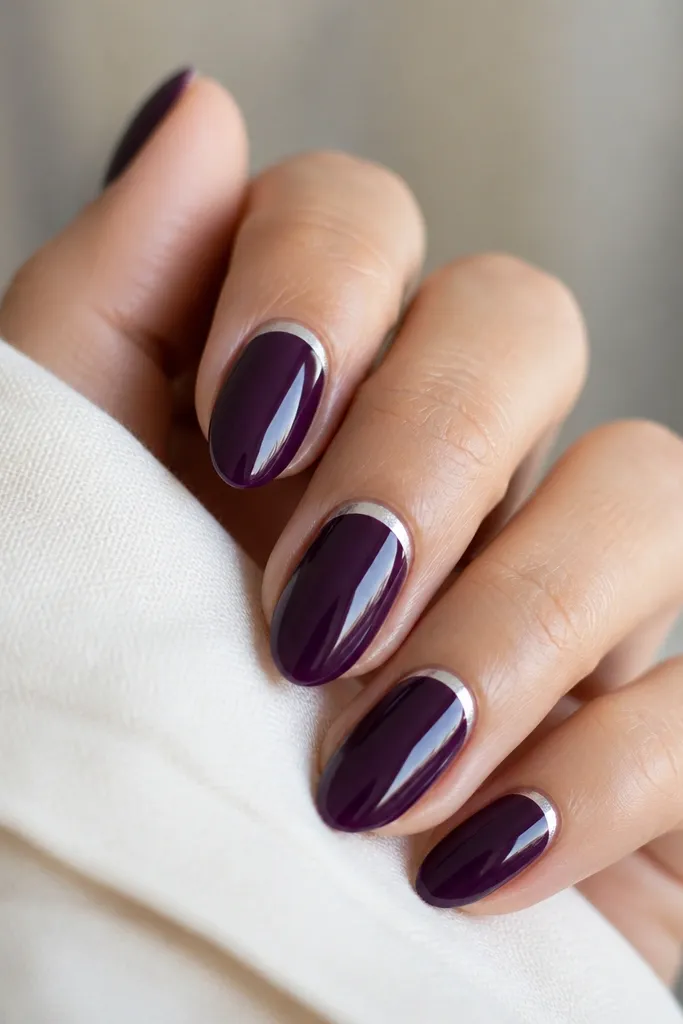
This one is all about contrast. The base is an eggplant purple that looks almost black in dim light, then the silver foil crescent at the cuticle makes it look like you're wearing a tiny bracelet on your nails. Glossy finish turns the purple into a high-depth color that catches hallway lighting. It flatters medium to deep skin tones because the silver reads bright without looking harsh, and it also makes shorter nails look cleaner because the foil line stays crisp. Keep the foil thin so it doesn't look chunky.
Start by painting 2-3 thin coats of eggplant purple gel or polish, curing each coat if you're using gel. Then, use a small makeup sponge to dab silver foil adhesive or foil gel just along the lower cuticle edge - you want a crescent, not a full band. Press silver foil onto that crescent and tap off excess. Finish with a glossy topcoat, wiping the brush along the free edge so the foil stays sealed.
Editor's noteIf your foil looks too patchy, place it slightly closer to the cuticle so the shape still reads as a moon.
Watch outDon't spread the foil across the whole nail; a full coverage foil makes dark purple look cluttered instead of jewelry-like.
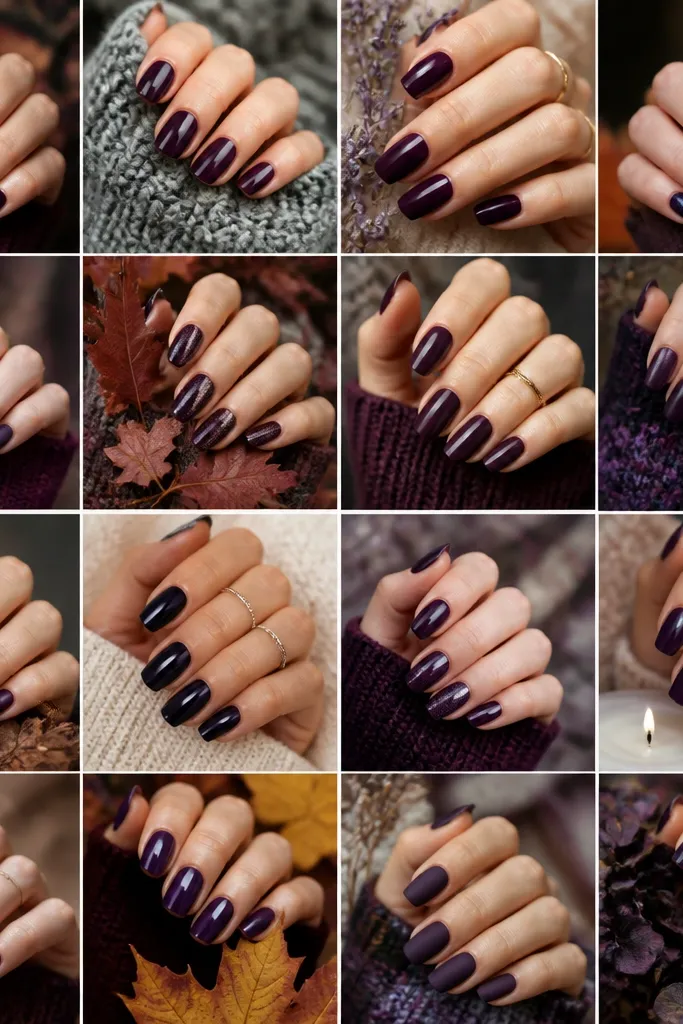
2. Velvet Matte Dark Purple With One Rhinestone Channel
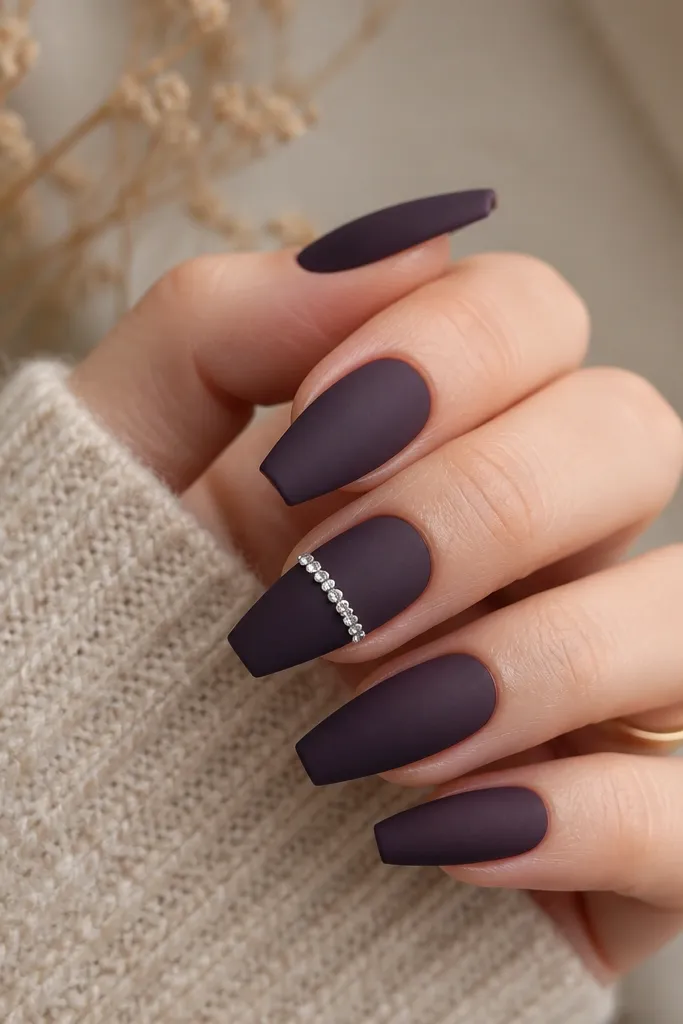
Matte dark purple has this velvety, soft look that photographs better than you'd think. I like pairing it with one clean rhinestone channel because it makes the nails feel dressed-up without turning into a full bling set. The rhinestones catch light even on matte, so you still get that prom sparkle. This works on fair to tan skin because the purple stays cool and the stones add brightness. It also flatters hands with longer fingers because the coffin shape emphasizes the straight line of stones.
Paint all nails with 2-3 thin coats of matte dark purple, then cure or let dry fully. Add rhinestones to only one accent nail: use nail glue or gel adhesive and place stones in a straight line about one-third down from the cuticle. Press each stone lightly with a dotting tool, then cap the stones with a thin layer of glossy topcoat. Finally, topcoat the rest of the nails with matte topcoat so the shine contrast stays intentional.
Editor's noteUse small stones (SS3-SS5 size) for a tight line; bigger stones look messy on matte.
Watch outDon't put rhinestones on every nail - the set looks heavy and less refined fast.
3. Dark Purple Galaxy With Tiny Star Dust Over Nude Base
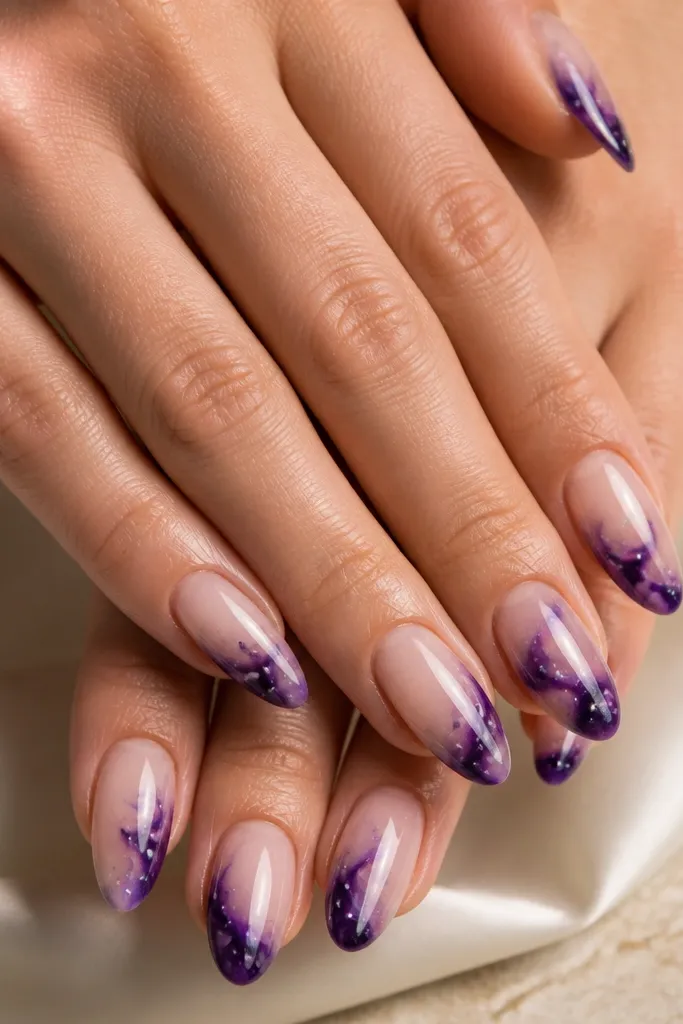
This design looks like you're wearing glittery night sky without the bulk. The nude base keeps it wearable and helps the dark purple galaxy pop - you can see the purple depth instead of it blending into a full dark layer. I use a glossy topcoat so the specks look like they're suspended in glass. It flatters almost everyone because the nude base matches your skin undertone and makes the purple read more "intentional" than gloomy. If you're unsure about dark nails, this is the safest entry point.
Start with a sheer nude base coat in a close-to-skin tone shade, then build a dark purple fade at the tips with a sponge for soft edges. Add galaxy swirls with a thin brush using dark purple and a slightly lighter berry shade to create dimension. Use a toothpick or stiff brush to flick micro specks of white and silver polish over the purple areas. Seal everything with a glossy topcoat, then cure or dry fully.
Editor's noteKeep the star dust concentrated in the lower half of the nail so your cuticle area stays clean.
Watch outDon't cover the whole nail with specks; too many stars make it look like dust instead of a galaxy.
4. Purple Chrome Half-Moons On Glossy Eggplant
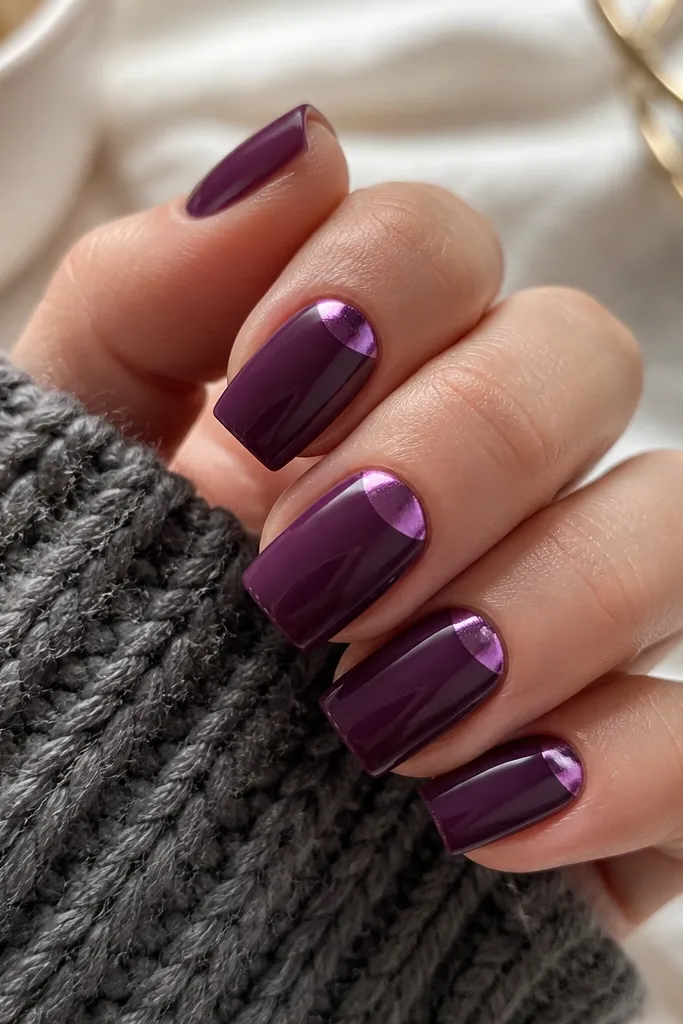
Chrome half-moons look expensive because they create a metallic shape without adding bulk. I like using them over glossy eggplant so the purple chrome has something deep to glow against. The half-moon placement is flattering because it visually lifts the nail - it draws the eye to the center and makes the cuticle area look intentional. This works on short to medium lengths; the shape stays readable even when your nail bed is shorter. It also looks great with warm or cool skin tones because chrome reflects both.
Paint nails with 2-3 thin coats of glossy eggplant purple and cure/dry completely. Apply chrome gel or adhesive right at the cuticle area, shaping a half-moon - leave a small gap around the sidewalls for clean edges. Rub purple chrome powder over the tacky area using an eyeshadow applicator or chrome applicator, then wipe off excess. Finish with a glossy topcoat that seals the chrome without dulling it.
Editor's noteDo your chrome after the purple is fully cured so you don't pull pigment while wiping.
Watch outDon't apply chrome gel all the way to the sidewalls; that's where it smears and looks sloppy.
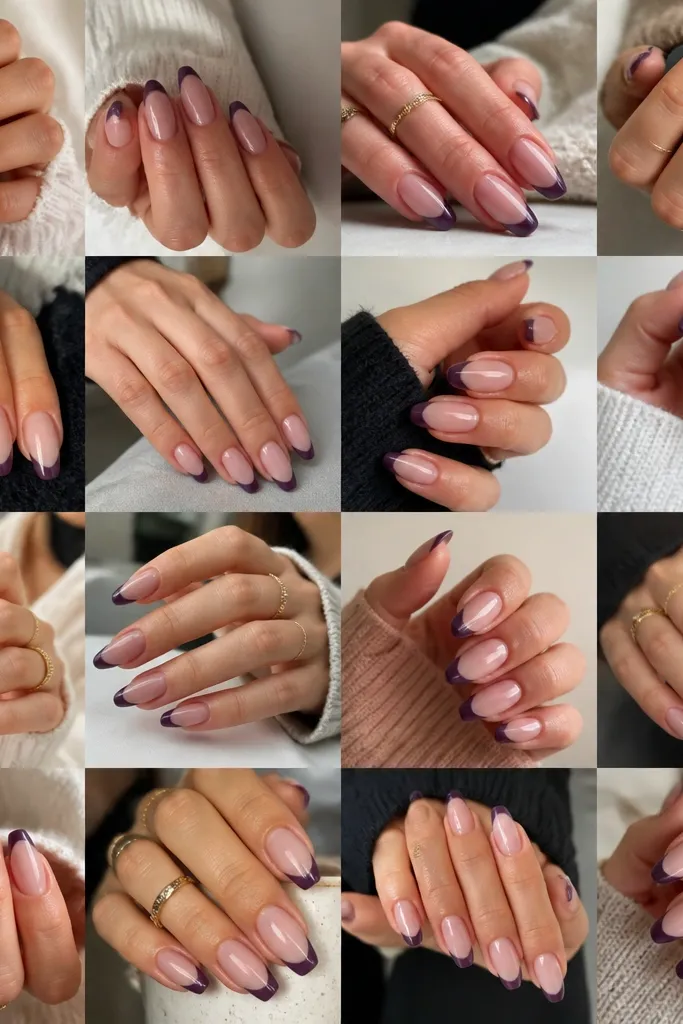
5. Dark Purple French Tips With Micro-Glitter Line
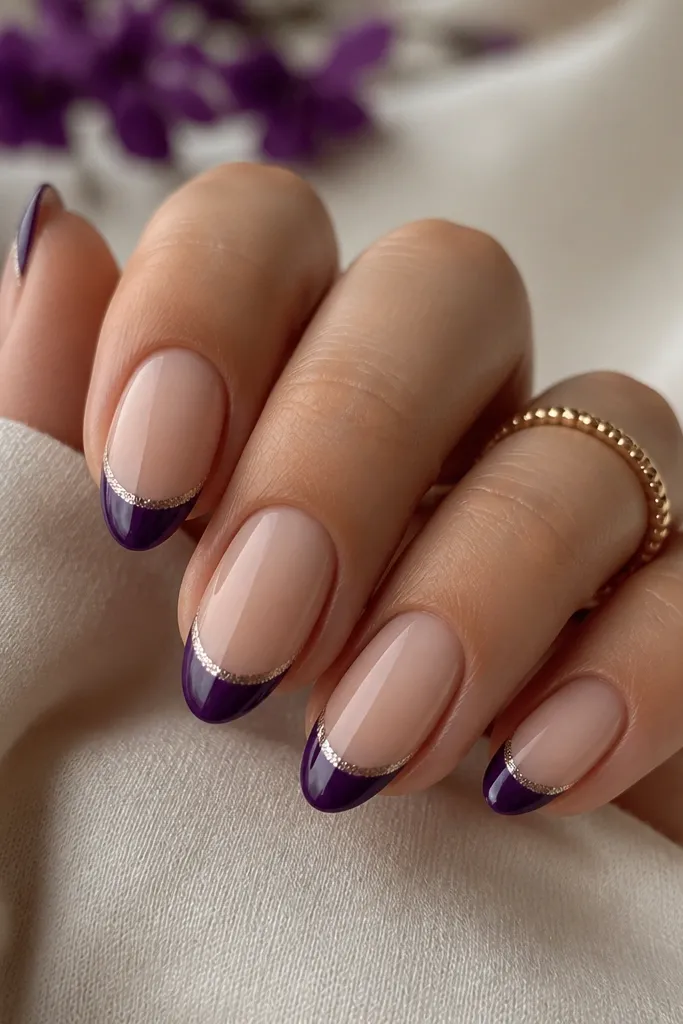
French tips are clean by nature, and dark purple tips make them feel prom-ready instead of everyday. The micro-glitter line between nude and purple gives you that subtle sparkle that shows up in photos without screaming. This looks amazing if you wear a lighter dress or want something classy that still pops. It flatters shorter nails because the nude base keeps the nail bed looking longer. The crisp tip edge is the key - it should look like a drawn line, not a gradient blob.
Start with a nude base coat or sheer builder gel tinted to match your skin. Use striping tape or a French guide to paint dark purple tips in thin layers, keeping the smile line smooth. Before removing the guide, add a very thin strip of micro-glitter gel or glitter polish right at the border. Remove tape carefully, then seal with a glossy topcoat.
Editor's noteUse a smaller brush than you think you need - French work looks neat when the brush is precise.
Watch outDon't make the French tips too thick; thick tips shrink the nail visually.
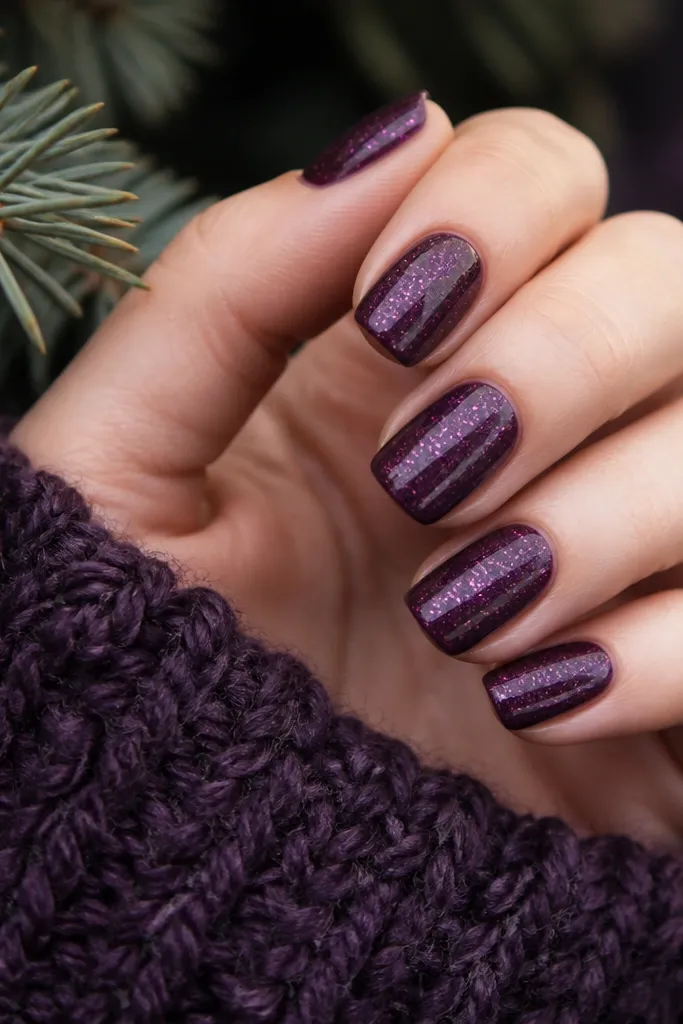
6. Berry Gradient Ombre Into Black-Purple Tips
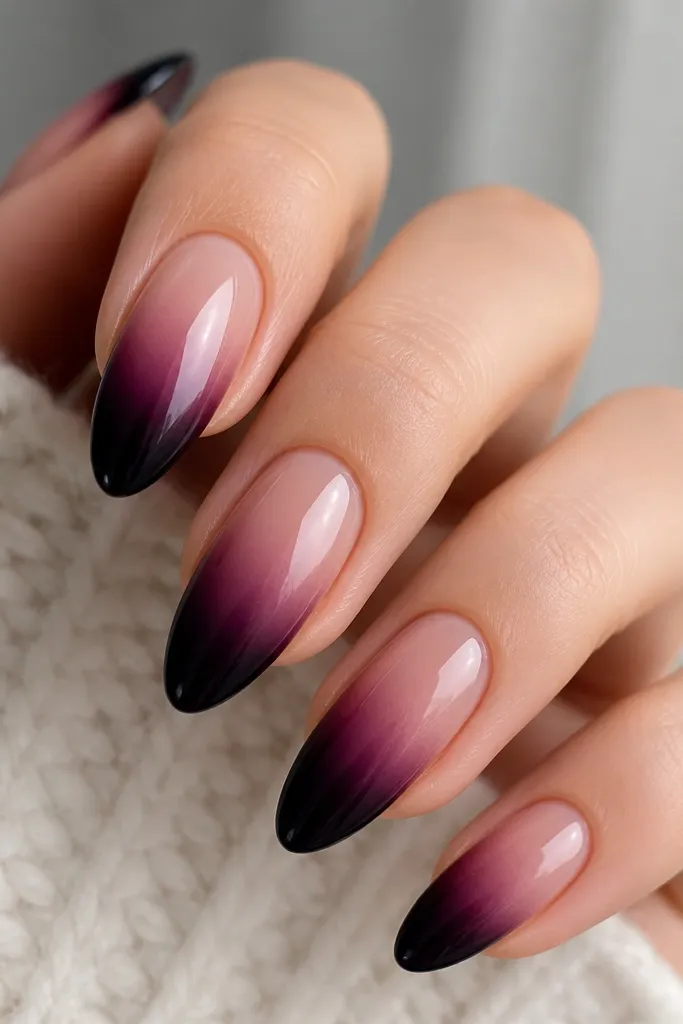
This is the "night out" version of ombre. The gradient starts soft in the center and deepens to a black-purple tip, so your nails look longer and more dimensional under light. I like using a berry shade in the middle because it keeps the dark purple from looking flat or one-note. It works especially well for medium to long almond nails, but you can do it on short nails too if you keep the fade tight. It flatters olive and medium skin tones because the berry undertone looks natural against warm skin.
Paint a nude or sheer base, then sponge on a berry purple starting around the middle of the nail. Blend the berry upward and downward with a makeup sponge lightly tapped, not dragged. Add black-purple at the tips and fade it into the berry with a second sponge pass. Finish with two glossy topcoat layers, making sure the ombre has no visible sponge texture.
Editor's noteWipe your sponge edge on a paper towel between colors so the fade stays smooth.
Watch outDon't rush the blending; hard lines between colors look like a color block, not ombre.
7. Dark Purple Glitter Fade Over Matte Base
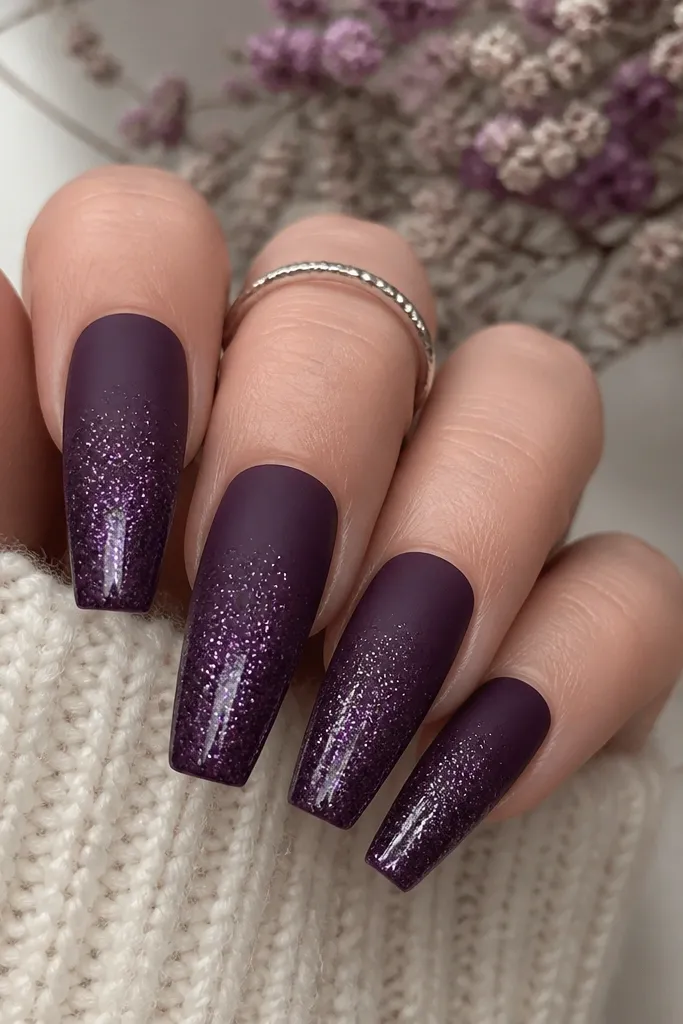
This design gives you the best of both finishes. The matte base makes the purple look rich and hides tiny unevenness, while the glitter fade adds that prom sparkle right where light hits - usually the tips as you move your hands. I keep the topcoat glossy only on the glitter area so it looks dimensional, not flat. This flatters hands with short nail beds because matte makes the color look smooth and the glitter tips add length. It's also forgiving if your cuticles aren't perfectly smooth since matte blurs small flaws.
Apply matte dark purple in 2-3 thin coats and cure/dry. Create the glitter fade by using a dense dark purple glitter polish or fine glitter gel, starting at the mid-nail and blending downward with a sponge. Avoid going all the way to the cuticle; leave a clean matte band. Cap the glitter area with a glossy topcoat, and keep the rest matte with a matte topcoat.
Editor's noteUse a glitter that's small-particle, not chunky; chunky glitter can look gritty over matte.
Watch outDon't put glossy topcoat over the whole nail; it kills the matte "velvet" effect.
8. Icy Lilac Outline On Dark Purple V-Shape Tips
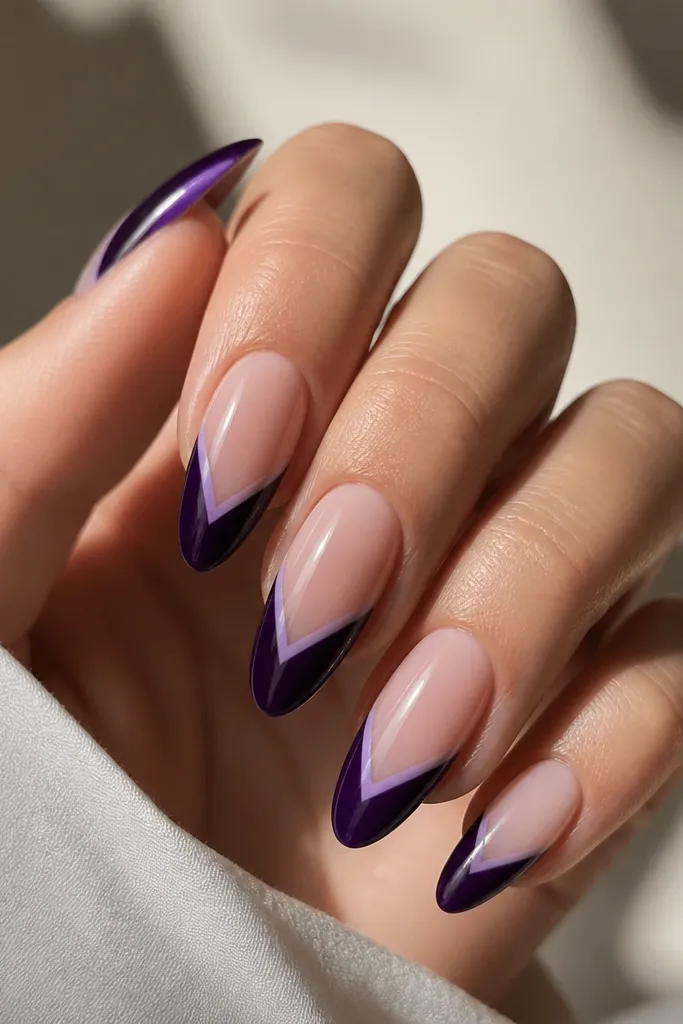
The V-tip shape is sharp and flattering because it draws the eye toward the center of your nail. Dark purple gives it drama, and the icy lilac outline adds a cool highlight that looks like it belongs in winter photos. This is a great choice for people who want dark nails but still want them to feel light and youthful. The outline also makes the tips look more defined, which helps if your natural nails curve slightly. It looks best on longer almond or coffin lengths.
Paint the base with a sheer or medium dark purple, then build a solid dark purple V at the tips using a nail art brush. Outline the V edges with icy lilac gel polish - keep the line thin and steady. Add a small dot at the center of the V with the same lilac to make the shape feel intentional. Finish with a glossy topcoat, running the brush along the edges so the outline doesn't catch.
Editor's noteIf your outline wobbles, wipe the line with a brush dipped in remover before curing.
Watch outDon't use bright neon lilac; it looks like Halloween instead of prom.
9. Black-Purple Marble Swirls With Pearl Micro-Dots
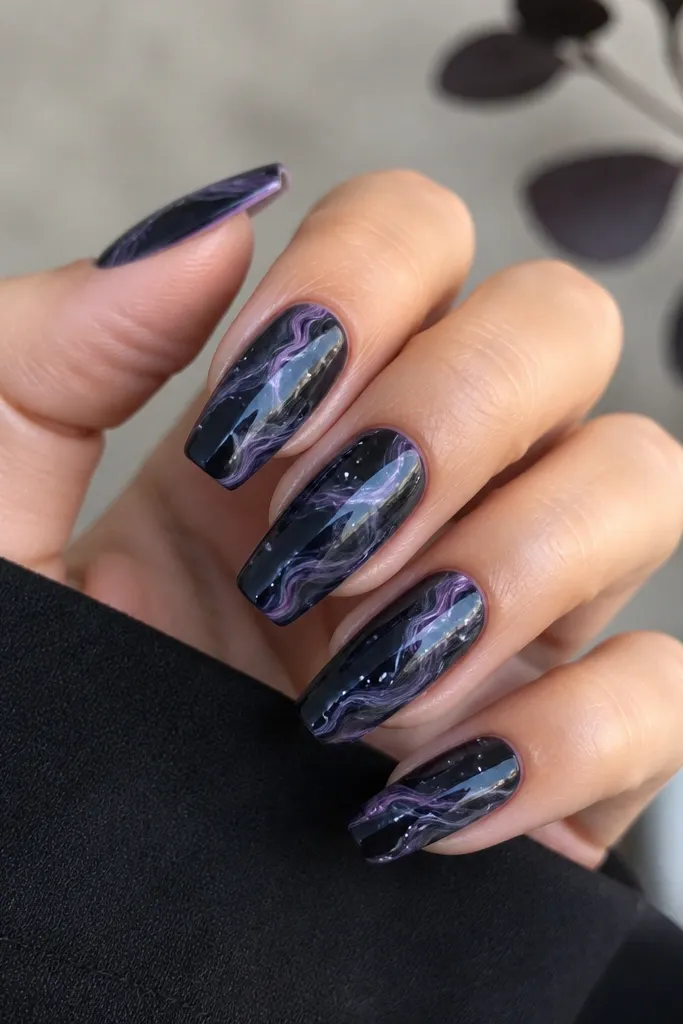
Marble nails look luxe because the pattern is organic, not perfectly uniform. Here, the base is black-purple so the marble reads deep, then white pearl micro-dots add a soft highlight without turning into rhinestones. It flatters darker skin tones because the white dots show up clearly, but it also looks great on fair skin because the contrast is crisp. The glossy finish makes the marble look like it's under glass. If you're wearing a patterned dress, this keeps your nails interesting without adding a ton of separate shapes.
Start with a dark purple-black base coat, then add thin white-gray marble lines using a striper brush. Pull the lines into swirls and break them up so they don't look like straight streaks. Add pearl micro-dots with a dotting tool - place them near some swirls, not in a perfect grid. Seal with glossy topcoat in two layers to smooth the marble texture.
Editor's noteUse gel marble lines; they stay crisp and don't smear like regular polish.
Watch outDon't flood the marble with too much white; the nails will look gray instead of purple.
10. Plum Velvet With Diagonal Nude Cuticle Stripe
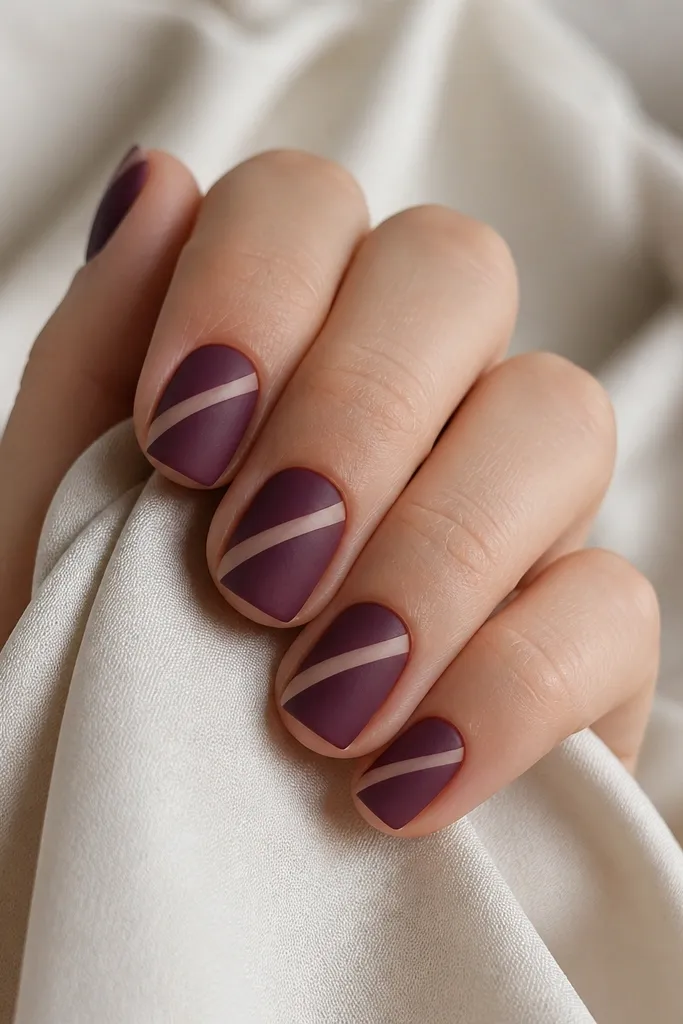
This is a clean graphic look that still feels soft because of the matte finish. The diagonal nude stripe breaks up the dark color and makes the nail look longer and more tailored. I like it on short square or short almond nails because it adds structure without needing length. It flatters hands with wider nail beds since the stripe creates a visual centerline. If you're wearing a simple dress, this gives your nails a "designed" feel without heavy bling.
Apply matte plum-purple in 2-3 thin coats. Take a striping brush and paint a nude diagonal stripe starting at the cuticle area, aiming toward the upper side of the nail - keep the stripe narrow. Make sure the stripe edges are clean by doing two thin passes instead of one thick pass. Topcoat with matte topcoat again so the stripe stays flat and consistent.
Editor's noteChoose a nude that matches your natural nail bed tone - pinky-nude for cool undertones, beige-nude for warm.
Watch outDon't make the stripe too wide; a wide stripe makes the purple look smaller.
11. Dark Purple Butterfly Accent On One Nail
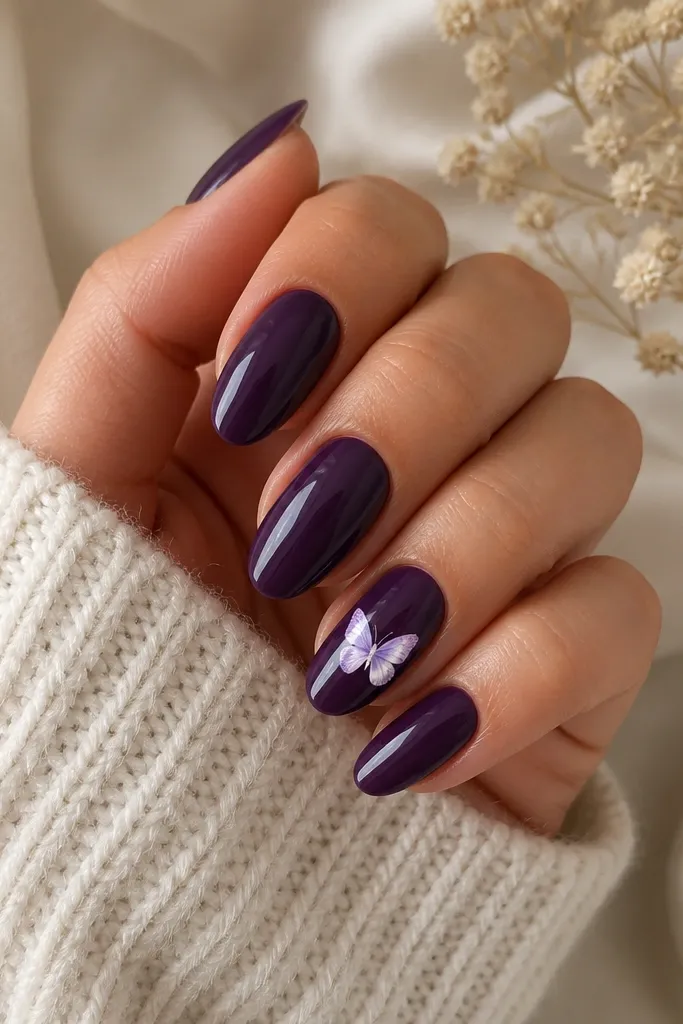
A tiny butterfly accent is cute without being childish when you keep it minimal and place it on only one nail. The base is glossy dark purple for that deep, prom-night look, and the butterfly in white with lavender shading makes the design feel airy. This works well for anyone wearing a floral dress or a dress with light details because the butterfly echoes that softness. It also flatters short-to-medium nails because the art stays small and centered. Keep the rest of the nails plain so the butterfly stays the focus.
Paint all nails with glossy dark purple and cure/dry fully. Apply a butterfly decal or stamp on one nail only, about one-third down from the cuticle. Seal the edges of the decal with a thin layer of clear gel, then cap with glossy topcoat. If you're hand-painting, use a fine liner brush and add lavender shading on the wings with a second thin color pass.
Editor's notePlace the butterfly slightly toward the cuticle, not the tip - it looks more balanced on almond shapes.
Watch outDon't put decals on every nail; it turns into a sticker collage fast.
12. Purple Aura Nails With Smoky Center Glow
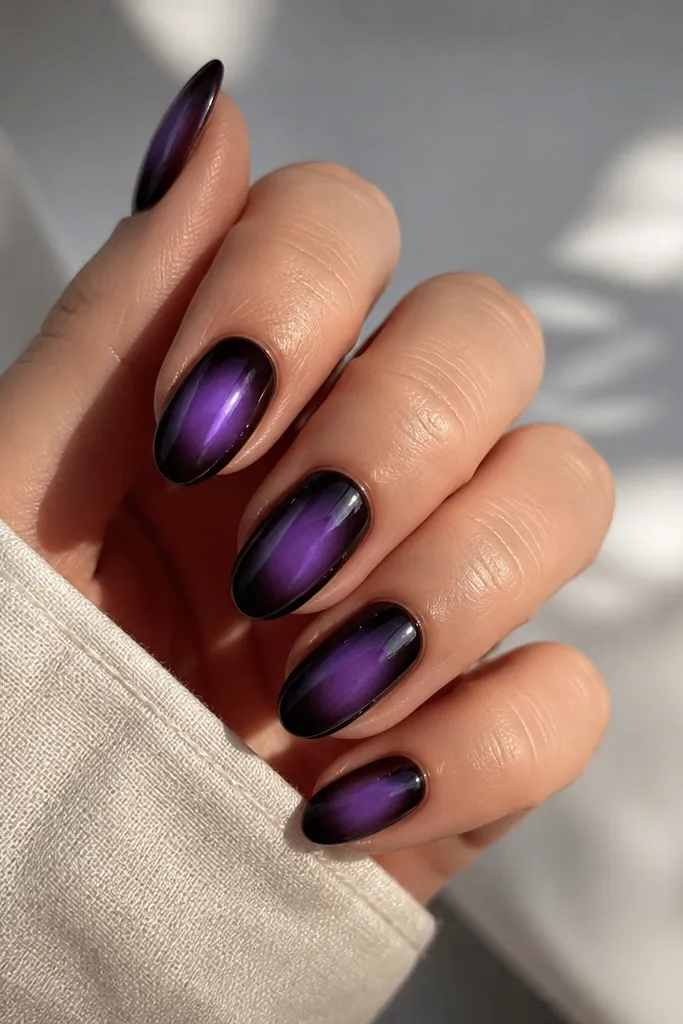
Aura nails look like soft light wrapped around your nail. For this version, the center glow is a brighter purple while the edges are smoky and darker, so it feels like a halo around your nail bed. The effect is flattering because it adds dimension and keeps the design from looking flat. I like it on people who want dark purple but don't want glitter or hard lines. It also hides small imperfections because the aura blur smooths the surface visually.
Start with a dark purple base coat, then sponge a brighter purple in the center of each nail. Use a small sponge and keep the brighter color concentrated in the middle, blending outward into the darker base. Add a tiny bit of smoky black-purple around the edges for depth. Finish with glossy topcoat, and wipe the brush along the sides to keep the aura soft but controlled.
Editor's noteIf the aura looks too strong, blend with a clean sponge lightly dipped in the darker shade.
Watch outDon't go too close to the cuticle with the bright glow; it can look like a stain.
13. Dark Purple Pearls and Chain Links Over Gloss
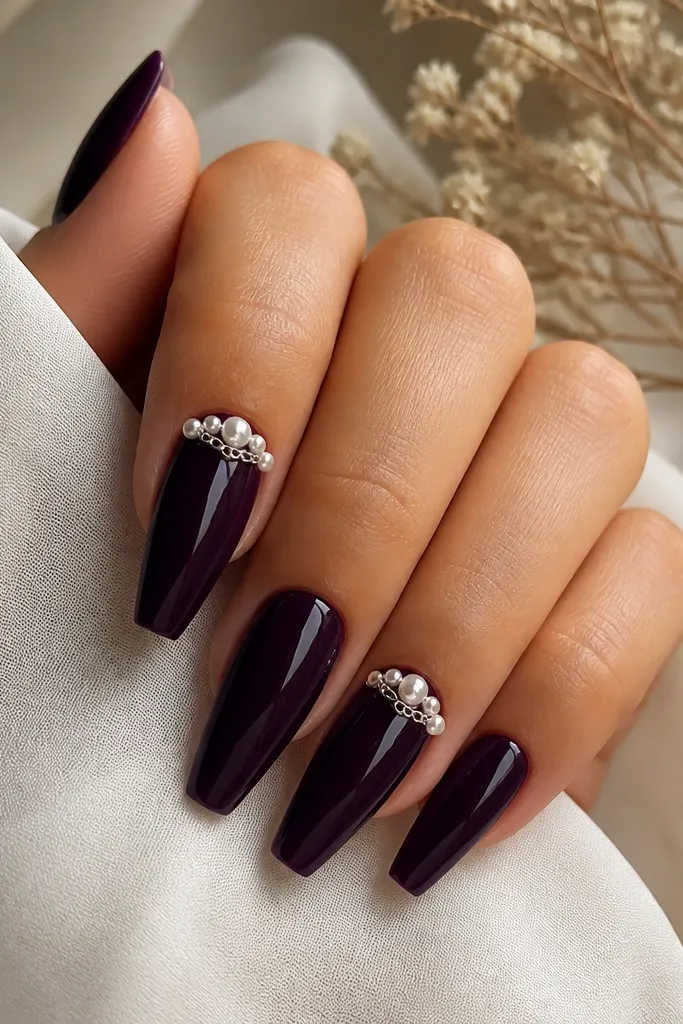
This design reads like a mini necklace on your nails. The base stays clean and glossy, while pearls and chain links add that expensive detail without needing a full rhinestone set. I like arranging them diagonally because it elongates the nail and looks good with long sleeves and bracelets. This flatters medium and deep skin tones because the silver chain and white pearls pop clearly. It also looks great with formalwear - gowns, satin dresses, and anything with jewelry details.
Paint all nails with glossy dark purple and cure/dry. Choose two accent nails and place tiny silver chain links diagonally near the cuticle - leave a small gap between links so it looks airy. Add small pearl clusters at the ends of the chain using nail glue or gel adhesive. Cap the whole section with a clear gel layer, then topcoat with glossy sealer to smooth every edge.
Editor's noteUse a thin chain (not chunky) so it sits flat and doesn't lift when you type or grab your purse.
Watch outDon't skip the capping step; lifted chain edges snag and make the set look worn.
14. Purple Holographic Tips On Nude Base
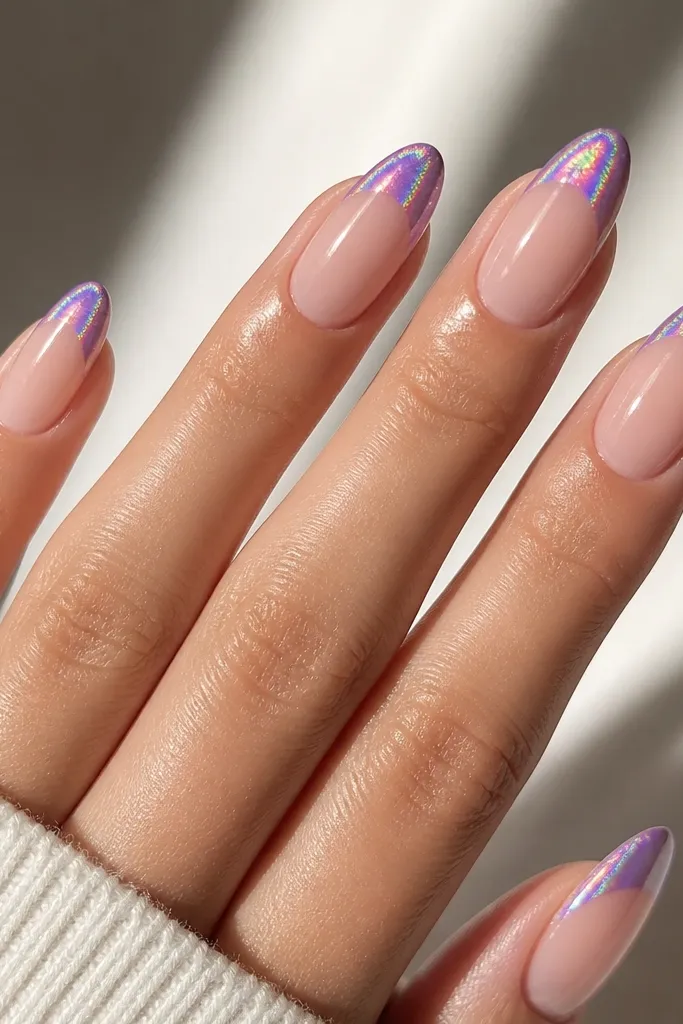
Holographic tips look like liquid light. Keeping the nude base makes the holographic purple feel intentional instead of overwhelming, and it also keeps your nails looking longer. In photos, the tip shimmer shows up even when your dress is dark, so you still get that "wow" effect. This flatters fair, tan, and deep skin tones because holographic reflects multiple shades. It's also beginner-friendly if you use a holographic polish or gel with a built-in color shift.
Apply a sheer nude base coat in two thin layers. Tape a guide at the tip line, then apply holographic purple to the tips only. Build it in thin coats so it stays smooth and not gritty. Remove tape, then seal with glossy topcoat across the whole nail to even out texture and lock in the holographic layer.
Editor's noteFor extra pop, keep the nude slightly pinker if your holographic leans cooler (more blue-purple).
Watch outDon't extend holographic too far down; if it reaches the cuticle, it can look messy.
15. Dark Purple Crisscross Web On Clear Base
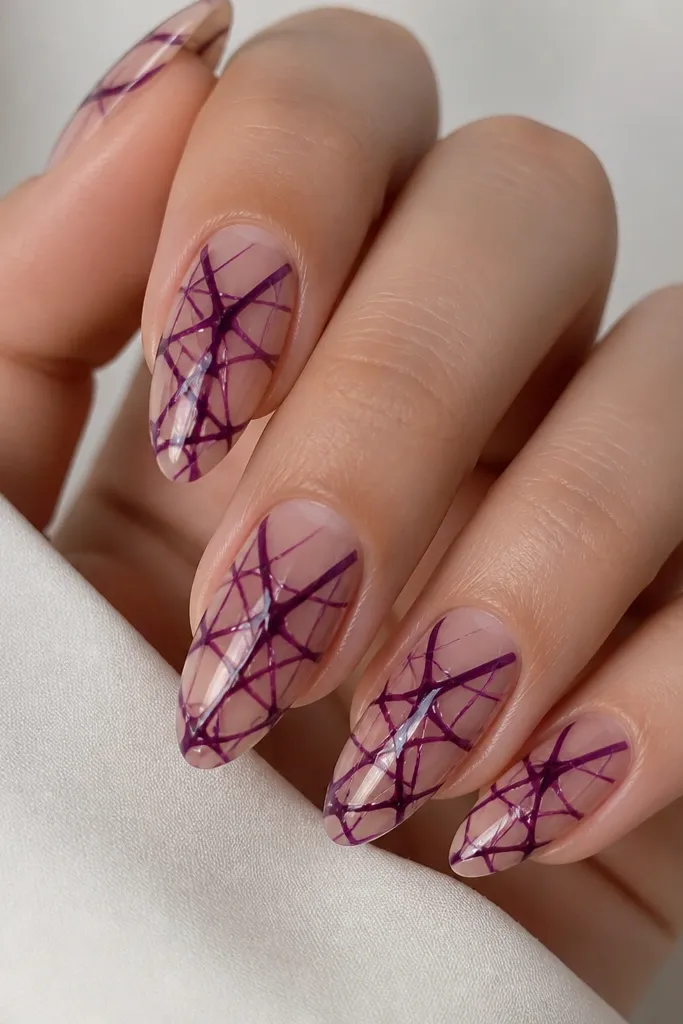
Negative space makes dark purple webbing look modern instead of costume-y. This design uses a clear or sheer base so your nail bed still shows through, then dark purple lines create a web pattern in the center. It's surprisingly flattering because it draws attention to the middle of the nail and makes fingers look slimmer. This works on short square, almond, and even natural rounded nails. If you want dark purple that still looks clean and wearable, this is it.
Start with a clear or sheer nude gel base and cure. Use a thin nail art brush to paint dark purple lines in a crisscross pattern across the center, leaving negative space between lines. Keep the web lines thin and stop them before the sidewalls so it stays neat. Finish with a glossy topcoat that smooths the lines and prevents snagging.
Editor's noteUse gel for the lines - it levels smoothly and keeps the web edges sharp.
Watch outDon't make the lines thick; thick webbing looks heavy and cheap.
16. Plum Tie-Dye Swirls With Gold Flecks
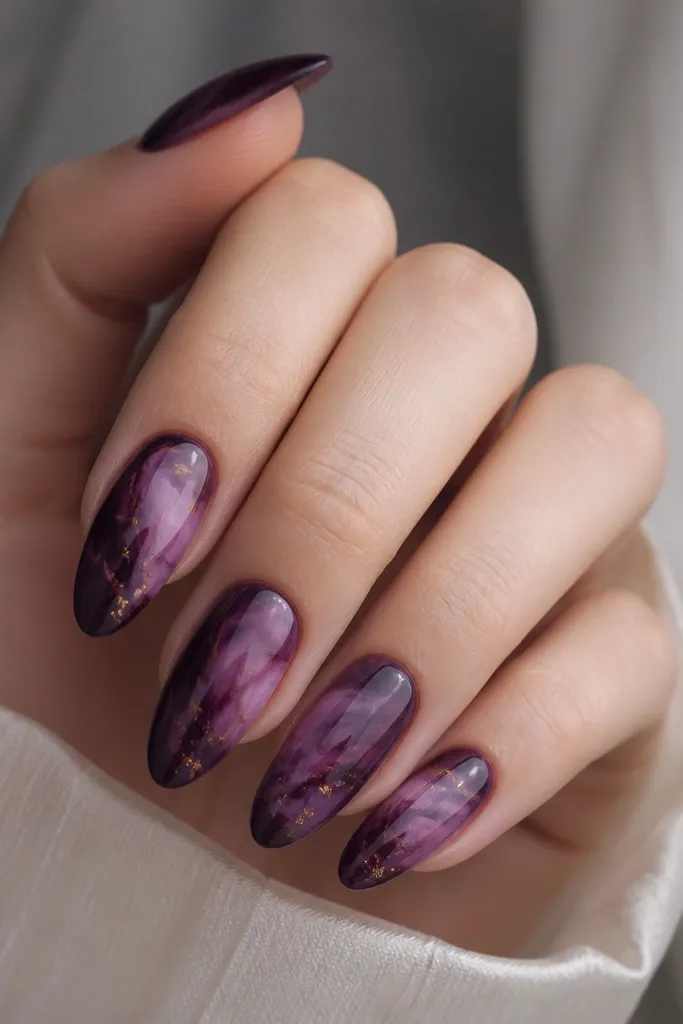
Tie-dye swirls in plum give you a soft, artsy look that still reads prom-ready because the gold flecks add that warm sparkle. I like this combo because dark purple is cool and gold warms it up, so it feels balanced. It flatters people who wear gold jewelry since the flecks match. It also looks good on medium lengths where you can see the swirl movement. The key is keeping the gold flecks tiny so the design stays refined.
Paint a dark purple base, then sponge or brush in lighter plum swirls across the middle and tips. Use a second shade (slightly more magenta) to create variation within the swirl. Add gold leaf flakes or fine gold glitter with a toothpick, placing them lightly over the swirled areas. Seal with glossy topcoat in two layers so the flecks don't look raised.
Editor's noteIf your gold looks too bright, mix a few flecks into clear gel first, then dab it on for a softer scatter.
Watch outDon't cover every nail with gold; scattering only over swirls keeps it elegant.
17. Dark Purple Ombré Glaze With Clear Sparkle Top
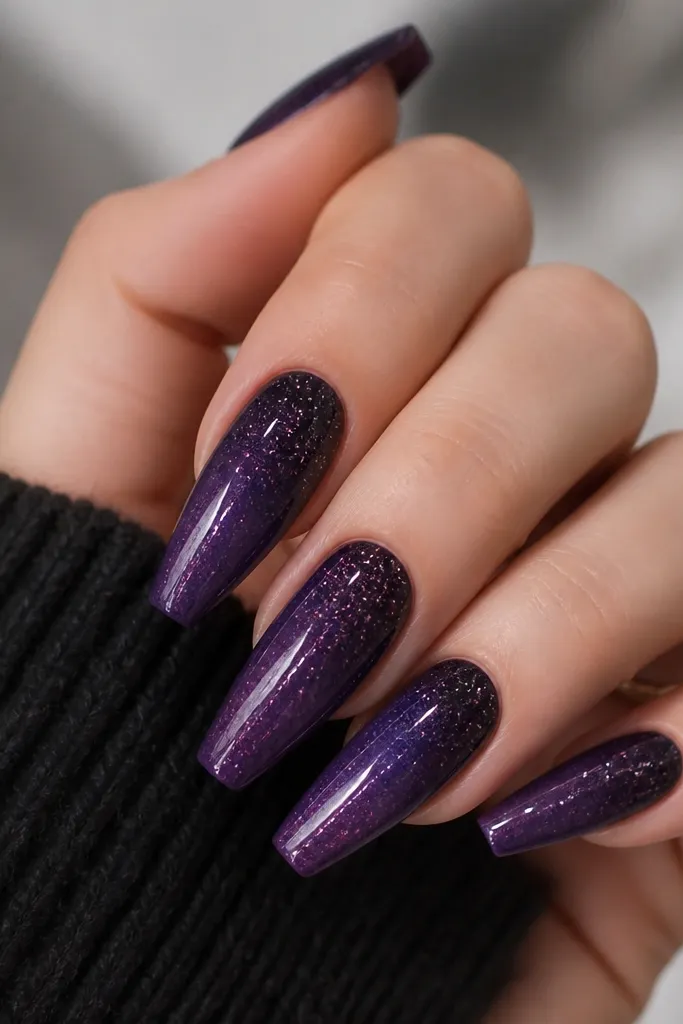
This is the "glass glaze" look. The purple ombré is smooth and dark, but the sparkle top stays clear so it looks like your nails are coated in a sparkling glaze rather than glitter chunks. It flatters all skin tones because the sparkle is silver and the purple stays deep without turning brown. I like it for prom because it looks good in both bright and dim lighting - the sparkle just shows differently. It also works well if you don't want heavy art on every nail.
Apply a sheer base, then sponge or brush dark purple from cuticle down to tips, keeping the fade subtle and smooth. Cure/dry fully. Apply a clear gel layer mixed with ultra-fine silver sparkle, covering the whole nail. Cap with glossy topcoat and cure again so the sparkle sinks into the top layer.
Editor's noteUse ultra-fine silver glitter; chunky glitter over glaze looks gritty.
Watch outDon't overbuild the purple; thick ombré layers can shrink the nail and look uneven.
18. Purple Marble French With White Tip Edge
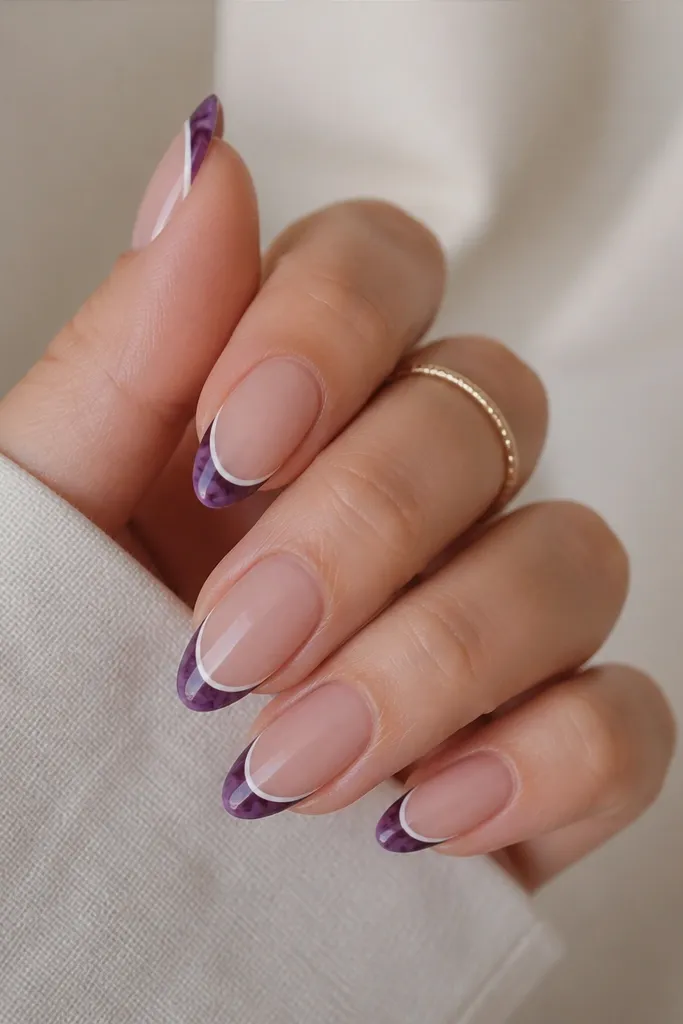
This is French tips, but with a marble twist. The nude base keeps it clean and wearable, while the dark purple marble tips add depth like you're wearing stone. The thin white outline on the outer edge makes the tip look sharper and more defined, which helps in photos. It flatters short nails because the outline adds a crisp boundary. If you like dark purple but want something that still feels classy and bright, this one nails it.
Start with a nude base coat and cure/dry. Use a French guide to paint dark purple marble tips with a mix of dark purple and a slightly lighter berry shade, then add white-gray veining with a thin brush. Outline the outer edge of the French tip with a thin white gel line. Seal everything with glossy topcoat, focusing on the sidewalls so the outline stays smooth.
Editor's noteLet the marble tip layer get slightly tacky before adding veining so the lines don't blur.
Watch outDon't skip the outer white outline; without it, the tips can look rounded and less crisp.
19. Dark Purple Velvet Glitter Strip Across One Side
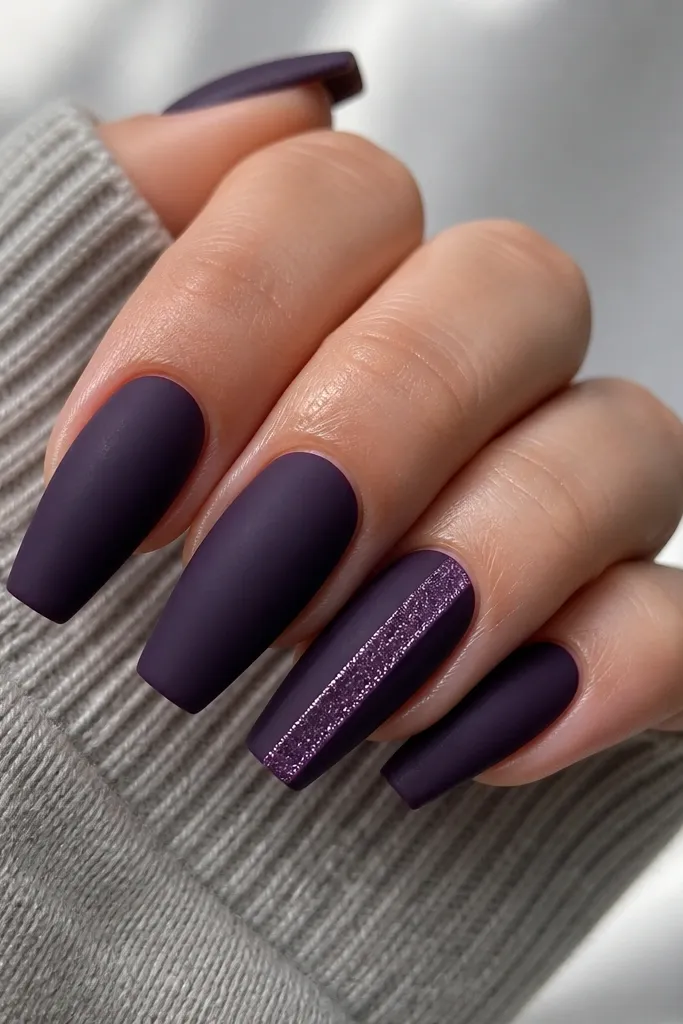
This design feels like a ribbon running up your nail. Matte dark purple gives the background a velvet look, and the glitter strip adds sparkle without covering the whole nail. I like placing the glitter strip on one side because it creates a slimming diagonal effect and looks great with rings. This is especially flattering for people who want a little drama but don't want a full accent nail with rhinestones. It also looks good on hands with thinner fingers because the single strip draws attention upward.
Paint nails with matte dark purple in thin coats and cure/dry fully. Choose one accent nail and apply striping tape along the right sidewall - leave about 1-2 mm space from the edge. Paint or press on a dark purple glitter gel in a narrow strip, then remove the tape carefully. Finish the glitter strip with a glossy topcoat only on that section, keeping the rest matte.
Editor's noteUse striping tape and burnish it with a finger so glitter doesn't creep under the edges.
Watch outDon't make the glitter strip too wide; wide strips look like accidental spill.
20. Deep Purple Rose Outline On Clear Pink Nude
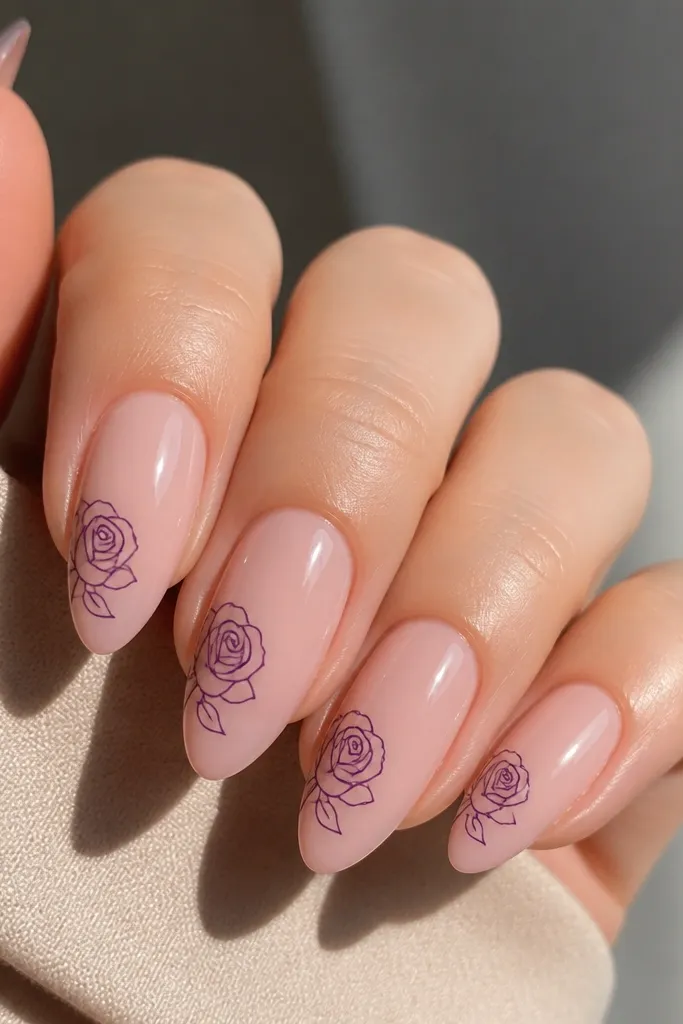
Line art roses look romantic without needing thick paint or heavy decals. The clear pink nude base makes the deep purple outline feel delicate and lets your skin tone peek through. I've worn this with both black dresses and soft blush gowns - it always looks intentional because the art stays minimal. It flatters shorter nails because the outline is thin and doesn't take up the whole nail. If you're worried dark purple will feel too harsh, this keeps it sweet.
Apply a clear pink nude base coat and cure/dry. Use a fine liner brush with deep purple gel to draw a rose outline near the side of each nail, keeping it about the size of a pea. Add a couple of tiny leaf lines so it reads like a rose, not random swirls. Seal with glossy topcoat in two layers, making sure the line art doesn't lift at the edges.
Editor's notePractice one rose on a nail tip first; line art looks best when the petals are consistent in size.
Watch outDon't fill the rose in solid; filled roses look heavy and lose the delicate prom vibe.
21. Dark Purple Rhinestone Frame Around Cuticle
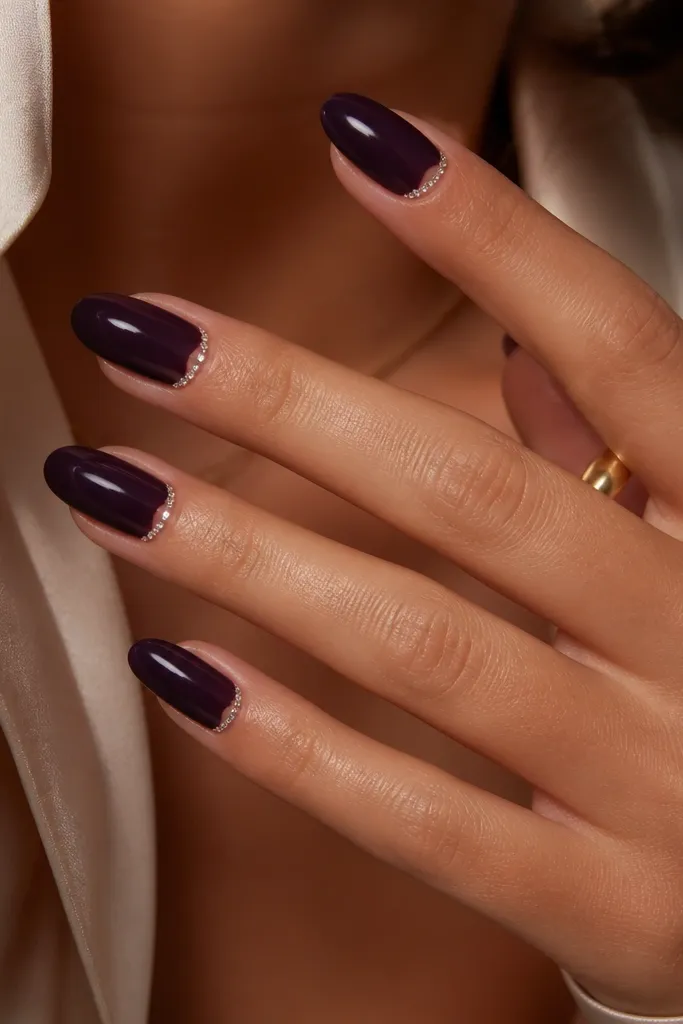
A cuticle frame is the difference between "sparkly" and "sprayed-on." The dark purple base is the anchor, and the rhinestones create a border that makes the nail look like it has jewelry hardware. This flatters hands with longer nail beds because the frame can sit cleanly at the cuticle without overflowing. It also looks great with rings since both are clustered near the finger base. Keep the stones small and evenly spaced so it looks like a salon placement, not a random scatter.
Paint nails with glossy dark purple and cure/dry. Add rhinestones only around the cuticle: start at one side and move across in a thin curve, leaving a small gap in the center if you want that "frame" look. Use gel adhesive under each stone and press with a dotting tool. Cap over the stones with a thin clear gel layer, then finish with glossy topcoat over the whole nail.
Editor's noteCount stones as you place them so both hands match - uneven spacing looks off in flash photos.
Watch outDon't use big rhinestones; big stones over a cuticle frame look bulky.
22. Matte Dark Purple With Glossy Center Candy Stripe
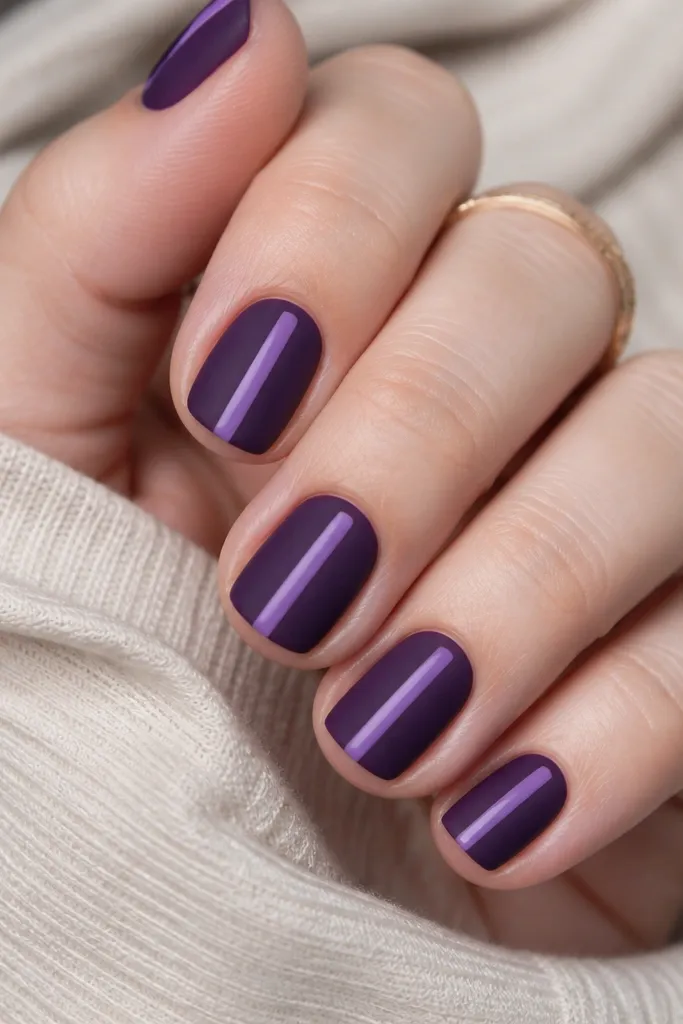
This is the cleanest optical trick for making nails look longer. Matte dark purple is your base, then a glossy candy stripe in a lighter purple runs down the center, creating a highlight line. The gloss difference makes the stripe catch light and keeps the design from looking flat. I like it for people who want dark nails that still look neat and not overly decorated. It flatters short nails most because the vertical line adds length. Keep the stripe centered - that's the whole look.
Apply matte dark purple to all nails and cure/dry fully. Use striping tape to mask a thin center line if you want perfect symmetry. Paint the center line with a lighter purple gel - two thin coats so it stays smooth. Remove tape carefully, then topcoat the stripe area with glossy topcoat and topcoat the rest with matte.
Editor's noteIf you don't use tape, use a liner brush and steady your hand on a table - the center line needs zero wobble.
Watch outDon't blend the stripe edges; blurred edges make it look like a smear.
23. Dark Purple Stained Glass With Silver Lines
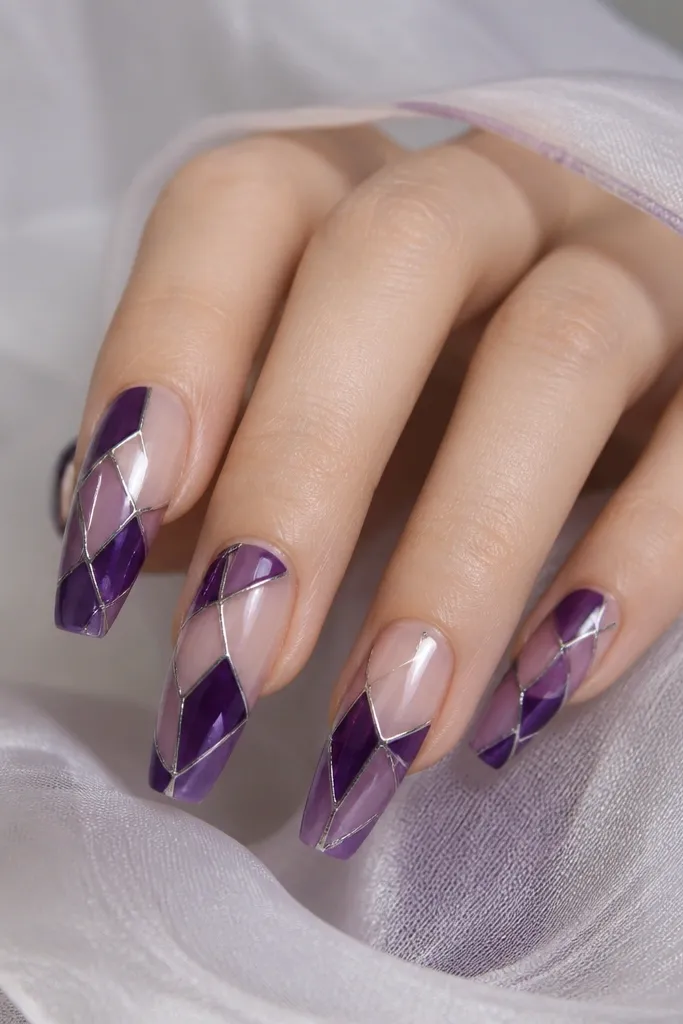
Stained glass nails look like stained acrylic, which screams prom. The sheer base keeps it light, then the dark purple panels look bold because they're separated by thin silver lines. This is flattering on medium and long nails because you get more panel area, but it works on short nails if you keep it to two panels per nail. It also looks great with both silver and mixed-metal jewelry because the lines are silver. The glossy topcoat makes the panels look like they're trapped under clear plastic.
Start with a sheer base coat and cure/dry. Draw stained-glass panel lines with silver chrome gel or silver line gel - thin and slightly uneven for a real glass feel. Fill panels with dark purple gel, working in thin layers so it doesn't flood the outlines. Add a second purple layer if needed for full opacity, then cure. Finish with a thick glossy topcoat (or clear builder gel cap) to create that glassy depth.
Editor's noteKeep your panel shapes simple - triangles and rectangles look cleaner than swirls.
Watch outDon't overfill the panels; thick gel can push the silver lines aside and look messy.
24. Glazed Dark Purple With Rose Gold Foil Flecks
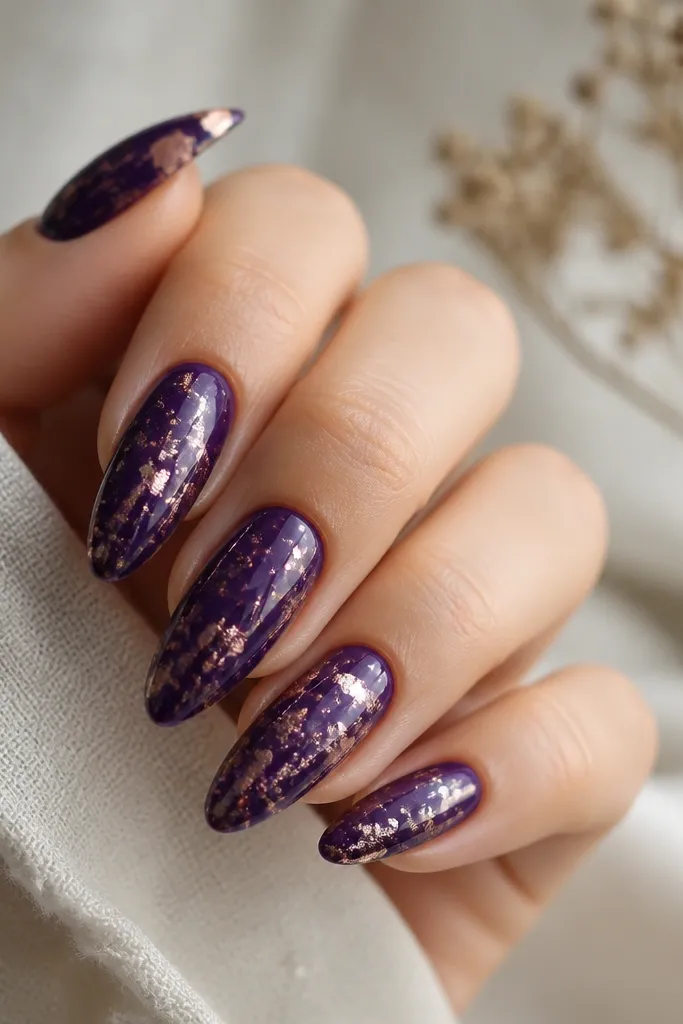
Rose gold flecks over dark purple look warm and romantic, even though the base is deep and moody. I call this the "glazed" look because the purple stays smooth and shiny while the foil adds tiny bursts of light. It flatters people who wear rose gold jewelry since the tones match your rings and bracelet. It also works on fair and deep skin because rose gold is flattering across undertones. If you want something that feels special without a lot of design work, this is a winner.
Paint nails with 2-3 thin coats of glossy dark purple and cure/dry. Apply a thin layer of clear gel or foil adhesive to the center and slightly toward the tips only. Dab rose gold foil flecks onto the tacky spots and tap off excess. Cap with glossy topcoat to seal the foil and smooth the surface so it doesn't snag on fabric.
Editor's noteFoil flecks look best when you vary their size - small, medium, and a few larger pieces.
Watch outDon't place flecks right at the cuticle; they can lift and make the base look messy.
25. Dark Purple Micro-Glitter All Over With Matte Topcoat
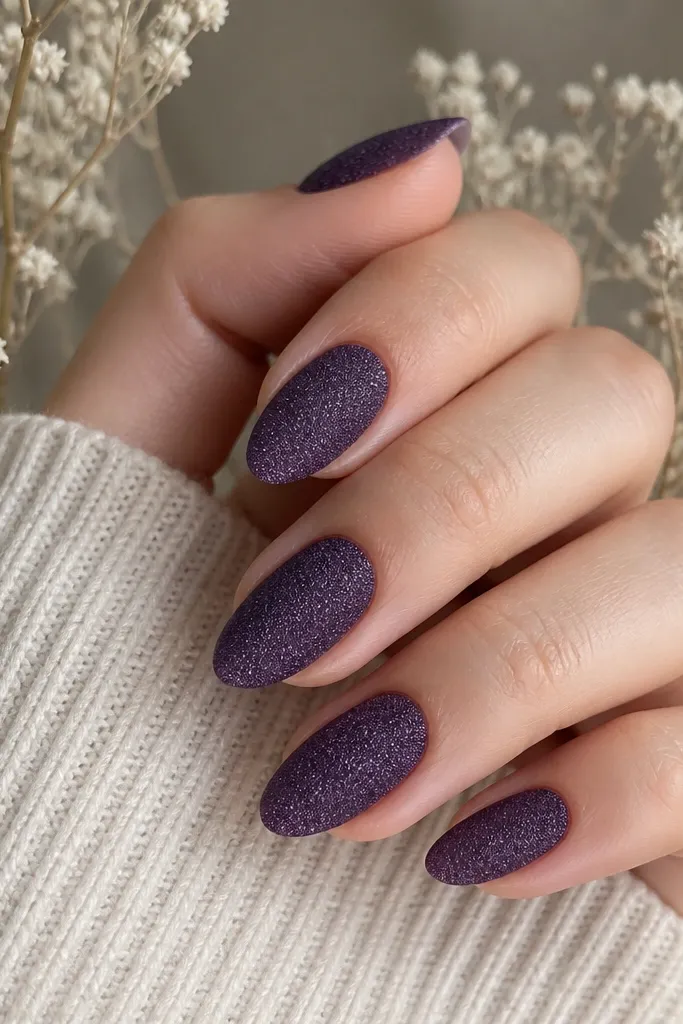
This is the "sparkle but quiet" version of dark purple. Micro-glitter all over gives you shimmer that shows when you move your hands, but matte topcoat keeps it from looking like a party confetti set. I love it for proms because it looks rich under flash but not too loud in normal lighting. It flatters every nail length because the glitter texture stays uniform. It also hides tiny surface ridges better than full gloss. If you're doing your nails the day of and your surface is a little uneven, matte glitter forgives.
Apply a dark purple base (or use a dark purple micro-glitter polish as your base). Build in thin coats until coverage looks even, curing or drying between coats. Once the micro-glitter is fully set, apply matte topcoat over everything. If your glitter looks too textured, do a thin clear gel layer first, cure, then matte topcoat for a smoother feel.
Editor's noteUse matte topcoat sparingly - one solid coat is enough for that velvet look.
Watch outDon't use chunky glitter; chunky pieces under matte look rough.