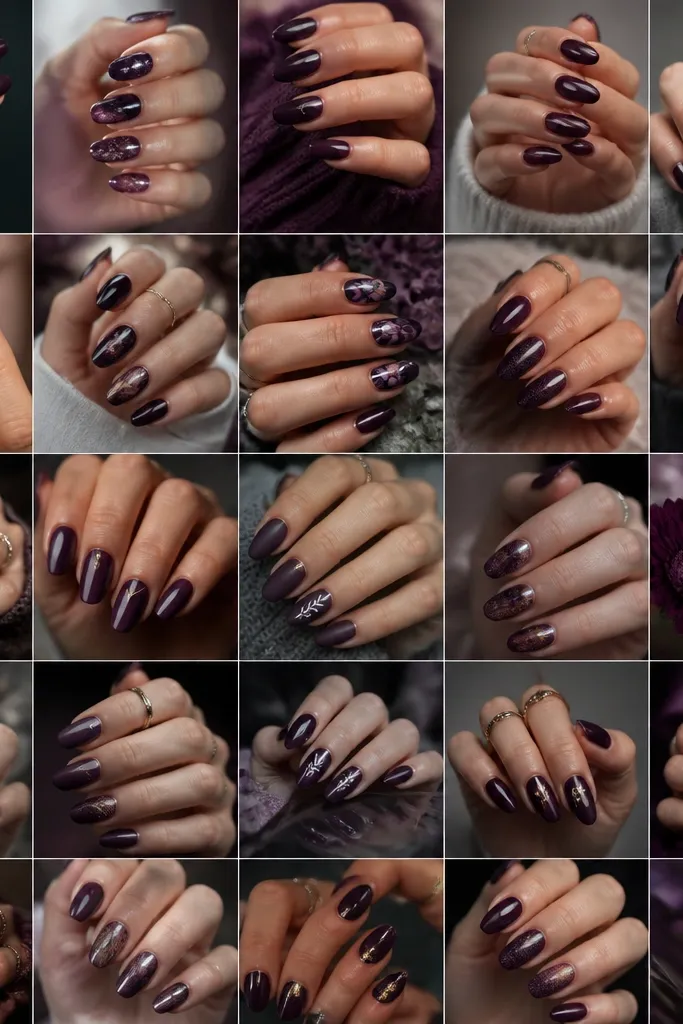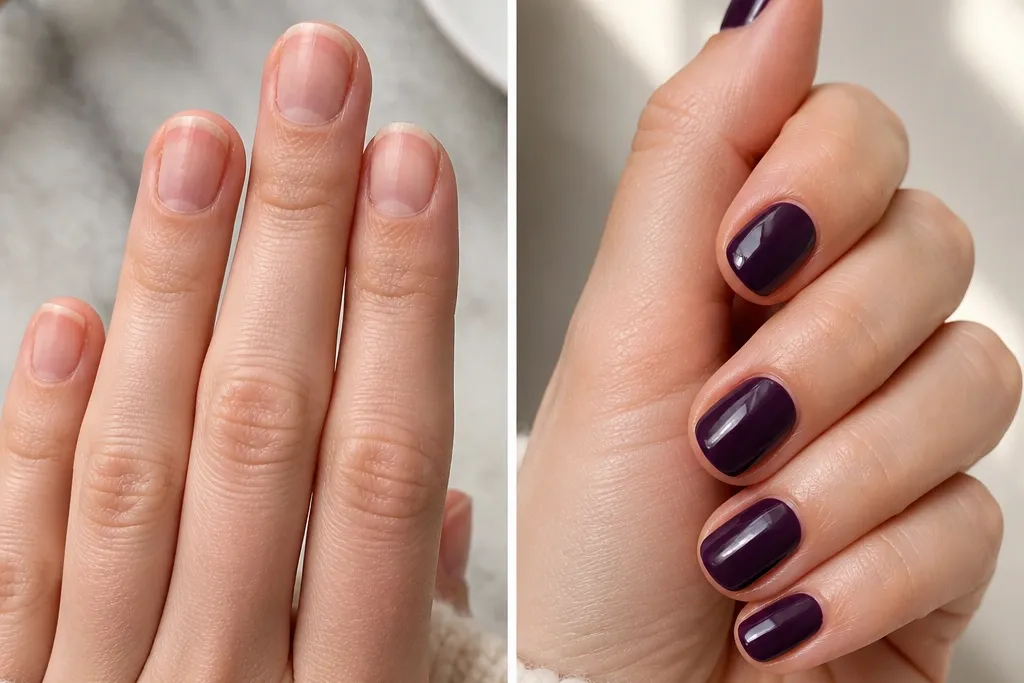
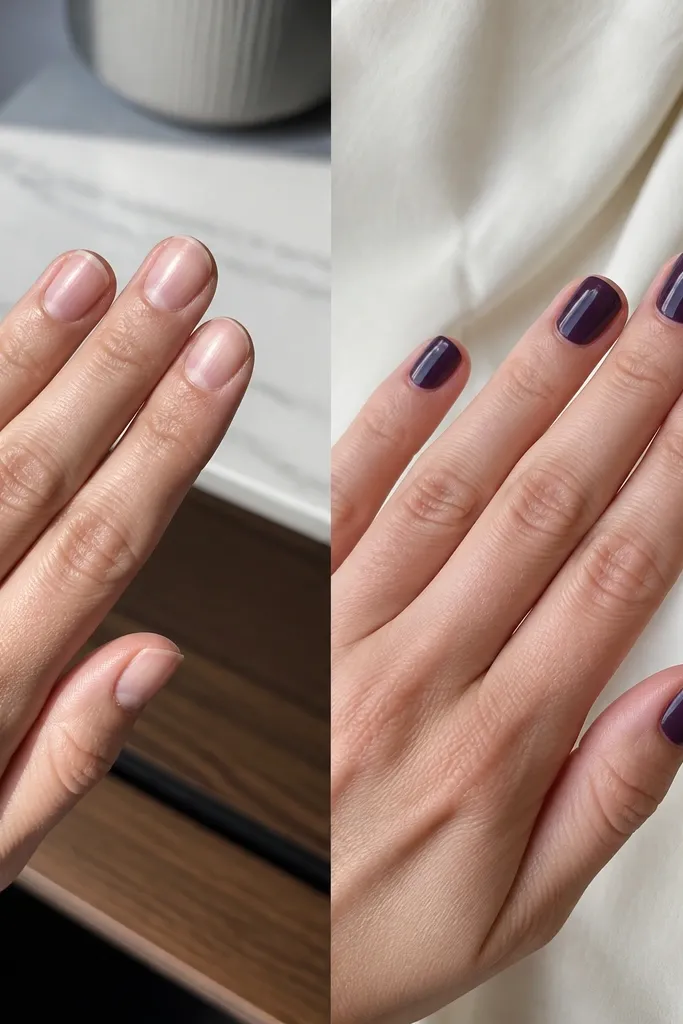
1. Blue-Black Purple Glass Nails
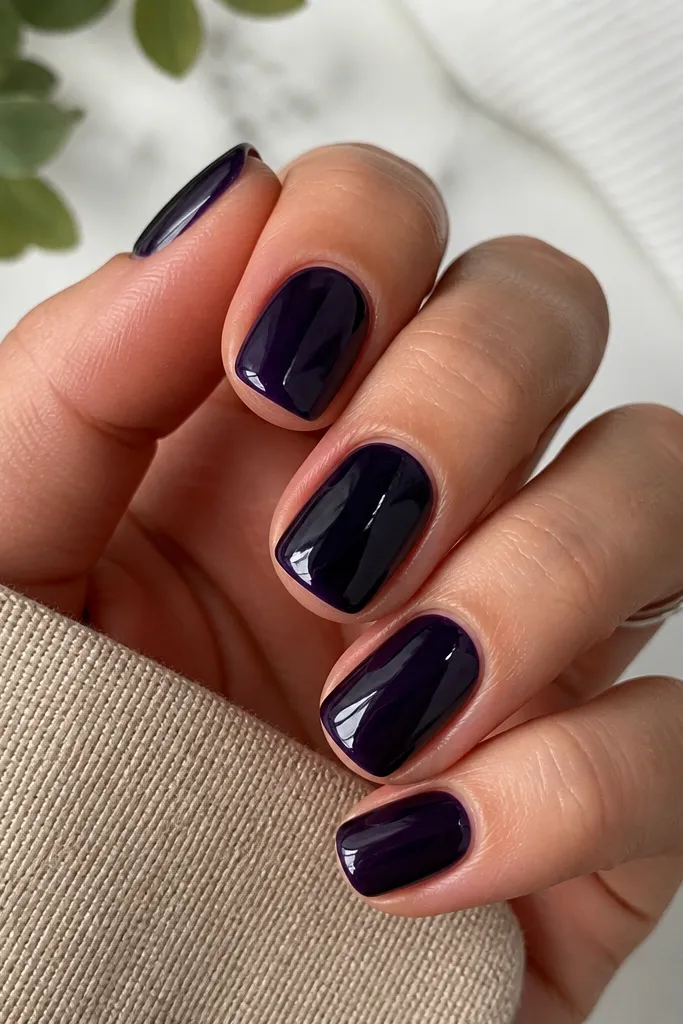
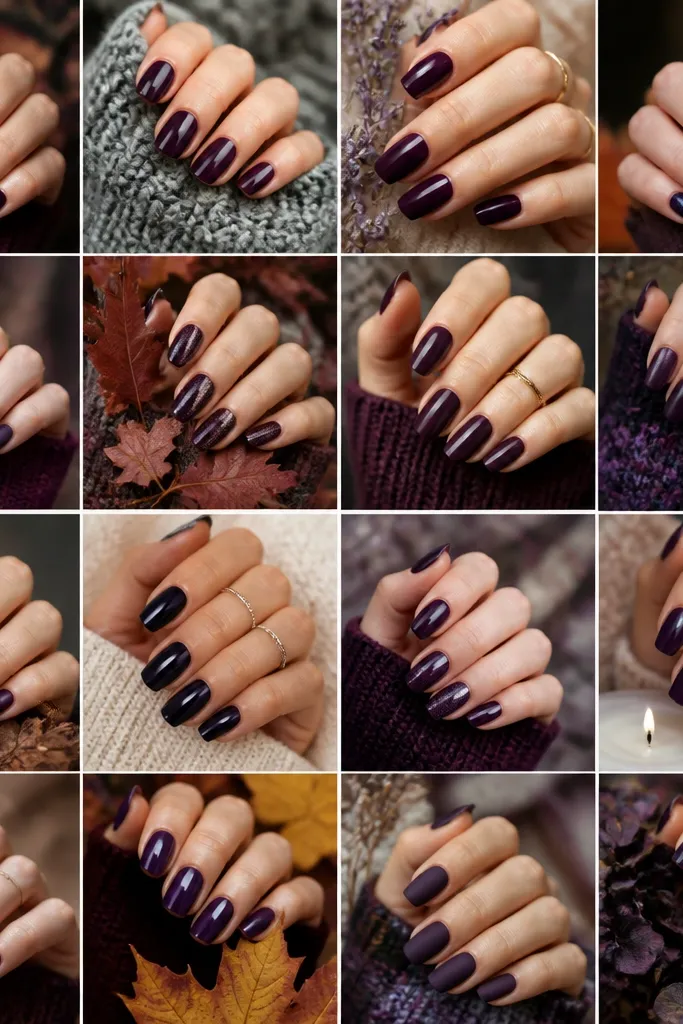
This look is my go-to when I want dark purple to look expensive without adding design work. The shade is a blue-black purple - think ink with a purple tint - so it reads deep instead of muddy. It flatters almost everyone because the blue undertone brightens skin in photos and makes the nail bed look cleaner. Gloss matters here: a thick, high-shine topcoat makes the color look like it's sitting under clear gel. I wear it to work and dinners because it looks bold but still neat.
Start by pushing back cuticles and buffing only the shine off the natural nail - not down to bare matte. Apply a thin base coat, cure, then do two thin coats of the blue-black purple, curing each coat fully. Keep the second coat slightly thicker at the center of the nail so the color looks domed. Finish with a glossy topcoat and cap the free edge - swipe the brush over the tip twice. Clean up around the cuticle with a small brush dipped in gel cleanser before curing the last time.
Editor's noteIf you want extra depth, add one more ultra-thin topcoat layer after curing - it makes the color look wetter in daylight.
Watch outSkip thick first coats - they flood the cuticle and make short nails look messy.
2. Plum-Wine Cream with Micro-Glow Topcoat
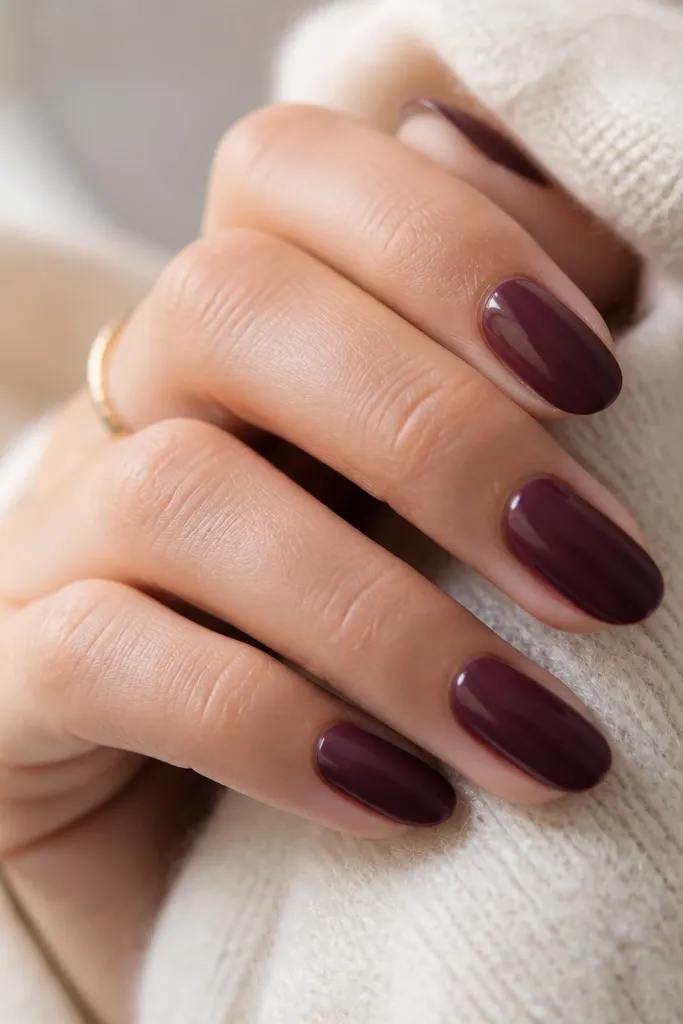
Creamy plum-wine purple is the "friendly dark" version of purple - it looks rich without turning ashy. I love it on short almond because the rounded shape makes the cream finish look smooth and even. This shade flatters warm undertones and deep skin tones especially well, because the wine note warms the hands. The micro-glow topcoat keeps it from looking flat like regular polish. It's perfect for dates, holiday parties, and any time you want dark but not sparkly.
Prep your nails by filing the free edge straight across, then soften the corners to keep the almond shape. Apply base coat and cure. Paint two thin coats of the plum-wine cream, keeping the edges slightly thinner than the center so it doesn't bulge. After curing, use a topcoat that dries with a soft glow (not thick gel-like) and cap the free edge. If you see any texture, add a second thin topcoat after the first cures.
Editor's noteUse a slightly smaller brush for the last coat so you keep the cream close to the sidewalls.
Watch outDon't pick a purple that has too much gray if you want a warm, flattering look - it can pull dull on short nails.
3. Smoky Eggplant with Negative Space Half-Moon
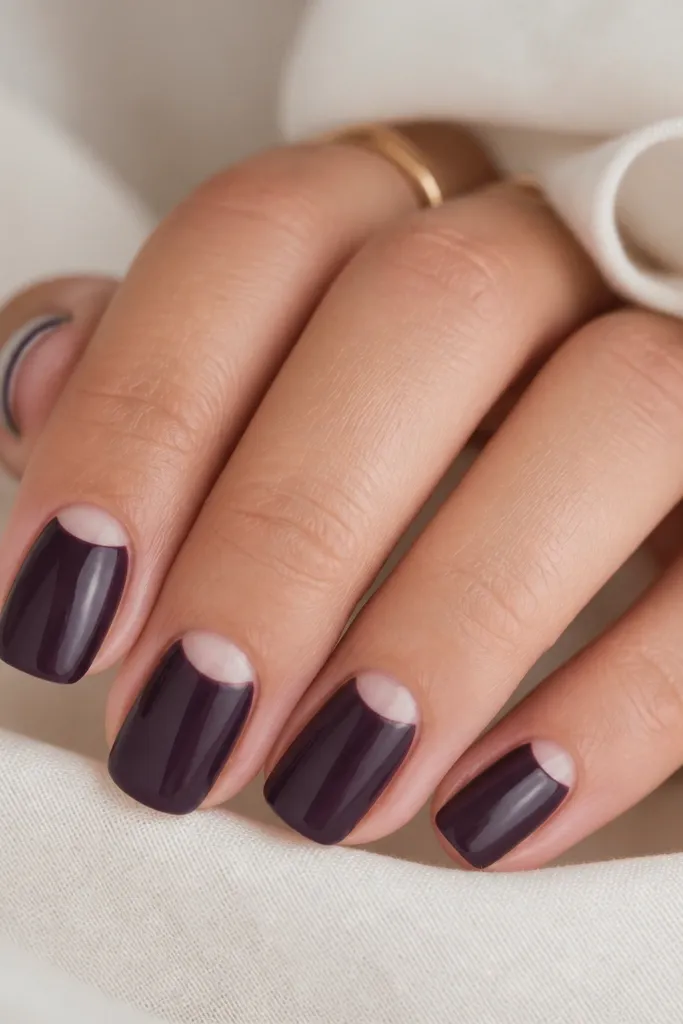
This design makes short nails look longer because the negative space breaks up the dark color right where the eye wants to stop. The smoky eggplant purple has a gray-purple tone that looks classy on its own. It's especially flattering if your skin is fair to medium because the natural half-moon brightens the hands. The clean curved separation is the secret - it should look like a professional cutout, not a smudge. Wear it for events when you want dark purple but still want breathing room.
Start with a base coat, then paint a full thin layer of smoky eggplant but keep it away from the cuticle area where the half-moon will sit. Before the polish fully sets, use a half-moon stencil or a small curved brush to mask the cuticle area. Cure or let it dry, then apply a second thin coat for even opacity. Remove the stencil to reveal the natural half-moon. Finish with glossy topcoat, but avoid flooding the half-moon edge - cap the free edge and sides lightly.
Editor's noteIf you don't have stencils, use painter's tape to make a gentle curve and press it only on the edge, not flat across the nail.
Watch outDon't blur the half-moon line - fuzzy edges make it look like old nail polish.
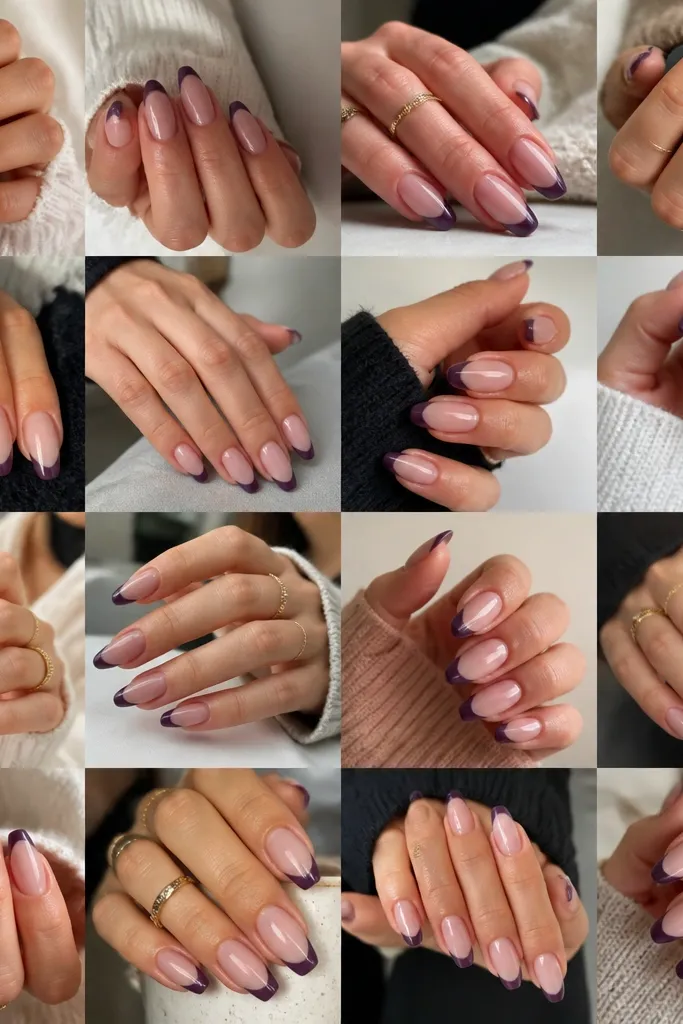
4. Dark Purple French Tips (Short Edge Only)
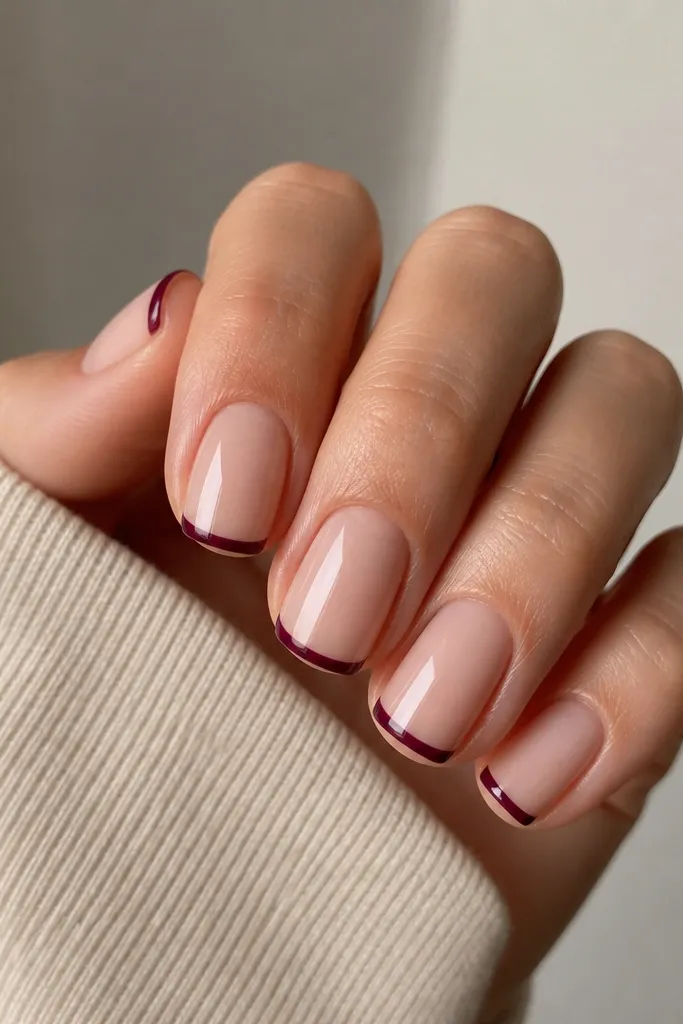
French tips are the fastest way to make short nails look polished, and dark purple tips make it modern. Keep the tip narrow - on short nails, a wide smile line makes the nail look shorter. This look flatters all skin tones because the nude base matches your nail bed, while the dark tip adds contrast. I like it best with a glossy nude and a deep purple that's not too bright. It's a great option if you're starting out with nail art and want something clean and repeatable.
Apply a sheer nude base coat or nude gel polish and cure. Use a French guide strip or a steady freehand with a liner brush to paint a thin dark purple tip - aim for about 1-2 mm wide on short nails. Let the first purple line cure, then add a second pass to even out opacity without widening the tip. Clean the edges with a flat brush and cleanser. Seal with a glossy topcoat and cap the free edge.
Editor's noteDo the tip line slightly higher at the sides so the smile line looks balanced on short nails.
Watch outDon't let the purple touch the sidewalls too heavily - it can look thick and cheap.
5. Matte Smoky Purple with Glossy Cuticle Stripe
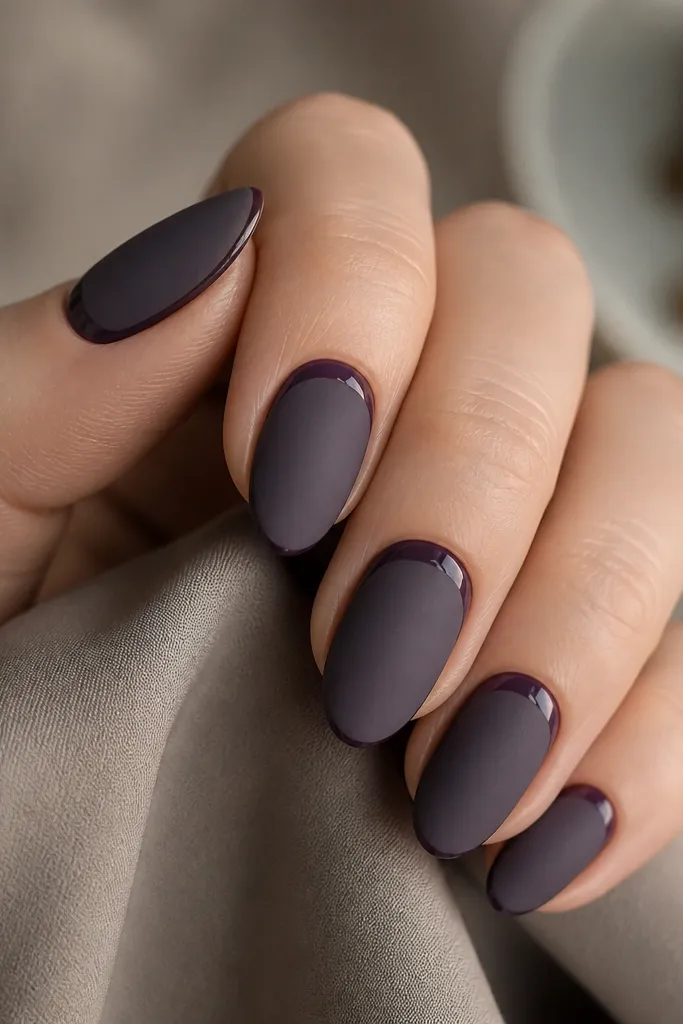
This is a style trick I learned after my matte nails looked flat in daylight. Matte smoky purple gives a velvety, grown-up vibe, while a glossy cuticle stripe pulls focus to the center of the nail. It flatters hands that look a bit dry because matte hides minor surface texture better than glossy. If you wear gold rings, the glossy stripe makes them pop. This works for everyday and also for nights out because the contrast reads intentional.
Paint two thin coats of smoky purple and cure. Apply matte topcoat over the whole nail and cure. Then, with a fine liner brush, paint a thin line of glossy topcoat or gel along the cuticle edge - leave a tiny gap so it doesn't flood. Cure again. Finally, add a second glossy topcoat pass only over the stripe and cap the free edge with matte-friendly topcoat so the tip doesn't chip.
Editor's noteKeep the stripe super thin - about the width of a sewing thread - so the nail still looks short and neat.
Watch outDon't apply matte over the stripe area - it kills the contrast.
6. Velvet Purple Ombre (Airbrush Look, No Real Airbrush)
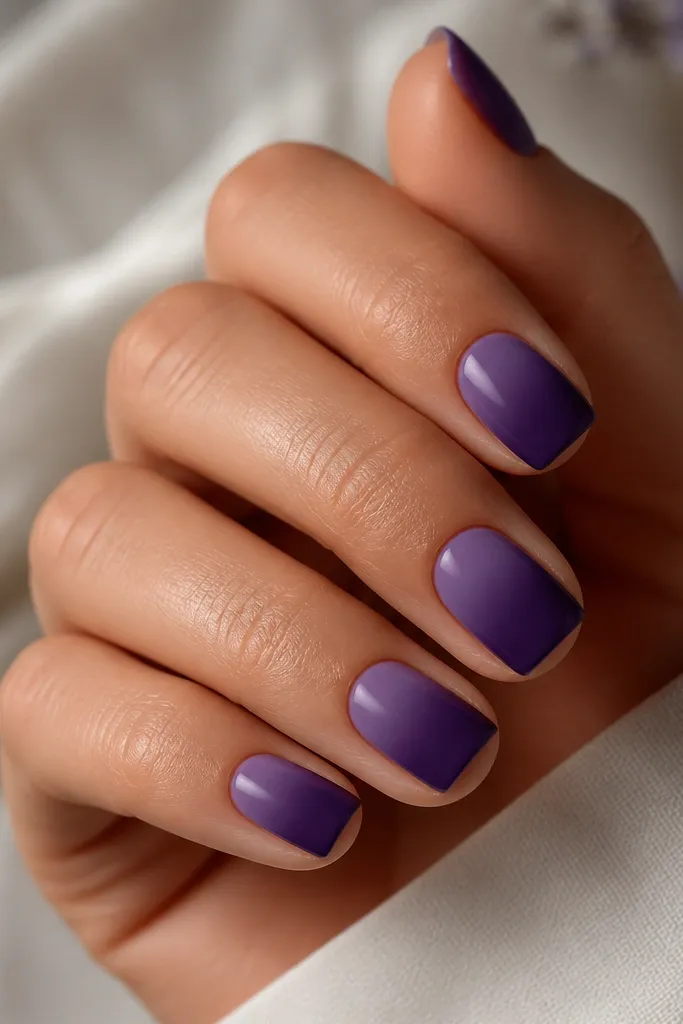
A velvet ombre makes dark purple feel lighter and more wearable while still looking glam. The effect is strongest when the fade is subtle - you want a smudge-free gradient, not a harsh line. This flatters most skin tones because the lighter purple near the cuticle brightens the hand. It looks especially good on short squoval because the shape gives room for the fade to stretch visually. I wear this when I want my nails to look "done" without hand-drawn art.
Start with base coat and cure. Apply a mid-tone purple as a base (not the darkest), then take a small makeup sponge and dab the darker purple only at the tips. Blend in tiny taps, working from the center outward so the fade stays smooth. Cure, then add one more ombre layer only where the fade needs more depth. Seal with glossy topcoat to smooth the gradient and hide sponge texture.
Editor's noteWipe the sponge on a paper towel first - it stops the ombre from turning into a blotchy spot.
Watch outDon't blend right up to the cuticle - it makes short nails look shorter.
7. Dark Purple Hologram Accent on Ring Finger
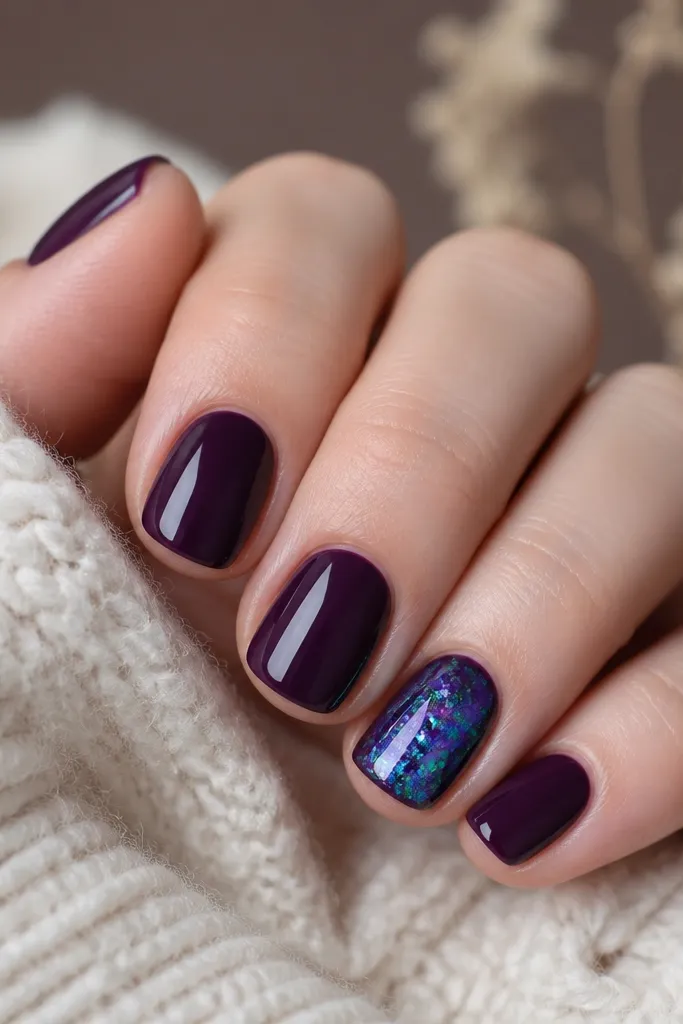
If you want affordable glam, do it with one accent nail instead of five. A dark purple base makes the hologram pop without looking chaotic. I like hologram foil because it looks dimensional even on short nails - the light catches tiny edges that wouldn't show with bigger glitter. This flatters every skin tone because the hologram reflects light back to the hand. It also photographs well because the accent finger gives the camera something to focus on.
Paint all nails with two thin coats of solid dark purple and cure. On the ring finger, apply a tacky layer or foil gel on the middle-to-tip area - not the cuticle. Press hologram foil flakes lightly and dab off excess so it stays controlled. Seal with a clear topcoat in two thin layers, curing between so the foil doesn't lift. Keep the other fingers plain glossy for contrast.
Editor's noteUse a matte topcoat on the plain nails if you want the hologram to look even brighter.
Watch outDon't cover the whole nail with foil - it can look thick and uneven on short tips.
8. Glitter Fade Tips (Only the Last 2mm)
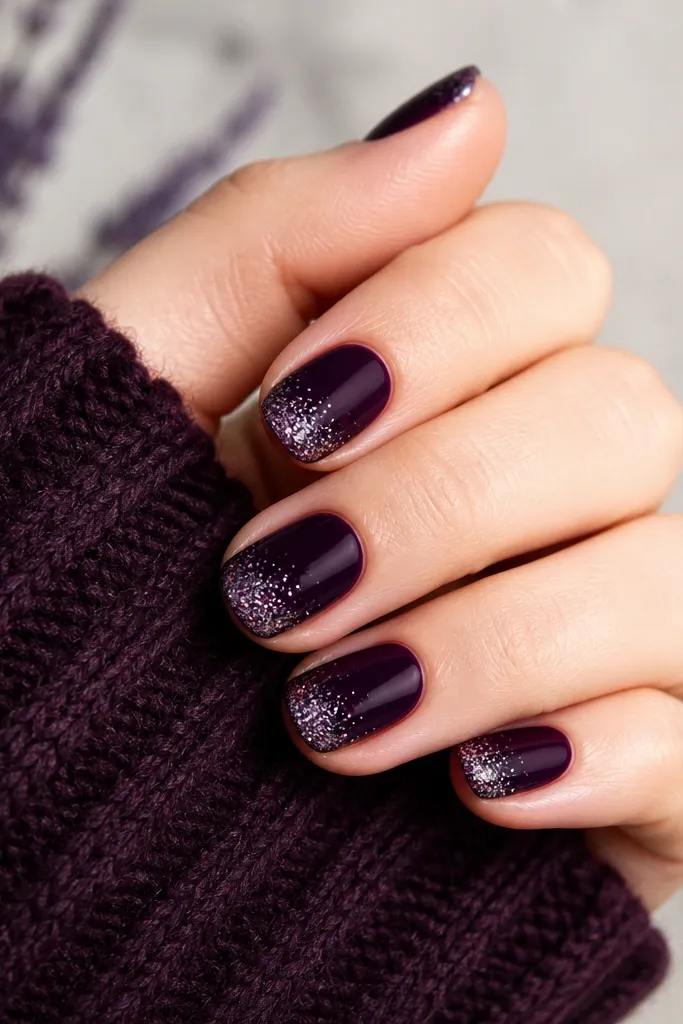
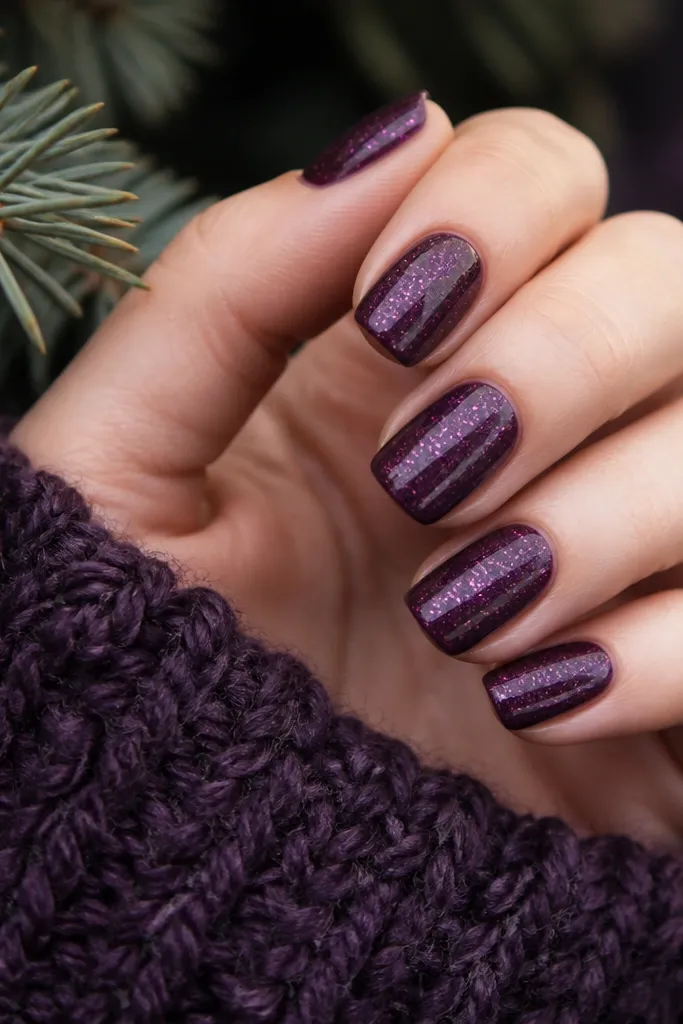
This is the "camera-friendly" glitter placement that doesn't ruin short nail proportions. By keeping glitter to the last 2mm, the nails stay neat and the sparkle reads like a finishing touch. Dark purple under-glow makes even fine glitter look richer. It flatters hands because the eye stays on the center of the nail, not on a busy cuticle. I use this for weddings, birthdays, and New Year outfits when you want sparkle but still want something wearable.
Apply base coat and paint two thin coats of dark purple, cure each. For the glitter, use a fine glitter gel polish or loose glitter with a clear gel - start at the tip and press the glitter only on the very edge. Blend the glitter upward with a clean sponge or a small makeup wedge so it fades smoothly. Cure and then cap with a thick-ish clear topcoat, focusing on the glitter area. Seal the free edge carefully to stop glitter from catching on fabric.
Editor's noteIf loose glitter catches, do a second clear topcoat only over the glitter tip area.
Watch outDon't bring glitter to the cuticle - it makes short nails look cluttered.
9. Dark Purple Chrome Over Solid Base
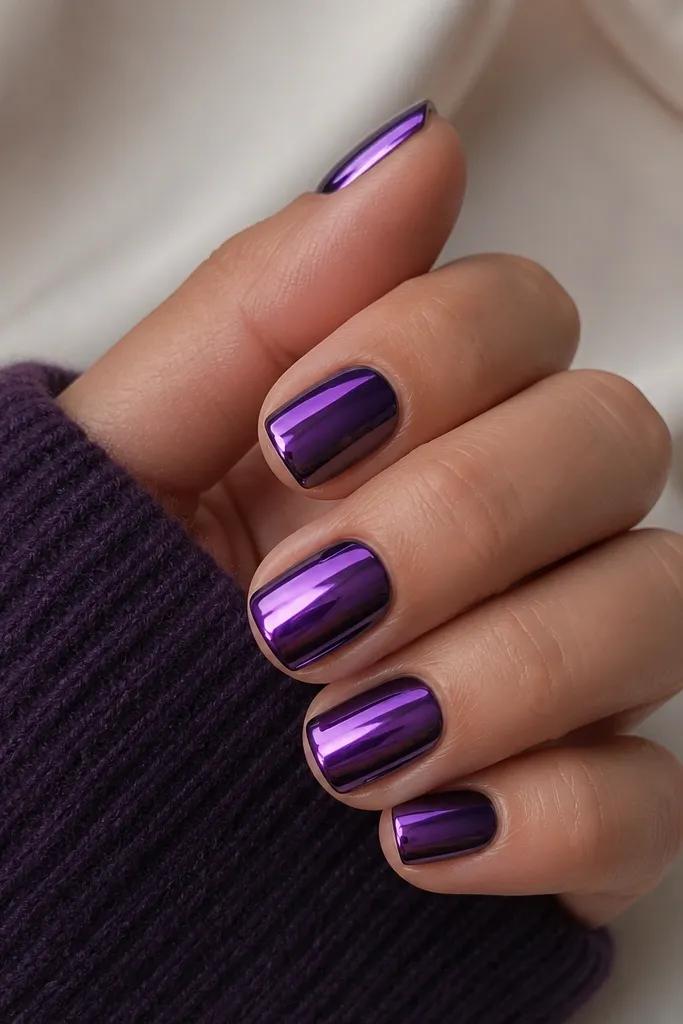
Chrome is one of the quickest ways to make dark purple look like a salon job, and short nails handle it really well. The key is using a purple chrome powder that matches the base tone, so you get a coherent color instead of a random silver overlay. This look flatters cool undertones and looks amazing with silver jewelry. It also hides small ridges better than glitter because chrome powder fills micro texture. For photos, chrome gives you that high-contrast shine that looks crisp even in low light.
Paint nails with two thin coats of dark purple and cure fully. Wipe dispersion layer if your system requires it, then apply chrome base gel in a thin, even coat. Wait the tack time until it looks slightly sticky, then buff purple chrome powder on with an applicator pad. Brush off excess gently and seal with a chrome-safe topcoat. Cure, then check under a lamp - if you see dull patches, add another ultra-thin chrome base and repeat only on those spots.
Editor's noteStore chrome powder in a flat container and tap the applicator lightly - too much pressure creates streaks.
Watch outDon't skip the chrome-safe topcoat - regular topcoat can dull the shine.
10. Purple Jelly with Embedded Stars
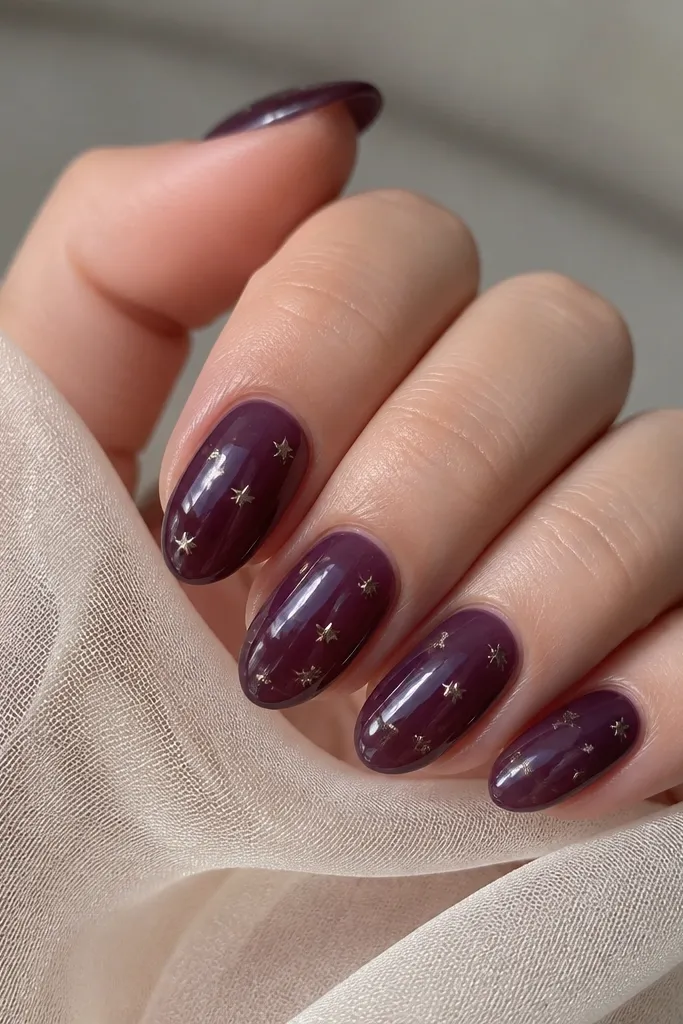
Jelly polish makes short nails feel juicy and dimensional without adding length. This version uses a dark purple jelly - it should look semi-clear at the edges so light passes through. Embedded stars keep it playful, but the charm size matters: tiny stars read cute on short nails, while big stars look heavy. This flatters fair to medium skin tones because the jelly glow brightens the hand. It's also perfect for concerts and festivals where you want a bit of magic.
Start with a clear base gel, cure, then apply dark purple jelly in two thin layers. Place tiny star charms on the middle of the nail using a dot of clear gel and cure. Add another thin jelly layer over the stars so they sit under the surface, not on top. Cap with a glossy topcoat and seal the free edge. If the stars feel sharp, file the top layer lightly after curing and then re-topcoat.
Editor's noteUse tweezers with a rubber tip or silicone pad so the stars don't fly and end up off-center.
Watch outDon't embed large charms - they lift easily on short nails and snag on sleeves.
11. Dark Purple Marble with White Vein
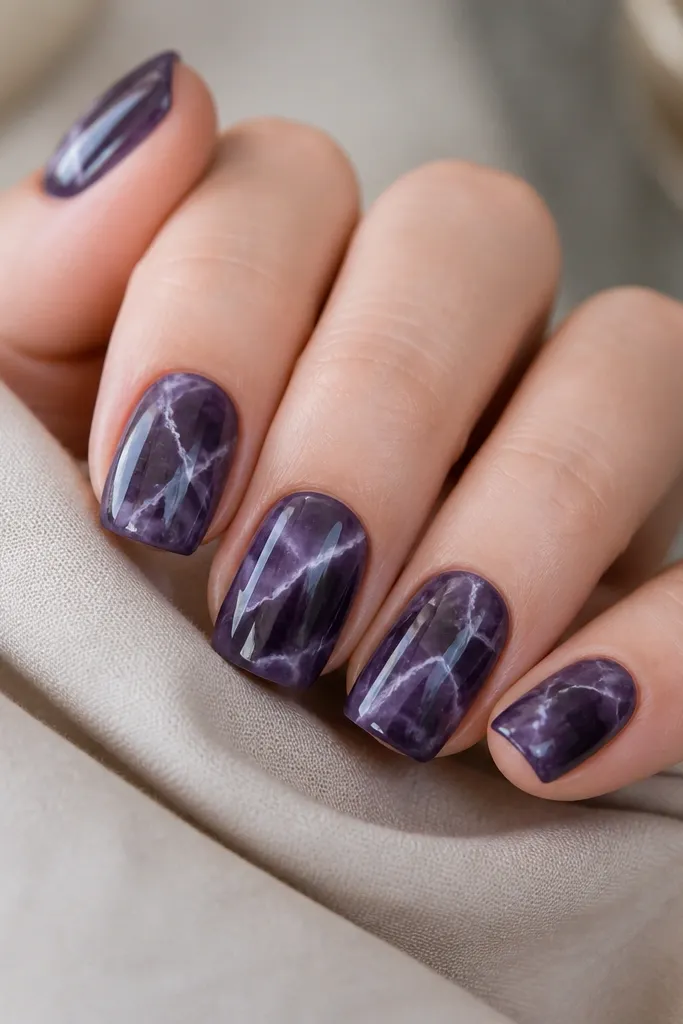
Marble looks fancy, and it's actually easier than it seems when you keep the pattern tight for short nails. The best version for short length has thin white veins and a small amount of gray - too much white turns it into a mess. Dark purple marble flatters all skin tones because the dark base grounds the design. I especially like it for fall and winter because it pairs well with knitwear and silver rings. It also hides minor nail shape imperfections because the pattern draws the eye.
Paint nails with two thin coats of dark purple and cure. Use a thin nail art liner with white gel to draw 2-3 diagonal veins per nail - keep them narrow and slightly uneven. Add gray around the veins with a small dotting tool and a diluted gray polish so it looks like stone depth. With a small brush dipped in cleanser, soften the edges of the gray so the marble blends. Finish with glossy topcoat in two layers to smooth the surface.
Editor's noteDo one "vein" first on each nail, then copy the direction - it keeps the marble from looking random.
Watch outDon't draw thick white lines - they look chalky and cheap on short nails.
12. Purple Yin-Yang Accent on Solid Dark Base
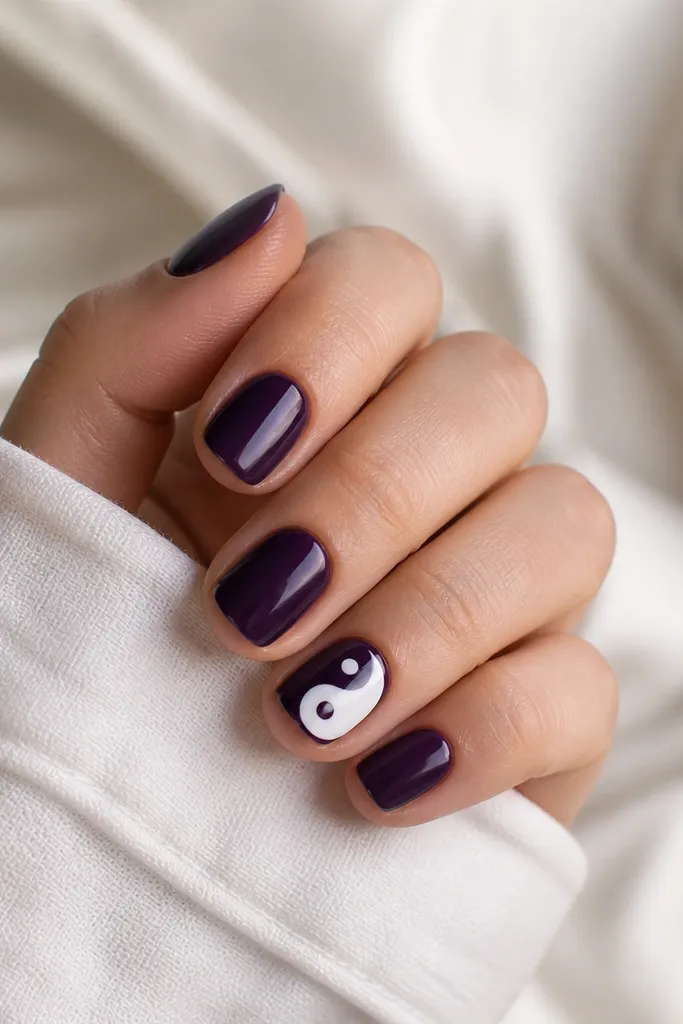
A tiny yin-yang gives you a graphic look without covering the whole nail with art. The trick is keeping it small and centered so it doesn't overpower short length. Solid dark purple base makes the white and lighter purple details crisp. I like this for people who want something different but still clean enough for school or office. It also flatters hands with shorter nail beds because the symbol sits in the visual center.
Apply base coat and paint two thin coats of dark purple, cure each. Choose one accent nail and outline a small circle in white gel at the center. Add a curved yin-yang shape with a lighter purple and fill the small dot areas with white and dark purple gel. Clean edges with a fine brush and cleanser. Seal everything with glossy topcoat, making sure the symbol is fully covered but not flooded over the lines.
Editor's noteUse a dotting tool for the two dots - it keeps the symbol symmetrical.
Watch outDon't place the symbol too close to the cuticle - it looks cramped on short nails.
13. Dark Purple Lace Overlay (One Nail Per Hand)
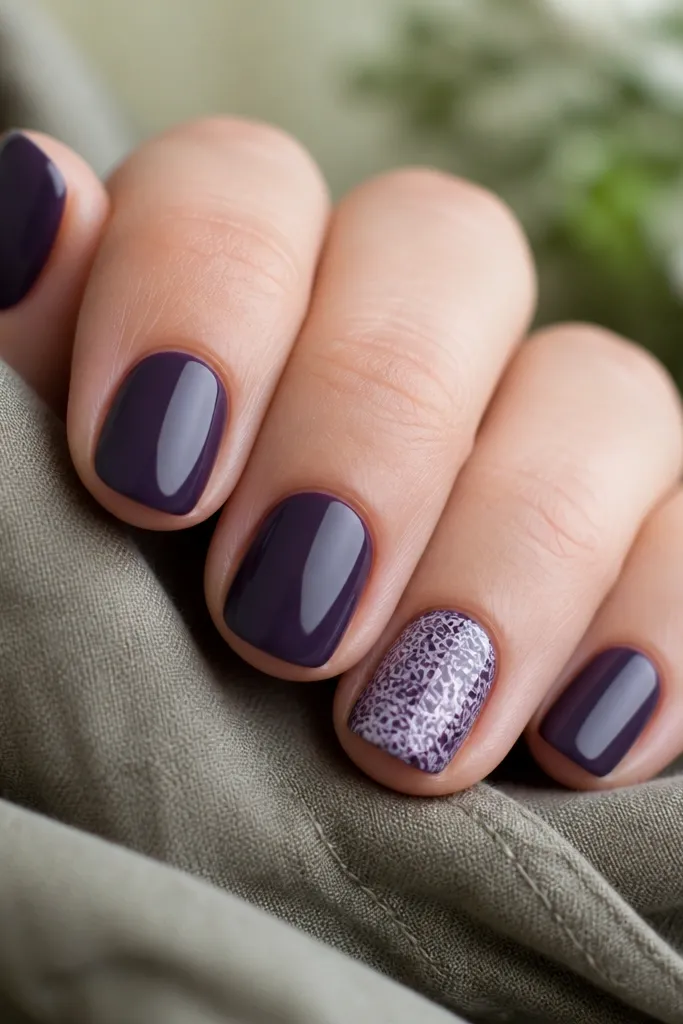
Lace looks romantic, but on short nails it has to be controlled. I do lace on one accent nail per hand so the design feels intentional instead of busy. The lighter purple and white lace lines give contrast against the dark base, and the pattern makes the nail look more detailed without needing extra length. This is flattering on fair, medium, and deep skin tones because the contrast is strong. It's a good pick for date nights and bridal events where you want dark purple instead of classic red.
Paint all nails with two thin coats of dark purple and cure. On the accent nail, add a thin layer of clear gel where the lace will go so the stamp transfers cleanly. Use a lace nail stamping plate or lace decal set in white and a slightly lighter purple - keep the pattern centered. Cure and then seal with a glossy topcoat in two thin layers, focusing on sealing the edges of the lace. If using decals, press them down with a silicone tool and trim the excess before topcoat.
Editor's noteIf the lace looks dull, add a micro layer of glossy topcoat only over the pattern after curing.
Watch outSkip thick lace layers - they lift at the edges on short nails.
14. Purple Foil Cutout Lines (Negative Space Grid)
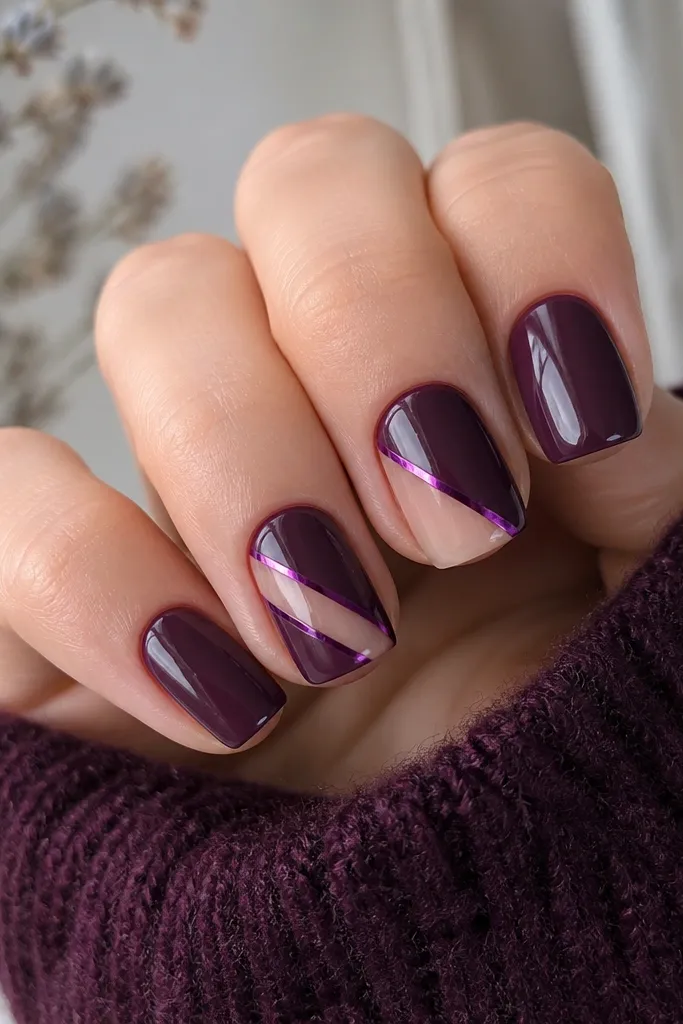
This design looks modern because it mixes negative space with metallic accents. The dark purple base anchors the look, while the cutout lines make the nail feel lighter and longer. Foil strips reflect light sharply, so the design shows up even on short nails. It flatters hands with warmer undertones too because purple foil often has a pinkish sheen that warms the skin. I wear this when I want dark purple to look fashion-forward without heavy glitter.
Start with two thin coats of dark purple and cure. Apply thin strips of nail tape or create diagonal masking to form 2 cutout lines, then paint a slightly lighter purple gel on the exposed areas near the base - cure. Add foil strips along the edges of the cutouts using foil glue or tack gel, press lightly, and cure. Remove the tape to reveal clean negative lines. Finish with glossy topcoat, keeping it off the negative spaces so the edges stay crisp.
Editor's notePress foil with a cotton pad for 5-10 seconds - it improves adhesion without smearing the lines.
Watch outDon't flood the cutout edges - it blurs the negative space and kills the graphic look.
15. Dark Purple Ombré Dots (Stamp with Sponge)
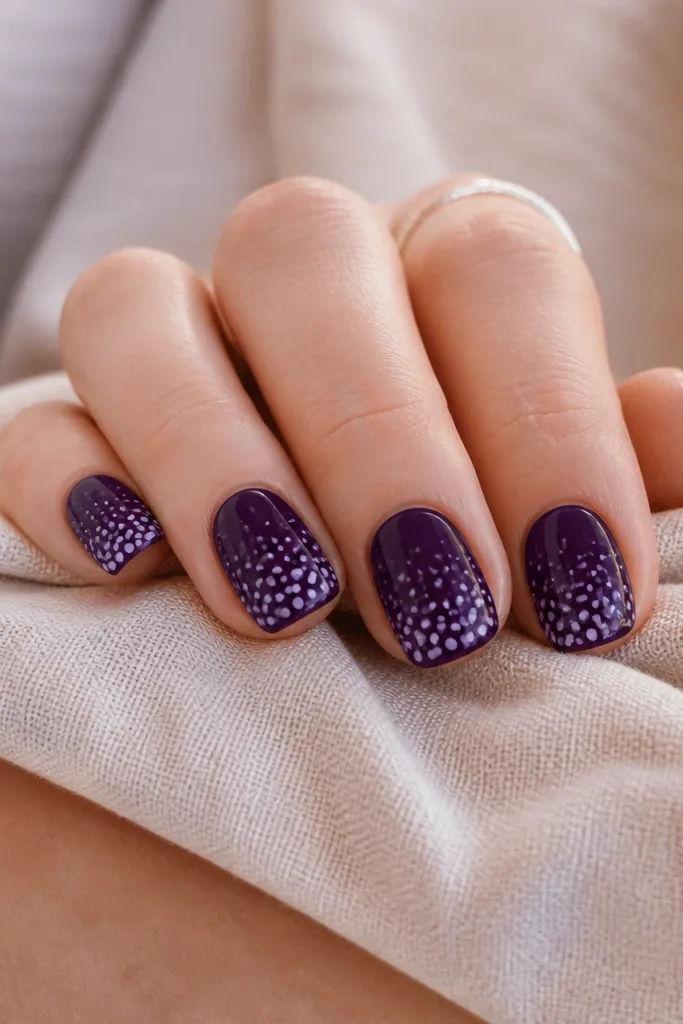
Dots look cute on short nails, but only when you control the scale. This ombré dot pattern keeps the nail balanced by placing the densest dots at the tip and easing them out toward the cuticle. The dark purple base makes the dots look like they're floating. It flatters most skin tones because the dot gradient draws the eye down the nail. It's also beginner-friendly if you use stamping or a dotting sponge instead of freehand.
Paint two thin coats of dark purple and cure. Choose a lighter purple or deep plum for the dots. Use a dotting sponge or a stamper with a dot pattern: dab lightly at the tip first, then tap upward with fewer dabs to create the fade. Cure and check coverage under light. Seal with glossy topcoat in two passes so the dots don't look raised or rough.
Editor's notePractice on one scrap nail tip or a paper swatch before you commit to your real nails.
Watch outDon't use dots that are the same size all the way - that makes short nails look blocky.
16. Solid Dark Purple with One Side Silver Line
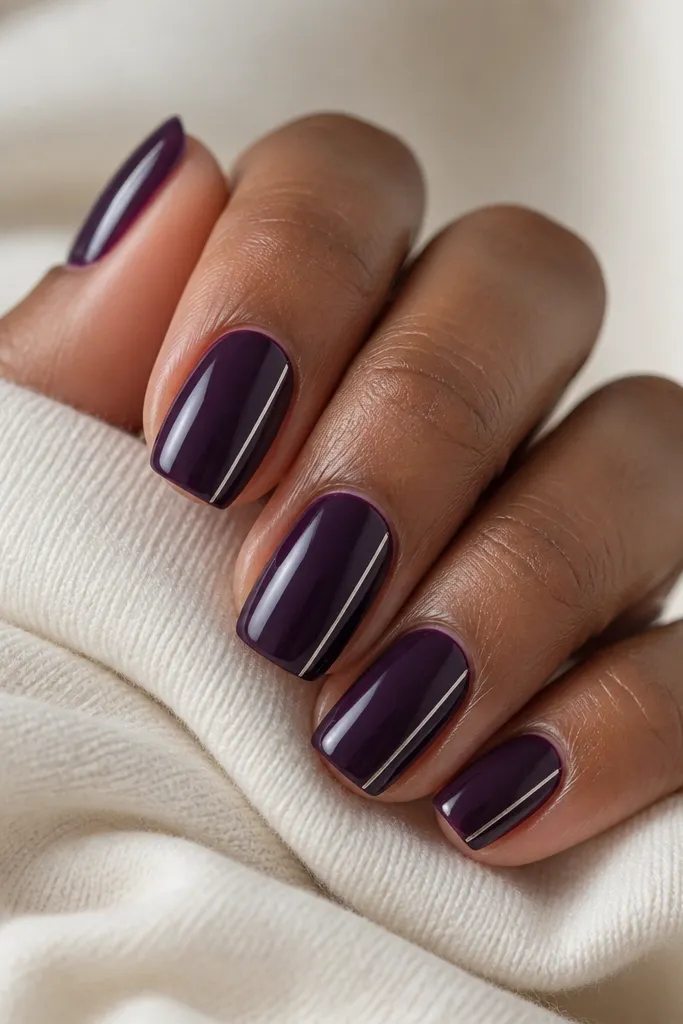
A single side line is my favorite "minimal but glam" trick for short nails. The silver line creates a vertical reference point that makes the nail look longer, even though the length stays short. Dark purple is deep enough that the silver doesn't look flashy or cheap. This looks best on squoval or short almond because the nail sides are clean and the line can follow the shape. It flatters hands with any skin tone, especially if you wear silver rings.
Paint nails with two thin coats of dark purple and cure. With a liner brush, draw a thin silver gel line along the left or right side of the nail - keep it centered on that sidewall. Leave about 1-2 mm space from the cuticle so it doesn't flood. Stop the line around the upper third so it doesn't hit the tip curve. Cure and seal with glossy topcoat, making sure the line is fully covered but the edges stay sharp.
Editor's noteIf your silver gel is thick, thin it with a drop of gel medium so the line stays crisp.
Watch outDon't draw the line all the way to the tip - it looks like a thick border on short nails.
17. Dark Purple Checker Accent (Two Nails Total)
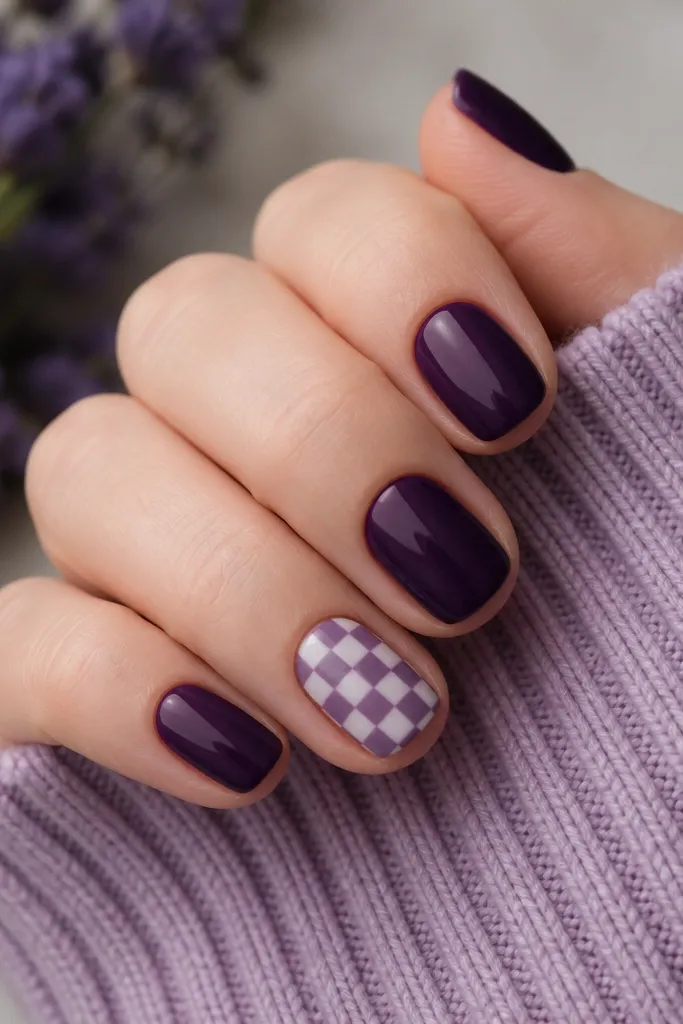
Checker patterns can look childish, but tiny squares on a dark base look sharp and grown-up. Limiting it to two nails keeps the vibe chic instead of costume. The lighter purple and white squares pop against the dark purple, and the small scale is what makes it work on short length. This flatters medium and deep skin tones because the high contrast reads clean. It's a fun choice for casual weekends and concerts.
Paint all nails with two thin coats of dark purple and cure. Choose two accent nails and add a base coat over them (still dark purple). Use a thin liner brush to draw a grid: start with one horizontal line across the nail, then add two vertical lines to create small squares. Fill alternating squares with white or a lighter purple gel. Cure each nail, then topcoat with glossy gel in two thin layers so the surface stays smooth.
Editor's noteUse a striping tape as a guide for the first grid lines - it keeps the squares even.
Watch outDon't make the squares too big - large checker blocks shorten the nail visually.
18. Purple Galaxy Speckle (No Big Stars)
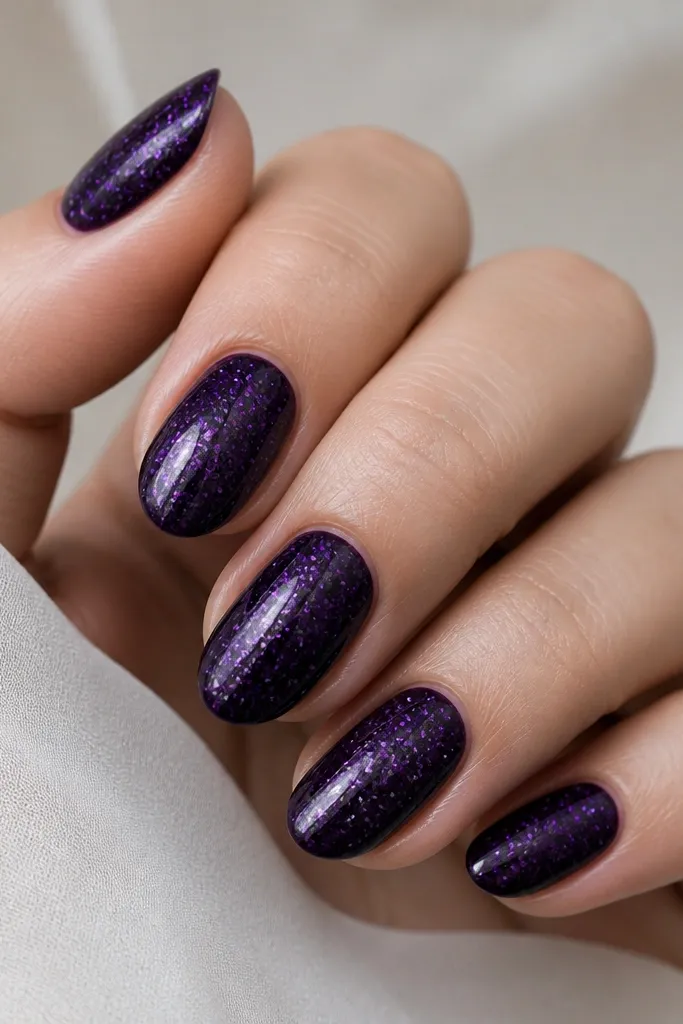
Galaxy nails can get bulky fast, and on short nails, big stars look heavy. This speckle version uses tiny dots and a few fine lines so it reads like a galaxy without adding thickness. The dark purple base gives the background depth, while the lighter speckles make the design look dimensional. It flatters all skin tones because it's subtle at first glance and pops in sunlight. I wear this when I want something dark that still feels whimsical.
Paint nails with two thin coats of dark purple and cure. Using a small brush or a toothpick, tap tiny dots of lighter purple and white across the nail - keep them sparse near the cuticle. Add a few micro specks around the center and tip for balance. Let it set, then seal with a glossy topcoat in two thin layers. If the speckles look uneven, add a clear gel layer over the whole nail to smooth.
Editor's noteTap from a higher distance than you think - it makes the dots smaller and airier.
Watch outDon't pile speckles thickly in one area - it turns into glittery sludge.
19. Dark Purple Marble French (Tip-Only Vein)
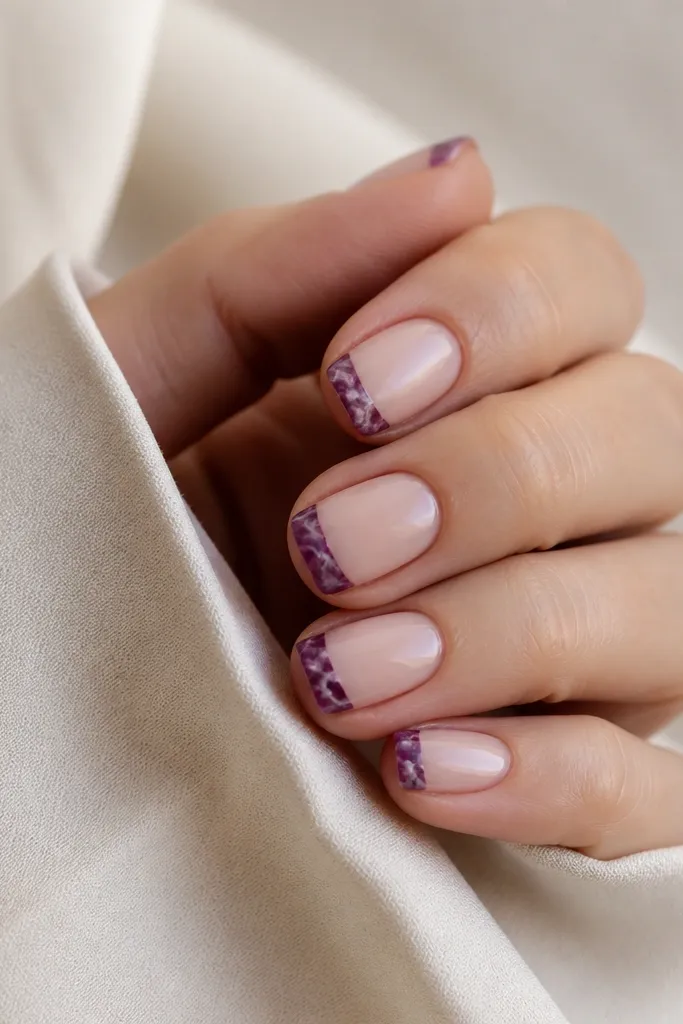
This is French tips with a twist, and it's made for short nails because the nail bed stays nude and bright. The dark purple marbled tip gives drama without covering the whole nail. White veins keep the design from looking like a solid block of purple. It flatters fair and medium skin tones because the nude base matches the natural nail color and makes the tip look intentional. It's also a great option if you want dark purple but your workplace prefers subtle nails.
Start with a sheer nude base gel and cure. Use a French guide strip to mask the tip line, then paint the tip with dark purple in two thin coats, curing each. While the second coat is slightly tacky, drag a thin liner brush with white gel to create 2-3 veins within the tip area only. Remove the guide while the gel is still stable so the edge stays crisp. Seal with glossy topcoat and cap the free edge carefully.
Editor's noteIf your marbling looks too busy, do fewer veins and keep them thin.
Watch outDon't bring the white veins into the nude area - it makes the tip line look messy.
20. Dark Purple Velvet Glitter Stripes (Two Lines)
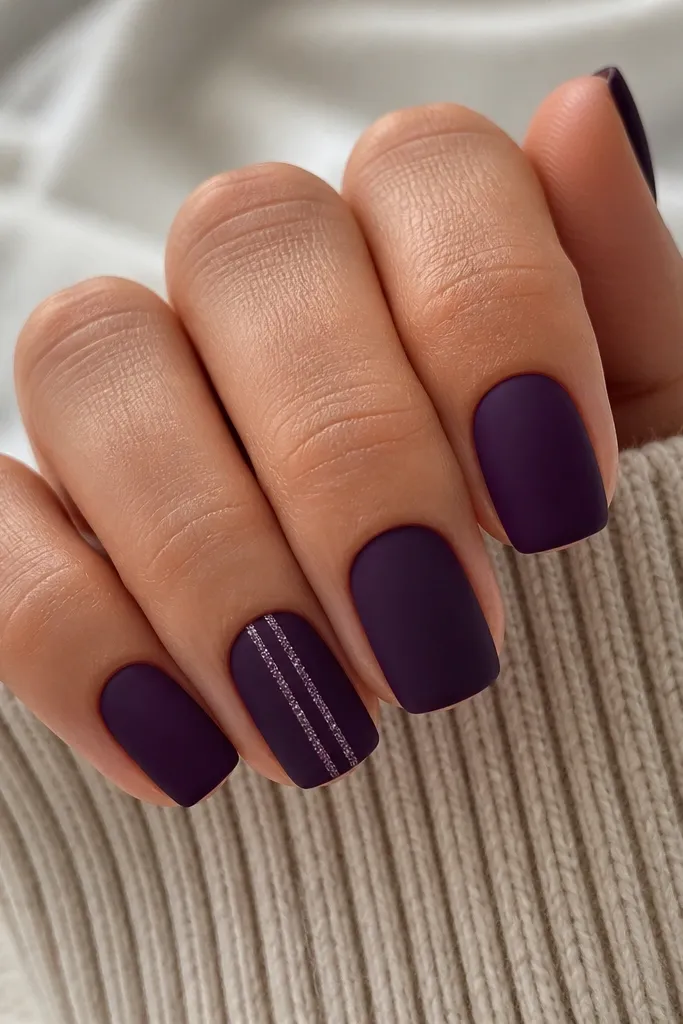
Matte + glitter stripes is a combo I keep redoing because it looks styled, not random. The two thin stripes create a vertical pull that makes short nails look longer, and the glitter stays controlled. Dark purple velvet base makes the glitter look like it's embedded, not sitting on top. This flatters hands with uneven nail texture because matte hides tiny surface bumps. I wear it for birthdays and holiday dinners when I want a little extra without full sparkle coverage.
Paint nails with two thin coats of dark purple and cure. Apply matte topcoat and cure fully. On the accent nail, use a liner brush to paint two thin vertical lines with clear gel starting about 2 mm from the cuticle. Sprinkle ultra-fine purple glitter over the lines, press lightly, then cure. Seal with a topcoat that matches the matte look around the stripes and a glossy topcoat only over the glitter lines so they stay bright.
Editor's noteUse ultra-fine glitter, not chunky - chunky glitter makes short stripes look thick.
Watch outDon't do glitter stripes on all nails - it turns into "too much" fast.
21. Dark Purple Aura Glow (Soft Center Halo)
Aura nails look good on short length when the glow is focused in the center, not spread across the whole nail. The dark purple base gives drama, while the lighter purple halo makes the nail bed look brighter. This is flattering because it draws attention to the middle of the nail, which is where the eye naturally goes when you have shorter length. I like it for everyday glam because it looks "designed" but still wearable. It also pairs well with simple outfits and minimal jewelry.
Apply base coat and paint two thin coats of dark purple, cure. For the aura, use a small makeup sponge and dab a lighter purple in a circular spot near the cuticle center - leave the sides darker. Blend with light taps so the halo fades out within 1-2 mm. Cure and check the blend under a lamp. Finish with glossy topcoat in two thin layers to smooth any sponge texture.
Editor's noteKeep the halo slightly lower than the cuticle line so it looks like a glow, not a patch.
Watch outDon't blend too far to the sides - aura that covers the whole nail looks flat.
22. Dark Purple Striped Tape Lines (Clean Geometric)
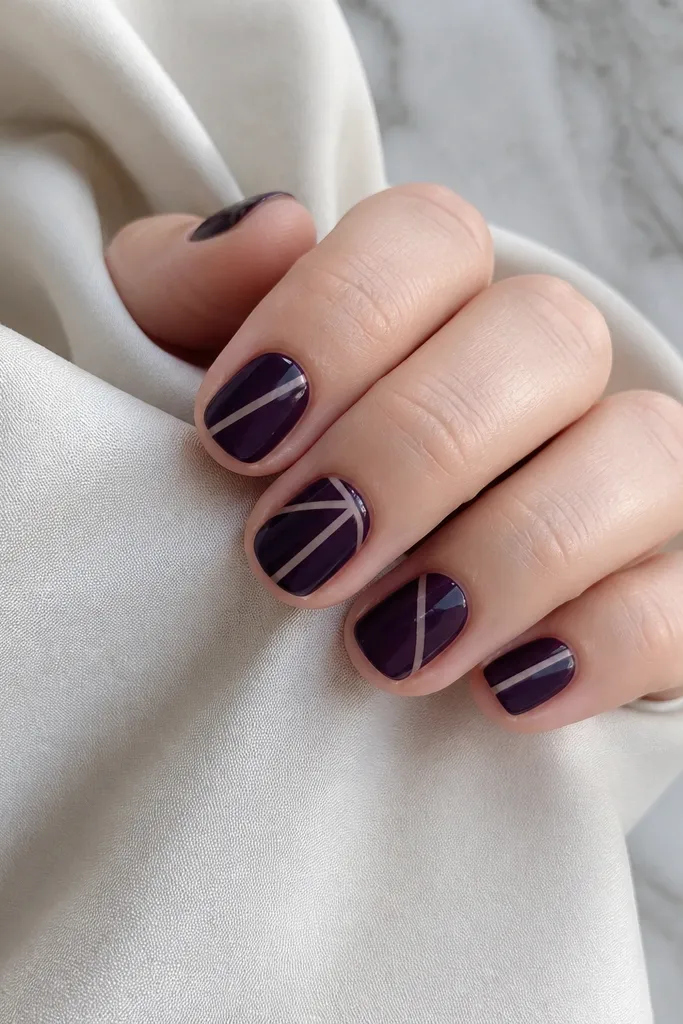
Tape geometry on dark purple looks sharp and expensive because the lines are clean and the contrast is high. Short nails love geometric patterns because you can control how much area gets covered, and you can keep the nail bed visually longer. This works best with squoval nails where the edges are smooth. It's flattering across skin tones because dark purple stays consistent and the negative space adds brightness. This is my pick when I want nail art that doesn't require freehand drawing.
Paint nails with two thin coats of dark purple and cure. Apply thin nail tape strips to form a simple shape - like a diagonal V or a vertical stripe - then seal the tape edges with a thin coat of dark purple gel so it doesn't bleed. Cure, remove the tape to reveal negative space, and then apply topcoat. If you want extra contrast, fill one negative section with a thin silver gel line using a liner brush. Cure again and finish with glossy topcoat.
Editor's noteRemove tape while the last coat is still slightly tacky so the edges stay razor clean.
Watch outDon't use wide tape - wide gaps look chunky on short nails.
23. Dark Purple Floral Stamp on One Thumb
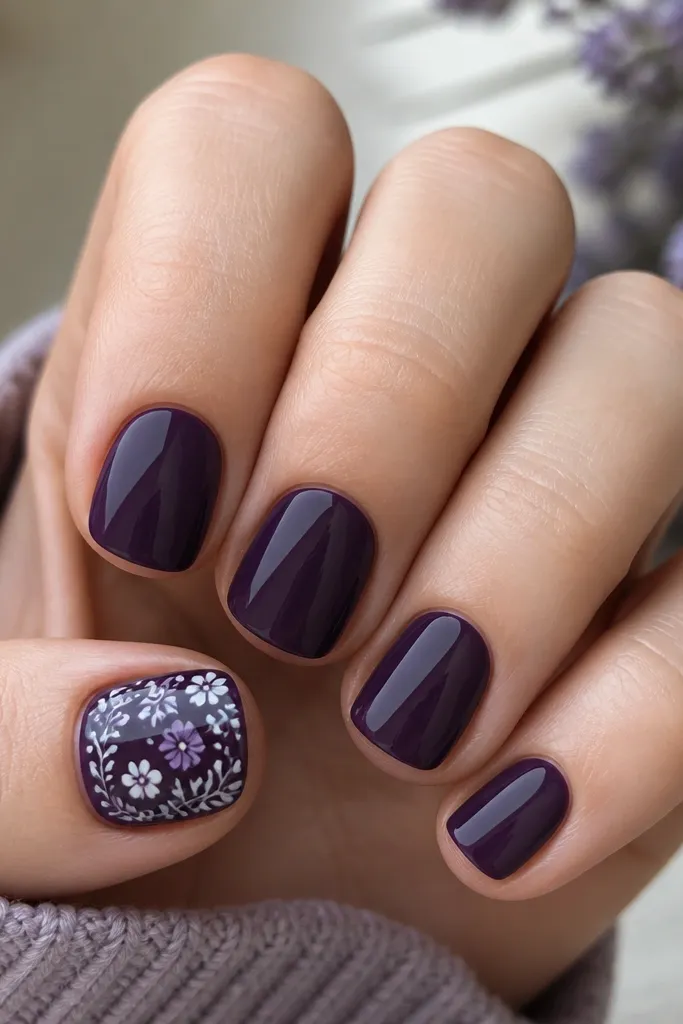
A small floral stamp is the easiest way to add detail without hand-painting on every nail. Dark purple makes the floral pattern look more luxe, especially when the stamp colors are light purple and white. I keep it to the thumb because it looks intentional and doesn't clutter the rest of your fingers. This flatters any skin tone and looks great in photos because the thumb is what people notice when you gesture. It also works for both casual and dressy days.
Do a full solid manicure with two thin coats of dark purple and cure. Clean and wipe the stamping plate, then stamp the floral pattern in light purple and white onto the thumb nail using a stamper. Place the stamp exactly where the center of your nail bed sits. Cure the stamp if your system needs it, then apply glossy topcoat over the entire nail. Keep the other nails glossy and plain so the thumb design stands out.
Editor's noteWipe the plate with a lint-free wipe right before stamping - old polish residue ruins the crispness.
Watch outDon't stamp too close to the cuticle - the floral lines can look cramped on short nails.
24. Dark Purple Pearl Dotting (Pearlized Centers)
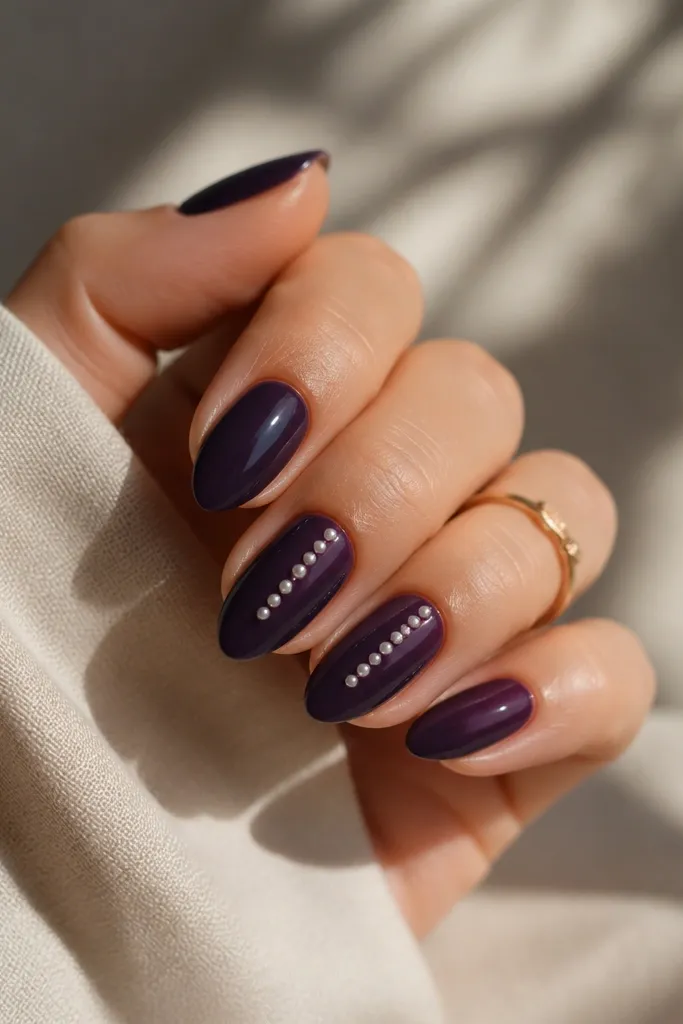
Pearl dotting gives dark purple a "soft luxury" look instead of sharp sparkle. The pearls are small and placed near the center so the nail doesn't feel crowded. This flatters hands that look better with gentle detail - it's not flashy like full glitter. Dark purple makes the pearls look like they're glowing from underneath. I wear this when I want something dressy but still clean enough for everyday errands.
Paint nails with two thin coats of dark purple and cure. On two accent nails, apply a small dot of clear gel where each pearl will sit - start near the center and keep a straight line. Place micro pearl beads (or pearl gel dots) and cure. Add a thin topcoat layer over the pearls to lock them down and smooth the surface. Finish with a glossy topcoat on all nails, capping the free edge to prevent lifting.
Editor's noteUse fewer pearls than you think - three to five dots look best on short length.
Watch outDon't put pearls near the sidewalls - they catch on hair and snag easily.
25. Dark Purple Aura with Tiny Star Confetti
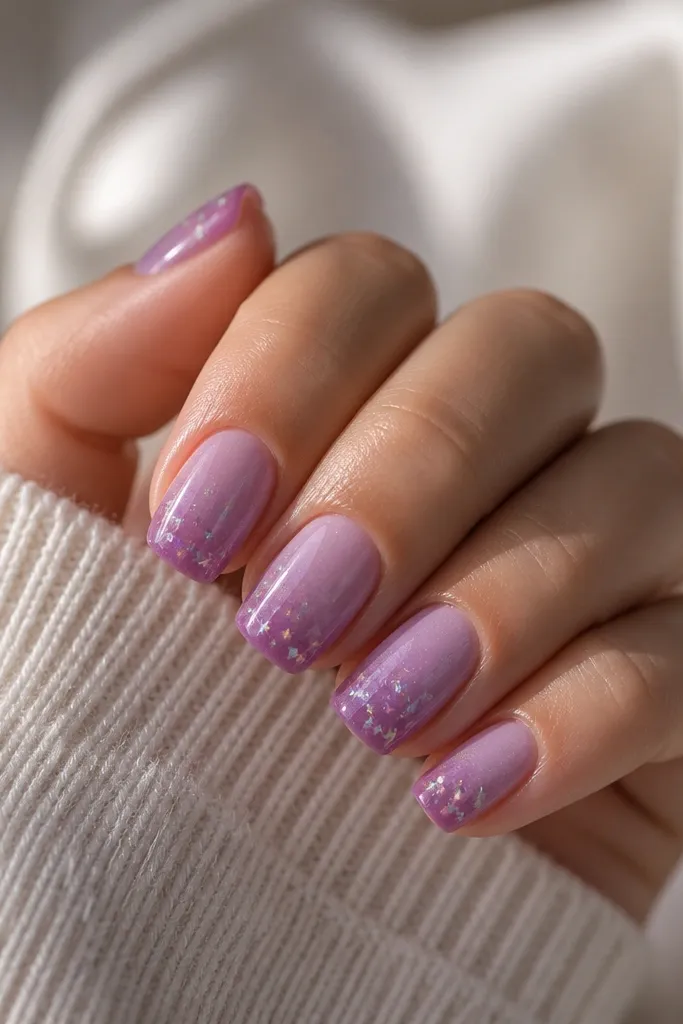
This look mixes two effects that work well on short nails: aura glow and tiny confetti stars. The aura keeps it bright at the cuticle area, and the stars add sparkle only where your nails naturally catch light. Dark purple keeps everything grounded so it doesn't turn into a party pattern. It flatters fair to deep skin tones because the lighter aura reflects light back to the hand. This is my pick for nights out where you want glam without chunky glitter.
Apply base coat and paint two thin coats of dark purple, cure. Use a sponge to dab a lighter purple aura circle near the cuticle center and blend out softly. For star confetti, place tiny star pieces with a dot of clear gel mostly from mid-nail to the tip. Cure, then apply two thin glossy topcoat layers to embed the confetti. Cap the free edge twice so stars don't lift and snag.
Editor's notePress each star gently with a silicone tool so it sits flat before curing.
Watch outDon't over-pack confetti - too many stars makes short nails look textured and uneven.