
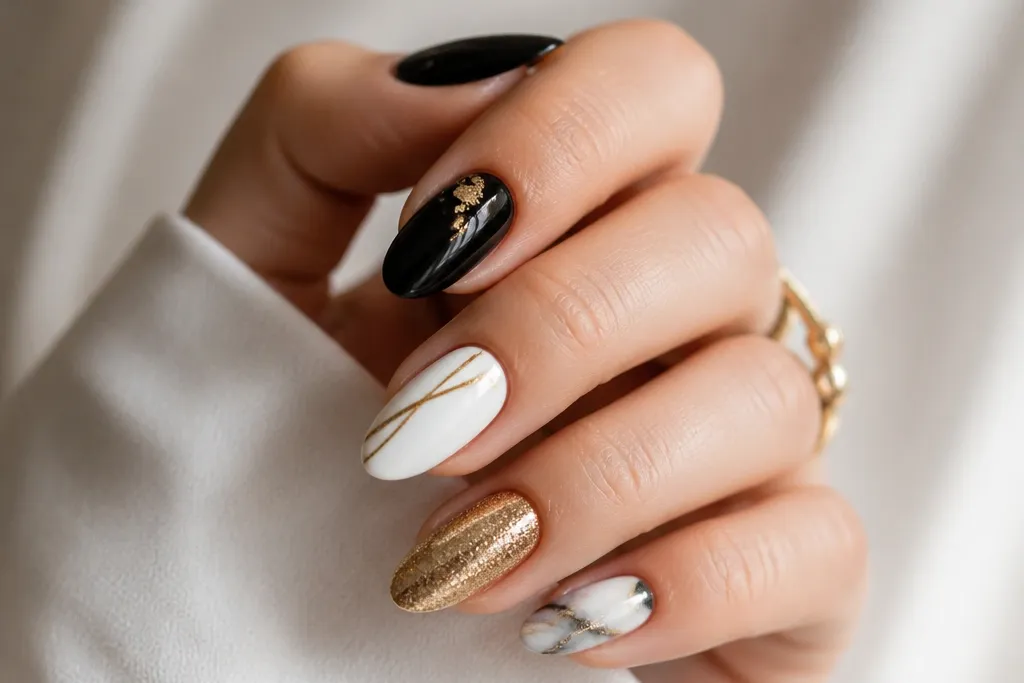
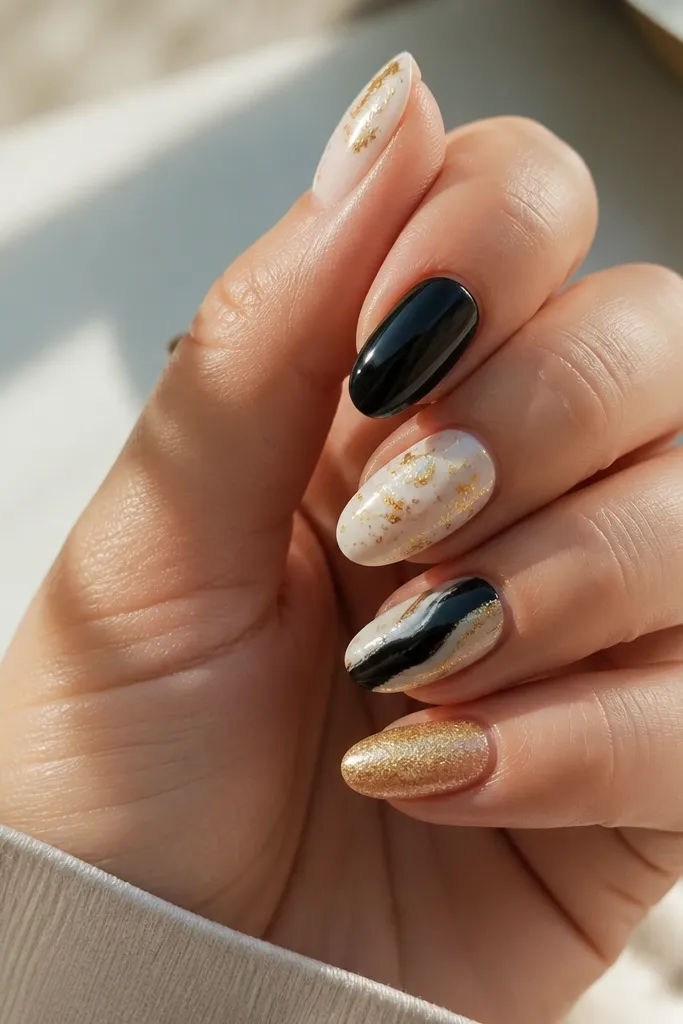
1. Micro French Tips with Gold Foil Edge
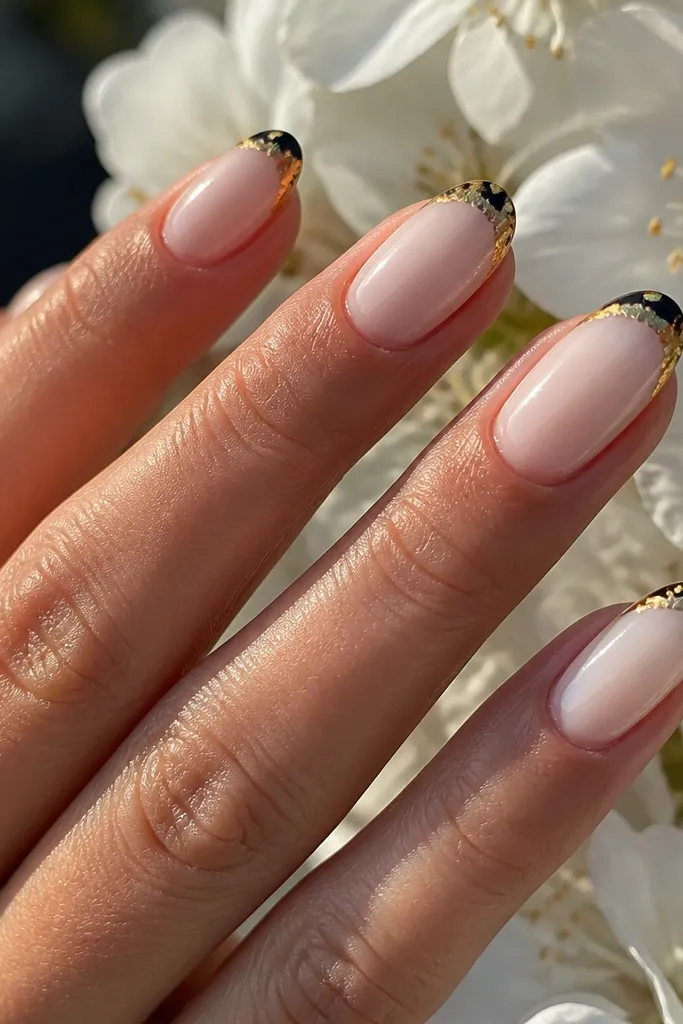
This look works because the black stays the main color and the gold only shows at the tip edge, which makes nails look longer without covering your whole nail. The gold foil edge gives a textured, light-catching effect that looks like expensive nail salon work. I’ve worn this on medium warm undertones and cool undertones — both look good because gold warms the skin and black anchors it. It’s also perfect for everyday events where you want “done” nails but not a loud full design. The styling principle is restraint: thin placement plus high-contrast shine.
Start by painting two coats of glossy black and curing/air-drying fully. Take a small strip of gold foil sheet and press it only along the outer curve of the tip edge, using a silicone tool or the back of tweezers to pick up the foil. If the foil overlaps too far, lightly tap it off with a clean sponge. Finish by sealing with one thick top coat, then cap the free edge with the same top coat so the foil doesn’t lift.
If your foil looks patchy, do a second tiny foil press after the first top coat dries, then seal again.
Avoid a thick gold band — it makes short nails look stubby.
2. Black Half-Moon Cuticles with Chrome Gold Crescent
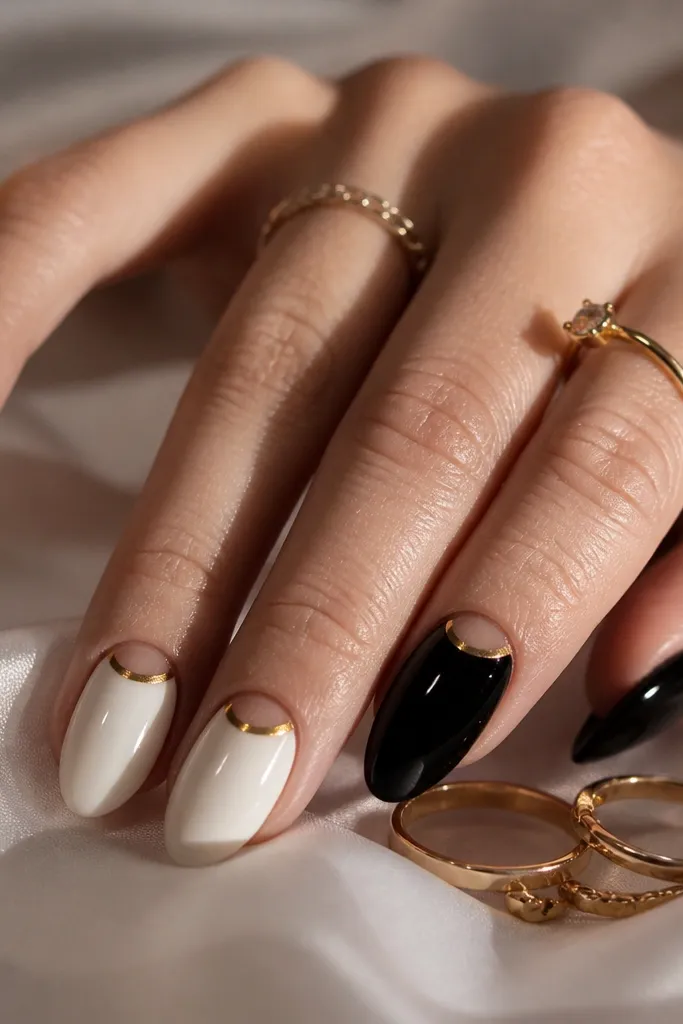
A cuticle crescent is flattering because it frames the nail bed and makes the nail look tidy and intentional. Chrome gold reads more expensive than glitter, and it looks smooth against black instead of dusty. I love this on almond nails because the crescent naturally follows the curve of the cuticle area, and it looks great on hands with slightly longer nail beds. On shorter nails, keep the crescent smaller so it doesn’t take over the nail. This set works for workdays, date nights, and holiday dinners because it’s bold but controlled.
Paint two coats of glossy black and let it fully cure or dry. Use a small makeup sponge to apply gold chrome powder or a chrome gel to a tight crescent near the cuticle, leaving a small gap of black around the edges for a crisp border. Press lightly so you don’t flood the cuticle area, then wipe away excess with a soft brush. Seal with a top coat that’s compatible with chrome (some top coats dull chrome), then re-cap the free edge.
Use a thin liner brush to clean up the crescent edge with a tiny bit of black polish if it smears.
Don’t drag chrome all the way down the nail — it turns into a streaky mess.
3. Diagonal Black Base with Gold Striping Tape Band
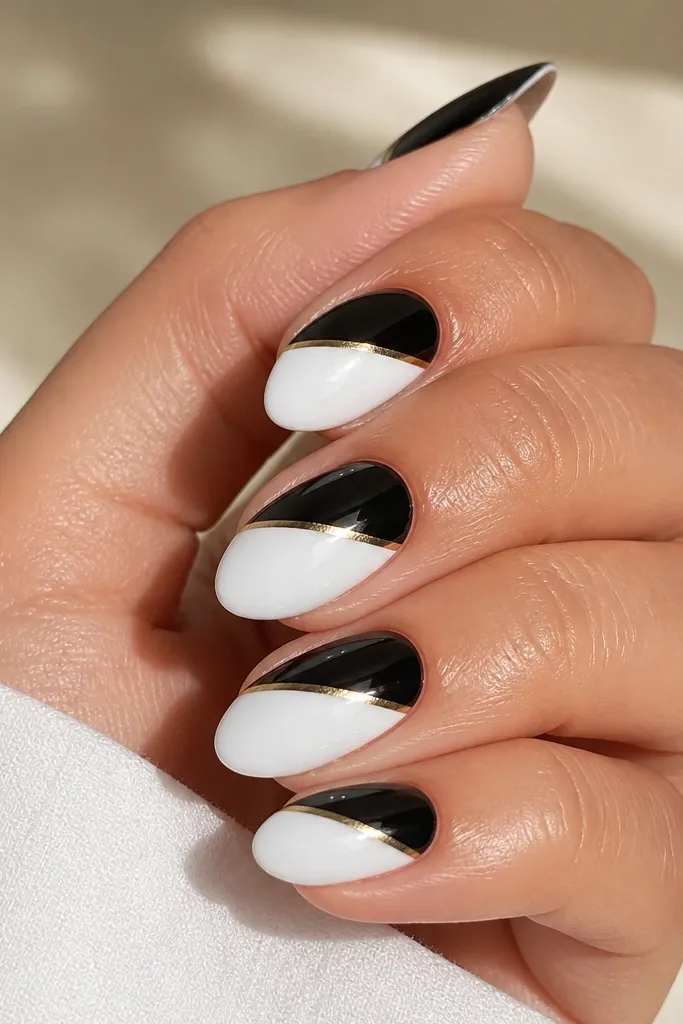
Start with two coats of glossy black, fully cured. Place a piece of gold striping tape diagonally from the lower left corner toward the upper right corner, then press it down firmly along the edges. Paint over the tape with clear gel or a thin top coat and cure, or use a matching gel top coat if you’re doing gel. Peel tape off carefully if you used temporary tape, or leave it if it’s designed for nail art. Finish with a final glossy top coat and cap the edges.
Diagonal lines are my go-to for making nails look sleek because they pull the eye across the hand. The gold striping tape gives you a straight, salon-clean stripe without needing steady hand painting. This looks best on squoval and square shapes where the sidewalls are visible, and it flatters hands that want a slimmer look. If your skin tone is deeper, the gold pops hard against black; if your skin tone is fair, it still reads luxe because the contrast is strong. The principle is geometry: one clean band beats lots of tiny details.
Watch outAvoid uneven tape pressure — it creates a wavy gold line.
Editor's noteAngle the stripe so it crosses the center of the nail — not too high or it looks off-balance.
4. Black Marble with Gold Vein Lines
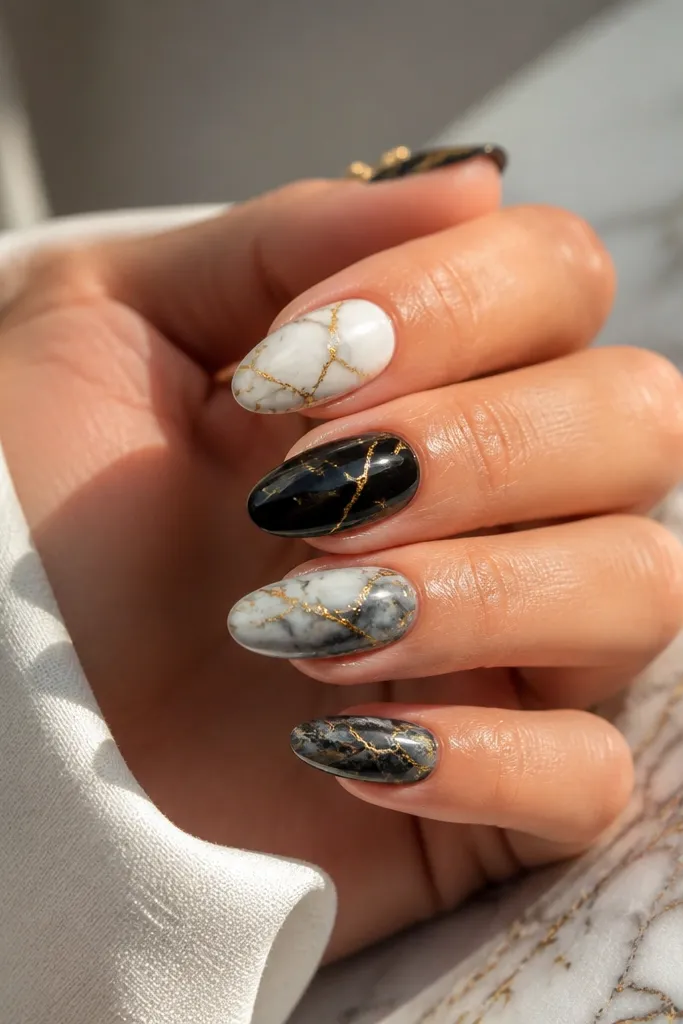
Paint a base of two coats of black and let it dry completely. Use a small sponge to dab a tiny amount of dark gray polish (or black with a touch of white) to create soft marble patches, then drag a thin toothpick through the swirls lightly. With a striping brush, paint thin gold lines that mimic the marble cracks, starting near the center and branching toward the edges. Seal with two layers of glossy top coat so the texture looks smooth and not rough.
Marble works because it adds movement while staying within a dark palette. The gold vein lines make it look intentional rather than like a random swirl, and gold reads “expensive” even when the marble is done with simple tools. I’ve done this on hands with short to medium nails and it still looks refined because the gold veins guide the eye toward the tip. It’s a great option for parties because it photographs with depth under flash. The styling principle is controlled chaos — marble texture plus clean gold lines.
Watch outSkip chunky glitter over marble — it kills the marble depth.
Editor's noteKeep the gold lines thinner than you think — thick veins look heavy on short nails.
5. Black Velvet Look with Gold Speckle Topcoat
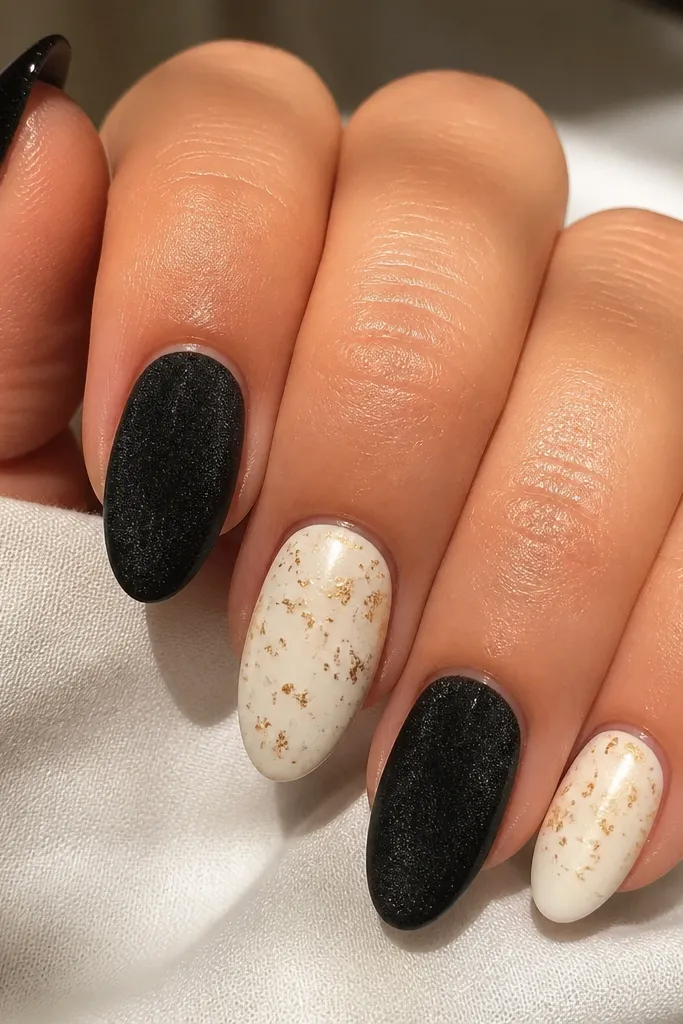
Start with two coats of black polish, then apply a matte top coat and let it set fully. Shake a gold speckle polish or use a gold metallic nail art spray over a nail-sized area, keeping the distance around 6-8 inches so the specks land fine. If you only have gold glitter polish, use a stippling motion with a sponge to keep the texture micro. Seal with a thin layer of regular glossy top coat only over the speckles area if you want extra shine, or leave it matte for a more couture look.
This design is budget friendly because it uses one finish trick and one easy overlay. Matte black makes the gold speckles look sharper and more like metal flakes instead of cheap glitter. I wear this when I want something that looks fashion-y without needing detailed nail art. It flatters all nail lengths, but it especially looks good on medium ovals because the shape gives the speckles room to spread. The styling principle is texture contrast: matte background, metallic micro-detail.
Watch outDon’t make the whole nail glittery — the matte effect disappears.
Editor's noteTest the speckle density on a paper towel first so you don’t overspray.
6. Black and Gold Beaded Line Accent (No Beads Needed)
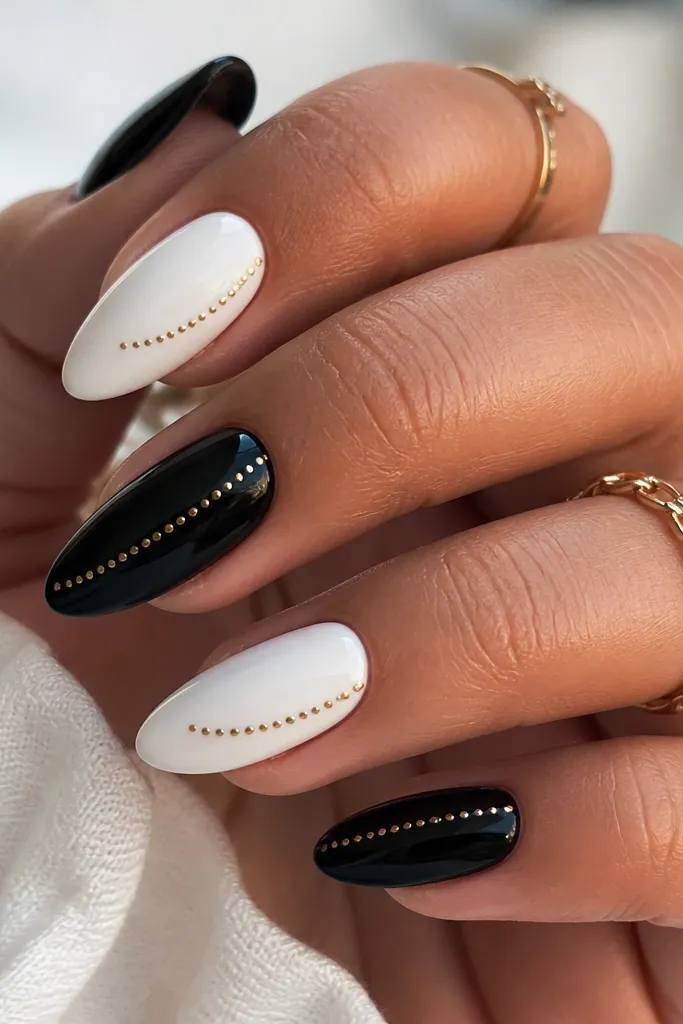
Paint two coats of glossy black and cure/dry fully. Using a dotting tool or toothpick, place a row of tiny gold dots along a straight path near the cuticle, leaving a small black gap between the dots and the skin. After the dots are placed, run a striping brush lightly across them with gold gel or thick gold polish so they merge into one raised line. Cure and seal with a glossy top coat, avoiding flooding the cuticle area.
The “beaded” look is all about dimension, and you can fake it without buying 3D nail charms. The raised gold line catches light as it moves, so even minimal designs look expensive. I like it on longer almond nails because there’s more room for the line to travel without crowding the cuticle. It also works on medium nails if you keep the line short, like one-third of the nail width. The styling principle is 3D illusion: small dots create the bead texture.
Watch outDon’t smear gold while it’s wet — it turns into a blob.
Editor's noteIf the line looks uneven, add one more tiny dot at the thinnest spot before sealing.
7. Half Black Tips with Gold Foil Top Corner
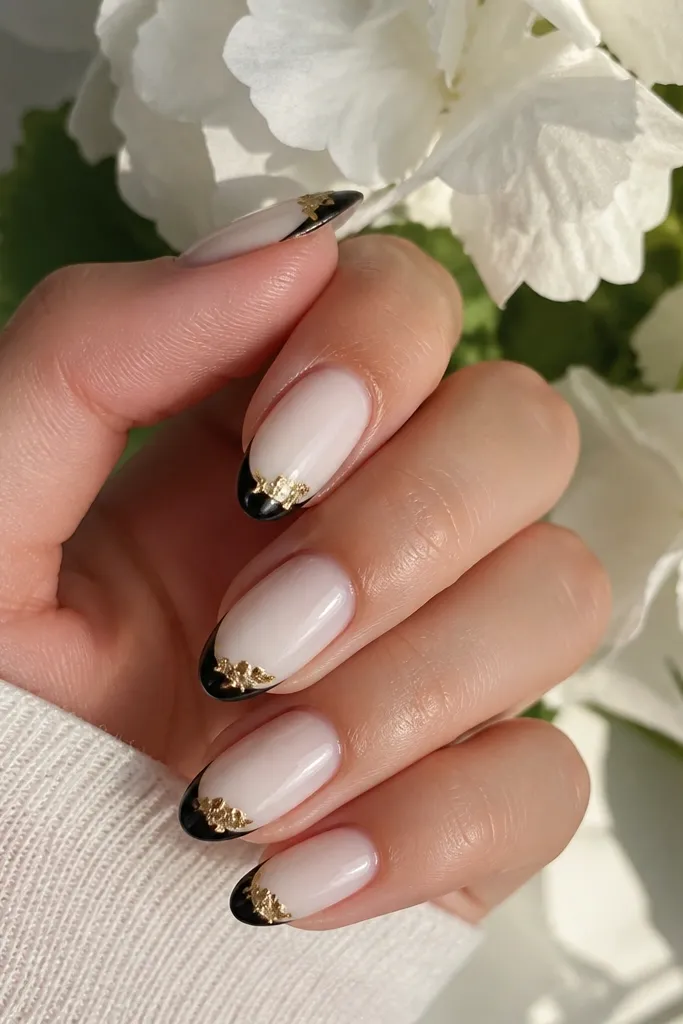
This design is a cheat code because the nude base makes your hands look clean and longer, while the black tip gives drama. The gold foil corner is small but noticeable, so it reads “intentional” instead of random. I love this for fair to medium skin because the nude base blends smoothly and the black tip creates crisp contrast. On deeper skin tones, it still works — choose a nude that matches your undertone (peachy nude for warm, rosy nude for cool). The principle is balancing negative space with one gold accent.
Start with a sheer nude base (two thin coats) and let it dry fully. Paint black on the lower half of the nail tip area using a straight brush, keeping the top edge of the black section crisp. Press a tiny gold foil piece into the top corner of the black area so the foil sits only on that corner. Seal with a glossy top coat and cap the edges where black meets nude so it stays sharp.
Use painter’s tape under your nail to keep the black line clean while you fill the tip.
Don’t make the nude too gray — it can make the gold look dull.
8. Gold Leaf French with Black Gloss Base
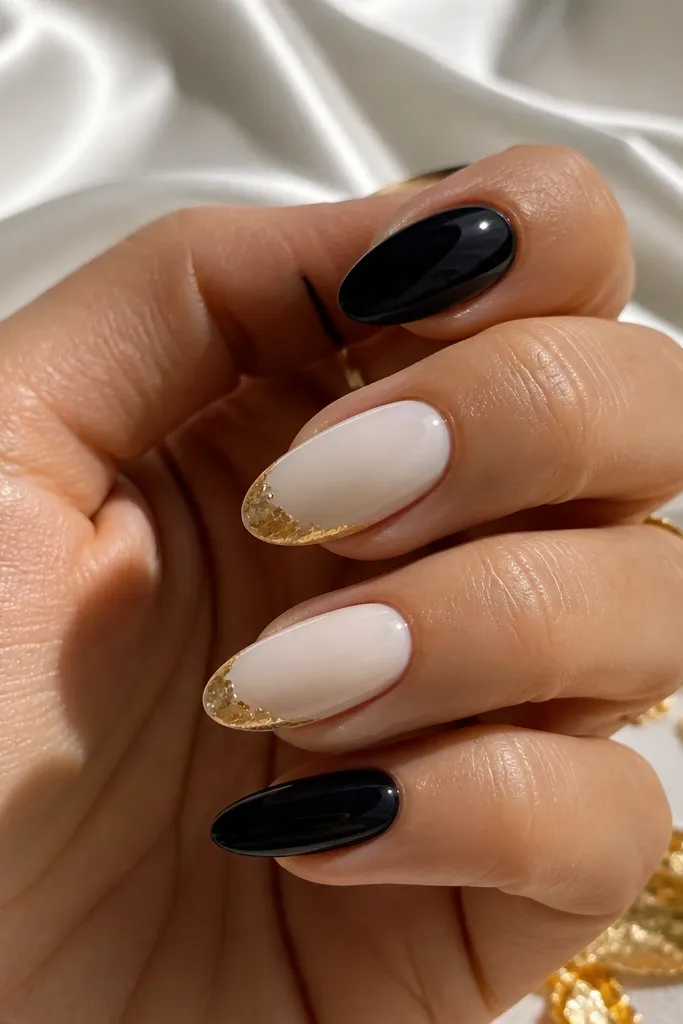
Apply two coats of glossy black and cure fully. Map a French tip line lightly using a thin strip of striping tape as a guide, then apply gold leaf pieces within that area. Press leaf down with a silicone tool, then lightly brush off excess so only the best pieces stay. Seal with a thick top coat in two layers, letting the first coat settle so the leaf doesn’t lift.
A French tip is classic, and gold leaf makes it look like you paid for an art service. The gold leaf edge is irregular, so it catches light in multiple directions, which is why it photographs so well. This works best on medium to long nails because the gold needs a bit of space to show texture. It flatters hands with longer nail beds and makes fingers look more elegant under ring light. The styling principle is traditional shape plus a high-end material finish.
Watch outAvoid a flat gold foil line — leaf texture is what makes this look luxe.
Editor's noteIf leaf sticks to your cuticle, wipe with a cotton swab dipped in alcohol before top coat.
9. Black Base with Gold Outline Around the Tip
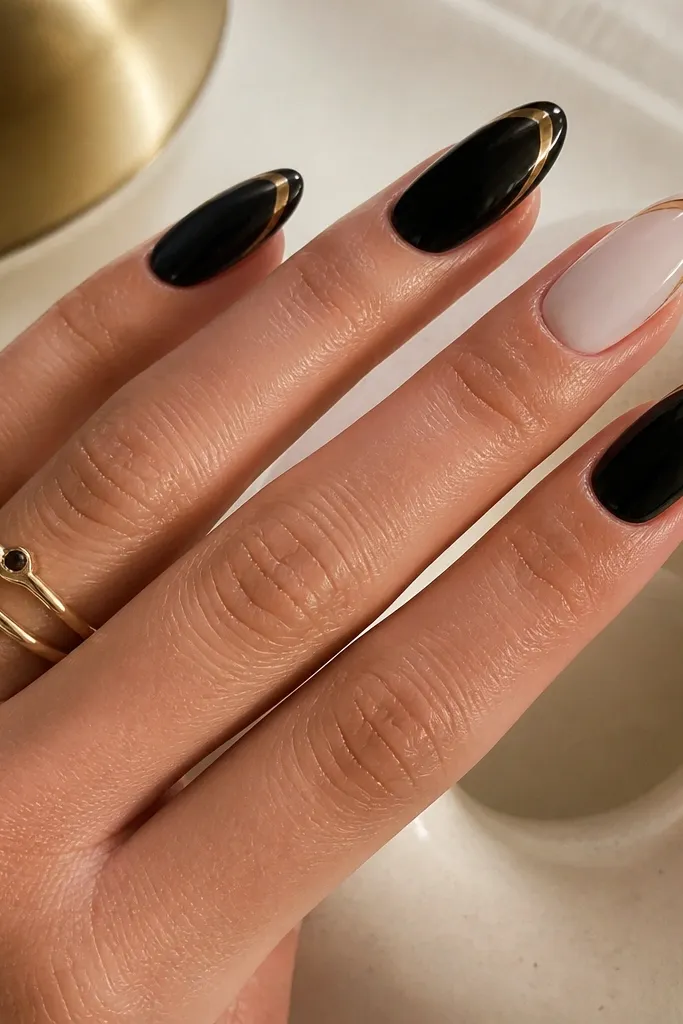
Start with two coats of glossy black and fully cure/dry. Use a dotting tool or thin striping brush with gold polish to draw a thin line along the outer curve of the free edge, staying a millimeter away from the sides. Connect the line smoothly at the center, then add a second pass only if you need it brighter. Seal with a glossy top coat, and cap the tip edge so the gold outline stays crisp through wear.
This is one of the easiest ways to get that “designer frame” look without painting a full design. The gold outline makes the tip area pop and gives your nails a clean border, which looks sharp on short ovals. I’ve done this for events where I needed something tidy, because the outline doesn’t grow out in a messy way. It also works on any skin tone since the contrast is on the nail, not the skin. The principle is framing: outline the shape instead of filling the nail.
Watch outDon’t put the gold outline too close to the cuticle — it makes nails look shorter.
Editor's noteIf your line wobbles, clean the edge with a small brush dipped in remover before it dries completely.
10. Gold Chrome Accent Nail with Black Checkered Skins
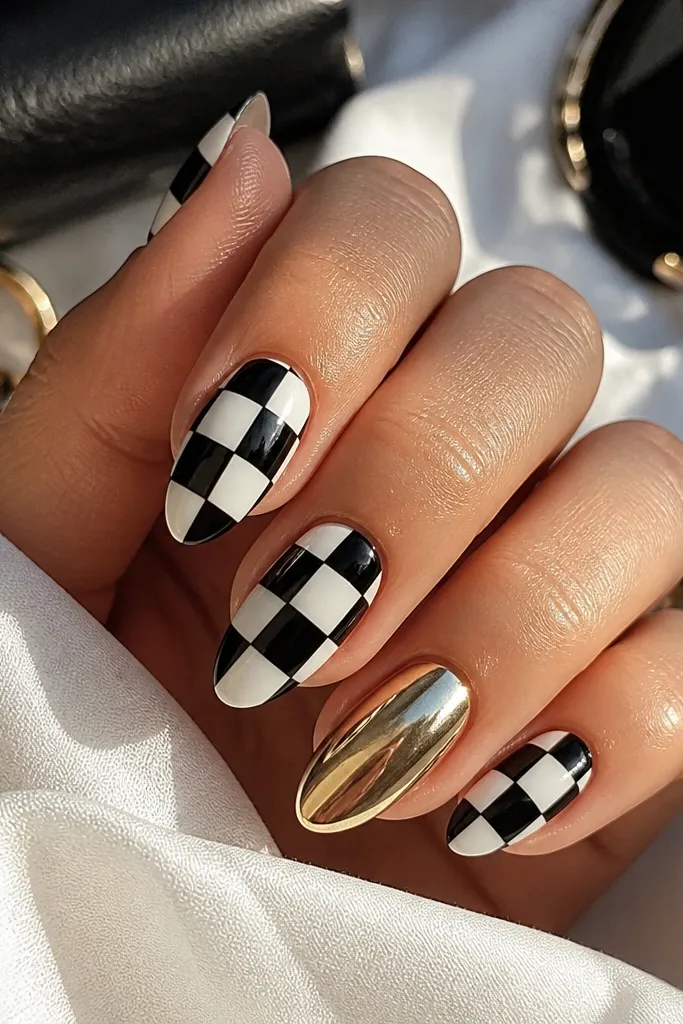
Paint all nails black with two coats. On four nails, place tiny gold squares using a striper brush and a steady hand: start with a vertical line, then add short horizontal segments to create small checker blocks. Keep the grid about the width of a pencil eraser and centered. Leave the ring finger (or thumb) fully black, then apply gold chrome powder or chrome gel for a mirror effect. Finish with a glossy top coat across everything, using chrome-safe top coat on the chrome nail.
This is the set I reach for when I want black and gold but not the same pattern on every nail. The checkered squares add structure, and the chrome accent nail gives you that focal point that looks expensive. It flatters hands because the pattern stays small and centered, so it doesn’t overwhelm shorter nails. On deeper skin tones the gold squares look extra bright, and on fair skin the set looks crisp instead of harsh. The principle is one strong accent plus a repeating micro-pattern.
Watch outDon’t make the squares large — big checks look costume-y fast.
Editor's noteUse painter’s tape as a guide for your first vertical line so the grid doesn’t drift.
11. Black and Gold Swirl Cuff (Wrap Style)
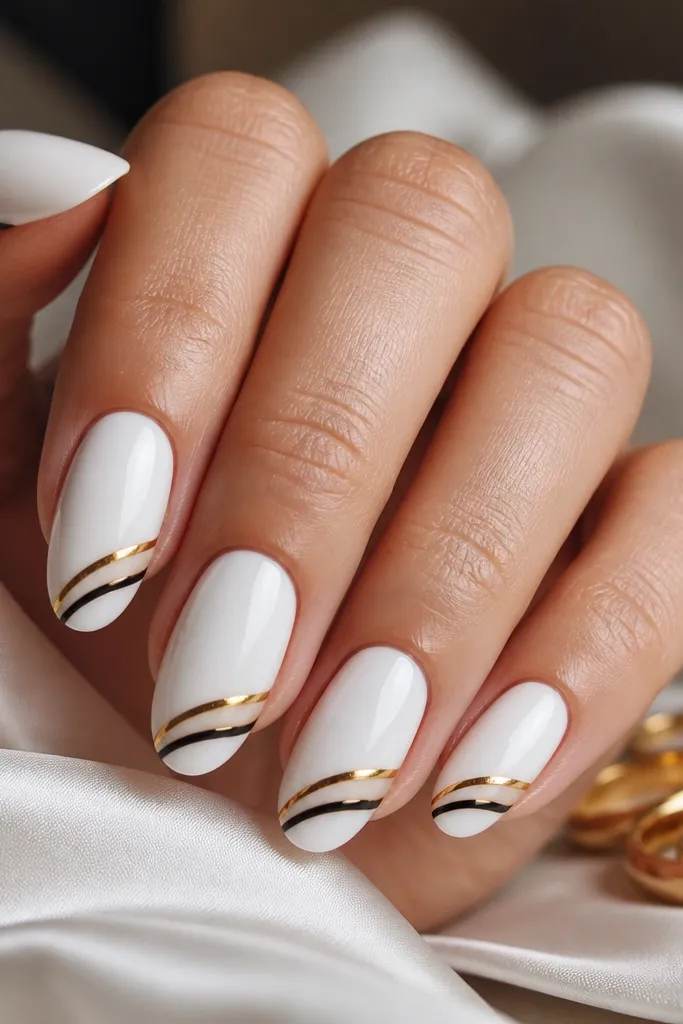
A swirl cuff looks like jewelry on your nails, and that’s why it always feels more polished than random gold lines. The negative space in the swirl keeps the design airy, so it doesn’t feel heavy even on darker nails. I’ve worn this with short and long nails; short versions need a smaller cuff, but the look still works. It’s great for parties because it adds movement and catches light as you turn your hand. The principle is curved line work with breathing room.
Start with two coats of glossy black. Use a thin striping brush to draw a gold swirl cuff across the lower third of the nail, following the curve from one sidewall to the other, then add a second thin gold line inside the swirl for dimension. Leave a small black gap inside the swirl so it looks like metal on top of metal. Let it dry/cure, then seal with one glossy top coat and cap the edges so the gold stays smooth.
Keep the swirl thicker at the outer edge and thinner toward the center for a more “bracelet” look.
Avoid filling every gap with gold — the swirl loses that jewelry effect.
12. Black Ombre Fade into Gold at the Tips
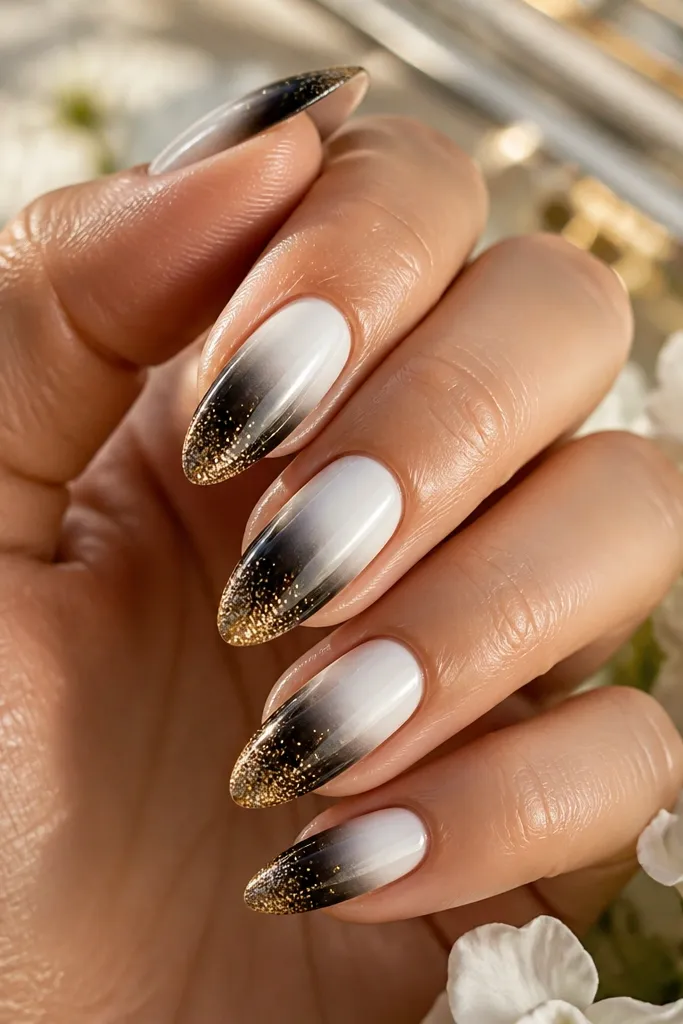
Ombre looks fancy because your eye sees a smooth transition, not separate blocks of color. Gold at the tips makes the nail feel brighter and more celebratory, while the black base keeps it grounded. I like this on medium to long nails because you need enough tip area to blend. It looks great for weddings as a guest and for holiday photos because the gold catches warm light. The principle is blending — the smoother the fade, the more expensive it looks.
Paint two coats of black and let it fully cure/dry. Sponge a small amount of gold metallic polish or gold chrome gel onto the very tips, then blend upward with a slightly damp sponge until the transition looks soft. Work in thin layers, letting each layer dry enough that you don’t smear the black. Once the gradient looks right, seal with a glossy top coat that evens out texture. If you see patchiness, add one more gold layer only at the tip edge.
Use a makeup sponge you reserve for nails — cheap sponges shed fibers and mess up the blend.
Don’t blend too far up the nail — you lose the black contrast.
13. Black Base with Gold Foil "Smudge" Across the Center
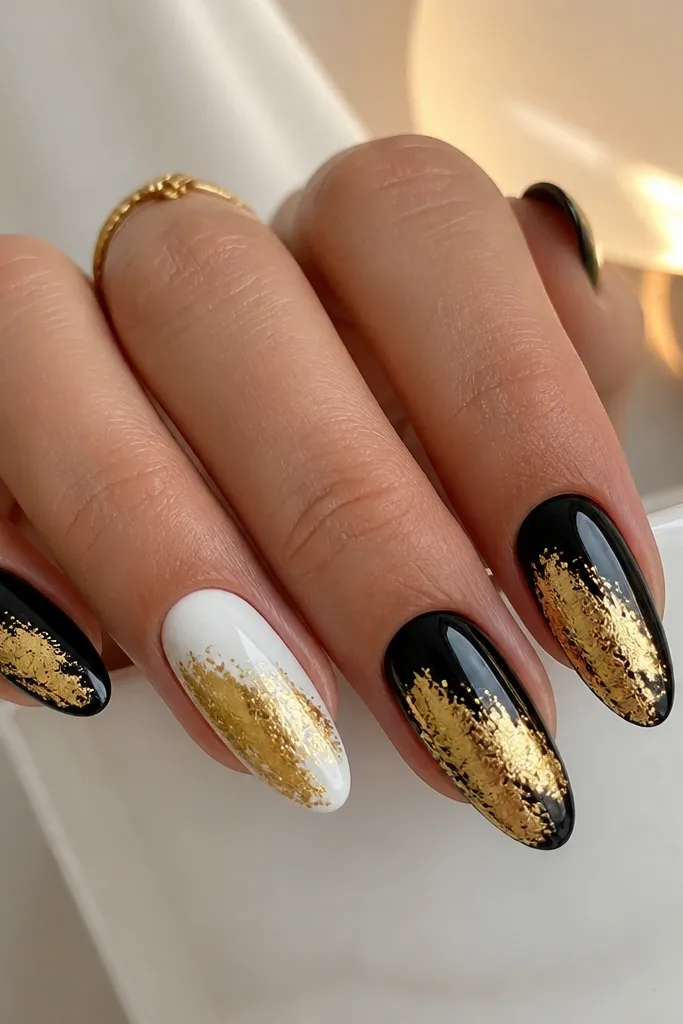
Apply two coats of glossy black and cure/dry fully. Tear a small piece of gold foil and press it lightly across the center of the nail, then lift and re-press until you get the smudgy, uneven look you want. Keep the band about one-third of the nail height so it doesn’t overwhelm the nail bed. Seal with a thick top coat in two layers so the foil locks down and doesn’t lift at the edges.
This design is bold without needing fine brushwork. The foil smudge looks like metallic smoke, and that texture hides small mistakes from application. It flatters most nail lengths because the foil band sits in the middle, and your nails still read sleek. On fair skin it looks dramatic; on deeper skin it looks rich and bright. The principle is using foil as a texture tool instead of trying to paint perfect shapes.
Watch outDon’t cover the whole nail with foil — it turns into a glittery block.
Editor's noteIf the band looks too bright, press the foil once and then lightly tap over it with black polish on a thin brush to dull it.
14. Black and Gold Dainty Dots with Negative Space Half Moon
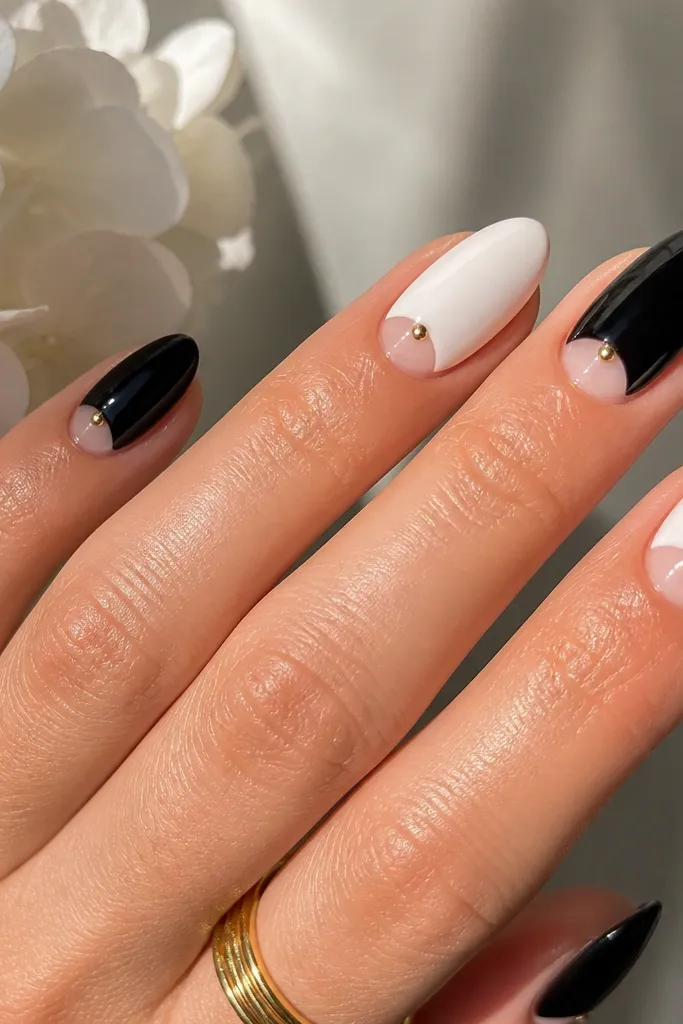
Negative space makes black and gold feel modern instead of heavy. The half-moon near the cuticle keeps your nail looking clean and gives your hands that fresh, airy look. Tiny gold dots add detail without requiring a steady hand for lines, and dots are forgiving if they aren’t perfectly even. This style flatters shorter nails because it avoids big gold shapes and keeps the design concentrated near the cuticle. The principle is spacing: dots plus negative space look intentional when you leave room for the eye to breathe.
Start with a sheer base layer or clear nail prep so the negative space stays clean. Paint black on the outer sides of the nail, then stop before the center at the cuticle to form a half-moon gap. Use a dotting tool with gold polish to place small dots along the black area, keeping the dots denser near the center and lighter toward the edges. Cure/dry, then apply a glossy top coat carefully around the negative space so it doesn’t flood and blur the half-moon.
Wipe your dotting tool often so each dot lands crisp instead of dragging.
Avoid gold dots all the way to the cuticle — it can smear and look messy.
15. Black Marble Base with Gold Foil Geometric Triangle
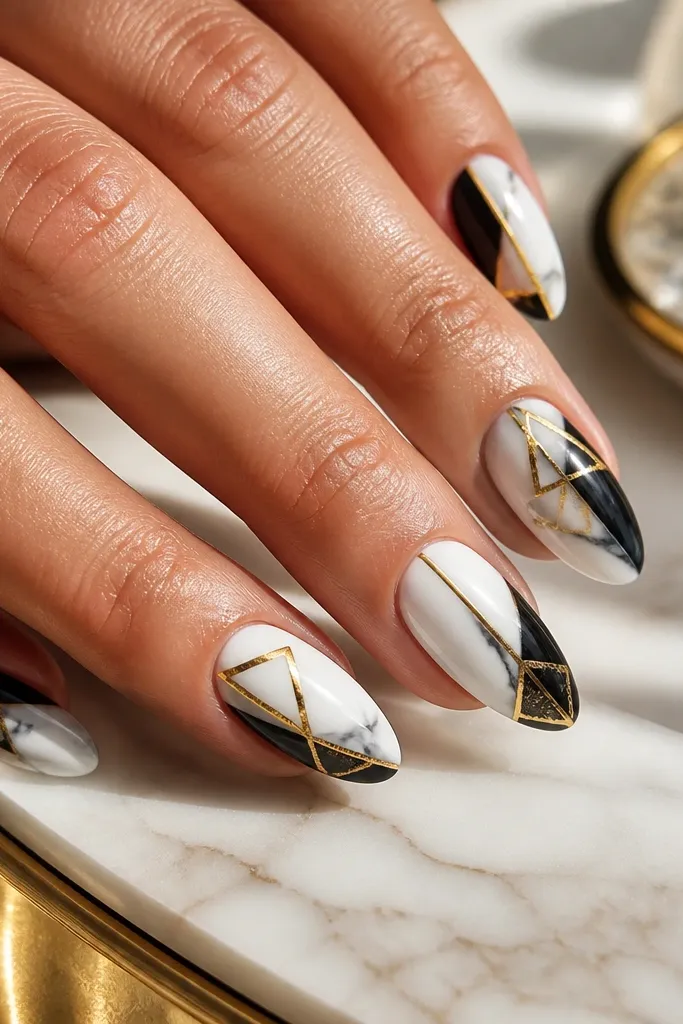
Create a quick black marble by layering black with tiny touches of dark gray and swirling with a toothpick, then seal lightly. Press a small gold foil piece into a triangle near one sidewall, aiming the point toward the center of the nail. If the triangle edges aren’t sharp, use a thin brush to paint a gold outline over the foil so the shape reads crisp. Seal with two glossy top coats, letting the first coat fully dry so foil texture doesn’t lift.
This look is budget friendly because foil makes the geometric shape fast, and marble gives depth without needing multiple colors. The triangle placement gives a fashion-forward feel, and the sharp point draws the eye down the nail. I like it on medium almond and squoval because the sidewall gives the triangle a place to “sit” cleanly. It also works on different skin tones since the design contrast is on the nail surface. The principle is one geometric accent over a textured base.
Watch outDon’t add extra gold lines everywhere — one triangle is enough.
Editor's noteChoose one nail as the “hero” triangle — make it slightly larger so the set has a focal point.



