
1. Negative Space French with Gold Foil Edge
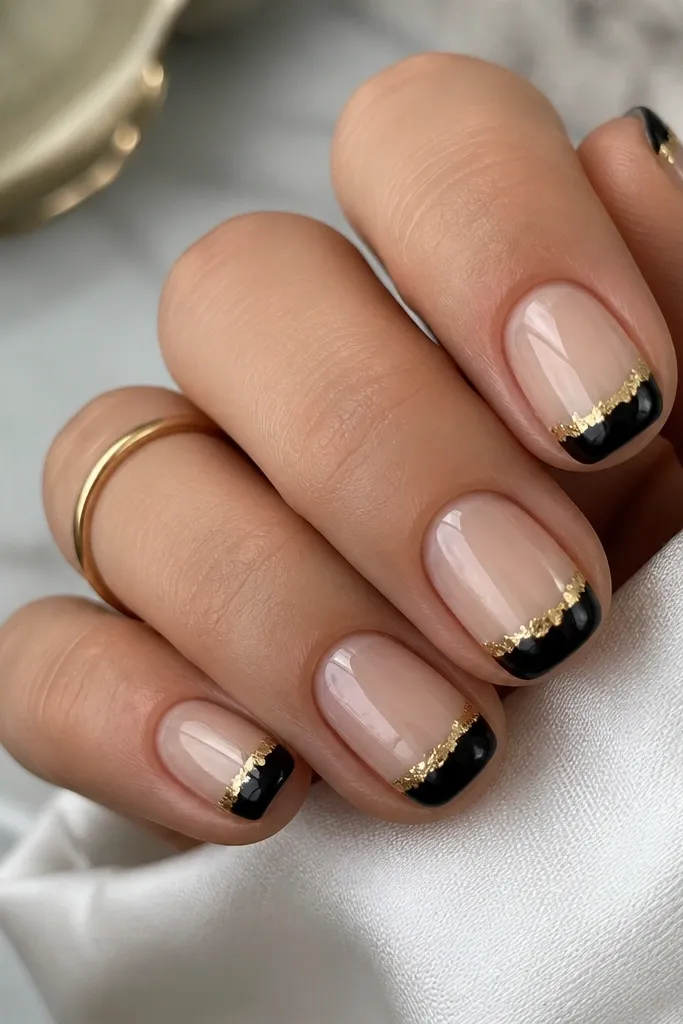
This look works because it keeps the black confined to the tip while the gold only shows on the edge. The gold foil makes the French line look handmade and expensive, but the negative space keeps it wearable. If you have smaller nail beds, the sheer nude base makes your nails look longer and less chunky. For medium to deeper skin tones, the nude base warms up the gold so it doesn’t look like a cold sticker.
Start by prepping and pushing back cuticles, then apply a sheer nude base coat and cure. Paint a thin black French tip in two coats, keeping the curve even and the tip about 2-3 mm wide on short nails. Press torn gold foil along the outer edge of the black tip, using a small piece per nail so it doesn’t spread. Finally, cap everything with a glossy top coat, and seal the free edge so the foil doesn’t lift.
Editor's noteUse foil pieces smaller than you think — big chunks look thick on a French tip.
Watch outDon’t paint gold directly over wet black; it smears and dulls the foil look.
2. Black Marble Veins with Gold Chrome Highlights
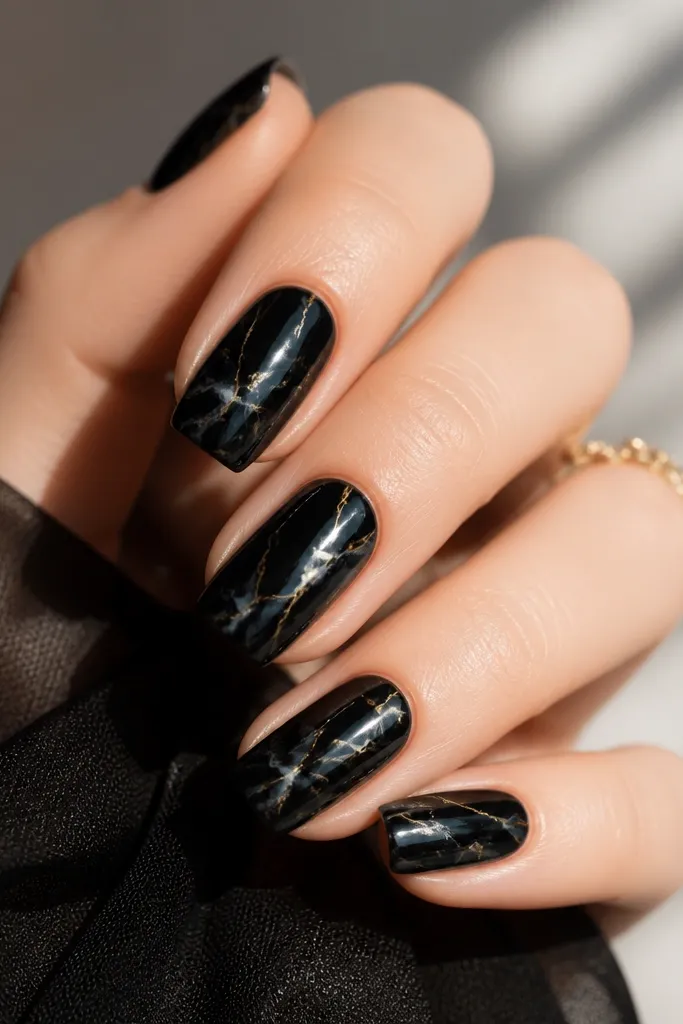
Marble looks classy on black because the veins give you movement without adding extra heavy color. Gold chrome on top of selected veins makes it look like jewelry instead of nail art. This flatters most skin tones because the base is deep and the gold reflects light across your hand. If your nails are medium length, the marble lines can run vertically and make your fingers look longer.
Start with a fully opaque black base and cure, then create marble with a thin brush dipped in diluted gray-white polish. Pull a few irregular vein lines, then soften the edges with a tiny sponge dab while the polish is still tacky. Add gold chrome only along 2-3 vein paths per nail, rubbing lightly so the shine stays narrow. Seal with a thick glossy top coat and wipe any stray chrome at the sides before curing.
Editor's noteKeep the gold chrome to the center third of the nail for the cleanest, most “intentional” look.
Watch outSkip heavy chrome layers — they look grainy and can catch on fabric.
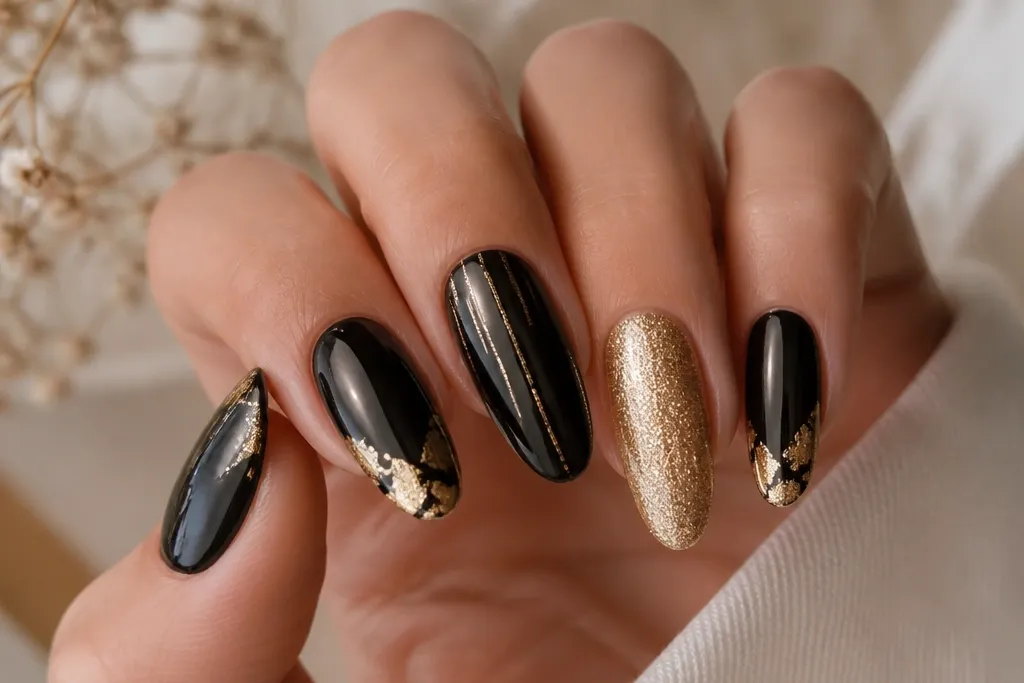
3. Gold Striping Tape Side Lines on Glossy Black
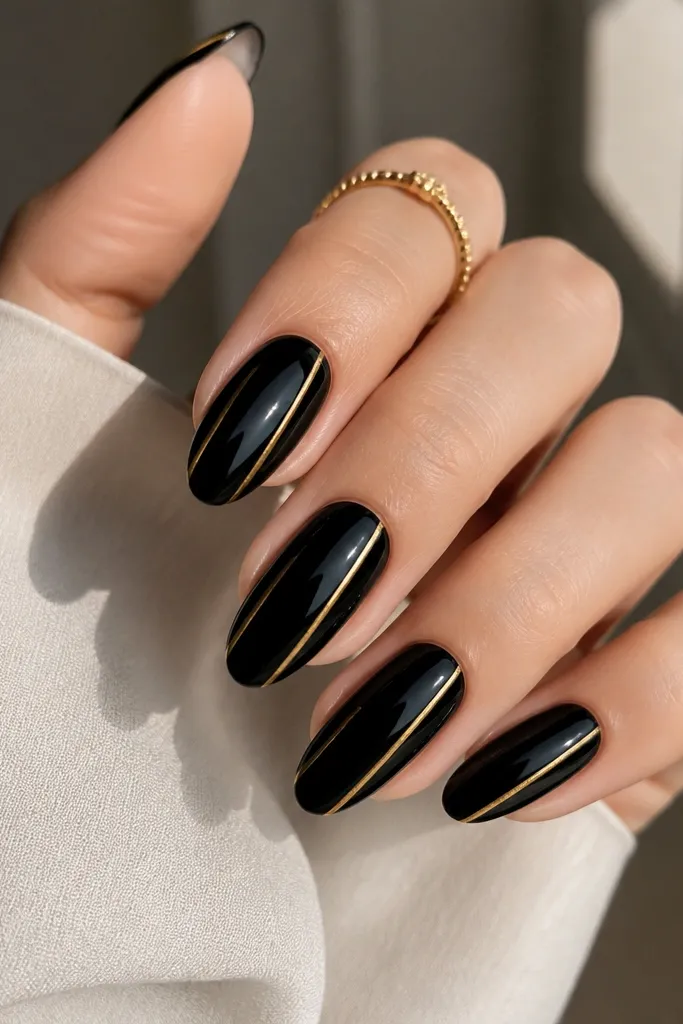
Side striping is the fastest way to make nails look longer. The black is the anchor, and the gold lines act like vertical light streaks that guide the eye. This is especially flattering if you have short nails or wider nail beds because the gold lines can be placed slightly off-center to create a slimming effect. It also looks great for work because the gold is narrow and controlled.
Paint two thin coats of glossy black and cure each layer. Cut striping tape into 2-3 cm pieces, then place one line from near the cuticle to the tip, leaving a 1 mm gap from the cuticle area. Press the tape down firmly with the back of a manicure brush and trim at the free edge. Add a second gold line only on accent nails if you want variation. Finish with one full layer of top coat, making sure you cap the tape edges.
Editor's noteIf the tape lifts at the edges, touch the area with a micro-dot of clear gel before top coat.
Watch outDon’t use thick metallic tape — it creates ridges that chip sooner.
4. Black Velvet Effect with Gold Studded Cuticle
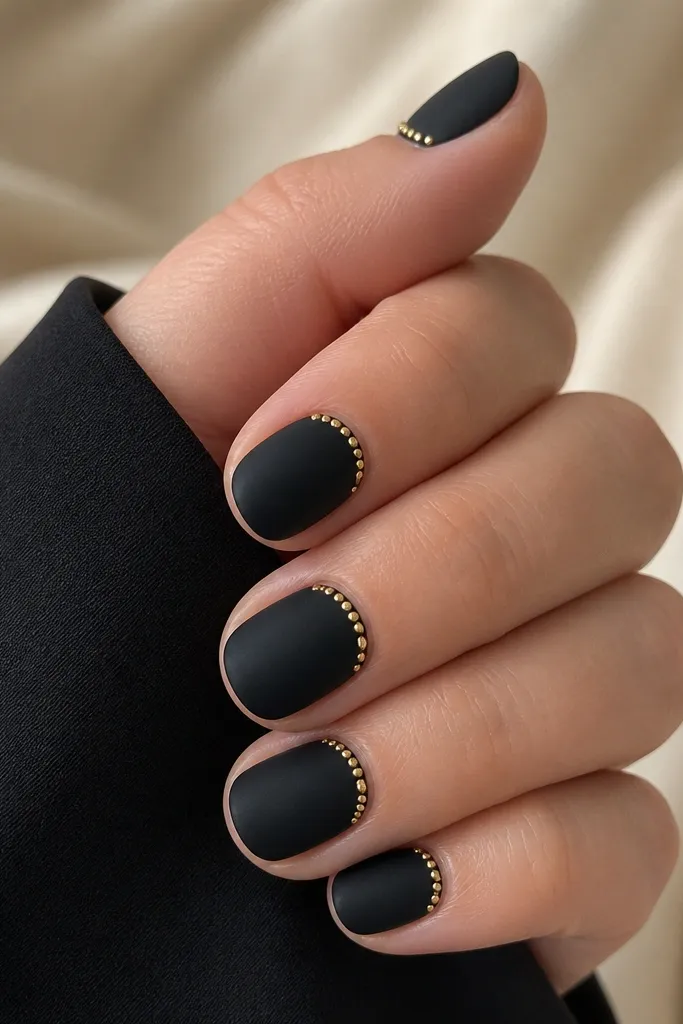
Velvet-style black looks expensive because the texture absorbs light instead of reflecting it. Adding gold studs only at the cuticle creates a jewelry effect without making the whole nail feel busy. This works well for hands that look better with contrast — the matte black frames your skin and makes gold pop. If you want something that looks “done” but still easy to wear, this is it.
Start with your black base and cure, then apply a black velvet matte powder or velvet top effect according to your product instructions. Focus on keeping the velvet layer thin so it doesn’t look fuzzy. Place tiny gold studs in a straight line 0.5-1 mm below the cuticle on each nail, pressing each stud into a tacky layer. Seal with a matte-safe top coat only over the studs area so they stay secure. Cure fully and clean around the cuticles with a small brush.
Editor's noteUse a dotting tool to place studs; it keeps the spacing even.
Watch outDon’t cover studs with a glossy top coat if your velvet finish is meant to stay matte.
5. Gold Foil Half-Moon Cuticles on Black Jelly Base
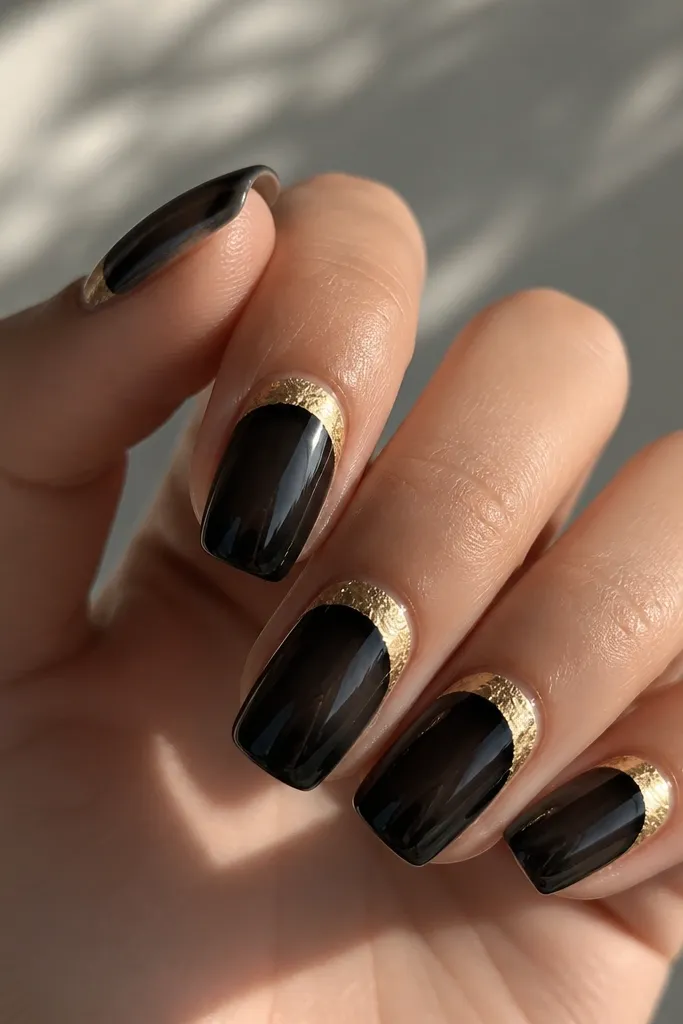
A half-moon placement is flattering because it mimics a classic manicure shape but with a modern metallic twist. The black jelly base gives depth without going fully opaque, so the gold looks brighter. This is great if you want black without it looking too heavy on your nails. It also looks good on different skin tones because the jelly base lets your natural tone warm the design.
Apply a black jelly base in two thin coats, curing each layer, so it stays slightly see-through. Press gold foil into the half-moon area around the cuticle, then trim excess with a small file. Keep the foil arc consistent across nails — aim for about 2-3 mm tall on medium nails. Add one careful layer of top coat over the foil, then cap the free edge to lock it down. If the foil edges peek out, add a second thin top coat just in those spots.
Wipe your foil surface with a dry lint-free wipe first so it adheres more cleanly.
Don’t put foil too close to the cuticle skin — lifting happens fast there.
6. Black and Gold Geometric Blocks with Negative Space
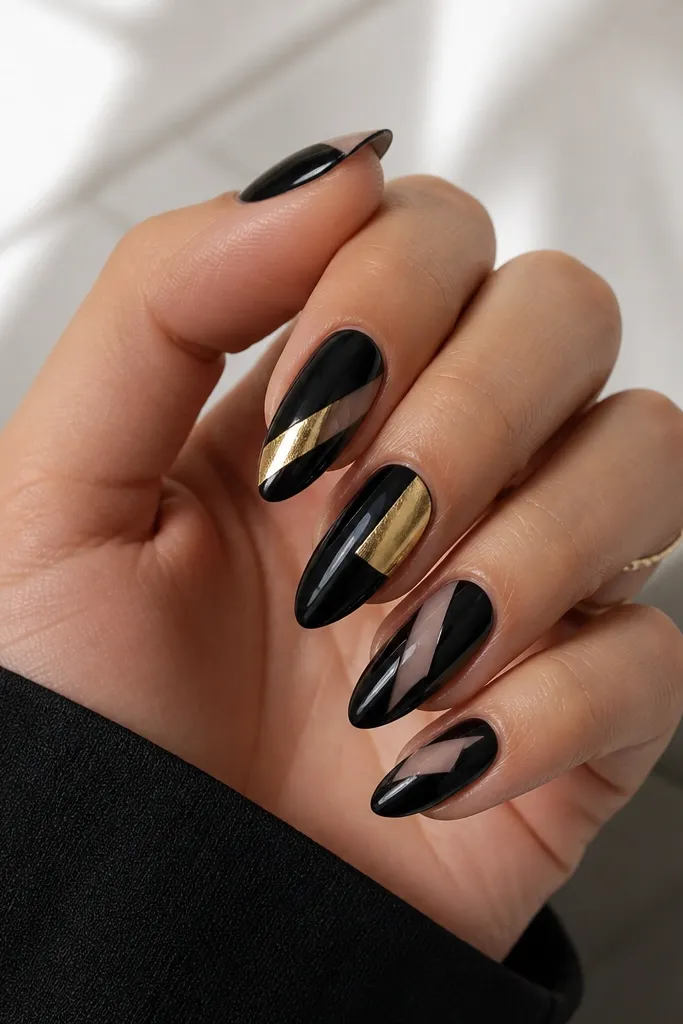
Geometric designs look clean because you’re controlling the shapes instead of free-handing curves. Black and gold blocks make your nails look like graphic jewelry, and the negative space keeps it from feeling too dark. This flatters hands with short to medium nails because the shapes can be scaled down. If your skin tone is deeper, the nude windows prevent the gold from looking dull against solid black.
Start with a glossy black base on all nails and cure. Use striping tape to mask crisp angles, then add gold metallic polish or gold foil to the taped sections. Remove the tape while the gold is still tacky so the edges stay sharp. Leave small nude triangles or rectangles by not covering those areas with black. Finish with top coat, making sure you don’t flood gold into the negative space.
Editor's notePress tape edges with a cuticle stick so the lines look razor-straight.
Watch outDon’t overfill taped sections — thick gold polish bleeds under tape.
7. Gold Chrome Ombré Fade over Black
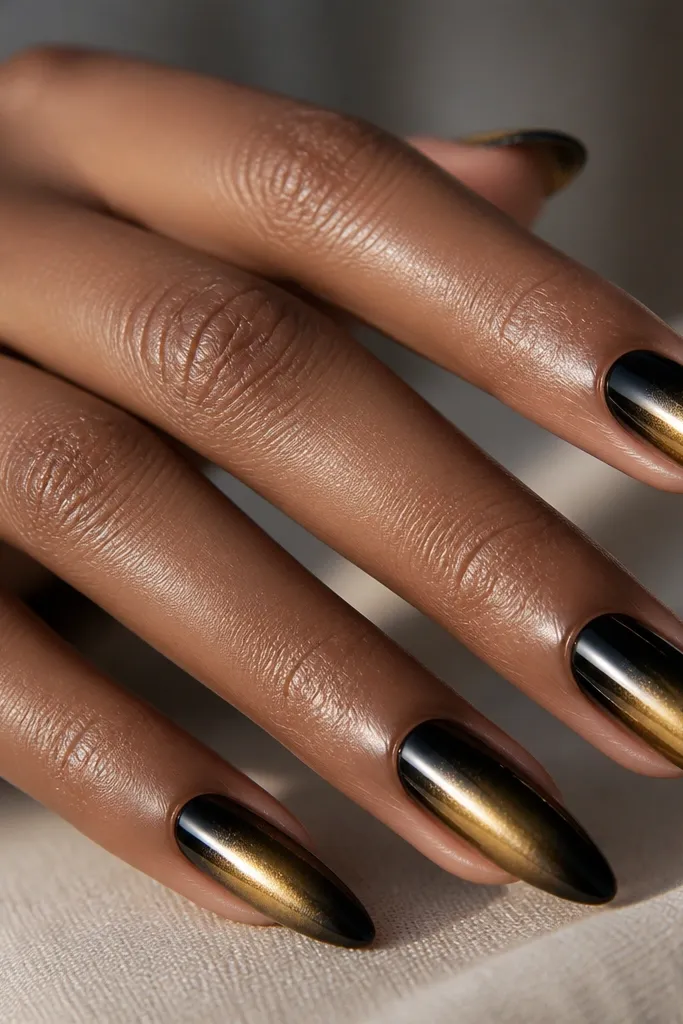
An ombré fade gives you movement and makes black feel lighter. The gold chrome catches light as you move your hands, and the fade keeps it from looking like a sticker. This is flattering for most nail lengths because you can control how high the gold starts. On fair skin, the black tip grounding makes the gold look warmer; on deeper skin, the chrome reflects a brighter gold tone.
Paint two thin coats of black and cure. Apply a thin layer of clear gel in the middle zone where you want gold to start, then sprinkle gold chrome powder and rub it in with a soft applicator. Use a sponge to blend the chrome upward and downward, so you don’t get a hard edge. Seal with a glossy top coat after you remove extra powder. Cap the tips with one extra thin top coat layer so the chrome doesn’t wear off first.
Do the ombré placement slightly higher than you think — it looks better in photos once your hands move.
Don’t rush curing between steps; chrome can smear if the layer is too wet.
8. Black Gloss with Tiny Gold Dots like Confetti
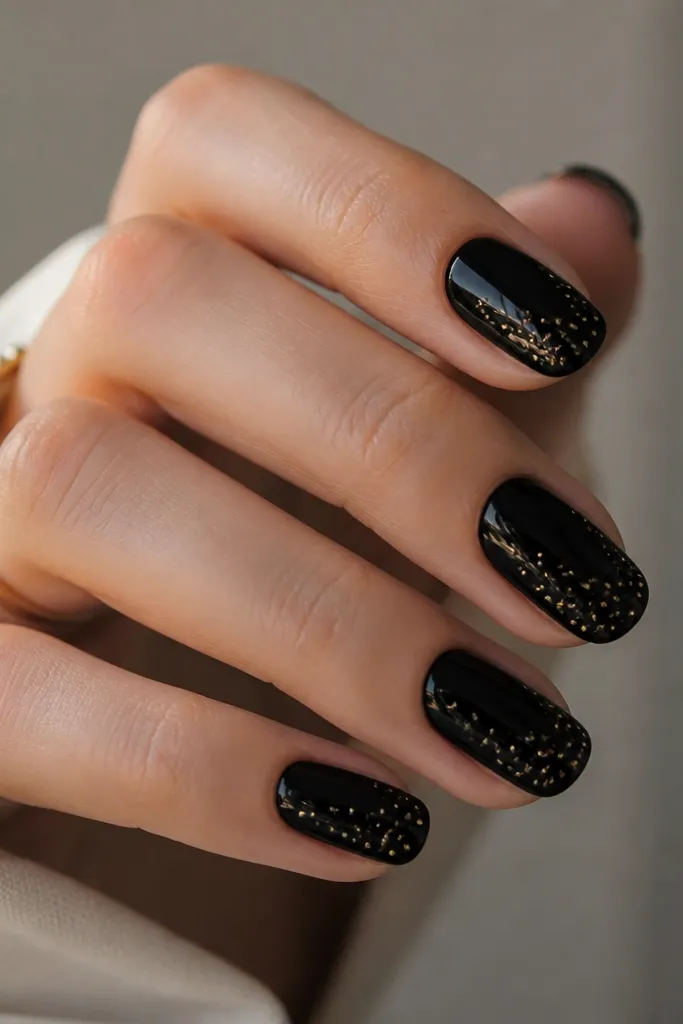
Micro dots are the easiest way to make black-and-gold feel playful without turning into full coverage glitter. The tiny scale makes your nails look neat, even on short lengths. This works if you want something cute for everyday and still want gold to show up in sunlight. It also looks good if you have uneven nail beds because the dots draw attention to the top surface instead of shape.
Start with glossy black in two coats and cure. Use a dotting tool dipped in gold acrylic paint or gold gel, then tap off excess on a paper scrap so dots stay tiny. Place most dots in a loose cluster near the tips, with 1-2 dots closer to the center for balance. Let it cure, then add top coat in thin layers so the dots don’t sink. Finish by capping the free edge to keep the dots from catching on sleeves.
Editor's noteIf dots look too big, reload paint less often and wipe the tool tip on your palette before dotting.
Watch outDon’t cover the whole nail with dots — it looks cheap and thick.
9. Gold Foil Flames on Black for a Night-Out Look
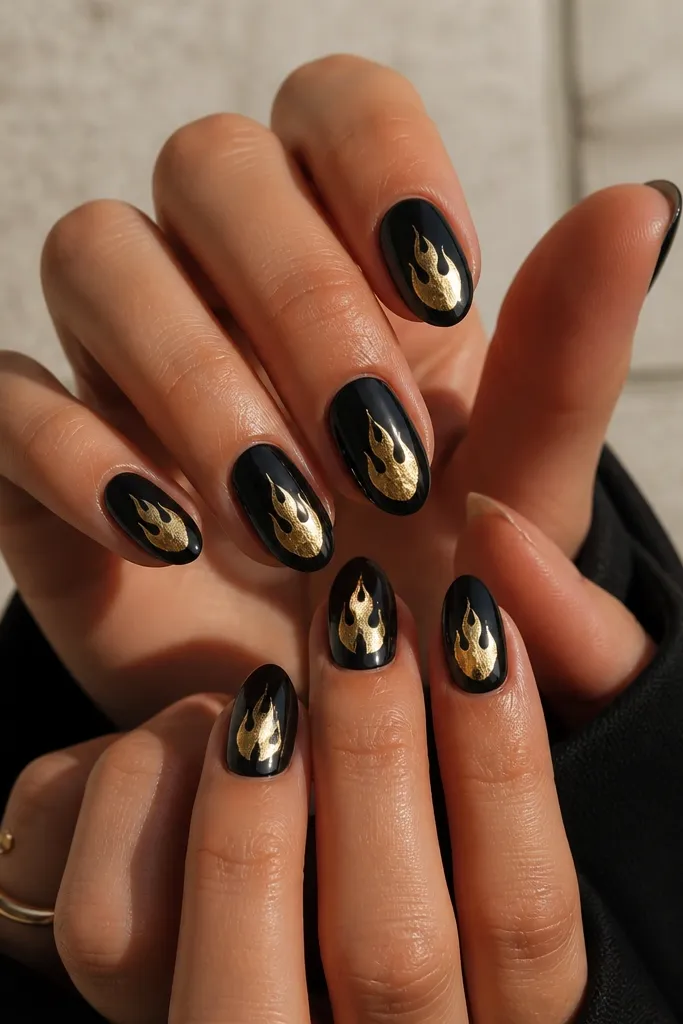
Flame shapes look bold, but gold foil keeps them from looking harsh. The foil’s irregular edges mimic real flames, and black gives you the contrast that makes the gold pop. This design flatters longer nail shapes because the flame can run vertically and elongate. If you have a softer nail shape like almond, the flames follow that curve and look more natural.
Apply a glossy black base in two coats and cure. Tear gold foil into small flame-like pieces, then press them onto the center area of each nail. Use a thin brush to nudge foil edges into a vertical flame direction. Add a thin layer of clear gel or glue over the foil if your kit needs it, then cure. Seal with top coat, paying attention at the flame edges so they don’t lift.
Editor's noteKeep flame width narrow — about the width of your thumbnail line — for a clean look.
Watch outDon’t place flames across the sidewalls; it chips where your fingers rub.
10. Black and Gold Crown Accent Nail Set
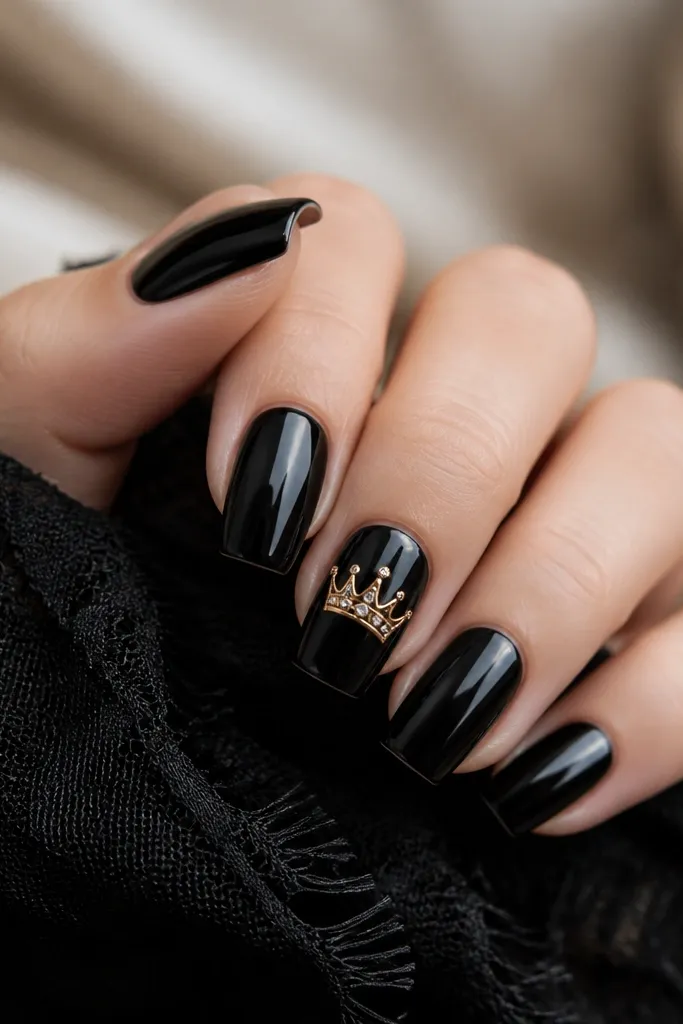
Crown art looks cute because it reads like jewelry, not random doodles. Keeping the crown small near the cuticle makes it look intentional and keeps the rest of the nails wearable. This design works for short nails because the crown can be scaled down without losing detail. On any skin tone, the gold outline against black makes the hand look polished fast.
Paint all nails glossy black and cure. On accent nails, place gold foil or gold striping tape to form a crown outline, then fill the crown with gold gel or metallic polish. Add tiny dot gems using a dotting tool, keeping them to three points so it still looks clean. Cure and top coat over the entire nail. If you want extra depth, add a second thin top coat only over the crown so it looks smooth.
Editor's noteUse a nail art brush with a pointed tip so the crown points stay sharp.
Watch outDon’t draw crowns too large; oversized nail art looks messy on black.
11. Gold Leaf Over Clear Negative Space on Black Tips
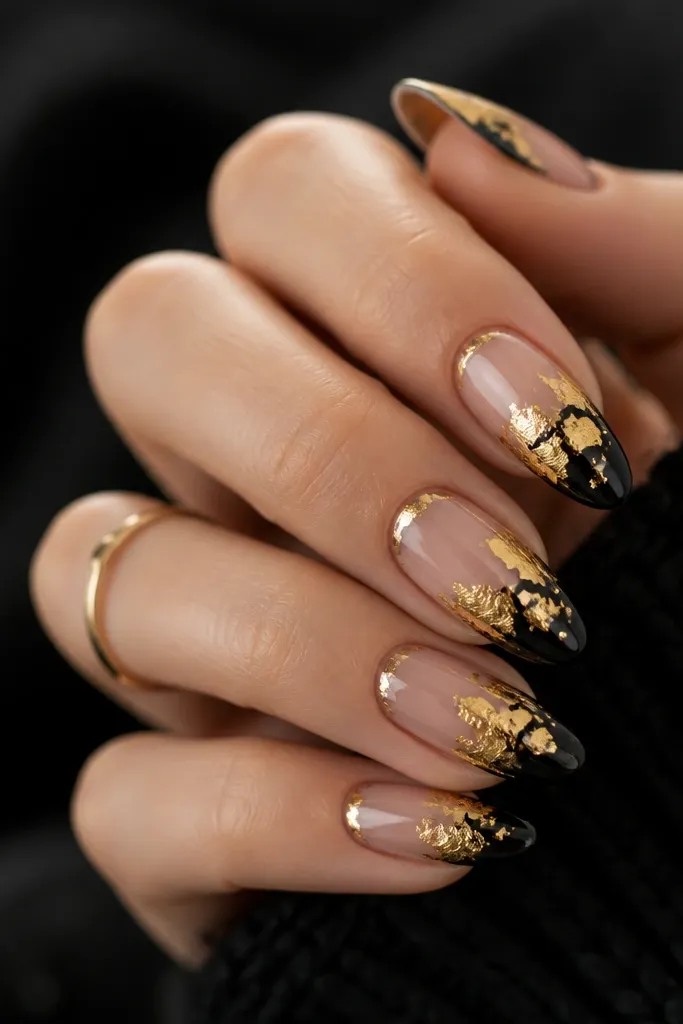
This one looks airy because the gold leaf sits over clear and the black only takes the tip. The contrast reads high-end in photos because you see both transparency and metallic texture. It’s flattering on short nails since the clear base makes the nail look longer and less heavy. If your hands get dry and your cuticles show easily, the clear base hides it better than a full nude opaque layer.
Start with a clear or sheer base coat and cure. Paint black tips in two coats, keeping the tip thickness consistent across nails. Press gold leaf into the clear area starting just below the tip line, covering about one-third to halfway of the nail. Use small pieces and overlap lightly so it doesn’t look like flakes. Seal with glossy top coat in two thin layers to smooth the leaf and lock it down.
Editor's noteIf leaf edges catch on fabric, lightly file the top surface before the final top coat.
Watch outDon’t use chunky glitter leaf — it makes the nail feel rough.
12. Black Lace Stamping with Gold Foil Frame
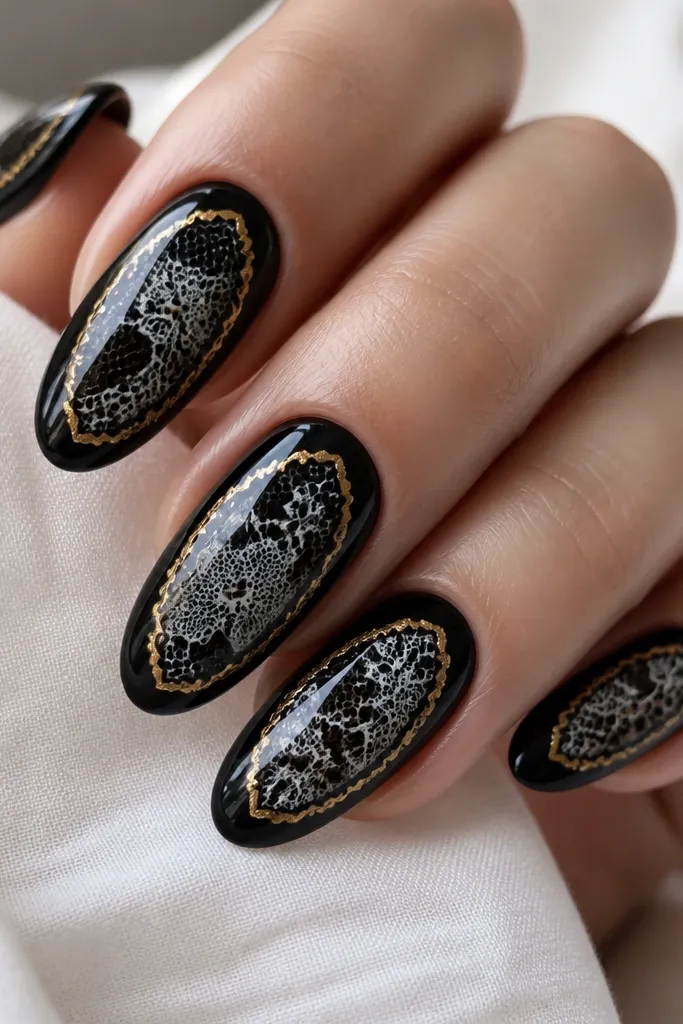
Lace stamping looks detailed without requiring freehand drawing. When you frame it in gold foil, it turns the pattern into a “picture” on the nail, which makes it look expensive. This flatters hands with longer nail beds because lace has lots of line work. If you have medium skin tones, the lace lines stay readable against black, and the gold frame adds warmth.
Paint a full black base and cure. Use a lace stamping plate with fine lines and stamp the lace using a light polish that contrasts well (cream-gray or white works best). Apply gold foil around the stamped area by pressing foil along the border you want, then trim excess. Add a glossy top coat, using a gentle brush to guide top coat over the lace without flooding it. Cure and clean up the edges with acetone on a fine brush.
Choose lace plates with thin line spacing so the stamp doesn’t look blobbed on black.
Don’t skip a top coat over the stamp — it fades and chips faster.
13. Gold Chain Link Accent on Black (Striping + Tiny Links)
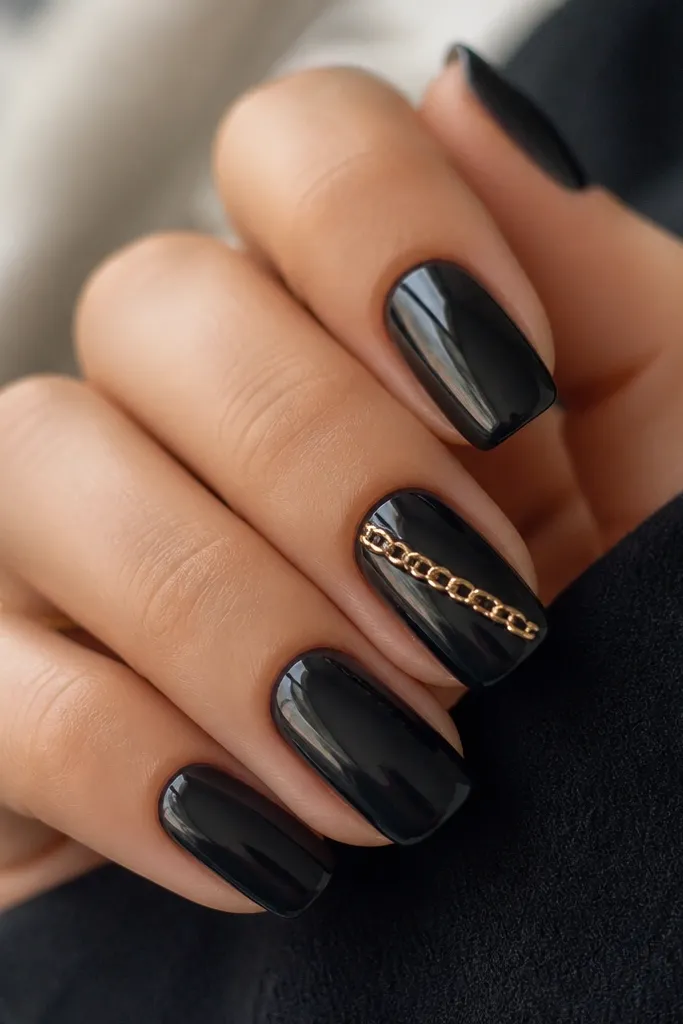
Chain link accents look like jewelry because the gold has dimension and direction. Keeping it diagonal adds length and makes your nail look slimmer. This is flattering for narrow nail beds because the line hugs the nail shape. On deeper skin tones, the gold links look bright and clean; on fair skin, the black background keeps it from washing out.
Base coat and paint all nails glossy black. On the accent nail, place striping tape diagonally where you want the chain to travel, leaving a 1-2 mm gap from the side edges. Apply a thin line of gold gel or adhesive along the taped path, then place tiny gold chain links (or use pre-made micro chain) with tweezers. Cure, remove tape, and top coat carefully around the links without flooding them. Cap the free edge so the chain doesn’t snag.
Editor's noteUse tweezers with flat tips so links don’t twist out of line.
Watch outDon’t put chain links on every nail — it looks heavy and gets bumpy.
14. Black Galaxy Glitter Fade with Gold Micro Specks
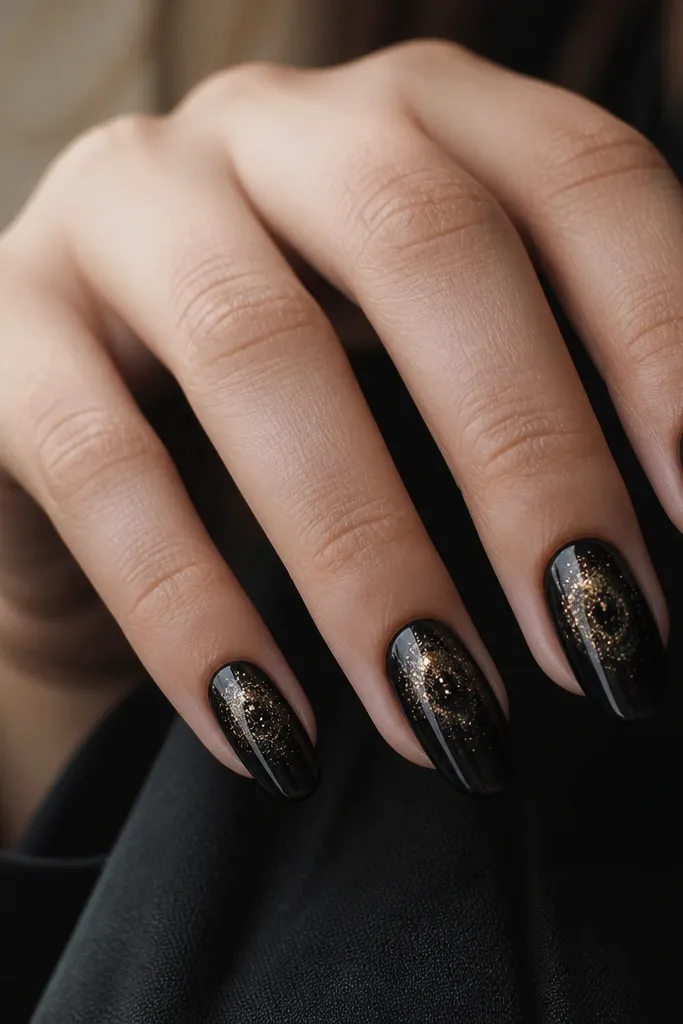
Galaxy nails work because the background already has movement, so gold doesn’t need big shapes. Micro specks look like stardust and they stay elegant when they’re small. This is a good pick for evenings because the black base makes the gold sparkle show up under warm light. If you’re doing your nails for a party, this one reads “special” without needing big foil coverage.
Paint black base and cure, then sponge on a slightly lighter black or charcoal shade for the galaxy clouds. Add a fine black glitter polish at the tips only, blending upward with a makeup sponge. While the surface is tacky, dab gold micro glitter or gold gel dots with a dotting tool near the center. Cure and seal with a glossy top coat in two thin layers so the glitter smooths out. Clean the cuticle edges with a cotton swab soaked in remover.
Tap gold specks with the lightest touch — heavy dots look like glitter glue.
Don’t use chunky gold glitter — it lifts and catches on hair.
15. Gold Foil Swirl French on Short Almond Nails
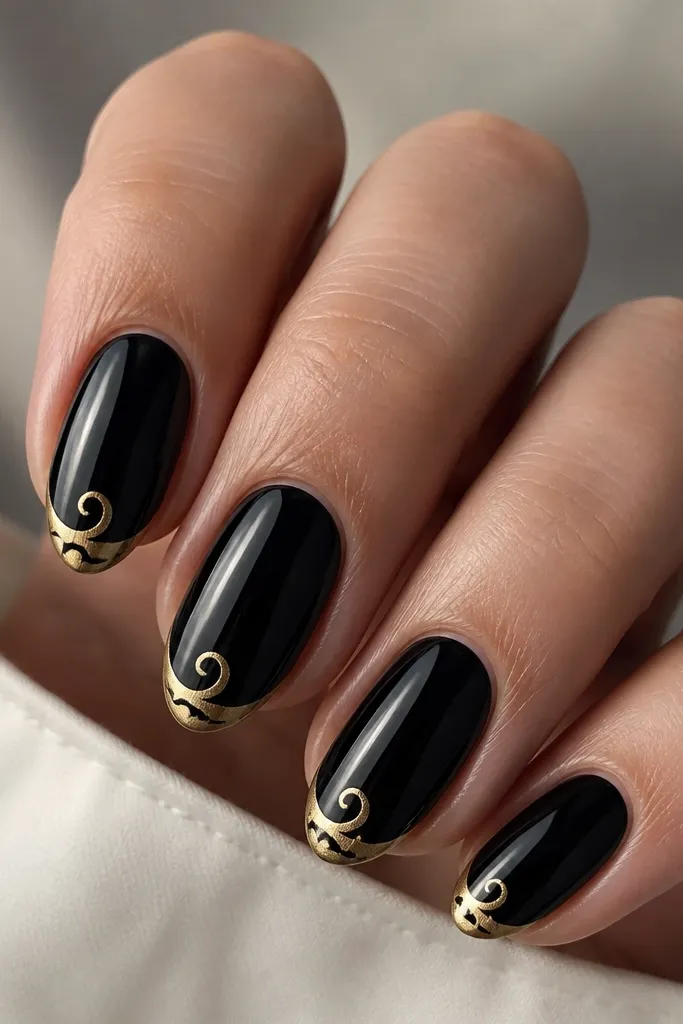
A swirl French keeps the manicure looking custom, not template-like. The foil at the tip makes your nails look sharp and the swirl adds one focal point that looks great in close-up photos. This works especially well on short almond nails because the tip shape visually stretches the nail. If you have a wider nail plate, keep the swirl centered so it doesn’t widen the sides.
Start with a glossy black base in two coats and cure. Paint a French guide with black slightly lighter or darker than the base so you can see the outline, then cover with black again for opacity. Press gold foil along the French line, then use a small piece of foil to create a centered swirl. Press gently so the swirl stays tight and doesn’t spread. Seal with top coat, and run the brush along the tip edge to lock the foil.
Editor's noteUse one foil scrap per nail for the swirl so it stays crisp instead of messy.
Watch outDon’t over-file the foil; filing too hard dulls the shine.
16. Black and Gold "Aura" Halo Over the Cuticle
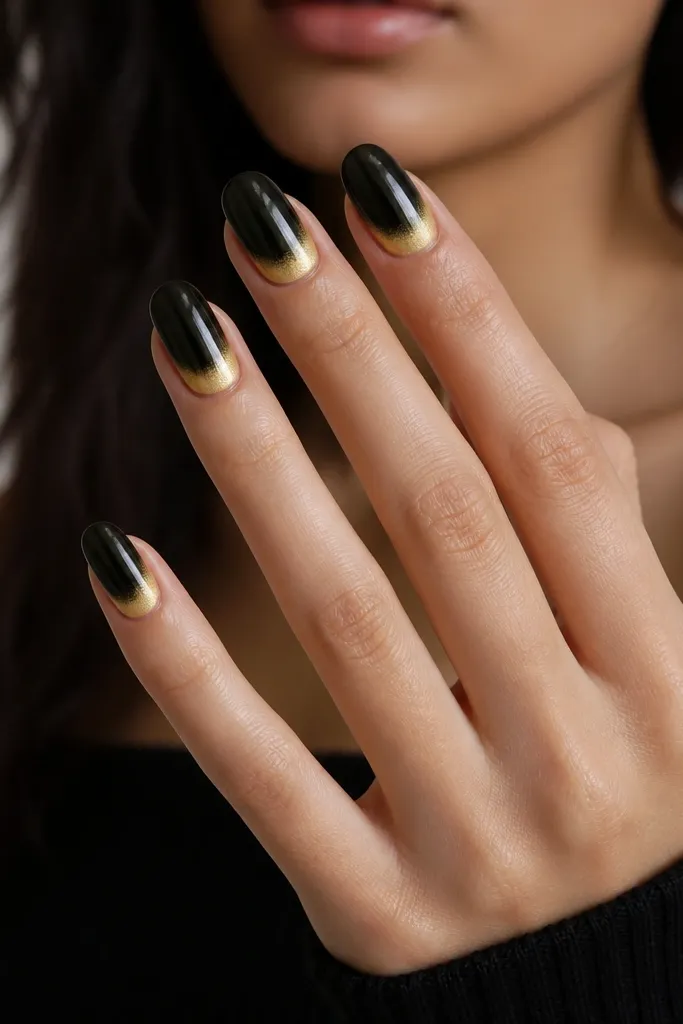
Aura designs look good because they frame your nail bed in a way that feels flattering and modern. The gold halo around the cuticle makes your nails look like they have a bright center, which is how you get that “glow” effect in photos. This is great for hands with shorter fingers because it draws the eye upward. For deeper skin tones, gold chrome looks extra bright against black.
Apply two coats of opaque black and cure. Add a small amount of clear gel right at the cuticle area, then rub gold chrome powder into a ring shape using a sponge or small applicator. Blow off excess and blend the ring slightly outward so it fades, not a hard circle. Cure, then seal with glossy top coat. Cap the free edge to keep the design from wearing off first at the tip.
Keep the halo ring about 1-2 mm wide at its thickest point.
Don’t make the halo too big; a wide ring turns into a blob fast.
17. Gold Foil Confetti with Black Glass Top Coat
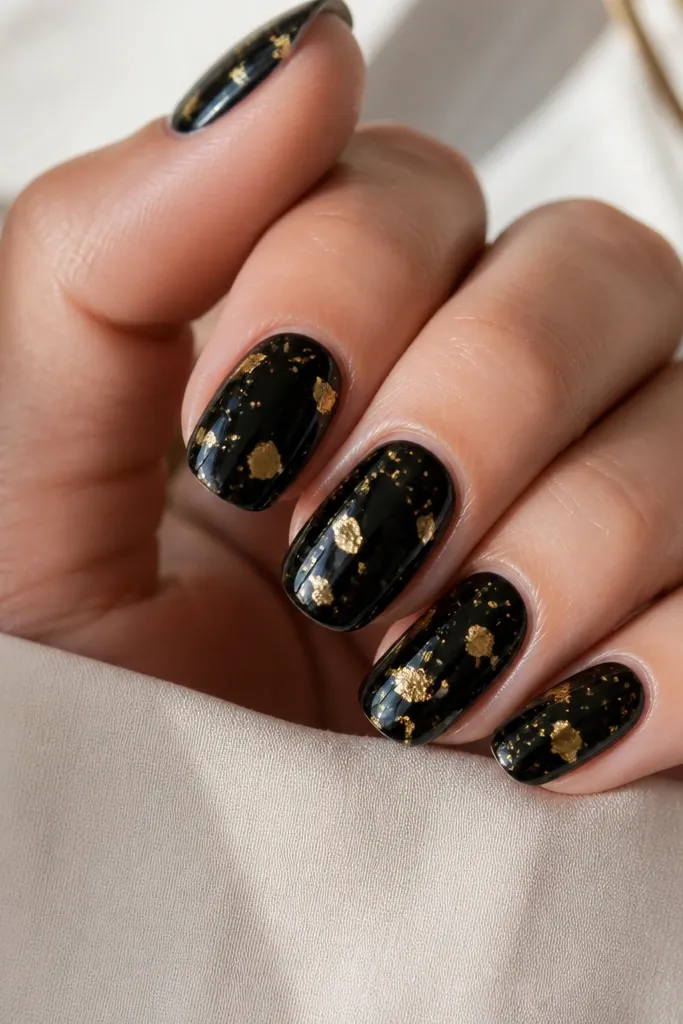
Confetti foil looks expensive because it has irregular texture, and the glassy top coat makes it feel smooth instead of rough. The black base keeps everything grounded so the gold doesn’t look like holiday glitter. This design flatters any nail length, especially short ones, because the foil pieces can be small and controlled. If you hate big art, this gives you sparkle without a single big focal shape.
Paint two thin coats of glossy black and cure. Apply small dots of clear gel where you want foil to land, spacing them so the gold isn’t clumped. Press tiny pieces of gold foil onto the dots and pat down gently. Cure and add a thick but smooth top coat, then cure again. If you see tiny edges, do a second thin top coat after the first fully cures.
Editor's noteUse smaller foil pieces than you think — they spread nicer and look more delicate.
Watch outDon’t put top coat too soon over foil before it grips; it can slide.
18. Black Checkerboard with Gold Border on Accent Nails
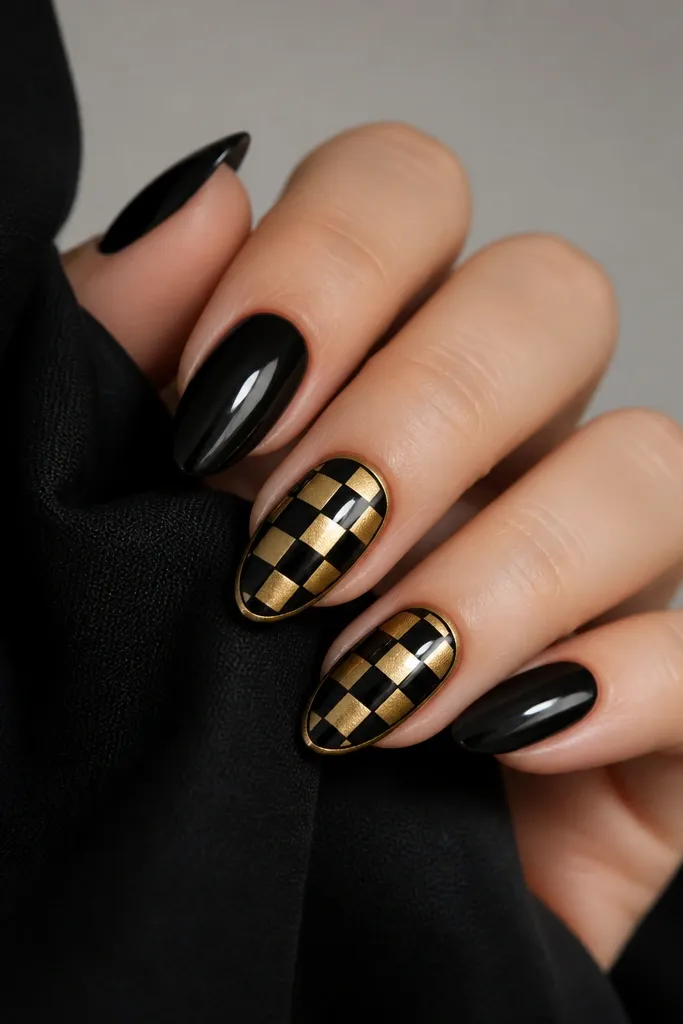
Checkerboard reads structured, which means it looks neat even when your nails are short. The gold border makes the accent nails look framed, like a design panel. This flatters hands that look better with crisp lines, and it draws attention to the center of the nail bed. If you’re wearing black outfits, this design makes your nails look like matching accessories rather than random color.
Base coat and paint all nails glossy black. On accent nails, place striping tape in a grid pattern first to guide square placement. Paint alternating squares with gold metallic polish or gold gel, curing each layer if needed for opacity. Remove tape slowly while the last layer is slightly tacky so edges stay sharp. Add a thin gold border line around the whole checker area, then seal with top coat.
Editor's noteIf your squares look uneven, measure by nail width — each square should be about equal to your brush tip width.
Watch outDon’t rush tape placement; crooked grids make the whole manicure look off.
19. Black and Gold Starburst Lines (Sunburst) on One Nail
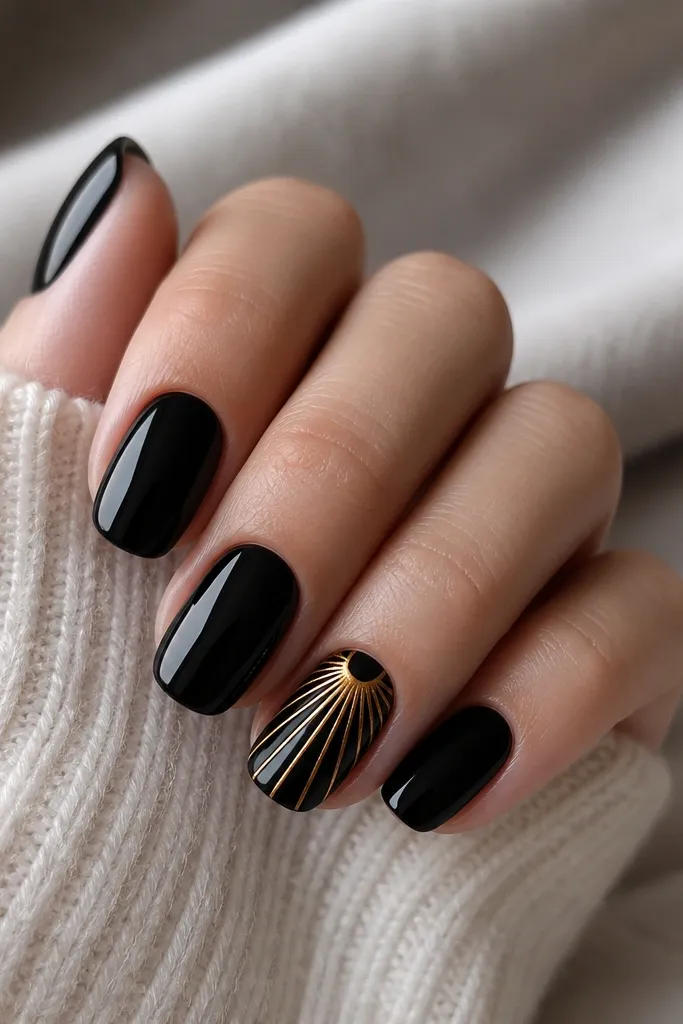
Sunburst patterns look glamorous because they create movement from a single point. Keeping it to one accent nail keeps the look from being too loud, and the black background makes the gold lines pop. This is flattering on both short and medium lengths because the rays can be tightly spaced. It also looks great for parties since the gold catches light from different angles.
Paint all nails glossy black and cure. On the accent nail, mark a tiny center dot near the cuticle area and use striping tape to create 6-8 ray guides. Paint or apply gold gel along each ray, then remove tape after curing or while tacky depending on your gel system. Add a thin layer of top coat over the rays, then do a second top coat to smooth the surface. Keep the rays narrow so they look like metallic light beams.
Use a center dot as your guide so every ray starts in the same spot.
Don’t make rays too wide; wide rays look like stripes, not a starburst.
20. Gold Frame Outline on Black with Thin Negative Center
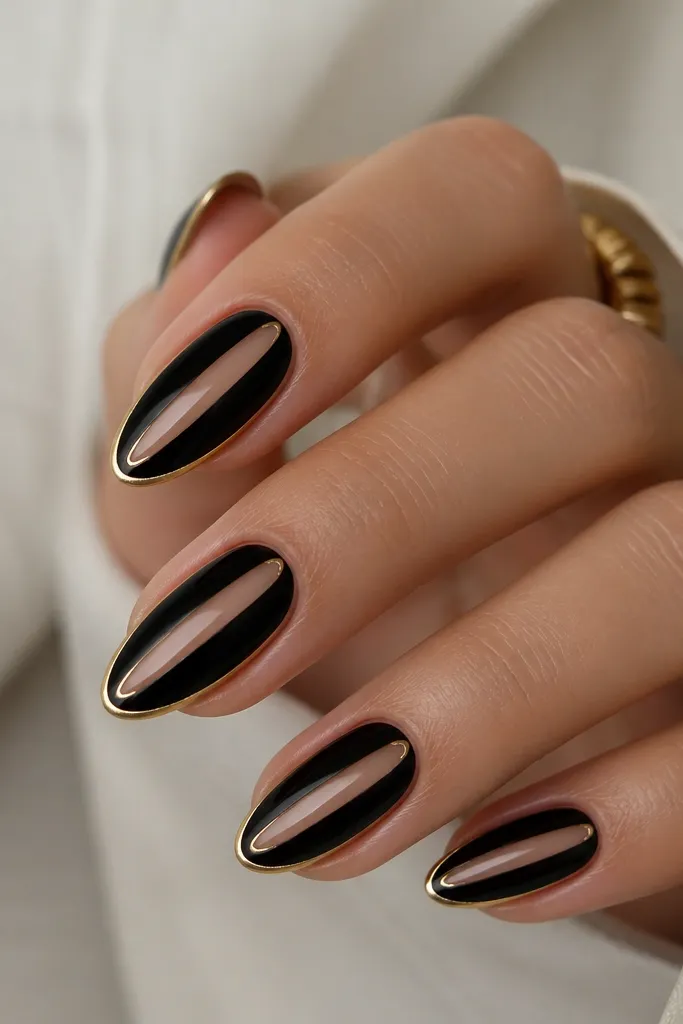
This design is clean and graphic because the gold outline defines the nail shape, and the negative strip adds breathing room. It’s the kind of black-and-gold that looks “put together” even if you wear simple outfits. It’s especially flattering if your nail beds are narrow — the nude strip gives a lengthening line. For deeper skin tones, the nude strip keeps the gold from looking too stark.
Paint a sheer nude base coat and cure, then apply black around the edges only, leaving a thin vertical nude strip in the center. If you want a crisp strip, use striping tape down the nail first, then paint black around it in two thin coats. Remove tape after curing so the nude strip stays clean. Add gold foil or gold striping tape as a border outline following the nail shape — about 0.5-1 mm thick. Finish with glossy top coat and cap the edges.
Editor's noteKeep the nude strip about the width of one striping tape line for a balanced look.
Watch outDon’t flood black over the nude strip; mistakes show fast on long lines.