
1. Sun-kissed coral square with milky nude base
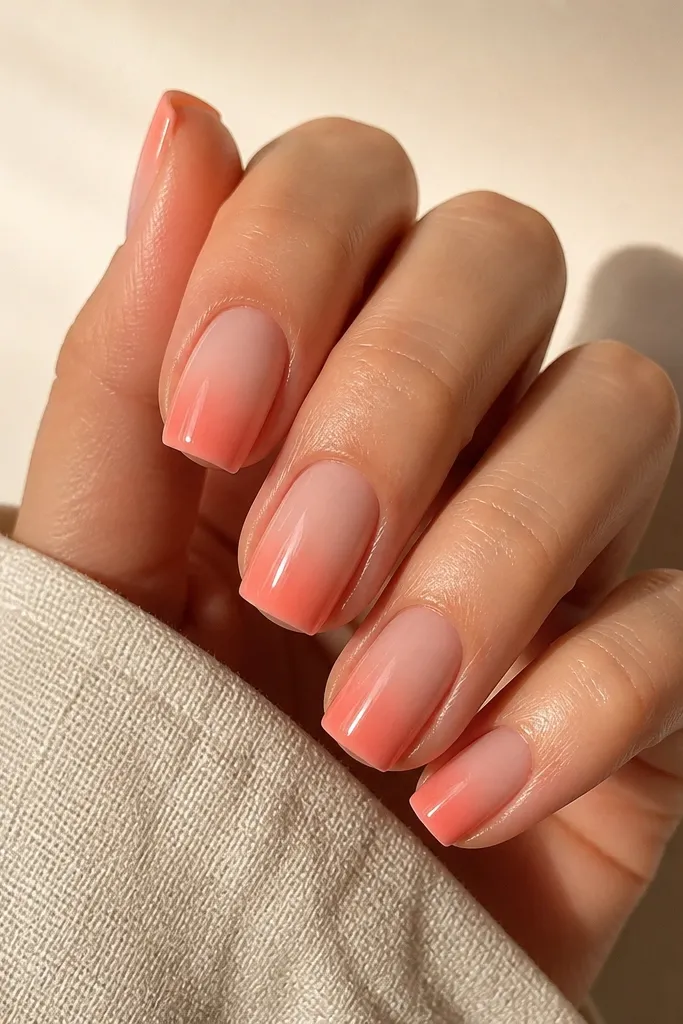
This one flatters warm and neutral skin tones because milky nude gives you that "healthy nail" look, and coral wakes it up without going orange-red. On square nails, the gradient stays readable because the tip is flat - you get a crisp color block that doesn't blur into the sides. I like it for summer brunch, pool days, and casual work because it looks polished even when your cuticles aren't perfect. The styling principle is simple: keep the base sheer and let coral do the heavy lifting at the tip.
Start by prepping your nails and pushing cuticles back, then apply a milky nude gel or polish in two thin coats. Cure each coat under your lamp (if gel) or let it dry fully (if regular polish). Next, paint a coral shade only on the top third of the nail and soften the edge slightly with a sponge or a gradient brush. Finally, add a glossy top coat and, if you want it extra clean, draw one thin coral line right at the square tip before the final top coat.
Editor's noteIf your coral looks streaky, mix in a drop of white polish and apply two thinner layers instead of one thick one.
Watch outSkip a thick first coat - it creeps into the corners on square shapes and makes the edge look messy.
2. Tangerine french tips on sheer pink
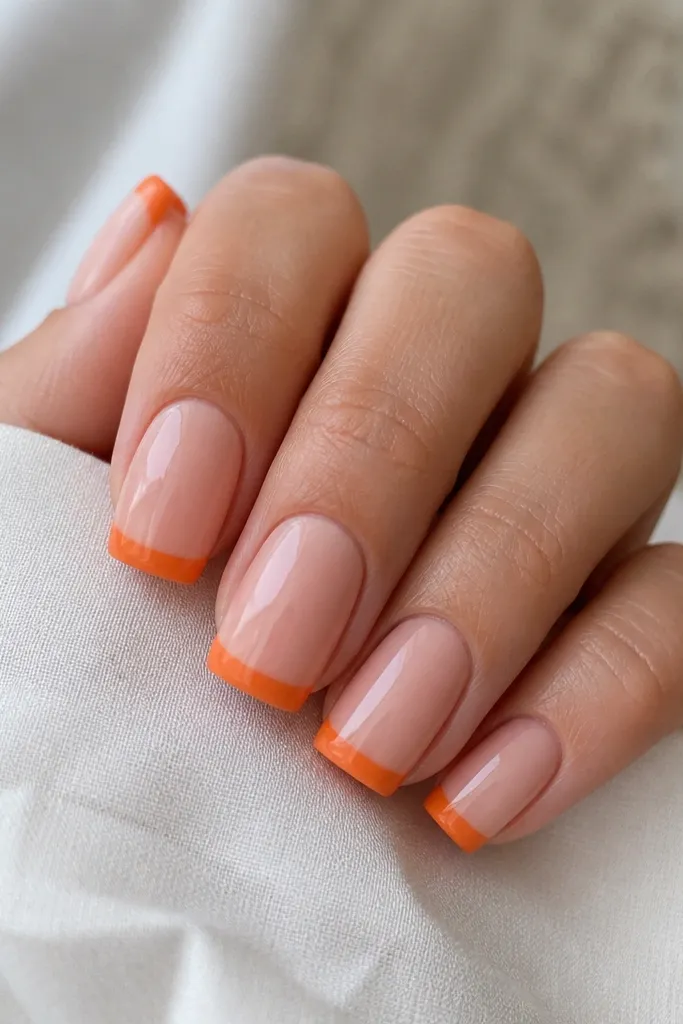
Tangerine French tips look bright without feeling loud, which is why I keep coming back to them for summer festivals. They flatter fair to medium skin because the sheer pink base blends with your nail bed and makes the tangerine look crisp. Square tips make the French line look modern since it's a straight border, not a curved smile line. The key idea is boundary control: paint the tip line first, then fill the rest of the tip evenly.
Apply a sheer pink base (two coats) and let it dry to a glassy finish. Place a thin strip of tape or a French guide along the tip edge at a 90-degree angle for a true square line. Paint tangerine over the guided area, then remove the guide while the polish is still slightly tacky so edges stay sharp. Clean up the sides with a flat brush dipped in acetone, then seal with a glossy top coat.
Editor's noteUse a small angled brush and wipe one side of the brush on a paper towel so you don't flood the cuticle line.
Watch outDon't freehand a thick tip on the first try - uneven width is what makes cheap French look.
3. Lime chrome half-moon with nude base
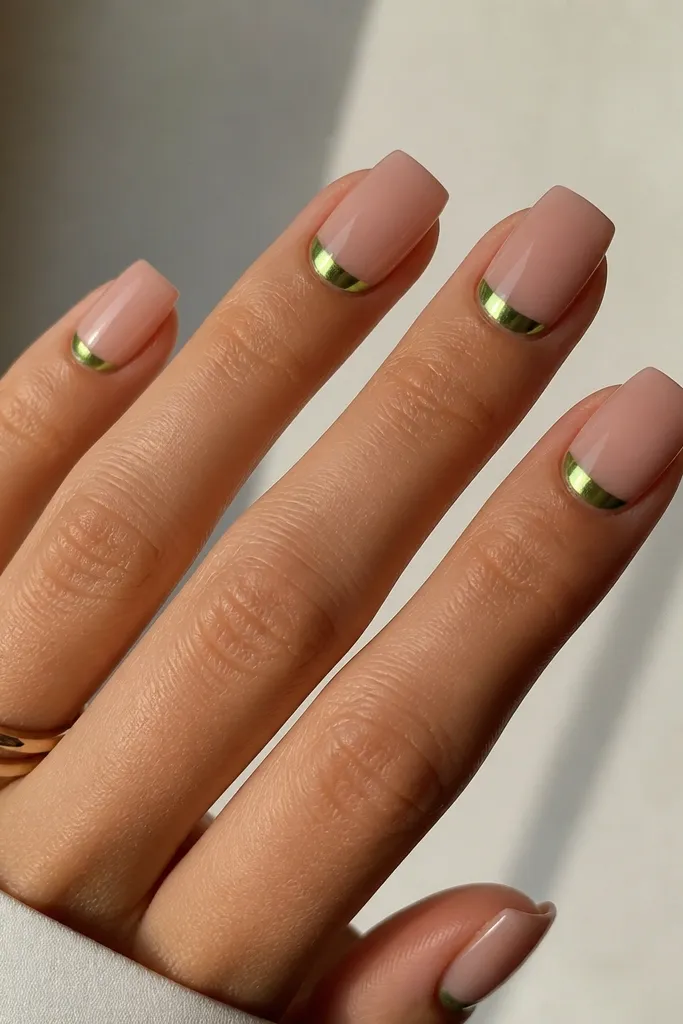
This half-moon chrome is the fastest way to make affordable Summer Nails 2026 Square look "salon" because chrome catches light even when your art is minimal. It flatters olive and light skin tones especially well, since lime-green pops against warm undertones. The square shape gives the half-moon a clean frame, and the nude base keeps it wearable for everyday. The technique is contrast at the cuticle: bright chrome in a small area reads luxe, not busy.
Start with a nude base gel or polish, then cure fully. Tape a tiny curved guide at the cuticle edge - or use a half-moon stencil - so you get a crisp crescent. Apply a lime-green chrome powder over tacky gel (or a sticky base layer), then wipe off excess with a soft brush. Seal with a thin glossy top coat that won't dull the chrome too much.
Editor's notePress the chrome powder gently with your applicator, then clean the edges with a cotton swab dipped in remover for a sharper crescent.
Watch outDon't overcoat immediately with a thick top coat - it can mute the shine and make the half-moon look dull.
4. Watermelon slice squares with glossy seeds
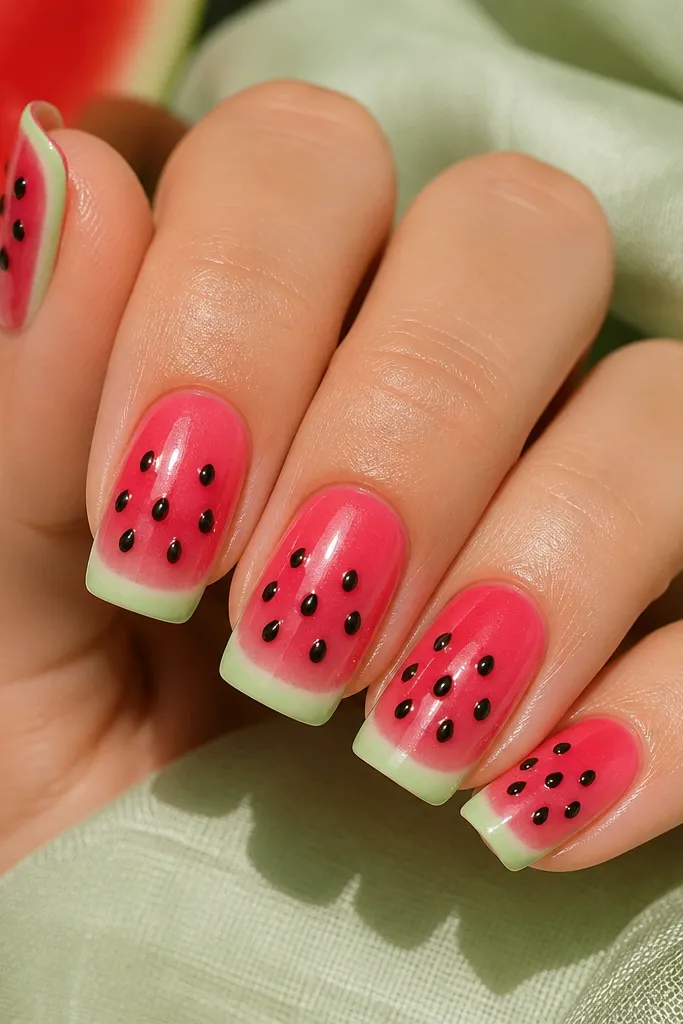
Watermelon nails are playful but still flattering because the colors are separated into clear sections. On square nails, the rind lines look straight and graphic, which makes it feel modern instead of cartoon. This one looks great on medium and deep skin tones because the pink-red pops, and it also works on fair skin if you keep the rind pale green rather than neon. The principle is simple: block the colors first, then add tiny seeds last for a realistic slice effect.
Paint a pale green base on the lower half of each nail, then cure and clean up edges. Next, paint a pink/red layer on the upper half, leaving a narrow green stripe visible like the rind. Use a fine liner brush to place 8-12 tiny black seed dots and short curved lines in the center, then add a small gloss drop over each seed so they look dimensional. Seal with a glossy top coat across the whole nail.
Editor's noteIf you're using regular polish, let the red layer dry completely before you add seeds or they'll bleed.
Watch outSkip the messy seed blobs - chunky dots look like smudges instead of seeds.
5. Cornflower blue with white cloud swirls
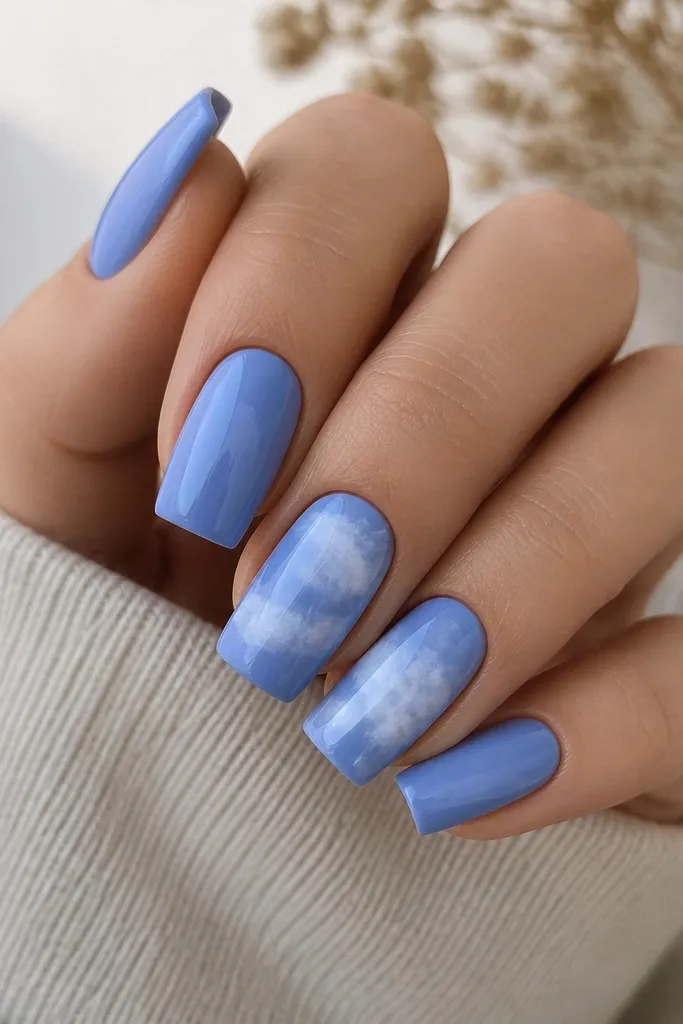
Cornflower blue feels crisp and clean in summer, and the white cloud swirls make it look airy instead of heavy. It flatters cool undertones and also looks good on neutral skin because blue gives you that "fresh" contrast. Square nails help the swirl pattern look intentional because the nail provides a flat canvas for the lines. The styling principle: keep the design mostly solid and add art only on one or two nails so your mani stays affordable and neat.
Apply cornflower blue in two thin coats to all nails and cure/dry fully. On the accent nails, use a thin brush to draw small white curved lines starting near the center and moving toward the sides. Add a second layer of white to thicken the cloud edges, then blend the inner lines lightly with a dry brush tip. Finish with glossy top coat on everything so the clouds sit on top of the blue.
Editor's noteUse white gel with a slightly thicker consistency for clouds so the lines hold their shape.
Watch outDon't cover the whole nail with clouds - it turns into a blurry pattern fast.
6. Tropical palm leaf on milky nude
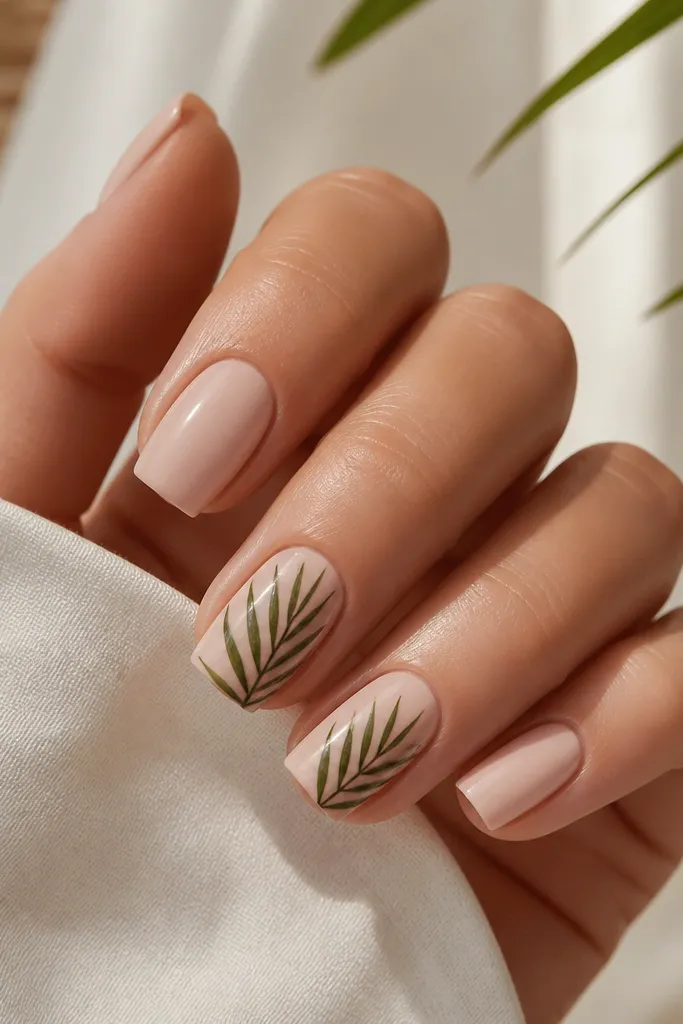
Palm leaf art looks expensive because it's all linework, and linework is forgiving if you keep it spaced. Milky nude makes the greens look fresh instead of murky, and it flatters nearly every skin tone because it matches your natural nail color. Square tips make the leaf look like it's printed on a card, which is exactly what you want for a crisp summer look. The principle is negative space: let the nude show through so the leaf stays airy.
Paint milky nude on all nails in two coats and cure/dry. Pick two accent nails and use a fine liner brush to draw one long palm frond from the center down, then add short angled leaf lines on both sides. Add small gaps between fronds so it doesn't look like a solid blob. Touch up any uneven lines with a second pass, then top coat glossy for a smooth finish.
Editor's noteIf your green looks too bright, mix a drop of forest green with a tiny bit of brown polish to get that "leaf" tone.
Watch outSkip thick leaf strokes - they look clunky on square nails.
7. Hot pink shimmer with micro-sparkle fade
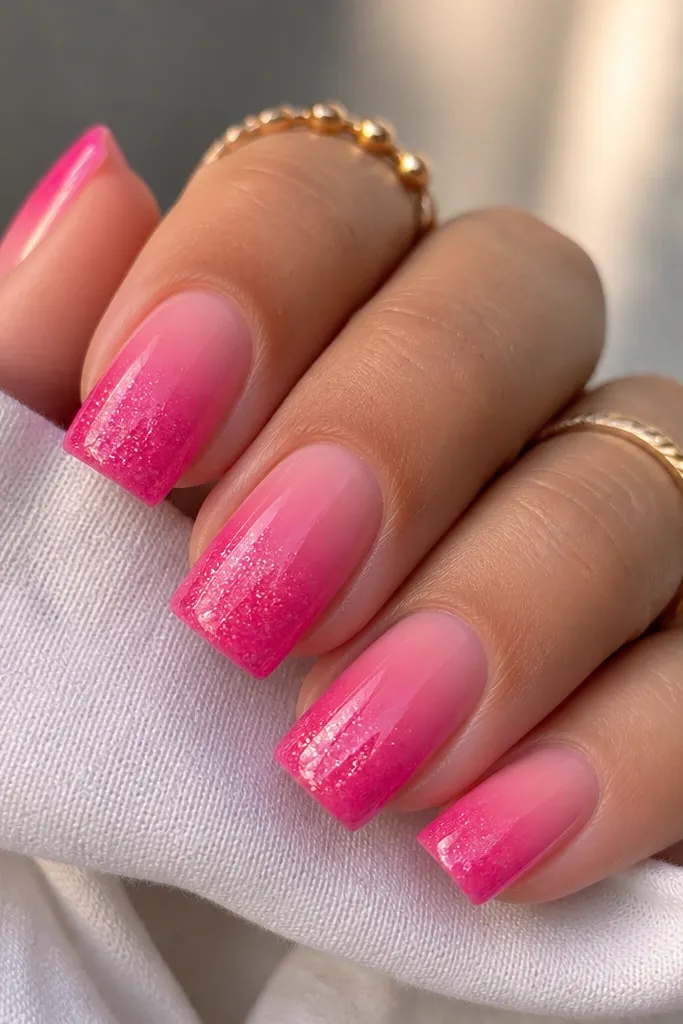
Hot pink shimmer reads fun and confident, and the fade keeps it from feeling too heavy. This flatters fair and medium skin by lighting up the nail bed, and it also looks great on deeper skin because the shimmer catches light in a tight pattern. Square nails make the shimmer fade look like a deliberate ombre block because the tip is straight. The principle is controlled sparkle density: concentrate the glitter where your nail already has the most visual weight.
Start with a sheer pink base (one coat), then sponge a hot pink shimmer over the top half only. Use a makeup sponge for a soft fade, pressing lightly so it doesn't look patchy. Add a second hot pink shimmer layer just on the tips to deepen the color, then cure/dry. Seal with two layers of glossy top coat so the shimmer feels smooth, not gritty.
Editor's noteTo avoid gritty texture, cure longer than you think and use a thicker top coat on the tips.
Watch outDon't skip the second top coat - gritty sparkle is the fastest way to make it look cheap.
8. Sky blue + white diagonal checker accent
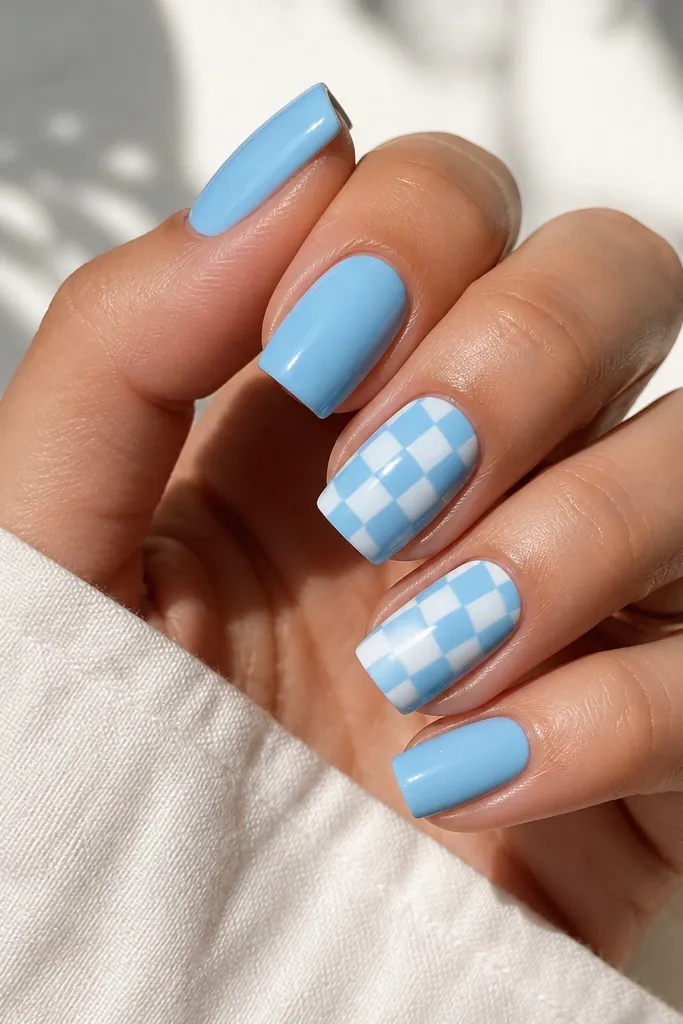
Diagonal checkers look graphic and clean, which means they don't clash with summer outfits even when you wear bright colors. Sky blue flatters cool undertones and also makes tan skin look extra warm by contrast. Square nails help the checker pattern stay crisp because the edges are straight, so your grid reads clearly. The styling principle is one strong base color and one geometric accent, not a full set of patterns.
Paint all nails sky blue in two coats. On two accent nails, place tape strips diagonally to create a grid, then paint white into the taped sections. Remove tape while the polish is slightly tacky for sharp lines. If you're using gel, cure between steps and do a second white pass only where the grid looks thin. Finish with glossy top coat on every nail.
Editor's noteUse thin nail tape instead of wide tape so your checker squares stay small and tidy.
Watch outDon't make the checker squares too big - they start looking like a sticker rather than nail art.
9. Lavender milk nails with glossy top only
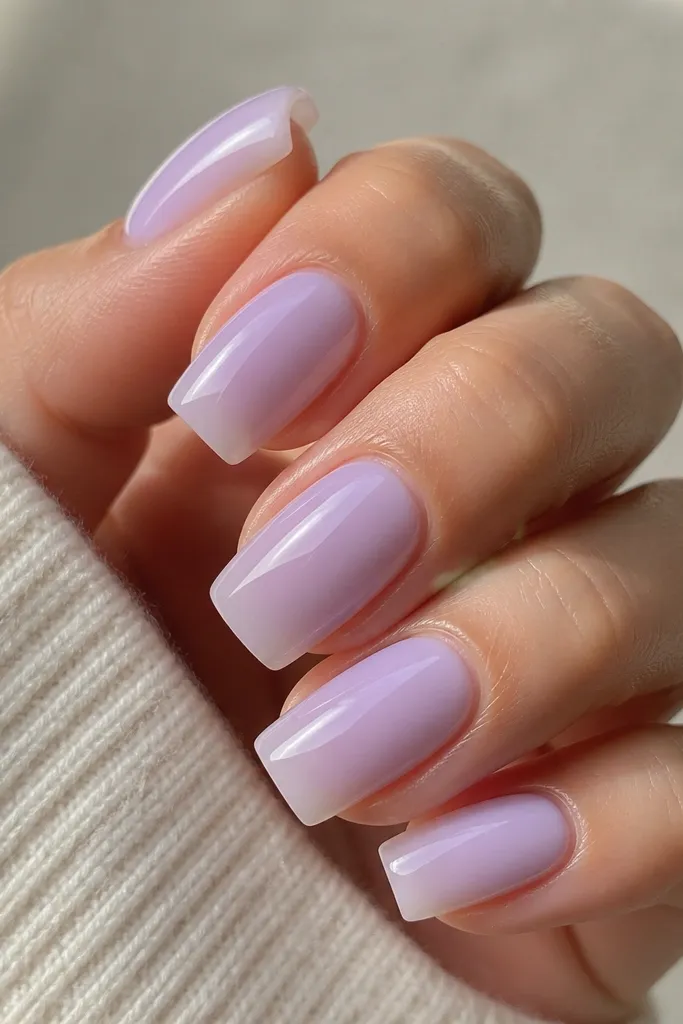
Milk nails are the easiest way to look "done" without spending time on details, and lavender adds a summer twist. It flatters fair to medium skin because it blends like a tint over your nail bed, and it looks especially good when your hands are tan. Square nails make milk polish look modern because the flat tip catches light evenly. The principle here is finish: glossy top coat makes milky shades look expensive and smooth.
Buff the surface lightly so the milky polish grips, then apply a milky lavender in two thin coats. Keep the first coat sheer and the second coat slightly more opaque, focusing on even coverage at the tip. Avoid dragging the brush too hard - milky shades show streaks when you overwork them. Finish with one thick glossy top coat layer, then cap the tip by brushing polish across the very edge.
Editor's noteIf your milky lavender looks chalky, add a drop of clear gel into the bottle and mix before applying.
Watch outSkip matte top coat on milk nails - it makes lavender look dusty in daylight.
10. Mint green soda bubbles with tiny dots
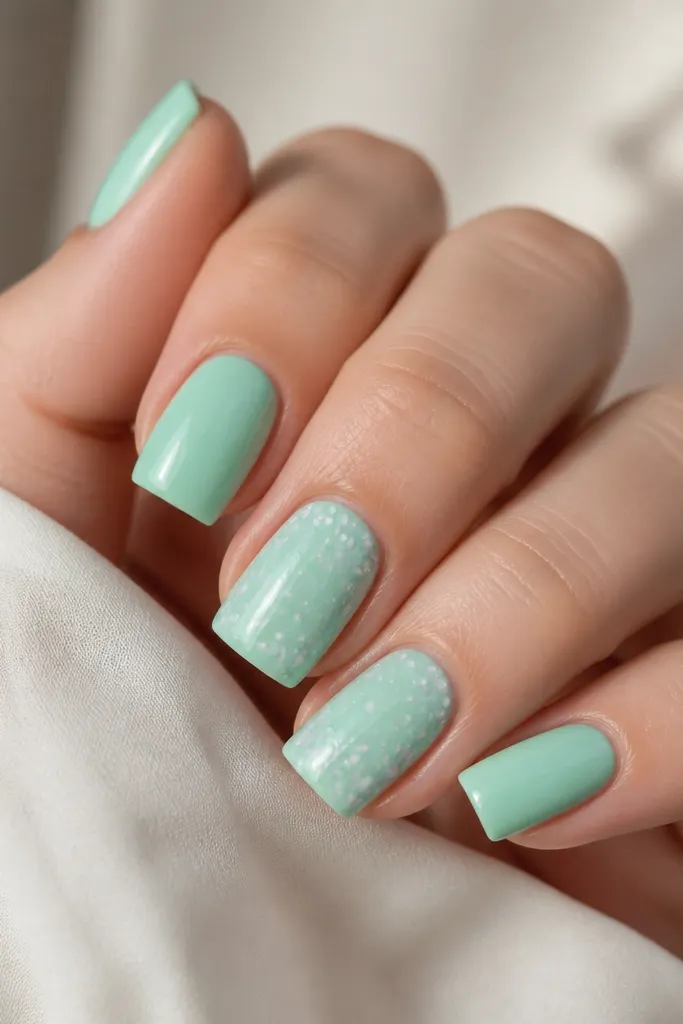
Mint green is one of those summer shades that makes your hands look clean fast, and the bubble dots add a cute detail without needing fancy painting. This flatters many skin tones because mint sits between green and blue and doesn't overpower. Square nails give the bubbles a clear layout, especially when you keep them in a vertical cluster. The principle is micro-art: small dots look better than large circles on square tips.
Paint mint green on all nails, two coats for an even opaque look. Pick one or two accent nails and add a vertical line of bubble dots using a dotting tool: start with pale blue dots, then add smaller white dots on top. Leave small gaps between clusters so it looks like real bubbles. Cure/dry fully, then add a glossy top coat that covers the dots without smearing them.
Editor's noteUse a white gel with good opacity for the smallest dots so they don't look gray.
Watch outDon't drag the dotting tool - it turns circles into ovals and ruins the bubble look.
11. Peachy nude with gold foil edge line
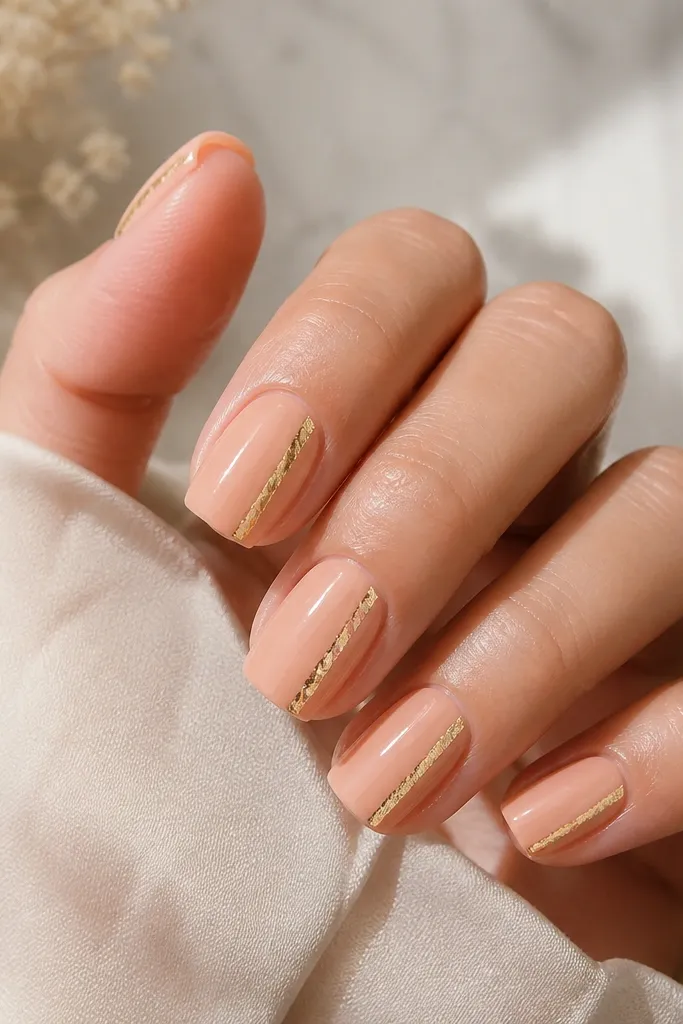
Peachy nude looks flattering on almost everyone because it sits close to your natural nail color, but the gold foil edge instantly makes it feel like jewelry. It's a great option for weddings, dinners, and summer events where you want something that still grows out nicely. Square nails make the foil line look intentional since it follows the flat tip. The principle is one metallic detail, placed where light hits - near the edge.
Apply peachy nude gel or polish in two coats and cure/dry. Place a small strip of gold foil glue (or tacky gel) along the outer edge of the tip, staying about 1-2 mm away from the sidewall. Press gold foil onto the glued area, then tap off extra foil so it doesn't cover the whole nail. Seal with glossy top coat, using a thicker coat over the foil so it doesn't catch on fabric.
Editor's noteTrim foil with nail scissors before you place it so you don't get chunky bits.
Watch outSkip foiling the entire nail - it turns into a heavy, cheap-looking layer.
12. Red cherry tips with negative space base
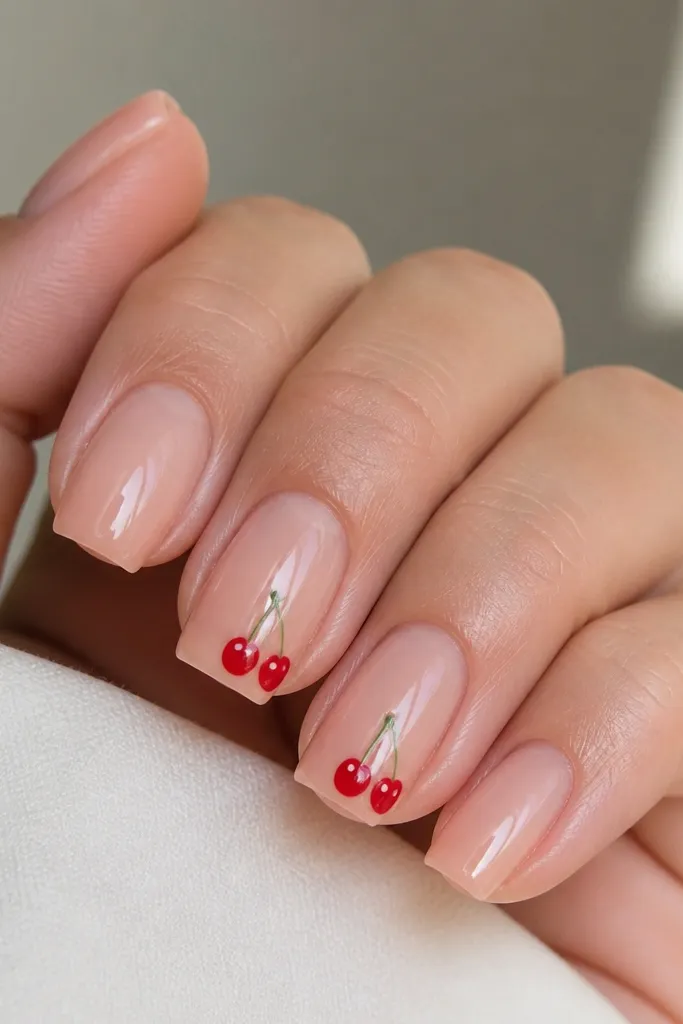
Red cherry tips look playful but still clean because the base is sheer and the cherries sit only at the edge. This flatters short and medium nail lengths because the negative space makes nails look longer. Square nails help the cherry placement stay balanced since the tip is a straight line. The principle is placement: keep the art in one zone so it grows out without looking chaotic.
Start with a sheer nude or clear base in two thin coats. On each nail, paint a red rounded tip shape that touches the square edge but leaves a small gap at the corners so it looks like a cherry. Add a tiny white highlight dot in each red shape, then on one or two nails add a thin stem line with a brown or dark red liner. Finish with glossy top coat and cap the tip to protect the edges.
Editor's noteIf you struggle with stems, use a thin strip of striping tape for the first line, then paint over it and remove carefully.
Watch outDon't fill the negative space with red - it removes the length effect and makes it look bulky.
13. Navy night sky with tiny star dots
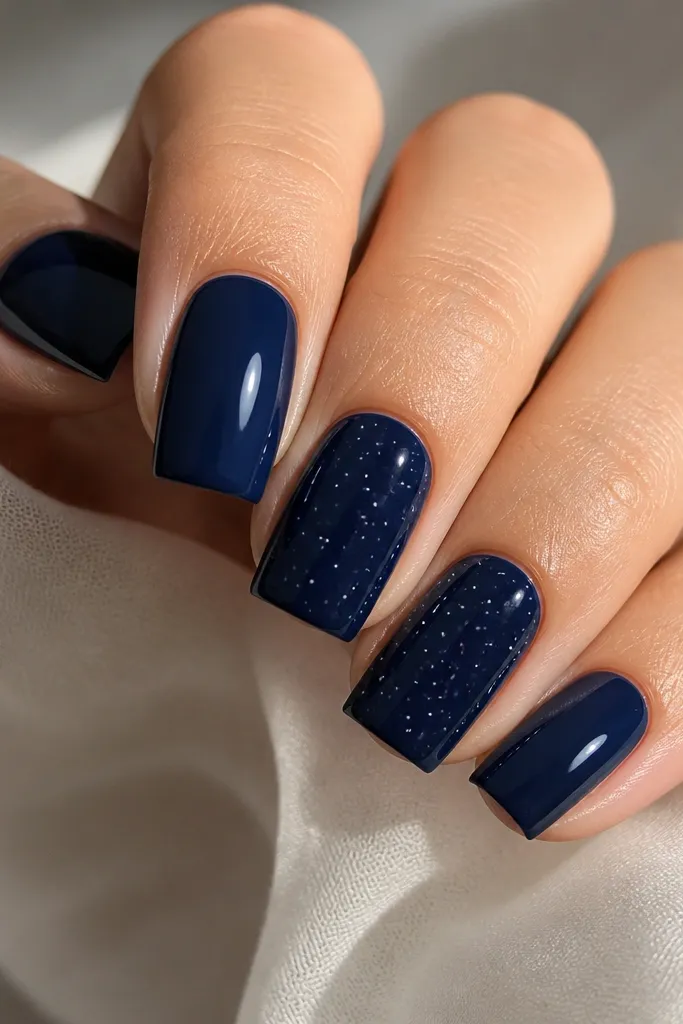
Deep navy is summer-night energy and looks amazing with gold jewelry, denim, and white sneakers. It flatters cool undertones and also makes warm skin look more defined because navy creates a sharp contrast. Square nails make the star placement look crisp since the nail surface is flat. The principle is restraint: a few stars look intentional, while covering the whole nail looks messy and cheap.
Apply navy in two coats, then cure/dry fully. On two accent nails, use a dotting tool to place 6-10 tiny white dots of different sizes. Add one or two slightly larger dots and a couple of short star lines by dragging a needle-like tool through the wet paint very lightly. Seal with a glossy top coat so the stars look embedded, not sitting on top.
Editor's noteUse a toothpick for the smallest star lines; it gives you thinner strokes than a big liner brush.
Watch outSkip big chunky stars - they look like confetti instead of tiny points.
14. White squiggle lines on coral pink
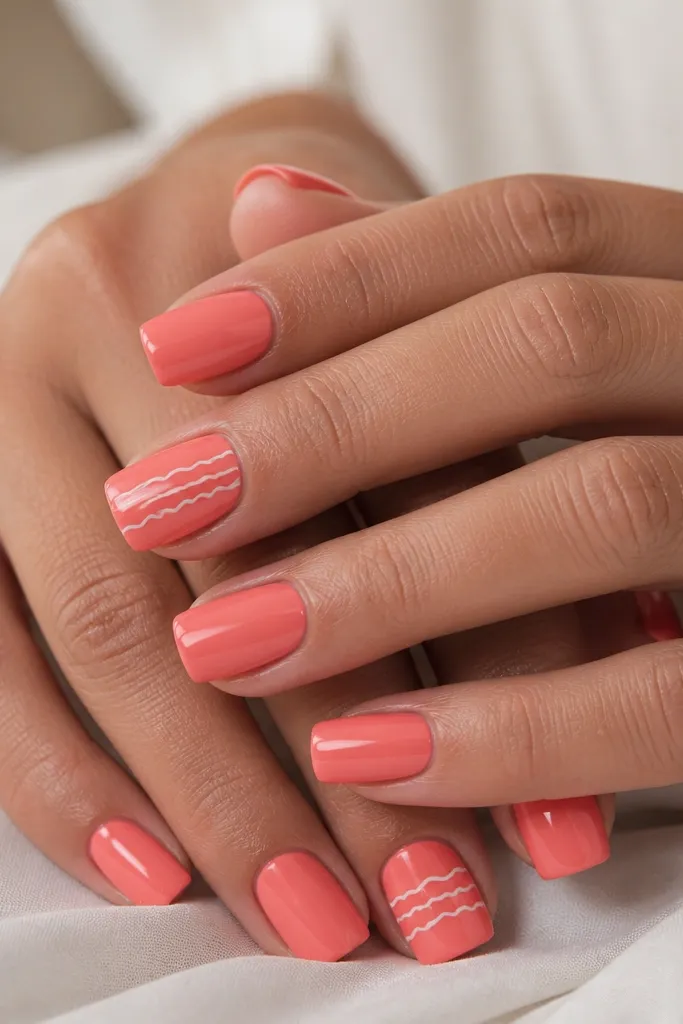
Squiggle line art feels fun and modern, and it works great when you don't want tiny painting. Coral pink flatters warm and neutral skin tones by adding a healthy flush. Square nails keep the squiggles graphic because they sit on a flat canvas; you get that "sticker" look without actually using stickers. The principle is line rhythm: vary thickness and spacing so it looks hand-drawn rather than stamped.
Paint coral pink on all nails in two coats. Choose two accent nails and draw three to five white squiggle lines across the middle, spacing them evenly. For thickness variation, press the brush a little harder for one line and lighter for the next. Add a second thin white pass only where a line is too faint, then top coat glossy. Keep the design off the cuticle area so it looks clean as you grow out.
Editor's noteIf your white looks streaky, do one thin line layer, cure/dry, then reinforce with a second pass.
Watch outDon't overcrowd the squiggles - too many lines make it look like a scribble.
15. Seafoam ombre with sheer top gradient
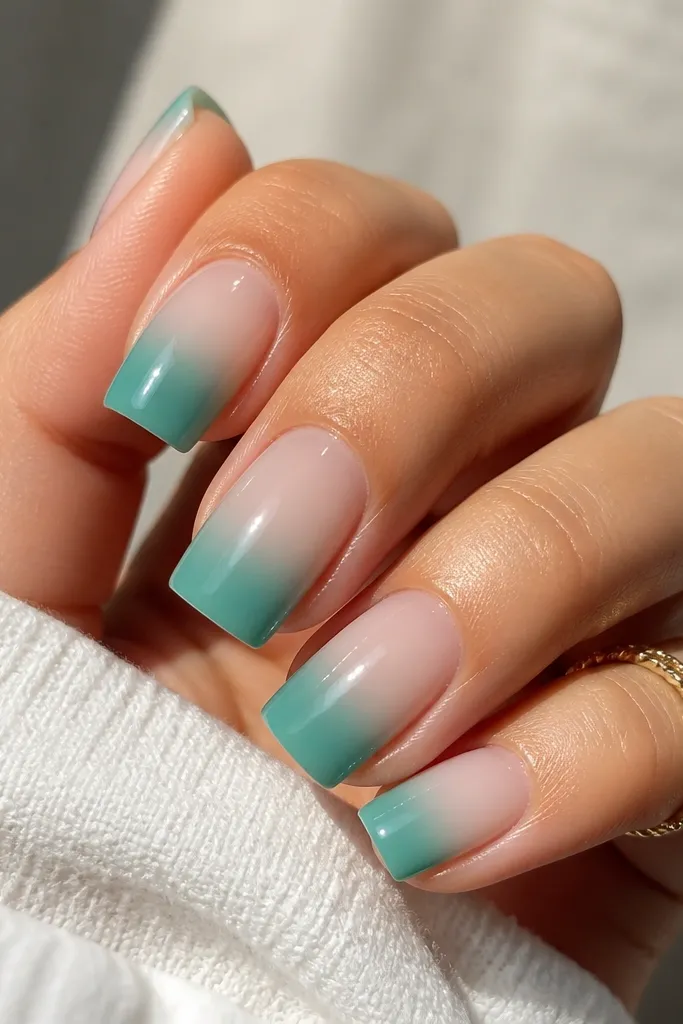
Seafoam ombre is the kind of summer manicure that looks expensive because the color shift looks smooth, not painted. It flatters light and medium skin tones by staying soft near the cuticle while still giving you a pop at the tip. Square nails help the ombre look intentional since the tip is flat and the fade reads as a clean block. The principle is a sheer-to-color gradient: keep the base translucent so the nails look airy.
Apply a sheer base (milky nude or clear) and cure/dry. Sponge seafoam green starting at the free edge and blending upward about halfway, then clean the side edges with a small brush. Add a second sponge layer only on the tip to deepen the color and sharpen the gradient. Finish with glossy top coat; if you want extra smoothness, add one layer of builder gel or a thicker top coat just over the ombre area.
Editor's noteUse a small piece of makeup sponge and press once per nail - multiple presses create texture.
Watch outSkip a fully opaque base under ombre - it blocks the "airy" look and makes it look flat.
16. Yellow butter chrome with nude center stripe
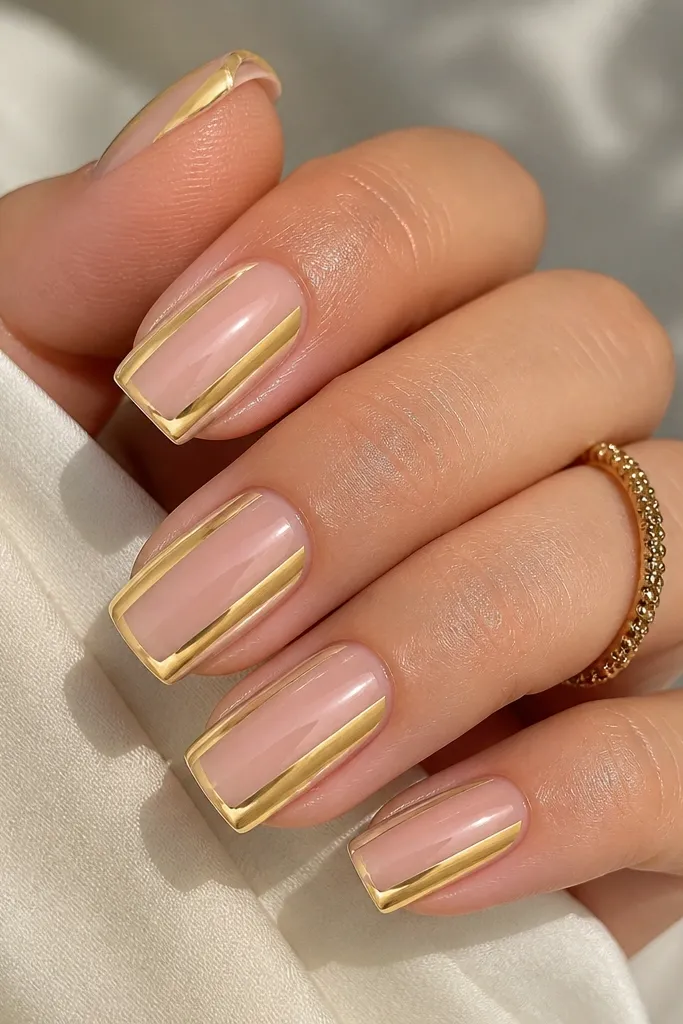
This design looks like summer butter melting on toast, and it works because the nude center stripe breaks up the bright chrome. It flatters all skin tones, but especially looks good on medium to deep skin where chrome reflects light in a strong, clean way. Square nails make the stripe look crisp because the nail surface is flat and wide. The principle is negative space framing: bright chrome on the edges plus a calm nude stripe keeps it from being overwhelming.
Apply a nude base and cure/dry. Tape a thin vertical strip down the center of each nail, then apply yellow chrome powder over tacky gel on the remaining sides and tip. Remove the tape carefully so you get a sharp nude stripe. Seal with a glossy top coat, but keep it thin so the chrome stays reflective. If you're using regular polish, use chrome powder on top of sticky gel, not on a wet liquid polish.
Editor's notePress foil/chrome gently and wipe off excess with a soft brush so it doesn't creep onto the nude stripe.
Watch outDon't use a wide tape strip - a thick stripe makes the mani look off-balance on square nails.
17. Pastel rainbow micro-lines on clear base
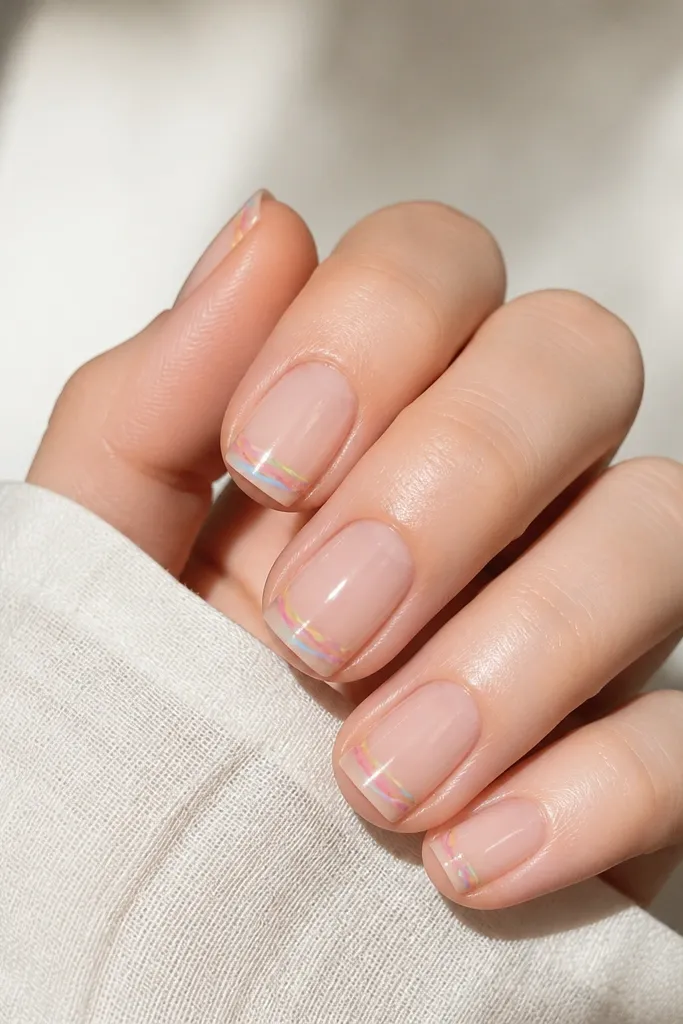
Micro-line rainbows look airy and expensive because they're tiny and precise, not painted in chunky blocks. Clear or glassy nude base makes the pastels feel light, and it flatters short square nails by keeping everything from looking heavy. On square tips, the micro-lines align nicely with the flat edge so the design stays crisp. The principle is scale: small art reads more delicate, and it grows out without looking messy.
Apply a clear or glassy nude base in two coats and cure/dry fully. At the free edge zone, draw 3-6 thin micro-lines using a fine liner brush - keep them roughly parallel and angled slightly. Use one color per line (pink, yellow, mint, light blue) and leave gaps so the nail surface still shows through. Seal with glossy top coat and cap the tips carefully so the micro-lines don't lift.
Editor's noteIf lines keep dragging, clean your brush with acetone and dry it on a lint-free wipe before you touch the nail again.
Watch outSkip thick lines - they cover the nail and make the rainbow look cartoonish.
18. Neon coral outline on milky nude
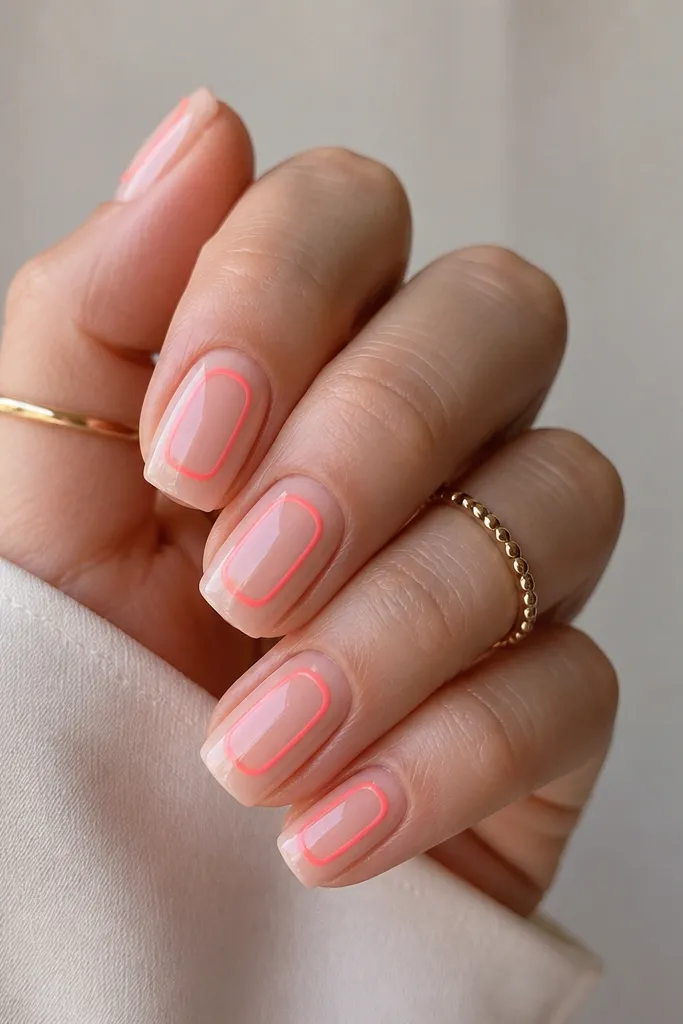
Neon coral outlines give you the summer pop without filling the whole nail with neon pigment. Milky nude makes the neon look clean, not harsh, and it flatters every skin tone because the base stays soft. Square nails make the border shape look crisp and graphic since the edges are straight. The principle is line-only art: outlines read sleek and stay wearable as your nails grow.
Start with milky nude in two coats. Choose one simple shape per nail, like a rounded rectangle, and use neon coral to draw the outline in one continuous loop. If you want a cleaner look, do a first thin pass, cure/dry, then reinforce the outline. Leave the center area bare so it stays airy. Finish with glossy top coat and cap the tip lightly so the border doesn't snag.
Editor's noteOutline art looks best when the line thickness is consistent - reload your brush the same way each nail.
Watch outDon't fill the inside with neon - it turns into a blocky look that chips fast at the edges.
19. Classic butter yellow with white dot cluster
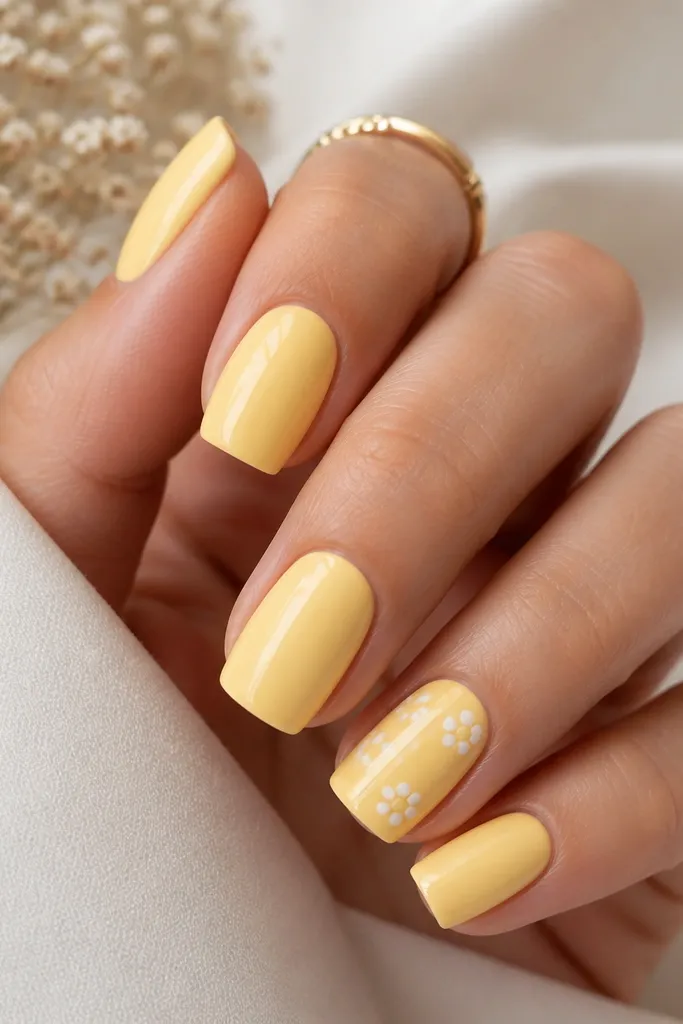
Butter yellow makes hands look sunlit, and it's one of the most flattering summer colors for fair skin because it doesn't wash you out like very pale pastels. For medium to deep skin, it still works - it just needs good opacity so it looks smooth, not patchy. Square nails make dot clusters look neat because the flat tip gives you space to place dots evenly. The principle is a focused accent: one cluster per accent nail instead of scattered dots everywhere.
Apply butter yellow in two solid coats, curing/drying fully. On two accent nails, place a small dot cluster near the center of the nail: start with one larger white dot, then add 5-8 smaller dots around it. Use a dotting tool to keep sizes consistent, and add one tiny dot at the top for balance. Seal with glossy top coat, then check the edges for any raised spots and smooth with an extra thin top coat layer.
Editor's noteIf your butter yellow is sheer, build opacity with a thin second coat before you add dots.
Watch outSkip watery yellow - it drags and leaves streaks that make dots look off.
20. Olive green with tiny white flower petals
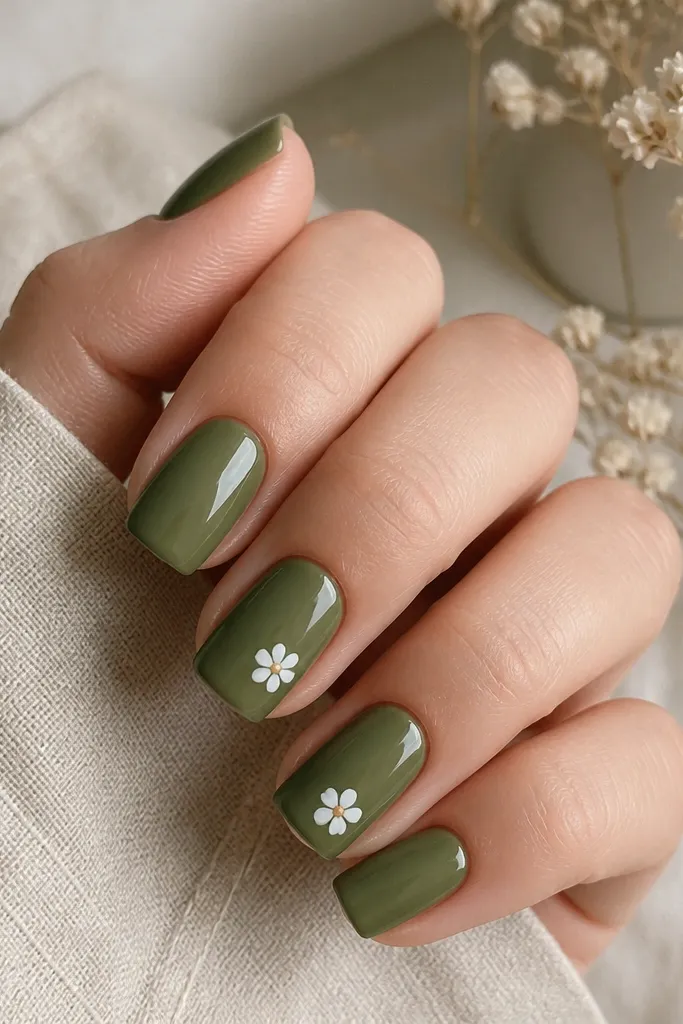
Olive green feels grown-up and summer-casual at the same time, and it looks incredible with gold rings. It flatters warm undertones and also looks striking on cool skin because olive adds depth instead of brightness. Square nails make the flowers look clean when you keep them small and centered. The principle is micro-florals: small petals and one dot center keep it from looking busy.
Paint olive green on all nails in two coats. On accent nails, draw one tiny flower near the center: place a small yellow dot for the center, then add five white petals around it using a dotting tool or a toothpick. Keep petals evenly spaced so the flower reads as a flower, not random dots. Add a second micro layer of white only if a petal looks thin, then top coat glossy for a smooth finish.
Editor's noteUse a yellow that's slightly muted (marigold tone) so the center doesn't look neon.
Watch outDon't make the petals bigger than your center dot - that's where small flowers start looking like blobs.