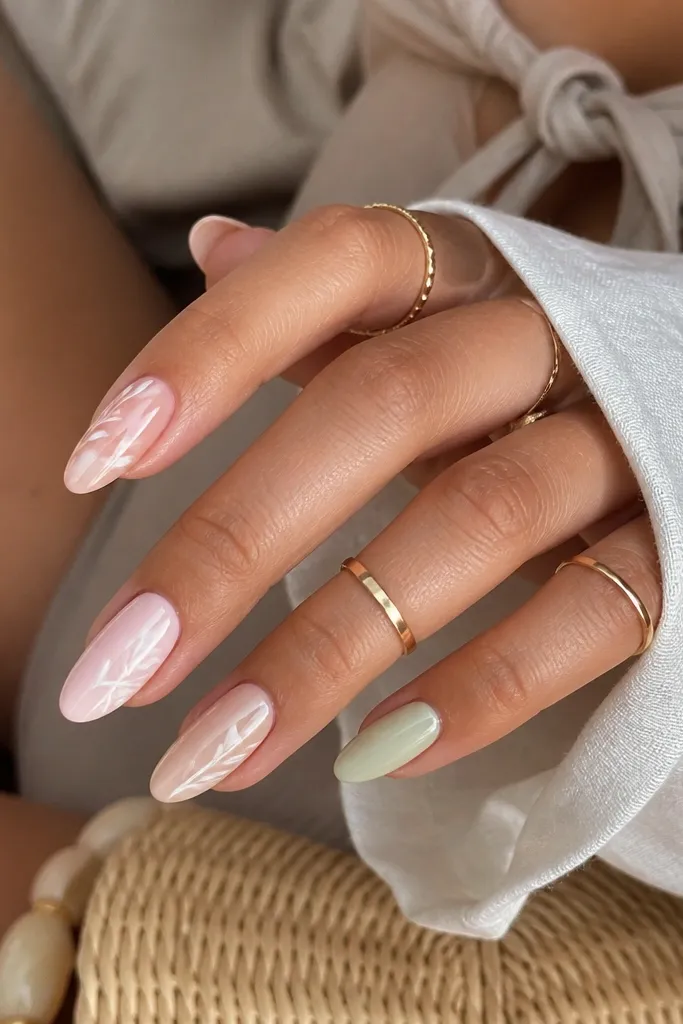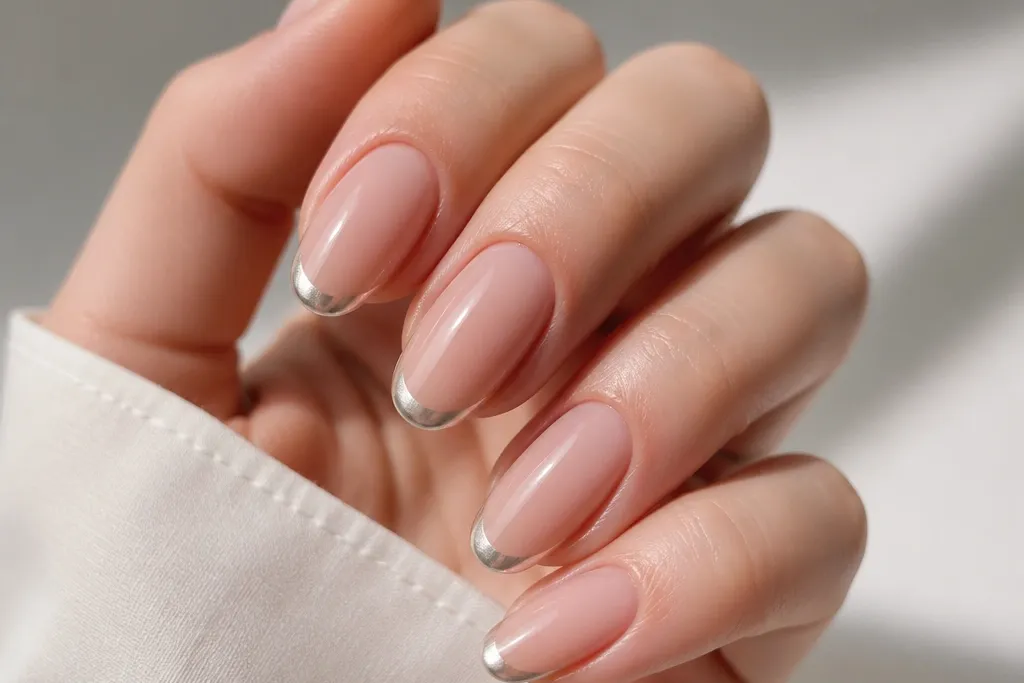
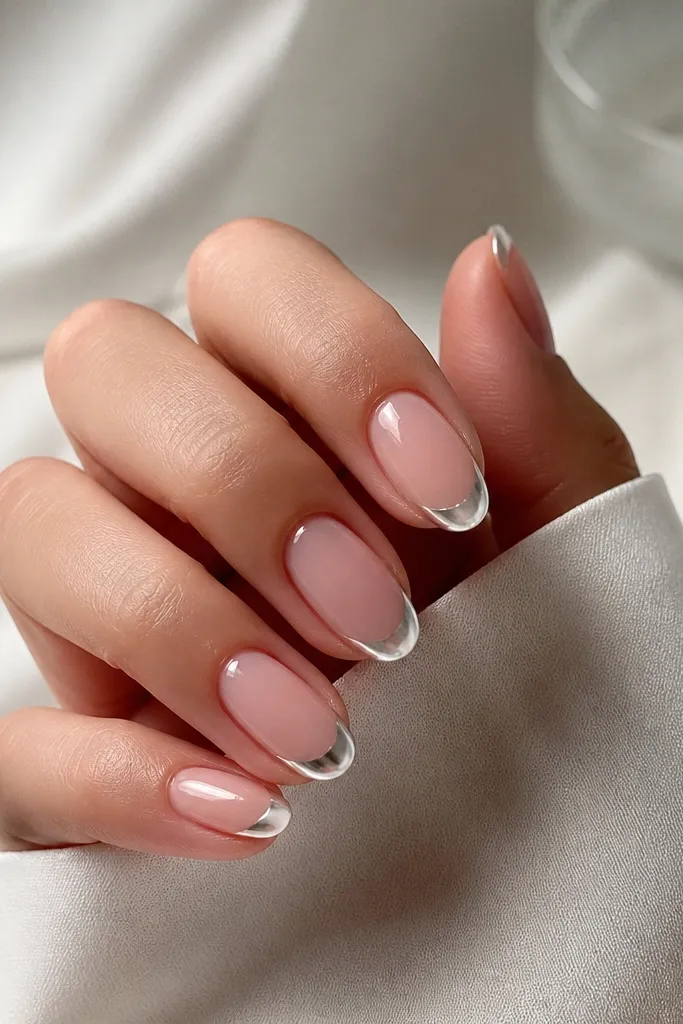
1. Classic Nude + Silver Chrome French Micro-Line
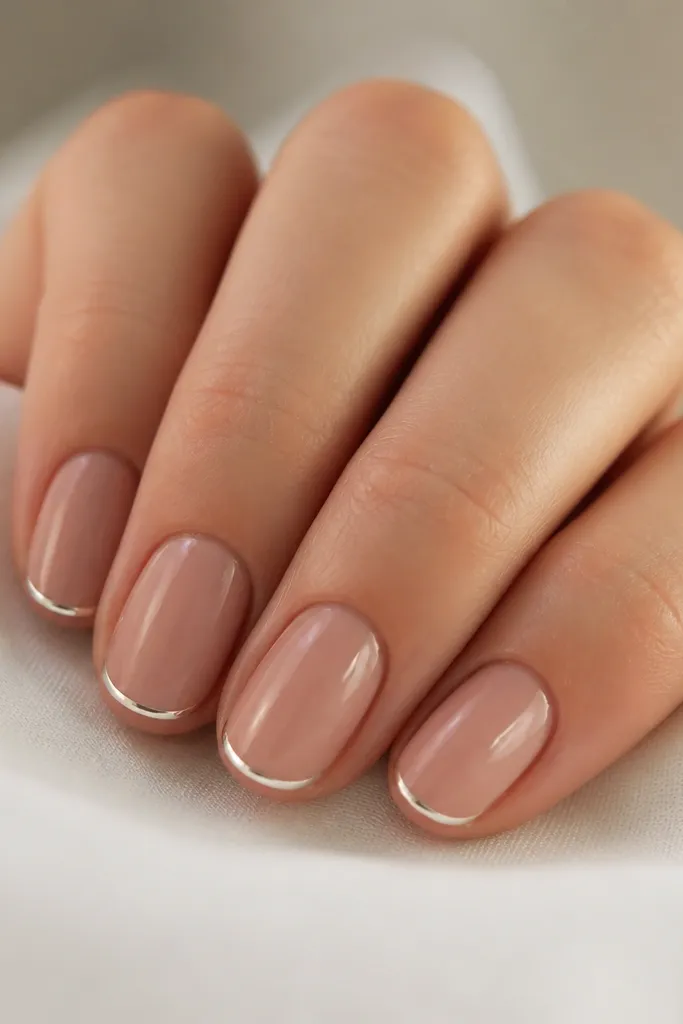
This one is the cleanest way to get Chrome French Nails easy without overthinking. The nude pink base is thin and slightly warm, so the silver French looks bright instead of icy. Keep the French line micro-thin, about 1.5 mm, so it frames your nail without covering too much. Silver chrome reflects light hard, which flatters smaller nail beds and makes short nails look neat. It also works on every skin tone because silver sits between cool and neutral undertones.
Start by prepping and applying a nude gel base in two thin coats, curing each coat fully. Place a French guide and paint only the very tip edge with a clear-to-milky nude gel mix, then cure. Apply a black gel or chrome adhesive layer where the French line will be, cure if your system requires it, and then tap silver chrome powder/gel chrome over just the French area. Brush off excess, then seal with a non-wipe or chrome-safe top coat in two thin layers, curing each time.
If the French line looks wobbly, use nail guides and place them after your first nude coat so the guide sticks evenly.
Don’t do a thick French smile line — it turns mirror chrome into a chunky border.
2. Blush Nude + Rose Gold Chrome French Curve
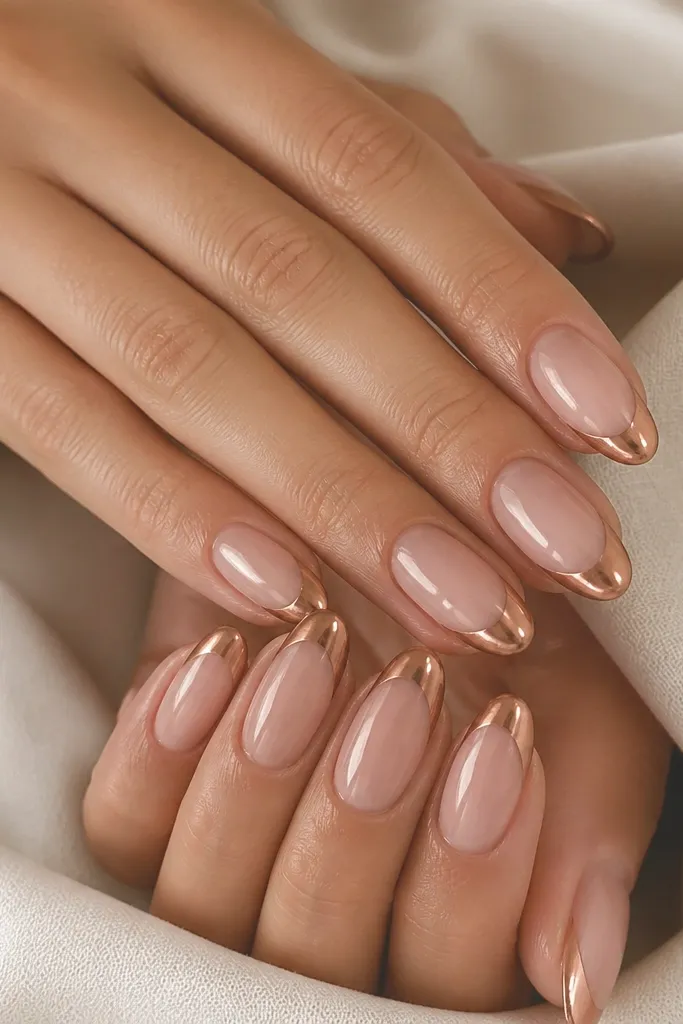
Rose gold chrome looks softer than silver, so it flatters hands that run warm or golden. The blush nude base should be semi-sheer so the French line looks like it’s floating on top. A slightly wider curve at the center tip makes the nail look longer, especially on medium almonds. This is a great “date night” French because the chrome stays bright under indoor lighting but doesn’t look harsh.
Apply a blush-nude gel base in two thin coats and cure. Use a French guide and paint the tip with a translucent pink gel, leaving the center slightly higher for a gentle smile curve. Apply rose gold chrome adhesive (or a black base if you’re using powder) only inside the French shape, then cure as directed. Buff on rose gold chrome powder or press the foil onto the tacky area, then clean edges with a small brush dipped in gel cleanser. Finish with a high-shine gel top coat and cure fully.
For a smoother rose gold reflection, press chrome with a flat applicator sponge instead of rubbing hard.
Avoid using a super opaque nude base — it can make the rose gold look muddy.
3. Cool Nude + Platinum Chrome French Tips
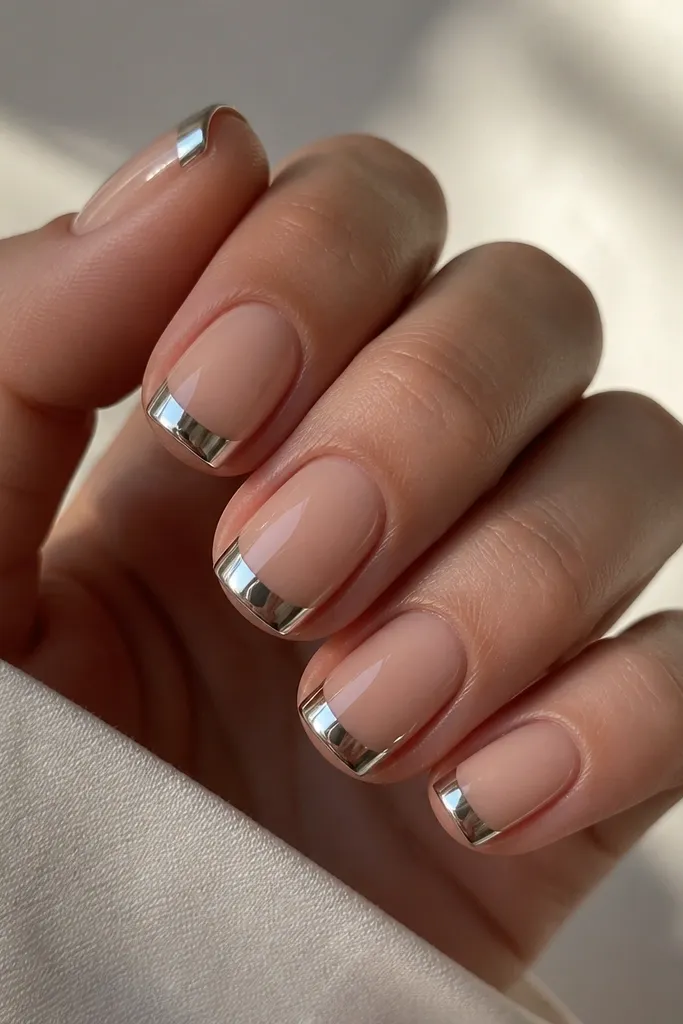
Cool nude plus platinum chrome makes a crisp contrast that looks expensive. If your skin is fair-to-medium with cool undertones, this combo makes your nails look cleaner and your hands look brighter. The square shape also benefits because sharp corners catch the chrome reflections. Keep the French line even across all nails so the set feels coordinated.
Start with a cool nude base gel (slightly gray-pink) and cure in two thin layers. Apply French guides so the tip line sits consistently about 1.8-2 mm from the free edge. Paint the tip area with clear gel or a matching nude gel and cure. Add a black gel layer inside the French area if using powder, cure, then apply platinum chrome powder and buff lightly. Seal with chrome-safe top coat, focusing on the tip edge so it doesn’t lift.
Wipe the French line area with cleanser before chrome so you don’t trap dust under the mirror finish.
Don’t cure the chrome area too short — dull chrome usually means incomplete curing.
4. Milky Pink Base + Chrome French Half-Moon Accent
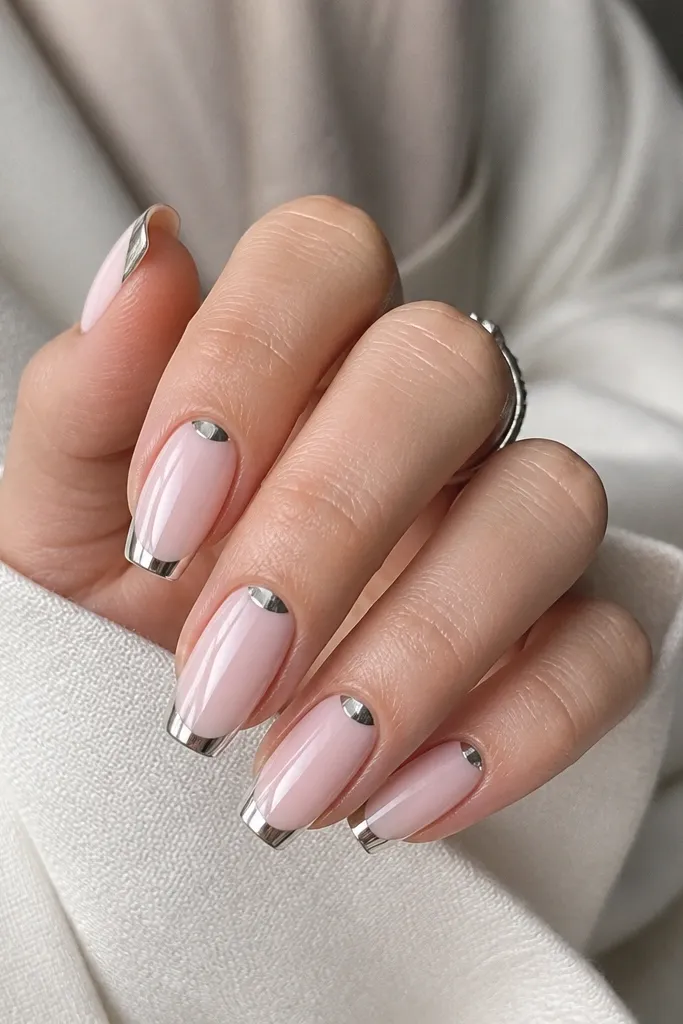
This design keeps the French tip classic but adds a small chrome half-moon at the cuticle to make the nails look styled even when you’re only wearing one layer of jewelry. Milky pink makes everything look soft and “fresh set.” The half-moon accent flatters most nail beds because it visually lengthens the center line. It’s also beginner-friendly because the half-moon is small and forgiving.
Apply milky pink base gel and cure. Use a guide for the French tip and create your French shape with nude gel, curing it. Add chrome adhesive/black base just on the French tip area and press silver or platinum chrome onto it. For the half-moon, use a small dotting tool to place chrome adhesive in a thin crescent at the cuticle, then press a tiny amount of chrome powder/foil. Seal with two top coat layers, and cap the free edge on both the French tip and the half-moon edge.
Editor's noteDo the half-moon last so you can match its height to the French smile line.
Watch outDon’t let chrome touch the skin — it lifts and then you’ll see dull spots.
5. Black Base Chrome French for Extra Mirror Shine
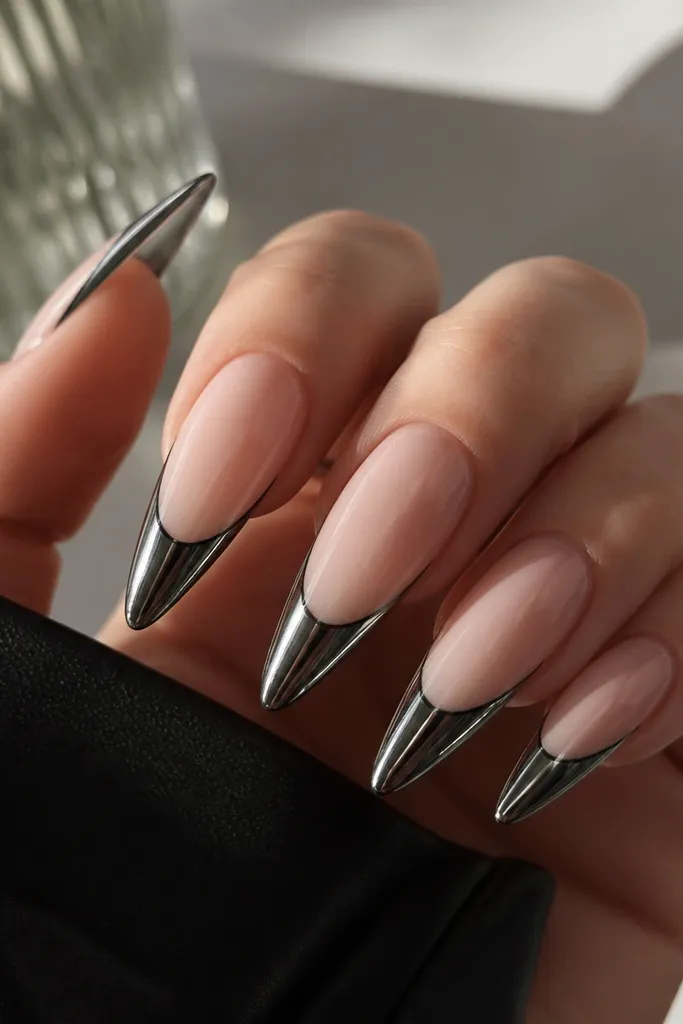
Black under chrome gives you the highest mirror effect, and it’s a trick I use when I want the chrome to look like glass. The nude base stays visible so it still reads French, not goth. This is gorgeous for long stiletto nails because the contrast makes the tip look sharp. It also helps if your chrome powder is sometimes patchy — the black gel makes coverage more even.
Start with a sheer nude gel base, cured in two thin coats. Apply French guides for a clean tip line and paint the tip area with a thin nude gel, then cure. Brush on black gel inside the French tip shape (only where you want chrome), cure, then apply chrome powder over it and buff once it’s set. Clean edges carefully with a gel cleanser on a detail brush so the black doesn’t smear. Seal with a chrome-safe top coat and cure long enough to harden the surface.
Editor's noteIf the chrome looks grainy, apply a second light dusting of chrome powder only to the dull spots.
Watch outAvoid thick black gel — it can create a raised line under the chrome.
6. Pearl Nude + Opal Chrome French
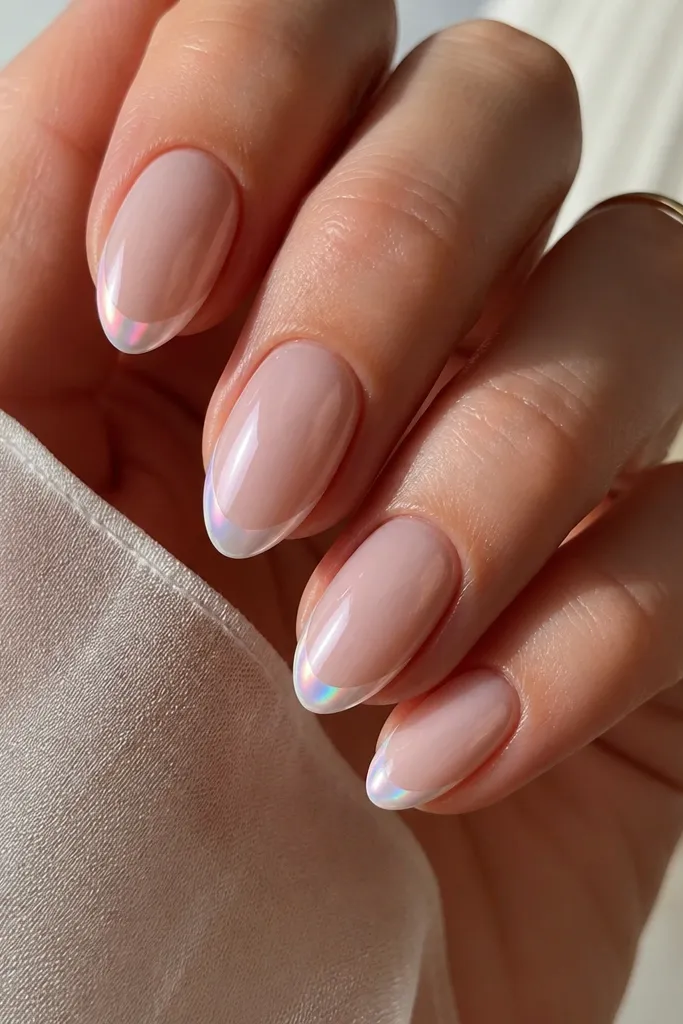
Opal chrome is the “looks expensive” option because it shifts color instead of staying one tone. Pearl nude helps the opal shift show up — it’s not too warm, not too gray. This works on almost any skin tone, especially if you wear silver and gold jewelry together. On short nails, the opal French still looks light because the line is narrow and reflective.
Apply pearl nude gel base in two thin coats and cure. Use a French guide and build the tip shape with translucent white-pink gel, curing. Add chrome adhesive or black gel only inside the French area, cure if needed, then apply opal chrome powder. Buff lightly so it stays mirror smooth, then wipe away excess from the nail edges. Finish with a glossy chrome-safe top coat in two thin layers.
Angle your phone light while you work — opal chrome shows its color shift only when it hits the right angle.
Don’t over-buff opal chrome — over-buffing can flatten the shift.
7. White French + Silver Chrome Overlayer
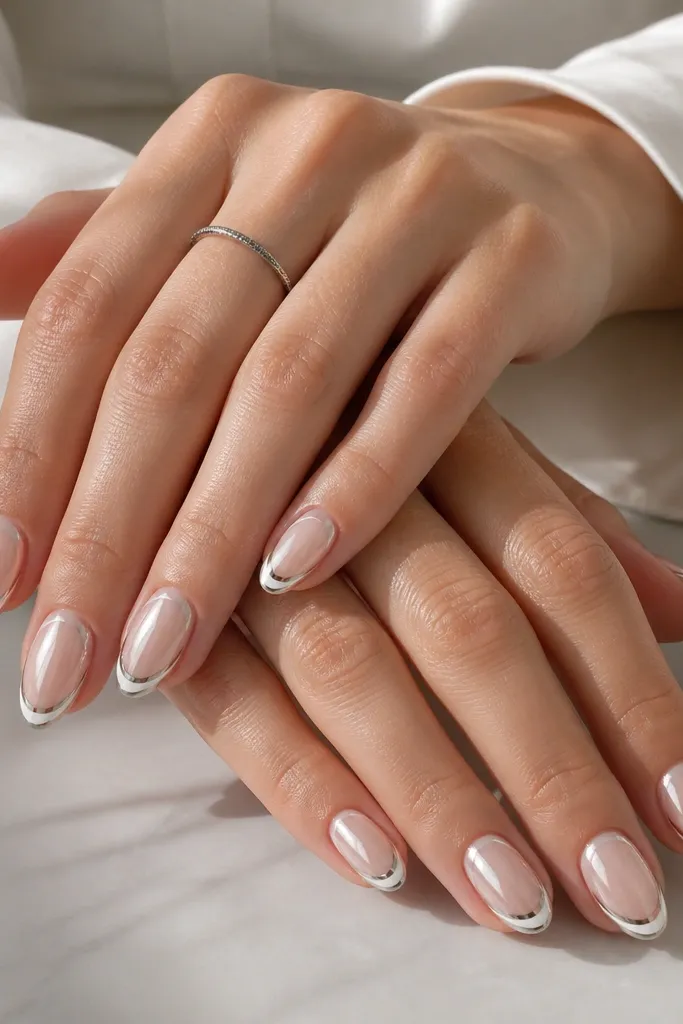
This one looks like a French manicure that got dressed up for a party. The bright white base gives a clean line, and the silver chrome overlayer makes it pop without needing extra art. It flatters hands that look good in stark contrasts, and it makes the nail shape look crisp even if your cuticles are a little dry. It also photographs super well because the white and chrome reflect differently.
Apply a nude base in two thin coats and cure. Use a French guide and paint the tip with crisp white gel, curing fully. Next, apply a thin layer of chrome adhesive over the cured white French area (only the tip), then cure if your system requires it to become tacky. Press silver chrome powder/foil onto the adhesive and buff lightly. Seal with a glossy gel top coat, making sure to cap the tip edge so the chrome doesn’t lift.
Use a liner brush to clean the French edge before you add chrome — chrome copies any unevenness.
Don’t skip the adhesive layer — chrome over plain gel white turns patchy.
8. Nude Ombré Base + Chrome French Fade
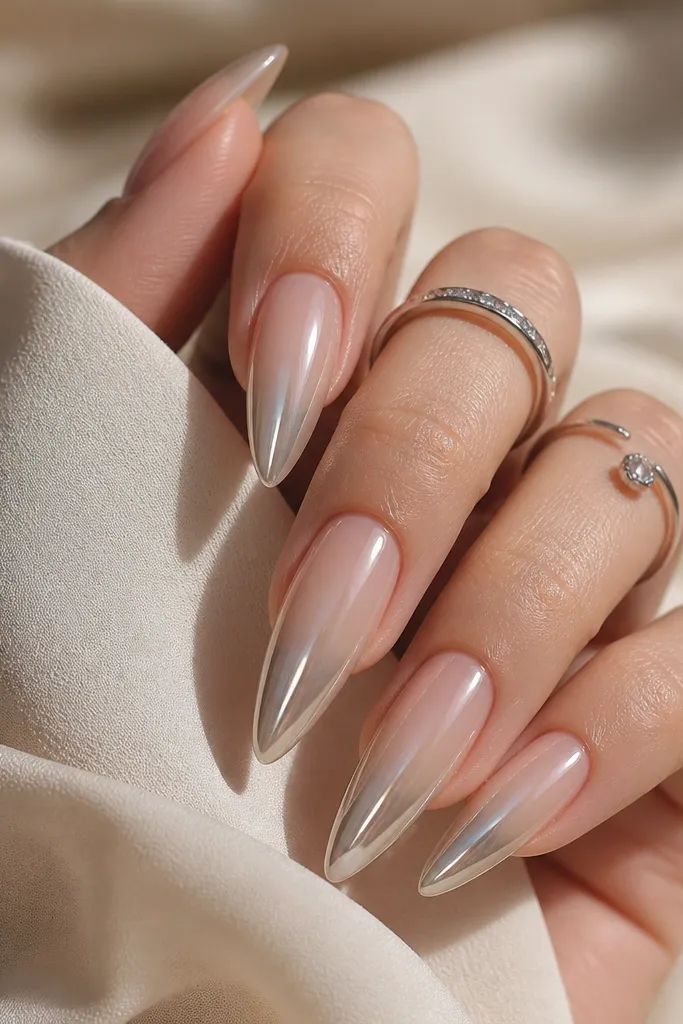
A fade French looks more modern because it doesn’t stop at a hard line. The ombré base creates a gentle transition, and the chrome fade keeps it glossy without looking like a sticker border. Long almond nails benefit because the gradient makes them look tapered. This is also flattering for different nail lengths since the fade visually lengthens the tip.
Apply a nude base and cure. Create an ombré near the tip using a sponge: blend white-pink gel starting at about 2 mm from the free edge upward, curing after you get the softness you want. Apply black gel or adhesive only at the very tip band, about 1-2 mm tall, cure if required. Press silver chrome powder over that band and then gently feather slightly upward with a light touch. Seal with top coat, and keep your brush strokes smooth to avoid streaking on the gradient.
Editor's noteSponge ombré always looks cleaner when you do two thin sponge layers instead of one heavy one.
Watch outAvoid a hard chrome edge — it defeats the point of the fade.
9. Clear Jelly Base + Chrome French Tip Border
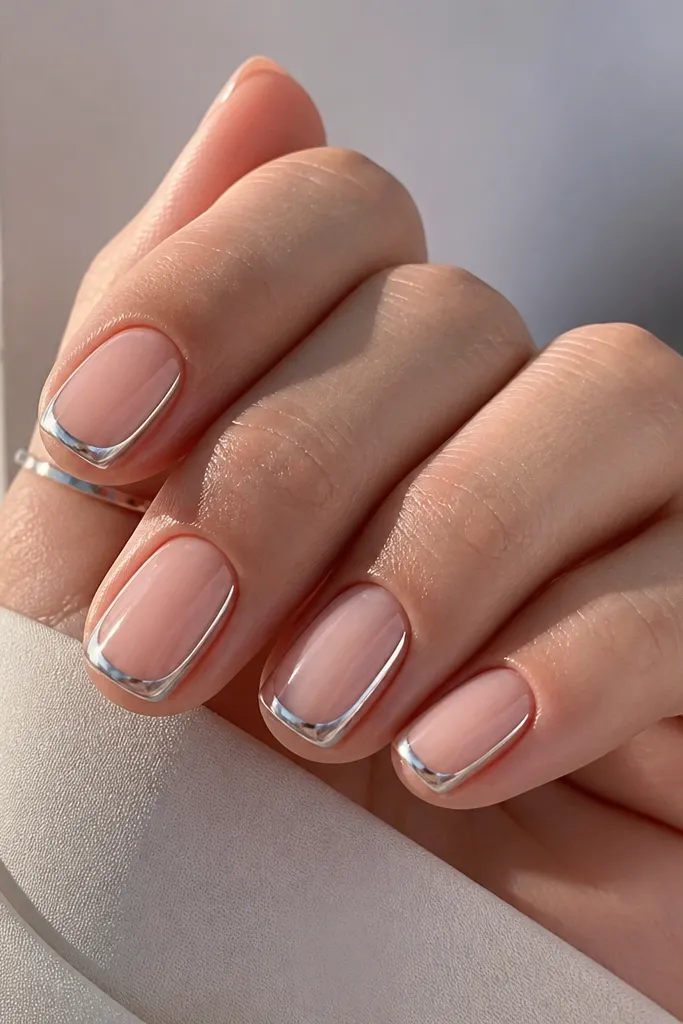
A clear jelly base makes the nails look fresh and lightweight, and it makes chrome look like it’s floating. This is the best choice if you hate thick-looking manicures. The chrome tip border should be thin so it reads like a frame, not a cap. Jelly bases also flatter hands with visible nail ridges because the gel can smooth them out while staying see-through.
Start with a clear jelly base gel, cure, then add one more thin layer to build even thickness. Place French guides and apply a thin line of chrome adhesive inside the tip area, cure if needed. Press chrome powder (silver or holographic) over just that adhesive line, then brush off excess. Use a fine brush to clean the outer edge so the border stays crisp. Finish with a glossy top coat that won’t cloud the jelly effect.
Editor's noteCap the sides of the French border with top coat — side lift shows faster on jelly bases.
Watch outDon’t use a fully opaque nude if you want the jelly look — it kills the floating effect.
10. Chocolate Brown Nude + Copper Chrome French
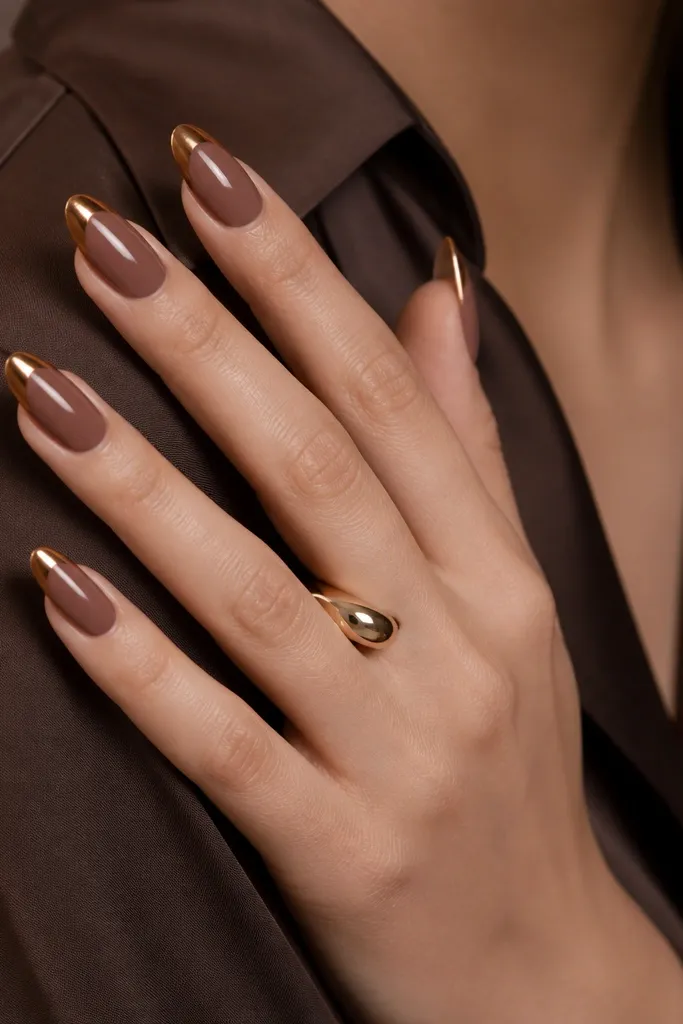
Copper chrome looks unreal on warm brown nudes because it warms the whole hand. This set looks great on deeper skin tones and also on anyone who wears gold jewelry a lot. The copper French line makes the nail tip look rounded and strong, which flatters short to medium nails. It’s a fun alternative to silver if you want chrome but not “icy.”
Apply a chocolate-brown nude gel base in two thin coats and cure. Use French guides to create a consistent tip shape, about 2 mm tall. Paint the French tip area with a thin layer of black gel or copper adhesive, cure if needed, then apply copper chrome powder. Press and buff lightly so it stays mirror smooth. Seal with a glossy top coat and cure thoroughly, then wipe tacky residue if your system uses it.
If copper looks too orange, mix a tiny amount of brown gel into your base next time for a closer match.
Avoid copper chrome on a cool pink base — it can look off and too bright.
11. Icy Pink Nude + Chrome French Snowcap
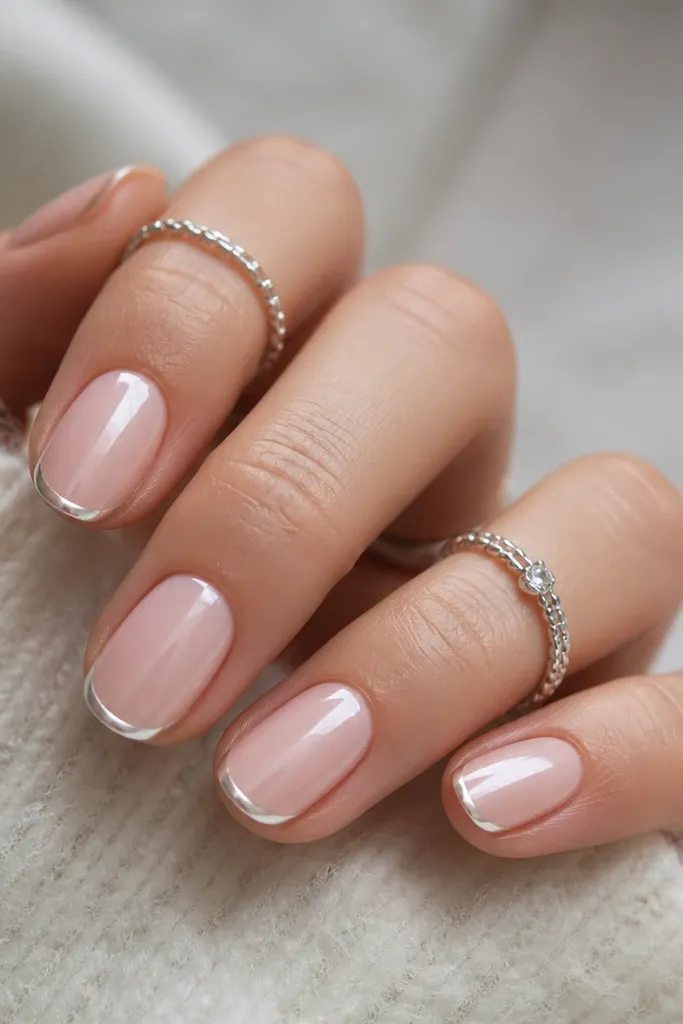
This design keeps the French edge super tight to the tip, like a snowcap. The icy pink base gives a cool, fresh look that makes chrome feel wintery without needing glitter. It flatters short nails because the line is narrow and the rest of the nail stays light. If you wear silver rings or cold-toned makeup, this combo looks extra cohesive.
Apply an icy pink gel base, two thin coats, cure. Use guides to place the French line right at the tip edge, around 1.5-1.8 mm tall. Add black gel or adhesive only in that thin strip, cure if needed, then apply silver chrome powder. Tap off excess and buff lightly for mirror finish. Seal with top coat, and make sure the tip edge is fully capped so the chrome stays smooth.
Use a thin liner brush to bring the French line closer at the corners — it makes the snowcap look intentional.
Don’t make the French area too tall — it turns snowcap into a block.
12. Matte Nude Base + Glossy Chrome French Contrast
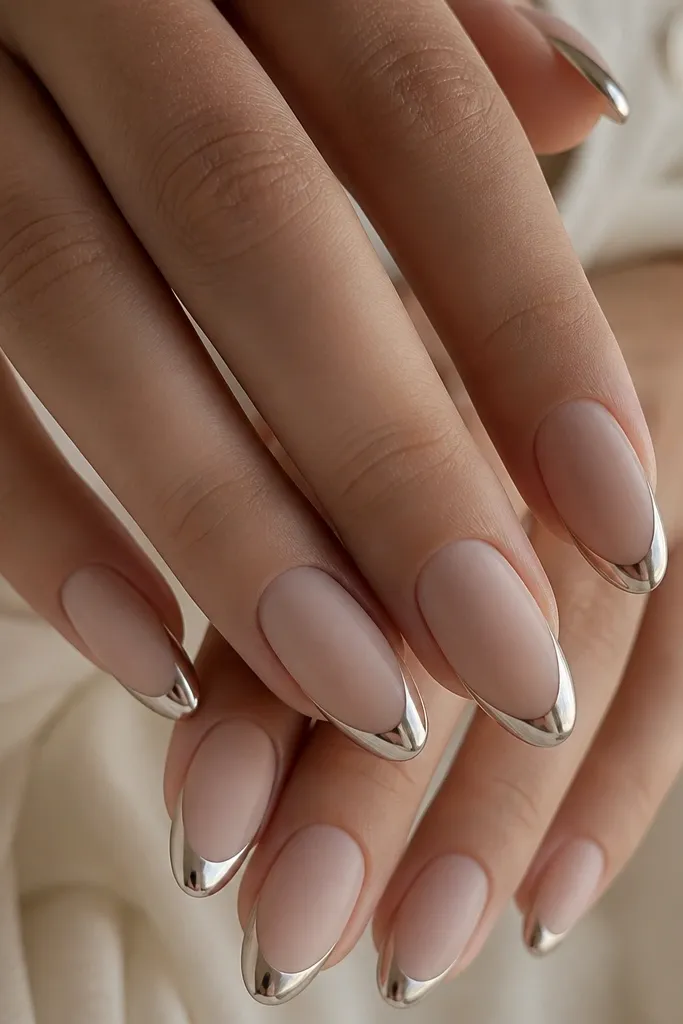
The contrast is the magic here: matte base makes the chrome look sharper and brighter. I do this when I want chrome to look less “loud” and more design-y. Matte also hides tiny base imperfections, so your nails look smoother even if your cuticle cleanup isn’t perfect. This works on most skin tones because nude stays nude, and the chrome does the talking.
Apply a nude gel base and cure in two thin coats. Apply a matte top coat to the entire nail and cure. Then, use French guides and add chrome adhesive/black gel only inside the French tip area, cure if required. Apply silver or rose gold chrome, buff lightly, and seal only the chrome area with a glossy top coat. Keep the matte elsewhere so the shine contrast stays crisp.
After curing the glossy top coat, wipe the chrome area with cleanser to reveal the true mirror shine.
Don’t matte the whole nail after you add chrome — it kills the shine.
13. French Tips with Micro Rhinestone Chrome Line
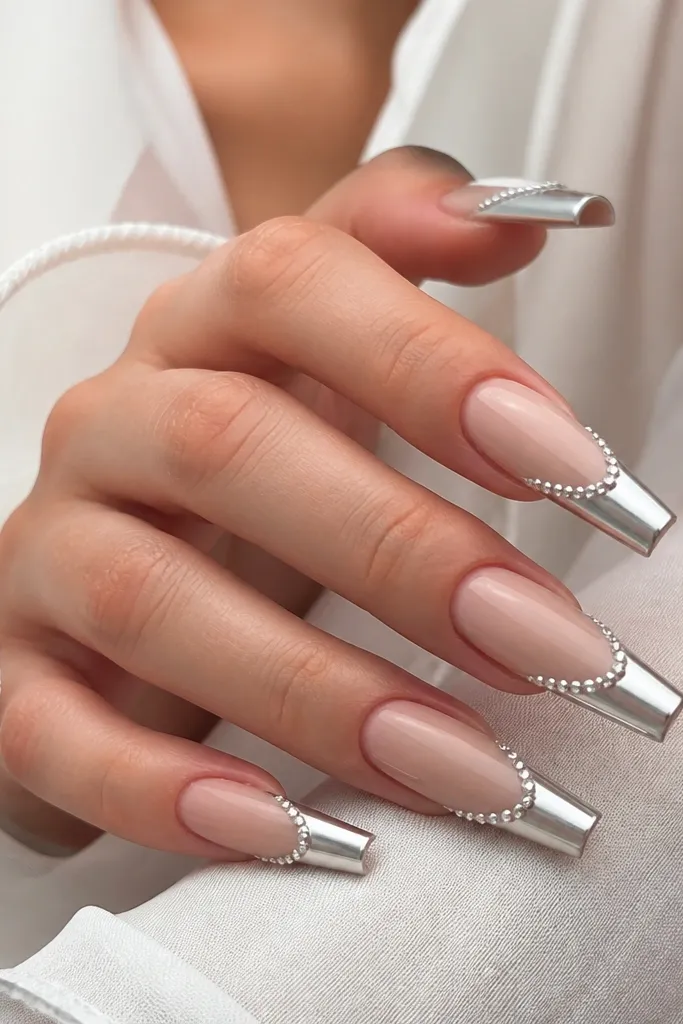
If you want chrome French nails for events, this is the version that looks like jewelry. The chrome gives the mirror effect, and the micro rhinestones add sparkle only on the edge, so it doesn’t feel busy. It flatters longer nail shapes because the rhinestones have a place to sit cleanly along the smile line. This also looks great on hands with slimmer fingers because the edge detail draws the eye to the nail shape.
Apply nude base gel in two thin coats and cure. Use French guides and paint the tip area with nude gel, cure. Add black gel or adhesive inside the French shape, cure if needed, then apply silver chrome and buff. Before top coat, use a dotting tool to place tiny flatback rhinestones along the very border of the French line, one by one, and cure. Finish with a chrome-safe glossy top coat, keeping it thin so you don’t drown the rhinestones.
Editor's noteSpace rhinestones at a steady rhythm — if you crowd them, the line looks messy under flash.
Watch outAvoid big stones — big stones on a chrome French edge look bulky and uneven.
14. Chrome French with Nude Negative Space Half-Moon
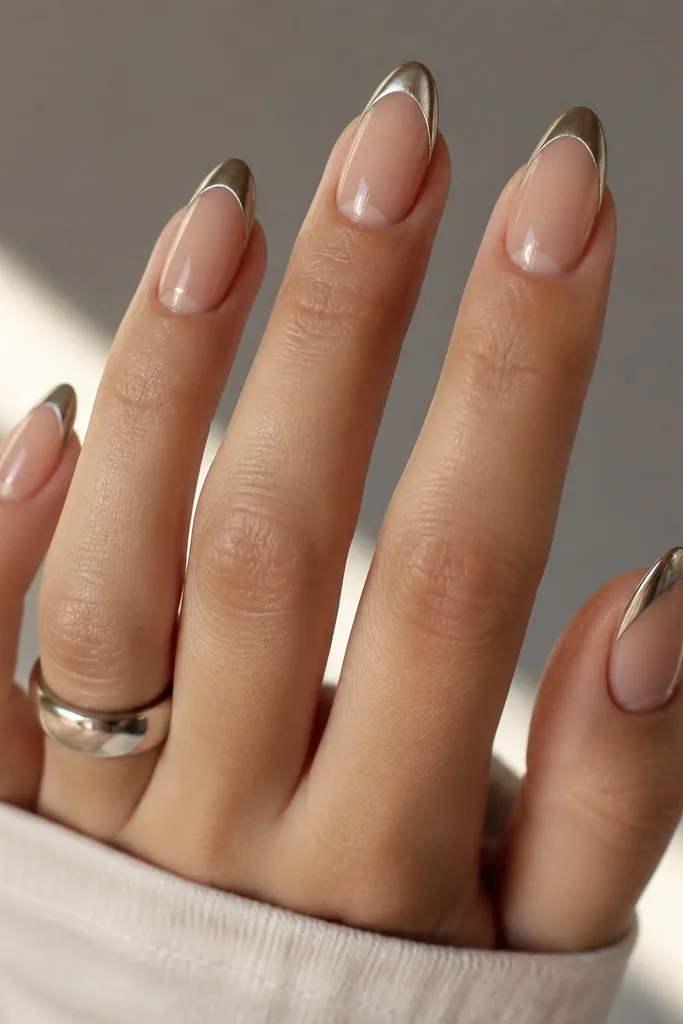
Negative space makes this look modern and keeps it from feeling like a full chrome tip. The half-moon gap gives your nail a little breathing room, which flatters short nails and hands with narrower nail beds. The chrome still does the shine work, but the design line looks intentional. This is also forgiving if your French curve isn’t perfect because the gap breaks up the line.
Apply nude base gel and cure. Use French guides to create your tip boundary, then paint the tip area with a translucent gel. For the negative space, place a tiny strip of gel-free tape or a gel-safe stencil so you leave a half-moon gap at the center of the French. Apply black gel/adhesive to the remaining French area, cure, then apply chrome powder. Remove the stencil carefully, clean edges, and seal with top coat.
Editor's noteUse thin tape or a stencil that’s flexible — rigid stencils leave hard edges and can peel.
Watch outDon’t use too much chrome around the gap — it can creep and fill the negative space.
15. White Marble Base + Silver Chrome French Vein
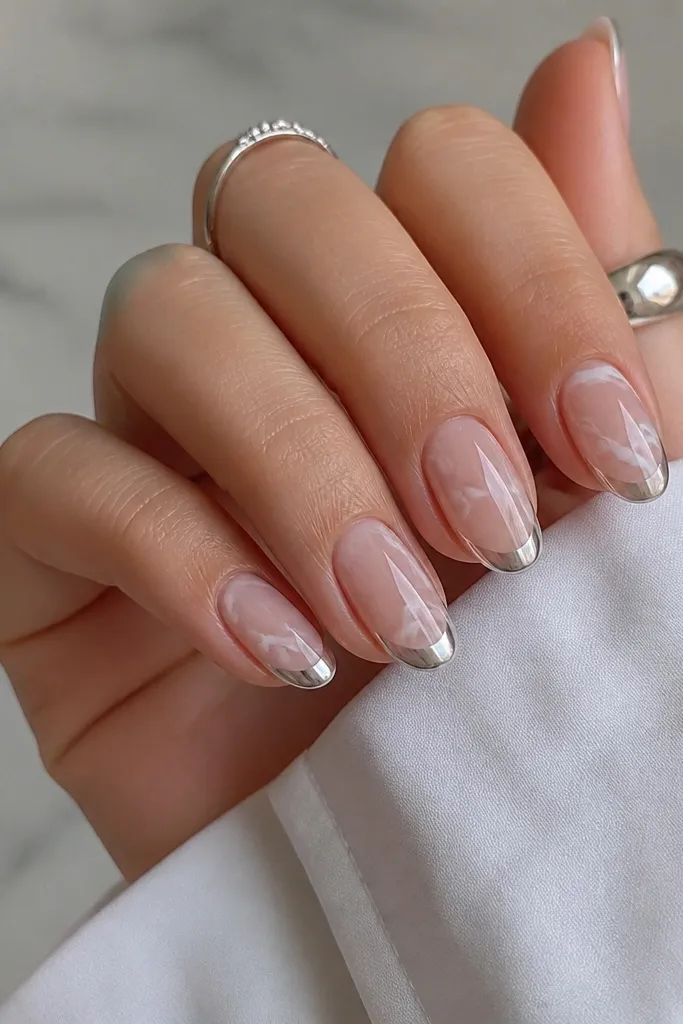
Marble plus chrome feels designer because it mixes movement (marble) with sharp structure (French). The silver chrome line sits on top of the marble, so the nails look dimensional. This flatters medium nail beds and hands that look good with neutral whites. It also works well for winter weddings or holiday parties because the marble reads clean, not heavy.
Start with a nude base gel and cure. Add marble by dragging white and light gray gel with a thin brush, then blend the edges with a clean sponge, curing after you like the pattern. Place French guides and paint a thin French tip area over the marble so the line stays crisp. Add black gel/adhesive only inside that French strip, cure, then apply silver chrome powder. Seal with a glossy top coat, and be gentle around the marble so you don’t smear the pattern.
Editor's noteLet your marble fully cure before chrome — chrome over wet gel drags the design.
Watch outAvoid busy marble under a thick French — the set gets chaotic.
16. Blush Chrome French with Tiny Star Foil Flashes
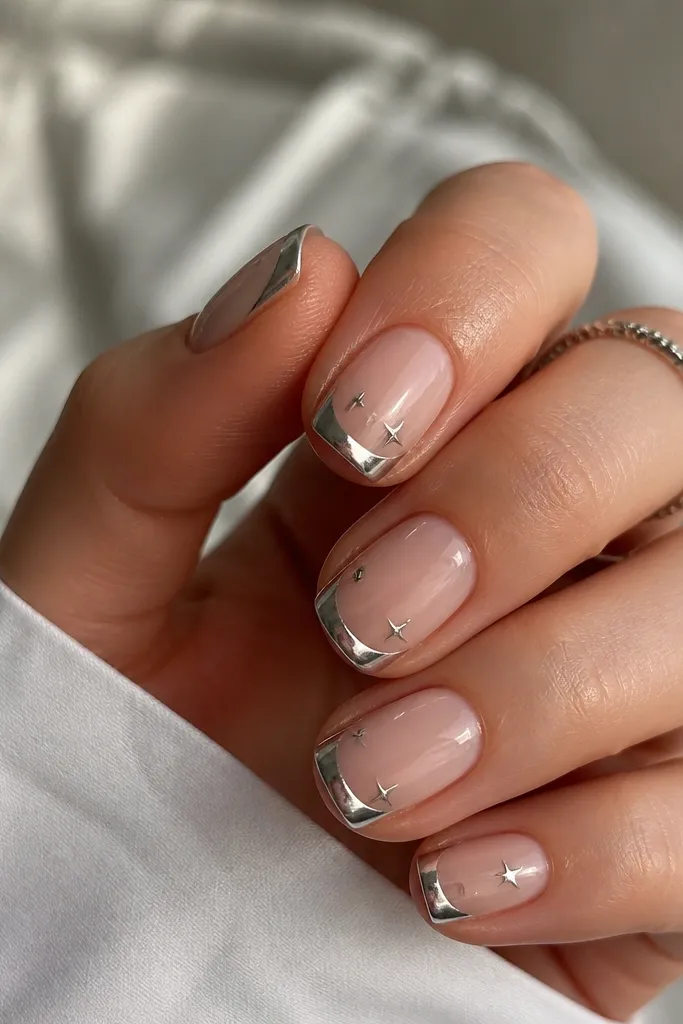
This is the “cute but not childish” chrome French. The blush base keeps it soft, the silver chrome keeps it shiny, and the star foil adds little pops of light. It flatters shorter nails because the accents are near the tip and don’t take over the nail. If you like fun details, this one is a safe step because the stars are tiny and controlled.
Apply blush nude base gel and cure. Use French guides and create the tip with a thin nude gel layer, cure. Add chrome adhesive/black gel inside the French area, cure if needed, then apply silver chrome and buff. For the stars, place small star foil pieces on the tacky top layer right at the edge of the French, not on the whole tip. Seal with top coat, using a thin brush to avoid moving the foil.
Press foil gently with a flat silicone tool so it sticks without wrinkling.
Don’t scatter stars across the whole nail — it stops reading as French.
17. Champagne Nude + Gold Chrome French Tips
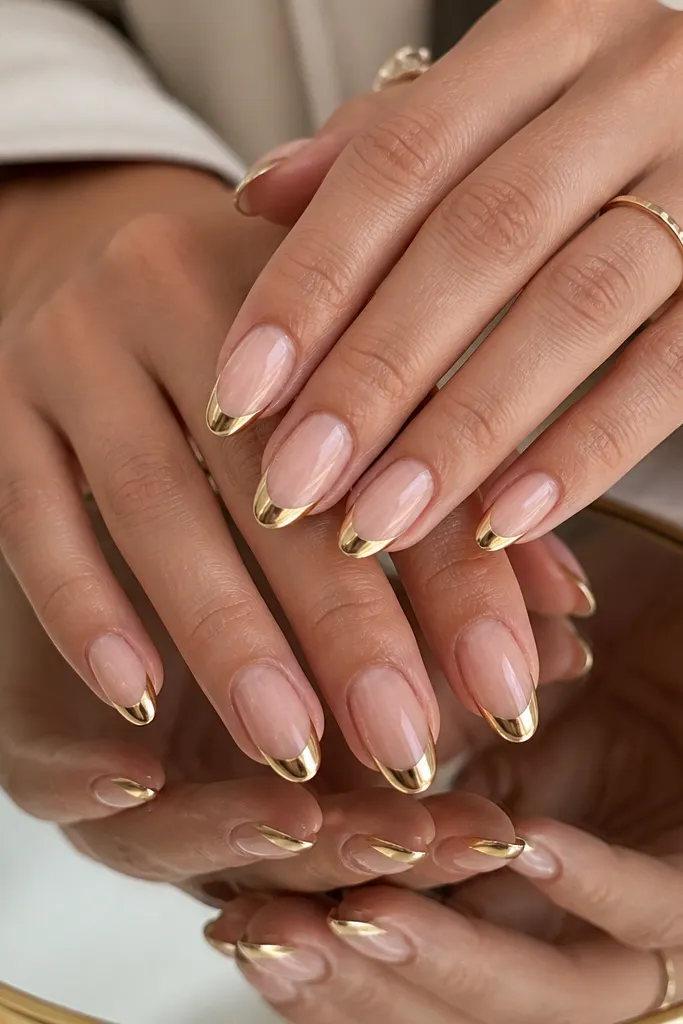
Gold chrome on champagne nude looks warm, clean, and flattering on most skin tones. The nude base should look like a soft metallic champagne, not a pinky beige. This set is perfect for evenings because gold chrome warms your whole hand and matches gold jewelry. On medium almond nails, a medium-thin French line looks balanced and makes the nail tip look smooth.
Apply champagne nude gel base in two thin coats and cure. Use French guides and paint the tip area with translucent gel, cure. Apply black gel or gold chrome adhesive inside the French shape, cure if required, then press gold chrome powder or foil onto the adhesive. Brush off excess and refine the edge with a detail brush. Finish with chrome-safe top coat and cure until fully hard.
Editor's noteIf gold looks too yellow, switch to a rose-gold chrome powder next time — it blends better with champagne nude.
Watch outAvoid pairing gold chrome with very cool gray nude — the combo looks mismatched.
18. Black French Line + Chrome Outline Only
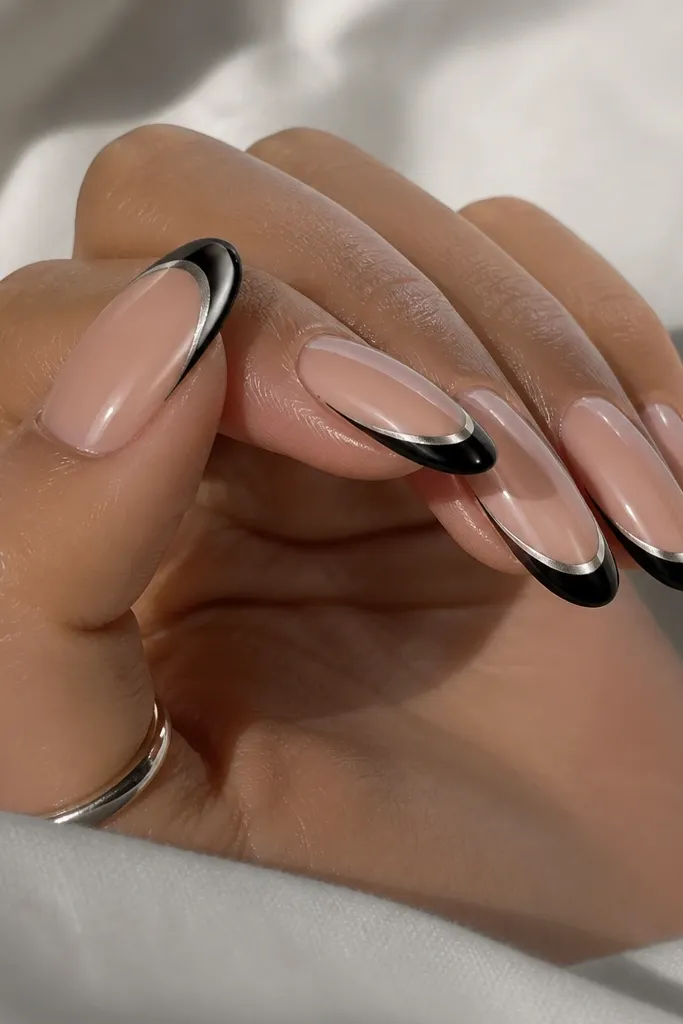
This looks like a graphic French manicure because only the outline gets chrome. The black line gives structure, and the chrome outline adds a thin highlight that makes the nail look polished. It’s flattering because it keeps the center nail area clean and draws attention to the tip shape. This is my go-to when someone wants “chrome” but hates full chrome tips.
Start with a nude gel base and cure. Use a French guide and paint the tip with black gel, curing thoroughly. Now only apply chrome adhesive to the top edge of the black line, about 0.5-1 mm wide. Press silver chrome powder onto that strip, buff lightly, and clean any spill. Seal with top coat, and cap the free edge so the chrome outline doesn’t catch and lift.
Editor's noteUse a liner brush to keep the chrome outline razor-thin — thickness makes it look like a mistake.
Watch outDon’t fully chrome over the black line — it stops being graphic.
19. Red Jelly Base + Silver Chrome French with Glossy Depth
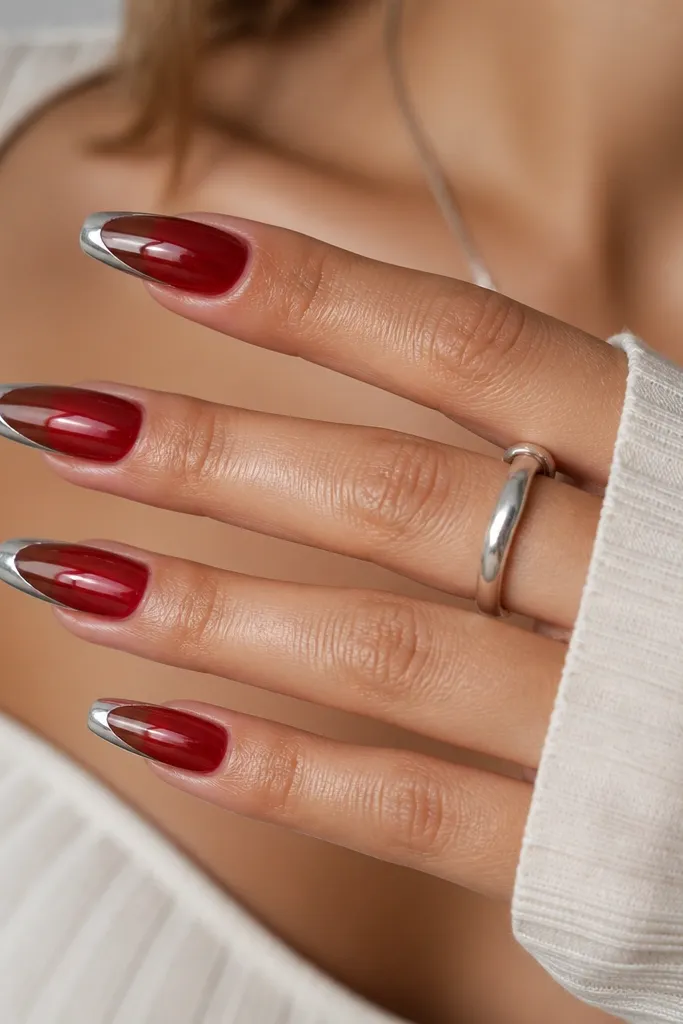
Red jelly base makes the nails look like they glow from inside, and it makes silver chrome look extra bright. This is a strong look for holidays, concerts, or nights out. It flatters hands with warm undertones because the red ties into your skin warmth. The jelly effect also makes the French line look smoother because the base has a glassy finish.
Apply a red jelly gel base (semi-transparent) in two thin coats and cure. Use French guides and paint the tip boundary with a clear gel layer, cure. Add black gel or silver chrome adhesive inside the French shape, cure if needed, then apply silver chrome powder. Buff lightly and wipe excess from the edges. Finish with a high-gloss gel top coat in two thin layers, making sure the jelly stays see-through.
Editor's noteIf your red looks too dark, use a more sheer jelly and build in thin layers instead of one heavy coat.
Watch outAvoid matte top coat on jelly reds — it makes the red look flat.
20. Nude Base + Chrome French with Iridescent Micro-Glitter Topcoat
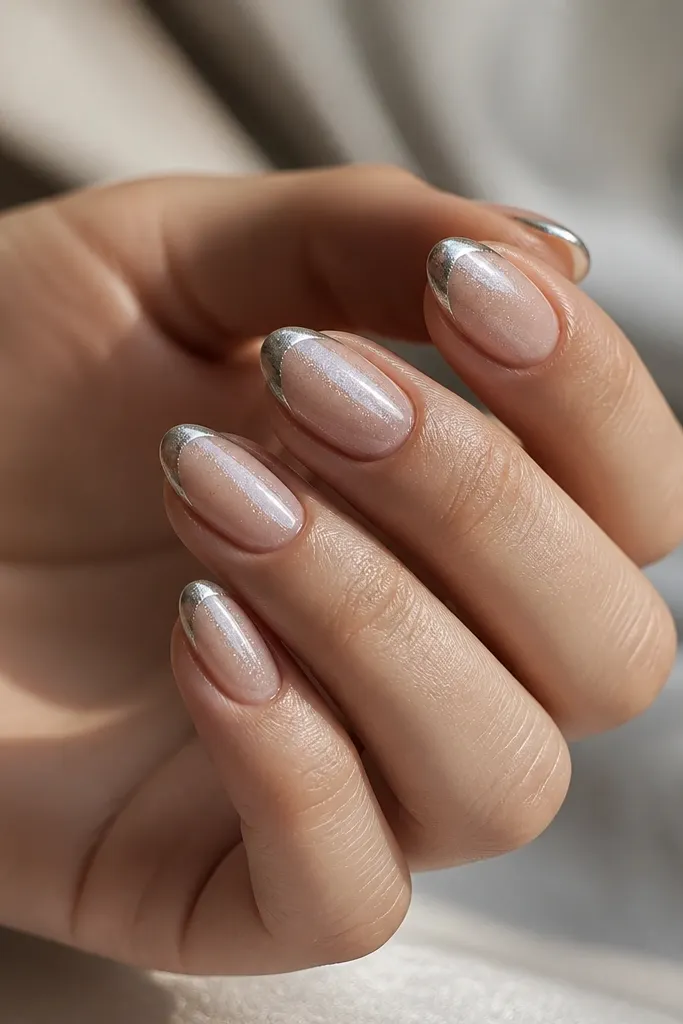
This one keeps the chrome mirror look but adds a whisper of shimmer that moves when you walk. The iridescent micro-glitter is best when it’s subtle — it shouldn’t look like chunky glitter. This set looks great for daytime events because the chrome reads clean, and the micro-sparkle shows up only when you’re moving. It flatters short nails because the sparkle doesn’t crowd the center.
Apply nude base gel in two thin coats and cure. Use French guides and create the tip area with a thin gel layer, cure. Apply black gel/adhesive inside the French area, cure if needed, then press silver chrome powder and buff. Seal with chrome-safe top coat as your first layer. For the sparkle, add a second thin layer of iridescent glitter top coat only over the French tip area, then cure.
Editor's noteKeep the glitter top coat only on the chrome — glitter on the nude can look dusty.
Watch outDon’t use heavy glitter — it turns mirror chrome into a textured mess.
21. Soft Lilac Nude + Purple Chrome French Tips
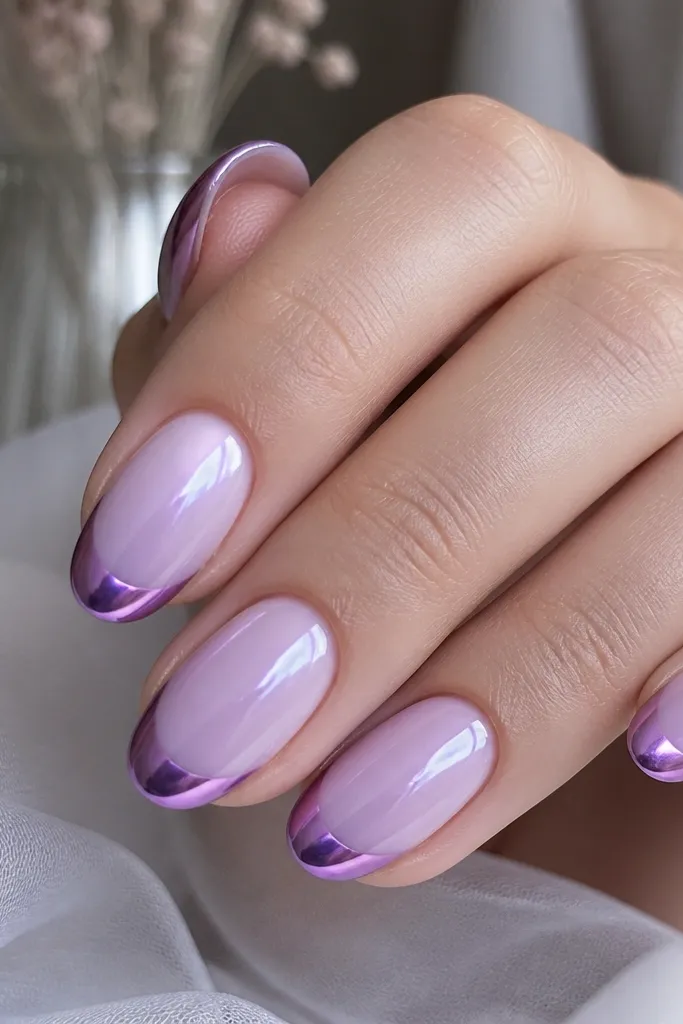
Purple chrome French tips look playful, but the key is keeping the base lilac-nude so it stays wearable. This set flatters cool undertones and looks amazing with silver jewelry. On medium ovals, a slightly curved French line makes the nail look smoother and longer. The purple chrome also photographs beautifully because it reflects both pink and blue tones.
Apply lilac nude gel base and cure in two thin coats. Use French guides and paint the tip boundary with translucent lilac gel, cure. Add black gel or purple chrome adhesive inside the French area, cure if required, then apply purple chrome powder. Buff lightly to get mirror smoothness. Seal with top coat, and cure long enough to lock in the chrome shine.
Editor's noteIf purple looks too dark, use a lighter lilac base next time so the chrome reflect shows more pink.
Watch outAvoid a white base with purple chrome — it can look harsh and neon.
22. Nude + Chrome French with Thin Diagonal Micro-Stripe
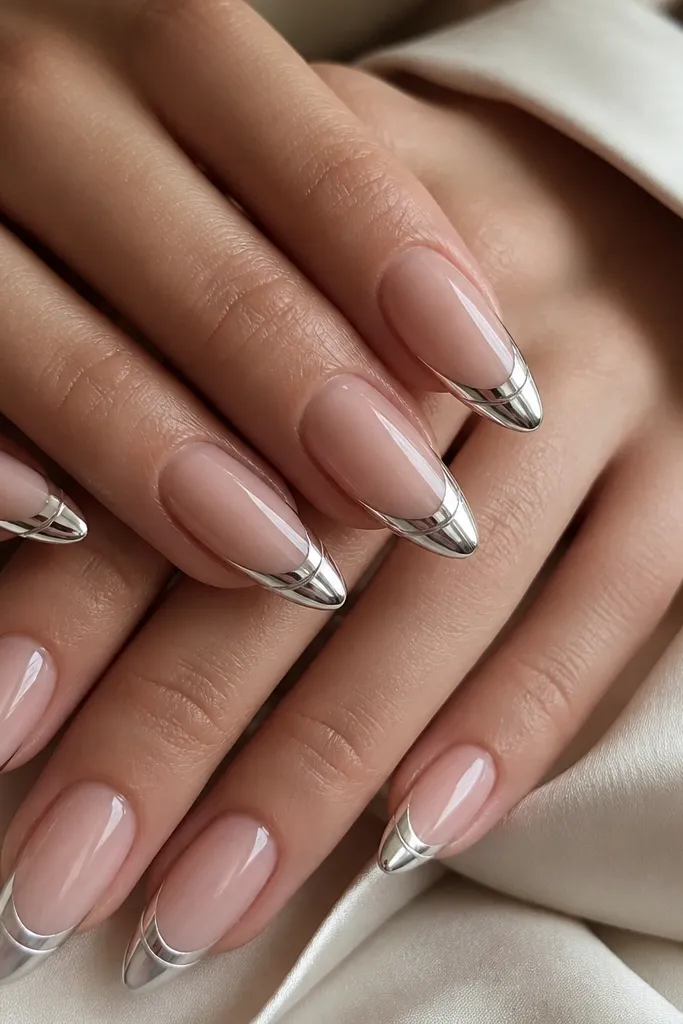
This is the one I reach for when I want chrome French to look like a nail trend without doing full nail art. The diagonal micro-stripe adds movement and makes your nails look like they have dimension. It flatters long almond nails because the diagonal line can follow the nail’s natural curve. On any skin tone, the nude base keeps it classy while the chrome does the shine.
Apply nude base gel and cure. Use French guides to create the tip shape and cure. Add black gel/adhesive inside the French area, cure, then apply silver chrome powder and buff. With a liner brush, paint a very thin diagonal stripe of chrome adhesive across part of the French tip, then press chrome powder on top of it. Clean edges and seal with chrome-safe top coat, curing fully.
Use a striping brush that’s under 1 mm wide so the diagonal stripe stays fine.
Don’t make the diagonal stripe too wide — it competes with the French line.
23. Clear Jelly Base + Holo Chrome French Tips
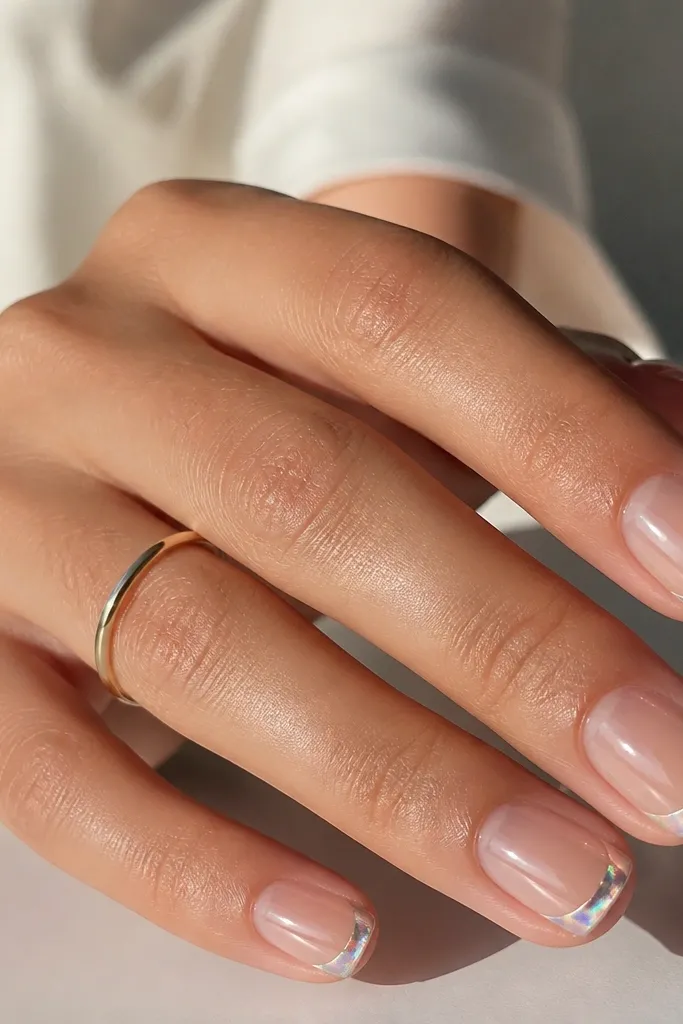
Holo chrome makes the French tips look like they change color every time you move your hand. The clear jelly base keeps it light and makes the holo shift feel airy instead of heavy. This set is flattering on short nails because the holo is concentrated on the tip. It also works for events where flash photography matters because holo chrome catches camera light hard.
Apply a clear jelly base gel and cure. Use French guides and define the tip shape with a translucent gel layer, cure. Add black gel/adhesive inside the French area, cure if needed, then apply holographic chrome powder. Buff lightly so it stays mirror smooth. Seal with a glossy chrome-safe top coat, and cap the free edge to prevent lifting.
If your holo looks dull, add a second light chrome dusting only to the center of the tip.
Avoid matte top coat — holo chrome needs gloss to show the shift.
24. Taupe Nude + Smoke Chrome French Tips
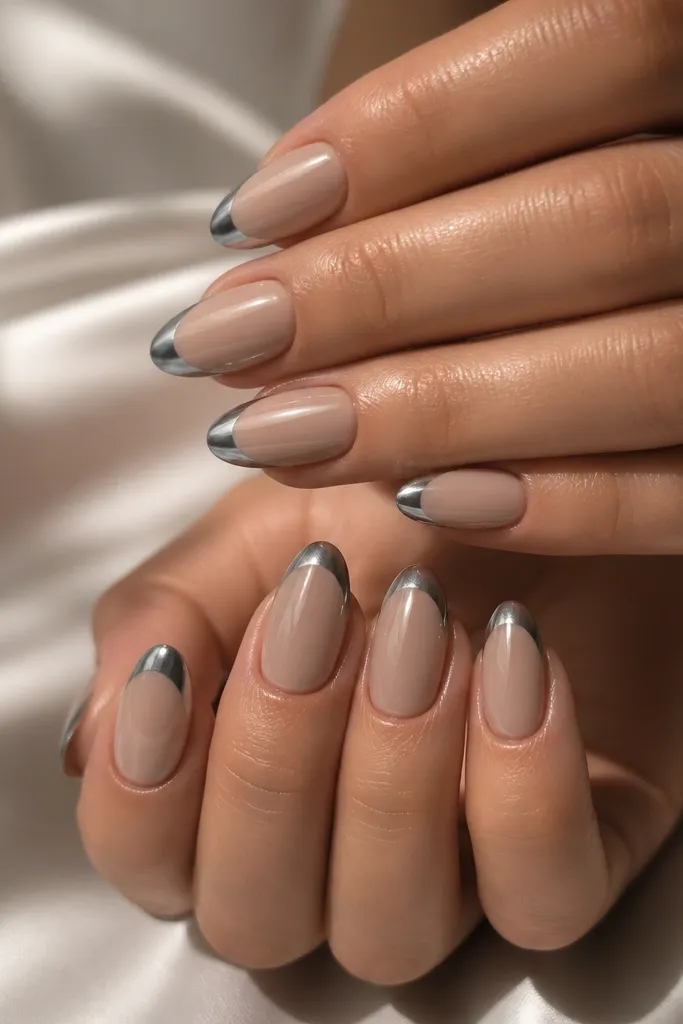
Smoke chrome is the “I want chrome but I don’t want it loud” option. Taupe nude makes it look modern and grown-up, and it flatters neutral undertones. The gray chrome reflection feels cool and clean, especially on almond shapes where the nail already has a gentle curve. This is great for work weeks because it looks stylish without shouting.
Apply taupe nude base gel in two thin coats and cure. Use French guides for a consistent tip line about 2 mm tall. Add black gel/adhesive inside the French area, cure if needed, then apply gray smoke chrome powder. Buff lightly to remove excess and keep it smooth. Seal with chrome-safe glossy top coat in two thin layers.
Keep your chrome thickness thin — smoke chrome looks best when it’s glassy, not thick.
Don’t pair smoke chrome with warm orange nudes — it looks mismatched.
25. Nude Base + Chrome French with Tiny Pearl Dot Corners
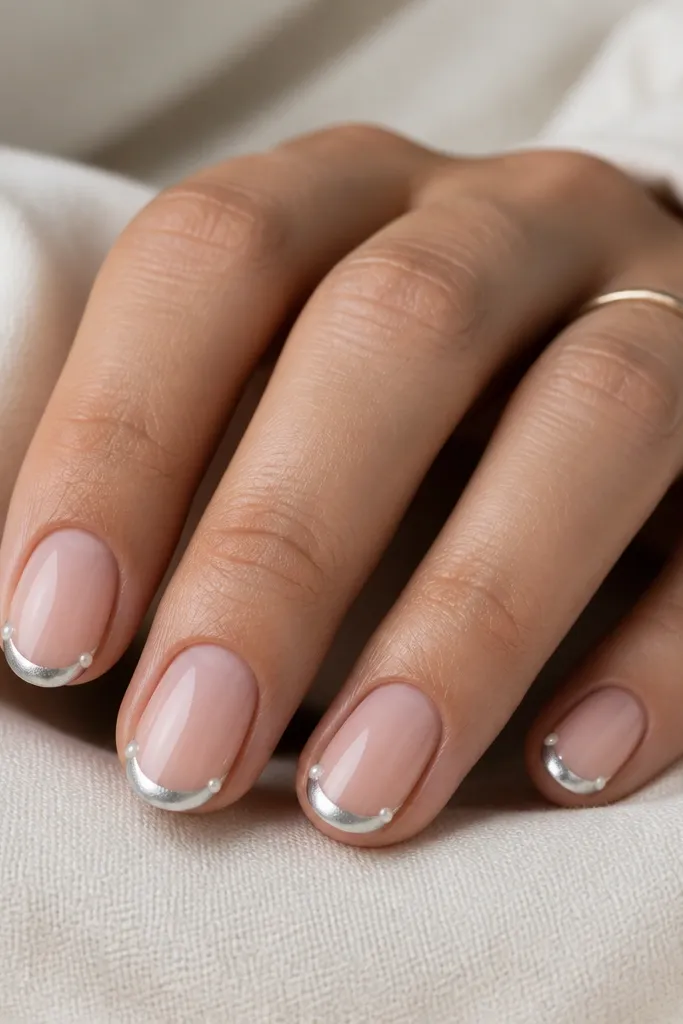
Pearl dots at the corners make a French manicure feel bridal without turning it into full pearl overload. The chrome French keeps it modern, while the pearls add softness. This is flattering on short ovals because the corners create a gentle framing effect that makes the nail look balanced. If you’re wearing pearl earrings, this is the nail detail that matches without looking too themed.
Apply nude base gel in two thin coats and cure. Use French guides and paint the tip area with a thin nude gel, cure. Apply black gel or silver chrome adhesive inside the French shape, cure if needed, then apply silver chrome and buff. Place two tiny pearl dots at the left and right corners of the French line using a dotting tool and a small amount of gel. Cure and then seal with a glossy top coat around the pearls and over the chrome.
Use pearls that are flat-backed and tiny, about 1.0-1.3 mm, so they don’t snag.
Avoid large pearls — they make the French line look uneven.