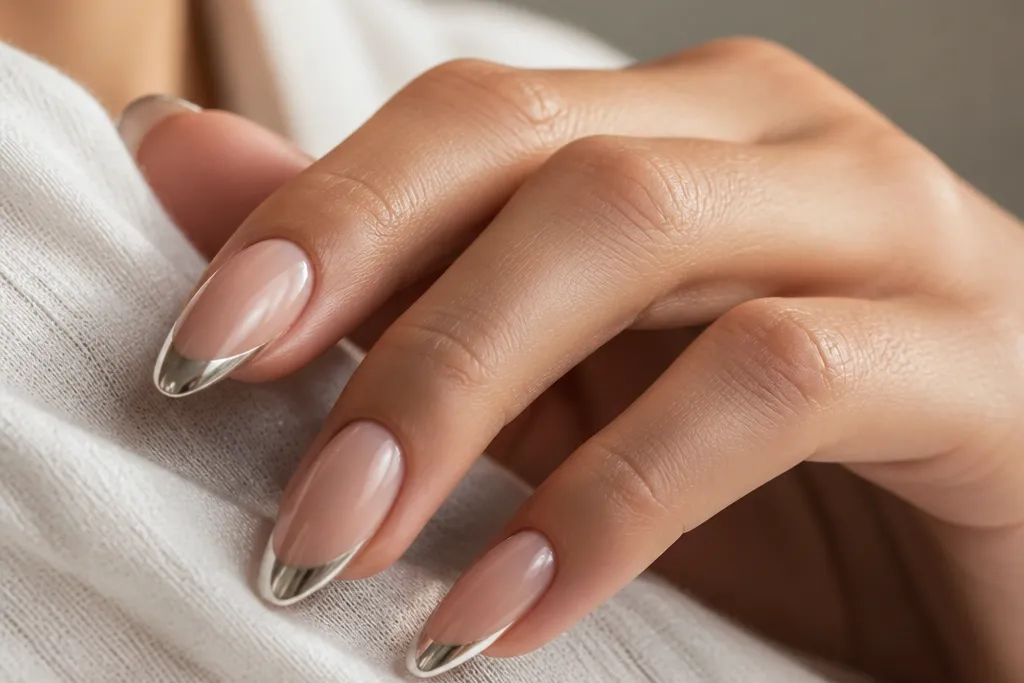

1. Classic Nude + Silver Chrome Micro French
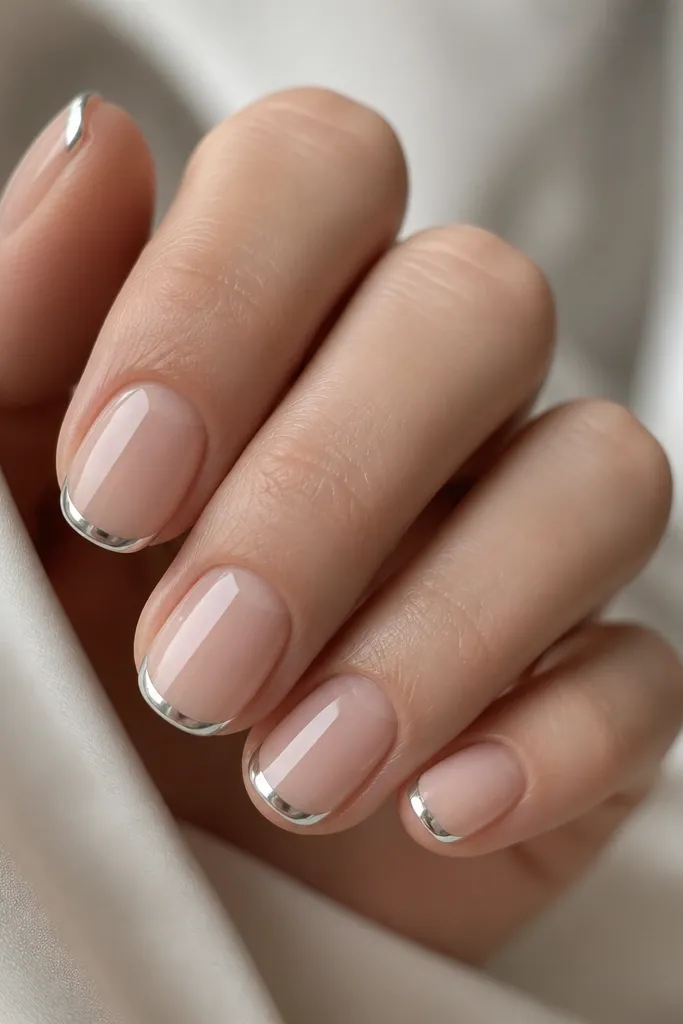
This one is the cleanest "Chrome French Nails affordable" look because it uses a sheer nude base and a micro tip so the chrome has less surface area to mess up. I like it on fair to medium skin tones because the nude blends and the silver reads sharp, not harsh. The tip arc stays around 1mm thick, so it feels delicate on short nails and still looks intentional. The chrome is mirror-style, which means it reflects straight highlights - that's why it looks expensive even when the chrome powder is budget.
Start by buffing the nail surface lightly and applying a sheer nude polish or gel base. Then add French tips with a guide strip so the arc is the same height on every nail, keeping the tip thickness around 1mm. Cure or wait until the tip is fully set and glossy, then dab chrome powder onto the tacky layer only on the tip. Finally seal with a high-shine top coat, focusing extra on the tip edge so it doesn't catch on things.
Editor's noteUse nail striping tape laid along the smile line for 10x cleaner symmetry than freehand on a first try.
Watch outDon't put chrome over a matte or streaky tip - it turns into dull speckles instead of a mirror edge.
2. Milky Pink Base + Silver Chrome Wide French
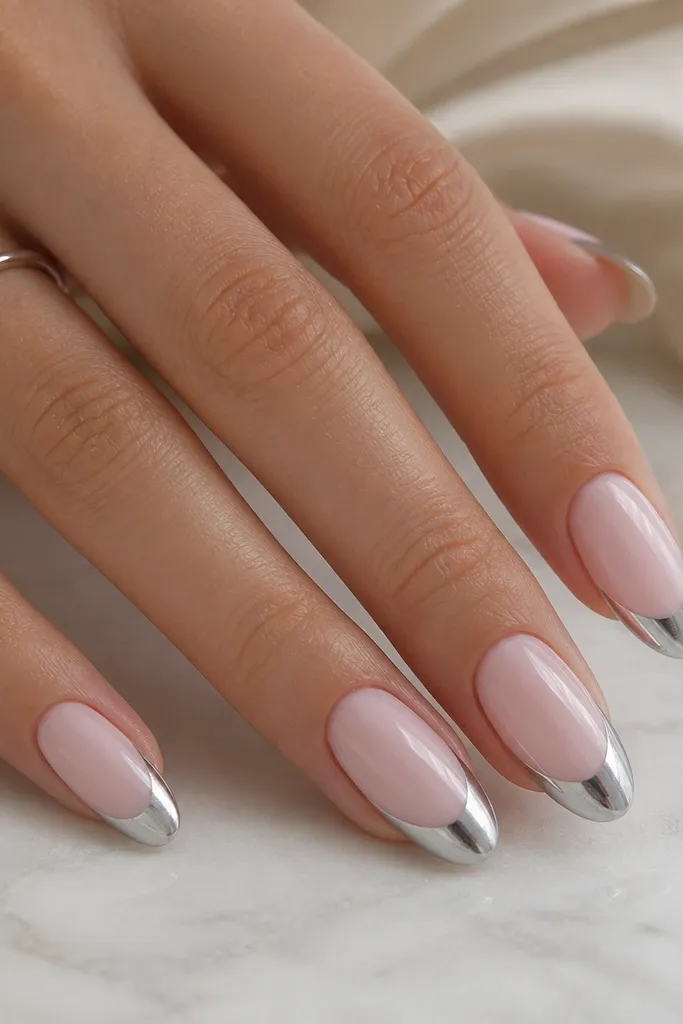
Wide French tips look glamorous because the chrome has more room to catch highlights. I recommend a milky pink base when you want the manicure to look soft, not stark, especially on medium and deeper skin tones where bright nudes can look too beige. Keep the chrome silver, not gray - gray chrome makes milky pink look dirty. The wide tip also flatters hands with longer nail beds because it makes the whole nail look "filled in."
Apply two thin coats of milky pink until the nail looks evenly opaque, then cure fully. Use a French tip guide sticker and paint the tip area with a glossy white or pale nude before chrome so the silver pops. Add chrome powder by pressing it gently onto the tacky layer, then brush off the excess with a soft dry brush. Seal with a thick top coat and cap the free edge of the tip.
Editor's noteIf your chrome looks patchy, press with a small makeup sponge for 3-5 seconds before sealing.
Watch outDon't make the chrome tip too thick on short nails - it shortens the nail visually.
3. Sheer Peach + Rose Gold Chrome French Half-Moon
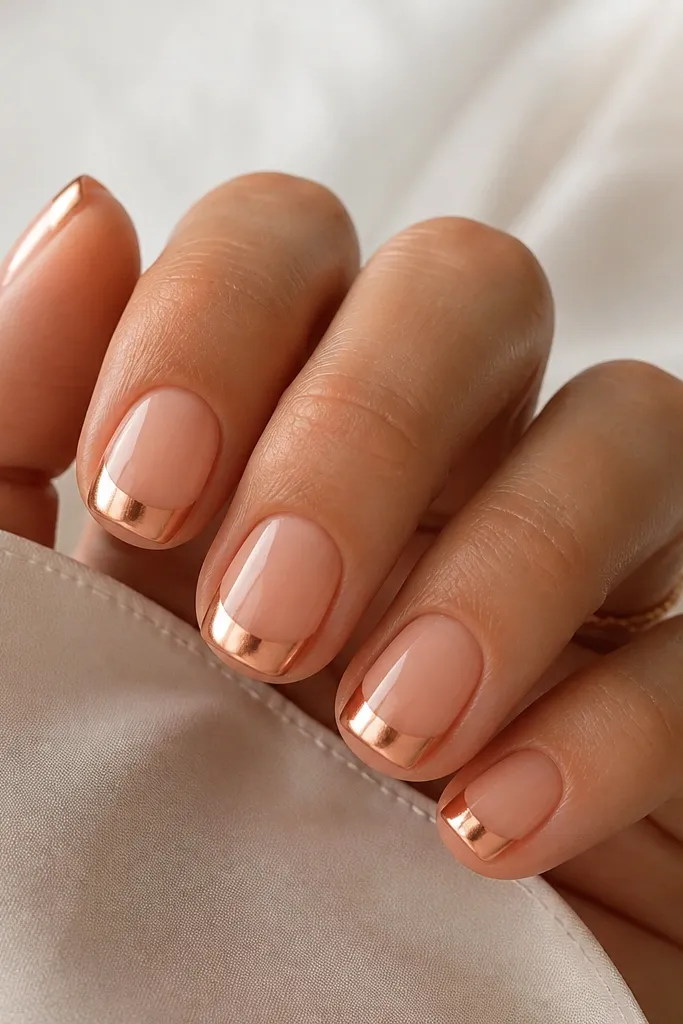
This is a warmer alternative that still reads as French because the chrome hugs the tip curve. Rose gold looks flattering on warm undertones and makes fingers look softer, especially with peachy bases. The half-moon style is forgiving when your smile line isn't perfectly even - the curve hides small differences. It also looks good on nails that curve downward because the chrome emphasizes the arc.
Start with a sheer peach base so your nails look juicy, not painted-thick. Add a thin line of glossy pink or light nude along the French arc using striping tape as a guide. Apply rose gold chrome powder over the tacky layer only in that arc area, not across the whole tip. Seal with top coat and keep the brush strokes flat so the chrome doesn't smear.
Editor's noteSweep a little extra top coat at the arc ends - that's where chrome chips first.
Watch outAvoid using a cool-toned pink base with rose gold chrome - it can look muddy.
4. Clear Jelly Base + Silver Chrome French Tip with Negative Space
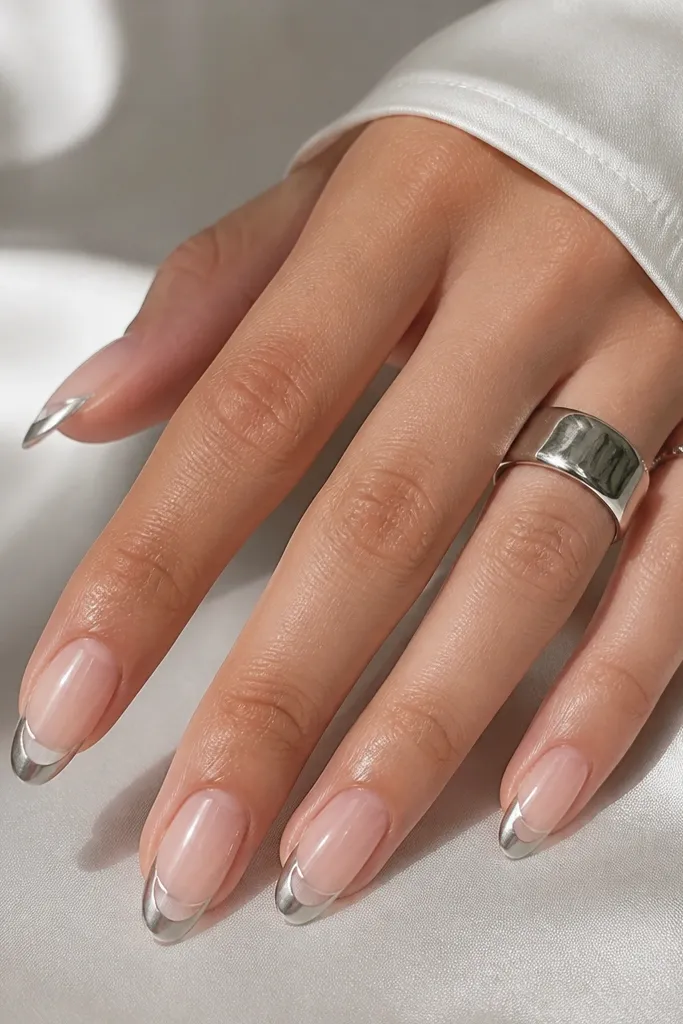
This design looks modern because it keeps some nail visible while still giving you the chrome edge. I like it when you want your hands to look lighter and less "covered," especially if your nails are thin or you don't want heavy opacity. Silver chrome reflects bright highlights, and the negative space keeps the look from getting bulky. It's also great for people who hate full-color tips because it feels airy.
Apply a clear jelly base and cure until it's glossy. Place a French guide strip lower than normal so you can leave a small center gap; paint the tip area with a glossy clear or pale base just where you want the chrome. Apply chrome powder only along the sides and arc, leaving the middle window bare. Seal carefully with top coat, using a lighter brush pressure so you don't flood the negative space.
Editor's noteUse gel cleanser on a lint-free wipe to keep the sides crisp before chrome - it helps the chrome powder grip evenly.
Watch outDon't overfill the center gap with chrome - it stops reading as negative space.
5. White Cream Base + Pearl Chrome French
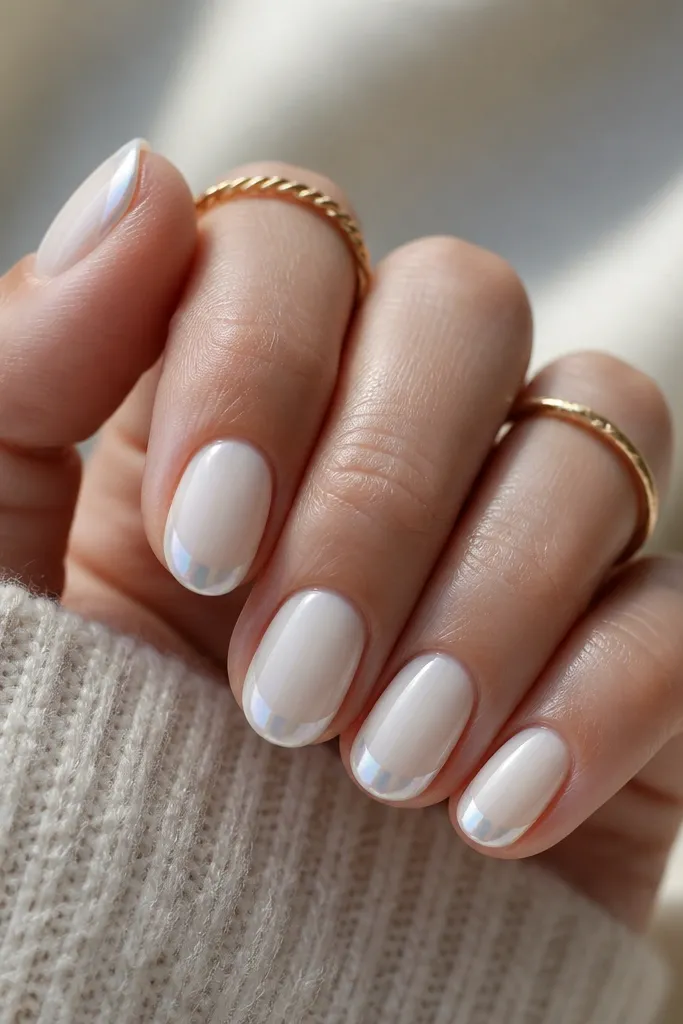
Pearl chrome is softer than mirror chrome, which makes it forgiving if your application isn't perfect. The creamy white base also hides tiny mistakes because it's not stark pure white. This combo looks bridal without screaming bridal, and it flatters fair to deep skin tones because pearl reflects in a gentle range. If you're new to chrome, start here - it's harder to mess up and still looks pretty in daylight.
Apply a creamy white base in two thin layers so it stays smooth and doesn't get thick at the cuticle. Use a French tip sticker to mark the arc, then paint the tip with a glossy white or pale cream. Apply pearl chrome powder over tacky gel or tacky top coat, then press lightly so it turns even. Seal with top coat and cap the tip edge.
Editor's noteAfter applying chrome, wait 10 seconds and then brush off gently - pearl chrome gets less dusty when you don't rub right away.
Watch outDon't use a matte top before chrome - pearl chrome needs a glossy surface to look like light.
6. Beige Nude + Silver Chrome French with Micro Rhinestone Line
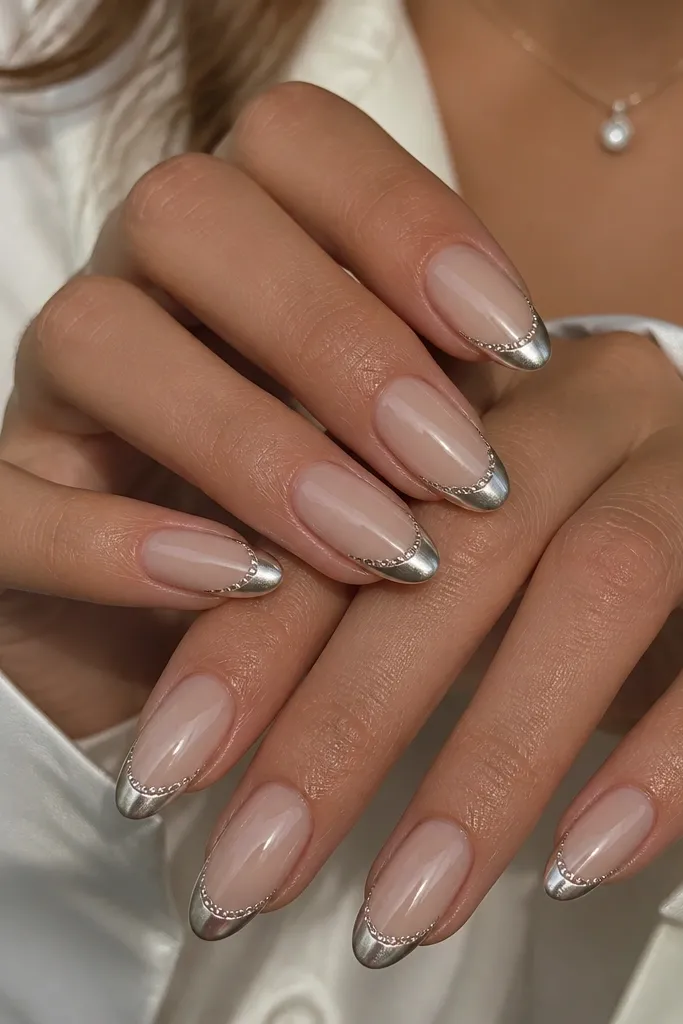
This one adds a little sparkle without turning into a full bling manicure. I like beige nude because it makes silver chrome look crisp and the rhinestones look clean instead of icy. The rhinestone line sits right on the smile line, so your eye reads the French curve faster - that's why it looks "done" even if the rest is simple. It's flattering on hands with shorter nail beds because the sparkle follows the arc and lengthens visually.
Start with a beige nude base that matches your skin tone, then cure. Place French tip guides and paint the tip area with a glossy base before chrome. Apply silver chrome powder to the tip, then after sealing is partially set, place micro rhinestones along the smile line using a dotting tool and clear gel. Cure and then finish with a glossy top coat that covers the rhinestones lightly so they don't snag.
Editor's notePick rhinestones in a single size (like 1.0-1.3mm) so the line looks intentional, not random.
Watch outDon't bury rhinestones under heavy gel - it makes the line look bumpy.
7. Soft Lavender Jelly + Chrome French Tips in Two Tones
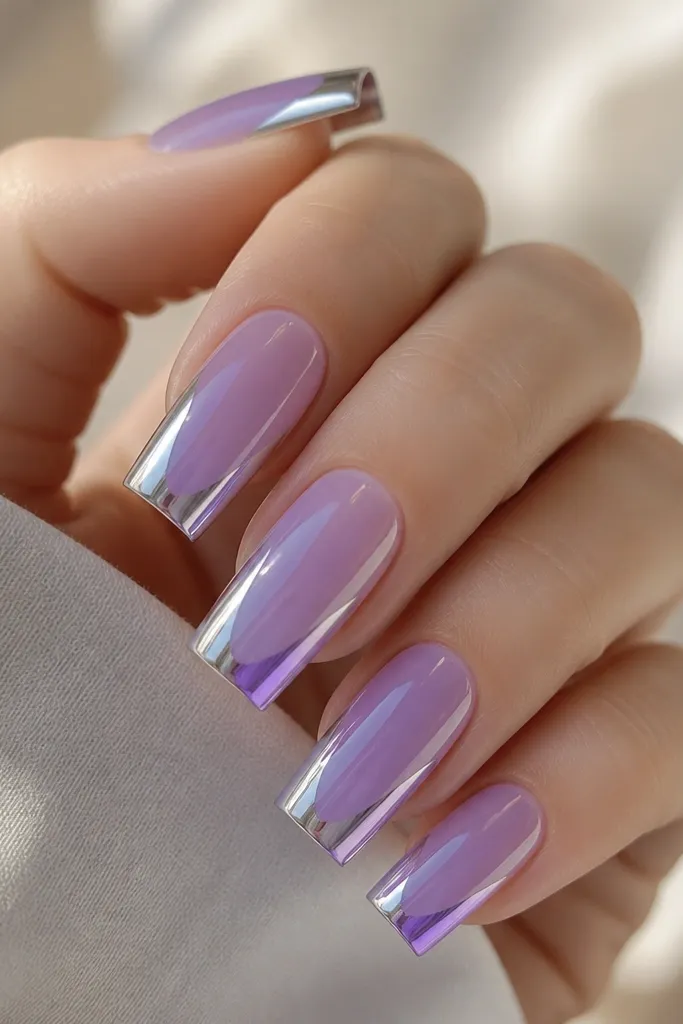
Two-tone chrome French tips look like nail art but still feel wearable because the base is calm. Lavender jelly makes the chrome look dimensional instead of flat, and it flatters people with cool undertones. The trick is keeping the split clean - it should look like two reflective materials meeting along the center. This style is great for events because it shows up in photos even when you're not wearing a heavy outfit.
Apply a soft lavender jelly base and cure until it's glossy and even. Use a French guide and paint the tip area with a pale base that won't stain, then apply silver chrome on one side edge and a lavender-tinted chrome powder on the other side edge. Press each side gently so the chrome stays within its half and doesn't bleed. Seal with top coat, and when you cap the free edge, do it slowly so the chrome stays separated.
Editor's noteUse a small piece of tape to mask one side while you apply the first chrome, then switch for the second side.
Watch outAvoid mixing the two chromes before curing - it turns into gray mush.
8. Chocolate Nude + Mirror Silver French with Thin Outline
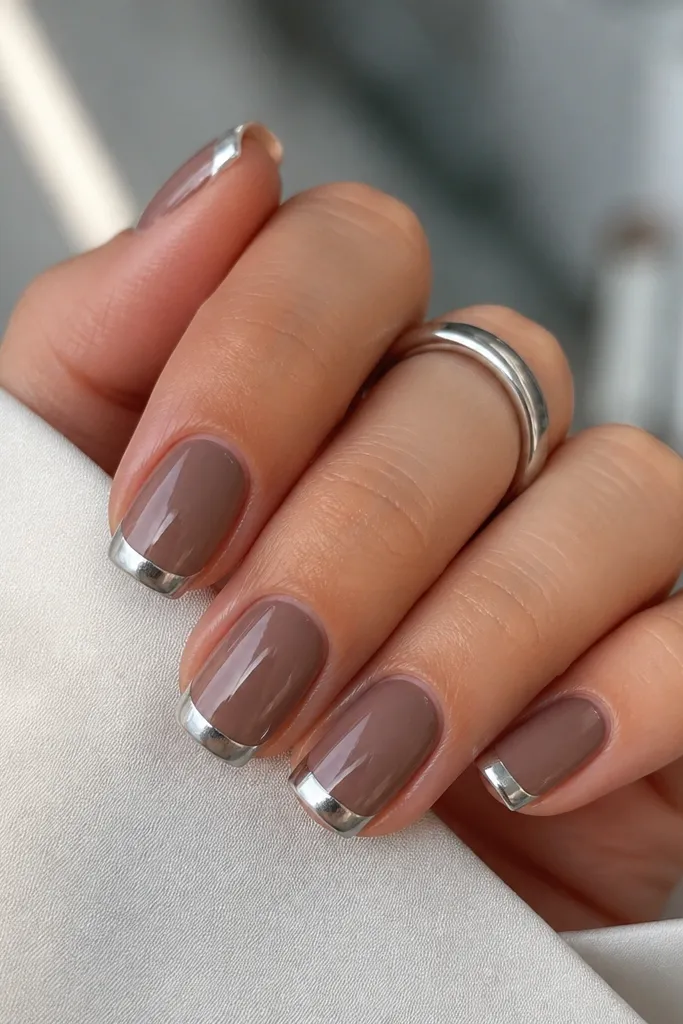
Warm chocolate nude makes silver chrome look extra bright because the contrast is strong. The thin outline at the very edge tricks the eye into seeing a sharper smile line, even if your guide isn't perfect. I love this on medium to deep skin tones because it makes the manicure look intentional and not washed out. It also hides any slight unevenness in the base color since the nude is rich and forgiving.
Start with a chocolate nude base in two thin layers so it stays smooth. Add a French tip guide and paint the tip with glossy nude or white, then apply mirror silver chrome over the tacky layer. After sealing, use striping gel or a thin brush to add a super thin silver outline right along the tip edge. Cure again and add one more glossy top coat to lock the outline.
Editor's noteOutline gel should be the same viscosity as your base - too thick floods and ruins the smile line.
Watch outDon't outline before chrome is sealed - the outline can smear into the chrome.
9. Clear Base + Chrome French with Glitter Fade at the Tip Edge
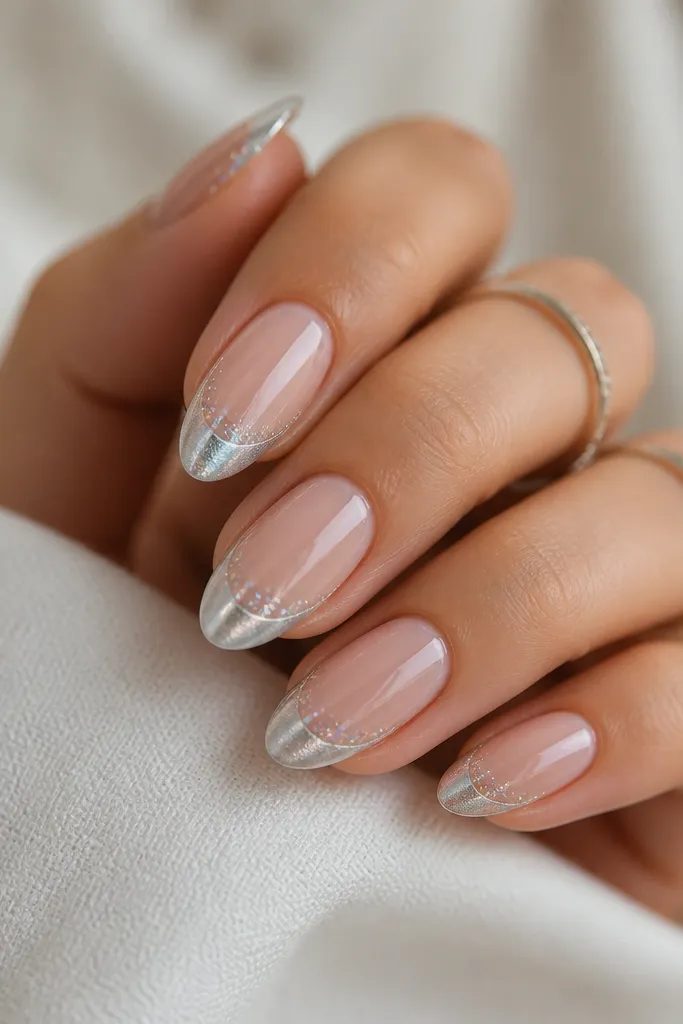
This design looks like a French manicure that turned into a party manicure without going full glitter. Keeping the base clear keeps it fresh and makes the chrome look brighter. The glitter fade at the outer edge adds texture and makes the tip look longer. It flatters most skin tones because the main colors are clear, silver, and holographic - the glitter reads neutral in photos.
Apply a clear base or sheer builder gel and cure. Use a French guide and paint the tip with glossy clear or pale nude, then apply silver chrome powder across the tip area. While the last layer is slightly tacky, dab fine holographic glitter only at the outer 1/3 of the tip, then brush off the rest. Seal with a glossy top coat, keeping the brush strokes gentle to avoid moving the glitter.
Editor's noteUse a small eyeshadow brush for the glitter fade so you don't wipe chrome off the center.
Watch outDon't put glitter under the chrome - it dulls the mirror reflection.
10. Rose Nude + Rose Gold Chrome French with Negative Cuticle Half
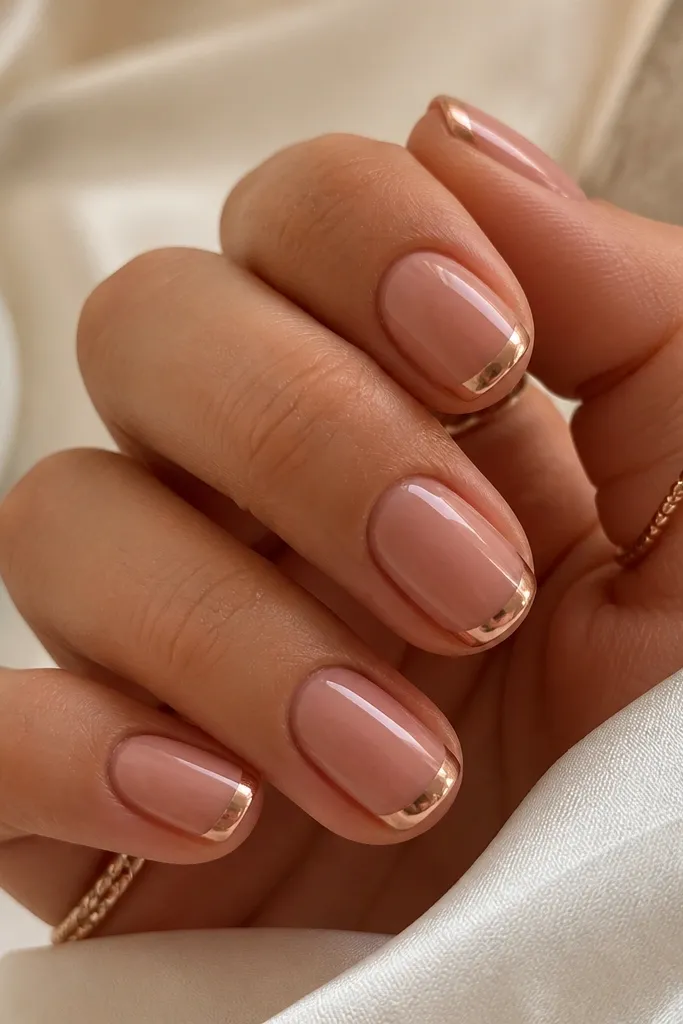
This is for when you want the chrome to look expensive but you're nervous about covering too much nail. The small negative corners near the sides keep the manicure light and make the tip curve look more delicate. Rose nude plus rose gold chrome looks flattering on warm undertones and also looks great if your nails have a pinkish tone. It's a good option for work because the coverage stays controlled.
Apply a rose nude base and cure. Use a French guide and paint the tip area, then apply rose gold chrome powder only within the guide but stop about 1mm before the side corners. Press gently so the chrome stays crisp and doesn't creep. Seal with top coat, then add a second thin top coat over the chrome only to keep it from lifting at the corners.
Editor's noteIf chrome creeps, clean the sides with a cotton swab dipped in isopropyl alcohol before curing.
Watch outDon't over-fill the side corners with chrome - that's where it looks messy and chips faster.
11. White Base + Silver Chrome French with Dainty Black Outline
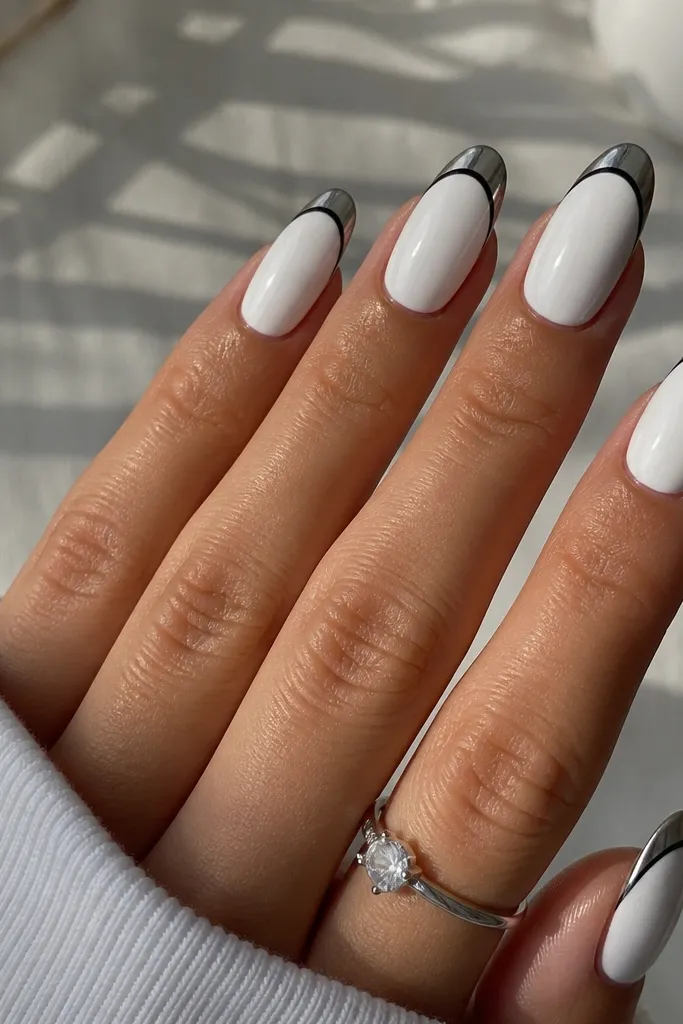
Black outline makes chrome feel graphic and modern. The opaque white base keeps everything clean, and the silver chrome stays the star. I like this for people who wear black, navy, or gray a lot because the palette is consistent. It also looks good on short nails because the outline defines the curve and prevents the tip from blending into the base.
Apply opaque white in two thin layers, cure fully. Add French tip guides and apply glossy base on the tip, then apply silver chrome powder to the tip. Seal with a thin top coat so the chrome doesn't smear. With a striping brush and black gel, trace a super thin line right on the chrome edge, then cure and finish with glossy top coat.
Editor's noteUse a striping brush with a pointed tip - round brushes make the outline thick and uneven.
Watch outDon't trace over wet gel - the black line will bleed into the chrome.
12. Nude Jelly + Chrome French with Tiny Star Dust on One Accent Nail
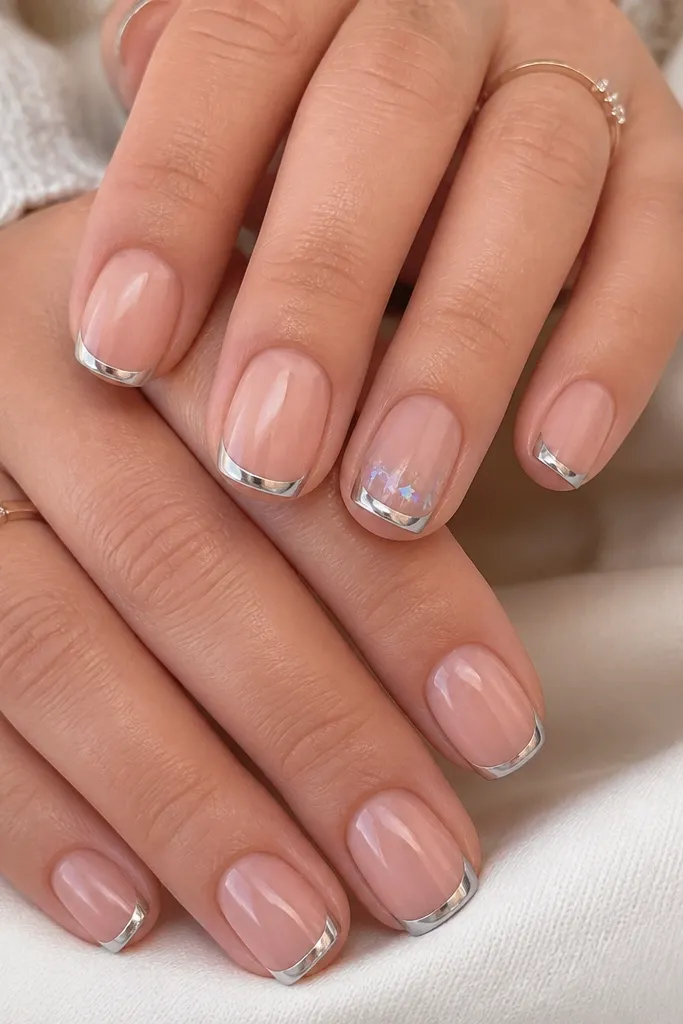
If you want "affordable" to still look special, do one accent nail. The nude jelly base keeps your hands looking natural, while the silver chrome French tips deliver the main effect. The tiny star flakes catch light differently than chrome, so the accent looks intentional, not random. This works great for birthdays and date nights because it's subtle up close and obvious in photos.
Apply nude jelly base and cure. Use French guides and apply glossy tip base, then add silver chrome powder on all nails. On one accent nail, after chrome is applied and sealed with a thin top, add a few tiny holographic star flakes just above the tip edge with clear gel. Cure and finish with glossy top coat so the flakes sit flat.
Editor's noteChoose star flakes that are small (like 0.5-1mm) so they don't look chunky.
Watch outDon't add flakes to every nail - it stops reading as French.
13. Clear Pink + Silver Chrome French with Foil-Like Edge
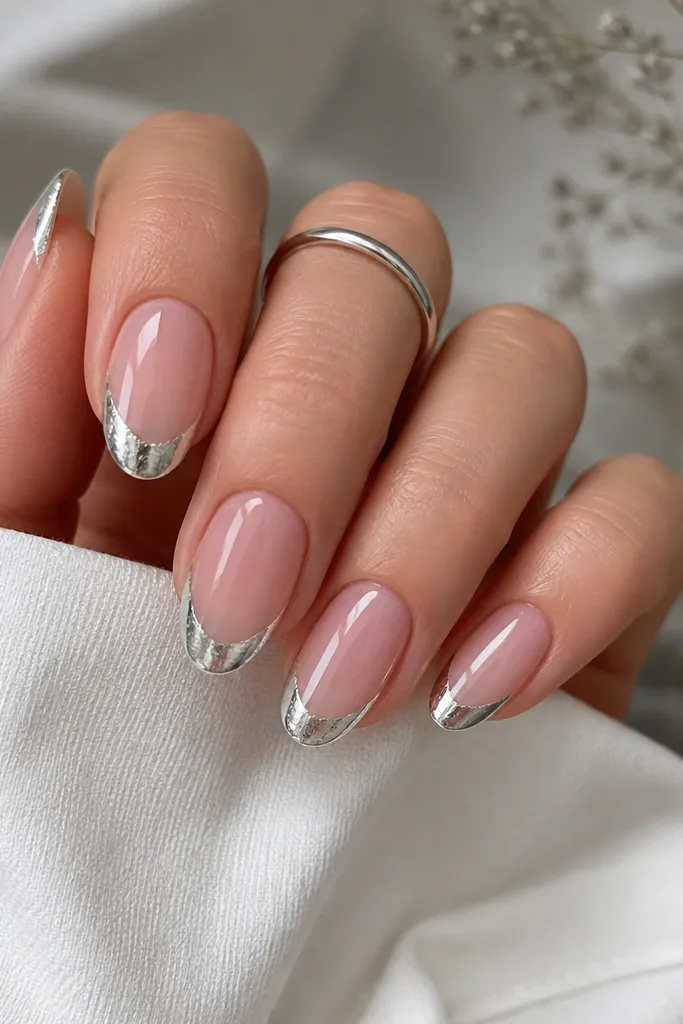
Foil-like edges add texture, and texture reads expensive because it creates micro highlights. A clear pink base keeps the look soft, and the silver chrome still makes it feel clean. I like this when you want chrome but you don't want the mirror finish to look too harsh. It flatters most skin tones because the base is neutral and the effect is only on the tip.
Apply a clear pink base (one to two thin coats) and cure. Apply tip base with a glossy pale pink or white using a guide, then apply silver chrome powder. While the chrome is still tacky, press a small piece of thin silver foil along the outer 1mm edge of the tip and then peel it off - you get a textured border. Seal with glossy top coat, then cap the tip edges carefully.
Editor's noteUse foil sparingly - 1mm at the outside edge is enough to create the effect.
Watch outDon't press foil across the entire tip - it can look scuffed instead of intentional.
14. Mocha Nude + Pearl Chrome French with Satin Top
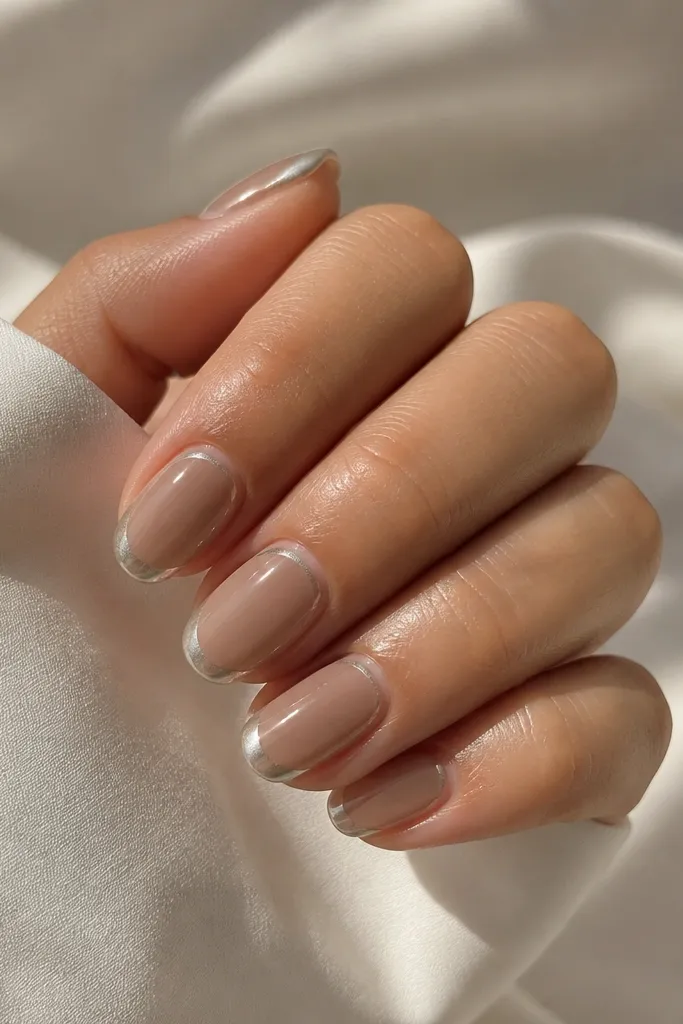
Pearl chrome with a satin top is a totally different vibe than mirror chrome. It looks expensive on mocha or coffee nudes because the warm base and soft glow feel cohesive. I've worn this to work and it doesn't look too loud, even though it still catches light when you move your hands. It flatters hands by making the chrome look smoother and less "flashy," especially if you don't like high shine.
Apply a mocha nude base and cure. Use a French guide and paint the tip with glossy nude, then apply pearl chrome powder over tacky layer. Seal with a satin top coat instead of a super glossy one - keep it thin so the satin doesn't dull too much. Cure fully and then wipe the surface if your system requires it.
Editor's noteIf you want a little shine, do satin only on the base nails and keep the tip glossy.
Watch outDon't use satin on top of mirror chrome if you want a sharp French look - it can blur the edges.
15. Dusty Blue + Silver Chrome French with Thin Diagonal Accent
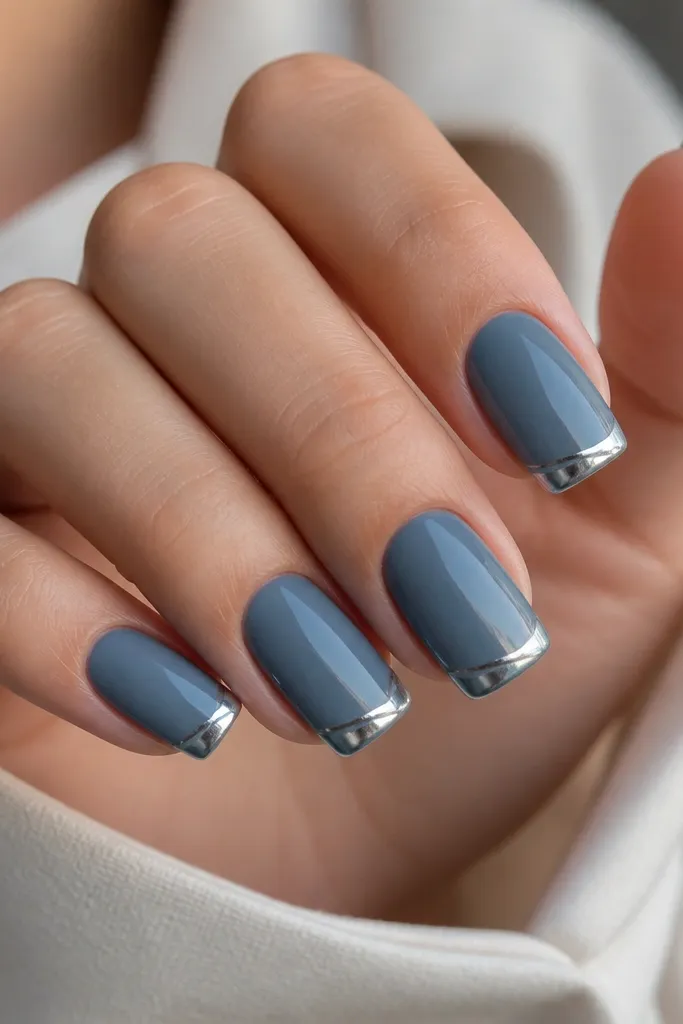
Dusty blue plus silver chrome feels modern and fresh, and the diagonal line adds interest without turning into full nail art. This flatters cool undertones and looks great with silver jewelry. The diagonal accent helps your eye track the nail shape, so even if your French curve isn't perfect, it still looks styled. It's also a fun option for spring and summer because the blue reads clean and not heavy.
Apply dusty blue base in two thin coats and cure. Add French tip guides and apply glossy base on the tip, then apply silver chrome powder. After sealing with a thin top coat, use a striping gel and a fine brush to draw a tiny diagonal line from the outer edge of the smile line toward the corner, about 1-2mm long. Cure and finish with glossy top coat.
Editor's noteKeep the diagonal accent super short - if it's longer than 2mm it starts looking like a mistake.
Watch outAvoid thick lines - chrome already reflects, so heavy gel makes it look cluttered.
16. Creamy Nude + Chrome French with Tiny Dot at Each Tip End
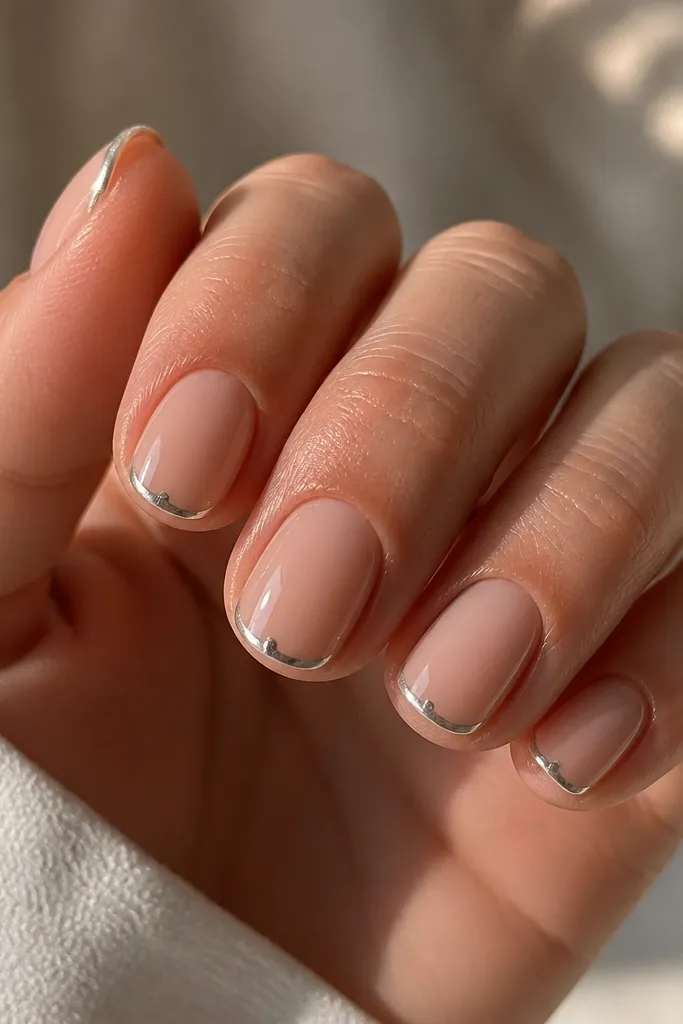
Tiny dots at the ends make the smile line feel intentional, like a design element instead of a random curve. I like creamy nude bases because they blur the transition between nail bed and tip. Silver chrome gives the dots a bright focal point, and the dot placement visually lengthens the nail on shorter fingers. This is a low-effort look that still looks polished in close-up photos.
Apply creamy nude base and cure. Use French guides and paint the tip, then apply silver chrome powder to the tip area. Seal with a thin top coat so the chrome is stable. Then use a dotting tool with clear gel (or white gel) to place a tiny dot at each tip end - right where the smile curve turns upward. Cure and finish with glossy top coat.
Editor's noteUse a dotting tool tip that's about half the size of your rhinestone dot - smaller looks more luxe.
Watch outDon't place dots in the middle - keep them at the ends so it frames the French curve.
17. Black Jelly Base + Silver Chrome French Edge
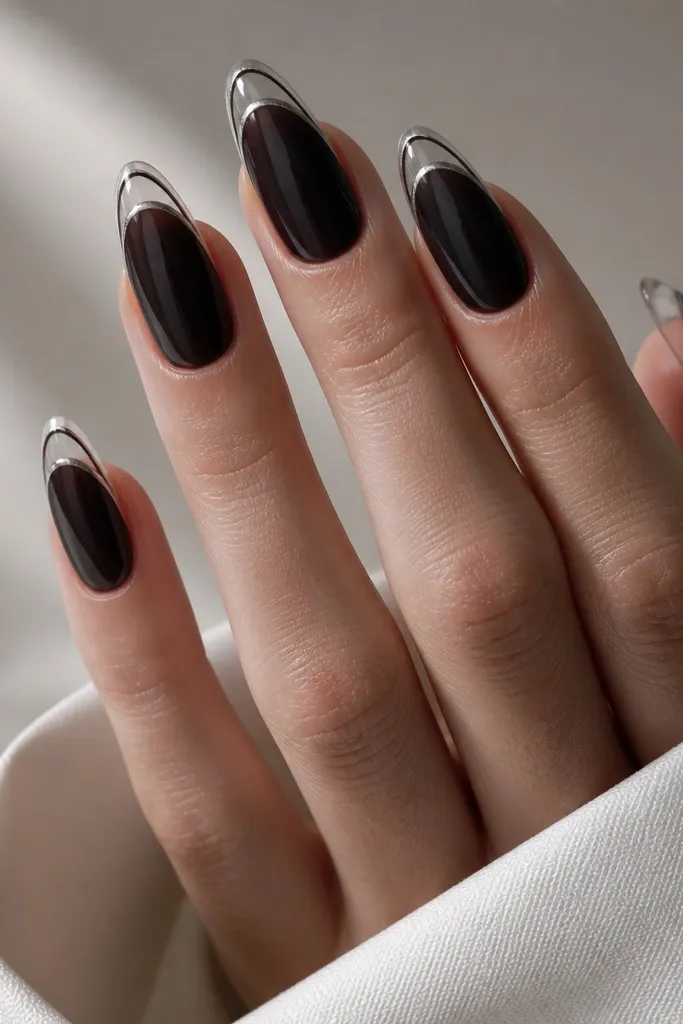
Black jelly under a thin chrome rim is dramatic without being messy. The chrome edge stays crisp, and the clear center keeps it from looking like a full chrome nail. This style flatters deep skin tones beautifully and makes nails look longer because the clear portion breaks up the solid black. It's also great for nights out because the black base looks sleek and the chrome flashes when you move.
Apply black jelly base and cure to full gloss. Use a French guide and paint only the outer tip edge with a glossy clear or pale base, leaving the center of the tip clear. Apply silver chrome powder to that edge area only, then brush off excess. Seal with glossy top coat and cap the very tip edge for durability.
Editor's noteIf your chrome looks too wide, redo with a narrower guide - the rim should be thin, like 1mm.
Watch outDon't cover the whole tip with chrome on black jelly - it can look heavy and less French.
18. Champagne Nude + Holographic Chrome French
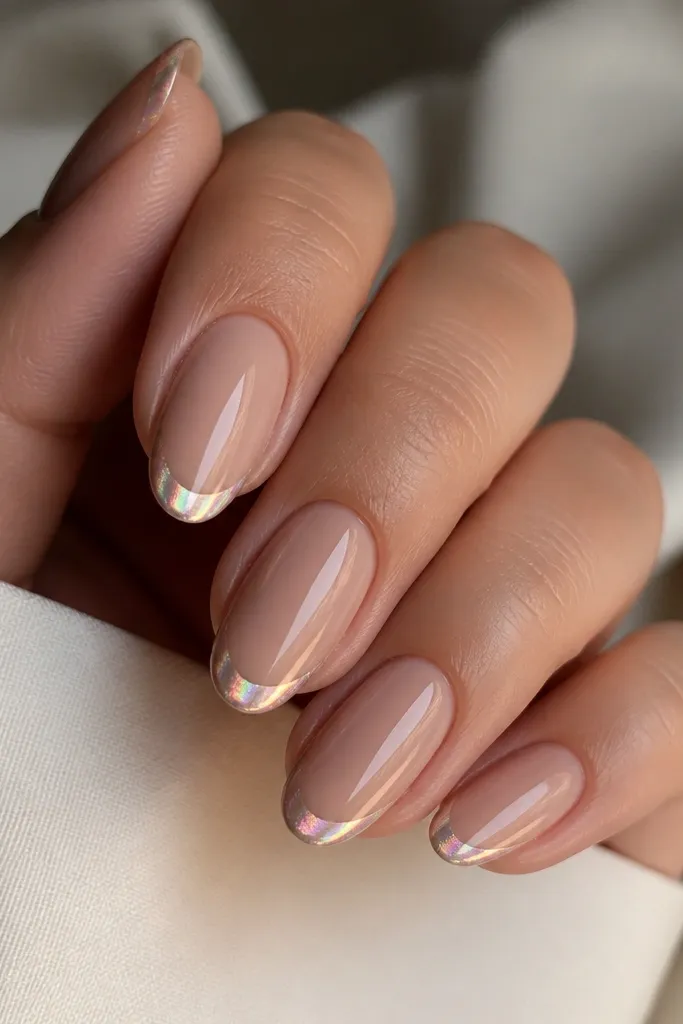
Holographic chrome makes French tips feel playful while still looking clean. A champagne nude base keeps the color warm so the holographic shifts look smooth, not chaotic. This works on almost every skin tone because the base is neutral and the chrome does the fun color work. I wear this when I want "pretty" without needing nail art lines or stickers.
Apply champagne nude base and cure. Add French tip guides and paint the tip with glossy nude or pale gold so the holographic chrome has a warm underlayer. Apply holographic chrome powder over tacky layer, pressing lightly so it reflects in multiple directions. Seal with glossy top coat and cap the free edge.
Editor's notePress chrome with a soft sponge instead of your finger for fewer streaks.
Watch outAvoid cold, pink nudes with champagne holographic - the shifts can look off.
19. Milky Beige + Silver Chrome French with Center Line (Pinstripe)
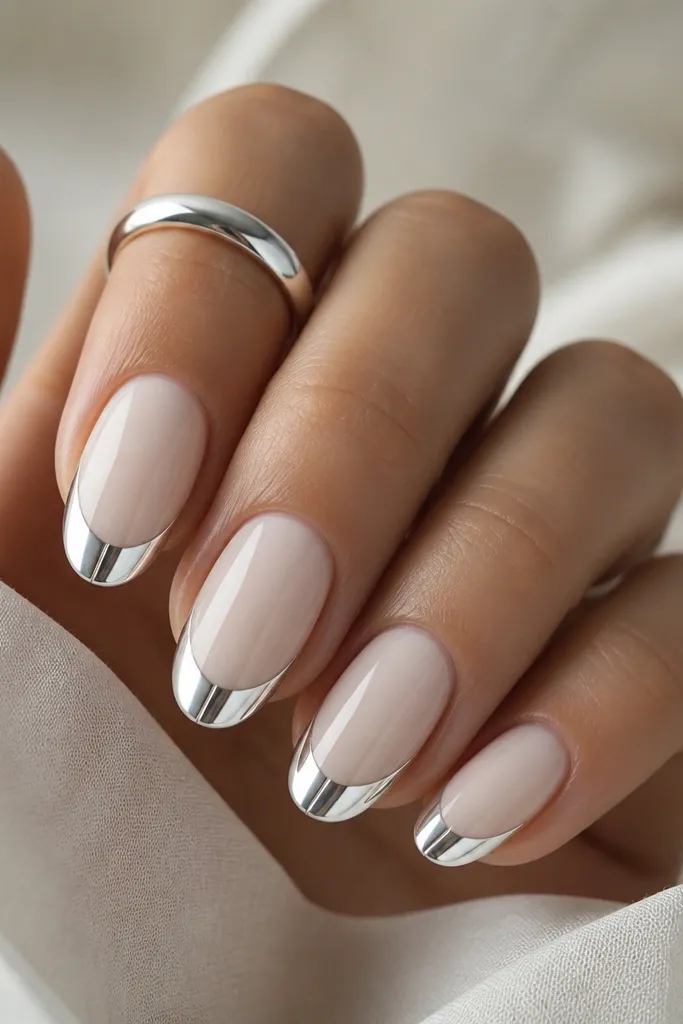
A center pinstripe turns a basic French chrome into a design that reads more "custom." Milky beige is forgiving and flattering because it matches a wide range of skin tones and doesn't pull too pink or too yellow. The pinstripe also helps if your French curve is slightly uneven - it gives the eye a second reference point. This is a great option for people who want chrome French but still love minimalist details.
Apply milky beige base and cure. Use French guides to paint and apply silver chrome to the tip area. Seal lightly with top coat so the chrome stays put. Then use striping gel with a fine liner brush to draw a thin line down the exact center of the tip, from inner arc to outer edge. Cure and finish with glossy top coat.
Editor's noteUse painter's tape to mark the center line before you start - it keeps the pinstripe straight.
Watch outDon't make the pinstripe thick - it turns from "pin" to "stripe" and looks heavy.
20. Clear Pink + Silver Chrome French with Tiny Cuticle Triangle
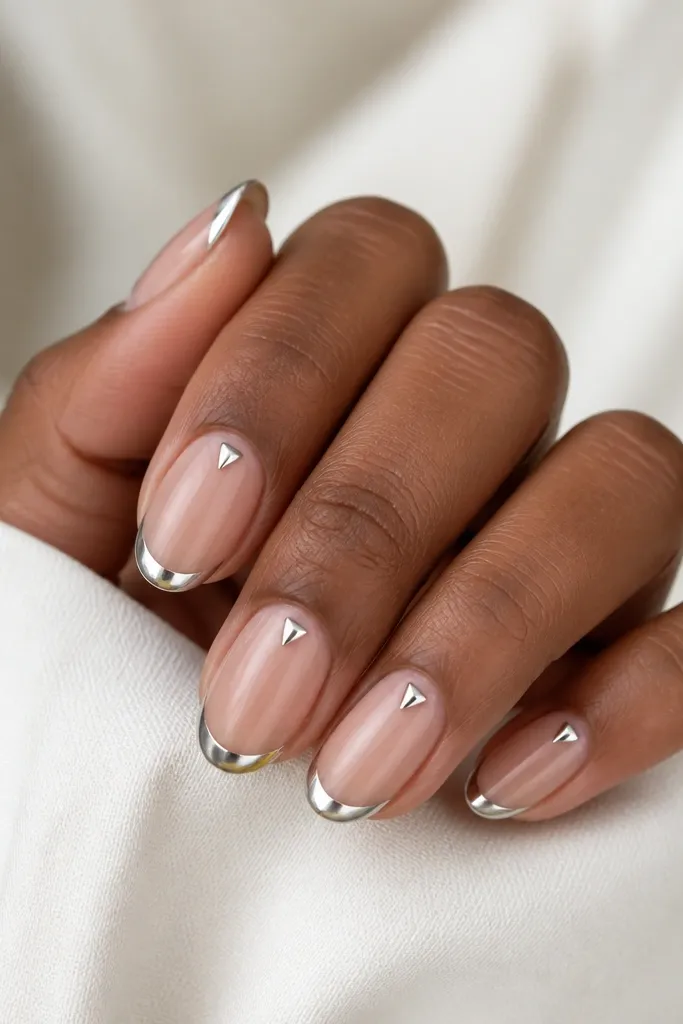
The tiny cuticle triangle is a small asymmetrical detail that makes the whole set feel designed. Clear pink keeps the look fresh and makes the triangle look like it's floating, not heavy. I like it on medium-length nails because there's room for the French tip arc and the small triangle without crowding. This style also photographs well because the triangle catches light even when your hands are relaxed.
Apply clear pink base and cure until glossy. Add French tip guides and apply silver chrome to the tip area as usual. Before sealing, use a dotting tool to place a small amount of tacky gel at the center of the cuticle and press a tiny pinch of silver chrome to form a triangle shape. Clean the edges with a cotton swab, then seal with top coat and cap the tip edge.
Editor's noteKeep the triangle smaller than your cuticle opening - about 1mm wide works for most nails.
Watch outDon't place the triangle too low - it can look like a chip instead of a design.