
1. Glossy Black With Gold Micro-Tip Lines
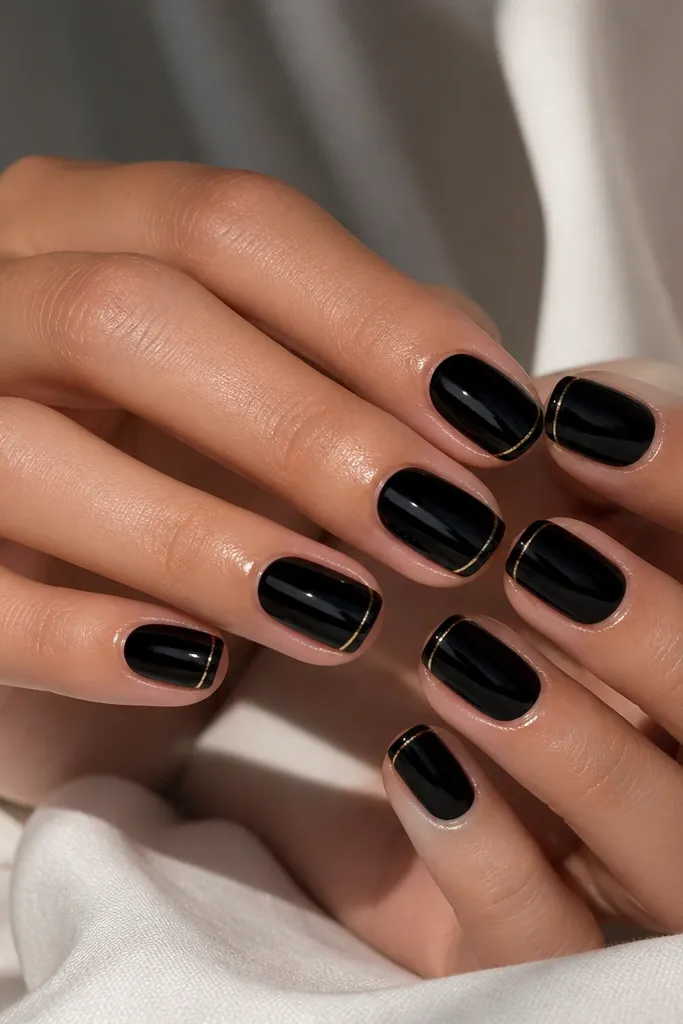
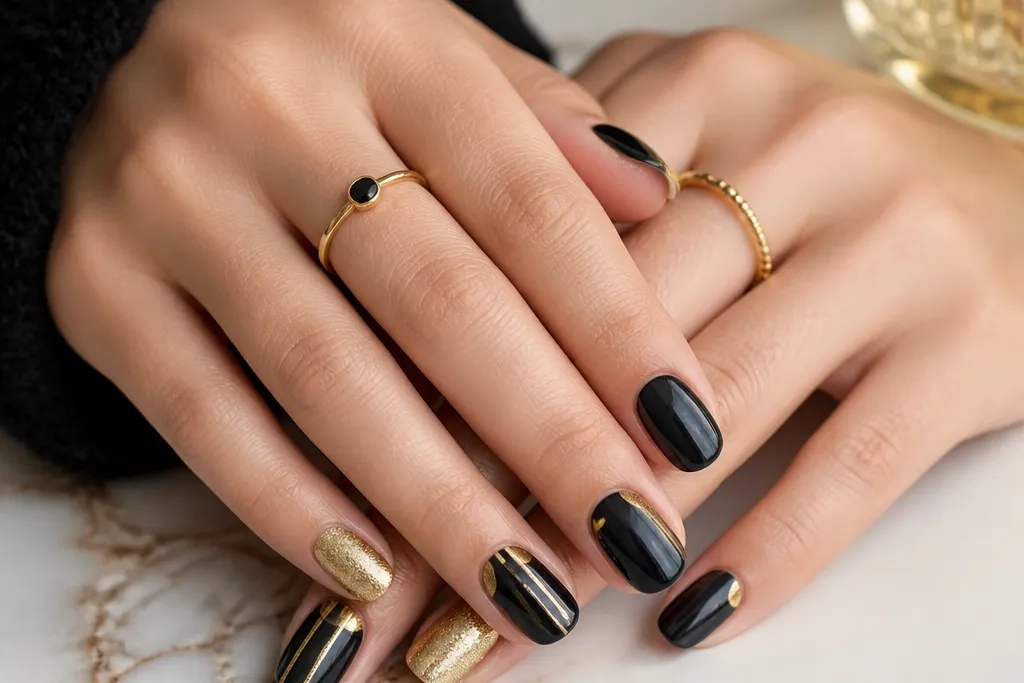
This is the black-and-gold party look I reach for when I want it to look intentional in photos. The glossy black reads sleek, and the gold micro-tip keeps the contrast sharp without covering too much nail. It flatters short to medium nails because the gold stays at the edge where your nail already looks longest. If your skin tone is warm or cool, the gold still pops because it’s a metallic line against a near-black base. The styling principle is restraint: one thin gold accent makes the whole manicure feel dressed up.
Start with two coats of glossy black, letting each coat dry fully. Next, use striping tape or a striping brush to place a thin gold line right at the free edge, keeping it centered so it doesn’t look crooked. If you’re using tape, remove it while the gold is still slightly tacky. Finally, seal with a high-shine top coat in two thin layers for a glassy finish.
Use a fine detail brush and paint the gold in one steady stroke from left to right to keep the line even.
Avoid thick gold at the tips — it looks chunky and drags attention downward.
2. Black Base With Gold Foil Half-Moons
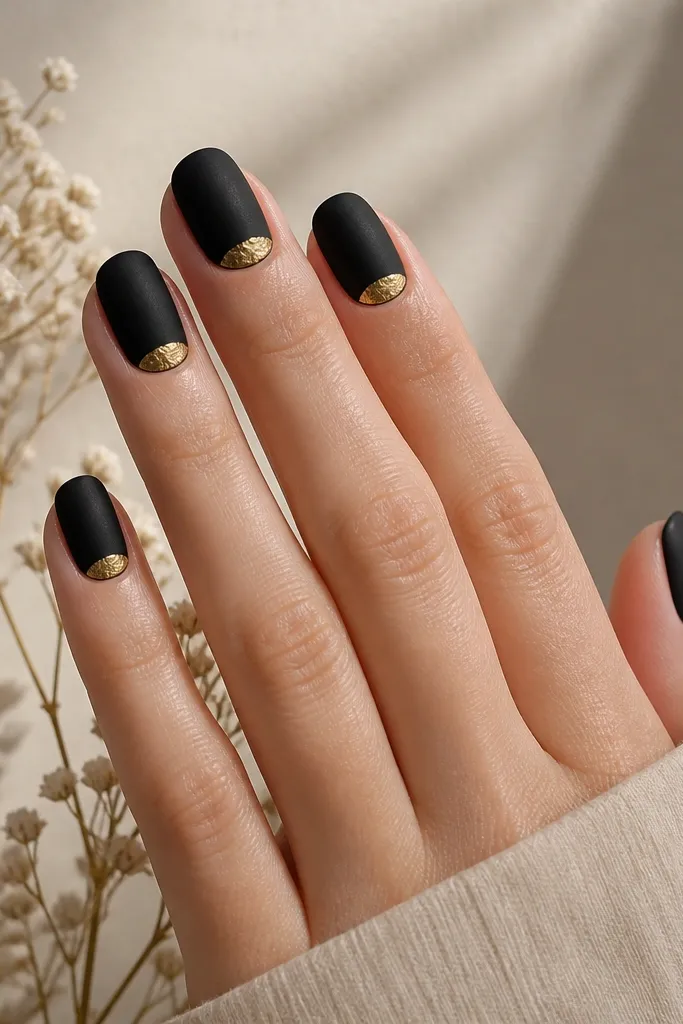
Begin with two coats of matte black and let it cure until it feels fully dry. Dab gold foil adhesive (or apply foil gel) in a curved band about 2-3 mm wide at the cuticle, leaving the sidewalls clean. Press gold foil pieces onto the adhesive, then tap off excess. Finish by sealing with a thicker top coat that can handle texture without smearing the foil.
Half-moons at the cuticle give you that “jewelry” effect without needing full coverage art. The matte black makes the gold foil look brighter and more dimensional, like actual metal. This design flatters small nail beds because the gold sits exactly where you want visual lift. On medium to deep skin tones, the gold looks especially luminous against the dark base. The principle is placement: keep the gold at the top third so the manicure looks balanced.
Watch outDon’t rush the foil — if the adhesive is too wet, it smears and the half-moon loses its edge.
Editor's noteCut small foil pieces so you can shape the half-moon curve instead of fighting large sheets.
3. Negative Space Gold Chevron Over Black
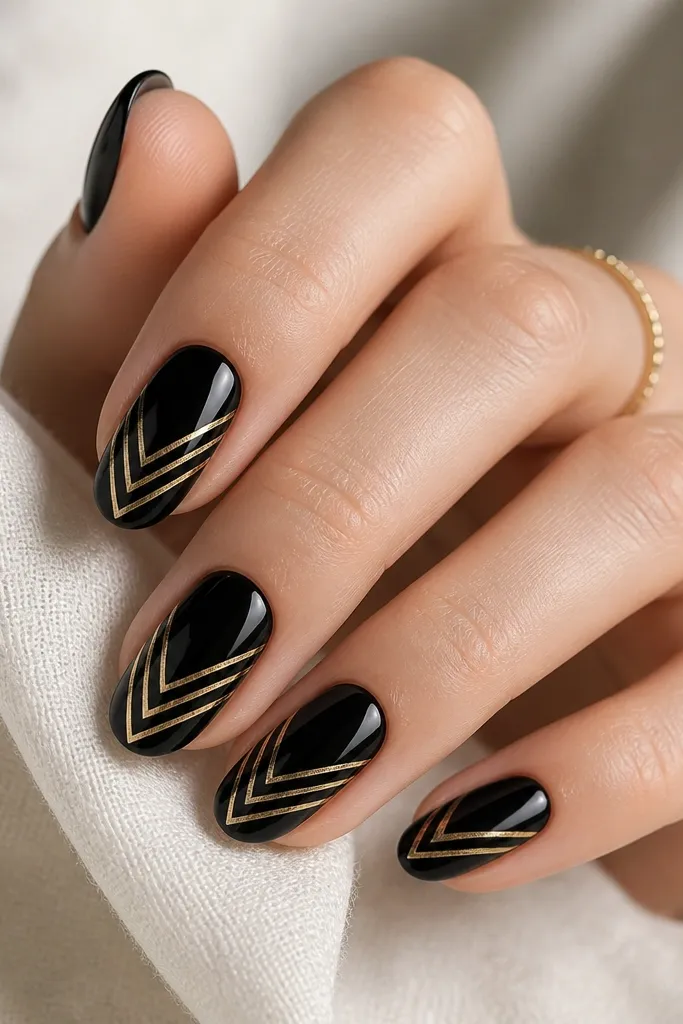
Chevron linework looks sharp and modern, and the negative space keeps it from feeling heavy. The glossy black makes the gold chevron look crisp, while the gaps let your natural nail tone peek through for a lighter look. This is flattering on longer nails because the chevron can stretch upward, but it also works on medium nails if you keep the chevron narrow. If you wear rings often, the geometric shape matches that jewelry vibe. The principle is structure: thin gold lines plus intentional gaps read clean in every photo angle.
Paint two coats of glossy black and let it dry completely. Using a striping brush, paint a V shape starting about halfway up the nail, then add a second thin line to form the chevron edges. Leave the center gap unpainted so you get that negative space effect. Seal with a top coat, and run the brush over the lines gently so you don’t flood them.
Lightly mark the center with a dotting tool first, then build the chevron from that guide.
Avoid thick chevrons — they blur at the edges and look messy instead of graphic.
4. Black Marble With Gold Vein Accent
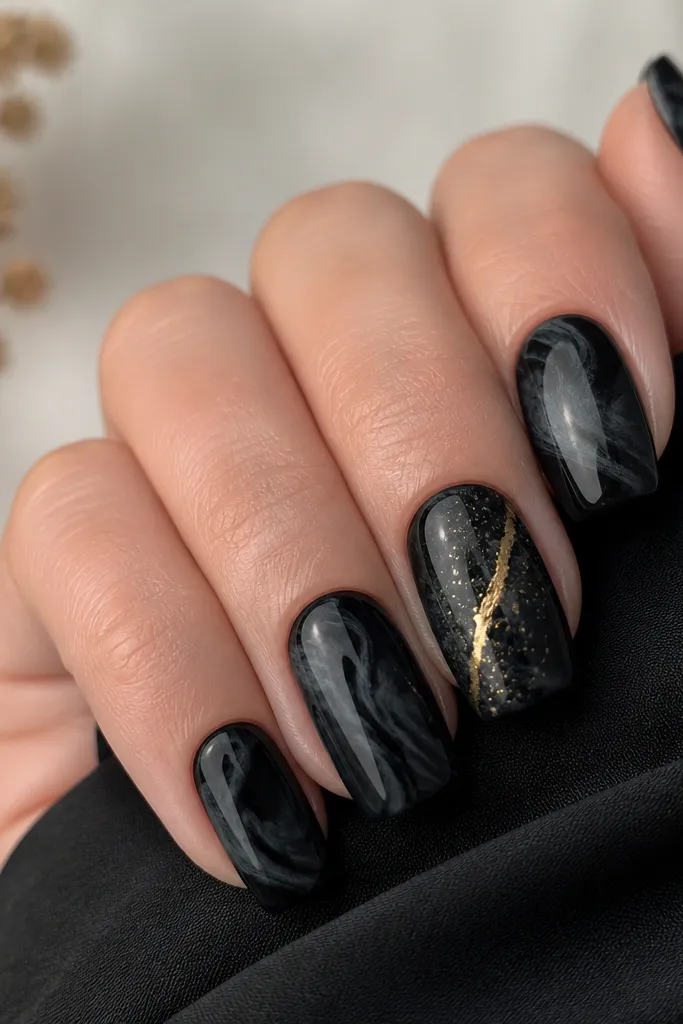
Marble looks fancy even when you keep it simple, and the gold vein makes it feel party-ready. I like this because the black marble hides minor brush strokes, so it’s forgiving if you’re not perfect with nail art. On fair to medium skin tones, the marble reads bold; on deeper tones, the gold vein gives extra contrast that still looks classy. This design flatters both short and long nails because the swirls spread naturally. The principle is one hero detail: gold goes on a vein or a single nail so the whole set doesn’t get cluttered.
Start with a solid black base, then use a small makeup sponge to dab in a darker gray-black mix for the marble movement. Add a few thin streaks with a marbling tool or toothpick, then blend lightly at the edges. On one or two accent nails, paint a gold metallic line diagonally and add tiny flicks branching off. Finish with a glossy top coat to smooth the marbling texture.
Use a toothpick for the vein — it makes thinner lines than a brush when you’re rushing.
Don’t cover every nail in gold — the marble already has movement and gold can tip it into busy.
5. Gold Chrome Tips On Almost-Black
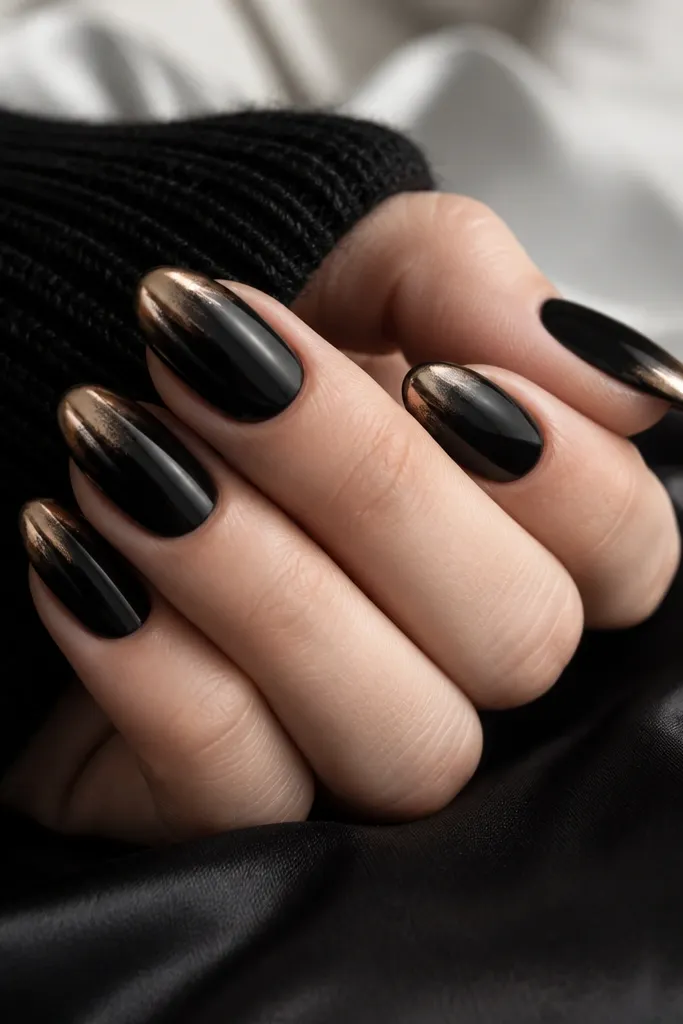
Apply two coats of a near-black polish or gel and cure fully if you’re using gel. Buff or apply gold chrome powder/gel at the tip area using a fingertip applicator, then blend slightly into the nail by tapping lightly. Wipe off excess powder if needed so the fade stays soft. Seal with a top coat that’s safe for chrome so you don’t dull it.
Gold chrome tips look like you just stepped out of a salon, and they’re easier than detailed striping because the fade guides you. I use an almost-black base (not pure flat black) because it reflects a little under the chrome and makes the gold look richer. This flatters short nails because the chrome sits at the edge and keeps your hand looking longer. On all skin tones, chrome catches light fast, so it looks good in motion. The principle is contrast plus glow — keep everything else clean.
Watch outAvoid a matte top coat over chrome — it kills the mirror effect.
Editor's noteIf your chrome looks patchy, apply a thin second layer of chrome only at the center of the tip.
6. Black Matte With Gold Studded Cuticles
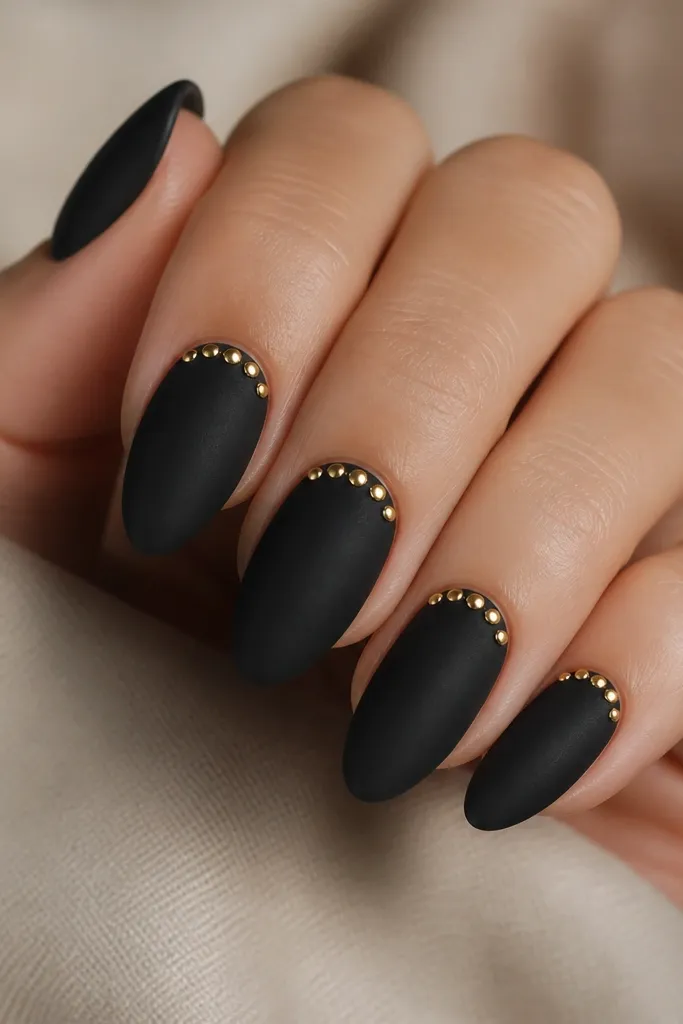
Studded cuticles look expensive because they catch light right where your fingers move. Matte black is my go-to here because it makes the gold studs pop without glare. This design flatters hands with shorter nails because the studs sit high and visually lift the nail bed. If you’re wearing a black outfit and gold jewelry, this matches perfectly. The principle is a single sparkle zone: the studs are only at the cuticle, not spread across the whole nail.
Start with matte black and cure or let it dry until it feels truly non-sticky. Use a dotting tool to place a tiny amount of gel glue at the cuticle, about 1 mm from the edge. Press one small gold stud near the center, then place 1 more near the side if you want extra balance. Cure, then seal with a matte-safe top coat around the studs so they don’t lift.
Pick studs that are 1.0-1.5 mm — anything larger can look heavy on short nails.
Don’t flood glue — it pushes the studs around and creates gaps.
7. Gold Leaf Flakes Over Black Ombre
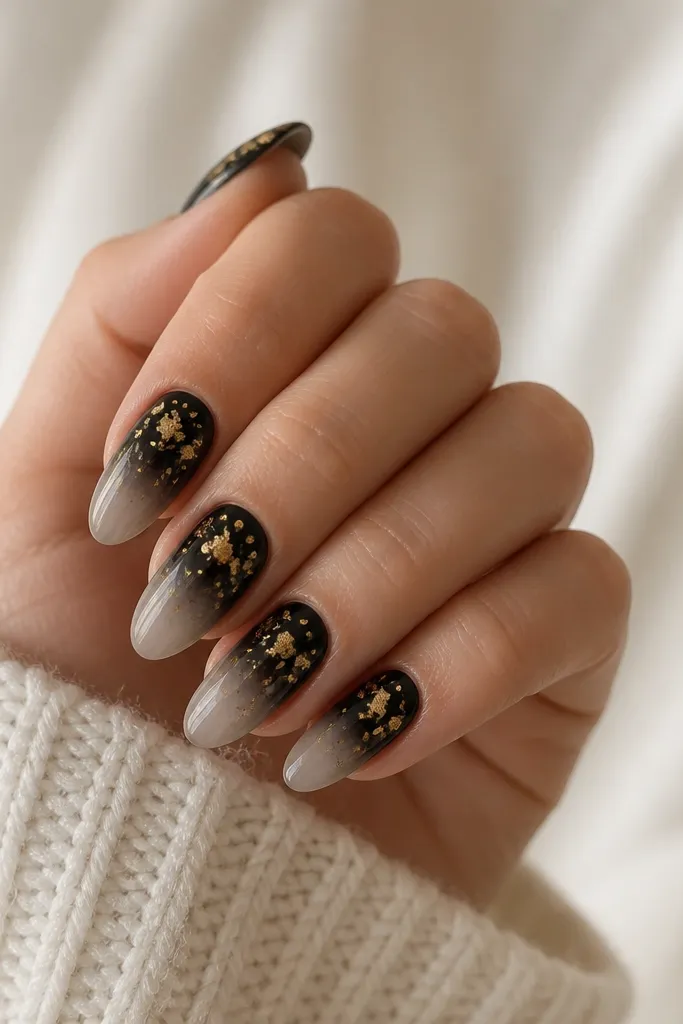
Paint a black base, then sponge on a lighter gray-black or charcoal toward the tips for the ombre using a makeup sponge. Keep the fade soft by dabbing, not swiping. Apply leaf adhesive or a thin layer of gel to the upper half of each nail and press gold leaf flakes on top. Seal with a thick top coat so leaf edges don’t catch on fabric.
Gold leaf over an ombre gives you that painterly party look without drawing lines. The ombre keeps it from looking flat, and the leaf adds texture that looks real in close-up. I love this on medium nails because the gradient gives the flakes somewhere to sit. It also works for deeper skin tones because the contrast stays bold. The principle is layering: gradient base first, then leaf placement where it looks natural.
Watch outSkip thin top coats over leaf — they can leave rough edges that snag.
Editor's noteDo the leaf placement with tweezers — you get cleaner control than using your fingers.
8. Black Satin With One Gold Side Panel
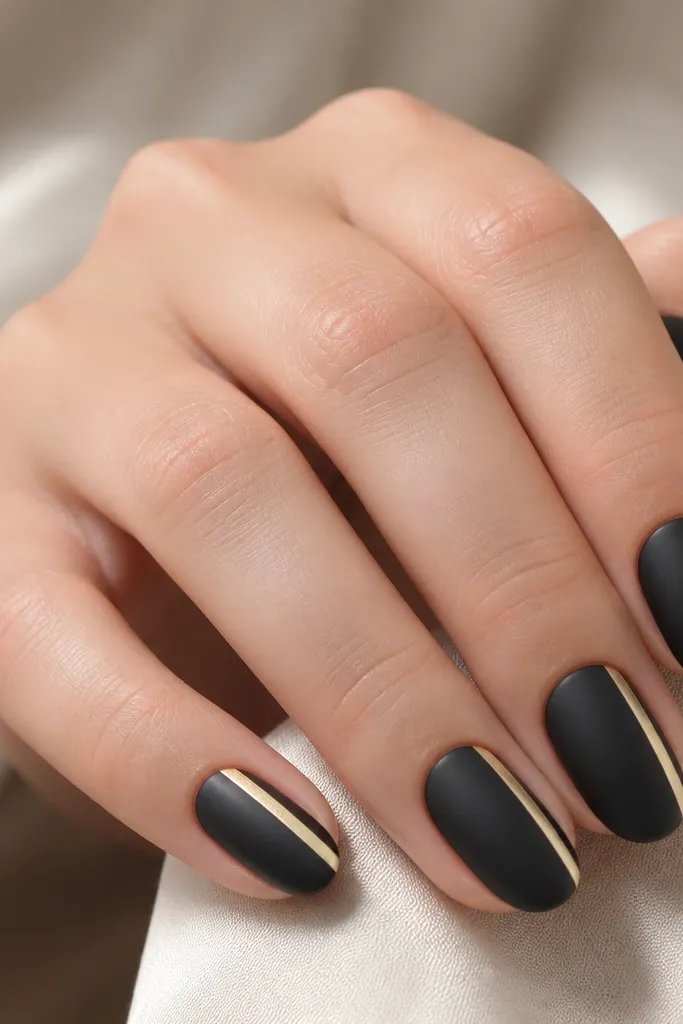
A single side panel is the easiest way to make black and gold feel modern. Satin black has a soft glow that looks smoother than matte, and the gold stripe adds a fashion-forward line. This flatters long nails because the vertical stripe lengthens, but it also looks good on short nails when the stripe is narrow. It’s great if you wear simple jewelry because the nail becomes the focal point. The principle is one clean line — it looks intentional even when the design is minimal.
Apply two coats of black satin polish or gel and cure fully. Use a striping brush or nail art pen to paint a gold vertical stripe on one side of the nail, about 1.5-2 mm wide. Keep the stripe slightly away from the sidewall so it doesn’t flood the cuticle. Top coat in two layers to lock in the stripe and keep the satin finish smooth.
Paint the stripe first, then touch up the edges with black polish on a cleanup brush.
Don’t center the stripe on every nail — stagger it slightly for a more styled look.
9. Black French With Thick Gold Outline
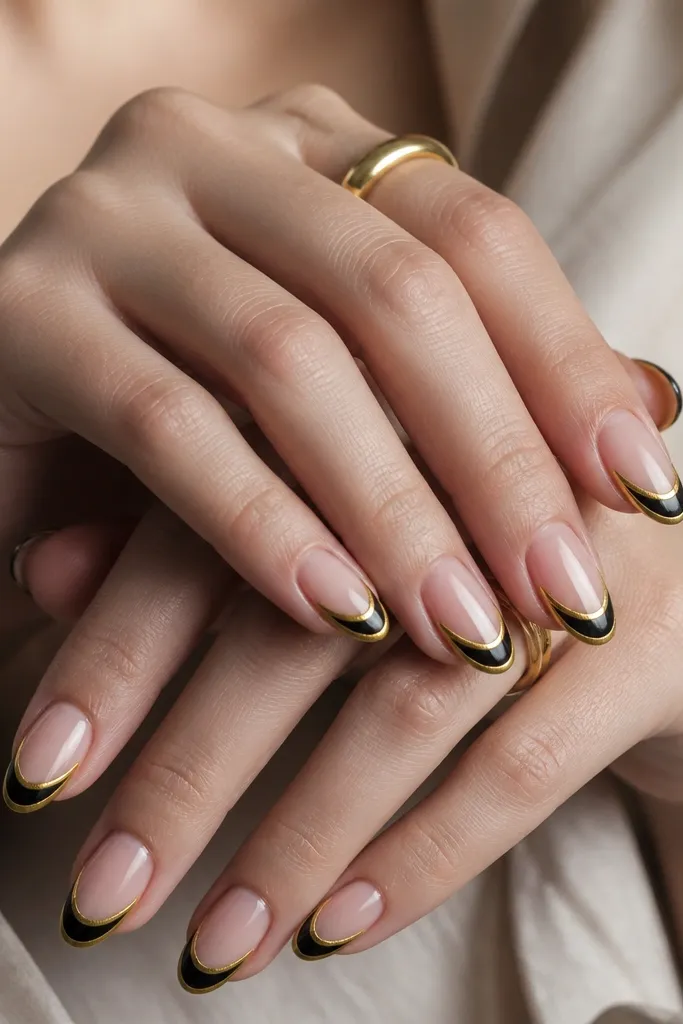
This is a “party on purpose” design because the gold outline frames the black French tip like jewelry. The nude base keeps it light, so the black doesn’t swallow the whole nail. It flatters hands with medium nail beds and looks great with rings because the gold border adds shine near the finger. On fair skin, the nude looks crisp; on deeper skin, choose a nude tone close to your natural nail color for the cleanest contrast. The principle is framing: outline the shape, don’t fill it.
Start with a nude base polish or gel close to your natural nail color. Paint a classic French tip in black, leaving the center nude. Then, using a striping brush, trace a thick gold line just outside the black tip edge, like a border. Let it dry, then seal with a glossy top coat to make the gold look smooth.
If you struggle with the outline, use a thin strip of tape to block the gold border line before painting.
Avoid a gold outline that touches the cuticle — it makes the manicure look bulky.
10. Gold Confetti Dots On Black Gloss
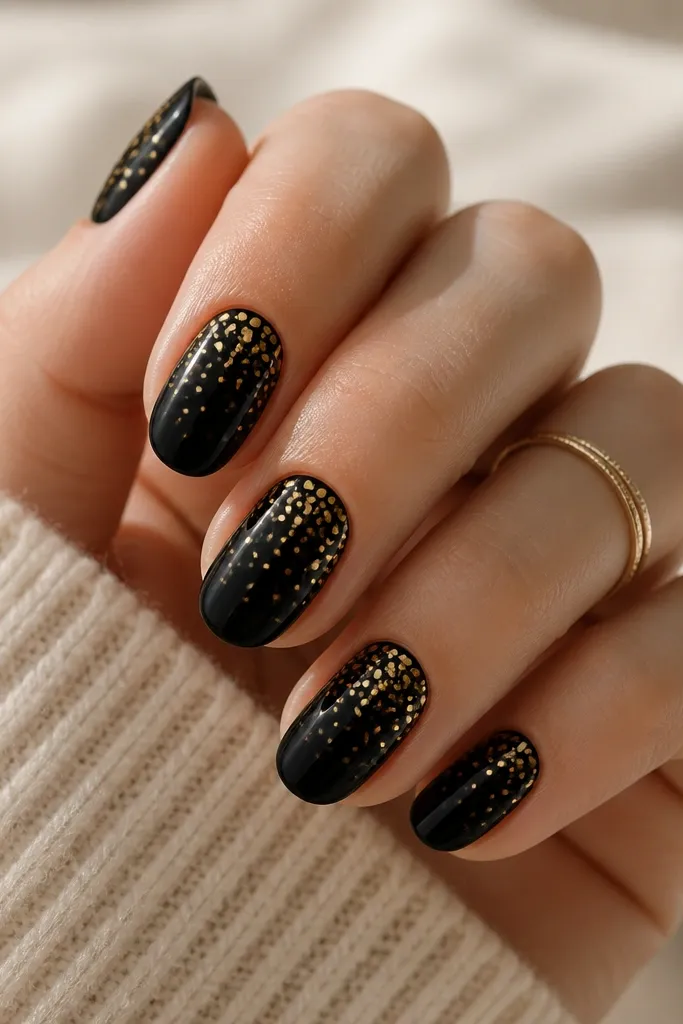
Confetti dots give you that celebratory look without requiring precision shapes. I like this for parties because it still looks festive if your nails catch light and you move around. Glossy black makes the dots look sharper, and gold dots look good on every skin tone because they add warmth. This flatters short nails when you keep the dots mostly in the upper third. The principle is variety within control: different dot sizes, but grouped in a clear area.
Paint two coats of glossy black and let them dry. Use a dotting tool or the back of a bobby pin to place small gold dots near the cuticle, then add a few medium dots toward the center. Keep the dots off the very tip so it doesn’t look messy. Finish with a glossy top coat, and avoid pressing too hard so the dots keep their round shape.
Mix two gold shades if you have them — one bright metallic and one softer antique gold — for depth.
Skip dragging the dot — it turns perfect circles into smears.
11. Black Lace Look With Gold Thread Lines
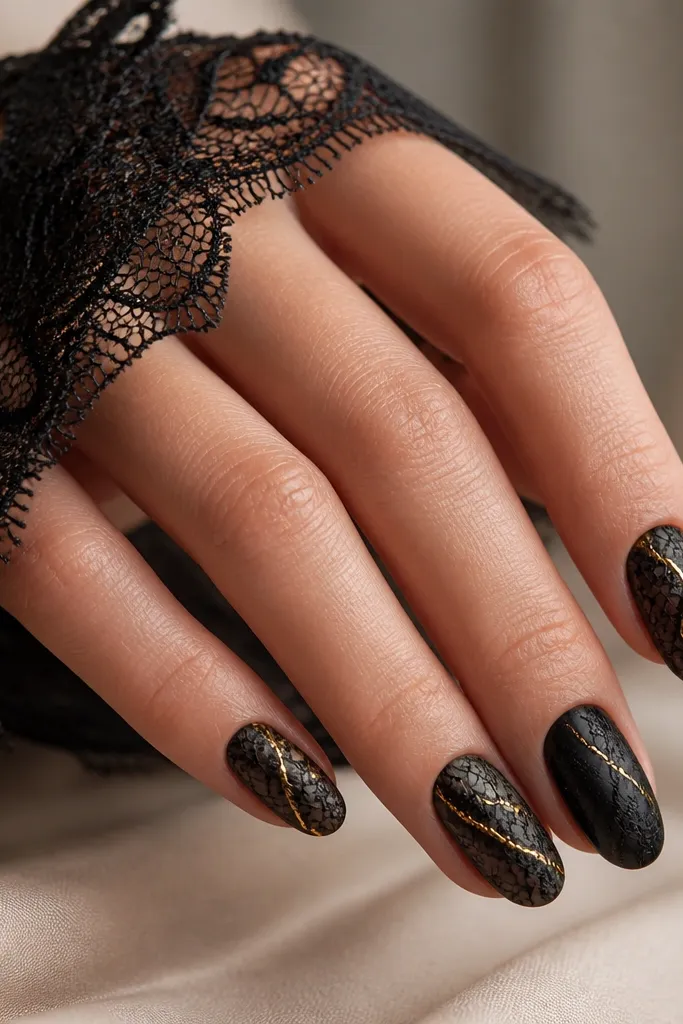
Start with a sheer black base or a black gel that lets the pattern show slightly. If you use stamping, press the lace plate onto the nail and scrape clean so the pattern transfers evenly. Then add thin gold lines with a striping brush to follow two or three lace edges. Seal with a careful top coat so the pattern doesn’t lift or wrinkle.
Lace nails sound fussy, but the version I do is surprisingly easy: a lace stamp or a lace pattern decal plus gold thread lines. The black lace gives you that romantic vibe, and the gold thread makes it feel party-ready instead of spooky. This looks amazing on medium and long nails because the lace pattern needs space to breathe. It also works on fair to deep skin tones because the base stays dark and the lace openings stay crisp. The principle is contrast: black pattern first, then gold only on the “thread” lines.
Watch outDon’t flood the lace with gold — it hides the openings and kills the lace effect.
Editor's noteChoose lace plates with smaller motifs — big lace squares look blocky on shorter nails.
12. Black And Gold Grid Check On Accent Nails
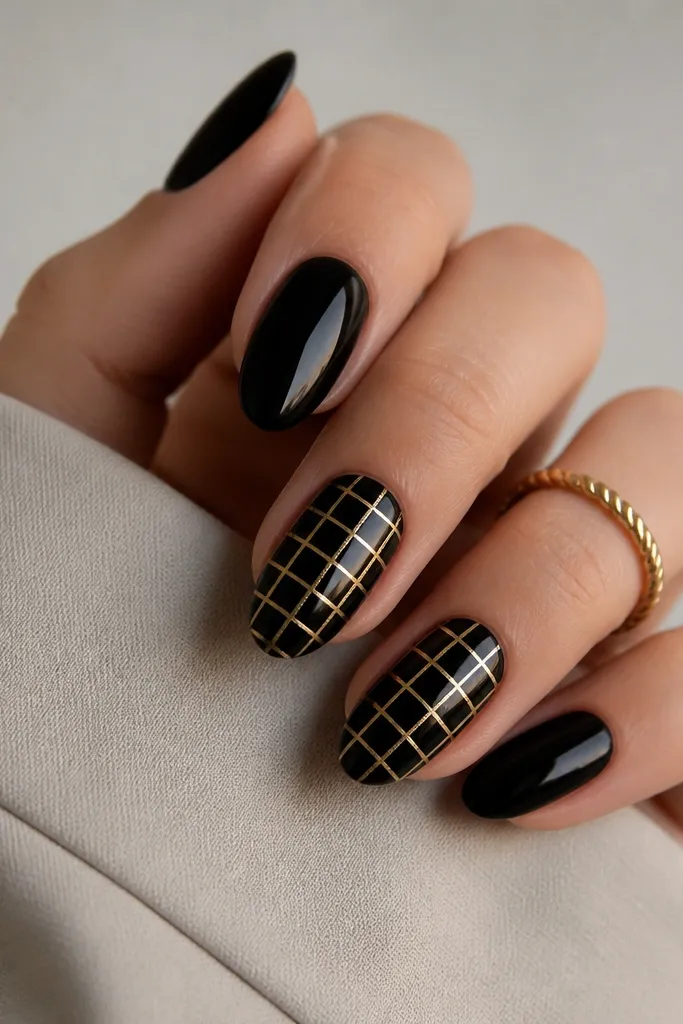
Paint all nails glossy black and cure/dry fully. On the accent nails, map out a grid with a striping brush: add a horizontal line near the middle, then another line above and below at even spacing. Next, draw vertical lines to intersect the horizontals, keeping the intersections consistent. Finish with top coat, and cap the free edge so the lines don’t catch.
A grid check pattern feels like party fashion because it reads structured and clean. I keep it on accent nails so the set stays wearable and not loud. The thin gold lines look sharp against glossy black, and the grid flatters hands because it visually organizes the nail surface. This is great if you have short nails and want something interesting without full coverage art. The principle is scale: thin lines and a simple grid spacing look best.
Watch outAvoid uneven line thickness — thick lines make the pattern look homemade.
Editor's noteUse a nail art ruler or a small piece of tape as a measuring guide for even spacing.
13. Gold Foil Drip On Black Tip
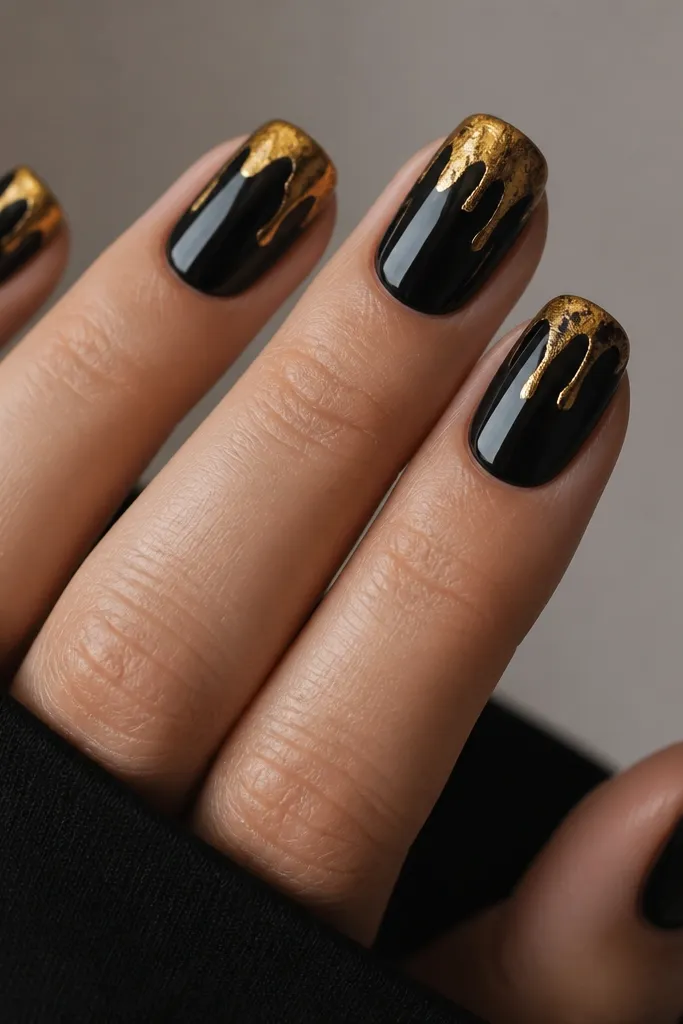
Gold drip foil looks like glam street style, and it’s easier than freehand painting because foil naturally creates irregular edges. The glossy black base makes the drip look intentional rather than random. This design flatters medium to long nails because the drip gives you a little vertical drama. It also looks great if you’re wearing a black dress with gold earrings — the nail matches the vibe. The principle is direction: the drip should pull down from the tip, not spread across the whole nail.
Start with two coats of glossy black. Add foil adhesive at the very tip area, then press gold foil so it sits at the edge and allows some pieces to fall slightly downward. Tap off extra so the drip stays concentrated. Seal with a thicker top coat and do a second thin top coat once the first is set to smooth texture.
If your drip looks too wide, use smaller foil pieces and press only the center of the tip.
Don’t cover the whole nail in foil — it looks like you spilled glitter.
14. Black Velvet Look With Gold Half-Crescent
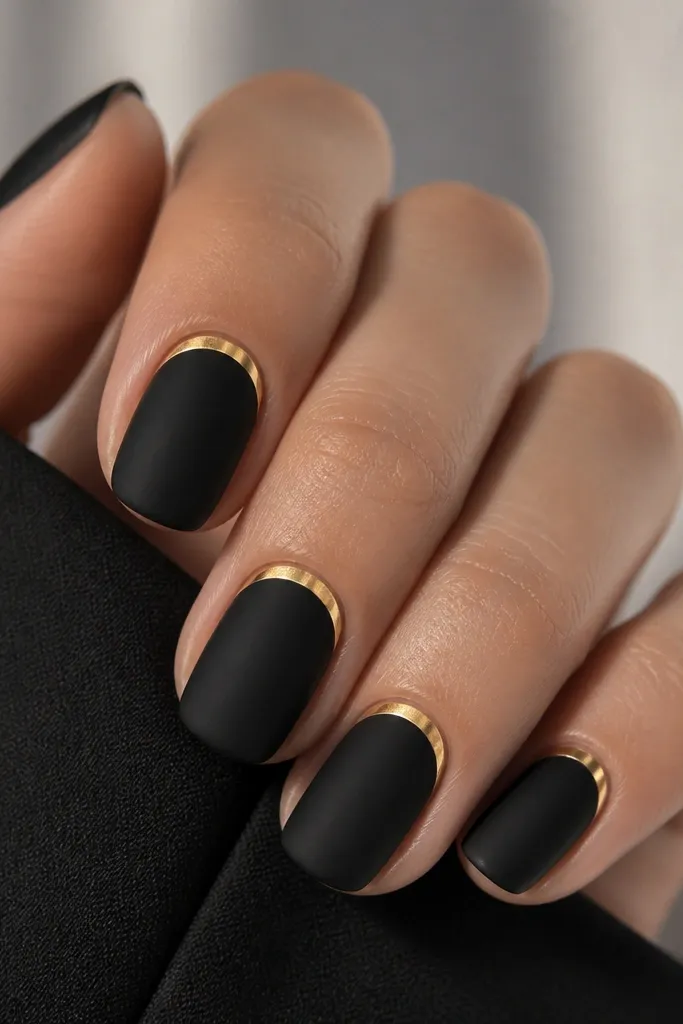
Apply a black velvet effect polish or a matte base with velvet powder according to the product directions. Let it set so it doesn’t smear. Paint a gold half-crescent arc at the cuticle using a small angled brush — keep it about 2-3 mm wide and centered. Cure/dry, then seal lightly with a top coat that won’t flatten the velvet too much, or seal only around the gold edge if needed.
Velvet nails give you that soft-touch feel in real life, and the gold crescent makes it look dressed up. The contrast between matte velvety black and mirror-like gold is what makes it feel expensive. This flatters short nails because the gold arc lifts the cuticle line without taking over the whole nail. It also looks good on hands with dry cuticles since the gold arc draws attention upward. The principle is smooth shapes: one perfect curve plus a soft background.
Watch outAvoid applying velvet powder over wet gel — it clumps and looks gritty.
Editor's noteUse an angled brush for the crescent — it keeps the curve crisp.
15. Black Marble Tips With Gold Leaf Corner
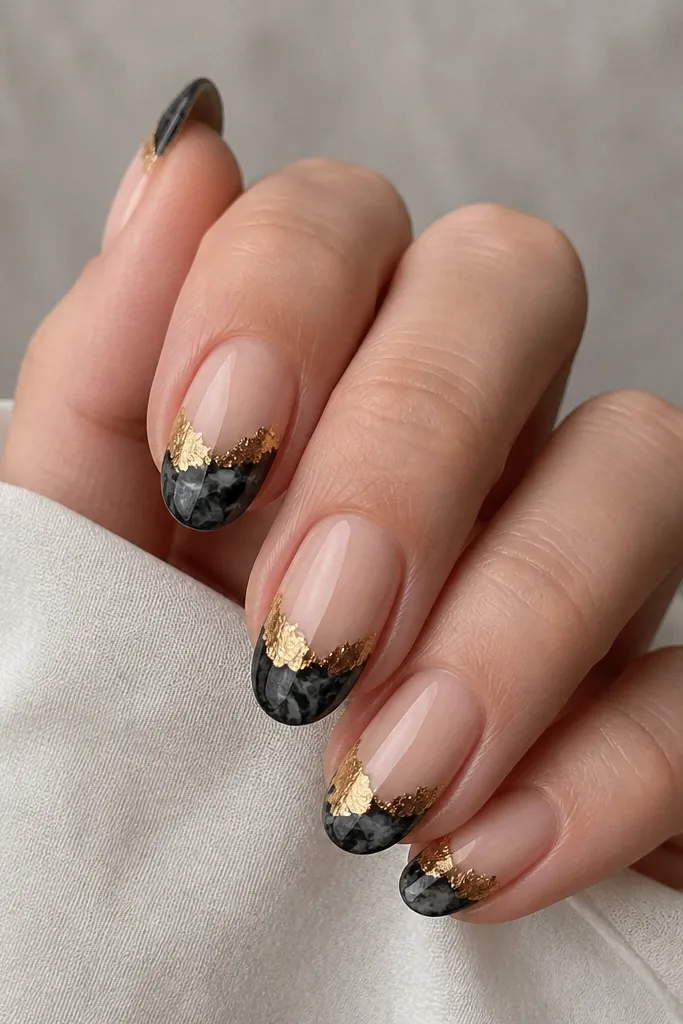
Marble tips keep the design light because only the top portion has movement. The gold leaf corner adds a “scrapbook” glam detail that looks great in close-ups. This design flatters short nails because the gold corner doesn’t widen the nail; it stays near the outer tip. On any skin tone, the nude base gives breathing room so the black feels intentional. The principle is concentration: marble at the tip, gold at one corner.
Start with a nude base and let it dry fully. Sponge or brush on a black marble effect only on the top third of the nail, blending the edges with a makeup sponge. For the gold, apply leaf adhesive at the outer corner of the marble tip and press small gold leaf pieces there. Seal with a glossy top coat, focusing on the leaf edges so they don’t lift.
Keep the marble area to the top third so the gold corner stays visible, not buried.
Don’t make the marble cover the whole nail — it removes the clean party contrast.
16. Gold Bar Accent On Matte Black
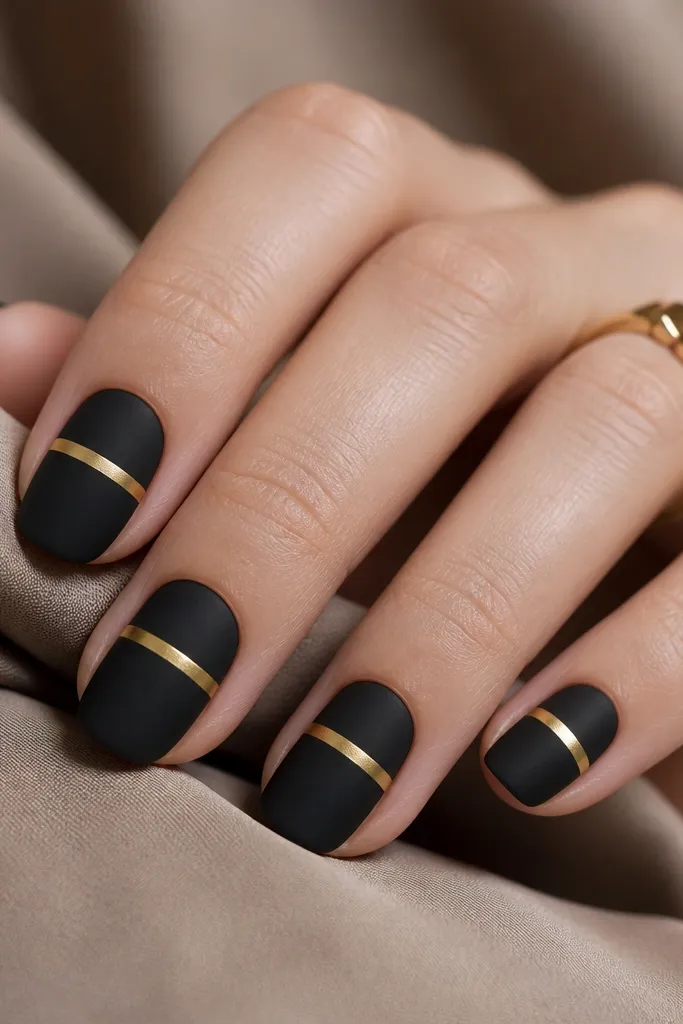
Paint two coats of matte black and let it dry to a true matte finish. Using striping tape, place a thin tape strip across the middle of the nail to mark where the bar goes. Paint gold metallic polish or gel over the exposed area, then remove the tape while the gold is still set enough to keep edges crisp. Top coat with a matte-safe finish if you want the gold to stay slightly satin, or use glossy only over the gold bar.
A gold bar is bold, graphic, and surprisingly flattering because it creates a line across the nail. Matte black is a great base for this because it removes shine and makes the gold look more metallic. This works best on medium nails where there’s enough space for a centered bar, but it still looks good on short nails if the bar is thin. It’s also a strong choice if you want something that looks “done” without tiny details. The principle is symmetry: center the bar and keep its thickness consistent.
Watch outAvoid freehand bars — uneven edges make it look cheap fast.
Editor's noteTest the bar thickness on one nail first — 1 mm looks cleanest on short to medium lengths.
17. Black Galaxy With Gold Star Dotting
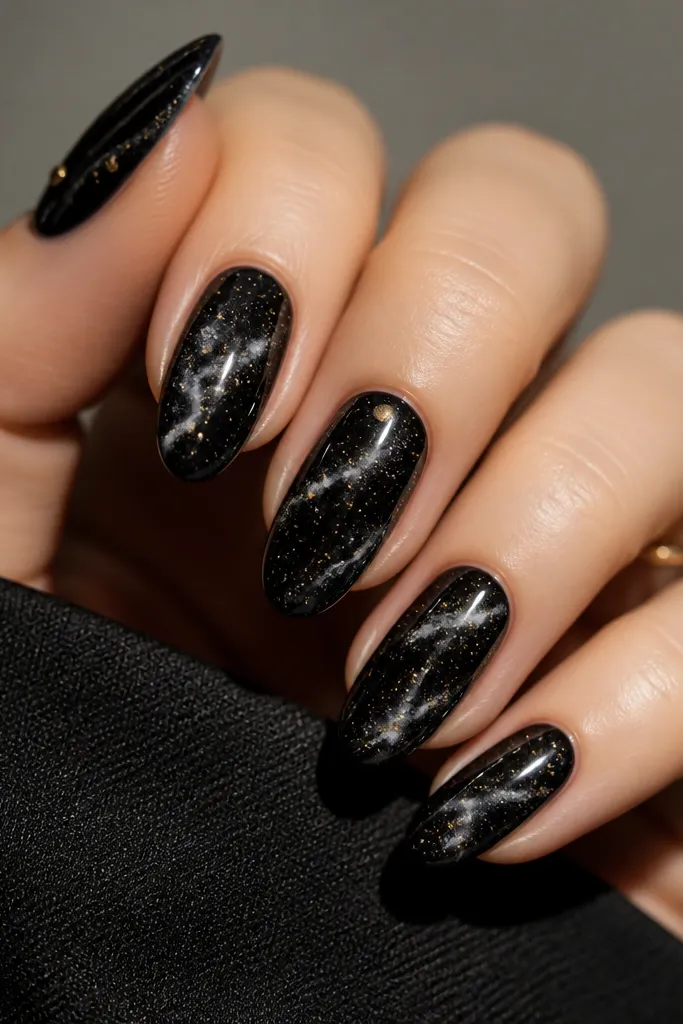
Galaxy nails sound complex, but the black-and-gold version is really about texture and dot placement. The smoky swirls give movement, and the gold dots look like stars without needing to draw constellations. This flatters every nail length because the pattern sits in the black base and doesn’t require a specific shape. On deeper skin tones, the black swirls look extra dimensional, and the gold stars pop under light. The principle is controlled randomness: scatter dots, but keep them denser toward the center.
Start with a near-black glossy base. Sponge on a slightly lighter smoky black/charcoal mix in a few soft patches and blend with a small brush so it looks cloudy, not streaky. Then use a dotting tool to place tiny gold dots, varying sizes, and add a few micro dots around them. Finish with a glossy top coat so the galaxy looks deep and wet.
Use a white gel pen under the gold dots if you want brighter star points in photos.
Skip large gold circles — they look like blobs instead of stars.
18. Black And Gold Stained Glass Lines
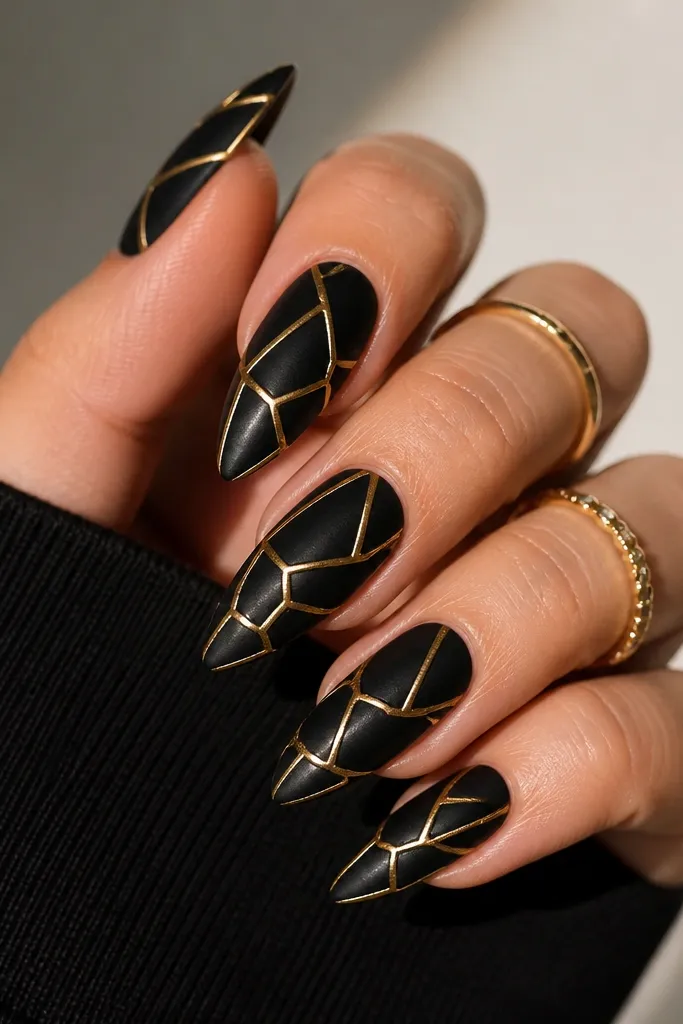
Apply two coats of black and cure/dry fully. With a striping brush or nail art pen, draw a few geometric lines across the nail to create panels — think triangles and rectangles. Paint gold along the lines, staying on top of the black so the gold looks raised and defined. Add gold only to the borders, not the inside. Seal with a glossy top coat and cap the edges carefully.
Stained-glass style looks like you planned a whole outfit around your nails, and it’s doable with simple linework. The gold outlines create the “glass” borders, while the black fill keeps it dark and party-appropriate. This flatters hands because the geometric panels make nails look longer and tidier. It also looks good on fair, olive, and deep skin tones because the contrast stays strong. The principle is clean geometry: the lines must be crisp and the panel shapes should be consistent.
Watch outDon’t let the gold pool at line intersections — it makes corners look messy.
Editor's noteMake fewer panels than you think — 3-5 shapes per nail looks more premium than a busy grid.
19. Gold Rimmed Black Oval Accents
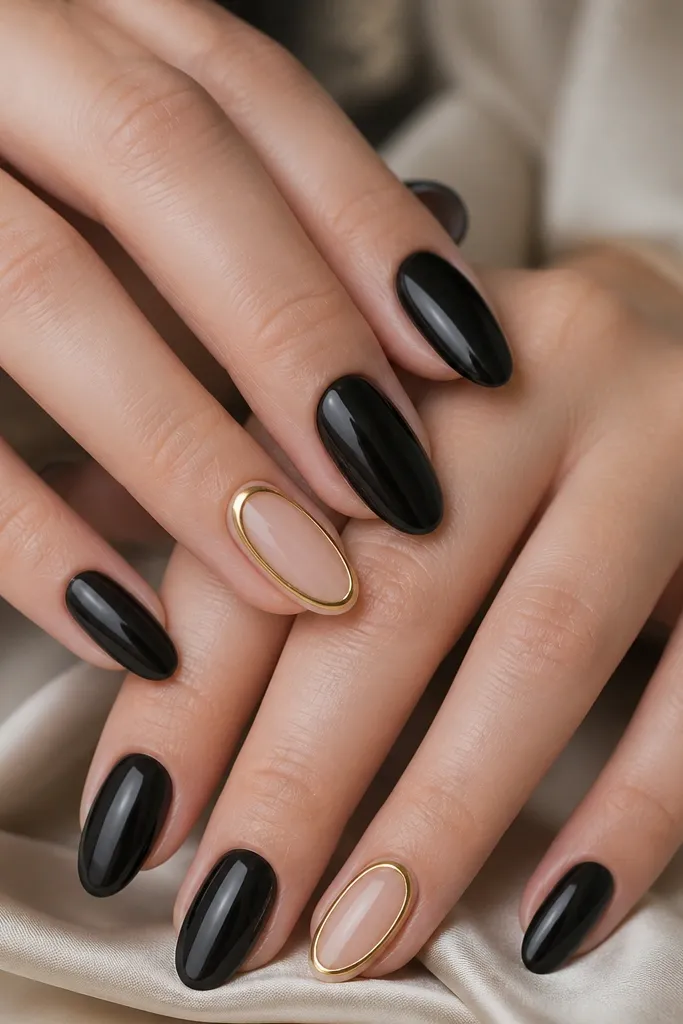
Paint all nails glossy black and cure/dry. On accent nails, use a small oval nail art stencil or freehand with a striping brush to outline an oval in the center. Carefully paint the oval interior with nude polish, leaving the outer area black. Then trace a gold rim around the oval, making it slightly thicker at the top for a jewelry look. Seal with a glossy top coat so the rim looks smooth.
This look mimics a ring setting, and that’s why it photographs so well. The nude oval interior keeps the design airy, while the gold rim gives the party sparkle. It flatters short nails because the oval can be centered and scaled to the nail width without covering the whole surface. On medium to deep skin tones, the nude oval looks clean and the gold stays bright. The principle is framing: the gold rim defines the shape, and the interior stays simple.
Watch outAvoid a rim that’s too thin — it disappears and looks like a mistake.
Editor's noteUse painter’s tape to block the oval edges if your freehand ovals wobble.
20. Black Base With Gold Glitter Fade
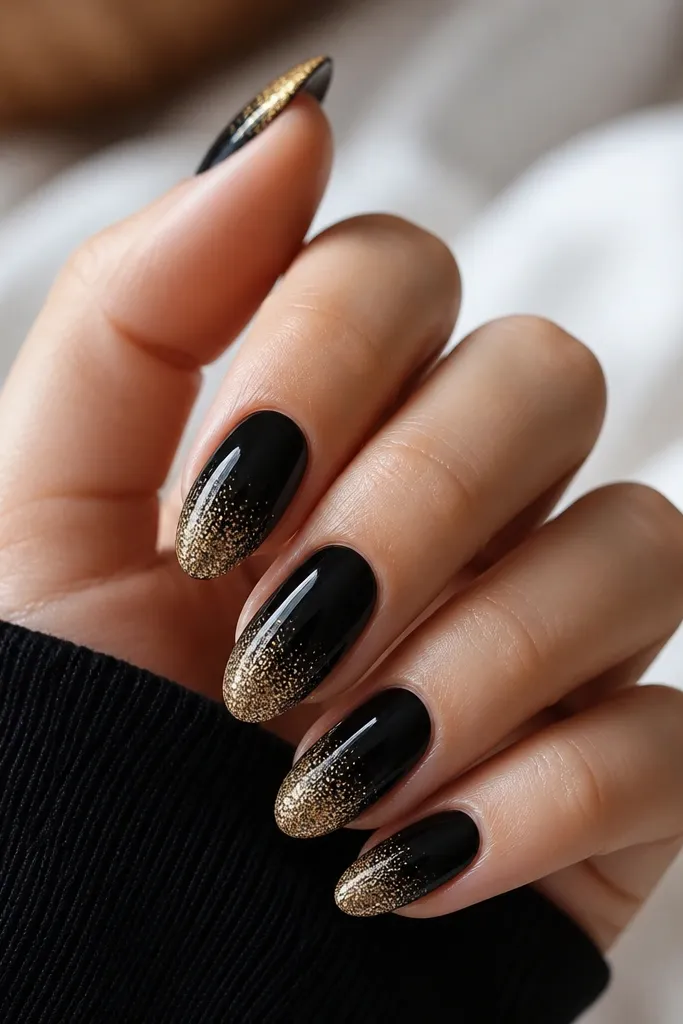
Start with two coats of glossy black. For the fade, sponge gold glitter polish from the tip upward, stopping around the middle so the gradient stays smooth. If you’re using loose glitter, mix it with a clear gel base first so it blends better. Seal with a thicker top coat, pressing gently at the tip so glitter doesn’t lift.
Gold glitter fade is the fastest way to look festive while keeping the design clean. The fade feels more intentional than a straight glitter tip, and it flatters every nail length because it follows the nail’s natural curve. On fair skin, the glitter looks bright and party-ready; on deeper skin, it still shows because gold reflects strongly. The principle is gradation: densest at the tip, softest toward the center.
Watch outDon’t overdo the glitter area — if it reaches the cuticle, it looks costume-y.
Editor's noteUse a makeup sponge with a small dab — big swipes create harsh glitter lines.
21. Black And Gold Marquise Outline
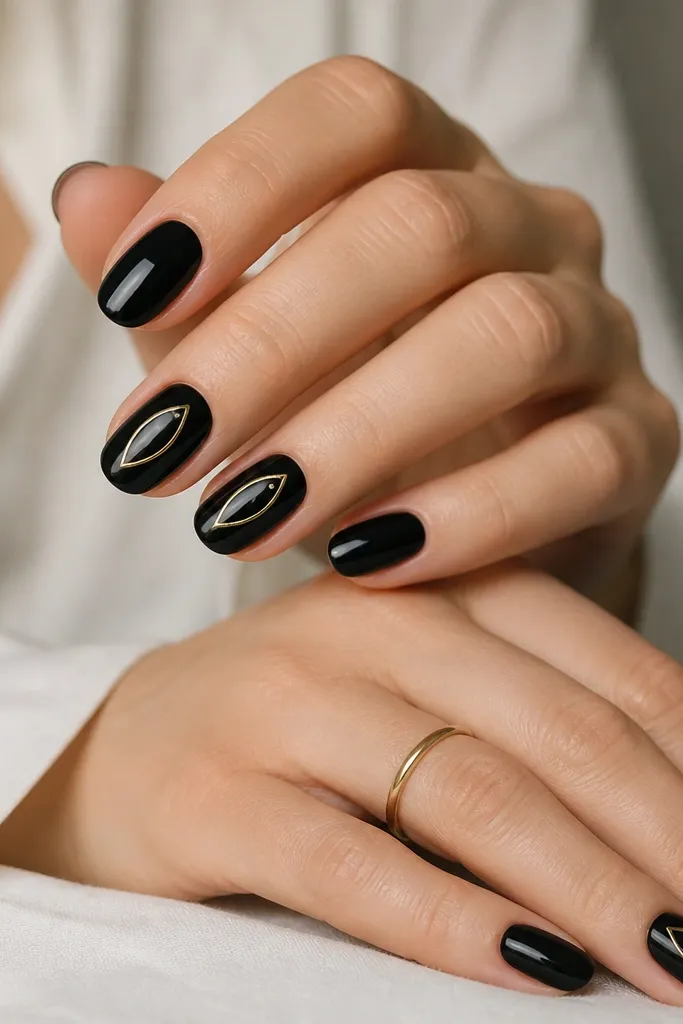
Marquise outlines look like tiny gemstones, and that’s why they feel special without covering every nail. The black base makes the gold edges sharp, and the gemstone shape elongates the nail visually. This flatters medium to long nails best, but you can scale it down for shorter nails by shrinking the outline and keeping it centered. It also works with gold rings because the shape matches jewelry settings. The principle is symmetry: clean points and even curves make it look expensive.
Paint black base on all nails and cure/dry fully. On accent nails, draw a marquise outline centered on the nail using a thin striping brush. Start at the center top point, curve out to the left and right sides, then meet at the center bottom point. Add a tiny gold dot near the top point for a gem highlight. Seal with a glossy top coat and cap the outline edges.
If your marquise turns lopsided, redo it quickly before the gold sets fully.
Avoid shaky lines — uneven marquise points read amateur.
22. Gold Foil Tape Diagonal Over Black
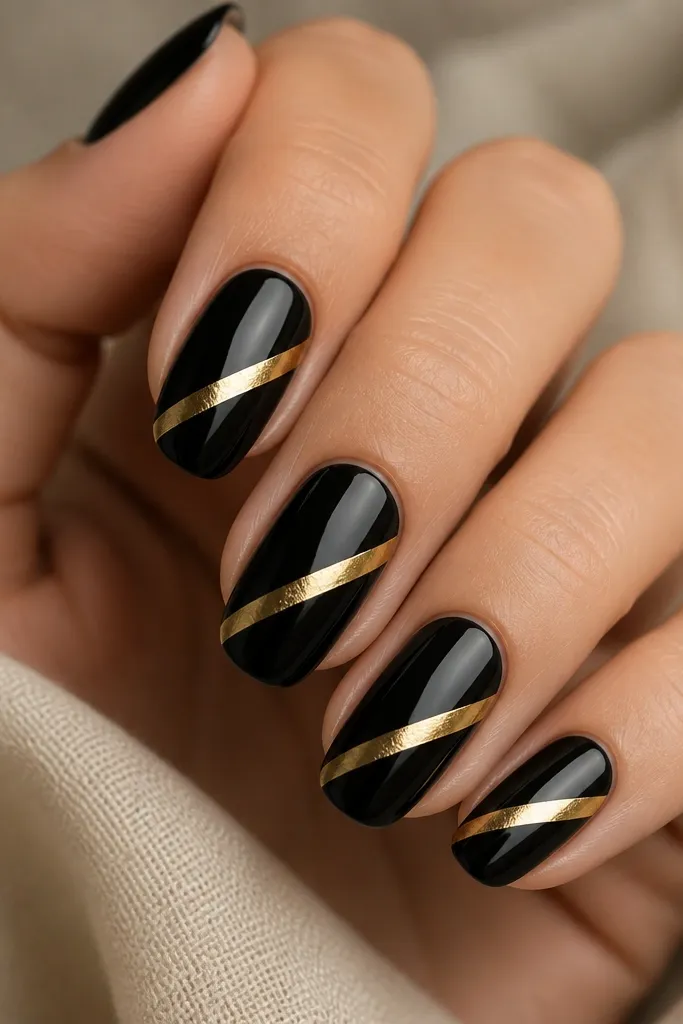
Diagonal tape looks like you did detailed nail art, but it’s actually a placement trick. The diagonal gold line pulls the eye upward, which makes fingers look longer and nails look slimmer. Glossy black keeps the contrast high, and the foil texture makes it look more expensive than flat gold paint. This flatters short nails because a single diagonal line adds length without covering much space. The principle is one strong angle — keep everything else clean.
Apply two coats of glossy black and cure/dry thoroughly. Place gold foil tape diagonally across the nail, starting about 2-3 mm from the sidewall at the lower part and ending near the tip. Press the tape down firmly, then trim excess with a small nail clipper or file. Seal with a thick top coat to lock the tape and prevent lifting at the edges. Do a second thin top coat after the first layer sets.
Use tape meant for nails, not craft tape, so the edges don’t peel over time.
Avoid leaving tape edges uncovered — they catch on fabric and lift fast.
23. Black And Gold Polka Dot French Tips
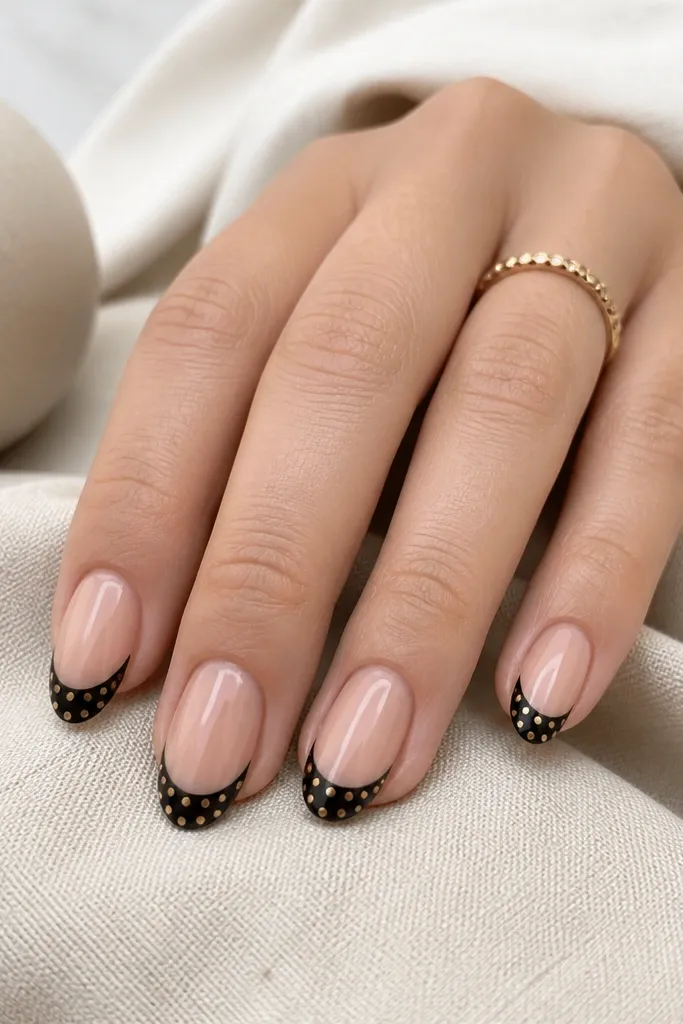
This is the French tip version of party nails — you get the classic shape plus gold sparkle detail. The nude base keeps it light, and the gold dots inside the black tip make it feel playful without going messy. It flatters medium and short nails because the French tip lengthens, and the gold stays contained in the tip area. On every skin tone, the dot pattern reads clean because the dots are small and consistent. The principle is containment: dots stay inside the black tip, not spread across the nail.
Start with a nude base and let it dry. Paint black French tips, keeping the curve even on each nail. While the black tip is slightly tacky or using a gel, add gold dots with a dotting tool, spacing them evenly from the center outward. Let it set, then apply a glossy top coat to seal the dots and smooth the surface.
Use a dotting tool with a consistent tip size so your polka dots match across nails.
Don’t use large dots — they make the French tip look crowded.
24. Gold Foil Frame Around Black Center
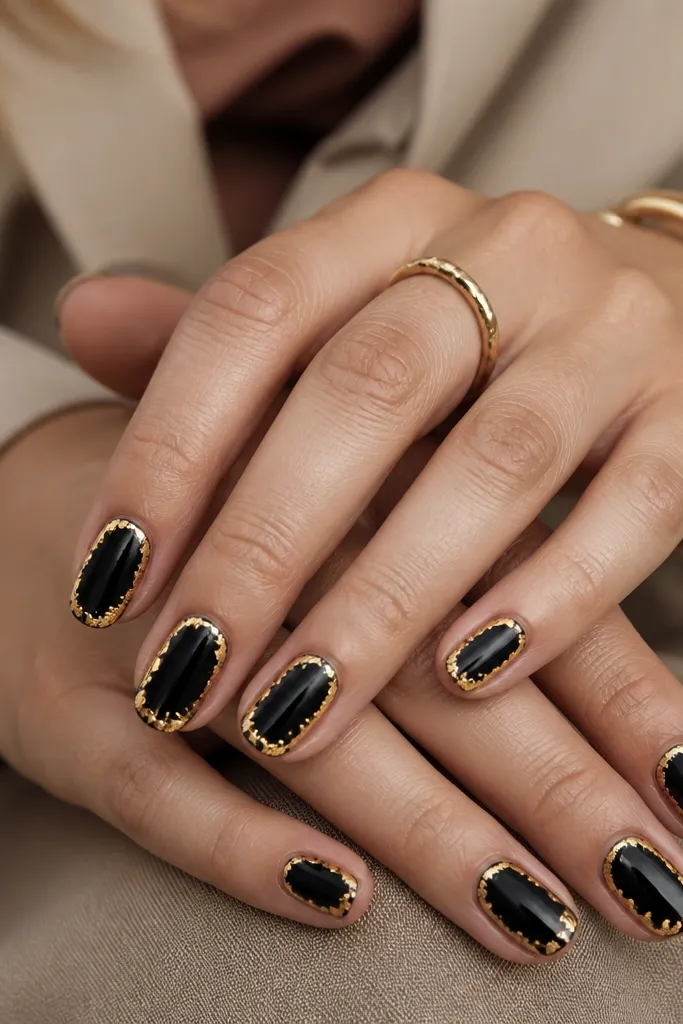
A gold frame makes black-and-gold nails feel like a luxury manicure because it mimics a bezel setting. The black center keeps it grounded and makes the gold look purposeful instead of scattered. This design flatters long nails because the frame can wrap the sides and elongate the finger, but it also looks great on short nails if you keep the frame thin. It’s especially pretty if you wear gold bracelets — the nail echoes that metal outline. The principle is border control: gold stays along the edges, black stays in the middle.
Paint the entire nail glossy black first and cure/dry. Apply gold foil adhesive thinly along the edges and around the sides, leaving a clean black center area. Press gold foil pieces onto the adhesive, then tap off excess so the frame stays defined. Seal with a glossy top coat, doing one careful pass around the frame edges to prevent lifting.
Keep the frame about 1-2 mm from the sidewall so it stays crisp and doesn’t crowd the nail shape.
Avoid thick foil frames — they look heavy and cover too much of the black center.
25. Black Floral Accent With Gold Outline
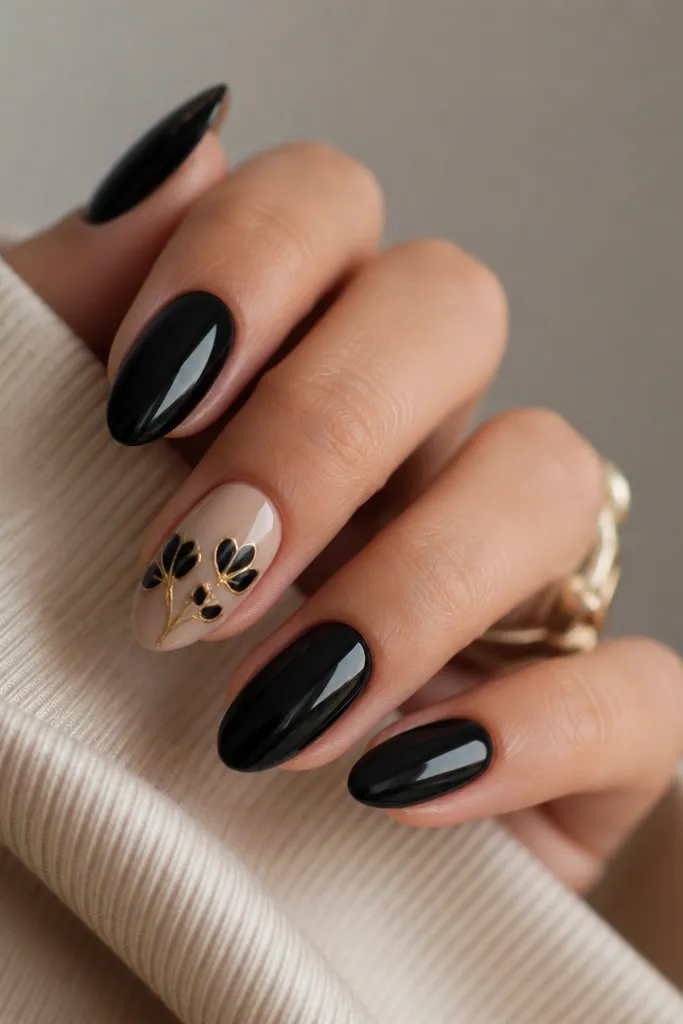
Floral accents soften black-and-gold without turning it into a basic “pink and gold” set. The trick is that the floral itself stays black, so it blends into the base, and the gold outline gives it that party shine. This flatters short nails because the floral can be small and centered, and it still reads clearly. On fair and medium skin tones, the nude base makes the gold outline pop; on deeper tones, choose a nude that matches your nail bed so it doesn’t look ashy. The principle is contrast by outlining — the gold edge does the work.
Paint all nails glossy black. On accent nails, apply a nude base polish and let it dry fully. Add a small floral graphic in black using a nail art brush, stamp, or decal, then trace around the flower edges with thin gold metallic polish. Seal carefully with a glossy top coat, and cap the outline so it doesn’t peel.
If the decal edges look thick, add one extra thin top coat layer only on the outline area.
Don’t place big flowers on every nail — it turns into a theme manicure instead of a party look.