
1. Sunrise Peach Fade With White Cloud Tips
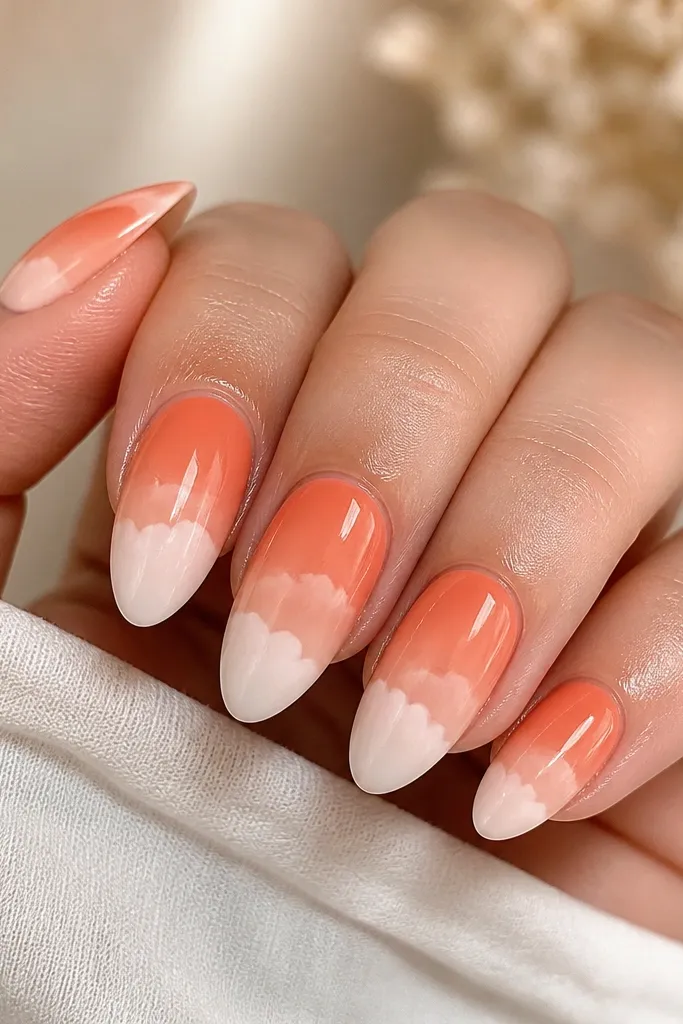
This look is peachy, warm, and forgiving because the fade blends the small brush strokes you might see on a straight line. I like it on light to medium skin tones because the coral end reads bright without looking neon, and the white tips add a clean summer contrast. The almond shape makes the fade feel like it’s stretching upward, especially when the fade starts a millimeter below the cuticle. It works for brunch, beach days, and even office Fridays when you keep the tips soft instead of graphic.
Start with a sheer nude-peach base so the fade looks smooth over your natural nail. Sponge or makeup brush the peach on the lower half, then blend coral into the very tip area using a slightly damp sponge. For the white cloud tips, tap white polish onto the outer third of the nail and blend edges with a clean brush using tiny strokes. Finish with two coats of glossy top coat, sealing the free edge twice so the tip stays sharp-looking.
Use a makeup sponge you already use for skincare — it gives a soft fade faster than a brush.
Don’t paint the white tips too close to the center or they’ll look heavy and block the fade.
2. Tangerine Half-Moon With Nude Center
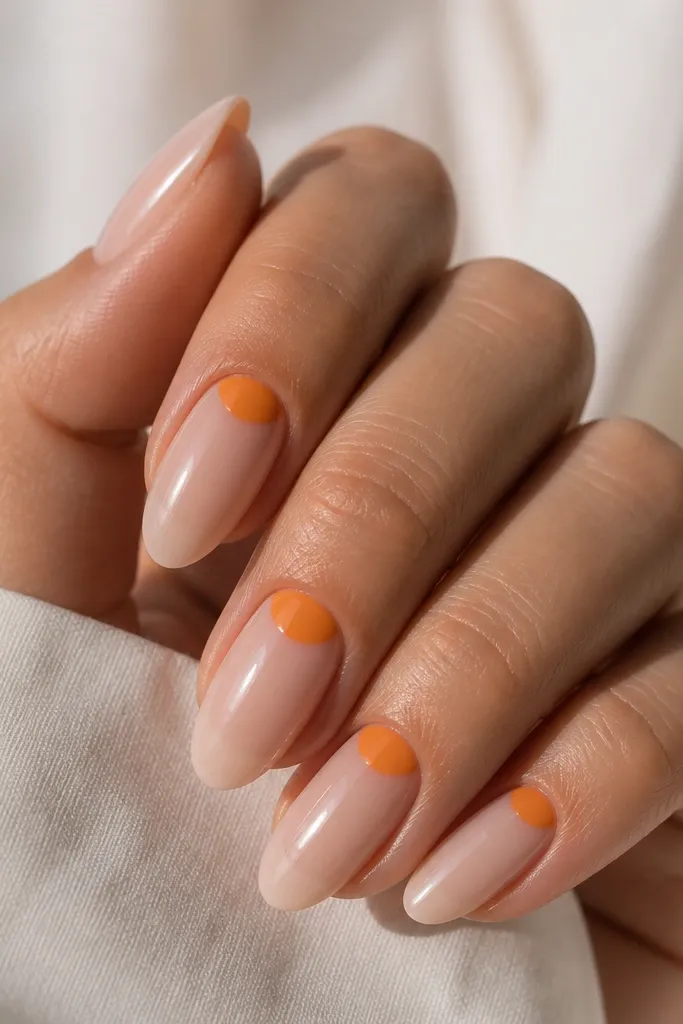
Apply a sheer nude or milky pink base and cure fully if you’re using gel. Place a half-moon guide using a small curved sticker or a cut piece of vinyl tape, then paint tangerine only on the cuticle area. Remove the guide while the polish is still tacky for the cleanest edge. Add one thin top coat, then a second coat for full shine.
Half-moons look clean on almond because the curved shape echoes the nail’s taper. Tangerine is flattering on warm skin tones and gives a fresh pop without needing tiny art details. The nude center makes your nails look longer, and it’s great if you’re between nail lengths or you want something that won’t grow out awkwardly. This design fits casual summer events and also looks neat for work.
Watch outDon’t overfill the half-moon — if it touches the mid-nail, it stops reading as a half-moon.
Editor's noteIf your cuticle line is hard to reach, use a tiny brush dipped in acetone to clean up the edge before top coat.
3. Lemon Dot Confetti On Clear Pink
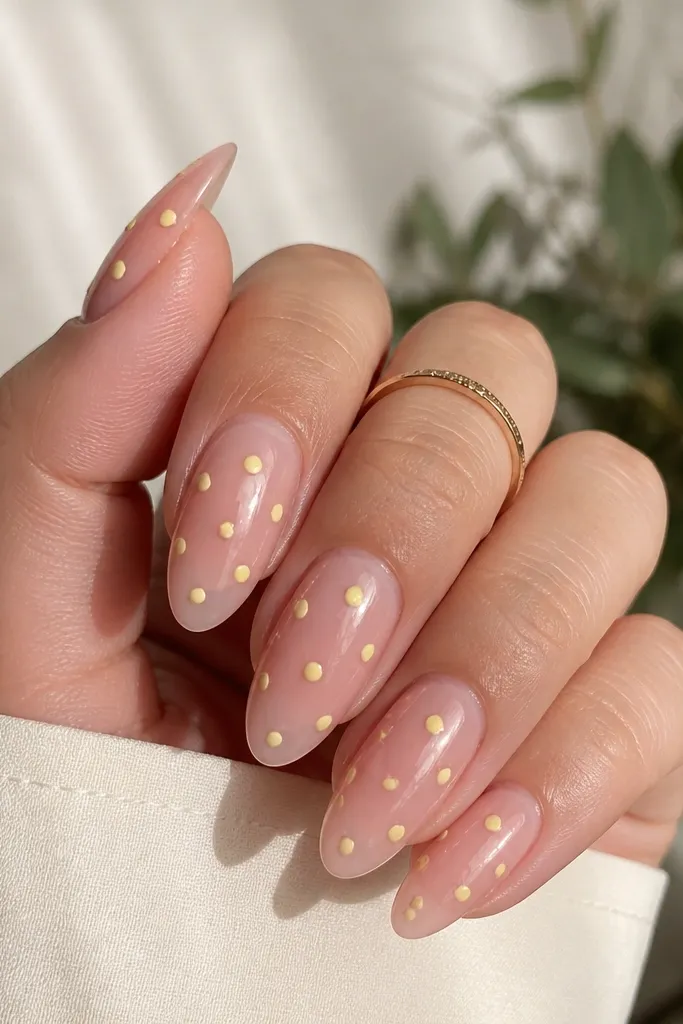
Dots are the easiest “summer nails almond easy beginner” trick because you don’t need steady lines. Lemon yellow over a clear pink base looks bright but still soft, and it flatters most skin tones because the base stays close to your natural nail color. The almond shape makes the dot pattern feel like it’s moving toward the tip. This is perfect for festivals, picnics, and any day you want a cheerful mani without spending an hour on details.
Start with a clear pink or sheer rosy base and let it dry fully. Using a dotting tool or the back of a bobby pin, place 3-6 lemon dots across the nail — I keep most dots on the center and a couple near the sides. Mix dot sizes so the pattern looks intentional, then let it dry. Seal with a thick glossy top coat, pressing the brush lightly on the dots so they don’t snag on your cuticles.
Make a quick dot map on a paper towel first so you know where you want big vs tiny dots.
Skip the tiny dot overload — too many dots make the nail look busy instead of playful.
4. Iced Vanilla French With Peach Side Lines
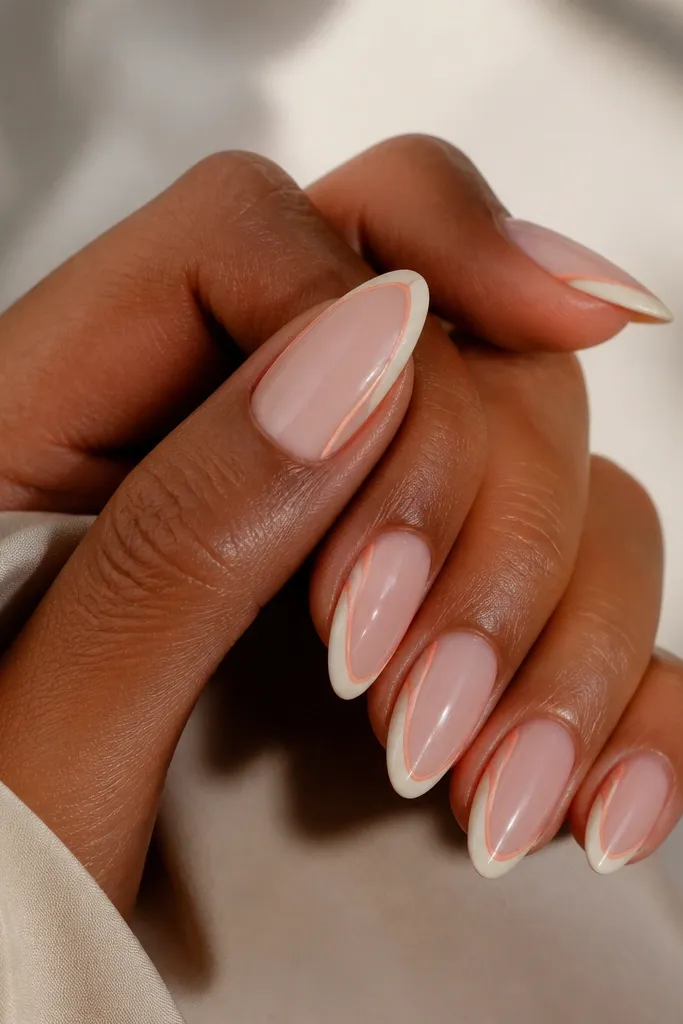
Paint a sheer nude base, then apply a thin vanilla-white French using a French guide sticker or a strip of tape. For the peach lines, place two tiny dabs of peach polish on the left and right side mid-length, then drag each dab upward and downward lightly with a striping brush. Keep lines about 1 mm away from the edges so the nail doesn’t look crowded. Top coat twice for a smooth, glassy finish over the lines.
A French tip makes nails look polished fast, and the iced vanilla color keeps it summer-bright without going neon. The peach side lines add movement while still staying beginner-friendly because they’re thin and spaced. This design flatters medium to deep skin tones especially well because the vanilla tip pops against warm undertones. It’s also great for weddings and holiday trips when you want a clean look that still feels seasonal.
Watch outDon’t make the French too thick — thick tips look heavy on almond.
Editor's noteIf your French tip looks uneven, use a cotton swab with acetone to sharpen the smile line before curing.
5. Watermelon Slice Accent On Nude Almond
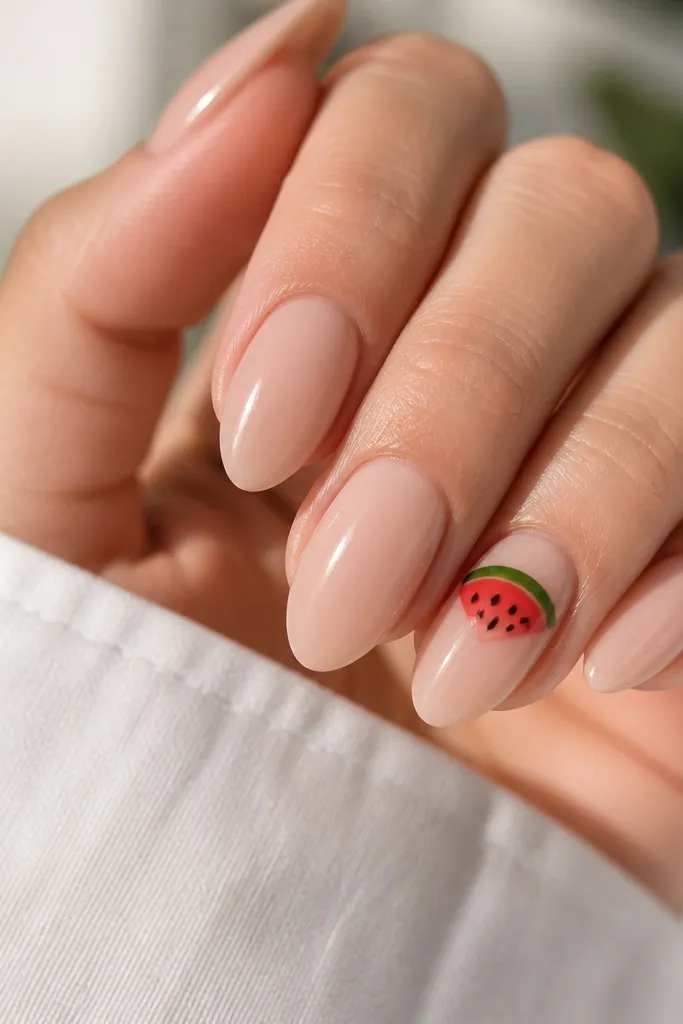
Start all nails with a nude base that matches your skin undertone — I use milky pink-beige for warm looks. On the accent nail, paint a thin green band at the top third, then add red in the middle and blend the edge slightly with a small brush. Dot tiny black seeds by tapping a dotting tool lightly, then add a small white highlight line on the slice for depth. Seal with top coat, avoiding extra pressure on the seeds so they don’t smear.
Watermelon nail art can look complicated, but you only need it on one or two nails for it to feel fresh. Nude almond nails make the fruit art feel intentional instead of childish, and the green/red contrast reads summer instantly. I like this on fair to medium skin tones because the red looks juicy and not washed out. It’s a great choice for beach weekends, barbecues, and photos where you want one standout nail.
Watch outDon’t put watermelon on every nail — the design gets loud and harder to keep clean.
Editor's noteUse a dotting tool for seeds, not a brush — taps look more like seeds and take less time.
6. Coral Jelly Overlay Over Milky Pink
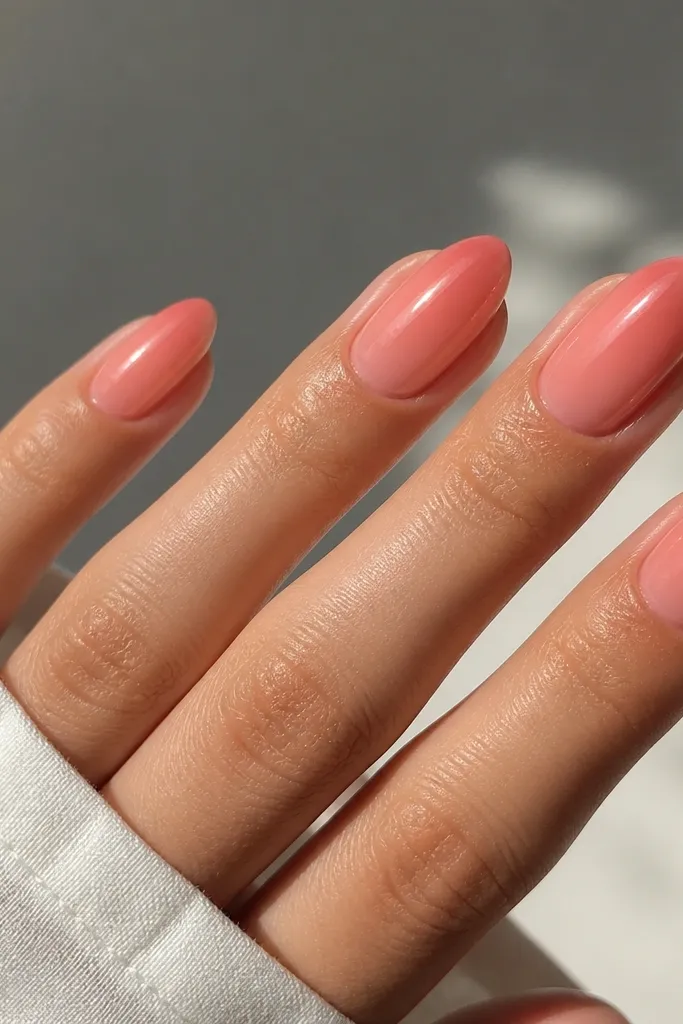
Apply a milky pink base and cure or dry fully. Then apply one to two layers of coral jelly, focusing the intensity on the tip and letting it fade toward the cuticle. If you get streaks, do thinner coats rather than one thick coat. Finish with two coats of glossy top coat to smooth the jelly look and lock in shine.
Jelly polish is a cheat code because it hides minor streaks and still looks expensive. Coral jelly over milky pink makes your nails look juicy and summer-ready without hard lines or detailed art. This works on all skin tones because the base is soft and the coral tint is adjustable. It’s also the easiest option if you want “done” nails but you hate cleaning tiny art edges.
Watch outDon’t skip top coat — jelly polish looks dull without the gloss layer.
Editor's noteLet the first jelly coat set for 30-60 seconds before the second so it levels out better.
7. Mint Green Micro-Stripe Tips
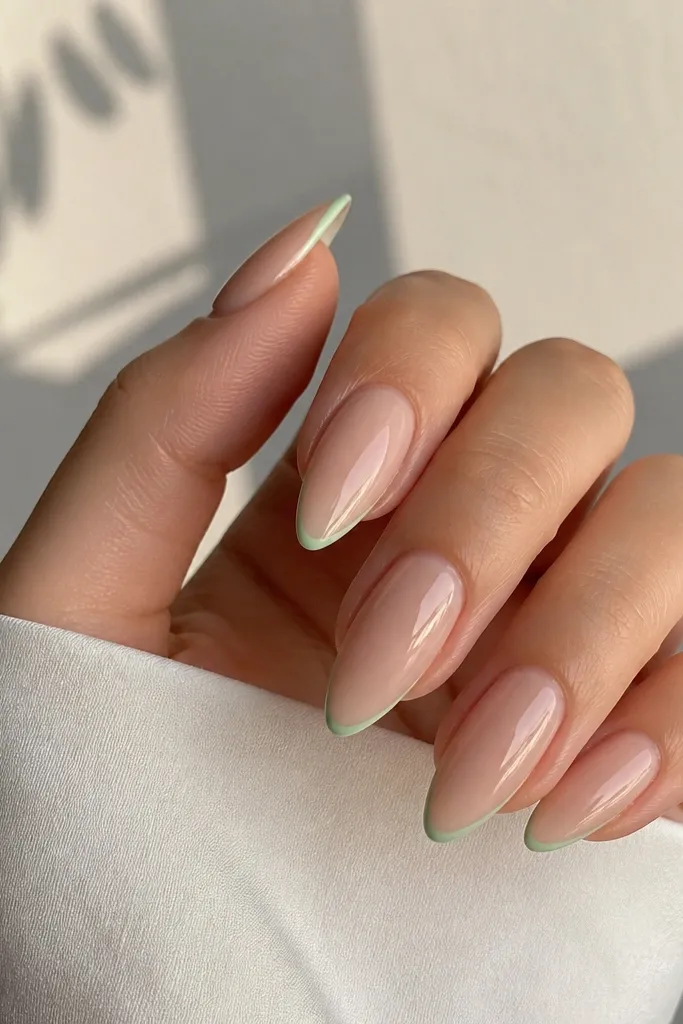
Micro-stripes look sharp without being hard. Mint is fresh against nude, and the narrow stripe makes the almond tip look longer. I love this for people who want something “summer” but still clean enough for everyday wear. It flatters fair to deep skin tones because the mint reads bright and the base stays neutral. The best part is it grows out pretty well because the stripe anchors at the tip.
Paint a sheer nude base and let it dry. Use a striping brush and draw a thin mint line along the center of the free edge, stopping about 1 mm before the sides so it stays crisp. If you want extra definition, add a second line right next to the first — keep both lines thin. Seal with a glossy top coat, wiping the brush across the free edge to lock in the stripe.
Practice one stripe on a spare nail or plastic wrap first — thin lines need a steady hand and a consistent stroke.
Don’t drag the stripe from cuticle to tip — keep it only at the free edge.
8. Sunflower Tiny Line Art On Nude
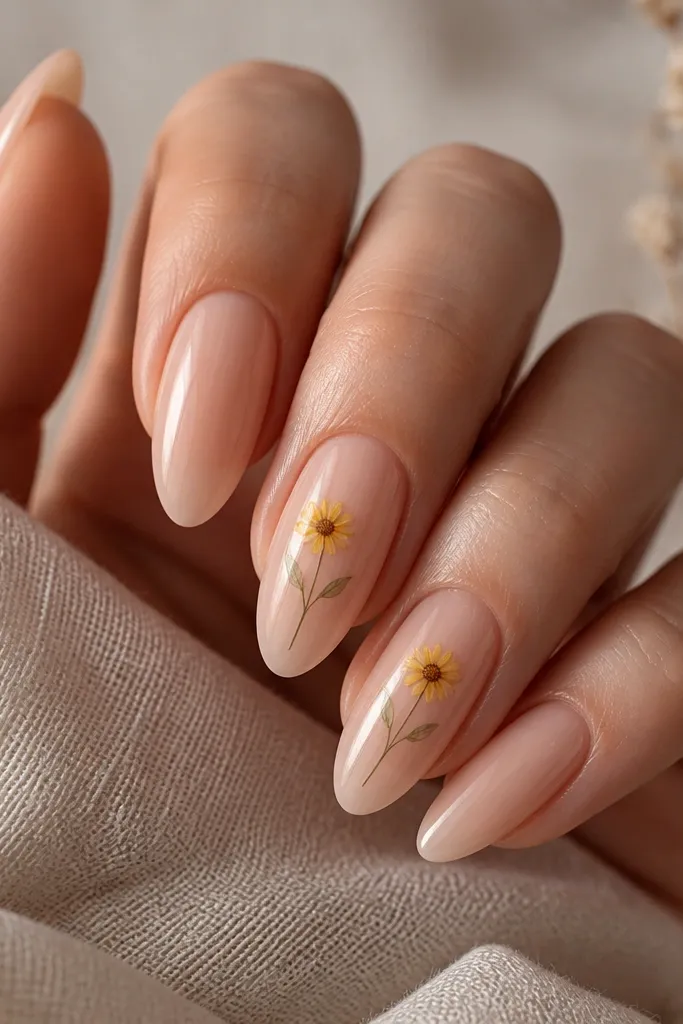
Start with a nude base and cure fully. On two accent nails, draw a small circle dot for the center using a dotting tool. Then add 6-8 petals around it with a thin brush, making each petal short and slightly curved. Add a simple green stem line if you want, then top coat twice. Keep the petals separated so the sunflower doesn’t look like a filled blob.
Small sunflower line art makes your nails feel like summer without covering the whole nail. The trick is keeping it tiny and centered so it doesn’t look like a sticker. Yellow petals over nude look best on medium to deep skin tones where yellow pops, but it also works on fair skin if your nude base is slightly warm. This design is perfect for spring-to-summer transitions and for days you want something pretty but not loud.
Watch outDon’t thicken the petals — thin lines make the sunflower look airy and cleaner.
Editor's noteUse a toothpick for the center dot — it gives a rounder core than a brush.
9. Blueberry Fade With Silver Speckle
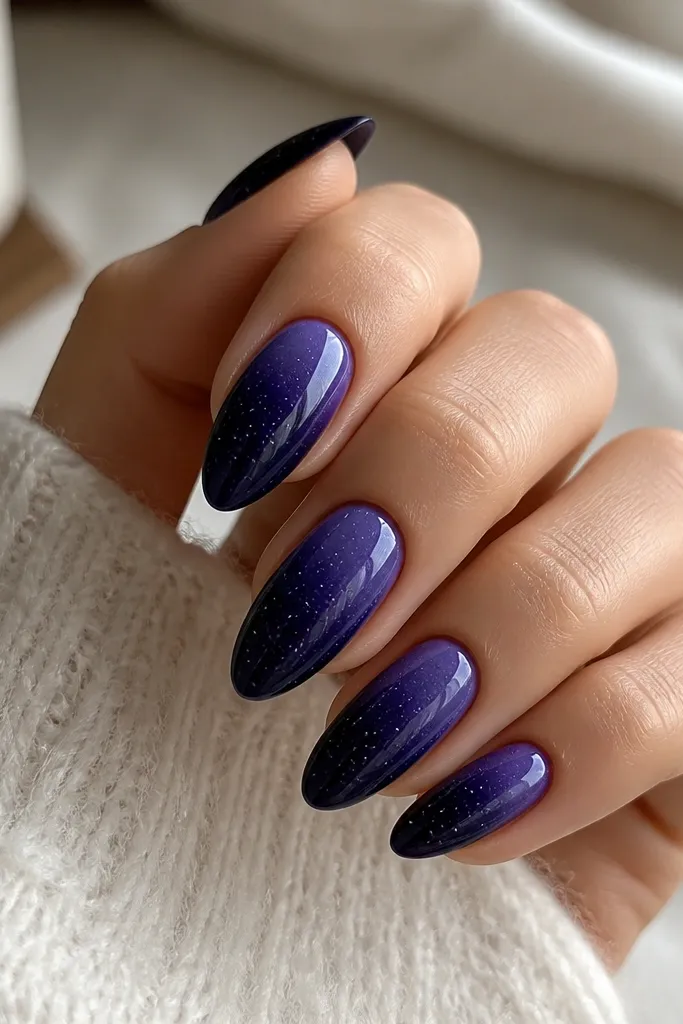
Begin with a sheer base or soft lavender-nude to prevent the blue from staining. Sponge a deep navy-blue starting at the mid-nail and blend upward with a lighter pressure. Add a tiny amount of purple at the very tip for dimension, then finish with silver speckles using a flicking brush or tapping method. Seal with two coats of top coat so the speckles stay smooth and don’t snag.
Blueberry nails look cool and summery when you keep the base glossy and the speckles fine. The deep blue-purple flatters warm and cool skin tones because it’s saturated, but the fade keeps it from looking heavy. Almond shape makes the fade look like it’s flowing, especially if the darkest color is only at the tip third. It’s a fun choice for evening dinners, outdoor concerts, and anything that needs a little drama.
Watch outDon’t use chunky glitter speckles — they look gritty on almond nails.
Editor's noteUse a stiff brush for speckles — soft brushes make big blobs instead of tiny sparkle.
10. Soft Pink Base With Orange Cuticle Glaze
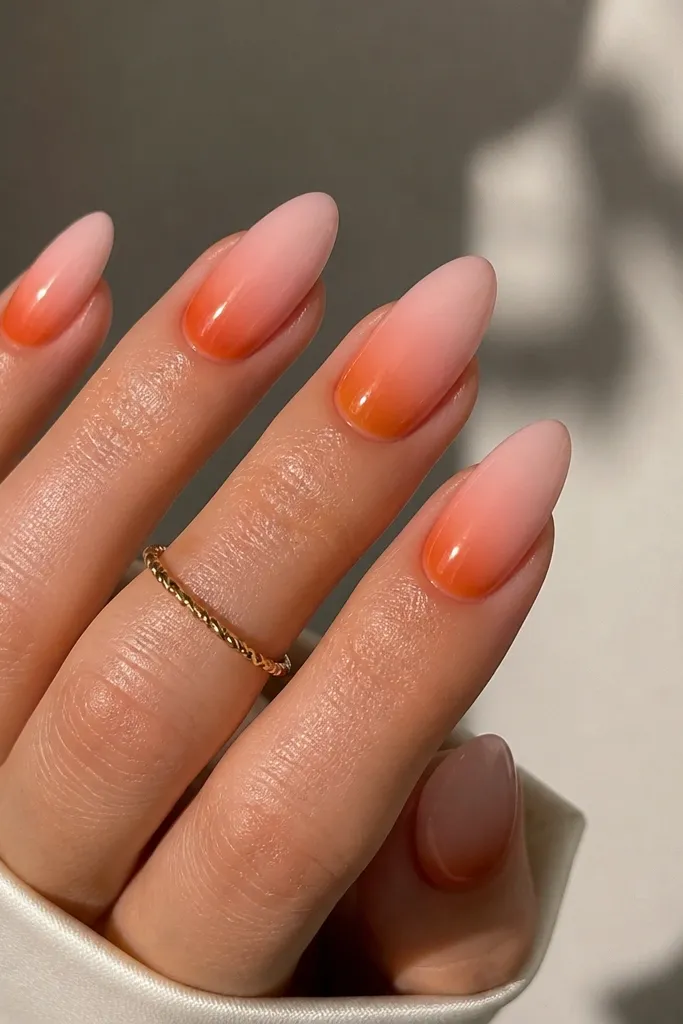
Apply a soft pink base and let it dry or cure fully. With an orange jelly polish or translucent pigment, dab a small amount right at the cuticle and drag it 1-2 mm outward. Blend with a clean sponge so there’s no hard edge. Top coat lightly first to smooth, then add a second glossy coat to lock the glaze in place.
This is a “barely there” summer look that still looks styled. The translucent orange at the cuticle makes nails look like they’re lit from within, and it flatters almost everyone because it follows your natural nail line. I like it on short almond lengths because it visually balances the tip taper. It’s great for hot weather when you want something light, and it looks good with gold jewelry.
Watch outDon’t paint over the skin at the cuticle — wipe your brush on the edge of the bottle to control the pigment.
Editor's noteKeep the orange glaze thin — thick glaze makes cuticles look messy as you grow out.
11. Kiwi Slice Green Tips Over Clear Nude
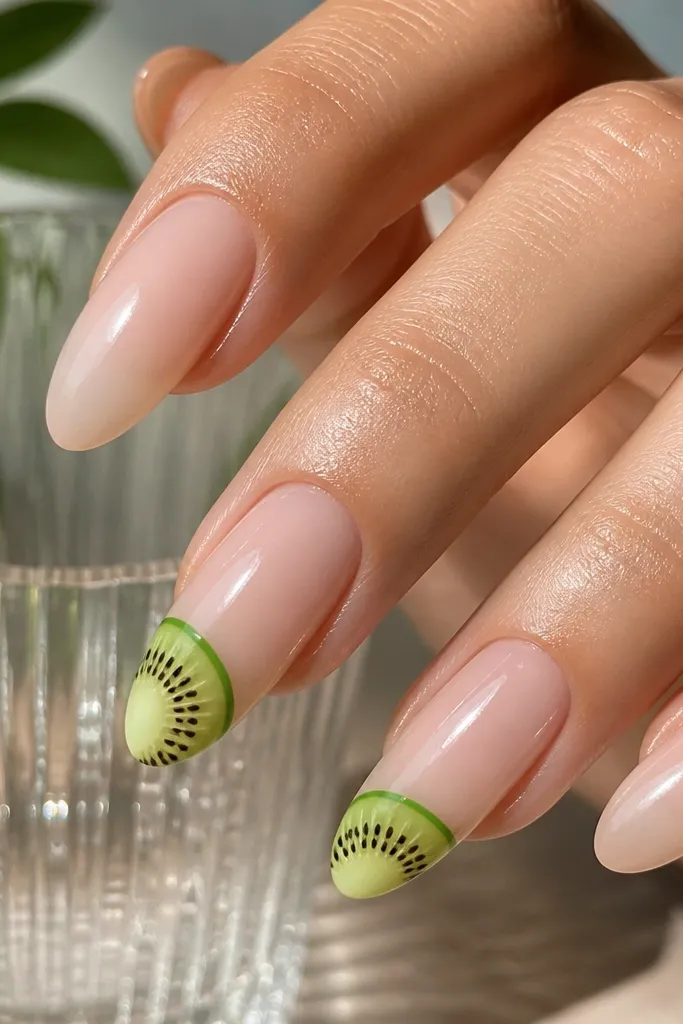
Start with a clear nude base and apply top coat once so the surface is smooth. On accent nails, outline a kiwi slice shape near the tip: draw a thin darker green rind arc, then fill the center with lighter green. Add tiny black seeds using a dotting tool — space them around the slice edge. Finish with glossy top coat, using a second brush pass along the tip so the slice looks sealed.
Kiwi slices feel playful but still classy because the colors are muted. Clear nude keeps it fresh, and the green tip art looks like it belongs on summer. This one flatters fair and medium skin tones most because the green reads bright without overpowering. Almond shape gives you a natural canvas at the tip, so the slice looks placed instead of floating. It’s also a fun conversation starter at brunch.
Watch outDon’t make the kiwi slice too wide — keep it in the tip third so it stays neat.
Editor's noteIf seeds smear, wait 2-3 minutes longer before top coat — the polish needs to set.
12. Tropical Palm Leaf On One Accent Nail
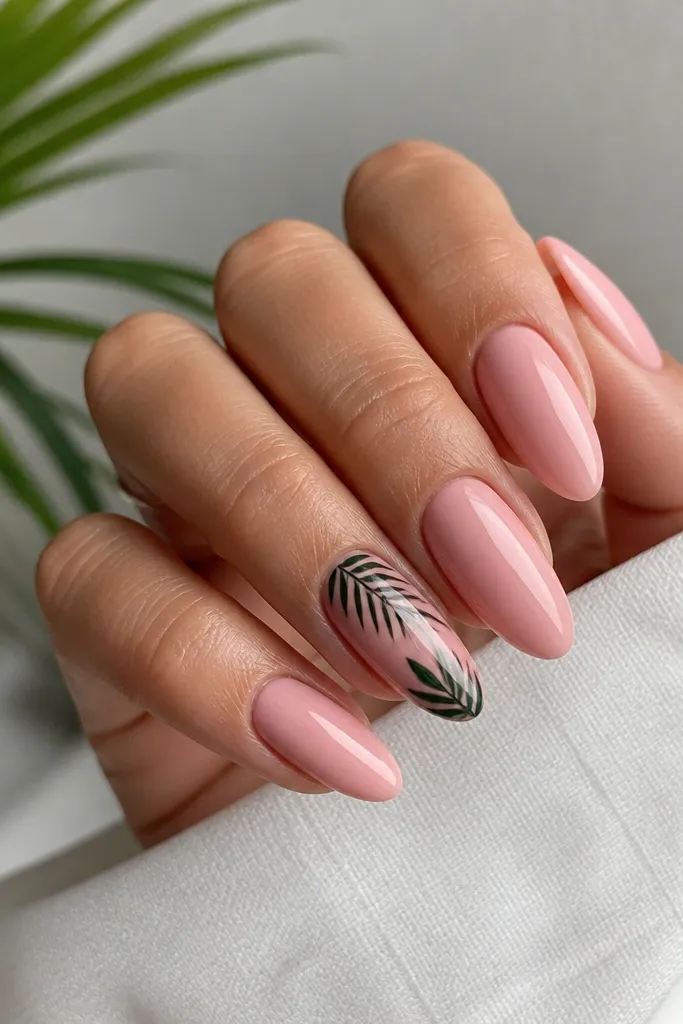
Paint all nails with a soft pink or sheer rosy base. On one nail per hand, draw a simple palm leaf using a thin brush: start with a center vein line, then add 5-7 short curved leaflets on each side. For extra color, add tiny green dots at the leaf base or along one leaflet. Let it dry, then top coat twice, keeping the brush strokes smooth so the leaf lines don’t flood.
Palm leaf art looks high-end when it’s minimal. By putting it on one nail, you get the tropical vibe without turning every nail into a drawing project. Black lines make it crisp, and the soft pink base keeps it wearable for daytime. This flatters light, medium, and deep skin tones because the silhouette has strong contrast and the base stays gentle. It works for vacations and summer nights where you want something photogenic.
Watch outDon’t fill the leaf silhouette completely — outline style looks cleaner and easier to control.
Editor's noteUse a fine liner brush meant for nail art — a cheap craft brush makes leaves too thick.
13. Coral + Gold Foil Edge Tips
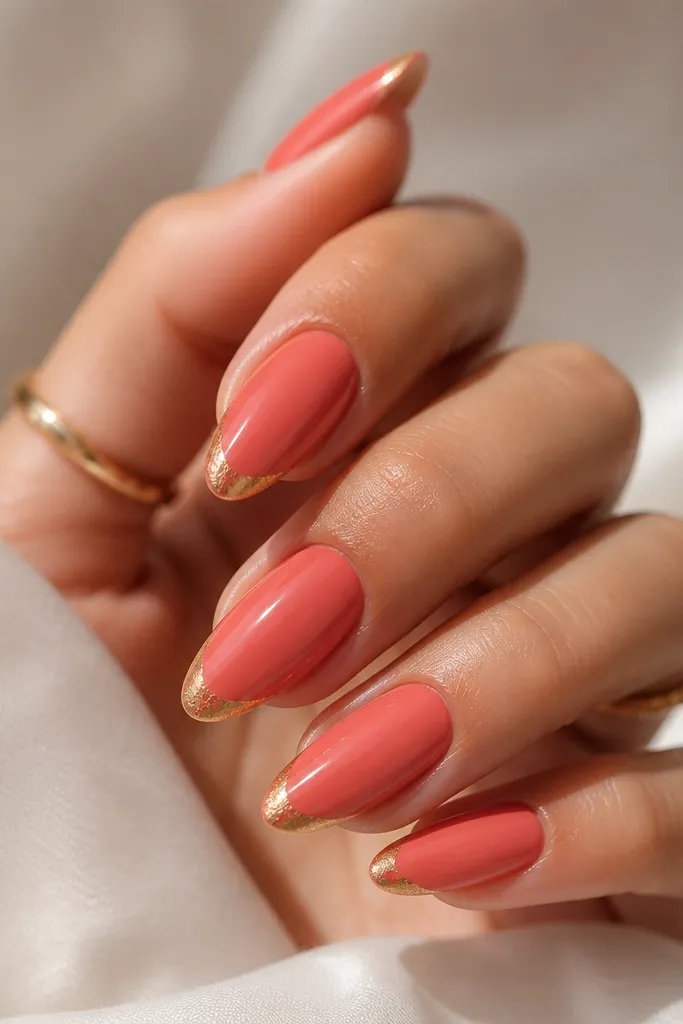
Gold foil edges make nails look like you planned the mani for a summer party. Coral is the perfect background because it’s bright but not neon, and the gold adds a warm sparkle that looks great with tan skin. Almond nails show the foil especially well because the tip edge is curved — the foil catches light as you move. I’ve worn this to rooftop dinners and it reads “put together” even when the design is simple.
Apply a coral polish base and cure or dry fully. Tear or cut gold foil into small thin pieces and press them only on the free edge — use tweezers so you don’t smudge coral. Add a thin layer of foil adhesive or a tacky top coat before pressing foil, then press gently for 10-20 seconds. Seal with two coats of top coat, but avoid piling so the foil stays dimensional rather than buried.
Cut the foil into a long skinny strip so it follows the almond curve instead of sticking straight.
Don’t foil the sides — foil only the tip edge so it looks intentional.
14. Sky Blue Gradient With White Star Specks
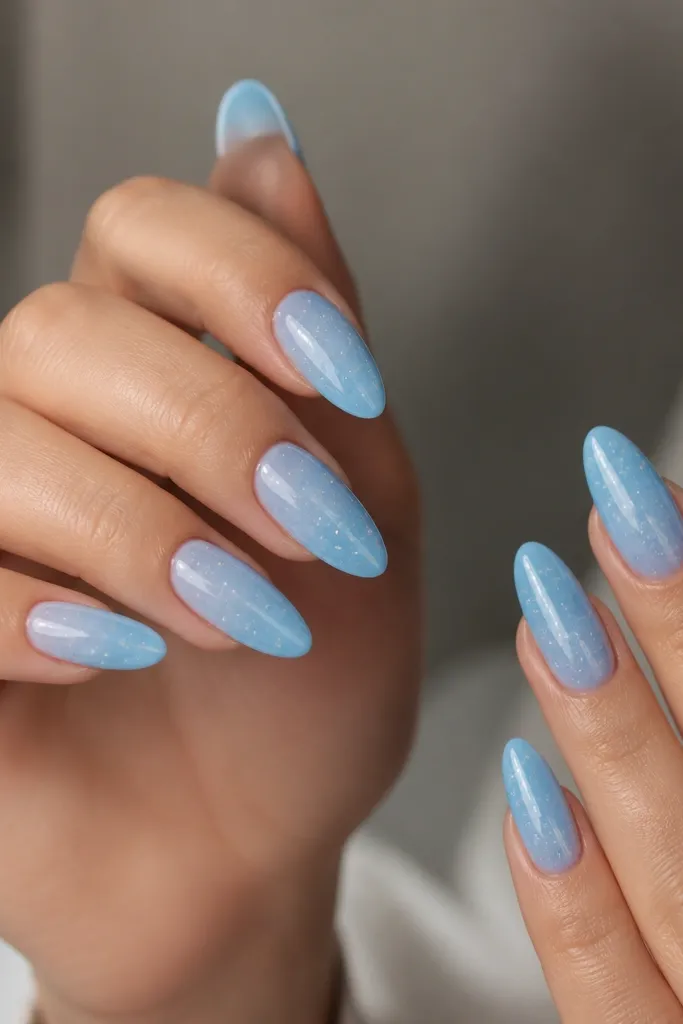
This is a “summer sky” mani that stays beginner-friendly because the gradient does the heavy lifting. Sky blue flatters cool undertones and looks amazing with silver jewelry, but it also works on warm skin if your base is a little milky. The white star specks add charm without requiring detailed art. Almond shape makes the gradient look like it’s stretching toward the horizon, which is why it always photographs well.
Start with a milky white or sheer nude base. Sponge sky blue starting at the mid-nail and blend upward toward the cuticle, leaving a lighter center if you want a dreamy look. Add white specks by tapping a stiff brush or dotting tool — make them irregular so they look like stars. Finish with glossy top coat, and run the brush across the tip to keep the surface smooth.
Use a slightly thicker top coat for the last layer so the specks don’t sink.
Don’t make the gradient too dark at the cuticle — it will look harsh on almond.
15. Coral Daisy Accent On Milky Nude
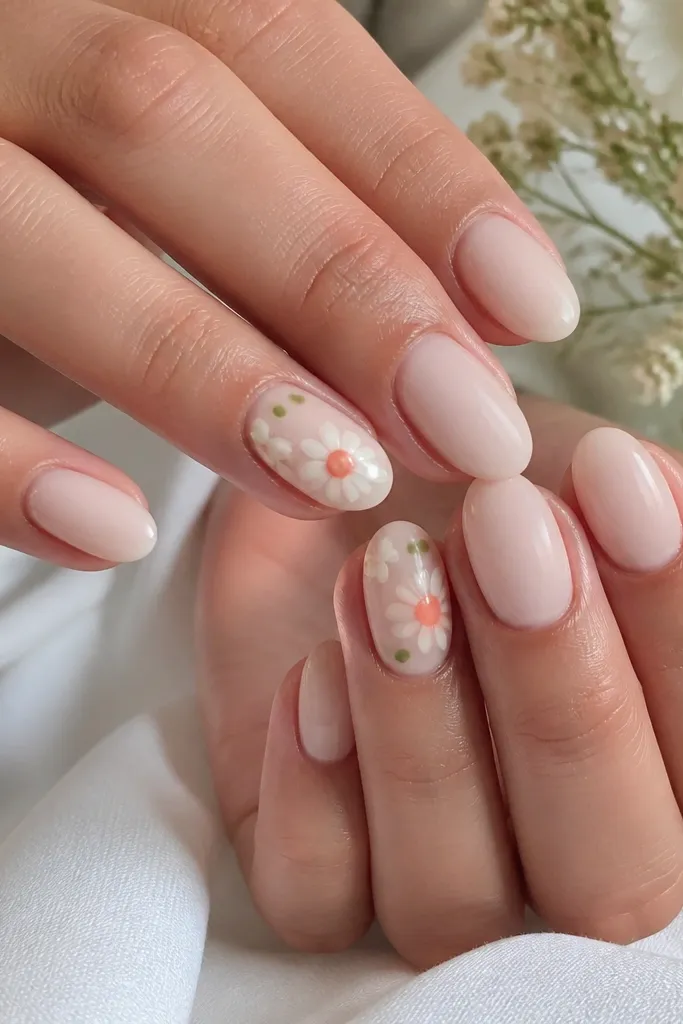
Apply a milky nude base and let it dry completely. On accent nails, add a small coral dot in the center using a dotting tool. Then paint 6-8 tiny white petals around the center with a thin brush, keeping each petal short and evenly spaced. Add one tiny green dot or short stem line if you want, then seal with two top coats for a smooth finish.
Daisies look sweet without being childish when you keep the petals small and the color palette tight. Milky nude makes the coral center pop while the white petals stay bright. This design flatters most skin tones because the base is neutral, and the daisy sits at the center of the nail where beginners can place it more accurately. It’s a great choice for birthdays, weekend dates, and any time you want a clean floral moment.
Watch outDon’t draw long petals — long petals can look messy on almond tips.
Editor's noteIf petals look lopsided, add one extra petal on the “empty” side — it balances instantly.
16. Peach Marble Swirl On Two Nails
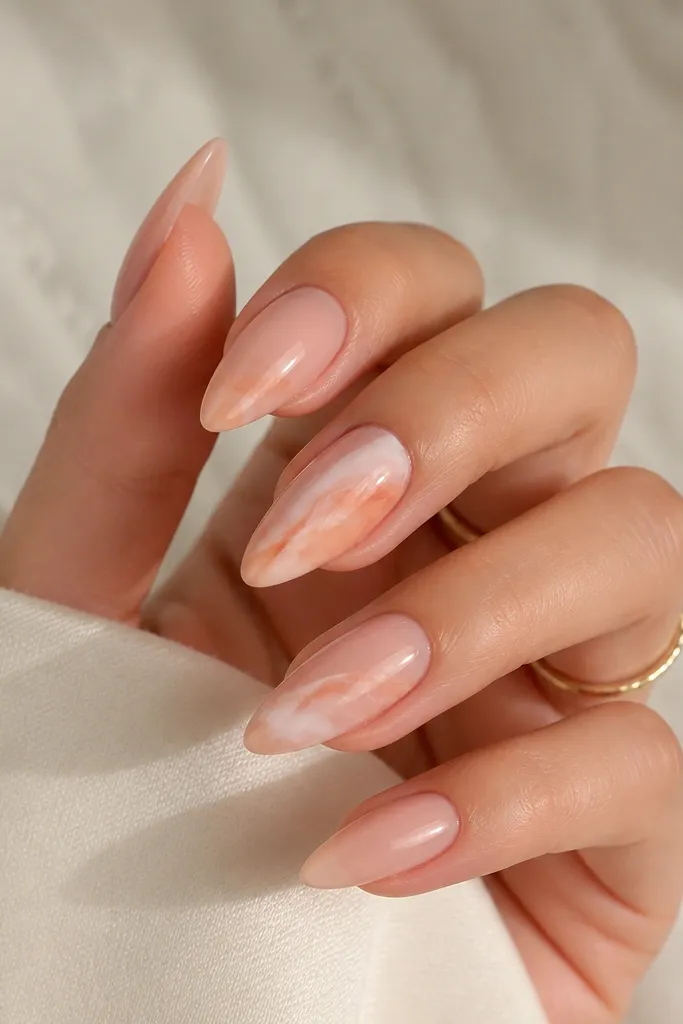
Paint all nails with a sheer nude base and cure fully. On two accent nails, add a few thin strokes of peach and white polish close together, then use a dotting tool or thin brush to swirl the lines into marble patterns. Don’t overwork the swirls — stop once you see feathered edges. Seal with a thick glossy top coat, pressing gently so the marble lines don’t lift.
Marble looks hard, but on nails it’s mainly about controlled swirl placement. Using peach and white on a sheer nude base keeps it light and summer-appropriate. This design flatters all skin tones because the base stays close to your natural nail color and the swirls add movement. It’s also ideal for beginners because you can limit the marble to two nails and let the other nails act as a calm backdrop.
Watch outDon’t layer too many colors — three shades is enough for a clean marble look.
Editor's noteMarble looks best when the swirls stay in the center and don’t reach the cuticle too hard.
17. Yellow Outline French With White Base
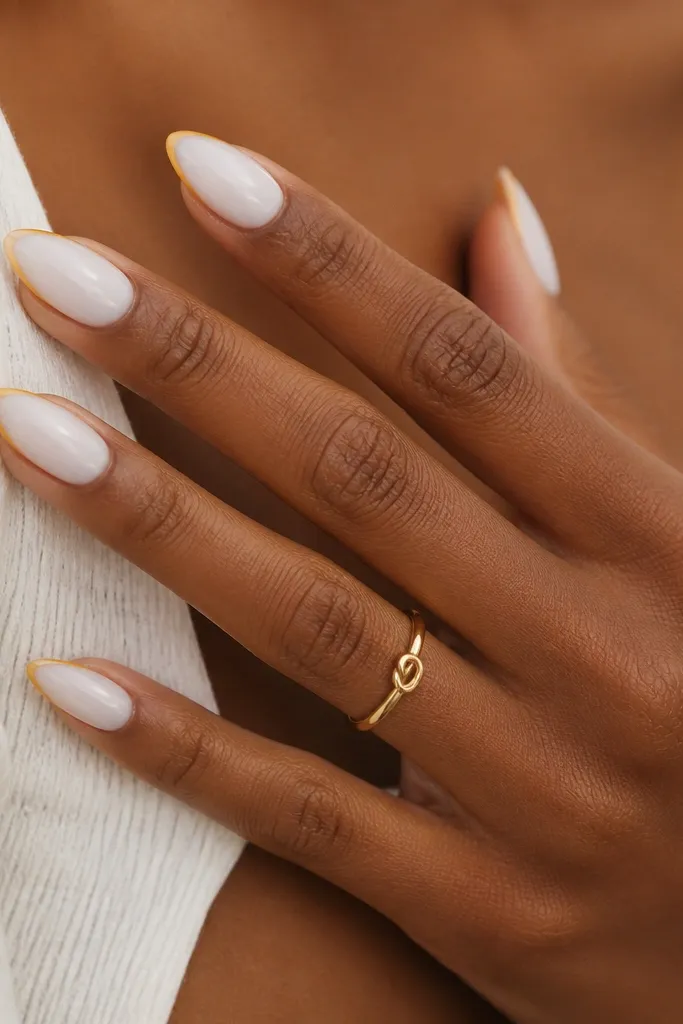
Outline French is one of my favorite “beginner-friendly but looks sharp” summer designs. The white base makes the yellow outline pop, and the almond shape keeps the tip line smooth. This works on every skin tone because the base is bright and the outline is thin, so your nails look clean instead of bulky. It’s also perfect if you want something beachy that still looks tidy for daytime events.
Apply a milky white base on all nails. Add a thin French tip line in white or a slightly deeper white if you want definition, then outline the tip edge with yellow using a striping brush. Keep the yellow outline about 0.5-1 mm thick and follow the curve of the almond tip. Finish with one or two coats of glossy top coat to smooth the edges.
Let the white base set fully before drawing the yellow outline or the line will smear.
Don’t paint yellow too close to the sidewalls — it can look uneven on almond.
18. Pink Aura Center Glow With Coral Edge
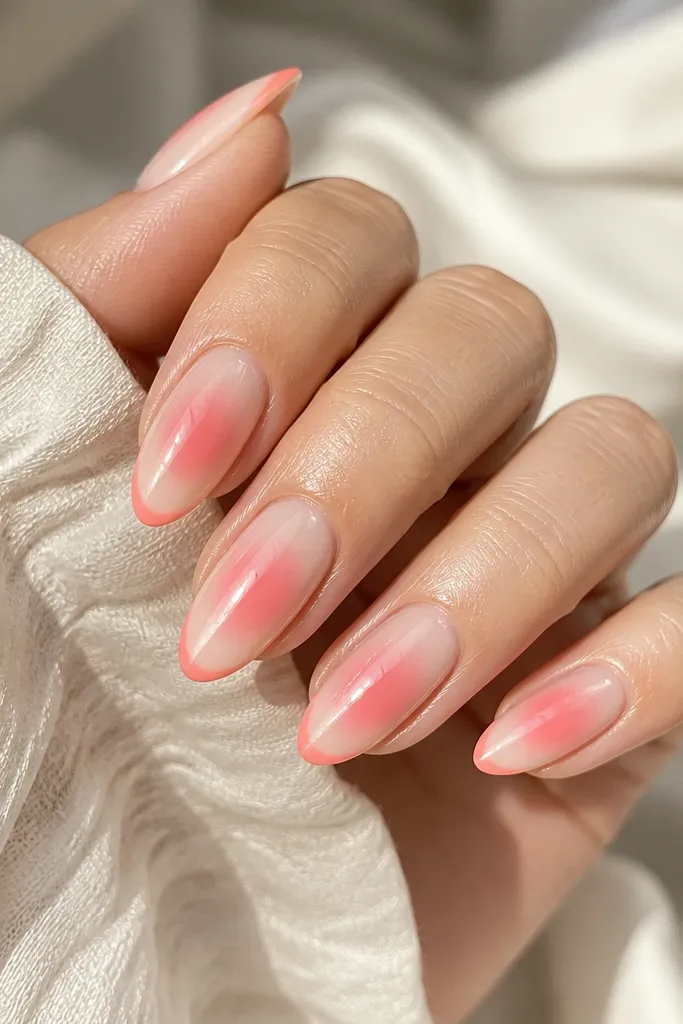
Aura nails are flattering because they create a soft light effect that makes almond tips look defined. The pink center glow flatters fair to deep skin tones by staying close to your natural color, while the coral edge gives that sunny summer pop. I like this for people who want something more modern than dots but still easy to repeat. It also photographs well because the glow has a natural gradient.
Start with a milky nude base. Sponge a soft pink aura around the center of the nail — keep it concentrated in the middle and feather outward. Then add coral at the tip third, blending into the pink so you get a gentle transition. Top coat twice, and avoid heavy pressure on the sponge so you don’t streak the base.
Use a small makeup sponge and dab, don’t swipe — dabbing keeps the aura soft and clean.
Don’t make the aura too high near the cuticle or it will look like a smudge.
19. Turquoise Single-Line Side Stripe
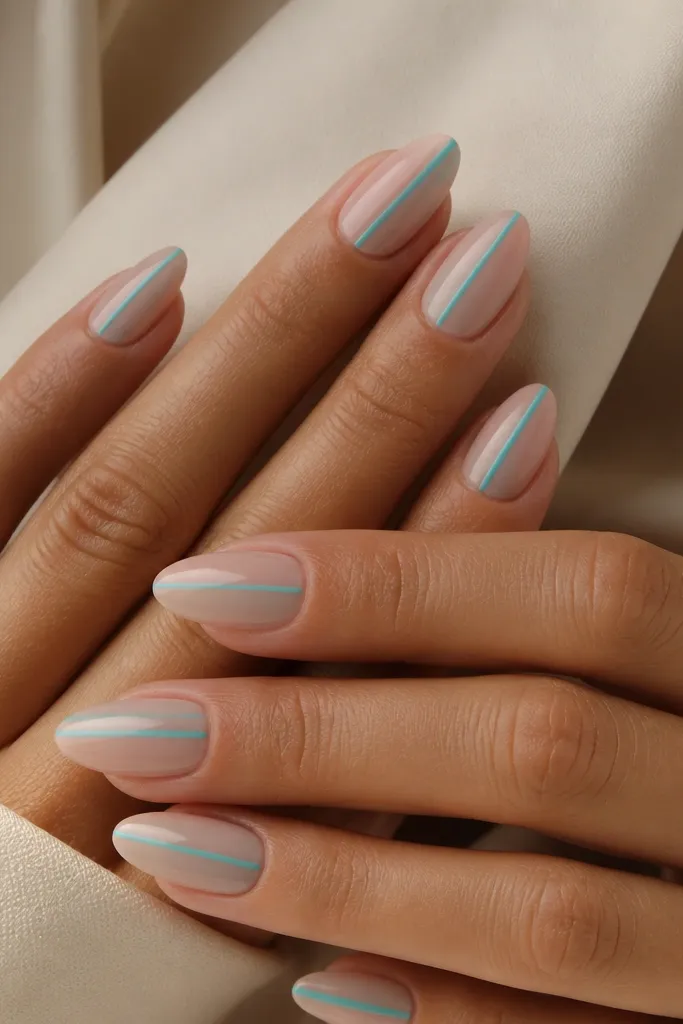
A single side stripe is clean, modern, and fast. Turquoise over nude gives you a summer color that reads “cool” and looks great with silver rings. On almond nails, a side stripe makes your nail look slimmer and longer, which is why I use it when someone wants a flattering mani without heavy art. This is especially pretty on fair to medium skin tones, but it still works on deeper skin as long as your base is sheer and not too dark.
Apply a sheer nude base and cure or dry fully. Load a striping brush with turquoise polish and draw one line from just above the mid-nail down toward the tip, keeping the stripe about 1 mm from the edge. Clean up the line with a fine brush dipped in acetone if needed. Seal with top coat, and run the brush across the tip so the stripe doesn’t lift.
If your stripe wobbles, fix it while the polish is still wet by nudging it with a damp brush tip.
Don’t do a stripe on every nail with thick paint — keep it thin or it looks sloppy.
20. Strawberry Jam Gloss Topcoat
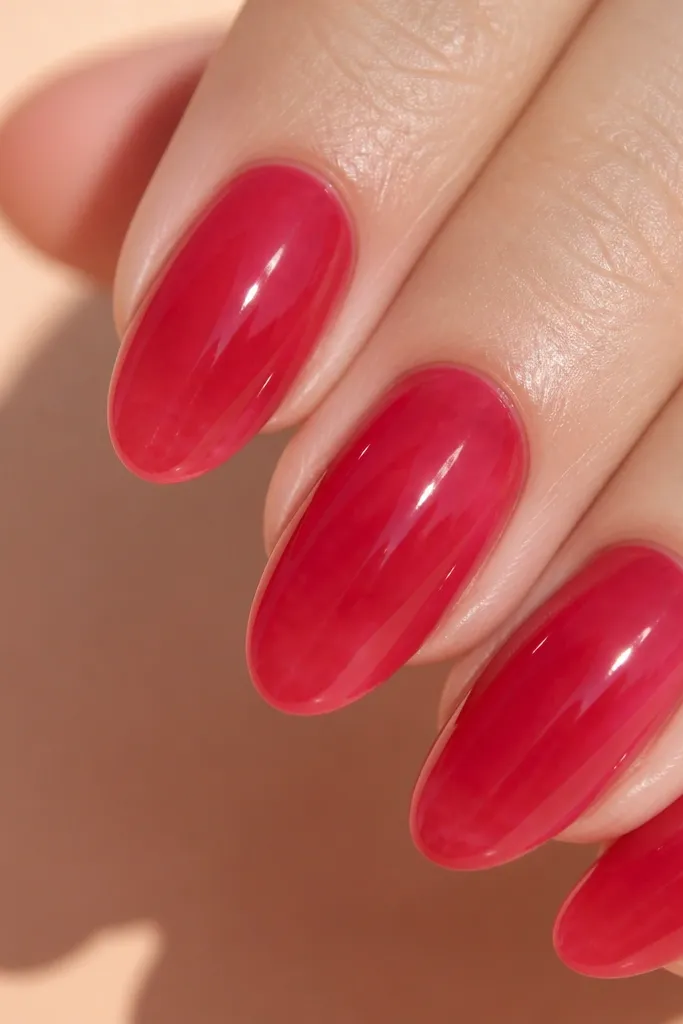
Paint a sheer nude base and let it fully dry. Apply one coat of strawberry-red jelly, then wipe excess from the brush so the second coat is controlled. Focus the second coat on the tip third, gently blending back toward the center. Add two coats of glossy top coat — jelly needs shine to look like jam instead of flat color.
This look is all about the finish. Strawberry jam jelly polish gives color that’s rich but still translucent, so it looks bright in summer light without needing nail art. Almond shape makes the jelly look smooth and dimensional, especially when the darkest tone sits on the tip. I’ve worn it on days when I was rushing, and it still looked like I had a plan. It flatters all skin tones because the base is sheer.
Watch outDon’t over-apply too close to the cuticle — jelly can flood and look messy.
Editor's noteWarm the jelly polish between your hands for 20 seconds if it feels thick — it levels better.
21. Sea Glass Speckle On Sheer Nude
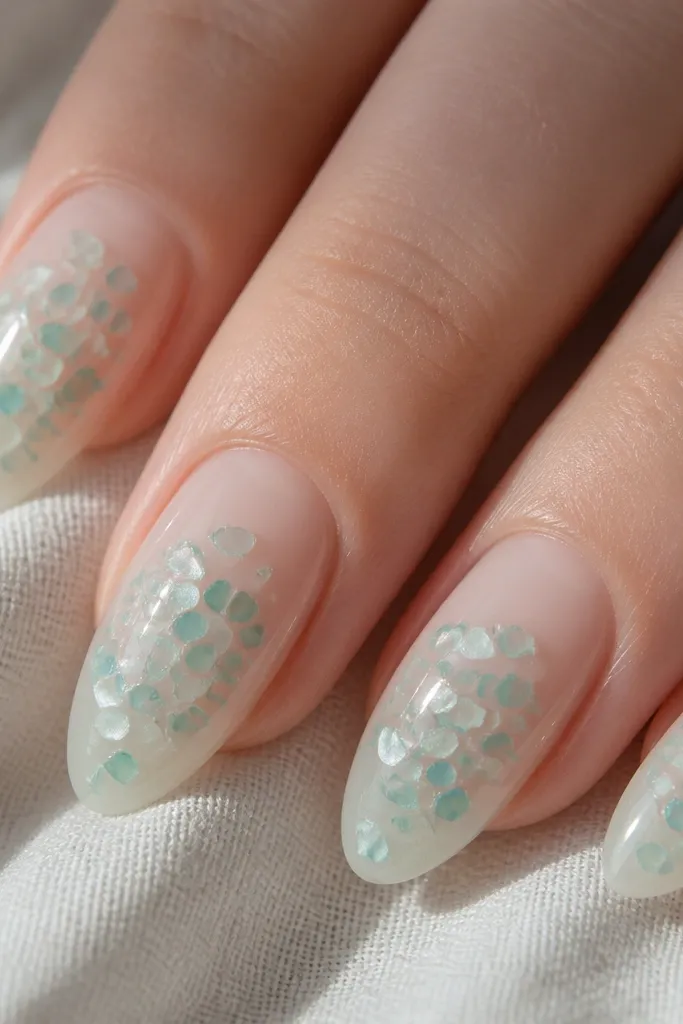
Start with a sheer nude base. Add seafoam speckles by tapping a tiny brush with aqua/seafoam polish — keep them scattered but denser near the tip. Add 1-2 slightly larger translucent spots by dabbing a lighter aqua polish and blending edges with a clean brush. Seal with a glossy top coat, doing a second coat for full smoothness over the speckles.
Sea glass speckles look like you found beach glass and put it on your nails. The sheer nude base keeps it delicate, while seafoam and aqua speckles give that cool summer feeling. This design flatters everyone because the colors are light and the base is close to your nail bed. It also grows out nicely because there’s no cuticle-heavy art. Perfect for ocean trips, casual weddings, and days you want something airy.
Watch outDon’t use glitter that’s too chunky — it kills the sea glass vibe.
Editor's noteUse a white-tipped dotting tool to place the larger spots — the edges look more glassy.
22. Coral Dot Grid Accent On Nude Almond
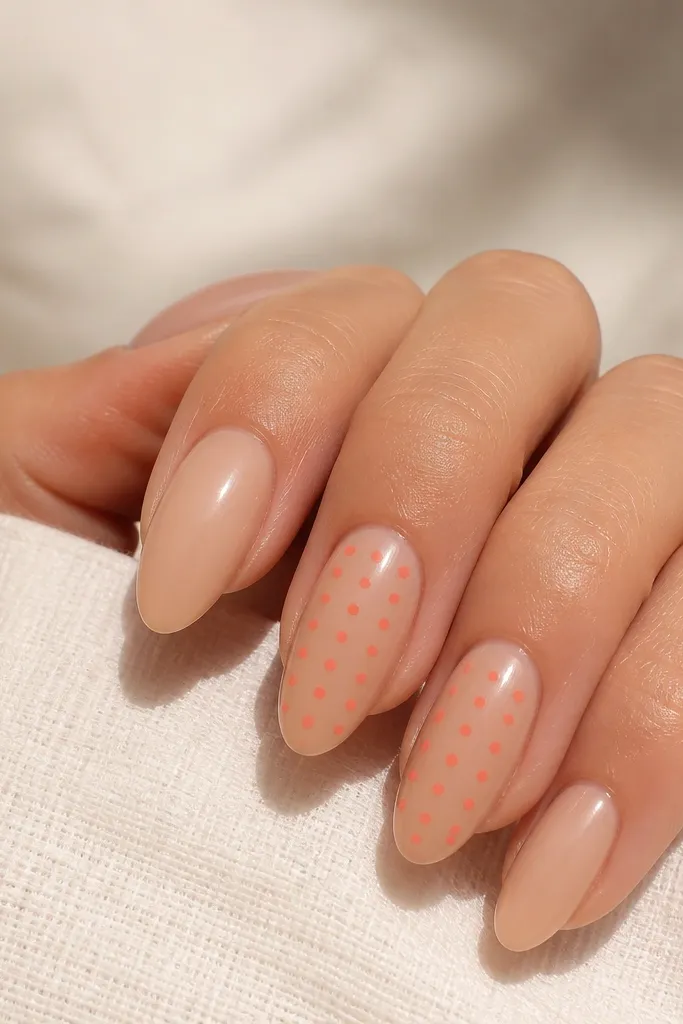
Apply a nude base and cure fully. On accent nails, place dots in a grid by making a row of 4 dots, then adding a second row under it and matching spacing. Keep the grid centered and leave breathing room around it so it doesn’t feel cramped. Let it dry, then top coat two times, using a thicker top coat on the grid to prevent texture from catching.
A dot grid makes your nails look “patterned” without needing straight lines. Coral dots on nude look warm and summery, and the grid gives a structured look that still feels playful. This flatters most skin tones because nude keeps it clean, and the coral reads bright without being neon. I like it when you want something different from stripes but still beginner-friendly. It also works for short to medium almond lengths.
Watch outDon’t make the grid too big — a small center grid looks cleaner on almond.
Editor's noteIf your dots aren’t even, correct by adding one extra dot to balance the spacing visually.
23. Palm Sun Burst Rays On One Accent Nail
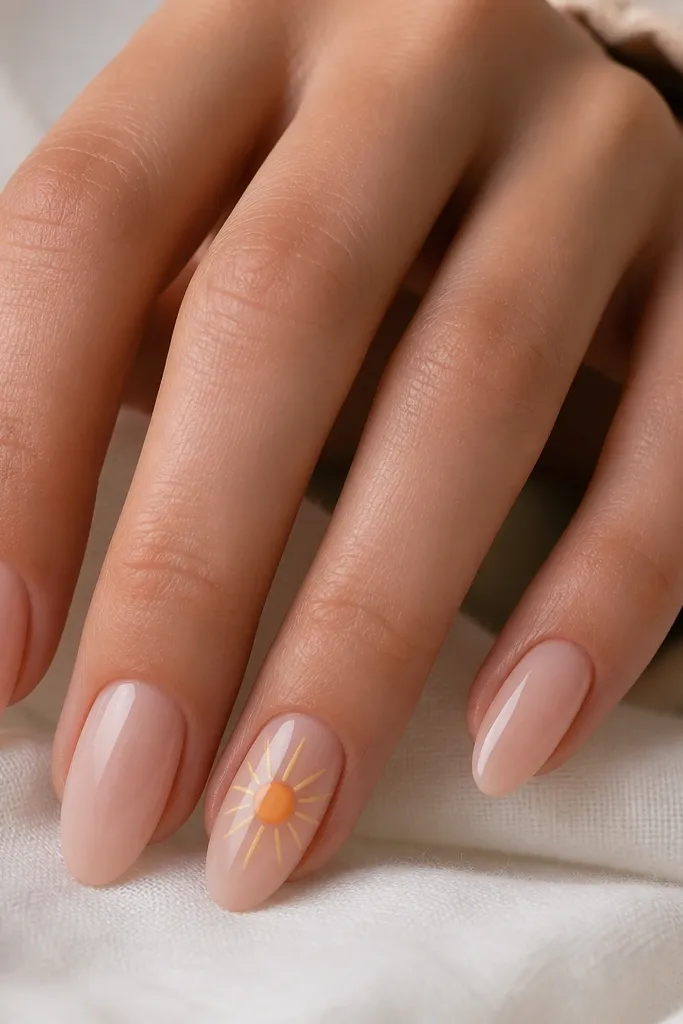
Start with a nude or milky pink base. On one accent nail, paint a small orange circle in the center. Then draw 8-12 thin yellow rays outward using a liner brush — keep rays short so the burst stays delicate. Wait for it to dry, then seal with glossy top coat, brushing carefully around the rays so they don’t smear.
Sun burst rays are a super summer motif and they’re easier than they look if you keep them small. A tiny sun at the center of the nail looks cute instead of childish, and it draws the eye along the almond shape. I like yellow rays with a warm orange center because it looks like real sunlight. This design works on fair through deep skin tones because the base stays neutral and the sun has strong contrast. Great for beach weekends and sunny photos.
Watch outDon’t extend rays to the edges of the nail — that makes it look crowded.
Editor's noteUse a dotting tool to place the orange center first — it anchors everything.
24. White Milk Nails With Peach Sprinkle Tips
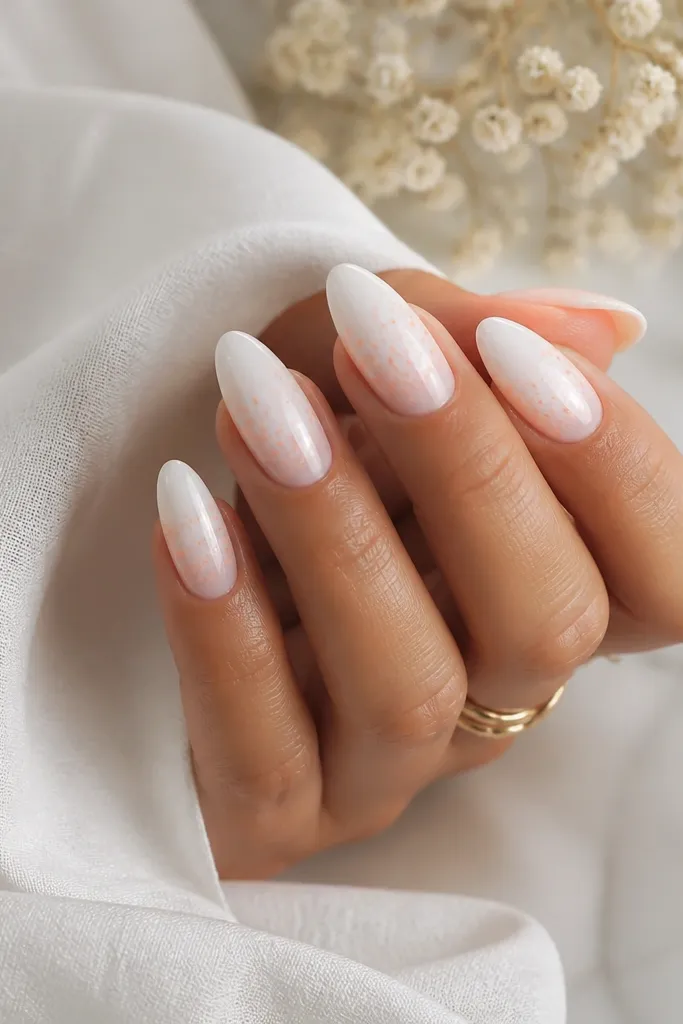
Apply a milky white base in two thin coats so it’s opaque but not thick. For sprinkle tips, dab peach polish with a small brush or tapping tool at the tip third, then blend lightly upward with a clean brush. Keep the flecks small and sparse near the center of the nail so the tip area stays the focus. Finish with two coats of glossy top coat, sealing the free edge well.
Milky white makes nails look clean and expensive, and peach sprinkle tips add the summer feel without detailed art. The peach flecks look like summer confetti, and they’re forgiving because small imperfections read as texture. This is flattering on all skin tones since the base is bright and the peach matches warm undertones. It’s also a great beginner option if you want a design that looks intentional even when you’re not perfectly steady.
Watch outDon’t pack the peach flecks too dense — dense flecks look like a stain.
Editor's noteUse a makeup brush to blend the sprinkle fade — it softens edges faster than a nail art brush.
25. Neon Coral Outline Over Sheer Nude
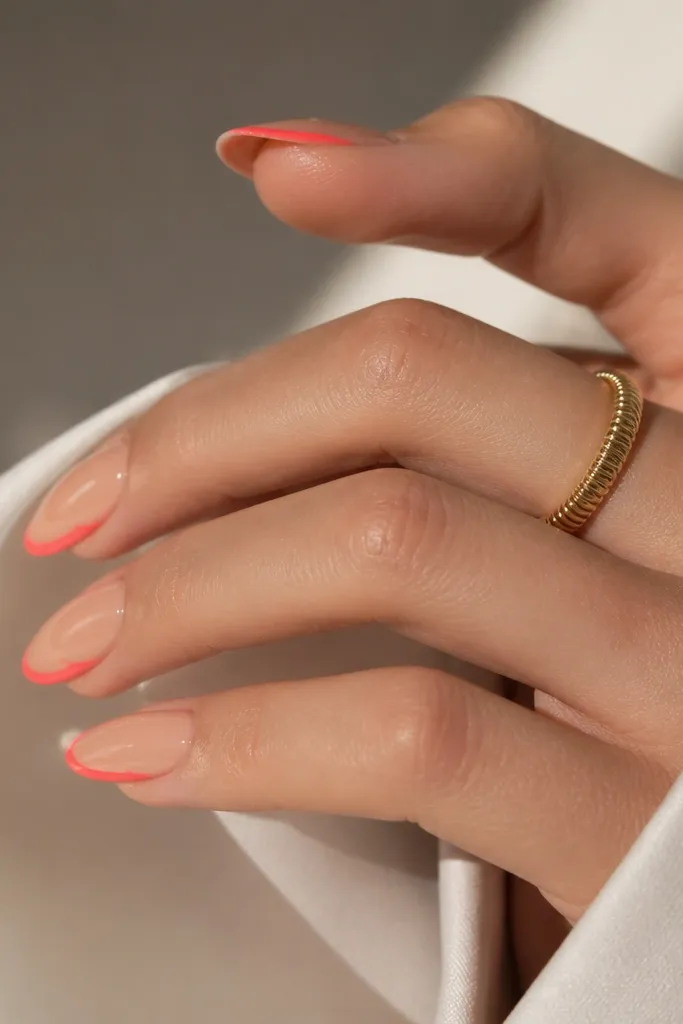
Outline art is the fastest way to make nails look bold without covering them in paint. Neon coral can be tricky, but on a sheer nude base it stays bright and clean instead of harsh. The outline follows the almond shape, so your nails look longer and sharper. I like this on medium and deeper skin tones because the neon coral reads vivid, but fair skin looks great too if your nude base is slightly pink. It’s perfect for summer concerts and nights out.
Start with a sheer nude base. Using a striping brush, draw a thin neon coral line along the almond tip curve — think of it as tracing the smile line on the free edge. Add a small vertical accent line down one side about halfway, then clean the edges with a cotton swab dipped in acetone. Top coat twice so the outline looks glassy and smooth.
Thin neon lines need less polish — reload your brush often instead of trying to pull a long line from one dip.
Don’t outline the entire nail — keep it to the tip and one small accent for a clean look.