
1. Champagne Gold Tip Over Charcoal Matte
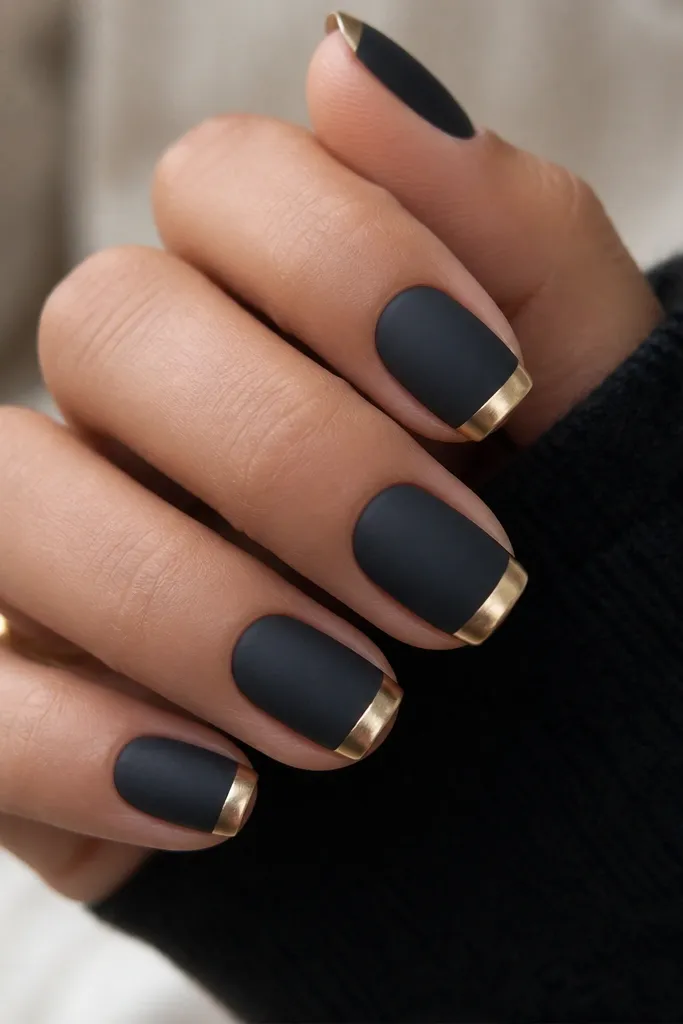
This one reads cozy because the charcoal is warm and flat, while the champagne tip has a gentle metallic glow instead of mirror shine. I like it most on medium almond or soft square shapes because the French line stays sharp and elongates the nail. If your skin tone is warm (golden undertones), the champagne gold melts in beautifully; if your skin tone is cool, the charcoal keeps it grounded so it doesn’t look harsh. It’s also a great first gold-and-black set because the art is controlled — you’re not guessing where to place details.
Start by filing your acrylics to your shape and wiping the dust off with a lint-free pad. Apply a thin matte charcoal base gel, then cure. Next, paint a classic French tip using champagne metallic gel — keep the free edge line about 1.5 to 2 mm wide for short nails and slightly wider for medium length. Finish by capping the gold with a glossy top coat only on the tips, then apply matte top coat over the charcoal sections so the contrast stays intentional.
Editor's noteIf your French line looks wobbly, use a silicone French guide for the first pass, then clean the edges with a gel brush dipped in isopropyl alcohol.
Watch outAvoid a glossy black base under a matte tip — the mismatch makes the set look messy instead of cozy.
2. Gold Leaf Half-Moon With Espresso Black
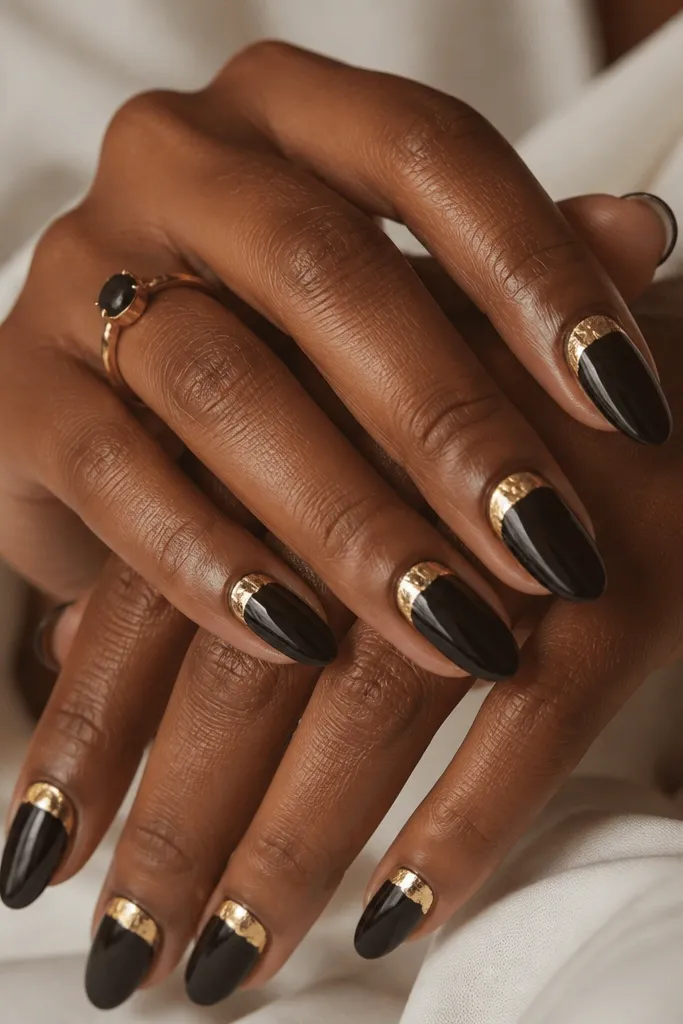
Gold leaf gives that warm candlelight effect, which is exactly why this feels cozy. Espresso black is softer than jet black, so the gold looks like it’s glowing from within. This design flatters hands with slightly dry cuticles because the half-moon draws attention to the nail bed instead of the skin. It also works for everyday wear — the focal point is small, centered, and doesn’t overwhelm your fingers.
Start with a smooth espresso-black acrylic base and cure fully. Use a thin layer of tacky gel around the cuticle area where the half-moon will sit, leaving a small gap so it doesn’t flood the cuticle. Press gold leaf pieces into the tacky gel, then seal with a thin glossy top coat. Finally, clean up the sides and apply top coat to the rest of the nail in a matching finish so the leaf area stays glossy and the base stays mostly smooth.
Editor's noteTap gold leaf onto a small silicone mat first and pick tiny pieces — big chunks look heavy near the cuticle.
Watch outDon’t put gold leaf directly on gel that’s already fully cured; it won’t grab and you’ll get bald spots.
3. Black Velvet Base With Micro Gold Stars
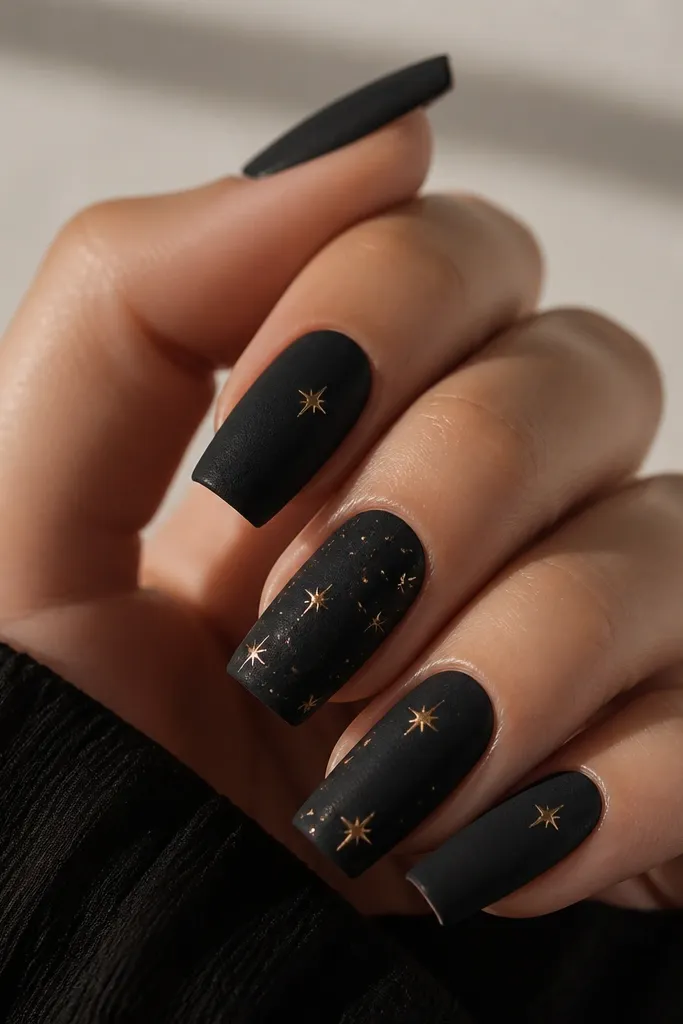
This is cozy because the matte velvet finish kills shine on the black, and the micro gold stars look like warm night light instead of flashy jewelry. I do this on longer square or coffin shapes because the stars have room to breathe and the nail bed looks longer. If you have fair skin, the stars pop gently without looking neon. If you have deeper skin tones, the gold still reads warm and the matte black keeps it sleek.
Begin by painting a true matte black base, then cure and buff lightly so it feels velvety. Use a fine liner brush or a dotting tool to place tiny gold star dots — keep them 1 to 2 mm apart so they don’t turn into a blob. Add one accent nail with a slightly higher star density, but keep the overall pattern sparse. Top coat with matte over the black, then use a tiny amount of glossy top coat only over the gold stars so they look raised.
If you don’t have a star stencil, use a hole punch tip on a dotting tool for consistent star points.
Skip heavy glitter — it turns “cozy night sky” into “party flare” fast.
4. Gold Cable Knit Lines Over Matte Black
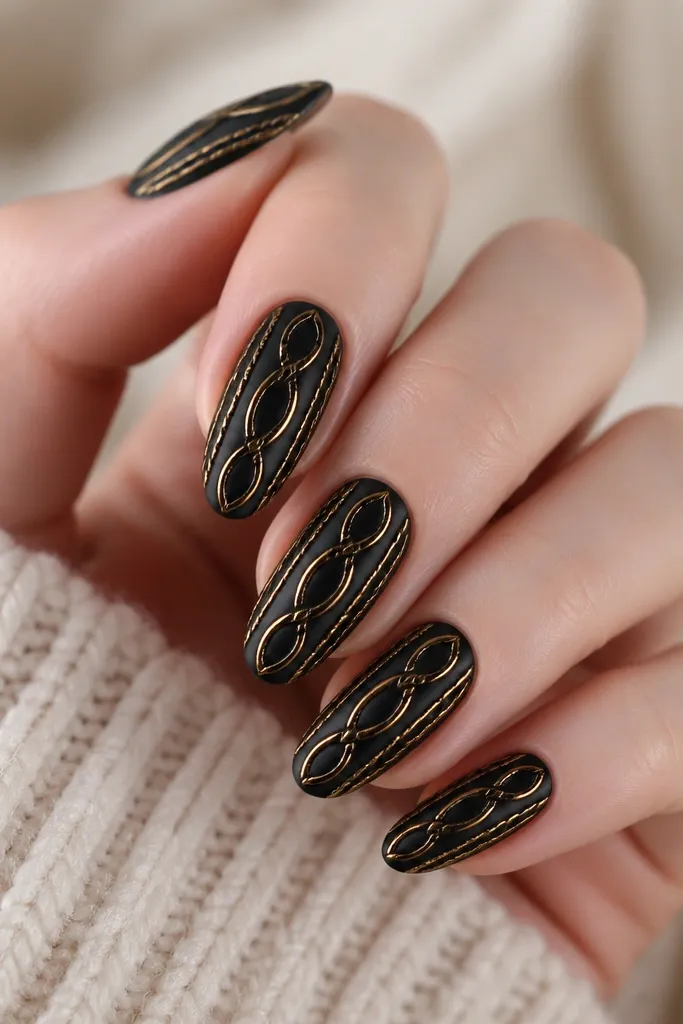
Cable knit nail art makes everything feel warmer, and gold lines are the perfect color to mimic yarn shine. This works especially well on medium almond because the pattern curves naturally with the nail shape. For hands that look better with softer edges, this design looks intentional and not too sharp. The glossy gold lines over matte black create that knit texture illusion without needing actual fabric.
Start with a matte black base and cure. Mix a thin gold gel (or use gold chrome gel) and load a striping brush. Draw two vertical “yarn rails” down the center third of the nail, then cross them with short diagonal lines every 3 to 4 mm to form the cable pattern. Finish by curing, then apply glossy top coat only over the gold lines and matte top coat over the rest so the cable effect stays crisp.
Editor's noteDo one nail at a time so the gold gel stays workable while you place each crossover.
Watch outDon’t make the cable lines too thick; chunky lines look like paint, not knit.
5. Black Marble With Honey Gold Veins
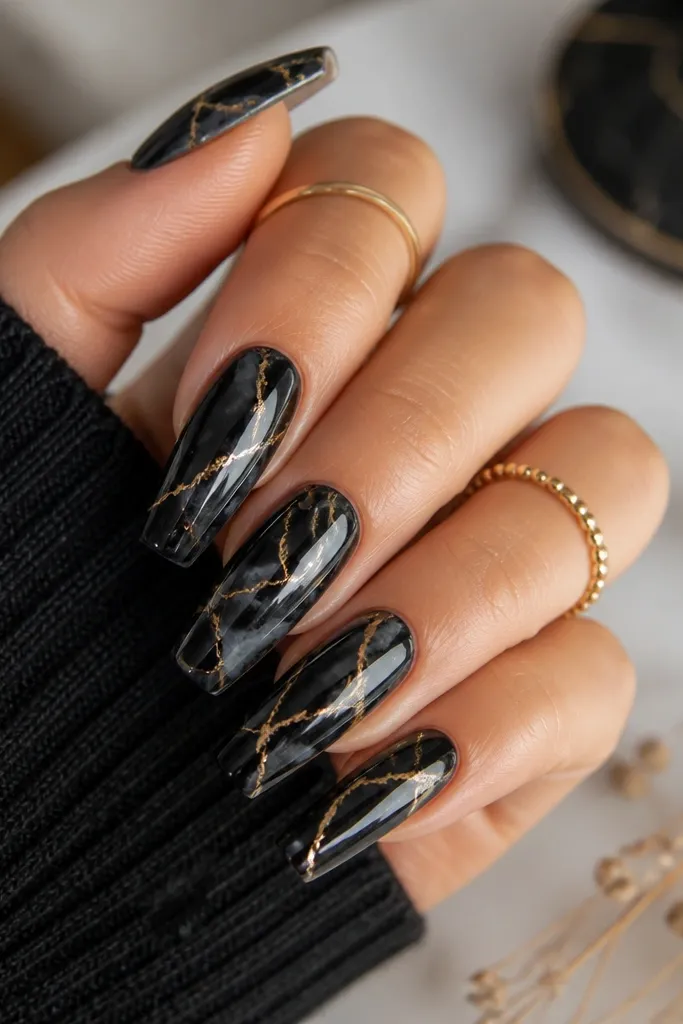
Marble looks cozy when the gold is honey-toned and the black has movement instead of looking flat. I love this on coffin or long almond because the veins have room to flow, and the glossy top coat makes the stone effect feel like real gel marble. If you have a lot of contrast in your wardrobe (black jeans, gold hoops), this set matches without trying too hard. It also hides small nail plate imperfections because the marbling disperses attention.
Apply a thin black base and cure, then add a second layer of black with a slightly translucent gel so the marble can blend. Use a marbling brush to pull thin wisps through the black in irregular paths. While the gel is still tacky, add honey-gold striping gel in the “crack” areas — keep the lines thin and uneven. Cure fully, then top coat with a high-gloss layer to lock in the marble and make the veins look dimensional.
Editor's noteUse two different black tones (charcoal + espresso) so the marble has depth, not one flat shade.
Watch outDon’t over-swatch the veins — if the gold covers half the nail, it stops looking like stone.
6. Gold Foil Over Black Gloss With Negative Space
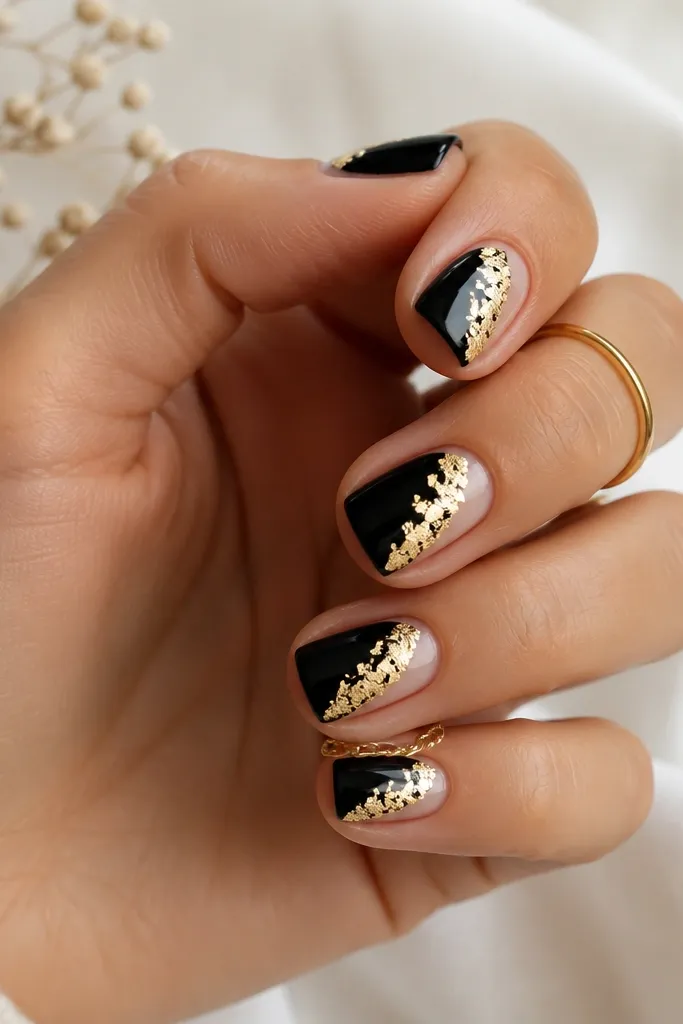
Negative space is what keeps gold foil from looking messy, and that’s why this feels cozy instead of chaotic. The glossy black makes the foil sparkle like warm metal, while the clear areas keep it light. This is flattering on short nails because the diagonal strip visually lengthens your fingers. If you hate heavy patterns, this gives you impact with minimal drawing.
Start with a glossy black base and cure. Apply a thin tacky gel in a diagonal band from the side of the nail near the middle toward the tip. Press small gold foil fragments into the tacky gel, then seal with a glossy top coat over the foil area. Leave the rest of the nail clean — then cap the free edge so foil edges don’t lift after a few days.
Editor's notePress foil with a silicone applicator, not your fingers — it keeps the foil from smearing into the negative space.
Watch outDon’t cover the entire nail with foil; that’s how it turns into a cheap-looking sheet.
7. Matte Black Base With Gold Half-Frame Outline
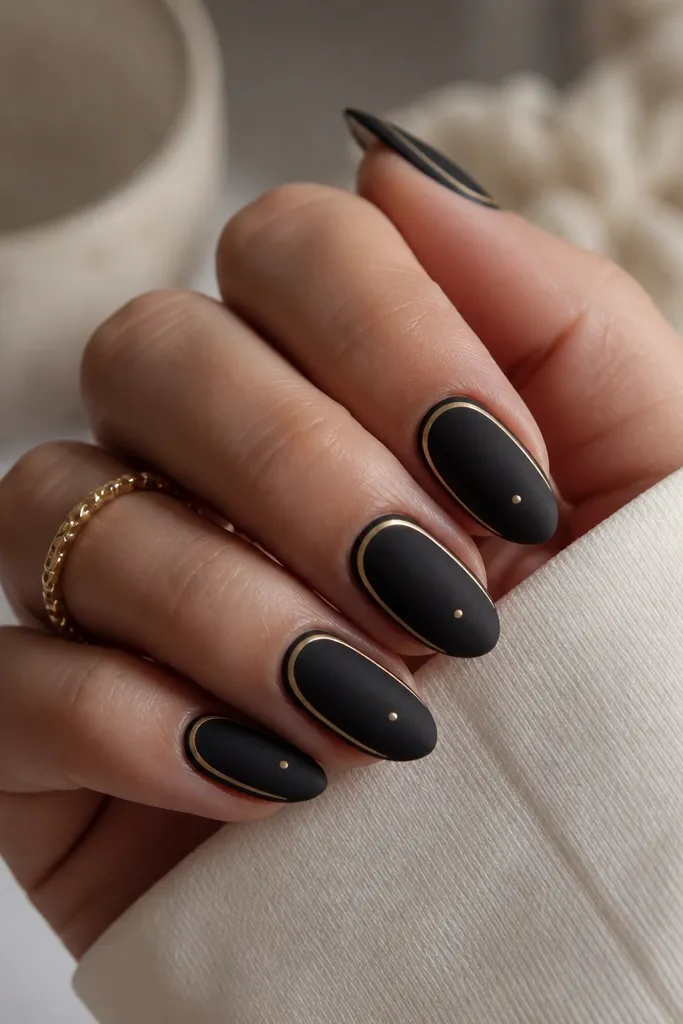
A thin gold outline feels cozy because it mimics the look of a warm picture frame — contained, not loud. Matte black keeps the background soft and velvety, while the gold line gives structure to your nail shape. This works best if your nail beds are slightly short or wide; the outline draws the eye upward and inward. It also looks good on both warm and cool skin tones because the gold is minimal and controlled.
Apply matte black gel and cure. With striping gel and a fine detail brush, draw a thin line starting at the left side of the nail’s middle edge, curve it near the tip, and stop before the cuticle so it forms a top-half frame. Add a small centered gold dot (about the size of a grain of rice) where the two sides visually meet. Cure, then apply matte top coat over black and a glossy top coat just over the gold line and dot.
Editor's noteUse painter’s tape to mark a straight “frame” line on your first attempt — it makes the curve look intentional.
Watch outSkip thick outlines; wide gold borders make nails look shorter.
8. Gold Swirl Accent Over Black French Side
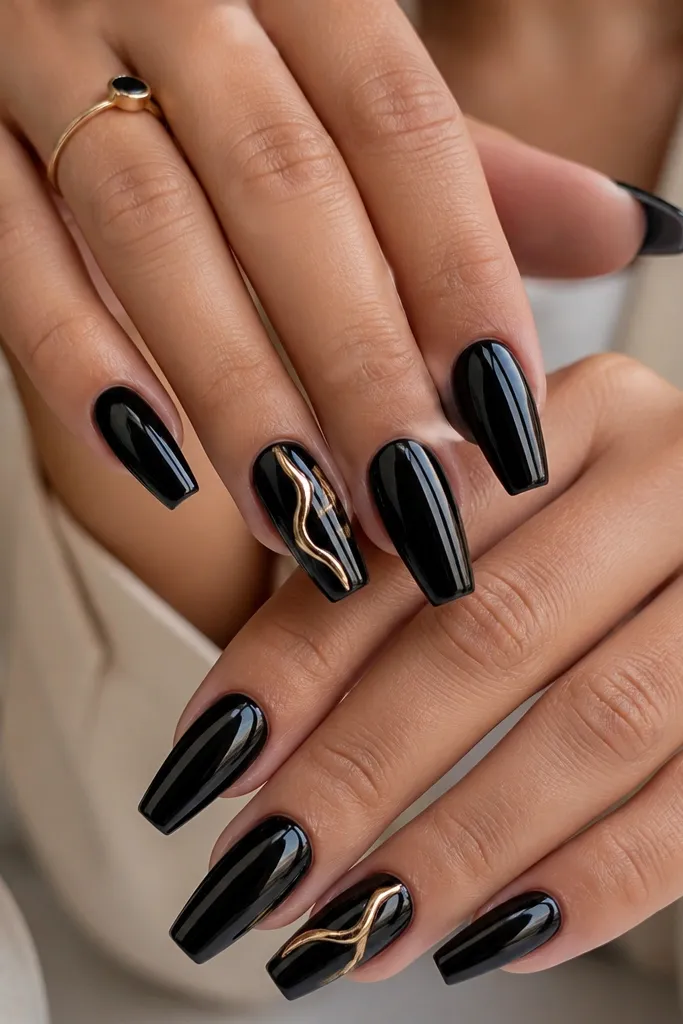
This design is cozy because the gold swirl feels like a warm scarf loop — flowing, not blocky. I do it on medium coffin or almond because swirls follow the nail curve and look smooth instead of lumpy. It flatters hands with long fingers and also works on shorter nails if you keep the swirl within the center third. The black-on-black French side detail adds structure so the gold doesn’t float randomly.
Start with a clear or nude base if you want a softer start, then seal and cure. Paint a black French side stripe along one side of the nail using gel, keeping it about 2 mm wide. On the accent nails, draw a single thick-to-thin gold swirl starting near the mid-nail and curling toward the tip. Cure, then top coat glossy over the gold swirl and sides of the black stripe, keeping the rest smooth and even.
Editor's noteOutline the swirl first with a thin gold line, then fill the inside — it keeps the curve clean.
Watch outDon’t add multiple swirls on every nail; the set loses the cozy focus.
9. Black Ombré Into Gold Glitter Tip
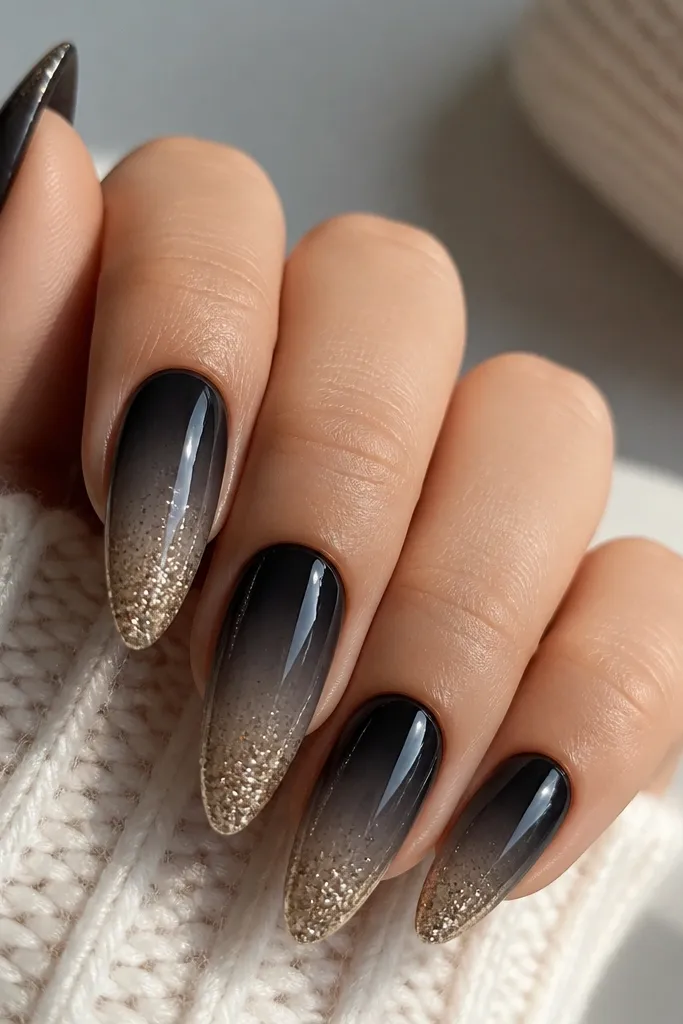
This one looks cozy because the black-to-gray fade feels smoky like winter fog, and the gold glitter tip looks like warm candlelight. The ombré also hides grow-out lines on acrylics, which is a huge practical win. I prefer it on long almond or coffin because the gradient needs length to blend smoothly. It suits almost every skin tone because the gold is the star and the black just frames it.
Apply a matte black base near the cuticle and cure. Sponge a soft transition using a gray-black gel or a matte black mixed with a clear base — blend it outward until it looks smoky, not streaky. Then build the gold glitter at the tip using a fine gold glitter gel in layers, keeping the densest area at the very edge. Cure after each layer if needed, then top coat glossy to melt the glitter into a smooth finish.
Editor's noteUse a makeup sponge with one light press per nail — too much rubbing makes the ombré look dirty.
Watch outSkip chunky glitter at the tip; it catches on sweaters and looks rough fast.
10. Gold Chain Link Lines on Matte Black
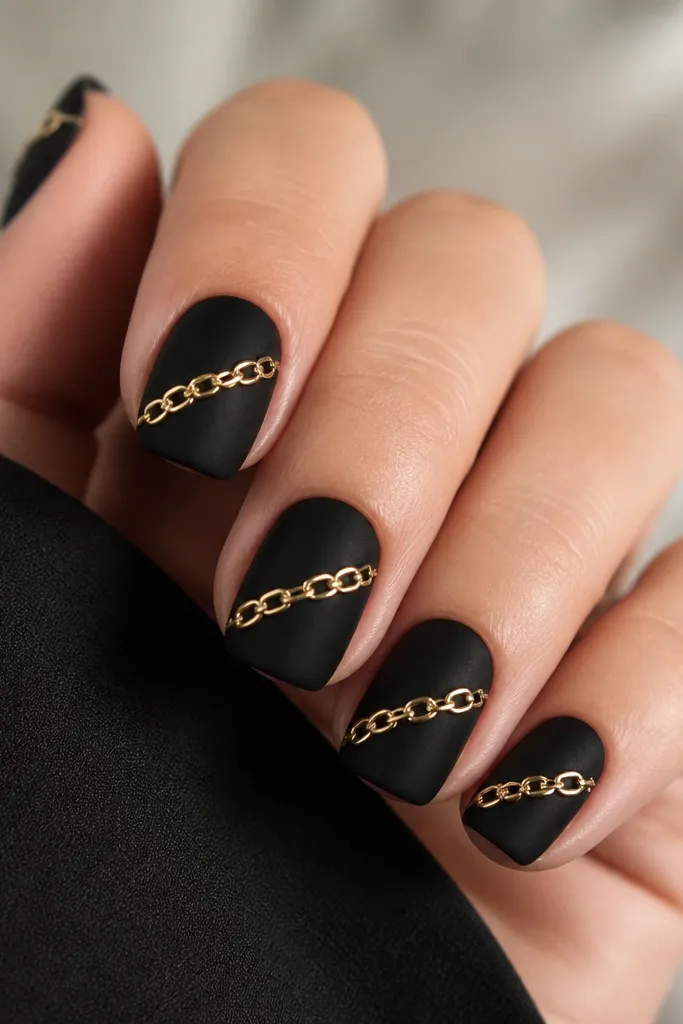
Chain links look cozy when they’re small and spaced, not giant hardware. Matte black makes the chain read like jewelry on a knit sweater — warm and intentional. This flatters short nails because diagonal chain links add length without covering the whole nail. If you wear gold rings or a gold watch, this matches your accessories without needing extra decoration.
Start with matte black and cure. Use striping gel and a detail brush to draw a diagonal path across the nail from lower left to upper right. Create small oval links by drawing each oval outline, then connecting them with a thin gold line — keep each link about 1.5 mm wide. Cure, then apply glossy top coat only over the chain so it looks raised and metallic.
If your ovals look uneven, practice on a nail tip first — then copy the same spacing on all fingers.
Don’t use thick gold paint for links; it clumps and makes links look cartoonish.
11. Black Base With Gold Dot Crescent Lining
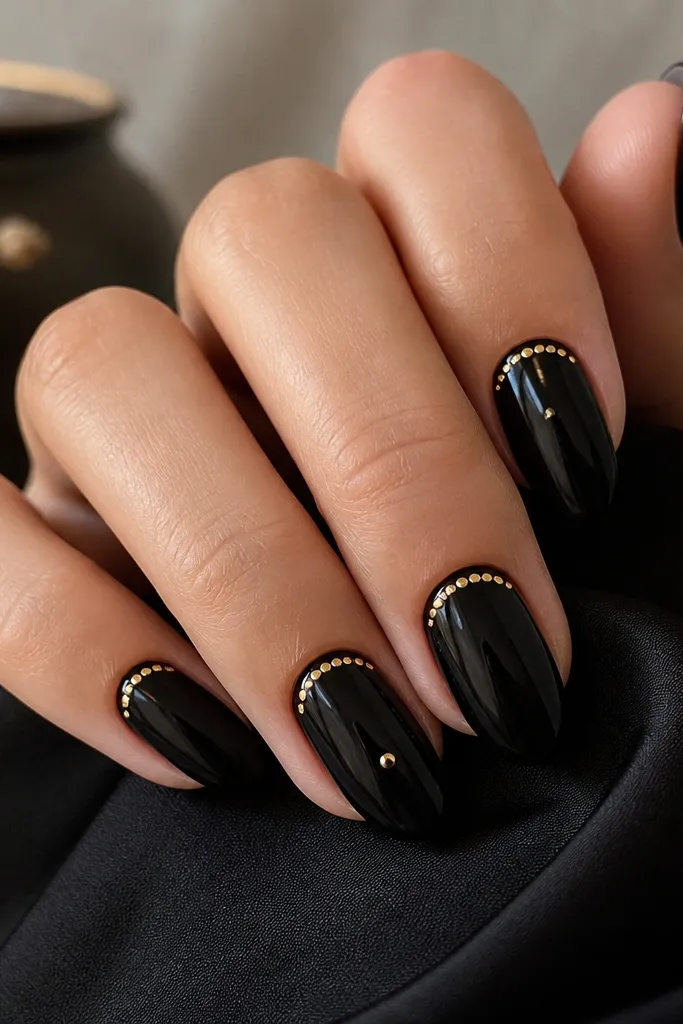
Dot crescents feel cozy because they look like warm fairy lights close to the cuticle. Glossy black gives a smooth background, and the dots add texture without heavy drawing. This is flattering on medium almond and soft square because the crescent naturally follows the nail curve. If your nails are prone to chips, dots hide minor imperfections better than thin lines.
Paint a glossy black base and cure. Dip a dotting tool into gold gel (or gold chrome gel) and place dots in a curved arc about 1 mm below the cuticle. Keep the arc centered and stop before the sidewalls so it doesn’t touch skin. For two accent nails, add one larger gold dot at the center third, then cure and seal with a glossy top coat across the entire nail.
Editor's noteUse a slightly smaller dot for the ends of the crescent so it looks tapered, not like a sticker.
Watch outAvoid too many dots — if the arc becomes a solid line, it loses the cozy lantern effect.
12. Gold Glitter Reverse French on Black
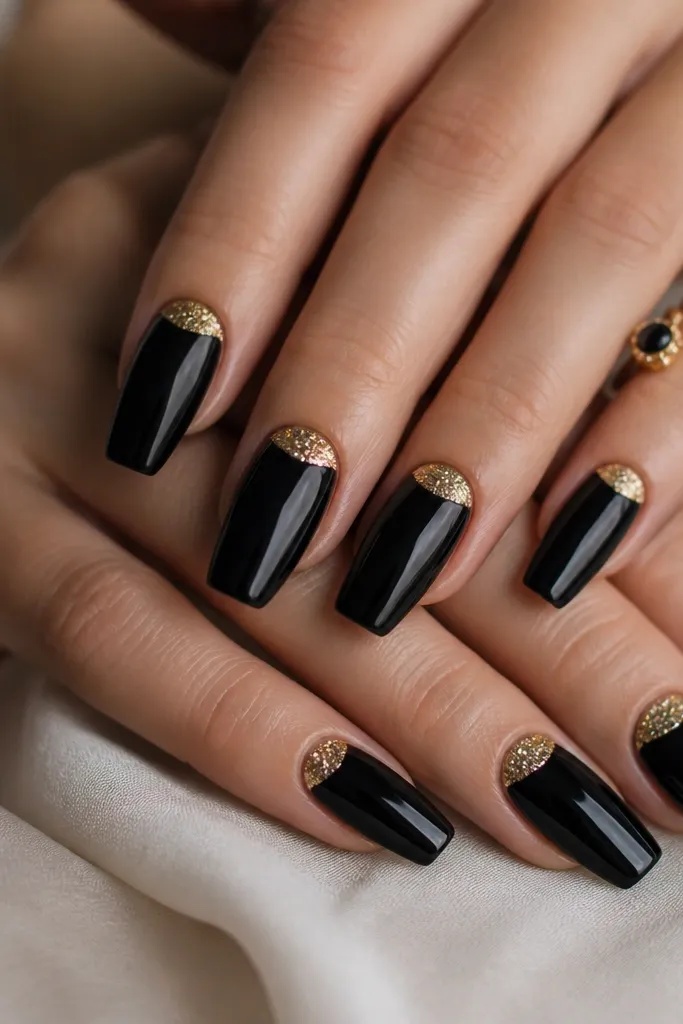
Reverse French looks cozy because it frames the nail bed like jewelry on your wrist — warm at the base, quiet on top. The fine gold glitter is key: it sparkles without feeling chunky. This design flatters hands with short nail beds because it draws attention to the cuticle line, making the nail look fuller. It also looks great for holiday nights and winter dinners when you want something dramatic but still clean.
Start with a glossy black base and cure. Apply a small amount of tacky gel right along the cuticle curve, staying about 0.5 mm away from the skin. Build a reverse French using fine gold glitter gel, packing it lightly and keeping it smooth — you want a crisp arc, not a messy halo. Cure, then apply a glossy top coat over everything to lock in the glitter and protect the edges.
Cap the glitter with a thin gel layer so it doesn’t shed when you wash your hands.
Don’t push glitter right up to the cuticle — it lifts and looks grown-out fast.
13. Matte Black With Gold Crackle Finish Accent Nail
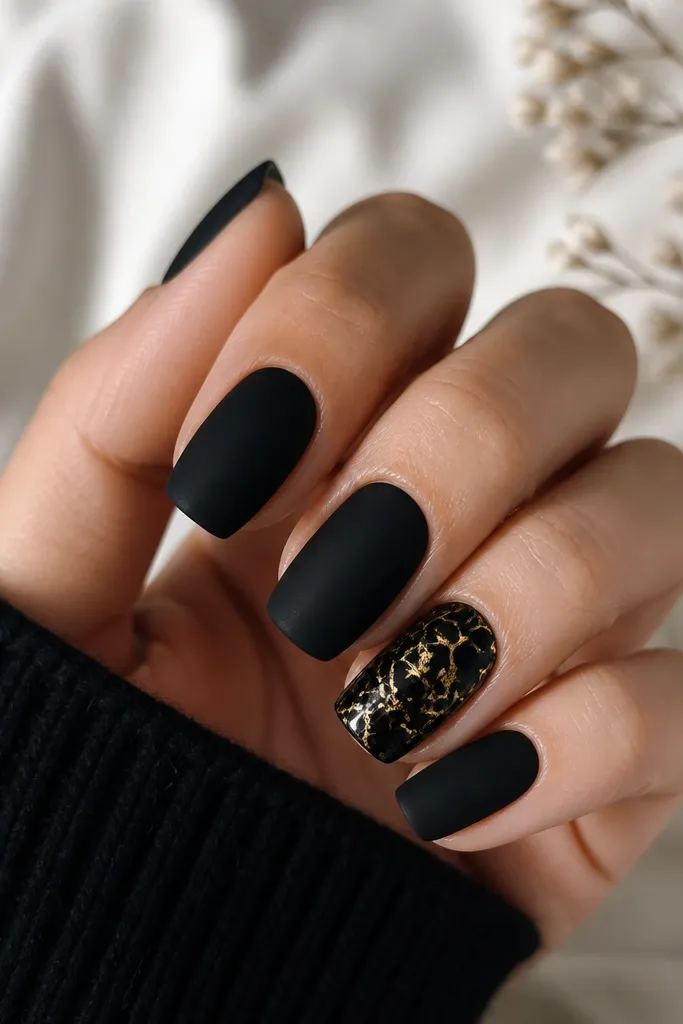
Crackle reads cozy when it’s warm gold and kept to one nail. The rest of the set stays calm in matte black, so the crackle looks like a warm winter ornament rather than a loud wallpaper. I like this on medium almond because the accent nail stands out without overpowering the hand. It also hides small application bumps because crackle texture distracts from perfection.
Apply matte black to all nails and cure. On the accent nail, paint a base layer of black (slightly tacky if your crackle gel needs it) and cure according to the product directions. Apply the gold crackle gel or crackle top effect in a thin layer — the magic happens as it dries, so don’t overwork it with the brush. Seal the accent nail with glossy top coat so the crackle looks dimensional, then keep matte top coat on the other nails.
Editor's noteUse a light hand when applying crackle gel — thick layers can stop the crackle pattern.
Watch outSkip crackle on every nail; it turns the set into visual noise.
14. Black Marble With Gold Foil Edge Frame
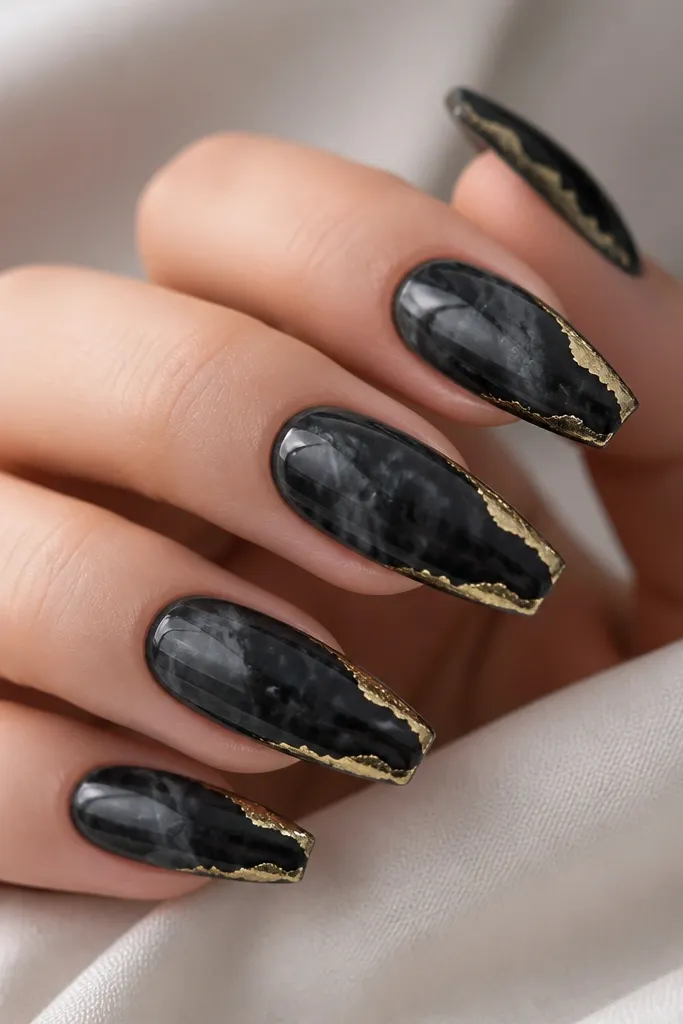
This looks cozy because the marble has softness and the foil edge adds warm light without covering the whole nail. The irregular gold border feels like metallic trim on a winter coat — present, but not loud. I like it on coffin and long almond because the edge framing follows the nail shape and makes fingers look longer. It also flatters darker skin tones really well because the marble movement gives dimension instead of looking flat.
Create the black marble by layering charcoal and espresso swirls in a glossy base, then cure. Choose one side of the nail for the foil frame and apply tacky gel along that edge — keep it narrow, about 1 to 1.5 mm. Press gold foil pieces onto the tacky gel, then add a few foil fragments near the tip corner for a “trim” feel. Seal with glossy top coat, paying extra attention to the foil edges so they don’t lift.
If your marble looks too dark, add one thin gray-black swipe before curing to create lighter stone movement.
Don’t frame both sides equally; it makes the nail look boxy.
15. Gold And Black Checker Accent With Matte Base
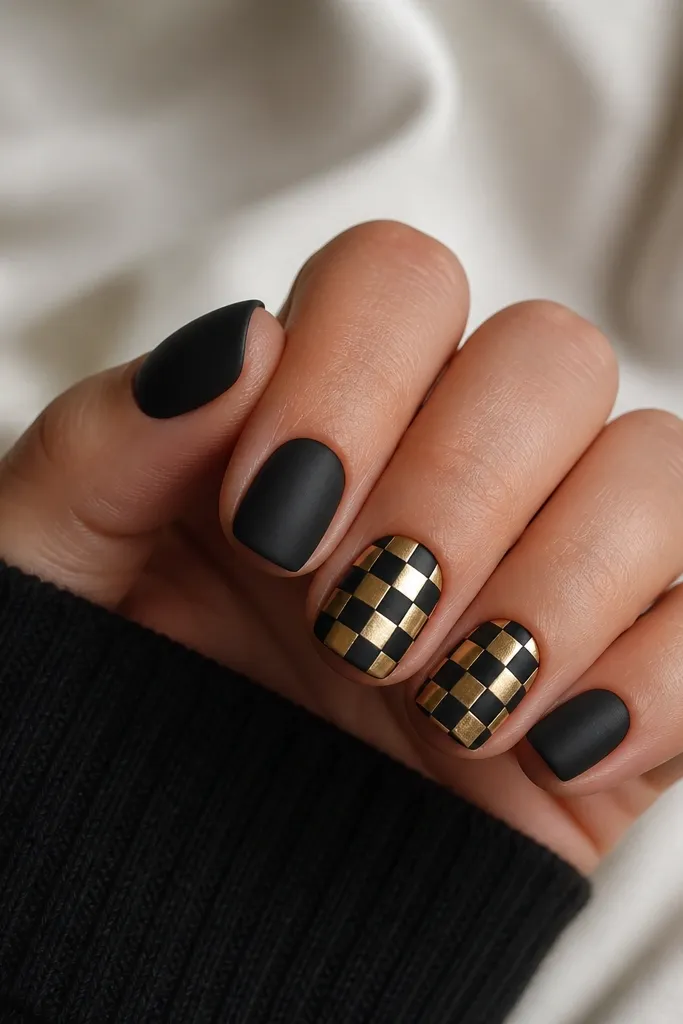
Checker patterns feel cozy when they’re small and placed on accent nails, not across every finger. Matte black keeps it grounded, and the glossy gold squares give that warm contrast like knit texture with metallic thread. This works on short square because the grid aligns with the shape and makes nails look tidy. It also looks good if you want something playful but still winter-appropriate.
Start with matte black on all nails and cure. On two accent nails, draw a simple 3x3 grid with thin striping gel lines, keeping the grid centered and about 4 to 6 mm wide depending on nail size. Fill alternating squares with gold metallic gel, cure, then add glossy top coat over only the gold squares. Finish with matte top coat over the black squares on the accent nails so the checker has clear texture contrast.
Use a clear ruler edge or nail art guide card to keep your grid spacing even.
Avoid filling the gold squares too thick; thick gel can shrink the grid and blur lines.



