
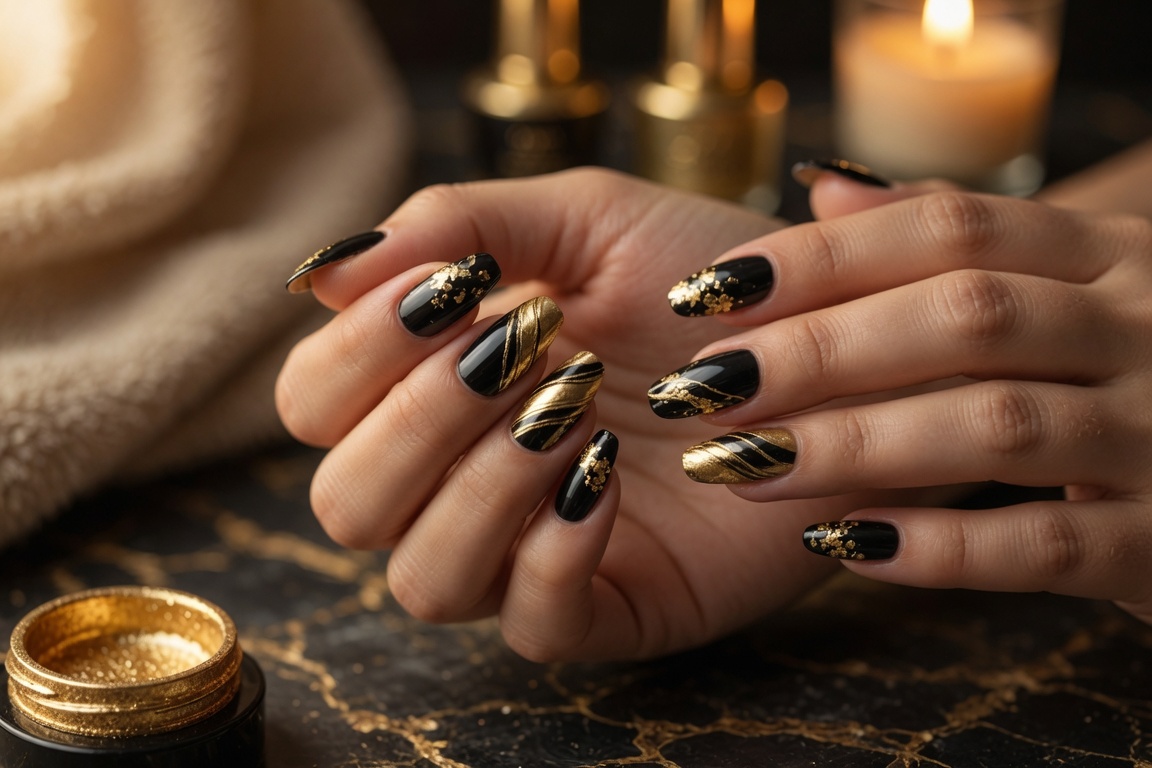
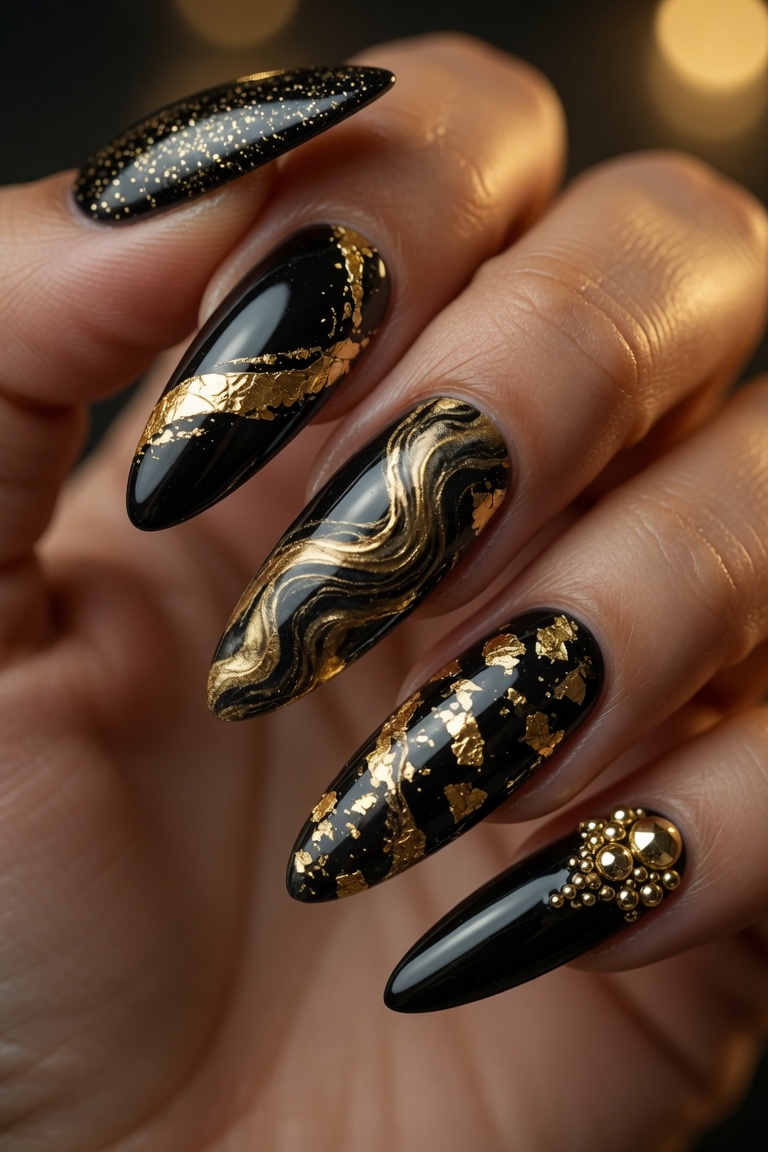
1. Classic Black Base With Gold Foil Half-Moon
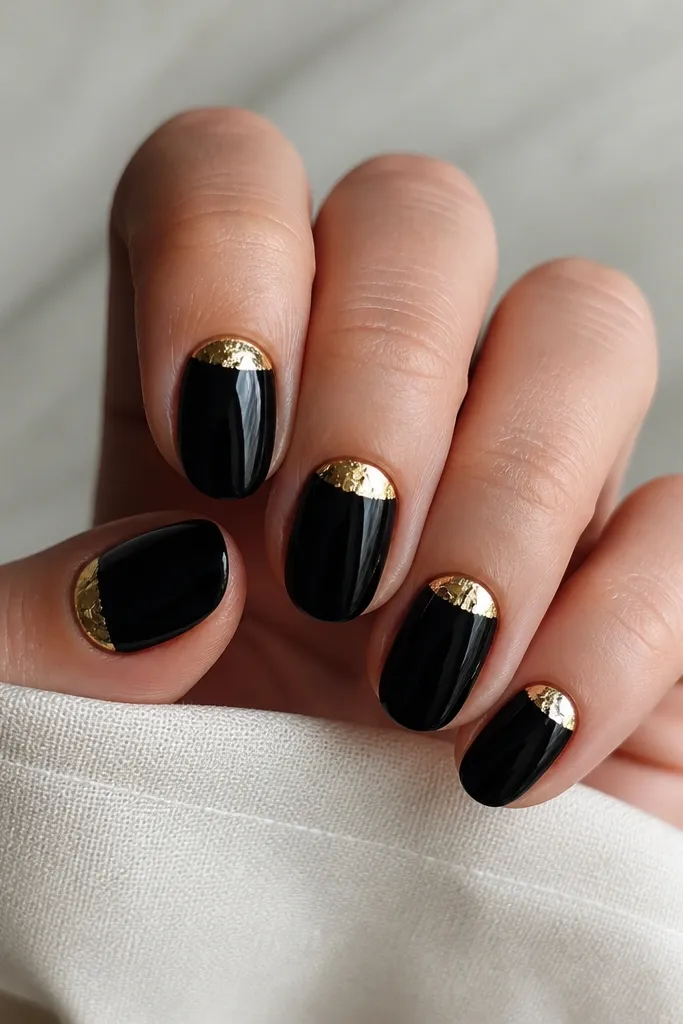
This look is the one I reach for when I want black and gold that still feels wearable. The base is a smooth, glossy black (deep, not gray) and the gold sits as a half-moon near the cuticle, so the gold reads “intentional” even if your foil isn’t perfectly shaped. It flatters most nail shapes because the half-moon lifts the center of the nail visually — especially on short nails where full gold coverage can feel heavy. For skin tones, it works on fair, medium, and deep because the gold is warm against the black, and the contrast makes fingers look longer. The styling principle is placement — keep the gold near the cuticle, not across the whole nail, so it stays elegant instead of busy.
Start by prepping nails with a light buff and pushing back cuticles, then wipe with 70% isopropyl alcohol. Apply a thin black gel base, cure fully, then add a second black coat for full opacity. Use gel glue or foil adhesive at the cuticle area only, then press gold foil flakes into the half-moon shape with a silicone pusher — don’t overwork it. Seal with a thin clear topcoat over the foil, cure, then cap the free edge with another thin topcoat layer. Finally, wipe off tackiness and check the sidewalls for any raised gold edges.
Press the foil for 3-5 seconds per nail, then stop — too much pressing smears the flakes.
Don’t cure foil adhesive with gold already sitting loosely; if it’s not pressed down, it lifts after a week.
2. Gold Chrome Cat-Eye Over Black (Magnet Method)
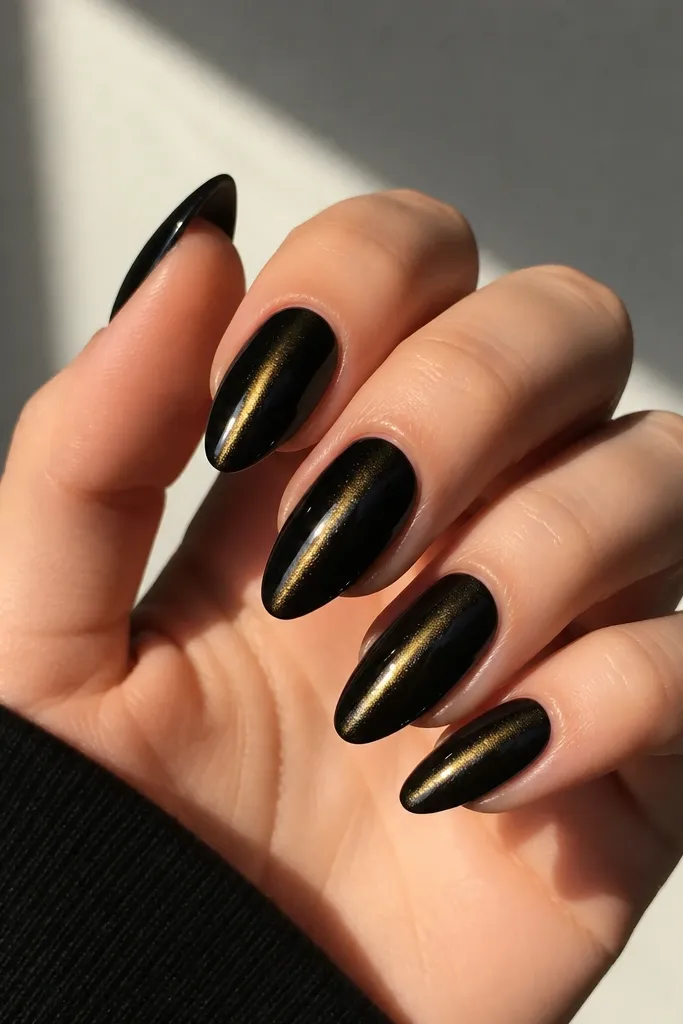
This one looks like jewelry on your nails. The black base makes the gold chrome line pop, and the cat-eye effect gives movement when you tilt your hand. I love it for almond or medium-length nails because the center streak makes the nail look longer and more sculpted. It’s flattering for almost every skin tone because the gold isn’t pale — it’s warm and reflective, so it catches light across different undertones. The styling principle is directional light — you’re aiming the magnet so the glow travels straight down the nail, not diagonally.
Editor's noteKeep your hand still under the lamp — the cat-eye line breaks if your wrist moves.
Apply a thin black gel base or black polish coat and cure. Sponge or brush on a cat-eye gold chrome gel (or cat-eye chrome powder over the correct base if that’s what you use), then cure briefly only if your product instructions require it. Bring the magnet close to the nail (usually 2-4 mm away) and hold it steady for 10-20 seconds while the gel is in the magnetic state. Cure fully, then apply a clear, non-wipe or wipe topcoat depending on your chrome system. Cap the free edge with topcoat so the reflective layer stays sealed.
Watch outDon’t put topcoat too thick right away; thick layers dull chrome and can blur the center streak.
3. Black Gloss With Gold Leaf Tips (French Twist)
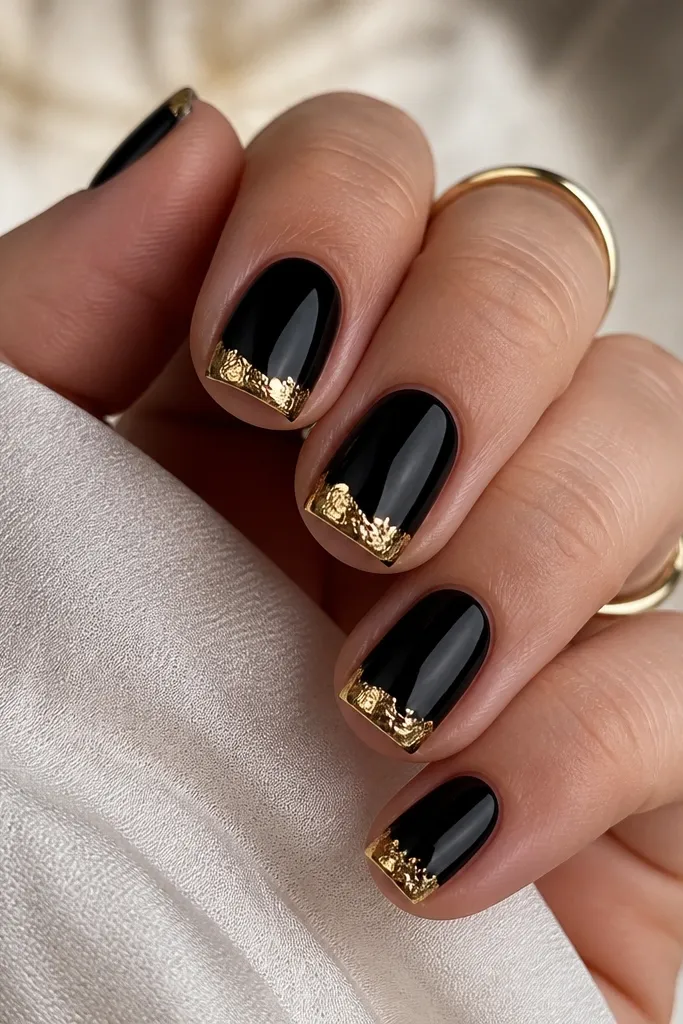
This is a French manicure idea where the “white” part is replaced by gold leaf. The black is solid and glossy, so the gold reads clean and intentional even though leaf flakes look organic. This flatters short squares and squoval nails because the tip band creates a neat frame without adding width. On deeper skin tones, the gold leaf looks especially warm; on fair skin, it still pops because the contrast is strong. The styling principle is a narrow tip band — keep the gold band thin so it doesn’t look like a thick paint stripe.
Paint two thin coats of glossy black gel polish, curing each coat fully. Wipe the nail with alcohol after the final black cure to remove surface oils. Apply a thin line of gold leaf adhesive or a strip of foil-transfer gel right where you want the tip band. Press gold leaf flakes onto the adhesive and blend edges with your finger or a small brush, then seal with clear topcoat. Cure, then do a second topcoat pass and cap the free edge so the leaf doesn’t snag.
Leave 1 mm of black at the sidewalls so the gold tip stays crisp when your nails grow out.
Don’t apply leaf directly over uncured tackiness that isn’t meant for transfer — it smears and looks patchy.
4. Gold Striping Tape Lines on Black (Clean Geometry)
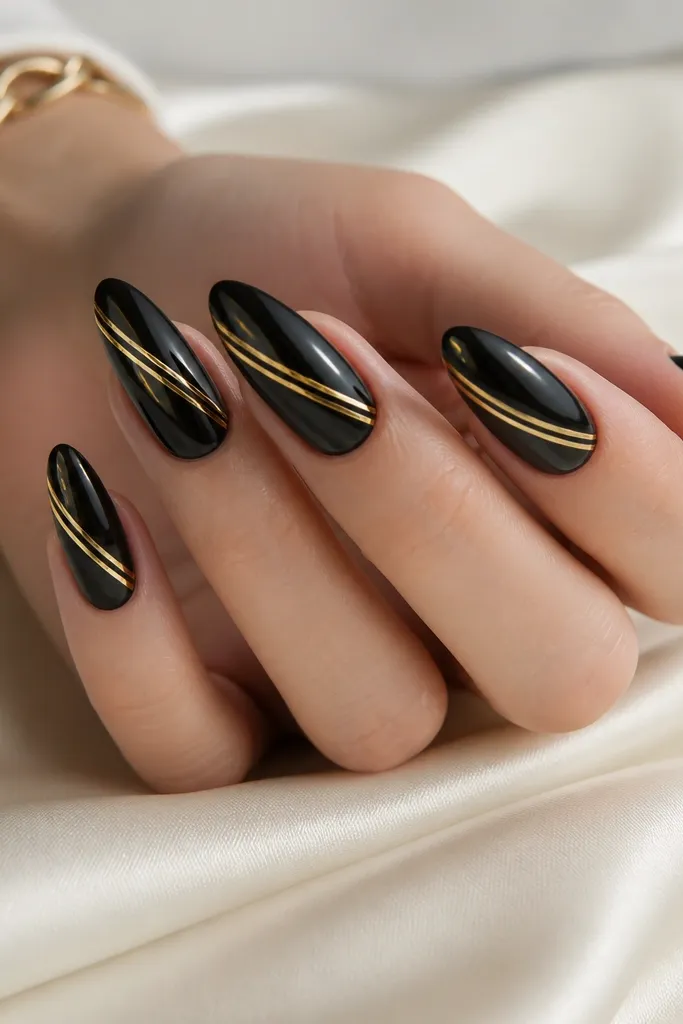
Tape geometry is the easiest way to get sharp black-and-gold lines at home. The black gives you a solid background, while gold tape creates crisp angles that look like you used a stencil. I like this on almond and long squoval nails because diagonal lines guide the eye and make the nail look slimmer. It flatters hands with wider nail beds too, since the lines create a visual “length” instead of adding bulk. The styling principle is using tape as a guide, then sealing it perfectly so it doesn’t lift.
Editor's noteUse tweezers for tape placement; fingers leave oil and tape twists.
Start with a smooth black base: two coats of black gel polish, cured in between. Cut striping tape into small segments if you want angles — longer tape often sticks crooked. Place one tape line starting about 1-2 mm from the cuticle and angle it toward the center of the tip, then add a second line parallel with slight spacing. Brush a thin layer of clear gel over the tape, cure, then add another thin clear layer to fully bury the edges. Cap the free edge with clear gel so the tape is sealed on the underside too.
Watch outDon’t skip the “bury” clear gel layer; tape edges catch on hair and clothes.
5. Black Marble With Gold Vein Accents
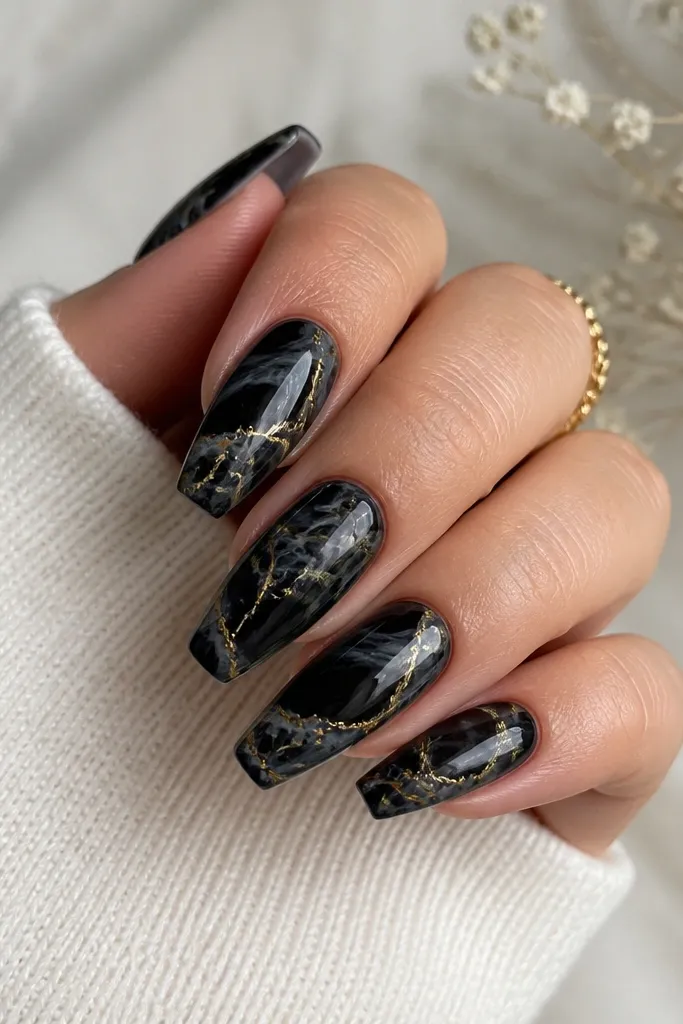
Marble looks hard until you do it with gel in thin layers. The black marble gives depth, and the gold vein accents make it look like expensive stone instead of random swirls. Coffin and almond nails look best because marble veins need space to travel from cuticle to tip. This works on any skin tone because black and gold reads high-contrast, and the marble texture adds dimension without extra colors. The styling principle is controlled veining — keep gold lines thin and let the black texture do the heavy lifting.
Editor's noteUse a thin liner brush for gold; thick gold makes marble look like stickers.
Paint a solid black base and cure completely. Apply a thin layer of clear gel, then add black gel in small dots or streaks with a liner brush or sponge and swirl gently, curing in short bursts if your gel requires it. Add gold striping gel or gold chrome pen lines along the marble movement — keep them narrow, like 0.5-1 mm. Seal with clear topcoat in two coats: one thin to lock the pattern, cure, then a second thicker for shine. Cap the free edge and wipe after curing so the marble doesn’t look dull.
Watch outDon’t flood the marble with too much gel at once; it turns muddy and loses the stone effect.
6. Gold Foil Frame Around the Cuticle
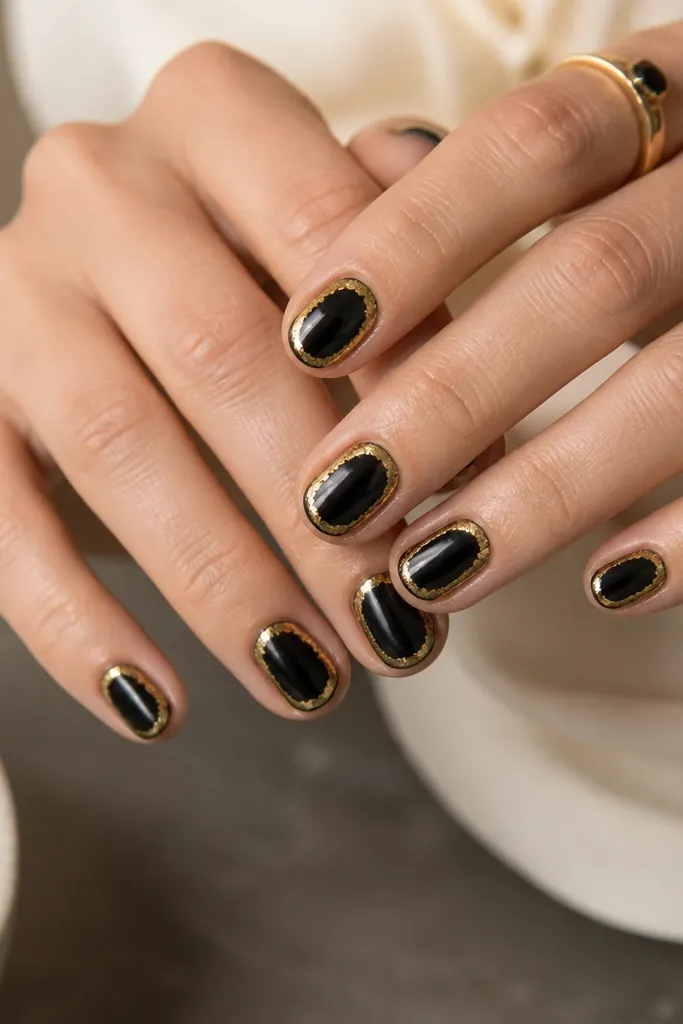
A cuticle frame is a clean way to add gold without covering the whole nail. The foil creates a bright outline that makes nails look more “finished,” and it’s flattering because it draws attention to the natural nail bed shape. This is great for short nails because the frame sits at the top and gives the illusion of a longer nail. It also looks good on hands with uneven cuticles, because the foil can hide slight imperfections when it’s pressed thinly. The styling principle is outlining, not filling — you want a border effect.
Start with a black base in two coats, fully cured. Apply foil adhesive along the cuticle outline only, staying inside the sidewalls. Press gold foil flakes into the adhesive and tap off excess with a soft brush. Seal with a clear gel layer, cure, then do a second topcoat layer to smooth over the foil texture. Cap the free edge carefully so the frame doesn’t peel at the tips.
Use a small makeup brush to clean foil dust off the nail before topcoat.
Don’t apply adhesive too wide; foil that creeps down the nail looks like a smudge.
7. Black Velvet Matte With Gold Leaf Edge
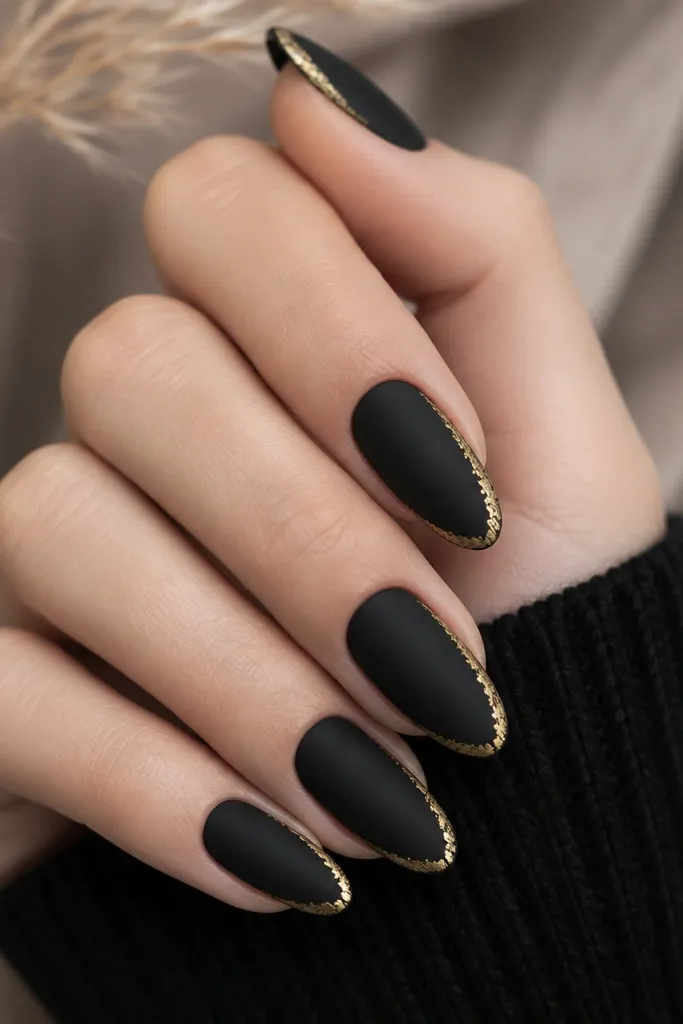
Matte black plus gold leaf is dramatic in a way that still looks grown-up. The matte finish hides small ridges in your gel, and gold leaf adds texture where light hits. I like this on medium almond because the side edge placement looks like a manicure bracelet. It flatters hands with dry cuticles because matte visually softens shine around the edges. The styling principle is contrast: matte for the base, then gold only on the edge so it stays intentional.
Editor's noteIf your matte topcoat smears gold, seal gold first with a glossy micro-layer, cure, then keep matte elsewhere.
Apply your black gel polish in two coats and cure well. Add a matte topcoat and cure until it fully turns non-glossy. Tear or cut gold leaf into small pieces, then dab gold leaf adhesive on just the outer side edge area near the tip. Press leaf pieces into place, then seal with a thin gloss topcoat only over the gold spots if your matte topcoat would dull it — otherwise use a matte-safe topcoat system. Cure, then check that gold edges are fully sealed to prevent catching.
Watch outDon’t do full glossy topcoat over the whole nail; it kills the velvet look.
8. Gold Chrome French Tips on Black Gel
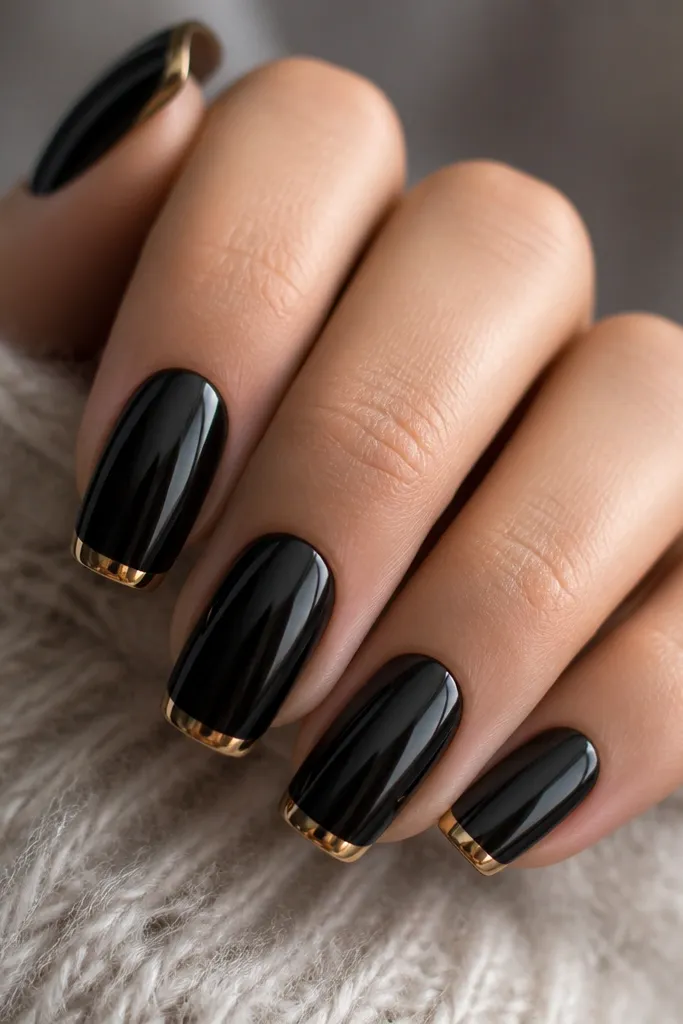
This is French tips, but the tip is chrome instead of white. The mirror gold looks sharp and clean, and black makes the gold feel warmer and richer. It’s especially flattering on long nails because the tip band gives a strong silhouette without filling the whole nail. On fair skin, it looks bold; on deep skin, it looks like gold jewelry against a dark stone. The styling principle is a tight smile line — keep the arc even across nails so it looks like you used a guide.
Editor's noteDo one nail at a time so the chrome gel doesn’t get tacky-dry before powdering.
Start with two coats of glossy black gel polish, cure fully, then wipe with alcohol. Apply a thin layer of chrome gel or adhesive gel only where the French tip will sit. Use a French tip brush to create a narrow smile line, about 2-3 mm from the free edge depending on nail length. Cure, then apply gold chrome powder and rub gently until it looks even. Seal with a clear topcoat in two layers and cap the free edge so the chrome doesn’t scratch off.
Watch outDon’t make the tip band too thick; chunky chrome over black looks heavy fast.
9. Black And Gold Confetti Speckles
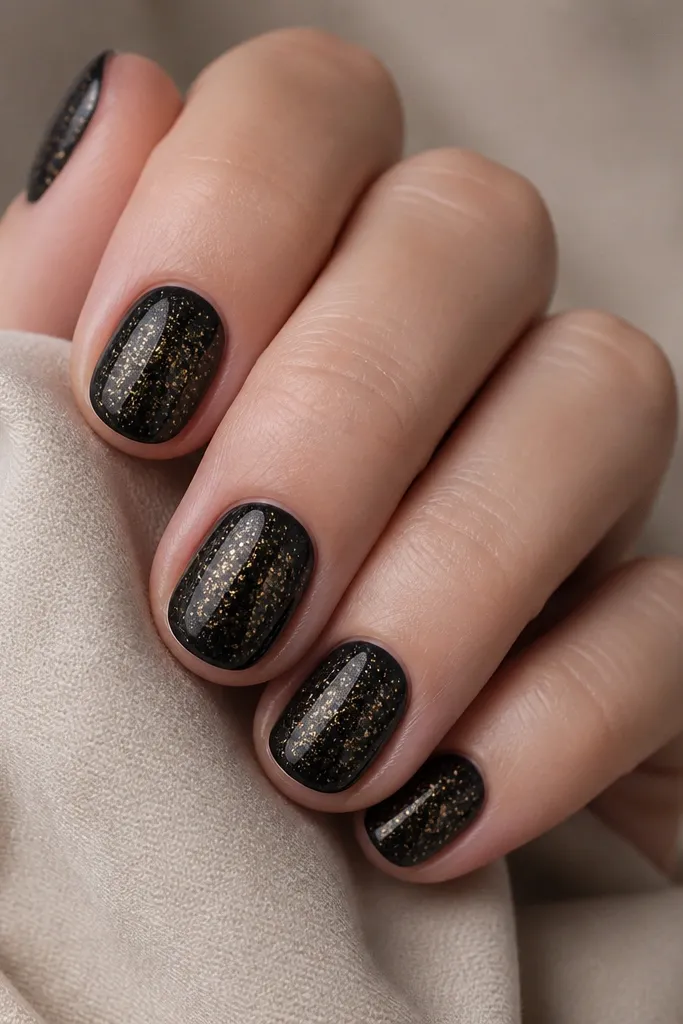
Confetti speckles are the easiest way to get “black and gold” without precise lines. The specks look festive but still classy because the base is solid black and the gold is small and controlled. Round and short nails look great because speckles fill space without elongating too much. This works for everyday wear since the gold is subtle until the light hits. The styling principle is density control — keep more specks in the center, fewer near the sides.
Paint two coats of glossy black gel polish and cure. Apply a thin layer of clear gel over the nail surface where you want speckles, then cure just until tacky if your product needs it. Use a small sponge or a cut-up makeup sponge to dab gold foil dust or fine gold glitter — tap lightly so you don’t get big blobs. Add a second dab pass if you want more sparkle in the center. Seal with a clear topcoat and cap the free edge so specks stay embedded.
Dip off excess gold dust on a paper towel before touching your nail.
Don’t use chunky glitter in a confetti style; it makes the look feel like craft glitter.
10. Gold Leaf Crackle Over Black (Dry Brush Effect)
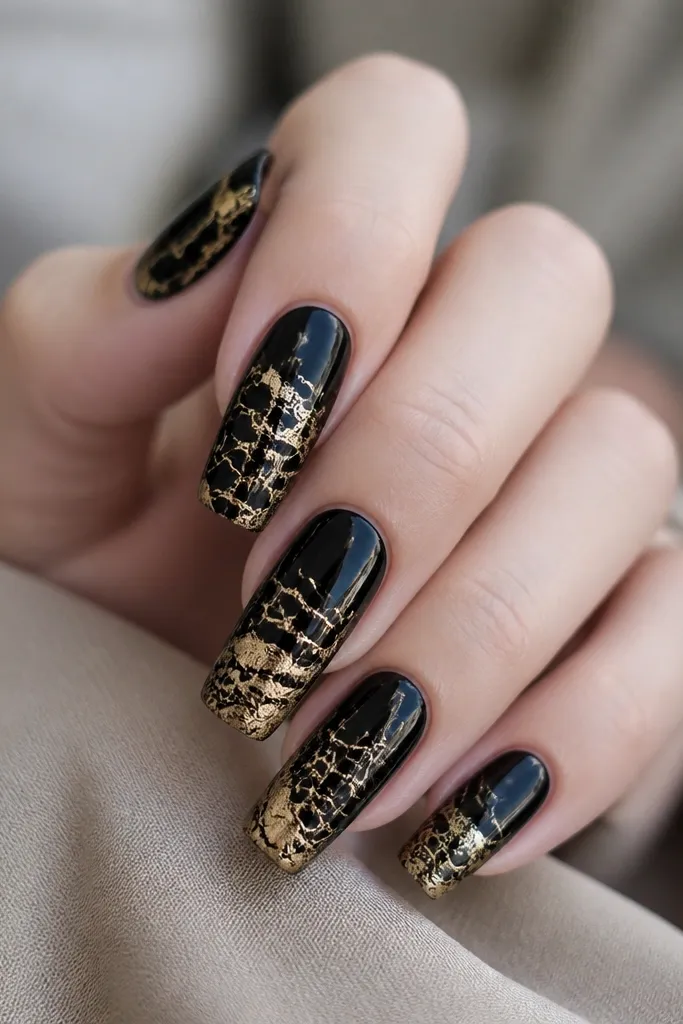
Crackle patterns look like old gold on black stone. The gold leaf gives irregular broken lines, while the black base keeps the pattern readable. This looks best on medium to long nails because the crackle has room to spread from cuticle toward the tip. It’s flattering on hands that need a little extra drama because the pattern creates movement. The styling principle is layering gold in a network, not random blobs — you want lines that feel connected.
Start with a glossy black base in two coats, cured fully. Apply a thin layer of crackle gel medium or a leaf adhesive in small patches — don’t coat the whole nail. Press gold leaf into the adhesive patches, then use a dry liner brush to brush away loose bits so the cracks show through. Seal with clear topcoat in two thin layers, curing between. Cap the free edge and check for any raised leaf corners.
If your leaf won’t break into lines, tear smaller pieces and place them like puzzle fragments.
Don’t overload adhesive; heavy adhesive makes the crackle disappear into a gold smear.
11. Black Gel With Gold Outline Hearts (Tiny Accent)
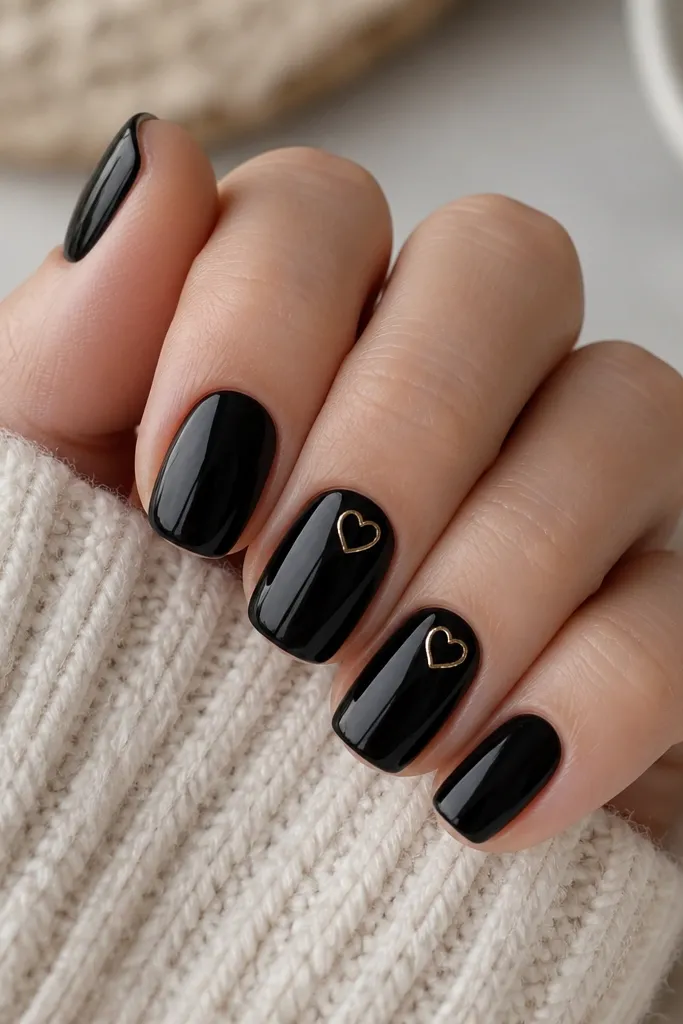
Tiny hearts on black look cute without turning into cartoon nails. The outline style keeps it clean, and gold makes the hearts look like delicate jewelry. I like it for short squoval because the hearts can sit near the cuticle and still look proportional. It’s flattering for hands that look best with minimal nail art because the rest stays solid black. The styling principle is accent placement — do hearts on one or two nails, not all five.
Editor's noteDraw one half of the heart first, cure for 10 seconds, then draw the second half so it stays symmetrical.
Apply two coats of glossy black gel polish and cure. On accent nails, use a gold striping gel or gold liner polish with a fine detail brush to draw a small heart outline near the cuticle, about 2-3 mm wide. Cure the line work carefully, then apply a thin clear topcoat to lock it in. Add another clear topcoat layer for shine and cap the free edge. Finish by wiping tackiness and cleaning around the cuticle with a tiny brush dipped in alcohol.
Watch outDon’t fill the heart solid gold; outline looks sharper on black and hides fewer brush mistakes.
12. Gold Foil Ombré Fade Into Black (Gradient Look)
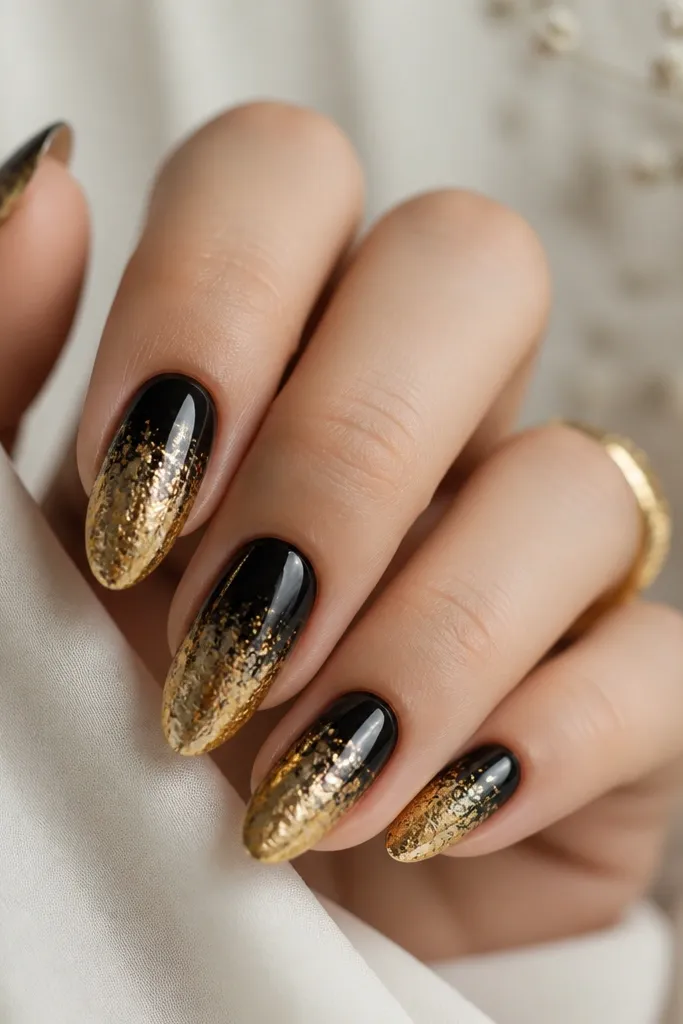
Ombré fade is the kind of look that looks hard but is actually forgiving. The black to gold transition hides small application differences because foil is naturally uneven. Medium almond nails look best because the gradient has space to soften. It’s flattering on shorter nails too if you keep the gold fade narrow and concentrated at the tip. The styling principle is a fade, not a cutoff — you want gradual coverage, with the darkest black blending into the gold.
Paint nails with glossy black gel polish and cure in two coats. Apply foil adhesive starting at the mid-nail and moving toward the tips, leaving the cuticle area fully black. Press gold foil flakes on the adhesive in layers, starting light at the middle and heavier toward the tip. Blend by lightly tapping the transition zone with a silicone tool. Seal with two clear topcoat layers and cap the free edge so the gradient stays smooth.
Use a smaller foil piece near the transition line; big flakes make a harsh border.
Don’t seal too soon with thick topcoat over loose foil; it can smear and turn the gradient patchy.
13. Gold Studs and Micro Lines on Black (Night Out Set)
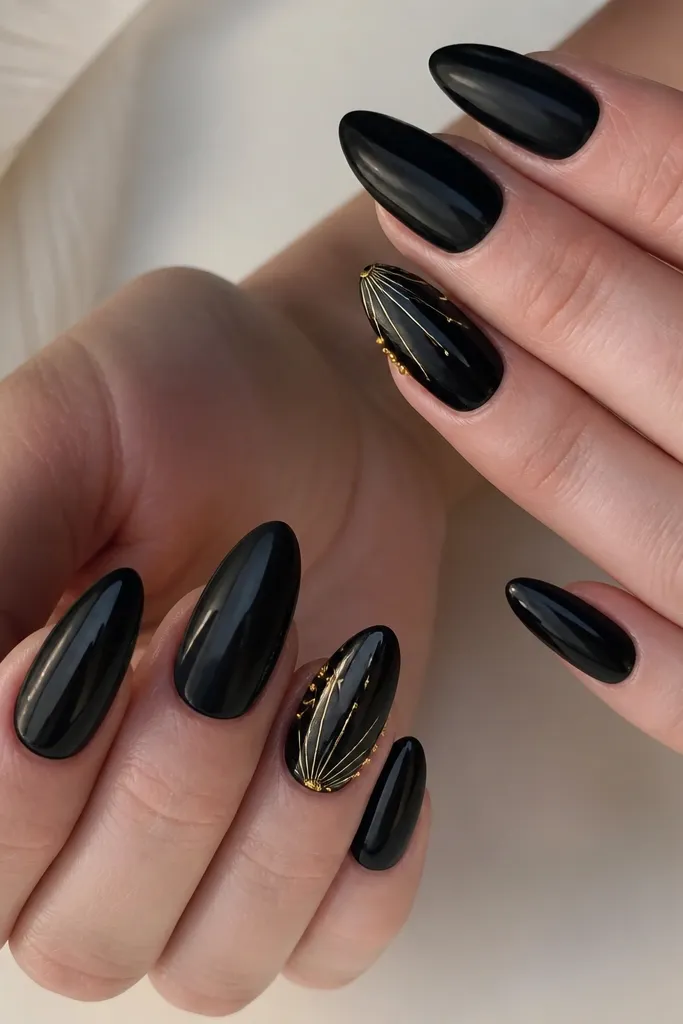
This is where black-and-gold can look like actual party jewelry. The tiny studs add sparkle in a way that chrome doesn’t, and the micro lines give structure so it doesn’t look random. I like this for long almond because the sidewall placement makes the nail feel wider and more glamorous. It’s flattering for medium to deep skin tones because the gold reflects strongly and stands out against dark skin. The styling principle is restraint — two accent nails, small studs, and thin lines.
Start with a glossy black base in two coats and cure fully. On accent nails, dot clear gel where you want studs and place 2-3 small gold studs using tweezers — press gently and cure. Add micro line details with a gold striping gel using a liner brush: one line down the center and one short line toward the side. Cure after each nail’s line work if your gel requires it, then seal with a clear topcoat layer, making sure to cover around the studs without flooding. Cap the free edge so studs don’t lift and snag.
If studs catch on fabric, use a slightly thicker topcoat around them and smooth with your brush before curing.
Don’t put studs on every nail; it turns into heavy texture fast.
14. Black And Gold Foil Swirl on One Nail Accent
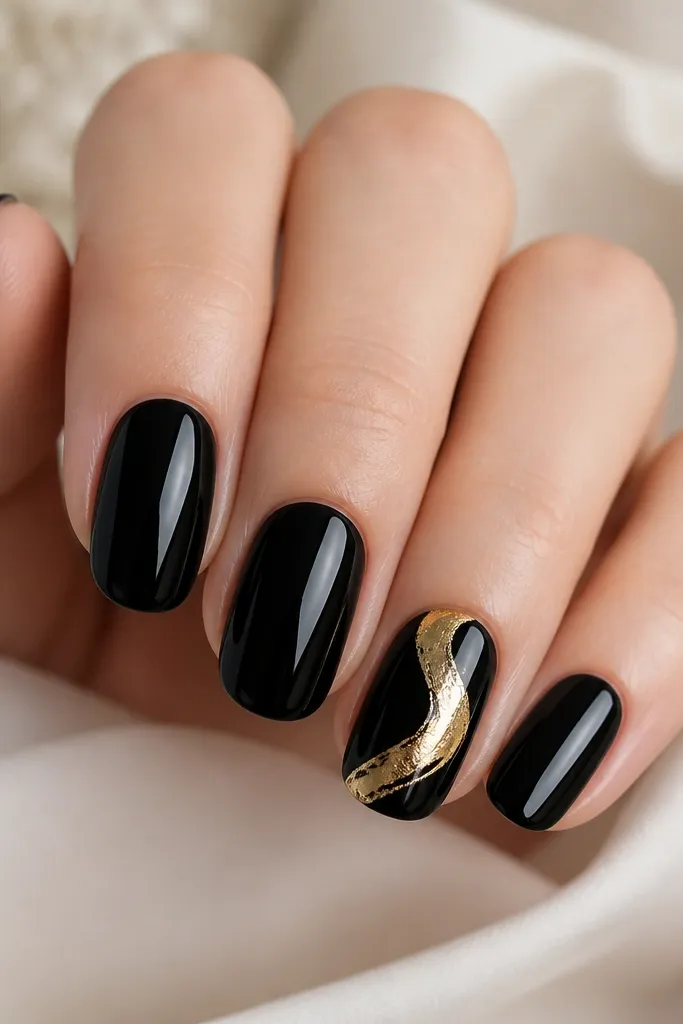
One accent swirl is my go-to when I want black and gold that looks intentional but not busy. The swirl pulls the eye across the nail and makes your hand look more coordinated. It’s flattering on any nail shape, but it looks especially good on short oval because the swirl can curve around the natural nail bed. On fair to deep skin tones, gold foil always reads warm, so the contrast feels clean instead of harsh. The styling principle is one strong motif — pick one nail, place the swirl diagonally, and keep the rest plain black.
Apply two coats of glossy black gel polish to all nails and cure. On the accent nail, apply foil adhesive in a thin curved path where the swirl will go, then press gold foil flakes along that path. Use a silicone pusher to shape the swirl edge so it follows the curve, and tap off extra foil. Seal with clear topcoat in two layers, curing between, then cap the free edge carefully. Wipe any tackiness and check that the swirl isn’t raised at the edges.
Keep the swirl thicker near the middle and thinner near the ends for a more natural “calligraphy” look.
Don’t try to swirl foil with your fingers; it smears and you lose the crisp curve.
15. Gold Leaf Half-Nail at the Side (Asymmetrical Edge)
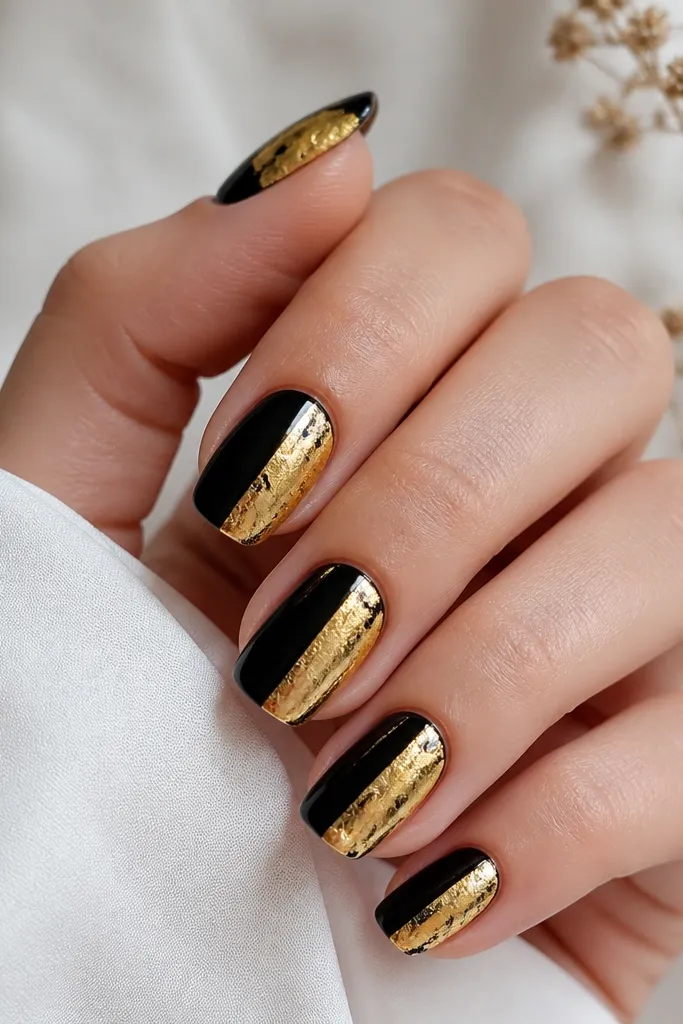
Asymmetrical gold leaf on the side makes black-and-gold look modern, not traditional. The gold sits like a metallic highlight, and the sharp divide makes the nail feel longer. This style is flattering for nails that curve or have slight asymmetry because the gold half can balance the visual weight. It works on all skin tones since the black base is consistent and the gold leaf stays warm. The styling principle is one-sided weight — place the gold on one side so the eye has a direction to follow.
Editor's noteUse a strip of painter’s tape as a boundary while you apply adhesive, then remove it before leaf placement.
Paint nails with two coats of glossy black gel polish and cure fully. Choose one side for the gold (right side looks best on my hands because my left hand placement is steadier), then apply leaf adhesive along a straight-ish diagonal that starts at mid-nail. Press gold leaf flakes into the adhesive, then use a soft brush to clean the boundary line so the black remains visible. Seal with a clear topcoat in two layers, cure fully, and cap the free edge. After curing, run a finger over the boundary — if it catches, add one more thin topcoat layer.
Watch outDon’t make the gold boundary too wavy; the look turns messy instead of intentional.



