
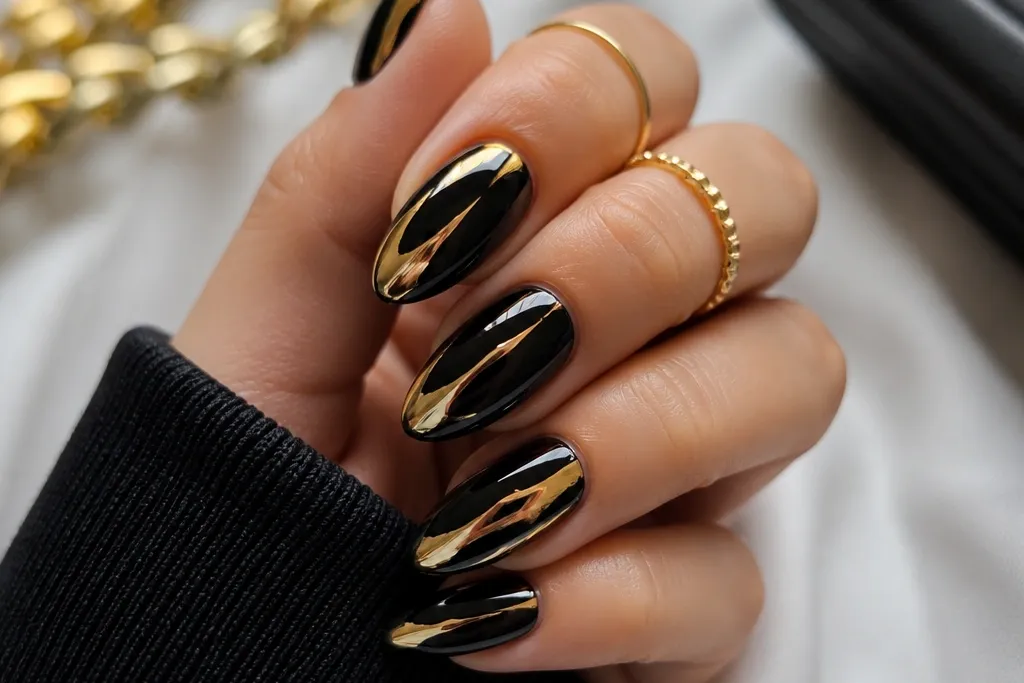
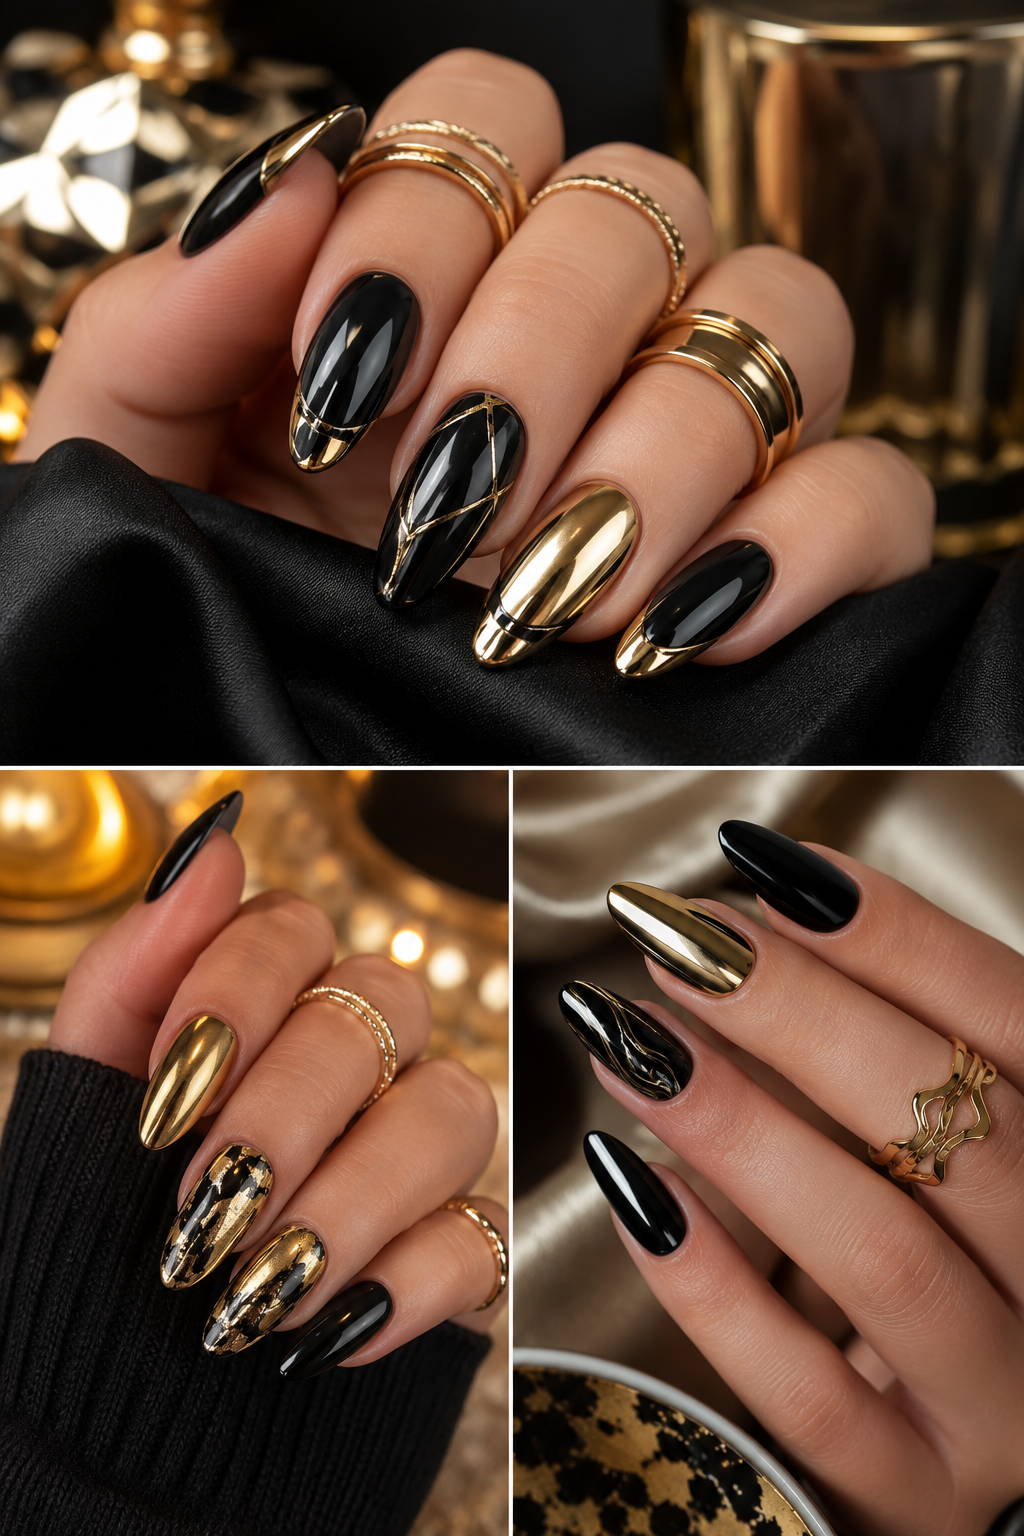
1. Mirror Black Base with Thin Gold Halo Lines
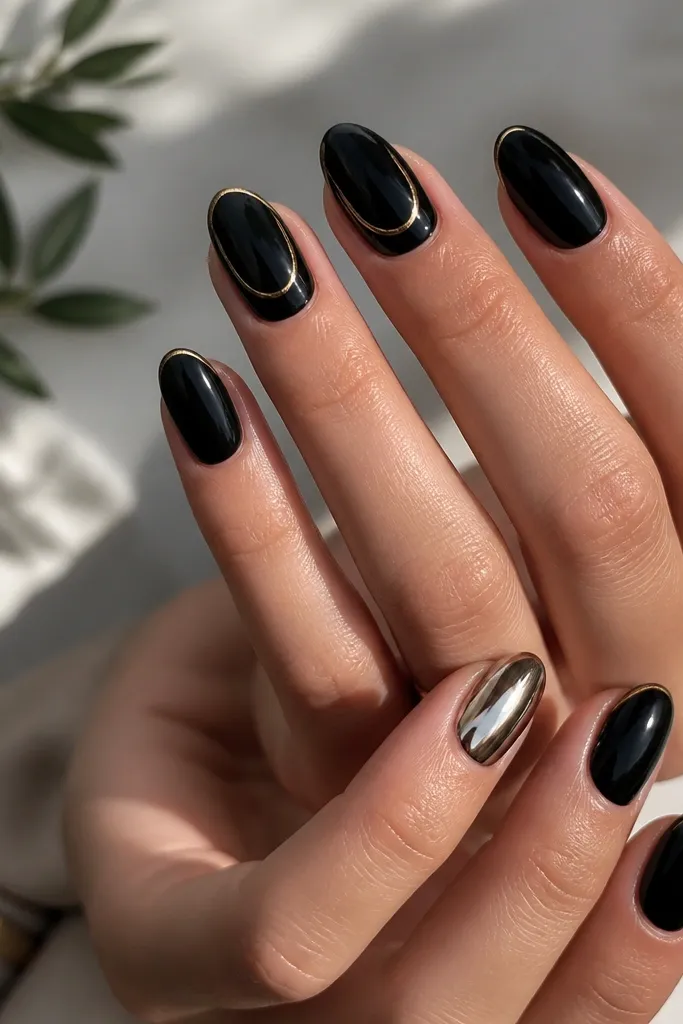
Start with a true mirror black on all nails, then reserve the strongest reflection for your ring fingers. On the other nails, keep the black glossy and add a pair of thin gold curves that sit about halfway between the cuticle and the midpoint. This gives you a “lit from within” look without making the whole set feel busy. I like this on medium almond or soft square because the curves track the nail shape. It flatters warm and neutral undertones because the gold is used as a highlight, not a full overlay.
File to an even medium almond or soft square, then remove shine with a 180-grit buffer. Apply two thin coats of black gel, curing 60 seconds between coats. On the ring fingers, apply chrome powder directly over the cured black, then buff and seal with a gel topcoat. On the index and middle fingers, paint a thin strip of gold gel (or line it with a gold striping brush) and cure, then add a second curved line parallel to the first. Finish with a high-gloss topcoat on all nails, cap the free edge, and cure fully.
Editor's noteUse a striping brush with a tiny amount of gold gel so the line stays sharp — thick lines look heavy fast.
Watch outAvoid skipping the second black coat; thin black under chrome looks gray instead of black.
2. Black Chrome Tips with Rolled Gold Foil Arc
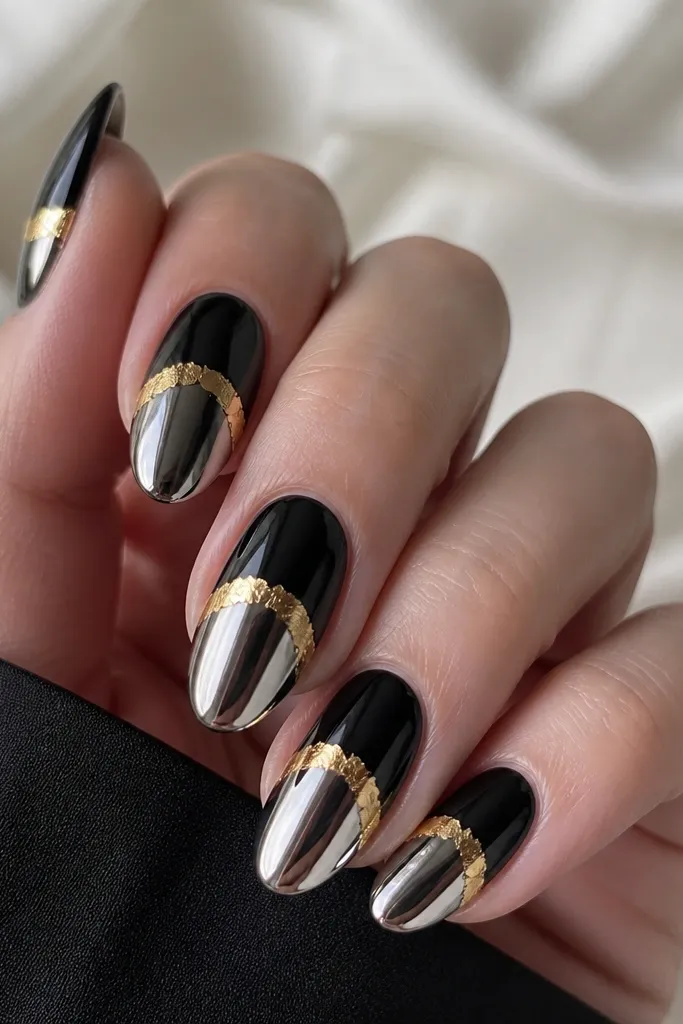
This one looks like jewelry. The base is a sleek black gel with a soft shine, while the tips get mirror chrome so the nail tip flashes every time you move your hand. The gold foil arc placed high on the nail (not at the cuticle) creates a “bracelet” effect that elongates the nail bed. It looks especially good on hands with shorter nail beds because the arc pulls the eye upward. I’ve worn it on both cool and warm skin tones; the gold stays flattering because it’s warm and textured rather than flat.
Shape nails to short almond so the tip area has enough space for chrome. Apply two coats of black gel and cure completely. Do mirror chrome only on the last third of each nail, buffing lightly to keep the chrome crisp. Tear small pieces of gold foil, press them onto the nail with foil glue at the upper third, and overlap slightly to form an arc — cure if your glue requires it. Seal with two thin topcoat layers, cure between coats, so the foil edges don’t lift.
Press the foil with a silicone tool for 5-8 seconds per piece; it makes the arc look “rolled” instead of patchy.
Don’t place the foil arc too close to the cuticle or it will catch on hair and start lifting first.
3. Gold Stiletto Frame on Black Glass Chrome
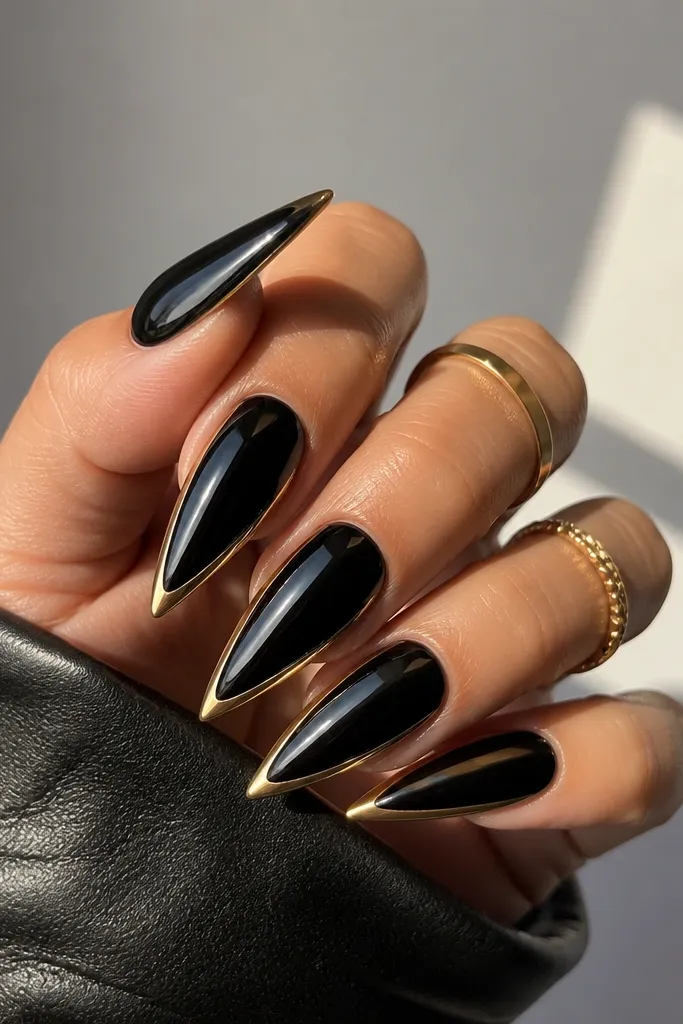
If you want a designer look without rhinestones, this is it. The black is full mirror chrome so the nail looks like polished glass. Then you add a gold “frame” that traces the nail shape — thin at the sides, slightly thicker around the tip. This makes the nail look longer and sharper, especially on stiletto or long almond. It flatters fair to medium skin because the high-contrast gold edge reads clean, not muddy.
Prep and buff, then apply black gel and cure twice for full coverage. Apply mirror chrome across the whole nail and buff lightly to remove excess powder. Use a fine liner brush to paint gold gel along the left and right sidewalls, stopping about 1mm before the cuticle. Add a gold line across the tip, then connect the side lines to form a clean outline. Cure, then apply a smooth topcoat in two passes so the frame stays crisp.
Editor's noteKeep the frame lines under 0.5mm thick; thick outlines look like paint, not jewelry.
Watch outAvoid rushing the outline; wobbly lines make chrome look cheap because the reflection exaggerates uneven edges.
4. Black Cracked Ice with Gold Leaf Veins
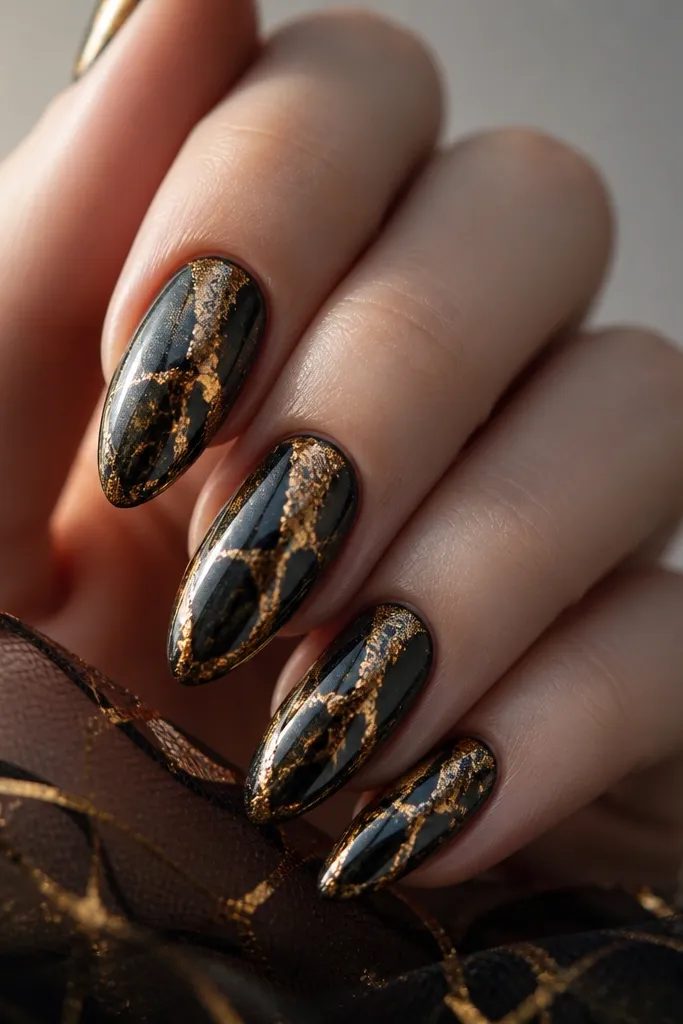
This is drama without heavy 3D. The cracked-ice look gives you texture under the light, and gold leaf veins make it feel like black marble with metallic gold. I do it on two accent nails per hand because the texture already grabs attention. It looks stunning on medium almond and short coffin shapes. On deeper skin tones, the gold leaf reads especially warm and flattering against the dark base.
Start with two coats of black gel and cure. Apply a cracked-ice gel or crackle medium over the black base according to product instructions, then cure fully. Add gold leaf pieces with leaf glue on top of the crack lines where the cracks are densest, pressing lightly to avoid flattening the leaf texture. Seal with a matte-to-gloss topcoat mix only if you want contrast; otherwise use a glossy topcoat to make the gold pop. I do two topcoat layers for leaf sets: thin first, thicker second.
Place leaf on the cracks, not between them — the cracks become the “veins” and it looks intentional.
Skip thick leaf glue; it can fill the cracks and make the pattern look muddy.
5. Black Marble Swirl with Metallic Gold Vein Stroke
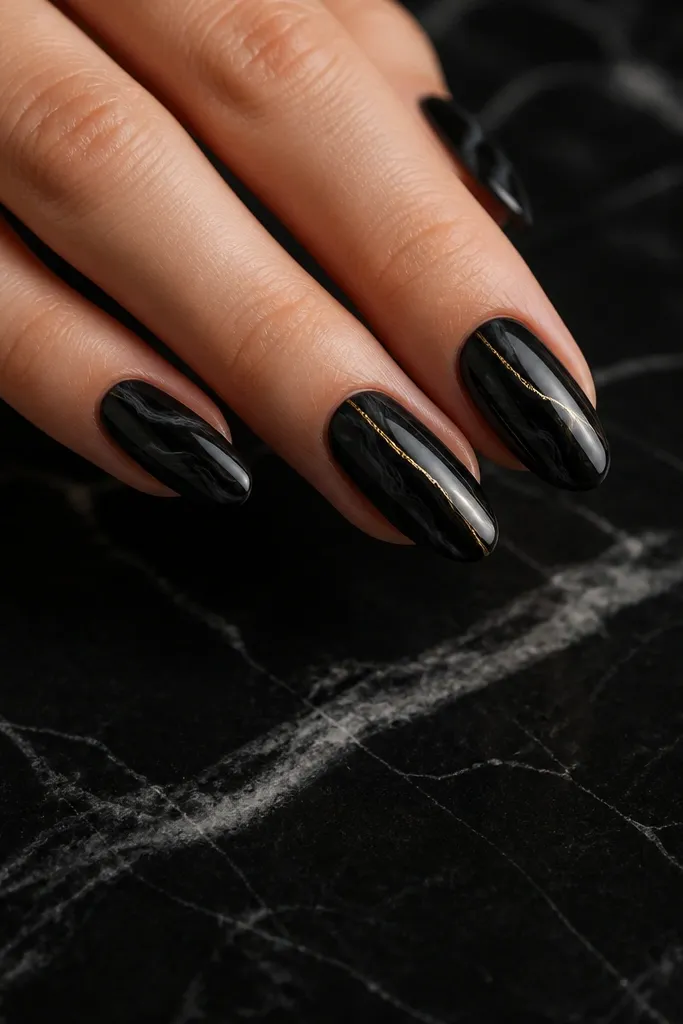
Marble works because it has natural movement, and gold gives the swirl a direction. Keep the marble subtle on most nails, then pick two nails to get a bold gold vein stroke. The black marble gives depth even without full chrome, so it’s wearable if mirror chrome feels too intense. This design looks great on oval and almond shapes because the swirl follows the nail curve. It flatters most skin tones because the gold is used as a single highlight, not a full coverage.
Paint a smooth black base with two coats and cure. Create marble by adding thin gray and near-black gel streaks, then drag a clean brush through them once or twice for a controlled swirl. For the accent nails, add a metallic gold gel vein diagonally with a liner brush, starting about 1mm above the cuticle line. Cure and then apply a thin chrome-like topcoat only if you want extra shine; otherwise use a glossy topcoat. Finish by sealing the free edge with topcoat to prevent chips.
Editor's noteUse a liner brush and wipe it on a lint-free wipe before each line so the gold stays crisp.
Watch outDon’t swirl the marble too much; you’ll lose the clean marble effect and it turns into a gray blob.
6. Gold Chrome Half-Moon Cuticle with Black Mirror Center
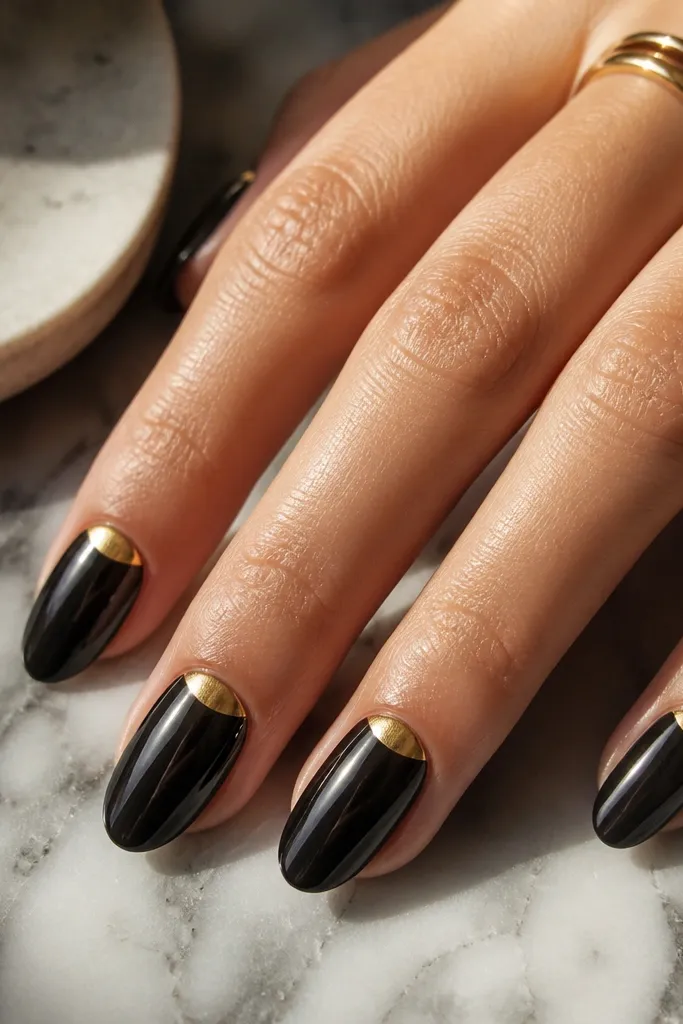
This is the cleanest, most “put together” version of black-and-gold chrome. The half-moon cuticle shape makes the nail look longer, and gold chrome near the cuticle catches light right when your hand lifts. I do this on short almond or square because the half-moon looks intentional at smaller sizes. If you have dry cuticles, you’ll still like it because the design is placed right at the cuticle line. It looks good on both cool and warm undertones — the gold reads bright instead of yellow.
Prep nails and apply two coats of black gel, curing fully. For the gold half-moon, apply gold foil or gold chrome powder only in a crescent shape at the cuticle, leaving a clean gap of black around the edges. Use a small detail brush to refine the crescent line before curing. Buff off excess chrome if needed, then seal with a topcoat. Apply topcoat in two thin layers to keep the mirror finish smooth and prevent gold edges from catching.
Use a cuticle stencil or a steady hand — the half-moon should be even on both sides of each nail.
Avoid getting gold chrome onto the black mirror area; once it mixes, it stops looking sharp.
7. Black Velvet Matte with Gold Chrome Outline Tips
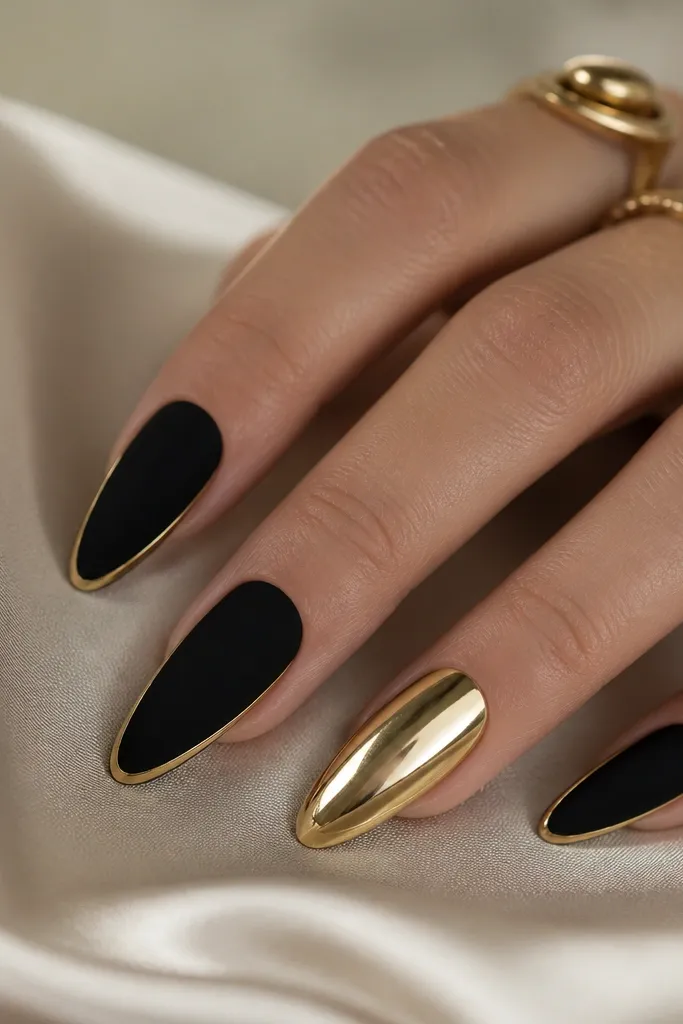
This one is my “cool girl” pick. Matte black hides tiny imperfections and makes the gold look brighter, so the set reads expensive even if your application isn’t perfect. The gold is only an outline at the tip, so it stays delicate and doesn’t overpower the matte base. I wear this to dinners and events because it looks softer than full chrome. It flatters hands with slightly shorter nails too, because the outline gives a visual lift without adding bulk.
Apply two coats of black gel and cure, then do mirror chrome on nothing — keep it matte. Use a velvet/matte topcoat over the black and cure. On the tip area, use a small liner brush to draw a thin arc outline where your smile line would be, then cure. Sprinkle gold chrome powder lightly over the wet outline (or apply gold gel then chrome), buff gently, and seal with a matte or glossy topcoat depending on the finish you want. I like a glossy micro-layer over just the gold outline so it stays reflective against the matte black.
If your matte topcoat dulls the gold too much, add a tiny glossy topcoat only on the gold lines.
Don’t matte the gold — it makes the chrome look like metallic paint.
8. Black Chrome Skittle with Gold Accent Corners
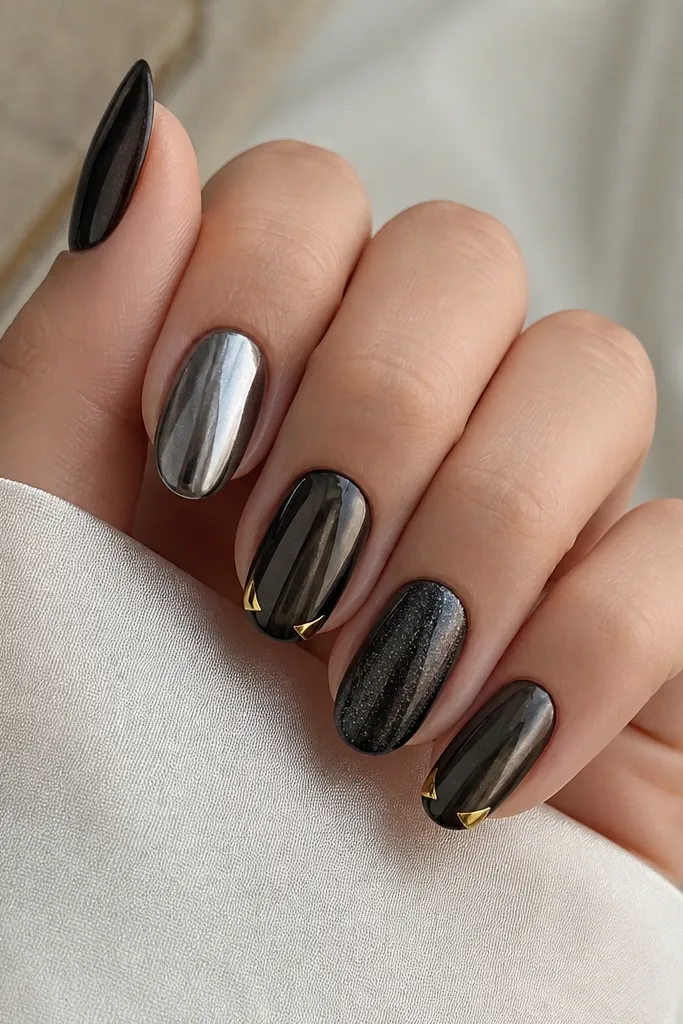
I call this the “skittle” because each nail changes the light. You keep the black chrome consistent so the set feels cohesive, then you add tiny gold corner accents on just one or two nails. The gold triangles at the tip corners make nails look sharper and more symmetrical, especially if you’re not confident drawing full lines. This design is great for medium almond and short coffin. It works on every skin tone because the gold is minimal and sits exactly where the light already hits.
Apply black gel base and cure, then apply mirror chrome to all nails. For the gold accent corners, place gold foil or gold gel at the top-left and top-right corners of the tip area, making a small triangle shape on each accent nail. Cure and seal. To vary the skittle effect, you can use a micro-gloss topcoat on two nails and a standard gloss on the rest, or lightly buff one nail less so it stays shinier. Finish by capping free edges with topcoat so the chrome doesn’t chip.
Keep the triangles tiny, about 1mm wide, so they read like jewelry edges.
Don’t add gold corners on every nail; it turns into a theme park look fast.
9. Gold Foil Drip Over Black Mirror Chrome
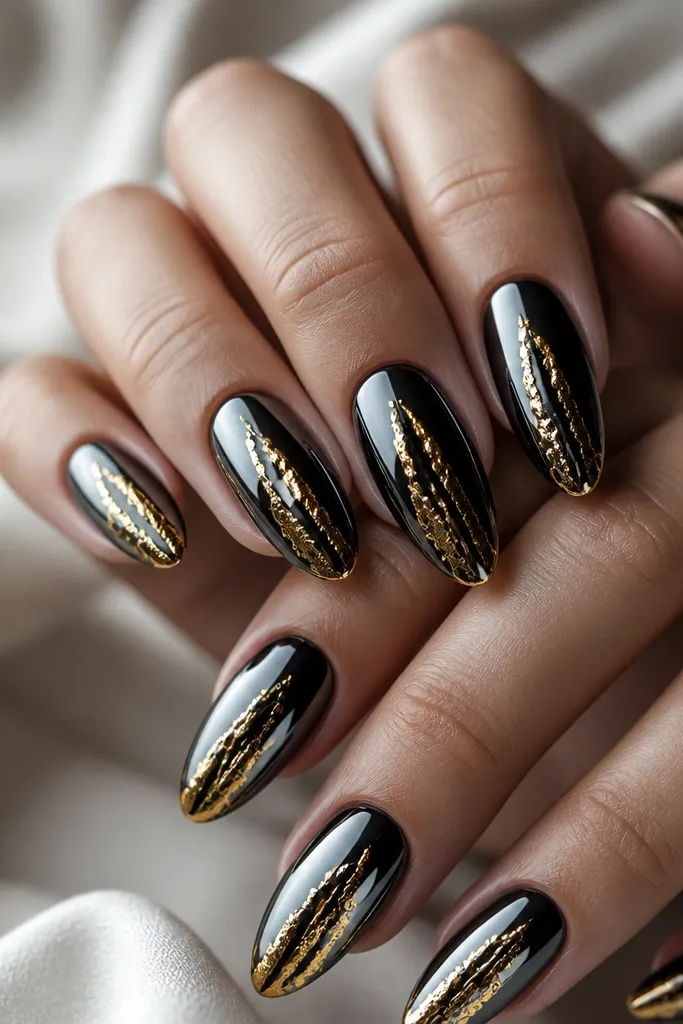
Drip designs look messy in photos when the placement is wrong. When it’s done right over mirror chrome, the gold foil drip looks like molten metal. I place the drip from slightly off-center so it looks natural, and I keep it limited to two accent nails. The gold foil texture adds depth, while the black chrome keeps it sleek. This flatters long almond and stiletto shapes because the drip has room to flow. On deeper skin tones, the gold reads warm and bright with no extra sparkle needed.
Build black mirror chrome first: two black coats, cure, then chrome powder across the whole nail and buff. On two accent nails, apply foil glue in a vertical strip that starts near the upper third and tapers as it goes down. Press gold foil on top, letting it wrinkle and tear for a true drip texture. Seal with two topcoat layers, but keep the first layer thin so the foil texture still shows. Cure fully each time and cap the free edge carefully.
Editor's noteUse a small foam applicator to press foil — it makes the drip edges look feathered instead of sharp blocks.
Watch outAvoid using flat gold paint for drip; it looks like sticker residue over chrome.
10. Black Chrome French with Stacked Gold Lines
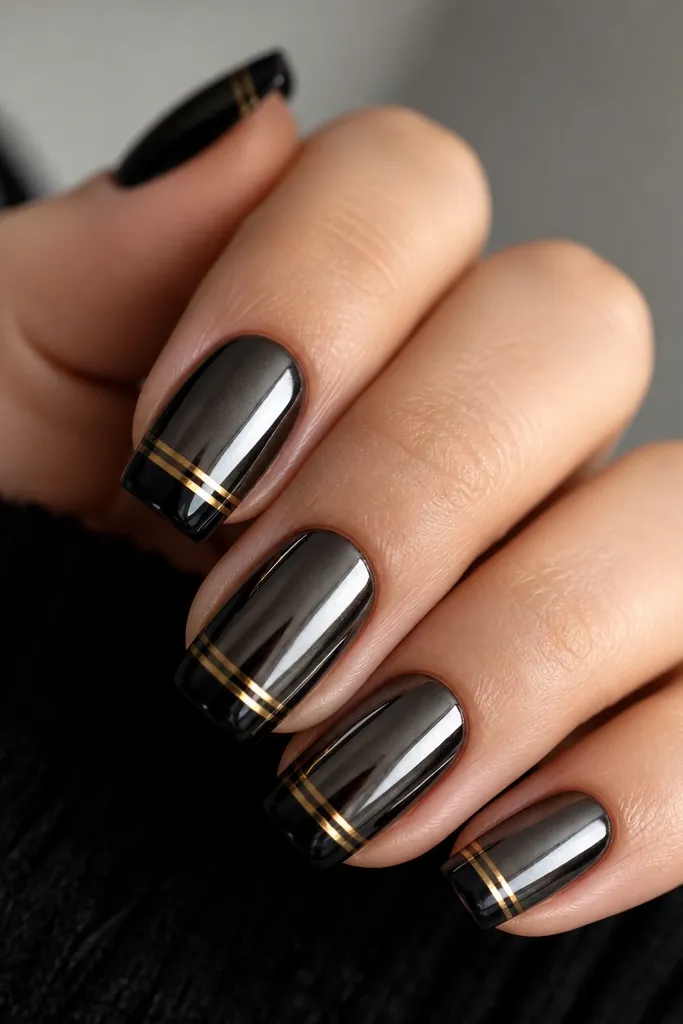
This is a French tip design that looks modern because the base is mirror black. The gold lines sit right on the smile line, and stacking two thin stripes makes the tip look layered like a ring. I like this for weddings and holiday parties because it feels classic but not boring. It works best on medium almond and soft square because the smile line curve can be clean. The gold stays flattering on all undertones because it’s placed at the tip where light already reflects.
Prep and apply a smooth black gel base, cure twice. Apply mirror chrome over the whole nail for that glassy look. Create the French shape by tracing the smile line with a thin strip of black gel so the tip reads like a French boundary, then cure and cover any gaps. Add two gold gel lines right above that boundary using a striping brush, curing each line. Finish with a glossy topcoat and cap the tip edges.
Editor's noteIf your smile line wobbles, use French tip guides once — you’ll get a straight curve faster than freehanding.
Watch outDon’t make the gold lines thick; stacked chrome lines should stay narrow to look intentional.
11. Black Chrome with Gold Spider-Thin Web Lines
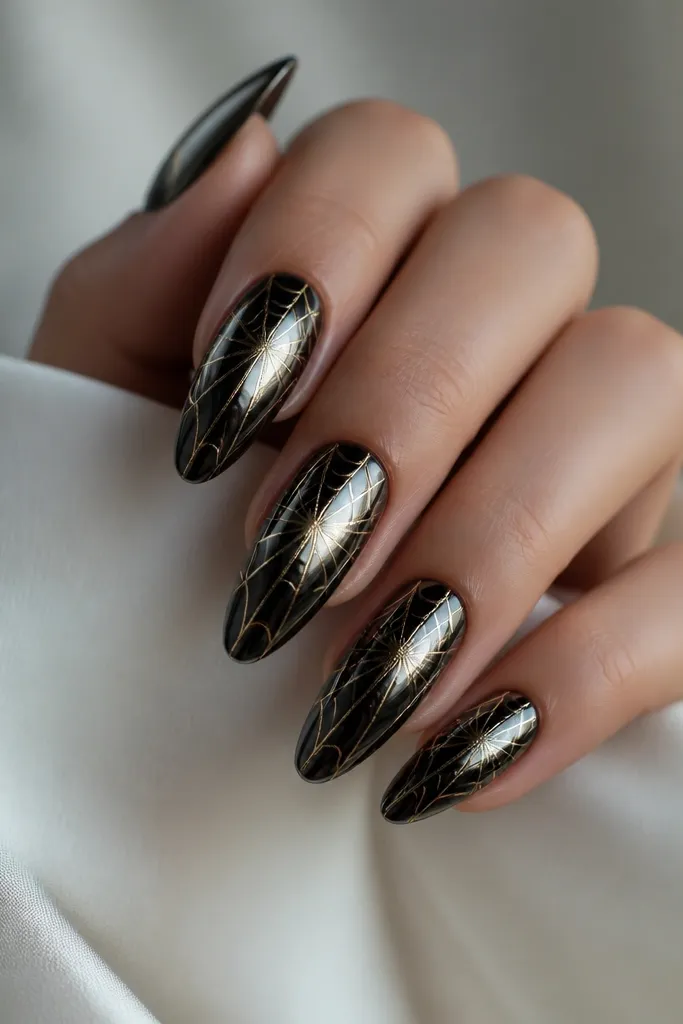
Gold web lines over black chrome look like couture for Halloween and also for a regular night out. The reason it works is that the web is thin, so the black mirror still does most of the work. I keep the web centered on one or two nails per hand because the pattern is visually busy. Oval and almond shapes look best because the lines can radiate evenly. It flatters lighter and medium skin tones especially well; the gold lines pop cleanly against the dark.
Apply two coats of black gel, cure, and add mirror chrome to all nails. Use a nail art gel pen or a very fine liner brush for gold lines. Draw a central point at mid-nail, then pull thin lines outward to the sidewalls and tip edge, making 6-8 lines total. Add a second pass of tiny cross lines to form the web net. Cure, then topcoat with a glossy layer that is applied slowly so it doesn’t flood the web.
Editor's noteUse a gel pen if you have shaky hands — the line thickness stays even.
Watch outDon’t overfill the web with gold; thick lines lose the airy spider look.
12. Black Satin Base with Gold Chrome Crosshatch
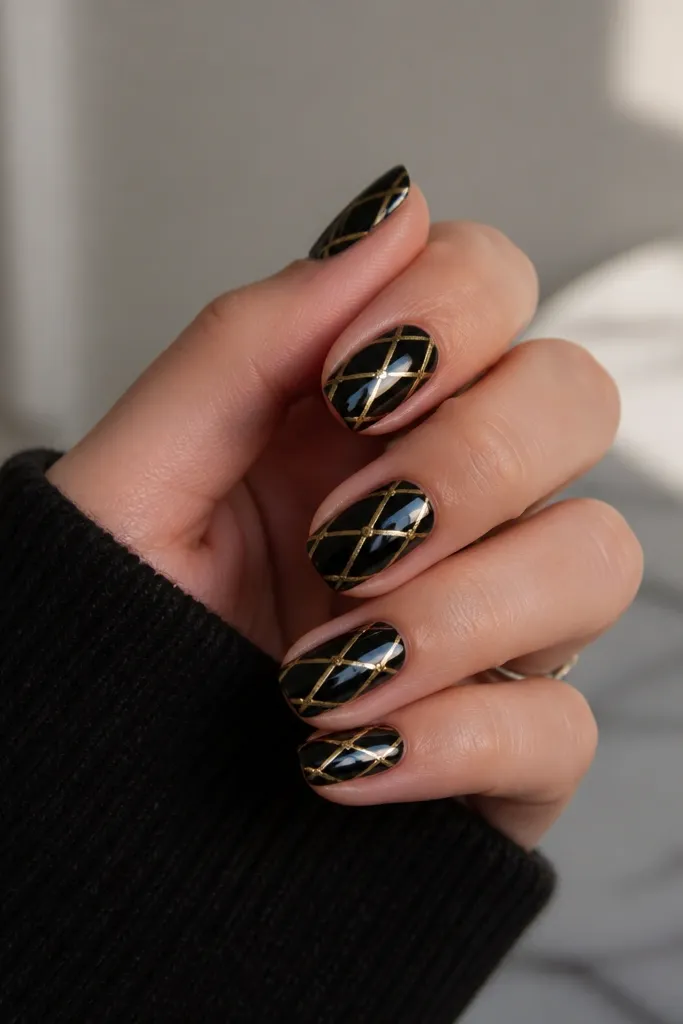
Crosshatch is one of those designs that looks simple until you see it up close. The satin black makes it feel softer and more wearable, while the gold chrome grid gives it a metallic edge. I do crosshatch on just the ring fingers because it keeps the set classy. This looks great on short almond and square because the grid reads clean on flatter surfaces. It also flatters hands with wider nail beds because the grid pulls the eye inward.
Paint all nails with black gel and cure, then apply a satin topcoat (not matte) and cure again. On the accent nails, use gold chrome gel or gold foil gel to create horizontal lines across the nail, leaving small gaps. Cure, then add vertical lines to form a grid. Lightly buff if needed and seal with a glossy topcoat over the grid only, leaving the rest satin. Cap the edges so the gold lines stay locked.
Keep the gap between lines about the width of a thin brush hair; tight grids look messy.
Avoid full mirror chrome on satin sets; the shine mismatch makes the crosshatch look uneven.
13. Black Chrome Ombre to Gold Dust Tip
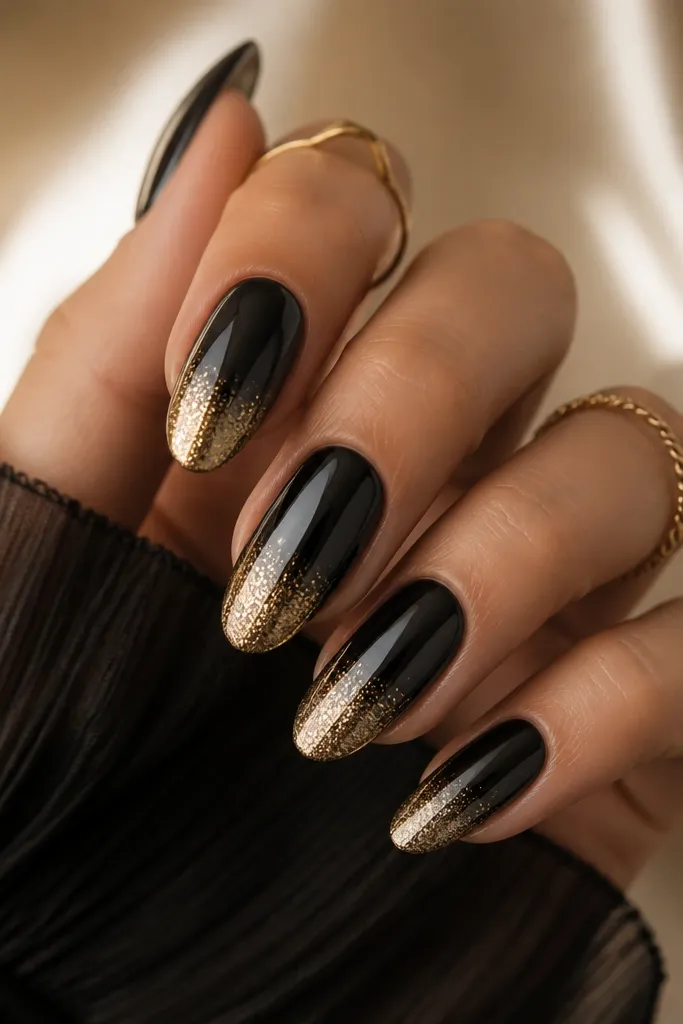
This is the easiest way to get “gold chrome” without doing complicated art. The black mirror base stays sharp, and the gold dust at the tip creates a gradient that looks expensive in motion. I use it when I want something glossy but not loud, and it’s perfect for medium almond. The gradient flatters short nail beds because it visually stretches from mid-nail to tip. On fair skin it looks bright; on deeper skin it looks like warm light reflecting off glass.
Apply black gel and cure twice. Add mirror chrome to the full nail for a clean reflective base. For the ombre, use a gold pigment powder or gold chrome powder mixed lightly with a gel medium, then tap it onto the tip and blend upward with a sponge. Cure and then add a thin topcoat to lock the gradient. Finish with a glossy topcoat on all nails, making sure the gold dust is sealed but not overbuilt.
Blend with a makeup sponge by tapping, not swiping — swiping creates harsh bands.
Don’t over-cure gold dust; too much gel thickness makes it look like glitter stuck on top.
14. Gold Leaf Underlay with Black Chrome Topcoat
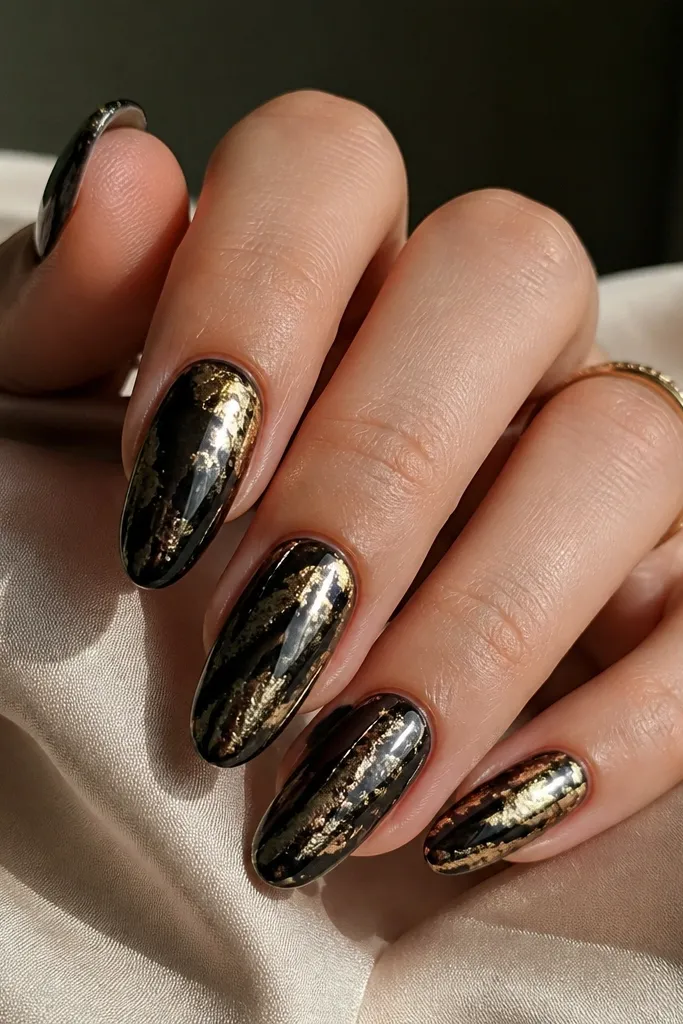
This one has the most depth. You place gold leaf under a black layer, then your black chrome finish makes the gold look like it’s glowing from inside. I do this on every nail if you’re going to an event, but two nails per hand looks just as good if you want it toned down. It’s gorgeous on almond shapes because the gold peeks through the curved surface. It flatters cool undertones too because the gold has enough warmth to balance the black.
Apply black gel base and cure. Place small pieces of gold leaf in a pattern you like — I keep it uneven, mostly toward the center and near sidewalls. Seal leaf with a thin layer of clear gel and cure. Then apply black chrome over the whole nail — the chrome will catch on the gold leaf texture underneath. Topcoat in two thin layers to keep the chrome smooth and prevent leaf edges from lifting.
Editor's noteUse smaller leaf pieces than you think — big chunks show as blobs under chrome.
Watch outAvoid thick clear gel over leaf; it smothers the gold glow.
15. Black Chrome with Stamped Gold Circle Confetti
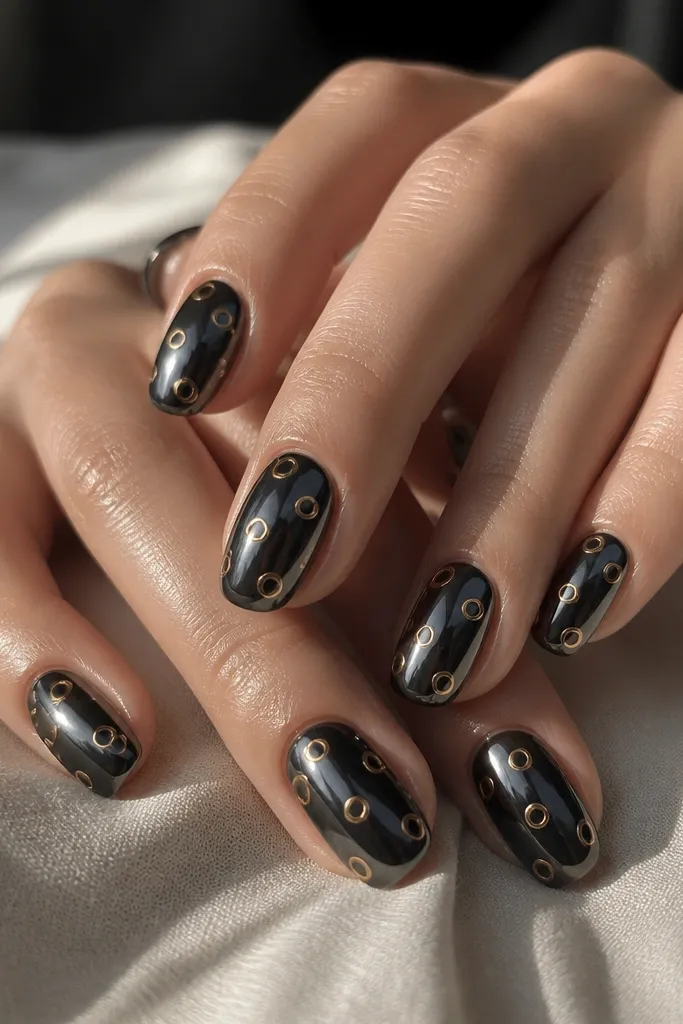
Stamping looks crisp when your black is mirror and your gold is consistent. Tiny gold circles scattered across black chrome look like confetti without needing actual glitter. I keep the circles on all nails for a full set, but you can also do it on the index and middle only. This design looks best on short almond and oval because the circles sit neatly inside the nail curve. It works across skin tones because gold circles read as bright points, not heavy color blocks.
Create black mirror chrome first: two coats of black gel, cure, then apply chrome powder evenly and buff. Use a stamping plate with small circle motifs and pick up gold stamping polish or gold foil gel. Stamp onto each nail lightly, then cure if your system needs curing. Wipe excess and apply a glossy topcoat over everything, but don’t flood the stamped pattern — thin topcoat keeps the circles sharp. Cap the free edge last.
Editor's notePress the stamper for 1-2 seconds only; longer pressure can smear gold on chrome.
Watch outAvoid using thick stamping polish; it fills the circle edges and looks fuzzy.
16. Black Chrome with Gold Half-Sun at the Sidewall
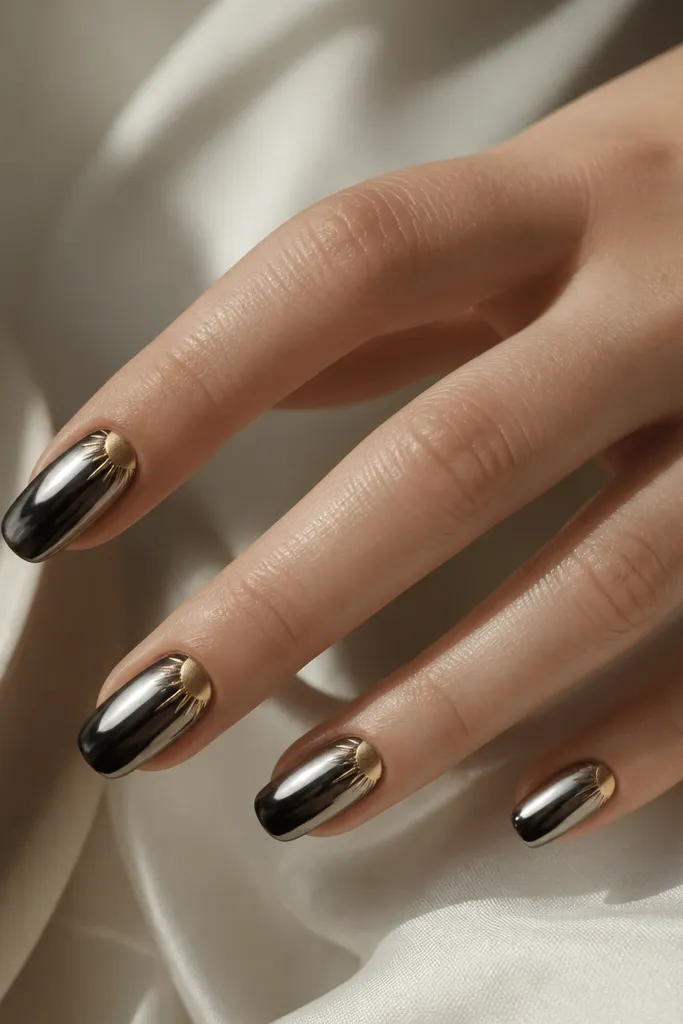
Side placement makes this feel modern. Instead of a center accent, the gold half-sun sits slightly off to the side near the cuticle, which makes your nails look more dimensional. The black mirror chrome keeps everything glossy and sharp, while the gold shape adds a bright focal point. I like this on medium almond and soft square because the sidewall has enough length to frame the crescent. It flatters hands with slightly wider nail beds because the side accent creates a visual balance.
Prep and apply black gel, cure twice, then apply mirror chrome to all nails. For the gold half-sun, use a fine brush to draw a small arc along one sidewall about 2-3mm from the cuticle line. Fill the arc with gold gel or apply gold foil pieces to match the arc shape, then cure. Add a tiny highlight line inside the arc with gold chrome gel if you want extra “sun glow.” Seal with a glossy topcoat, especially over the arc edges.
Keep the arc size consistent across nails — if one half-sun is bigger, it throws off the whole set.
Avoid placing the gold arc too low; it can look like an accidental smear instead of a sun.
17. Black Chrome with Gold Knife-Edge Tip Line
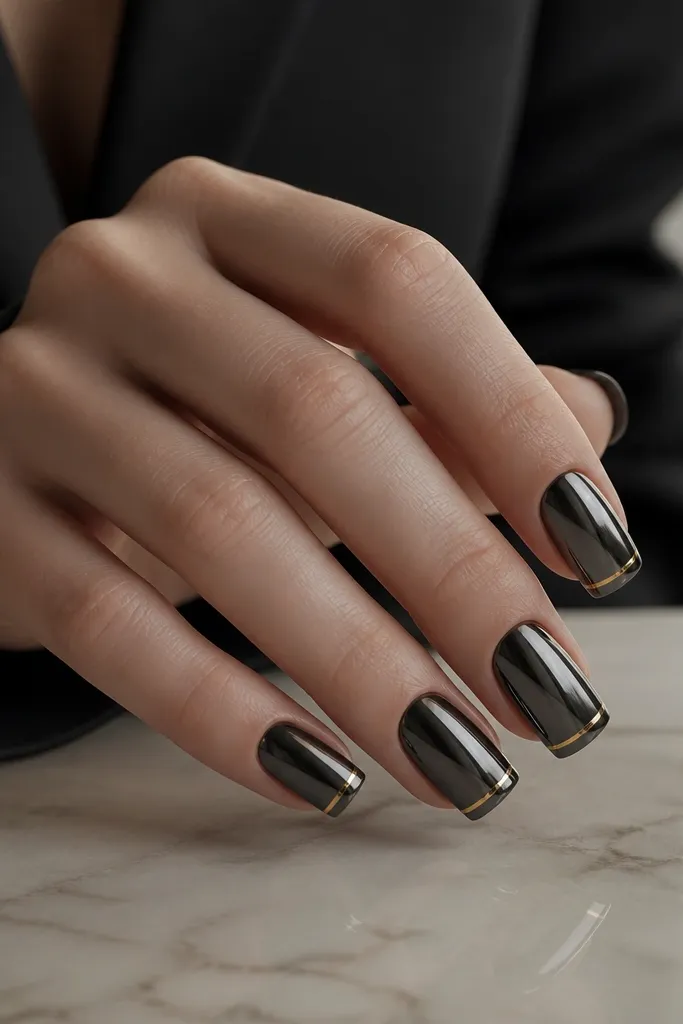
This is minimal, but it looks aggressive in the best way. A single knife-edge gold line across the tip makes your nails look engineered, like you paid for nail art that took hours. It works because the line is straight and thin, so the black mirror chrome stays the main background. I love it on short coffin and soft square because the tip edge is already defined. It flatters all skin tones because the contrast is clean and the gold reads bright without needing extra sparkle.
Apply black gel base and cure fully. Add mirror chrome across the entire nail and buff lightly. Use striping tape or a steady liner brush to place a straight gold line about 0.5mm below the very tip — keep it even from sidewall to sidewall. Paint gold gel over the line, cure, then remove tape if you used it. Finish with a high-gloss topcoat that caps the gold line and the free edge.
Editor's noteIf you use tape, burnish it down gently with a clean orange stick so the gold line stays razor straight.
Watch outAvoid a gold line too close to the edge; it chips faster because it’s sitting where nails take the most hits.
18. Black Chrome Waterfall with Gold Center Stripe
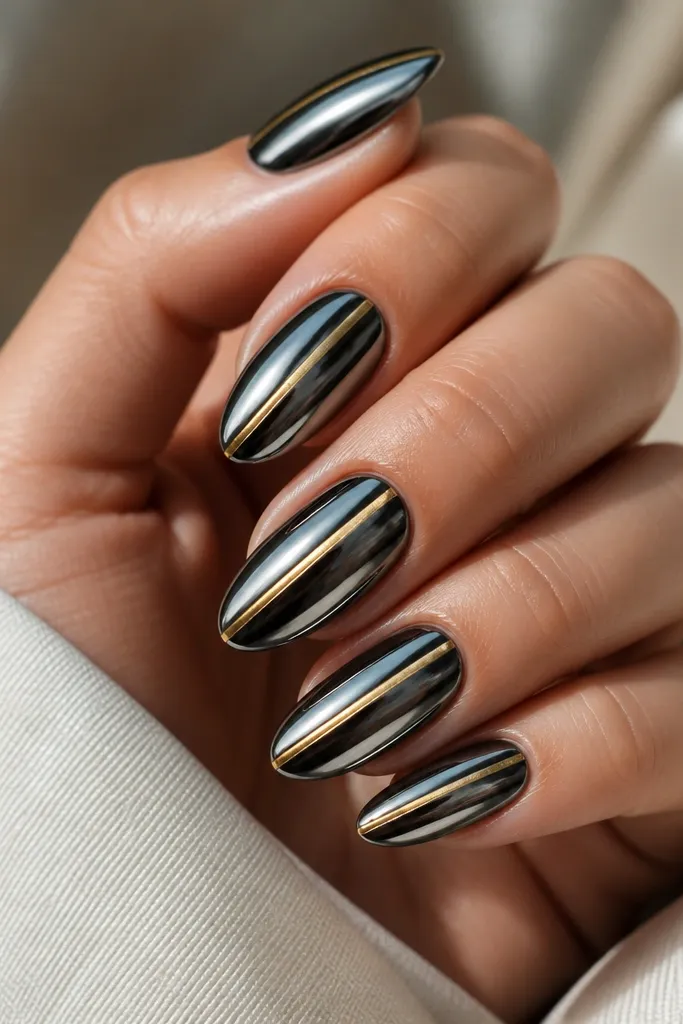
Waterfall reflection is hard to describe until you see it under light. When you do it right, the chrome looks like it’s flowing, and the gold center stripe gives the set a clean focal point. I keep the gold stripe straight and narrow so it looks like a runway detail, not a thick ribbon. This design is best on long almond because the center stripe has room to stretch. It flatters medium and deep skin tones because the gold stripe brings warmth without adding extra patterns.
Build your black mirror chrome first with two thin black gel coats and cure. Apply chrome powder and buff so the reflection is smooth. To create the subtle waterfall effect, press a chrome applicator sponge lightly at different angles while the chrome is still being set — move in short passes, not circles. Then draw a gold center stripe with a liner brush from about 1mm above the cuticle to the tip, keeping it 0.5mm wide. Cure and seal with a glossy topcoat, applying slowly over the center stripe so it doesn’t smear.
Wipe your brush on a lint-free wipe before the stripe so the gold stays one clean line.
Avoid wide center stripes; they make the chrome look busy and less “flowing.”
19. Black Gloss Chrome with Gold Ribbon Bow Accent
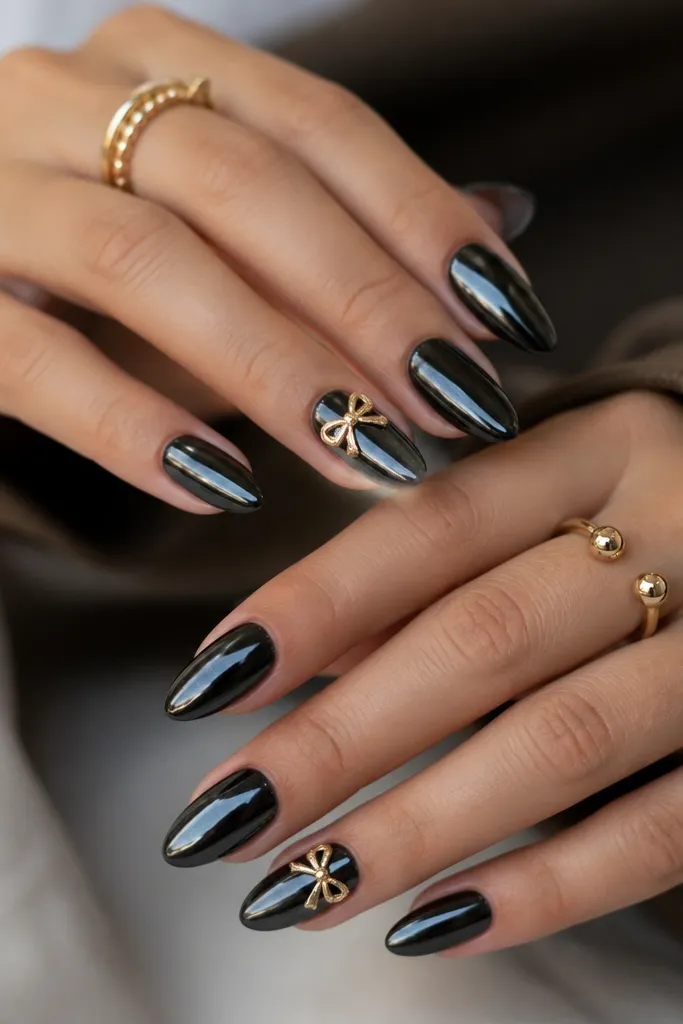
A bow sounds childish until it’s done in thin metallic lines. This version uses a small gold ribbon bow placed near the cuticle, then keeps the rest of the nails in clean black chrome so the bow looks intentional. It’s perfect for birthdays, bridal events, and nights out where you want something sweet but still sharp. I do it on the ring finger only because the bow is a focal point and chrome already has shine. It flatters fair and light-medium skin tones because the gold bow pops against the black without looking heavy.
Apply black gel base and cure twice. Apply mirror chrome to all nails for a uniform glossy look. On the accent nails, use a thin gel strip to form the bow loops: place two curved gold gel arcs, cure, then add a small center knot with gold gel. If you want extra metallic shine, tap gold chrome powder onto the bow gel before curing. Seal with two topcoat layers, keeping the first layer thin so the bow edges stay defined.
Editor's noteKeep the bow small — about the width of a pencil eraser at the cuticle — so it doesn’t look oversized.
Watch outAvoid thick bow gel; raised blobs catch on hair and make the set look uneven.
20. Black Chrome Coffin Nails with Gold Bar-Handle Hardware
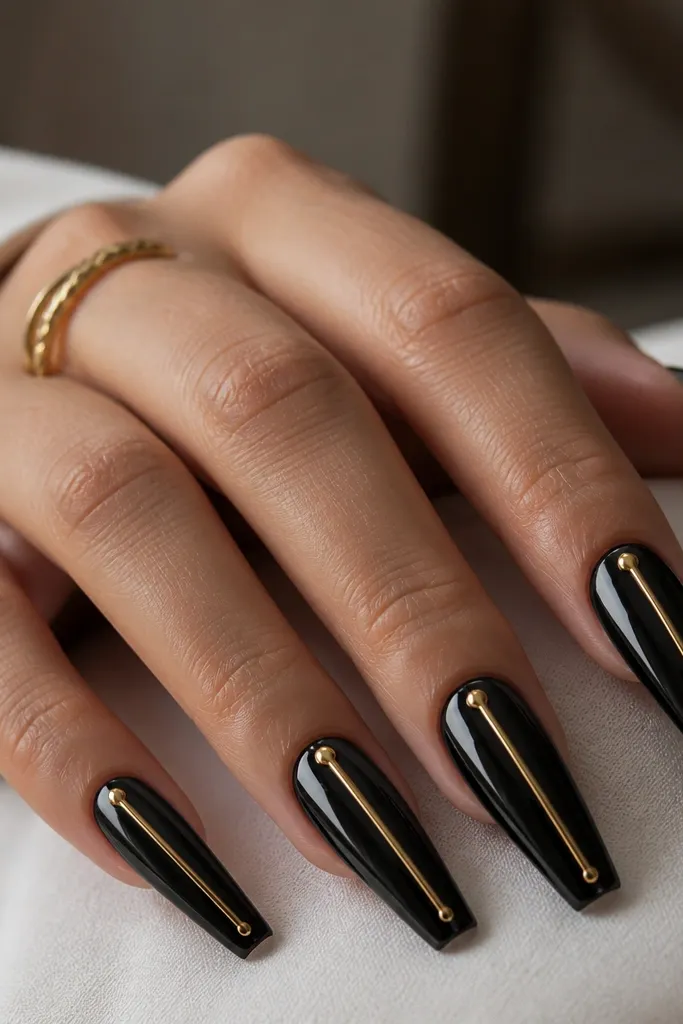
I wore this for a dinner where I knew I would be under warm indoor lighting, and the gold looked like jewelry instead of nail art. The trick is the placement — the gold bar sits dead center on the nail so it reads as a single “hardware” piece from across the table. Black chrome gives you that mirror depth, and the gold chrome hardware makes it feel intentional, not busy. I also like that it works on short coffin tips because the bar length visually stretches the nail bed.
Start with a black gel base and cure it well, then apply black chrome powder over a tacky black gel layer. Use a fine liner brush to seal the edges so the chrome stays mirror-smooth at the sidewalls. Cut two tiny pieces of gold chrome tape or gold foil strip for each nail, then trim them into a vertical bar shape that sits slightly above the free edge line. Add a small dot of thick clear gel at the top and bottom of the bar, press on two mini rounded gold end caps (or pinch small foil into caps), and cure. Finish with a high-gloss top coat in two thin layers so the bar feels smooth when you run your finger over it.
If your gold bar looks flat, switch from regular gold foil to gold chrome powder on a tacky gel pad, then top coat lightly so it stays reflective.
Don’t place the bar too close to the cuticle — leave a 1-2 mm gap so it doesn’t look like a random stripe.



