
1. Rose-Gold Cuticle Halo on Inky Black
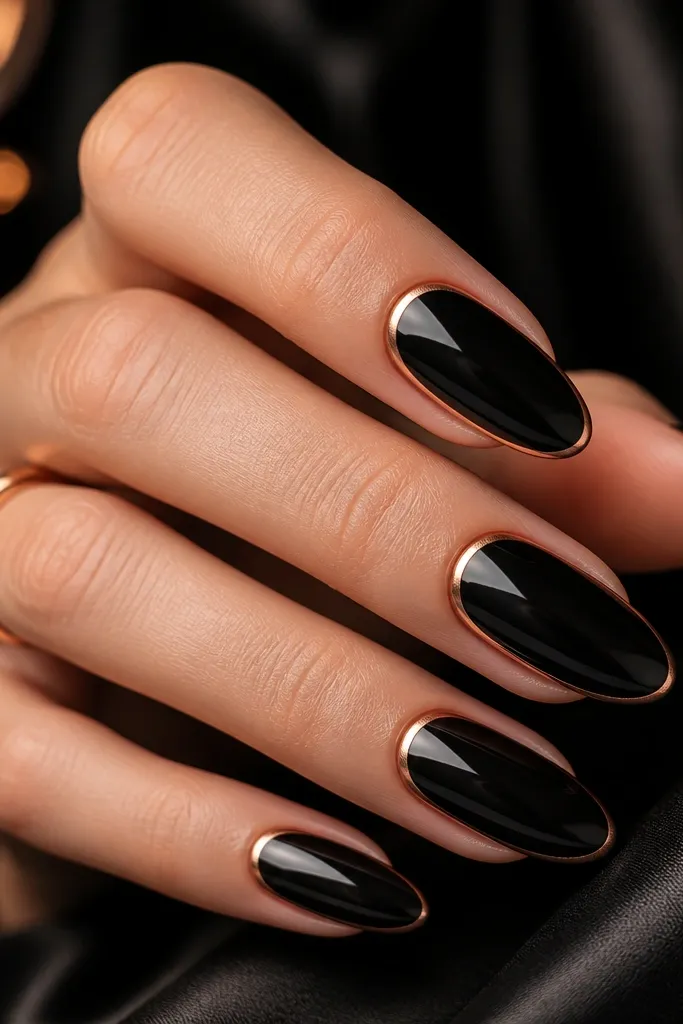
This look is why I keep reaching for Black And Rose Gold Nails vs gold when I want clean glam fast. The rose-gold crescent sits where your light hits first, so your hands look more “lit” without feeling busy. I use a true inky black gel (almost blue-black) because it makes rose gold read pinker instead of yellow. It flatters short to medium nails and looks especially good on oval or almond shapes since the arc follows the cuticle curve. For skin tone, it’s forgiving — it looks sharp on cool undertones and still warm enough for neutral skin.
Start by painting two thin coats of inky black gel, curing fully between coats. Next, take a fine rose-gold striping gel or a micro liner brush and draw a thin crescent right at the cuticle, leaving a hairline gap from the skin. Cure, then check symmetry from the side — the arc should be thicker at the center and slightly thinner near the corners. Finish with a glossy top coat and cap the free edge so it stays smooth for a week.
Editor's noteIf your cuticle area floods easily, do the arc on a slightly thicker black layer so the rose gold doesn’t drag.
Watch outDon’t make the halo too wide — thick arcs turn into chunky glitter instead of a jewelry-like highlight.
2. Matte Black with Rose-Gold Smile Line
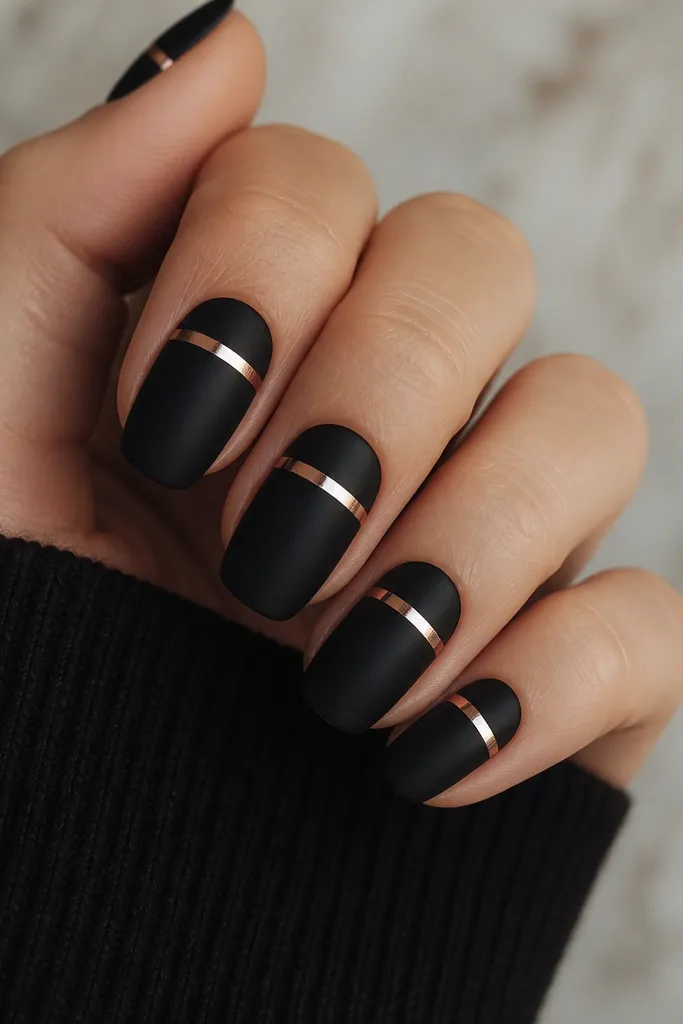
Matte black makes rose gold look intentional instead of like a random accent. The smile line sits near the tip where you get natural light from your hands, so the stripe reads like a ring around your nail. This is my pick for weddings, date nights, and outfits where you want dressy without loud sparkle. It works best on medium almond or coffin because the stripe has room to look straight and not cramped. On fair skin, it avoids the “too dark” vibe because the rose-gold gives a warm focal point.
Start with two coats of matte black gel and cure thoroughly. Then use striping tape to place a perfect line across the middle-to-tip zone, leaving about 1-2 mm from the free edge depending on your nail length. Paint rose-gold gel over the exposed area, cure, and remove the tape while the gel is still fully cured. Seal with a glossy top coat only on the rose-gold stripe area if you want contrast, or use full glossy if you want it to pop more.
For extra clean lines, press the tape down with a silicone tool so the edges don’t bleed.
Don’t put matte black under chunky rose-gold foil — the foil edges catch and look messy fast.
3. Black Ombré to Rose-Gold Sparkle Tips
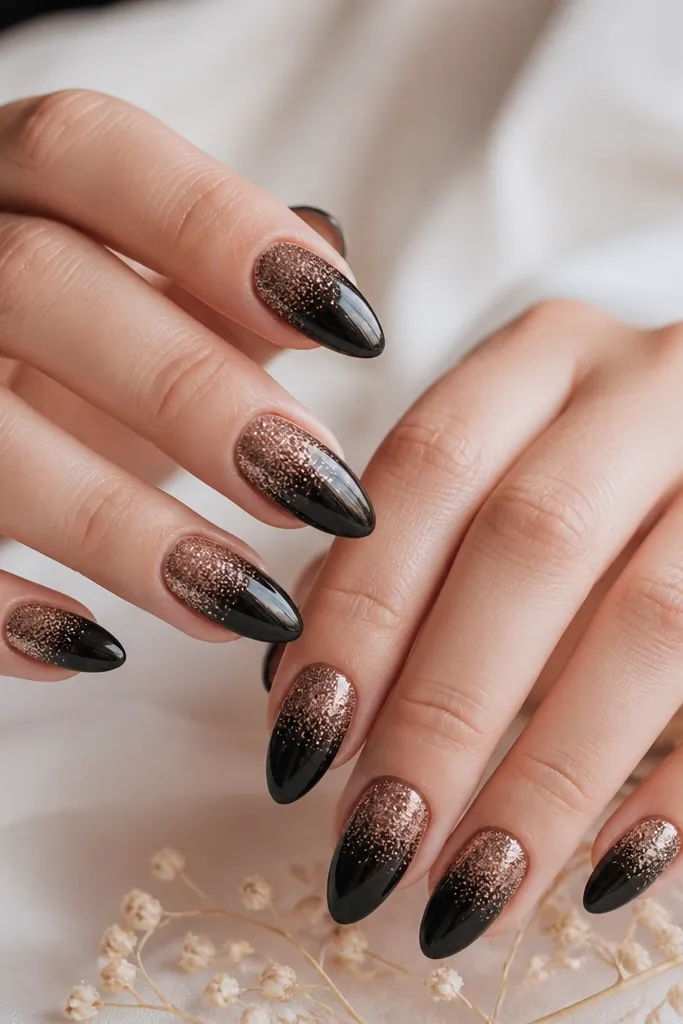
This is the set I do when someone wants Black And Rose Gold Nails vs gold but still wants a “wow” transition. The rose-gold only appears at the tips, so it looks like light hitting the edge instead of full metallic coverage. I like it on almond and long squoval because the gradient has space to blend. It flatters hands with shorter fingers too because the dark base is trimmed upward and the glow happens at the end. If you wear gold jewelry, the rose-gold still matches because it sits in the same warm family, but it reads more flattering than straight gold on most people.
Start with a black base that goes on opaque — two thin coats, cured well. For the ombré, use a makeup sponge or ombré brush to blend rose-gold glitter gel starting about halfway up the nail, then build the glitter density toward the tip. Keep it moving and blend in small taps so you don’t get hard bands. Cure, then add a thin layer of rose-gold gel at the very tip to smooth the texture, and finish with a glossy top coat to lock it down.
Editor's noteLet each layer cure before adding more glitter — it prevents fallout and keeps the blend soft.
Watch outDon’t skip a top coat — glitter tips without sealing feel rough and catch on hair.
4. Rose-Gold Foil Leaf on Black Negative Space
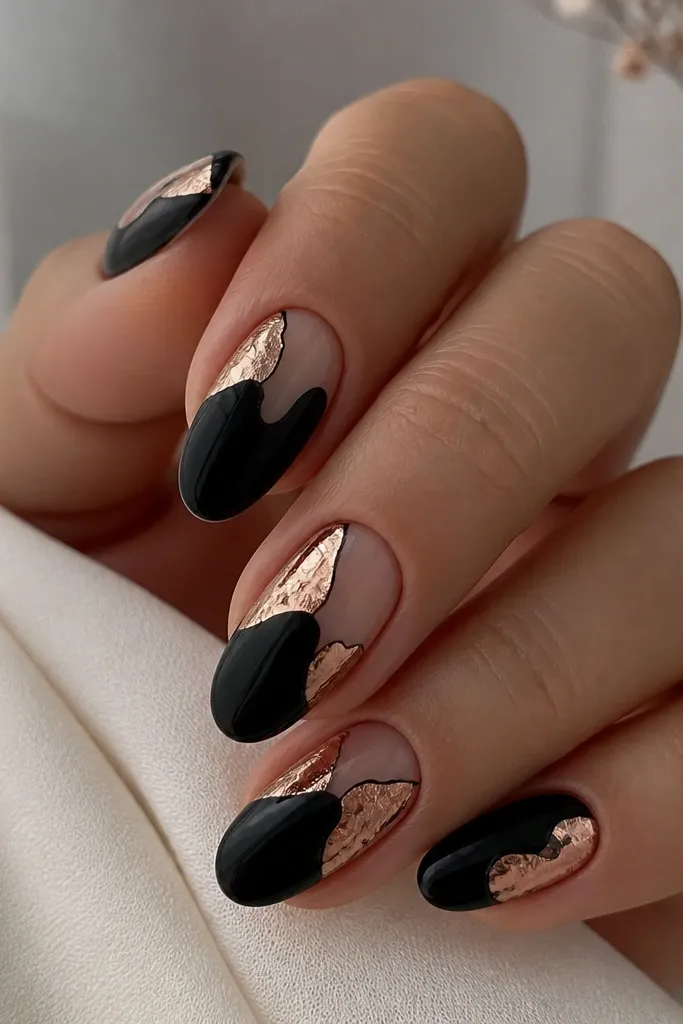
Foil leaf gives you the expensive look without needing a full metallic coat. The negative space matters here: it keeps the design airy and keeps the rose gold from overpowering the black. I do this for people who hate “solid glitter” but still want something that photographs well. It looks great on medium almond and short oval because the foil pieces can stay small and controlled. The pinky rose undertone makes the foil look softer than straight gold leaf, especially on fair or rosy skin.
Start by painting your nails with sheer nude gel or a clear base, then add black gel only where you want the coverage. Place rose-gold foil leaf using foil glue — dab a small patch of glue, wait until it turns tacky, then press the foil in short sections. Use a thin brush to tidy the edges with black gel so the foil doesn’t look smeared. Cure everything, then apply a glossy top coat that fully covers the foil so it feels smooth.
Editor's noteKeep foil pieces under control by cutting small triangles first — bigger sheets fold and look bulky.
Watch outDon’t cover the entire nail in foil leaf — it turns into a thick layer that chips at the edges.
5. Black Marble Veins with Rose-Gold Flecks
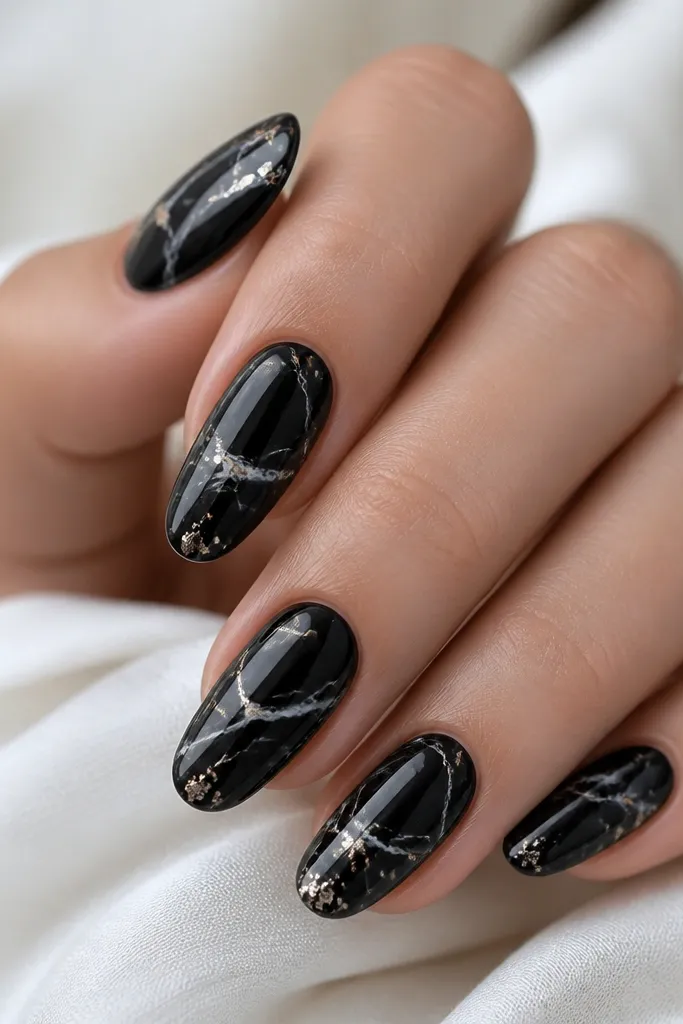
Marble is one of those designs that looks hard until you do it once, then you realize it’s mostly about thin lines and controlled movement. Rose-gold flecks add a warm glint that makes the marble look less cold than straight gold would. I’ve worn this to events where my outfit had both black and warm metallic accessories, and it always looks like it belongs. It’s flattering on short squoval and almond because the veins don’t need a lot of length to read. If you have dry cuticles, marble hides unevenness better than glossy solid metal.
Start with a black base and cure it fully. Add thin white and charcoal marble lines using a liner brush or a marbling tool, then drag the lines slightly with a dry brush tip so they blend naturally. While the design is still tacky, tap in tiny rose-gold pigment or micro glitter flecks with a flat brush. Seal with a glossy top coat in two layers so the marble lines stay crisp and the flecks don’t sink.
Editor's noteUse a sparse hand with the flecks — less looks more expensive.
Watch outDon’t swirl the marble too much — heavy blending makes it look like paint rather than stone.
6. Geometric Black Blocks with Rose-Gold Outline
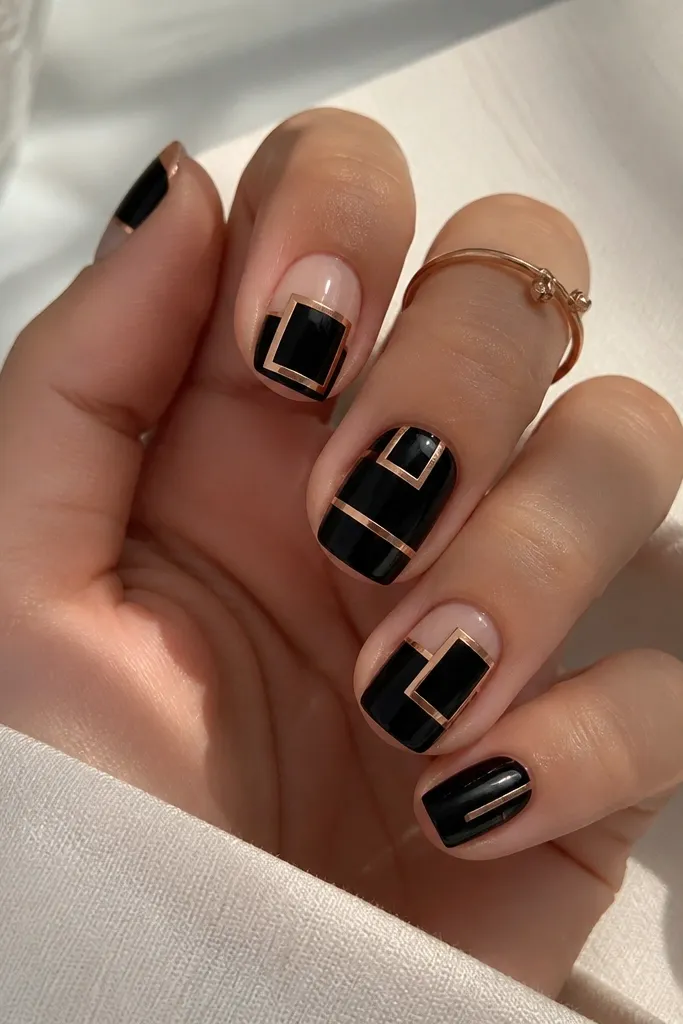
This is graphic nail art that stays wearable because the rose gold is only an outline. When you compare Black And Rose Gold Nails vs gold, the rose outline looks more modern and less yellow against nude skin. I love this for work weeks because it looks sharp even with minimal jewelry. It flatters fingers with wider nail beds because the shapes can widen or narrow visually through the blocks. Choose a nude base that matches your skin tone so the black and rose gold feel intentional.
Start with a nude base gel and cure. Use striping tape to section off angled panels — press tape down firmly so edges stay crisp. Paint black gel on the taped sections, cure, then remove tape carefully. Add rose-gold gel outline along the panel edges with a liner brush, cure, and finish with a thick glossy top coat.
Editor's noteIf your rose outline looks thick, wipe your liner brush on a lint-free pad before pulling the line.
Watch outDon’t freehand big geometry — crooked angles ruin the clean, pricey vibe.
7. Half-Moon Rose Gold at the Base
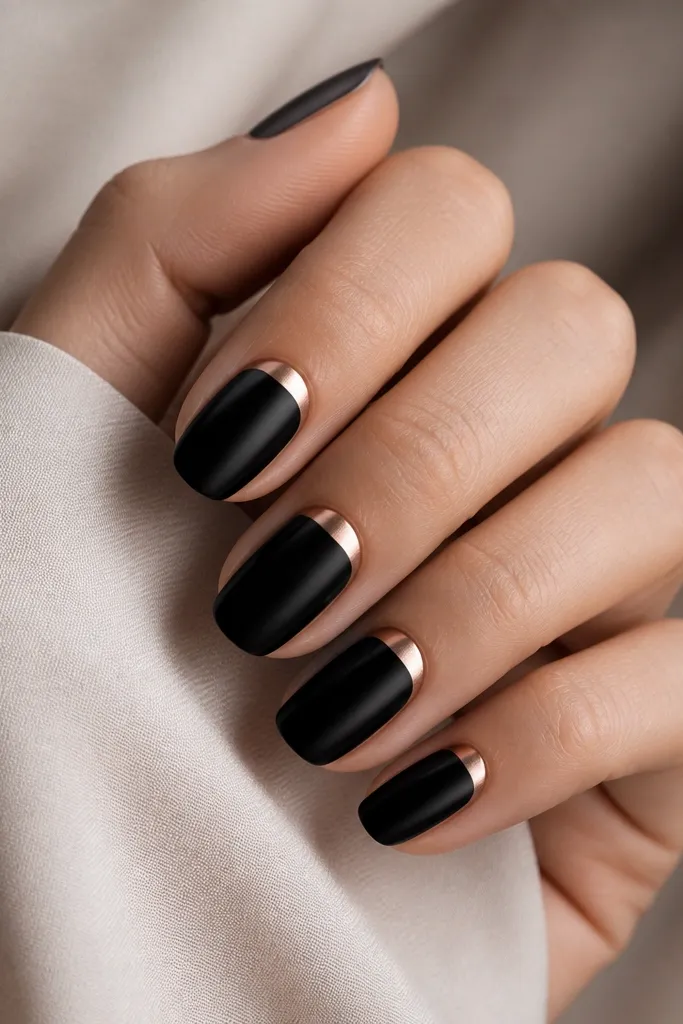
Half-moons are a classic for a reason: they look like jewelry framing, not random decoration. Rose gold makes the half-moon glow warm against black, and it reads softer than straight gold because of the pink undertone. This design is great for people who want something “done” but still neat enough for school or office. It’s flattering on short nails because the half-moon is compact and doesn’t require much length. If you have dry hands, the rose glow draws attention away from roughness.
Paint two coats of black gel and cure completely. Use a half-moon stencil or cut a small crescent from striping tape and place it at the cuticle, leaving a tiny gap from the skin. Fill the exposed crescent with rose-gold gel, cure, then remove the stencil while the gel is fully set. Seal with glossy top coat and cap the free edge.
Editor's noteWarm your rose-gold gel slightly in your hands if it’s thick — it spreads smoother inside the crescent.
Watch outDon’t let the rose gold touch the skin — it will lift and look messy in a few days.
8. Rose-Gold Foil French with Black Base
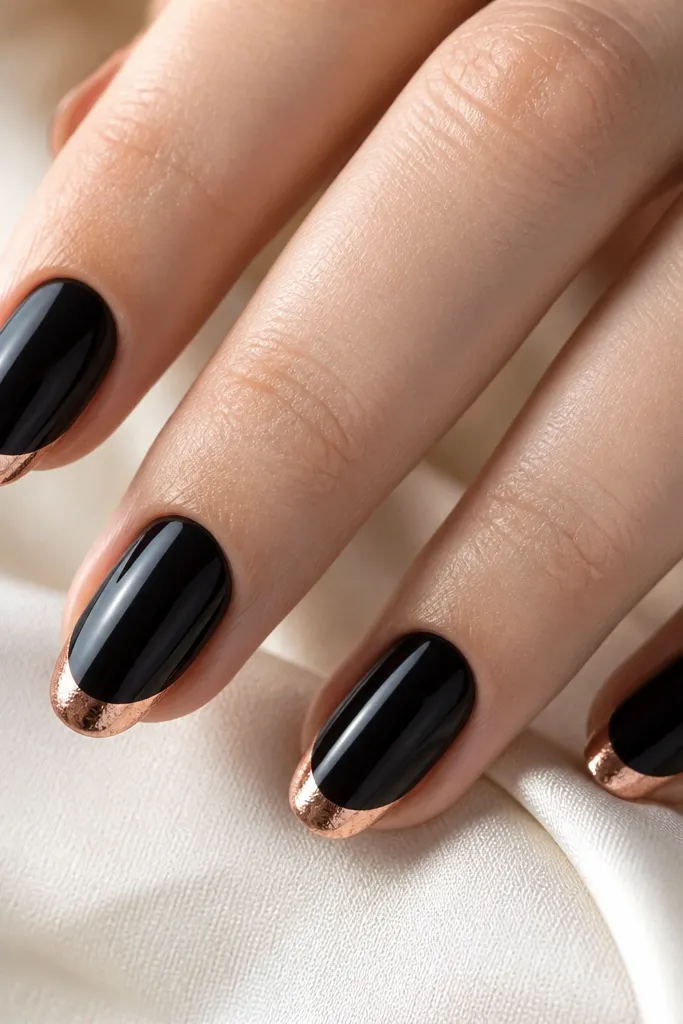
Foil French is the fastest way to get “expensive manicure” energy without painting tiny details. The rose-gold band at the tip makes the black look intentional instead of heavy. I do this when someone wants a French but hates the dryness of white tips. It suits almond, squoval, and short coffin because the tip band can be adjusted — thin for subtle, thicker for drama. Rose gold looks especially good if you wear blush, mauve, or warm nude lipstick.
Start with black gel base — two coats, cure well. Place French tip guides at your preferred smile curve, then apply foil glue only on the exposed tip area. Press rose-gold foil down, then use a soft brush to remove loose pieces. Cure, remove any guide marks, and apply glossy top coat so the foil band feels smooth and doesn’t snag.
Make the French band slightly thicker on ring fingers — it balances the look across the hand.
Don’t use a thin, watery top coat over foil — it can dull the metallic quickly.
9. Black Velvet Matte with Rose-Gold Velvet Dot
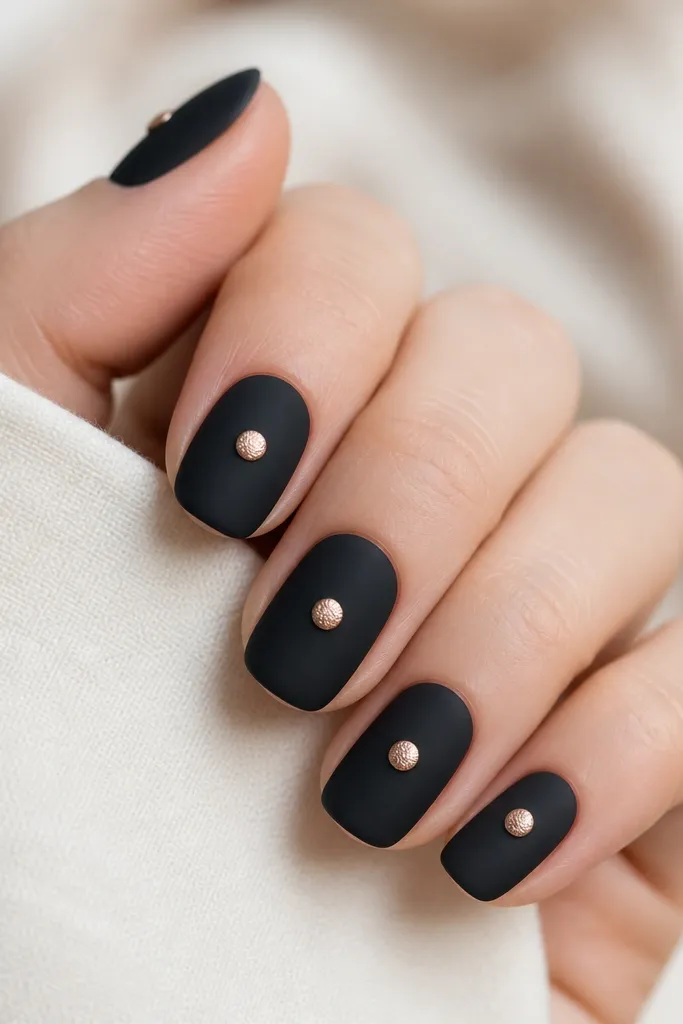
If you want something that looks soft and pricey, this is it. Matte black gives you a velvet vibe, and the rose-gold dot works like a tiny spotlight. I use this when I’m wearing cozy knits or simple outfits and don’t want loud patterns. It flatters hands with short nails because the design is centered and doesn’t need length. Rose gold here looks more delicate than straight gold because it has that pink warmth.
Paint matte black base and cure. Use a dotting tool and rose-gold gel to place one centered dot about one-third up from the tip. Cure again and add a second small layer on the dot if you want it slightly domed. Finish with matte top coat on the rest of the nail, and only a thin glossy coat over the dot if you want a charm-like highlight.
Editor's noteIf your dot looks too big, do it in two layers — the first layer sets the shape, the second layer adds height.
Watch outDon’t add multiple dots — three or more makes it look like cheap nail stickers.
10. Rose-Gold Chrome Half-Top on Black
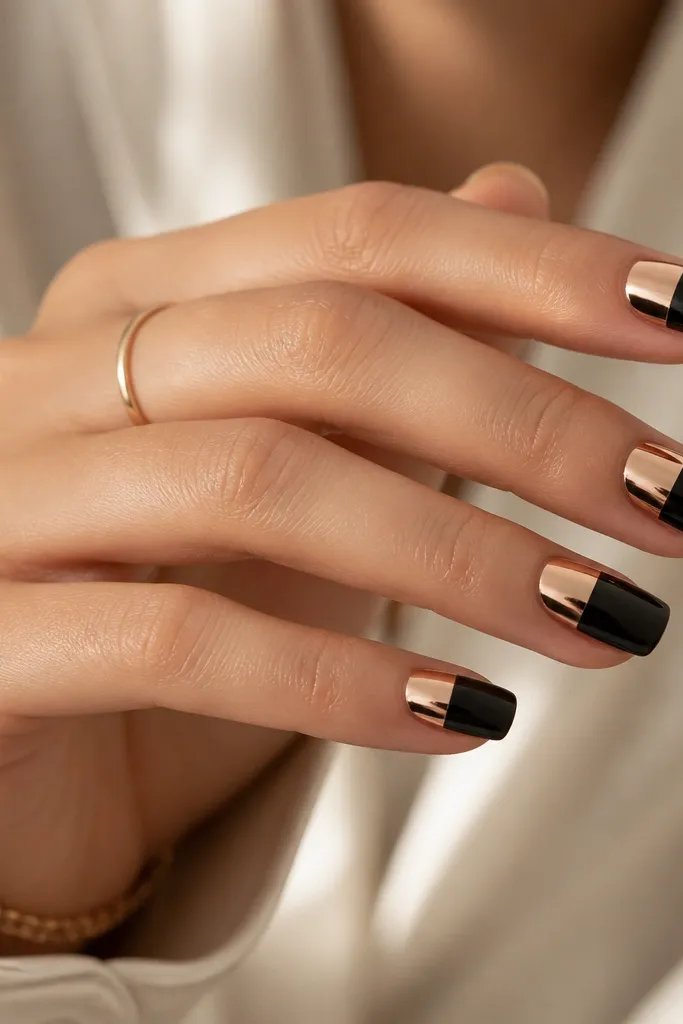
Chrome half-top makes your nails look like jewelry on purpose. The rose-gold chrome reads warm and flattering, and it catches light from every angle, which is why it beats straight gold when your outfit is cool-toned. This design is great for parties, birthdays, and any time you want your manicure to be the accessory. It looks best on medium almond or coffin because the chrome line needs a smooth surface to reflect cleanly. If you have ridges on your natural nail, chrome hides them better than high-shine glossy polish.
Start with a black base and cure. Apply a thin layer of chrome-ready base to the top half only, using striping tape to keep a clean boundary. Dust rose-gold chrome powder over the tacky base, then buff gently to remove excess. Seal with a chrome-safe top coat so the shine stays mirror-like, and remove the tape after curing.
Use a striping brush to clean the chrome boundary line — tiny cleanup makes it look salon-level.
Don’t try to do chrome on thick gel — it can look grainy and peel at the edges.
11. Black Lace Tips with Rose-Gold Thread Lines
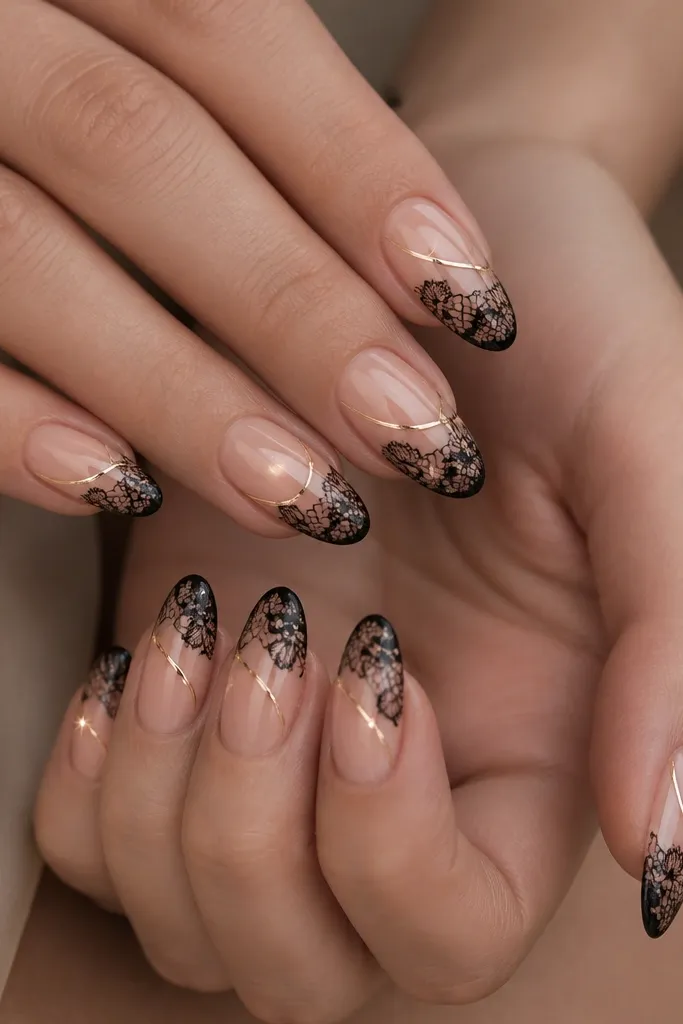
This one looks delicate, but it’s actually easy once you use a lace stencil or lace decal. The nude base keeps it airy, while black lace gives that lingerie-style contrast. Rose-gold thread lines make the pattern feel warmer and more romantic than straight gold. It’s flattering on oval and almond nails, especially if your nail bed is short because the nude base extends the look. Wear it with soft pinks, creams, or black dresses and you’ll feel put together.
Start with a nude base gel and cure. Apply black lace decal or paint lace using a stencil — focus on the tip zone so it doesn’t cover the whole nail. Then use a thin rose-gold liner to draw two or three thread lines over the lace pattern, keeping them uneven like real stitching. Cure and finish with a glossy top coat in two thin layers to smooth over the decal edges.
Editor's noteIf your lace edges lift, add a tiny amount of top coat only at the lifted corners and cure again.
Watch outDon’t flood the lace with thick gel — it blurs the pattern and looks bulky.
12. Rose-Gold Starburst Accent on Black
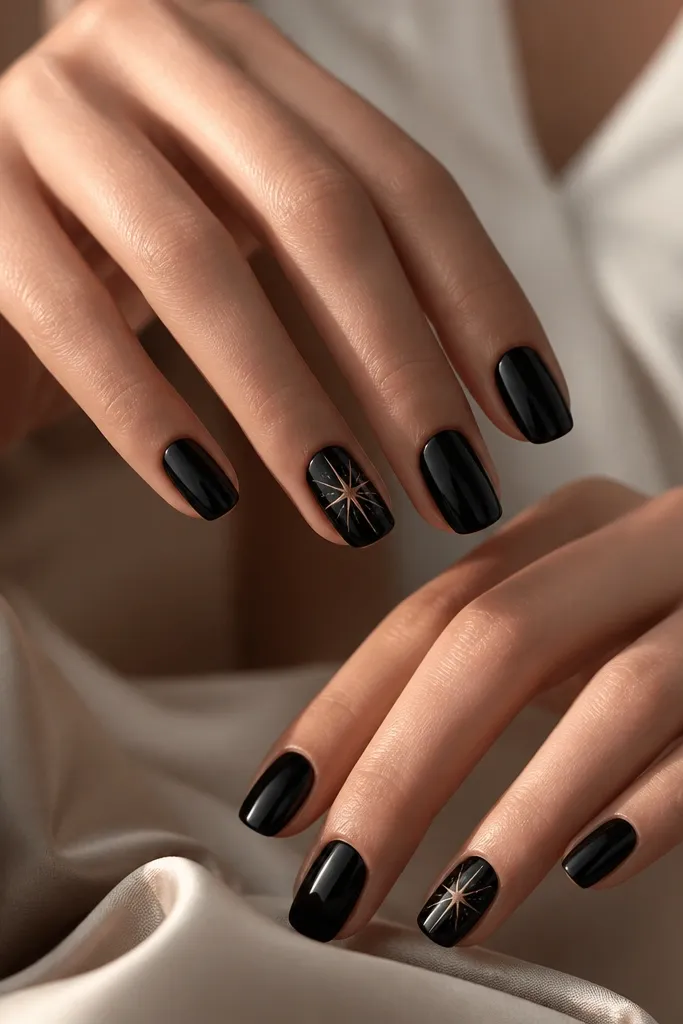
Starbursts look like fireworks, but on nails they’re clean when you keep the rays thin. Rose gold makes the starburst look warm and wearable, not harsh. I use this when I want a fun design that still matches black outfits and gold jewelry. It flatters medium almond and short coffin because the rays fill the center without needing long length. If you’re worried about black being too heavy, the starburst gives your nails a light source.
Paint all nails black and cure with a glossy top coat if you want shine. On your accent nail, place a small rose-gold dot in the center, then draw 8-10 thin rays outward with a liner brush. Keep the rays uneven in length so it looks like a burst, not a star sticker. Cure, then add a final top coat to smooth the lines.
Editor's noteUse a liner brush with a fine tip and wipe it on a tissue before each ray for crisp lines.
Watch outDon’t make the starburst rays too thick — that’s where it starts looking like marker ink.
13. Black and Rose-Gold "Broken Mirror" Pieces
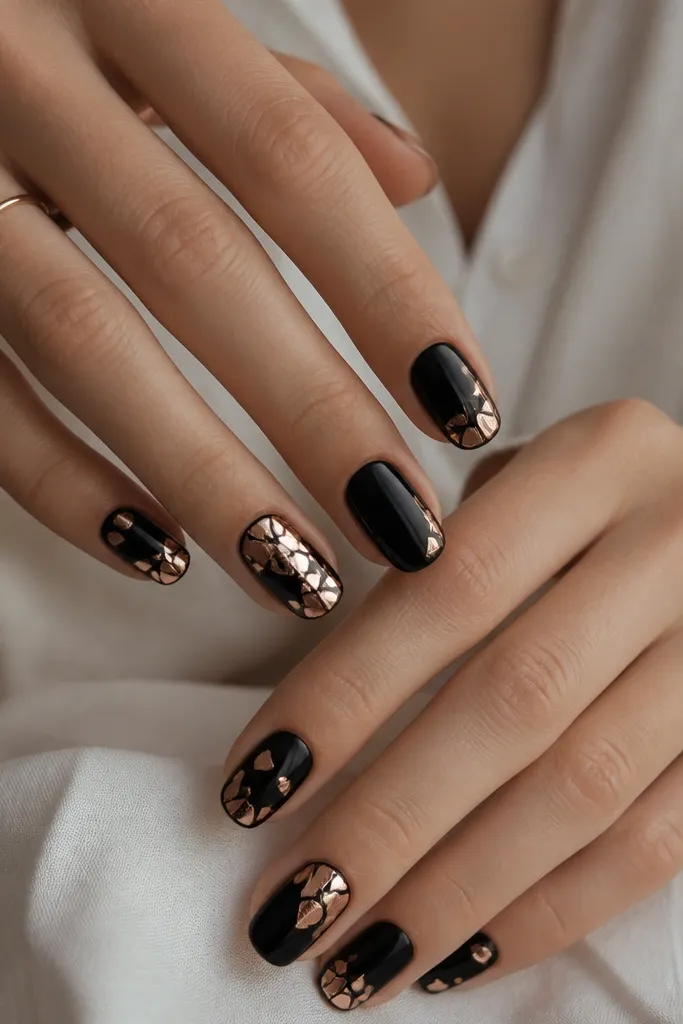
Broken mirror pieces look high-end because the reflections look like real metal fragments. Rose gold here gives a softer warmth than straight gold, so it blends better with everyday makeup. I’ve worn this to a holiday dinner where my outfit was black with a rose-gold bag, and the manicure matched without feeling overdone. It flatters short nails if you keep shards small and concentrated near the tip. On longer nails, you can spread shards more, but the key is still spacing.
Start with a black base and cure. Apply foil glue in small dots where you want shards, then press rose-gold mirror pieces onto the glue. Leave gaps between pieces — gaps make the reflections look intentional. Cure and seal with a thick top coat, then buff any sharp edges gently so it doesn’t catch.
Editor's noteCut mirror pieces with nail shears into tiny triangles so you can place them precisely.
Watch outDon’t stack shards on top of each other — it creates bumps that pop off first.
14. Rose-Gold Glazed Donut Stripe on Black
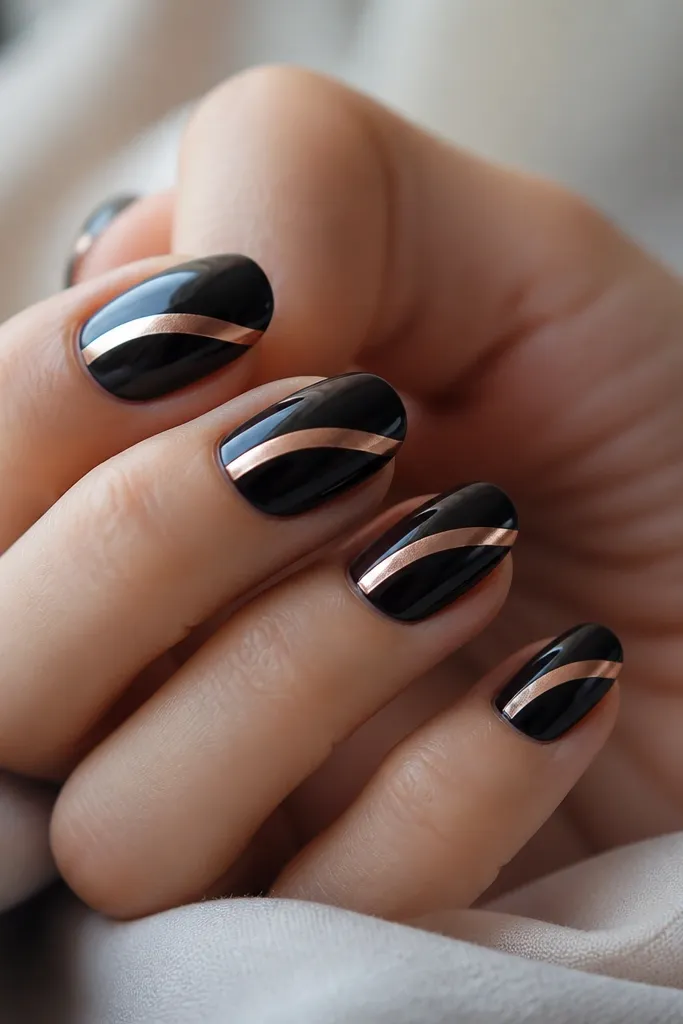
This design is my go-to when someone wants something different from standard French. The curved stripe looks like a glaze ring, and rose gold keeps it warm and flattering against black. I like it on oval nails because the stripe follows the nail’s natural curve and makes the hand look longer. It also looks great on medium coffin because the stripe can be slightly higher for a lift effect. Straight gold can look too yellow and flat, but rose gold keeps that jewelry glow.
Apply two coats of black gel and cure. Use a curved striping guide or a thin strip of tape to map the arc — place it slightly above the center for a lengthening effect. Fill the arc with rose-gold gel, cure, then remove tape. Add glossy top coat over everything and do a second thin top coat if the rose-gold stripe needs smoothing.
Editor's noteIf your arc wobbles, remove the tape immediately and redo — cured rose gold is harder to fix.
Watch outDon’t pair this with matte top coat — it kills the glazed look.
15. Black Marble French with Rose-Gold Edge
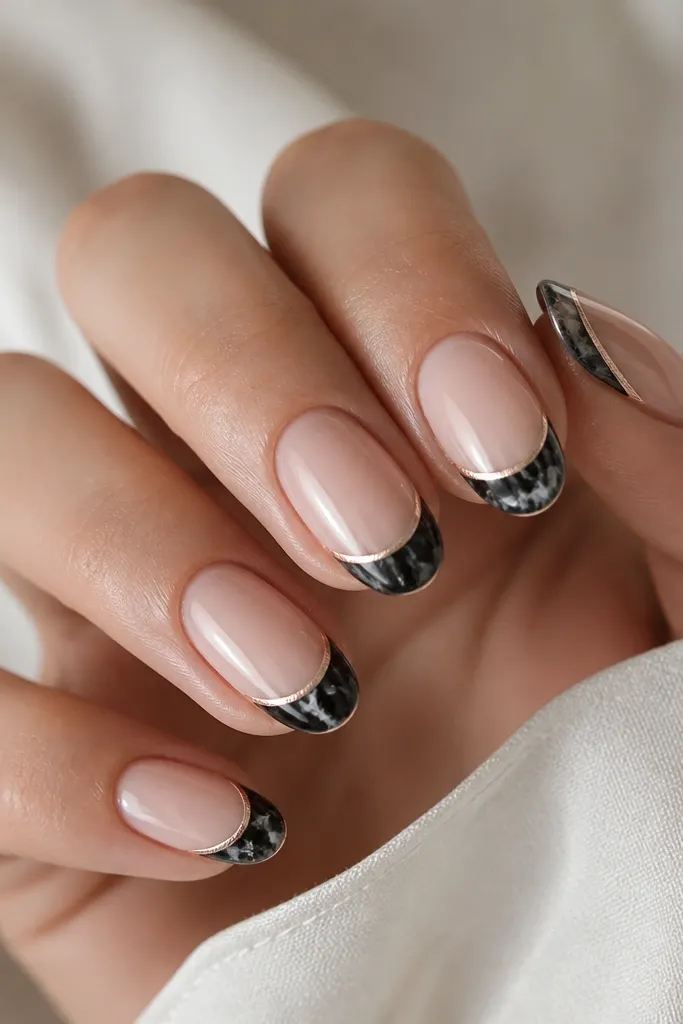
Marble French feels fancy, but the rose-gold edge makes it look crisp instead of messy. This is where Black And Rose Gold Nails vs gold really shows: the rose border reads softer and more romantic, especially next to nude. It’s perfect for bridal events, engagement photos, and any time you want “pretty nails” without glitter. I like it on short almond and squoval because the French border can stay thin and clean. It also flatters a range of skin tones because the nude base does the blending work.
Start with a nude base gel and cure. Create a French marble tip by painting black in the tip area, then dragging tiny white/charcoal lines through it with a liner brush. Seal the marble tip with a thin top coat layer and cure. Finally, add a thin rose-gold line right along the outer edge of the French tip, cure, and finish with glossy top coat.
Editor's noteUse a striping brush for the border — it keeps the rose gold from bleeding into the marble.
Watch outDon’t make the marble too thick at the tip edge — it makes the rose border sit uneven.
16. Black Glitter Base with Rose-Gold Outline Doodles
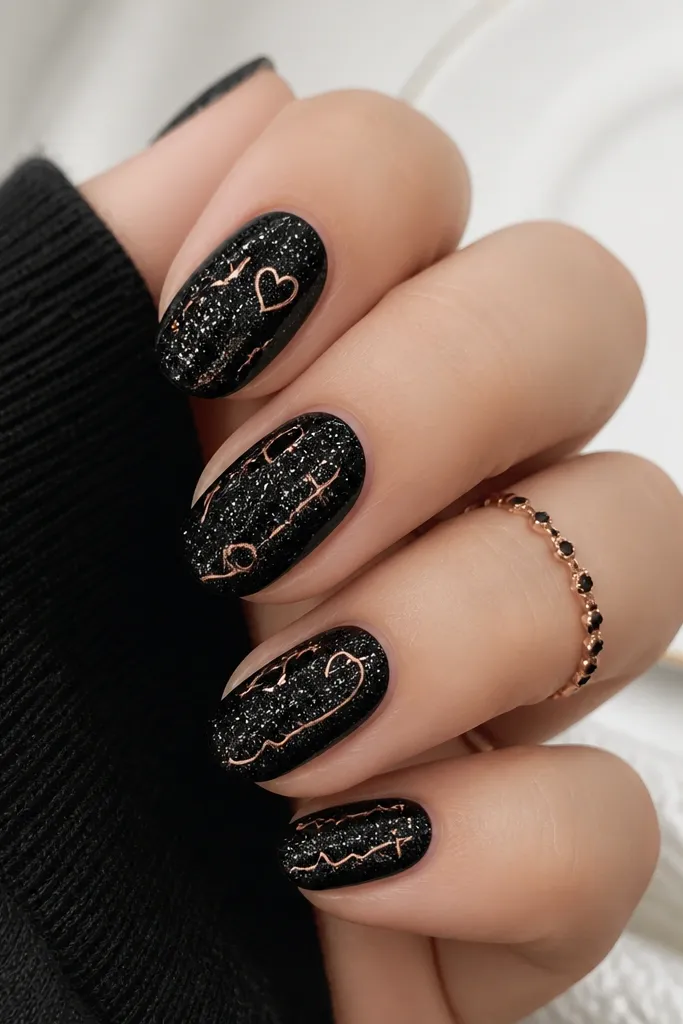
This is for the person who wants sparkle but hates big chunky glitter. The black glitter base stays dark and grounded, and the rose-gold outlines add detail without covering everything. I do this for concerts, parties, and nights out because it photographs better than plain glitter. It’s flattering on short to medium nails because the doodles can be spaced and small. Rose gold keeps the sparkle warm, so it doesn’t fight with warm makeup tones.
Paint two coats of a black glitter gel over the whole nail and cure. Using a fine liner brush, draw small rose-gold doodles — one heart, a slash line, or two dots — keeping them around the center or near the cuticle. Cure, then add a glossy top coat in one or two thin layers depending on your glitter texture. If the doodles feel raised, add a second top coat after curing the first.
Editor's notePick one doodle type and repeat it across the hand for a cohesive look.
Watch outDon’t overload doodles — five or six per nail looks chaotic fast.
17. Black and Rose-Gold Two-Tone V Tip
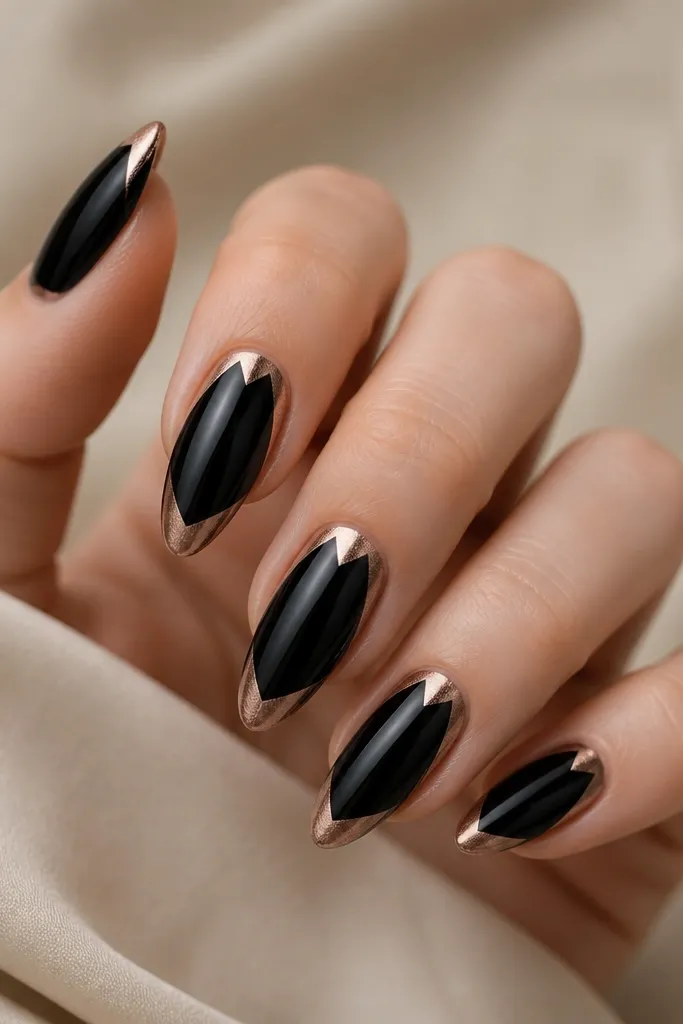
The V tip is dramatic without being busy. Rose gold in a V shape creates a lengthening effect because it funnels the eye toward the center. I like this when you want Black And Rose Gold Nails vs gold but your outfits are mostly black and you want a warm contrast that still looks sleek. It flatters almond and coffin shapes most, and it works on shorter nails if you keep the V small. Straight gold can look too bright in a V; rose gold looks more controlled and wearable.
Start with a black base and cure. Place two small striping tape pieces to form the V angles at the tip — press them flat so the lines stay crisp. Paint rose-gold gel between the tape pieces, cure, then remove tape. Clean the edges with a thin brush dipped in gel cleanser, cure again, then apply glossy top coat.
Editor's noteMark the center point with a tiny dot of rose gold first, then build the V outward from that anchor.
Watch outDon’t let the V go past the midline of the nail — it can shrink the nail visually.
18. Rose-Gold Lattice Lines on Matte Black
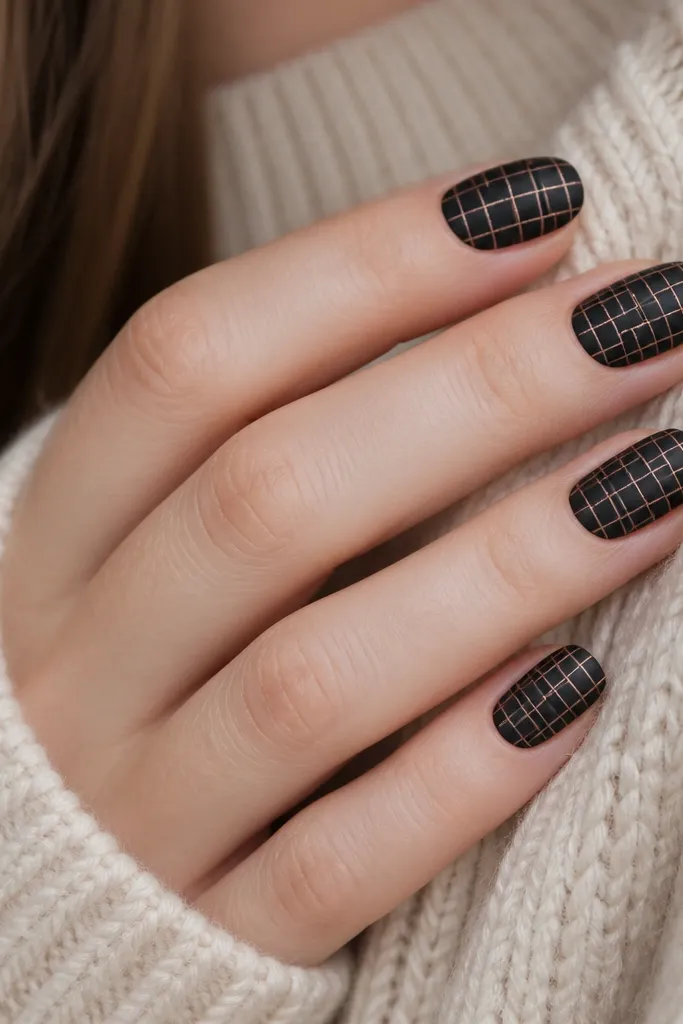
Lattice looks clean and structured, and it’s a great option if you want something more detailed than stripes without going full nail map. Matte black makes the rose-gold lines look sharper and more jewelry-like. I’ve worn this to work events where I needed a manicure that looks intentional under office lighting. It flatters medium almond and short coffin because the grid can stay centered. Rose gold reads warmer and less harsh than straight gold in this grid style.
Apply matte black gel in two coats and cure. Use striping tape to place vertical lines first, then add horizontal lines to form a grid — keep the squares small, about 1-2 mm. Paint rose-gold gel over the taped lines, cure, and remove the tape carefully. Finish with a matte top coat over the black and a glossy top coat only on the rose-gold lines if you want extra contrast.
Editor's noteDo one hand with a full lattice and keep the other hand as two accent nails if you want a calmer look.
Watch outDon’t make the grid too thick — thick lattice lines look like tape residue.
19. Black Rose-Gold Marble with Thin Gold-Look Stripe (Hybrid)
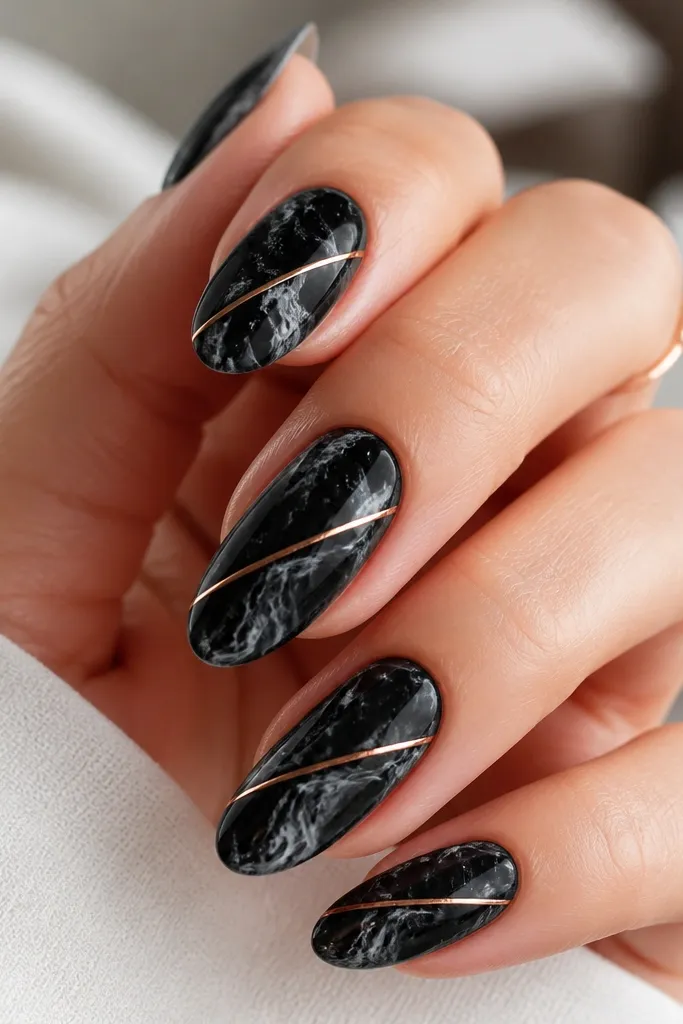
This is my “best of both” when someone says they want Black And Rose Gold Nails vs gold but can’t decide. The diagonal sash gives the eye a direction, and the marble keeps it soft. Rose gold on the diagonal looks more flattering than straight gold because it keeps a pink warmth that matches a lot of lip colors and warm blush tones. I do this for casual weddings and brunch dates where you want something pretty but not heavy. It flatters oval, almond, and even short nails because the diagonal line creates length.
Start with a black base and add marble veins using white and charcoal gel — keep the veins thin. Cure, then choose one diagonal path from lower side near the cuticle to upper side near the tip. Apply rose-gold gel along that path using a liner brush, cure, and tidy edges with a small brush. Seal with glossy top coat and add a second thin layer if the marble texture feels bumpy.
If you want it even more “gold jewelry,” use a rose-gold chrome top coat over just the diagonal stripe.
Don’t add rose gold on every vein — keep it to one clean element.
20. Black and Rose-Gold Dot Confetti on Nude Base
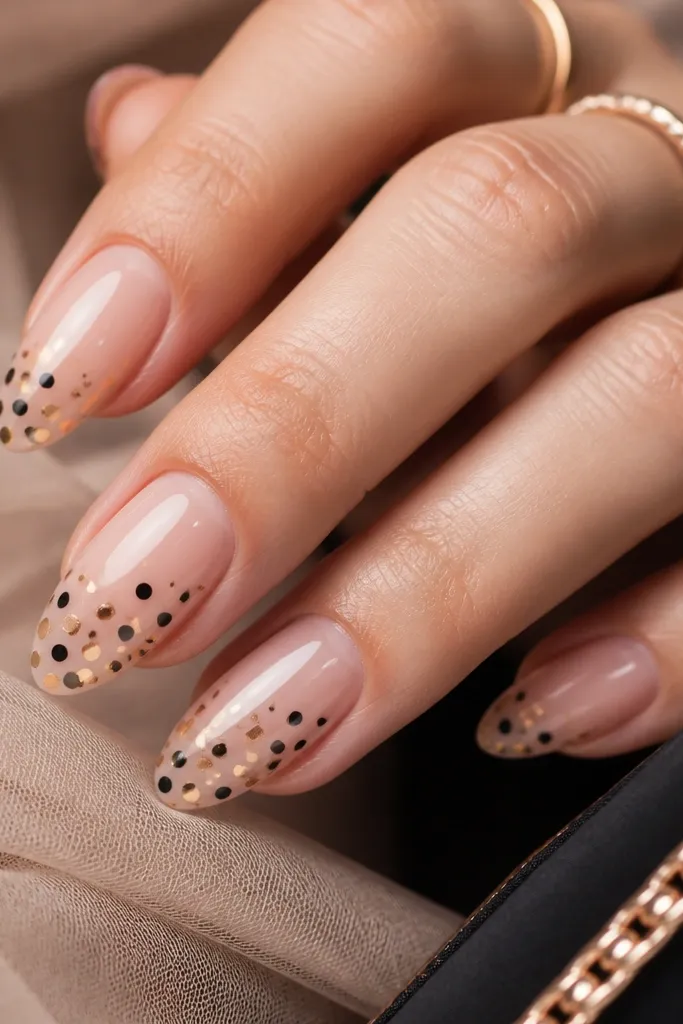
Confetti dots are fun but still look neat when you keep the dots tiny and consistent. Rose gold dots add warmth without changing the overall vibe too much, so it still reads like Black And Rose Gold Nails vs gold in a flattering way. I do this when the client wants black in the design but doesn’t want full black coverage. It looks great on short square and squoval nails because the dots sit nicely across a smaller canvas. On deeper skin tones, the rose-gold dots pop like jewelry even with minimal sparkle.
Start by painting a nude base gel and cure. Use a dotting tool to place tiny black dots across the nail — I keep them mostly around the center and near the sides. Add 2-3 rose-gold dots only, spacing them so they don’t cluster. Cure and seal with glossy top coat in one smooth layer to lock the dots down.
Editor's noteUse a fresh dotting tip each time you switch colors so the rose gold doesn’t get tinted by black gel.
Watch outDon’t use big dots — large confetti looks like a kid’s sticker set.



