
1. Classic White Chrome French with Mirror Smile
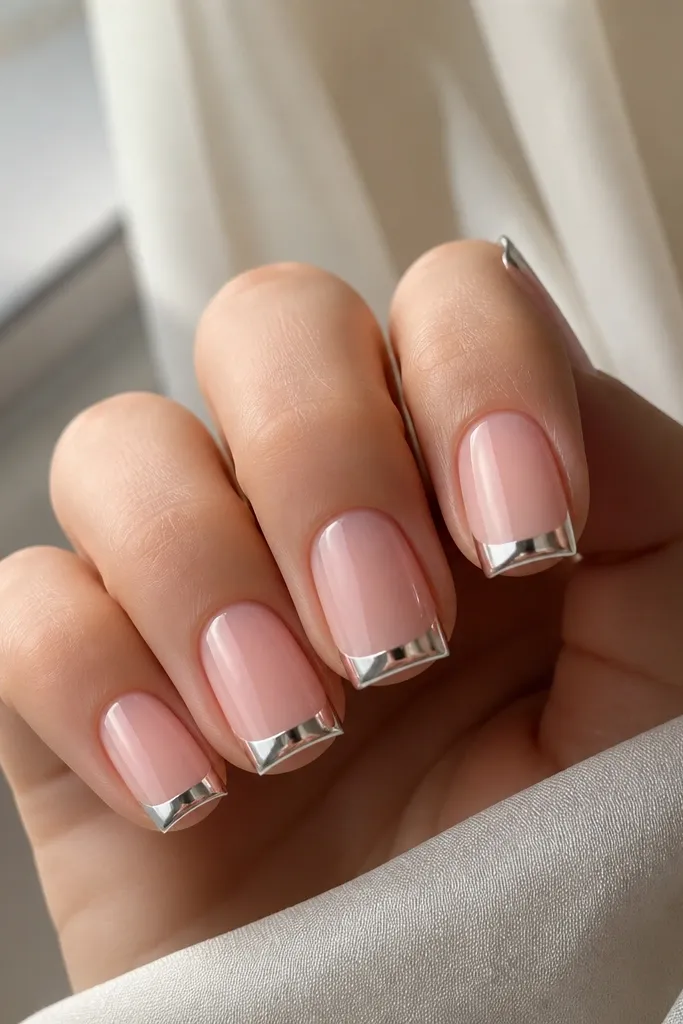
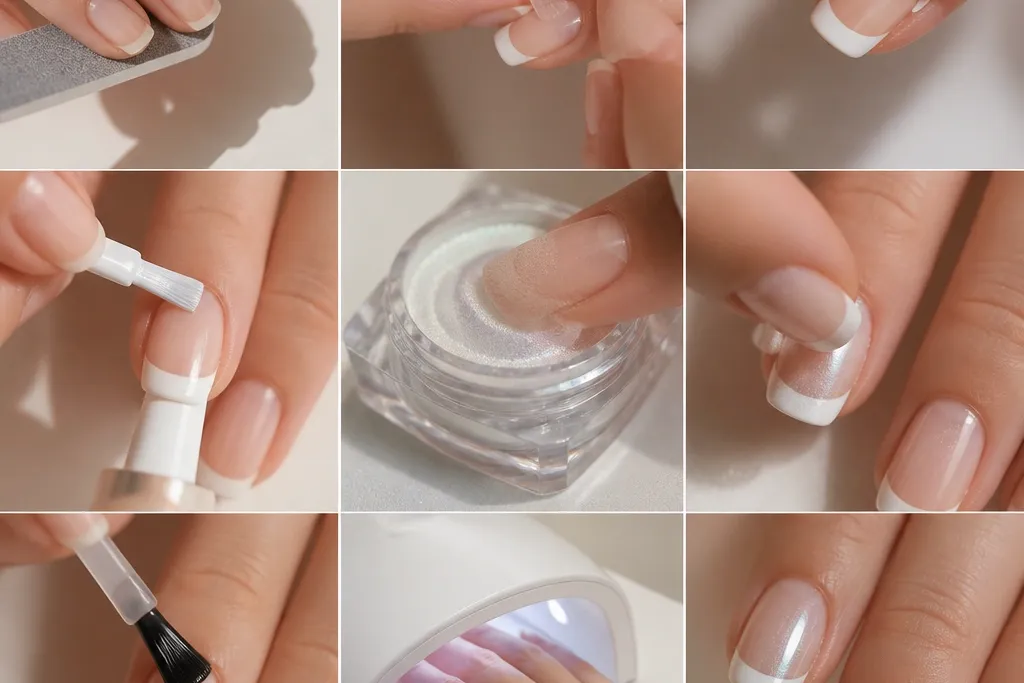
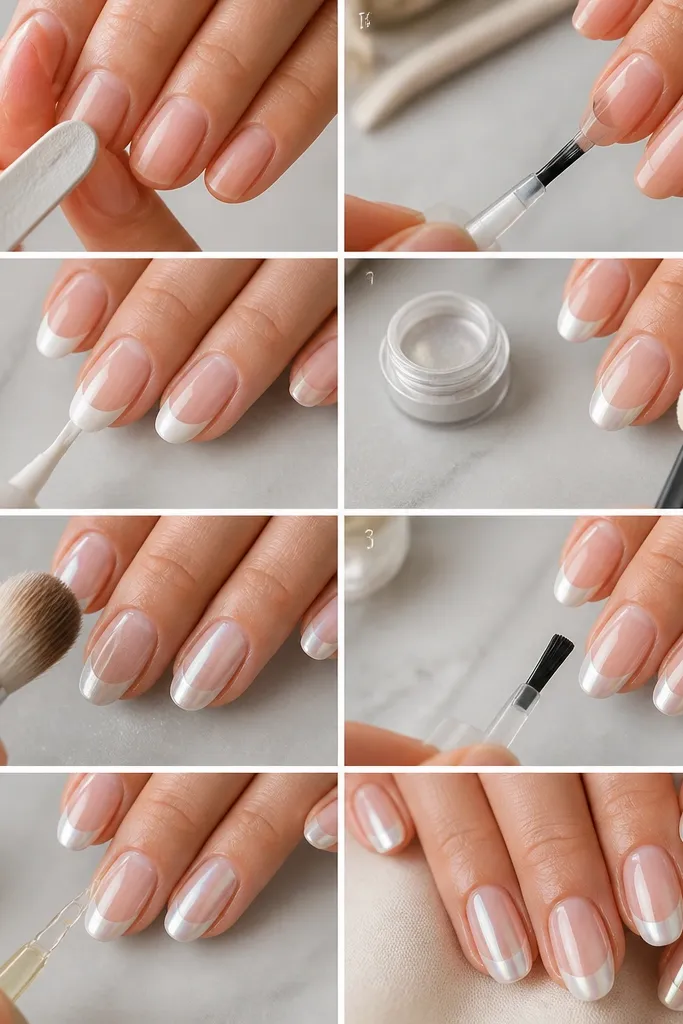
This is the version that makes people stop mid-scroll. The French line is a narrow, even band of opaque white, then the chrome powder goes on top so the smile looks like it’s made of polished metal. I like it on warm or neutral skin tones because the nude base stays believable and the white reads clean against it. If your nails have ridges, this works because the glossy chrome and top coat hide small texture while the square shape keeps the design sharp.
Start by filing your nails into a true square with a tiny bevel on the corners, then push cuticles back and remove shine with a 180-grit buffer. Apply a sheer nude base gel, cure, then paint a thin French band using a gel liner brush. Cure the white fully, then apply a tacky layer on the white only and dab chrome powder over it with a soft sponge applicator. Brush off loose chrome gently, then seal with two coats of glossy top coat, curing each coat. Finally, wipe the tacky residue and clean up the edges with a lint-free wipe and gel cleanser.
Keep your French line width to about 1/10 of the nail width — thin chrome looks expensive, thick chrome looks foggy.
Don’t put chrome over a matte or under-cured layer; it turns gritty and lifts fast.
2. Black French Chrome with Clear Nude Base
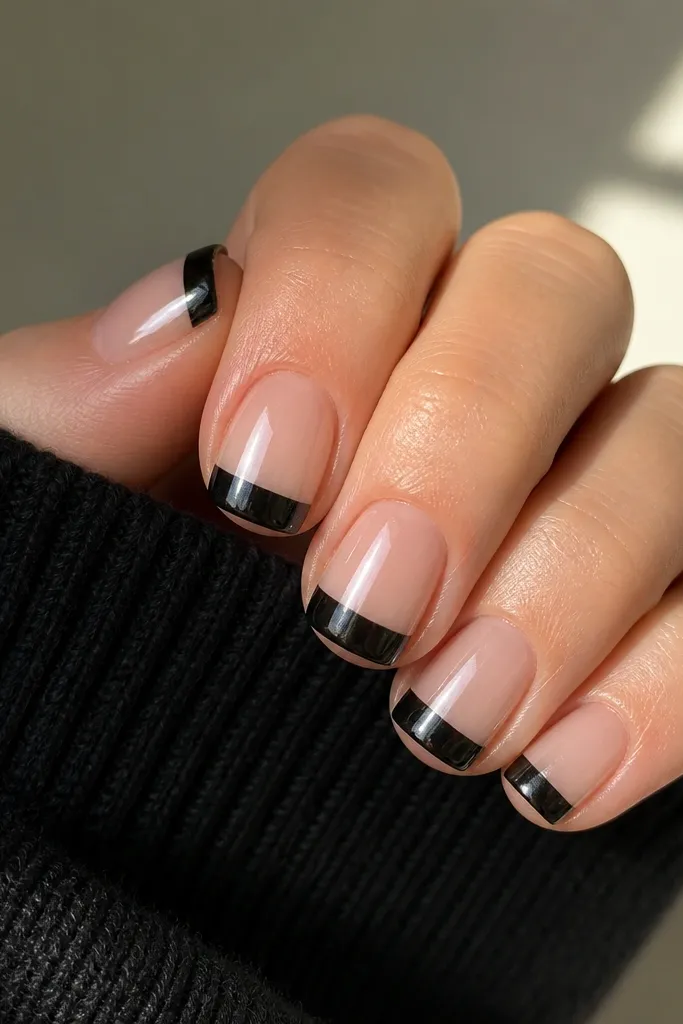
Black French with chrome looks sharp because black gives the reflections a darker frame. I do this when I want the manicure to look bold without needing neon polish. The clear nude base keeps the focus on the tip, and the square shape makes the black line look like a design element instead of nail art. This suits cool undertones and people who like contrast, especially for night events or a monochrome outfit.
Start with a clear or sheer nude base gel, cure, and file the tip edge so it’s flat enough for a straight line. Paint the French band with a dense black gel polish, using short strokes from corner to corner, then cure. Add a thin tacky layer on the black only, then press chrome powder onto the black with a sponge and buff lightly with a dry brush. Seal with a glossy top coat — one thin coat to lock chrome, then a second slightly thicker coat for shine. Cure, wipe, and use a small brush dipped in cleanser to remove any chrome specks from the sidewalls.
Use a darker chrome shade (smoky/graphite) so the black stays deep instead of turning mirror-silver.
Skip thin black polish; streaky black under chrome makes the tip look dirty.
3. Rose Nude French with Champagne Chrome Edge
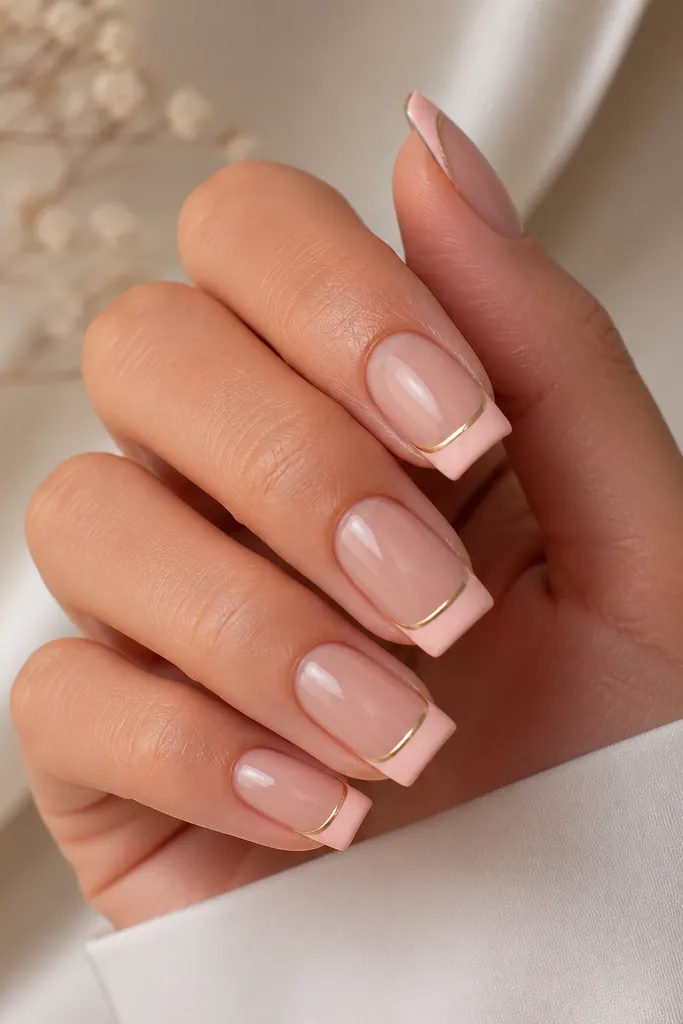
This one is pretty in a way that still photographs like metal. The pale blush French stays soft, and the champagne chrome only on the edge gives a highlight effect rather than a full mirror slab. I wear it when I want my nails to look flattering with everyday outfits, from jeans to a pink dress. It works especially well if your skin has a golden or peach undertone because the champagne tone blends instead of clashing.
Apply rose nude base gel and cure. Paint a pale blush French band, then cure again — keep it slightly thinner than your usual white band so the chrome rim stands out. Add a tacky layer only along the top edge of the French, then dab champagne chrome powder just on that narrow strip. Press, brush off, and check the edge in good light before sealing. Seal with a glossy top coat over the whole nail, but try not to flood the rim so it stays crisp.
After chrome, hold the nail under a lamp and check the rim — if it looks uneven, add a second tiny dab only where needed.
Don’t chrome the entire French band if you want that soft rim look; full coverage turns it into a heavy block.
4. Icy White French with Silver Chrome Fade
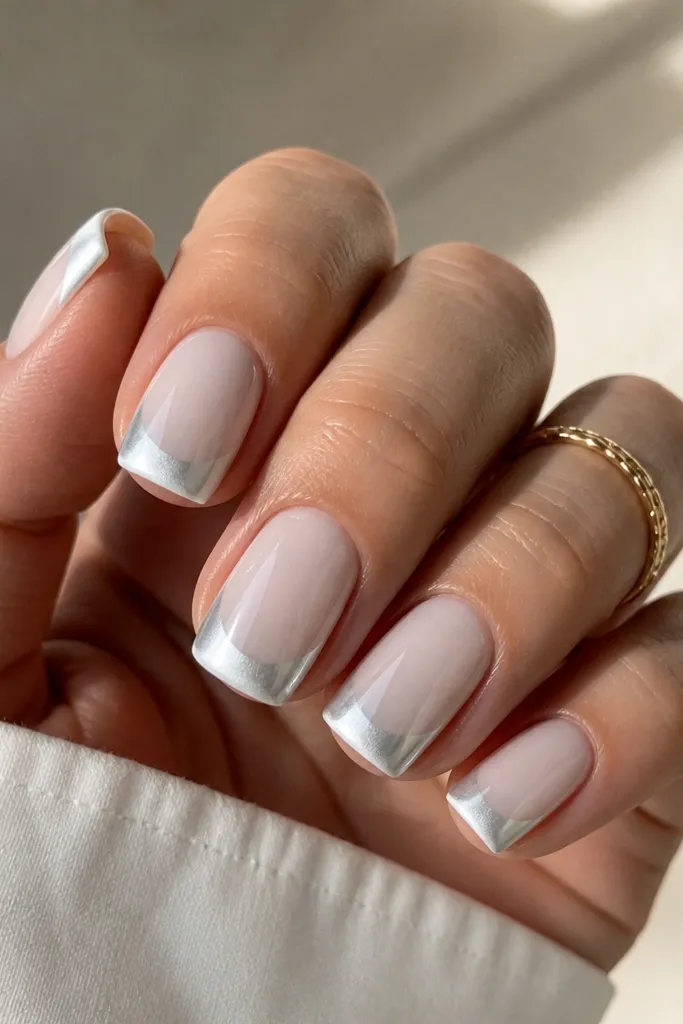
Start with a milky white or sheer milky base and cure. Paint an opaque icy white French band, cure it, and apply tacky layer on the French. Use a sponge applicator to press silver chrome in the center first, then lightly tap outward so the edges get less chrome coverage. Brush off loose powder carefully, then seal with two glossy top coats. Cure fully and wipe residue — the gradient should look smooth, not speckled.
This design looks like winter light on nails. The icy white French gives a cool base, and the silver chrome fade adds movement so it doesn’t look like a flat sticker. I like it on short square nails because the gradient makes the tips look longer. If you have fair skin or cool undertones, the icy white reads extra clean.
Watch outDon’t drag chrome with a wet brush; it smears and kills the fade.
Editor's noteUse a smaller sponge than you think — big sponges spread chrome too fast and the fade turns blotchy.
5. French Micro-Line Chrome Over Nude Pink
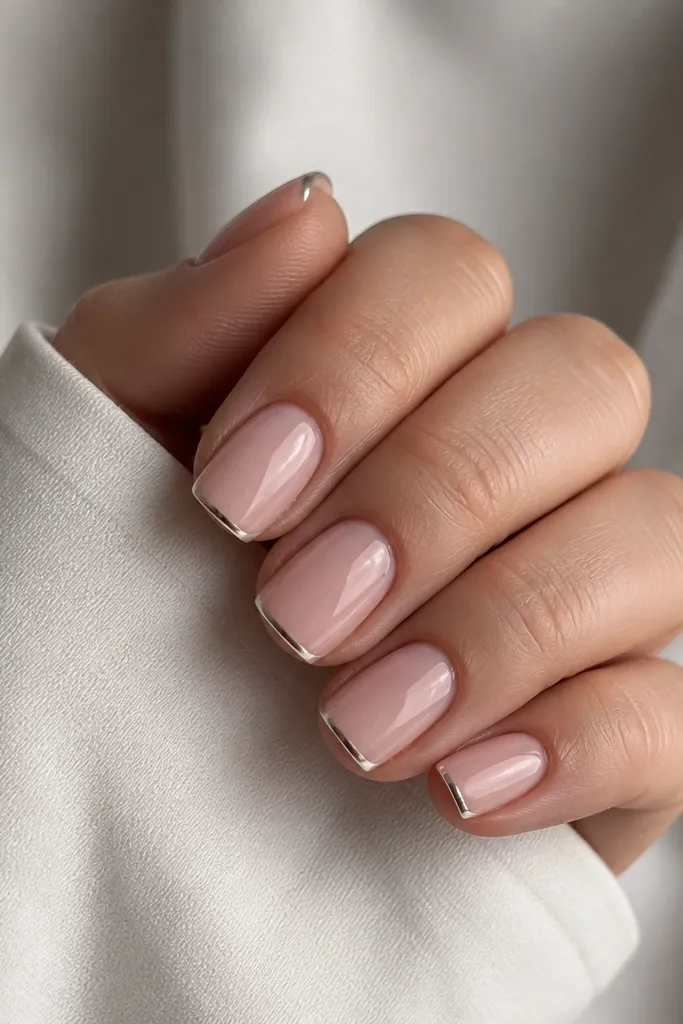
Prep and shape your nails square, then apply nude pink base and cure. Thinly outline the smile line with white gel using a fine liner brush, then cure. Apply tacky layer only along that white micro-line, then press chrome powder over it with a tiny sponge or a folded piece of makeup sponge. Brush off excess and inspect from the side — the line should catch light only where the chrome is. Seal with one careful top coat, then a second top coat if needed for full smoothness.
Micro French is the one I reach for when I want chrome but don’t want it to look loud. The trick is that the French is only a line — think hair-thin smile, not a band. The nude pink base keeps it wearable, and the chrome line makes the tips look extra polished. This is flattering on hands with shorter nails because it visually lengthens without covering too much of the nail.
Watch outDon’t try to chrome over the whole tip; it ruins the micro effect and makes it look bulky.
Editor's noteIf your liner brush is too thick, wipe it on a lint-free wipe before painting so it lays down a thinner line.
6. Matte Nude Base with Glossy Chrome French
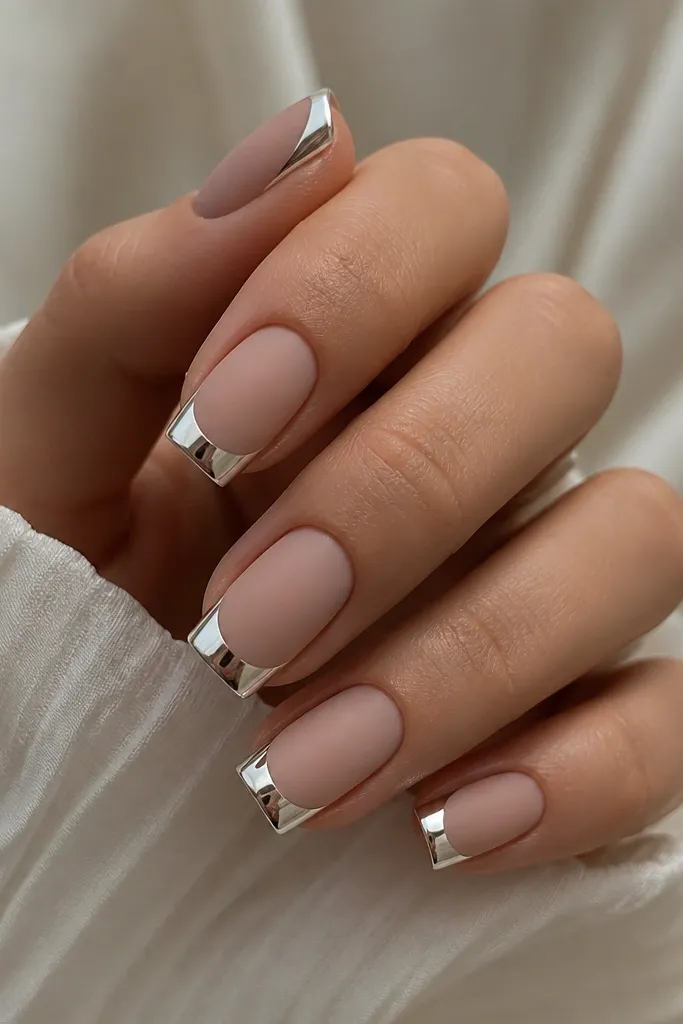
The contrast is the whole point. I like matte on the base because it makes the chrome tip pop harder and look cleaner. This style looks great on hands that show oiliness on the nail bed because matte hides it, and the chrome still looks fresh. Warm undertones love the nude matte, and the glossy chrome tip balances the softness.
Apply nude gel base and cure, then apply a matte top coat over the entire nail except the French area you plan to chrome. Paint your French tip in glossy white gel, cure, then add tacky layer on the white only. Dab chrome powder onto the white and press lightly so it turns mirror smooth. Seal the chrome with glossy top coat, but keep matte top coat away from the chrome so it stays reflective. Cure, wipe, and clean the edges with a small brush.
Use matte top coat only on the base — if matte touches chrome, the reflections dull.
Don’t skip sealing the chrome; unsealed chrome chips at the tip edge.
7. Pearl White French with Iridescent Chrome Overlay
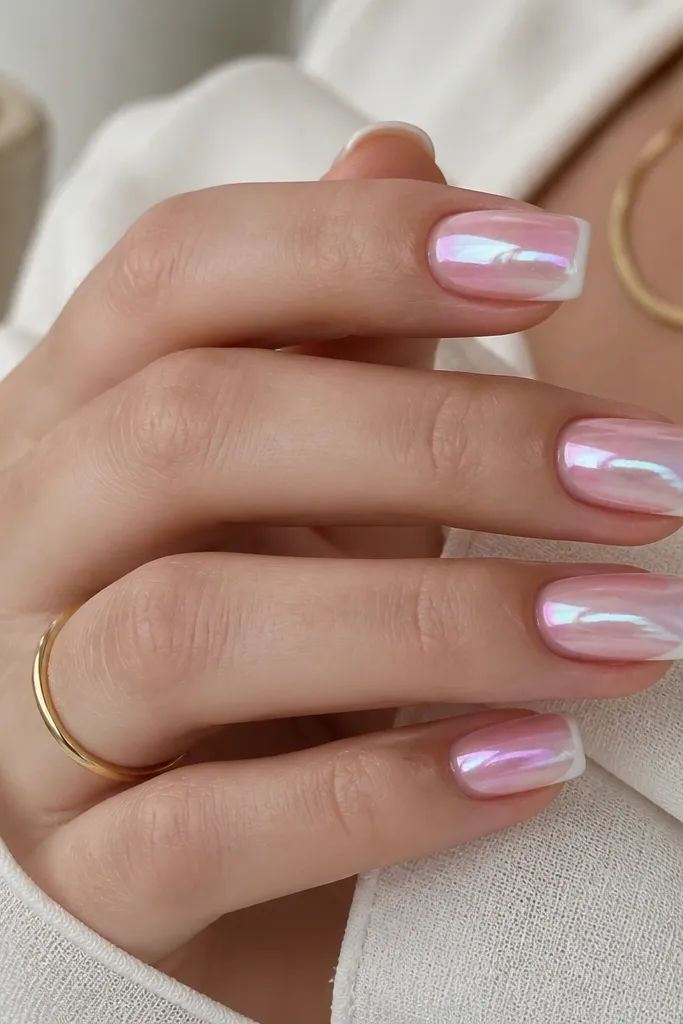
Prep nails and apply a sheer pink base gel, cure. Paint a pearl white French band and cure until it’s fully set. Add tacky layer over the French only, then apply iridescent chrome powder with a sponge — press firmly, then lightly buff with a dry brush. You should see color shift when you rotate your hand under light. Seal with glossy top coat in two layers, curing each coat. Clean up sides with cleanser and a lint-free wipe so the iridescent specks don’t stick to skin.
Pearl white French looks expensive because it’s not flat white — it has a subtle glow that turns chrome into a color-shifting highlight. I do this when I want chrome to feel more romantic than harsh. The iridescent overlay keeps it interesting without adding extra lines or shapes. It’s flattering for special events and also works for everyday because the base stays sheer and the only color punch is at the tip.
Watch outDon’t use a translucent white for the French; you need opacity so the iridescent chrome reads clean.
Editor's notePress chrome longer than you think on pearl white — it helps the glow show through the mirror.
8. Lavender French with Silver Chrome Core
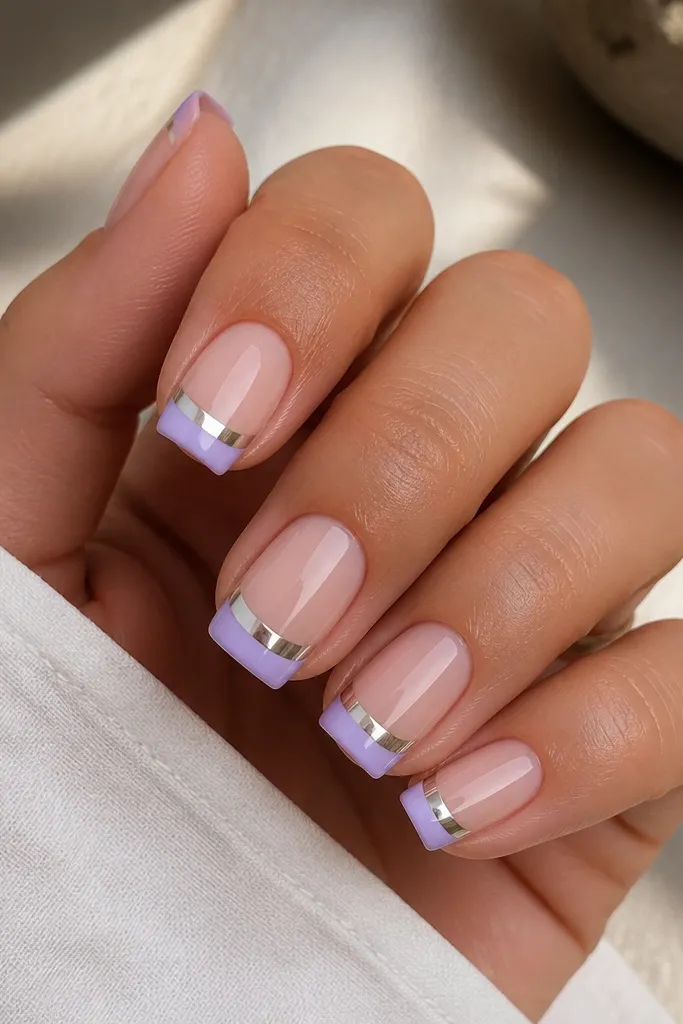
Lavender gives a softer vibe than white or black, and the silver core makes it look like a spotlight. I like this design because it feels playful but still crisp and photo-ready. It works on medium and short square nails because the chrome center visually lifts attention to the middle. If you wear cool-toned makeup or jewel colors, this matches without looking forced.
Start with a sheer nude base gel and cure. Paint lavender French band, cure, then apply tacky layer only in the center of the French. Press silver chrome powder onto the center area and keep the outer edges un-chromed so lavender stays visible. Brush off excess, then seal with glossy top coat over the entire nail. Cure well, then check the side profile — the chrome should sit flush, not raised. If it feels bumpy, buff lightly with a very fine file before final top coat.
Mask the outer edge with a tiny strip of tape while you chrome the center, then remove it right away.
Don’t flood tacky gel across the whole French; it makes the whole band chrome and loses the contrast.
9. Chrome French with Nude Negative Space Window
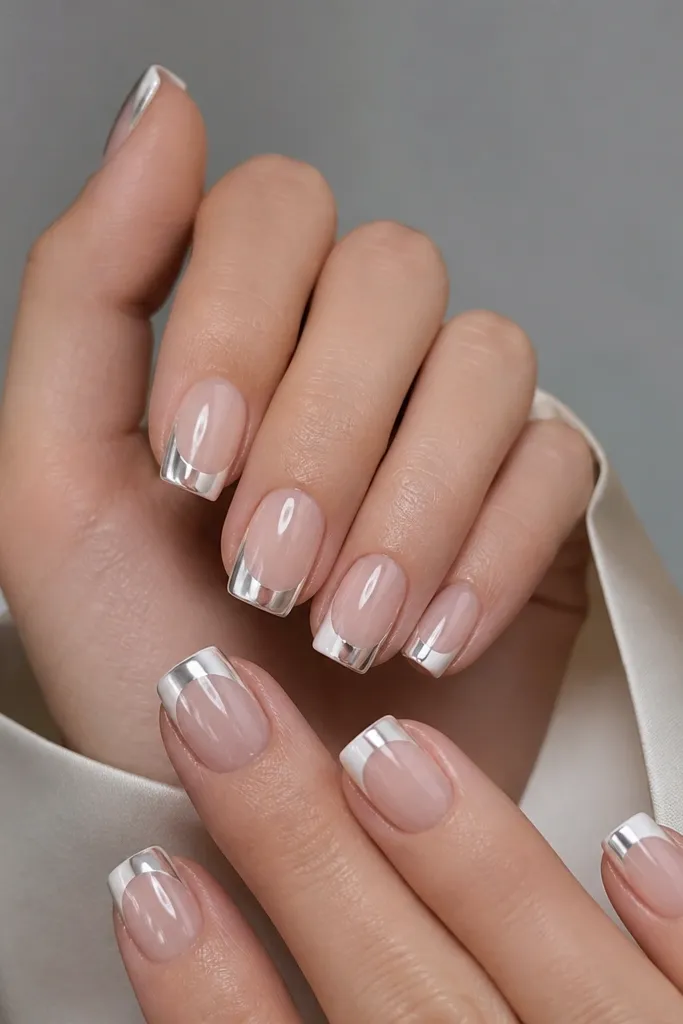
Apply sheer nude base and cure. Paint a thin white French band but leave a small gap in the center where you want negative space. Cure the white, then apply tacky layer only on the white portions on the left and right. Press chrome powder onto those corner sections, then brush off. Seal with glossy top coat, making sure the top coat flows over the chrome without covering the nude gap. Cure, wipe, and use a soft brush to remove any chrome dust from the gap edges.
This is the one that looks custom because it uses negative space. You get the chrome drama on the corners while the center stays nude, which makes your nails look more structured and elongates the tip. I like it when my hands look dry — the nude window hides small skin-tone differences and keeps the design clean. It’s especially flattering on short square nails because the center gap draws the eye upward.
Watch outDon’t make the gap too wide; it turns into a split instead of a window.
Editor's noteUse a dotting tool to mark the center gap size before painting so both sides match.
10. Reverse Chrome French on Clear Base
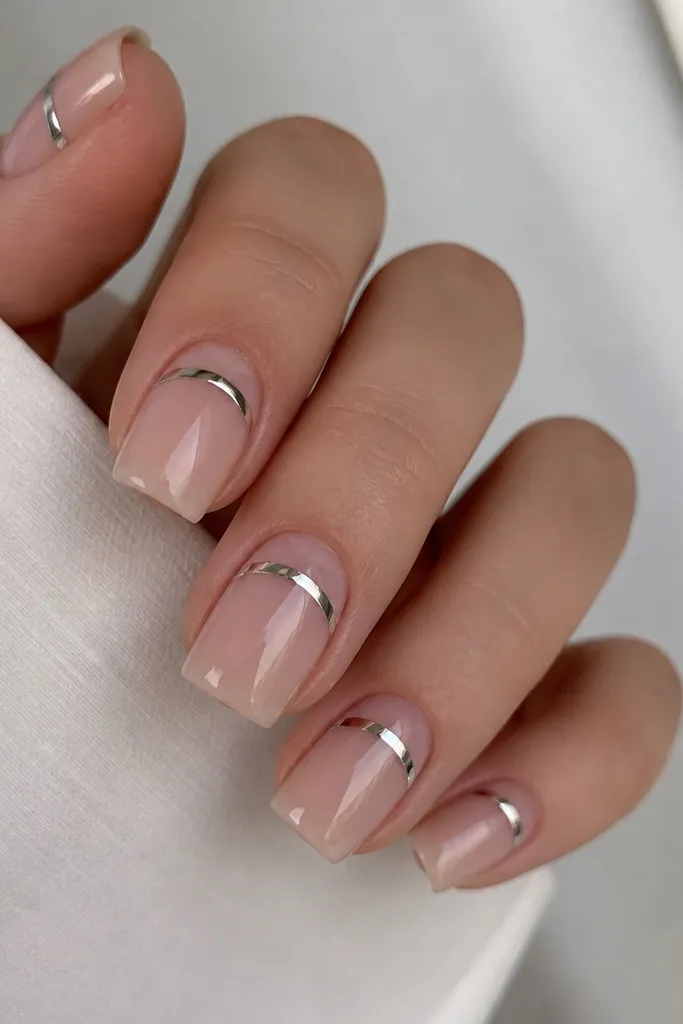
Prep nails and apply a clear base gel, cure. Map the reverse French curve with a liner brush and white gel, cure it. Add tacky layer on the white curve only, then press mirror chrome powder over that curve. Brush off and check the line thickness from above — keep it thin so it reads like a design line. Seal with glossy top coat in two coats, curing each. Clean sides and under the free edge so chrome doesn’t lift.
Reverse French looks modern because it breaks the usual tip placement. You get chrome shine without covering the entire tip, so it feels lighter on the hand. I do this when I want chrome but my nails are short and I don’t want to overpaint the free edge. Clear base makes it look extra clean, and the square shape keeps the line straight.
Watch outDon’t put chrome on the cuticle area; it chips there first.
Editor's noteKeep the reverse curve slightly higher than you think; it makes the nails look longer once the hand relaxes.
11. Rainbow Chrome French with Color-Blocked Tips
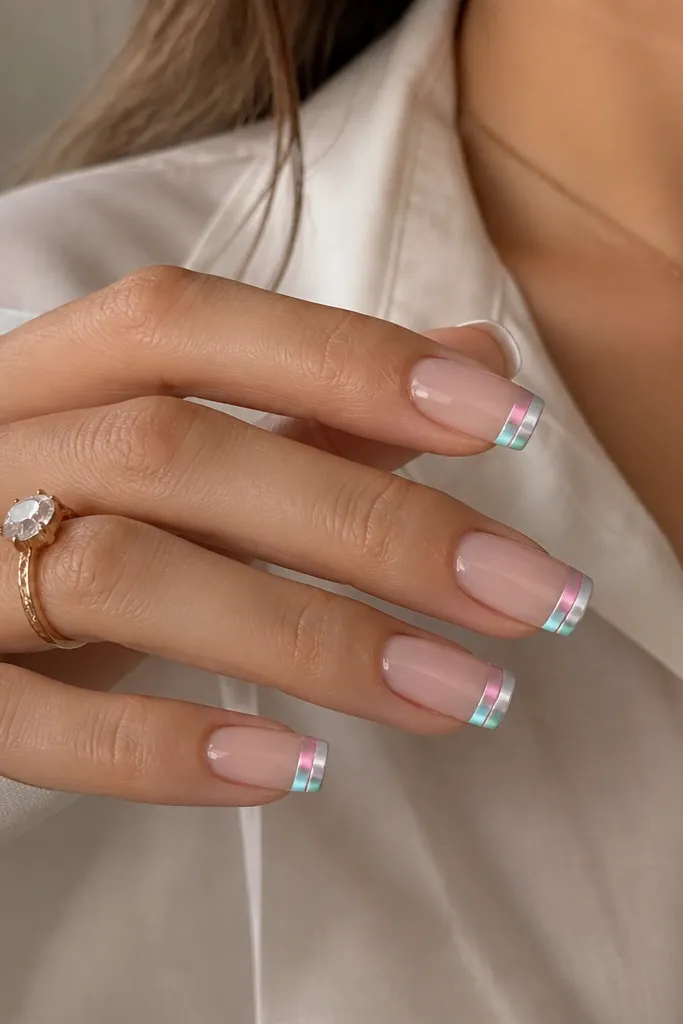
Apply nude base gel and cure. Paint the French tip in three sections: start with a thin white band at the very top edge, then a pink block in the middle, then a mint block toward the bottom of the French. Cure each section by painting and curing in order so colors stay crisp. Apply tacky layer only on the French blocks, then press chrome powder to cover each section — you’ll get multicolor shifts depending on the light. Brush off and seal with two glossy top coats. After curing, check the corners for sharpness and touch up any uneven edges with a tiny amount of white gel.
This design is for when you want chrome but also want color. Color-blocked French keeps it organized, so the chrome still looks intentional instead of messy. I’ve worn this to festivals and got compliments from strangers who asked if it was press-ons. It flatters medium skin tones because the nude base stays neutral while the chrome picks up color from the blocks. It’s also great if you like fun nails but hate complicated hand-painted art.
Watch outDon’t mix colors before curing; blurred blocks make the chrome look like dust.
Editor's noteUse gel polish with high opacity for each color; thin rainbow layers show through as muddy under chrome.
12. Ombre Nude-to-White French with Silver Chrome Top
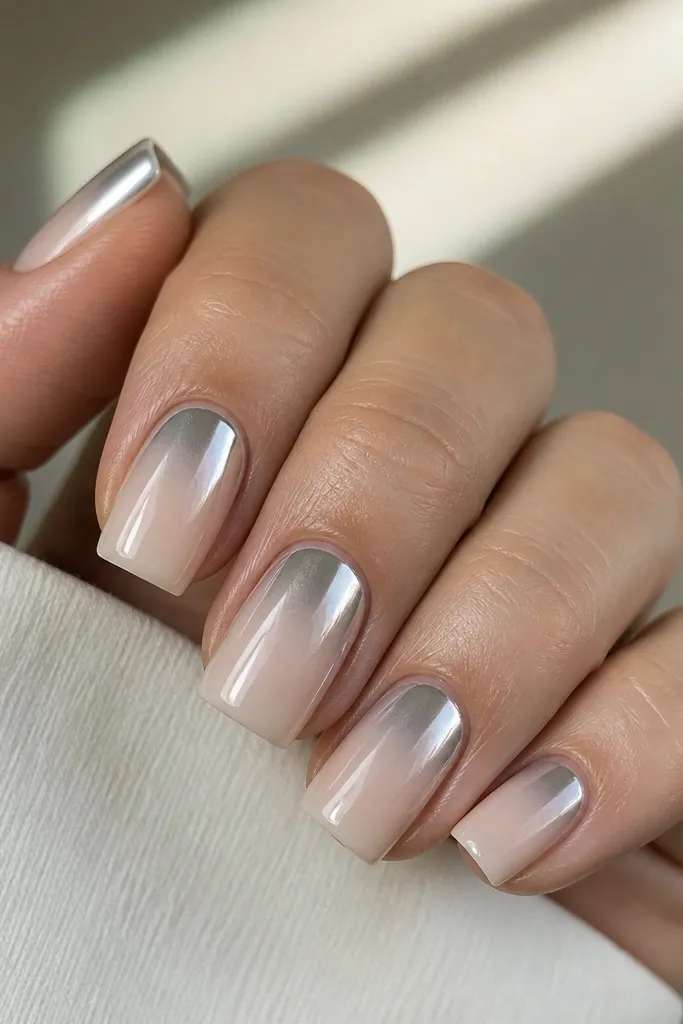
Start with a nude base gel. Make an ombre French by blending a white gel into the nude near the tip using a small makeup sponge — keep the blend within the free edge area. Cure, then apply tacky layer only on the top section of the white (the highest edge of the ombre). Press silver chrome powder onto that top strip, then brush off. Seal with glossy top coat over the whole nail, but keep chrome locked with a careful top coat so it doesn’t flood down into the fade.
This one gives you the chrome look without a hard line. The ombre fade between nude and white makes the tip feel softer, and chrome only on the top part gives a highlight you can see from far away. It works on all skin tones because the ombre starts nude and only turns white at the end. If your nail plate is wide, the gradient helps it look more tapered.
Watch outDon’t chrome the entire ombre; it flattens the gradient.
Editor's noteBlend with a dry sponge first — wet sponge makes gel spread and turns the ombre muddy.
13. Red French Chrome with Deep Ruby Reflect
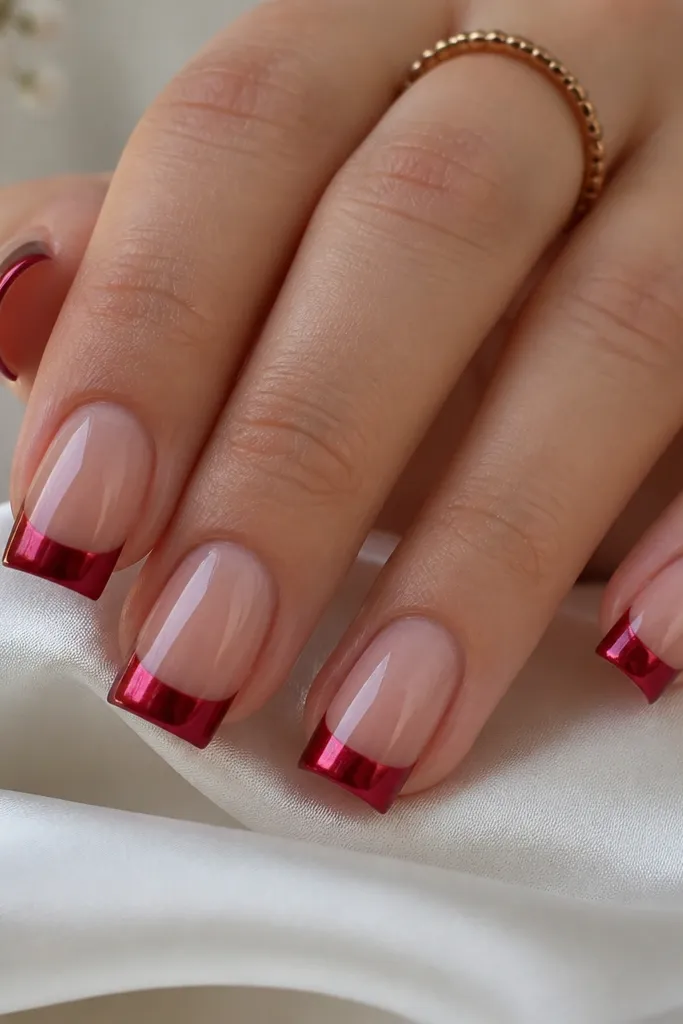
Red chrome French looks like a manicure that came straight from a holiday party. The deep red underlayer keeps reflections warm, so the chrome reads as ruby instead of cold silver. I love it for hands that need a color pop without neon brightness. It looks great on olive and medium skin tones because the red warms everything up, and the square shape makes the red line look clean and graphic.
Prep, then apply sheer nude base gel and cure. Paint a dense deep red French band using a gel brush, cure fully. Add tacky layer on the red only, then press red-tinted chrome powder over the band. Buff gently with a dry brush so it turns mirror smooth. Seal with glossy top coat in two layers, curing each. Clean around the sidewalls with a small brush and cleanser so red chrome dust doesn’t smear onto skin.
Use a red chrome shade that looks darker in the jar; it reads richer once applied over deep red gel.
Don’t use a watery red polish; it makes the French look translucent under chrome.
14. Matte Chrome French with Soft Satin Finish
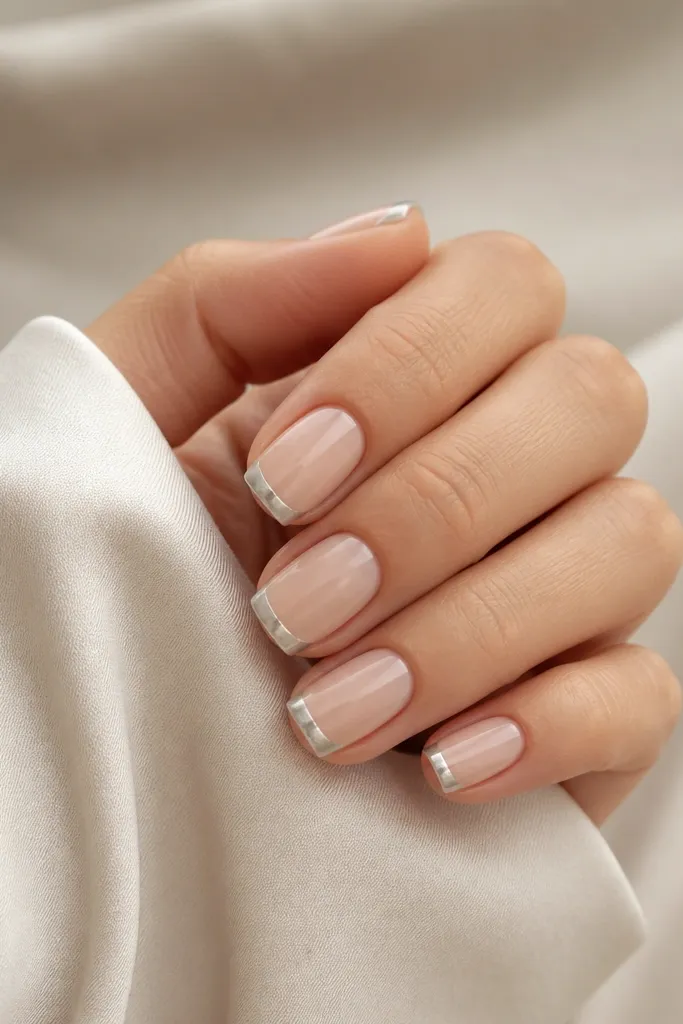
Apply nude base gel and cure. Paint a thin white French band and cure, then add tacky layer on the white only. Press chrome powder onto the white and brush off excess. Seal with a matte top coat over the chrome area after curing the chrome lock coat with a clear glossy top coat. If your matte top coat dulls too much, add a second thin matte coat just on the French to keep it even. Cure fully and wipe residue.
Satin chrome French is for people who love chrome but hate the mirror glare. You still get the metallic look, just toned down, so it reads more modern and less flashy in daylight. This is flattering on hands with dry cuticles because the satin finish hides tiny imperfections better than full mirror. It also looks clean for work settings where glossy mirror might feel too loud.
Watch outDon’t matte the whole nail; it makes the design look flat instead of intentional.
Editor's noteDo one test nail first — matte top coats vary and can shift chrome color slightly.
15. Glitter White French with Micro Chrome Sparkle
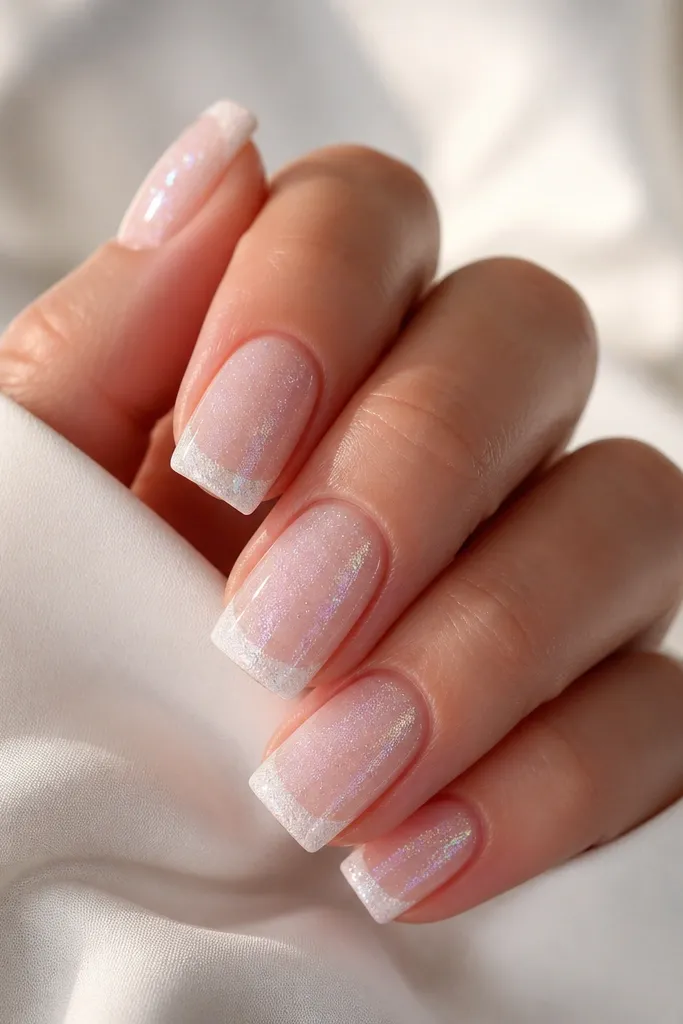
Start with nude base gel and cure. Paint a glitter white French band, keeping it thin and crisp with a liner brush. Cure, then apply tacky layer on the French only. Use a very light hand to press chrome powder over the glitter — you want sparkle, not a solid mirror block. Brush off excess carefully, then seal with glossy top coat in two layers. Cure well and clean the sidewalls so glitter doesn’t catch on fabric.
This is chrome French that looks dimensional, not just mirror. Glitter white under chrome gives you tiny sparkle points, and the chrome turns them into light-catching highlights. I like this when I want the manicure to look festive without switching to full glitter nails. It flatters most skin tones because the base stays nude and the glitter is in the tip area only. It also looks great on short square nails because the sparkle makes the tip feel fuller.
Watch outDon’t skip sealing; glitter + chrome snags easily at the free edge.
Editor's noteIf chrome looks too heavy, use less pressure with the sponge and do a second light dusting instead.



