
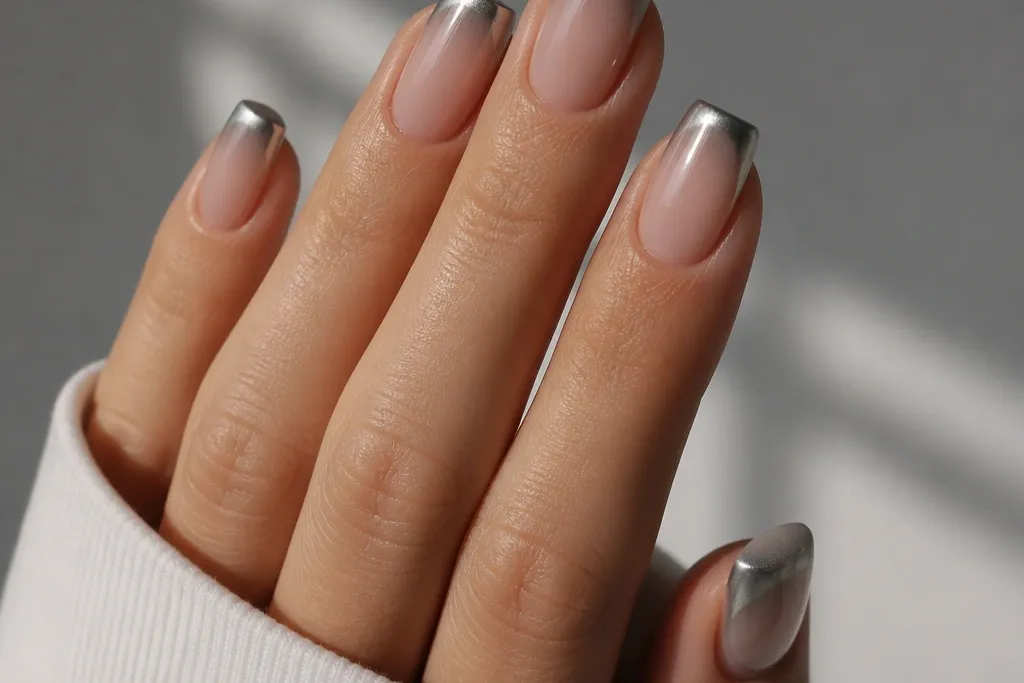
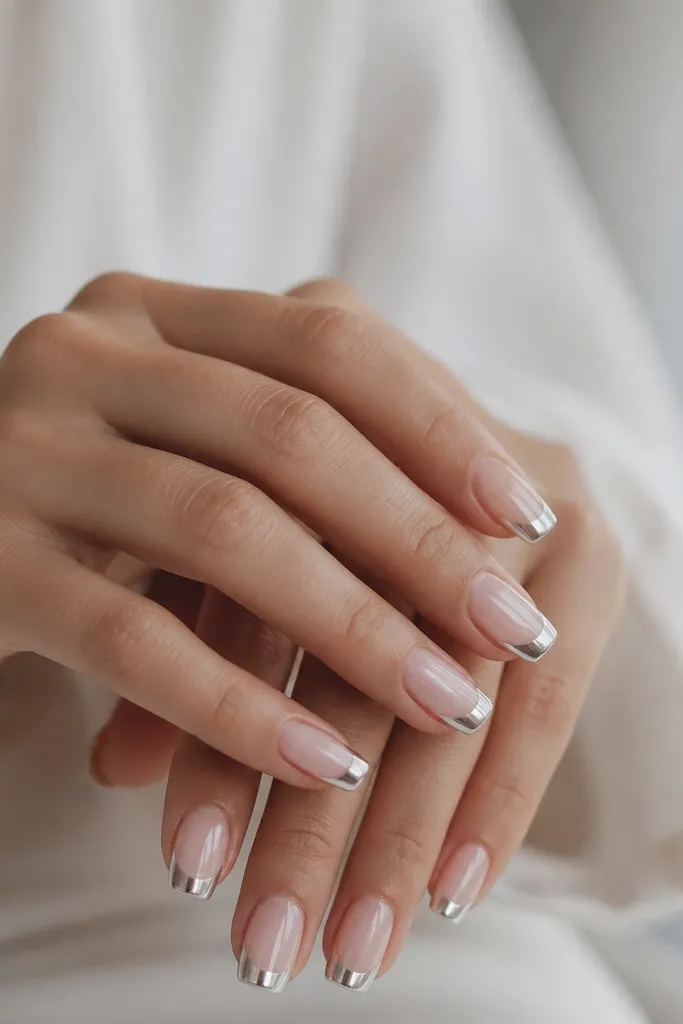
1. Pearl Nude to Silver Chrome Micro Ombre French
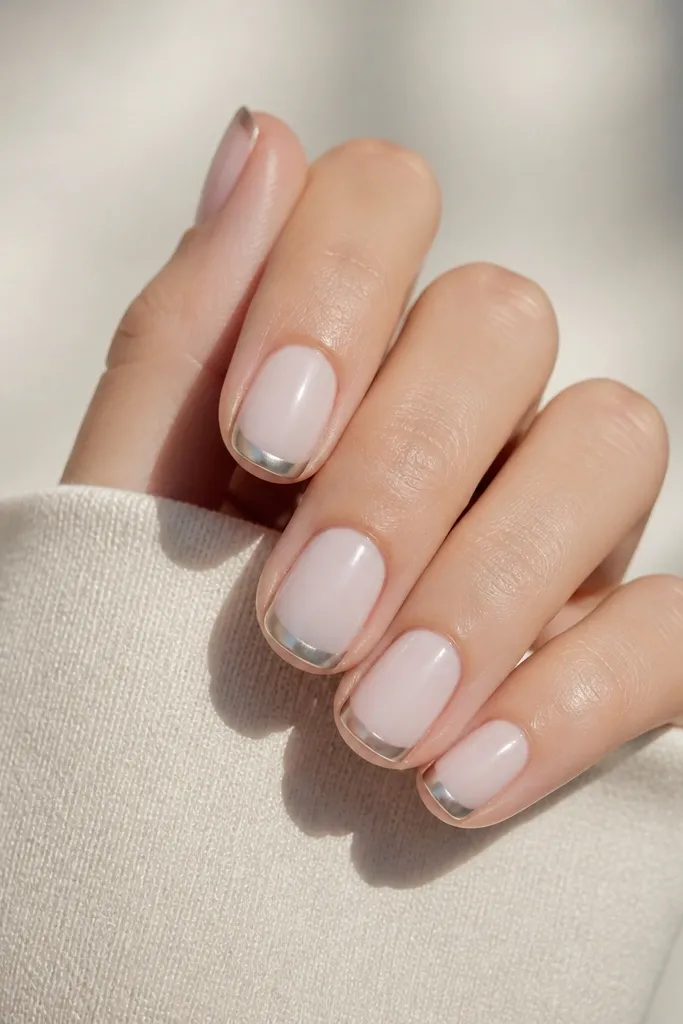
This look is the one I reach for when someone wants “clean but special.” The base is a pearl nude gel that isn’t fully opaque — it has a soft milky translucence. The chrome is silver, applied as a micro French band about 1.5 to 2 mm wide at the very tip, then feathered down so the reflection turns into a misty shimmer. It flatters light and medium skin tones because the nude stays warm and the silver doesn’t fight your undertone. For everyday wear and office days, it reads polished even if you keep jewelry minimal.
Start by prepping and shaping to squoval, then apply a rubber base and cure. Paint a pearl nude in 2 thin coats, keeping the color slightly sheer at the sidewalls so it looks soft, not thick. Apply sticky gel only across the top 1.5 to 2 mm of the nail, then tap silver chrome powder onto that tack — press lightly, don’t drag. Use a soft brush to blend the chrome downward in a few quick, gentle strokes, then clean the edges with a lint-free wipe and isopropyl alcohol. Finish with a non-wipe top coat if your system allows, or wipe carefully if your chrome setup needs it.
Do the chrome blending with a dry brush, not a wet brush — water makes the gradient go blotchy fast.
Avoid a thick French line; if the chrome zone is too wide on short nails, it looks like a sticker.
2. Rosy Nude Fade with Rose-Gold Chrome French Curve
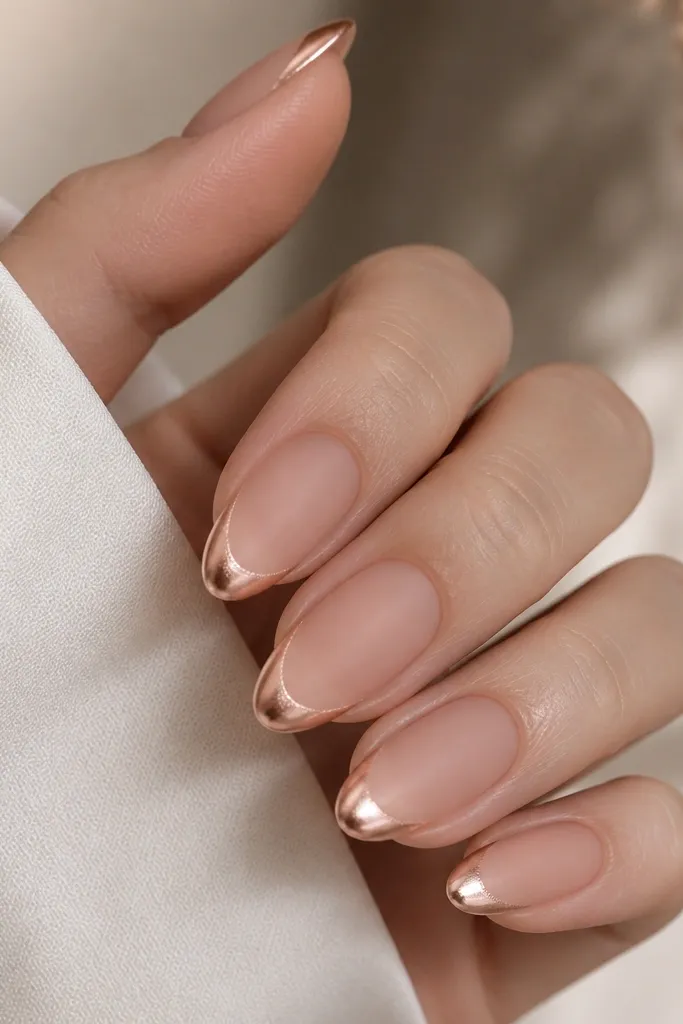
Rose-gold chrome on a rosy nude base gives you that “fresh manicure” feeling without going full glitter. The nude here is pink-leaning, not beige, so the chrome looks warm against skin and matches blush tones. I like the matte nude finish under the chrome because it makes the fade look like it’s glowing from inside rather than sitting on top. This one flatters cool undertones too because the rosy nude bridges the temperature — the chrome stays warm, but the base keeps it balanced. It’s perfect for date nights, weddings, and spring events.
Apply a matte rosy nude base in 2 coats, then cure fully. Add a thin strip of tacky gel from the tip edge up to 2.5 mm, following the natural smile line curve. Tap rose-gold chrome powder onto the tack and press with a folded makeup sponge — one tap per nail, then stop. Feather the gradient downward using a dry fluffy brush, focusing on the center first so the sides don’t get heavier. Seal with a matte-to-gloss top strategy: gloss top over the chrome fade only, matte top on the nude area.
If your rose-gold chrome looks too orange, switch to a cooler rose-gold powder with more silver in the mix.
Don’t put glossy top over the entire nail; it kills the contrast that makes this look modern.
3. Milky White Base with Chrome French Ombre on Almond
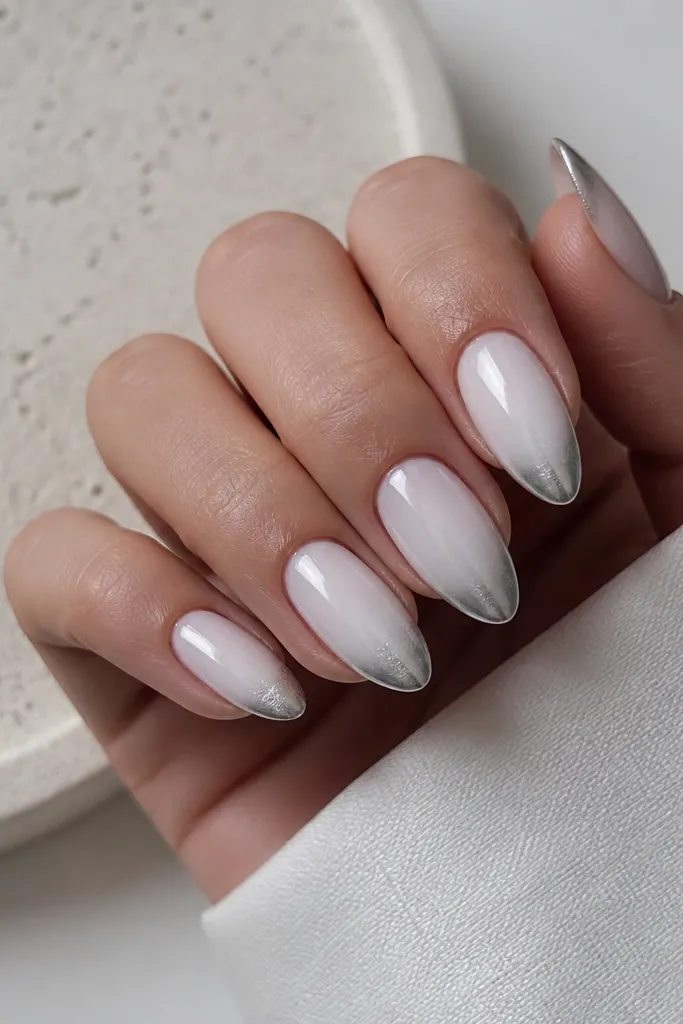
Shape to almond and prep thoroughly, then apply a rubber base. Paint milky white in 2 to 3 thin layers until it’s evenly opaque, curing between coats. Apply sticky gel only at the top 2 to 3 mm, keeping the sides slightly lower so the fade looks like it wraps the nail. Tap silver chrome powder on, then immediately use a clean, dry brush to sweep down from the center to the sides to build the ombre. Seal with a glossy top coat, and do not wipe the chrome area aggressively.
Milky white under chrome looks crisp and clean, like a modern take on a gel manicure that’s always camera-ready. Because the base is opaque and bright, the chrome fade reads smooth and intentional instead of looking like a patchy overlay. The chrome is silver and mirror-like at the tip, then it turns into a diluted sheen as it drops toward the mid-tip. This flatters deeper skin tones especially well because the milky white acts like a bright frame. It also looks sharp for formal events where you want nails that match white outfits.
Watch outAvoid using a sheer white base; it makes the chrome fade look uneven against the skin.
Editor's noteLet the milky white cure for a full minute — tackiness under chrome makes the gradient bleed.
4. Champagne Chrome Soft Fade Over Nude Pink
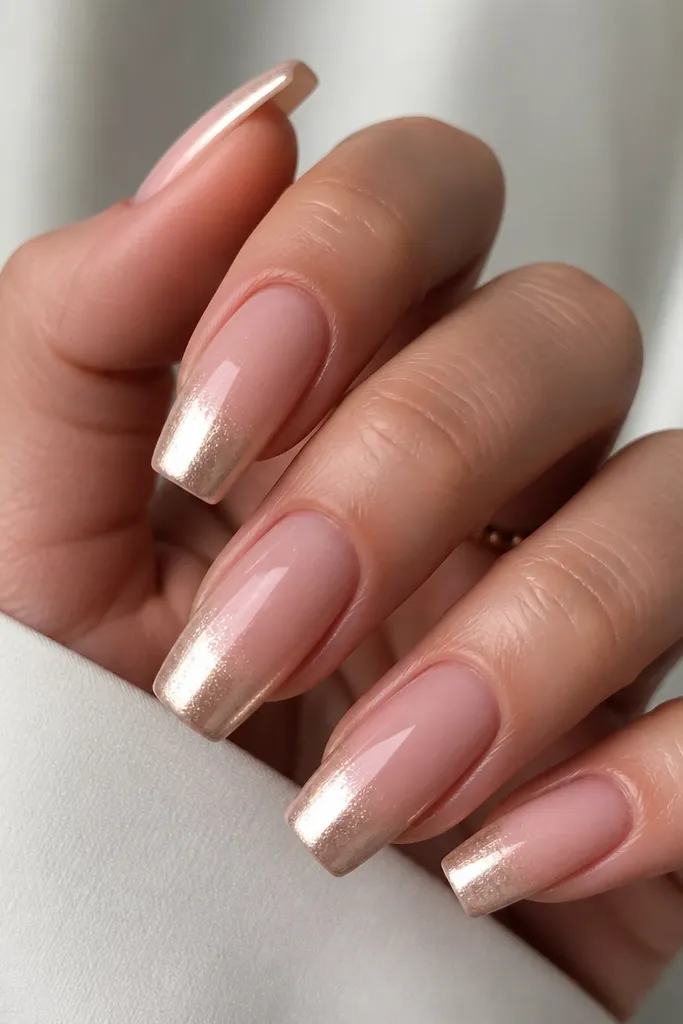
Champagne chrome is my favorite when someone wants chrome but doesn’t want it to scream silver. The nude pink base keeps it romantic, and the champagne tone makes it look flattering on warm and neutral undertones. The ombre is subtle — it’s more of a soft halo around the tip than a dramatic gradient. This look is great for hands that show veins or dryness because the nude pink base makes the skin look smoother and the chrome draws attention upward. It’s also easy to wear with gold jewelry.
Start with a nude pink base that is slightly sheer — I do 2 coats for even coverage. Apply sticky gel across the top 2 mm, then tap champagne chrome powder only onto that tack zone. Use a small eyeshadow brush to blend the edges downward without adding more powder. If you want extra smoothness, repeat: add a tiny amount of sticky gel just under the first chrome band and feather a second whisper of powder. Finish with a glossy top coat; keep it thin so the chrome stays crisp.
Blend in one direction (tip to center), then stop. Going back and forth makes stripes.
Don’t overbuild the powder — too much champagne chrome turns the fade into a solid cap.
5. Icy Silver Chrome Fade with Clear Jelly Nude
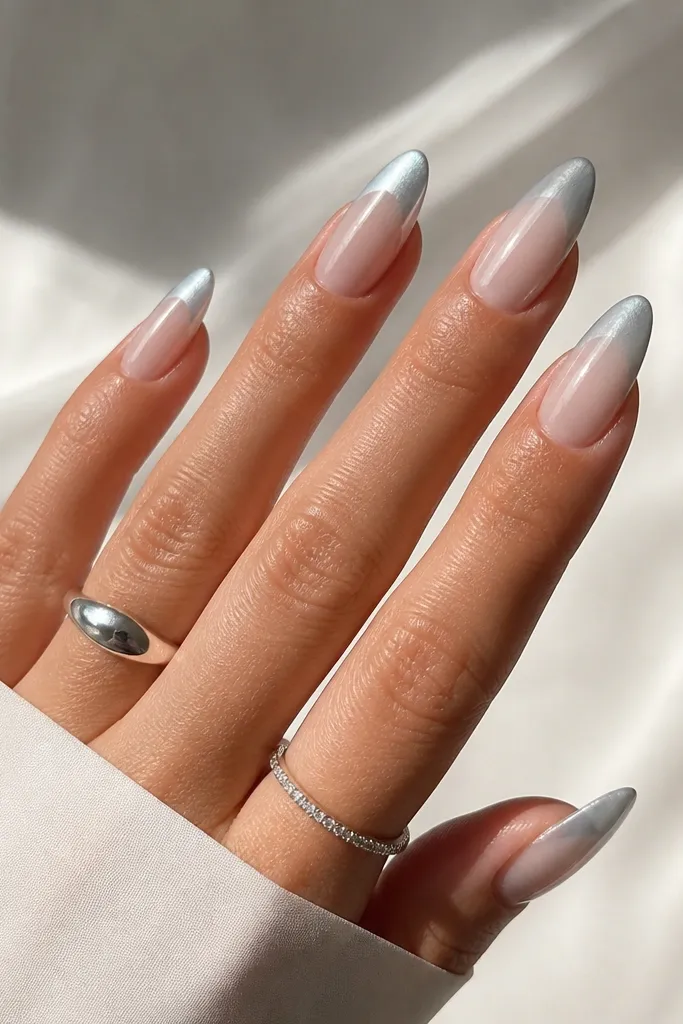
A clear jelly nude base makes the chrome look like it’s suspended under glass, not sitting on top. Icy silver chrome gives a cool, clean effect that looks extra bright in sunlight. The fade is strongest at the tip and melts down until it’s almost invisible near the center, which is why it reads modern minimalist instead of “full chrome.” This style is flattering on every skin tone because the base is clear and the chrome is doing the visual work. It also looks amazing if you’re wearing silver rings or a cool-toned outfit.
Apply a clear jelly nude in 2 thin coats, curing fully so it stays glossy and not thick. Add sticky gel only at the very tip, about 1.8 to 2.2 mm wide. Tap icy silver chrome powder onto the tack, then immediately brush downward with a clean dry brush to create the gradient. Work slowly — you want a smooth melt, not a hard line. Seal with a high-shine top coat in a thin layer, and cap the free edge so the chrome fade stays intact.
Use a light touch on the cap — heavy pressure can smear the gradient when the top coat starts to level.
Avoid opaque nude under icy chrome; it can look chalky and makes the fade look harsh.
6. Latte Beige Nude to Mirror Chrome Ombré French
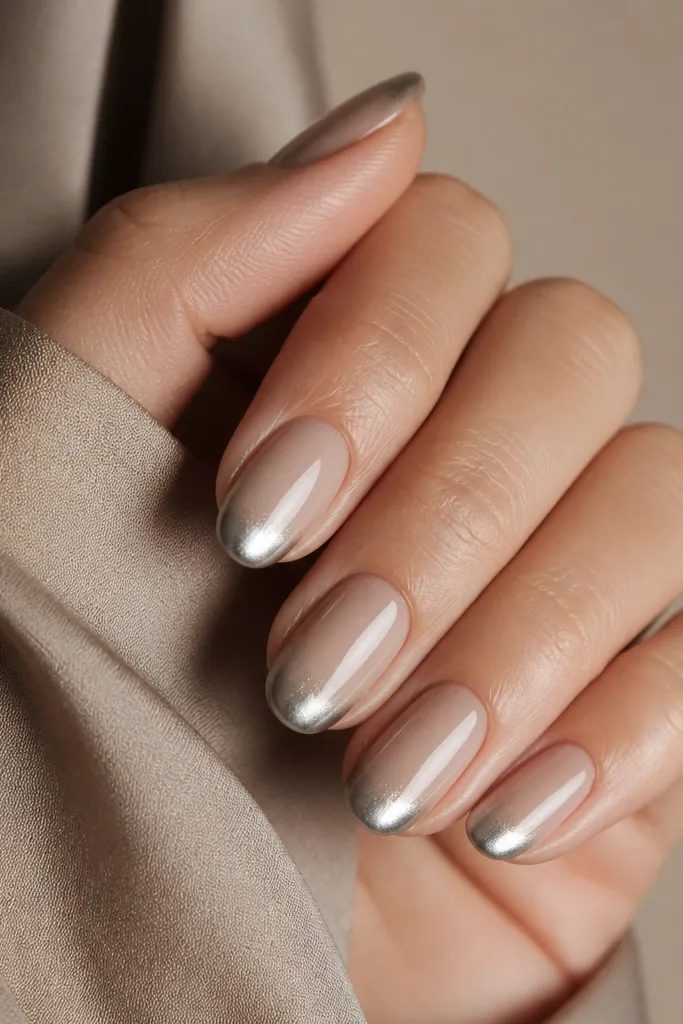
Latte beige is the “grown-up” nude that makes chrome look wearable. The warm beige base keeps the manicure from looking too cold, and the mirror chrome gives you that sharp French moment. The ombre is smooth and slightly longer than the micro styles — the fade starts around the mid-tip so it looks intentional on oval shapes. This flatters medium to deep skin tones because the warm base creates contrast without looking stark. It’s also a great option if you want chrome but you hate bright white French tips.
Prep, shape to oval, and apply a rubber base. Paint latte beige nude in 2 coats, keeping the first coat thin so the second coat levels evenly. Apply sticky gel at the tip zone about 2.5 mm wide, then tap mirror silver chrome powder onto the tack. Blend the bottom edge by sweeping a dry brush downward for a minute — stop when the gradient looks like a soft fog. Finish with a glossy top coat and wipe only after curing if your top coat requires it.
If your chrome looks too bright, use a tiny bit less powder on the second pass of blending.
Don’t use beige that’s too yellow; warm chrome on yellow nude can look dirty.
7. French Fade with Gunmetal Chrome Over Sheer Nude
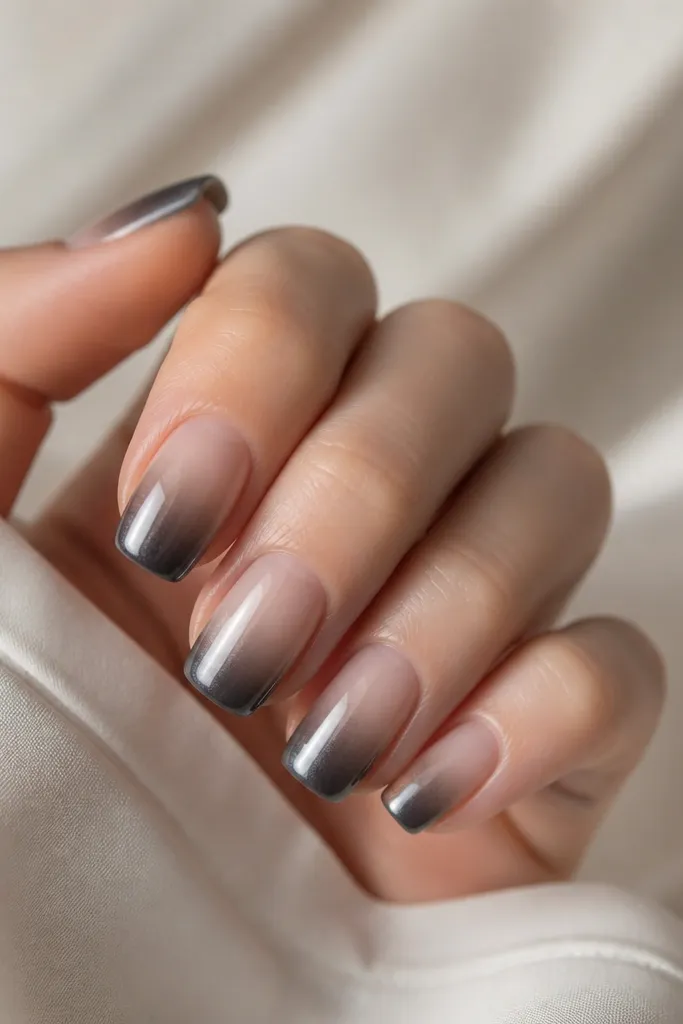
Gunmetal chrome looks modern and a little edgy without adding any nail art. The sheer nude base keeps it minimalist, and the smoky fade makes your nails look longer because the darkest tone is only at the tip. I use this for fall and winter, but I’ve worn it in summer too because it doesn’t clash with tan skin. This is flattering on hands with shorter nail beds because the gradient gives a vertical line. It also pairs perfectly with black outfits and silver hardware jewelry.
Start with a sheer nude gel that matches your skin tone — I usually do 2 thin coats. Apply sticky gel only at the top 2 mm, then tap gunmetal chrome powder onto that tack. Use a cotton-free brush to blend the lower edge with light strokes so the smoke effect fades evenly. If the gradient needs more softness, add a tiny strip of sticky gel just below the first band and tap a very small amount of powder. Seal with a glossy top coat; keep it thin to preserve the smoky look.
Gunmetal is messy if you press too hard — tap, don’t rub.
Avoid sealing before curing fully; gunmetal smears when the gel is under-cured.
8. Clear Base with Iridescent Chrome French Ombre
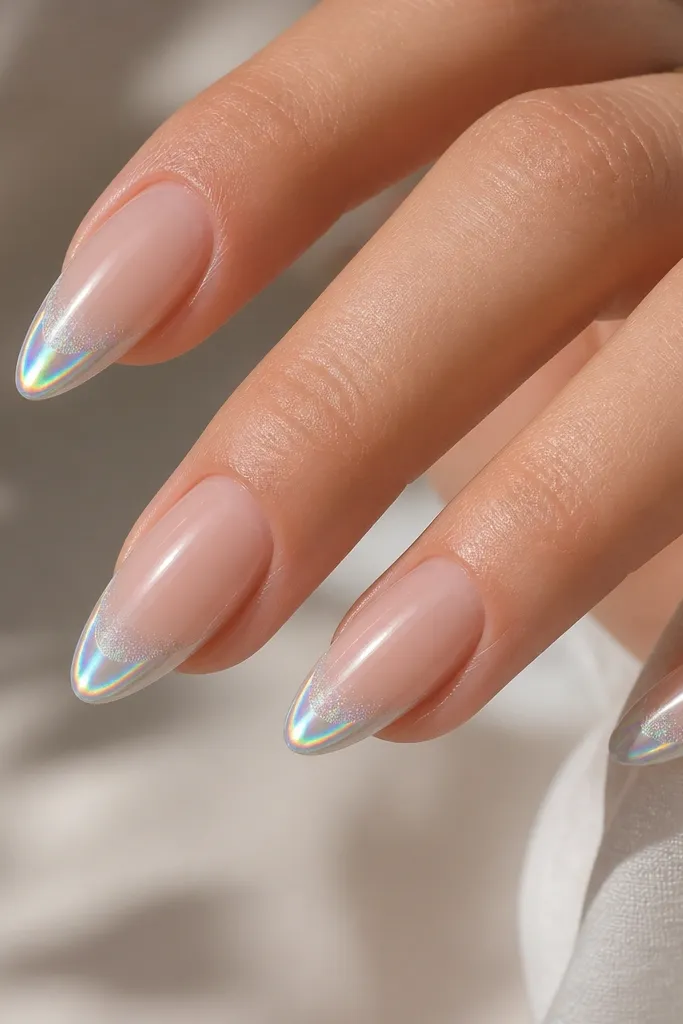
Iridescent chrome gives you movement as your hand turns, and it looks extra modern when the base is clear. The French fade keeps the effect controlled — you see color at the tip, then it softens into a whisper. This is the one I recommend when you want something “chrome” but you don’t want a flat mirror finish in photos. It flatters everyone because the clear base doesn’t compete with your undertone. It also looks amazing with minimal rings because the nails do the talking.
Apply a clear base gel and cure until it’s fully smooth. Paint a narrow sticky gel zone at the tip, about 2 mm, with a crisp curve. Tap iridescent chrome powder onto the tack, then blend downward with a dry brush to create the ombre. For a cleaner fade, do a second micro-pass: add a tiny amount of sticky gel halfway down the gradient and tap a lighter dusting of powder. Seal with glossy top coat, and cap the tip edge.
Turn your hand under the lamp while blending — you can literally see where the gradient shifts.
Avoid thick sticky gel; it traps powder and creates a hard band.
9. Matte Nude with Glossy Silver Chrome Ombre French
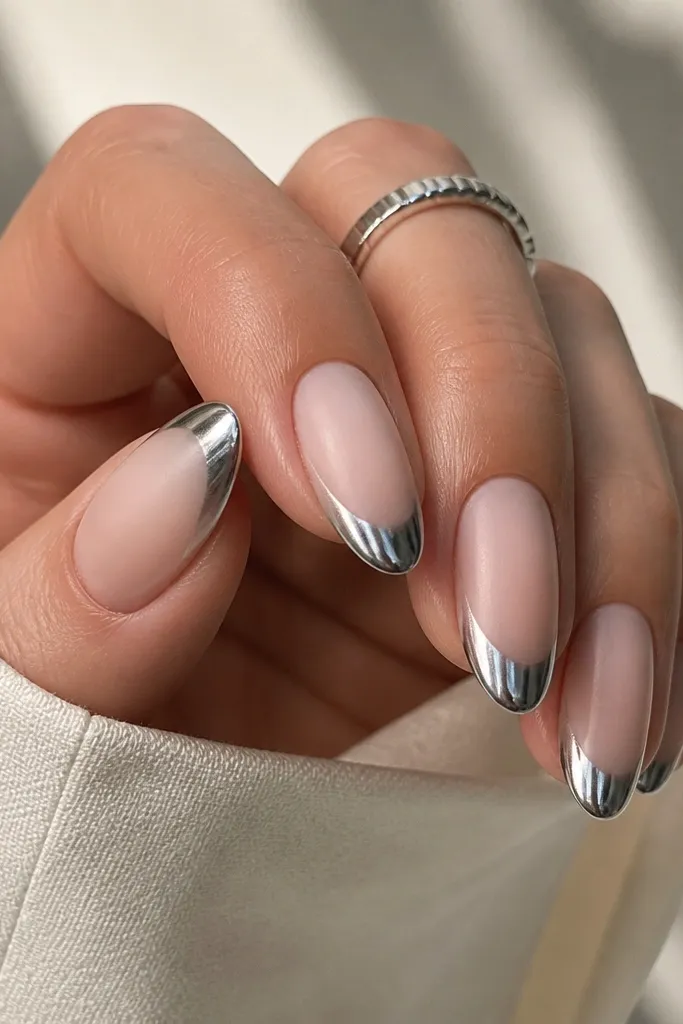
Start with a rubber base, cure, then apply nude gel in 2 coats. Top with a matte top coat and cure. Apply sticky gel only on the tip zone, about 2.2 to 2.7 mm, then tap silver chrome powder onto that tack. Blend the lower edge with a dry brush until the chrome fades into a soft shimmer over the matte. Seal the chrome area with glossy top coat only, leaving the rest matte.
The contrast is the whole point: matte nude makes the chrome look sharper, like a polished accessory. I do a creamy matte nude base (not dusty pink) so it looks smooth and even under different lighting. The chrome is classic silver, and I keep the fade soft so it doesn’t look like a sticker. This flatters fingers of all lengths because the matte finish hides minor texture, and the gloss chrome draws attention to the tips. It’s a great choice for events where you want “clean nails” that still look special in photos.
Watch outAvoid full gloss top if you want the modern minimalist look; it removes the matte contrast.
Editor's noteUse matte top first, then chrome — if you add chrome before matte, you’ll get dull patches.
10. Chocolate Brown Nude to Silver Chrome Fade
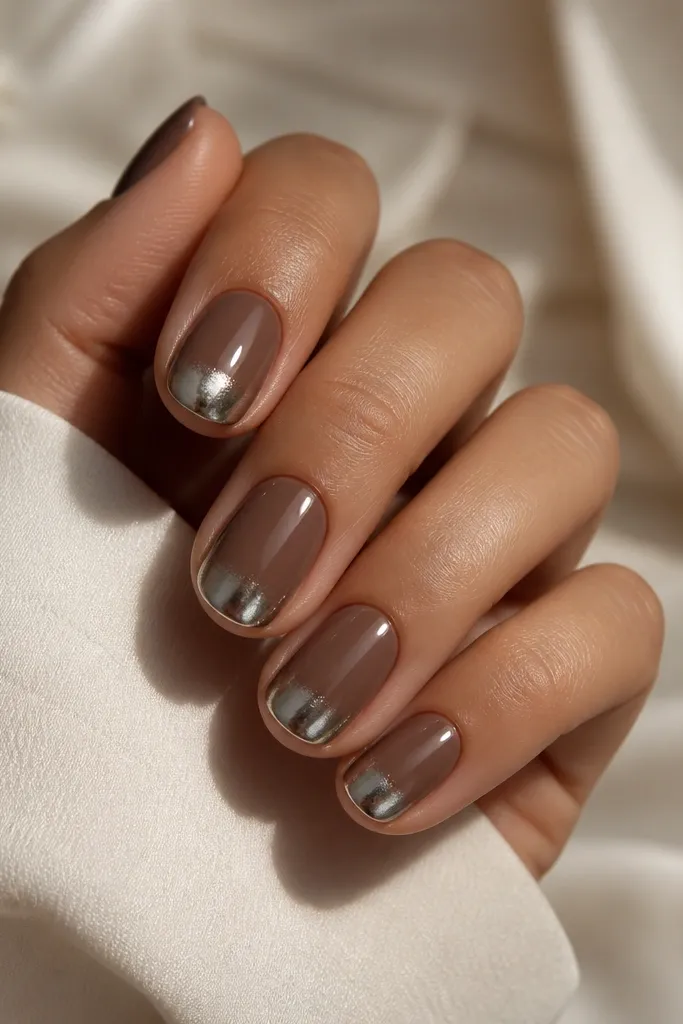
Prep and shape to short oval, then apply a rubber base. Paint chocolate nude in 2 thin coats, curing between, and check that the color is even near the sidewalls. Apply sticky gel at the tip zone about 2 mm, then tap silver chrome powder onto the tack. Feather downward with a dry brush, focusing on a soft center-to-sides gradient so it doesn’t look like a thick stripe. Seal with a glossy top coat and cap the free edge.
This one is for when you want “neutral” but not boring. The base is a chocolate nude brown that looks rich without turning into a solid color manicure. Silver chrome over dark nude creates a high-contrast fade that still reads clean because the ombre is smooth. I love this on medium to deep skin tones because the brown base harmonizes with your undertone and the silver tip brightens the whole hand. It also pairs well with gold and bronze jewelry.
Watch outAvoid using a sheer brown; you need enough opacity so the fade stays crisp.
Editor's noteChoose a chrome powder labeled “fine” or “smooth” — coarse powders can show grain on dark bases.
11. Neutral Pink Nude with Chrome French Ombre Half-Moon Twist
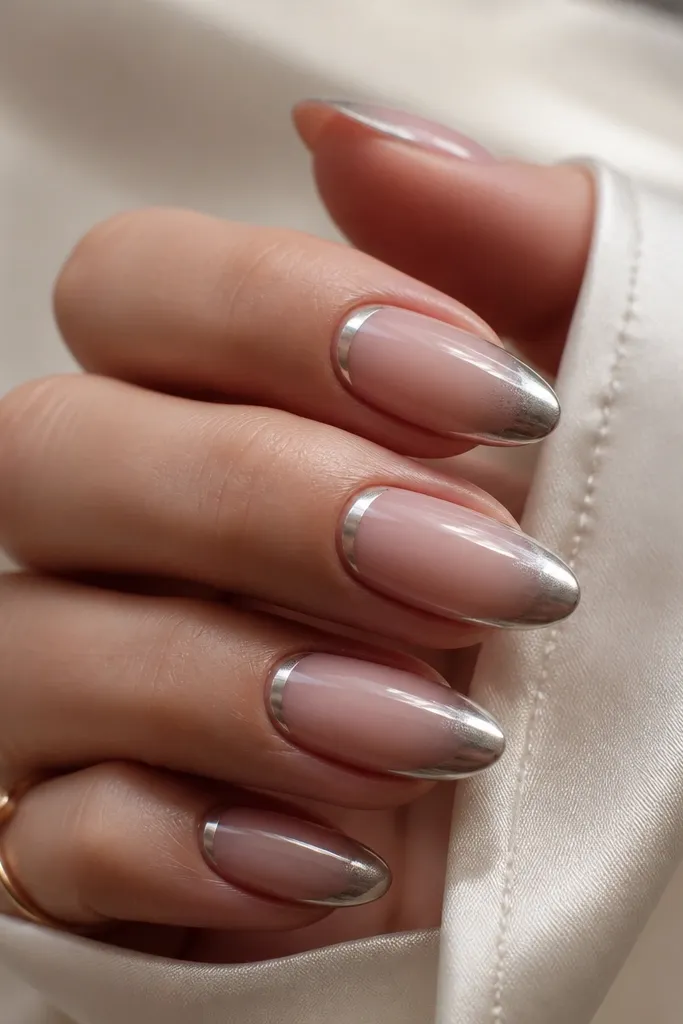
This is still a French ombre, but it has a tiny twist that makes it look intentional, not random. The neutral pink nude acts as a clean canvas, and the chrome half-moon sits closer to the top of the nail so it frames the fade. When I do this, I keep the half-moon small — about the width of a pencil eraser — so it doesn’t turn into a different design. It flatters short nail beds because the extra chrome near the top adds visual length. The result looks modern minimalist from a distance and more detailed up close.
Apply neutral pink nude in 2 coats and cure. Paint sticky gel in two areas: a narrow French strip at the tip (about 2.2 mm) and a small crescent half-moon near the upper side of the nail. Tap silver chrome powder onto both tack zones, then blend the edge where they meet so the ombre flows. Use a dry brush to soften any harsh boundary between the half-moon and the French fade. Seal with glossy top coat, making sure you cap the tip and the crescent edge.
Use a thin silicone tool to pick up excess chrome dust from the half-moon so it stays crisp.
Don’t make the half-moon too wide; it turns into a full moon manicure.
12. Foggy Gray Nude with Chrome French Ombre Cloud Edge
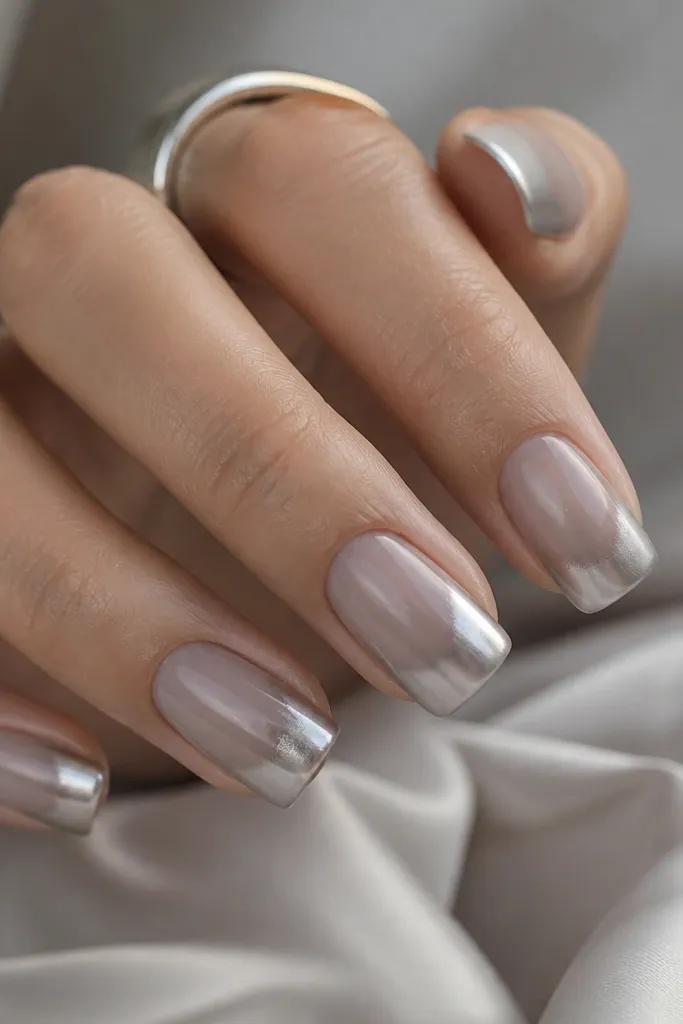
Foggy gray nude makes chrome look soft and editorial. The base has a cool tint, so silver chrome looks like it’s part of the same color family instead of sitting on top. The “cloud edge” effect comes from feathering the gradient slightly more than usual — it’s not a hard ombre line, it’s a blurred transition like mist. This style is flattering on hands with strong nail ridges because the gray nude tone hides minor unevenness better than pink nudes. It’s also perfect for winter outfits and cool-toned makeup.
Prep, then apply a rubber base and cure. Paint foggy gray nude in 2 coats, and keep the first coat thin so it doesn’t pool. Apply sticky gel at the tip zone about 2.3 mm, then tap silver chrome powder onto the tack. Blend downward with a dry brush using small circular motions at the bottom edge only, not across the whole chrome area. Seal with glossy top coat, but keep it thin so the cloud edge stays defined.
Practice on one nail first — the cloud edge takes a light hand to avoid turning into patchiness.
Avoid wiping the chrome edge with alcohol after powder — it can remove the gradient and leave gaps.
13. Soft White Jelly Nude with Chrome French Fade Staggered
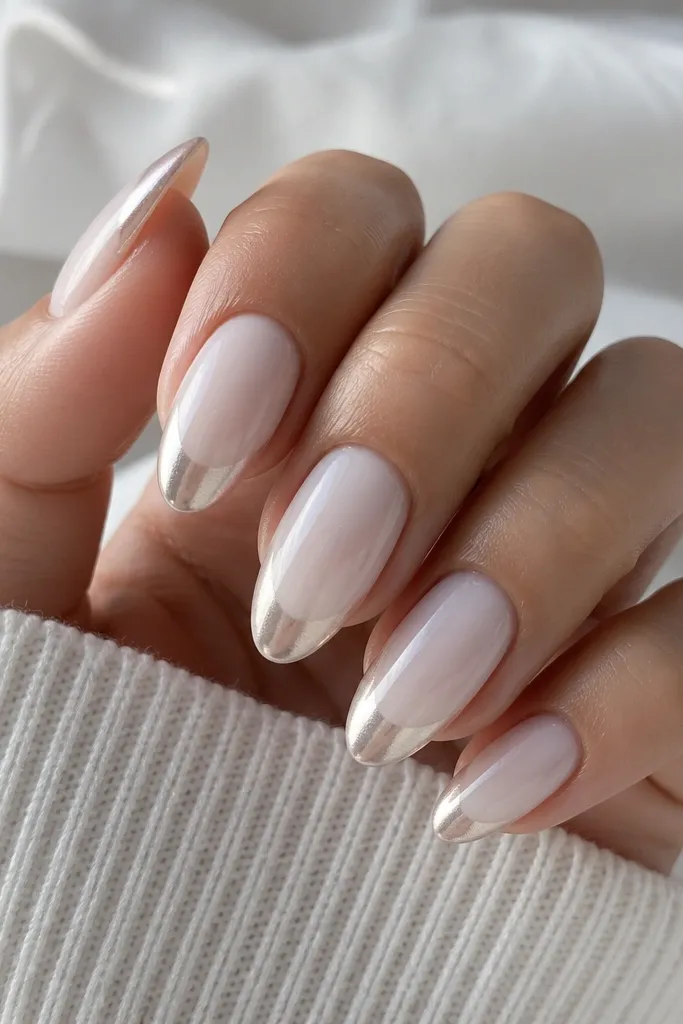
Apply soft white jelly nude in 2 thin coats and cure until glossy. For each nail, decide your fade start height: keep index and pinky at about 2 mm from the tip, and set middle and ring at about 2.5 mm. Add sticky gel only in those tip zones, tap silver chrome powder onto the tack, then blend downward with a dry brush to create the ombre. Clean the smile line with a brush dipped in isopropyl alcohol so the fade looks controlled. Finish with glossy top coat and cap the free edge.
This look stays minimalist but adds a little rhythm. The base is a soft white jelly nude — translucent, milky, and smooth — so the chrome fade looks airy instead of heavy. “Staggered” means the fade starts at slightly different heights from nail to nail, like a subtle wave. I do it on the ring and middle finger most, leaving the index and pinky closer to the classic micro fade so it doesn’t get busy. This flatters most skin tones because the base is light and neutral. It’s a nice choice for spring and bridal events where you want a clean, soft manicure.
Watch outAvoid staggering on every finger; too many different fade heights look messy in real life.
Editor's noteMark the fade start height with a tiny dot of gel before chrome — it keeps the stagger even.
14. Nude Beige with Silver Chrome Ombre French and Thin Side Lines
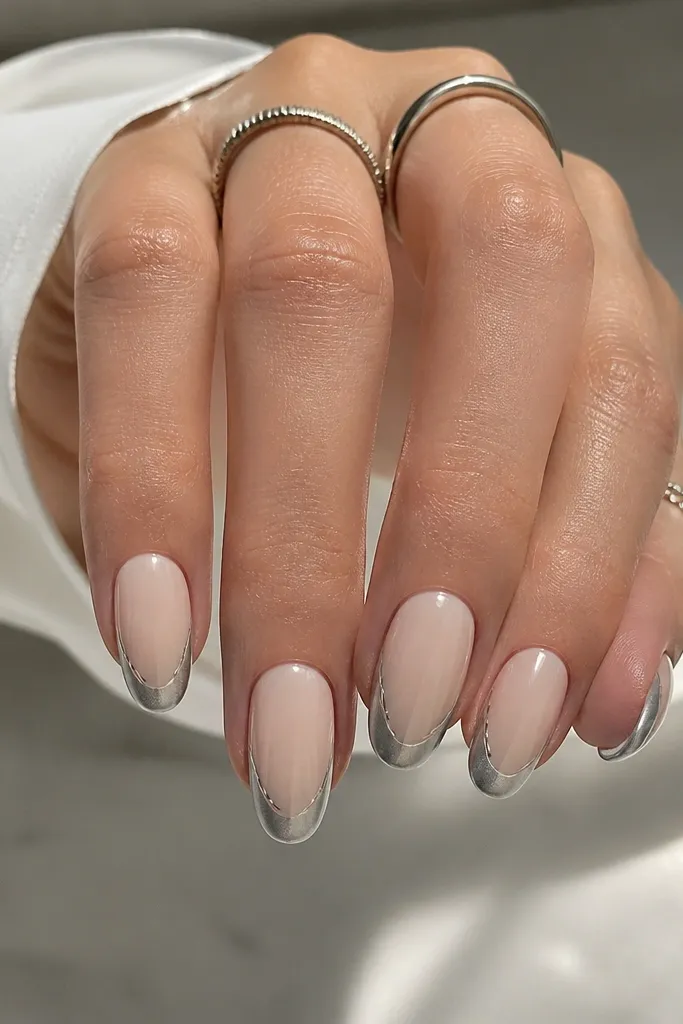
This is minimalist French ombre with a detail that frames the nail. The nude beige base stays neutral, and the chrome side lines sit close to the sidewalls — so they elongate the nail without adding chunky art. I keep the side lines thin, about the width of a hair, and I let them fade into the main ombre so there’s no harsh separation. It flatters hands with wider nail beds because the side lines visually narrow the center. Wear it with simple rings and a clean outfit — it looks intentional rather than decorated.
Prep and apply nude beige base in 2 coats, cure, then top with no-wipe if your system needs it. Apply sticky gel across the tip zone for the main French fade, about 2.2 mm wide. Tap silver chrome powder onto the tack and blend downward with a dry brush. For the side lines, use a thin strip of sticky gel along each side near the tip, then tap a tiny amount of chrome powder so the lines blend into the main fade. Seal with glossy top coat, making sure you don’t flood the side lines.
Use a fine liner brush to clean chrome off the sidewall edges before top coat — it stops the lines from looking thick.
Avoid thick side lines; they make the design look like a cheap sticker border.
15. Taupe Nude to Iridescent Chrome French Fade
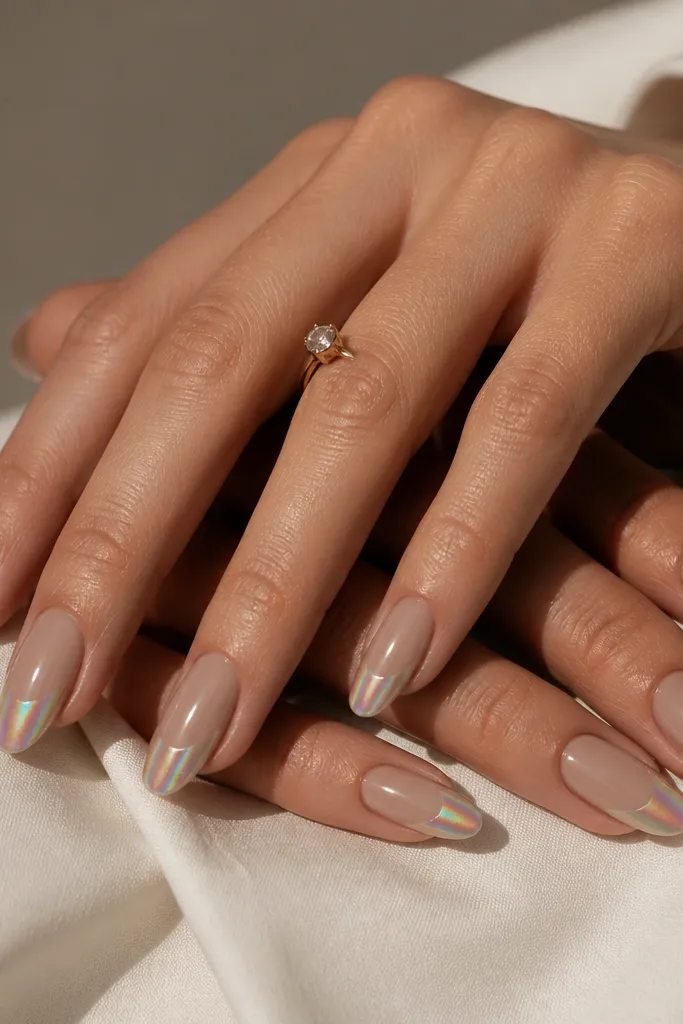
Apply taupe nude gel in 2 coats and cure well. Add sticky gel across the tip zone about 2.4 mm, keeping the curve even. Tap iridescent chrome powder onto the tack and watch it shift — then stop tapping once the tip looks mirror-bright. Blend downward with a dry brush to fade the color shift into a softer shimmer. Seal with a glossy top coat and cap the tip edge to keep the iridescent from lifting.
Taupe nude is the easiest way to make iridescent chrome look grown-up. On a pink or clear base, iridescent can look playful; on taupe, it looks controlled and tailored. The ombre fade keeps the color shifts concentrated at the tip, so you get a “sparkle on the edges” effect instead of full rainbow coverage. This flatters neutral and cool undertones because taupe doesn’t fight your skin tone, and the chrome adds dimension. It’s a smart choice for people who like chrome but want it to look less loud.
Watch outAvoid using too much chrome powder; iridescent overload turns into a cloudy mess.
Editor's notePress with a sponge for the first tap, then switch to a soft brush for blending. That combo keeps the fade smooth.
16. Creamy Nude with Chrome French Ombre and Micro Glitter Dust
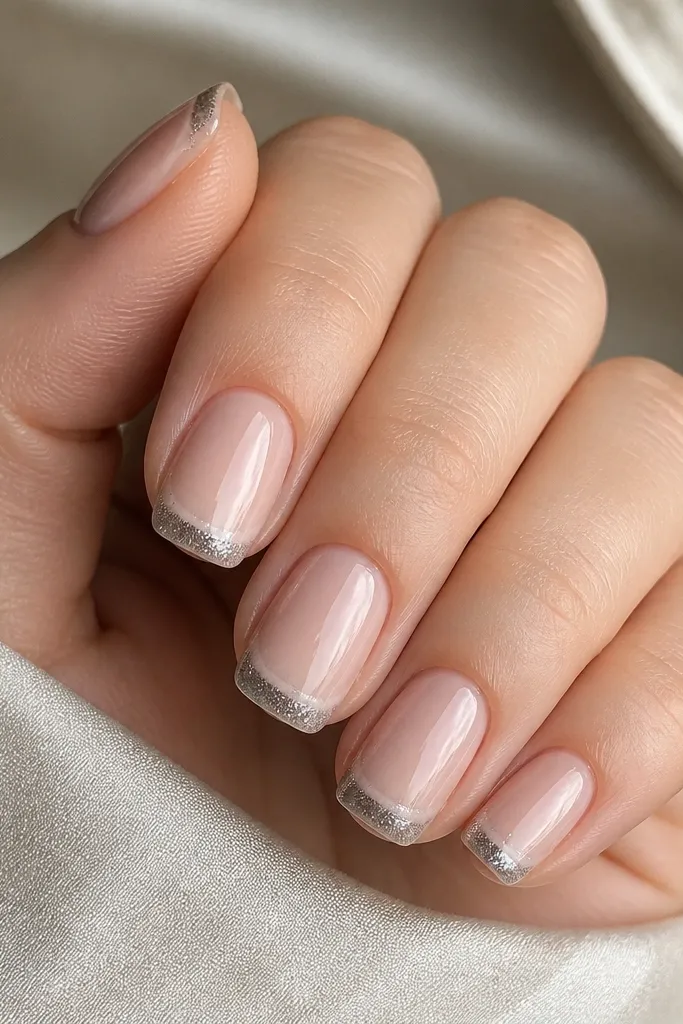
This is for when you want chrome to look slightly celebratory but still modern minimalist. The creamy nude base stays smooth and neutral, and the micro glitter dust sits only at the extreme tip edge — like a thin sparkle halo. The chrome fade does the main work, while the glitter adds a little texture that catches light when you move your hands. This flatters most skin tones because the base is warm and the glitter is fine, not chunky. It’s perfect for birthdays, holiday dinners, and any “small celebration” moment.
Start with a creamy nude base in 2 coats and cure. Apply sticky gel at the tip zone about 2 mm wide. Tap silver chrome powder onto the tack, then before blending, lightly press micro fine silver glitter only on the top 0.5 mm of the tip. Blend the rest of the chrome downward with a dry brush so the glitter stays concentrated at the edge. Seal with glossy top coat, and cap the free edge carefully so the glitter doesn’t lift.
Use micro glitter dust, not regular glitter — regular glitter will make the French edge look bumpy.
Avoid mixing glitter into the chrome while it’s wet; it spreads and ruins the fade.
17. Champagne Nude with Split Chrome Ombre French (Center Brighter)
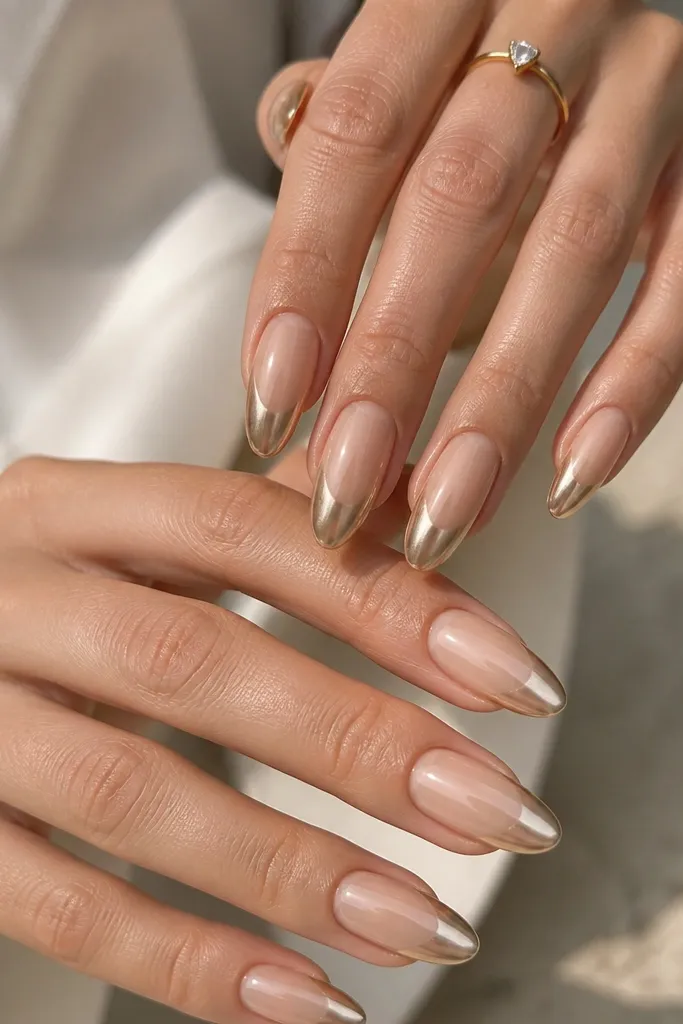
A split brightness gradient looks expensive because it mimics how light hits a curved surface. The champagne nude base is warm and soft, and it keeps the chrome from looking harsh. I make the center brighter by placing more chrome powder in the middle third of the French zone, then feather less on the sides. This flatters hands with slightly uneven nail widths because the brighter center draws the eye to the nail’s center line. It looks great for photos because the chrome catches light right where you want it.
Apply champagne nude in 2 coats and cure. Add sticky gel across the tip zone about 2.5 mm wide, but keep it thin at the sides. Tap chrome powder onto the tack — add a heavier amount in the center third, then lighter amounts toward the sides. Blend using a dry brush, starting from the center and sweeping outward so the brightness fades evenly. Seal with glossy top coat and cap the edges so the gradient stays sharp.
Use a small amount of chrome on the sides first; you can always add more, but you can’t remove it once it’s sealed.
Avoid making the sides equally bright; that flattens the effect and loses the modern look.
18. Nude Rose with Silver Chrome Ombre French and Thin Negative Space Gap
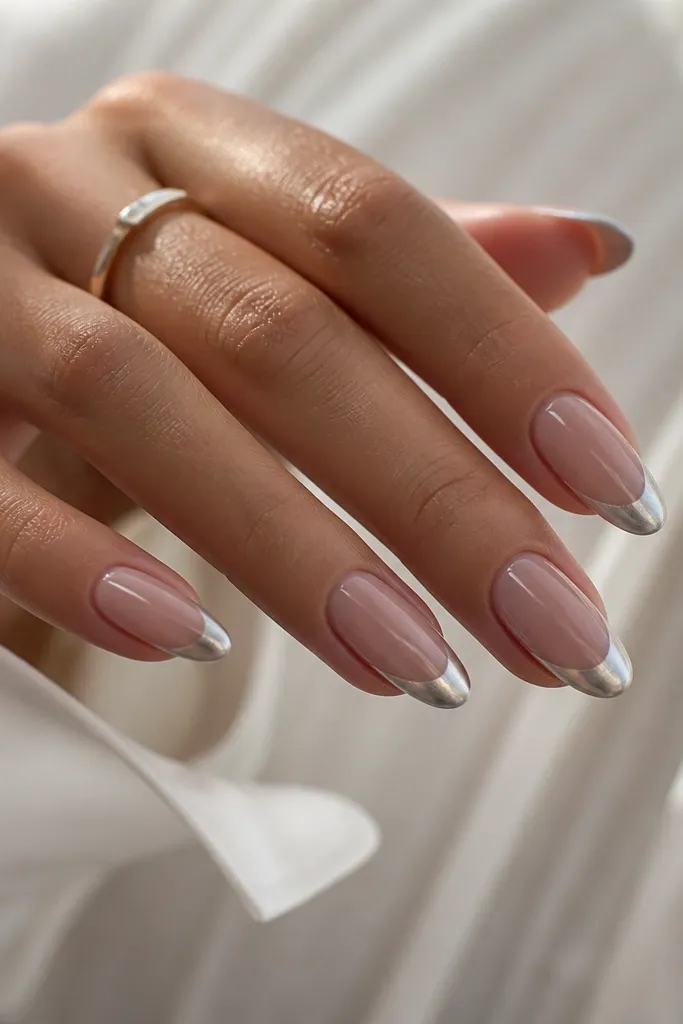
Negative space makes the French fade look crisp and architectural. The nude rose base is smooth and slightly opaque so the gap reads clean, not see-through. The chrome ombre starts just above the gap line, so the transition feels intentional. This is a great option if you have trouble getting a perfect smile line because the hairline gap hides minor unevenness. It flatters medium skin tones and looks stunning with both silver and rose-gold jewelry. It’s also a good “first chrome set” because it gives you structure.
Apply nude rose base in 2 coats and cure. Paint a thin band of sticky gel at the tip zone about 2.2 mm wide, leaving a tiny 0.5 mm gap from the edge of the nail’s natural smile line. Tap silver chrome powder onto the sticky gel, then blend downward lightly with a dry brush so the ombre softens. Clean the gap area with a brush and isopropyl alcohol so the negative space stays clear. Seal with glossy top coat, but avoid flooding the gap — keep the top coat thin.
Use a gel brush to control the sticky gel edge; it’s the difference between a hairline gap and a blob.
Avoid using too much sticky gel — it will fill the gap and remove the negative space effect.
19. White Milk Fade French with Chrome Tip Only at the Edge
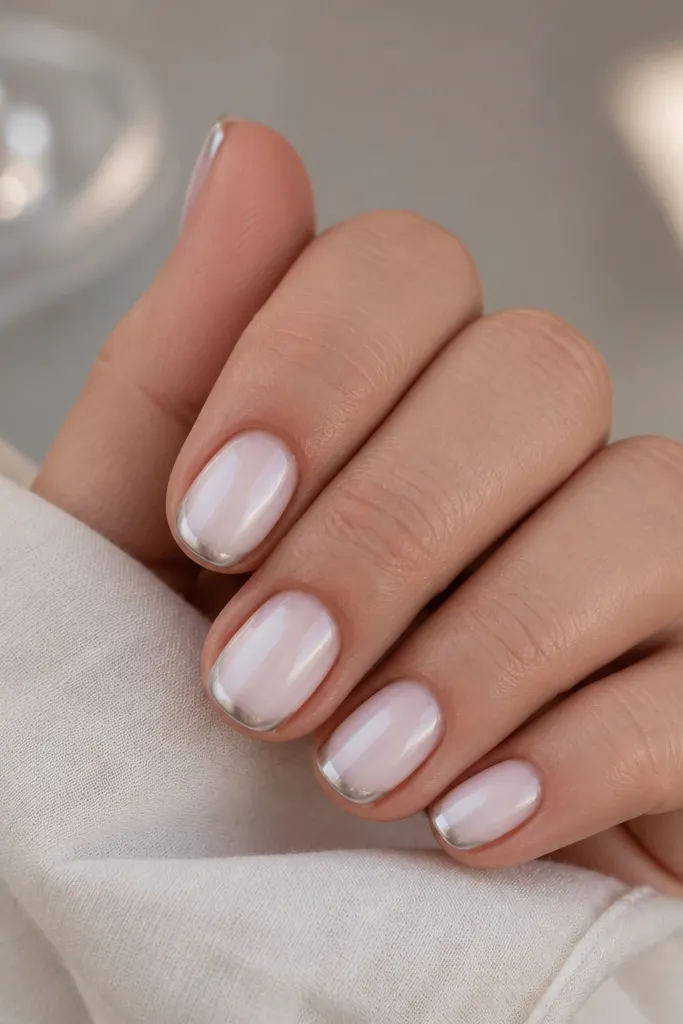
Prep and shape to short oval. Apply white milk gel in 2 coats and cure until smooth. Apply sticky gel only at the outer tip edge, about 1.2 to 1.6 mm wide. Tap silver chrome powder onto the tack and then blend downward just slightly, keeping the gradient tight. Wipe excess powder from the rest of the nail, then seal with glossy top coat in a thin layer. Cap the free edge so the narrow chrome band doesn’t chip.
If you want chrome that looks almost like a glow rather than a full chrome manicure, this is it. The white milk base gives brightness, and the chrome is kept extremely narrow — it sits only at the outer edge and melts down a little. That makes it super flattering on shorter nails because it lengthens without taking over the whole tip. I also like this for people who dislike high shine everywhere; the chrome is concentrated where it matters. It looks great with minimal outfits, especially cream knits and white shirts.
Watch outAvoid going too wide; wide edge-only chrome turns into a thick French cap.
Editor's noteKeep your chrome band narrower than you think — this style looks best when it’s subtle.
20. Nude Tan to Mirror Chrome Ombre French with Soft V-Curve
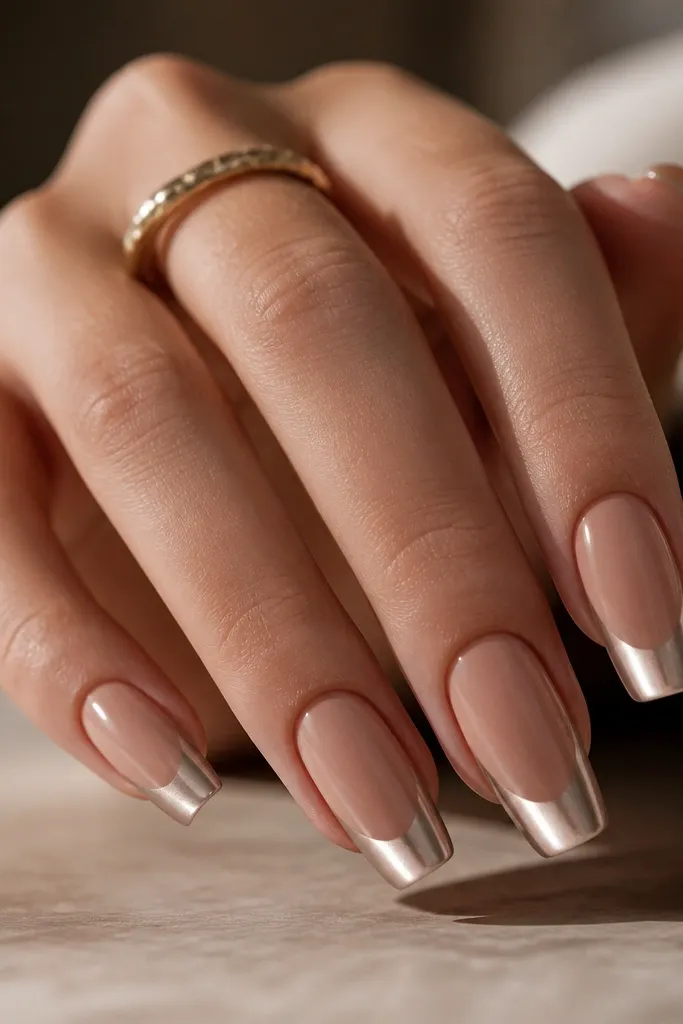
Apply nude tan base in 2 coats and cure. Create a soft V-curve smile line by applying sticky gel so it’s slightly higher at the center of the nail and lower near the sidewalls. Keep the sticky gel zone about 2.5 mm wide at the center and taper to around 2.2 mm at the sides. Tap mirror silver chrome powder onto the tack, then blend downward using a dry brush, keeping the center brighter longer. Seal with glossy top coat and cap the tip edge.
The V-curve gives you a modern “lift” effect that makes fingers look longer. A nude tan base keeps it warm and natural, and mirror chrome at the tip adds the sharpness. The fade is still minimalist — you’re not adding gems or lines — but the smile line shape changes how the manicure frames your hand. This flatters hands with longer knuckles because the V shape balances the proportions. It also looks great with tan skin and gold jewelry because the base and chrome feel aligned.
Watch outAvoid a sharp, deep V; it can look harsh and ruin the minimalist vibe.
Editor's noteIf your smile line is hard to draw, use the gel brush to mark the V shape lightly before you add sticky gel.



