
1. Cherry Red French With Micro Gold Lines
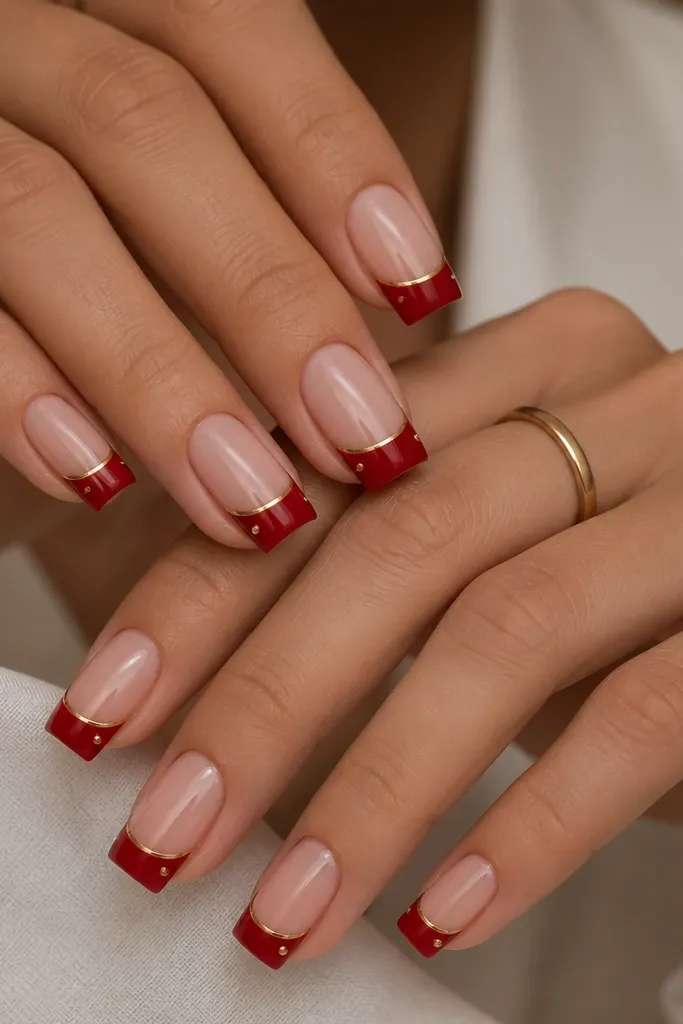
This one is clean and wearable, and it’s the set I reach for when I need black-and-gold to look “intentional” instead of heavy. Use a sheer nude base so the nail bed looks neat, then paint a crisp cherry-red French tip. Add a single micro gold line just under the tip edge — it catches light without covering everything. The black part comes from a thin black outline on every other nail tip, so you still get the black-and-gold vibe even when the red is the star. It flatters most skin tones because the nude base keeps it light, and it works great for short to medium lengths.
Start by prepping and lightly buffing the nail for adhesion, then apply a sheer nude base coat and cure. Paint the French tips in cherry red, keeping the curve even across all nails. On four nails, add a thin black outline along the lower edge of the French line using a stripping brush. Finally, draw one micro gold line parallel to the outline, then place a single tiny gold dot at the outer corner and seal with glossy topcoat.
Editor's noteIf your gold striping looks thick, thin your gold polish with a drop of clear gel and use a liner brush — it stays sharp.
2. Wine Red Half-Moon With Black Border And Gold Leaf
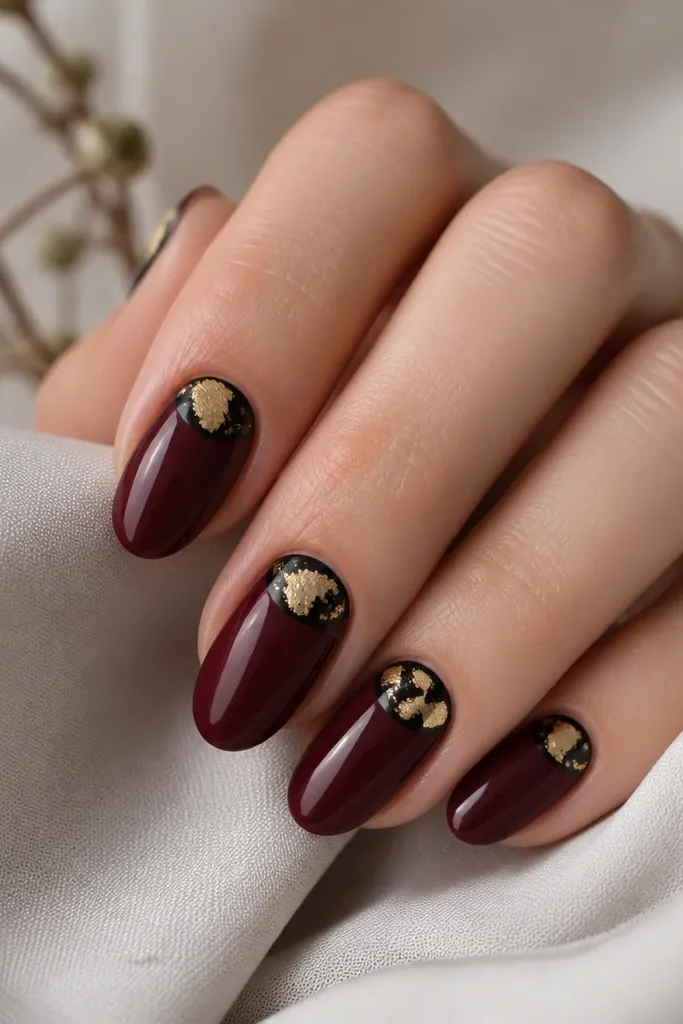
Half-moons make nails look tidy because they frame the cuticle instead of covering the whole nail. I love wine red for this because it looks deep and expensive under warm indoor lighting, and it pairs cleanly with gold leaf texture. The black border is the key: it makes the half-moon shape look intentional and prevents the gold from blending into the red. This looks best on medium-short nails and on hands with slender nail beds because the half-moon draws the eye upward. It’s also forgiving if your cuticle line isn’t perfect, since gold leaf hides tiny gaps.
Start by applying a glossy wine-red coat, then cure fully. With a small detail brush, paint a half-moon in black right at the cuticle — keep it consistent on every nail. Press tiny torn pieces of gold leaf into the wet gel area and lightly seal them so edges don’t lift. If you want more contrast, add one extra thin black line under the half-moon on the ring fingers only. Finish with a high-shine topcoat, using extra care around the leaf edges.
Editor's notePress gold leaf in small sections instead of a single big piece so the texture spreads evenly.
3. Black Crisscross Over Red With Gold Foil Corners
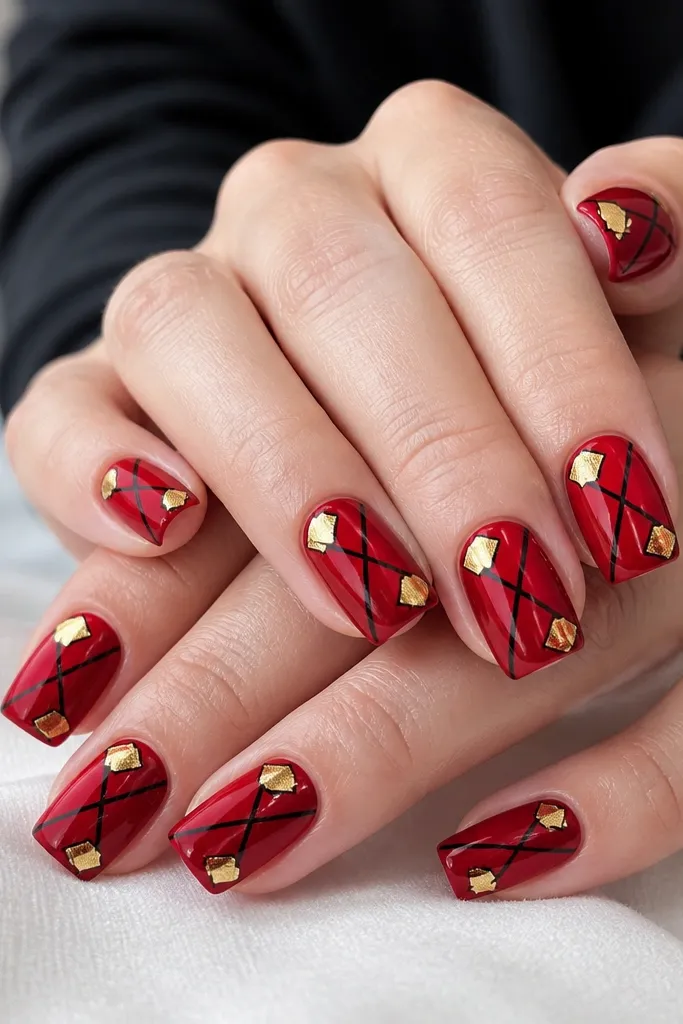
This set gives you that graphic, editorial look without needing big gems. Start with a glossy red base so the nails look polished, then draw black diagonal crisscross lines for structure. The gold foil corners add a “flash” effect — it feels like jewelry because it sits at the edges where light hits. I like this on medium squares because the pattern has enough space to look sharp, and the foil corners keep it from feeling flat. It works for everyday outfits, but it also photographs well for nights out.
Apply two thin coats of glossy red and cure between coats. Use black striping gel and a fine brush to draw one diagonal line, then cross it with the second diagonal to form an X in the center. Keep the lines about 1-2 mm apart so the red still shows through. On the thumb and ring fingers, place small gold foil squares at the top-left and bottom-right corners, sealing them with a thin layer of clear gel. Seal everything with glossy topcoat and cure.
Editor's noteIf your lines look wobbly, rest your hand on a folded towel and let the brush do the straight movement.
4. Matte Black Marble With Red Veins And Gold Specks
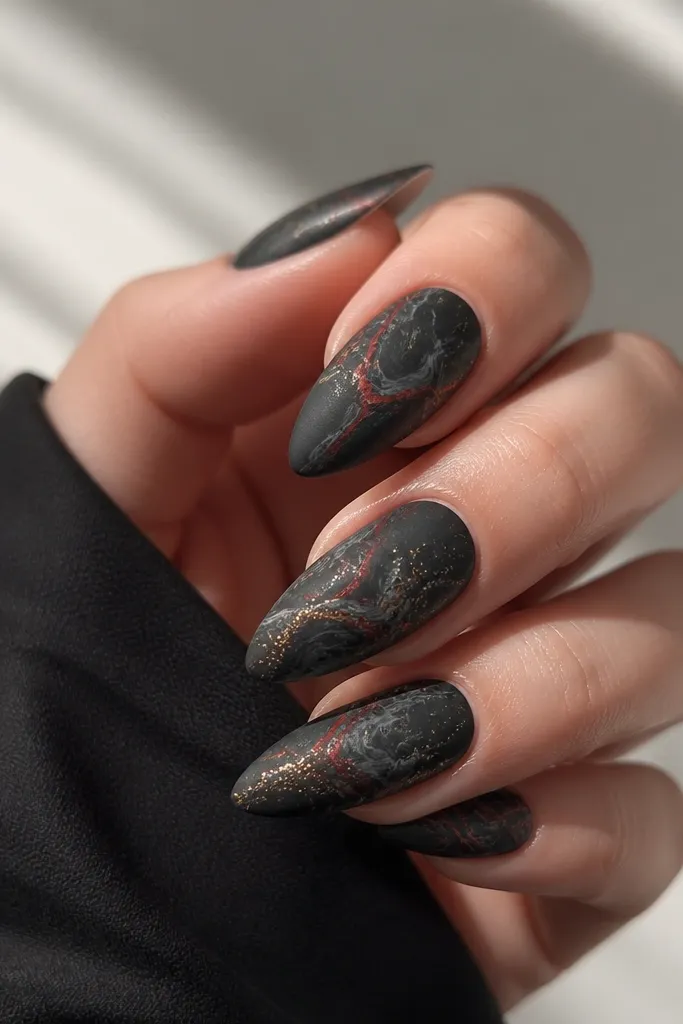
Marble looks hard when you do it wrong, but this version stays wearable because the base is matte black. Matte hides minor unevenness and makes red veins look like they’re glowing from under the surface. I use red as thin veining instead of big blocks so the set feels modern. Gold specks are the finishing touch — they read like dusted metal, not chunky glitter. This is flattering on almond shapes and on hands that need a bit of visual length, since the marble swirls can be pulled upward.
Paint a matte black base and cure, then avoid adding too thick a topcoat at first. Use a marbling tool or a small sponge to drag thin red lines through the black — keep them skinny and irregular. Add a few gold specks using a dotting tool and gold acrylic paint or gold polish. Let it dry slightly, then apply matte-friendly topcoat over everything, keeping the topcoat thin so the marble texture stays visible. If you want extra dimension, add a glossy top only to one or two center veins.
Editor's noteUse red gel polish that’s slightly runny — it creates cleaner marble streaks than thick paint.
5. Red Velvet Ombre To Black With Gold Outline
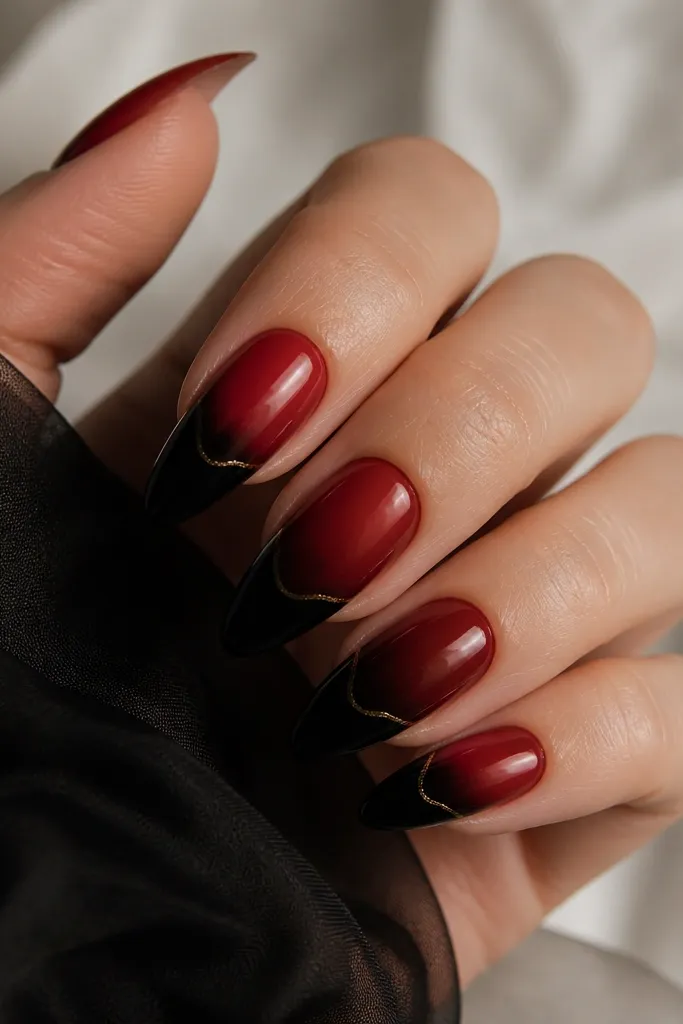
Ombre is my go-to when I want black-and-gold to look expensive without heavy nail art. Start with deep red at the cuticle so your hands look warm, then fade into black at the tips for that dramatic edge. The gold outline makes the transition look designed, like a seam in velvet clothing. This set is flattering on long almond and coffin shapes because the gradient stretches the nail. It also works year round because the red is rich and the black anchors it.
Apply a base layer of red gel at the cuticle area, then blend downward into black using a makeup sponge. Clean up the edges with a brush dipped in gel cleanser. Once the gradient is even, draw a thin gold line right where red meets black, not at the very tip. On the ring fingers, add a second gold line parallel to the first for a slightly bolder look. Finish with a glossy topcoat so the gradient looks smooth and plush.
Editor's noteBlend in two light passes instead of one heavy pass — it prevents patchy ombre.
6. Black Grid Accent Nails With Red Background And Gold Studs
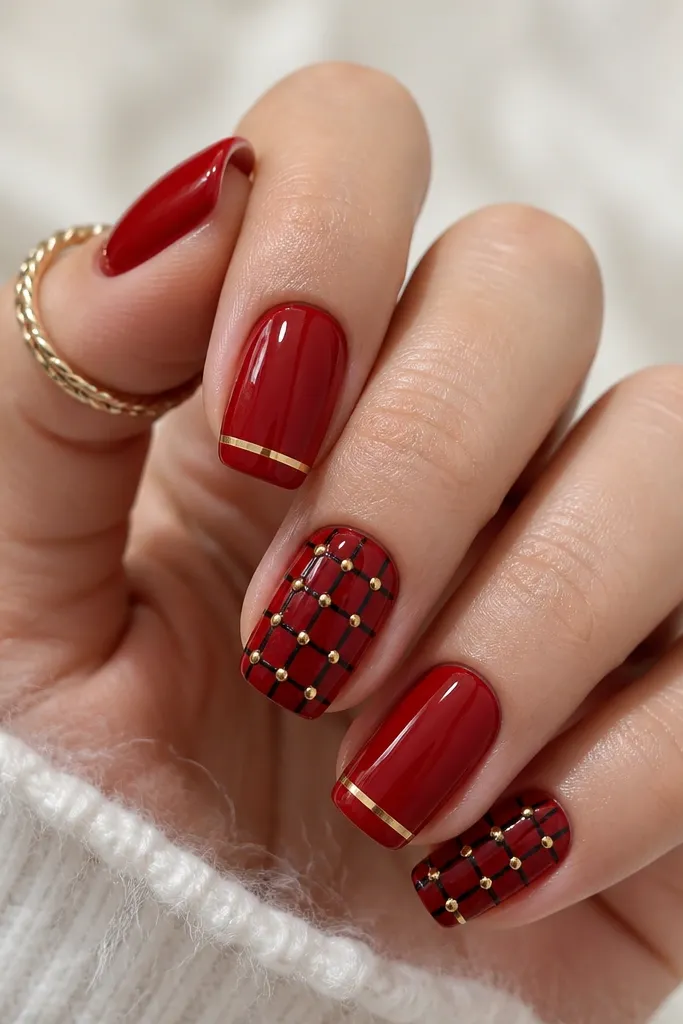
Grid nails feel sharp and modern, especially when they’re kept to the accent nails. I like a glossy red background because it makes the black lines look crisp and the gold studs look like tiny hardware. Keep the grid only on the index and ring nails so the set doesn’t feel busy. The gold studs at intersections give a jewelry feel without needing big 3D pieces. This looks great on medium lengths and on hands with wider nail beds, because the grid adds structure.
Paint all nails glossy red and cure. On two accent nails, use black striping tape as a guide to draw perpendicular lines, then remove the tape and fill in any gaps. Add gold micro studs at 3-4 intersections, pressing them into a clear gel layer before curing. For the remaining nails, draw a single gold stripe about 2 mm from the tip and seal. Topcoat everything with glossy gel top for a smooth finish over the studs.
Press studs lightly and cure right away so they don’t shift while you’re working.
7. Black Lace Tips Over Sheer Red With Gold Thread Line
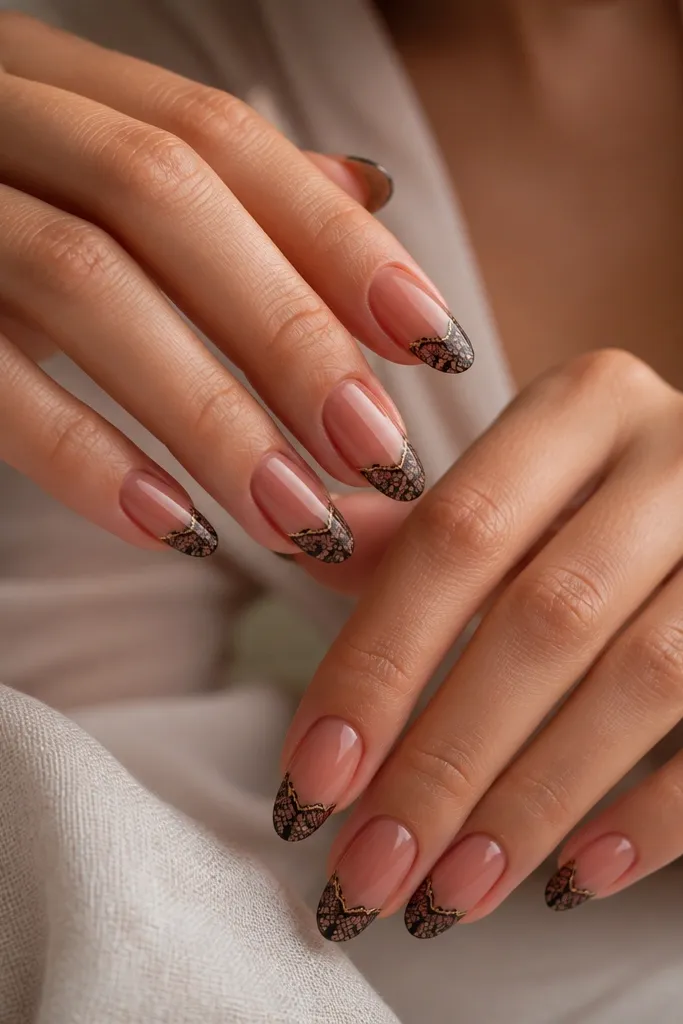
This is romantic without going full bridal. The sheer red base gives softness, while black lace tips add drama. The gold thread line is what makes it feel like a luxury fabric — it sits between the sheer base and the lace so your eye gets a clean boundary. This is flattering for short almond because the lace pattern can be kept compact at the tip. It’s also a great choice for events because it looks detailed even when you’re wearing simple jewelry.
Start with a sheer red jelly base (thin layers, cure each time) so you get a glassy red glow. Create black lace tips using a lace nail stamping plate or a fine lace stencil, placing the pattern only on the last third of the nail. Draw a thin gold line along the lace base to frame it, then add one small gold dot on the outer edge of two nails. Keep the rest of the nails plain sheer red with a single gold line near the tip. Seal with a gel topcoat, and wipe the tacky layer if your topcoat leaves one.
Editor's noteStamp lace one nail at a time and scrape off excess — it prevents muddy edges.
8. Red And Black Yin-Yang With Gold Dot Centers
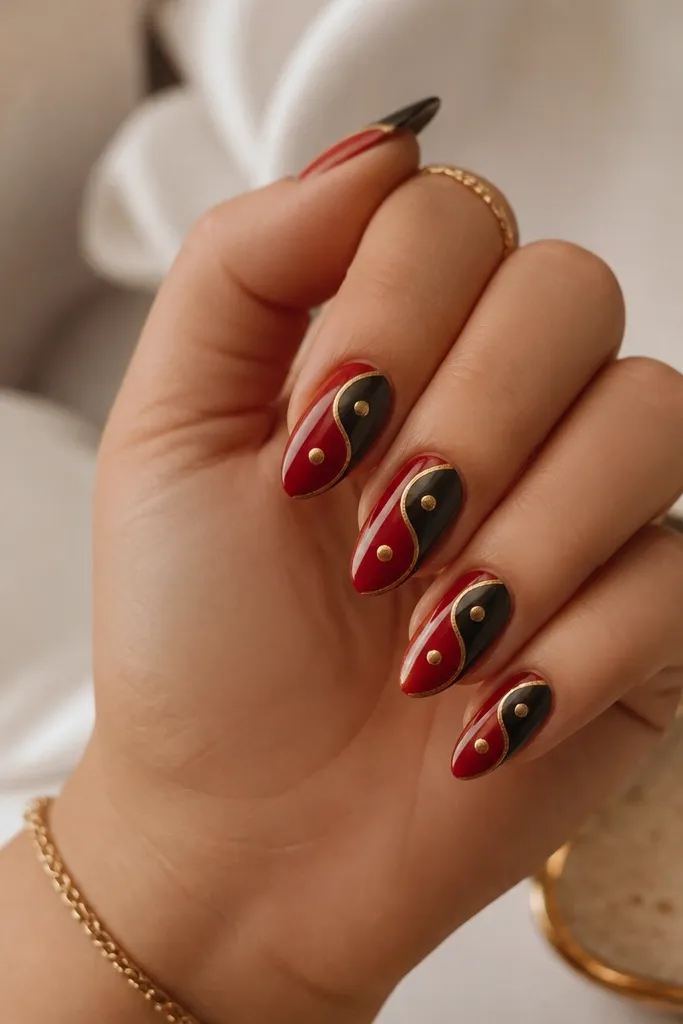
Yin-yang nails look playful, but they still read classy when you keep the shapes crisp. I use a full-color yin-yang on one or two nails and repeat a simplified version on the others, so you don’t overwhelm your hands. Red and black are a natural pairing here, and the gold dot centers make the symbol look like it’s been polished. This set is flattering on almond and oval because the curves match the symbol. It’s also a fun year-round statement because it doesn’t depend on seasonal colors — it depends on contrast.
Paint the base a glossy red on all nails, then cure. On two accent nails, use a small circular guide to paint a black half-moon shape to form the yin-yang curve. Add the opposite curve so the red and black halves mirror each other cleanly. Place a tiny gold dot where each color “contains” the other, and draw a thin gold outline around the symbol. Finish with glossy topcoat to lock in the details.
Use a dotting tool with a small ball tip so the gold centers stay perfectly round.
9. Black Ombre Fade With Red Top Glow And Gold Edge
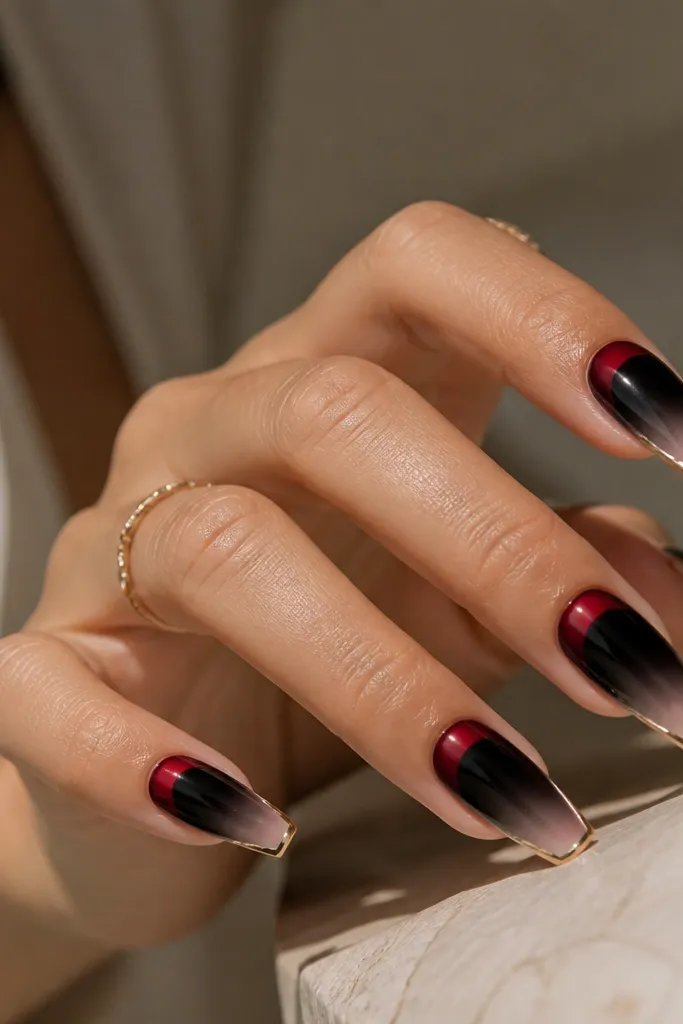
This design flips the usual ombre direction, and it looks great because it keeps the nail looking light at the tip. Black at the cuticle makes your hands look slimmer, while the red glow near the free edge keeps it warm and eye-catching. The thin gold line at the tip makes it feel finished like a custom manicure. I like this on short coffin and rounded shapes because the gold edge visually lengthens. It’s also forgiving if your reds fade slightly — the gold line hides uneven tip edges.
Start by painting the cuticle area black and blend downward with a sponge so it fades. Leave the very tip area slightly lighter by blending less. Then add a thin red “glow” band across the top third of the nail, feathering it so it looks like light through glass. Draw a thin gold line along the free edge, centered so it doesn’t drift to one side. Seal with glossy topcoat and cap the tip.
Cap the gold line with topcoat twice — once gently, cure, then a second thin layer.
10. Red Heatwave Blocks With Black Outlines And Gold Corner Caps
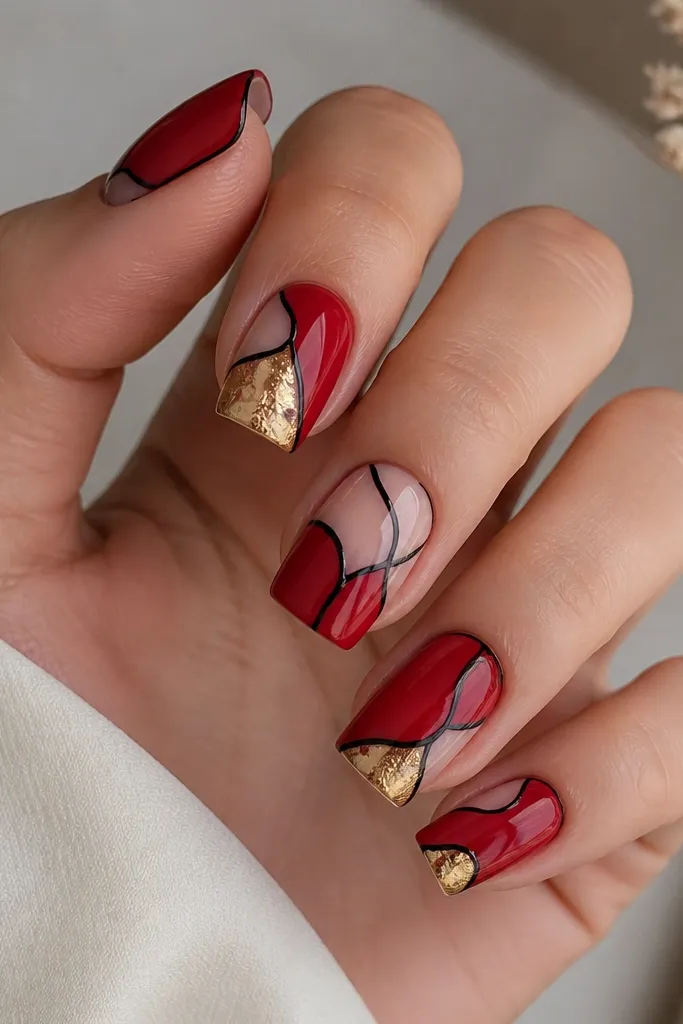
Heatwave blocks look bold without needing glitter. The black outlines make each red block look crisp, and that crispness is what makes gold feel like a finishing accent instead of a distraction. I use gold foil corner caps at the outer edge of two nails, because corners catch light and look like small accessories. This set flatters hands with longer nail beds since the blocks can stretch upward. It also works on year-round outfits because red and black are always “in,” and gold adds warmth.
Paint a full glossy red base and cure. Use black striping gel to outline heatwave-style shapes across the nail — irregular zigzag edges, but keep the lines consistent thickness. On two nails, place tiny gold foil pieces only at the outer corners, not in the middle. Clean up edges with a brush and gel cleanser so the black outlines look sharp. Finish with glossy topcoat for a smooth, glass-like surface.
Editor's noteOutline first, then fill — it keeps the red blocks clean and prevents messy borders.
11. Black Rose Accent With Red Petals And Gold Stem
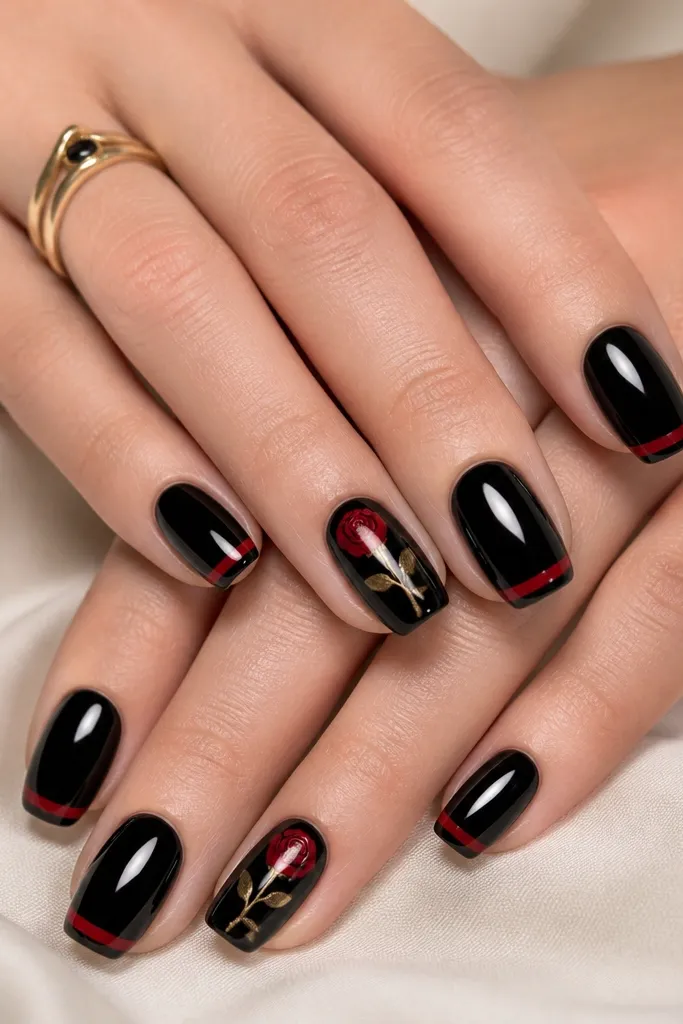
A rose accent works because it tells a story on one nail instead of trying to cover all ten. I draw a black rose outline and fill petals in red so it looks like ink and color on top of a dark base. The gold stem line is the trick — it gives a “grown” feel and ties the gold theme together. This set flatters medium almond and oval shapes because roses look natural on curved surfaces. It’s also great for date nights or dinners where you want detail, not sparkle.
Paint all nails glossy black and cure. On the ring finger and one thumb nail, paint a red petal cluster at the center, then add black linework to outline the rose edges. Draw a thin gold line from the base toward the side like a stem, and add one tiny gold leaf dot. On the remaining nails, add a single red stripe about 2 mm from the tip and keep it straight. Seal with glossy topcoat and cap the design edges.
Use a fine liner brush and keep lines under 1 mm — rose details look expensive when they’re thin.
12. Red Glazed Donut Nails With Black Center And Gold Rim
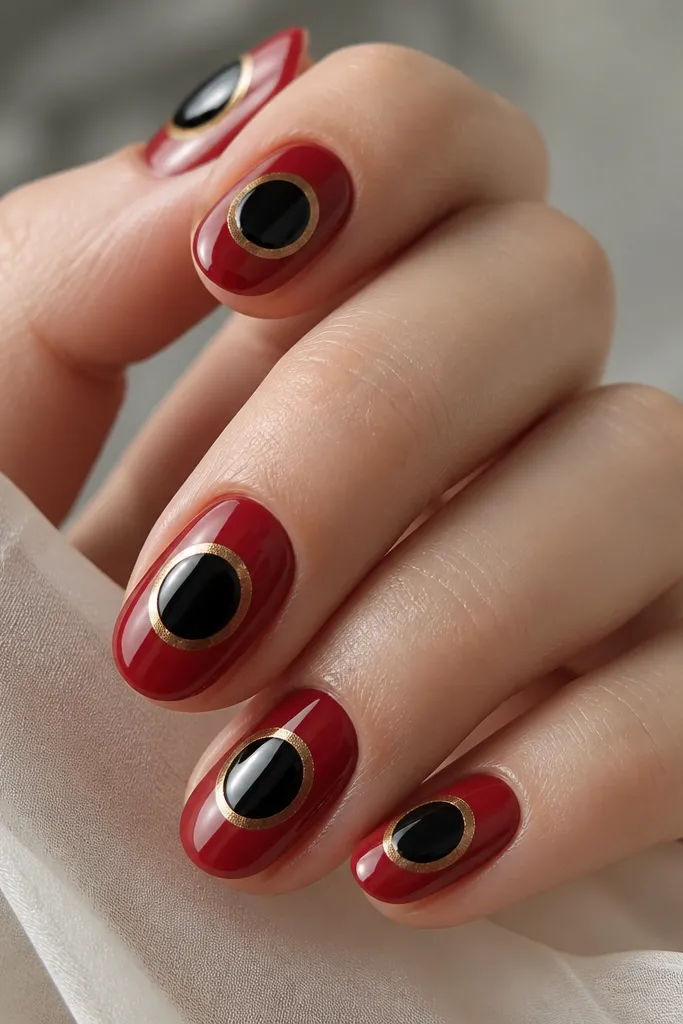
Donut nails sound silly until you do them clean, then they look like tiny luxury objects. The black center makes the design feel grounded, and the gold rim gives it that glazed-metal look. I like this with a red ring because it reads warm and makes gold look more yellow instead of greenish. This works best on medium lengths where the circle can sit comfortably. It’s also a good year-round design because it’s graphic and doesn’t rely on seasonal motifs.
Start with a glossy red base and cure. Use a round stencil or a small makeup sponge edge to place a black circle near the center of each nail. Then paint a thin gold ring around the black circle, keeping the ring consistent thickness. Add a second thin red line just outside the gold ring on two nails for extra dimension. Finish with glossy topcoat, and be careful not to flood the ring so it stays crisp.
Editor's noteIf your circle looks off, outline the circle in gold first — gold gives you a guide for the black fill.
13. Black And Gold Foil Swirl Over Red Aura
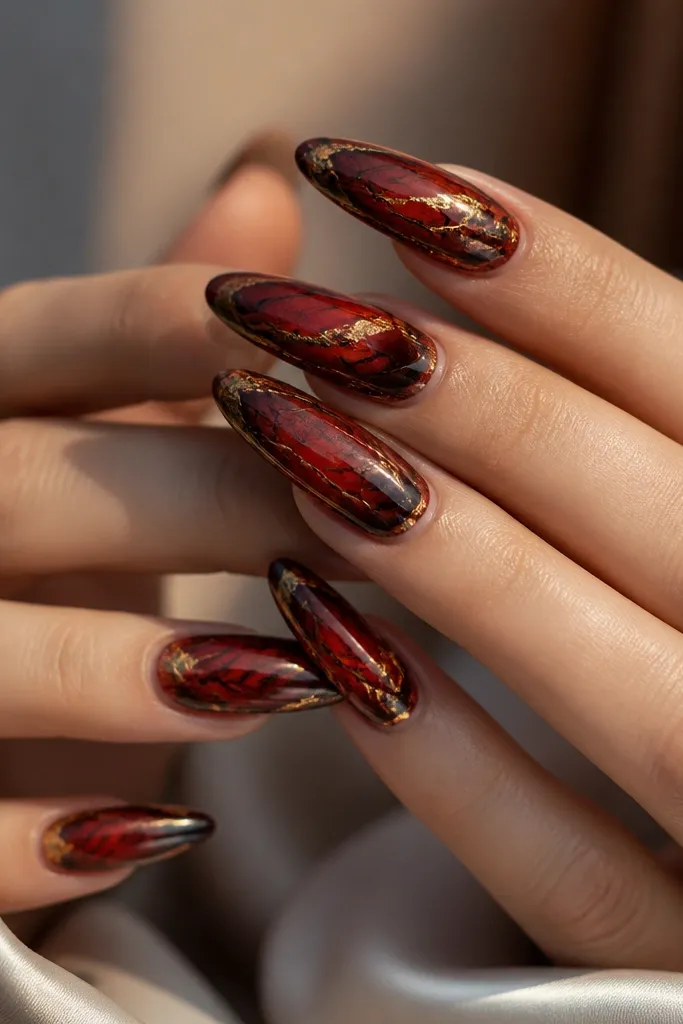
Aura nails are flattering because they create a soft focal point without covering the whole nail. Here, the center glow is red, and black swirl lines pull the eye outward. Gold foil layered over the swirls adds movement and makes the set look dimensional. This is best on long almond or coffin because the swirl has room to stretch upward. It works for year round because the aura glow looks good in daylight and in dim restaurant lighting.
Paint a sheer nude base, then add a red aura center using a makeup sponge — dab red pigment/gel in the center and feather outward. Draw black swirl lines around the aura with a thin brush, following a loose spiral direction. Press gold foil onto the top of the black swirls, then seal with a clear gel layer. On the index and middle fingers, make the swirl thicker for a stronger focal point. Topcoat with glossy gel, avoiding thick layers that flatten the aura.
Use small foil pieces and overlap them — large sheets crease and look crinkled.
14. Red Side French With Black Half-Moons And Gold Knuckle Line
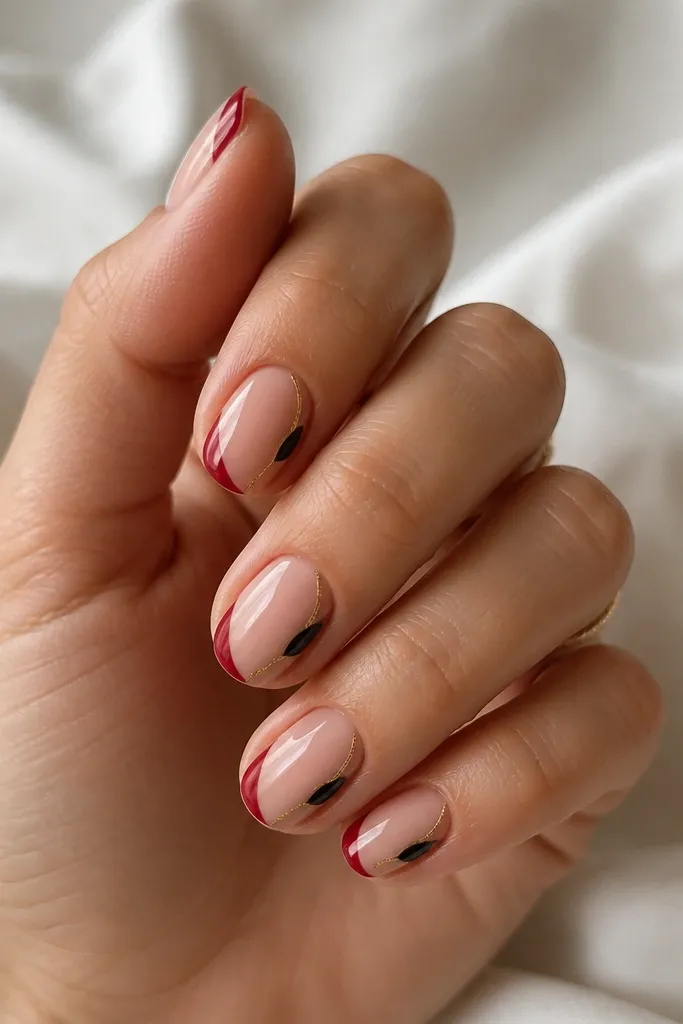
Side French is the trick when you want something different from regular tips but still clean. The red side tip keeps the look bright, while black half-moons add structure near the cuticle without covering the whole nail. The gold knuckle line — that curved line near the side — makes it look like a custom frame. This flatters short oval nails and hands with strong nail curves because the side detail follows your natural shape. It’s also a good choice if you want black-and-gold year round but don’t want heavy glitter.
Start with a sheer nude or pale pink base and cure. Paint a side French tip in red on one side of each nail, keeping the curve consistent across nails. On the same side, paint a small black half-moon at the cuticle corner. Use a liner brush to draw a thin gold line that mirrors the side French curve near the knuckle area. Finish with glossy topcoat and cap the tip edges.
Mask the opposite side with tape while painting the side French so the red edge stays razor sharp.
15. Black Base With Red Reverse French And Gold Stud Trio
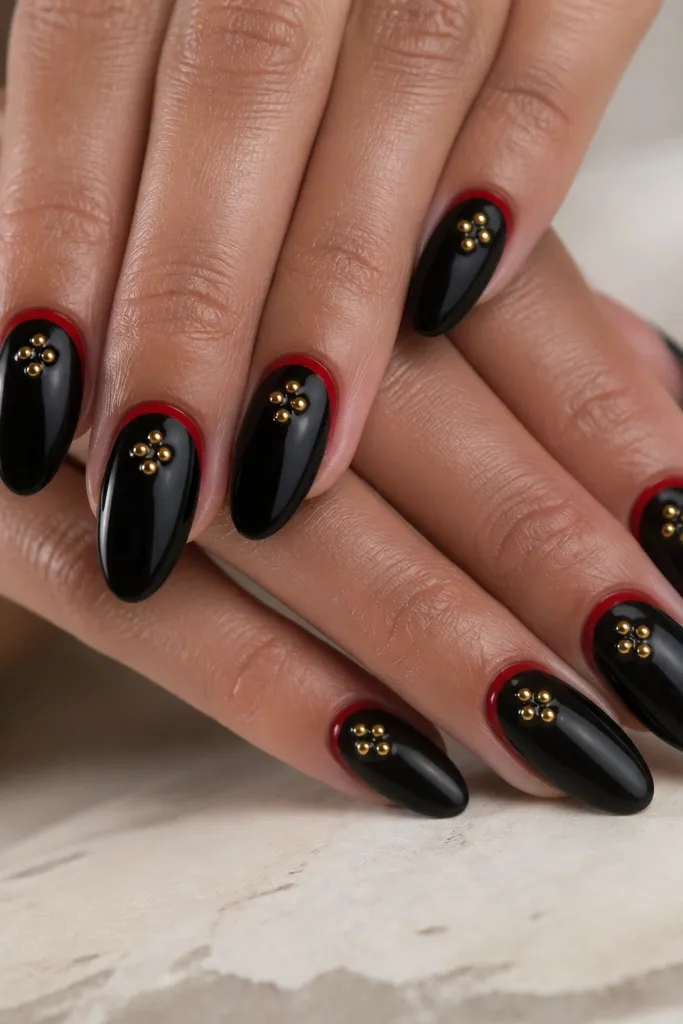
Reverse French looks bold and clean because it frames the cuticle instead of the tip. With a glossy black base, the red cuticle line pops, and the gold stud trio adds a geometric jewelry vibe. I like this on medium square and almond because the studs sit nicely in the center of the nail surface. This set is especially good for colder months because the black base hides staining and looks deep even when your hands are dry. It also reads “done” fast because the design is symmetrical.
Paint two coats of glossy black and cure fully. Use a striping brush to draw a red reverse French line right at the cuticle curve, keeping it thin and even. Place three gold micro studs in a triangle formation — one in the center and two slightly lower left and right. Press studs into a thin layer of clear gel before curing so they don’t pop up. Seal with glossy topcoat, and cap around the studs for a smooth feel.
If studs catch on fabric, file the topcoat smooth over them after curing.
16. Red Marble French Tips With Black Cap And Gold Flecks
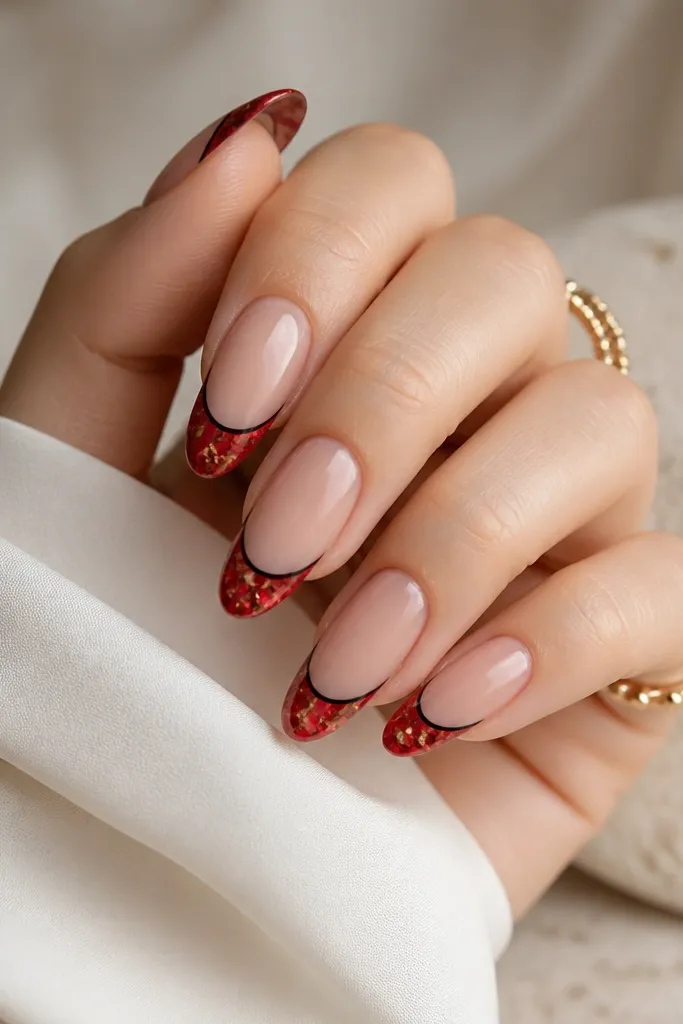
Marble French tips are a great compromise when you want detail but still want a clean base. The nude base keeps your nails looking longer, and the red marble tips give movement. A thin black cap at the tip edge makes it look crisp and prevents the red from blending into gold too much. Gold flecks scattered lightly across the marble make it look like metal dust trapped in the gel. This flatters most nail lengths, but it’s especially pretty on medium almond and short squoval.
Start with a nude base and cure, then paint French tips in translucent red jelly. For marble, drag a few thin streaks of darker red through the jelly before it fully sets. Add a very thin black line along the tip edge like a cap. Sprinkle gold flecks sparingly using a dotting tool, then seal with glossy topcoat. Clean the sides with a liner brush so the flecks don’t smear onto the nude base.
Editor's noteKeep the gold flecks sparse — one or two per nail is enough to read “luxury.”
17. Black And Gold Geode Slice With Red Background Glow
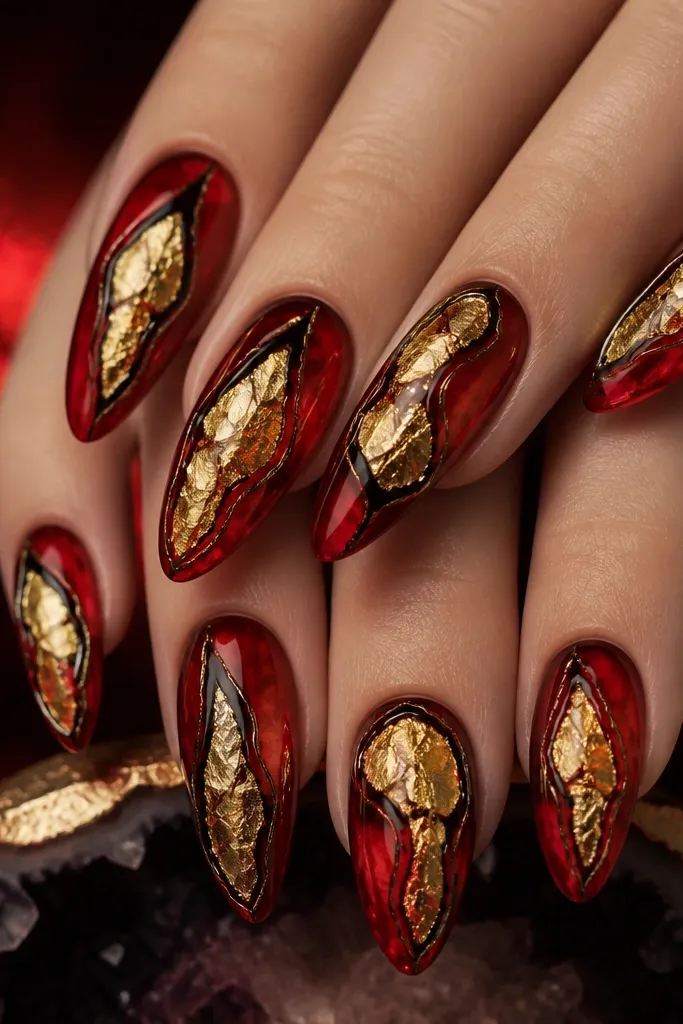
Geode nails look like real stone when you outline the facets and keep the gold in the “crystal” areas. Use a red glow background so the black outlines feel dramatic and the gold looks warm. The gold foil facets create the stone effect, while the black geode lines make the shape readable. I like this for special weekends because it still feels wearable — you’re not covering all nails with heavy 3D. It flatters medium almond and long oval because the geode slice can sit diagonally.
Apply a red glow background using a sponge over a sheer base, then cure. Draw a geode slice shape in black — a diagonal oval with jagged inner facets. Press gold foil into the facet areas, sealing lightly so it holds texture. On one or two accent nails, make the geode larger and more centered. Finish with glossy topcoat, and add a thin clear gel layer over the gold so it doesn’t snag.
Editor's noteOutline first, then foil — if you foil before you draw facets, the shape gets muddy.
18. Red And Black Checker Accent With Gold Outline Tips
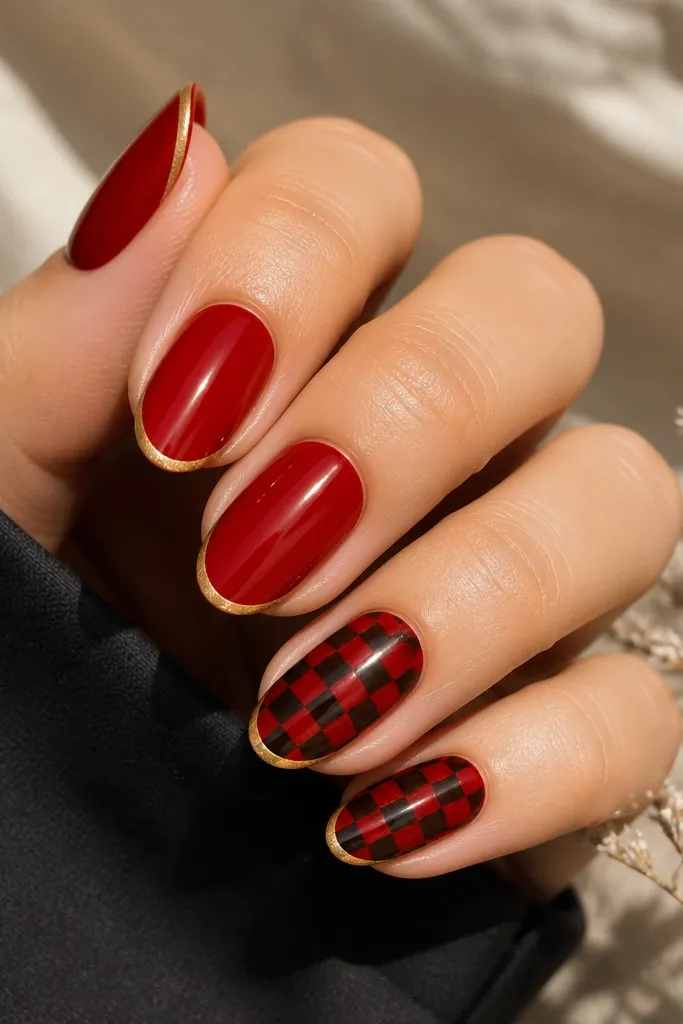
Checker patterns look fun, but they can go childish fast. This version stays grown-up because the checker is small and confined to accent nails, while the rest of the nails keep a clean red base. The black-and-red checker gives contrast, and the gold outline tips make it feel like a coordinated set. I like this on short squoval because the gold outline gives the illusion of a sharper tip. It’s great when you want a statement but you still want your manicure to match work clothes.
Paint all nails glossy red and cure. Draw a thin gold outline along the French tip line on every nail. On two accent nails, paint a small checker grid using black gel squares, keeping each square about 1.5-2 mm. Leave the rest of the nails plain red with the gold tip outline. Seal with glossy topcoat and cap the gold edge so it stays smooth.
Editor's noteUse striping tape to mark the grid — straight checks look expensive.
19. Gold Foil Half-Sheet On Black With Red Edge
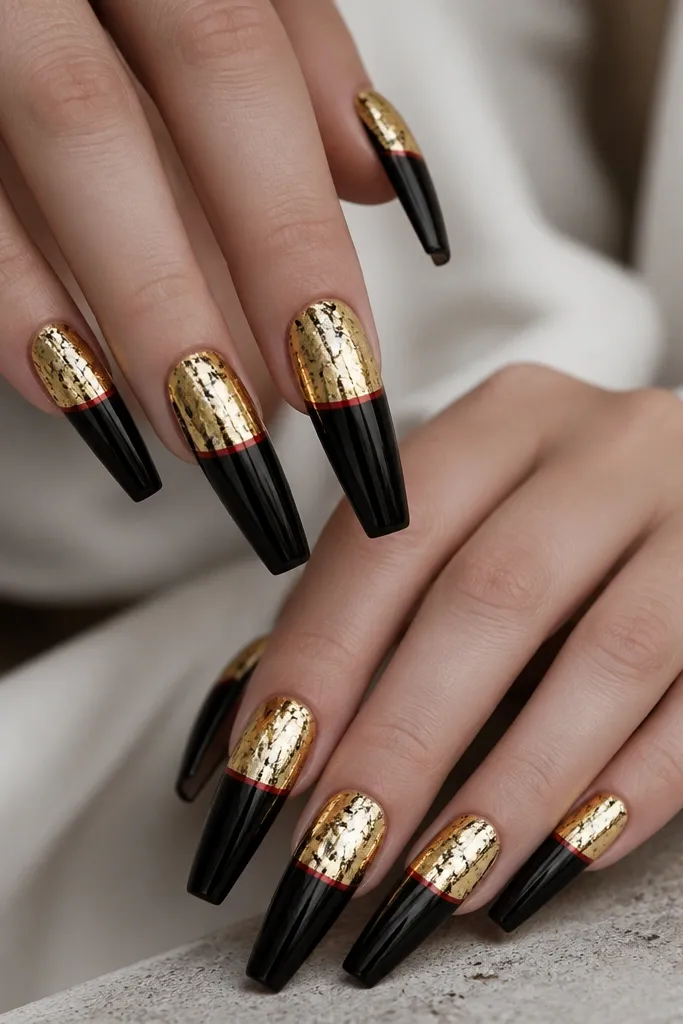
This set is bold because the gold covers a big area, but it still looks clean when it’s cut into a clear boundary. The glossy black base makes the gold foil read bright and reflective, while the thin red edge line keeps the color story connected. I like it on long coffin because the gold half-sheet stretches and looks like a cuff. It’s also one of the best year-round statement looks because it doesn’t depend on tiny details — the shape does the work. If you wear gold jewelry, this matches naturally.
Apply glossy black base in two thin coats and cure. Press gold foil onto the upper half of each nail, leaving the lower half black, then seal with a clear gel layer. Use a thin red gel line to trace the boundary between black and gold so it looks intentional. Make the foil slightly uneven on two nails so it still looks organic, not like a sticker. Finish with glossy topcoat, applying extra topcoat over the foil edge so it doesn’t lift.
Editor's noteTrim foil edges with a small brush after curing — it keeps the boundary crisp.
20. Red And Black Striped Stiletto With Gold Corner Shine
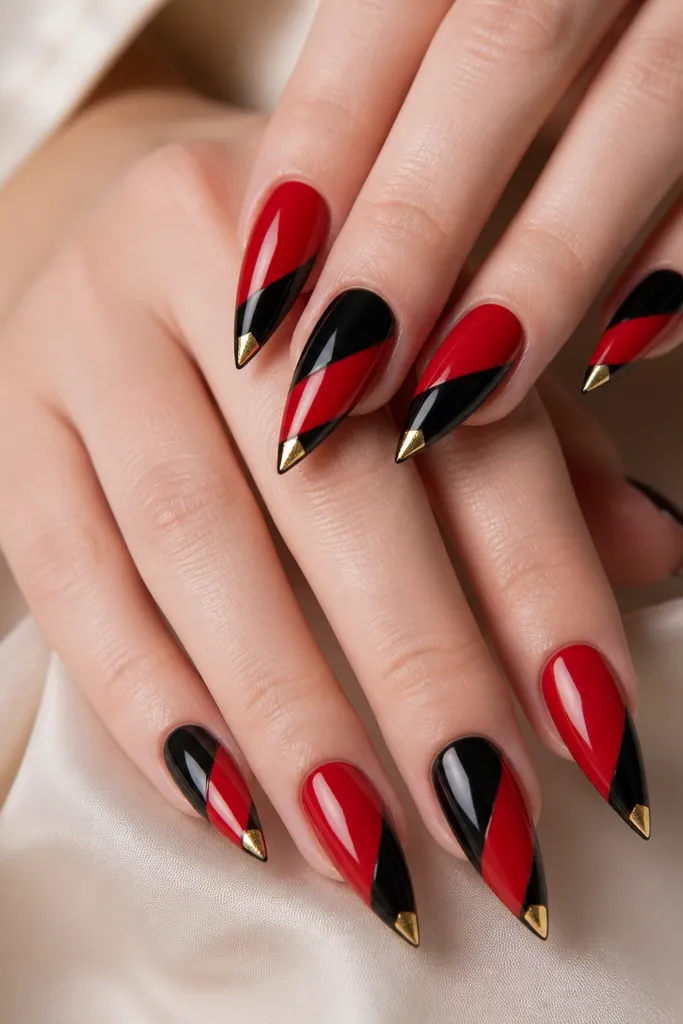
Diagonal stripes elongate the nail and make stiletto shapes look sharp instead of bulky. Keep the stripes thin so the red and black feel like clean design lines. The gold corner shine is small but powerful — it sits right at the tip and makes the whole set catch light when you move your hands. This works best on stiletto and long almond because there’s enough space for the stripes to look crisp. It’s a strong year-round statement because the colors stay bold even when your outfit is simple.
Start with a base coat, then paint alternating diagonal stripes in red and black using a striping tape guide. Remove tape carefully so lines stay crisp. Add a small gold foil triangle or gold polish corner at the tip on every nail, pressing it into clear gel before curing. If you want extra polish, add a thin gold line along one side of the stripe pattern on the ring fingers only. Seal with glossy topcoat and cap the tip.
Use a striping brush for the edges after tape — it cleans up any micro-bleed.
21. Black And Gold Outline Roses On Red Jelly Nails
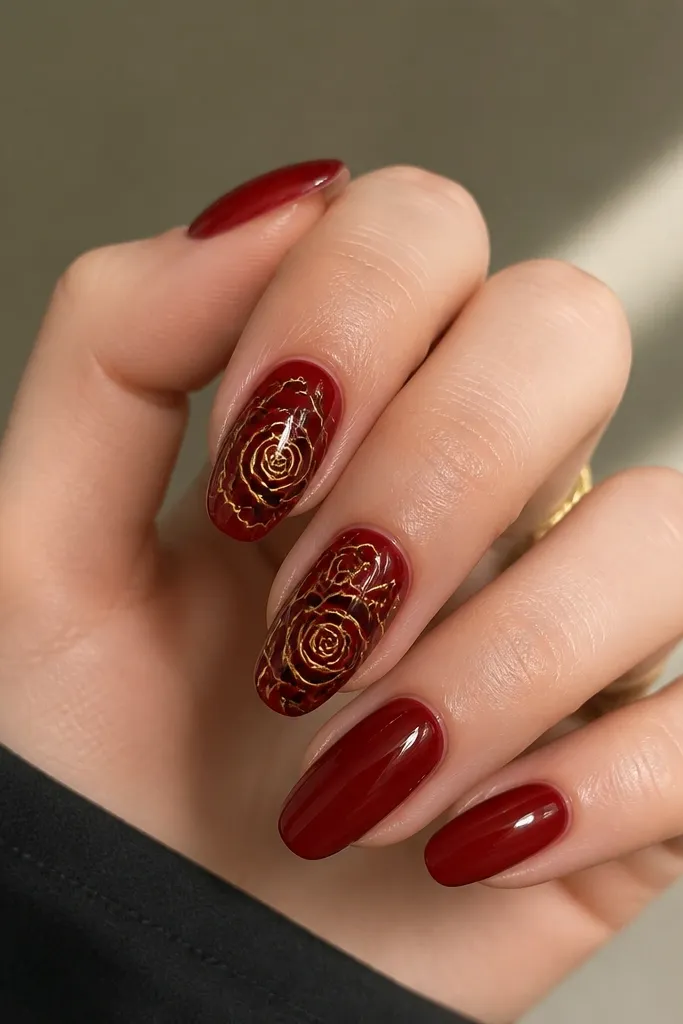
Outline roses look classy because they’re linework, not filled art. A red jelly base gives that glossy, soft glow, and it makes black lines look crisp instead of harsh. Double outline with black then gold makes the rose look like it’s been inked and then traced by metal. This is flattering on oval and almond shapes because the rose can sit naturally along the nail curve. It’s also beginner-friendly compared to full painting because you’re mostly drawing lines.
Apply two coats of jelly red, curing each thin layer so it stays glossy. On two nails, draw a rose outline in black with a fine liner brush or stamping plate. Trace the rose outline lightly with thin gold polish, focusing on petals edges and the center swirl. Add one tiny gold dot near the rose center to finish it. Topcoat with glossy gel, using a thin layer so the linework doesn’t blur.
Editor's notePractice one rose on a nail swatch first — line thickness is what makes it look clean.
22. Red Velvet Matte With Gold Half-Arch On Two Nails
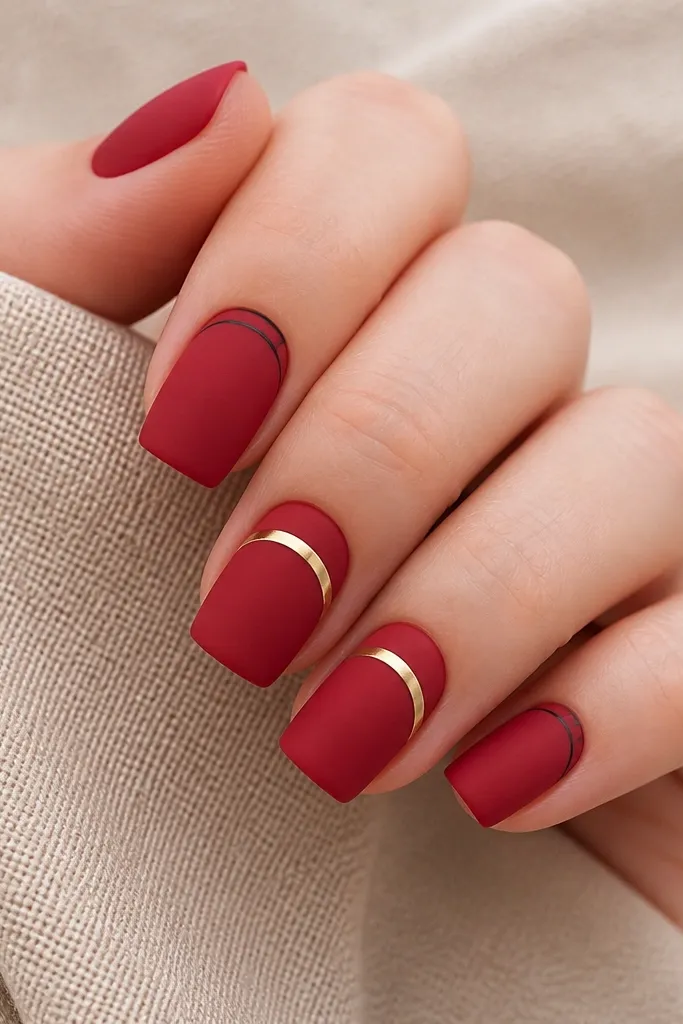
Matte red is a cheat code for year-round wear because it looks soft and hides small chips better than glossy. This set uses matte red as the main look, then adds black and gold in controlled places so it doesn’t look like holiday nails all the time. The gold half-arch on two nails creates a clean statement without needing foil coverage. I like adding a thin black line near the cuticle on the remaining nails because it ties the black-and-gold theme together. This is flattering on short nails because matte makes edges look smooth and the half-arch adds length.
Paint all nails matte red and cure, then apply matte topcoat if your red isn’t already matte. Add a thin black line near the cuticle on four nails, keeping it about 1 mm tall. On two accent nails, draw a gold half-arch across the upper third — like a curved smile, centered. Use gold metallic gel so the arch looks solid, not patchy. Seal with matte topcoat over everything except the gold — for gold, use a satin or glossy top so it stays reflective.
If matte topcoat dulls your gold, cover only the gold arch with a satin top and keep the rest matte.
23. Black And Gold Foil Confetti Over Red Gloss
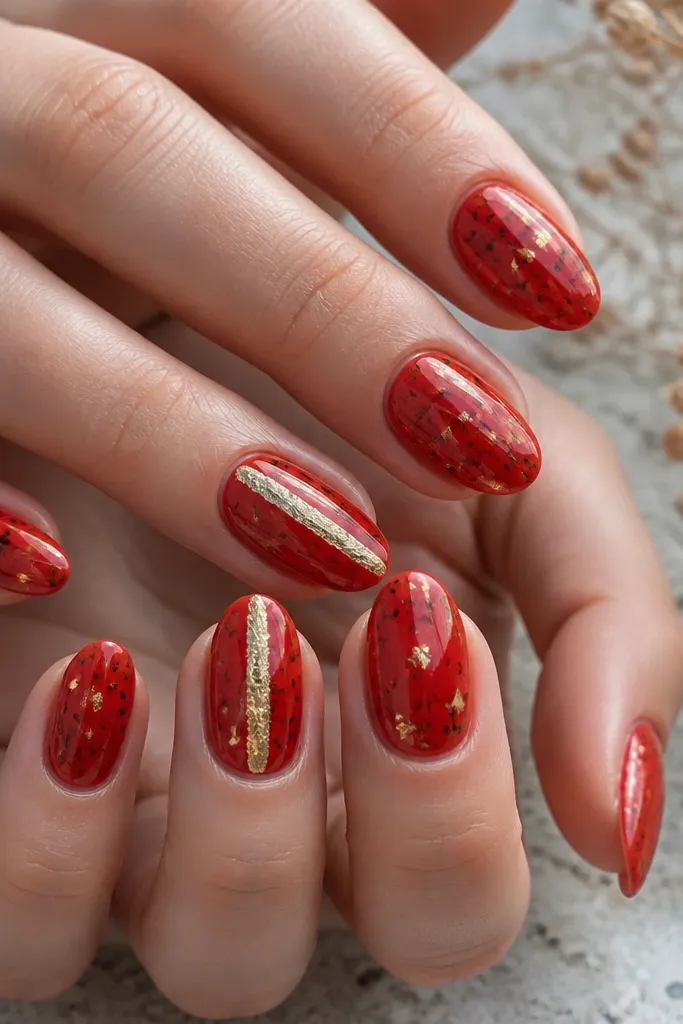
Confetti nails look effortless when the pieces are sized correctly. Here, the red base is glossy and smooth, then you add tiny black bits and gold foil flecks so it looks like metallic confetti stuck under glass. This reads as creative statement without the heavy look of large glitter. I like it for hands that get photographed a lot because the confetti catches light from different angles. It’s flattering across nail lengths, but it looks best on medium almond and squoval where the surface area is even.
Apply a glossy red base and cure. Add small pieces of black foil or use black acrylic glitter in tiny amounts, then press gold foil flecks on top. Keep distribution even — aim for 6-10 flecks per nail, not clumps. On two nails, add a vertical gold foil stripe down the center, leaving space on both sides. Seal with glossy topcoat in two thin layers so the foil pieces stay flat and smooth.
Editor's noteSort your foil pieces by size first — tiny pieces look more expensive than mixed chunky bits.
24. Red And Black Vertical Split With Gold Center Bar
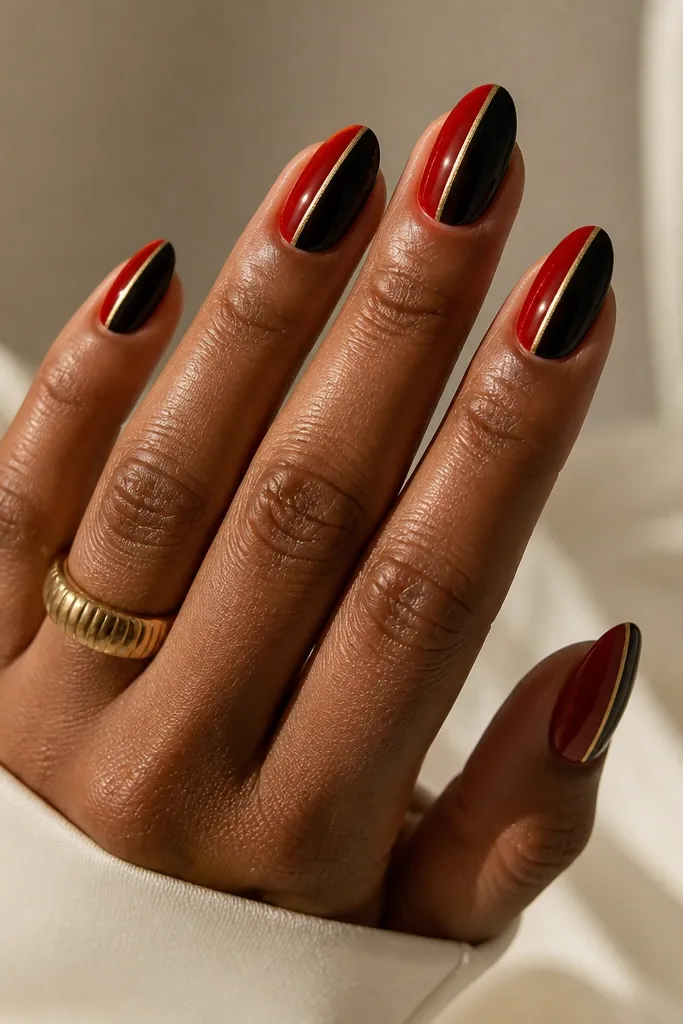
This design is graphic and clean, and it looks sharp on hands because it creates a strong vertical line. The vertical split makes the nail look longer, and the gold center bar adds that jewelry detail. I use a warm red so the red side looks rich, not pink. The black side should be glossy so it reflects light and makes the gold bar pop. This is flattering on oval, almond, and short squoval because the vertical line works with any nail curve.
Start with a base coat and cure. Paint the left half of each nail red and the right half black, using striping tape to keep the split straight. Remove tape carefully after each color cures so the line stays crisp. Add a thin gold center bar down the exact middle — about 1 mm wide — using gold striping gel. Seal with glossy topcoat and cap the edges so the tape line doesn’t lift.
Editor's noteIf your split line isn’t perfectly straight, hide it with the gold bar — that’s what it’s for.
25. Black French Tips With Red Glitter Veil And Gold Dot Border
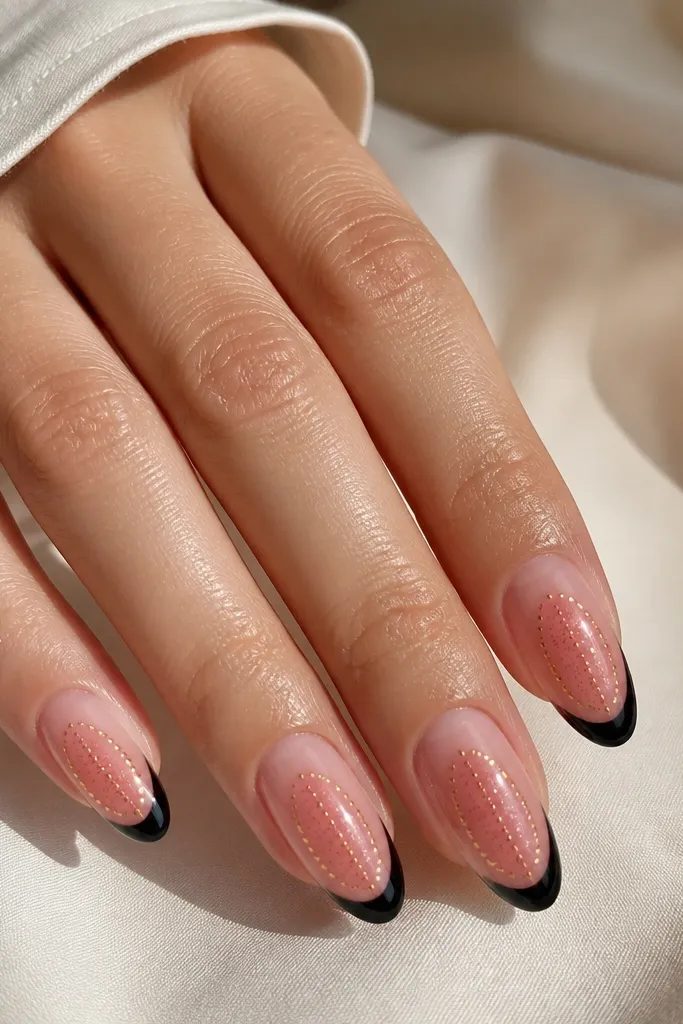
This set looks fancy because it layers sheer, black, and gold dots instead of piling on one heavy effect. The sheer base keeps it light, and black French tips anchor the design. The red glitter veil in the center adds softness and a subtle sparkle that doesn’t feel like holiday glitter. The gold dot border is small but makes the whole thing look finished, like a framed picture. It’s flattering on short to medium nails and works well if you want black-and-gold year round without going full dark on every nail.
Apply a sheer pink or nude base and cure. Paint black French tips, keeping the tip curve clean. Apply a thin red glitter veil over the center area only, then cure. Add tiny gold dots along the left and right edges of the veil, about 3-4 dots per side. Finish with glossy topcoat, and keep the glitter layer thin so it doesn’t feel gritty.
Use a dotting tool with a clean tip — contaminated gold polish makes dots look messy.



