1. Champagne Pearl Almond with Micro Gold Line
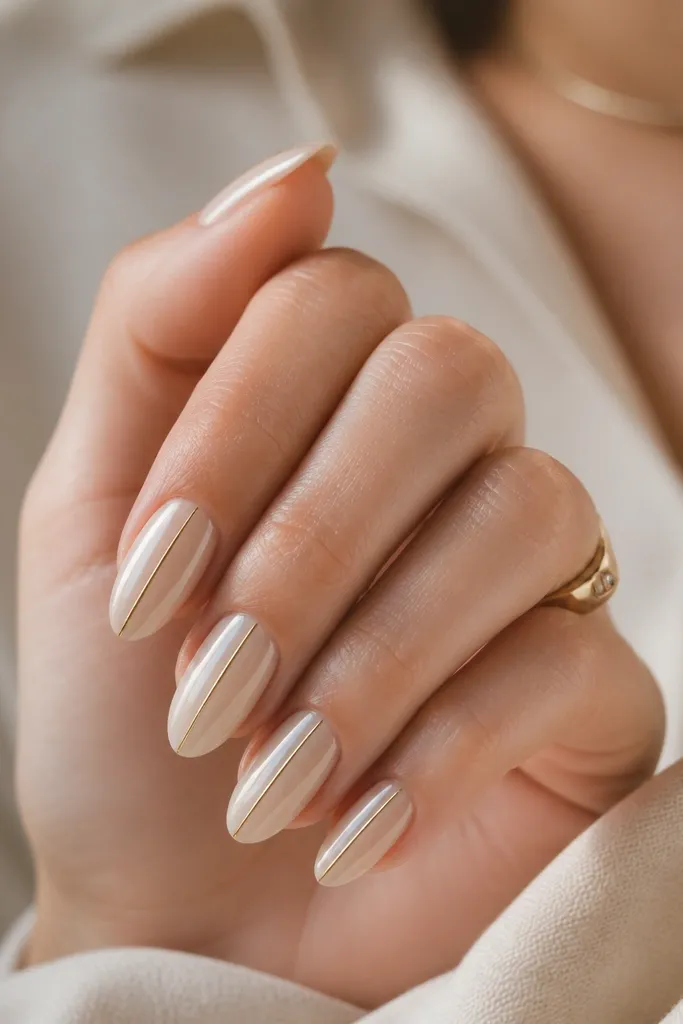
This set makes your hands look expensive fast. The sheer champagne pearl base reflects light like liquid, and the micro gold line adds structure without covering the whole nail. I've worn this with a tan and with fair skin - it works either way because the base is warm and the gold reads "sunlit," not yellow. It also flatters almond nails because the center line elongates the finger. For a vacation dinner, it's glam without looking like you tried hard in the bathroom mirror.
First, apply a sheer champagne pearl polish or gel in 2 thin coats, keeping the edges neat. Then use a striping brush and metallic gold gel to place a line down the center of each nail - stop about 1 mm before the cuticle and leave a tiny gap from the sidewalls. Cure, then add a glossy top coat in a normal thickness, not too thick. Finally, clean up around the cuticle with a lint-free wipe and a bit of cleanser so the line stays crisp in photos.
Editor's noteIf your gold line looks too bright, thin it with a clear gel so it looks like fine foil, not a sticker.
Watch outAvoid a thick gold stripe - it makes the set look heavy and chips sooner at the tip.
2. White Sheer French Almond with Gold Outline
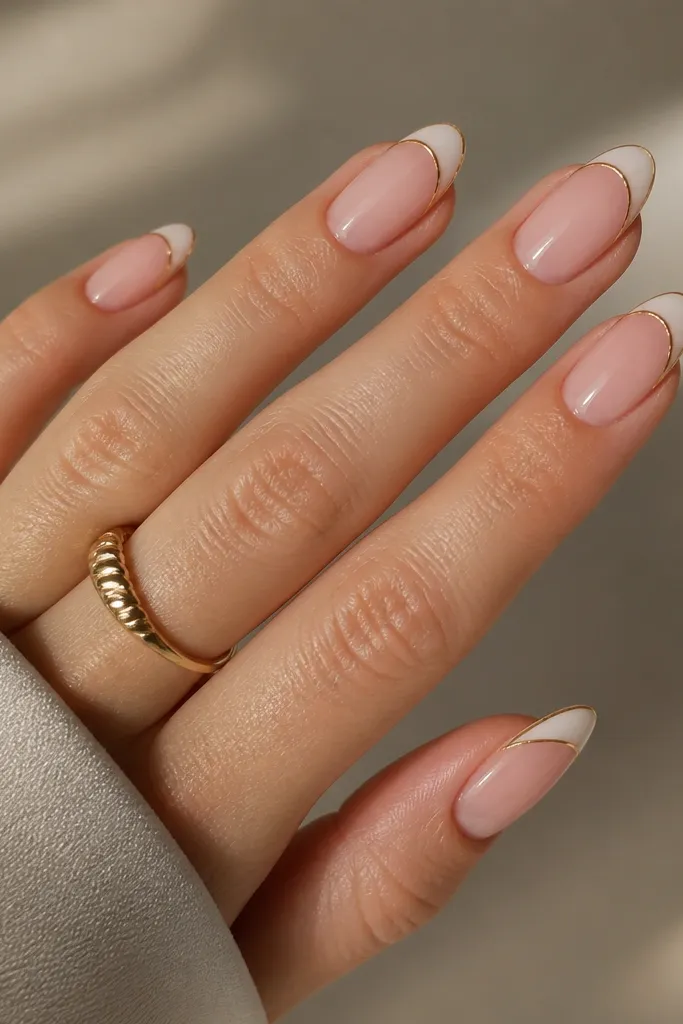
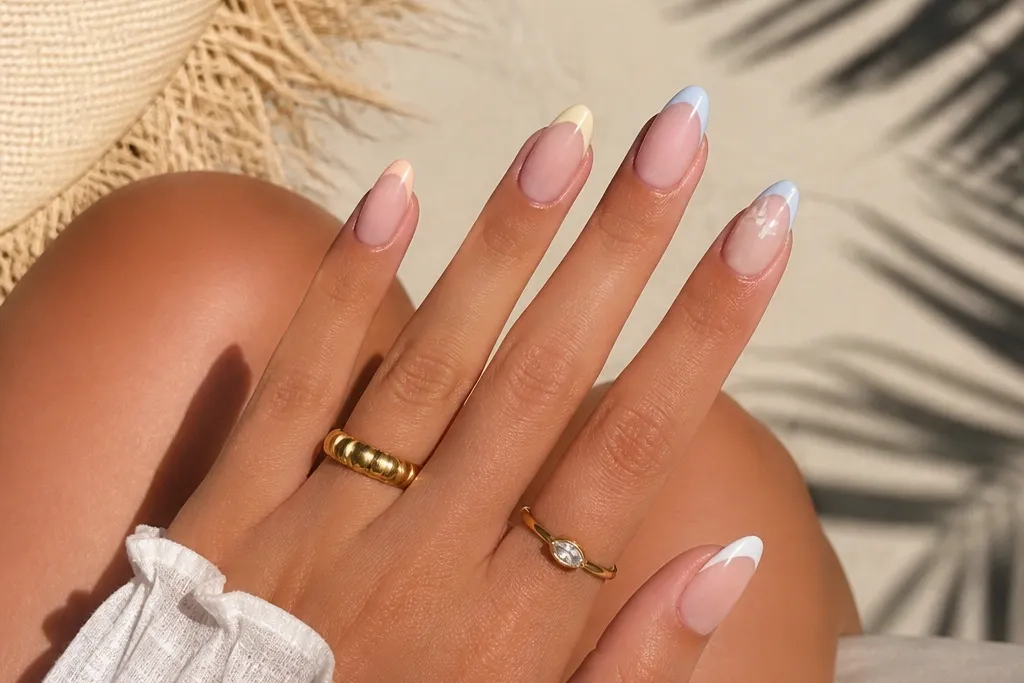
This is the cleanest "vacation glam easy" option when you want your nails to match everything. The sheer pink base blends with your natural nail and looks flattering on short and long almond tips. The translucent white French keeps it bright without turning harsh like opaque white can. A gold outline gives the manicure a jewelry feel, especially with gold sandals or a watch. It also photographs well because the tip edge is sharp but not stark.
Start with a sheer pink base in two thin coats. Next, paint a white French tip that's slightly see-through - I do three light passes instead of one heavy coat so it stays creamy. While the white is tacky (or after curing base coats for gel), trace the outer edge with a thin gold line so it sits right on the border. Seal with a glossy top coat and cap the free edge to help it last through beach wear.
Editor's noteUse a guide strip under the nail for your first attempt; remove it while polish is still wet so the line stays smooth.
Watch outAvoid painting white too low on the nail - it makes almond tips look shorter.
3. Tropical Peach Jelly Almond with Lime Micro Dots
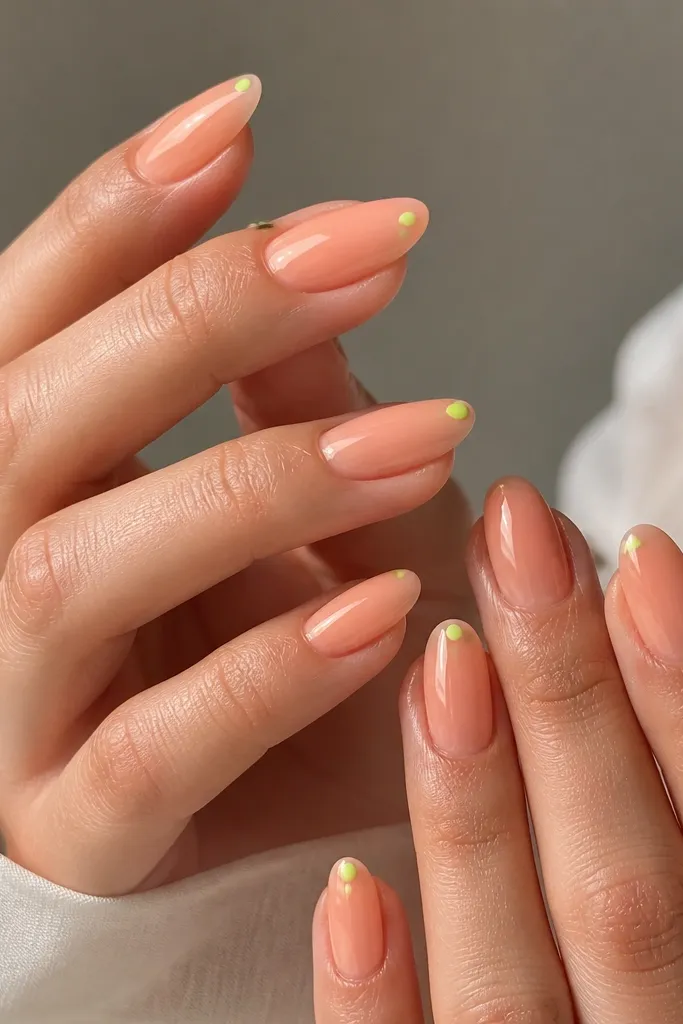
This set looks like warm fruit juice and it screams summer without neon chaos. Peach jelly is flattering because it has that "healthy nail bed" tone - it makes skin look warmer and hands look smoother. The lime micro dots add a fun vacation pop while staying small enough to look intentional. Almond shape is perfect here because the tip is where the dots catch light. I've worn this with bright linen and also with a plain white tee - it still looks like you planned it.
Apply the peach jelly base in two coats, keeping it slightly thicker in the middle for a domed shine. Cure each coat if you're using gel. Then use a dotting tool with lime polish or gel to place 2-3 tiny dots near the upper third of the tip on two to three nails. Don't cover the whole nail - keep the dots clustered on one side. Finish with glossy top coat and cap the tips.
Editor's noteIf lime feels too loud, use a softer chartreuse and keep the dots fewer than you think.
Watch outAvoid large dots - they look like nail decals and can lift at the edges.
4. Rose Nude Almond with Soft Pink Marble Swirl
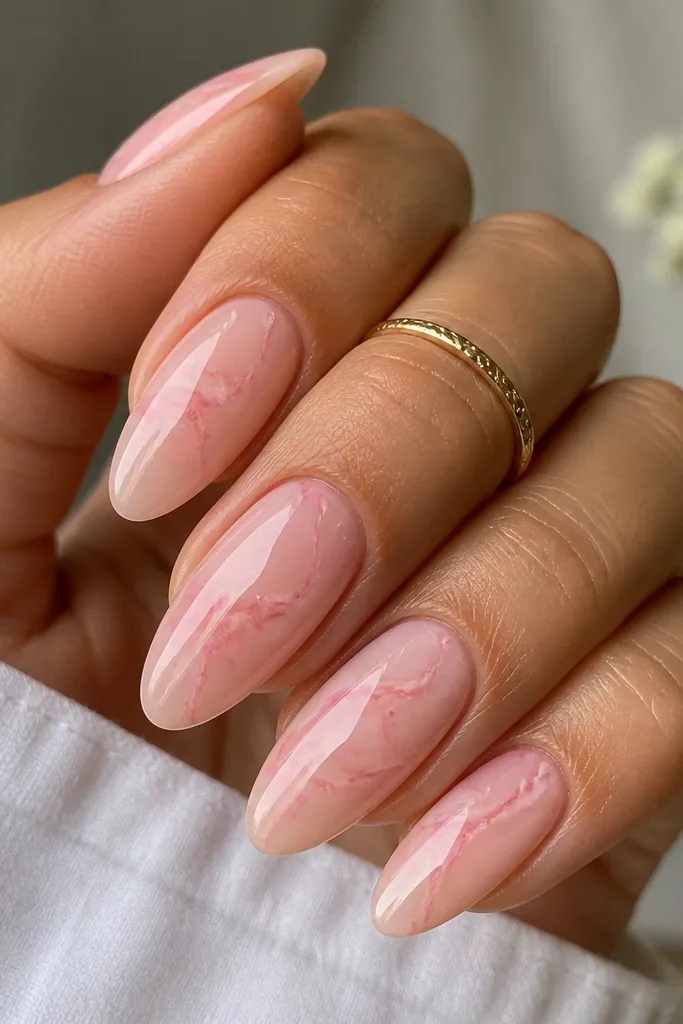
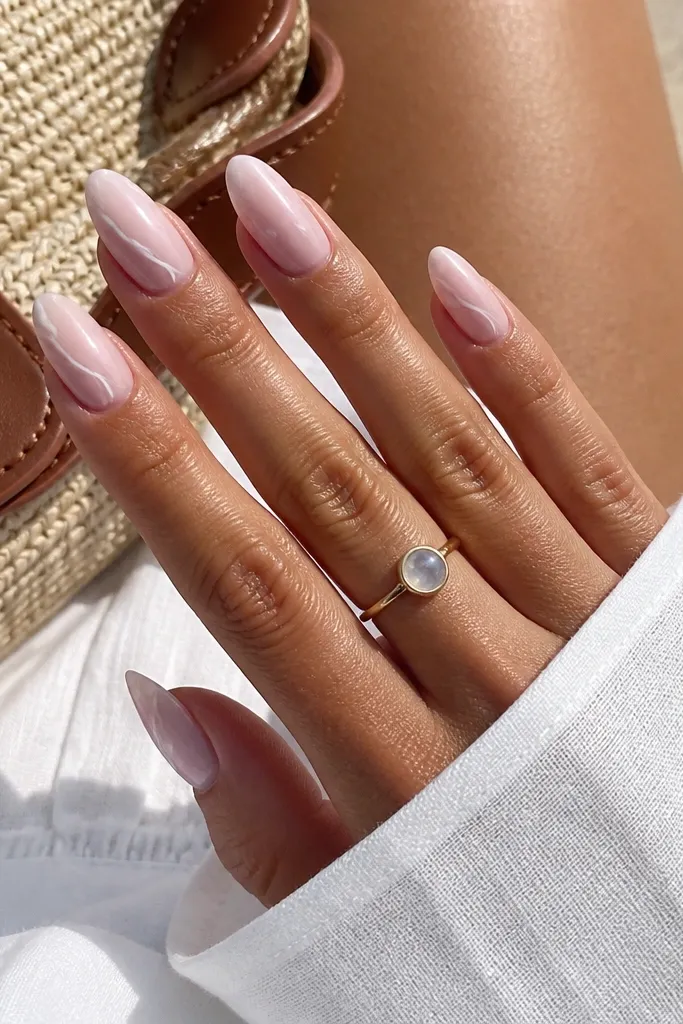
Marble sounds hard, but the version that looks good on vacation is actually simple. The rose nude base flatters almost every skin tone because it's close to your natural pink but slightly warmer. The soft pink swirls mimic marble without heavy grey - it keeps the set feminine and photo-ready. Almond nails make the swirl look longer and more fluid, especially when you place the veining diagonally. This set works for beach days because it hides minor chips better than high-contrast art.
Start with a rose nude gel in two thin coats. On a silicone mat, thin a soft pink gel with a clear gel so it spreads like paint. Using a fine liner brush, drag 2-3 thin lines diagonally across the nail, then lightly blend the edges with the tip of the brush (don't overwork it). Cure, then seal with glossy top coat. For a "natural marble" look, keep the swirls away from the cuticle by that 1 mm gap.
Editor's noteDo marble on accent nails only (like ring and middle) and keep the rest solid nude for a cleaner look.
Watch outAvoid thick marble lines - they look chalky and can look messy after a few days.
5. Sea Glass Almond with One Side Turquoise Fade
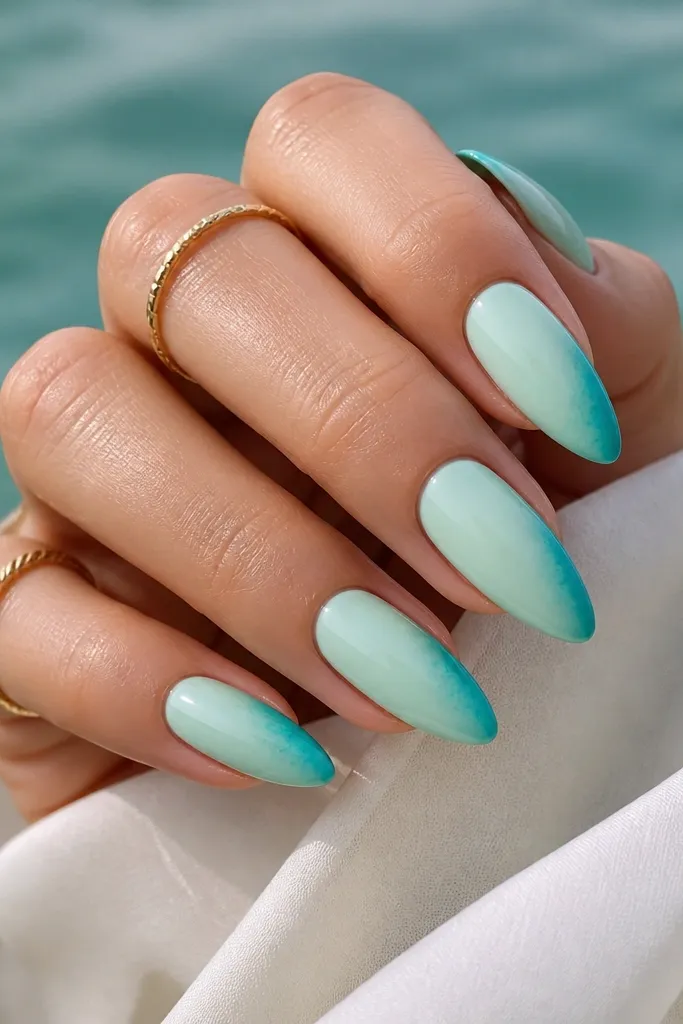
Sea glass is the exact color story that makes vacation photos look calm and expensive. The pale mint base is refreshing on warm and cool skin tones, and it looks great next to denim, white, and swimwear. The one-side turquoise fade looks modern and keeps the manicure from looking like a solid block color. Almond shape helps this design because the fade follows the nail curve. It's glam easy because you're basically doing a gradient with one accent placement.
Paint a pale sea-glass mint base in two coats. Then sponge a slightly deeper turquoise on a foam makeup sponge - lightly dab starting from the upper third of the nail and keep it only on one side. Blend with a second sponge pass so the fade transitions softly into the base. Cure and add glossy top coat. Clean the sidewalls with a small brush dipped in cleanser so the gradient stays sharp.
Editor's noteUse a foam eyeshadow applicator - it creates a softer fade than a brush.
Watch outAvoid bringing the darker turquoise all the way to the cuticle - it can look harsh and grow out badly.
6. Midnight Navy Almond with Star Dust Tips
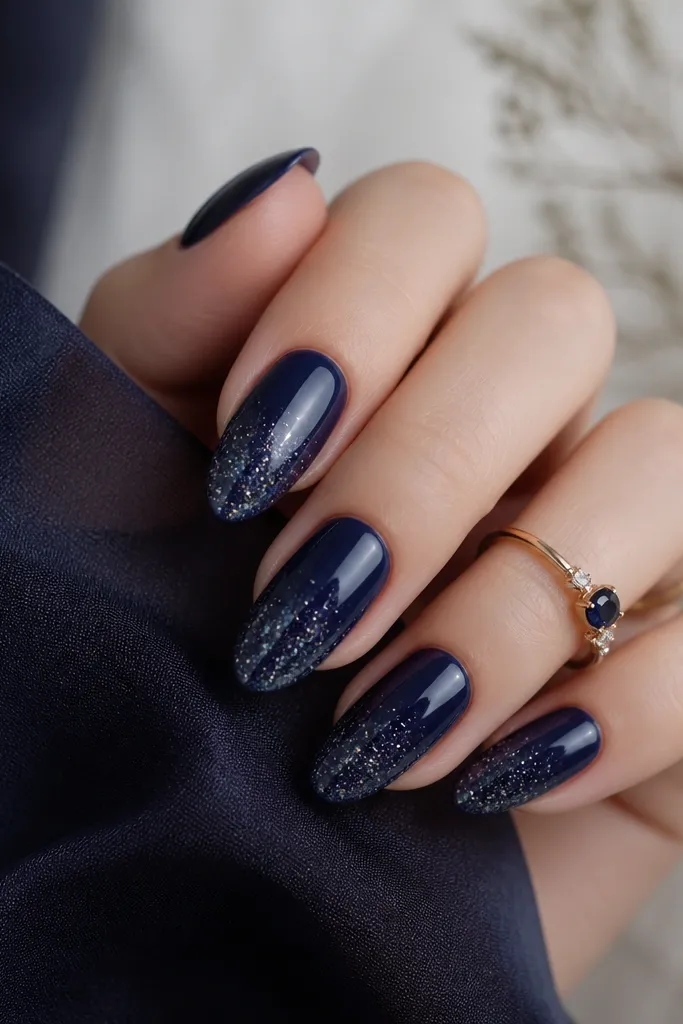
This set looks like night sky in a bottle. Midnight navy makes hands look slimmer, and it's flattering with silver jewelry and cool-toned outfits. The star dust glitter at the tips stays playful but still reads glam because the base is dark and clean. Almond nails help the glitter sit neatly at the end, like a comet tail. It's perfect for dinner on vacation or a night out where you want your nails to show in flash photos.
Apply midnight navy polish or gel in two coats, with even coverage and clean edges. Then dab a fine silver or iridescent glitter only at the tip area using a small makeup sponge, blending upward just a little. If you want it extra smooth, place a thin clear gel over the glitter and cure so the surface is even. Finish with glossy top coat and cap the free edge.
Editor's noteChoose fine glitter over chunky - the star dust effect looks more expensive and wears longer.
Watch outAvoid full glitter coverage - it catches on fabric and chips at the corners.
7. Warm Nude Almond with Toasted Gold Foil Half-Moon
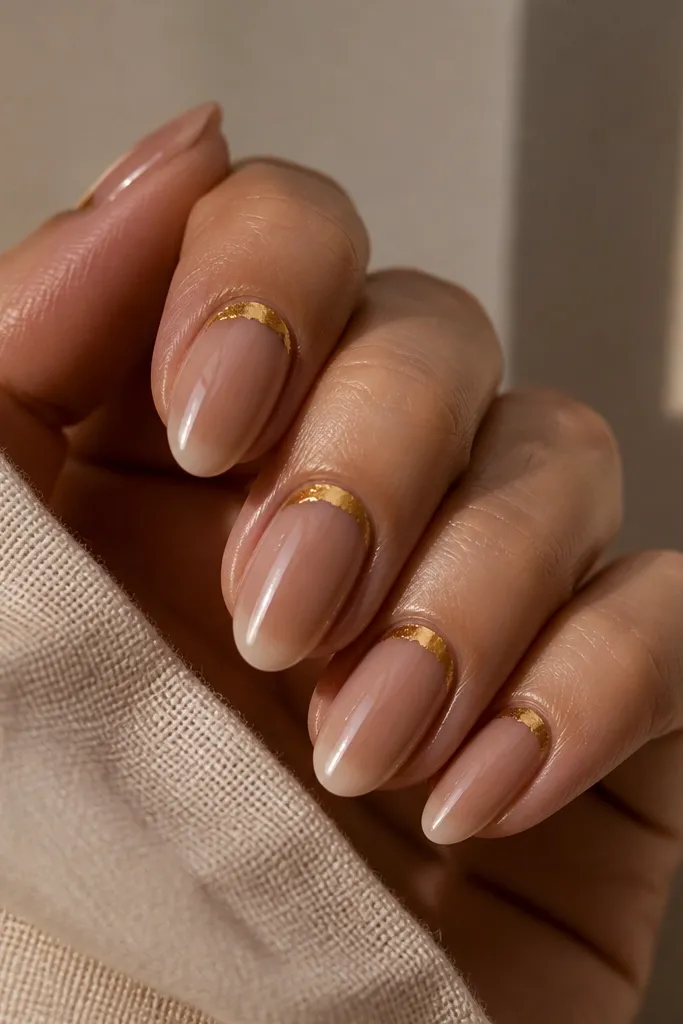
Half-moons at the cuticle are a fast way to make nude nails look styled. The warm nude base makes your nails look like your natural color but better, and it flatters most skin tones because it has a slight peach-brown undertone. Toasted gold foil reads like jewelry and gives a "sunset" vibe. Almond shape makes the half-moon feel intentional instead of random. This is my go-to for vacations when I want something that looks good in daylight and still works for dinner.
Start with a warm nude base in two thin coats, leaving the cuticle area clean. Apply gold foil adhesive or a peel-off gel near the cuticle only on the center area of the nail. Press small pieces of toasted gold foil onto the adhesive, then trim any overhang with a cuticle nipper or file. Seal with a glossy top coat, and cap the free edge. Keep the half-moon shape consistent across nails so it looks designed.
Editor's noteIf your foil is too bright, mix in a little champagne foil for a softer glow.
Watch outAvoid covering the whole cuticle - the look gets bulky and can snag.
8. Ballet Pink Almond with Clear Negative Space V- French
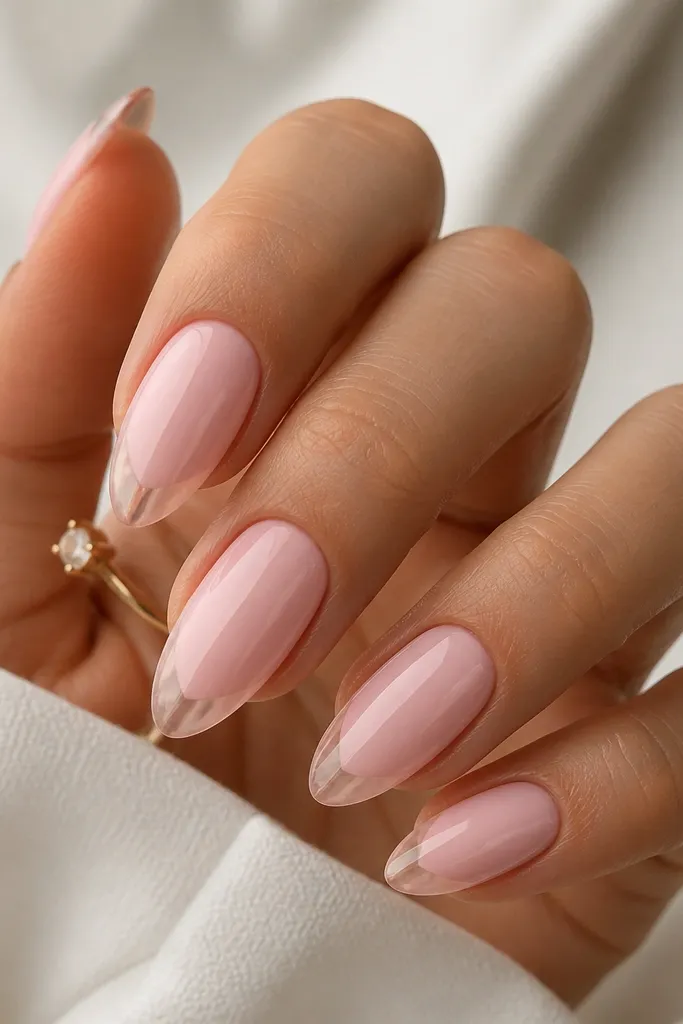
Negative space makes nails look fresh and clean, especially when you're traveling and want low-maintenance glam. The ballet pink base flatters because it's soft and close to natural nail color. The V-shaped clear space elongates the finger and gives a modern French twist without using lots of white. Almond nails make the V look sharp and elegant in photos. This is also beginner-friendly because you don't need perfect curves - you need clean lines.
Paint ballet pink in two coats, leaving the cuticle line neat. Then place a thin striping tape or a nail vinyl strip to create a V guide on the tip area. Paint over the sides with the same ballet pink or a slightly deeper pink if you want contrast, then remove the tape to reveal the clear V. Cure, then apply glossy top coat. Make sure the clear V stays truly clear - don't flood polish into it.
Editor's noteUse vinyl strips for the V - tape can bleed and ruin the sharp negative space.
Watch outAvoid thick top coat over negative space - it can turn the clear area cloudy.
9. Coral Cream Almond with White Swirl Accent
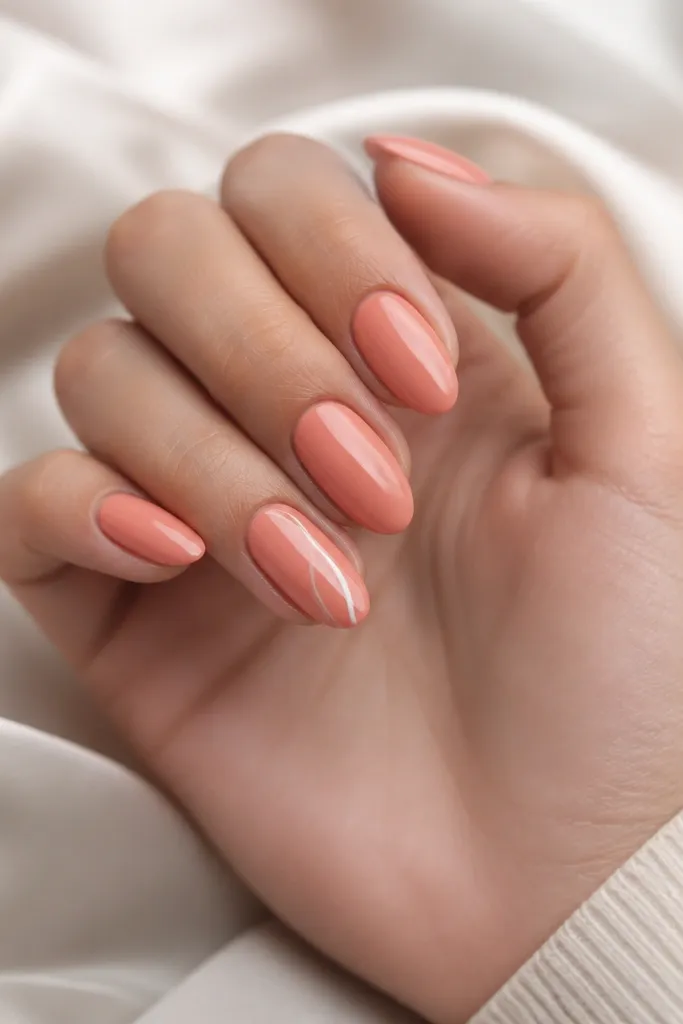
Coral cream is the vacation shade that makes your skin look bright without going neon. It flatters warm skin tones and also adds warmth to cool skin tones, which is why I reach for it when I'm tan-less at the start of a trip. The white swirl accent keeps it interesting but still easy - you're not doing full nail art on every finger. Almond nails make the swirl feel like a ribbon because the nail surface is longer. It's glam easy because the base does most of the work.
Apply coral cream in two coats and let it level fully before top coat. Choose one or two accent nails and use a fine liner brush dipped in white gel polish. Draw a thin swirl that starts around the center of the nail and curves toward the tip. Keep the line narrow and leave space between the swirl and the sidewalls. Cure and seal with glossy top coat, then cap the tip.
Editor's noteIf the swirl looks wobbly, wipe the brush on a lint-free wipe and redo one clean line instead of trying to fix it.
Watch outAvoid putting swirl accents on every nail - the set looks busy and loses the "vacation glam" vibe.
10. Espresso Brown Almond with Nude Marble Tips
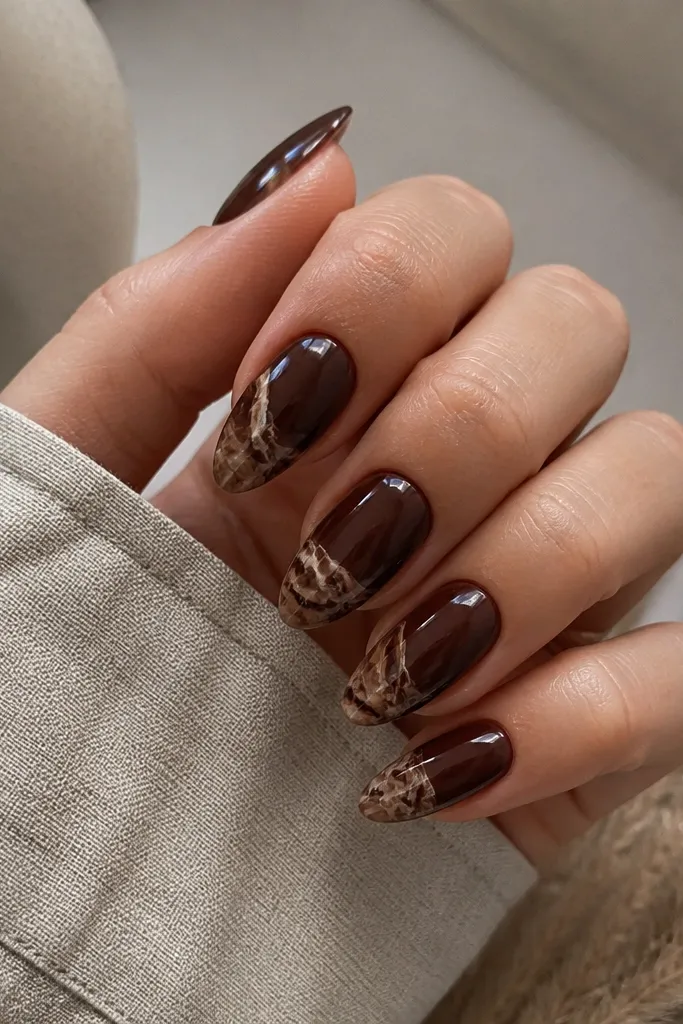
This is the "grown-up vacation" look. Espresso brown makes hands look polished, and it hides small chips better than bright colors because the tone matches wear. The nude marble tips add light and dimension, so the nails don't look flat. Almond shape works because the tip area is where the marble effect sits and reads like natural stone. It looks amazing with gold jewelry, cognac leather bags, and black outfits at night.
Paint espresso brown in two coats. For the marble tips, sponge a nude beige or taupe near the top of the tip area, then use a liner brush to drag 2-3 thin lines through it. Blend the edges lightly with a clean brush tip so it looks like veining, not stripes. Keep the marble only on the bottom half of the nail so it stays elegant. Cure and apply glossy top coat with extra attention to sealing the marble edges.
Editor's noteUse a slightly sheer nude for the marble so the brown still shows through - it looks more natural.
Watch outAvoid full marble coverage - it starts to look like a pattern print by day three.
11. Hot Pink Almond with Thin Black Side Stripe
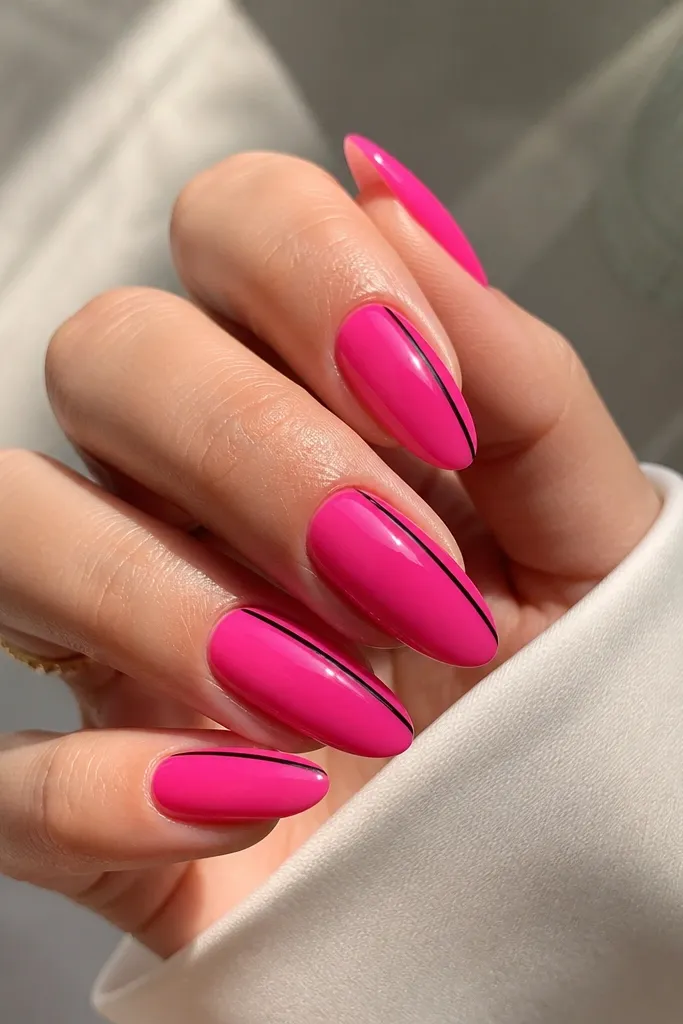
Hot pink is the easiest way to look instantly "vacation ready," especially with a white sundress. The thin black stripe gives it edge and keeps it from looking childish. Almond nails make the stripe look like it's framing the finger, which is why hands look longer. I've worn this on resort trips where I'm taking lots of beach photos with sunglasses and it still looks sharp. It's bold but controlled because the art is minimal.
Apply hot pink in two smooth coats and make sure the surface is level - hot pink shows brush marks. Cure, then use a fine liner brush to paint a thin black stripe along one sidewall, about 1 mm away from the cuticle. Keep the stripe straight and stop before the very tip so it doesn't chip at the edge. Cure again and top coat glossy to lock it in.
Editor's noteIf your black line bleeds, let the hot pink fully cure hard before adding the stripe.
Watch outAvoid thick stripes - they make the manicure look cheap and can catch on hair.
12. Lavender Almond with Silver Chrome Half-Top
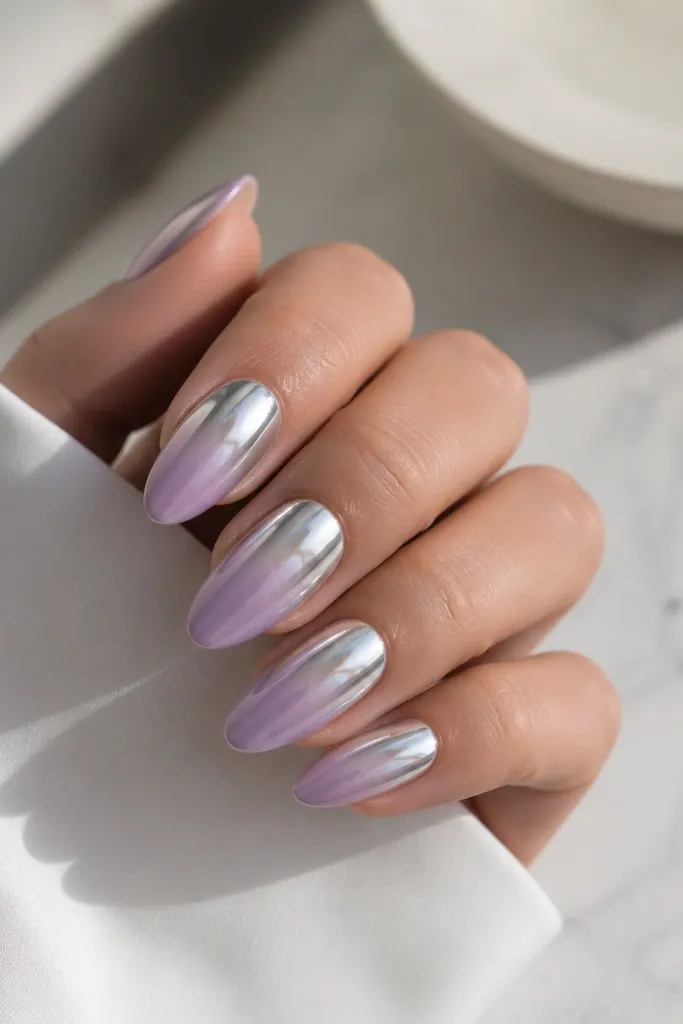
Lavender plus silver chrome looks like a resort pool in the evening. The lavender base flatters many skin tones because it's not too blue and not too purple. Chrome on the upper half creates a dramatic photo look without covering the whole nail, so it still feels wearable. Almond shape helps the chrome line look smooth and elongated. This is my pick for weddings or fancy dinners where you want glam but still summer-appropriate.
Start with a glossy lavender gel in two coats. For chrome, apply a dark-to-clear chrome base or tacky gel on the upper half of the nail only - about the top 40-50% of the nail. Rub mirror silver chrome powder in small circles, then brush off the excess. Use a soft sponge to blend the chrome edge so it fades into lavender. Seal with a chrome-friendly top coat or a thin layer of glossy top coat if your system allows it.
Editor's notePractice on one nail first - chrome application is all about pressure and timing.
Watch outAvoid dragging chrome powder over the cuticle area - it makes the look messy as it grows out.
13. Sea Salt Nude Almond with White Tip and Tiny Shell
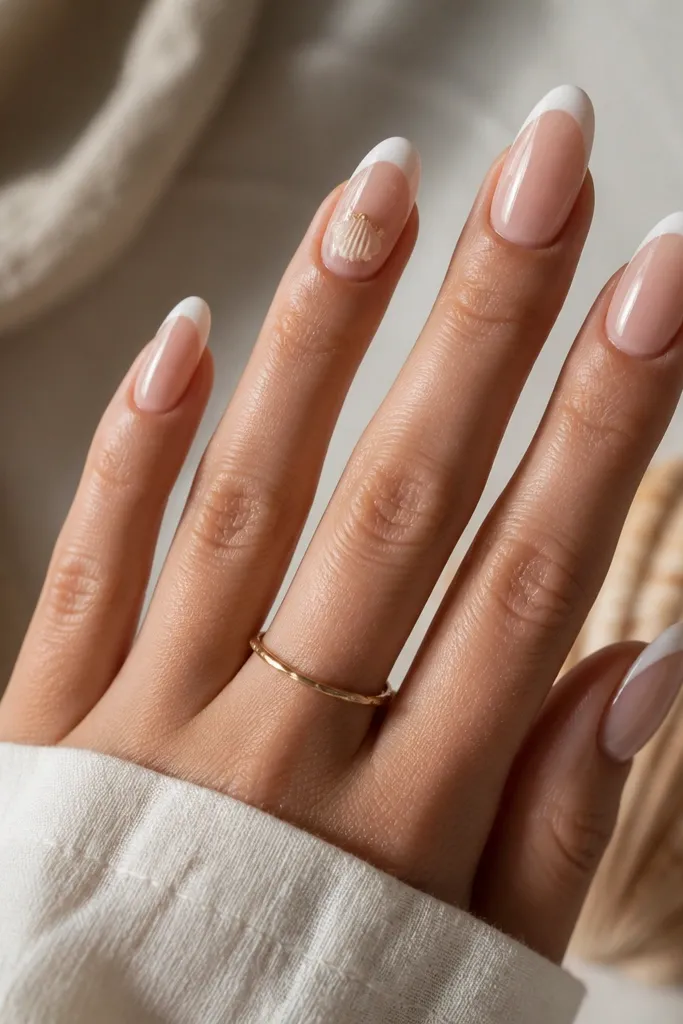
This is the vacation nail that makes people comment. The sea salt nude base looks natural and clean, and the crisp white tip gives that classic beach postcard vibe. The tiny shell charm adds texture and catches light, especially in sunlight. Almond nails are perfect for charms because the tip has room without crowding the cuticle. This set is best for beach trips, boardwalk dinners, and any time you want a cute detail that still feels polished.
Apply nude sheer in two coats and cure. Paint a French tip in opaque white, keeping the tip thickness thin so it doesn't look bulky on almond. On one nail per hand, place a small shell charm using a dot of thick gel or nail glue - keep it centered and low so it doesn't snag. Cure and then top coat around the charm carefully, building a smooth layer over the edges. File gently at the sides if the charm lifts the surface.
Editor's noteSeal charm nails with extra top coat on the underside edge so it doesn't peel off after day two.
Watch outAvoid big charms - they snag towels and look awkward on almond tips.
14. Gold Foil Glitter Fade Almond on Nude
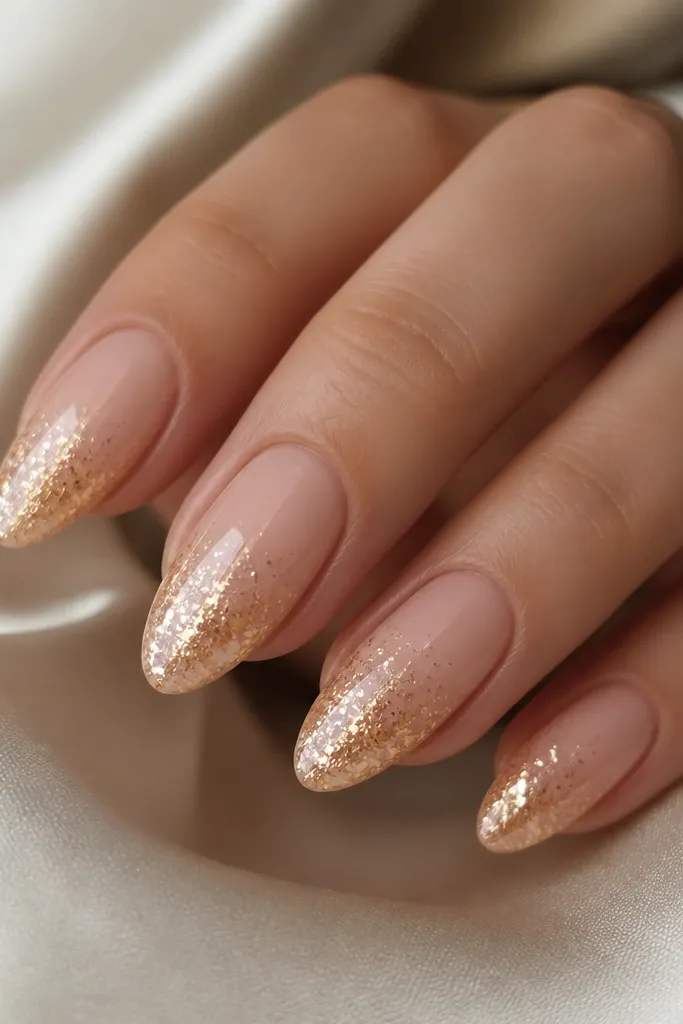
This is glam vacation polish that still grows out gracefully. The nude base looks clean and flattering, and the gold glitter fade adds movement without needing a lot of line work. Because the glitter is concentrated at the tip, wear looks intentional instead of patchy. Almond nails make the fade look like a gradient sunset. I love this when my trip includes a mix of beach and dinners and I don't want to repaint halfway.
Paint nude base in two coats and cure. Mix or layer gold foil glitter so it's denser near the tip: apply glitter gel starting around the middle of the nail and blend upward with a sponge or brush so the glitter thins out. Cure, then apply a glossy top coat that smooths the surface. Cap the tip edge firmly. For best results, keep the glitter off the sidewalls so it doesn't peel.
Editor's noteUse a sponge for the fade - brush fades look streaky on glitter.
Watch outAvoid glitter all the way to the cuticle - it lifts and looks rough fast.
15. Mint Green Gloss Almond with White Daisy Accent
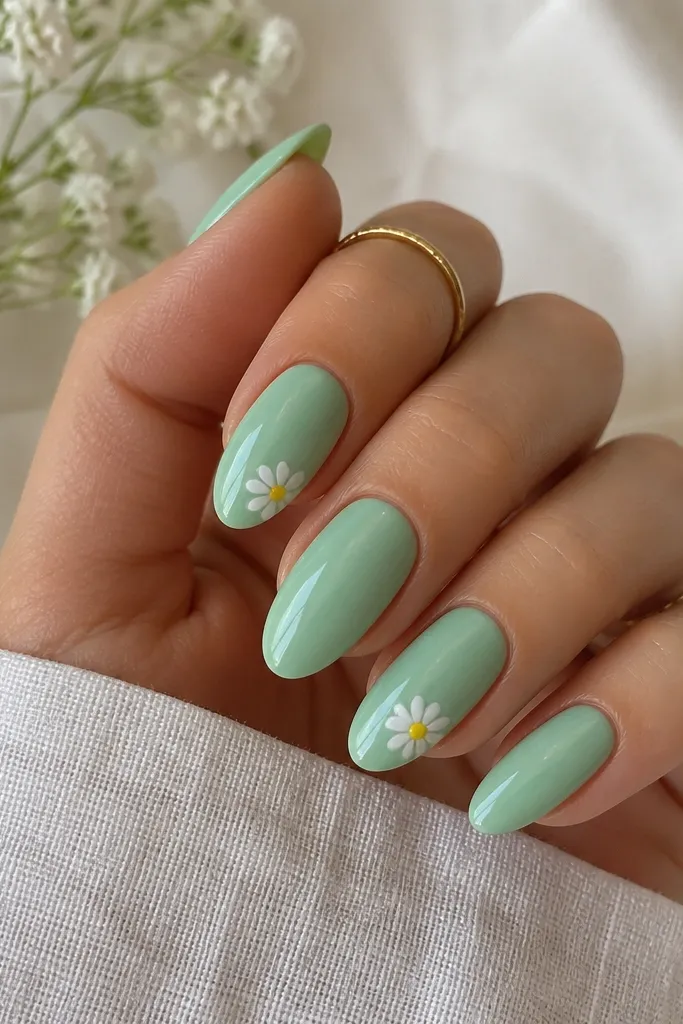
Mint green is the most flattering "summer fresh" color when you want something that looks clean next to sunglasses and beach hair. The glossy finish makes it look like gel even if you're using regular polish with a strong top coat. The daisy accent adds a playful, sunny vibe without taking over the whole manicure. Almond shape makes the daisy look like it's floating because the tip area is slightly narrower. This set is perfect for casual vacation days where you still want your nails to look cute.
Apply mint green in two coats, making sure the color is even and not streaky. Choose one accent nail per hand and use a dotting tool to place five small white petals around a tiny yellow center. Position the daisy near the upper tip, leaving space from the cuticle. Cure if gel, then seal with glossy top coat. If your daisy has texture, do a second thin top coat layer to flatten it.
Editor's noteFor crisp petals, use a toothpick for the final dot and don't overfill the center.
Watch outAvoid placing the daisy too low - it can look like a random sticker as the nail grows.
16. Sheer Pink Almond with Tiny Gem Bow at Cuticle
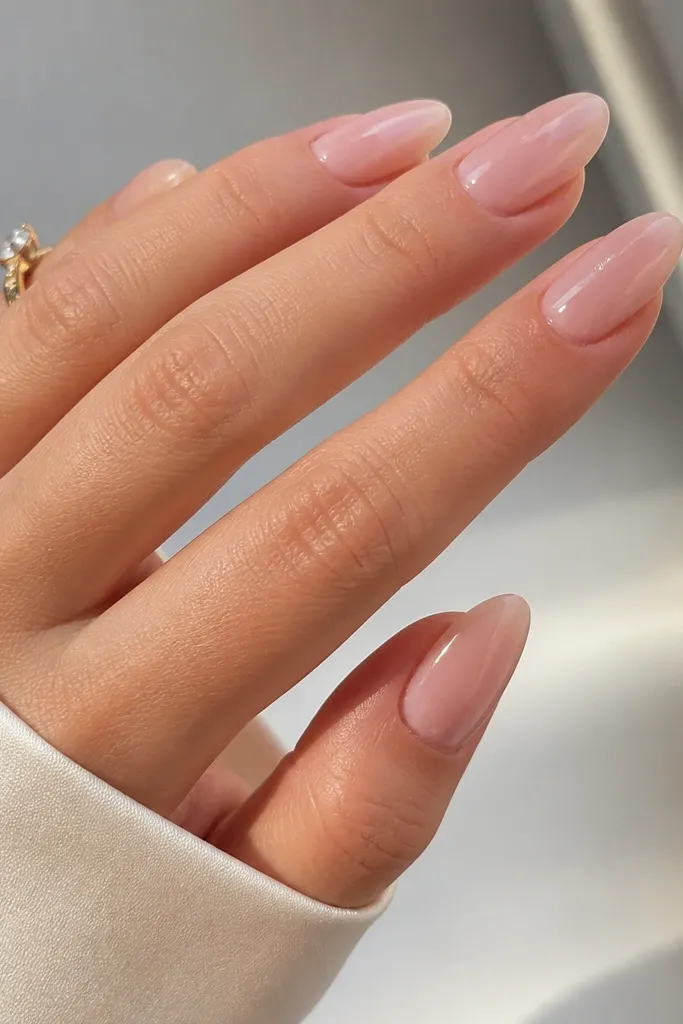
This is the "cute but not childish" vacation glam. The sheer pink base makes your nails look neat, and the tiny gem bow adds sparkle without needing a full rhinestone pattern. Almond shape gives you a clean canvas near the cuticle, and the bow sits where light hits when you move your hands. It looks great on fair and medium skin because the base is translucent. I wore this to a resort dinner and it looked like jewelry when I clinked drinks.
Apply a sheer pink gel in two thin coats and cure. On the ring finger, place two small clear gems slightly apart near the cuticle and connect them with a tiny third gem or a micro bead of gel for the bow center. Use tweezers and press lightly so the gems sit flat. Cure, then apply glossy top coat carefully around the gems, building a smooth layer so they don't catch. Keep gems only on accent nails so it stays classy.
Editor's noteUse tweezers with a fine tip and a light touch - too much pressure can pop gems up.
Watch outAvoid large stones on sheer pink - the contrast can look heavy and messy.
17. Nude Almond with Braided Gold Line Art
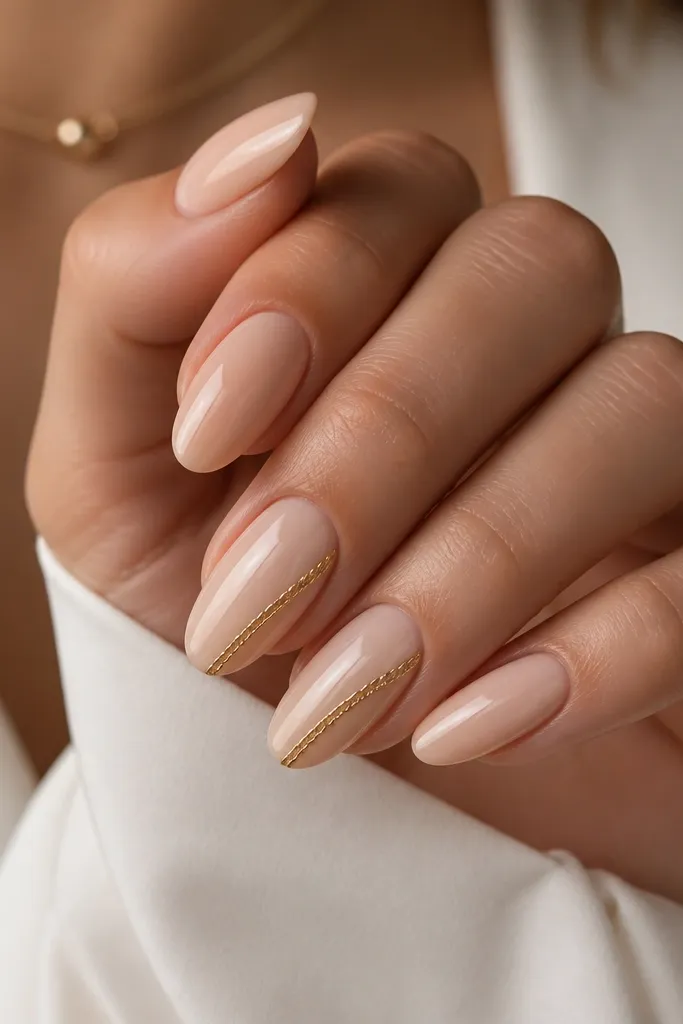
Braided line art looks like jewelry hardware and it gives your nails detail without using color. The nude base is the workhorse - it makes your hands look clean and lengthened. The gold braid pattern adds texture and depth because the line is raised slightly under top coat. Almond shape helps the diagonal braid feel sleek instead of chaotic. This is perfect for vacations where you pack one "going out" outfit and want your nails to match gold earrings and a chain bag.
Paint nude in two coats and cure. On two accent nails, use a striping brush to draw a thin diagonal line from mid-nail to the tip. Then add a second parallel line and create the braided look by adding tiny crossing strokes between the two lines, one small segment at a time. Cure and top coat glossy, making sure the braid lines are sealed. If the pattern is raised, do a thin second top coat so it smooths out.
Editor's noteDo the braid in small sections - long strokes smear and ruin the "braid" effect.
Watch outAvoid drawing braid lines too close together - it turns into a blob after top coat.
18. Coral Rose Almond with Thin White Side Tips
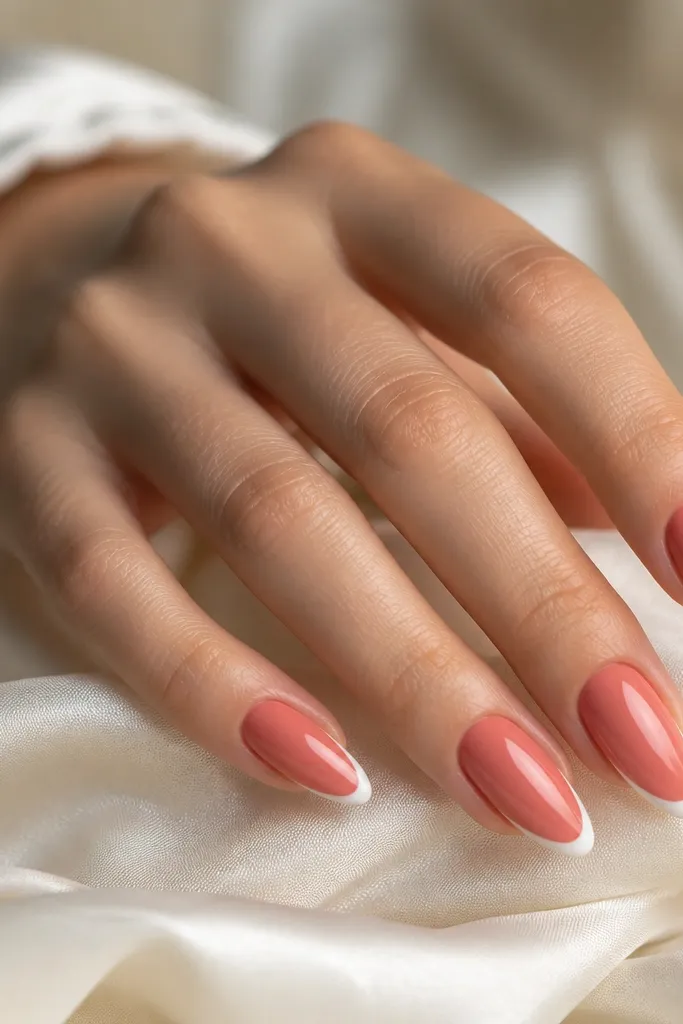
This set looks like a French manicure but it's more modern and less stark. The coral rose base is flattering because it sits between pink and orange, which matches summer skin tones and warm lighting. The thin white side tips frame the nail while keeping the center clean, so your nails look longer. Almond shape makes the side framing extra flattering, especially if you have wider nail beds. It's vacation glam easy because it's mostly base color with small, controlled detail.
Apply coral rose in two coats and cure. Use a fine brush to paint thin white lines on the left and right edges of the tip, leaving the center of the tip untouched. Keep the white lines narrow - about the width of a fine eyeliner stroke. Cure and seal with glossy top coat. Cap the tip and lightly clean the sidewalls so the lines stay crisp.
Editor's noteIf your white lines look uneven, use a makeup sponge to soften the edge on one nail and keep it crisp on the others.
Watch outAvoid thick side tips - they shorten the nail visually.
19. Emerald Green Almond with Gold Leaf Accent
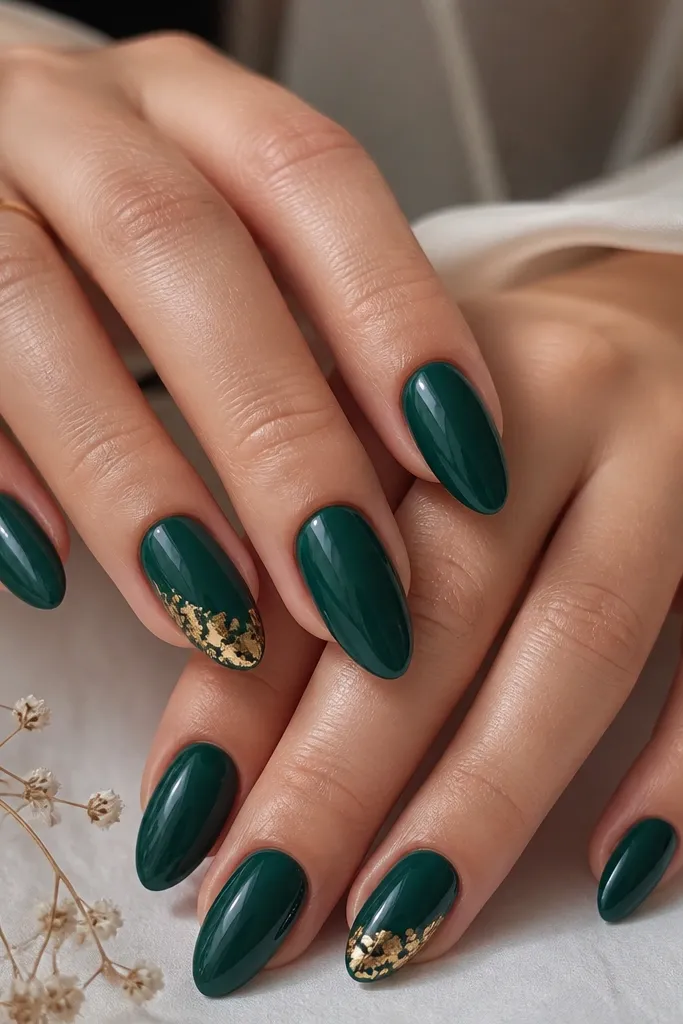
Emerald green is a vacation flex that still looks classy with natural makeup. It makes your hands look rich and it stands out against tan skin without turning neon. Gold leaf adds a warm, organic sparkle that looks like sunlight hitting leaves. Almond nails are great for gold leaf because the tip area gives the leaf room to spread naturally without crowding. This set works for dinners and also for day trips when you want your nails to look like an accessory.
Apply emerald green in two coats and cure fully. On one or two nails, dab a small amount of gold leaf adhesive gel near the upper tip and press irregular gold leaf pieces onto it. Leave some negative space so it doesn't look like glitter. Cure and then top coat glossy, using a thicker top coat over the leaf to smooth sharp edges. Keep leaf placement similar across nails so it looks intentional.
Editor's noteUse fewer pieces than you think - gold leaf looks better scattered than packed.
Watch outAvoid placing leaf too close to the cuticle - it lifts and looks messy as nails grow.
20. Watermelon Sorbet Almond with Black Seed Specks
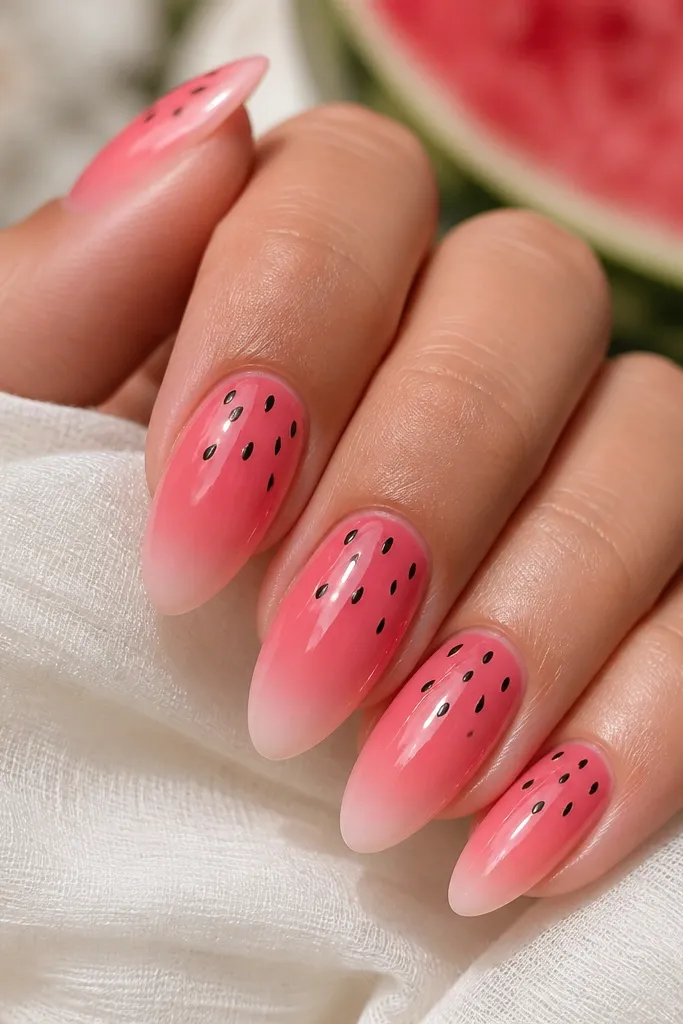
This is the vacation-glam watermelon set I keep reaching for when I want something fun but still polished. The trick is the gradient: a juicy pink at the cuticle that fades into a paler sorbet at the free edge so it looks sunlit, not cartoonish. Black seed specks add the theme without turning the whole nail into a sticker. It also photographs really well because the matte dots pop against the glossy base.
Step 1: Paint a glossy watermelon-pink base (from cuticle to about 2/3 of the nail), then sponge a pale sorbet pink/cream onto the last third and blend with a clean brush while the gel is still tacky. Cure each coat fully so the fade stays smooth. Step 2: Add a thin clear or nude overlay for glassy shine, then use a dotting tool with black gel or polish to place 8-12 seed specks per nail - mostly along the top third, like seeds on the fruit skin. Step 3: For extra realism, make some seeds tiny and slightly oval, and leave a few clusters so it looks natural instead of evenly spaced. Step 4: Finish with a high-gloss top coat, then cure and wipe the inhibition layer if your top coat needs it.
Editor's noteUse matte black for the seed specks and keep the rest of the nail glossy. The contrast makes the set look expensive in photos.
Watch outDon't place the black seeds in perfect rows - that makes it look like nail art practice sheets instead of watermelon.