
1. Peachy nude + tiny gold shimmer fade
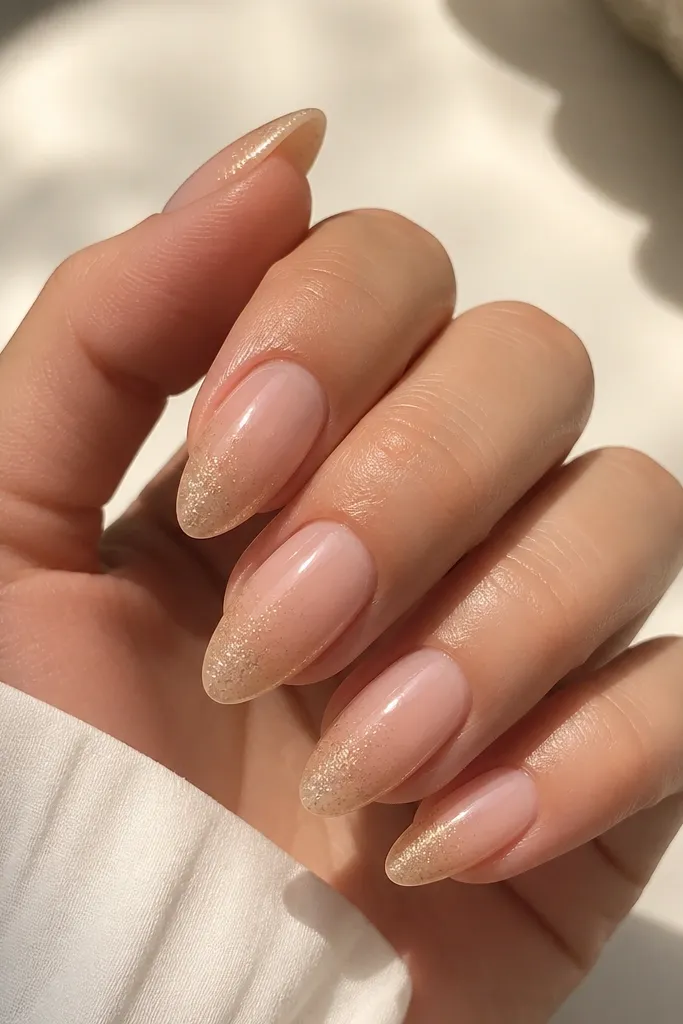
This one is my go-to when I want summer color but I don’t want to think about maintenance. The peachy nude base matches a lot of skin tones without going too pink or too orange, and the shimmer is small enough that it hides the tiny texture you get from daily wear. Almond nails look extra clean with this because the taper makes the shimmer fade look intentional instead of random. It flatters fair to medium skin especially well, and on deeper skin tones it still reads warm and sunny rather than chalky. I wear it to brunch, work, and travel because it looks “done” even when the tip has started to dull a bit.
Start by pushing cuticles back gently and buffing the shine off the nail plate so polish grips. Paint two thin coats of peachy nude, letting each coat dry fully, then add a shimmer fade only from mid-nail to the tip using a small eyeshadow brush or a detail brush. Keep the shimmer denser at the last 2-3 mm so the free edge looks bright even as nails grow. Finish with one glossy top coat, and cap the free edge with the top coat so water and soap can’t sneak under as easily.
If you hate glitter that feels gritty, use a shimmer that has very fine particles and apply it with a light hand so it levels smooth.
Skip chunky glitter on almond if you want low maintenance; it catches on hair and causes early lifting.
2. Sheer pink jelly base with glossy glass top
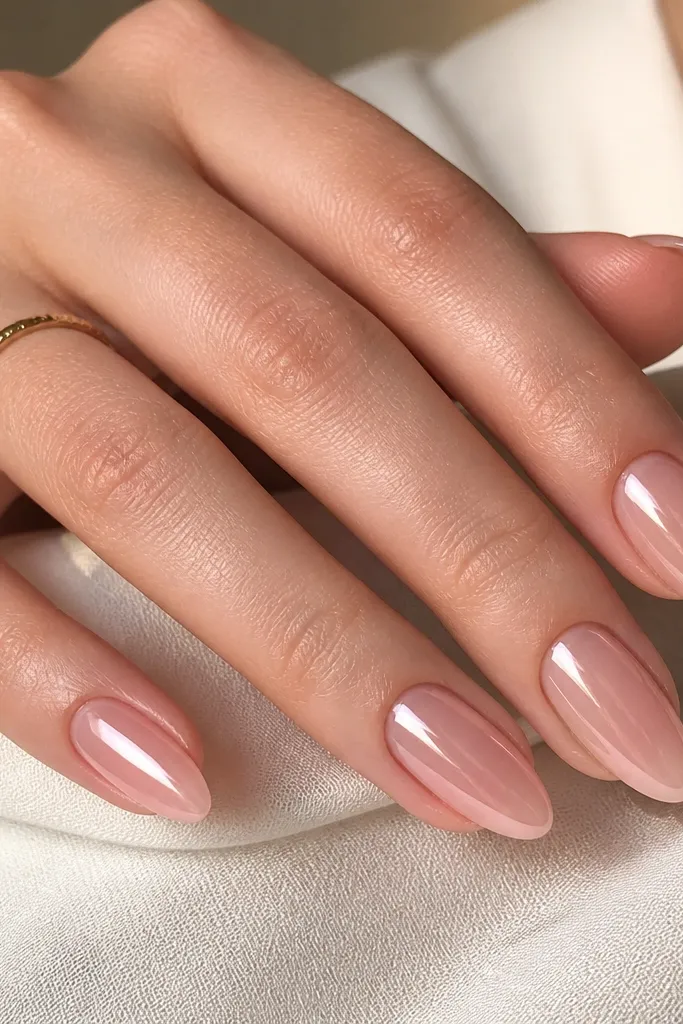
Jelly pink is the easiest way I know to get that “fresh manicure” look without heavy pigment wear showing. The sheer base stays pretty even when it’s slightly grown out because you don’t see a harsh line. On my nails, this reads flattering on both cool and warm undertones since the jelly has a balanced pink tone. It also looks great on shorter almond lengths because the translucency makes the nails look longer. If you’re the type who hates full neon but still wants fun, this is your middle ground.
Apply a thin layer of base coat, then do two thin coats of sheer pink jelly, stopping just short of the cuticle and pushing the color out toward the edges. After it dries, add a glossy top coat that self-levels — I like ones that don’t flood the cuticle line. For extra durability, cap the tip and swipe a thin line across the sidewalls. Let it cure fully before you wash dishes or handle hair tools.
When the jelly polish is slightly streaky, add a third thin coat rather than thickening the second coat.
Don’t paint jelly polish thick around the cuticle; it stays tacky longer and looks messy.
3. Coral micro-French tip over nude
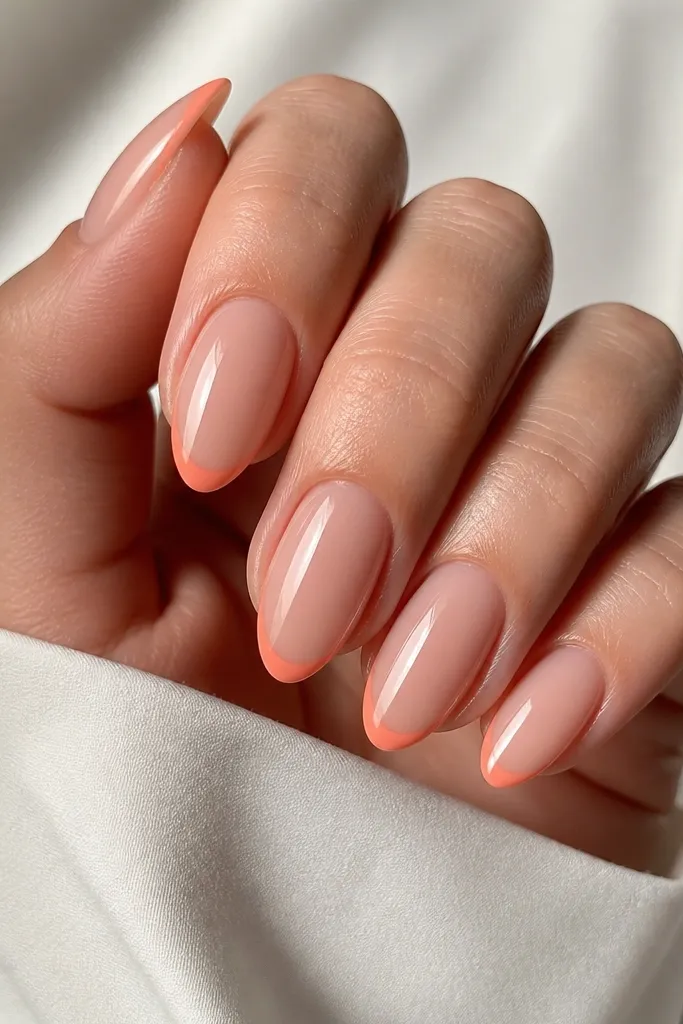
Micro-French is low maintenance because the “design” sits right at the tip where wear is least noticeable. Coral is warm and flattering, and over a nude base it looks like a real summer manicure instead of a random bright color. Almond shape makes the line look sharp because the free edge tapers, so you get a clean curve without thick paint. I wear this when I’m doing a lot of hand washing because the nude base doesn’t show scuffs as easily as bright full colors. It’s also easy to match with coral tops, bronzy makeup, and gold jewelry.
Start with a nude base that matches your natural nail tone or your skin — I use a milky nude so the tip line pops. Paint two thin nude coats, then place French tape guides or use a French brush to draw a very thin coral arc at the free edge. Keep the coral line about 1-2 mm tall so it doesn’t get chunky as you grow out. Seal everything with glossy top coat and cap the free edge twice if your nails chip at the very tip.
If your French lines always bleed, chill your polish bottle in a cool drawer for 2 minutes and it thickens slightly for cleaner edges.
Don’t make the French tip too wide — wide tips peel first and look ragged fast.
4. Butter yellow over milky nude
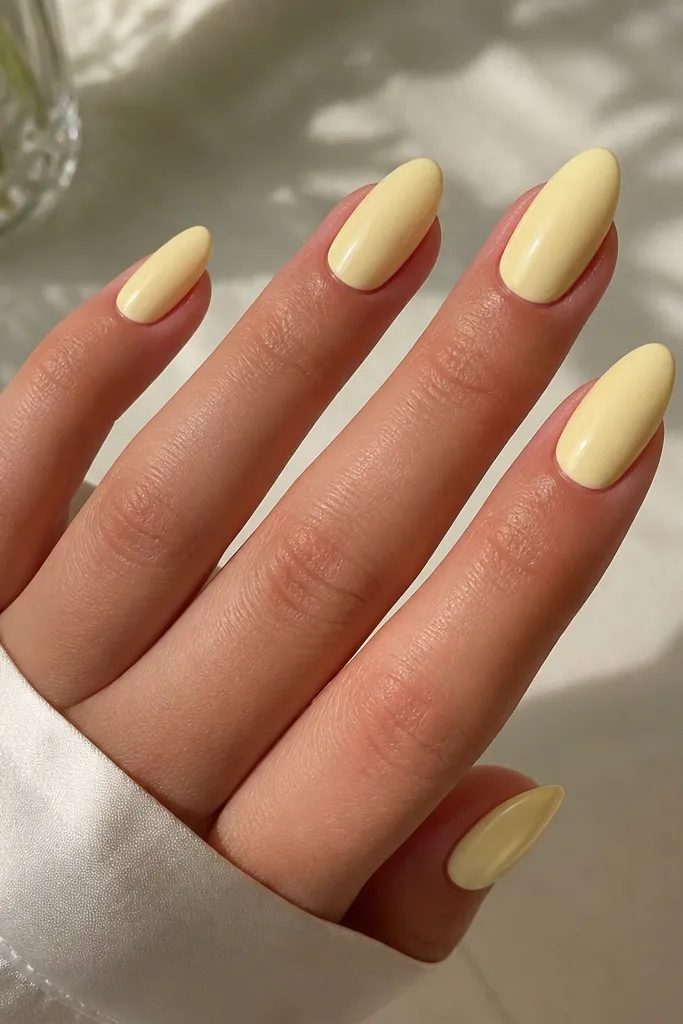
Butter yellow is a summer color that looks expensive when you get it opaque without looking thick. Over a milky nude base, it turns from streaky to buttery in two coats, which is exactly what you want for low maintenance. It flatters fair skin by warming it up, and on deeper skin it creates a bright contrast that still feels soft rather than harsh. The almond shape makes the color look like it’s glowing because yellow reflects light more than pinks. I wear it with white tees, denim, and gold rings — it looks like sunshine without being neon loud.
Apply a milky nude base coat first, then do two thin coats of butter yellow, letting each coat fully dry. Use a light touch and brush from cuticle to tip in one smooth stroke, then clean up the sides with a small brush dipped in remover. If the first coat looks uneven, don’t add thickness — add a second thin coat. Finish with a glossy top coat and wipe the sides so the top coat doesn’t lock in smudges.
Editor's noteFor extra smoothness, apply the top coat in two passes: one thin coat, then a second slightly heavier coat after the first sets for 30-60 seconds.
Watch outSkip yellow polish straight on bare nails; it grabs and streaks, and you’ll see it after day 3.
5. Mint green one accent nail with nude gloss
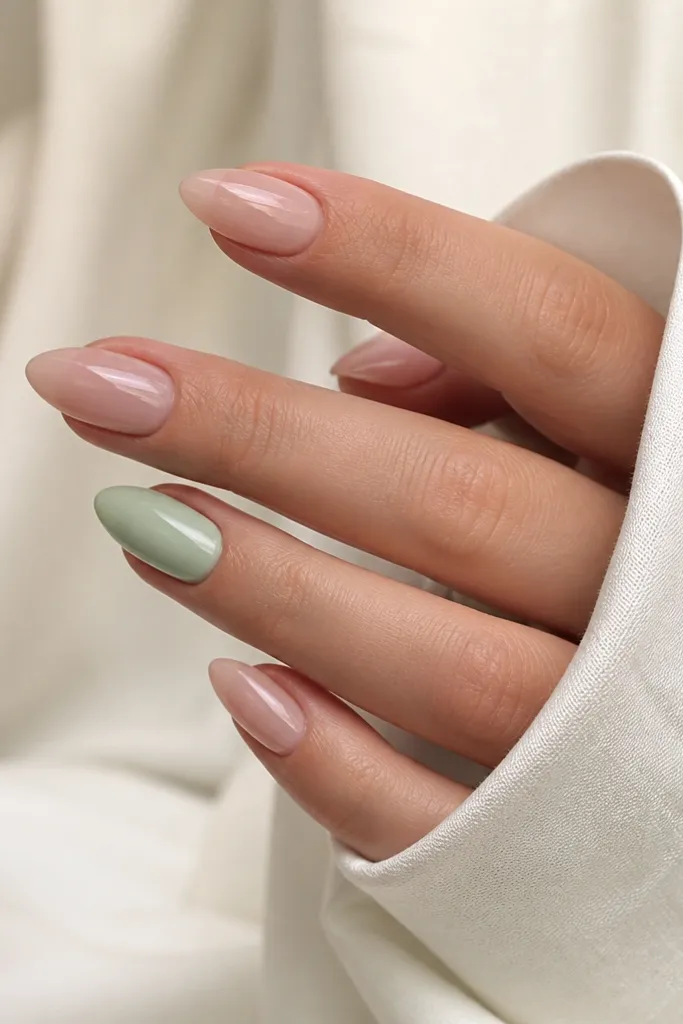
This is the easiest way to wear summer color without committing to a full set. Mint green reads fresh against nude, and it looks especially good if you like clean, minimal outfits. The accent placement keeps your nails looking “styled” even when your cuticles grow a little, because the nude nails hide that change better. On my medium skin tone, mint doesn’t look harsh — it looks airy. If you’re doing a vacation trip and want minimal touch-ups, this one survives because only one or two nails take the hit from chips.
Paint all nails with two thin coats of nude glossy polish, then choose one accent finger per hand (I like ring finger or thumb). Apply mint green in two thin coats on the accent nail only, keeping the cuticle line crisp. Add a top coat to all nails, but don’t let the top coat drag the mint color — cap the tip carefully. If you want it extra summer, add a tiny dot of white at the cuticle on the mint nail after the second coat dries.
Use the mint polish brush to “cap” the free edge — it makes chips less likely on that accent nail.
Don’t pick a mint that’s too translucent; it looks patchy as it wears.
6. Seashell pink + pearl dot at the side
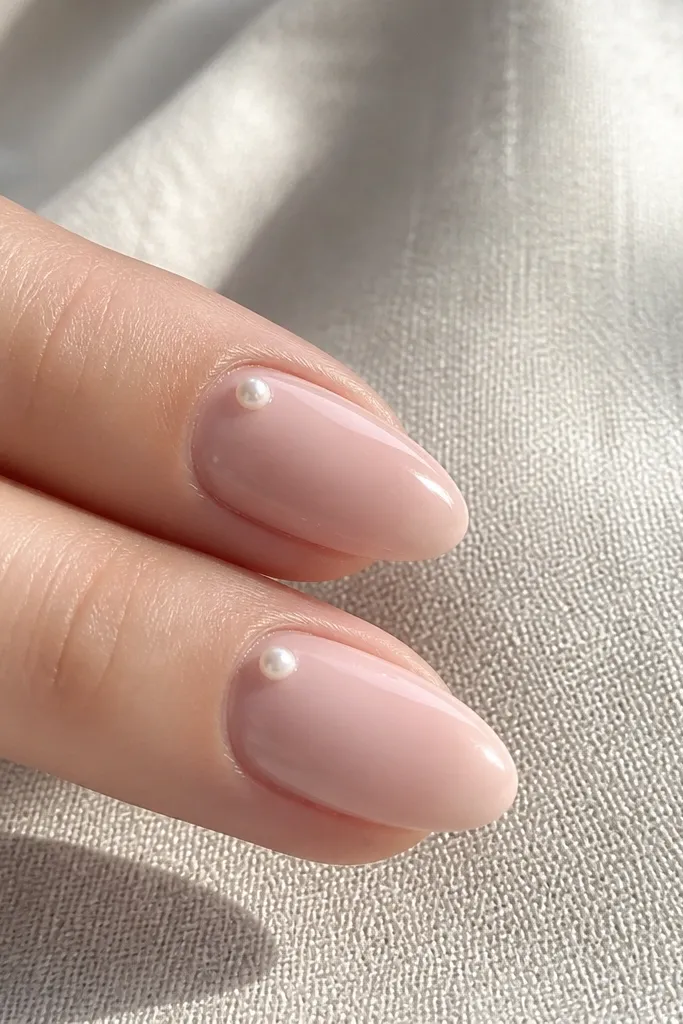
This one looks delicate but it’s actually practical. Seashell pink is a gentle shade that doesn’t show wear as clearly as bright colors, and the pearl dot gives you that “jewelry nail” vibe without filling the whole nail with heavy decoration. Almond shape makes the dot placement look balanced because the nail tapers and gives the accent a natural focal point. It flatters most skin tones because it sits in the neutral pink family. I wear it for weddings, baby showers, and dinners when I want something pretty that still survives a busy day.
Start with two thin coats of seashell pink, then seal with a glossy top coat so the surface is smooth. Use a toothpick to place a single pearl dot near the outer sidewall about 2-3 mm from the cuticle line. If you use loose pearls, set them with a tiny dab of clear gel or nail glue and let it set fully. Finish with one more thin top coat around the pearl, not over it too thick, so it doesn’t turn cloudy.
Editor's noteIf pearls catch on fabric, place the dot slightly above the sidewall and keep top coat thin over the pearl.
Watch outDon’t add pearls on every nail if you hate maintenance; even one pearl edge lift can snag.
7. Neon pink diagonal split over nude
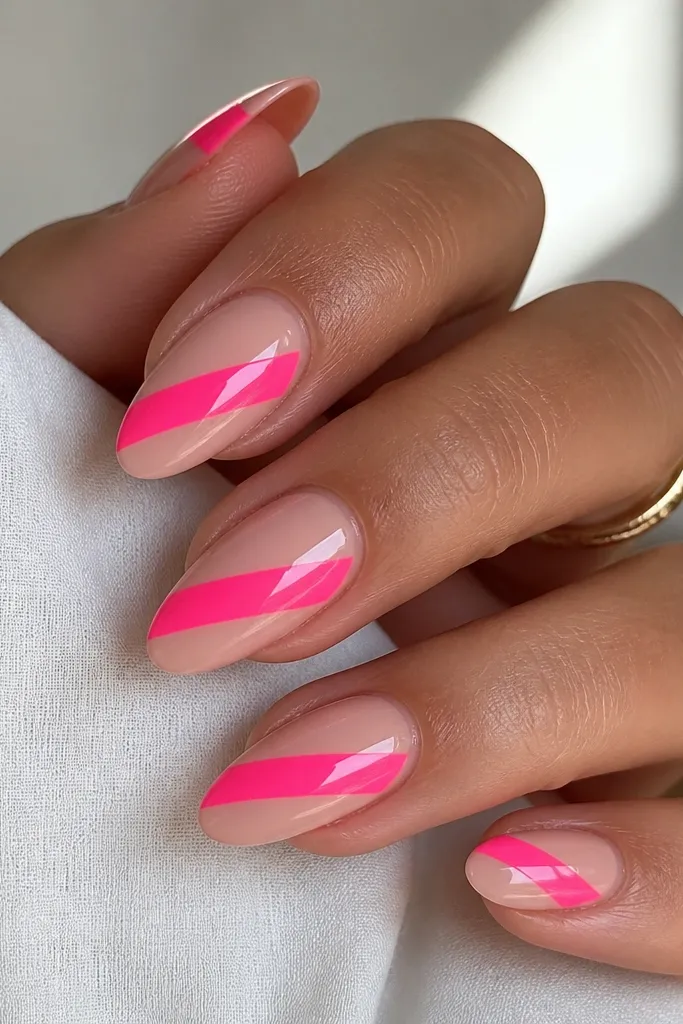
Full neon can feel like a lot, but a diagonal split keeps it fun and still low maintenance. The nude base hides small growth, and the diagonal line disguises tiny unevenness because your eye tracks the angle. Neon pink is the most flattering neon for me because it doesn’t turn orange as it fades — it stays pink. Almond nails make the split look sleek, especially on shorter-to-medium almond lengths. This is my go-to when I want “festival nails” without repainting every two days.
Paint a nude base in two thin coats and let it dry completely. Use striping tape to mark the diagonal line — place the tape so it leaves about 2-3 mm of nude visible on both sides. Paint neon pink over the exposed section in two thin coats, then remove tape while the second coat is still slightly tacky for a crisp edge. Seal with glossy top coat, cap the tip, and run a small brush with top coat along the diagonal edge to lock it in.
Editor's noteIf your neon looks streaky, apply a thin opaque first coat, cure, then do a second thin coat instead of going thicker.
Watch outDon’t freehand the diagonal on day one; crooked neon looks cheap fast.
8. Neon lime French tip with nude base
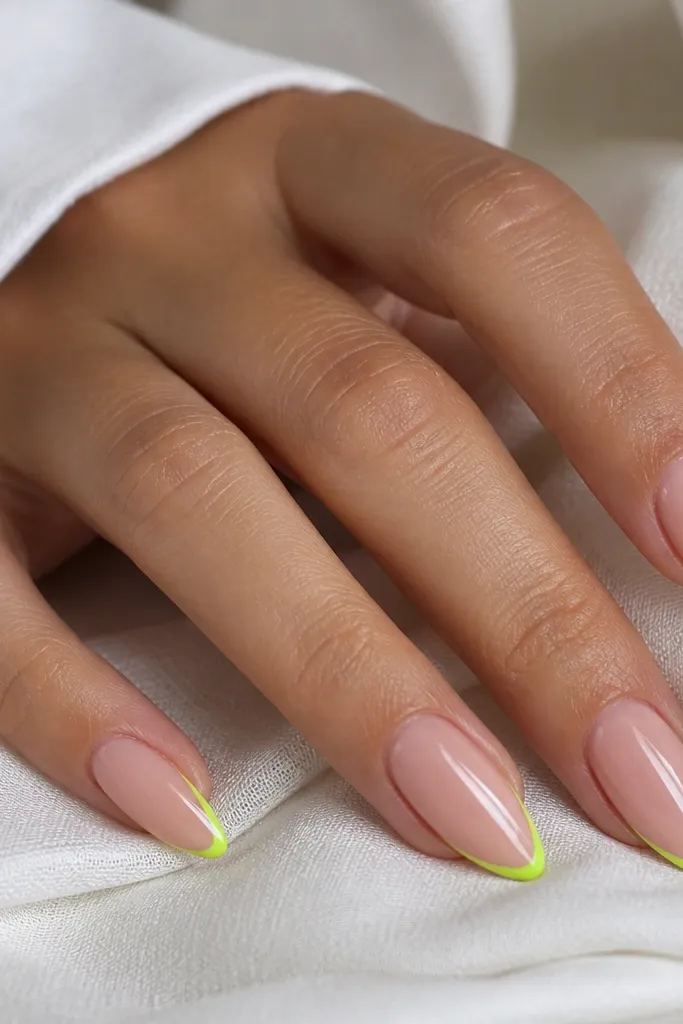
Neon lime is the “summer but make it sporty” color. French tips keep it controlled, and because the neon is only at the tip, you get a bold look without the heavy neon wear across the whole nail. On fair skin it looks bright and clean, and on deeper skin it pops without needing extra jewelry. Almond shape makes the neon tip look like a crisp highlight rather than a block of color. I wear this on weekends when I’m out in sandals and want my hands to look fresh even after sunscreen smudges.
Start with two thin coats of nude base, then use French tip guides or tape to mark a thin neon lime arc at the free edge. Paint neon lime in one opaque thin coat first, then a second thin coat only where it needs coverage. Remove guides/tape carefully and clean the line with a brush dipped in remover. Finish with glossy top coat and cap the tip so the neon edge doesn’t chip.
Editor's noteUse a neon that dries quickly; slow-drying neon smears when you pull tape off.
Watch outSkip thick top coat directly over neon edges; it can blur the line.
9. Coral orange ombre with sheer base
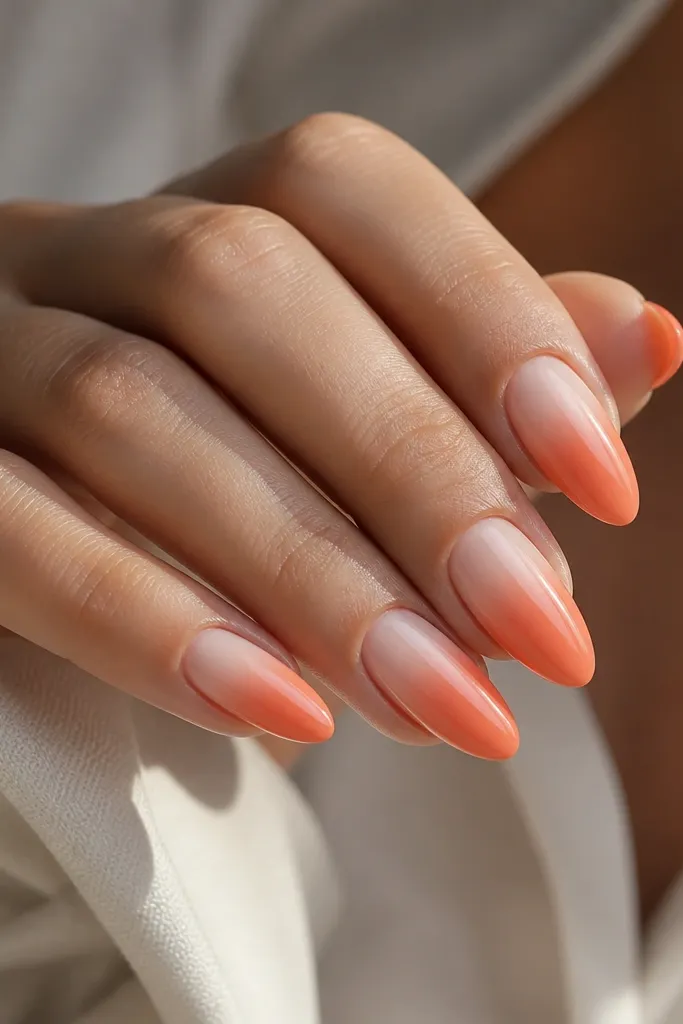
Ombre looks harder than it is, and it’s actually low maintenance because the gradient hides regrowth. A sheer-to-coral-orange blend doesn’t create a hard line when nails grow out, so it looks “intentional” for longer. Coral orange gives that warm summer vibe without going full neon. Almond nails make ombre look longer and more flattering because the taper adds extra space for the blend. This works well for fair to medium skin and looks great with bronzer and warm lip colors.
Paint a sheer base first — I use a milky nude or sheer pink — then sponge on a coral-orange shade from mid-nail to the tips. Use a small makeup sponge and dab lightly, building the intensity gradually. Let it dry, then go back with a second sponge pass only on the tip area so the gradient stays smooth. Seal with a glossy top coat, and wipe the underside of the free edge so the ombre doesn’t get rough.
If you see harsh sponge dots, buff lightly with a very gentle buffer once it’s dry, then top coat again.
Don’t skip the sheer base; ombre on bare nail looks patchy and shows wear lines.
10. Neon blue half-moon accent (negative space)
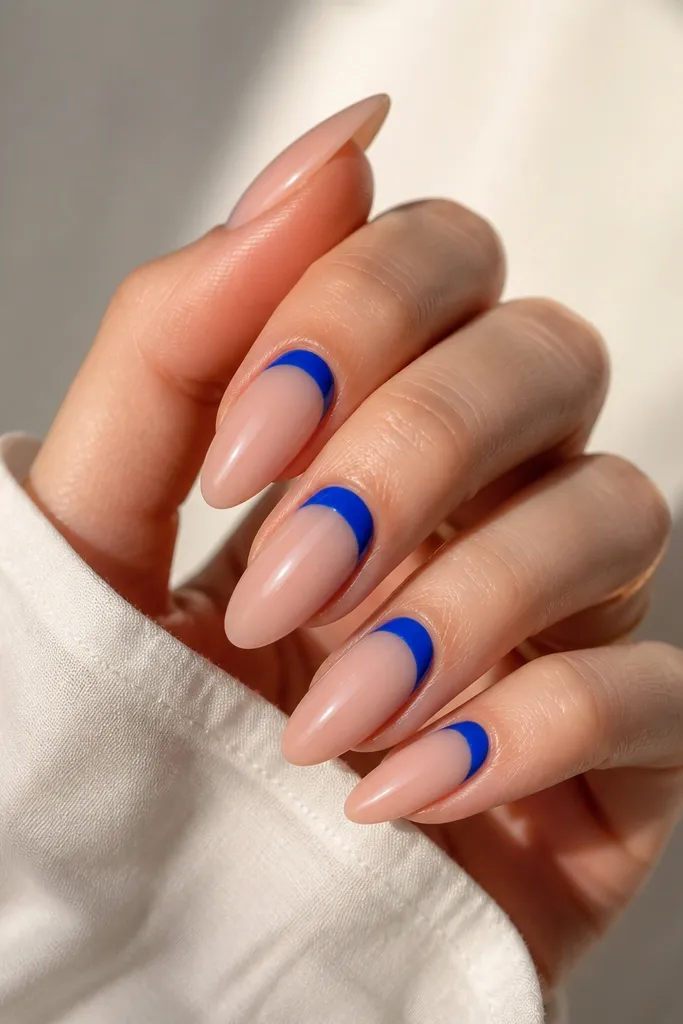
Negative space designs are low maintenance because the regrowth line blends into the design. The half-moon near the cuticle looks sharp, and neon blue keeps it summery without covering the whole nail. This is one of my favorite options for people who hate thick polish — you’re only applying neon in a small area. Almond nails make the half-moon look more refined because the cuticle area is narrower and the shape stays crisp. It’s flattering on a wide range of skin tones because the blue reads bright and clean rather than muddy.
Start with two thin coats of nude base so the cuticle area is smooth. Use a half-moon stencil or small curved tape to mask the area you want neon blue — place it so the neon sits right under the cuticle line. Paint neon blue in two thin coats, remove the stencil carefully, then clean edges with a detail brush. Finish with glossy top coat over the whole nail, and cap the tip so the nude base stays glossy longer.
If your half-moon stencil lifts, dampen it slightly so it sticks without tearing the tacky base.
Don’t make the half-moon too large; bigger neon sections chip sooner.
11. Coral pink solid with gel-like top coat
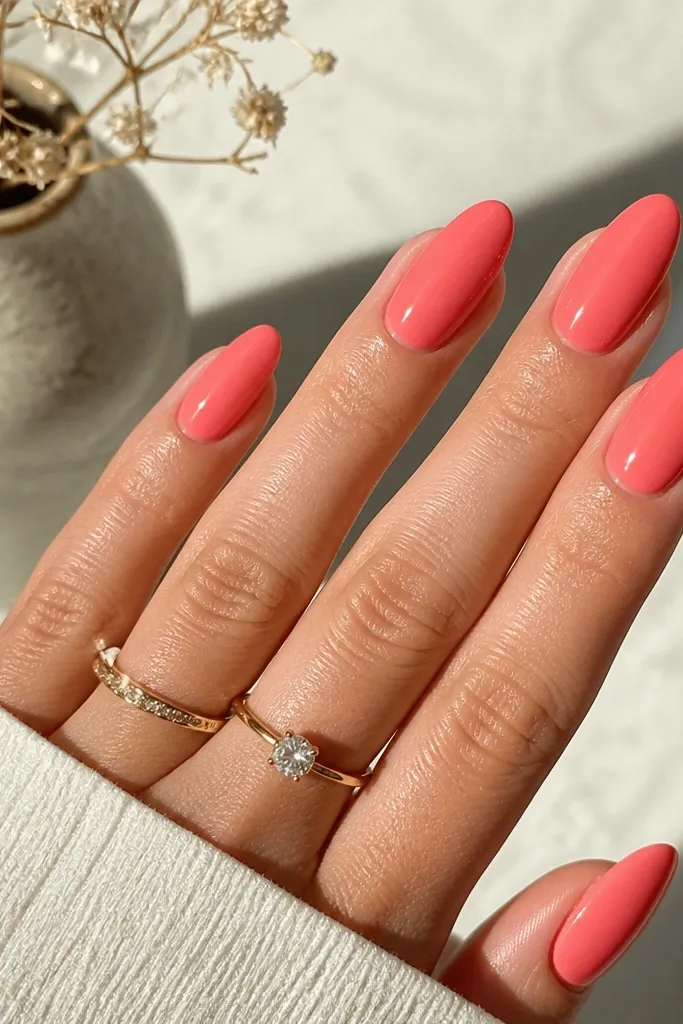
Solid coral pink is the “set it and forget it” summer shade when you use the right formula. Coral pink hides tiny dents better than neon because the pigment is more forgiving, and the color still looks bright in natural light. Almond shape makes a solid color look polished because the taper gives it a sleek silhouette. This shade flatters cool and warm undertones since it sits in the coral-pink lane. I wear it when I’m running errands and want my nails to look tidy without a design to maintain.
Prep and buff lightly, then apply a base coat. Paint two thin coats of coral pink, using a full center stroke first and then two side strokes, keeping the polish off the cuticle line by a hair. Let it dry fully between coats. Add one gel-like glossy top coat and cap the tip, then do a final swipe along the sides so the finish stays smooth.
Editor's noteTurn your hand under the lamp or light while it cures; you’ll catch streaks before they set.
Watch outDon’t rush drying — solid summer shades show shrinkage and streaks when they cure unevenly.
12. Neon orange micro-sunburst tips
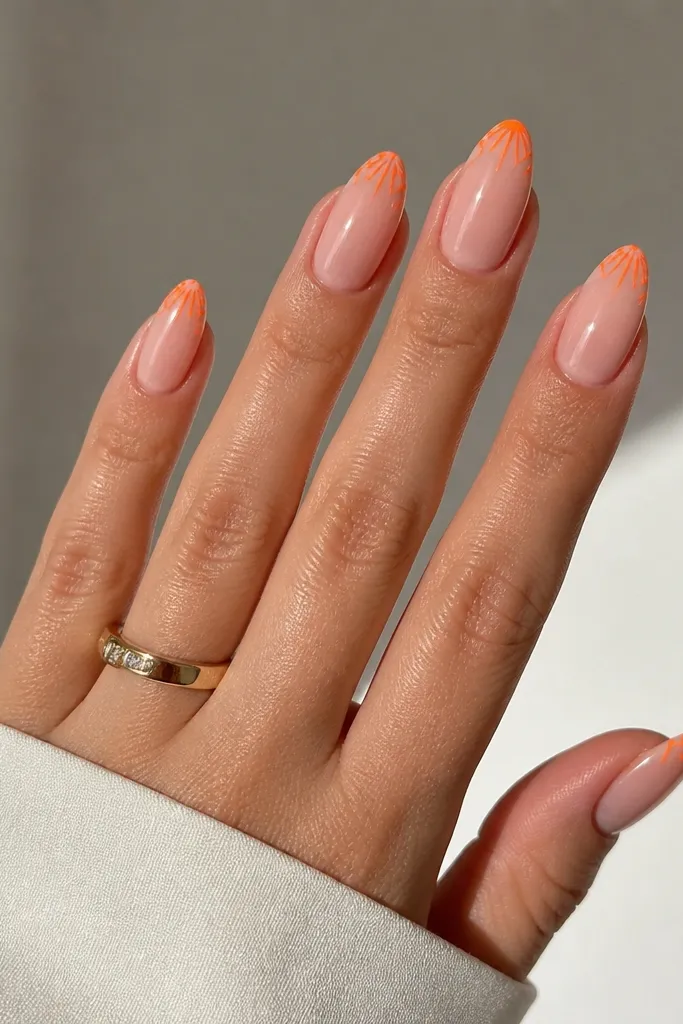
Sunburst tips look bold but they’re actually low maintenance because the neon is small. The nude base keeps the nails looking clean as they grow out, and the orange lines add summer energy without the weight of full neon coverage. I like neon orange for this because it reads warm and beachy rather than aggressive. Almond nails give the rays a natural taper, so the design looks like it wraps the tip instead of sitting flat. This is a fun pick for festivals, outdoor dinners, and photos when you want something graphic but still wearable.
Paint a nude base in two thin coats and seal with a glossy top coat. Use a striping brush or nail art pen to draw 5-7 thin neon orange rays starting at the upper free edge and pointing outward, keeping them about 1-2 mm long. Build in layers only if you need more opacity — thin lines dry faster and look cleaner. Finish with a glossy top coat, and cap the tips so the ray edges don’t catch on fabric.
Editor's noteDo the rays with the nail held slightly angled; it helps you keep the lines the same length across the taper.
Watch outSkip thick paint pens for rays; thick lines look like stickers and chip from the edges.



