1. Sea Glass Half-Moon Almonds
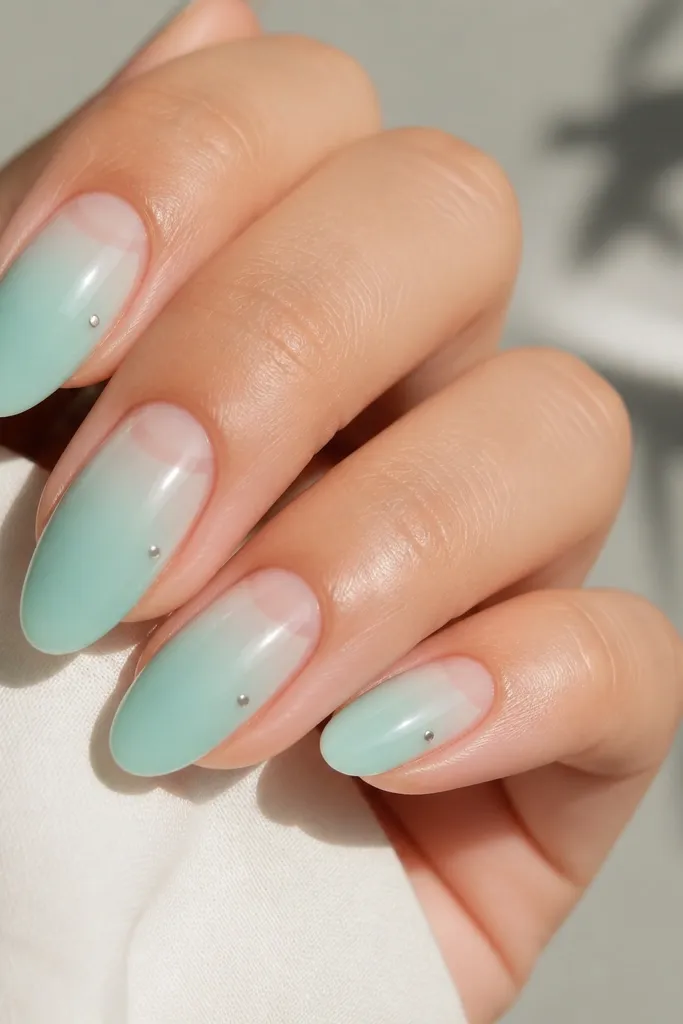
This design uses a sea-glass gradient that looks soft in daylight and more saturated in shade. I do it on medium almond lengths because the half-moon needs space to sit clean above the nail bed. The mint and aqua mix flatters warm and neutral skin tones by adding a cool glow without looking icy. The negative-space half-moon also makes your cuticle line look tidy even if your natural cuticles grow fast. It's one of the few summer designs that still looks sharp with short sleeves and simple jewelry.
Start by painting a sheer mint base, leaving the bottom center slightly translucent so the nail still looks like skin. Then sponge an aqua gradient from just above the cuticle up to about the top third, keeping the edges feathered and never streaky. Use a thin brush to paint a crisp half-moon shape in negative space by masking with tape or carefully cleaning around it with acetone on a brush. Add one tiny silver dot on the left or right side of the half-moon area so it catches light when you move. Finish with two coats of glossy top coat and cap the free edge.
Editor's noteFor extra "glass" effect, use a slightly thicker second top coat on the gradient area so it looks deeper, not just shiny.
Watch outAvoid filling the half-moon with opaque white - it makes the design look like nail art stickers.
2. Lemon Zest French with Micro Dots
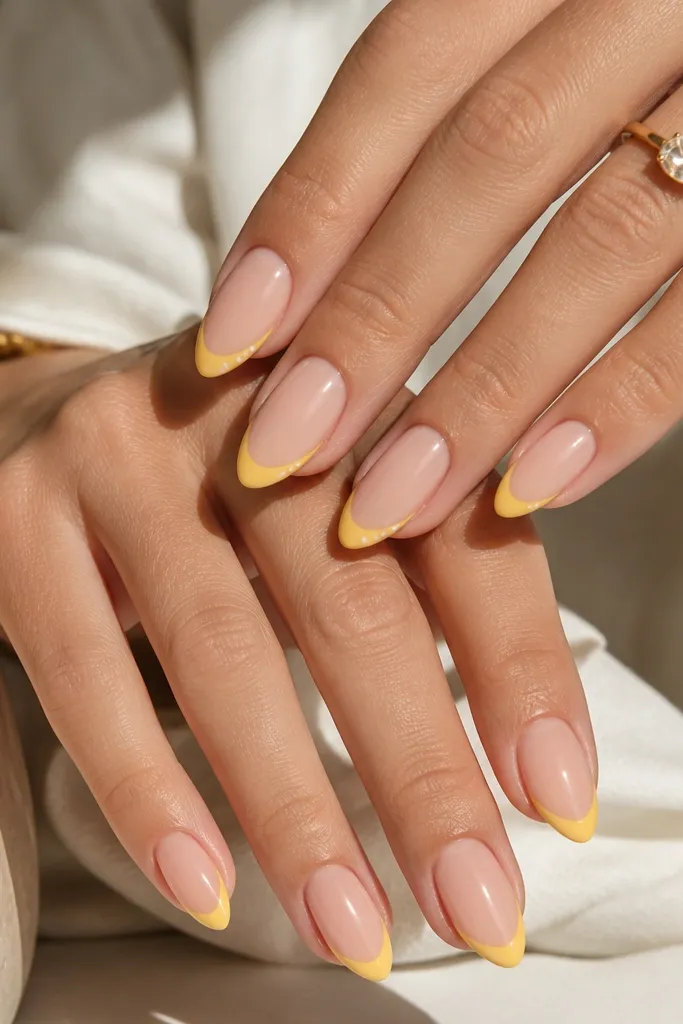
A lemon French works because the almond shape makes the tip line look longer and more intentional. I like this on short-to-medium almond because the French should feel delicate, not thick. Bright yellow flatters fair to medium skin tones, especially if you pair it with a sheer nude base. The micro dots keep it playful without turning it into clutter. This is the set I reach for when I want summer energy but still need it to look neat for work.
Start with a sheer nude or milky pink base so the nail bed looks even. Use striping tape or a French guide to paint a thin lemon-yellow tip line - keep it about 1.5 to 2 mm thick at the widest point. While the tip line is still tacky (or after it cures if you're using gel), place three to five micro white dots just above the French line, spaced like a small arc. Clean up the sides with a lint-free wipe and a brush dipped in acetone. Seal with glossy top coat, making sure the tip edges are fully capped.
Editor's noteIf your yellow looks too bold, mix it with a tiny drop of sheer yellow or use a second thin coat instead of one heavy coat.
Watch outDon't make the French line too wide - on almond nails it can swallow the shape.
3. Coral Swirl Cuticle Accent
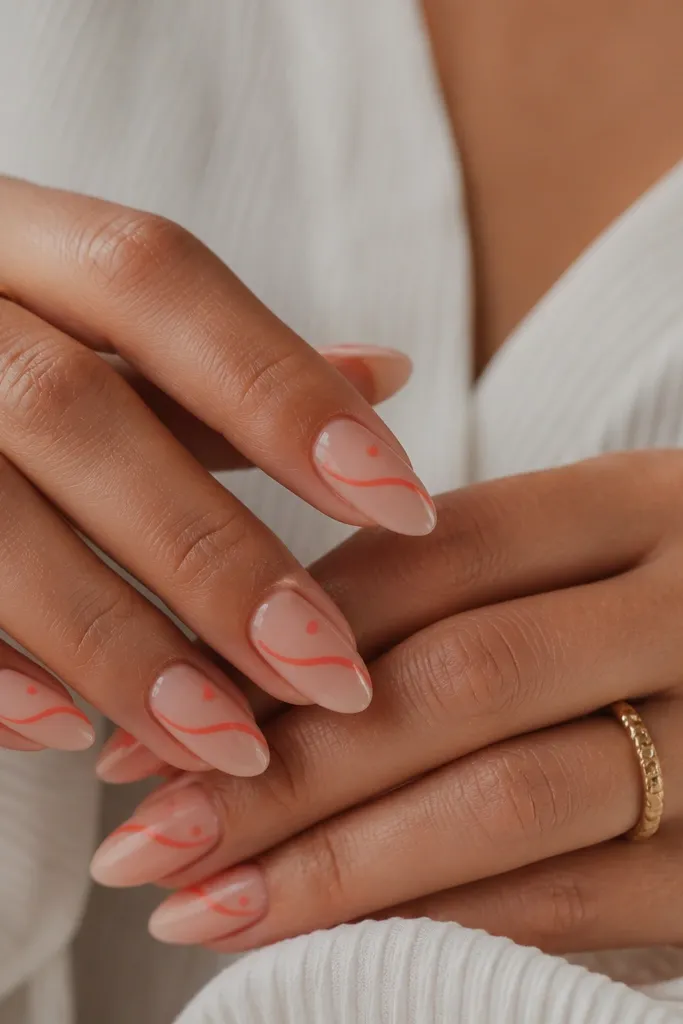
This look is all about placement: the swirl sits near the cuticle, which makes your fingers look longer. Coral is flattering because it warms up cool skin tones and adds life to medium tones. I like this on almond nails with a slightly rounded tip, not super pointy, because the swirl has to follow the nail curve. The nude base keeps it wearable, and the glossy swirl looks dimensional even when the rest is simple. It's also great if you want art that doesn't snag on hair or clothing.
Start with a nude base that matches your natural nail bed - I use a milky pink that's sheer enough to look like your nails. Then paint a thin coral line that begins at the cuticle center and curves outward like a small comma. Build the swirl by adding a second pass over the same line so it's opaque, but keep the edges clean with a fine detail brush. Add one tiny coral dot at the tip of the swirl to give it a focal point. Finish with one glossy top coat over everything, and cap the swirl lightly at the edges so it stays smooth.
Editor's noteUse a liner brush with a slightly damp tip - it helps the coral line flow without flooding the cuticle area.
Watch outSkip thick swirls - they catch on fabric and look raised even after curing.
4. Tangerine Ombre with White Cloud Edge
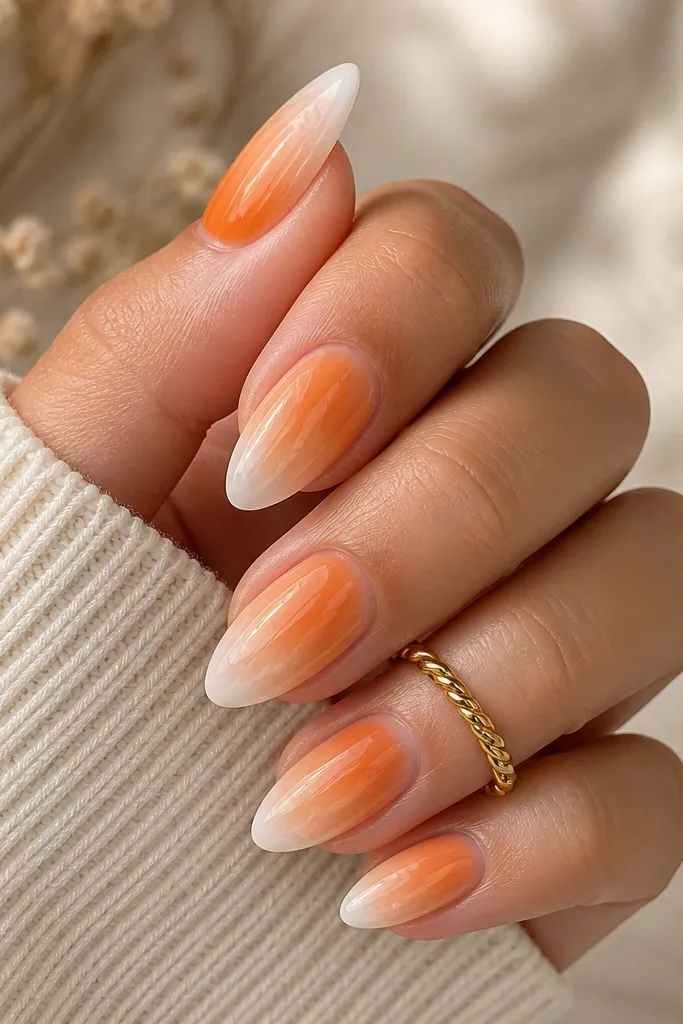
Ombre is the easiest way to get a salon look at home, and the almond shape makes the gradient feel extra long. Tangerine flatters golden undertones and looks amazing with summer tans, but it also works on fair skin if your base stays sheer. The white cloud edge keeps the design from looking harsh because it softens the tip boundary. This set reads "airy" instead of heavy, which is why I like it for hot-weather events. It also hides minor application streaks better than solid color.
Start with a sheer nude base, then sponge tangerine color from the mid-nail down to about 1/3 up, leaving the cuticle mostly nude. Blend upward so the ombre is smooth, not stripey, and cure fully. For the cloud edge, use a small makeup sponge or stippling brush with white - dab lightly across the top third so it looks foggy, not painted on. Leave the very tip slightly clearer so the almond point stays crisp. Seal with glossy top coat and cap the free edge thoroughly.
Editor's noteIf the ombre looks too dark, wipe your sponge on a paper towel before applying the second layer.
Watch outDon't drag tangerine all the way to the cuticle - it can make your nail bed look smaller.
5. Mint Chrome Side Lines
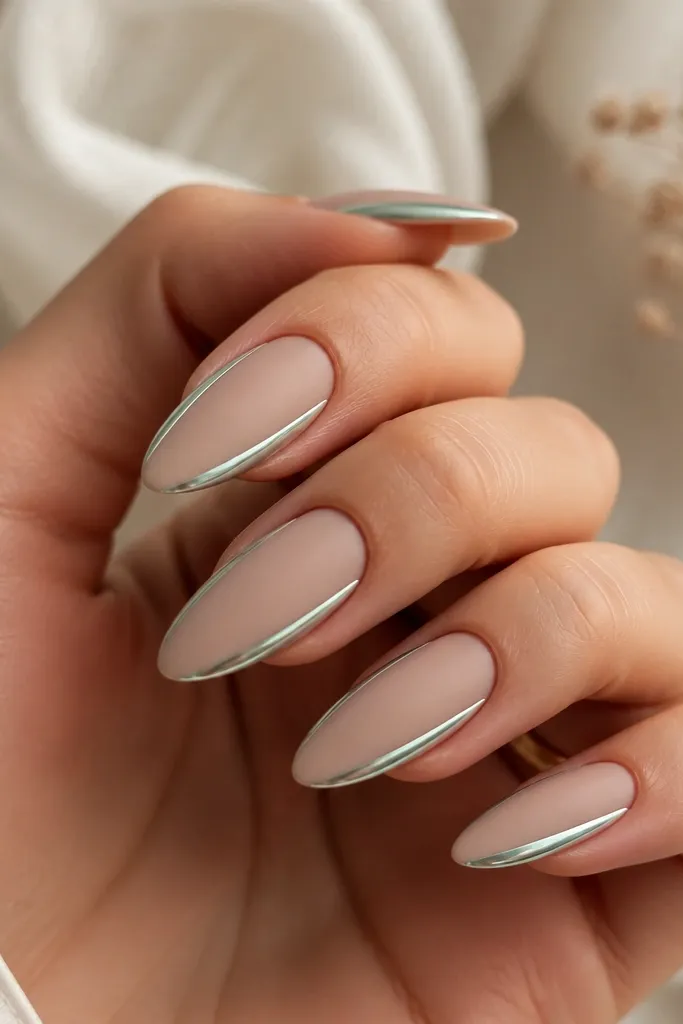
Side lines give your nails length without covering the whole nail, and chrome makes the line look bright even on matte bases. I do this on medium almond because the sidewalls have enough surface to hold the chrome without spilling. Mint chrome flatters a wide range of skin tones - it looks clean on fair skin and adds a cool glow on warmer tones. The matte center makes the chrome look sharper, not dusty. This is my go-to for beach dinners when I want something that catches headlights and sunset light.
Paint a nude base and cure. Apply matte top coat only on the center area, leaving a small strip along each sidewall untouched so the chrome has something to grip. Next, press mint chrome powder or gel chrome along each sidewall using a small silicone applicator - keep the line width about 0.5 to 1 mm. Wipe off excess powder and then seal the chrome lines with a thin layer of glossy top coat, avoiding the matte zone. Finish by cleaning the underside of the free edge so the chrome doesn't chip.
Editor's noteIf chrome smears, let your base cure a full cycle longer before applying top - it grips better when it's fully set.
Watch outDon't put chrome over matte - it can look patchy and dull.
6. Strawberry Milk Gloss Tips
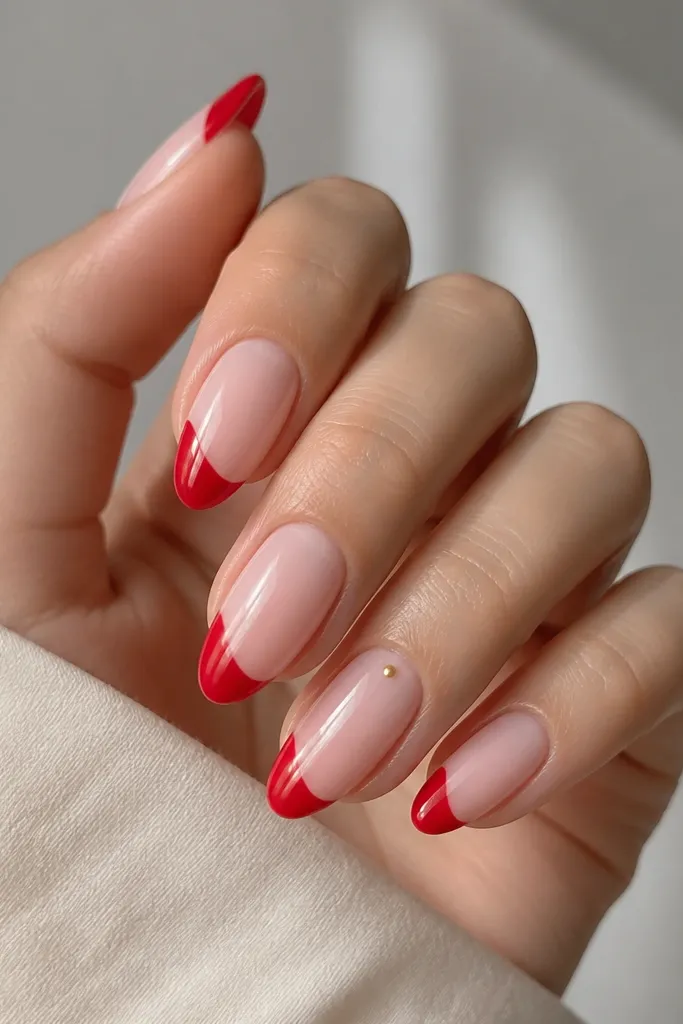
This design looks sweet but polished because the tips are glossy and shaped like a soft curve rather than a straight French. Milky pink makes strawberry red look creamy instead of harsh. It flatters fair to medium skin tones because the base mimics the natural nail bed color. The rounded comma tips also make the almond point look smoother, which matters if you're prone to rough cuticle edges. It's a dessert-color set that still looks wearable in daylight.
Start with a milky pink base, slightly thicker near the center so it looks even. Paint strawberry red only on the tip area, shaping it into a curved comma that follows the almond outline. Keep the red area about the top quarter of the nail and leave a thin gap near the sides for a clean edge. Add one tiny gold dot near the cuticle on one accent nail - place it a few millimeters away from the cuticle line, not touching. Seal with a high-gloss top coat and cap the tip so the comma edge stays smooth.
Editor's noteUse a small brush for the comma curve - a wide brush makes the red look like a blob.
Watch outSkip matte tops here - strawberry milk looks best when the tips shine.
7. Blueberry Jam Half-and-Half
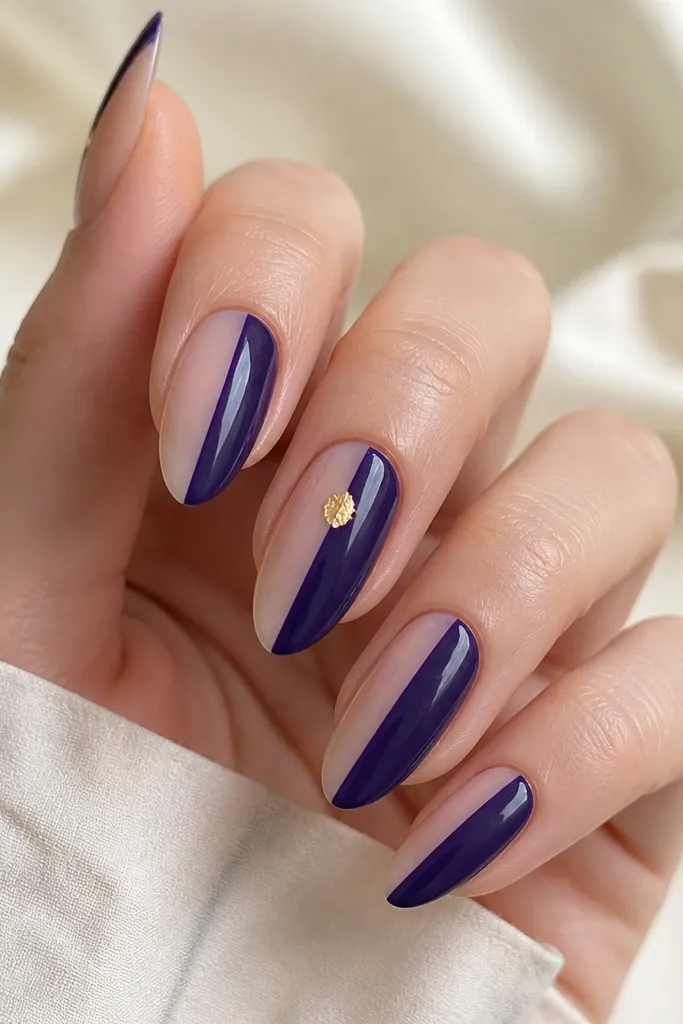
Vertical half-and-half makes the almond shape look sharper and more structured. Deep blueberry purple looks gorgeous against sheer nude because the contrast is clear without being neon. I like it for medium almond lengths because the split line can stay straight and doesn't warp around a super short tip. This design flatters hands with longer fingers because it emphasizes the vertical line, but it also works for shorter fingers if you keep the purple area narrow. The gold foil flake adds a jammy "spark" without turning it into full glitter.
Apply a sheer nude base and cure. Use a striping tool or thin brush to paint deep blueberry purple on one side of the nail, keeping the split line crisp and centered. For the accent nail, place a small gold foil flake right on the split line, then press it gently so it grabs. Clean the edges with acetone on a brush so the purple doesn't bleed into the nude. Finish with glossy top coat over everything, paying attention to the split line so it doesn't feel raised.
Editor's noteIf your split line wobbles, repaint the line after curing using a thin liner brush - it's faster than trying to fix it mid-paint.
Watch outDon't make the purple half too wide - it can shrink the nail look on almond shapes.
8. White Daisy Accent with Negative Space Petals
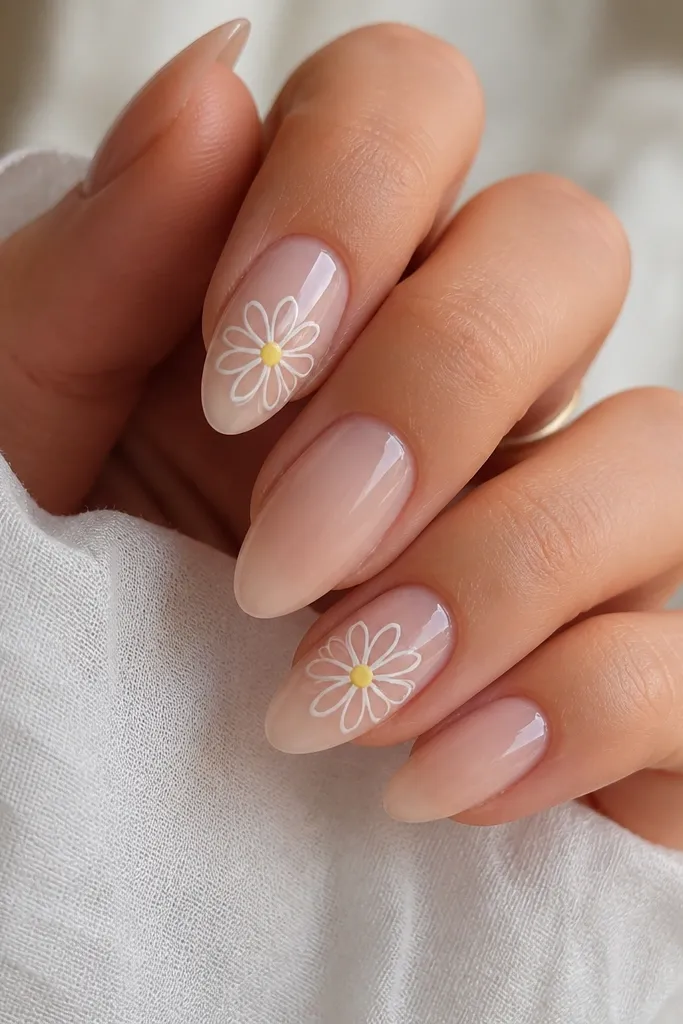
Daisies look summer-fresh, but the negative space is what keeps them from looking cartoonish. I use a sheer nude base so the daisy sits like it's printed on skin. White petals outlined cleanly flatter most skin tones because they brighten the nail bed. This works best on almond nails that have a smooth, even tip - small chips around the tip make petals look uneven. It's also a good choice if you want art that doesn't cover every nail.
Start with a sheer nude or milky base and cure. On accent nails, use a dotting tool to place a small yellow center circle about the size of a sesame seed. For petals, outline five white petals using a thin liner brush, leaving the middle of each petal as negative space so you can see the nude base between them. Add a tiny brownish dot in the center or a second thin yellow ring for depth. Seal with glossy top coat carefully around the petal edges so the art stays crisp.
Editor's noteLet the outline dry or cure fully before filling - it stops the white from bleeding into the gaps.
Watch outDon't fill every petal solid white - it loses the airy daisy effect.
9. Tropical Leaf Cat-Eye Tips
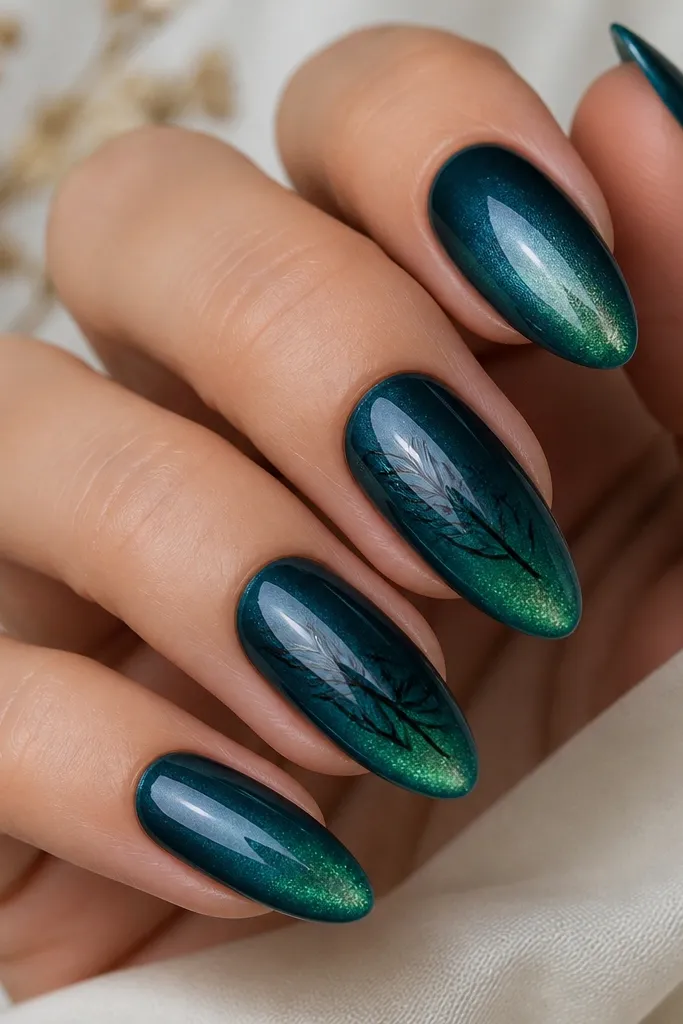
Cat-eye polish gives you that tropical depth without needing glitter everywhere. The shifting teal-to-green looks expensive in sunlight, and it stays interesting even when you're not staring at your hands. I like this on medium almond because the tip glow makes the almond point look long. Leaf line art adds the summer theme while staying thin and neat. This set flatters hands that look better with darker colors - it makes the nail bed look more defined and hides minor staining.
Paint the full nail with deep teal cat-eye gel and cure under the magnet for the glow direction. Move the magnet so the shift is concentrated toward the tip - about 2 to 3 mm wide at the top. Cure again and add a glossy top coat. On two accent nails, use a fine black liner to draw one simple leaf on each nail near the center, angled slightly toward the tip. Keep the leaves small so the cat-eye still carries the look. Finish with another thin layer of glossy top coat over the leaf lines.
Editor's noteWipe the magnet after each use - dust makes the cat-eye lines look streaky.
Watch outAvoid thick leaf art - bold strokes over cat-eye can look heavy.
10. Peach Nectar Jelly Gradient
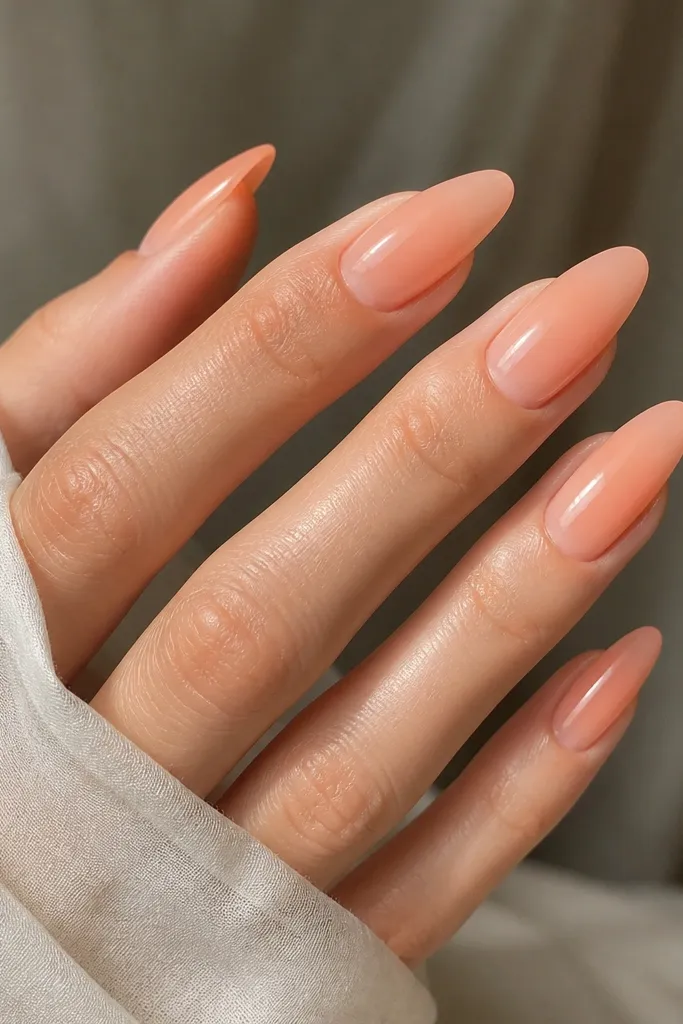
Jelly gradients look like summer sunlight trapped in gel. Peach nectar is flattering because it warms cool undertones and looks soft on medium skin. I like it on longer almond nails because the translucency shows the natural nail structure. This set is also forgiving - if your application isn't perfect, the jelly effect smooths it visually. It's the kind of manicure that looks good even with minimal jewelry.
Start with a clear or sheer nude base and cure. Apply peach jelly gel starting at the mid-nail and blend it up with a sponge so the cuticle stays lighter. Build two thin layers for opacity at the tip, keeping the top third slightly stronger than the rest. Cure each layer fully so it stays glassy, not cloudy. Finish with a high-shine top coat and cap the free edge with extra attention.
Editor's noteUse thinner layers than you think - jelly gel looks best when it's smooth and not thick.
Watch outDon't overwork the sponge - it can lift product and create patchy spots.
11. Coral Reef Glitter Fade
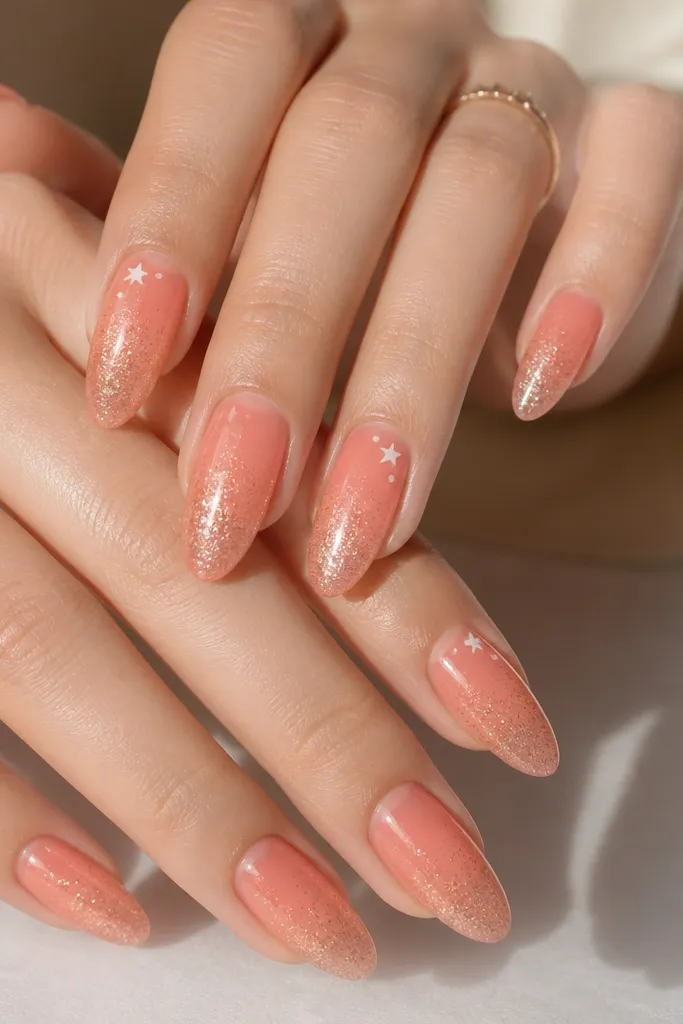
This is glitter that looks like it belongs in summer photos. The trick is a fade - glitter only at the tip reads intentional, not messy. Coral base keeps it warm and flattering, especially with gold jewelry. I do this on medium almond because the tip area has enough space for the glitter, and the nail still looks clean at the cuticle. Adding a few tiny white star dots keeps it playful without needing full nail art on every finger.
Paint a sheer coral base and cure. Apply fine coral glitter starting at the tip and lightly dragging it down about 2 to 3 mm using a flat brush, then stop so the fade is soft. Add one extra thin glitter layer only at the tip for brightness and cure. On one or two accent nails, place 3 to 4 tiny white star dots near the cuticle - use a dotting tool and keep them small. Seal with glossy top coat, focusing on the free edge so glitter doesn't catch.
Editor's noteIf glitter feels gritty, add a thin layer of clear gel before top coat so it levels out.
Watch outDon't pack glitter all the way to the cuticle - it looks like glitter dust.
12. Rose Quartz Chrome Cuticle Glow
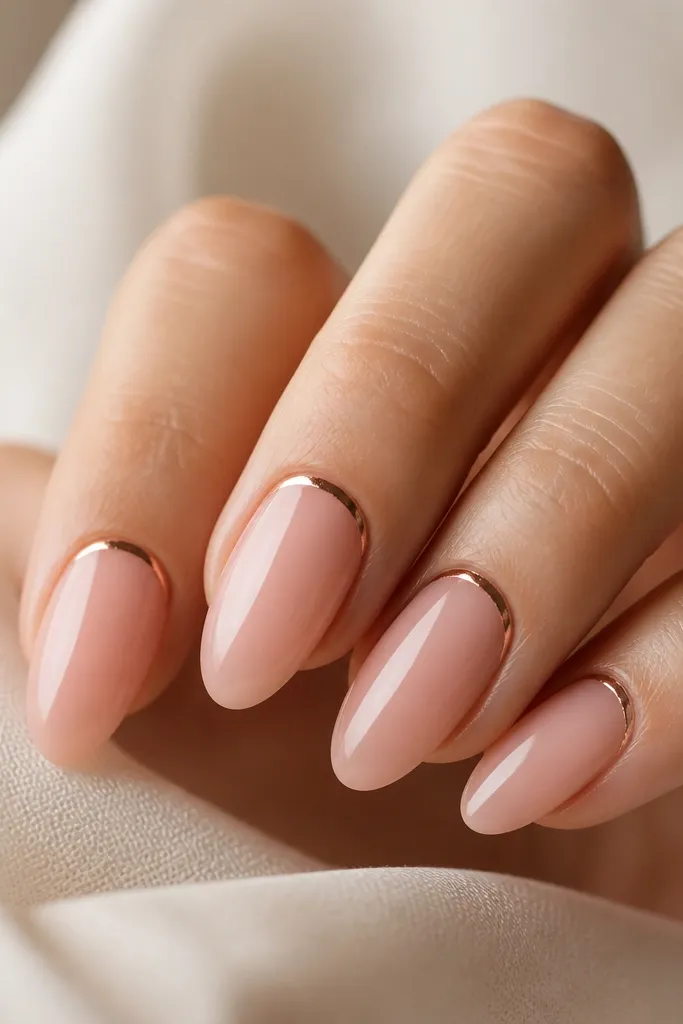
Chrome at the cuticle gives a "lit-from-within" effect that looks flattering on almost every hand. Rose quartz tones look soft and romantic without turning your nails into a solid pink block. I like this on almond nails that are medium length because the chrome strip should be thin and controlled. It also helps if your nail beds are slightly uneven - the chrome draws attention to the cuticle line, not the imperfections. This is a great summer set for date nights and dinners because it catches light when you move.
Start with a sheer pink nude base and cure. Leave the cuticle area clean, then apply a thin line of rose-gold chrome gel right around the cuticle perimeter - just a 1 mm strip. Press chrome powder lightly or use chrome gel for a smooth mirror look, then cure. Add a second layer of nude base only if you need to even out the center, but keep the chrome strip crisp. Finish with glossy top coat and cap the free edge so the chrome stays sealed.
Editor's noteUse a small foam applicator for chrome powder - it keeps the strip narrow instead of spreading.
Watch outSkip thick chrome blobs - they lift and look textured.
13. White Linen Texture with Coral Dots
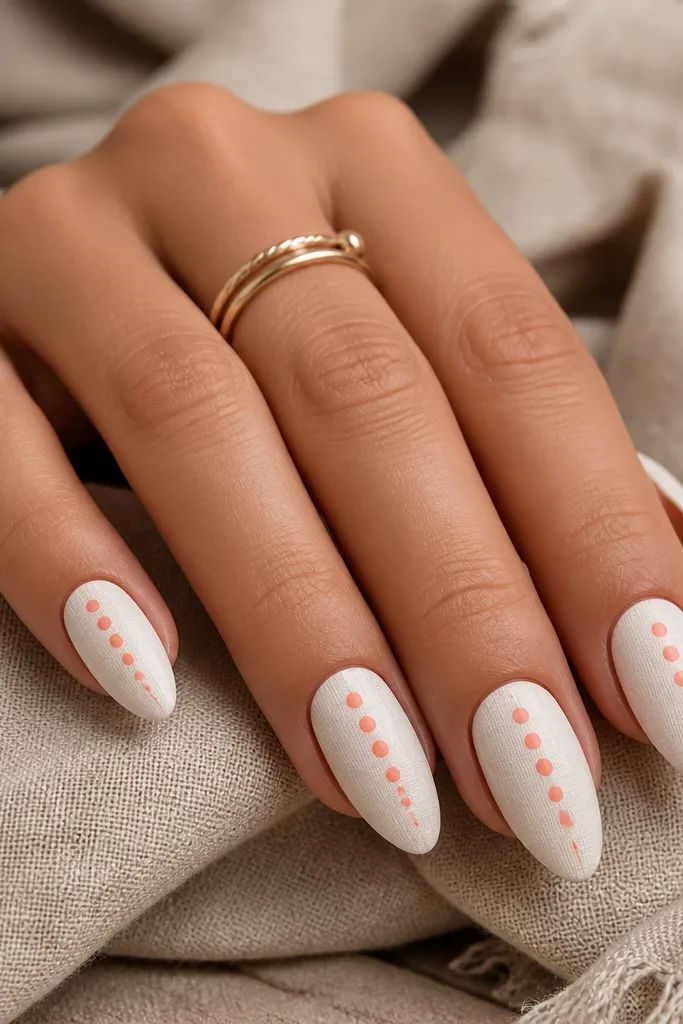
Texture reads summer when it's subtle. A white linen-matte base gives a fresh, airy vibe, and coral dots add just enough color to keep it from looking sterile. I recommend this for medium almond lengths because the texture needs a smooth surface to look even. It flatters fair and cool undertones because white brightens, and coral keeps your hands from looking washed out. This design also hides small imperfections because the texture diffuses shine.
Start with a white gel base and cure. Apply a linen texture effect by using a textured gel or a fine matte powder technique - keep the coverage thin so it doesn't look chunky. Cure and then place coral dots in a vertical line - I do one dot near the cuticle and two more spaced toward the tip. Use a dotting tool and let each dot cure if you're working in layers. Seal with a matte top coat over the dots, but keep the top coat thin so the dots stay defined.
Editor's noteIf your dots blur, let the base cure longer and use a slightly thicker dot color so it holds shape.
Watch outAvoid glossy top coat over the whole set - it kills the linen effect.
14. Sky Blue Micro French with Gold Foil Specks
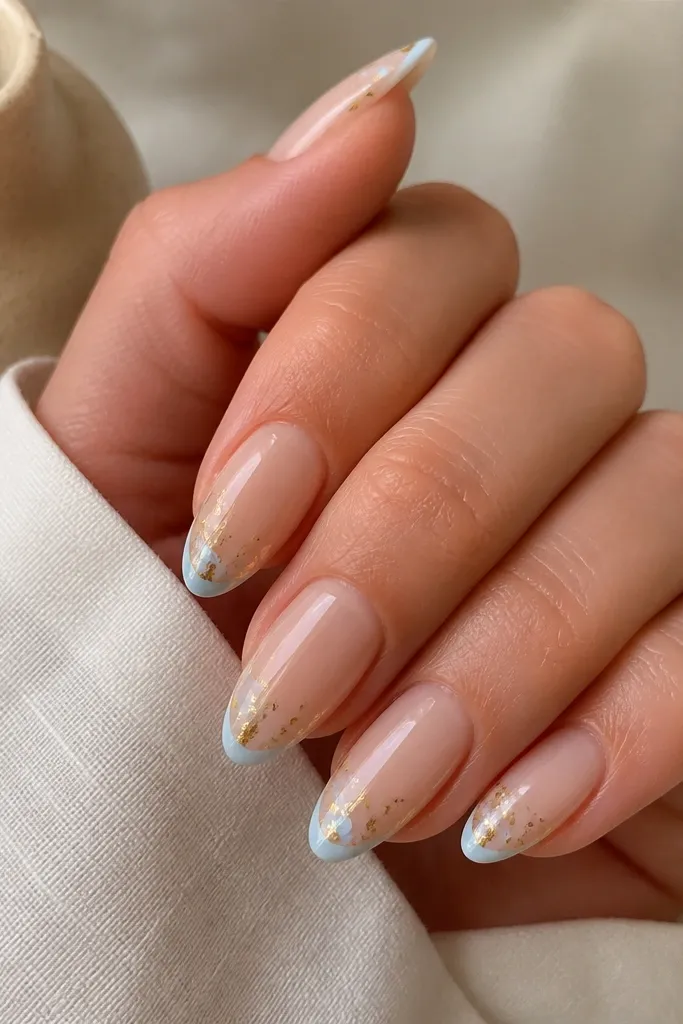
Micro French looks clean on almond nails because it keeps the tip area airy while still giving you a defined shape. Sky blue is summer without being loud, and it flatters many skin tones because it's closer to the color of your eyes or veins in daylight. Gold foil specks add a "sun glint" effect that feels beachy but still grown-up. I like this for events where you want your nails to look intentional in pictures but not overly decorated. The result stays neat as your nails grow because the design sits at the tip.
Apply a sheer nude base and cure. Use a French guide to paint a super thin sky-blue tip line - aim for about 1 mm at the widest and keep it even across nails. Before top coat, add tiny gold foil specks by pressing small pieces near the blue line, concentrating on two nails for balance. Clean the rest of the nail surface with a soft brush so foil doesn't smear. Finish with glossy top coat, and cap the free edge to lock in the foil.
Editor's noteGold foil looks best when you vary the speck sizes - use tiny pieces, not one big chunk.
Watch outDon't use thick paint for the French - it will look raised and catch on fabric.
15. Watermelon Slice Tips with Green Outline
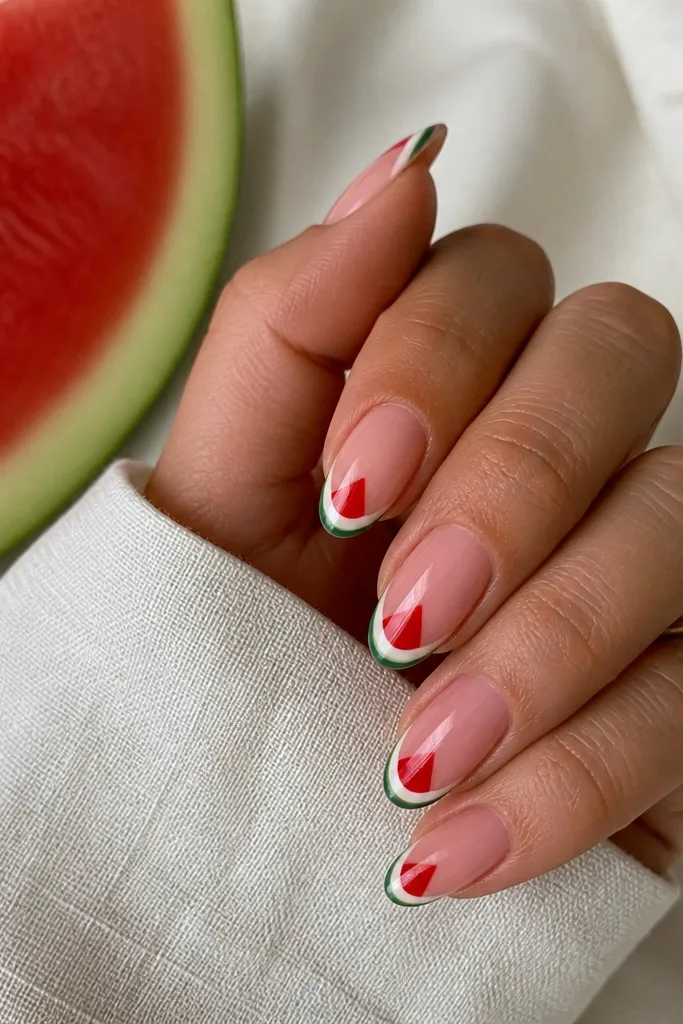
Watermelon nails look fun, but the green outline is what makes them look like actual fruit slices instead of random color blocks. The sheer pink base keeps it light and summer-appropriate. This design flatters medium and warm skin tones because watermelon red brings warmth, while the green outline adds freshness. I like it on medium almond because the slice shape needs a little width for the layers to read clearly. It also looks great with casual outfits and white sneakers.
Start with a sheer pink jelly base and cure. Paint a thin white band across the top third to represent the rind highlight, then add red on the very tip area so it looks like the fruit inside. Use a fine green liner brush to outline the red shape - keep the line thin and follow the almond curve. Add a few tiny white seed dots by placing small dots in the red area, then cure. Finish with glossy top coat and cap the edges so the outline stays smooth.
Editor's noteKeep the seeds random - three too-perfect seeds looks fake. Vary size by one dot.
Watch outDon't overfill the tip with red - leave a little space for the rind white band.
16. Tropical Orange Palm Tree Silhouette
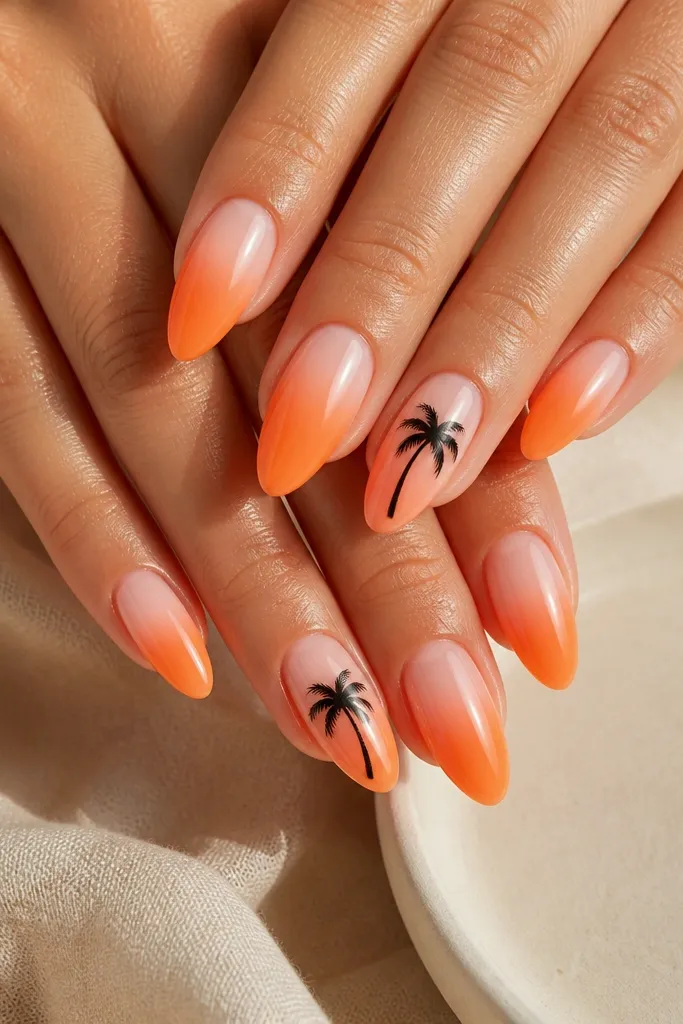
Silhouette art looks clean and modern because it avoids tiny details that can smear. The orange-to-sheer gradient gives you the sunset feel, and the black palm tree anchors the design. This flatters most skin tones because orange is warm and the black outline gives crisp contrast. I like it on almond nails that are medium length so the palm tree doesn't look cramped. The glossy finish makes the gradient look like it's glowing, especially outdoors.
Start with a warm nude base, then blend orange jelly or polish from mid-nail upward to the top third. Sponge the gradient so the cuticle stays lighter and cure fully. On two accent nails, use a thin black liner brush to draw a small palm trunk and a fan of fronds - keep it near the center with fronds leaning toward the tip. Add one thin black curve near the base to suggest ground or shadow. Cure and seal with glossy top coat, making sure the palm silhouette edges are fully covered.
Editor's noteIf your palm fronds look uneven, draw fewer lines. Two or three strong fronds read better than ten messy ones.
Watch outSkip tiny branches - they disappear on glossy nails and look like smudges.
17. Champagne Pearl Bead Cluster
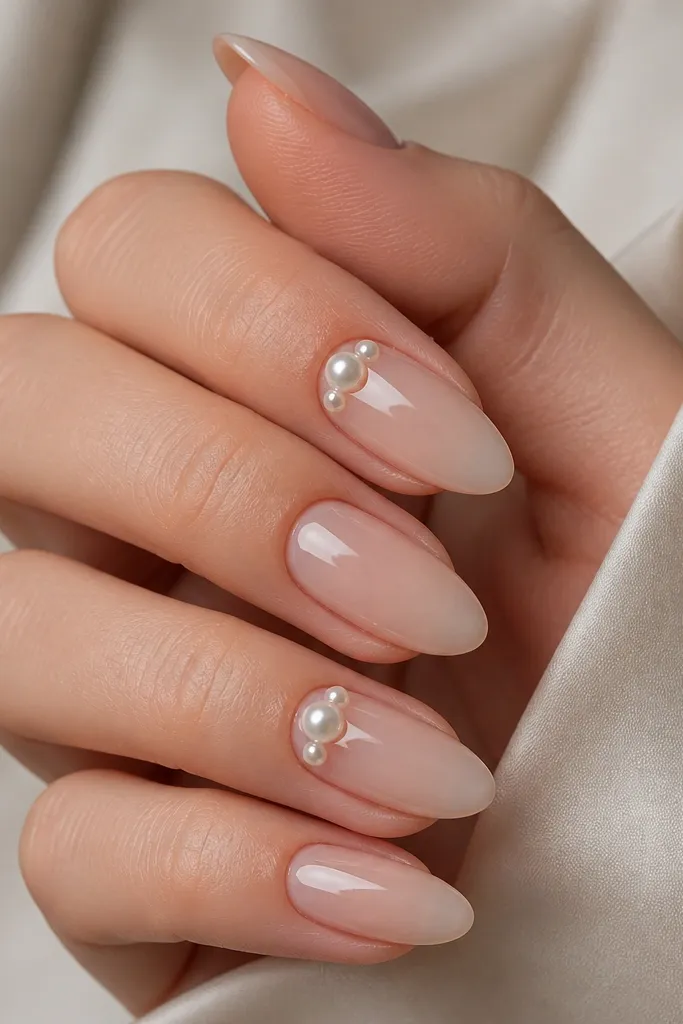
Pearl clusters feel summer-clean when you keep them small and placed low near the cuticle. I use champagne pearls instead of pure white because they match warm undertones and look softer in daylight. This design looks best on almond nails with a smooth tip and sturdy nail thickness, since beads add weight. It flatters hands with shorter nails too, because the cluster draws the eye upward. For weddings, brunch, and vacation dinners, this is the set that gets compliments without looking costume-y.
Paint a sheer nude base and cure. Choose two accent nails and apply a thin gel adhesive near the cuticle - just a small crescent area on one side. Place three to five champagne pearl beads with tweezers, starting with the biggest one in the center and filling around it with smaller beads. Press gently and cure according to your gel instructions. Seal over the beads with a clear gel layer so they don't snag, then cap the free edge with top coat.
Editor's noteUse beads that are flat-backed or pre-glued - they sit cleaner and don't rock when your nail bends.
Watch outDon't put beads on every nail. One or two accent nails looks intentional; all ten looks heavy.
18. Mocha Latte Nude with Gold Half-Frame
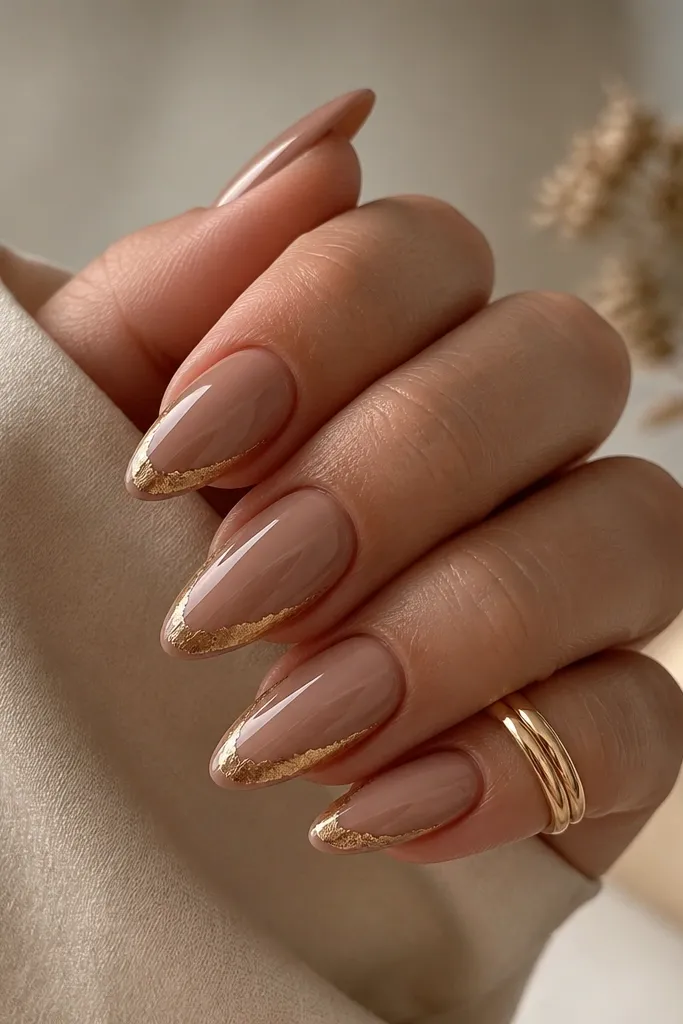
Warm nude plus gold linework reads expensive even in summer heat, and it doesn't scream "beach" if you're going somewhere more polished. The mocha latte base looks great on medium and deeper skin tones because it matches the warmth in your undertone. On fair skin, it still works if you keep the base sheer and creamy, not dark. The gold half-frame is placed along one side near the tip, which makes the almond look sharper. This is a design I wear when I want something minimal but still with a detail you can photograph.
Start with a sheer mocha nude base and cure. Use a fine brush to apply gold foil gel or gold striping tape along one sidewall - keep it starting around the top third and stopping before the very tip. If you use foil gel, press the gold gently and cure, then remove excess if needed. For a clean finish, add a thin clear gel over the gold so it doesn't feel raised. Seal with glossy top coat, and cap the free edge so the gold line doesn't lift.
Editor's noteGold looks best when it's slightly off-center. I aim the line a millimeter closer to the outer edge of the almond.
Watch outDon't wrap gold all the way around the nail - it looks like a cheap ring on the nail.
19. Iced Vanilla Marble Almonds with Opal Vein Lines
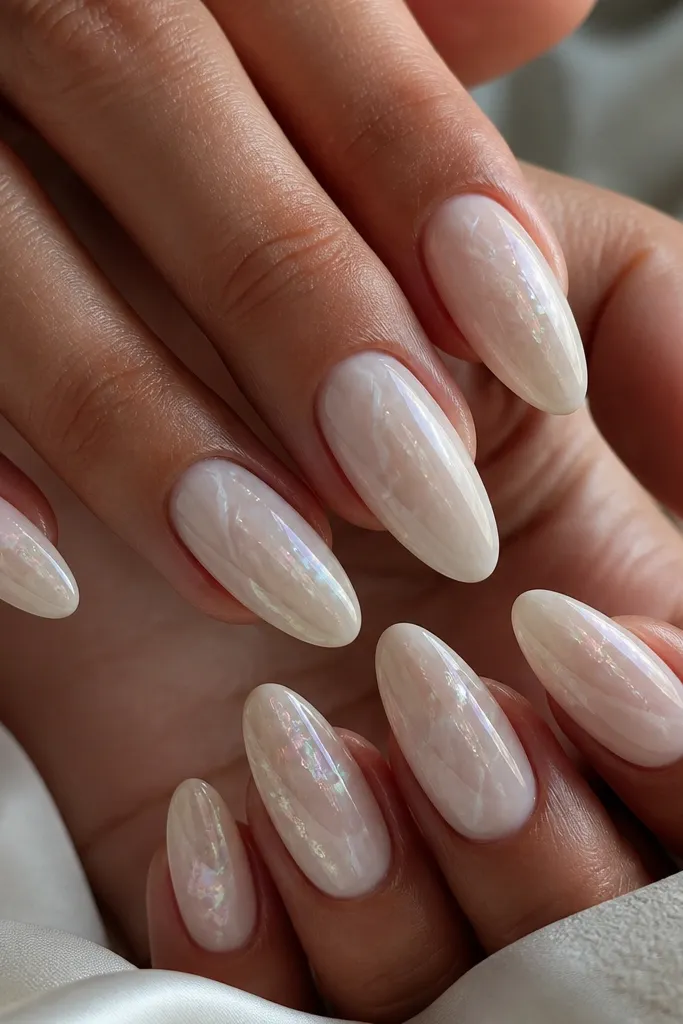
This design looks like chilled vanilla ice cream with marble swirls, and the opal vein lines make it feel expensive without adding heavy glitter. The milky base makes the white veining pop, but it still stays soft and summer-appropriate instead of stark. I like it for warm weather because the shine reads clean and bright even when your hands are in sunlight. The thin lines also give you a built-in "movement" so your nails look interesting from every angle.
Start with a sheer milky nude or white-leaning builder gel base. Cure fully, then use a striping brush or a detail liner loaded with white gel to paint thin marble arcs - keep them narrow and let them break in places so it doesn't look like painted streaks. Add opal effect by dragging a small amount of iridescent gel or opal pigment gel along one or two of the marble arcs, then feather it with a clean brush so the vein looks like it's glowing from inside. Finish with a high-gloss top coat and cap the free edge so the marble stays sharp when it grows out.
Editor's noteFor marble lines, wipe your brush on a lint-free wipe once before you start each nail - it keeps the white from flooding.
Watch outDon't use thick white gel for the marble - it turns into chunky frosting instead of marble.
20. Seashell Pearl Almonds with Peachy Micro-Scales
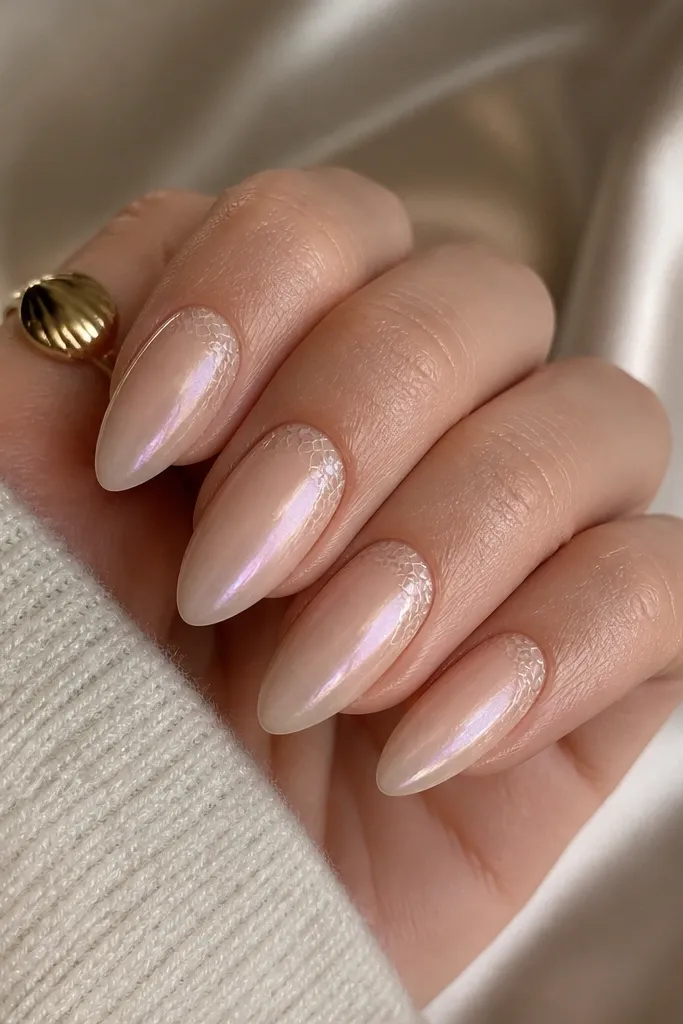
This one gives you seashell texture without looking like you glued on decorations. The micro-scales sit close to the cuticle and along the sidewalls, so your nails look detailed even when they're only medium length. The peach nude base keeps it summery and flattering for skin tones from fair to deep. I also love how the pearl finish makes the texture look dimensional instead of flat dots.
Apply a sheer peach nude base gel and cure, leaving the center smooth. Use a dotting tool or toothpick to place tiny scale dots: press lightly so each dot forms a small "cap," then overlap them in rows starting at the cuticle and moving outward about halfway down the nail. Add a second layer of the same peach tone only where the overlap needs more definition, then cure again. Seal everything with a pearlized top coat - I use a thicker pearl gel so it fills tiny gaps and makes the scales look like they're under glass.
Editor's noteIf your scales look too uniform, vary the dot size by one half - it mimics real shell ridges.
Watch outSkip matte top coat here - it kills the pearl glow and makes the texture look rough.