
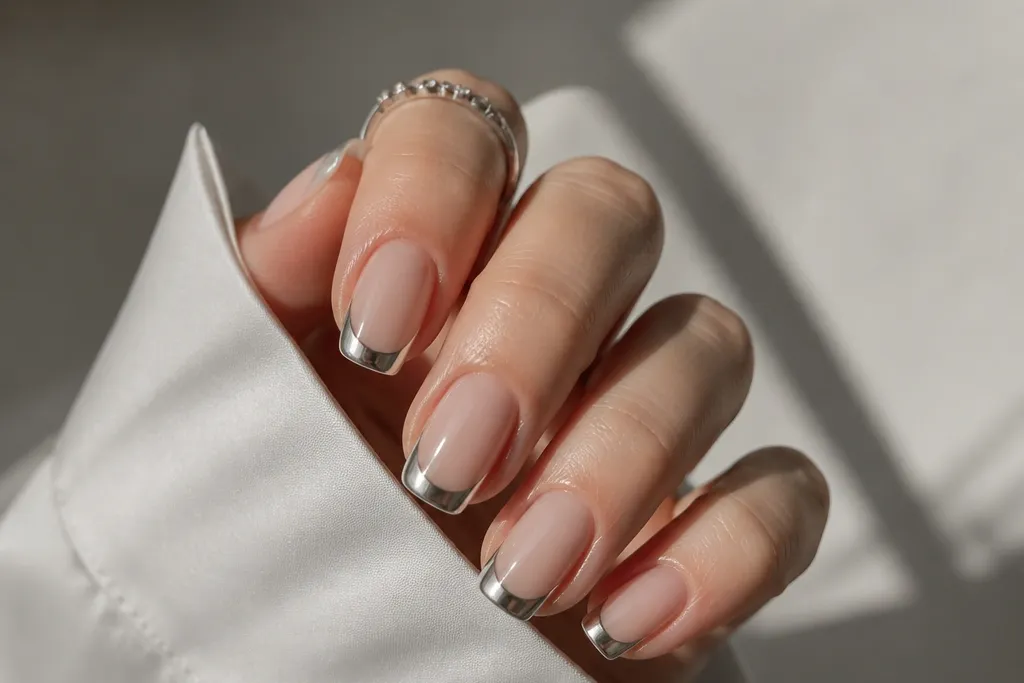
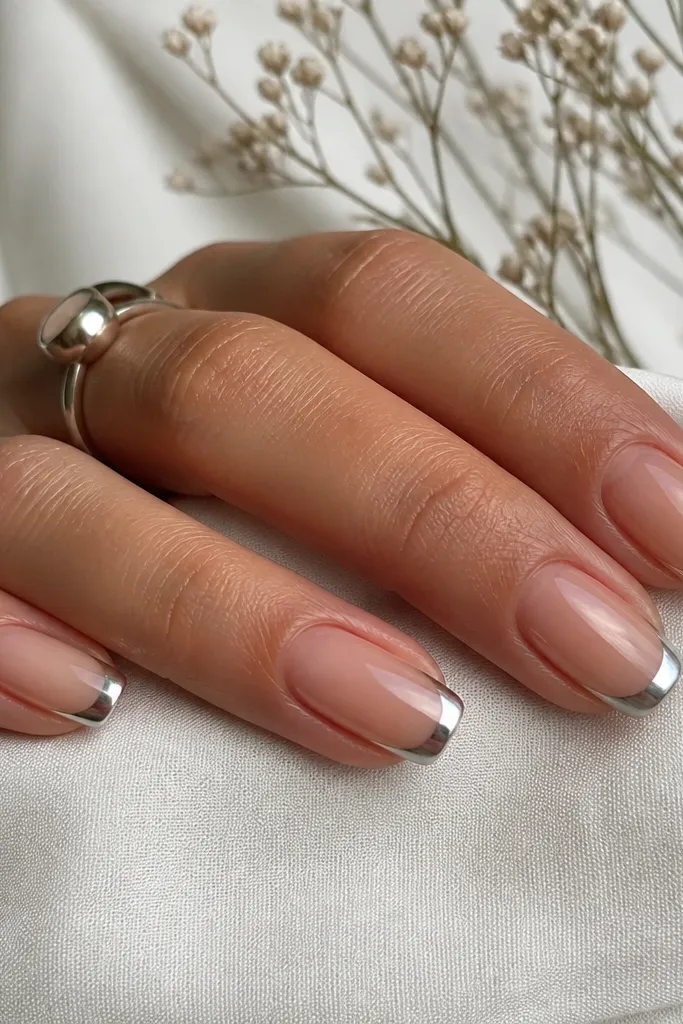
1. Classic Mirror Silver French on Milky Nude
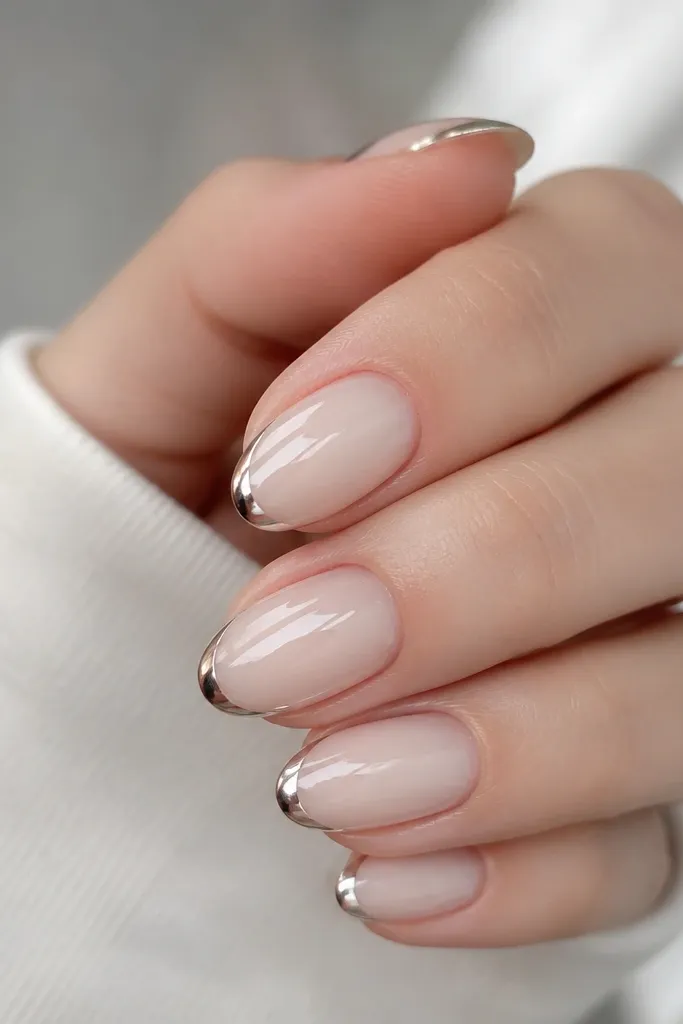
This is the French I keep coming back to because it stays luxe even when your hands are doing real life. The milky nude base blends with most skin tones and makes silver look brighter without turning your nails stark. Mirror chrome on the tip gives you that sharp “jewelry” effect, but keeping the line thin keeps it low maintenance and neat as it grows. It flatters short to medium nails and looks especially good on warm or neutral undertones because the nude base cancels any harshness.
Start by pushing back cuticles and buffing the shine off your natural nail lightly. Apply a sheer milky nude gel base, cure fully, then use a French tip guide to paint a thin smile line with gel — keep it about 1/8 inch from the free edge. Cure again, add a second gel layer only on the French area if you need more opacity, then cure. Rub chrome powder onto the French gel while it’s still tacky, then seal with a non-wipe or careful wipe top coat over just the chrome area and cure.
Use a thin brush to clean the sides of the French line before you chrome — it stops that “fuzzy edge” look.
Don’t chrome over a fully cured, non-tacky gel layer — you’ll get patchy silver.
2. Sheer Pink Base with Micro-Arc Silver French
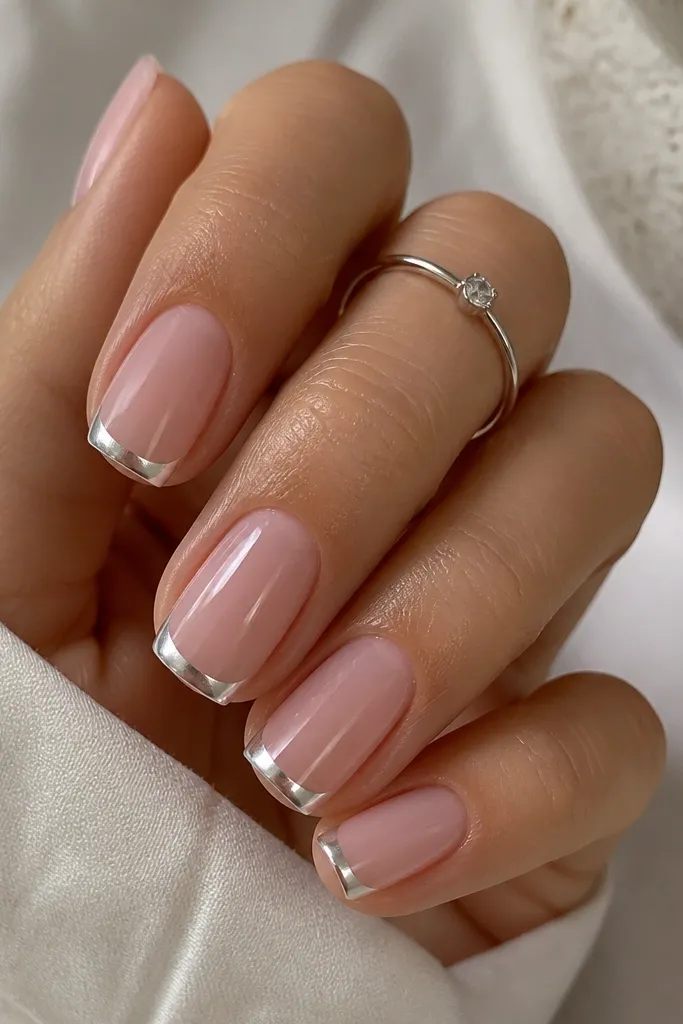
Micro-arc French is my answer for people who hate a heavy tip. The base is sheer pink, so it looks soft against your skin and keeps the silver from looking too “Halloween.” The smaller arc makes your nail look longer and cleaner because it doesn’t cover much surface area. On deeper skin tones, the sheer pink keeps the contrast balanced, so the chrome reads classy instead of overly sharp.
Editor's noteIf your smile line tends to wander, lightly mark the center point of each nail first, then draw from the center outward.
Apply your sheer pink gel base and cure. Add a French guide or use a nail art striping tape to mark a tight smile arc; then paint gel only inside that arc, keeping the line about as wide as a credit card’s edge. Cure, then add chrome powder to the French gel — press gently so the powder goes into the gel texture. Seal with a glossy top coat, curing fully, and wipe with cleanser only if your top coat requires it.
Watch outSkipping a second gel opacity layer on the French can make the silver look grey in patches.
3. Reverse French with Silver Chrome Outline
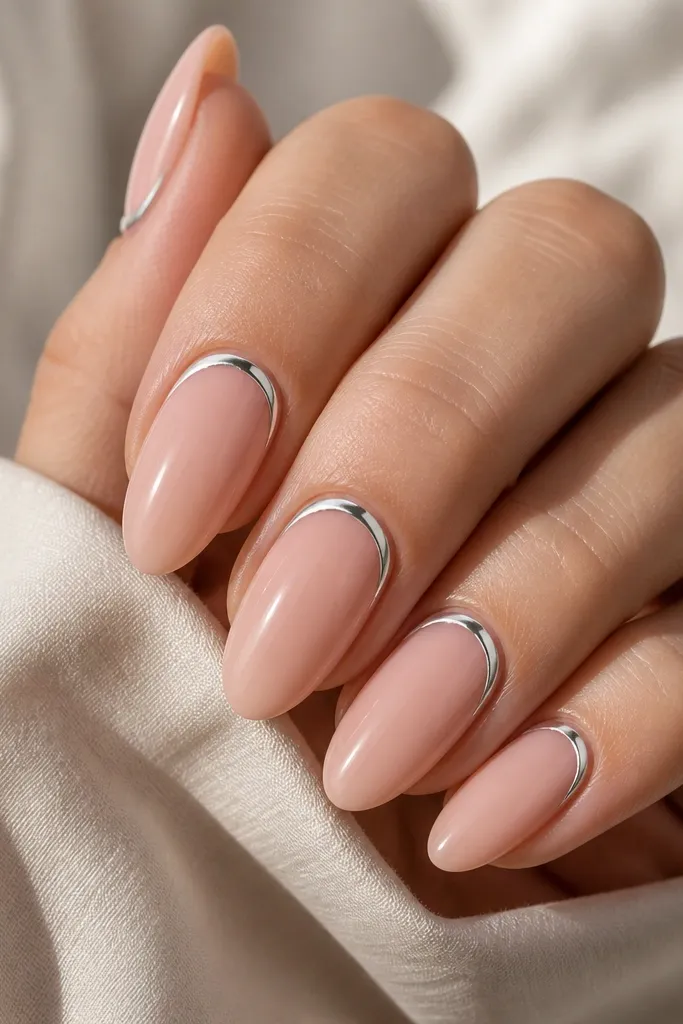
Reverse French is low maintenance because it doesn’t show growth as quickly as a tip-heavy design. The silver chrome sits near the cuticle curve, so even a week later it still looks intentional. A nude base keeps it wearable for office days, and the outline makes your nails look more structured. This design flatters short nails and small nail beds because the eye-catching curve pulls attention upward.
Start with a nude gel base and cure. Paint a thin outline along the cuticle smile using gel and a detail brush; aim for a consistent gap of about 1 mm from the skin. Cure, then add chrome powder to the outlined gel while it’s tacky. Seal with top coat over the outline, then cap the free edge with a thin layer to prevent lift.
Use a dotting tool to place tiny gel beads along the curve, then drag them into a smooth line — it’s faster than freehanding.
Don’t let the gel touch your cuticle — chrome will lift and look messy right away.
4. Silver Chrome French with Clear Jelly Tip
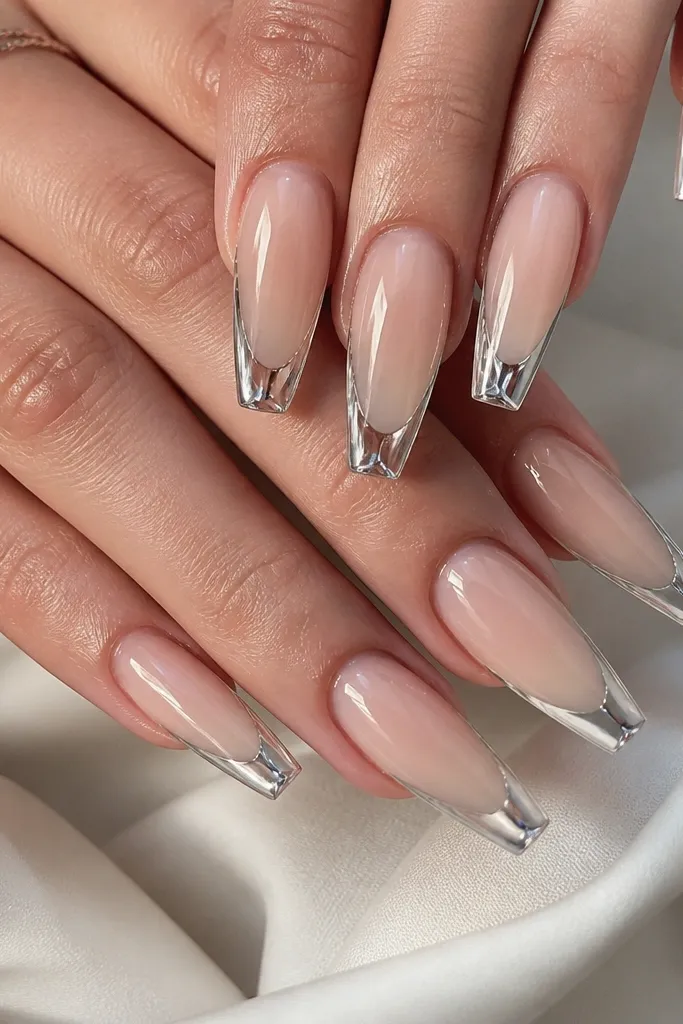
This one looks expensive because it has depth. The clear jelly tip makes the silver chrome look like it’s trapped under glass instead of sitting on top, which also helps it resist scuffs. It’s flattering on medium and coffin nails because the shape gives the jelly a longer surface to catch light. If your hands are rough from cleaning, the jelly layer is forgiving and hides tiny wear spots better than a fully opaque tip.
Apply a sheer nude base and cure. Build the French line with a thin gel smile, cure, then place a clear jelly gel over the entire tip area — keep the jelly slightly thicker in the center. Cure, then apply chrome powder only along the smile edge where you want the brightest silver. Seal with a glossy top coat, cure, and cap the free edge.
After curing the jelly, lightly buff the top surface so the chrome picks up cleanly without streaks.
Don’t chrome the whole jelly area — it can look muddy and uneven under the clear layer.
5. Pearl-Chrome French Tips on Nude Gel
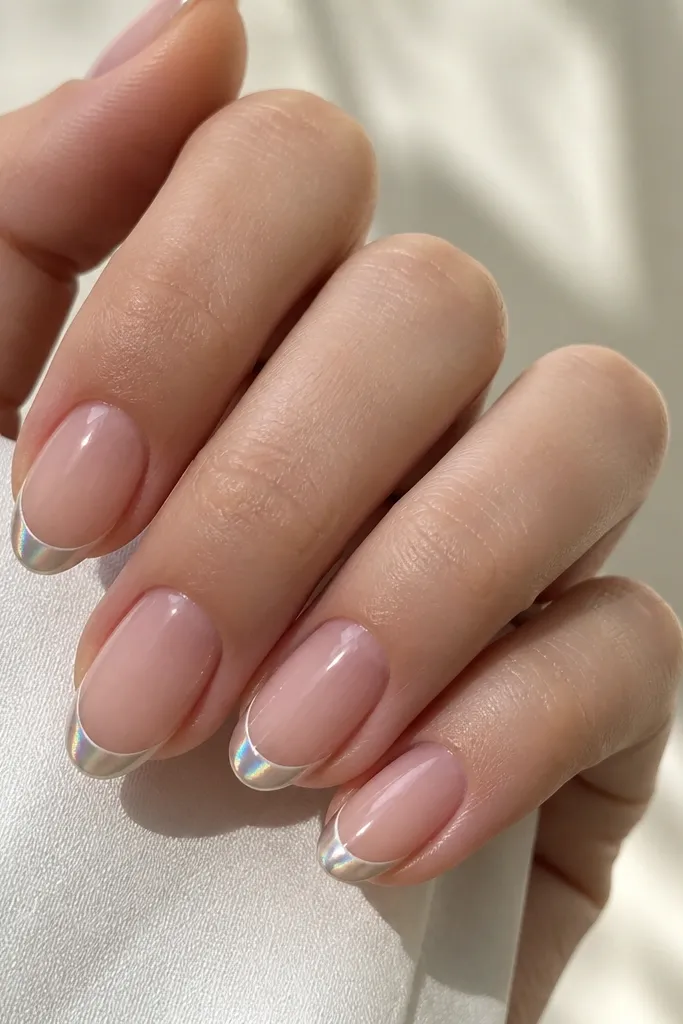
Pearl-chrome is for when mirror silver feels too harsh. You still get that chrome glow, but it reads smoother and more flattering in daylight. The nude gel base keeps everything wearable, and the pearl shift makes the nails look subtly different as you move your hands. This style works on almost every skin tone and looks especially good with warm neutrals like beige, cream, and tan.
Editor's noteUse a makeup sponge to press chrome for a smoother, pearl-like finish instead of a powdery look.
Start with a nude gel base and cure. Apply a French smile with gel — keep the line thin and centered, then cure. While the French gel is tacky, press pearl-chrome powder onto the tip and buff off excess gently. Seal with a high-gloss top coat, cure, and wipe only if your brand top coat needs it for clarity.
Watch outDon’t rub chrome aggressively — it can make the pearl shift look patchy.
6. Smoky Gunmetal French on Cool Rosy Base
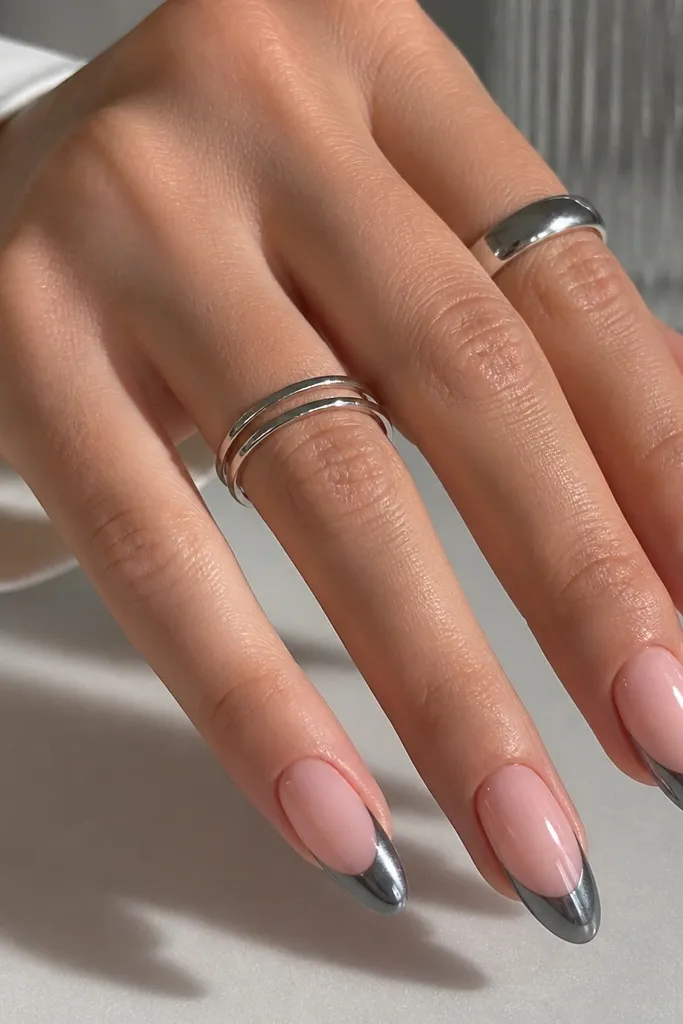
Gunmetal chrome French is moodier, but it still reads clean when the line is crisp. A cool rosy base keeps the dark silver from looking muddy, and it flatters fair to medium skin tones with pink or neutral undertones. This is my pick for winter outfits because it matches denim, black knits, and silver jewelry without trying too hard. It also looks great on almond and oval shapes because the darker tip defines the nail edge.
Editor's noteIf your gunmetal looks too dark, mix a tiny amount of mirror silver chrome powder on the same applicator and tap-blend at the center of the tip.
Apply your cool rosy base gel and cure. Use tape or a French guide to place a slightly wider French smile, then paint gel and cure. Add gunmetal chrome powder to the French gel and press evenly, then lightly buff to remove loose powder. Seal with a glossy top coat that doesn’t dull chrome, and cure thoroughly.
Watch outSkipping a glossy seal can make gunmetal look flat and chalky.
7. Silver Chrome French with Tiny Rhinestone Corner
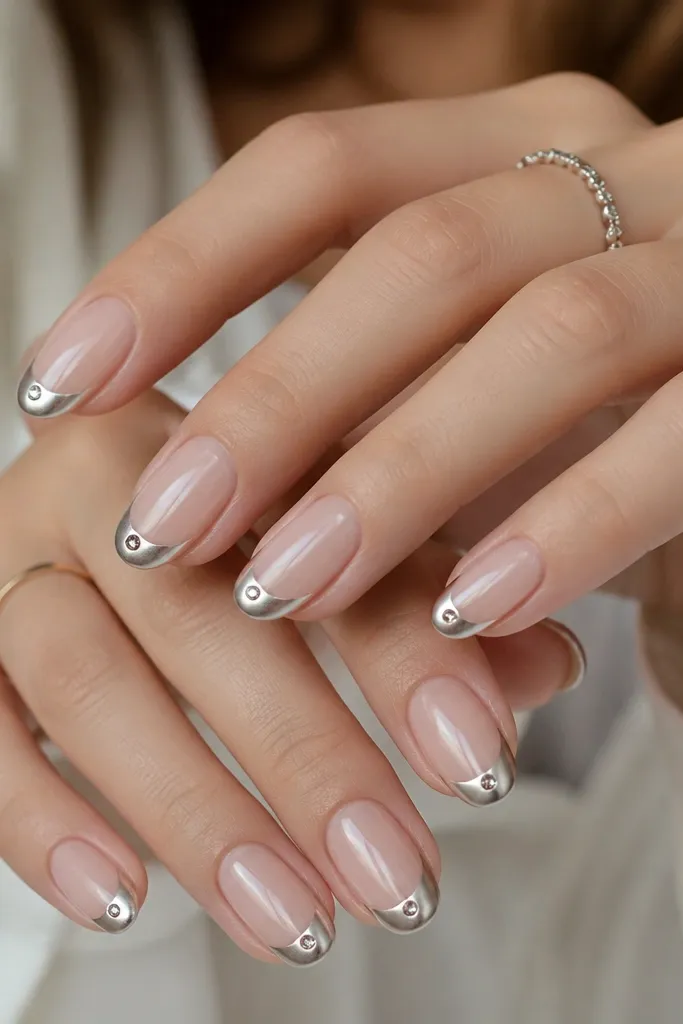
This is the “one detail” version of chrome French. The rhinestone corner makes the manicure feel dressed up, but it’s still low maintenance because it’s small and placed where it won’t snag on hair or fabric. Mirror silver keeps it bright, while the nude base makes it wearable for everyday. This flatters hands with shorter nails because the stone gives a focal point at the tip without needing a wide design.
Start with a nude gel base and cure. Create a thin mirror silver French tip using a guide, cure, then apply mirror chrome powder to the French gel. Place one tiny rhinestone at the outer corner of each tip using a dot of clear gel and cure. Seal over the rhinestone with top coat, and cap the free edge so the stone doesn’t lift.
Use a rhinestone size that’s about half the width of the French line — if it’s bigger, it looks heavy fast.
Don’t skip sealing around the stone — unsealed rhinestones catch water and lift.
8. Double-Line Chrome French with Negative Space
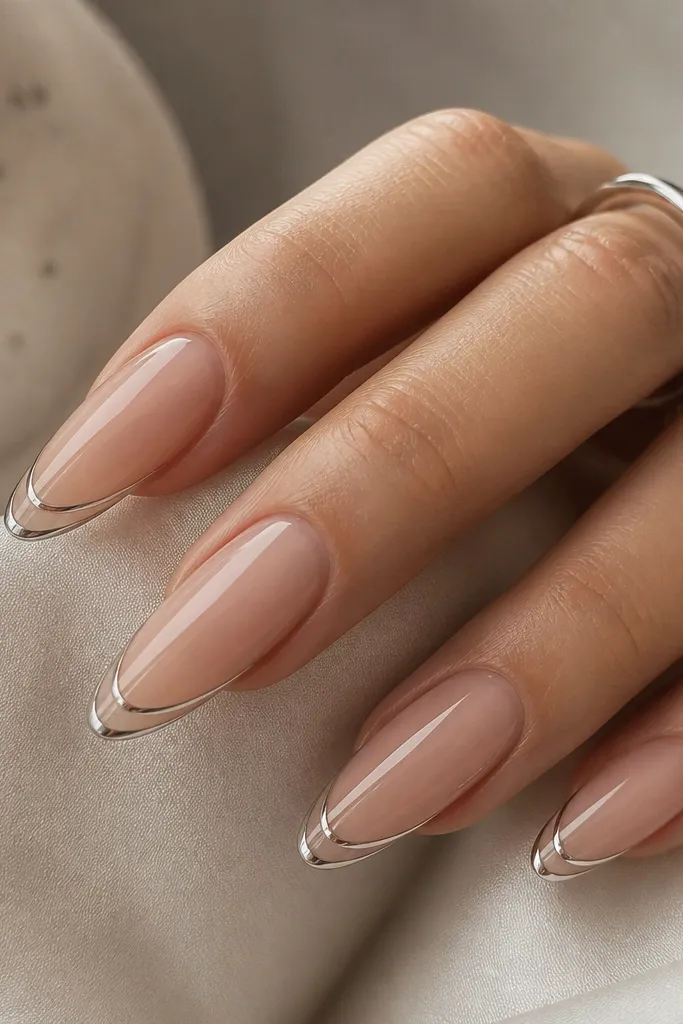
Double-line French is clean and graphic. The negative space between the lines makes the nails look longer and more modern, and it hides tiny differences in your natural nail curve. I like it on longer almond because the extra surface lets you keep both lines straight. For most skin tones, the nude base keeps the design soft while the chrome lines do the heavy lifting.
Editor's notePress tape firmly at the corners and lift slowly — jagged tape edges make the chrome lines look wavy.
Apply nude base gel and cure. Use tape to mark the first thin smile line close to the free edge, paint gel, cure. Remove the tape and place new tape slightly above it for the second line, paint gel, cure. Apply chrome powder to both lines while tacky, then seal with a glossy top coat. Keep the top coat thin so the lines stay defined.
Watch outDon’t flood gel between the two lines — it kills the negative space effect.
9. Half-Moon Chrome French on Nude Base
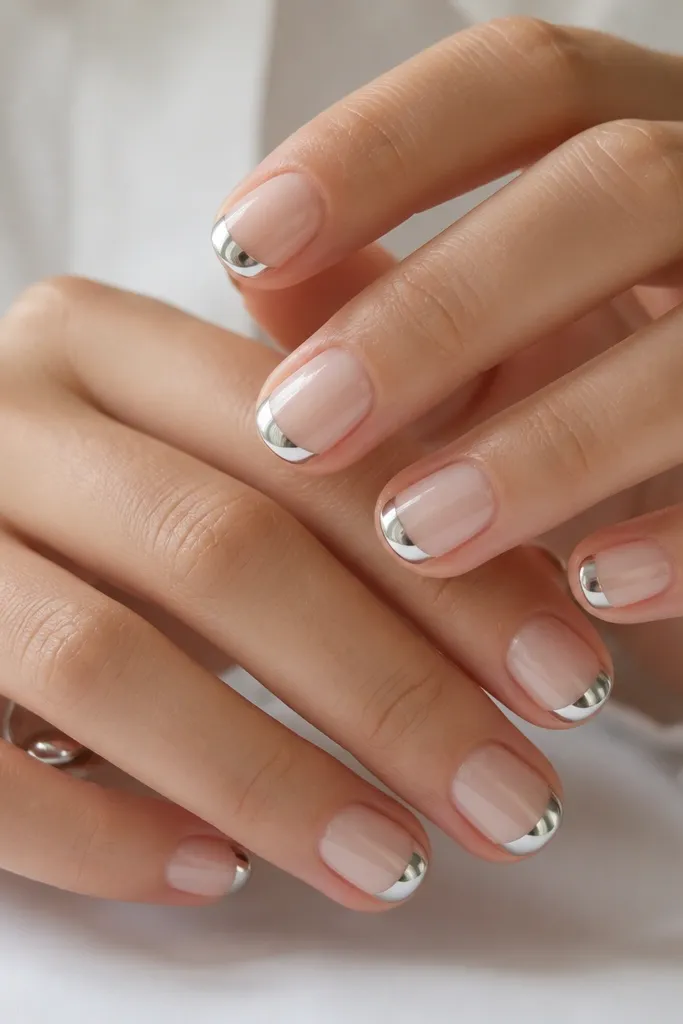
Half-moon French is surprisingly flattering and low maintenance because it hides uneven nail tips. Only the center gets chrome, so if your nail shape isn’t perfectly symmetrical, the design still looks intentional. The nude sides make it feel lighter than a full French tip, and mirror silver in the center gives a bright focal point. This works best on short square and short almond because the center cap visually lengthens.
Editor's noteIf your half-moon looks too round, flatten it slightly at the bottom edge — it reads more like a French tip than a bubble.
Start with a nude base gel and cure. Use a small curved brush to paint a half-moon gel shape at the free edge center — keep it about 2/3 of the nail width, leaving a nude gap on both sides. Cure, then apply mirror chrome powder to the gel area. Seal with glossy top coat and cap the free edge so the center chrome doesn’t chip at the point of contact.
Watch outDon’t extend the half-moon all the way to the sidewalls — it turns into a full tip and loses the clean effect.
10. French Tip Chrome Fade from Silver to Clear
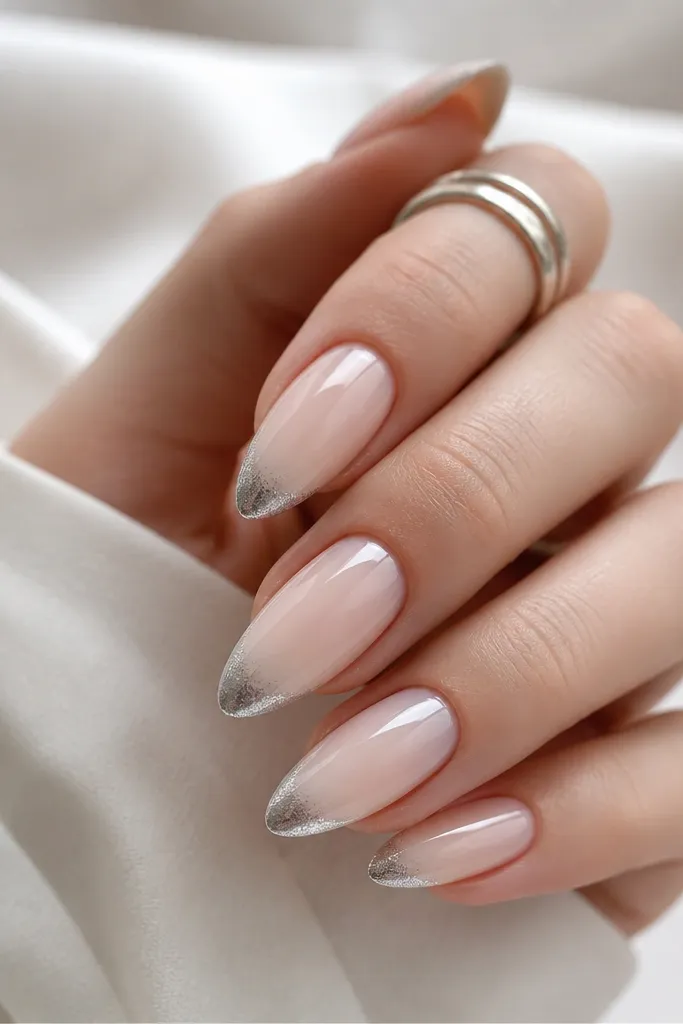
A chrome fade looks luxe because it’s softer than a hard smile line, but it still looks intentional. The milky nude base gives you a smooth transition, and the fade hides small application differences when you do it at home. This style flatters hands that show a lot of nail texture because the gradient smooths the visual. It also looks great for short nails because you don’t need a wide tip to get the effect.
Editor's noteUse less chrome powder than you think — you can always add, and too much makes the fade look like a stain.
Apply milky nude base and cure. Paint a French gel area slightly wider than you want the final silver, then cure. While tacky, apply mirror chrome powder at the free edge first, then use a fluffy makeup brush to lightly blend the chrome upward so it thins out. Seal with glossy top coat and cure, keeping the top coat even so the fade doesn’t get cloudy.
Watch outDon’t over-buff the fade before sealing — it can remove the gradient and leave bald spots.
11. Chrome French with Thin Black Micro-Liner
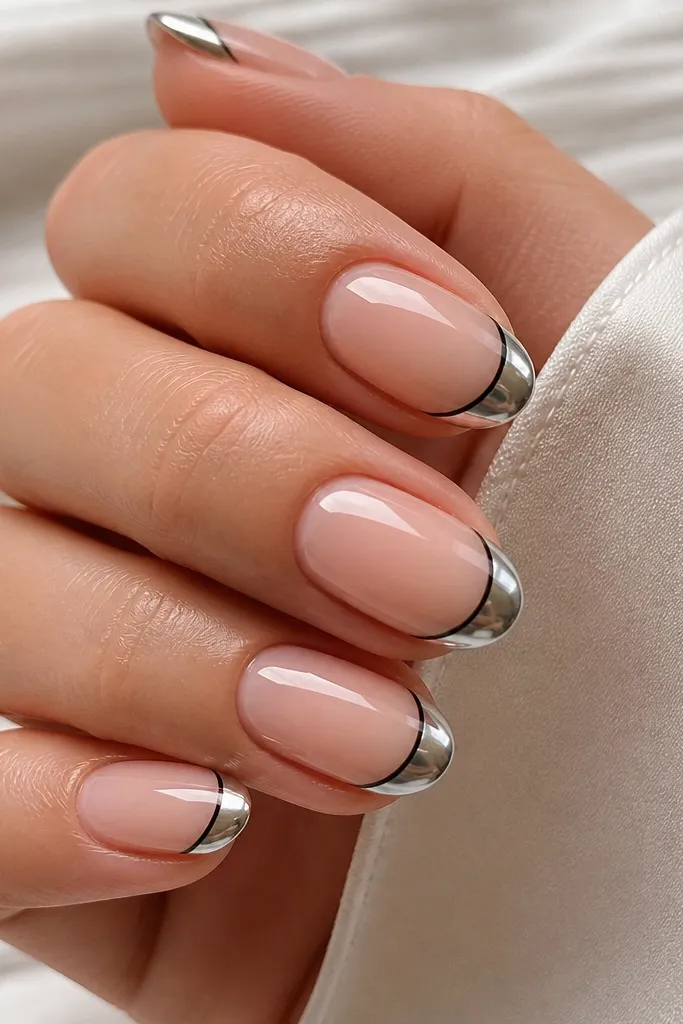
Black micro-liner makes chrome French look sharper and more styled without adding bulk. The silver still gives the luxe shine, but the black line gives you that “clean print” edge that hides tiny unevenness. This is a great choice if you wear a lot of black, navy, or charcoal — the pinstripe ties it together. It flatters medium nail beds and looks especially good on oval shapes where you can keep the line smooth.
Editor's noteLet the black liner cure fully before top coat so it doesn’t smear into the chrome.
Start with nude gel base and cure. Create the French smile with gel and cure, then apply mirror chrome powder and seal lightly. With a fine striping brush and black gel liner, draw a thin line under the chrome smile — keep it centered and even. Cure and top coat over everything, then cure again for a glassy finish.
Watch outDon’t make the black line thick — it turns from pinstripe to harsh border fast.
12. Silver Chrome French with Nude Glossy Top Only on Tips
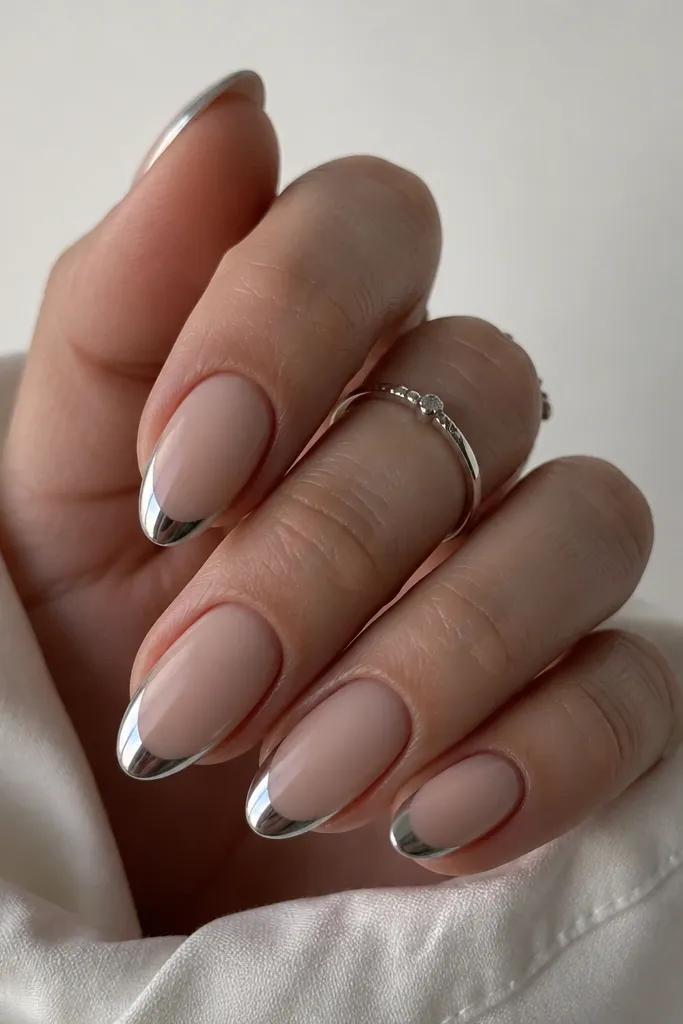
This contrast trick makes the manicure look expensive without adding extra design work. The matte-satin nude base hides small imperfections and makes the chrome look even brighter. Then the glossy top is only on the tip, so you get that “highlight” effect at the smile line. It flatters hands that get dry because a satin base hides flaking better than full gloss. It also works on short nails because it makes the tip feel longer.
Editor's noteMask the base with tape when you apply glossy top to prevent shine creep onto the satin part.
Apply your nude base gel and cure. If you want that satin look, use a matte top coat on the whole nail, cure, then add French tips over matte carefully with gel only on the smile area. Cure, chrome the French gel while tacky, then seal with a glossy top coat only on the chrome area. Cure again and leave the rest matte.
Watch outDon’t chrome over matte top coat — it blocks adhesion and makes the silver patchy.
13. Chrome French with Micro Glitter Dusting
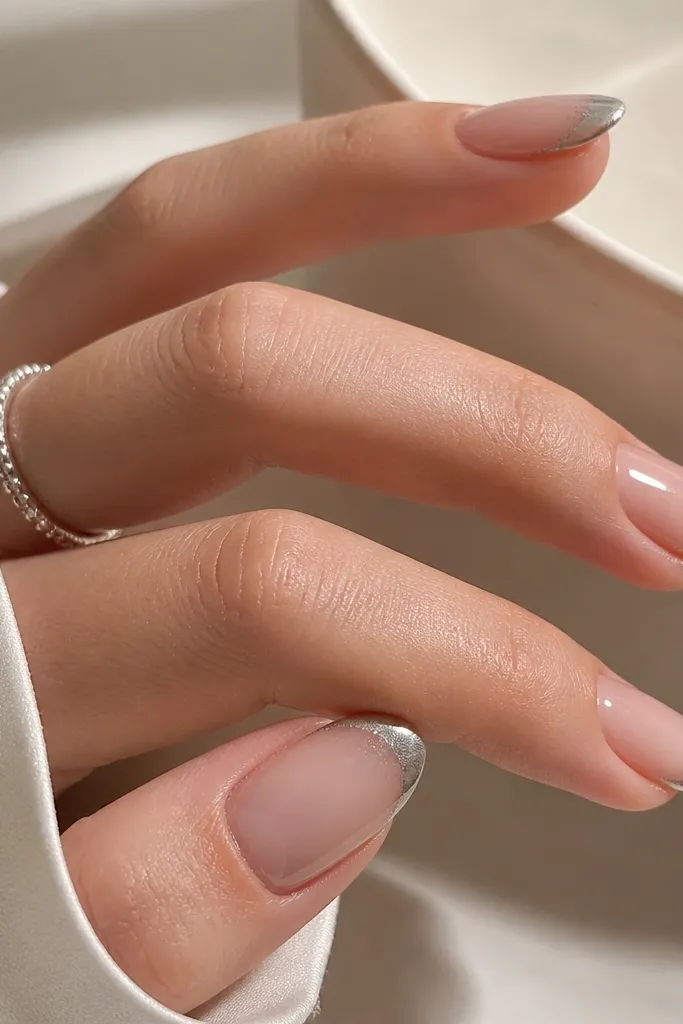
This is chrome French for nights out, but it still counts as low maintenance because the glitter is controlled and sealed into the tip. The holographic dust makes the silver look dimensional instead of one flat mirror. It flatters most skin tones because the base stays sheer and the sparkle sits where it reflects light. I like it on medium almond because the tip shape gives glitter a smooth landing.
Start with sheer nude base and cure. Paint a thin French gel smile, cure, then apply mirror chrome powder to the French gel. Before you seal, tap a tiny amount of fine holographic micro glitter at the free edge only — press lightly so it doesn’t spread. Seal with glossy top coat over the entire French tip, cure, and cap the free edge.
Use a small fan brush to remove loose glitter before top coat — that’s what keeps it from looking messy.
Don’t use chunky glitter — it lifts and catches on fabric.
14. Silver Chrome French with Clear Sidewalls
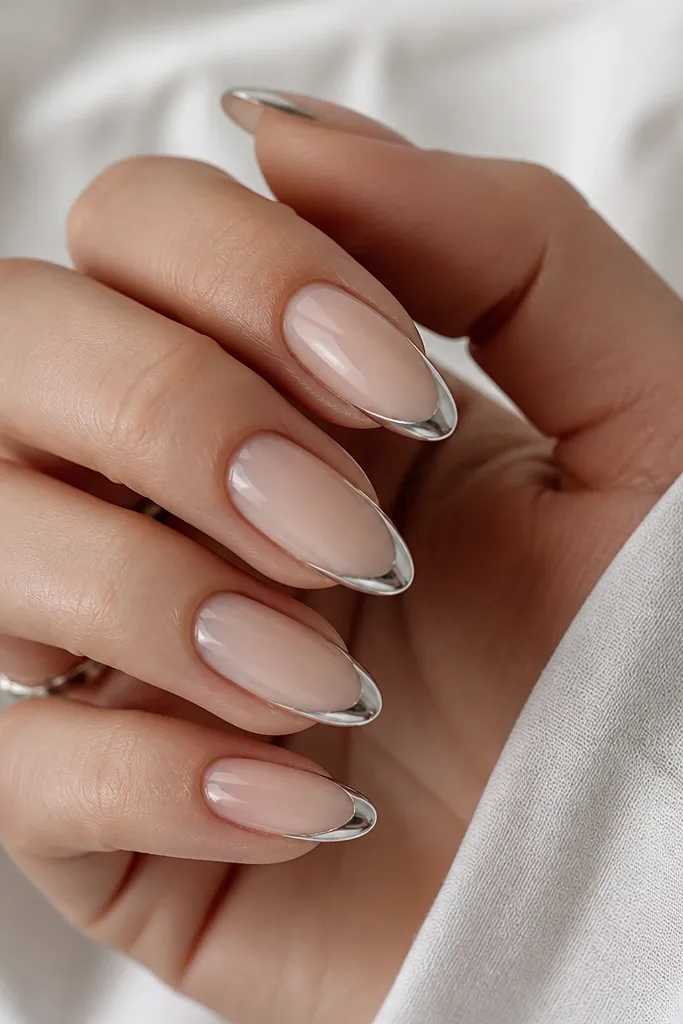
Clear side channels make chrome French look airy and intentional. It’s low maintenance because it hides sidewall cleanup issues that usually show up as smudges near the edges. The nude base and clear channel keep the manicure from looking too heavy. This design flatters wide nail beds because the clear channel visually narrows the nail. It also looks great for people who wear rings — the negative space catches light around jewelry.
Apply nude base gel and cure. Paint a French gel smile across the center only, leaving a small clear gap on both sides — about 1 mm from the sidewall. Cure, then apply mirror chrome powder to the gel area. Seal with glossy top coat, making sure the top coat doesn’t bridge into the clear gaps. Cure and check for any pooling at the cuticle.
If your nail sidewalls are uneven, use a gel that self-levels slightly so the channel edges stay clean.
Don’t let chrome touch the side gaps — it removes the channel look.
15. Chrome French Tip with Micro Heart at the Center
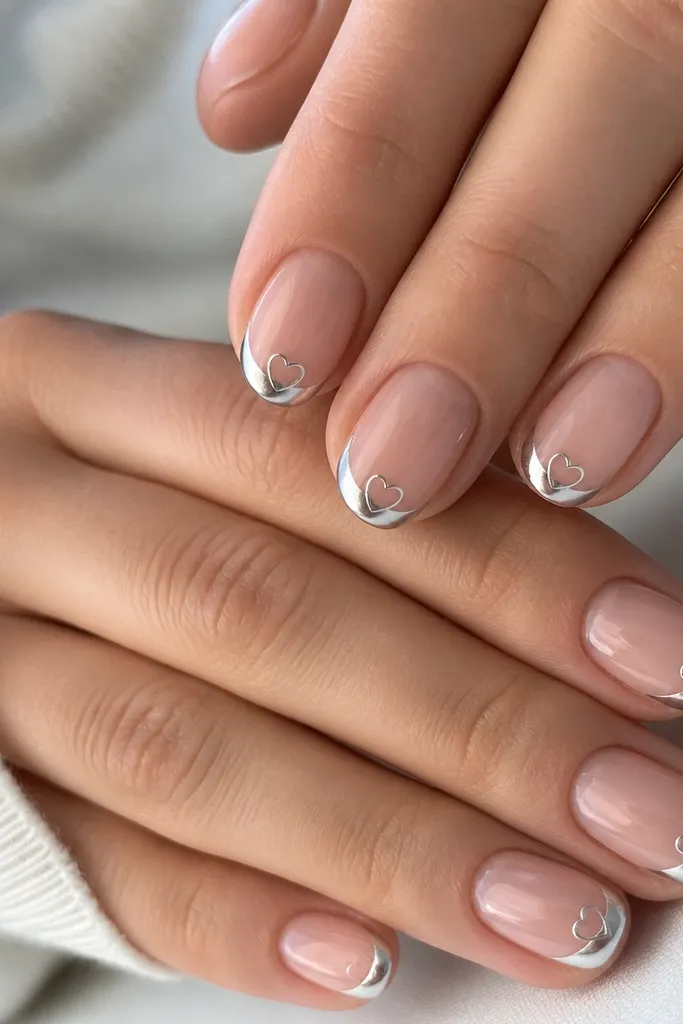
A micro heart is cute without turning the whole manicure into a theme. The heart sits in the center of the French tip, where it catches light, so it looks intentional even as your nail grows. Mirror silver keeps it chic, and the nude base keeps it wearable for everyday. This works best on short to medium nails because the heart stays small and doesn’t overwhelm the tip.
Start with nude base gel and cure. Create your French smile with gel and cure. Apply mirror chrome powder to the French gel and seal lightly so the chrome stays smooth. With a fine liner brush, draw a tiny heart outline centered on the tip using clear gel or silver gel and cure. Add one more thin top coat over the heart and cure.
Use a dotting tool to place the two heart lobes first, then connect with the liner brush for a clean shape.
Don’t fill the heart with thick gel — it can look domed and snag.
16. Silver Chrome French with Soft White Base Swirl
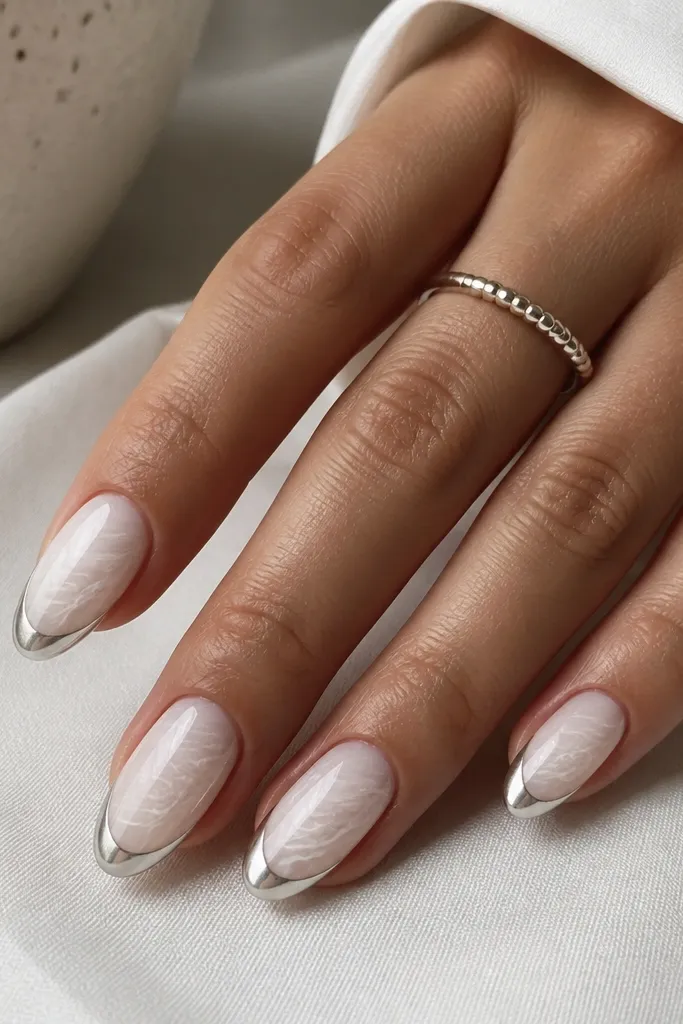
This design adds movement while keeping the chrome French as the star. The milky white base gives a clean, bright canvas that makes silver look super crisp. The faint swirl hides tiny streaks and makes the nail surface look custom instead of flat. It’s flattering on medium and longer nails because the swirl gives dimension without needing extra decals. If you like a clean, “spa manicure” look, this hits that vibe without being plain.
Editor's noteUse a thin striping brush and keep the swirl lines under 1 mm thick so it reads subtle, not busy.
Apply a milky white gel base and cure. Lightly paint a soft swirl in a slightly different milky shade near the lower third of the nail, then cure. Create your French smile with gel, cure, then chrome the tip with mirror silver powder while tacky. Seal with glossy top coat and cure, keeping the swirl under the top coat so it stays smooth.
Watch outDon’t overdo the swirl contrast — heavy white-on-white turns into a cloudy mess.
17. Chrome French with Silver Foil Flake Edge
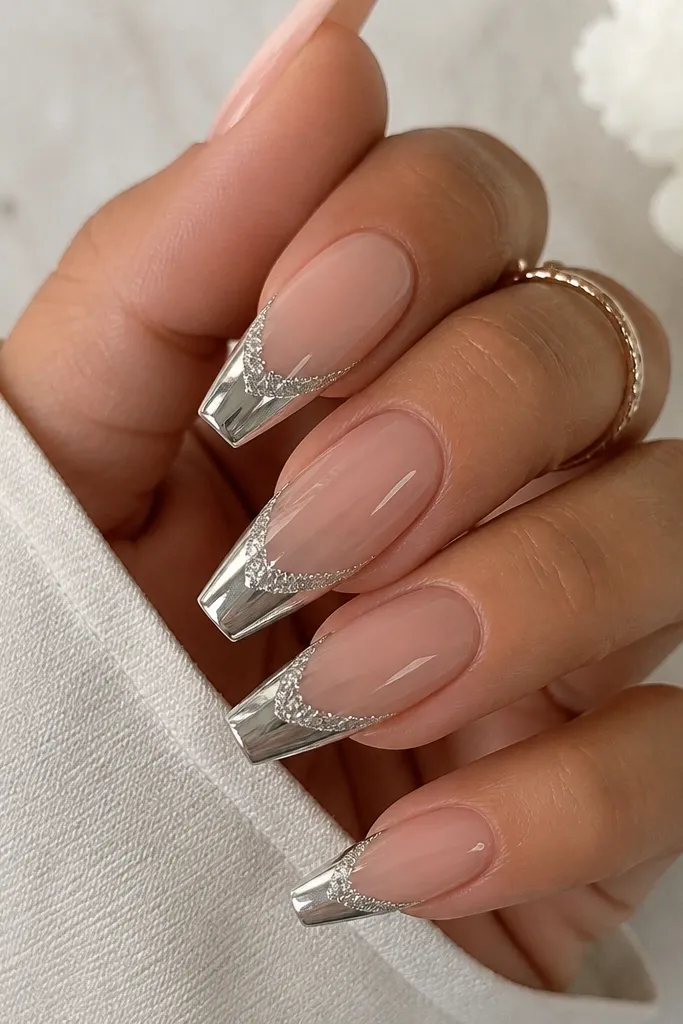
Foil flakes at the edge add texture and make the chrome look richer without needing extra painting. The foil catches light differently than powder chrome, so you get that “metallic depth” in photos and in real life. This is best on longer coffin or almond because the edge has enough length to show the flake detail. It flatters cool undertones and pairs well with silver rings and watches.
Start with a sheer nude base and cure. Paint a French smile with gel and cure. Apply mirror chrome powder to the French gel, then add a small amount of clear gel on just the very edge of the tip. Press silver foil flakes into that edge, then cure. Seal with glossy top coat, focusing on smooth coverage so the flakes don’t snag.
Trim any foil that sticks up before sealing — raised foil makes the manicure feel rough.
Don’t put foil across the entire tip — it looks thick and uneven fast.
18. Silver Chrome French with Micro Studs Along the Smile
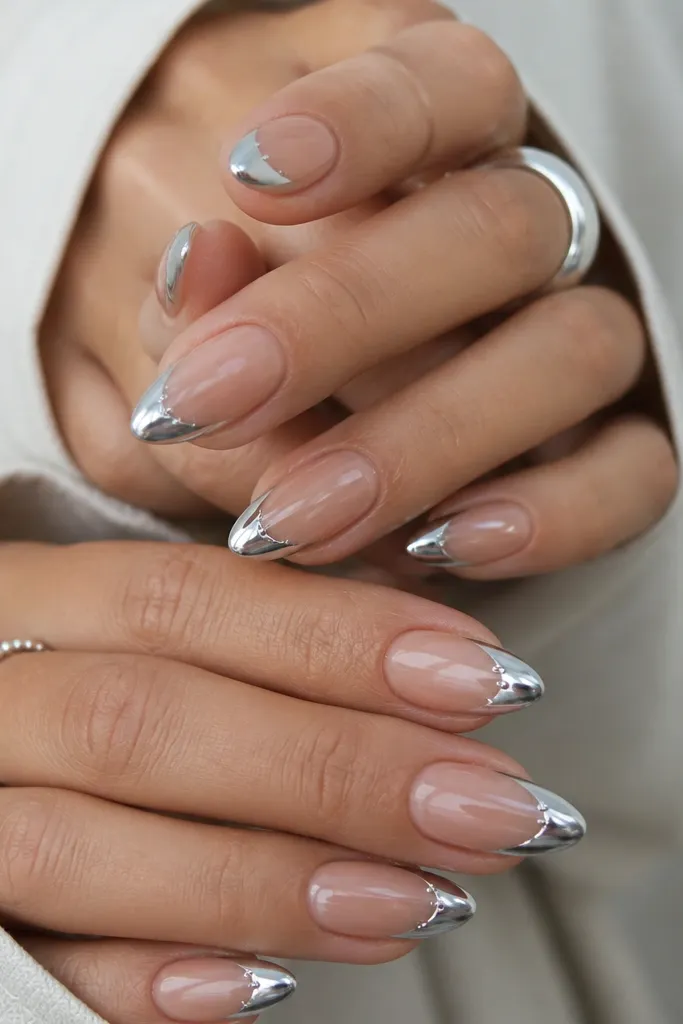
Micro studs give you a jeweled French line without covering the whole nail. The silver chrome provides the main shine, and the studs add sparkle only at the smile, which looks polished and not costume-y. This flatters medium nail beds and looks great on hands with neat cuticles because the line is delicate. It’s also low maintenance because you’re not relying on a complex pattern — even if one stud loosens later, the rest still look intentional.
Editor's noteUse a gel thickness that matches the stud height — too thick makes the studs float.
Apply nude base and cure. Create the French smile with gel, cure, then chrome the tip with mirror silver powder. After curing the chrome-sealed layer, place micro studs onto the smile line using a tiny amount of clear gel — space them evenly across the center third. Cure, then seal with top coat over the studs and across the tip, and cure again.
Watch outDon’t place studs too close to the cuticle — they pop off and look lifted.
19. Silver Chrome French on Blackened Nude
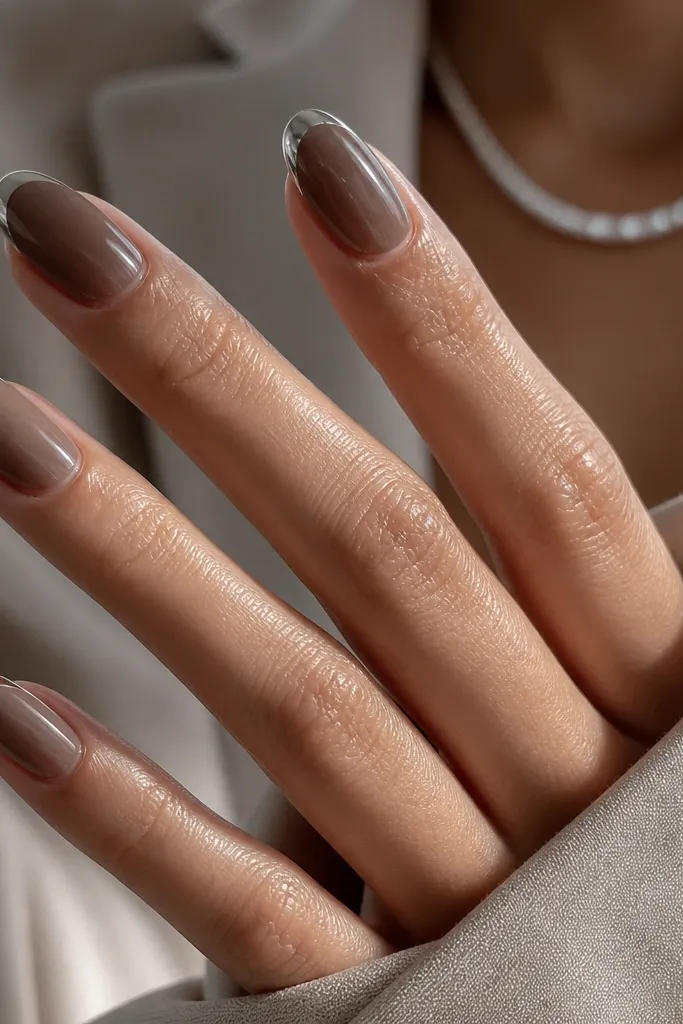
This contrast is why people stop scrolling. A blackened nude base makes silver chrome look brighter and more dimensional, especially under warm indoor lighting. It’s flattering for deeper skin tones and also looks stunning on fair skin when you want something moodier than classic nude. The crisp French line keeps it clean, so the darker base doesn’t turn the manicure into a heavy theme.
Editor's noteChoose a base with a hint of brown, not straight grey — it looks more natural on skin.
Apply a smoky taupe-nude gel base and cure. Paint the French smile with gel, keeping the line thin and centered, then cure. Apply mirror chrome powder to the gel while tacky, press evenly, and wipe off excess. Seal with a glossy top coat and cap the free edge so the contrast stays sharp for 10+ days.
Watch outDon’t use a fully black base — the French starts to look like a dark outline instead of luxe silver.
20. Chrome French with Diagonal Silver Tip Angle
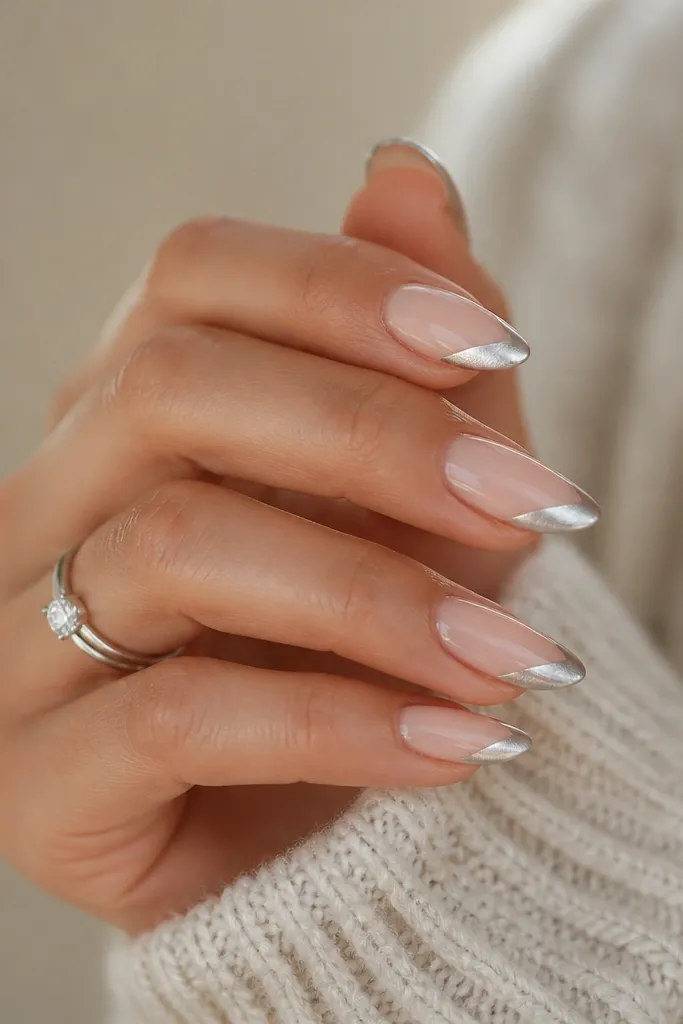
Diagonal French is modern and still low maintenance because the design hides small asymmetry in your nail shape. Instead of following a curved smile line, you draw one clean diagonal edge, which is easier to keep straight across nails. The nude base keeps it wearable, and mirror chrome makes the diagonal look like a metal strip. This flatters short almond and medium oval because the angle elongates the nail visually.
Editor's noteMeasure the angle once on your index finger and copy it to the rest — your eye will thank you.
Apply nude base gel and cure. Use striping tape to mark a diagonal line across the tip — anchor the tape near the sidewalls so the angle stays consistent. Paint gel above the tape for the silver area, cure, then remove tape. Apply mirror chrome powder to the tacky gel, press lightly, and seal with glossy top coat.
Watch outDon’t freehand the diagonal — it looks wobbly even when you think it’s straight.
21. Silver Chrome French with Tiny Side Lines
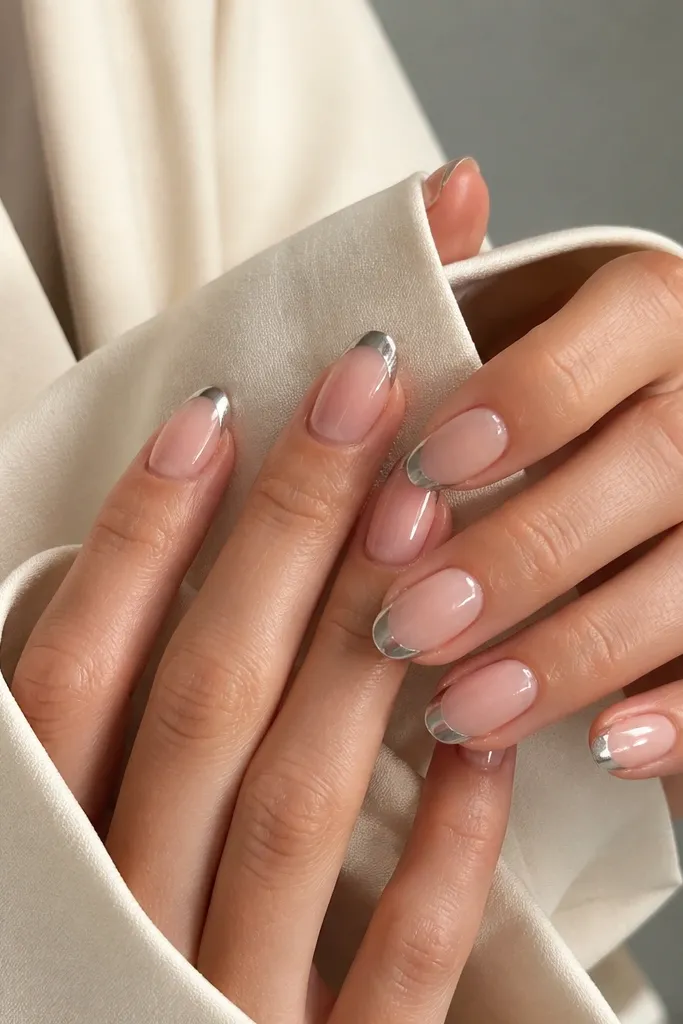
These tiny side lines add structure and make the French look sharper, especially on shorter nails where a full wide tip can feel bulky. The nude base keeps it soft, and the chrome side accents catch light when you move your hands. It flatters hands with shorter nail beds because it draws the eye toward the center and makes the shape look more intentional. This is also a great option for beginners because the main work is still just a French tip — the side lines are small.
Editor's noteUse the brush tip edge, not the bristles — you get a cleaner mini line.
Start with nude base gel and cure. Paint a standard thin French smile with gel, cure, then chrome the French tip. After chrome, use a fine brush to add two tiny lines on each side corner of the smile — each line should be about 1-2 mm long and connect visually to the tip edge. Cure if your gel requires it, then seal with glossy top coat over everything.
Watch outDon’t extend the side lines downward into the nail — it turns the design into a heavy border.
22. French Chrome Tips with Nude Ombré Base
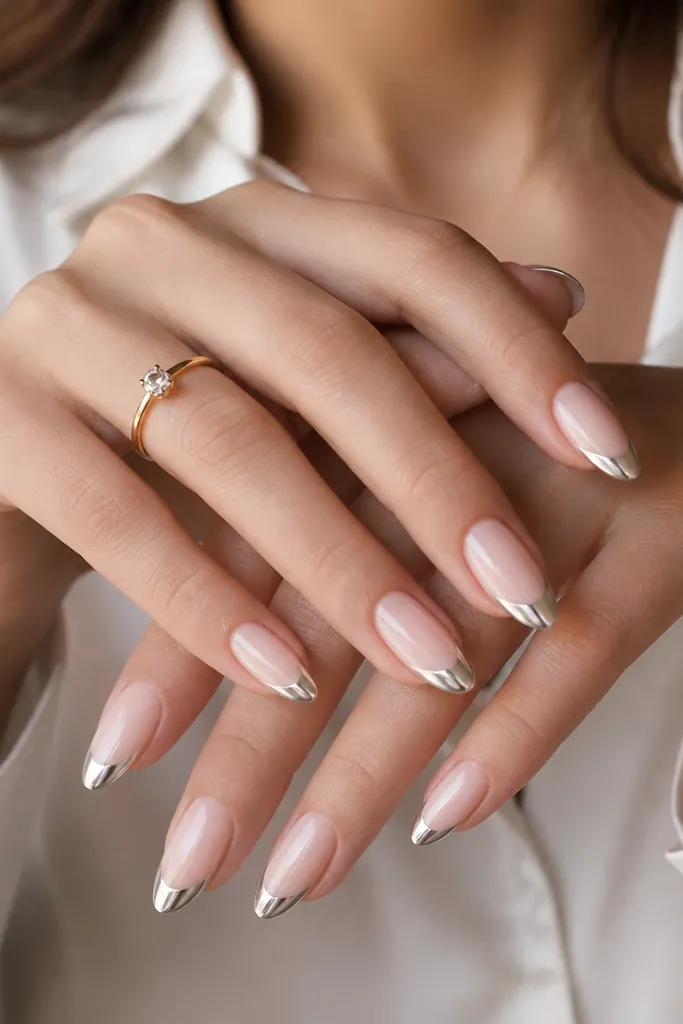
Adding a nude ombré base makes the chrome French look like it was designed for your exact nail shape. The fade softens any cuticle regrowth line, so the manicure stays “clean” longer. Mirror chrome on top still gives that bold silver moment, but the base transition makes the whole look more expensive. This works on almost everyone, but it’s especially flattering on medium skin tones because the ombré blends with the undertone instead of fighting it.
Editor's noteBlend the ombré with a damp makeup sponge — it removes harsh boundaries quickly.
Apply a base that’s slightly deeper nude near the cuticle and lighter nude toward the tip using an ombré sponge technique. Cure, then create your French smile line with gel and cure. Chrome the French tip area with mirror silver powder while tacky. Seal with glossy top coat and cap the free edge so the chrome stays smooth and doesn’t lift at the tip.
Watch outDon’t make the ombré too dark at the cuticle — it can look like staining.
23. Chrome French Tips with Clear Negative Half-Moons
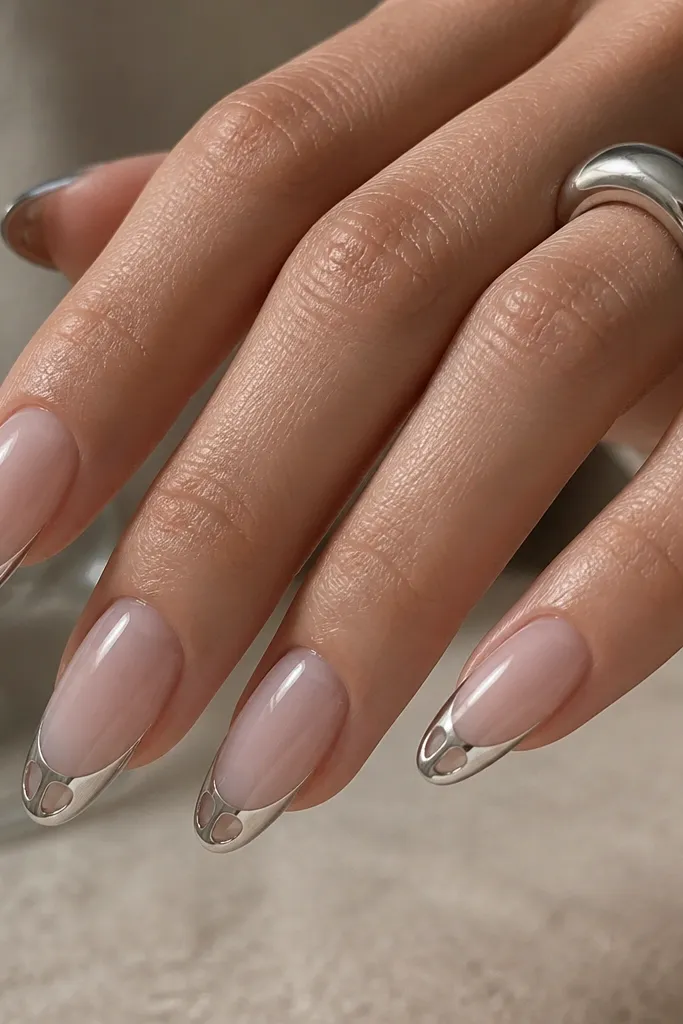
These clear cutouts make the French tip feel more graphic and less “painted on.” It’s still low maintenance because the design uses negative space, so minor growth or slight unevenness won’t ruin the structure. The nude base keeps it wearable, and the chrome edges make the cutouts pop like tiny windows. This flatters longer nails because the cutouts need space to look intentional rather than random.
Start with a sheer nude base and cure. Paint gel for the French tip across the smile line, cure, and apply mirror chrome powder to the French area. While the chrome gel is sealed and you’re working with a clear element, use a small striping tape to mask two tiny half-moon areas near the center of the tip where you want negative space. Apply clear gel over the chrome in those masked areas, cure, then remove the tape so you keep the cutouts clear. Seal with top coat around the cutouts and cure.
Plan cutout size by thumb width — if the cutouts are bigger than a pencil eraser, they start looking messy.
Don’t flood clear gel over the whole tip — it dulls the chrome effect.
24. Classic French with Silver Chrome on Top and Matte Bottom
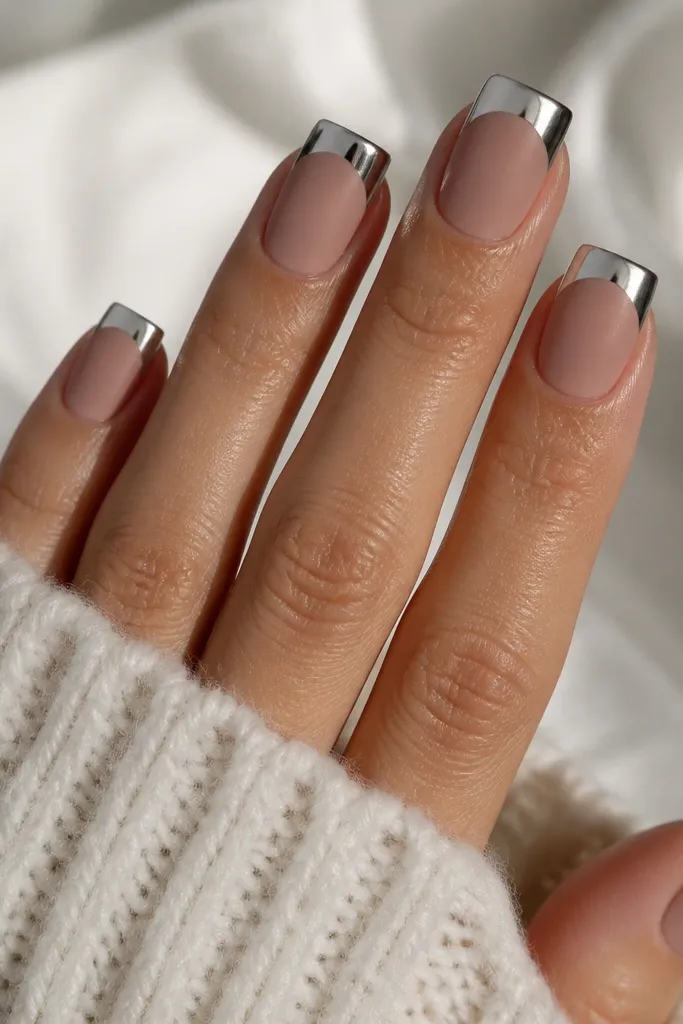
Matte bottom plus glossy chrome tips is the fastest way to make a simple French look styled. The matte nude hides micro dents and scratches that happen between manicures, which is why it stays low maintenance. Then the mirror chrome catches light and makes the manicure look fresh even if your hands get a little rough. This works on short square, medium almond, and even stubbier nails because the contrast defines the nail edge.
Editor's noteUse a matte top coat that doesn’t haze chrome — test on one nail if you’re switching brands.
Apply nude base and cure. Add your French gel smile and cure, then chrome the French gel with mirror silver powder. Seal the chrome with glossy top coat and cure. Finally, apply matte top coat to the rest of the nail only, keeping the matte away from the chrome area with tape or careful brush control, then cure.
Watch outDon’t matte the chrome area — it turns mirror silver dull and flat.
25. Silver Chrome French Tips with Tiny Cuticle Sparkle Halo
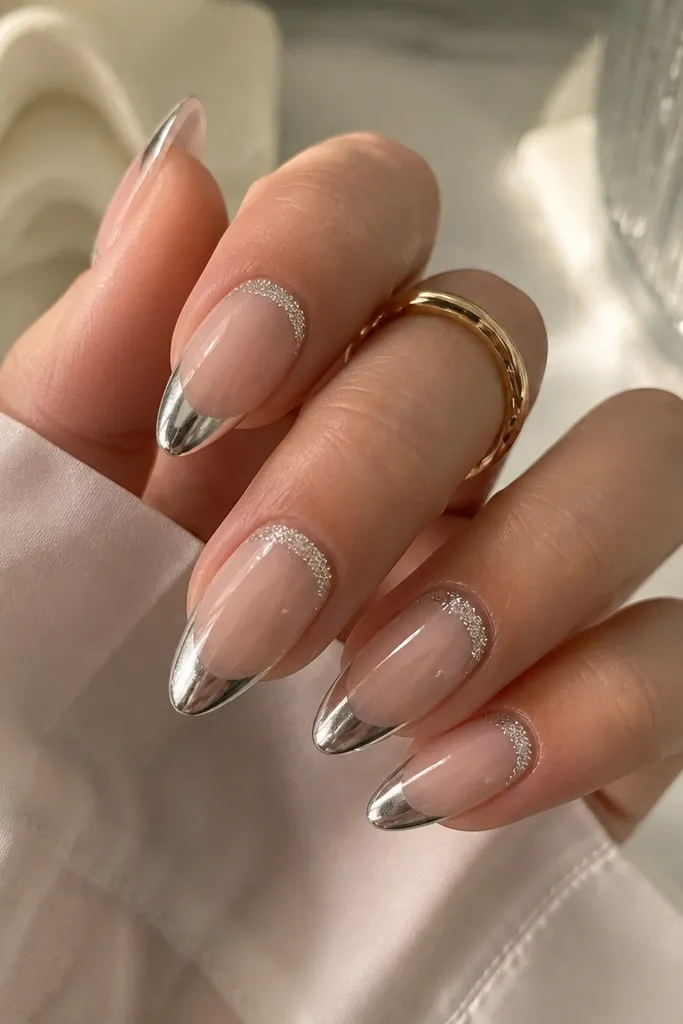
This is my “special but practical” chrome French. The sparkle halo near the cuticle makes regrowth look intentional because it frames the nail base, while the silver French tip still does the main shine. The nude base keeps everything wearable, and the glitter is small enough that it doesn’t feel rough. This flatters medium nail beds and looks great with silver jewelry because the halo mirrors your accessories.
Editor's noteUse a small angled brush to keep the halo width consistent across nails.
Start with a nude base and cure. Create and chrome your French tips as usual. After sealing the chrome with a clear layer, apply a tiny bead of clear gel along the cuticle curve — about 1 mm wide — and press fine silver glitter into it. Cure, then finish with glossy top coat over the halo and tip, avoiding thick buildup at the cuticle.
Watch outDon’t put glitter too high on the cuticle — it can irritate skin and lift fast.



