
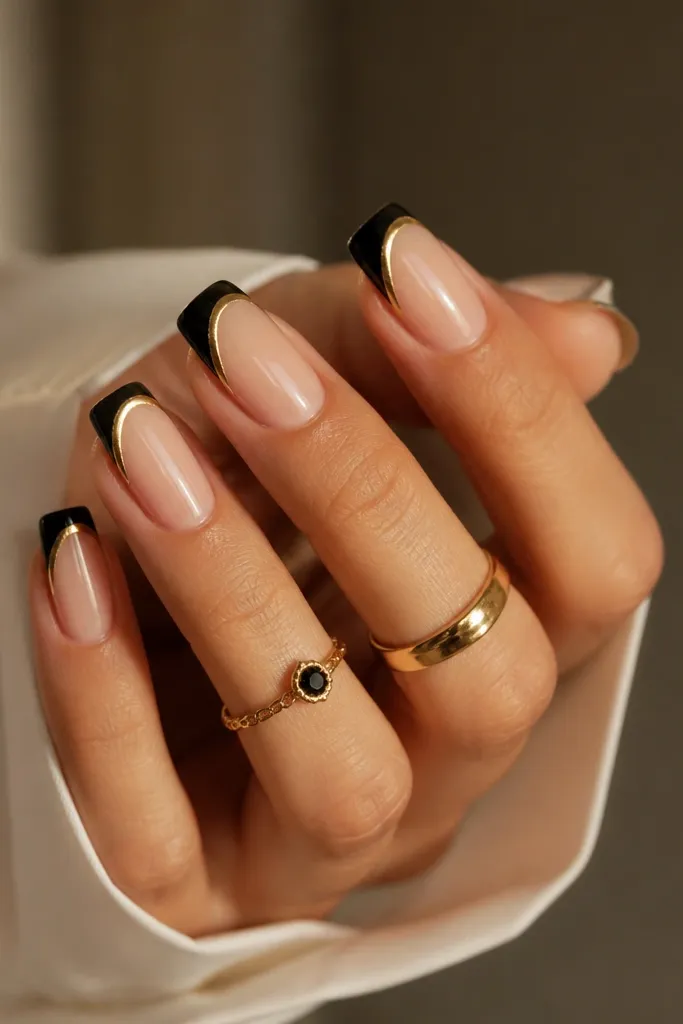
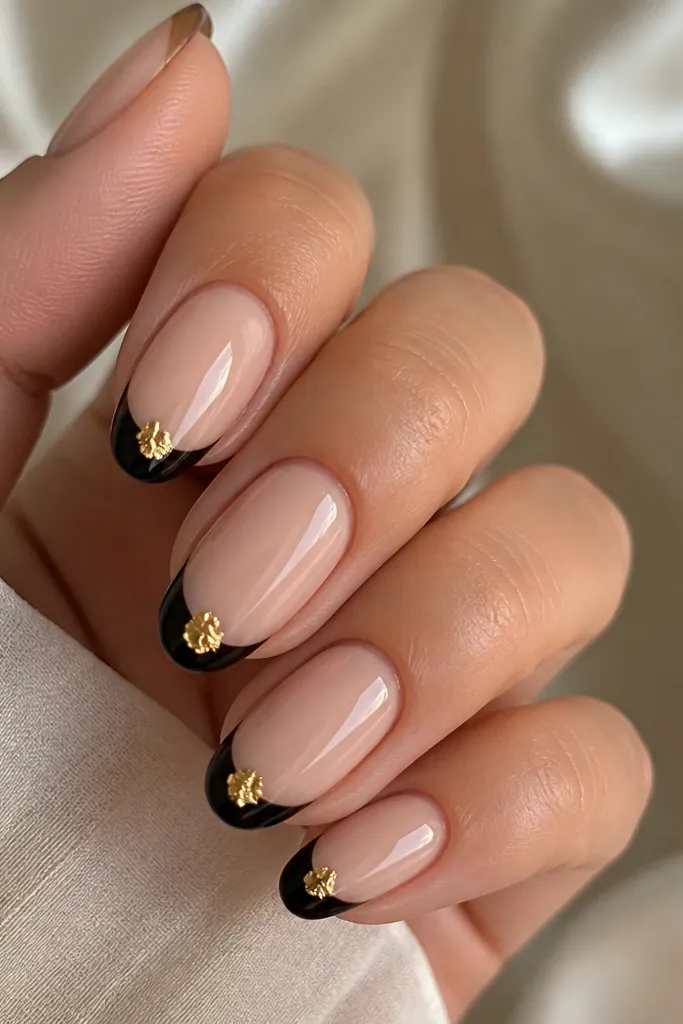
1. Classic Black French With Gold Foil Half-Moon
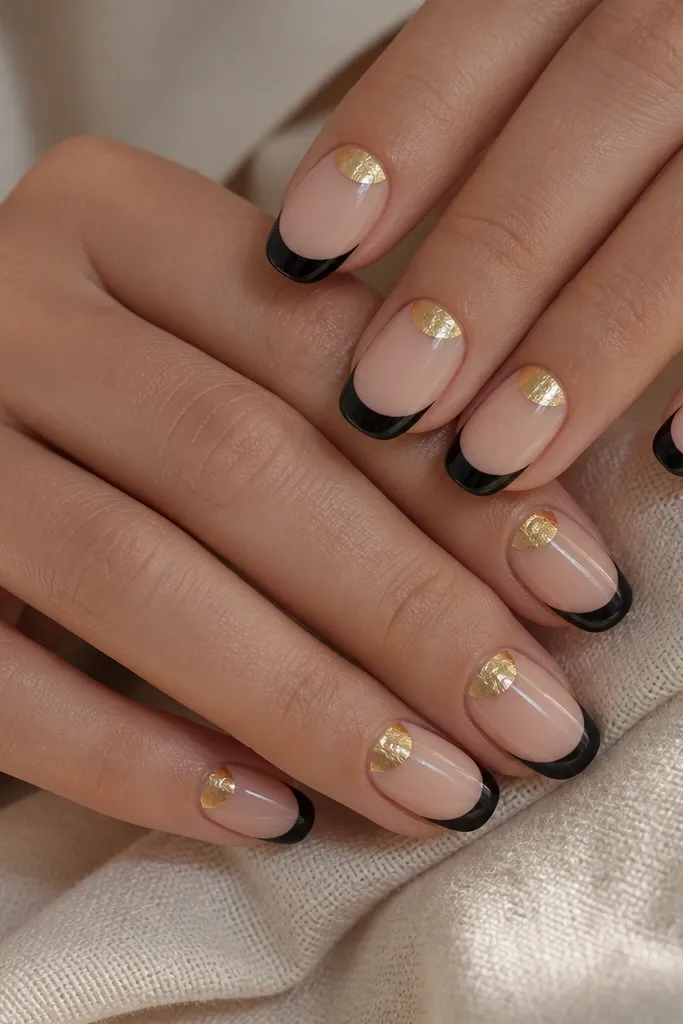
This is the cleanest modern version of black and gold French. The nude base keeps everything wearable, while the black French tip stays opaque and sharp. The gold half-moon near the cuticle gives you a “jewelry” flash without turning the tips into a heavy block. It flatters most skin tones because the gold sits at the lightest part of the nail — right under the nail bed — and it makes your fingers look longer. I wear this for dinners and nights out because it reads polished even when my outfits are simple.
Start by prepping and buffing the nail lightly, then apply a nude gel base in a thin coat. Cure, then paint a black smile line for the French tip using a French stencil, keeping the arc centered and even across fingers. Cure again. Press small pieces of gold foil on the center of the nail near the cuticle, then lightly seal with a thin gel layer and cure. Finish with a glossy top coat so the foil looks smooth and reflective instead of matte.
Editor's noteUse tiny foil fragments, not big sheets, so the half-moon stays delicate and doesn’t lift at the edges.
Watch outDon’t drag the black French line too close to the cuticle — if it hits the nail bed, the look turns chunky and messy.
2. Black French With Gold Chrome Micro-Line
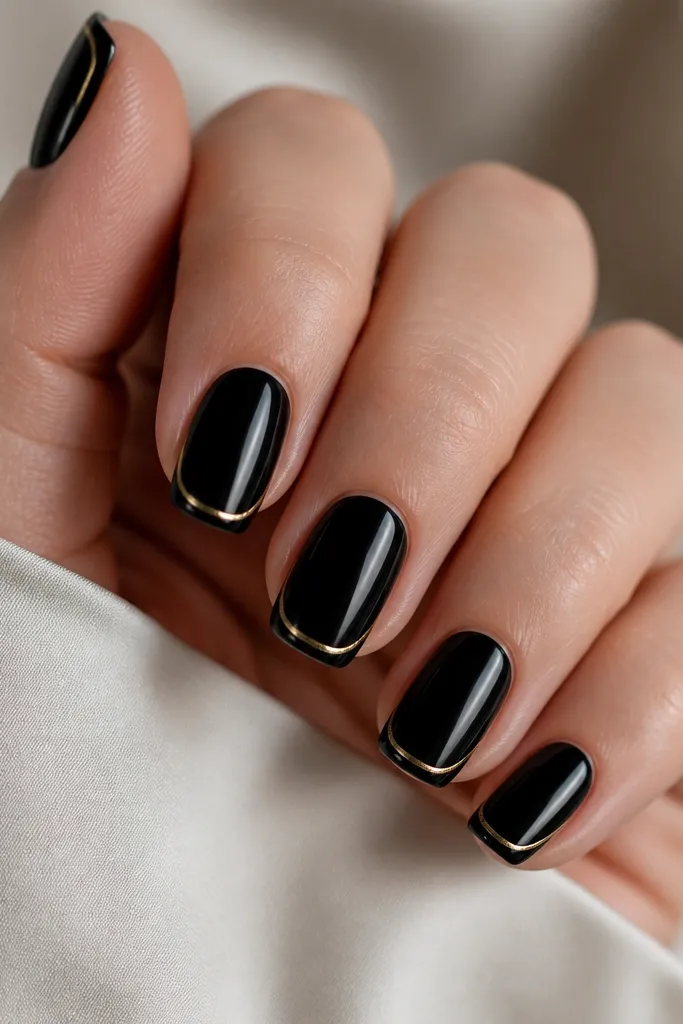
If you want modern but still subtle, this one is my go-to. The gold chrome micro-line is thin enough to feel “designer,” not decorative. The black tip gives contrast, and the micro-line adds a controlled glow that doesn’t overwhelm. It works especially well on medium-length nails because the line has room to curve cleanly. On deeper skin tones, the gold reads extra warm and looks expensive; on fair skin, it still pops without looking harsh.
Paint your base nude and cure. Apply the black French tip using a stencil so the smile line stays crisp. Cure, then add a narrow strip of gold chrome gel right along the inner edge of the black tip — I place it about 1 mm inside the line. Cure and top coat with a glossy finish, keeping the top coat thin so the chrome stays crisp. If you notice flooding onto the nude area, wipe the brush with gel remover and re-seal only the tip.
Lay the gold line with a gel liner brush — the tip should be sharp enough to draw a straight stroke in one pass.
Skip chunky chrome — heavy chrome fills the negative space and makes the French line look thick and cheap.
3. Black French With Gold Leaf Triangle at the Tip
This design looks modern because the gold leaf is shaped, not scattered. A triangle at the tip keeps the composition balanced and stops it from looking like random glitter. The gold leaf texture adds depth against matte-black or glossy-black French, depending on what you choose. I like it on almond nails because the tip triangle follows the natural point of the nail. It flatters short fingers too because the triangle visually guides the eye to the center of the nail.
Apply nude base and cure, then create the black French tip with a stencil. Cure fully so the black is sealed. Place a small triangle of gold leaf at the center of the tip — start with a tiny piece and build up if you need coverage. Press gently, then seal with a thin layer of gel and cure. Finish with a high-gloss top coat or, if you want extra contrast, use a satin top coat over the black and keep the gold glossy.
Use a small piece of tape or a cleanup sponge to press leaf into place so you don’t smear it across the black.
Don’t cover the whole black tip in leaf — the triangle shape is what keeps it modern.
4. Black French With Gold Stamped Bar Lines
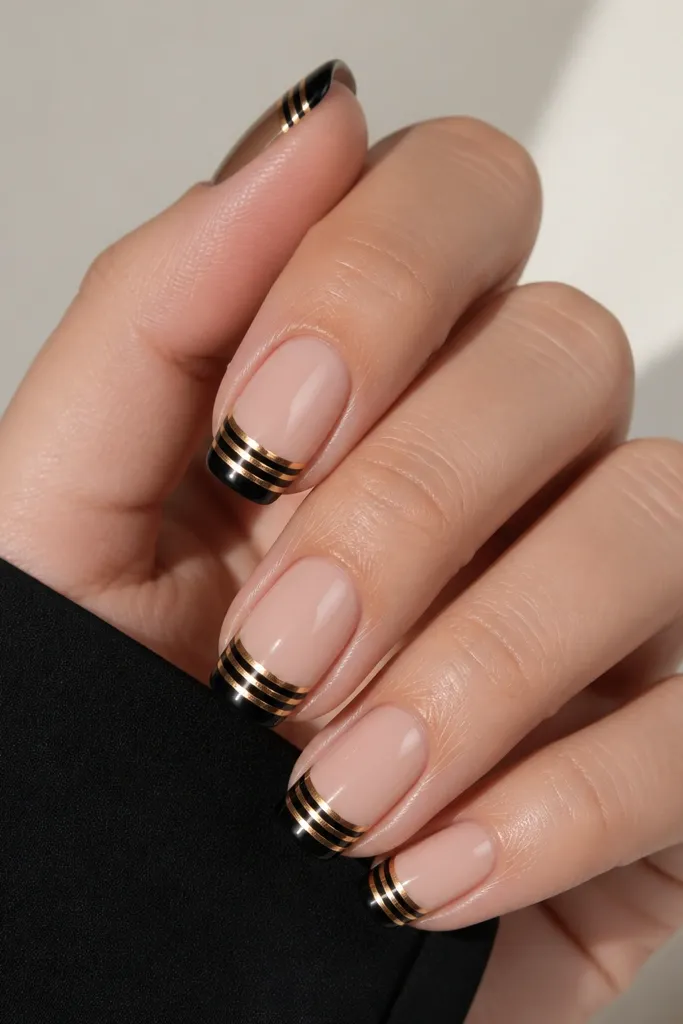
Stamping makes this set look “clean” even if your freehand skills are still developing. The gold bars are graphic, and the black French tip gives them a strong background. This feels modern because it’s geometric, not floral. I wear this on busy weeks when I need something that looks intentional without spending an hour painting. It flatters hands with longer nail beds because the bars stretch the eye across the tip.
Start with a nude base and cure, then apply the black French tip with a stencil for a uniform smile line. Cure and let the surface cool. Choose a stamping plate with bar-line patterns, then use gold stamping polish and scrape hard. Stamp onto the black tip only, using one firm press per nail. Seal with a glossy top coat, making sure you cover the edges of the stamped lines so they don’t catch on fabric.
Clean the stamping plate with a lint-free wipe and remover between nails so the gold stays crisp.
Don’t stamp over wet gel — the design will blur and look like smeared chrome.
5. Black French With Gold Rhinestone Thread
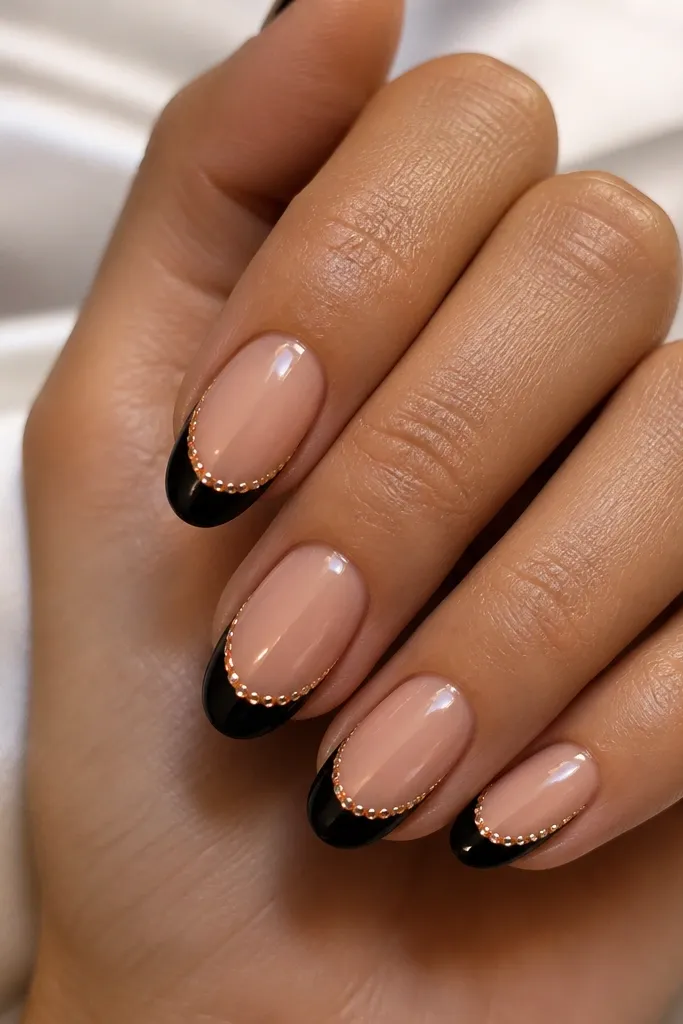
This is the “dressy but still neat” version of rhinestones. The key is spacing: small stones, consistent gaps, and a single line along the smile. The black French makes the stones look brighter, while the gold tone keeps it cohesive instead of silver-heavy. I like this for weddings, holiday parties, and nights where you’ll be photographed up close. It flatters fingers because the line follows the natural curve of the nail and makes the tip look longer.
Apply nude base and cure, then paint black French tip with a stencil. Cure and check the smile line before continuing. Use nail glue and place tiny gold-toned rhinestones along the smile line, starting from the center and working outwards so the curve stays even. Let it set for a minute, then seal the entire tip with a thin gel top coat layer and cure. Finish with one more glossy top coat to lock everything down.
Editor's noteUse a dotting tool to place stones one at a time; dragging them with a brush pulls glue into streaks.
Watch outAvoid big rhinestones — they lift faster and make the French line look bulky.
6. Black French With Gold Aura Fade
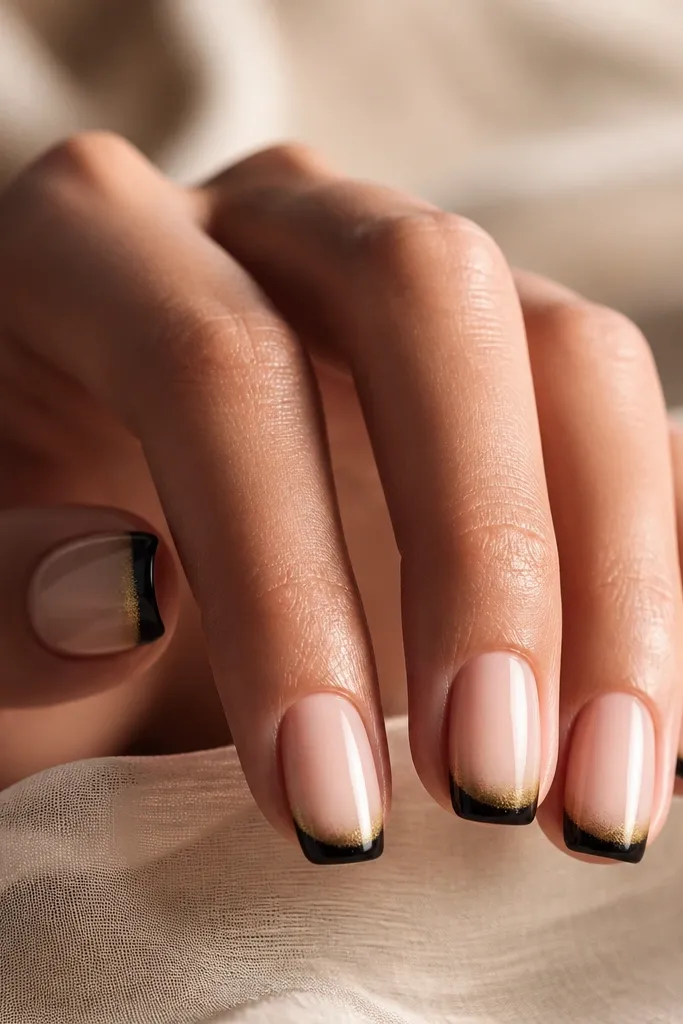
Aura gradients look modern because they feel airbrushed, not painted. The black French gives structure, and the gold fade adds warmth around the edges of the tip. This one flatters medium and long nails because the gradient has space to breathe. On warm undertones, the gold looks especially flattering; on cool undertones, it still works because gold has a softer, buttery tone that doesn’t clash with black. It’s a great pick for festivals or a night out when you want something that looks like it’s moving under light.
Start with nude base and cure. Create a black French tip with a stencil, then cure. For the aura, use a small sponge and gold pigment or gold chrome powder - dab lightly at the outer edge of the French tip and blend inward. Spray a fine mist of alcohol on the sponge if you need a controlled fade, then cure carefully. Seal with glossy top coat, keeping the gradient light so it doesn’t turn solid gold.
Editor's notePractice the fade on a paper towel first so you know how much pigment transfers with each dab.
Watch outDon’t pack the gold thickly — heavy aura turns into glittery mud and loses the glow.
7. Black French With Gold Foil Side V
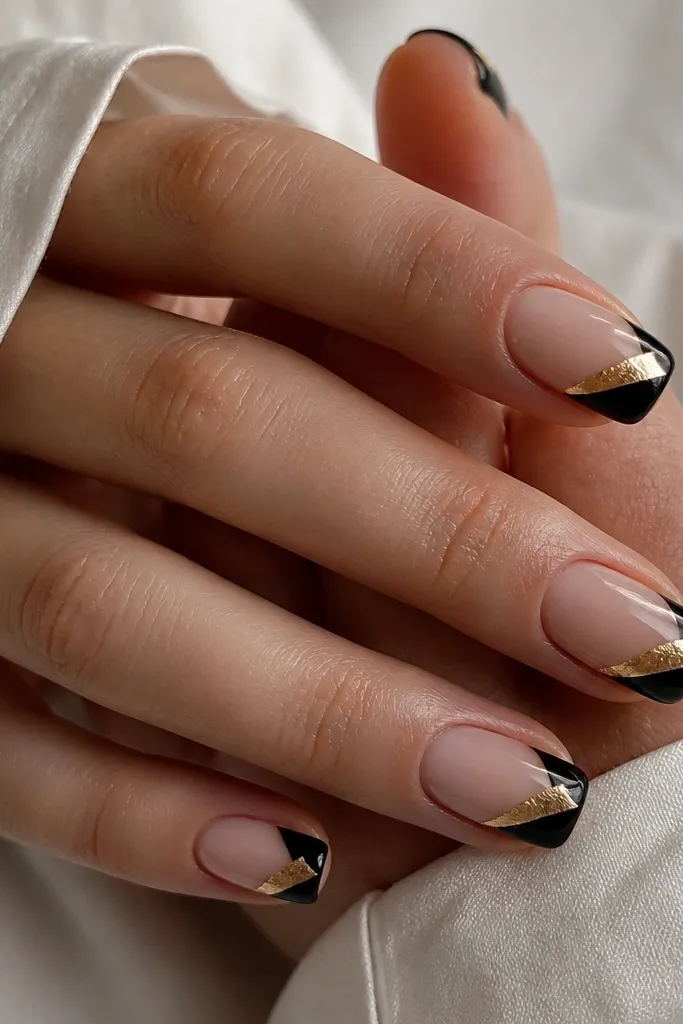
Side V foil is a modern trick because it creates motion without adding more length. The V points toward the center, so your eye travels upward and the nail looks longer. It’s also asymmetrical, which makes it feel current compared to perfectly centered accents. I like it on square and squoval nails because the geometric V holds its shape. It flatters hands that need a little visual lift — the slanted foil draws the eye away from wider nail beds.
Apply nude base and cure. Paint black French tips with a stencil, making sure both sides match. Cure, then place gold foil on one side of the tip in a V shape — the point of the V should land near the center of the smile line. Press and trim extra foil with a small cuticle tool so it doesn’t overhang. Seal with a thin gel layer and cure, then top coat glossy.
Use foil backing or tweezers to place the V — fingers can leave oil and make foil lift.
Don’t mirror the V on both sides — two foils makes it look like a costume sticker.
8. Black French With Gold Half-Tip Outline
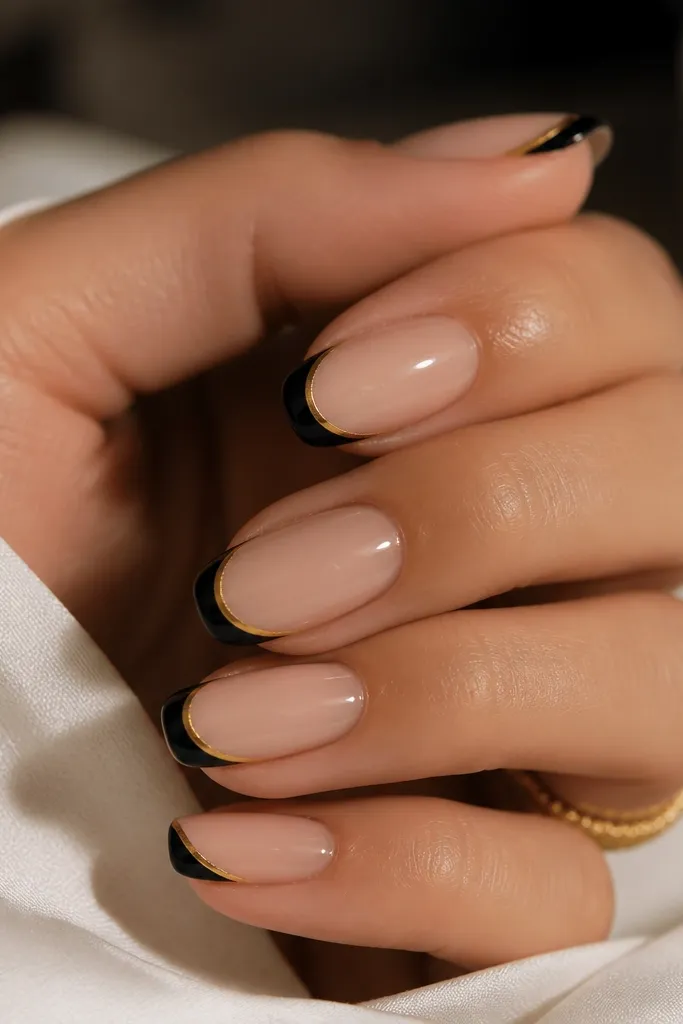
This is the “editorial” version of French tips. The gold outline only on the outer half keeps it modern and directional, and it makes the nail look sharper from the side. The black tip stays the main color, so the gold reads like jewelry trim. I love this on almond nails because the outline follows the curve and looks like a frame. It flatters most skin tones since the gold is just a line, not a big block of color.
Do nude base and cure. Apply black French with a stencil, then cure. Using a thin liner brush, draw a gold outline starting at one outer corner of the smile line and follow the outer curve halfway across, stopping before the center. Cure briefly, then top coat carefully so the outline stays crisp. If your gold bleeds, wipe the brush with remover and re-draw only the outer section.
Keep the liner brush almost dry — thick gel makes gold lines spread and lose that sharp frame look.
Don’t outline the whole smile line — full outlining looks dated and too “sticker-like.”
9. Matte Black French With Glossy Gold Specks
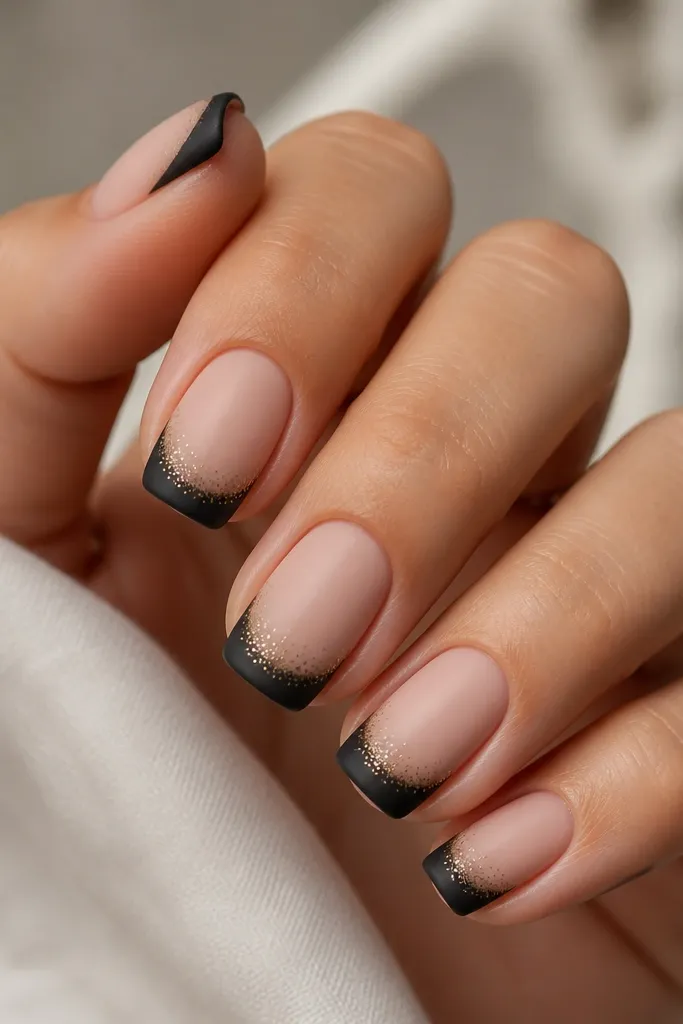
Matte black changes everything. When the black French is matte and the gold specks are glossy, you get texture contrast that reads high-end. This is modern because it avoids heavy gold coverage — the gold is just enough to catch light at certain angles. It looks great on short to medium nails because the specks don’t need much space. I’ve worn this with black dresses and it still looks soft, not harsh.
Paint nude base and cure. Apply black French tip with a stencil and cure. Once cured, use a matte top coat over the black area only, avoiding the nude base so it stays glossy. For gold specks, use a gold gel dotting tool or a micro glitter gel and dab tiny dots near the tip edge. Cure and finish with a glossy top coat over the specks only, or use a clear gloss top coat overall if you want all-gloss shine.
Editor's noteUse a toothpick to place specks — it gives you smaller dots than a brush.
Watch outDon’t use regular loose glitter here — loose glitter catches on sleeves and lifts fast under matte.
10. Black French With Gold Confetti Foil Flare
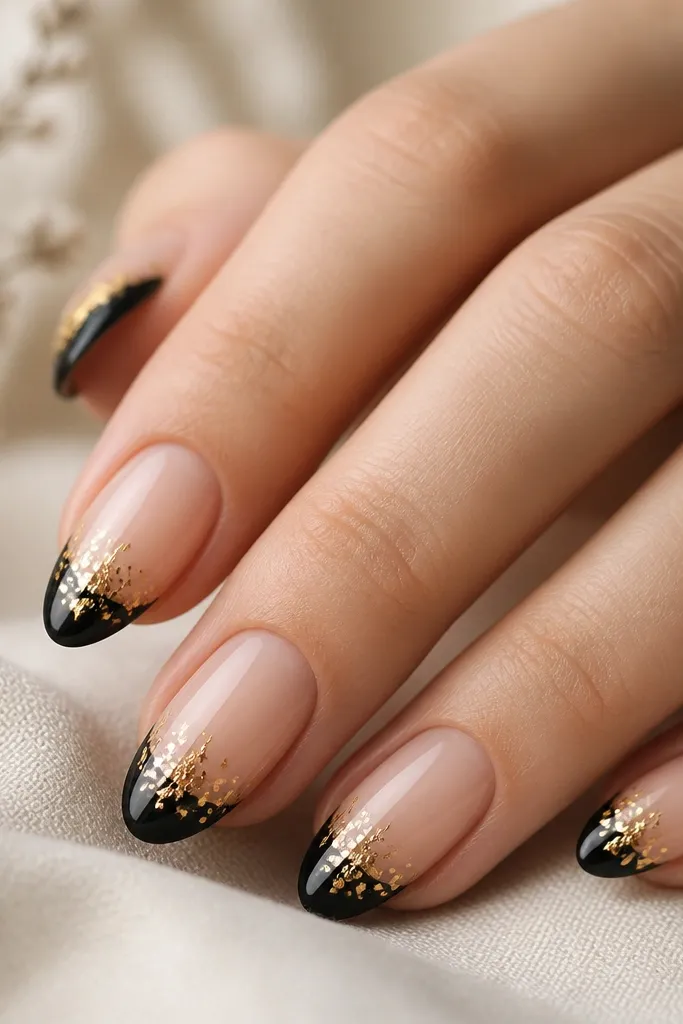
Confetti foil feels modern because it’s controlled chaos. The flare is centered, so it doesn’t look random, and the gold fragments catch light in small bursts. This works best on medium-length nails where the tip has enough area for the flare to expand. It flatters hands with thinner nail beds because the center flare draws attention to the middle. I wear this when I want something party-ready without going full glitter overload.
Start with nude base and cure. Apply black French tip with stencil, then cure. Place a small cluster of gold foil fragments at the center of the tip — press lightly and fan them outward in a teardrop shape. Build density in the center and taper off toward the sides. Seal with gel and cure, then top coat glossy to smooth the foil edges.
Editor's noteKeep the flare size to about one-third of the tip width so it stays elegant.
Watch outAvoid covering the entire tip in foil — it stops reading as modern and turns into heavy sparkle.
11. Black French With Gold French Tip Split Line
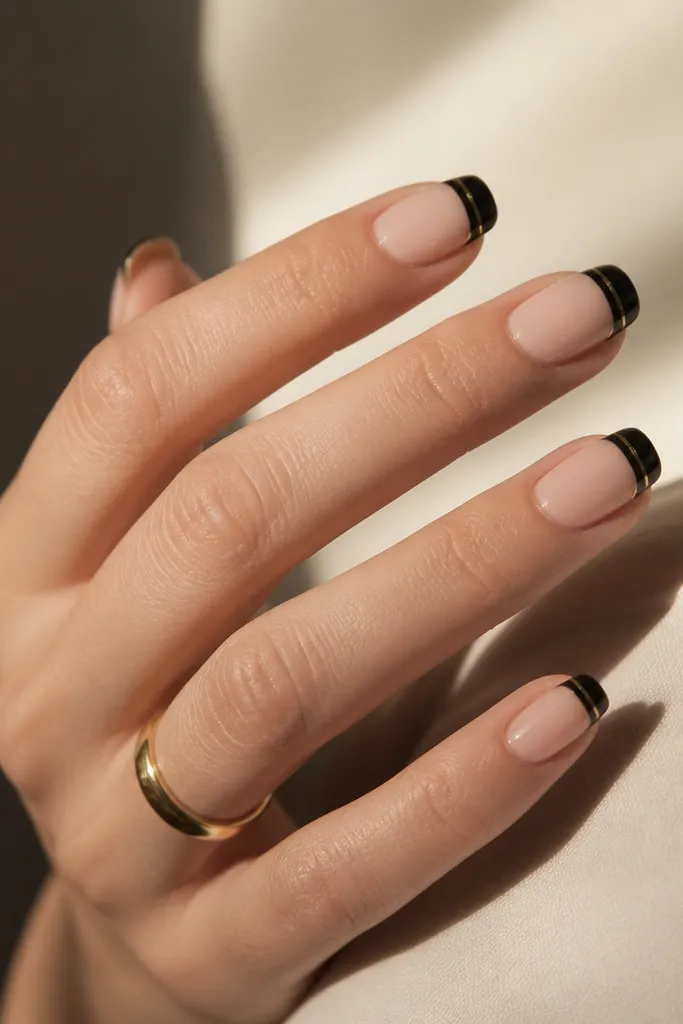
This design is a style trick that makes the French tip look custom. The gold split line creates a “double layer” effect without actually making the tip thicker. The result is clean and modern, especially on nails that are slightly shorter because it adds visual structure. It flatters all skin tones because the gold line is thin and the black still does the heavy lifting. It’s also a good choice if you don’t want rhinestones or foil texture.
Apply nude base and cure. Paint black French tip with stencil and cure. With a liner brush, draw a straight thin gold line across the French tip about halfway between the smile line and the tip edge. Cure the gold line, then apply a glossy top coat over everything. If the gold line looks uneven, add a second thin layer and cure again instead of trying to fix it with more pressure.
Use gel striping tape to get the line perfectly straight, then remove it before curing.
Don’t place the gold line too close to the smile line or it will look like a mistake instead of a design.
12. Black French With Gold Marble Accent Corner
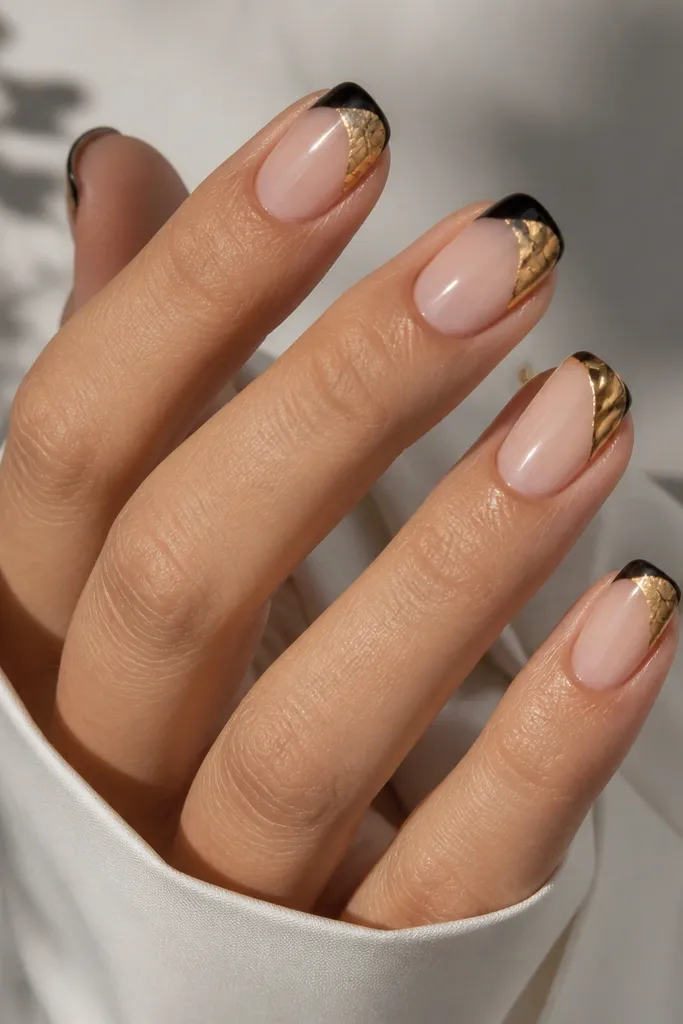
Marble corners look modern because they’re small, not full coverage. You get movement from the veining and shine from the gold, but the French tip stays the main shape. This is flattering on short nails because the marble lives in one corner and doesn’t crowd the whole tip. It also photographs well because the veining gives detail even from a distance. I use this for events when I want “statement” but still clean.
Start with nude base and cure. Create black French tips with a stencil and cure. For the marble, paint a tiny corner piece using gold gel — I start with a small triangular area near one outer corner of the tip. While the gold is tacky, drag a thin brush through a mix of black gel and a clear gel to create veining lines. Cure and seal with glossy top coat, keeping the marble confined to the corner so it doesn’t spread.
Use a very thin brush and pull lines in one direction for cleaner marble veining.
Don’t overwork the marble — too many passes makes it look muddy.
13. Black French With Gold Chain Link Detail
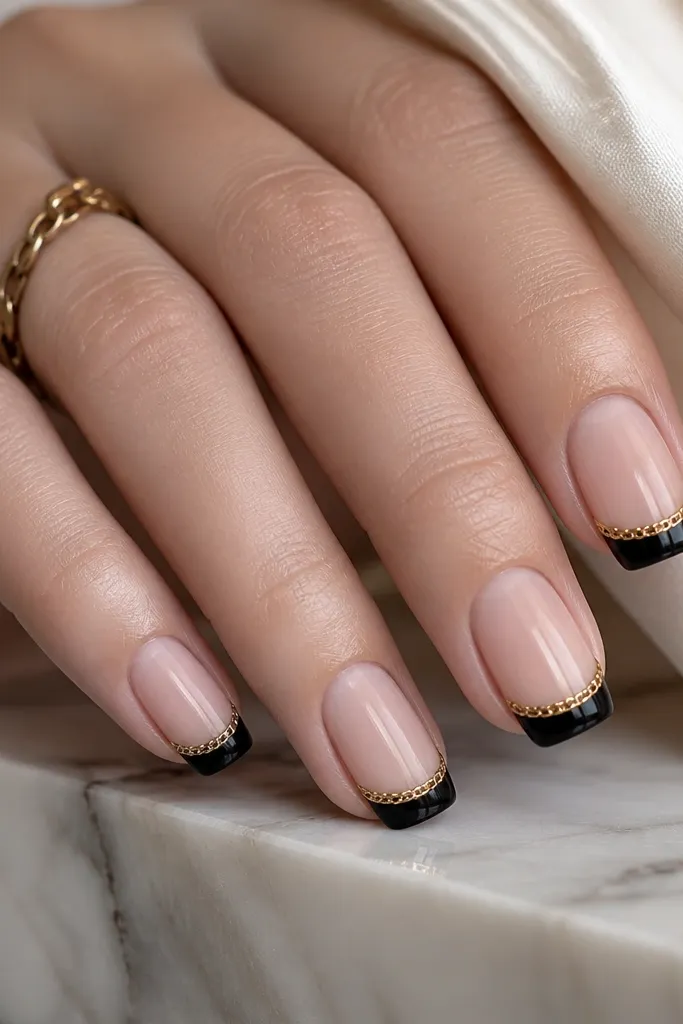
Chain-link details make black and gold French feel like jewelry. The gold chain sits on top of the black tip, so it looks dimensional and high-end. I like this on medium to long nails because the links need a bit of room to show shape. It flatters hands that look good with sharper lines, like almond or stiletto shapes. This is my pick for nights out because the chain catches light and looks intentional in photos.
Apply nude base and cure, then paint black French tips with a stencil. Cure fully. Use gold chain nail art pieces or tiny gold chain decals — I prefer small links that are flat on the backing. Place the chain along the outer edge of the French tip, starting from the center and pressing down with a silicone tool. Seal with a thin gel top coat, then cure. Finish with one more glossy top coat so the chain edges feel smooth.
If a chain piece lifts, add a micro dab of gel under it and cure — don’t just add top coat on top.
Don’t cover chain links with thick gel — it turns them into a blob and loses the link shape.
14. Black French With Gold Glitter Fade at the Tip Edge
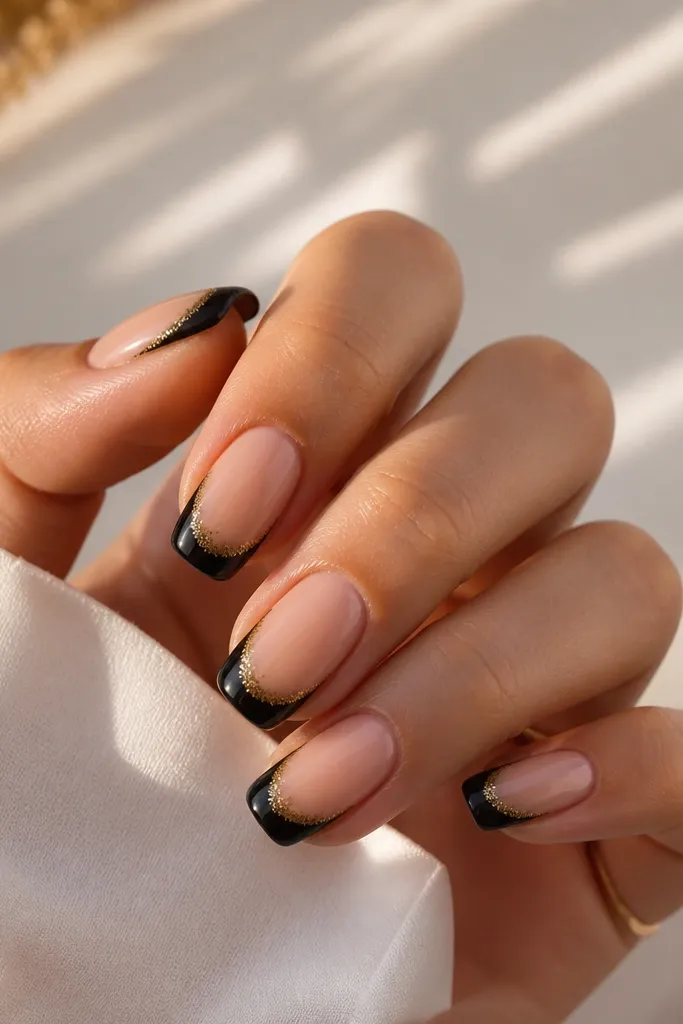
A glitter fade is modern when it stays on the edge. The gold concentrates at the tip so your nails still look sleek, not covered. The black gives a strong base, and the gold sparkle creates a soft gradient that moves with light. This works on short nails because the fade is narrow, and it also looks great on medium nails when you want a little drama. I wear this when I don’t want foil texture but still want “party” energy.
Apply nude base and cure. Paint black French tips with stencil and cure. With a small flat brush, tap gold glitter gel onto the very edge of the tip — start at the tip point and blend upward slightly. Keep the glitter density highest at the edge and lighten as it moves toward the smile line. Cure, then seal with glossy top coat in two thin layers so the glitter doesn’t feel gritty.
Use a dense glitter gel for the outer edge and a lighter glitter for the fade so you get a true gradient.
Avoid full glitter tips — they look dated and grow out messy.
15. Black French With Gold Foil Stripe Down the Center
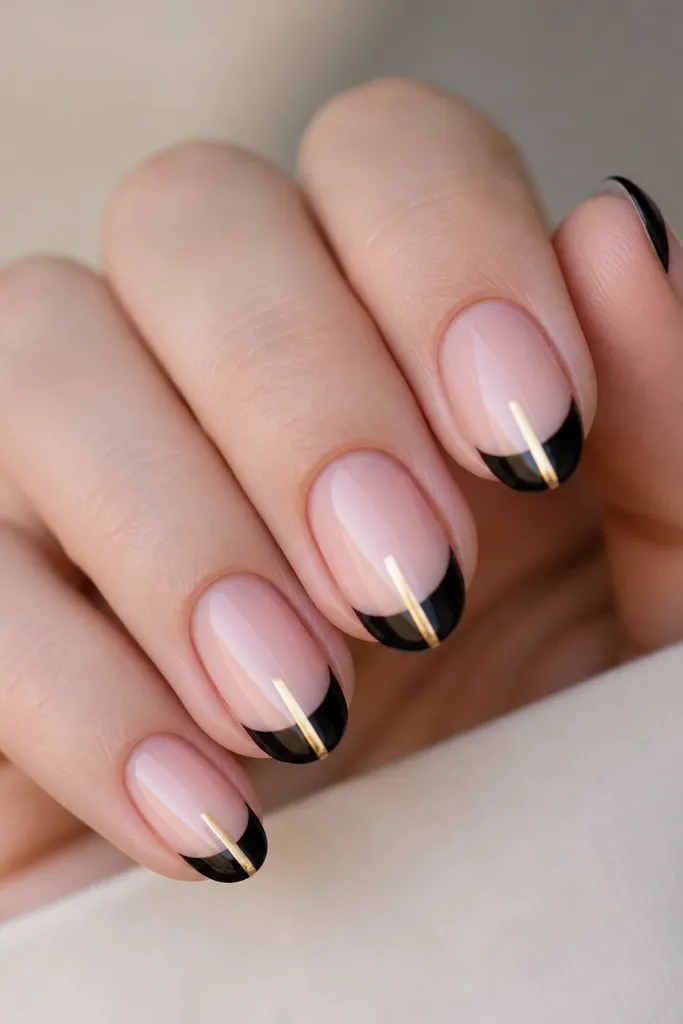
Center stripes are powerful because they create symmetry and length. The gold foil stripe adds a reflective highlight, while the black keeps the design sharp. It looks modern because the stripe is narrow and vertical, not a wide band. I like it on oval and almond shapes because the stripe follows the nail’s natural center. It flatters most hands and makes nails look “clean” even when the foil has natural irregular edges.
Start with nude base and cure. Apply black French tips with stencil and cure. Cut a thin strip of gold foil and place it along the center of the French tip, starting near the smile line and ending just before the very tip edge. Press gently and trim any overhang with a file. Seal with a clear gel layer and cure, then top coat glossy. Keep the stripe width about the same as a pencil line so it stays sleek.
If foil won’t stick, add a thin layer of clear gel exactly where the stripe goes, then press the foil into it.
Don’t make the stripe too wide — wide foil makes French tips look like you filled them in.
16. Black French With Gold Studs at the Outer Corners
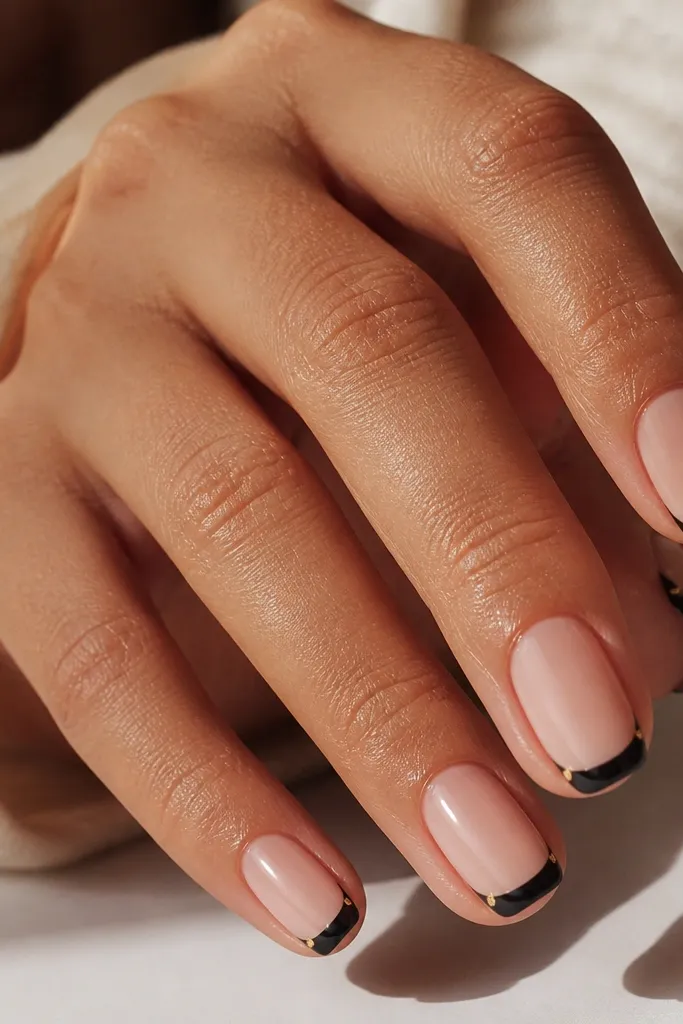
This is the smallest gold detail that still looks intentional. Two studs at the outer corners frame the French tip and make the nail look balanced. It’s modern because it avoids busy patterns and keeps the gold placement precise. I love it on short squoval nails because the studs add interest without taking up space. On any skin tone, the gold reads warm and the black keeps it crisp.
Apply nude base and cure. Paint black French tips with stencil and cure. Place two tiny gold studs at the outer corners of the smile line — keep them about 1-2 mm from the edge so they don’t look like they’re sliding off. Use nail glue or gel adhesive and let it set. Seal with glossy top coat, paying attention to the stud edges so they don’t snag on clothing.
Editor's noteUse a dotting tool to position studs; drop placement is the difference between symmetrical and messy.
Watch outAvoid placing studs too close together — if they’re near the center, the design loses the framing effect.
17. Black French With Gold Linework Frame
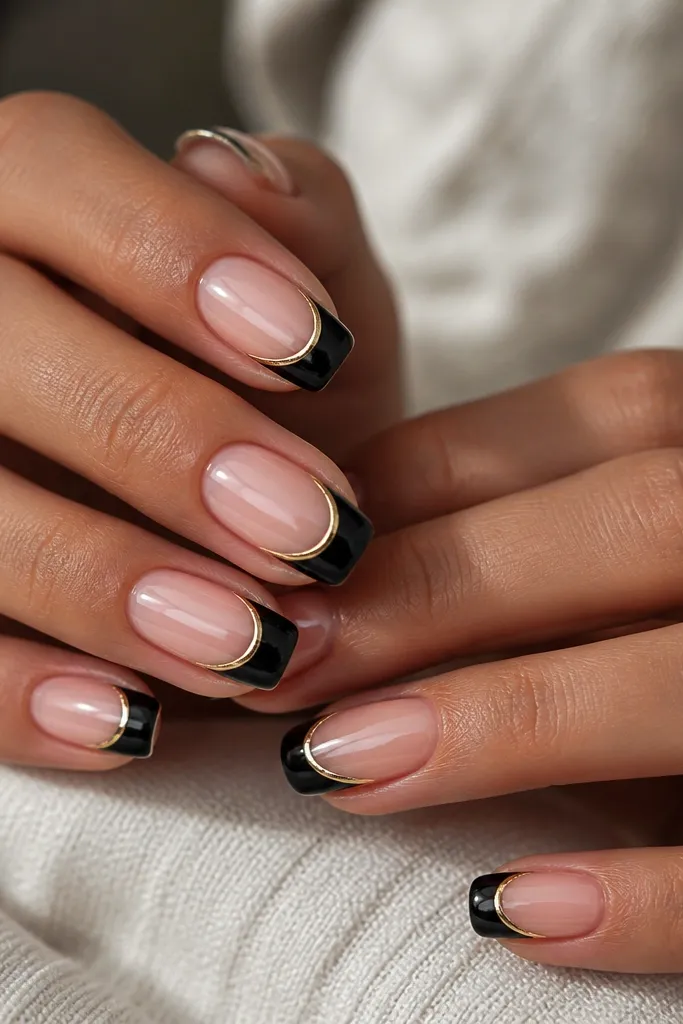
Linework frames feel modern because they create structure without filling the nail. The gold lines trace the black tip’s shape, so your nails look designed, not decorated. This flatters medium and long nails because you can see the frame clearly. It also looks good on hands with shorter nail beds since the frame draws your eye to the tip edge. I wear this when I want something graphic but not harsh.
Start with nude base and cure. Apply black French tip using stencil for a clean smile line, then cure. With a liner brush, draw a thin gold frame along the outer curve of the tip, then add two short lines near the corners to suggest a rectangle outline. Keep the lines separated from the black by a tiny gap so it looks like trim, not paint. Cure and seal with glossy top coat.
Editor's noteUse a liner brush that holds a point; if it fans out, your lines will look thick and uneven.
Watch outDon’t overdraw — too many gold lines make it look like a sketch instead of a frame.
18. Black French With Gold Foil French Tip Cap
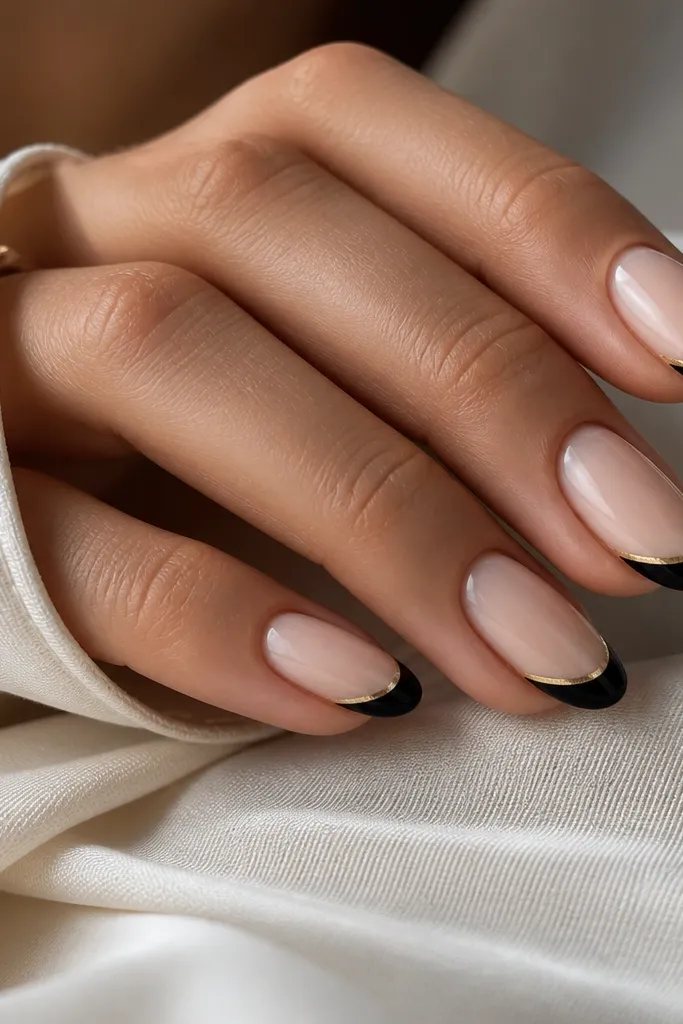
This one looks modern because it’s a cap, not a full replacement. The black stays dominant, and the gold only hits the very edge, which makes it feel like metallic trim on a coat. It flatters short nails because the gold cap is narrow and doesn’t crowd the nail plate. It also looks great on almond nails because the cap follows the curve naturally. I wore this to a holiday party and got asked where I got the set.
Apply nude base and cure. Create black French tips with stencil and cure. Tear a thin strip of gold foil and place it only on the top edge of the black French tip — right where the tip meets the air. Press and trim so the cap stays even across the nail. Seal with gel and cure, then finish with glossy top coat to lock the foil and add shine.
Editor's noteMake the cap strip thinner than you think — it should read as trim, not a second French tip.
Watch outAvoid thick foil caps — they lift at the edges and turn gold into a chunky layer.
19. Black French With Gold Studded Micro V at Tip
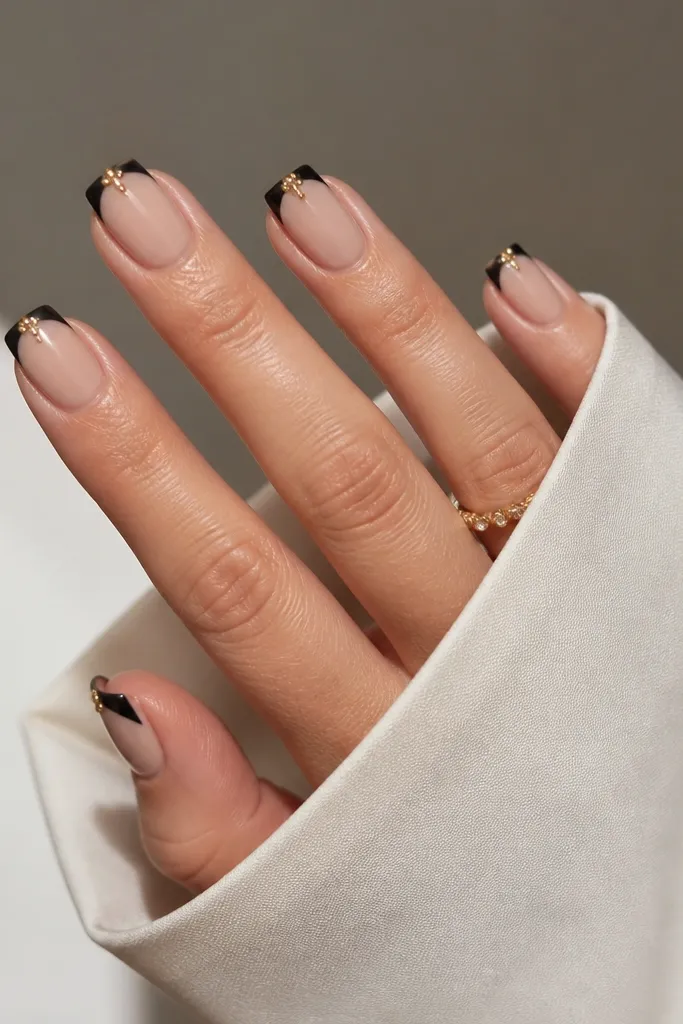
A micro V is a clean way to bring in texture without going full rhinestone. The V shape points upward and makes the nail look longer and sharper. The gold studs give sparkle that looks like jewelry hardware, especially under indoor lighting. I like this on medium-length nails because the V has enough space to be crisp. It flatters hands with oval and almond shapes because the V mirrors the nail’s natural geometry.
Start with nude base and cure. Apply black French tips with stencil and cure. Place small gold studs in a V pattern on the center of the French tip — start with the two outer points, then add the center point last so the V stays symmetrical. Keep the studs tiny and spaced so you can still see the black between them. Seal carefully with glossy top coat in thin layers so the studs don’t sink.
If studs shift, cure in short bursts — 10-20 seconds at a time — so you can adjust while it’s still tacky.
Don’t use large studs — they make the V look heavy and throw off the modern scale.
20. Black French With Gold Butterfly Wing Accent
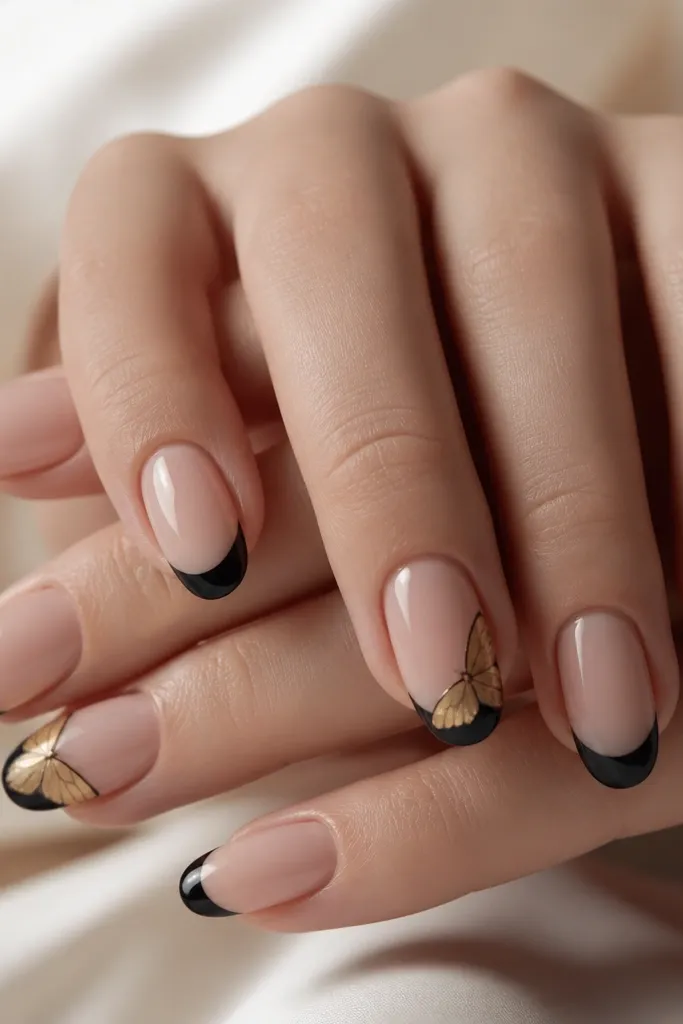
Butterfly wing accents can look modern when they’re line-based and placed only on a couple nails. The black French keeps the set grounded, and the gold wing adds a delicate, fashion-y detail instead of a full cartoon vibe. I like this on almond nails because the wing shape follows the nail curve and looks like it’s resting on the tip. It flatters many skin tones because gold shimmer sits on top of black and gives a warm highlight. This is a great option if you want “special” without going full nail art on every finger.
Apply nude base and cure, then paint black French tips with stencil and cure. Choose two accent nails and sketch a butterfly wing shape in gold gel — keep the outline thin and close to the tip edge. Fill lightly with gold shimmer gel, leaving negative space between lines so it looks airy. Cure and seal with glossy top coat. Keep the wing small enough that it doesn’t cross the smile line into the nude area.
Editor's noteUse a nail art liner and keep your wing lines consistent thickness — that’s what makes it look chic instead of messy.
Watch outAvoid putting wings on every nail — it turns into a theme instead of a modern accent.



