
1. Icy Sky Gradient with Sharp Square Tips
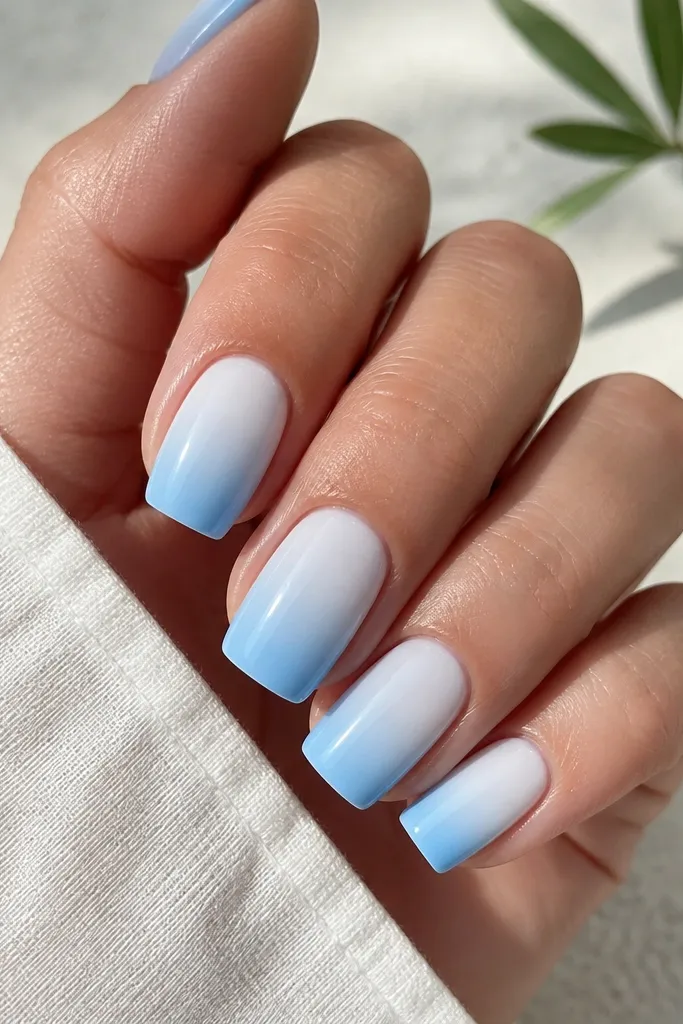
This look is the fastest way to make square nails feel fresh without adding tiny drawings you’ll regret later. Start with a sheer milky base so the blue stays clean and doesn’t go green. The gradient reads like morning air — lighter near the cuticle, stronger at the tip — and square shape makes the color shift look crisp rather than blurry. It flatters fair to medium skin because the milky white brightens the nail bed; on deeper skin it still works because the icy blue has enough contrast. I wear this for hot days when I want my nails to look polished even if I’m in flip-flops.
First, apply a milky pink sheer base and cure. Then sponge on icy sky blue from the middle downward, keeping the top edge of the blue slightly irregular for a natural fade. Use a small flat brush to smooth where the gradient meets the milky area, then cure again. Finally, cap with glossy top coat and clean up the sidewalls with a thin brush dipped in gel cleanser. If you want extra crispness, add a second thin layer of sky blue only on the very tip so the square corners look defined.
Editor's noteDo the gradient with a makeup sponge that has been trimmed so it doesn’t leave a speckled edge on square tips.
Watch outDon’t sponge all the way to the cuticle — it makes the blue look cloudy and cheap.
2. Cobalt Solid with Micro White Cuticle Lines
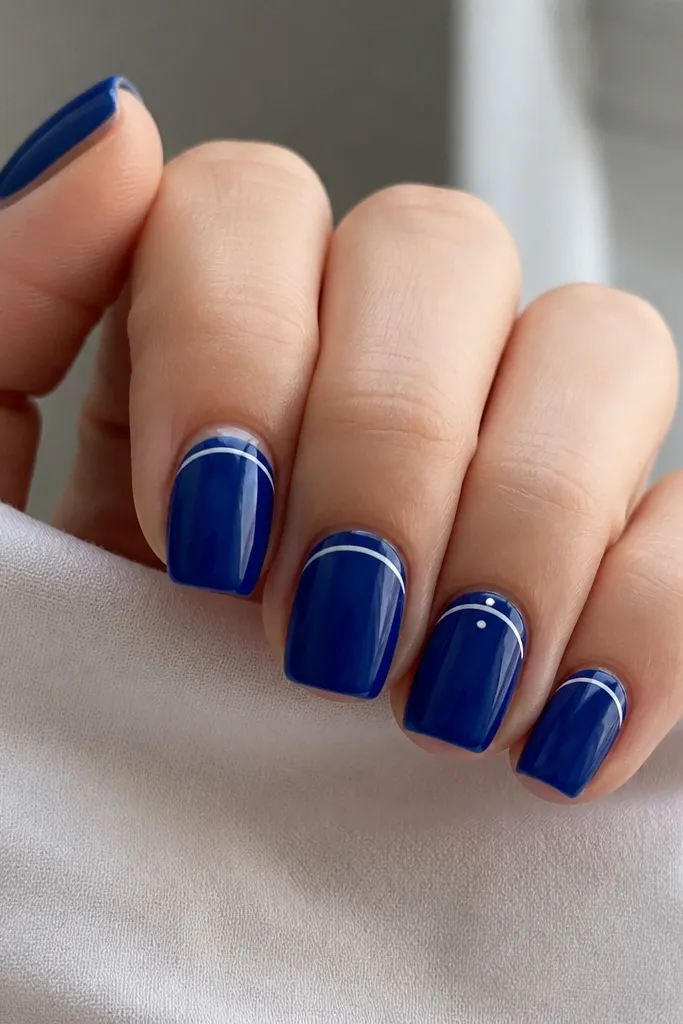
Solid cobalt looks expensive because it’s bold, but the micro white line keeps it from feeling heavy. That thin white detail lifts the whole set and makes your cuticles look more “finished.” I like this on medium-length squares because the clean line gives structure to the nail shape. It flatters most skin tones since cobalt has strong contrast, and the white detail brightens the area that usually shows dry skin. Wear it for cookouts, office days, and any time you want blue that reads “intentional” instead of “random.”
Start with two coats of cobalt blue gel, curing fully between coats for an even, opaque finish. Once cured, use a striping brush or a nail art liner to paint a thin white curve 0.5-1 mm below the cuticle. Keep the line consistent across nails; on the ring finger, add a single tiny dot where the line meets the center. Cure, then seal with a glossy top coat. Clean the edges carefully so the white line doesn’t flood into the sidewalls.
If the white line wobbles, wipe the brush clean, then drag the line back into shape while the gel is still workable.
Avoid thick white stripes — they look like sticker residue on square nails.
3. Periwinkle Half-Moon with Glossy Top Coat
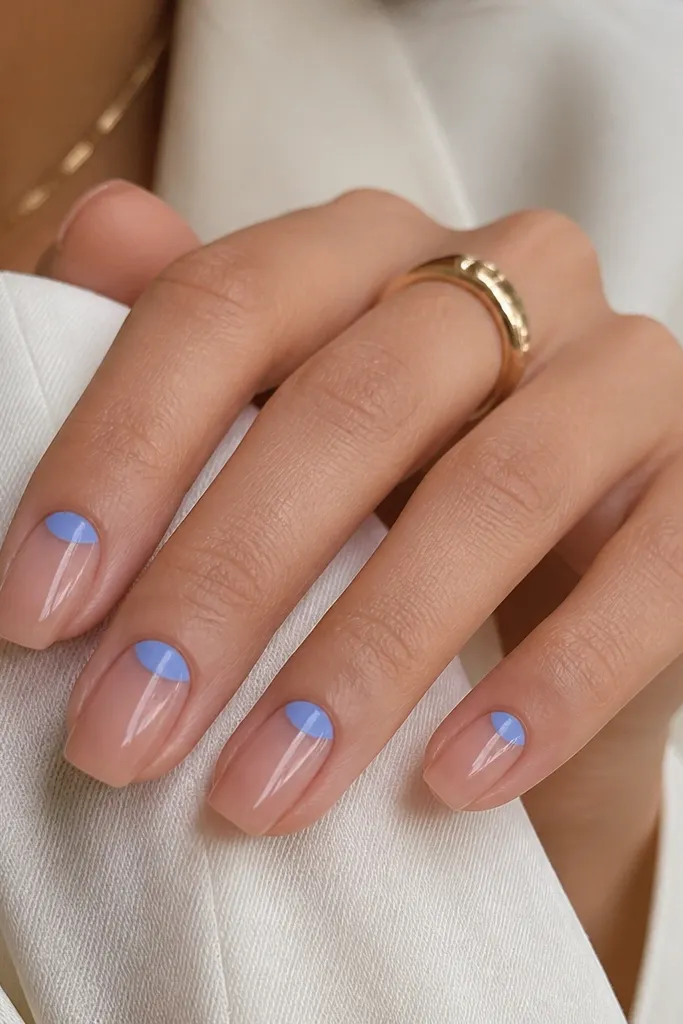
Half-moons are such an underrated summer move because they feel graphic but still light. The periwinkle color is soft enough for daytime, and the negative space makes the nails look longer — square tips exaggerate that effect. This works especially well if your nail beds are shorter, because the nude base keeps everything airy. On deeper skin tones, the periwinkle looks bright and clean instead of dull. I wear this when I want nail art that doesn’t clash with chunky rings or bright nail polish on my toes.
First, apply a sheer nude base and cure. Then use a half-moon stencil or cut small curved pieces of nail art tape and place them at the cuticle area. Paint periwinkle blue inside the half-moon shape, cure, and remove the tape carefully. Lightly file any sharp edges, then top coat everything with a glossy layer to blend the border. If you want it extra neat, add a second nude layer around the half-moon border before top coat so the line looks factory-straight.
Use tape meant for nail art, not painter’s tape — it tears and pulls gel.
Don’t make the half-moon too wide; it swallows the nail bed and makes square tips look squat.
4. Denim Blue with White Stitch Detail
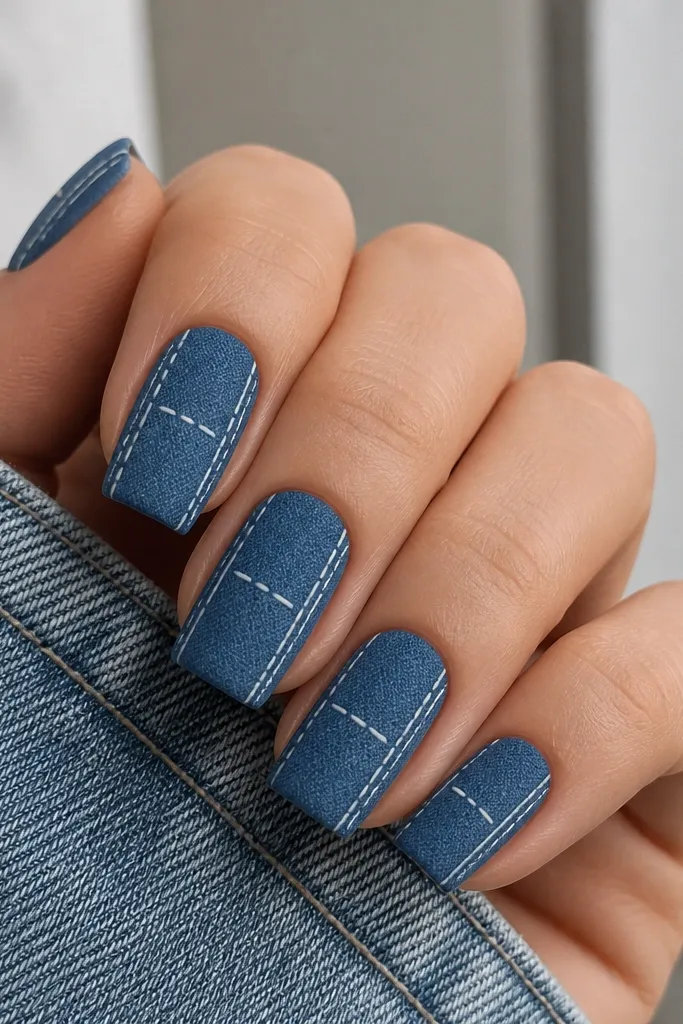
Denim blue is my go-to when I want blue that feels casual and wearable. The matte finish makes it look like real fabric, and the white stitch detail turns it into a theme you can wear with jeans and canvas shoes. Square nails are perfect for this because the stitch lines look sharp against the straight edges. It flatters all skin tones, but it especially looks good on hands with warm undertones because denim blues have a slightly purplish warmth. I do this for weekend errands because it hides small chips better than high-gloss art.
Start by painting two coats of denim blue gel and cure. For the stitch, use a fine liner brush and draw two thin vertical lines near the sidewalls, spaced about 1-2 mm from the edge. Add short horizontal stitch marks across the center line, like a few dashes rather than a full grid. Cure, then apply a matte top coat, keeping the stitch lines slightly raised for texture. If you want a cleaner look, keep the center stitch glossy by applying a small drop of gloss top coat only on the white lines.
Editor's notePractice stitch spacing on a clear nail form first so your dashes match across fingers.
Watch outAvoid thick white lines — they look like marker and kill the denim effect.
5. Navy and Turquoise Split Diagonal
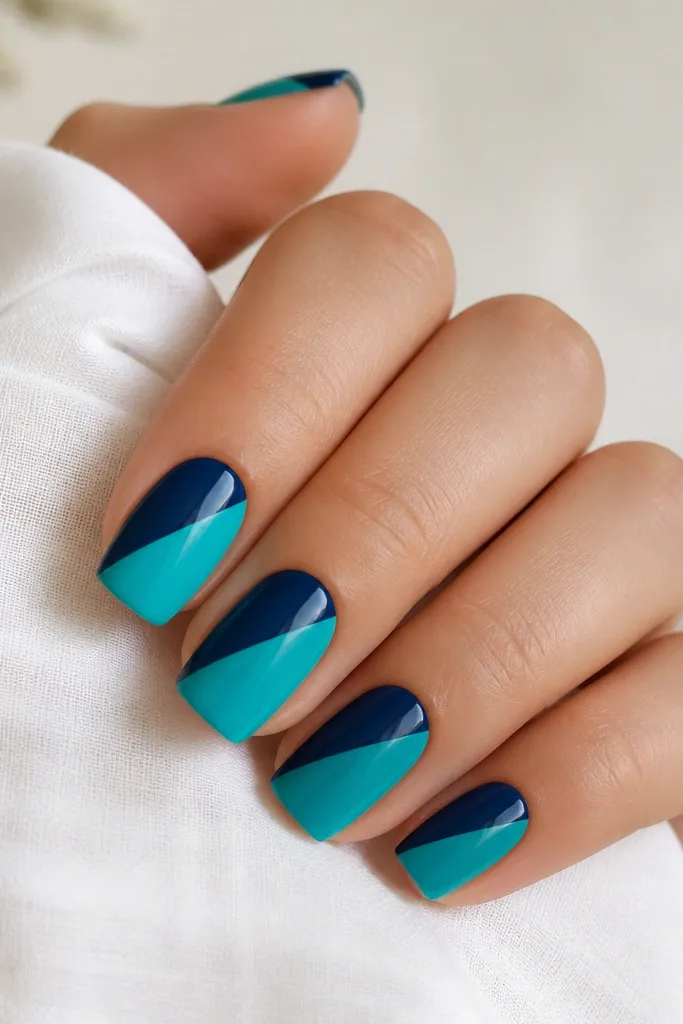
Diagonal splits look sharp because square nails already have clean geometry. Navy and turquoise are a summer-friendly combo that looks bold without needing extra decals. This design flatters hands that have longer fingers because the diagonal line visually lengthens the nail bed. If you wear gold jewelry, the turquoise brings warmth back in and keeps the set from looking too cold. I like it for parties and beach dinners because the glossy finish makes the blues look deeper under candlelight.
First, apply a base coat and cure. Paint the entire nail navy blue and cure completely. Place a strip of nail art tape diagonally from the upper left to lower right (or mirror it) and press it down firmly along the square edges. Paint the exposed triangle turquoise, cure, then remove the tape before top coat. Seal with a glossy top coat and wipe the edges with gel cleanser on a lint-free brush.
Editor's noteUse thin tape and run a manicure stick along the edge to prevent polish bleed under the tape.
Watch outDon’t eyeball the diagonal; off-angle lines make square nails look crooked.
6. Beach Glass Blue with Micro Glitter Specks
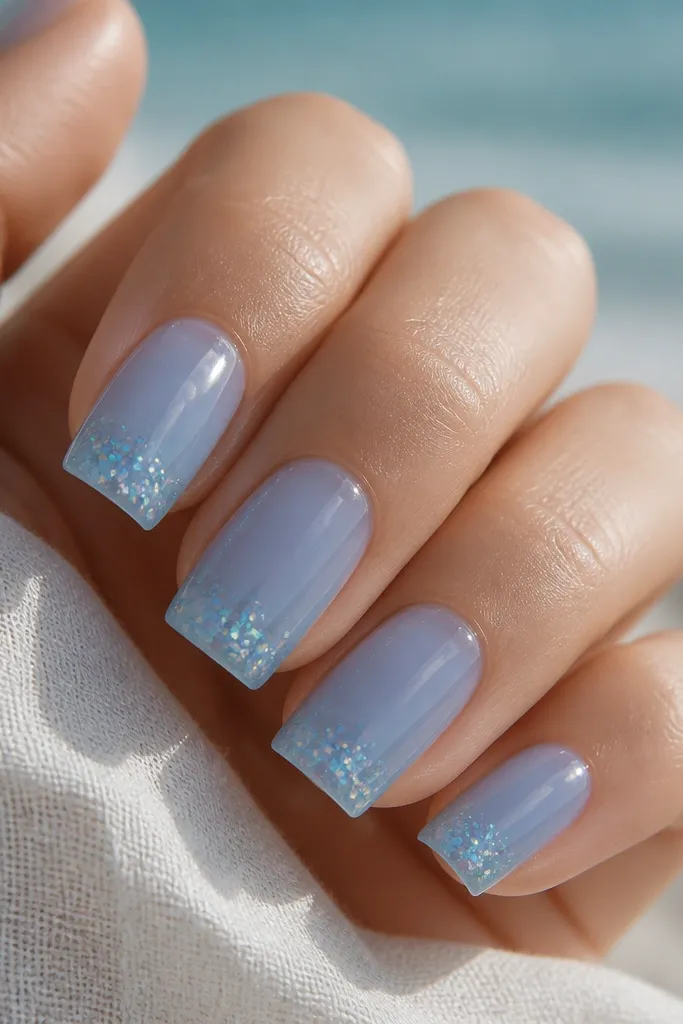
Beach glass blue is one of those shades that changes with light, which is exactly what you want in summer. The jelly look makes the nail feel airy, and micro glitter specks mimic sea sparkle without looking like full-on festival nails. Square shape makes the translucency look intentional, not streaky. This flatters short to medium nails because the jelly layer builds a little height without adding bulk. I wear this when my hands need something pretty but I don’t want super loud art.
Start with a sheer milky base and cure. Apply a translucent beach-glass blue jelly layer, then cure. Add micro glitter near the tip only — I tap it on with a dotting tool so it doesn’t spread. Cure again, then apply a slightly thicker top coat layer to smooth the surface and lock in the glitter. If you see uneven glitter density, add one more tiny tap of glitter only where it’s sparse.
Tap glitter on with a dotting tool instead of brushing — it keeps the specks tight to the tip.
Avoid heavy glitter coverage; it turns the jelly look into chunky texture.
7. Cornflower Blue with White Daisy on One Nail
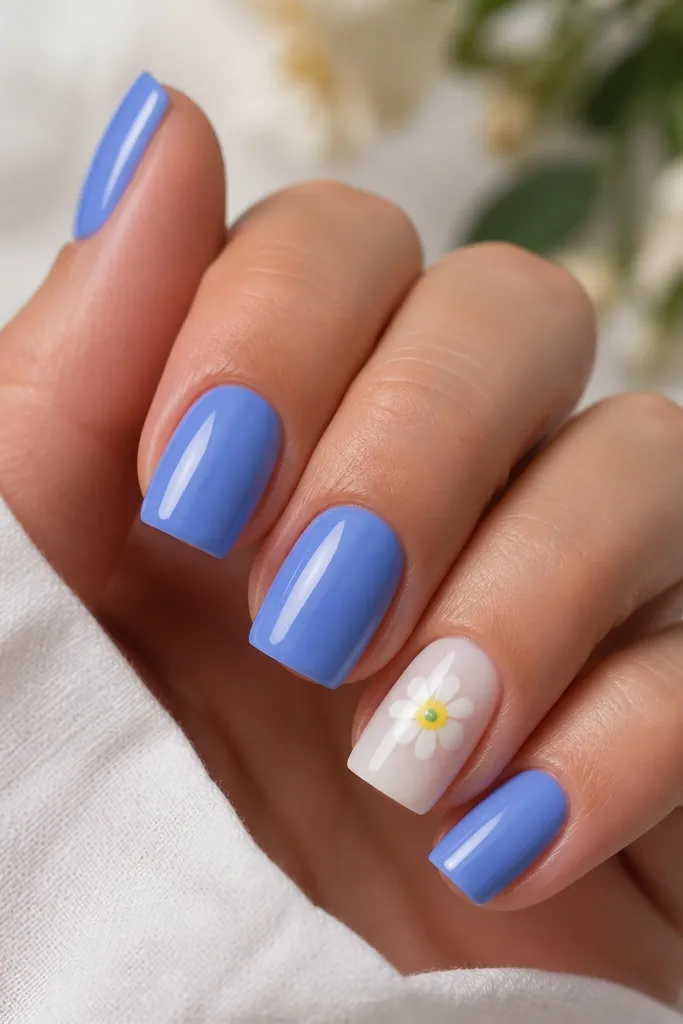
This is the summer nail set I keep coming back to because it feels cheerful without being childish. Cornflower blue is bright but not neon, so it looks clean in photos and in real life. Keeping the daisy on one nail lets the square shape stay the star while still giving you a focal point. It flatters hands of any undertone because the white base makes the flower crisp. I do this for birthdays, patio lunches, and any time I want “pretty” that still feels grown-up.
Paint all nails cornflower blue in two thin coats, curing fully between coats. For the ring finger, use milky white as the base color and cure. With a dotting tool, place a yellow dot in the center, then add five white petals around it using small, even dots. Add a tiny green dot for the center leaf feel, cure, then top coat all nails glossy. If you want it extra crisp, outline the petals with a micro liner using a very thin brush.
Use a toothpick for the daisy outline — it gives you more control than a brush.
Skip adding daisies to every nail; it makes square nails look cluttered.
8. Periwinkle Chrome Fade
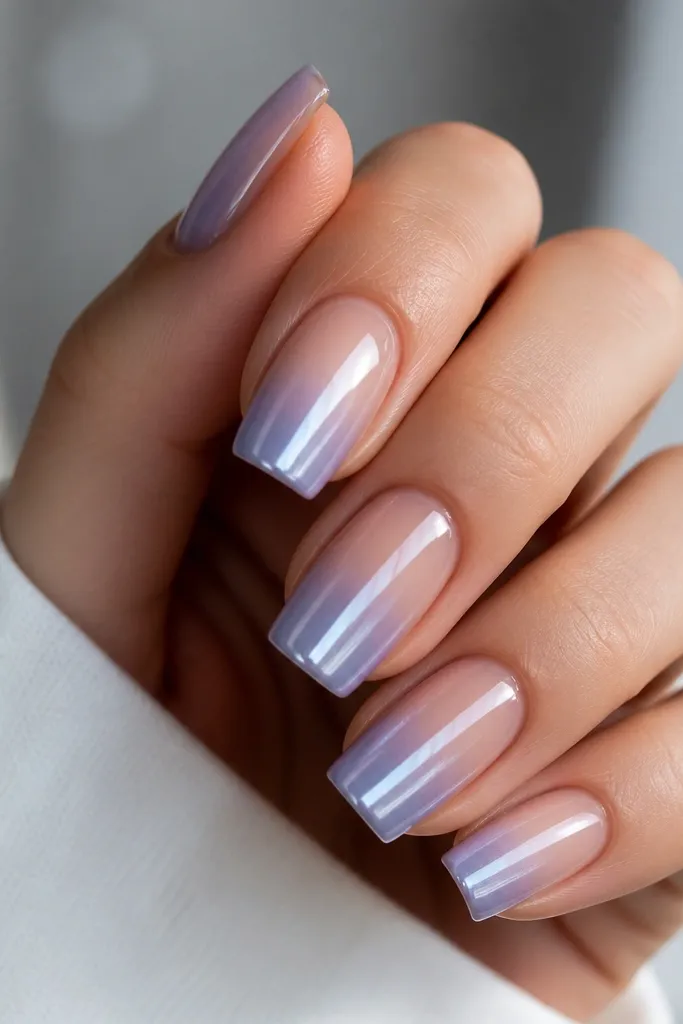
Chrome fade is the kind of blue that looks like jewelry. Periwinkle chrome reads softer than silver chrome, so it doesn’t overpower your hands. The fade placement on square tips makes the nail look longer and adds that “sun hit” effect even when you’re indoors near windows. This flatters medium and deep skin tones especially well because the chrome reflects light in a flattering way. I do it when I want my nails to look expensive with minimal drawing.
Apply a sheer nude base and cure. Paint a thin layer of periwinkle gel or tacky base at the tip area only, roughly the last third of the nail. Sprinkle chrome powder and press it in with the applicator, then gently buff the surface so the chrome fades smoothly into the nude. Seal with a chrome-safe top coat that doesn’t dull the shine. Cure and wipe any residue, then check each corner so the chrome doesn’t smear past the square edge.
Use a chrome powder that matches the periwinkle shade so the fade looks smooth instead of patchy.
Don’t over-buff chrome — it removes the mirror finish.
9. Sky Blue Matte with Glossy Star Accent
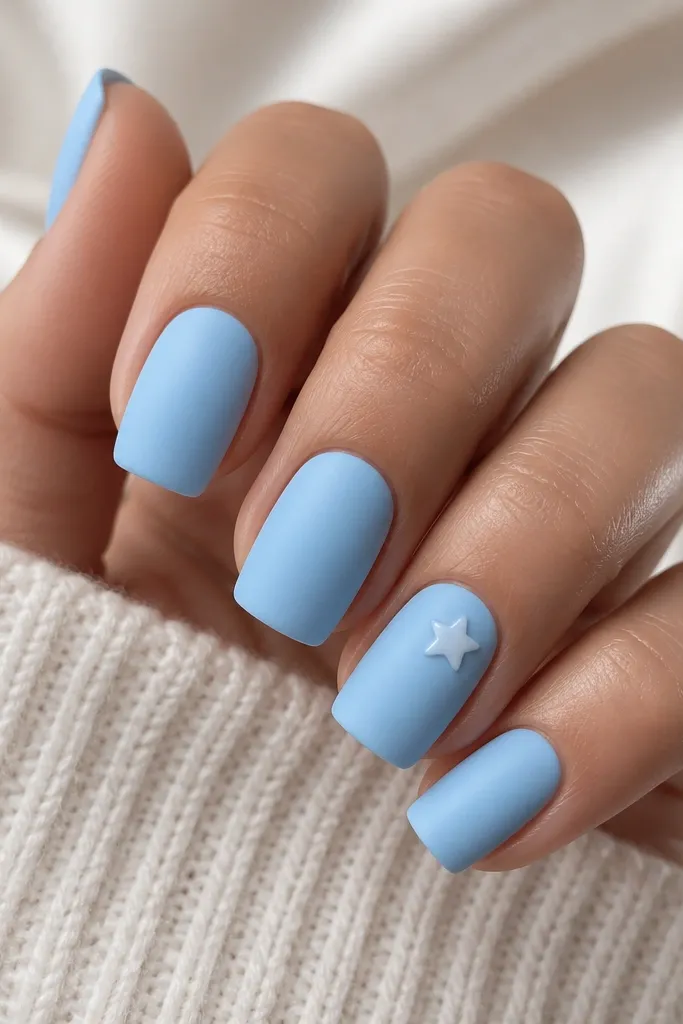
Matte sky blue gives that beach towel softness, and the tiny glossy star makes the set feel playful without getting loud. I like this combo because matte hides micro imperfections at the edges, which matters on square nails since corners chip first. The glossy star catches light and keeps your nails from looking flat in photos. This works on fair, medium, and deep skin because the sky blue is bright enough to show even against deeper undertones. I wear it to festivals and weekend dinners when I want a fun detail but clean overall shape.
Paint all nails sky blue and cure, then apply a matte top coat and cure again. On one accent nail, use a small star stamp or freehand with a thin liner brush to paint a white star on the upper third near the cuticle. Cure, then apply glossy top coat only over the star area to keep it shiny while the rest stays matte. Finally, check the star edges with a cleanup brush so it stays crisp against the square tip. Keep the star small — about 2-3 mm wide — so it doesn’t dominate the nail bed.
Editor's noteIf you freehand the star, draw a tiny cross first, then fill in points around it.
Watch outDon’t place the star too low; it can look like a sticker on a square tip.
10. Ocean Blue Marble with White Veins
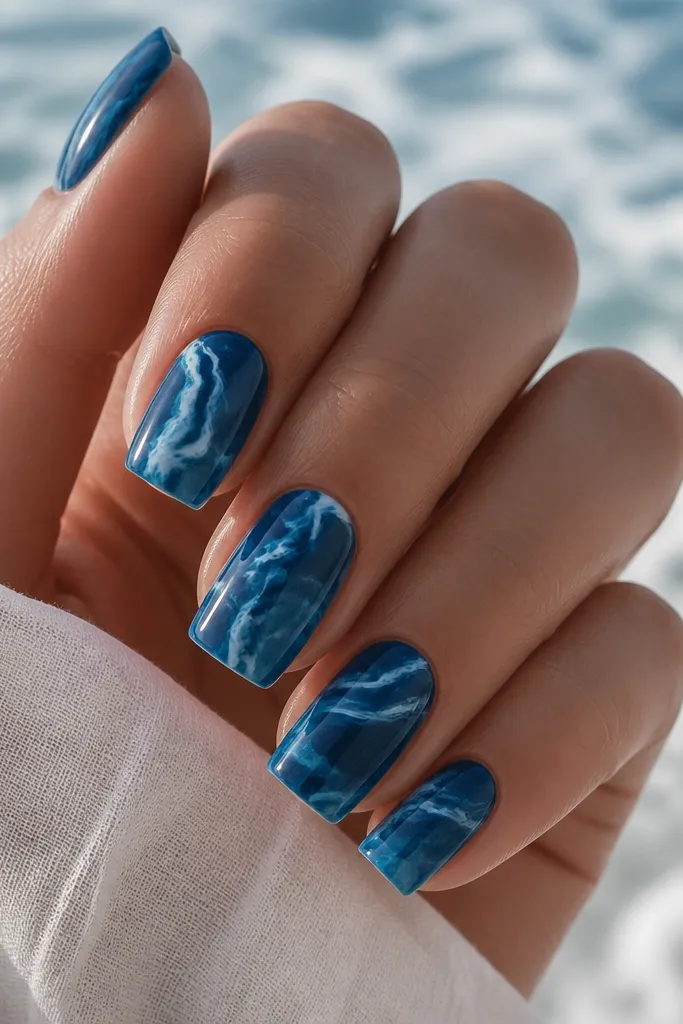
Marble looks best when the veins are thin and the base stays rich. Ocean blue marble gives that “vacation” vibe without using obvious beach icons. Square nails help the marble pattern look intentional because the straight edges frame the swirls. It flatters hands with cooler undertones because the white veins brighten the nail bed. On warm undertones, the light aqua in the marble keeps it from feeling too icy. I like this for trips and events because it looks high-effort even when you use a simple technique.
Start with a deep ocean blue base in two coats and cure well. Add wispy veins using a marbling tool or a striping brush with milky white gel, dragging in short lines from the tip toward the center. Add a few thin light aqua lines for dimension, then swirl gently so the colors don’t turn muddy. Cure, then top coat glossy and cap the edges. If you want a more controlled look, do two nails first as practice, then match the vein thickness across the rest.
Editor's noteKeep veins thin and let the blue show through — thick marble lines look heavy on square nails.
Watch outAvoid over-mixing the marbling; it turns into gray sludge.
11. Blue Floral Line Art on Clear Nude
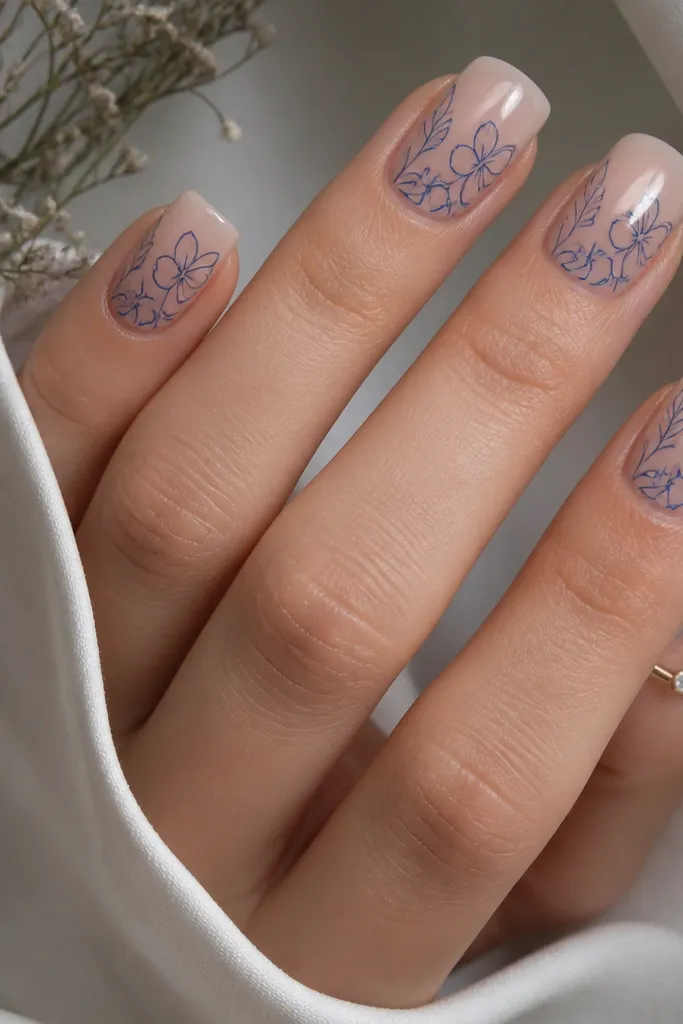
Line art on a clear nude base looks clean in summer because it doesn’t block light the way opaque stickers do. The blue stays delicate, and the square shape makes the lines look sharp instead of messy. This flatters hands with short nail beds because the clear base makes the nail look longer. I like this when I’m wearing light makeup and want my nails to match without competing with my outfit. It also works well for workdays because the art is thin and not too loud.
Apply a clear nude or sheer milky nude base and cure. Using a fine liner brush, draw one small flower with five simple petals and a tiny center, then add two leaves angled toward the sidewalls. Keep the line thickness consistent — pause to reload paint instead of dragging it too long. Cure, then seal with glossy top coat to smooth the line art. If you want it extra tidy, add one small dot or short dash near the cuticle on each nail so the design looks balanced.
Editor's noteUse gel paint for line art — it levels under top coat and stays crisp on square edges.
Watch outDon’t use thick nail polish for line art; it dries lumpy and looks messy.
12. Cobalt + White Striped Tape Accent
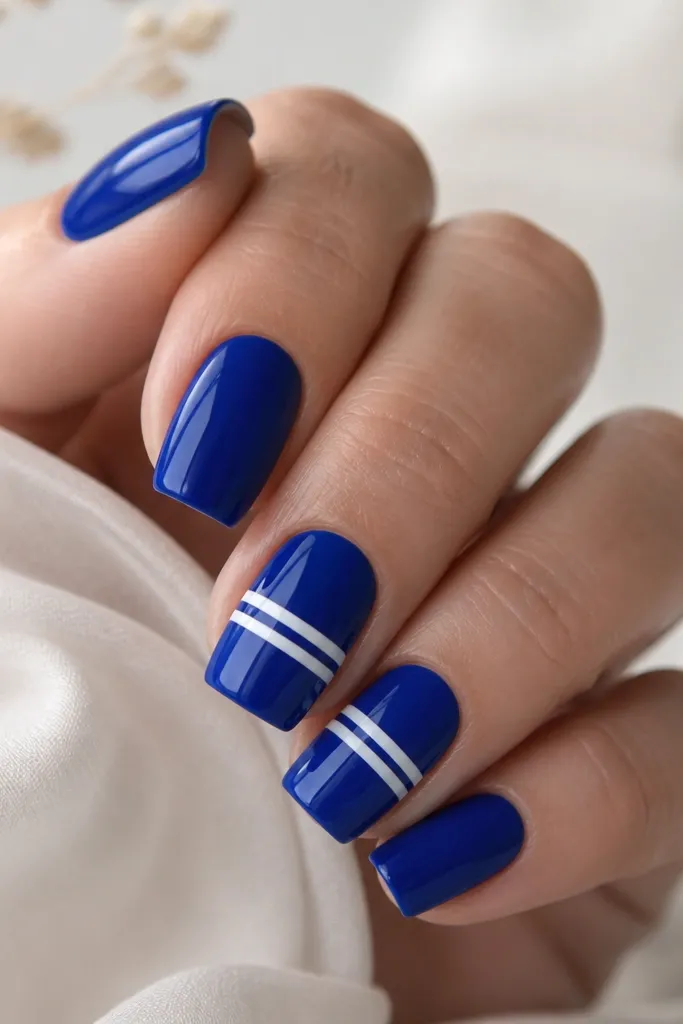
Tape stripes look neat because they’re straight and the finish stays crisp. This design gives you summer contrast without needing hand-painted art. I like it for square nails because straight lines highlight the shape instead of softening it. It flatters pretty much everyone, but it’s extra flattering if you wear rings because the stripes catch light as you move. I do this when I want something graphic that still feels wearable in everyday life.
Paint all nails cobalt blue in two thin coats and cure. On accent nails, place two thin strips of nail art tape horizontally across the middle third, keeping them parallel and about 1 mm apart. Paint over with white gel polish, cure, then remove the tape immediately after curing. Clean the edges with a brush and gel cleanser, then top coat glossy. If the white looks uneven, add a second thin white layer only on the taped stripe area.
Press tape down with a silicone tool or the back of a manicure stick so it seals to square edges.
Don’t remove tape while the gel is still wet; it smears and ruins the sharp line.
13. Blue Ombré with Clear Cuticle Space
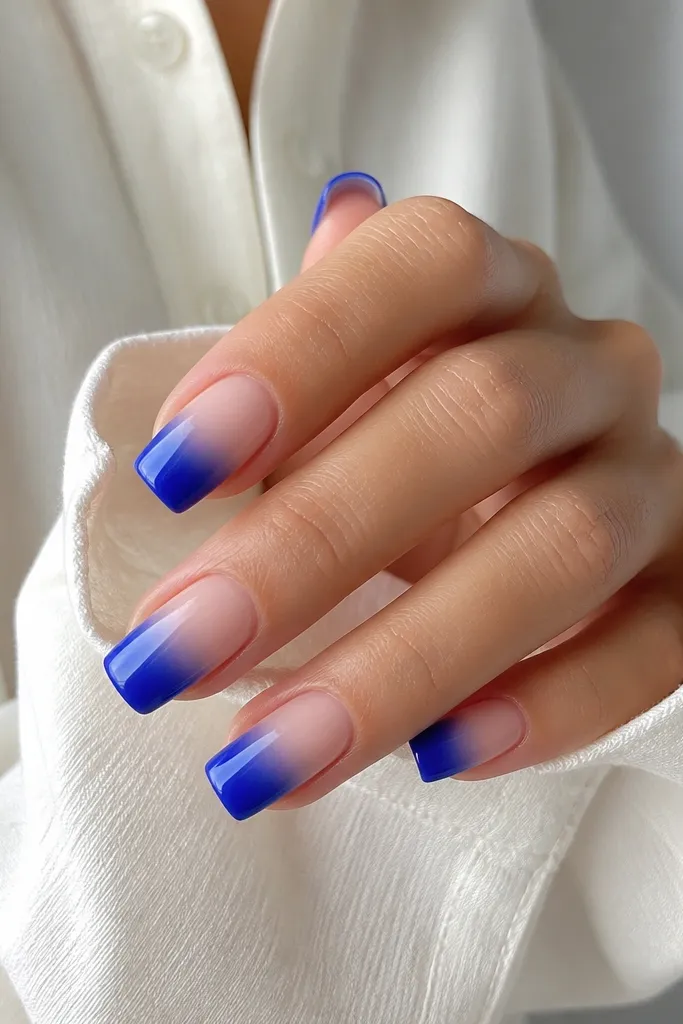
This is the ombré version that looks professional because it respects your cuticle area. By leaving a clear space near the cuticle, the design looks clean even if your natural nail grows out a little. The fade from transparent to royal blue looks like a sunlit shadow, which reads very summer. It flatters short squares because the clear cuticle area makes nails look longer. I wear this when I want blue but I don’t want to do detailed art every time.
Apply a clear or sheer nude base and cure. Use a makeup sponge to apply royal blue starting at about halfway down the nail, fading upward so the center blends softly. Leave the top 1-2 mm near the cuticle untouched so it stays clear. Cure, then apply a glossy top coat and cap the tip with a thin extra layer of blue gel if the ombré looks too light at the end. Clean around the cuticle area so the clear space stays sharp.
Angle the sponge so the fade starts lower on the nail — it keeps the cuticle space crisp.
Don’t blend too high; it removes the clear cuticle space and makes it look messy.
14. Turquoise Micro Tips with Nude Base
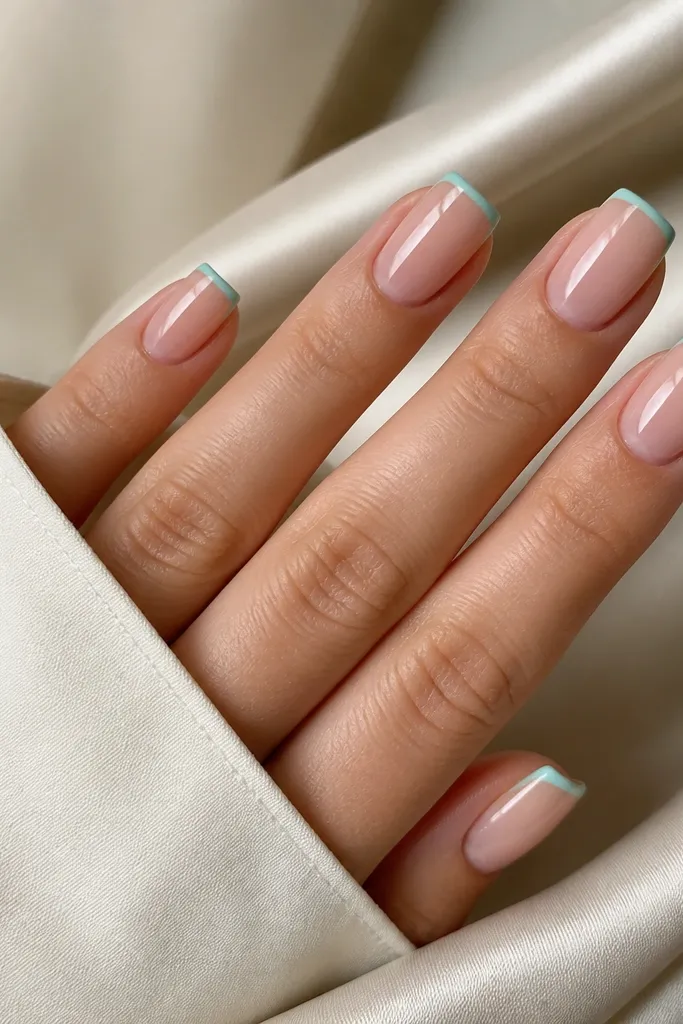
Micro tips are simple, but they look insanely polished on square nails because the tip is where the shape is most visible. Turquoise has that “pool day” energy, and the nude base keeps it classy. This is perfect if you want blue nails that still look natural for work or family events. It flatters all skin tones, especially if you pick a turquoise that’s slightly green — it brightens the hands. I do this when I’m traveling and don’t want to worry about tiny details chipping.
Start with two coats of sheer nude gel and cure. Using a striping brush, paint a thin turquoise line across the very tip, keeping it about 1-1.5 mm thick. Then connect the line to the sidewalls with a clean, straight edge so the tip looks square. Cure and inspect from the side — the turquoise should sit smoothly on top of the nude. Finish with glossy top coat and wipe sidewalls with a cleanup brush to keep the micro tip crisp.
Editor's noteIf you’re nervous, use a tiny piece of tape to mask the nude area before painting the turquoise tip.
Watch outDon’t make the turquoise tip too thick — thick tips look like a grown-out French manicure.
15. Royal Blue with White Polka Dot Accent Nail
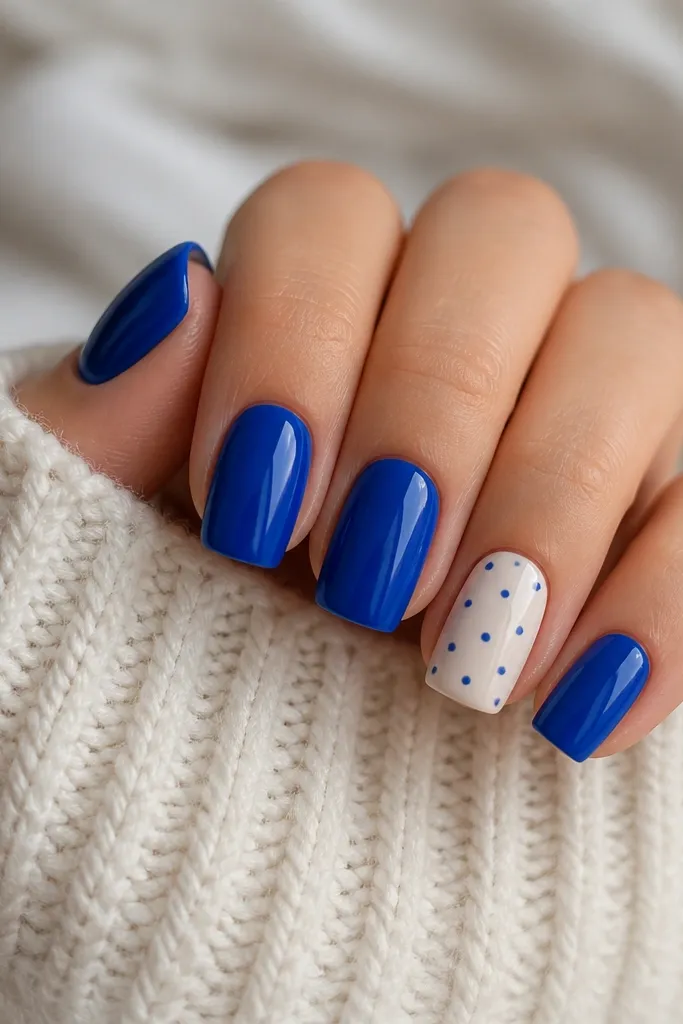
Polka dots in tiny sizes look cute without turning childish, and the base swap (white on the accent nail) makes the dots pop. Royal blue is bold, so the white background keeps it from feeling heavy. Square tips give the dots a structured layout, especially when the dots are evenly spaced. This set looks great on hands with medium nail beds because the white accent makes the nail look longer. I wear it for summer parties when I want something fun but still clean and wearable.
Paint four nails royal blue in two coats and cure. On the ring finger, paint milky white and cure. With a dotting tool, add small royal blue dots starting near the center and working outward in a loose oval pattern. Cure after the dots dry/settle, then top coat glossy on all nails. If the dots sink slightly, add a second top coat layer for a smoother, glassy look.
Use a dotting tool tip size that makes dots about the width of a pencil eraser — too small disappears, too big looks cartoonish.
Avoid random dot sizes; uneven spacing looks messy on square nails.
16. Blue Lagoon Jelly with Embedded Sea-Glass Confetti
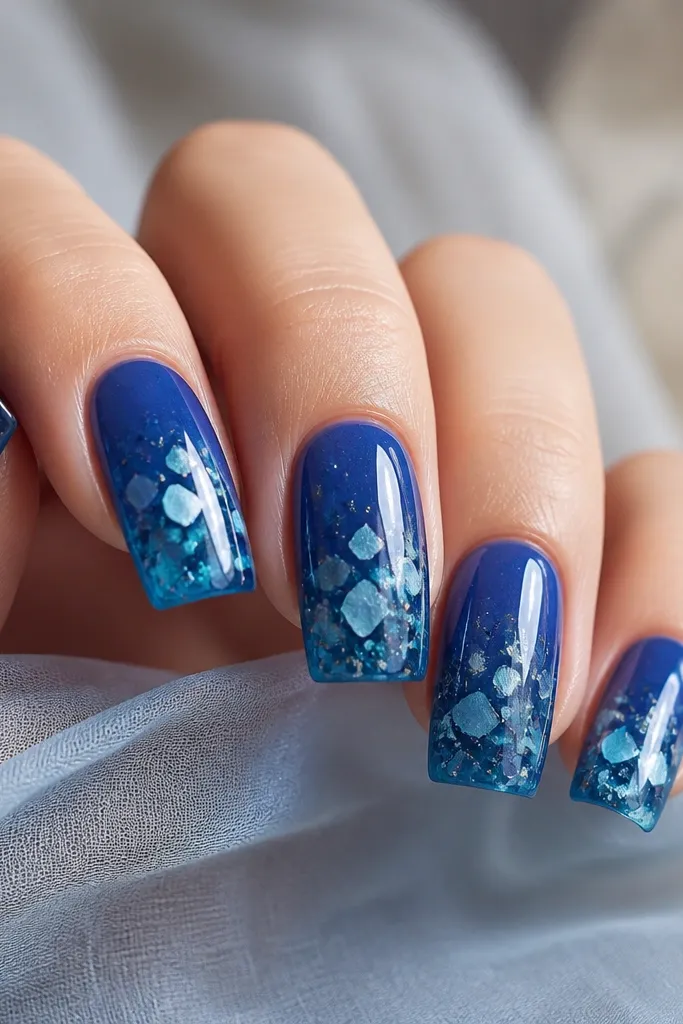
This is the “looks like candy glass” blue set that gets compliments because it looks dimensional. Jelly gel gives that depth, and embedded confetti makes it look like you trapped tiny pieces of beach glass inside. Square nails make the embedded pieces look intentional because the edges are clean and the layers don’t smear. It flatters short squares well because the jelly adds height without needing long length. I wear this for vacation photos and nighttime dinners when you want your nails to catch light in every frame.
Apply a sheer base and cure. Mix or apply a deep blue jelly gel layer, leaving it slightly thicker near the center. Place sea-glass confetti pieces with tweezers, then gently press them down so they sit under the surface rather than on top. Cure, then add one more thin jelly layer over the top to seal the confetti and smooth any bumps. Finish with glossy top coat and cap the free edge so the confetti doesn’t snag.
Press confetti in with a silicone tool — your nails stay smoother and the pieces don’t stick out.
Don’t skip the sealing jelly layer; exposed confetti catches on hair and clothes.
17. Iced Blue French with Ultra-Thin White Border
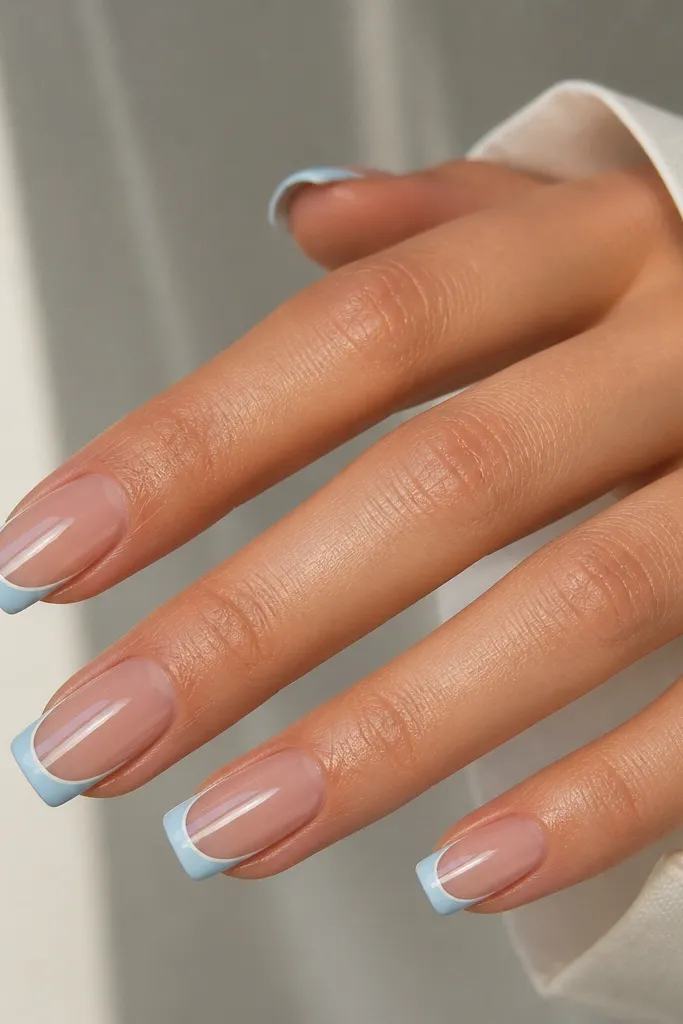
A French tip is classic, but iced blue keeps it summer and fresh. The ultra-thin white border is what makes it look expensive; it creates a clean separation that square nails highlight. This flatters hands because the nude base keeps the nail bed looking longer, and the tip color stays light instead of heavy. It looks great on both cool and warm undertones when you choose an iced blue that leans slightly gray or periwinkle. I do this for weddings, beach events, and anytime I need my nails to look neat in close-up photos.
Start with a nude sheer base and cure. Use a French guide sticker or tape to mask the tip, then paint iced blue and cure. Remove the guide and immediately add a razor-thin white border along the edge using a striping brush. Cure again and apply glossy top coat. For the crispest look, cap the tip edge with a thin clear gel so the border doesn’t feel raised.
Editor's noteWhite border lines look best when you paint them after the blue cures — you get a straighter edge.
Watch outDon’t make the French curve too high on square nails; it shortens the look.
18. Blue Watercolor Wash with White Splash on One Nail
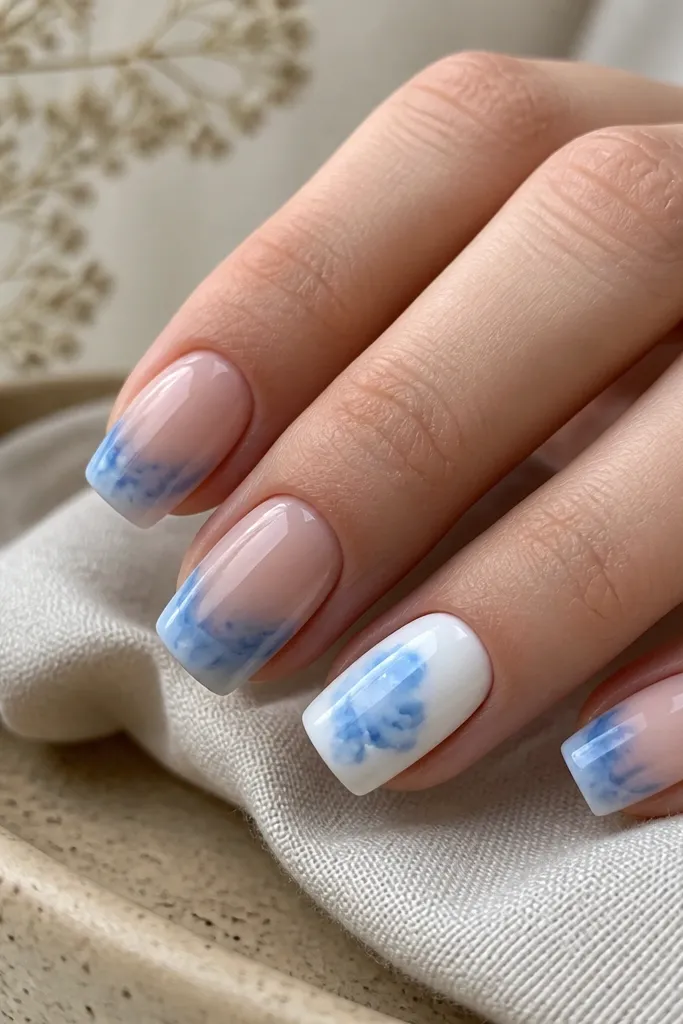
Watercolor wash nails look like sunlit fabric, and they’re forgiving on square edges because the art is soft. The key is keeping the wash light and letting the nude base show through, so it doesn’t look like a smudge. I add white splash only on one nail so the set stays balanced and doesn’t look like paint accidents. This flatters hands because the nude base brightens the nail bed and the blue stays airy. I wear this when I’m tired of solid colors but still want something summer that doesn’t require perfect lines.
Paint all nails with a sheer nude base and cure. For the watercolor wash, use a thin brush to dab watery blue gel or diluted gel polish in a few strokes across the center, then blend gently into the nude. Cure. On the accent nail, paint a milky white base, then add blue watercolor splashes with a small brush and tap off excess. Add tiny white splatters with a dotting tool, cure, and seal with glossy top coat.
Editor's noteDilute gel polish with clear gel in small amounts so you keep control of how transparent the wash looks.
Watch outAvoid full coverage watercolor; it turns into streaky solid color on square tips.
19. Midnight Blue with Light Blue Outline Skins
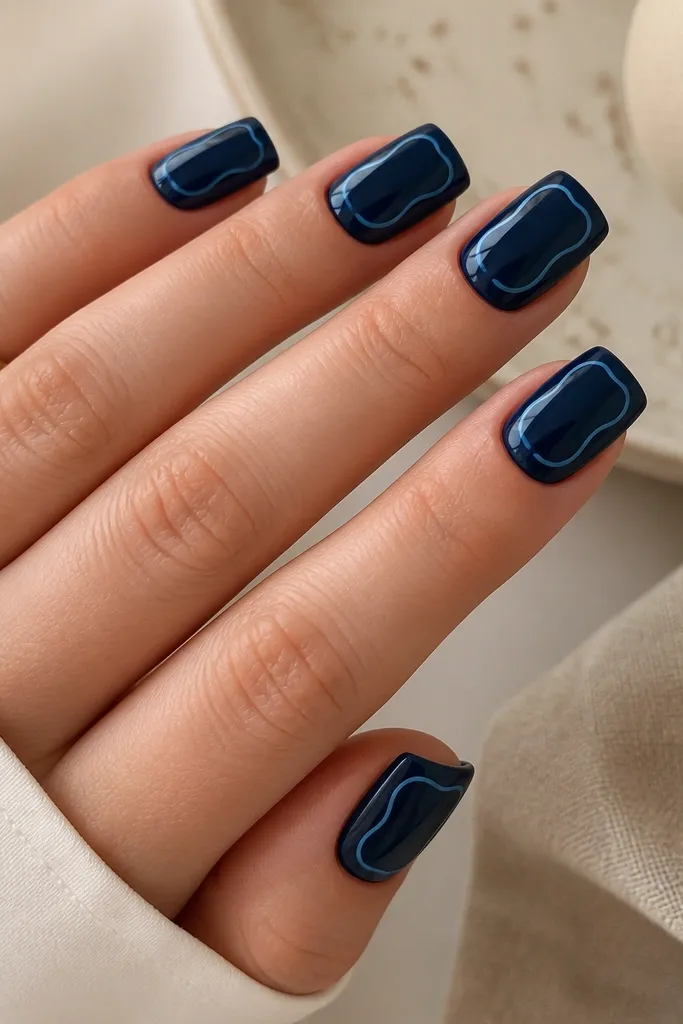
This set looks like nail art you’d see in a salon, but it’s actually just clean line work. Midnight blue gives you depth, and the light blue outline creates a framed effect that makes square nails look designed rather than painted. It flatters hands because the outline pulls the eye toward the center of the nail bed. On fair skin it looks crisp and graphic; on deeper skin it still pops because the light outline has enough contrast. I wear this when I want blue that feels evening-ready even in summer heat.
Start with two coats of midnight blue and cure. Use a fine liner brush with light blue gel to draw a curved outline shape across the center of the nail, leaving space between the outline and the sidewalls. Think of it like a soft oval frame, not a full border. Cure and repeat on each nail, keeping the outline thickness consistent. Seal with glossy top coat and check the corners — if the outline crosses the edge, wipe it back with a cleanup brush.
Editor's noteMake the outline slightly higher on the ring finger so the set looks intentional from a distance.
Watch outDon’t make the outline too wide; thick frames look like amateur nail stickers.
20. Blue Floral French Tips with Tiny Vines
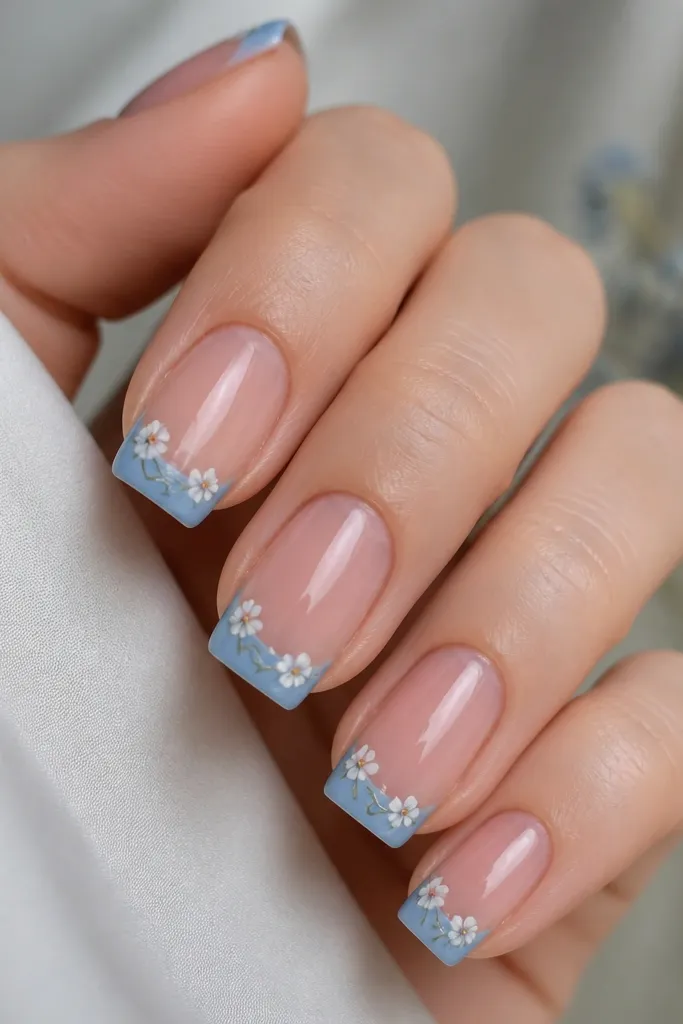
This is for when you want something that looks like nail art but still follows a clean French structure. The blue French tip is the anchor, and the tiny florals and vines add that summer garden feeling without covering the whole nail. Square nails make the tip art look crisp since the tip area is flat and defined. It flatters hands with slender nail beds because the nude base keeps everything light. I do this when I’m wearing dresses with floral prints or when my toes have a matching blue.
Apply a nude sheer base and cure. Mask the tip with a French guide and paint the tip blue, then cure. On the blue tip area, use a tiny dotting tool to place small white flower centers and petals, then add a couple of thin vine lines using a liner brush. Cure, then top coat glossy and cap the tip so the art stays smooth. Keep the florals small — one or two per nail — so the square edges stay visible.
Use a nail art brush with a sharp point for vines; blunt brushes make the lines look fuzzy.
Avoid putting full flowers across the entire nail — it makes square tips look busy.



