
1. Neon jelly square with a clean white core
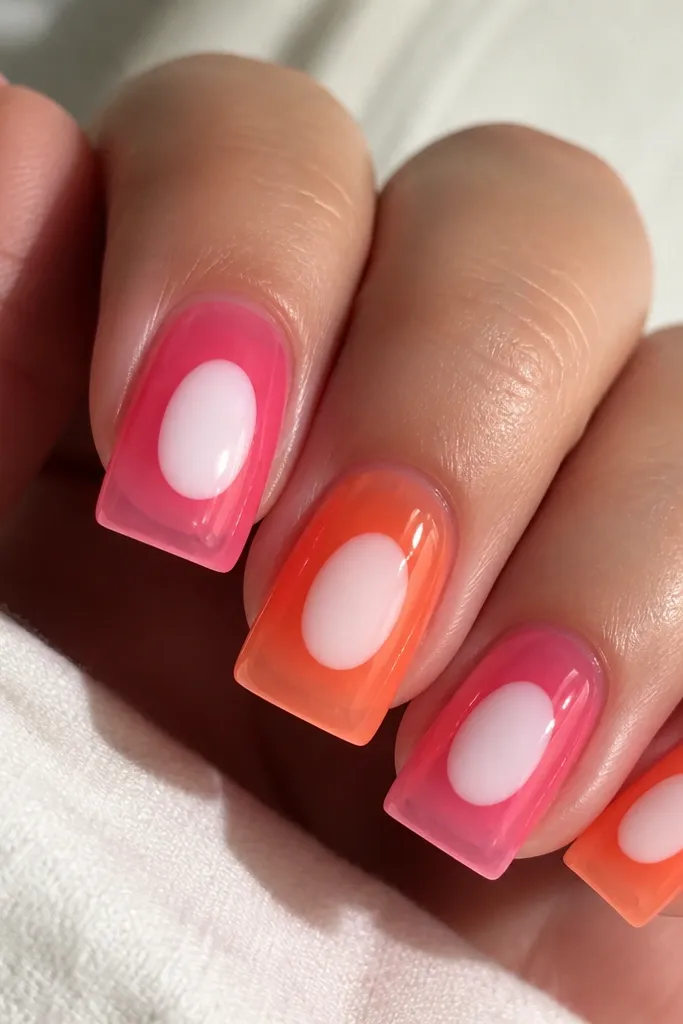
This look is neon without the harsh “painted on” feeling because the jelly base lets your nail bed color peek through. I like neon pink jelly paired with a warm orange jelly on alternating nails, then a solid white core that sits in the center — it makes the neon read brighter in sunlight. Square nails make the translucence look intentional because the flat tip reflects light cleanly. It flatters fair and medium skin tones especially well, and it looks amazing with gold rings because the white core adds contrast. For short-to-medium lengths, it also avoids that bulky vibe you get with thick opaque neon.
Start by prepping and filing your square shape so the tip is flat and corners are crisp. Apply a sheer milky base thin enough to see your natural nail through, then cure. Paint jelly neon layers in two coats, keeping the sidewalls neat so it doesn’t flood the corners; cure between coats. Add the white core as a small oval or rounded rectangle centered on the nail plate, then seal with a glossy top coat in one thin layer, pressing lightly at each corner.
Use a slightly thicker top coat only over the white core so it looks glassy instead of matte.
Don’t let jelly flood the corners — it lifts fast and makes the square edges look rounded.
2. Milky peach nude square with micro-French at the tip
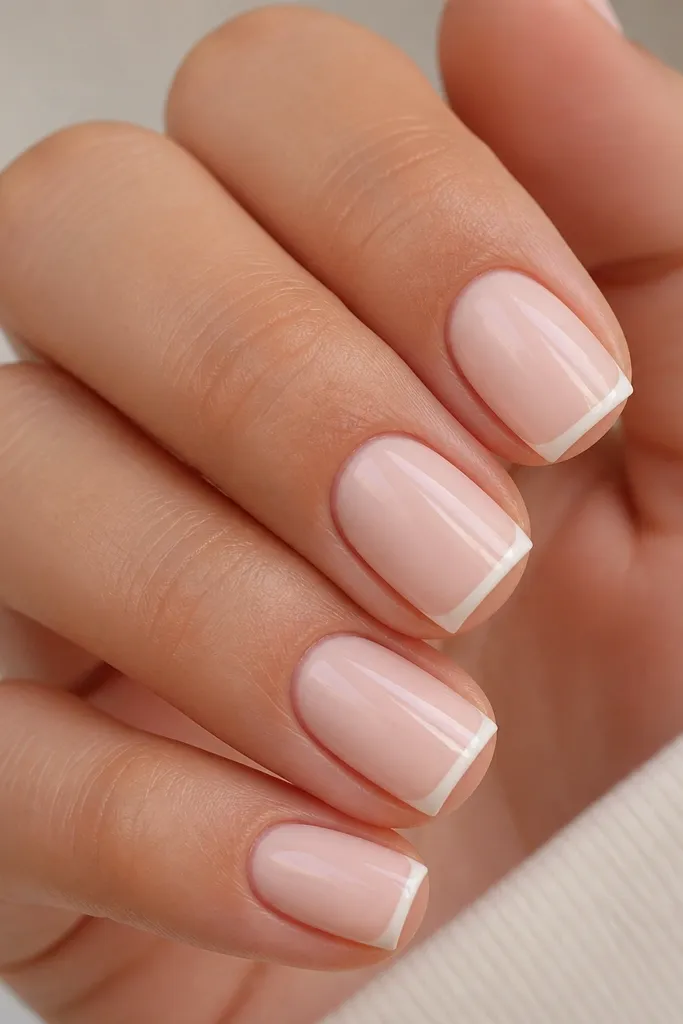
This is the classic square look that still feels fresh because the French line is micro — it doesn’t add bulk, and it keeps the hand looking longer. I use a milky peach base (not fully opaque) so the nail bed looks healthy, then a super-thin white line that hugs the flat tip. On square nails, micro-French draws attention to the shape rather than the length, which is perfect if your nails are naturally short. It flatters warm undertones and also looks good on cool skin tones when the peach leans slightly rosy instead of yellow. This one is my go-to for summer weddings and office days because it looks polished even with minimal jewelry.
File your square tips flat and keep the free edge around 2 mm, then push back cuticles and remove shine. Apply two thin coats of milky peach builder or polish, curing each layer until it looks even but still slightly translucent. Use a fine striping brush to paint a micro French line about 1 mm from the tip edge, then cap the edge with a tiny amount of top coat. Finish with one glossy top coat and clean up the cuticle line with a brush dipped in acetone-free remover.
If your French line wobbles, paint the line in two passes — first a guide line, then a second pass to thicken it slightly.
Don’t make the French too wide; wide tips on square nails can look like a thick sticker.
3. Pink-to-peach chrome gradient square
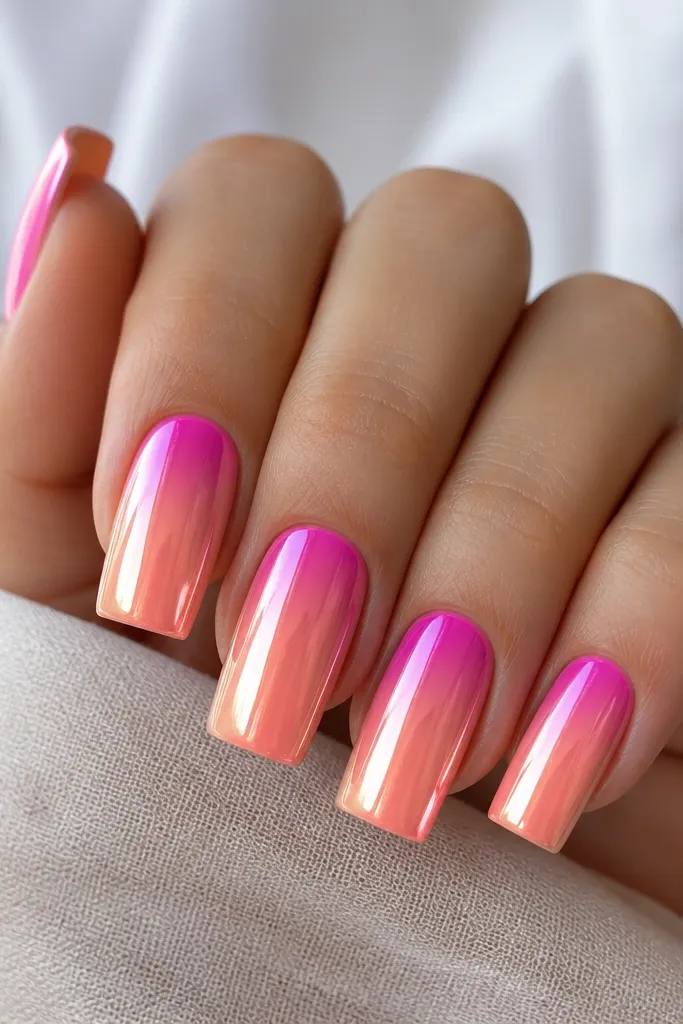
Build a smooth base first with a thin layer of builder gel or a solid nude gel, cured and filed to a glassy surface. Apply a light pink gel at the cuticle and feather it toward the center, then cure. Buff the surface very lightly, then apply chrome powder by pressing (not rubbing) so the pigment lays down evenly; wipe off excess. Finish with a glossy top coat over the gradient, focusing on sealing the flat edge and both side corners.
Chrome gradient is the summer “wow” that still reads wearable because the colors are close to your skin tone. I like pink at the cuticle because it makes your hands look awake, then peach at the tip keeps it warm and not too Barbie. On square nails, the flat tip makes chrome reflect in a clean stripe, so you get a crisp, expensive look. This works best when you keep the nail surface ultra-smooth; any ridges show up instantly with chrome. It flatters most undertones, but if you run very cool, swap peach for a soft apricot with a pink base so it doesn’t go orange.
Watch outDon’t rush filing — chrome will highlight every dip and bump.
Editor's noteDo a quick test swipe on the back of your hand to match the chrome shade before you commit to the nails.
4. Blue-lilac ombré square with sheer jelly top
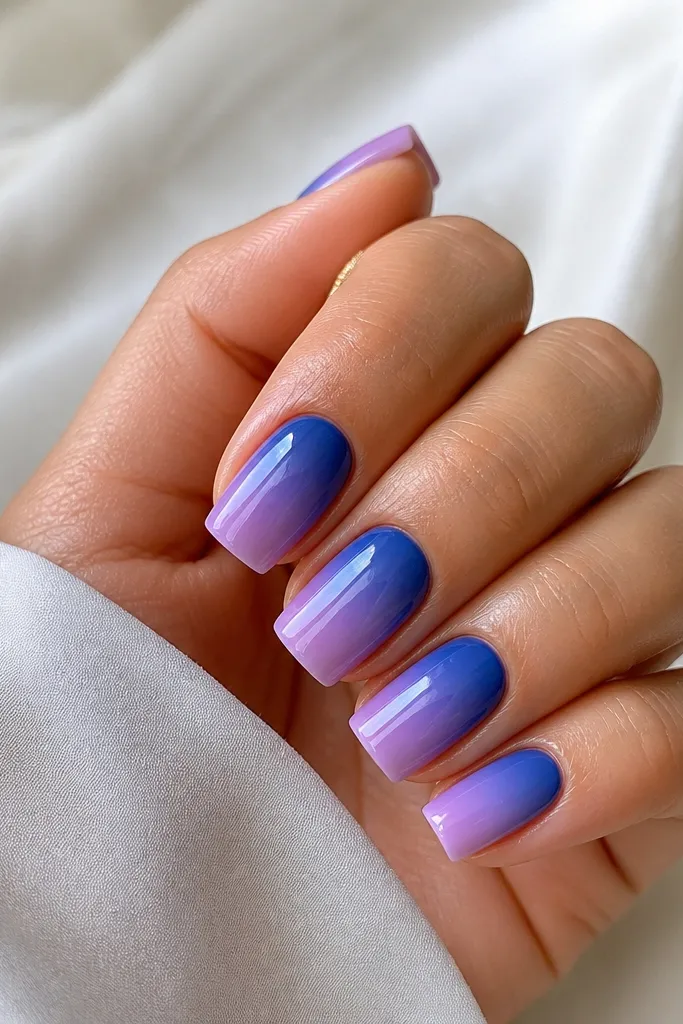
Start with a sheer base coat so the gradient looks like it’s floating, then cure. Apply deep blue gel at the cuticle in a thin band, then use a makeup sponge or ombré brush to feather the color toward the center, curing after you like the blend. Add lilac at the mid-to-tip area and feather again so the transition stays smooth; cure. Seal with a jelly-gloss top coat in one layer, then cap the free edge carefully.
This one looks like summer water — cool, airy, and a little dreamy without going full pastel baby. The trick is keeping the ombré sheer so the nail bed shows through, then topping it with a jelly-style glossy coat. I do a deep blue near the cuticle, then fade into lilac and leave the tip slightly lighter so the flat edge doesn’t look heavy. Square nails hold gradients really well because the corners frame the fade. It flatters fair to medium skin tones, especially with silver jewelry, and it’s great if you want something softer than neon but still clearly “trend.”
Watch outDon’t make the ombré opaque — opaque gradients on square tips look thick and less expensive.
Editor's noteFor a cleaner blend, wipe your sponge between nails so you don’t drag blue into lilac too hard.
5. Geometric negative-space square with black grid
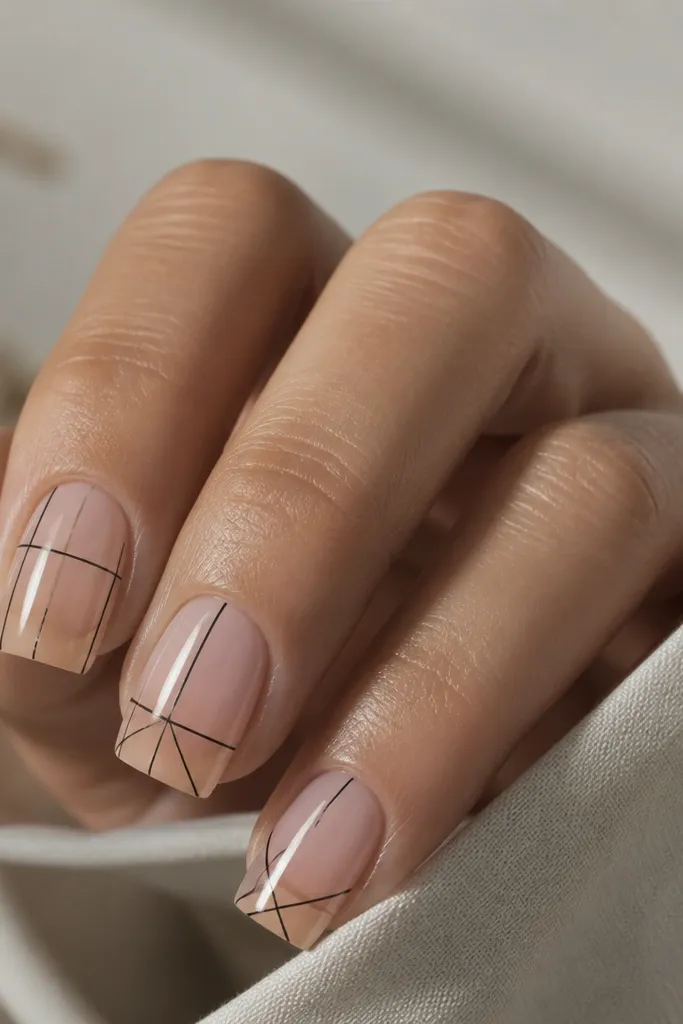
Apply a sheer nude base and cure, then lightly buff so the surface is smooth. Use striping tape or a thin liner brush to place straight black lines; I start with a vertical line down the center, then add two diagonals. Keep line thickness consistent, around the width of a fine marker, and leave a small gap at the cuticle to preserve negative space. Cure each nail, then seal with a glossy top coat that doesn’t smear — thin coats beat thick coats with geometric art.
Negative space is where square nails look sharp instead of busy. I use a nude sheer base that matches your skin tone, then paint a black grid that stops before the cuticle — that keeps it airy. The grid works because your eye reads the geometry across the flat tip, and the bare sections make the design feel light. This looks best on medium-length square nails where you have enough room for lines to breathe. It flatters warm and cool undertones because black anchors everything, and it looks especially good with bracelets that stack on the wrist. If you hate glitter but want a statement, this is it.
Watch outDon’t over-thicken the lines; thick black on square nails can look like nail wrap graphics.
Editor's noteUse striping tape for the first lines, then remove it before top coat so the edges stay perfectly crisp.
6. Soft-sun French square with warm beige and tiny dots
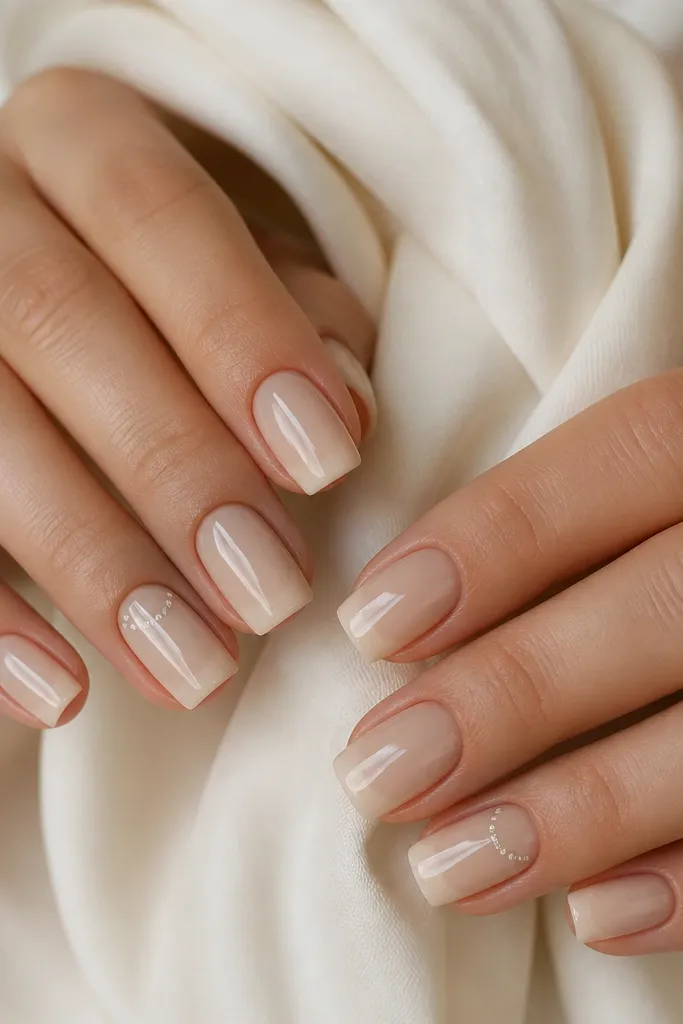
Paint or build a warm beige base in two thin coats, curing each. For the French part, use a makeup sponge to dab a lighter beige at the tip and blend upward a few millimeters, then cure. Add a tiny dot row with a dotting tool using white gel, placing the dots just above the tip edge so they don’t crowd the center. Finish with one glossy top coat and cap the free edge so the tip stays smooth.
This is a French that feels like late afternoon light — warm, subtle, and still “designed.” I start with a warm beige base that’s not too yellow, then blend a lighter beige at the tip so it looks like a soft shadow rather than a hard line. On one or two accent nails, I add a tiny dot row at the smile line to make it summer without turning into cartoon art. Square nails help here because the flat tip gives the fade a clean boundary. It flatters almost everyone, but it’s especially pretty on deeper skin tones because warm beige reads luxe instead of chalky. For daily wear, it’s the easiest way to look styled without constantly redoing neon.
Watch outDon’t place dots too close to the cuticle; it makes the nails look shorter.
Editor's noteIf your dots look messy, practice the spacing on a paper swatch first — dotting is all about rhythm.
7. Tangerine satin solid square with glossy edge seal
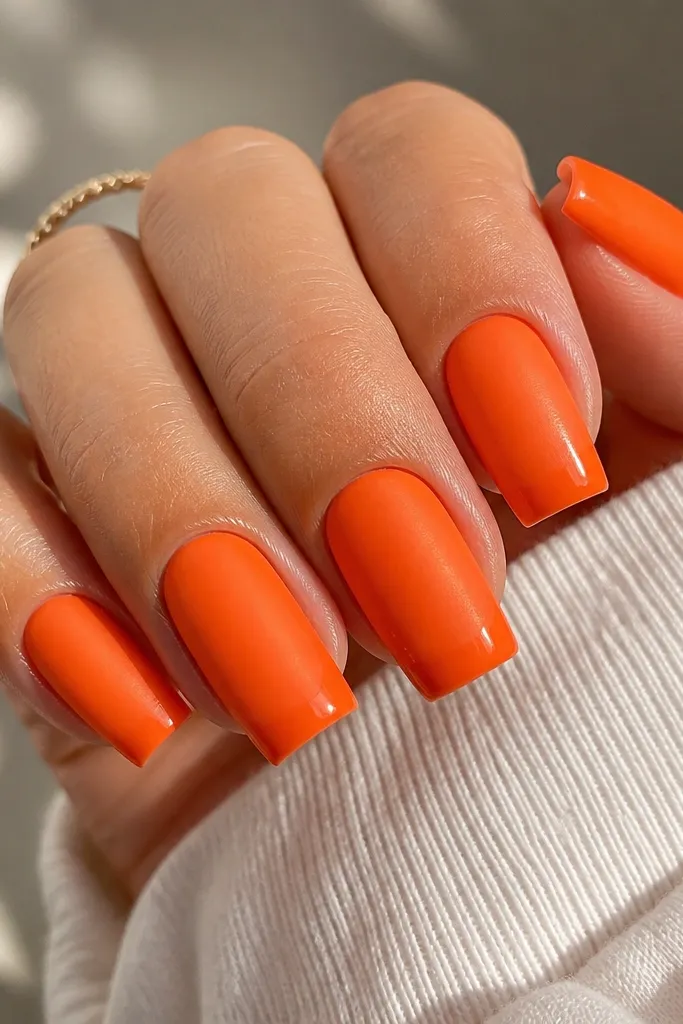
A solid color is underrated for summer because it makes your nails look clean even when the weather is messy. Tangerine satin is the move when you want bright without going neon — it reads juicy in daylight and not harsh indoors. I keep the satin finish on the main surface, then seal the very top with a glossy coat only at the flat tip and edges so it catches light. Square nails look especially good with satin because the flat plane holds the color evenly. This flatters light to medium skin tones and looks great with warm metals like rose gold. If you wear orange lipstick, this nail color matches without clashing.
Start with a smooth base and cure fully. Apply two coats of tangerine satin gel or polish, keeping coverage even and avoiding flooding the corners. Cure, then use a glossy top coat only on the top surface in a thin layer, focusing on the flat tip edge so it looks like a polished border. Clean the sidewalls and cure again, then wipe with cleanser to remove tackiness.
Use a small amount of glossy top coat — too much turns satin into dull gloss and kills the contrast.
Don’t skip sealing the side corners; satin can chip and look ragged fast there.
8. Classic cool nude square with a whisper of shimmer
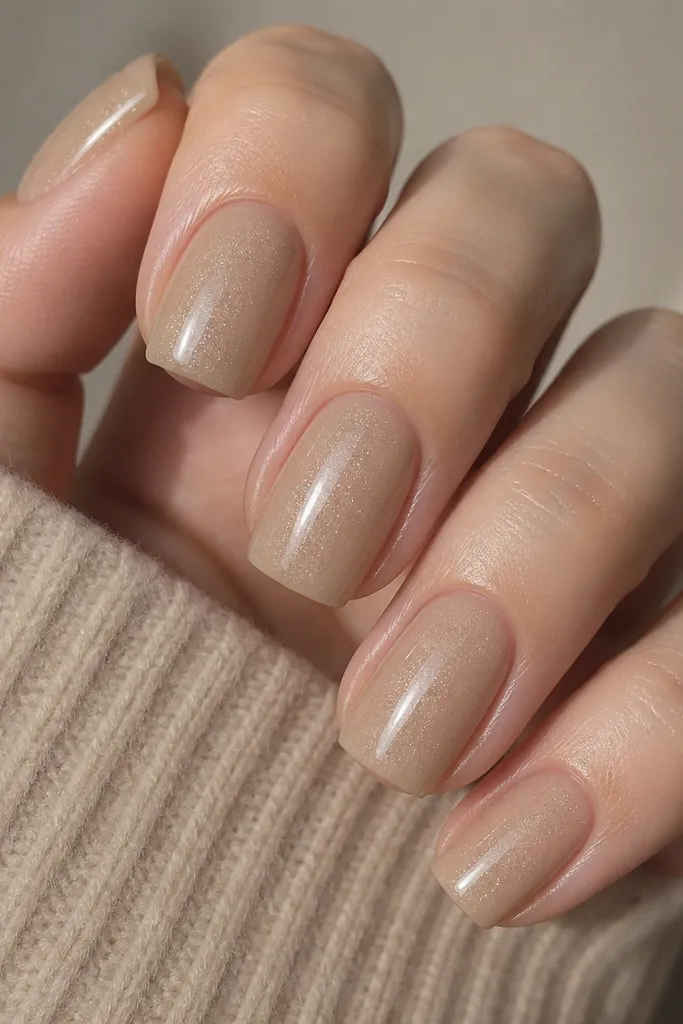
Apply a thin nude base gel and cure, then add a second thin coat for even opacity. Mix or apply a micro shimmer gel with a soft brush so it stays concentrated in the center, not all over the cuticle. Cure again, then finish with a full glossy top coat that levels the surface. Use a small detail brush with remover to sharpen the cuticle line before curing, so the set looks salon-clean.
If you want “classic” that doesn’t look boring, this is it. Cool nude hides imperfections and makes your nails look healthy, and the whisper shimmer stops it from looking flat in photos. I use a beige-nude that leans slightly pink-gray, then add a micro shimmer gel only where light hits — usually the center and just a touch near the cuticle. Square nails make this look intentional because the flat tip reflects light evenly. It flatters cool undertones beautifully and also works on neutral skin when the nude isn’t too yellow. This is the set I wear when I don’t want to think about my nails all week.
Watch outDon’t use chunky glitter in a classic set; it makes the nails look uneven at the edges.
Editor's notePick a nude that matches your cuticle color — it should look like “your nail, but better.”
9. Shell-and-sparkle square with tiny studs (vacation edition)
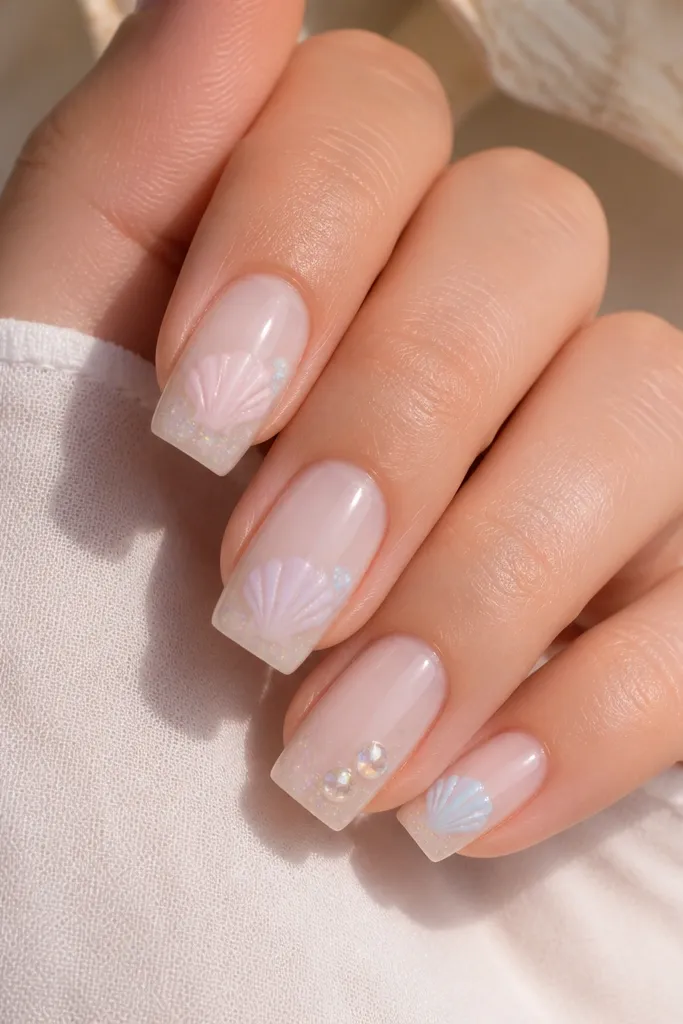
Apply a sheer milky base gel and cure, then seal the surface with a thin top coat layer so the decals stick smoothly. Place shell decals on accent nails and cure. Add tiny iridescent studs with a gel adhesive, pressing each stud down and curing, then use a small brush to apply a thin layer of builder gel over the stud so it stays low. Finish with glossy top coat and cap the free edge, especially where the stud sits.
3D details can look cheap fast, but tiny shell studs work when you keep them small and place them low on the nail. I use a sheer milky base so the shells look like they’re sitting on top of glass, then add pastel shell decals or hand-painted shell shapes on two nails. The studs are iridescent and only on the ring finger, with the rest staying mostly flat so the set doesn’t feel bulky. Square nails are great for this because the flat surface gives you room to keep the details neat and the corners from catching. It flatters all skin tones, but it looks extra good with light blues, white, and linen outfits. This is a “vacation nails” set that still looks classy in daylight.
Watch outDon’t add big charms on square tips; they catch on fabric and pop off early.
Editor's noteIf you feel the stud with your fingertip, it’s too high — file the top lightly before final top coat.



