
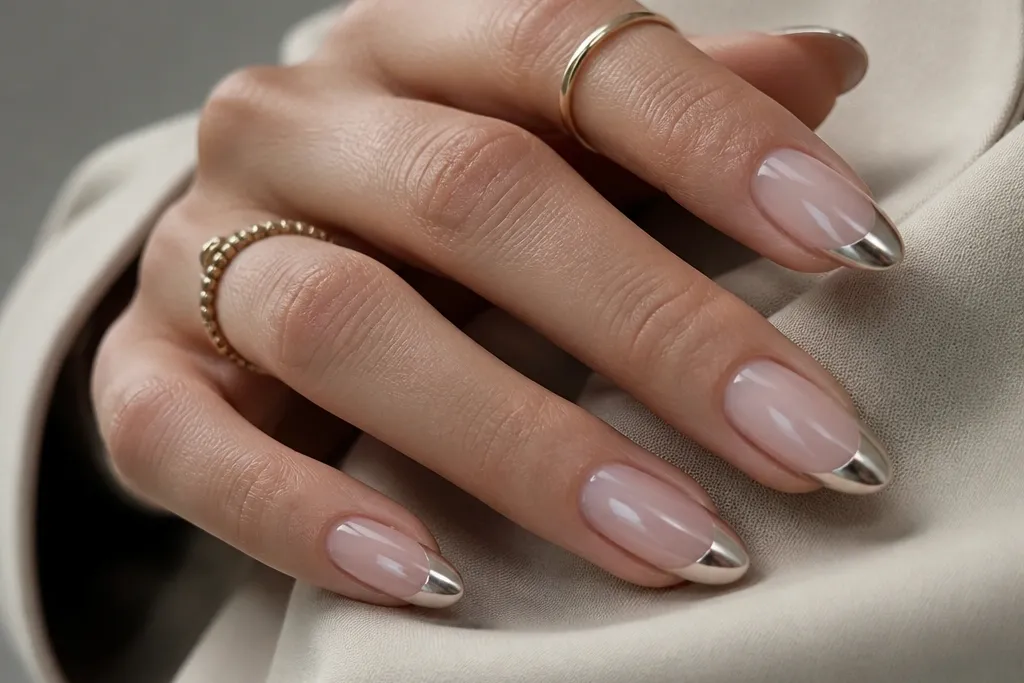
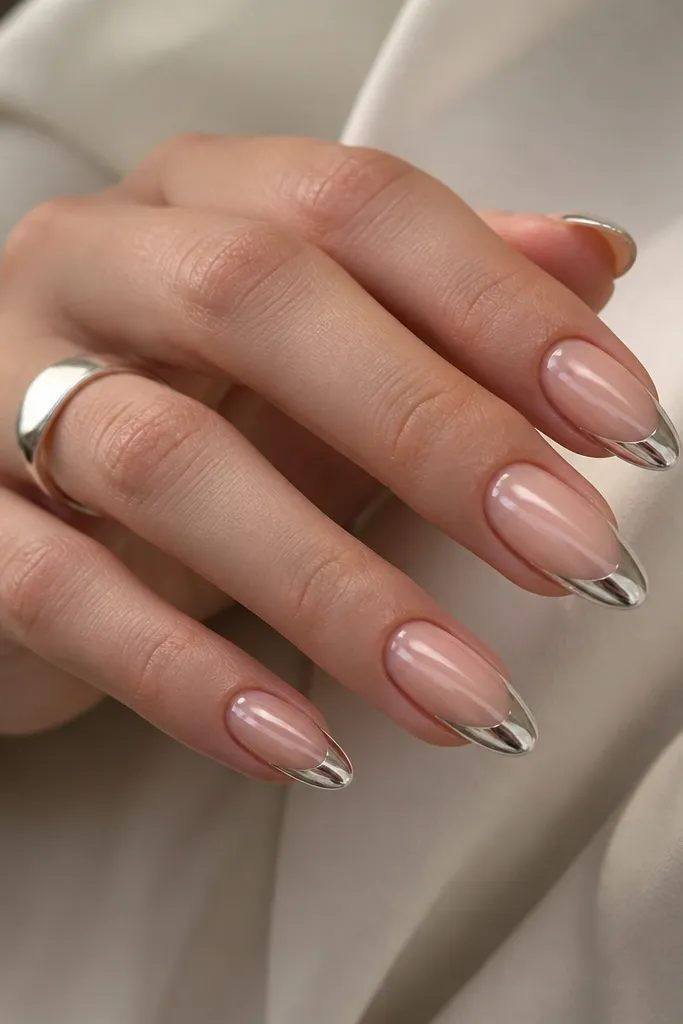
1. Classic nude almond with silver chrome smile arc
This is the chrome French set that always looks polished because the nude base blends with your nail bed and the silver chrome only lives on the smile line. I like it on fair to medium skin tones because the nude reads clean and the silver looks crisp instead of muddy. The almond shape makes the nail look longer without needing a super high French line. Wear it to work or events where you want shine, but not a full glitter situation.
Start by prepping and filing into a true almond: narrow the sides toward the tip and smooth the edge so it reflects light evenly. Apply two thin coats of sheer nude gel, curing fully between each coat. Place French guide strips slightly above the natural smile line so the arc sits centered - leave a tiny margin on both sides. Apply chrome gel only inside that arc, add silver chrome powder, then tap off the excess and seal with a glossy top coat.
Editor's noteAfter filing, wipe the nail with a lint-free pad soaked in cleanser and wait 30 seconds before chrome - it clings better when the surface is fully dry.
Watch outSkipping full cure on the nude base makes the chrome line lift or look patchy.
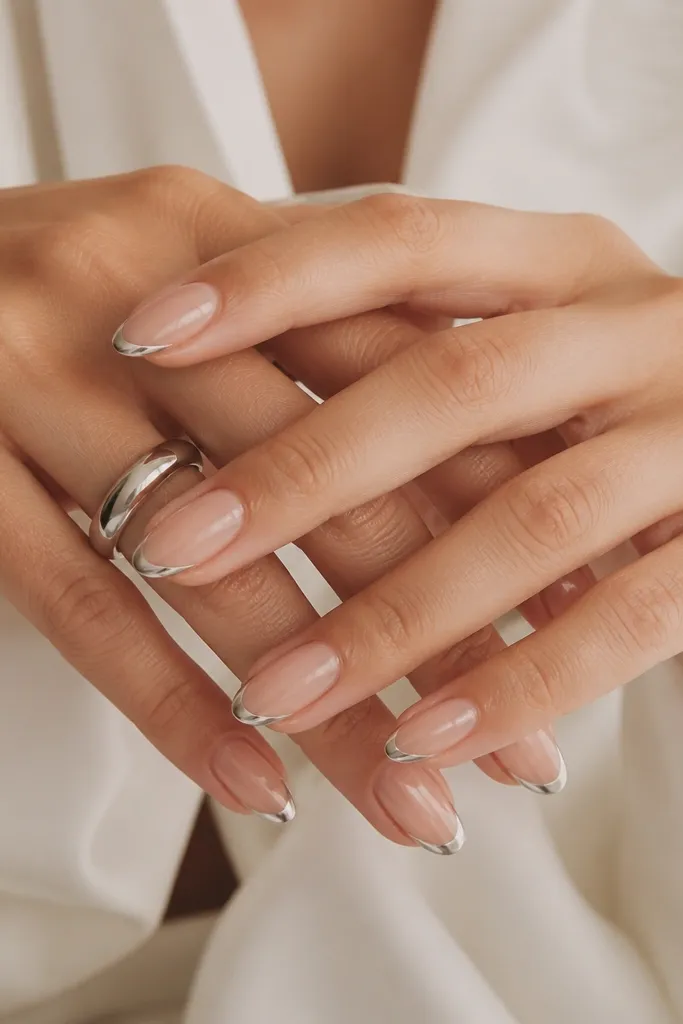
2. Milky nude base with silver chrome micro-French
Micro-French keeps the chrome feeling delicate. The milky nude base gives a soft glow that still lets the silver line look sharp, especially on medium-length almond nails. I recommend this for anyone who wants chrome but hates when it looks too heavy. It flatters shorter nail beds because the chrome line is thin and doesn't visually cut the nail in half.
Apply a milky nude builder or gel base in two thin coats, keeping the thickness even from cuticle to tip. Cure hard on each coat so the surface stays smooth. Use a fine striping brush to draw a thin arc at the tip edge - not too high, just where the nail starts to curve. Add chrome gel only along that arc, dust with silver chrome powder, then wipe and top coat all over for a glassy finish.
Editor's noteIf your smile line keeps wobbling, place a guide strip, draw the arc with a brush, then remove the strip before curing.
Watch outGoing too high with micro-chrome makes it look like a cap instead of a French line.
3. Sheer pink with rose gold chrome French and soft fade
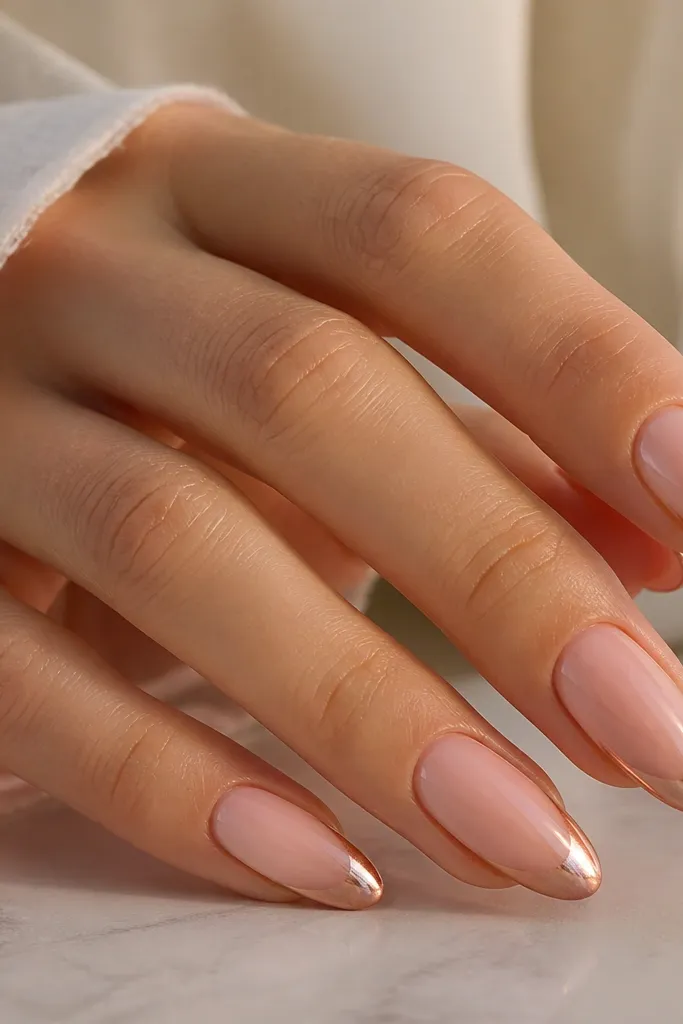
Rose gold chrome flatters warm undertones and makes almond nails look gentle instead of stark. The sheer pink base keeps it romantic, and the soft fade gives dimension when light hits from the side. I wear this when I want my nails to look "done" but still match blush makeup and gold jewelry. It also looks great on medium skin tones because the rose tone blends into the base instead of popping harshly.
Start with a sheer pink gel in two coats, then cure until fully firm. Draw your French arc with a striping brush using a thin layer of rose gold chrome gel - keep the curve slightly higher on the outer corners. Lightly blend the chrome gel inward by dragging the brush just once, then add rose gold chrome powder to the arc. Seal with glossy top coat, and cap the free edge so the chrome stays smooth.
Editor's noteUse rose gold chrome gel, not regular silver - the undertone matters for how the arc reads against pink.
Watch outOver-blending the chrome gel turns the French line blurry and loses the almond-friendly curve.
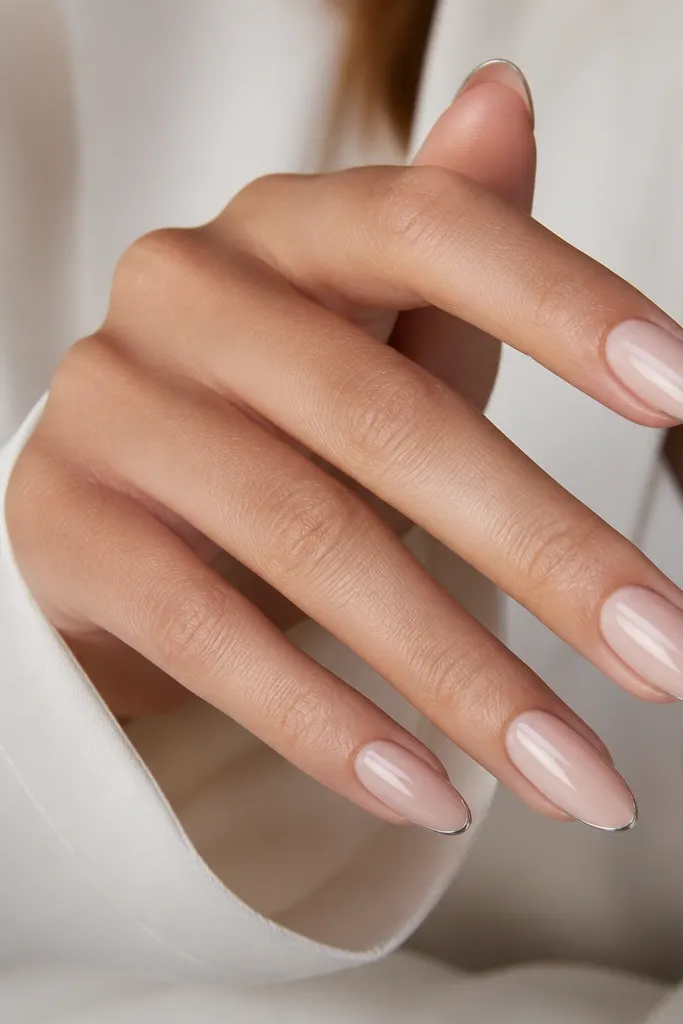
4. Clear base with chrome French on the top edge only
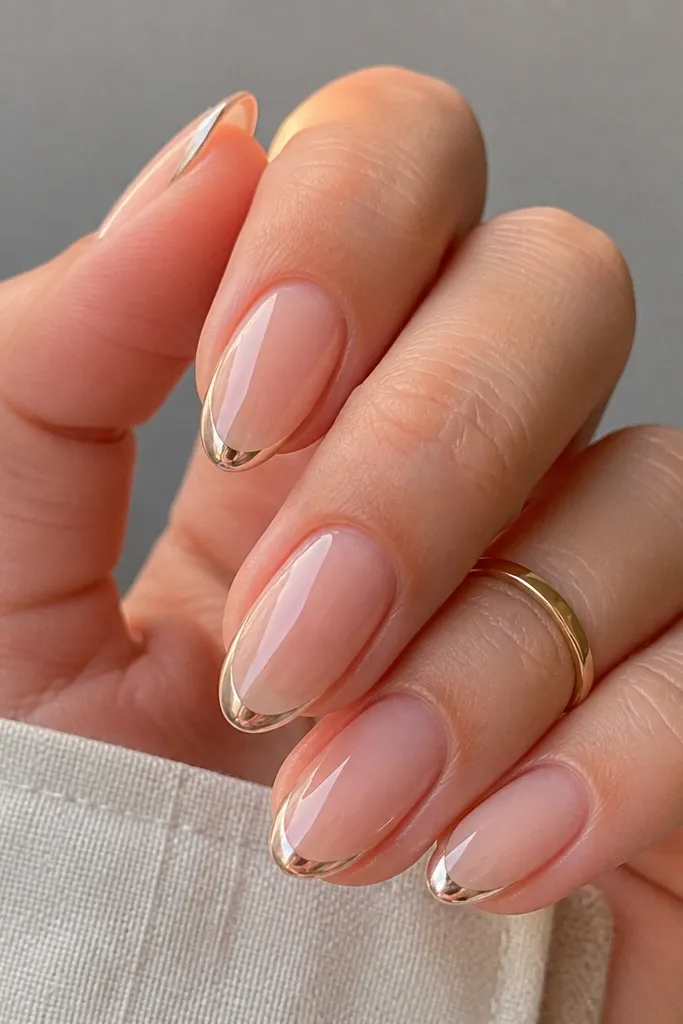
This design is for the "glass nails" look. A clear base makes the chrome feel like it's floating, and placing the chrome only on the top edge keeps the nail airy. It looks stunning on clean, short-to-medium almond shapes because it doesn't add bulk. I like it for summer because it pairs with bronzer and looks ultra sleek with minimal makeup.
Apply a clear builder gel or clear base gel in two thin coats, curing fully each time. Use a French guide sticker to map the smile arc, then remove it. Apply chrome gel only along the top edge of the arc, not underneath the whole smile - keep it like a thin ribbon. Dust with chrome powder, tap off, then top coat over the entire nail carefully so you don't smear the chrome ribbon.
Editor's noteIf you see chrome creeping, clean the brush and use a dry brush to pull excess gel away before curing.
Watch outDon't flood chrome gel across the whole smile or the clear base stops looking see-through.
5. White base with icy silver chrome French tips
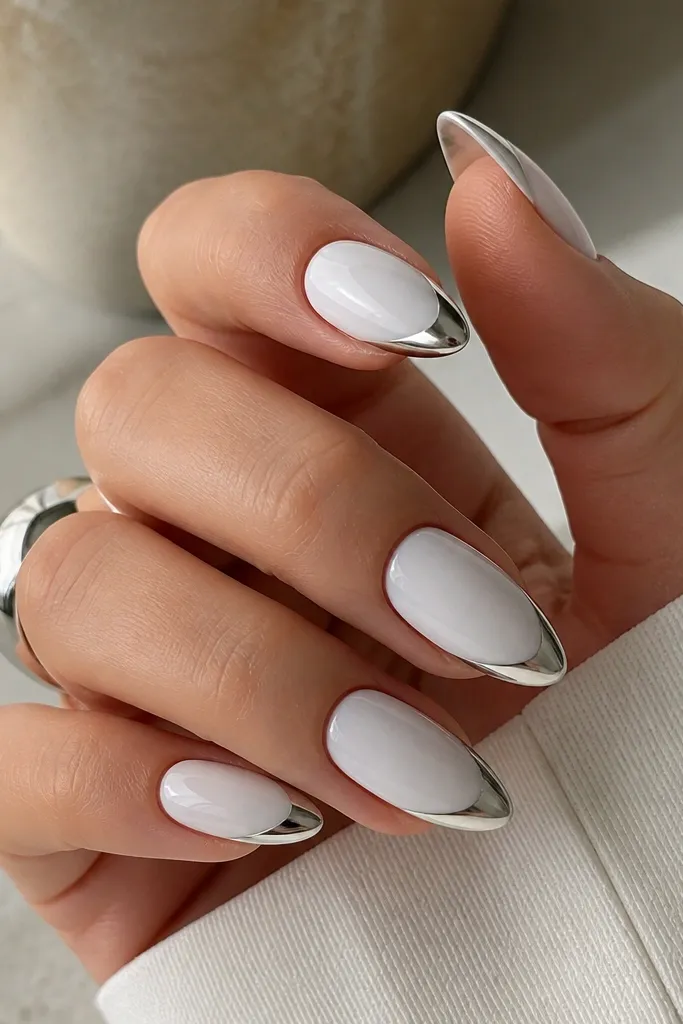
Opaque white under chrome makes the silver look bright and "cold," which is why this set photographs so clean. It's a strong choice for fair skin because the contrast is crisp, and it also looks good on deeper skin tones if you keep the white fully opaque (no streaks). The almond shape keeps it from looking like a square French manicure. This one fits bridal looks, holiday parties, and any time you want that high-contrast nail moment.
Start with a fully opaque white base in two coats, curing each coat thoroughly. File the surface smooth - any texture will show through the chrome reflect. Draw a classic French arc with a guide strip placed high enough to show the smile but low enough to keep the almond long. Apply icy silver chrome gel inside the arc, add chrome powder, then seal with a thick top coat for a smooth mirror finish.
Editor's noteUse a white that levels well. If your white self-levels poorly, apply thinner coats and build up rather than spreading one thick layer.
Watch outSkimping on white coverage makes the chrome look dull instead of icy.
6. Nude-to-mauve ombre base with silver chrome double line
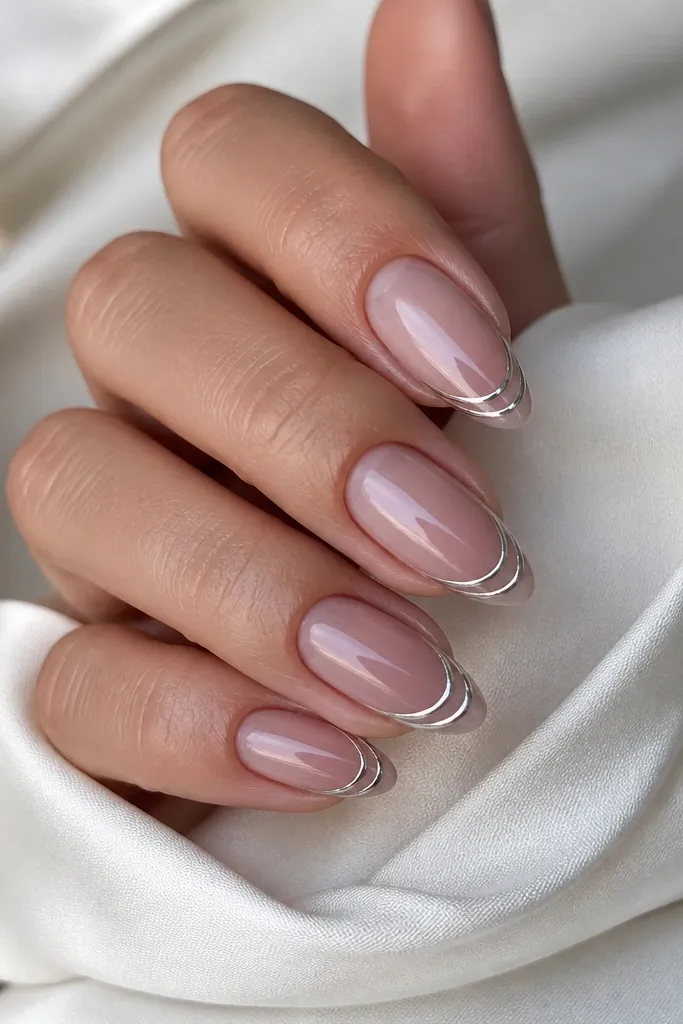
Double-line chrome looks fancy without going full chrome coverage. The nude-to-mauve ombre flatters a wide range of skin tones because it starts neutral and finishes in a soft color. I like the ombre because it makes the chrome feel designed, not pasted on. On almond nails, the two lines create a longer optical effect by guiding the eye down the nail.
Apply a nude base near the cuticle, then blend mauve toward the tip using a makeup sponge or a soft ombre brush. Cure the ombre layer, then smooth the surface with a light buff. Place a French guide and draw two arcs: one at the classic smile line and a second just slightly above it. Apply chrome gel to both arcs separately, dust silver chrome powder, then top coat and cap the free edge.
Editor's noteKeep the second chrome line thinner than the first so it reads like a highlight, not a second French tip.
Watch outCramming both lines too close makes the smile look messy under bright lighting.
7. Mocha brown base with silver chrome French and negative space center
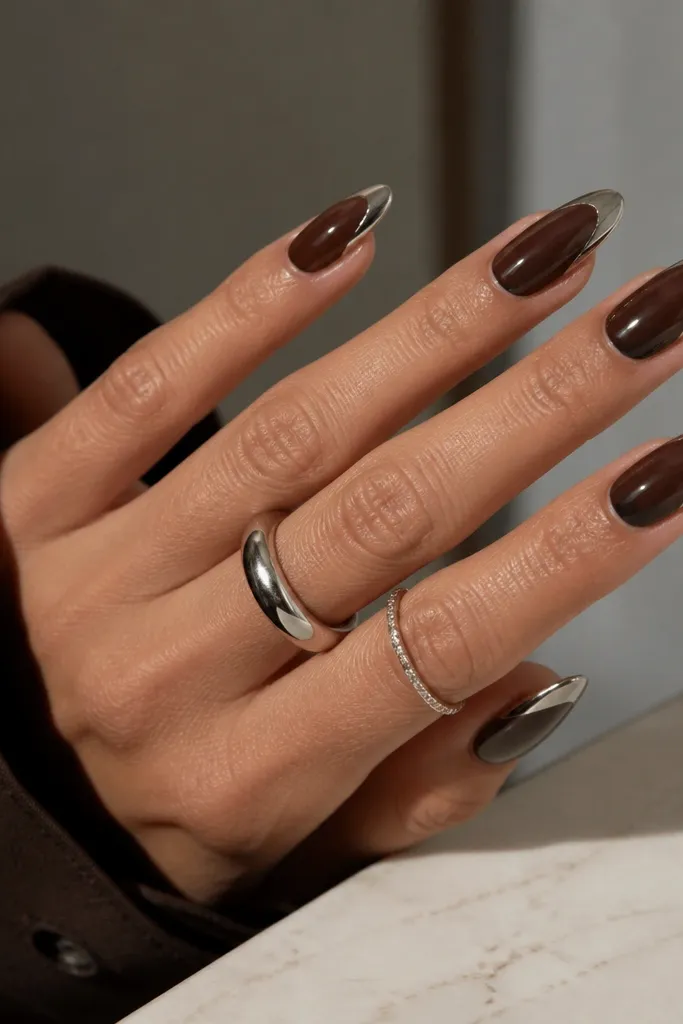
Negative space makes chrome French nails look modern and less "heavy." The mocha brown base adds warmth and contrast, and the silver chrome still gives that mirror pop. I like this for fall because it looks good with earthy outfits and gold hoops. It also flatters hands with longer fingers because the center opening visually stretches the nail bed.
Apply a mocha brown base in two coats, curing fully. Use a French guide to map the smile arc, then remove it. With a fine striping brush, apply chrome gel along the arc but leave a small center gap - about the width of a pencil eraser on medium nails. Add silver chrome powder to the gel, then clean the gap with a small brush dipped in cleanser. Top coat carefully around the negative space so the chrome stays sealed.
Editor's noteIf your gap fills during top coat, paint the gap area with base gel first so it stays clean and consistent.
Watch outDon't make the negative space too wide or the French loses its almond arc.
8. Black jelly base with silver chrome French curve
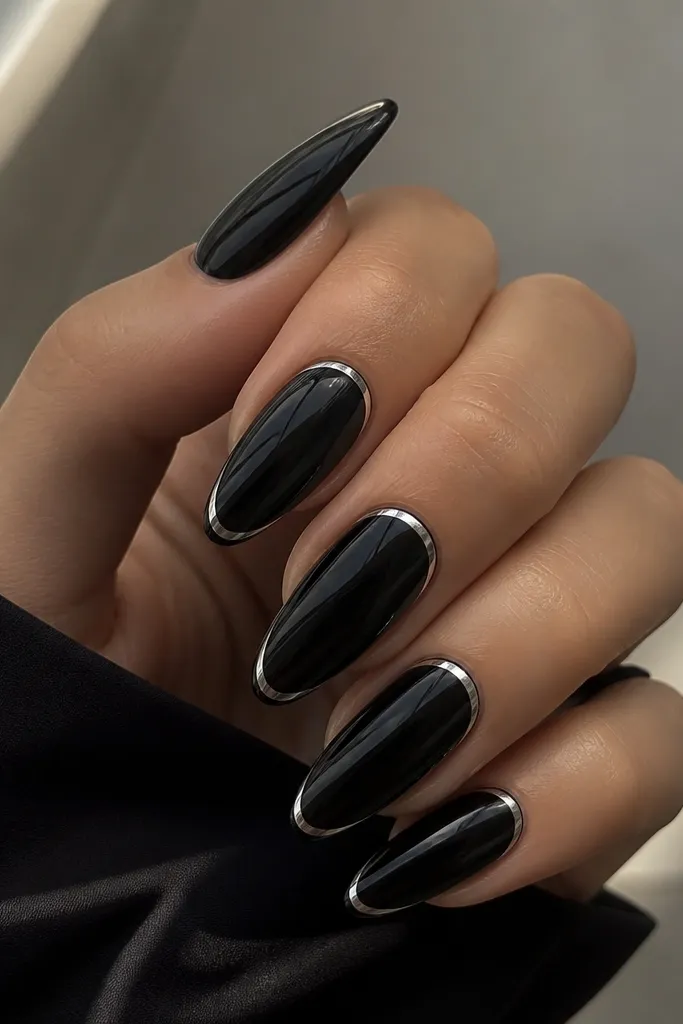
Black jelly under chrome makes the silver look like it's lit from inside. This set looks dramatic in photos and feels super clean because the chrome line is controlled. It flatters cooler undertones and hands that look good with dark nail polish. The almond shape keeps the drama classy instead of goth-chunky.
Apply black jelly gel in two thin layers, curing each time so it stays glossy and not too thick. Smooth the surface lightly with a buffer if needed, then wipe and clean. Use a French guide to place the smile arc at a classic height for almond nails. Apply silver chrome gel only on the arc, dust with silver chrome powder, tap off, then seal with a glossy top coat that cures fully.
Editor's noteAdd a drop of clear gel to your top coat if it looks too thick. Thick top coat can drag chrome powder out of the arc.
Watch outApplying chrome over a textured jelly surface makes the mirror look grainy.
9. Champagne nude with rose gold chrome scallop French
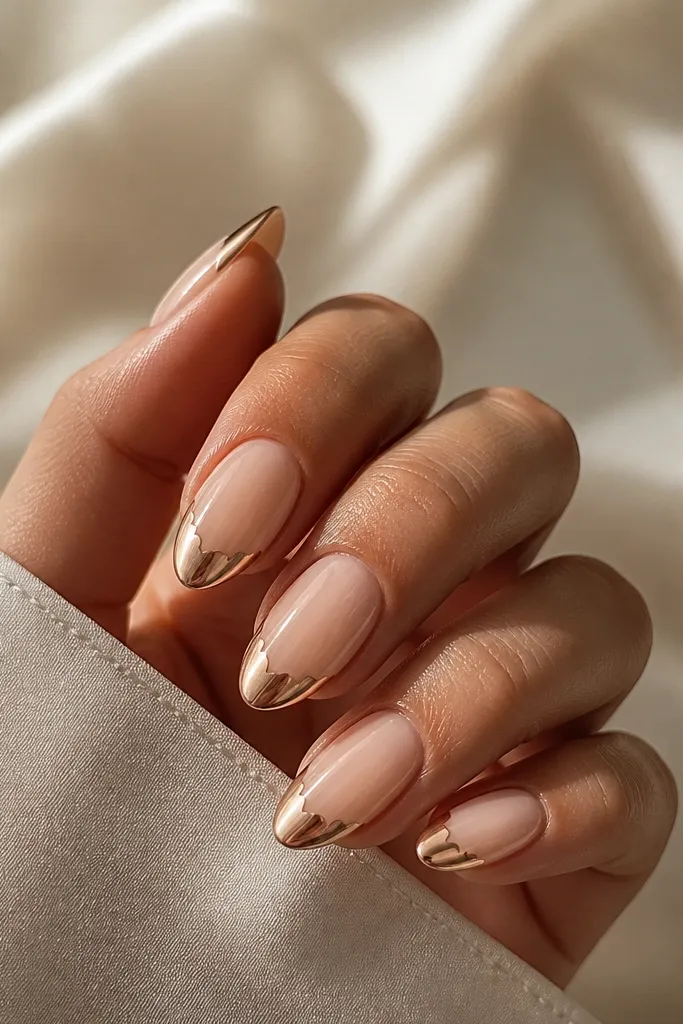
Scalloped chrome French is playful while still staying elegant because the base is neutral. Champagne nude keeps the look soft, and rose gold chrome matches warm jewelry and golden highlights. This one flatters medium to deep skin tones because the warm base and warm chrome create a continuous tone on the nail. The almond shape makes the scallops look like a neat shell border instead of a messy fringe.
Start with a champagne nude base in two coats, cure hard, then wipe clean. Use a French guide strip to hold the overall curve, then remove it. With a dotting tool or small brush, place tiny rose gold chrome gel "cups" along the smile line, leaving even spacing between them. Dust with rose gold chrome powder, tap off, and top coat gently - avoid flooding the scallops so they keep their definition.
Editor's noteUse a dotting tool with a slightly flat tip for more controlled scallops than a round ball.
Watch outOverloading chrome gel makes scallops collapse into one thick edge.
10. Lavender base with holographic chrome French line
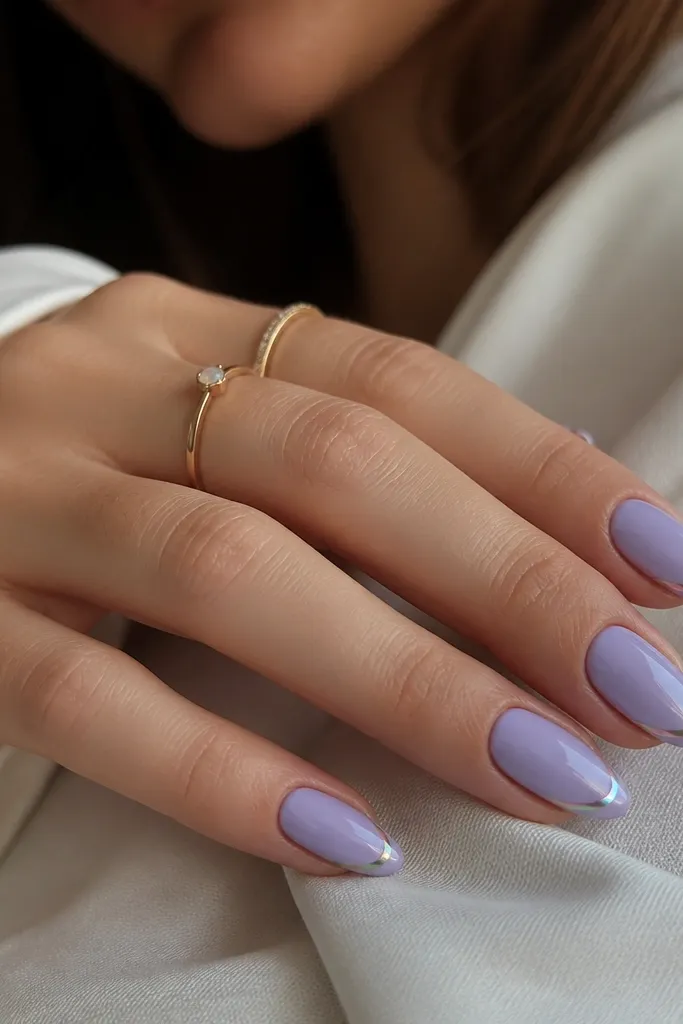
Holographic chrome over lavender gives you a color-shifting French line that looks different from every angle. This is one of the most eye-catching chrome French sets without covering the whole nail. It flatters fair to medium skin tones because lavender stays gentle, and the chrome adds the "wow." Almond shape keeps the holographic line refined instead of looking like a sticker.
Apply a lavender base in two thin coats, curing each one fully. Smooth the surface and wipe clean. Draw your French smile arc with a guide strip, then remove it. Apply holographic chrome gel only along the arc, dust with holographic chrome powder, tap off, and seal with a glossy top coat. Cap the free edge so the holographic line stays crisp through wear.
Editor's noteTake a quick photo in daylight and overhead light before you top coat - holographic chrome can shift a lot based on lighting.
Watch outPutting holographic chrome over a streaky base makes the flashes look uneven.
11. Iridescent pearl nude with ultra-thin platinum chrome French
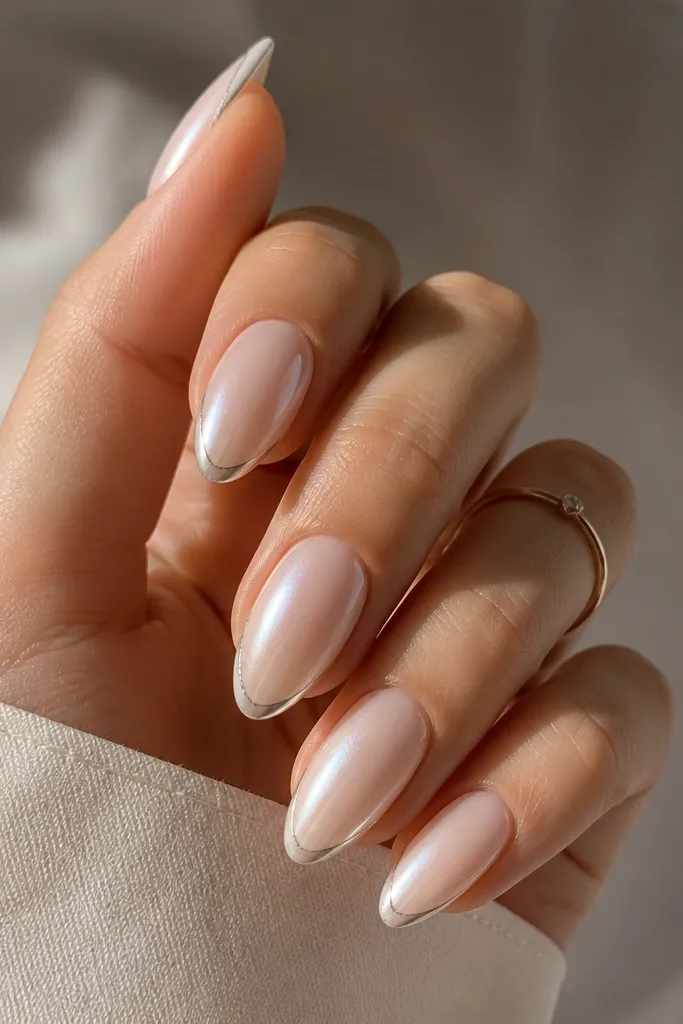
Pearl nude under platinum chrome gives a soft, expensive shimmer even before the chrome reflects. Platinum tone reads cooler, so it's best when your base has that pearly, slightly cool glow. I like this for formal events because it looks refined and not loud. Almond shape makes the line look like a fine bracelet around your nail tip.
Use a pearl nude gel in two coats, cure fully, then buff only if there's any texture. Clean the surface thoroughly. Place a French guide strip and keep the line very thin - use a striping brush to paint a narrow arc. Apply platinum chrome gel to that arc, dust with platinum chrome powder, then seal with a high-gloss top coat. Finish by cleaning around the cuticle so it stays sharp.
Editor's noteFor a truly thin line, load your brush lightly and wipe excess on a palette - heavy gel floods the arc.
Watch outThick chrome lines make platinum look dull instead of bright.
12. Nude base with chrome French and tiny crystal corners
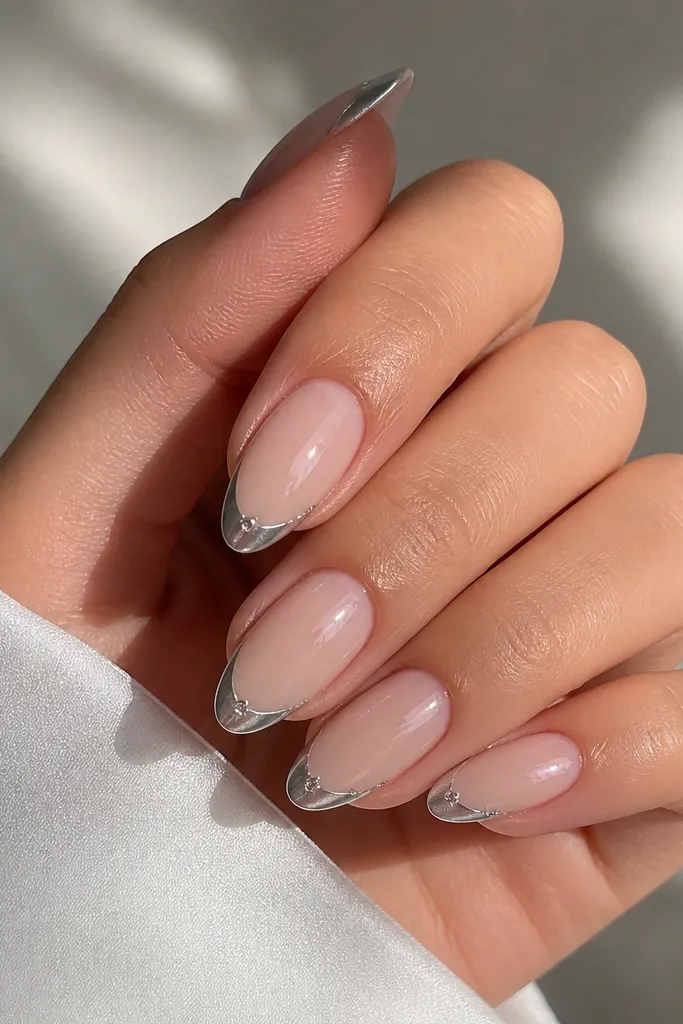
This set adds sparkle without turning into a full rhinestone situation. The silver chrome smile keeps it sleek, while the crystal corners add a focal point at the outer edge where your eye naturally lands on almond nails. I like it on medium-length nails because there's enough space to place the crystals without covering the arc. It flatters hands that look good with statement earrings and a clean manicure at the same time.
Apply a sheer nude base and cure. Place French guide strips to get the arc even, then apply silver chrome gel along the smile line and dust with silver chrome powder. Cure, then use clear gel to place two small crystals on each outer corner of the smile - keep them symmetrical. Press lightly, cure again, and top coat over the entire nail without dragging the crystals.
Editor's noteUse crystals that are the same size across nails. Uneven sizes show up fast with chrome reflections.
Watch outDon't put crystals on top of uncured chrome gel - they can sink and look cloudy.
13. Clear baby pink jelly base with silver chrome French and micro dots
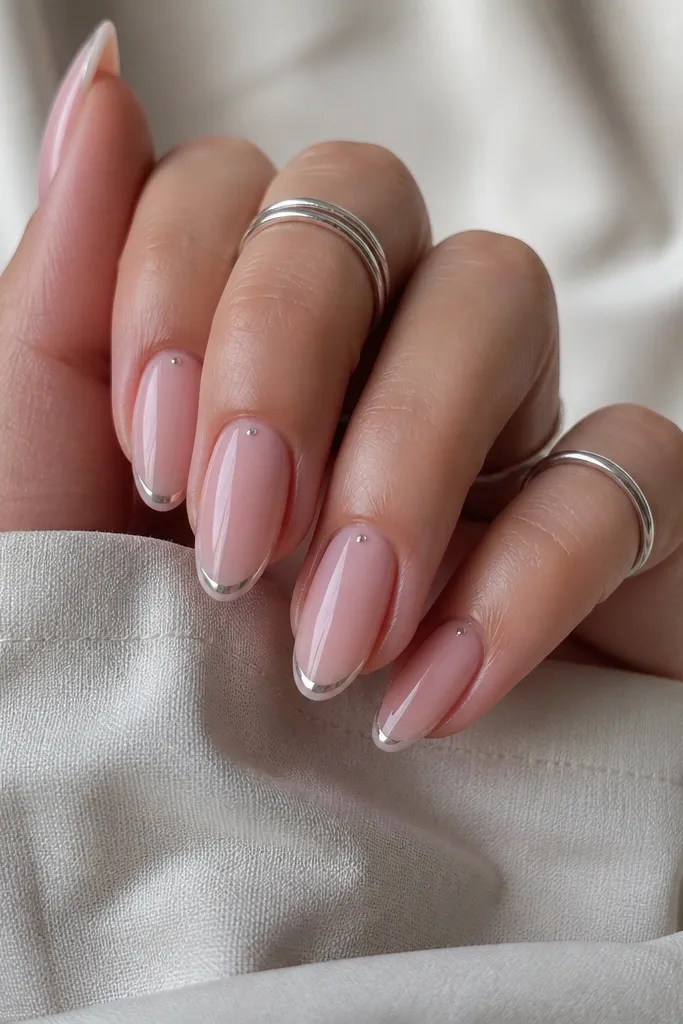
Micro dots make the French line feel intentional, like a tiny design detail instead of a plain smile. The clear baby pink jelly base has that soft, "skin-like" look but still shows the chrome clearly. I like it for spring and for anyone who wants chrome that feels cute. Almond shape keeps the dots from looking cluttered because there's natural spacing along the curve.
Apply a clear baby pink jelly gel in two coats, cure fully, then wipe clean. Use a French guide to place the silver chrome smile arc. Apply silver chrome gel to the arc, dust with silver chrome powder, and cure. With a dotting tool, add tiny dots of matching silver gel just outside the arc on both sides, cure, then top coat and cap the free edge.
Editor's noteDot size should match: aim for dots about half the width of your smile line thickness.
Watch outSkipping a cure step after adding dots causes them to smear into the chrome top layer.
14. Warm nude with rose gold chrome French and thin gold outline
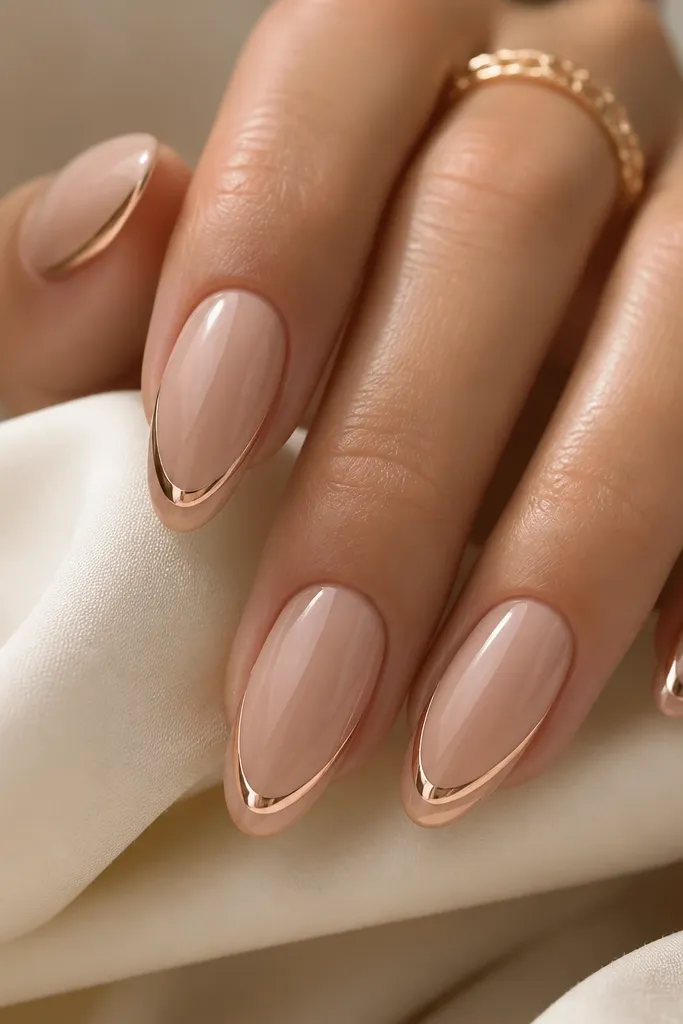
This is the "jewelry nails" version. Rose gold chrome gives you the mirror shine, and a thin gold outline makes the arc look outlined like a ring. Warm nude keeps everything cohesive with gold-toned accessories. I like this on fair to deep skin tones because warm nude and warm metals stay flattering. Almond shape makes the border look clean instead of thick.
Apply warm nude gel in two coats and cure. Smooth the surface and wipe clean. Use a French guide strip to draw the rose gold chrome arc placement. Paint rose gold chrome gel inside the arc, dust with rose gold chrome powder, then cure. After that, use a fine gold striping brush to draw a thin outline just outside the arc, cure again, and top coat fully.
Editor's noteIf gold bleeds into chrome, wipe the brush often and keep gold gel thin.
Watch outPutting gold outline inside the arc makes it compete with the rose chrome and blur the curve.
15. Teal base with silver chrome French and negative cutout sides
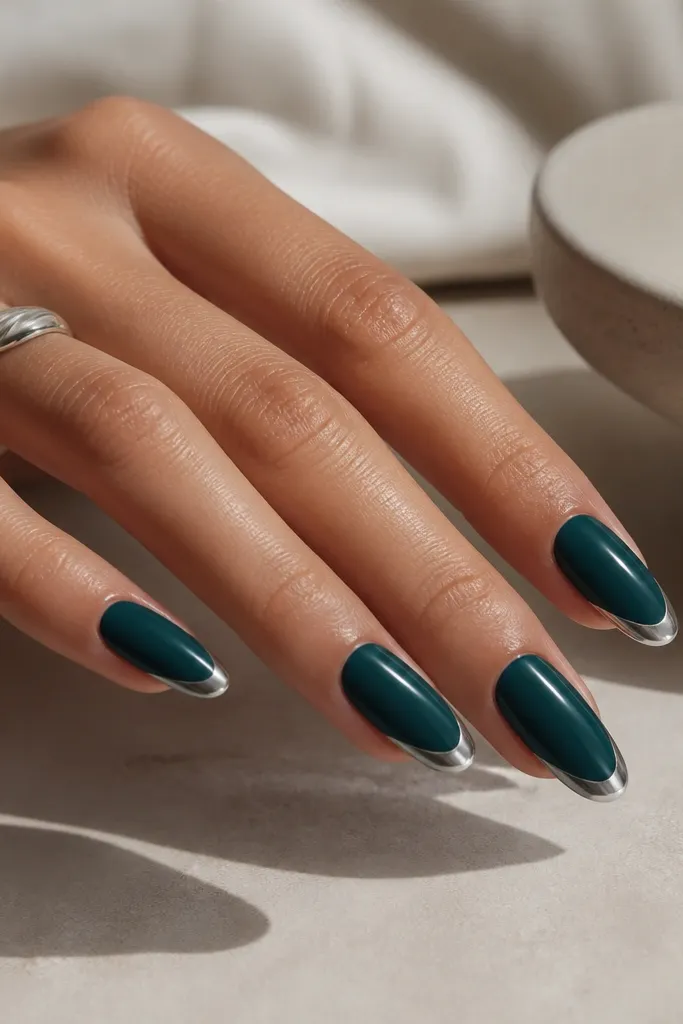
Teal plus silver chrome looks sharp and a little futuristic, and the negative cutouts keep it from looking too solid. This one flatters medium and deep skin tones because teal is strong against darker undertones. The cutouts add a slimming effect on almond nails - your eye sees less filled area on the sides. It also wears well for nights out because the teal reads rich while the chrome stays bright.
Apply a deep teal base in two coats, cure fully, and smooth the surface. Place a French guide to map the smile arc. Apply silver chrome gel along the arc but leave two small gaps near the side corners - about 1 to 2 mm wide on medium nails. Dust with silver chrome powder, tap off, and clean the gaps with a small brush dipped in cleanser. Top coat over everything else, avoiding flooding into the cutouts.
Editor's noteMark the gap spots with a pencil-thin dot using gel before you add chrome so you don't accidentally fill them.
Watch outMaking the gaps too large turns it into a broken-line design instead of a clean French arc.
16. Champagne shimmer base with chrome French and a matte nude underside
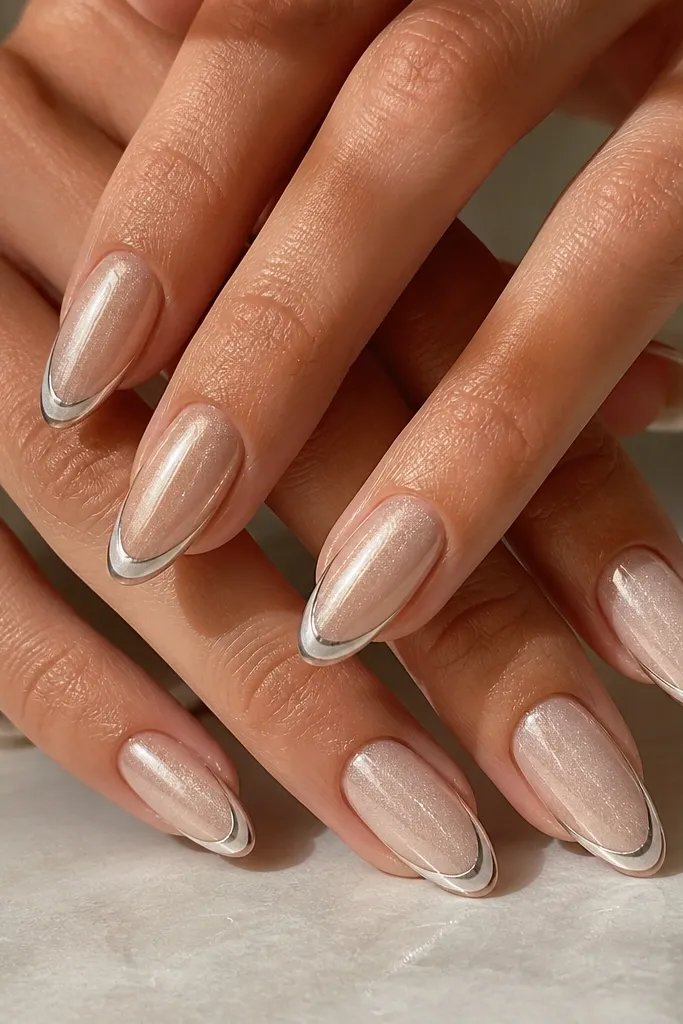
This is a texture-contrast chrome French that looks expensive in person. The champagne shimmer catches light, the chrome smile flashes, and the matte nude underside adds a soft stop so the shine doesn't look flat. I like it for anyone who wants a French set that's not all glossy. Almond shape helps because the tip edge shows the texture difference cleanly, especially when your nails move.
Apply a champagne shimmer gel base in two coats and cure. Smooth the top. Use a guide strip to place the French arc. Paint silver chrome gel on the smile arc only, dust with silver chrome powder, and cure. Then, brush matte nude gel along the very underside area near the tip edge - just a narrow band - and cure. Finish with glossy top coat everywhere except the matte band.
Editor's noteKeep the matte band thin. If it's wider than 1 mm on medium nails, it starts to look like a mistake instead of a design detail.
Watch outTop-coating the matte band makes it glossy and kills the texture contrast.
17. Clear pink base with silver chrome French and thin silver cuticle border
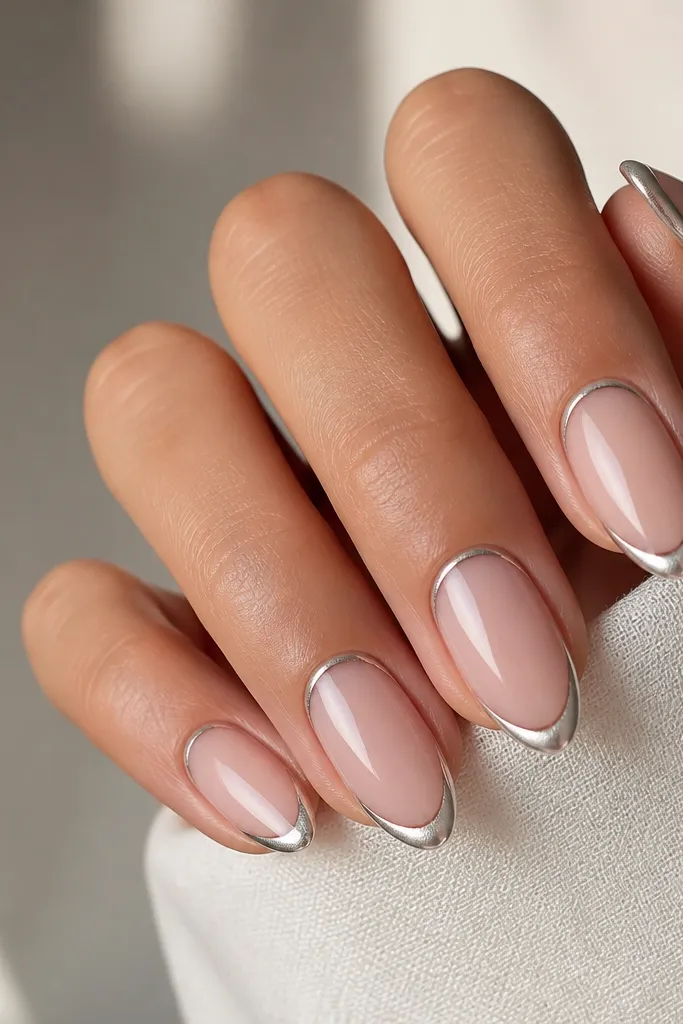
Adding a cuticle border makes the French look more intentional and balanced on almond nails. The clear pink base keeps it fresh and lets both chrome lines stand out without looking heavy. I like this for parties because it looks like a set of two highlights. It flatters hands with shorter nail beds because the cuticle line lifts the eye upward while the French arc elongates toward the tip.
Apply a clear pink gel base in two thin coats, cure, and wipe clean. Use a cuticle guide strip or a steady hand to draw a thin silver chrome line right along the cuticle - leave a tiny gap near the sidewalls. Apply chrome gel to that cuticle border, dust with silver chrome powder, and cure. Then add the silver chrome French arc using a French guide strip. Top coat the entire nail with a glossy finish, keeping the chrome lines sealed without thickening them.
Editor's noteUse a flat striping brush for the cuticle line. It keeps the border from looking wavy.
Watch outPainting too close to the skin makes chrome lift or stain during removal.
18. Pearl white base with holographic chrome French and tiny star dots
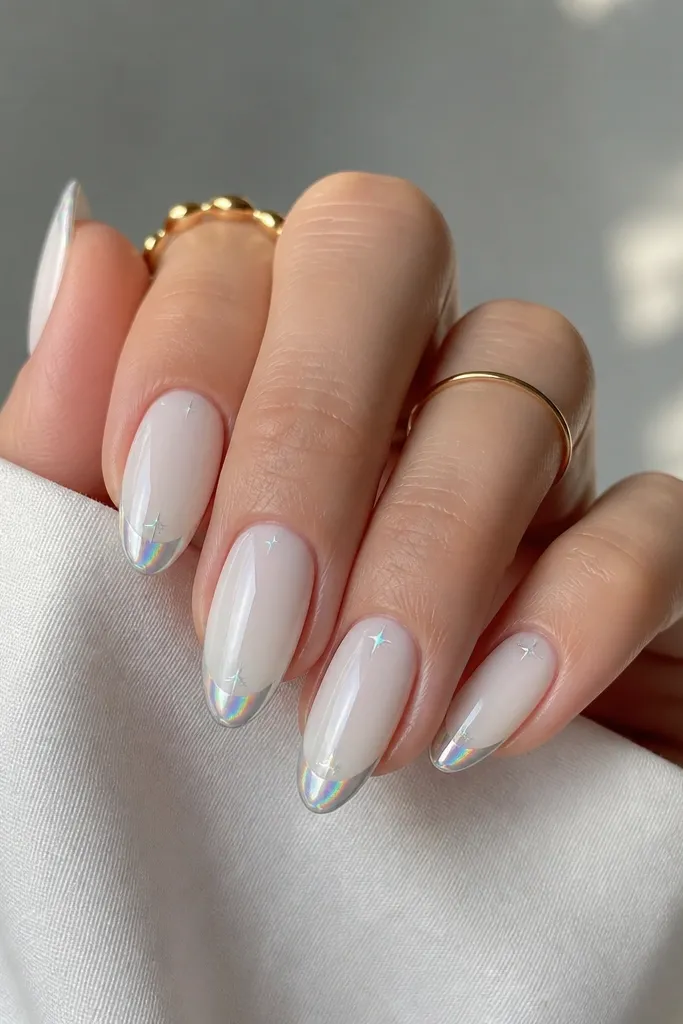
Holographic chrome over pearl white looks like winter light. The star dots add personality while staying small enough to keep the almond shape clean. I like this for birthdays and holiday dinners when you want nails that sparkle under warm indoor lights too. The pearl base softens the contrast, so it doesn't look harsh like pure white with full chrome coverage.
Apply pearl white gel in two coats, cure fully, and smooth the surface. Place a French guide for the arc location. Apply holographic chrome gel along the smile arc, dust with holographic chrome powder, tap off, and cure. With a star dotting tool or a small star stencil, add tiny star dots in leftover holographic gel near the inner corners of the smile. Seal with glossy top coat and cap the tip.
Editor's noteIf you're doing stars freehand, practice one nail first on a fake tip. It's faster than fixing stars after top coat.
Watch outUsing large star stickers makes the French look crowded and breaks the almond line.
19. Espresso brown base with chrome French and brushed metal texture
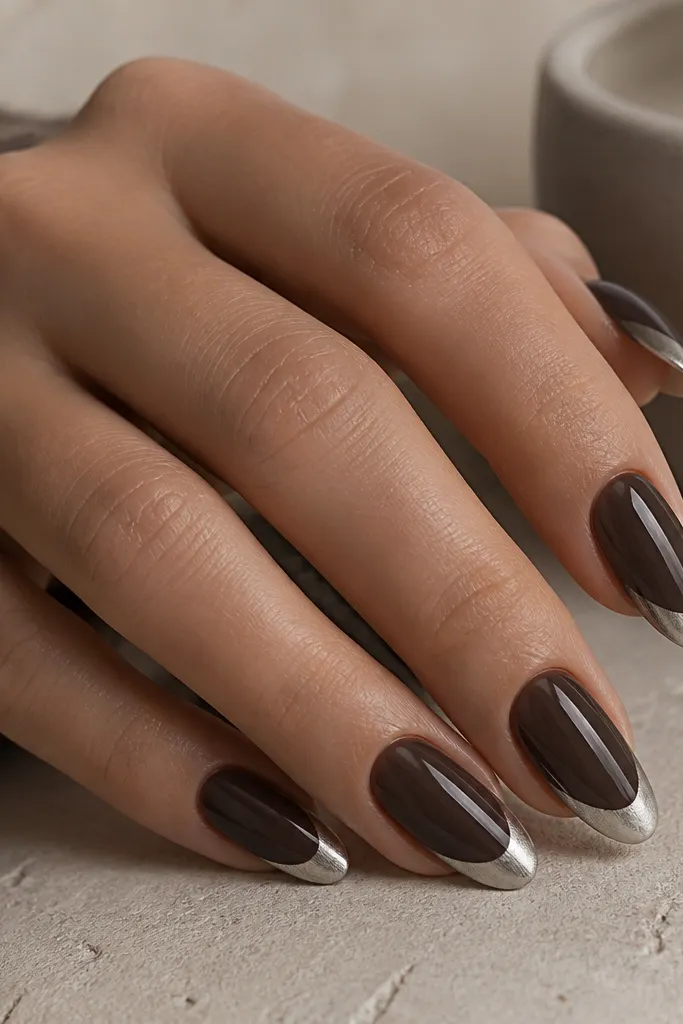
Brushed metal chrome gives a different kind of shine - less mirror, more like polished metal. Espresso brown makes it look luxe and warm, and it flatters deeper skin tones especially well because the contrast reads smooth. The almond shape keeps the brushed effect from looking messy, because the arc guides your eye. This set works for fall outfits and evening wear without looking like holiday glitter.
Apply espresso brown gel in two coats and cure. Smooth the surface and wipe clean. Use a French guide strip to place the arc. Instead of pressing chrome powder flat, apply chrome gel to the arc, then lightly drag a dry sponge or small brush across the chrome powder before curing to create a brushed texture. Tap off excess, cure, then top coat with a glossy layer to lock it in.
Editor's noteTest the brushed effect on one nail first. Too much dragging turns chrome into patchy spots.
Watch outDon't buff the chrome after it's applied - it destroys the brushed metal look.
20. Soft nude base with white chrome French and pearl overcoat
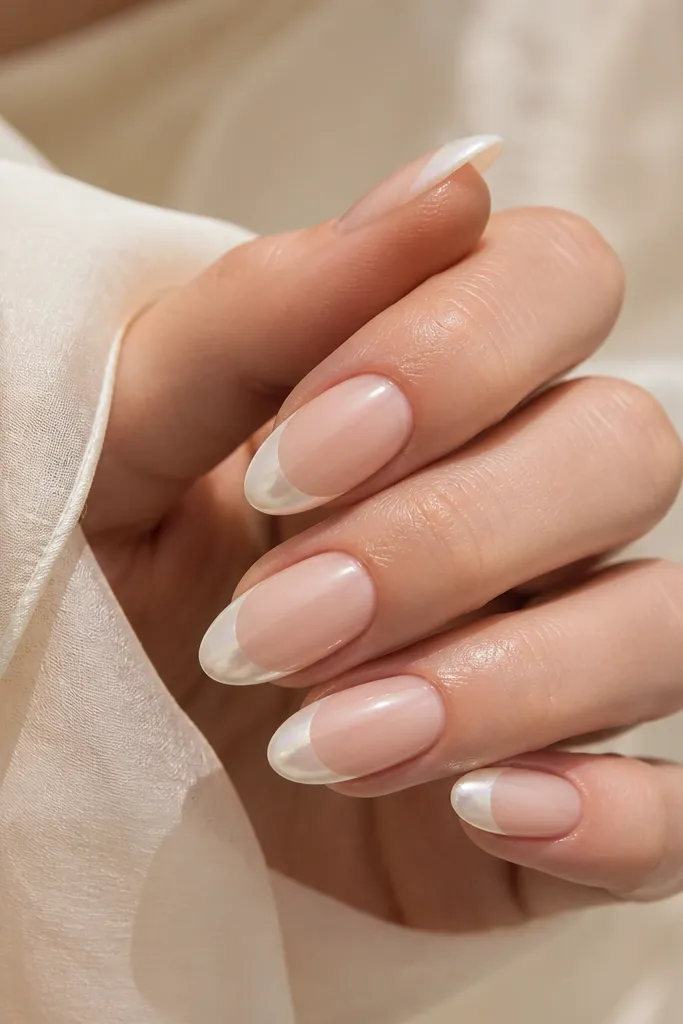
White chrome French is different from silver because it reads creamy and bright. On a soft nude base, it looks like a pearly glow at the tip, which is flattering for everyday wear. I like it for fair to medium skin tones because it doesn't overpower your nail bed. Almond shape keeps it refined, and the pearl overcoat adds a gentle shine instead of mirror glare.
Apply a soft nude gel base in two coats, cure, and smooth. Place a French guide strip to map the smile arc. Apply white chrome gel only inside the arc, dust with white chrome powder, tap off, and cure. Then apply a thin pearl top coat over just the chrome arc area, cure again, and finish with glossy top coat over the whole nail for durability.
Editor's noteKeep the pearl overcoat thin. A thick layer turns the French line gray instead of glowing.
Watch outSkipping the pearl top coat makes white chrome look too stark for this softer vibe.



